
Zainstaluj Steam
zaloguj się
|
język
简体中文 (chiński uproszczony)
繁體中文 (chiński tradycyjny)
日本語 (japoński)
한국어 (koreański)
ไทย (tajski)
български (bułgarski)
Čeština (czeski)
Dansk (duński)
Deutsch (niemiecki)
English (angielski)
Español – España (hiszpański)
Español – Latinoamérica (hiszpański latynoamerykański)
Ελληνικά (grecki)
Français (francuski)
Italiano (włoski)
Bahasa Indonesia (indonezyjski)
Magyar (węgierski)
Nederlands (niderlandzki)
Norsk (norweski)
Português (portugalski – Portugalia)
Português – Brasil (portugalski brazylijski)
Română (rumuński)
Русский (rosyjski)
Suomi (fiński)
Svenska (szwedzki)
Türkçe (turecki)
Tiếng Việt (wietnamski)
Українська (ukraiński)
Zgłoś problem z tłumaczeniem


Not as complex as the previous one, but the moment where I tossed the cube into a ceiling portal that I couldn't myself reach in order to get that cube into the next part of the puzzle (the fizzler/light bridge stuff) was definitely a highlight. Don't know if that was intended, but hopefully so, it's a cool move. The last area looked like it was going to be a major pain in the ass until I figured out that you can leave a cube on the light bridge, meaning I don't have to carry the cube WHILE messing with the light bridge and praying to god the cube doesn't fall, I can just grab it at the end.
The atmospherics were great, very ominous ending.
So I vaguely imagined that u had to use the launcher to get the last cube up to the last place. This seemed like a pain in the ass so I desperately tried to avoid it. I finally used a trick where I stood on the light bridge and shot two portals; one close to the edge that went up to where I wanted the box and the other portal close to the cube button with the cube below me. I then fell down one portal and came up where the cube was. On my way falling down again, I grabbed the cube and managed to push myself safely to the high place. It didn't feel very elegant, but it did the trick without much effort.
HInt: You don't really need to throw the cube. In fact, that can make it harder. Make sure you create the portal for the light bridge up really high for the second cube, and barely put the second cube on the pressure button that removes the fizzler. When your up high, and standing above the portalable floor next to the second cube on the pressure button, make two portals very fast. One next to the wall leading up to the cube buttons for the exit, one underneath you. You might want to go back and forth a couple times to get your bearings, but you can grab the cube off the pressure button as your flying back and forth, and then walk right onto the platform.
http://www.twitch.tv/deathwish808/b/527571962 (Video is after your Reconstruction map)
I really liked the previous maps but this one I have spent the most time on (about an hour) and just cannot find a way to complete it. I had to stop because I gave myself a headache.
Using the companion cube wouldn't be a good idea, since the whole map series is based on the companion cube which never gets to you before the final map. (Doors closing right in front of the cube, cube is stuck in tubes, but you can't grab him etc...)
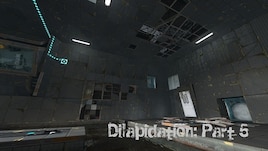
My escape-themed chamber, "The Oubliette", is fairly large, with deadly traps, and should be a quick bit of fun for players of the Dilapidation series:
http://steamcommunity.com/sharedfiles/filedetails/?id=140319013 .