Dota 2
593 คะแนน
Creating Hero Builds
โดย Jimo
I will demonstrate how to create Hero Builds which can be shared with your friends and other Dota 2 players around the world. Hero Builds provide instructional information such as item choices, skill orders and tactics.
   
รางวัล
ชื่นชอบ
ชื่นชอบแล้ว
เลิกชื่นชอบ
Introduction
This guide will demonstrate how to create Hero Builds which can be shared with your friends and other Dota 2 players around the world. Hero Builds provide instructional information such as item choices, skill orders and tactics. If your build is subscribed to, the player will be prompted in-game to follow your selections.

If you're unfamilar with this feature, you can check out the entire list of published builds here. You can also check out my example build below.

http://steamcommunity.com/sharedfiles/filedetails/?id=130277162
Getting Started
To begin creating your build, you'll need to visit the Dota 2 Blog. At the top of the page there is a dropdown menu titled Heropedia, hover over it and choose Hero Builds from the list. You can also click here to be taken there directly.

Before you can begin creating your build you'll need to sign in. This can be done by clicking on the sign-in button located at the top of the page.


You'll then be taken to a Steam Community login page. Enter your Steam account credentials and choose Allow when Dota2.com requests access to your information.

Once you're logged in, select the Create New Hero Build button.


You'll then be taken to hero selection screen. Locate the portrait of the hero you want to create a build for and click on it.


Once you've selected a hero you'll be taken to the Hero Build Editor screen. From here you can specify a title, create an item build and an ability build. At any point you save your work by clicking the Save button located at the bottom of the page.


Your saved build can be found by returning to the Builds page from the Dota 2 Blog. It will appear under the Steam Cloud Builds section. You can click on the drop down menu to the right of the build and select Edit to the return to the editor at any point to make changes, even after it has been published.

Item Build
The item build will provide guidance to players subscribed to your build on which items they should purchase. This information will be accessible when the player clicks Shop on their in-game HUD.

To add an item build click on the Add button underneath the Item Build section on the Hero Build Editor screen.


After you click add the section will then look similar to the Dota 2 shop you see in-game. On the left side you'll see the item categories and on the right you'll see a list of item icons. To search for a specific item you can use the search bar at the bottom right of the panel.


To add an item to your build drag and drop the icon to the category you'd like to place it in. The Starting Items section will show you a running total of how much gold the items placed in that box cost. If the cost of the items you place in this box exceeds the default starting gold, it will turn red.

To remove an item from your build drag and drop it out of the category and back into the list.


If you'd like to make your own categories, you can remove all of the default ones by clicking on the red x next to the corresponding one you'd like to remove. The only category you can't remove is the one labeled Starting Items.


You can also rename a category by clicking on the existing name and typing in a name you feel fits better. If you'd like to add more categories, you can click on New located at the bottom of the category list.


Once you've added items to your build you can then left click on them to add Author Note. The information typed into this box will be displayed on the in-game tool-tip for that specific item. It's a good idea to provide any strategy related information or why the player should purchase the item so they can get a better understanding of how they should play while following your guide.

The item icon will have yellow border around it once you save your author comment.


Once you're done setting up your item build you should have something which looks similar to this.


When you're done making your selections click on Save at the bottom of the page.
Ability Build
The ability build will prompt players on the order they should level up their skills as they play the game.

To add an ability build click on the Add button underneath the Ability Build section on the Hero Build Editor screen.


Once you've added an ability build you should now have a section which looks similar to this. On the left of you'll see the hero abilities and next to them you'll see 25 clickable buttons. The plus icon will be present for every hero, and it represents stats.


Clicking a button next to a spell will place a number within the box. The number represents the level the player should put a point in the ability. If you made the wrong decision you can click the box again to move the point elsewhere. Keep in mind that some abilities require the player to meet a certain level requirement before they can be activated. The ability build screen will not allow you to make selections the player can't make.

When you're done making your selections you should have something which looks similar to this.


Just like the item build, you can click on the ability icon on the left to add an Author Note. The author notes will appear on the tool-tip of the ability when the player hovers over it in the game.


When you're done adding author notes a yellow border will appear around the ability icon.


Once you're done creating your ability build click Save at the bottom of the page to save your work.

Testing Your Build
Once you're done creating your build you can test it out in game. To access your build all you need to do is select the hero you created it for and open up the guide menu. This can be done by selecting the book icon at the top left of the in-game HUD.


Once you have the guide menu pulled up, click on the arrow button at the top right to expand the menu.


On the expanded menu, look for your build name under the Drafts section. Check the box next to the name and then click the Ok button at the bottom of the menu.


Your build is now active. The game will now prompt you on what you should level up next by placing a gold border around the ability icon. If you hover over the icon, the tool-tip will also now display your author notes at the bottom.


If you open the Shop you'll also see your item choices under the recommended items section. If you hover over an item in your build that you added author added notes for, it will display them at the bottom.

Publishing Your Build
If you're satisfied with your build and you'd like to share it with other players, you can do so by revisiting the Builds page from the Dota 2 Blog.

Locate your build from the list underneath the Steam Cloud Builds section and click on the arrow to the right of it. From the drop down menu select Publish to Steam Community.


On the next page, populate the Build Notes section with a brief description for your build. This is the first piece of information people will see when they look at your build. If you have a guide which accompanies your build, you could place a link to it in this section.

Under the Privacy section you can choose from one of three options. Public will make your build accessible to everybody who plays Dota 2. Friends will make your build accessible to people on your Steam Friends list only, and Private will make the build accessible to nobody but yourself.

You'll also need to select the language you wrote your guide in using the drop-down menu.


When you're ready, read and accept the Steam Workshop Contribution Agreement and click Publish.

Once it's done publishing you'll get a confirmation screen. On this screen you can click View on Steam Community to be taken to the workshop page for your guide.


From the workshop page, players can view, rate, share and subscribe to your build. They can also leave a comment at the bottom of the page.


Once somebody is subscribed to your build, it will appear under their Pinned Builds list on the in-game guide menu.


Players who use your build in-game will also be prompted to rate it once the match is over. Builds with a high approval rating will appear on the guide menu underneath the Recommended Guides list.

If you have received some feedback from players and you'd like to make an edit to your build, you can simply click on Edit on the drop down menu next to your build via the Builds page. Once your edits have been saved click on the Publish to Steam Community button again, and it will update the existing build for everybody actively subscribed to it.
154 ความเห็น
Na tvoem meste ya by povesilsya 26 ต.ค. 2024 @ 2: 02pm 
Ребят, напишите пожалуйста что-нибудь в профиле, хочу сделать 10к комментариев. Guys, please write something in your profile, I want to make 10k comments.
Bodyasik 24 ต.ค. 2024 @ 5: 39am 
RUS: Выберите что-то одно из списка из напишите в моём профиле, отвечу тем же!
ENG: Choose something from the list from write in my profile, I will respond in kind!
🤍𝗖𝗼𝗺𝗺𝗲𝗻𝘁 𝗳𝗼𝗿 𝗖𝗼𝗺𝗺𝗲𝗻𝘁🤍
+rep
+rep tier 1 player
+rep clutchmeister
+rep professional player
+rep godness
+rep pistol king
+rep only headshots
+rep talent
+rep genius
+rep inhuman reaction
+rep high skill
+rep faceit god
+rep godaim
+rep 300iq
+rep sign pls
+rep great player
+rep fpl player
+rep killing machine
+rep insane flicks
+rep best openfragger
+rep great teammate
+rep team leader
+rep wp
+rep good mate
+rep xGOD
+rep nice profile
+rep nice player
+rep robotaim
+rep great clutcher
+rep destroyed faceit
+rep роспишись плиз
+rep лучший клатчер
+rep гений
+rep faceit god
+rep лучший в мире
+rep бог
+rep high quality player
+rep young talent
+rep машина
Carlangas 8 ก.ค. 2022 @ 10: 51am 
:steamfacepalm:
Jokl 29 ก.ค. 2021 @ 5: 52am 
outdated article
no longer works
mut be removed
Positive Thots 17 พ.ค. 2021 @ 5: 16pm 
incorrect information
Felaani 14 ธ.ค. 2020 @ 7: 03am 
just go to game. hero . guide . create
not my bracket 26 ก.ค. 2019 @ 11: 34pm 
hey i have a problem here, so i dont have "create new hero builds" menu for some reason, only browse steam guide. any idea why? thanks in advance
Nexu 7 ธ.ค. 2017 @ 5: 21am 
Just do it in Dota directly :steammocking:
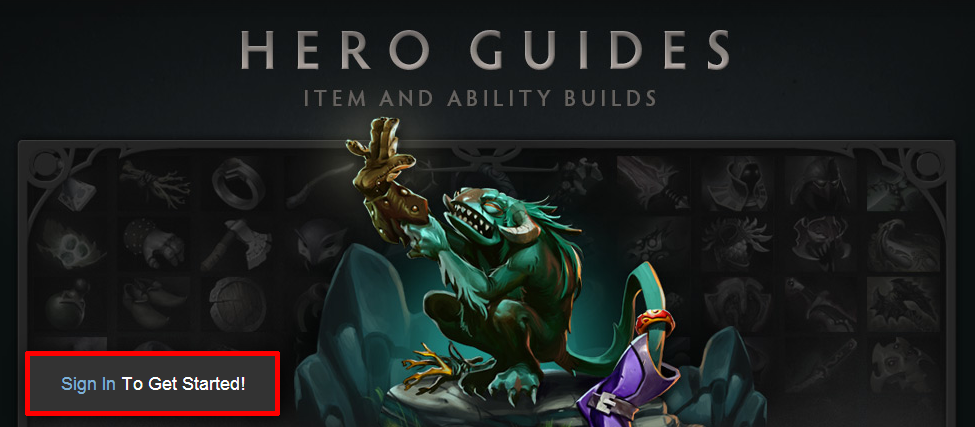
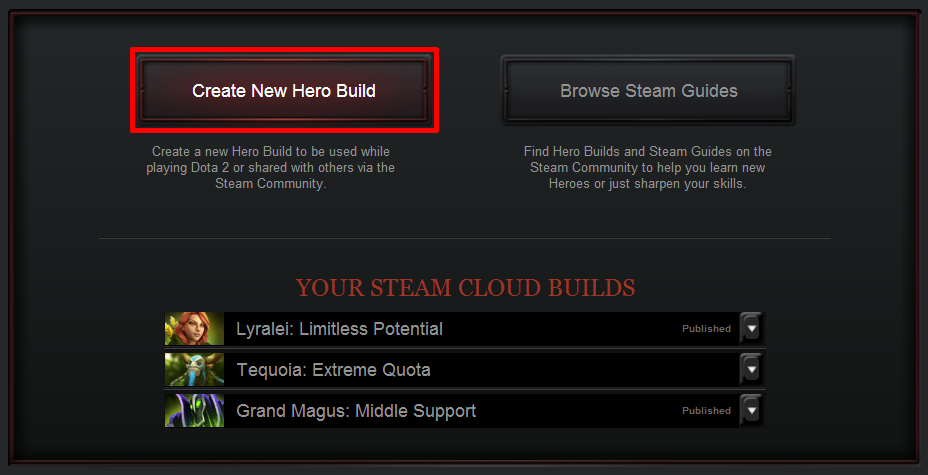
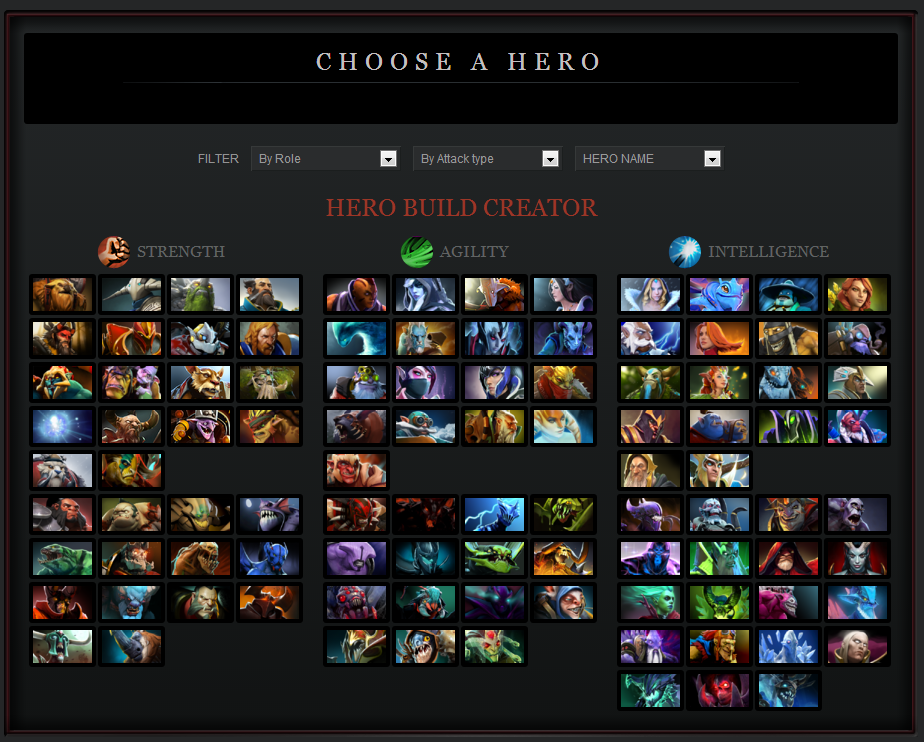
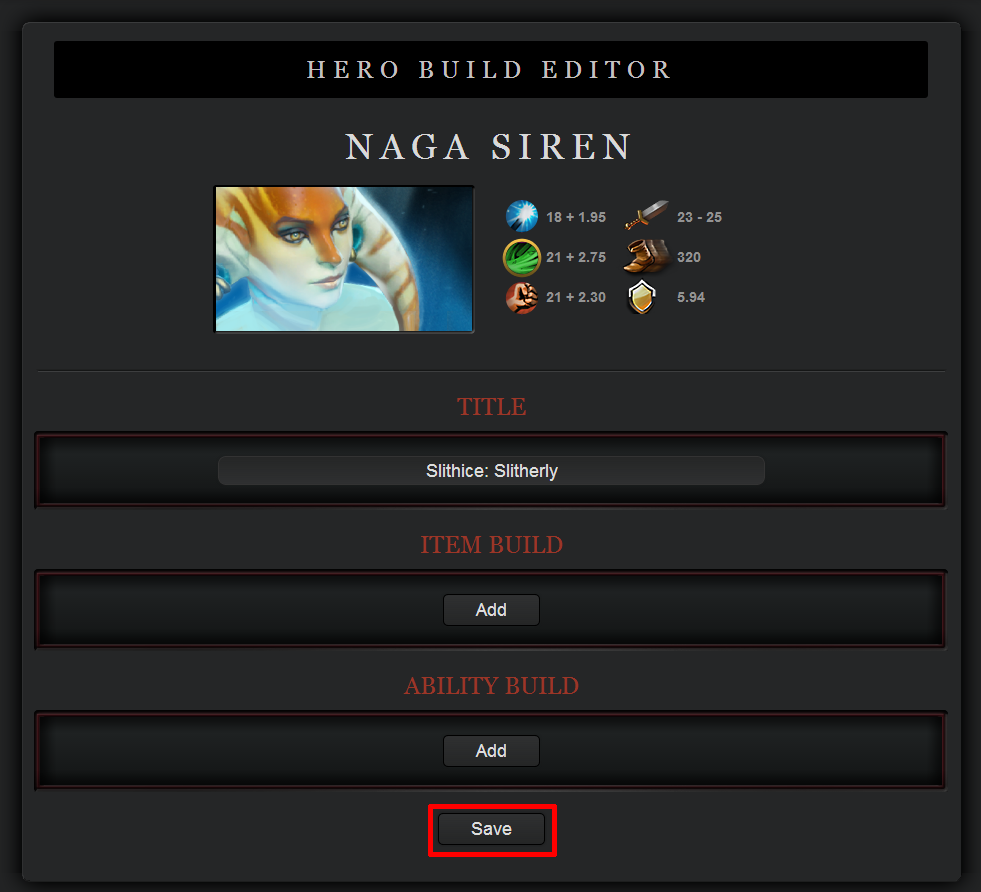
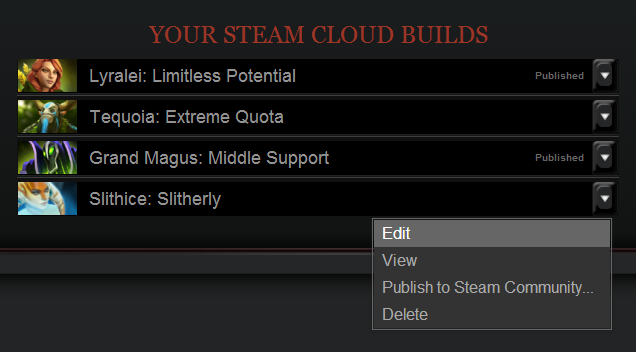
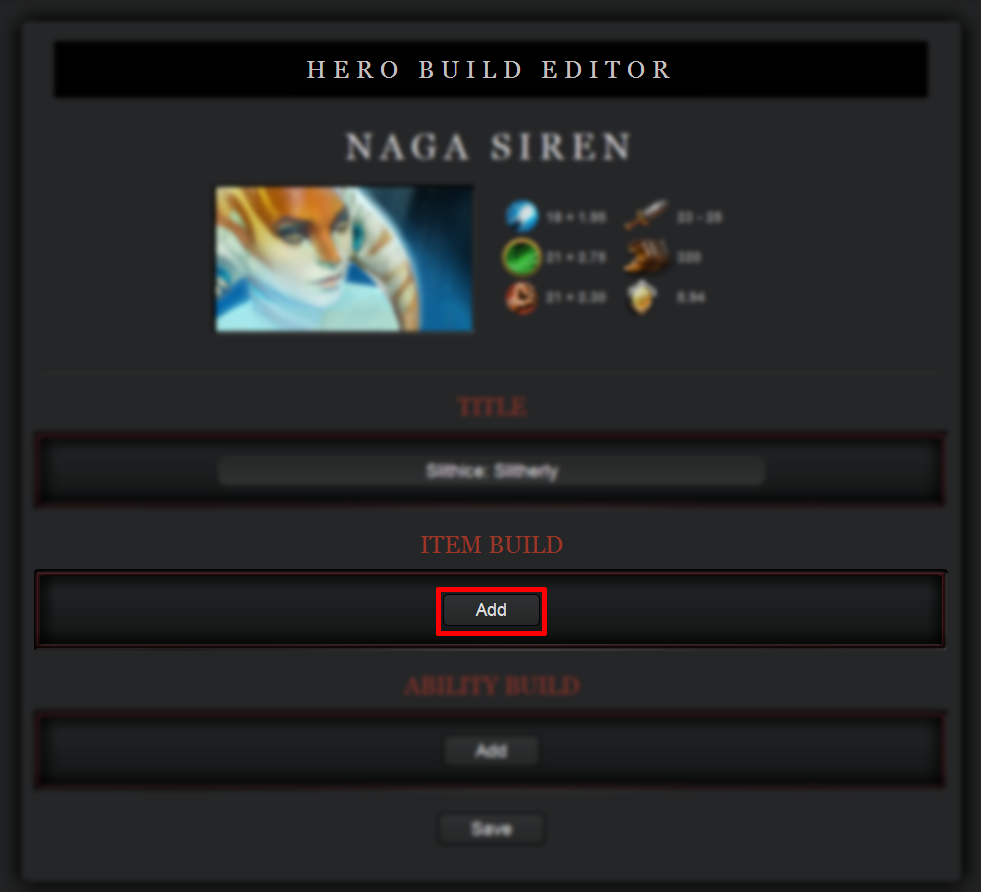
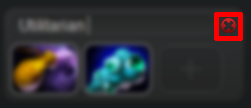
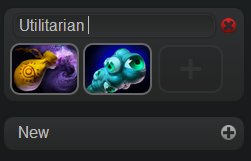
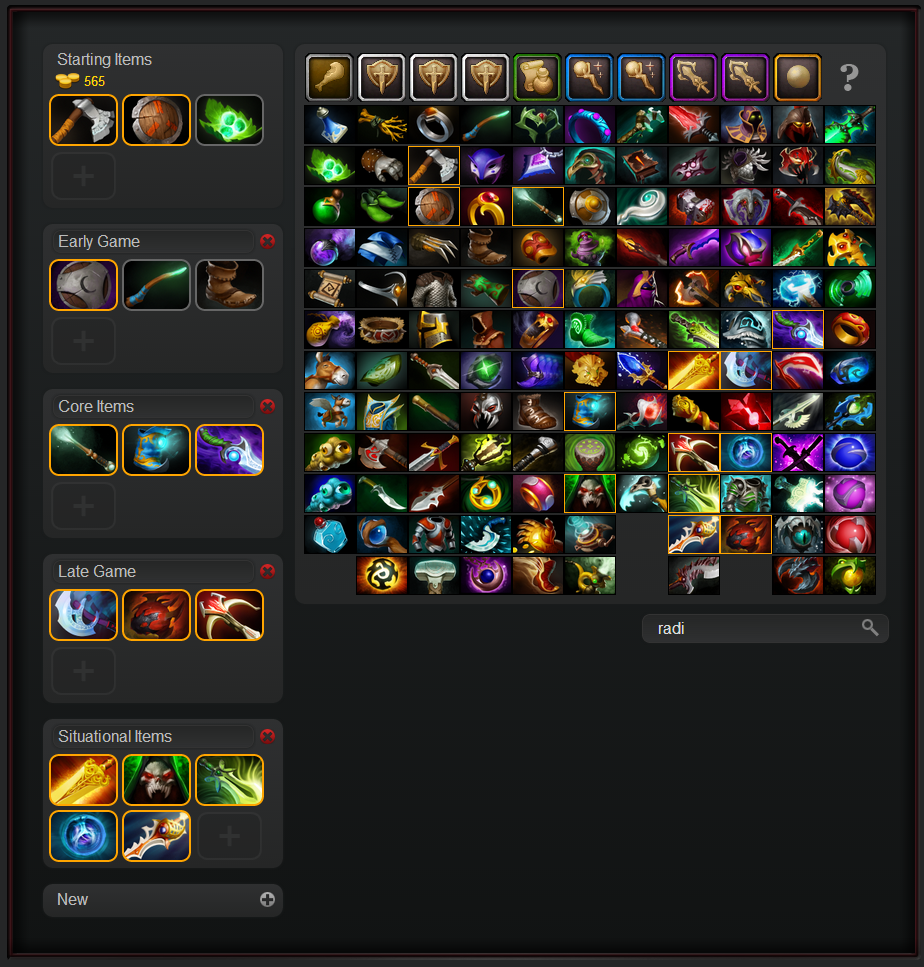
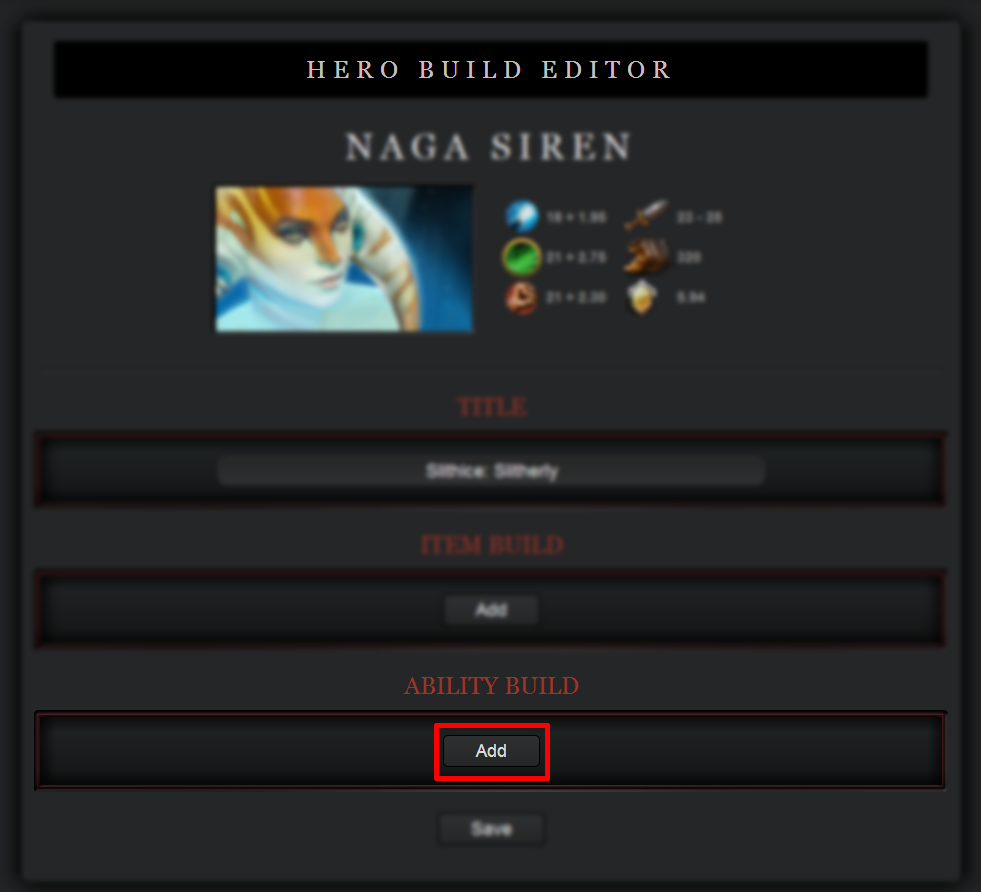
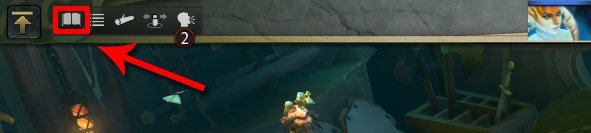
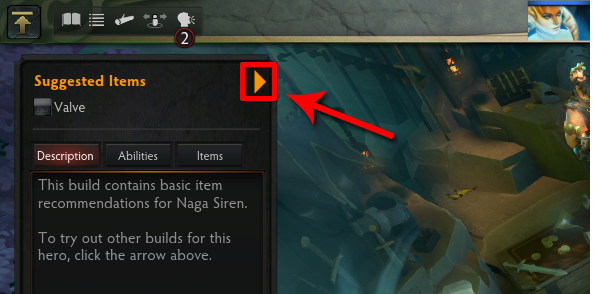
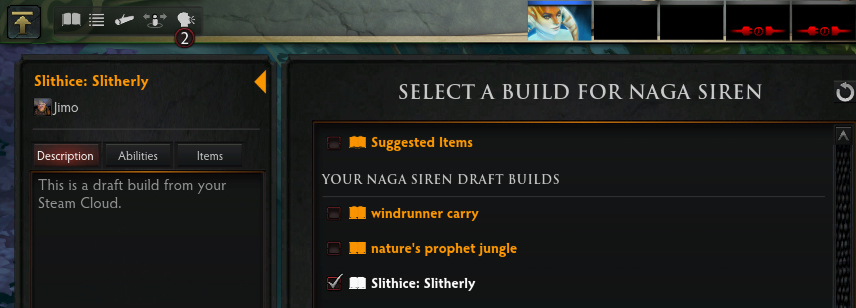
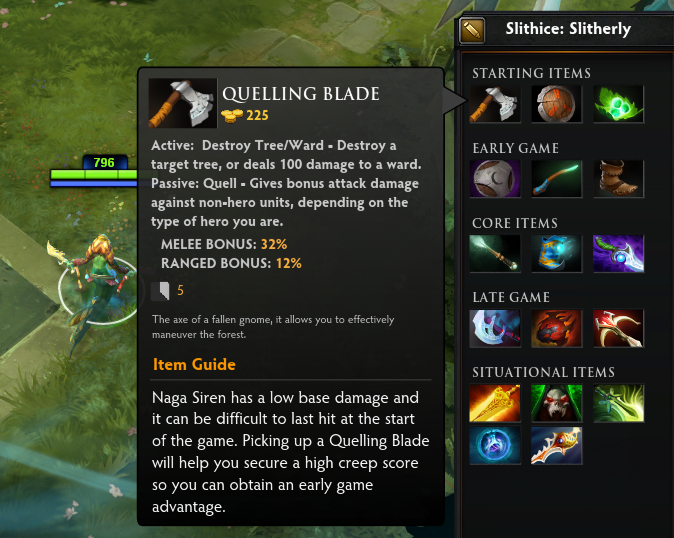
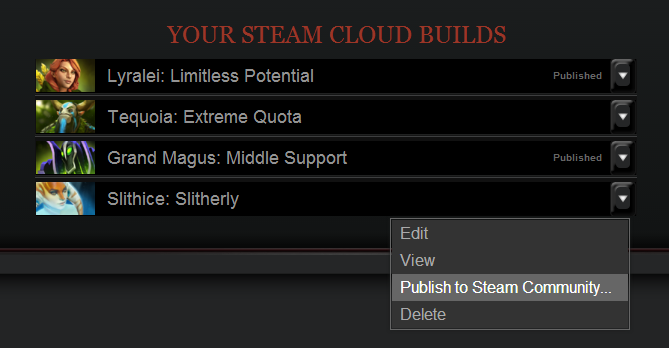
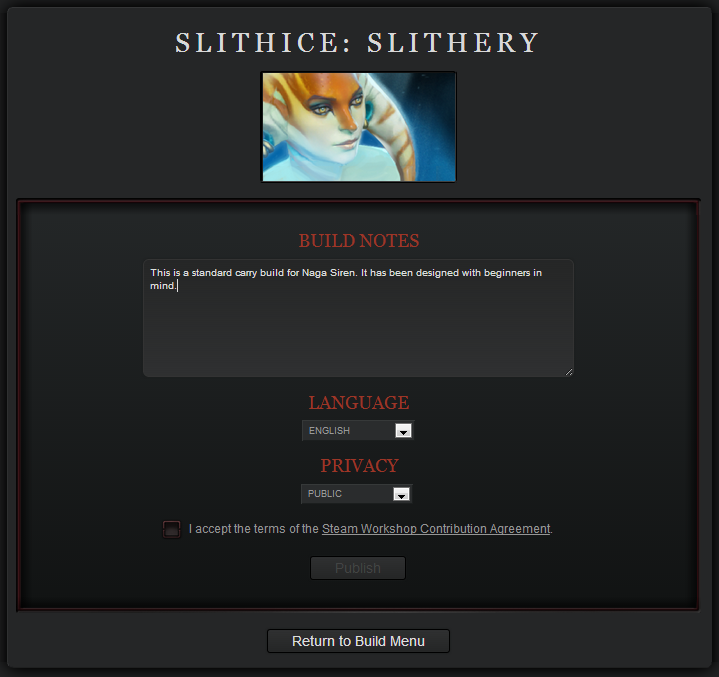
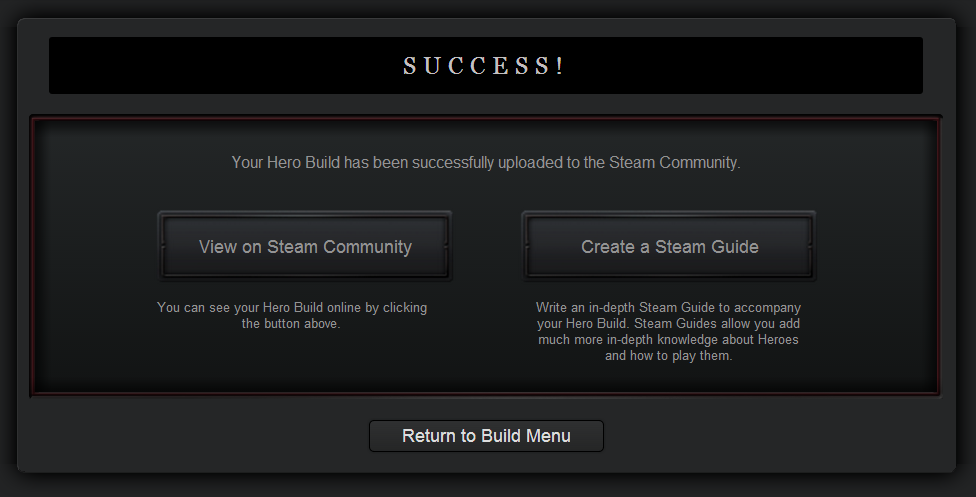
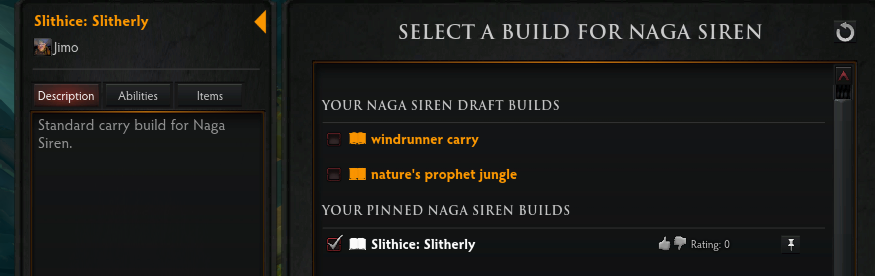
-> Start the game ->Tab: Learn -> Tab: Hero Guides -> Create or update a guide
Have fun :steamhappy:
Goon Master Smegma Blaster 4 ธ.ค. 2017 @ 7: 05am 
well, for me there is no [create new build] button... only [steam guides] then i came to my created builds. On that site i found button "create guide". i pressed. And... i came to a site were i could write a guide ABOUT dota 2, and not a guide about hero builds... ;-; so i am in a bit trouble creating guides now...:steamsad:
ComediNyan 12 พ.ย. 2017 @ 2: 58pm 
Yeah, there is actually a way to edit builds like you previously could through the site.
In Dota client go to Learn -> Hero Guides. You should be able to edit your guides.