
Steam 설치
로그인
|
언어
简体中文(중국어 간체)
繁體中文(중국어 번체)
日本語(일본어)
ไทย(태국어)
Български(불가리아어)
Čeština(체코어)
Dansk(덴마크어)
Deutsch(독일어)
English(영어)
Español - España(스페인어 - 스페인)
Español - Latinoamérica(스페인어 - 중남미)
Ελληνικά(그리스어)
Français(프랑스어)
Italiano(이탈리아어)
Bahasa Indonesia(인도네시아어)
Magyar(헝가리어)
Nederlands(네덜란드어)
Norsk(노르웨이어)
Polski(폴란드어)
Português(포르투갈어 - 포르투갈)
Português - Brasil(포르투갈어 - 브라질)
Română(루마니아어)
Русский(러시아어)
Suomi(핀란드어)
Svenska(스웨덴어)
Türkçe(튀르키예어)
Tiếng Việt(베트남어)
Українська(우크라이나어)
번역 관련 문제 보고

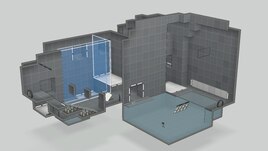


The key in this series is to keep in mind when you are able to walk to connected surfaces. Sometimes it's one-way i.e. a drop down. Sometimes it's all on the floor. At first, I didn't get why there is a surface up there in room 2. Then I realized that it is critical to walk over to room 1 and replace your Portal there - something that seemed impossible at first.
My favorite part was when I jumped off the second-highest jump and came within 1 square of the exit :P That was a funny moment for me.
Did something change in this map from the last time I saw it? *yawwwn* I wasn't watching.