Sid Meier's Civilization VI

Sid Meier's Civilization VI

54 ratings
Zigzagzigal's Guides - Norway (Vanilla)
By Zigzagzigal
Nowhere is safe from Norway's pillaging and looting - close or far from their homeland. Here, I detail Norwegian strategies and counter-strategies.
   
Award
Favorite
Favorited
Unfavorite
Legacy Guide
If you have the Rise and Fall expansion, click here for the updated guide.

This guide is no longer updated, but will remain for the sake of those without the Rise and Fall expansion.
Introduction
Note: This guide only covers content released prior to the Rise and Fall expansion. Content from any DLC pack released between the base game and Rise and Fall is marked as such.

Our greatest explorers have gone further than any before. They tell of landscapes of ash, of ice, of windswept meadows - and of great wealth. Rich, defenceless coasts surround the islands and continents of the world. While our Longships take control of the seas, our Berserkers will push further inland, ensuring those who neglected the faith in favour of merely filling churches with material goods shall be punished for their sins. The fact we end up with the gold at the end of it all is merely coincidental.

How to use this guide

This guide is divided into multiple sections explaining how best to use and play against this specific civ.

  • The Outline details the mechanics of how the civilization's unique features work and what their start bias is (assuming they have one at all).
  • The Victory Skew section describes to what extent the civ (and its individual leaders where applicable) are inclined towards particular victory routes.
  • Multiple sections for Uniques explain in detail how to use each special bonus of the civilization.
  • Administration describes some of the most synergistic governments, civic cards, pantheons, religious beliefs, wonders, city-states and Great People for the civ. Only the ones with the most synergy with the civ's uniques are mentioned - these should be given more consideration than they would be for other civs but are not necessarily the "best" choices when playing as the civ for a given victory route.
  • Finally, the Counter-Strategies discusses how best to play against the civ, including a consideration of leader agendas if the civ is controlled by a computer.

Note that all costs (production, science, culture, gold, etc.) mentioned within the guide assume a game played on the normal speed settings. To modify these values for other game speeds:

  • Online: Divide by 2
  • Quick: Divide by 1.5
  • Epic: Multiply by 1.5
  • Marathon: Multiply by 3

Glossary

Terminology used in this guide and not in-game is explained here.

AoE (Area of Effect) - Describes bonuses or penalties that affect multiple tiles in a set radius. Positive examples include Factories and Stadiums (which by default offer production and happiness respectively to cities within a 6 tile radius unless they're within range of another building of the same type) and a negative example is nuclear weapons, which cause devastation over a wide radius.

Beelining - The strategy of obtaining a technology or civic quickly by only researching it and its prerequisites. Some deviation is allowed in the event that taking a technology or civic off the main track provides some kind of advantage that makes up for that deviation (either a source of extra science/culture or access to something necessary for a eureka or inspiration boost.

CA (Civ Ability) - The unique ability of a civilization, shared by all its leaders. Unlike unique units, buildings, districts and improvements, civ abilites do not have to be built.

Civic cards - Another name for policy cards; you fill up your government with these for additional bonuses and can switch them for free every time you unlock a civic.

Compact empires - Civs with cities close together. This is useful if you want to make use of districts that gain adjacency bonuses from other districts, maximise the number of copies of the same district in the same area, or to maximise the potential of area-of-effect bonuses later in the game.

Dispersed empires - Civs with cities that are spread out. This is useful if you want to ensure cities have plenty of room for both districts and tile improvements. Civs with unique tile improvements generally favour a more dispersed empire in order to make use of them, as do civs focused on wonder construction.

GWAM - Collective name for Great Writers, Artists and Musicians. All of them can produce Great Works that offer tourism and culture, making them important to anyone seeking a cultural victory.

LA (Leader Ability) - The unique ability of a specific leader, which like civ abilities do not have to be built. Usually but not always, they tend to be more specific in scope than civ abilities. Some leader abilities come with an associated unique unit on top of the standard one every civ has.

Start bias - The kind of terrain, terrain feature or resource a civilization is more likely to start near. This is typically used for civilizations that have early bonuses dependent on a particular terrain type. There are five tiers of start bias; civs with a tier 1 start bias are placed before civs of tier 2 and so on, increasing their odds of receiving a favourable starting location.

Complete information on start biases within the game can be found in the Civilizations.xml file (find the Civ 6 folder in Steam's program files, then go through the Base, Assets, Gameplay and Data folders to find the file). If a civilization is not listed as having a start bias there, it does not have one, even if you feel like you keep spawning in the same terrain when playing as that civ.

Tall empires - Empires that emphasise city development over expansion, usually resulting in fewer, but bigger, cities.

Uniques - Collective name for civ abilities, leader abilities, unique units, unique buildings, unique districts and unique improvements.

UA (Unique Ability) - A collective name for leader abilities and civ abilities.

UB (Unique Building) - A special building which may only be constructed in the cities of a single civilization, which replaces a normal building and offers a special advantage on top.

UD (Unique District) - A special district which may only be constructed in the cities of a single civilization, which replaces a normal district and offers some unique advantages on top. In some cases, there may be minor disadvantages as well, but these are always outweighed by the positive features. All unique districts cost half as much to construct relative to the regular districts they replace.

UI (Unique Improvement) - A special improvement that can only be built by the Builders of a single civilization. Unlike unique buildings or districts, these do not replace a regular improvement. Some require a technology to unlock, and many have their yields improved with later technologies. "UI" always refers to unique improvements in my guides and not to "user interface" or "unique infrastructure".

UU (Unique Unit) - A special unit that may only be built by a single civilization, and in some cases only when that civilization is led by a specific leader. These usually replace an existing unit and offer extra advantages (and occasionally minor disadvantages as well in exchange for bigger advantages).

Wide empires - Empires that emphasise expansion over city development, usually resulting in more, but smaller, cities.
Outline (Part 1/2)
Start Bias


Norway has a tier 3 start bias for coast and a tier 5 start bias for woods tiles. The coastal start bias makes it easier to make use of Viking Longships early on, while the woods start bias allows you to make the most of Stave Churches.

Civilization Ability: Knarr

  • May cross ocean tiles with the classical-era Shipbuilding technology instead of the renaissance-era Cartography technology.
  • Naval melee units may heal 10 health per turn in neutral territory even without the Auxiliary Ships promotion
  • Embarking and disembarking land units costs just one movement point
    • Units always end up with fewer movement points remaining after embarking or disembarking regardless of whether or not their maximum movement points changed in the process.

Harald Hardrada's Leader Ability: Thunderbolt of the North


  • All melee naval units can perform coastal raids, an ability otherwise restricted to naval raider units.
  • +50% production bonus when constructing naval melee units.

Harald Hardrada's Unique Unit: Viking Longship


An ancient-era naval melee unit which replaces the Galley

Research
Obsoletion
Upgrades from
Upgrades to
Cost
Maintenance
Resource needed

Sailing
Technology
Ancient Era

Cartography
Technology
Renaissance era
None

Caravel
(270 Gold)
65 Production
or
260 Gold
1 Gold
None

Strength
Ranged Strength
Moves
Range
Sight
Negative Attributes
Positive Attributes
30 Strength
N/A
3 Movement Points
N/A
2
None
  • +1 Movement Point if starting on a coast tile

Positive changes

  • 30 strength, up from 25.
  • +1 movement point if starting on a coast tile
Outline (Part 2/2)
Unique Unit: Berserker


A medieval-era melee infantry unit which does not replace anything

Research
Obsoletion
Upgrades from
Upgrades to
Cost
Maintenance
Resource needed

Military Tactics
Technology
Medieval era

Gunpowder**
Technology
Renaissance era
None

Musketman
(130 Gold)
160 Production
or
640 Gold
or
320 Faith*
3 Gold
None
*Purchasing units with faith requires the Theocracy government, which in turn requires the renaissance-era Reformed Church civic. This number does not take into account Theocracy's 15% discount on faith purchases.

**If you lack access to nitre, you may continue to build Berserkers even beyond the Gunpowder technology.

Strength
Ranged Strength
Moves
Range
Sight
Negative Attributes
Positive Attributes
40 Melee Strength
N/A
2 Movement Points
N/A
2
  • -5 Melee Strength when defending
  • +10 Melee Strength vs. anti-cavalry units
  • +10 Melee Strength when attacking
  • +2 Movement Points when starting a turn in enemy territory
  • -1 Movement Point cost to pillage

Notable features

  • Does not require resources to build
  • Has 40 strength, 4 more than classical-era Swordsmen and 15 less than renaissance-era Musketmen
  • -5 strength when defending
  • +10 strength when attacking
  • +2 movement points when starting a turn in enemy territory
    • If you capture the territory, Berserkers starting in that captured land will still have 2 extra movement points until the end of the turn.
  • -1 movement point cost to pillage

Unique Building: Stave Church


A classical-era Holy Site building which replaces the Temple

Research
Prerequisites
Required to build
Cost
Maintenance
Pillage Yield

Theology
Civic
Classical era

Holy Site

Shrine
Worship Buildings
120 Production
or
480 Gold
2 Gold
25 Faith

Fixed yields
Other yields
Citizen slots
Great Person points
Miscellanious effects
4 Faith
1 Faith per adjacent woods tile
1 Priest
(2
if filled)
1 Great Prophet Point
1 Relic slot
All tiles containing coastal resources within the city limits provide +1 Production

Positive changes

  • +1 faith per adjacent woods tile
    • This particular bonus works even if the woods are improved, unlike the normal Holy Site adjacency bonus.
    • This stacks with the standard +1 faith per two adjacent unimproved woods tiles.
  • All tiles containing coastal resources within the city limits provide +1 production.
Victory Skew
In this section, the civ is graded based on how much it leans towards a specific victory type - not how powerful it is. Any score of 3 or above means the civ or leader has some kind of advantage to the victory route above a hypothetical civ with no unique features. A score of less than 2 means some kind of aspect of the civ actively discourages a particular victory route. All values are subjective and may be edited in future.

Leader

Culture

Domination

Religion

Science
Harald Hardrada
5/10
(Decent)
10/10
(Ideal)
6/10
(Decent)
4/10
(Acceptable)

Culture isn't really the best route for Norway, although they have a couple of slight advantages. Being able to cross oceans early means you can start attracting tourists from the whole world sooner, and the production bonus of Stave Churches can aid with wonder construction.

Domination is clearly your best option. Stave Churches offer a production advantage; something that's always good for a domination-oriented civ. Harald Hardrada takes it further by giving you a 50% production bonus to naval melee units. Viking Longships have good early-rush potential on very water-heavy maps, but still can be good otherwise supporting your other military efforts. Berserkers are a bit weaker than Knights for the same cost, but arrive slightly earlier, can easily pillage farms to recover health and crucially can make use of Siege Towers to tear down city walls. Finally, being able to cross oceans early combined with easy embarking and disembarking allows you to bring your medieval-era military strength to the entire world.

Religious victory is a reasonable path for Norway. While the unique faith bonus from Stave Churches isn't especially high, being able to send your religious units overseas sooner can give you an edge in the race to convert the world's heathens.

Scientific victory is a possibility, but not an especially strong one. Stave Church production bonuses offer a bit of a hand up with space projects, but you're often better off just using that production towards some late-game warfare if you get to that point.
Harald Hardrada's Leader Ability: Thunderbolt of the North (Part 1/3)

I don't even have Maritime Industries yet and I'm churning these things out rapidly.

There's a lot of little distinct features to Norway, but the ones that come first are the naval advantages. Harald Hardrada offers the strongest naval unit in the game until the renaissance era, a powerful production bonus and the ability for them to pillage land tiles. Norway's civ ability also adds healing in neutral seas to naval melee units, and ocean crossing two eras early. These advantages interweave with each other heavily, but each individual benefit will be mainly discussed in the appropriate unique section.

Naval melee units

Three of Norway's five uniques (including Harald Hardrada's leader ability) modify naval melee units, so before anything else, it's useful to know how they function. Naval melee units are reasonably fast, great at exploring and are the only non-land units that can capture cities. However, having a melee attack, they always take damage when they engage in combat, and they're not particularly good against city walls (use naval ranged units for that). Furthermore, like all naval units, they by default can only heal in friendly seas (Norway allows healing in neutral seas as well, but not enemy seas).

There are four types of naval melee units: Galleys (ancient era, replaced by Viking Longships), Caravels (renaissance era), Ironclads (industrial era, requires coal) and Destroyers (atomic era). They all share a set of promotions:

Promotion
Prerequisite
Effect
Notes
Additional Norwegian Notes
Embolon
None
+7 Strength vs. other naval units.
The lack of defensive bonuses on the high seas mean a one-on-one fight is often down to random chance until one unit can get this promotion.
Viking Longships start with a strength advantage and are easy to build in large quantities, so this promotion is a bit less useful.
Helmsman
None
+1 Movement
Saves a lot of time if you're trying to capture coastal cities using naval units alone, for exploration or to speed up escapes. It's not so great if you're trying to defend from a naval invasion. Remember that the classical-era Mathematics technology also adds +1 movement to all naval units, as does the Great Lighthouse wonder.
More movement means you have more left over after making a coastal raid, and it's also great for cutting journey times. For Viking Longships in particular, it's probably the better of the first two promotions, though it leads into the weaker of the second row of promotions as far as combat is concerned.
Reinforced Hull
Embolon
+10 Strength when defending against ranged attacks
With the Embolon promotion already, ranged attacks - particularly from the land - will often be the main threat to your naval melee units. If you're assaulting a city, this can often be the difference between the unit surviving after it makes its attack, and not.
Norway has the advantage on the seas - they have a stronger Galley that they can build faster. However, promoted Archers and city walls can still do a lot of damage to Viking Longships. This promotion really helps to cover a major weakness of theirs.
Rutter
Helmsman
+1 sight
A nice bonus when exploring, or spying on enemy coasts. Generally, it's best to dedicate a small number of units to this promotion rather than going overboard and giving it to everyone early on.
Because of Norway's faster naval UU and early ocean crossing, this promotion is a little less effective in its exploration role than it would be to for other civs.
Auxiliary Ships
Reinforced Hull or Rutter
May heal outside friendly territory.
Especially useful when fighting far from home, as it greatly decreases the downtime before naval units can get back in the fight.
This promotion is a lot less useful for Norway as they can already heal in neutral seas. It's rare you're in a situation where no neutral seas are available, so take a different promotion instead.
Convoy
Reinforced Hull or Rutter
+10 Strength when in a formation.
A formation refers to when you're escorting another unit such as an embarked land unit or Great Admiral. Formations with embarked units early in the game often slow down naval melee units, so be careful if you're trying to use the bonus offensively. Later on, embarked movement will be considerably better making this bonus easier to use.
With this promotion and Reinforced Hull, Viking Longships can have 50 strength against ranged attacks - as good as a freshly-built Caravel. However, you can't get a Great Admiral in the ancient era, nor is it easy to spare units to be part of a formation that early on in the game. You may want to consider filling out the first four promotions instead if you can't spare any land units to embark.
Creeping Attack
Auxiliary Ships or Convoy
+14 Strength vs. naval raider units.
Useless until other civs get Privateers in the renaissance era, but beyond that point, makes the naval melee unit incredibly strong against them (as well as later naval raiders). This is more niche than most fourth-row promotions for units, so it's not really important that you pick this up quickly.
You can use your early ocean crossing to discover all the civs in your game. If England or especially Germany is present, this promotion becomes more useful. Otherwise, you're often better off filling out the first four promotions instead and coming back to this later.

+50% production of naval melee units

All four naval melee units can be constructed faster with Harald Hardrada's leader ability. Keep in mind that "+50% production" does not mean "build them in 50% less time" - it's more like 33%.

You can build upon the production bonus (making it 150%) with the appropriate policy card:
  • Maritime Industries (Requires the ancient-era Foreign Trade civic, covers ancient and classical eras)
  • Press Gangs (Requires the renaissance-era Exploration civic, covers renaissance and industrial eras)
  • International Waters (Requires the atomic-era Cold War civic, covers modern, atomic and information eras)

That makes naval melee units essentially 60% cheaper than it would be for another civ without the policy card (though that ignores any other production multipliers like the Ruhr Valley wonder). Or, in other words, you can get five naval units for the price of two.

Remember that the production bonus does not affect gold purchasing. it's best to refrain from buying naval units considering the high cost involved. If you have lots of spare gold, consider instead buying land units in coastal cities you may capture so you can defend them.
Harald Hardrada's Leader Ability: Thunderbolt of the North (Part 2/3)
Coastal Raiding

All of Norway's melee naval units can perform coastal raids, an ability otherwise restricted to naval raider units. This is essentially a form of pillaging, but with a few special rules and restrictions.


A curious rule is that the unit must be on a coastal tile to carry out the action - city tiles and lakes don't count!

To carry out a coastal raid, you need the following:
  • Be on a coastal tile adjacent to land.
  • Have at least 3 movement points remaining, which will be used up for the action.
  • The adjacent land tile must be one of the following:
    • A tribal village without a Barbarian present
    • An empty Barbarian Encampment
    • A tile improvement or district (not a Harbour or Encampment) owned by a civ or city-state you're at war with which does not have a military unit present and has not already been fully pillaged
    • An enemy civilian unit without any military unit escorting it
      • Most civilians are captured and converted to your side
      • Great People are returned to an enemy city instead.

Tribal Villages and Barbarian Encampments


Because of Norway's ability to cross oceans early, I'm the only one who can make it here and take the reward.

Coastal raiding can be used on tribal villages to earn rewards as if you entered them using a land unit. Obviously, this can only be used on villages adjacent to the sea, but this can still result in you getting gold and research boosts (among other things) other civs wouldn't get.

You can also clear Barbarian Encampments this way. That's really useful for isolated islands that churn out annoying Barbarian naval units. Take some Quadriremes or other naval ranged units so you can clear the camp ready to be raided.
Harald Hardrada's Leader Ability: Thunderbolt of the North (Part 2/3)
Improvements and Districts


Farms heal units when pillaged, which is particularly useful when you want to keep up the pressure in warfare.

Regular naval melee and ranged units can pillage coastal tiles, but they will be swiftly exhausted. Here's a complete list of possible coastal improvements and districts that can be pillaged:

  • Fishing Boats - Up to 100 health
  • Harbour - 50 Gold
  • Kampung* (Indonesia) - Up to 100 health
  • Offshore Oil Rig - 70 Gold

Coastal raids can pillage improvements and nearly all districts positioned on land tiles next to the sea, meaning you can get a lot out of war even if you can't capture any cities. Remember that districts can be pillaged multiple times until all individual buildings and the district itself are pillaged.

In alphabetical order, here are all the land-based tile improvements and districts you can pillage with coastal raids, and their yields. Districts are shown in bold.

  • Airstrip - None
  • Aerodrome - 50 Gold
  • Alcazar* (Grenada city-state suzerain bonus) - 25 Culture
  • Aqueduct - 50 Gold
  • Camp - 50 Gold
  • Campus - 25 Science
  • Colossal Head (La Venta city-state suzerain bonus) - 25 Faith
  • Commercial Hub - 50 Gold
  • Entertainment Complex - Up to 100 health
  • Farm - Up to 50 health
  • Fort - None
  • Great Wall (China) - 50 Gold
  • Industrial Zone - 25 Science
  • Holy Site - 25 Faith
  • Kurgan (Scythia) - 25 Faith
  • Lumber Mill - 25 Science
  • Mine - 25 Science
  • Missile Silo - None
  • Mission (Spain) - 25 Faith
  • Monastery* (Armagh city-state suzerain bonus) - 25 Faith
  • Neighbourhood - 50 Gold
  • Nubian Pyramid* (Nubia) - 25 Faith
  • Oil Well - 50 Gold
  • Outback Station* (Australia) - Up to 100 health
  • Pairidaeza* (Persia) - 25 Culture
  • Pasture - 50 Gold
  • Plantation - 25 Faith
  • Roman Fort (Rome) - None
  • Quarry - 25 Culture
  • Seaside Resort - 100 Gold
  • Spaceport - 25 Science
  • Sphinx (Egypt) - 25 Faith
  • Stepwell (India) - Up to 100 health
  • Theatre Square - 25 Culture
  • Ziggurat (Sumeria) - 25 Science
*Only appears with specific DLC. In the case of the Alcazar and Monastery tile improvements, they require the Vikings Scenario Pack.

Note: Encampments cannot be pillaged via a coastal raid and produce no yield when pillaged.

The classical-era Raid policy card (requires the Military Training civic) will double yields from pillaging tile improvements. The medieval-era Sack policy card (requires the Mercenaries civic) doubles yields from pillaging districts. The industrial-era Total War policy card (requires the Scorched Earth civic) combines the two effects. All of these policy cards are military ones.

Earlier in the game, mines are particularly good targets for coastal raids thanks to their great science yield. Late in the game, it's worth looking out for Seaside Resorts - they have to be next to the coast, so they're all vulnerable to coastal raids, they produce 100 gold per pillage, and pillaging them sets back your enemy's tourism output.

Civilian units

Finally, if an enemy is foolish enough to leave civilians on the coast unescorted, you can use coastal raids to convert them to your cause. This can be useful for snapping up Builders that Barbarians managed to take, but it can also be used to deter enemy Builders from trying to repair their pillaged coastal improvements. That's especially useful late in the game if you're trying to stop a cultural victory by pillaging Seaside Resorts.

If military escorts do show up, ranged naval units with the Preparatory Fire promotion are pretty good at handling them.

Summary
  • Make use of naval production-boosting policy cards
  • Coastal raiding makes war worthwhile even if you can't take cities
Civ Ability: Knarr


If Harald Hardrada's leader ability wasn't enough, here's another load of naval bonuses!

Cross oceans with Shipbuilding

Although this only allows ocean crossing one technology early, Cartography is pretty expensive and has a eureka that can take a while to unlock (having two Harbour districts), so you'll still have a notable head start to ocean exploration. It also helps that the eureka for Shipbuilding requires you to build two Viking Longships, which is really easy to do.

The obvious benefit of early ocean crossing is the exploration potential. You can easily meet every civ and most city-states in the game, start trading luxuries to civs on other continents (which will have different ones to you) and use the coastal raid function on tribal villages you may encounter long before anyone else can get there.

Meeting all city-states in particular can be very powerful. City-states give you one quest per era. If you discover them two eras early, that could mean up to two envoys per discovered city-state. Even if you can't complete many quests, finding more city-states early means you have more choice regarding where to send envoys.

A less obvious benefit is the ability to withdraw units in war-time. Withdrawing a naval unit into the ocean, with at least a tile gap between them and the nearest coastal tile, will render them safe from attacks until either the enemy civ reaches the renaissance era, has the Leif Erikson Great Admiral (who doesn't arrive until the medieval era) or has a Quadrireme with the Coincidence Rangefinding promotion (which is very rare, and in that case you can just retreat the unit another tile). Being able to do this works very well with the next part of Norway's civ ability...

Neutral seas healing

All Norwegian naval melee units can heal in neutral territory for 10 health per turn. This isn't an especially fast source of health (and it's important to remember that it doesn't work on naval ranged units such as Quadriremes) but it nonetheless significantly aids your lasting power in naval warfare, especially early in the game when you don't have many farms or fishing boats to pillage. Make use of your ability to retreat into ocean tiles, and you can safely restore health and quickly get back into the fight when the unit's healed up.

Outside of wartime, this also helps with exploration. Barbarian naval units (and their land-based ranged units) can be a pain at times, but if you can move far enough to lose them, you can heal up and get right back to exploring more sea rather than having to go all the way back to land.

Quick embarking and disembarking


Uh-oh - time to get out of there!

The slow process of moving units from sea to land and back again can be partially alleviated with a Harbour district, but Norway can ignore all that and instead easily move land units between land and sea tiles. This can save time when escorting armies to new continents and making hasty escapes if units get injured, but it also can help speed up your religious units. Faster religious units means more cities converted to your faith sooner, which is very handy if you're going for a religious victory.

Later in the game, when embarked movement limits increase, you can use it to rapidly get large numbers of units from being embarked to moving inland. That's particularly powerful if you're launching a sudden war against another civ, as you can be a serious threat on land right from the start rather than needing to spend time securing your position.

Summary
  • Early ocean crossing is great for exploration
  • Retreat to ocean tiles to heal up prior to enemies entering the renaissance, so they can't hurt you
  • Quick disembarking can be used to flood enemy lands with your own land units on the first turn of war.
Harald Hardrada's Unique Unit: Viking Longship


I've talked about various tricks and tactics, but the Viking Longship is what helps to bring Norway's unique abilities together into an effective strategy.

You only need the Sailing technology to build Viking Longships, and it's very much worth your while to get one built quickly. With 4 movement in coastal tiles, they're one of the fastest things around at this early stage of the game, making them ideal for exploration. Exploration can find you city-states (and handy first-discovery envoy bonuses), tribal villages, and vulnerable enemy cities.


Few expect a maritime invasion so early in the game. I could take Brazil's new little coastal city with just a single unit, and use the gold I had accumulated to purchase a land unit to keep it safe.

Viking Longships have 30 strength and with the Maritime Industries policy card, are essentially cheaper to build than Scouts. You can build them in decent quantities before many civs even have Ancient Walls in their main cities, never mind their minor ones. Declaring war in the ancient era carries no warmonger penalties, and although taking cities still does, the penalties won't be quite so harsh.


Even if you can't take on a full civ, you can try picking on some coastal city-states to get a foothold on a new continent.

Once cities get a bit stronger, you may need to bring Quadriremes with your Viking Longships to handle city defences. They're a bit slower and don't benefit from Norway's unique abilities (aside from the ability to cross oceans early), so they're less disposable. Resist the temptation to pillage fishing boats with your Viking Longships so you can pillage them with your Quadriremes to heal up.

Alternatively, you can have fun going on coastal raid pillage sprees. If you start a war before the classical era and don't take any cities, you won't get warmonger penalties, so you can just keep putting pressure on the other civ and gaining pillage rewards for yourself. Forcing civs to bolster their defences can be a good strategy if you intend to win by religious victory, as they'll have to neglect their faith output to do so. It may backfire if you're intending to come back later with Berserkers.

Where next?

Viking Longships can be used in early-rushing strategies, for exploration or to pressure other civs into neglecting peaceful development in favour of stronger defences. This can help lay the foundation for Berserker wars, but it can also give you an early edge which helps the religious game.

The units themselves will be useful right up until the renaissance era, where they're completely eclipsed by Caravels. Caravels are stronger, faster, and still have access to Norway's unique abilities (healing in neutral land, coastal raids, and you can build them faster than other civs can).
Unique Building: Stave Church


You can have a lot of fun messing around with Viking Longships, but unless you're on a very water-heavy map, they generally won't win you the game. Something that can really help you with the next step is the Stave Church. Many players don't like building Holy Sites early on because they mean putting off Industrial Zones, but the Stave Church allows you to still get decent production while pushing down a religious path. Later on, you'll potentially be able to benefit from the production of Stave Churches, Harbours, Industrial Zones and Encampments all at once - something you may very well want to push for in relevant cities considering Norway has religious, land-based military and naval advantages.

+1 faith per adjacent woods

This is a relatively weak bonus, but not meaningless seeing as it gives you more of what you get out of religious buildings anyway. Unimproved woods next to the Holy Site become better than mountains, and even improved ones match up to them - letting you use more lumber mills.

What this allows you to do is settle exclusively in coastal areas without having to worry about how many mountains are available - you have a backup. Admittedly, there will be times where you have neither woods nor mountains, but you still have more flexibility than most civs.

Still, if you're willing to work for it, a single Stave Church can provide a huge amount of science. You'll need the Dance of the Aurora Pantheon, a Holy Site surrounded by as many tundra woods tiles as possible, and to obtain the medieval Great Scientist Hildegard of Bingen, who makes a Holy Site add its adjacency yield to science. A Holy Site with a Stave Church completely surrounded by tundra woods would provide +15 faith per turn, and therefore +15 science per turn. This doubles to +30 per turn with the Scripture economic policy card.

+1 production for sea resources


I don't even have a lighthouse yet, but thanks to the Stave Church and God of the Sea, the yield of this tile is great.

This is the main reason you'll want Stave Churches, making them worthwhile in any coastal city with more than a couple of fish or other sea resources. If you build a Holy Site fairly early, you can quickly secure the God of the Sea pantheon so together with this building your coastal cities will have strong production outputs. Add a Harbour with a Lighthouse, and that's an extra +1 food on top.

Small islands often have high numbers of coastal resources nearby. For many civs, these islands tend to be very unproductive, but Norway can make them surprisingly powerful.

Bonus production will be really helpful for getting Berserkers and Siege Towers built, considering you can't upgrade other units into them. If you want to continue on the warpath beyond that point, it'll also be great for churning out naval melee units at ridiculous speeds.
Unique Unit: Berserker


While Viking Longships terrorise the seas, Berserkers give you considerable power on land. While slightly weaker on defence than Swordsmen and considerably more expensive than them, they have mobility and offensive power superior to a Knight while retaining bonuses against anti-mounted units, the ability to use Siege Towers and the ability to impose Zone of Control.

Getting to Berserkers

Berserkers arrive at the medieval-era Military Tactics techology. Although it's possible to beeline it, there may be many other pressures for research. Here are three possible approaches:

The Faster Approach

This is more suited for maps heavy on land and light on water. The aim is to get Berserkers out quickly and worrying about other uniques later. Here's one possible research route, but remember this isn't set in stone and some prerequisite technologies aren't listed here:
  • Start with a Builder technology if required (Animal Husbandry, Mining, Sailing or Irrigation - whichever is most urgent.)
  • Research Writing and get Campuses built
  • Research Bronze Working so you can build a Spearman; send them to kill a Barbarian for the Military Tactics Eureka - this should save you more science than it costs.
  • Now, beeline Military Tactics

The Balanced Approach

This is good when you want Berserkers reasonably early, but you also want to not neglect other uniques. Here's a vague potential research order, but remember again that this is only an example and nothing to strictly follow:
  • Sailing
  • Clean up other necessary Builder technologies
  • Writing for Campus districts
  • Astrology for Holy Sites
  • Bronze Working for Spearmen and the Eureka they offer.
  • Masonry for Battering Rams
  • Now, beeline Military Tactics.

The Slower Approach

Nice for water-heavy maps where Berserkers are less effective. Here's a possible research path:
  • Sailing
  • Other necessary Builder technologies
  • Writing
  • Astrology
  • Shipbuilding
  • Celestial Navigation
  • Bronze Working
  • Construction (for Siege Towers)
  • Military Tactics
If you're taking this slow route, consider taking the Crusade belief in your religion and spreading it to your neighbours for a powerful +10 strength boost. It should at least partially compensate for

Meanwhile, on the civics tree...

You can build Berserkers faster with the Feudal Contract policy card available at Feudalism. Here's one possible civic route to get there, while not neglecting other bonuses:
  • Foreign Trade (unlocks Maritime Industries, allowing you to build Viking Longships faster).
  • Political Philosophy (needed for Oligarchy, which synergises very well with Berserkers)
  • Military Tradition (needed for flanking and support bonuses - don't forget this one!)
  • Theology
  • Feudalism
Once more, this is not a definite route you have to follow. You may want Military Training sooner for the Raid policy card (double rewards from pillaging improvements) for example.

Preparing for another war

Berserkers are great on the attack, but vulnerable in defence. For that reason, you'll need to build them in reasonable numbers so you can rotate out ones that are injured while still placing pressure on your opponents. Thankfully, the production bonus Stave Churches offer you can help make this more manageable. Bring some siege support as well (Battering Rams or Siege Towers are good) and you should be able to fight reasonably effectively. If you're launching a war fairly late, consider bringing Knights along as well - they defend better than Berserkers in most scenarios so can quickly form a front line to defend them if need be.

A classical or medieval-era Great General is a great help for Berserkers, but requires you to dedicate time towards building Encampments. Oligarchy will be useful as well.

Using Berserkers

Berserkers are slow in your own lands, but if they start a turn in enemy territory they start with +2 movement. That can be used to surround enemy units (allowing flanking bonuses) and cities (placing them under siege and hence preventing them from healing), as well as for retreating if things go wrong.


Fun fact: The speed bonus works even when embarked, as does the attack bonus and defence penalty. The attack penalty makes them great at amphibious assaults, but be sure to escort them with naval units if you're travelling over long distances as their defence will be particularly low.

Because Berserkers are so much stronger attacking than defending, it's important to play aggressively. Leaving enemy units alive is dangerous - even if they only have 1 HP left, they'll still generally do more damage attacking your Berserker than your Berserker would receive when attacking them. Flanking bonuses will really help when attacking. To boost your defence, consider keeping Berserkers clustered together so they can gain support bonuses from each other.

It's not unusual to start a turn with a few very injured Berserkers. Thankfully, their reduced pillage cost allows them to burn an enemy farm for health and still move a tile or attack in the same turn. Cheap pillaging can also be nice if you want to tear apart enemy mines for science or suchlike in the middle of war. Be careful about pillaging districts - if you take the city later, you're going to have to dedicate quite a bit of production to fixing it.

Once you can start promoting Berserkers, they become much better in defence. The Tortoise promotion is great, ensuring that Crossbowmen are significantly less of a threat, while Zweihander helps handle Knights to some extent. Elite Guard is particularly interesting, as it allows you to attack and then pillage the tile the Berserker's on, ensuring the unit has enough health left to survive incoming attacks.

Obsoletion

When Musketmen start arriving onto the battlefield in significant numbers, Berserkers will find it harder to justify their presence. Berserkers have a weaker attack and significantly weaker defence, and their mobility and pillaging advantages will only get them so far.

So, assuming Berserkers weren't enough to win you the game, it's time to consider where to go next. Having lots of cities from Berserker wars (and maybe some wonders) can support a religious victory path fairly well, and that's quite a good route to take. Alternatively, you can emphasise naval units once again as you go down the road of warfare some more.
Administration - Government and Religion
The administration section covers the governments, policy cards, pantheons, religious beliefs, wonders, city-states and Great People which have particularly good synergy with Norwegian uniques. Be aware that these are not necessarily the best choices, but rather options that you should consider more than usual if playing as Norway relative to other Civs.

Governments

Classical Era Governments

Oligarchy makes Berserkers very strong attacking and much less vulnerable in defence. The good balance of policy cards and experience bonus help even more.

Medieval/Renaissance Era Governments

Theocracy works well for both religion and war. If you're still using Berserkers, you can now faith-purchase them. Religious units also become cheaper to purchase, so you can make the most out of your Holy Sites. Furthermore, there's a good balance of policy cards on offer.

Modern Era Governments

Fascism works best if you want to carry on with warfare.

If you're after a religious victory, Democracy tends to work best due to the bonus to district projects as well as the high number of economic policy cards.

Policy Cards

Ancient Era

Conscription (Military, requires State Workforce) - This makes Viking Longships free to maintain, allowing you to spam as many as you like without trouble. It also helps you handle the relatively high maintenance cost of Berserkers.

God-King (Economic, requires Code of Laws) - Using this policy card improves your odds of getting to the God of the Sea pantheon before someone else can take it.

Maritime Industries (Military, requires Foreign Trade) - Produce Viking Longships at breakneck speeds, and Quadriremes pretty quickly as well.

Classical Era

Raid (Military, requires Military Training) - Coastal raiding and Berserker pillaging can produce some nice yields. Raid doubles the yields from improvement pillaging, allowing you to make even more out of it. Look out for mines in particular - they'll now give 50 science a time when pillaged.

Scripture (Economic, requires Theology) - Build on the bonus Stave Churches offer.

Medieval Era

Feudal Contract (Military, requires Feudalism) - This allows you to produce Berserkers quite a bit faster.

Meritocracy (Economic, requires Civil Service) - While at first glance this card might not appear to have much synergy with Norway's uniques, consider this: You need Holy Sites for Stave Churches, Harbours for better coastal city yields and ships, Campuses for science, Encampments and/or Industrial Zones for production, Entertainment Complexes to handle war weariness and so on. Norway's playstyle doesn't leave a lot of room for Theatre Squares. As such, this policy is a powerful one to have around.

Sack (Military, requires Mercenaries) - Double yields for pillaging districts, including via coastal raids.

Renaissance Era

Press Gangs (Military, requires Exploration) - A huge production boost for the Age of Sail, allowing you to build Caravels and Ironclads extremely quickly. It's also good for Frigates and Privateers.

Wars of Religion (Military, requires Reformed Church) - A good way to tie together faith from Holy Sites and Norway's military advantages.

Industrial Era

Total War (Military, requires Scorched Earth) - All pillaging is doubly effective. You can continue to raid coasts using your melee naval units, but remember that Privateers and other naval raiders are invisible to most other units meaning they can raid without as much of a threat of being caught.

Modern Era

Levee en Masse (Military, requires Mobilisation) - A huge navy is going to cost you an awful lot of gold. Thankfully, this will help alleviate that.

Atomic Era

International Waters (Military, requires Cold War) - Churn out Ironclads at incredible speed! It's also good for Battleships and Missile Cruisers.

Pantheons

City Patron Goddess - A reasonable choice if you failed to get God of the Sea, helping you to build the first district in a city faster. Constructing a Holy Site first and spending some gold to buy a Stave Church can help get production up and running.

Dance of the Aurora - Holy Sites in the middle of tundra forests can create massive amounts of faith with this pantheon.

God of Healing - Berserkers are prone to losing a lot of health very quickly when in war, so this belief really helps them recover and get back in the fight sooner.

God of the Sea - Often Norway's best choice. God of the Sea stacks with the production boost of Stave Churches, making coastal cities much more productive than they are for other civs.

River Goddess - For a civ that likes to build Holy Sites and go to war, this pantheon is rather helpful as it can aid in alleviating war weariness.

Religious Beliefs

You can have one founder, one follower, one enhancer and one worship belief.

Choral Music (Follower) - Norway's incentive to build a lot of Stave Churches could help you to really up your culture output with this belief.

Church Property (Founder) - Large navies cost a lot of money, and this helps manage it.

Crusade (Enhancer) - An excellent choice and one Norway is particularly good at making use of. If your faith output is half-decent, take this belief, convert a few cities of another civ in time for Berserker invasions and enjoy being incredibly hard to beat.

Feed the World (Follower) - If you're not so bothered about the faith aspects of Norway, this belief is a good way of ensuring you're making the most out of your Holy Site districts by offering food for Shrines and Stave Churches.

Jesuit Education (Follower) - A good way to use excess faith if you're not so interested in the religious game. This lets you build Campus and Theatre Square buildings with faith.

Meeting House (Worship) - Essentially a mini-Stave Church, combining the faith and production advantages.

Missionary Zeal (Enhancer) - Your units already have good mobility between land and sea, but Missionary Zeal ensures your religious units can move rapidly though land as well.

Religious Community (Follower) - A powerful way to make Holy Sites more useful even if you're not necessarily after a religious victory.

Tithe (Founder) - Like Church Property, a great source of money.

Wat (Worship) - Like Jesuit Education, a good way to turn unneeded faith into science, something more relevant to domination victories.
Administration - Wonders, City-States and Great People
Wonders

Oracle (Ancient era, Mysticism civic) - Offers an excellent way to burn off excess faith if religious victory doesn't interest you.

Great Lighthouse (Classical era, Celestial Navigation technology) - Faster movement complements early ocean crossing very well, helping you to explore the world sooner. This bonus is also also great for naval warfare.

Mausoleum at Halicarnassus (Classical era, Defensive Tactics civic) - Although no Great Admiral can offer a speed and strength bonus to Viking Longships, one in the classical era can make Quadriremes scarier to your opponents, which can help your navy in general. An extra retirement charge for Great Admirals has a number of powerful uses; see the Great Person section for more information. Requires the Persia and Macedon Double Civilization Pack.

Venetian Arsenal (Renaissance era, Mass Production technology) - Norway's naval production speed is already so fast that their ships catch fire from friction burns while being constructed. The Venetian Arsenal doubles that output. Try and get to the Electricity technology fairly fast after getting this wonder as well as the Mobilisation civic so you can build Seaports for fast armadas. That way, you have both quantity and quality in your navy.

City-States

Auckland (Industrial) - One of the best city-states around for Norway thanks to the strong synergy with Stave Church production bonuses. Requires the Vikings scenario pack.

Kandy (Religious) - Norway's strength at exploration means you can win a few relics from this city-state if you plan things out right. Make sure you have enough Stave Churches to store them in!

Mohenjo Daro (Cultural) - The best city spots for sea resources (and hence production via Stave Churches) are not necessarily next to a river. This city-state helps you to use those spots effectively.

Nan Madol (Cultural) - Norway's skew towards coastal cities as well as their skew against building Theatre Squares (Harbours, Holy Sites and others vie for attention) makes this a good city-state in Norway's hands.

Valletta (Militaristic) - A great city-state if you're conducting naval warfare with Norway. You can capture a city by the sea, then spend faith to quickly boost its defences. That buys you enough time to purchase or move in land units to keep it defended.

Great People

Keep in mind only the Great People with the most synergy with Norwegian uniques are covered here. All Great Admirals can be helpful, but it would be redundant to list every single one.

Classical Era

Euclid (Great Scientist) - Mathematics is on the way to Berserkers, but its Eureka boost can be tricky to pick up sometimes. Euclid solves that problem.

Gaius Duilius (Great Admiral) - While unfortunately there's no ancient-era Great Admirals to boost your Viking Longships, you can still make an early fleet with Gais Duilius and enjoy an early 40-strength monster to raid the coasts of the world.

Medieval Era

Abu Al-Qasim Al-Zahrawi (Great Scientist) - Berserkers can take a lot of damage very quickly, so someone who can speed up healing is very welcome.

El Cid (Great General) - A Berserker corps is strong enough to get through the renaissance era, though you may want to keep the general around for the speed and strength bonus for units in a radius instead. Multiple Berserkers with 5 movement points and 55 attack strength (59 with Oligarchy) are better than just one with 60 strength and 4 moves!

Hildegard of Bingen (Great Scientist) - Turn that Holy Site surrounded by woods into a healthy source of science! A curious side-effect of this Great Person is that 3 and 6-envoy bonuses from religious city-states will also boost science in this city, as the game considers them to be adjacency bonuses.

James of St. George (Great Engineer) - Naval conquests can often leave you with cities that are hard to defend. With James of St. George, however, you can simply send him to freshly-captured cities and use a charge to provide strong fortifications. That should buy you some time until the counter-attack comes.

Renaissance Era

Santa Cruz (Great Admiral) - Very powerful in conjunction with the Mausoleum at Halicarnassus wonder and Yi Sun-Sin. If you can't get either, then simply enjoy a 67-strength Caravel armada which rips apart the undefended coasts of your enemies without a care in the world.

Yi Sun-Sin (Great Admiral) - An early Ironclad is powerful. An early Ironclad that can raid coasts is scary for your opponents. Add Santa Cruz and that's an early Ironclad Armada with 77 strength, which is simply cruel. Add the Mausoleum at Halicarnassus and you can have two, which is downright evil. Just send them on a voyage around vulnerable civs and city-states you don't have any envoys present in, and enjoy ripping up their coastal tiles.
Counter-Strategies
Norway can be a nasty pillager and a threat both on land and in the sea. Still, there are some vulnerabilities you can really exploit.

Knarr

Ocean Crossing

Unless Norway doesn't have access to the sea, you can't stop them from using this ability. Still, there are ways you can be prepared for it.

For a start, Norway's ability to cross oceans early often means they start settling other continents sooner. Different continents have different sets of luxuries. Keep an eye on which ones Norway has, and if you can get on their good terms, they might be a good trading partner.

Healing in Neutral Seas

If Norway's exploiting the ability to retreat units into ocean tiles and heal them, consider focusing your fire upon individual units at a time. Destroyed ships can't escape and can't heal up again.

A little trick you can use in some cases is to purchase tiles you suspect Norway's ships are healing on, It's quite expensive to do so, but it will deprive the units of some health until they move and find a new healing spot.

Low Embarkment/Disembarkment Cost

Keep your coast well-defended with land units, and it'll be hard for Norway to flood your lands with their previously-embarked military units. Melee infantry units are good because they defend pretty well and provide Zone of Control, preventing any disembarking Berserkers or the like slipping through. Ranged units, however, are better at handling Norwegian ships. Keeping the coasts covered with military units is also the best tactic against coastal raids.

As far as religious units are concerned, it might help to line your coast with some Inquisitors. You don't need to cover the entire coast - zone of control will help prevent Norway's religious units slipping through.

Harald Hardrada - Thunderbolt of the North

Cheap Units

Harald's high naval melee unit production may result in their navy being lopsided. A lack of naval raiders in particular is quite likely considering they can conduct coastal raids using naval melee units. As warfare on the high seas works in somewhat of a rock-paper-scissors fashion (raiders beat range, range beats melee, melee beats raiders), you simply need to emphasise naval ranged units if you ever have to fight them on the high seas.

Cheap units also means Norway has to deal with high maintenance costs. They may at first use the Conscription policy card to cover the costs, but once Viking Longships obsolete, their costs will skyrocket. If you're a peaceful civ, trading them gold in exchange for their luxuries they've obtained from other continents means they'll rely on you more to cover naval maintenance costs. If they declare war on you, they'll suddenly have a much harder time supporting their huge navy.

Coastal Raids

Coastal raids can be prevented simply by protecting your improvements and districts with military units. Districts take a higher priority than improvements to protect as they're harder to repair.

Eventually, Norway may get wise to this and start using naval ranged units against you. In that situation, bring forward your land-based ranged units and injure them. Unlike Norway's naval melee units, their naval ranged units can't conduct coastal raids (so they can't heal off your farms) and can't heal in neutral seas, so only a bit of damage might be enough to persuade Norway to leave you alone.

Harald Hardrada - Viking Longship

If you start near Norway, be sure to avoid settling city spots that are very exposed to the sea - at least until the threat of Viking Longships dies down. Early on, even just one or two can take a new city out!

You can't really engage Viking Longships by sea very easily because of the fact they're both stronger and can be built faster than regular Gallies. For this reason, avoid improving coastal resources if you suspect Norway is going to fight you early on - it'll just get pillaged.

So, how do you beat these things? One possibility lies in promoted Archers. Archers can damage Viking Longships while Viking Longships can't hurt them at all, though be aware of the big strength penalty Archers have against them.

Harald Hardrada - AI Agenda (Last Viking King)

One of the simpler agendas, Harald likes you if you have a good navy and dislikes you if you don't.

This can be a tricky agenda to meet early in the game. Having a decent navy early on might keep Harald at bay, but if he chooses then to attack you, he's likely to still have the upper hand thanks to his UU. Instead, you might be better off just training some Archers and preparing for the worst - building up a navy can come later.

Berserker

Isn't it lovely - a UU with a downside built in!

Berserkers are vulnerable in defence. Even if you're an era behind Norway, you can still attack their Berserkers with Horsemen or Swordsmen and still deal decent damage. Knights are probably the most effective units against them, but Crossbowmen are great as well.

Try if possible to engage Berserkers before they enter your lands. If there's a bit of a gap between your lands and theirs, keep watch over it for possible incoming Berserker forces. Scouts are great at this role as they're cheap to replace if they get killed. If a Berserker army is on the march, get your Horsemen, Crossbowmen and/or Knights ready to meet them. You may have to declare war on Norway yourself just to ensure you have the tactical advantage.

If there's not much of a gap between your land and Norway's, know where good defensive terrain (e.g. forested hills) is, and place Swordsmen or other units that defend pretty well on those tiles.

If instead Norway is aiming for an invasion by the sea, get Crossbowmen or even promoted Archers lining your coast. Berserkers still have a +10 attack bonus when embarked (despite the fact being embarked produces a different base combat strength to normal, scaling based on era) but also a -5 defence penalty. You can pick them off while they arrive while also keeping your coasts safe from coastal raids.

Stave Church

The main advantage of Stave Churches is dependent on Norway having good access to coastal resources. Take city spots slightly inland from the coast, and not only will you prevent Norway having it, but it'll be safe from Viking Longship attacks.

When at war with Norway, you can pillage their Holy Site to pillage the Stave Church, denying them access to the production bonus, or alternatively block them from working coastal resources by placing naval units on top.
Other Guides
If you like these guides and want to send a tip, you can click here![ko-fi.com]

Compilation Guides

Individual Civ Guides
15 Comments
Zigzagzigal  [author] Feb 7, 2018 @ 12:58pm 
Change from the 7 February patch:

- Farms now only provide 50 health when pillaged, down from 100.
waterloodw Dec 7, 2017 @ 4:01am 
Thank you for the very good guide Zig.

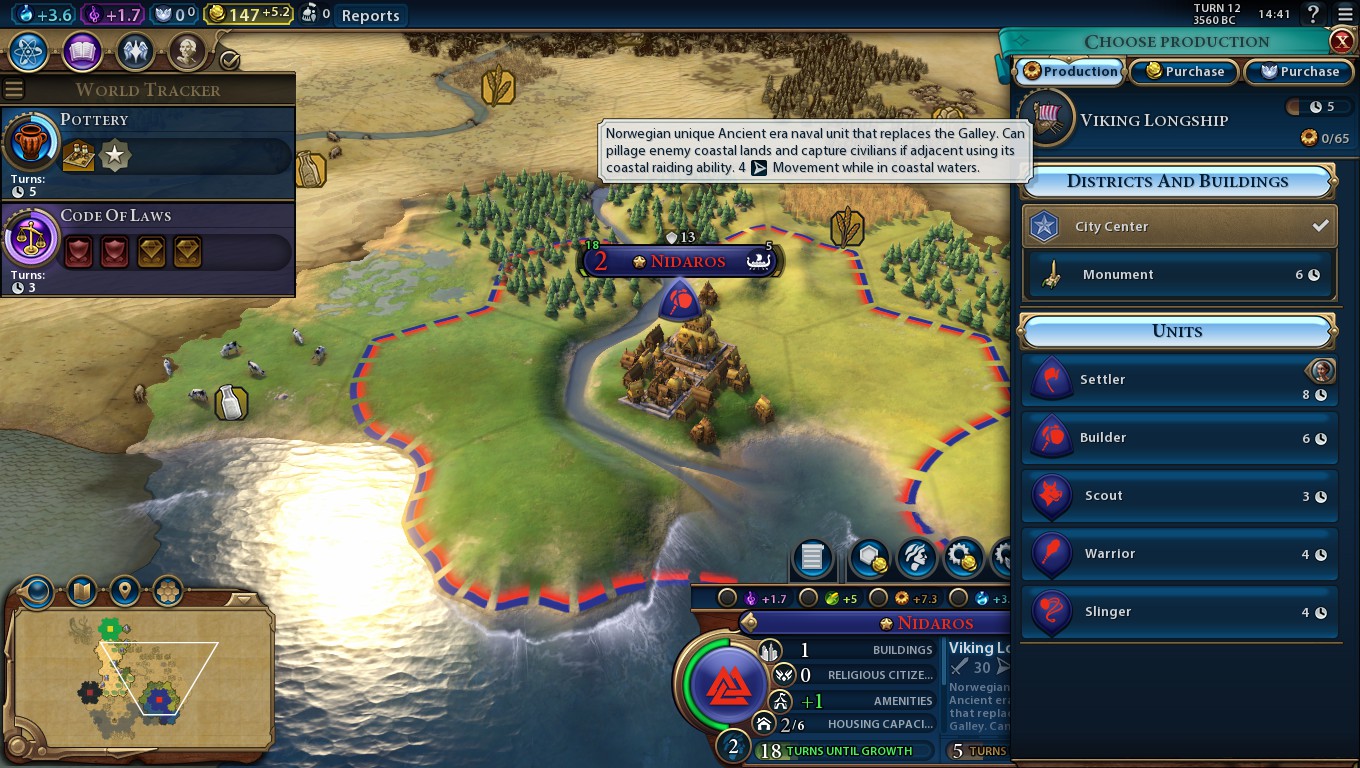
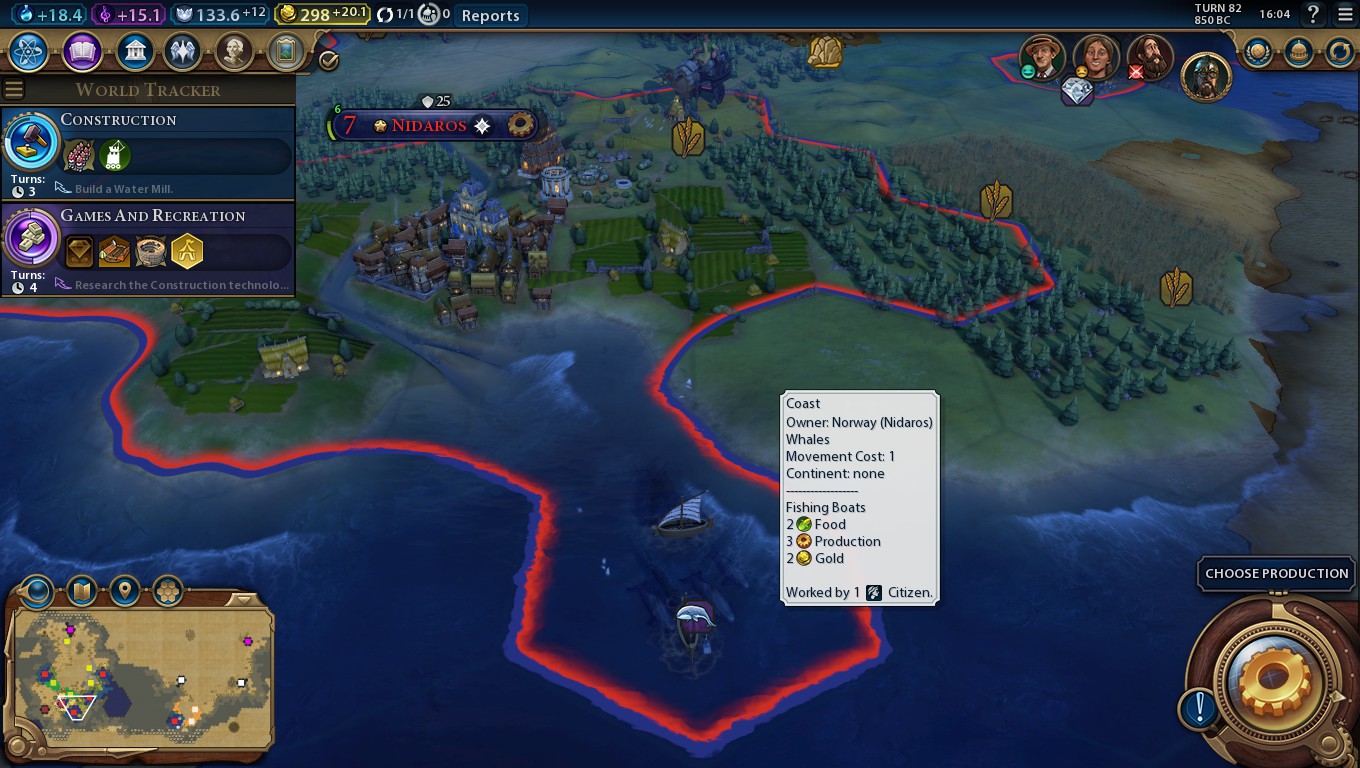
Playing on a giant earth map (ynamp) with Norway is really fun since there are a lot of development close to the coasts you can raid in Europe. Early on you can easily take smaller cities that has good resources/luxuries nearby with a few longships and, as the guide says, buy a unit to defend it.

When it comes to wonders my top picks early game are always the Great Lighthouse and the Colossus.

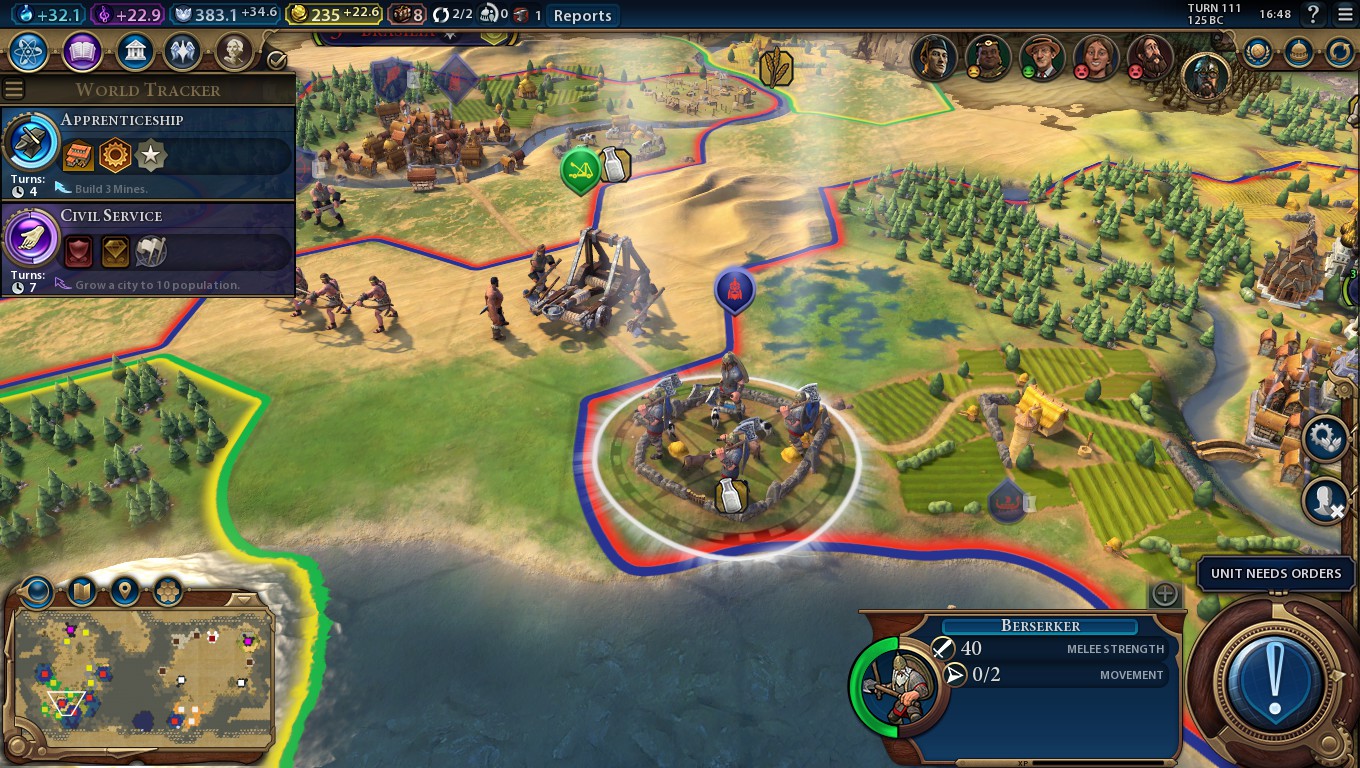
Trying a path with warrior monks to see how they perform together with berserkers.

Zigzagzigal  [author] Oct 20, 2017 @ 3:57pm 
Changes from the Autumn 2017 patch relevant to Norway:

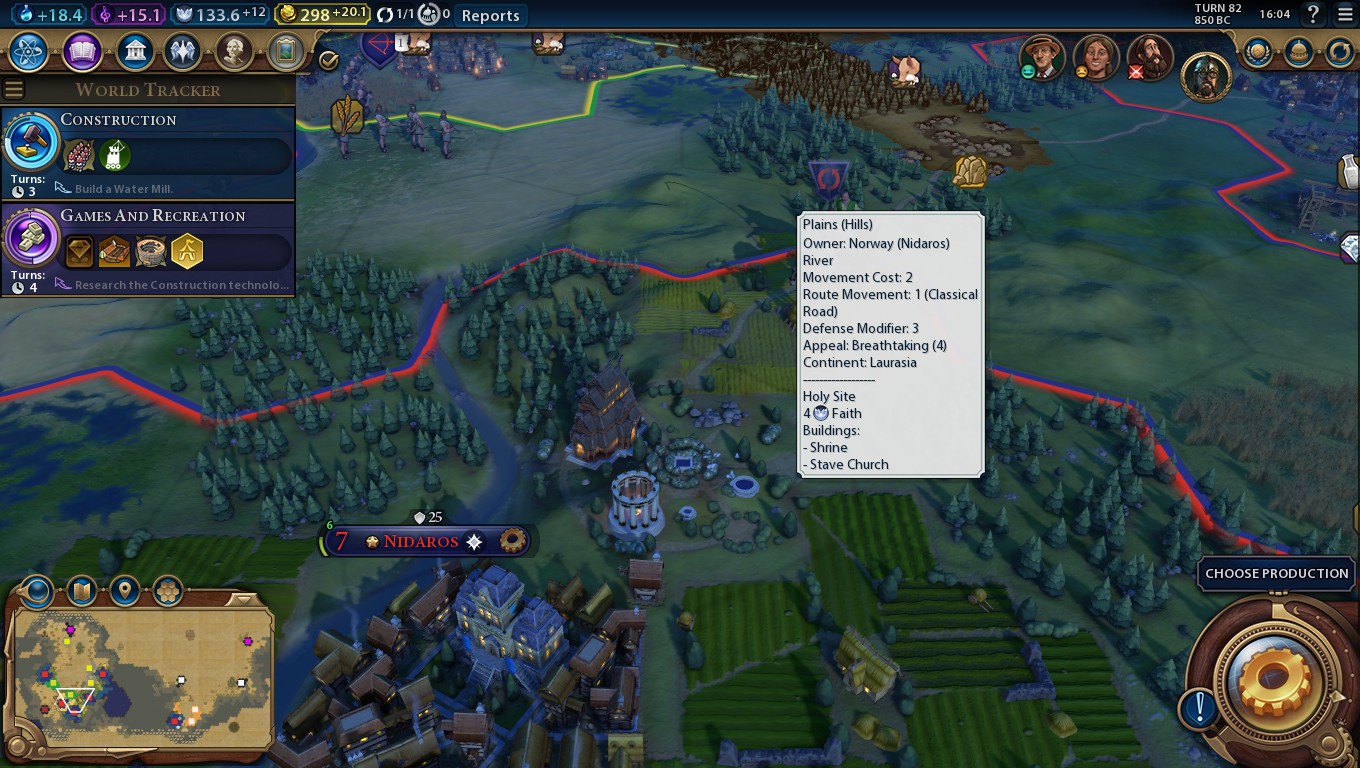
- Lots of new religious mechanics, including new beliefs. Choral Music may be good for Norway if you're looking for some culture without needing to build Theatre Squares.
Zigzagzigal  [author] Aug 6, 2017 @ 8:54am 
That's been there from the start of the game. With naval raider units, they can use their ranged attack to clear the Barbarians, then a coastal raid to remove the encampment. For Norway, you'll typically need to bring naval ranged units to accompany your naval melee units (as you can only clear the encampment with a coastal raid if there's no unit there.)

Coastal raids also clear tribal villages and capture civilian units.
Yensil Aug 6, 2017 @ 8:03am 
I just discovered (as Germany) that coastal raids can be used to clear barbarian camps, is that new or did I just never notice it before?
Zigzagzigal  [author] Aug 4, 2017 @ 12:57pm 
1. Sorry, should have clarified that it makes the units take 33% less time to build (versus no production boosts at all). I've done that now.

2. That's what I get for copying and pasting the template from the guide to Arabia. I'll go and fix that.
Benzombie Aug 4, 2017 @ 12:48pm 
Always love your guides, 2 things though.
1. When it says 50% bonus to navy melee units you said it's only 33%, what exactly does it modify that it's not actually 50%?
2. You wrote the Stave Chrurch is a campus building, just a little error.
Zigzagzigal  [author] Aug 3, 2017 @ 5:01pm 
With the guide to Sumeria done, all base game civs are now covered. DLC civs will not necessarily be covered in release order.
Zigzagzigal  [author] Aug 2, 2017 @ 6:32am 
It's a decent advantage of the civ, though it depends heavily on random chance (with regards to which city-states you have) and the type of map (it's generally better in larger maps where you have more choice).
🍣 Aug 1, 2017 @ 7:06pm 
What do you think about Norway's ability to specialize early? They can do it with faith, obviously, but they can also do it with other yeilds.

Their primary advantage is they can explore, this means they can cherry pick which type of city states they want. Where sedentary civs have to make due with whatever happened to spawn nearby, norway can explore every coast by medieval. If they want to spend every single envoy into science they can to the point where they can have 3 or 4 city states multiplying the bonus of each campus. Nevermind the suzerain bonuses, which Norway also has its choice of.

Everyone always treats Norway like a one trick pony, but really, their bonuses can be leveraged effectively toward any victory condition.