SteamVR

SteamVR

52 ratings
How to add working replacement models for steamVR
By Tquix
A guide on how to replace the SteamVR models with your own. It also includes a troubleshooting section if you are having problems getting your models to show up in SteamVR.
   
Award
Favorite
Favorited
Unfavorite
Introduction
It's not hassle-free to get your own objects working inside of SteamVR. They can easily become invisible for a number of reasons. I will share my experiences and conclusions in this guide from what I learned when experimenting with the file system.

(If you have already figured out how to upload new models, but can't get them to work inside of SteamVR, jump to the troubleshooting section or go through this guide to make sure)

This guide requires the user to know how to create 3D-models and exporting them as .OBJ files, and/or how model texturing works (if you only want to make a new skin for the default controller).
I have used Autodesk Maya in the creation of my models, but I've seen other people using Blender and 3ds Max, so it should be of less importance which software you are using.

This guide will use the SteamVR default controller object as example, but it should be applicable for other objects in SteamVR such as environments, base stations etc.

The SteamVR file system is rather picky with errors, and require a couple of steps to be taken that will be described in this guide.

You will most likely have to modify some files manually, and to do this a recommend Notepad++[notepad-plus-plus.org], but regular Notepad will also work.

Retexturing the default controller model
If you only want to change the texture of the default object, it's very simple.

  1. Locate the object folder. For the default controller, this is: Steam\steamapps\common\SteamVR(or OpenVR)\resources\rendermodels\vr_controller_vive_1_5.
    Inside you will find an image file called onepointfive_texture.png.

  2. Replace this with your new texture. Make sure to replace it and keep the same name, and the same file type (.png) for simplicity.

  3. You can use the original texture file as starting point when making your own. It's a good idea, because the controller object is UV mapped to different parts of the texture. Here is the default controller UV Mapping;
Add the model(s) and getting it to work
To start off, you need to make a backup copy of the original folder containing all the original files of the object that you will be replacing. It's important not to modify or replace anything in this backup.

The folder for the controller object is the "vr_controller_vive_1_5" folder. It's located in Steam\steamapps\common\SteamVR(or OpenVR)\resources\rendermodels.
When a backup has been made, we will make the changes directly in the original folder so that they will show up instantly in SteamVR. (Make sure to have the default controller set in SteamVR (Reset to default)).

Firstly, there is one object here that is connected to a .json file with the same name. Let's call this the main object. In this case, it's the vr_controller_vive_1_5.obj.
This is the .obj that you will be uploading to the workshop, and the .json file defines the other objects that are connected and should be used with it. The .json file also defines the other objects pivot points and how they are being animated (when pressing a button for example). I won't dig deeper into the animation of other objects because I don't possess that knowledge. With a closer look at the .json file format I'm sure someone will figure it out.

- What I did with my light saber objects was keeping all the default buttons as they were, and adapt the body model to them (to maintain animation etc.).

My workshop files can be found here: T-quix's workshop

The easiest way to go about all of this is to use the same names for objects and textures as by default. This way you won't have to modify the files so much.

Using multiple objects
Using multiple objects is handy in environments, or when utilizing the controller buttons etc.
The .json file allows us to use multiple objects connected to each other, and if the .json file is configured to have multiple connected objects, the main file with the same name as the .json will not be rendered. This is why the controller consists of a "body" object and several buttons.
- The body.obj is in fact the only object I replaced when creating the light sabers. The rest is as default.
If you are creating a new controller or environment with multiple of your own objects connected, not caring about animation. The .json file can be as simple as this:
Oh, by the way, the first line in the .json defines what thumbnail image to use for the object.

Using a single object
If you on the other hand want to use only one object (no buttons or extra connected objects) you can! In this case, the main objects mesh can be used. But to utilize only the main object you will have to modify the .json file to not have any "components" at all. It can then be as simplistic as this:

The material (.mtl) file
The .mtl files can be a hassle and this is where I had most issues.
A general tip is; if you don't have any fancy material attributes to your model, use any default .mtl file from the original folder, only changing its name to match the object, and the texture bound to it inside. The default .mtl file looks as follows:

Your own exported .mtl files should also work, but if the objects are not showing up, try one of the defaults. I've also used a more simplistic one that's working just fine;

The object (.obj) file
The first line in the .obj is defining what .mtl file to connect with. So if you are changing the name of the .obj when replacing another .obj, make sure to edit the first line in it to connect with the correct .mtl file.
For example: I exported my object as "light_saber.obj". Then I replaced body.obj with this object, and also renaming it to body.obj (so I wouldn't have to edit the .json). But the object would be invisible, because the first line in my new body.obj still was "mtllib light_saber.mtl". I had to change this to "mtllib body.mtl" and it would work just fine.

So: Either export your objects with the same name as the objects you will be replacing, or make sure to edit the .obj file to connect with the right .mtl file!


The 3D object itself should not contain weird faces or attributes that can mess up the .obj. It should not have faces crossing each other, and it should also not have holes. The polygons should exclusively be quads or triangles. Delete all history on the object before exporting. Triangulate. Change the .obj exporting settings to only include the important stuff. I only included material and normals. I excluded groups, point groups and smoothing.

Make sure your object is about the right size and not enormous (because the default controller is really really small). Load in the default controller object in your scene and match them up.


The new body.obj with the main object below.
Uploading the content to SteamVR
At the time of writing, you need to have the SteamVR Beta to be able to upload files.
  1. Start SteamVR and open the Menu -> Workshop -> Upload new.
  2. Select the Controller Model Type.
  3. Add a name, description and select the Thumbnail file.
  4. In the file section, you must choose the main .obj file, (the one with the .json file). This will include all related objects that is specified in the .json (or it just takes the whole folder, I don't know).
  5. It's recommended to set visibility to private at first if you are not sure it works. The visibility can be changed later on the workshop site.
  6. Subscribe to your own workshop contribution and select it inside of SteamVR to make sure it works before making it public!
If you want to know where the subscribed files ends up, it's in: \SteamLibrary\SteamApps\workshop\content\250820 - And then in random folders.
I think the latest subscriptions are at the bottom.
Here you can also check out others files to see how they managed it.
Troubleshooting
If you've created an object using this guide or figured it out yourself, but cant seem to get it to work in SteamVR (mesh is invisible). Try going through the steps below. I tried arranging it with the most common solution topmost.

  • Check the first line in the .obj so that it's connected to the right .mtl file
    Do this for the invisible object AND the main object. (See main section for more info)

  • Make sure the material file is correctly formatted.
    If your object doesn't have any special material attributes, the easiest way to do this is to copy the default .mtl file belonging to that object from the original folder. Then change the connected texture in the .mtl if necessary.

  • Check other file formatting
    Avoid .mtls including groups and/or multiple textures. Possibly a specularity map as by default, but it's not necessary.
    The .json file included objects should be separated by commas.
    (See the main section images for .mtl and .json formatting)

  • Double check all connected filenames and extensions.
    Check in the .mtl file so that the texture file has the exact right name and extension (.jpg .png etc.)
    Check in the .json file so that all connected objects are there and has the right names.

  • Opt in for SteamVR Beta.

  • Make sure you are working with the right files
    If you are working directly in the default controller folder on your PC, make sure that you have selected "Reset to default" inside the SteamVR configuration menu. Otherwise, you are viewing the wrong object.
    If you are working directly in the subscription folder, make sure that the right object is selected in the menu.

  • Only include necessary things in the .obj and keep it simple.
    I only included material and normals. I excluded groups, point groups and smoothing.

  • Make sure your object is about the right size.
    The SteamVR default controller is really, really small. Load in the default controller object in your scene and match them up.

    Getting desperate
  • Delete all history on the object before exporting the .obj file, and if that doesn't help, freeze transformations as well.

  • Make sure your mesh don't have any holes or weird crossing polygons.

  • Triangulate your object before exporting it.

  • Don't have too high poly-count. The original controller model has 17 326 triangles and you should not need more than that.

  • Scream at SteamVR and bump your Vive firmly *but not too hard*.

  • Comment this guide with a download link to the files and me or someone else might be able to look at them.
Thats it.
I hope this guide has helped anyone to add objects in SteamVR!
Feel free to comment about any issues that you might have with your objects or this guide.

Now get out there and make some kickass content to share!
35 Comments
Jank Feb 11, 2022 @ 5:09am 
hello i am steam we are here to tell you it works now we have updated the code
badaaim Sep 21, 2020 @ 2:58am 
Hi @whigger, Hope you are still active and around, I am trying to figure out the json file for the render model which defines/provides the animations and I think I understand the most part of it but I don't understand the coordinate system.

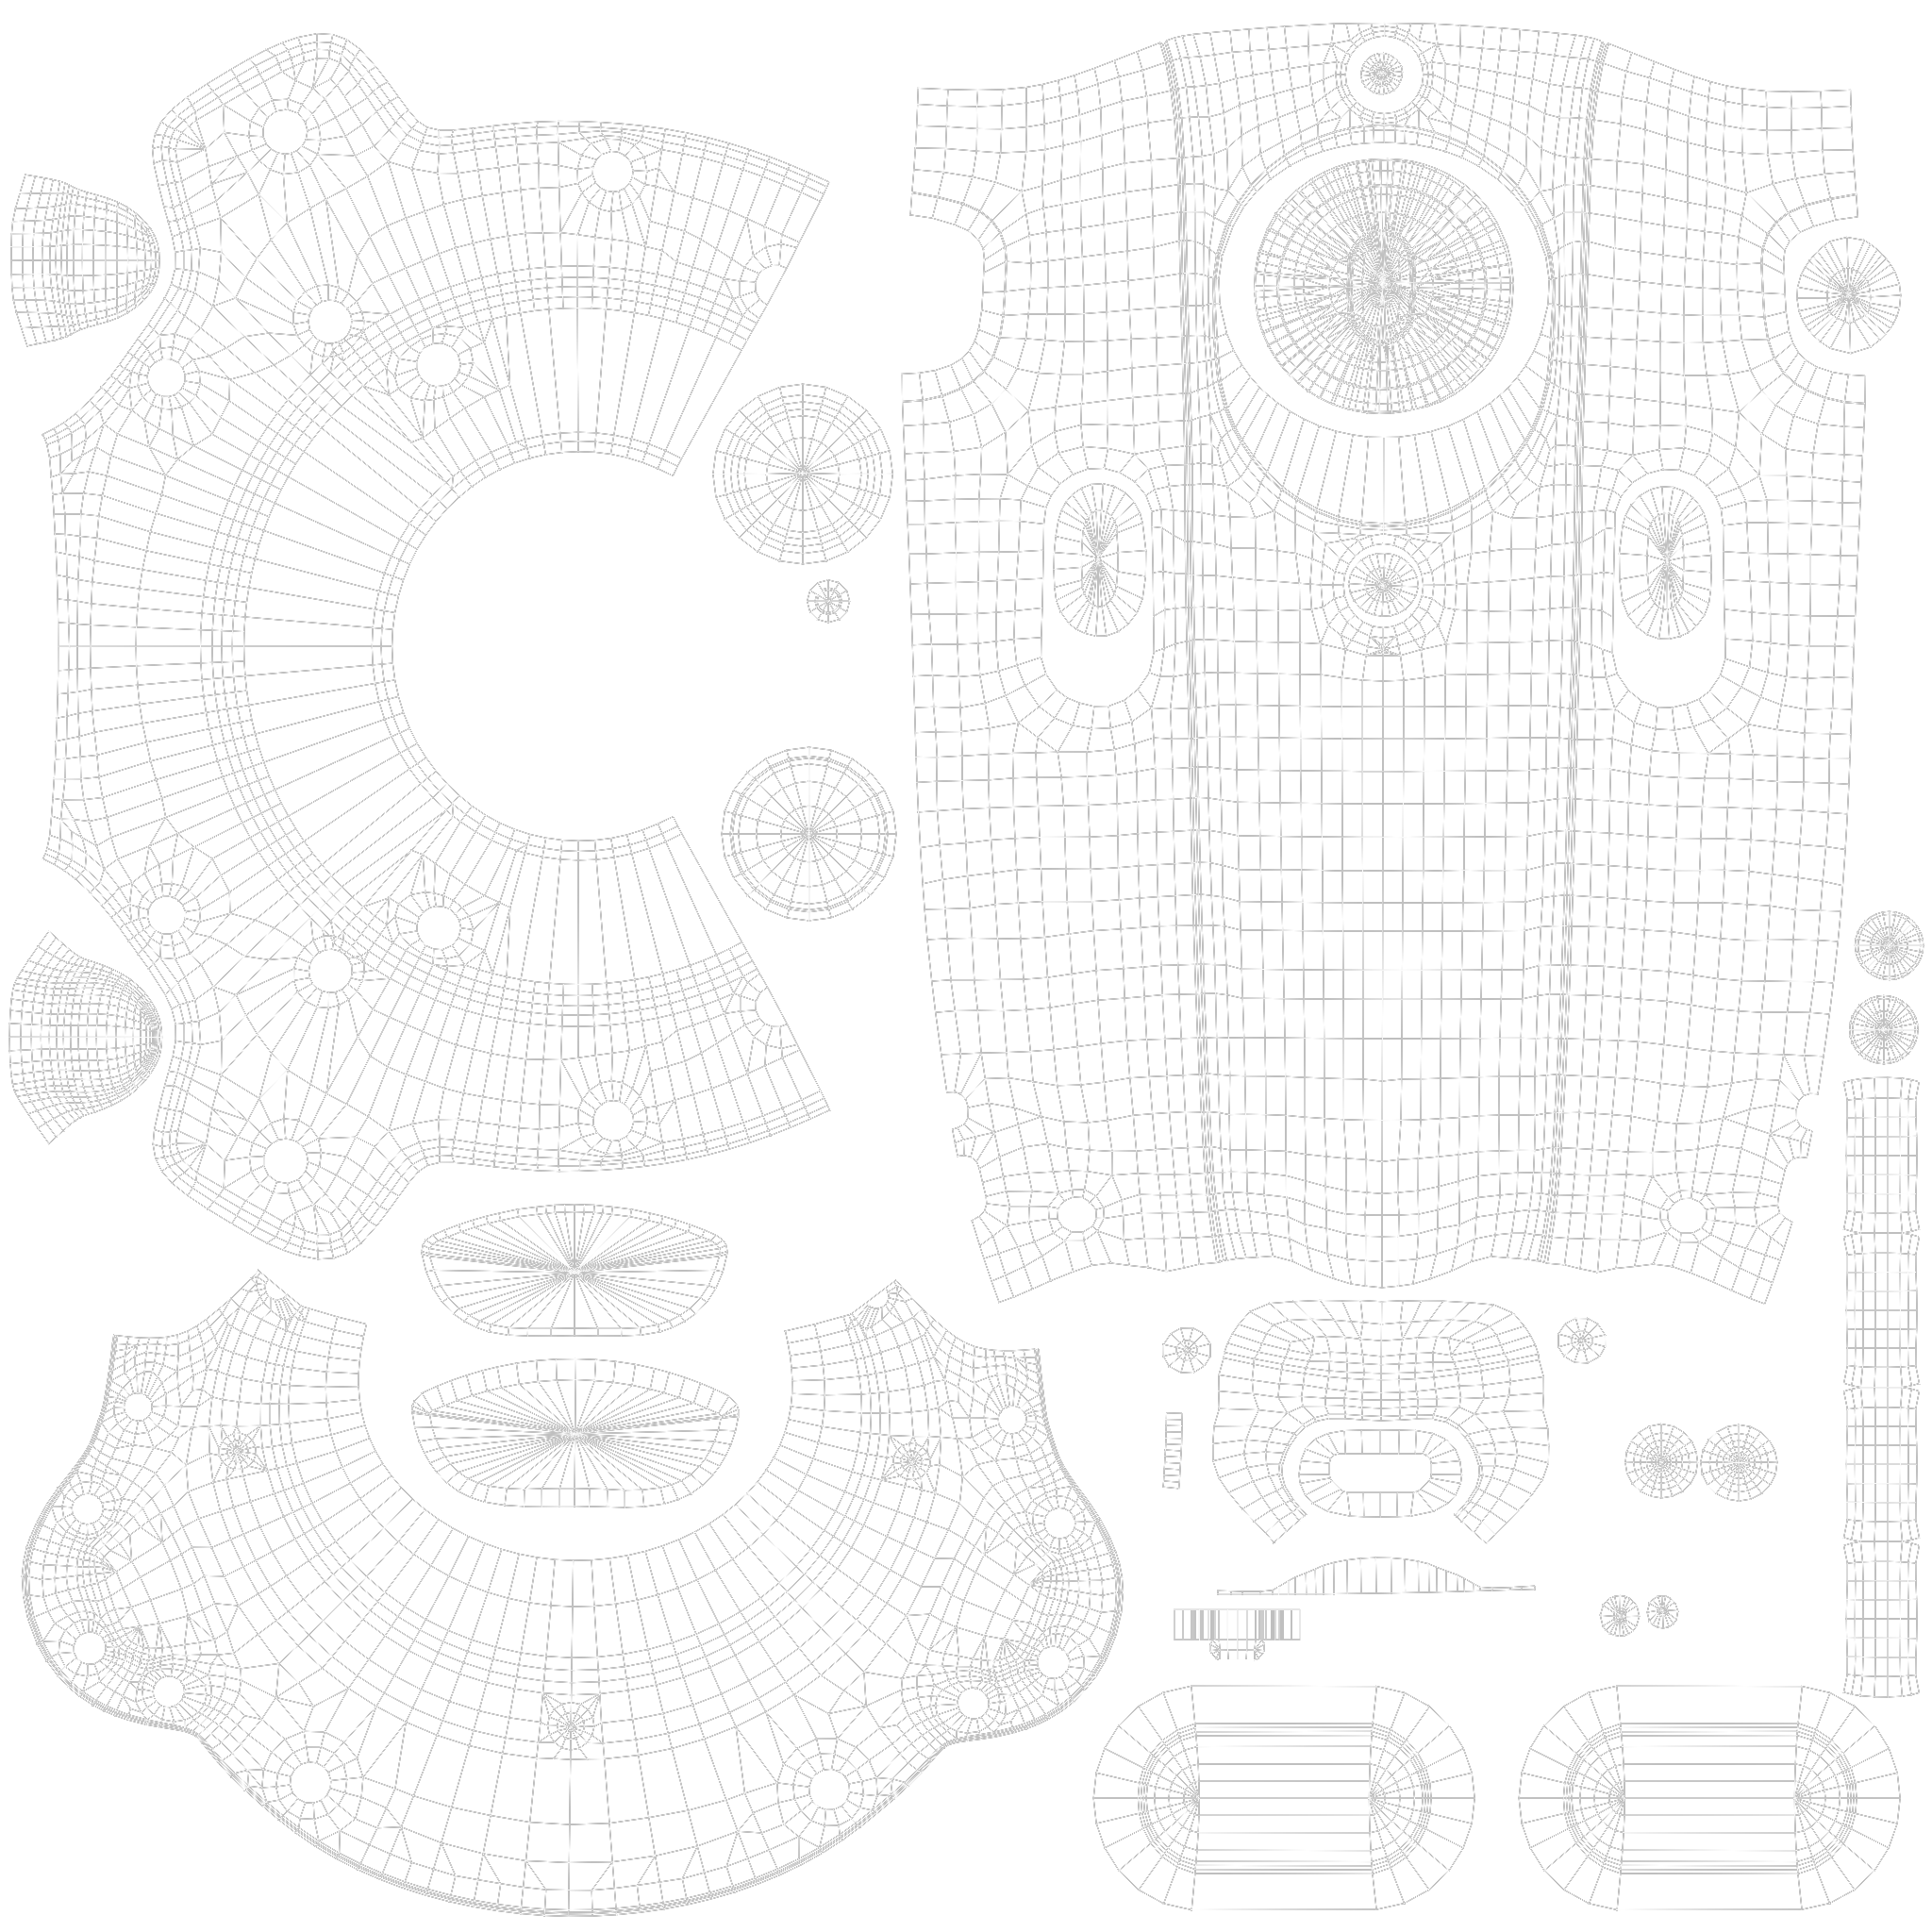
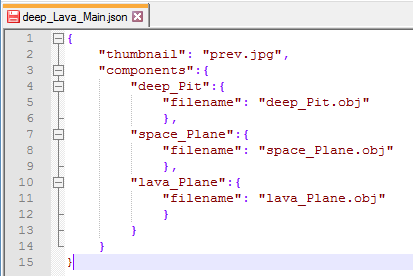
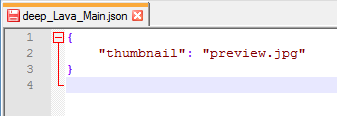
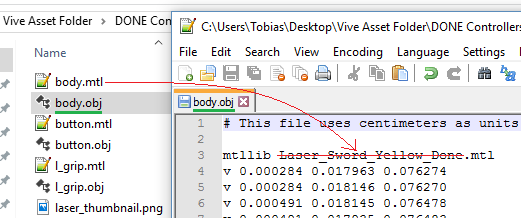
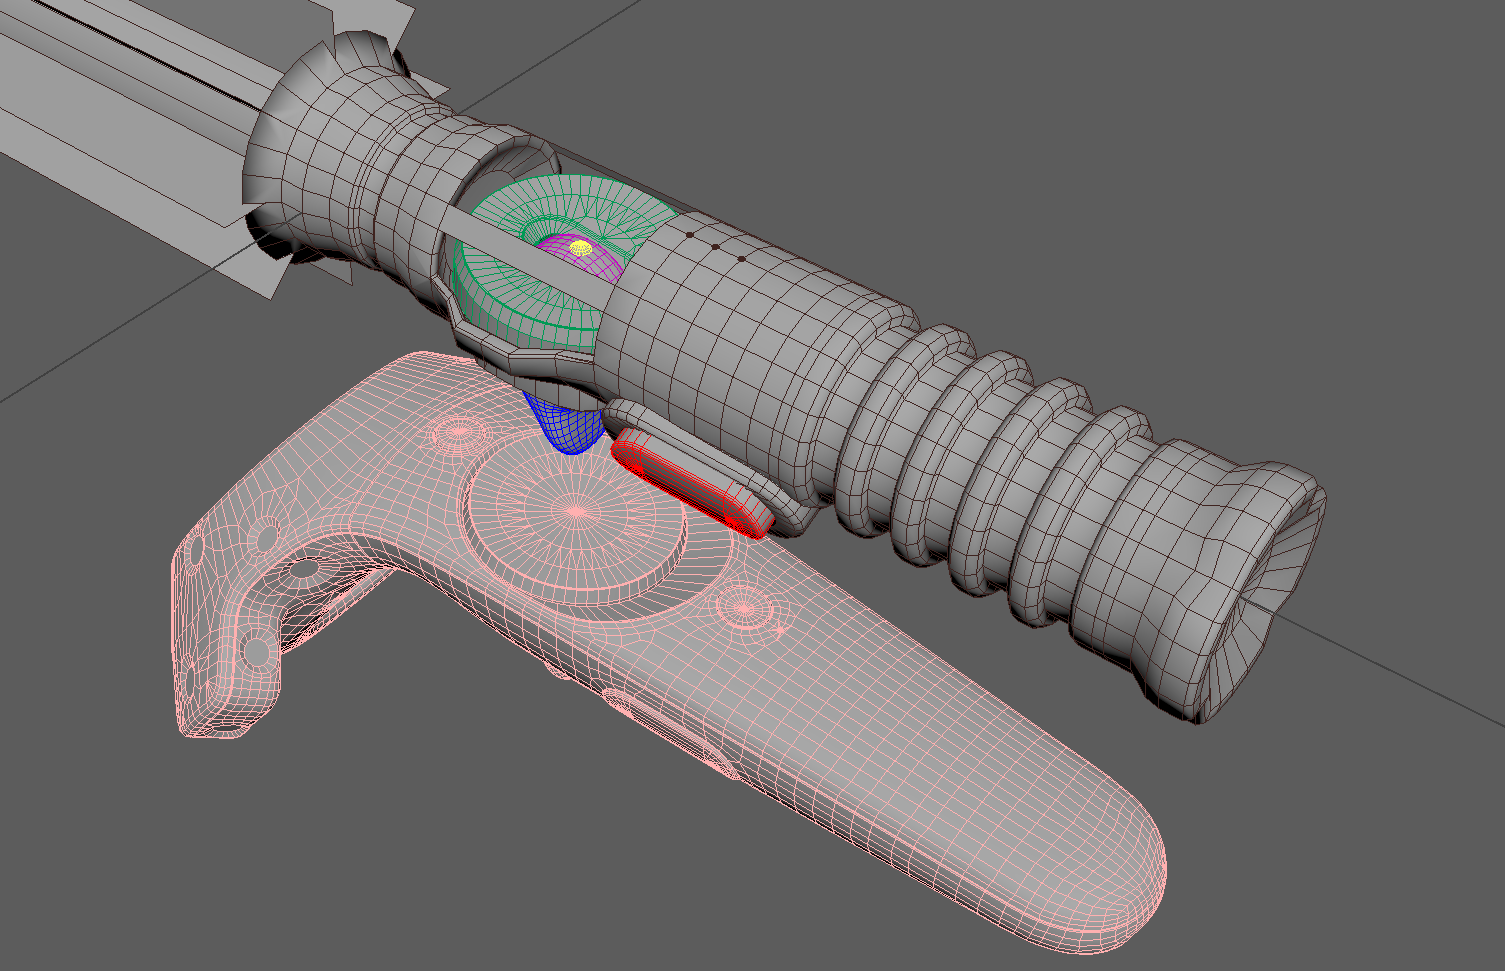
When I look at the reference Vive/Index controller's obj files, surely all the separate objects have the same origin? And I see that when I import them into Blender, they all have the coordinates 0,0,0 as origin ( For valve_controller_knu_ev2_0_right at least). But when you look at their json file, each component has different origin coordinates.

How does this work?
Trip Rodriguez Sep 2, 2019 @ 5:56pm 
As near as I can tell this is no longer possible, even locally. D= Even copying an official or existing workshop model (all files) that works into a new folder with a different name results in an invisible controller. This is a problem for me so if anyone can make a custom model work please please PM me to help me out. I need to replace the tracker models with gloves or hands. I can use OVRIE to assign any working model to them but I'm stuck with what's available which somehow doesn't include a single pair of gloves or hands which is insane. Animation not mandatory.

PS- the official SteamVR glove models are in the wrong format and don't work. I've put over 20 hours into this so it's time to quit unless someone can help.

If you can get me working hands/gloves I'll PayPal you $20 USD on the spot! If it's a lot of work I'd consider sending more.
Trip Rodriguez Aug 31, 2019 @ 4:26am 
Hey guys, sorry for the necro but @CaptLeberKaes you said we could contact you but your profile is private so apparently I can't PM you. Anyway, I've spent the last ten hours straight trying to get the damned vr_glove models included in the SteamVR assets folder converted over to obj and working in SteamVR home. I have no idea what I'm doing, just following instructions on this page and elsewhere to no avail. Any chance of a bit of help here? It's kinda hilariously dumb that I can't make one of the official SteamVR models work with SteamVR! This model is provided in only .glb and .fbx formats so it can't be used as is. Thanks for any help.

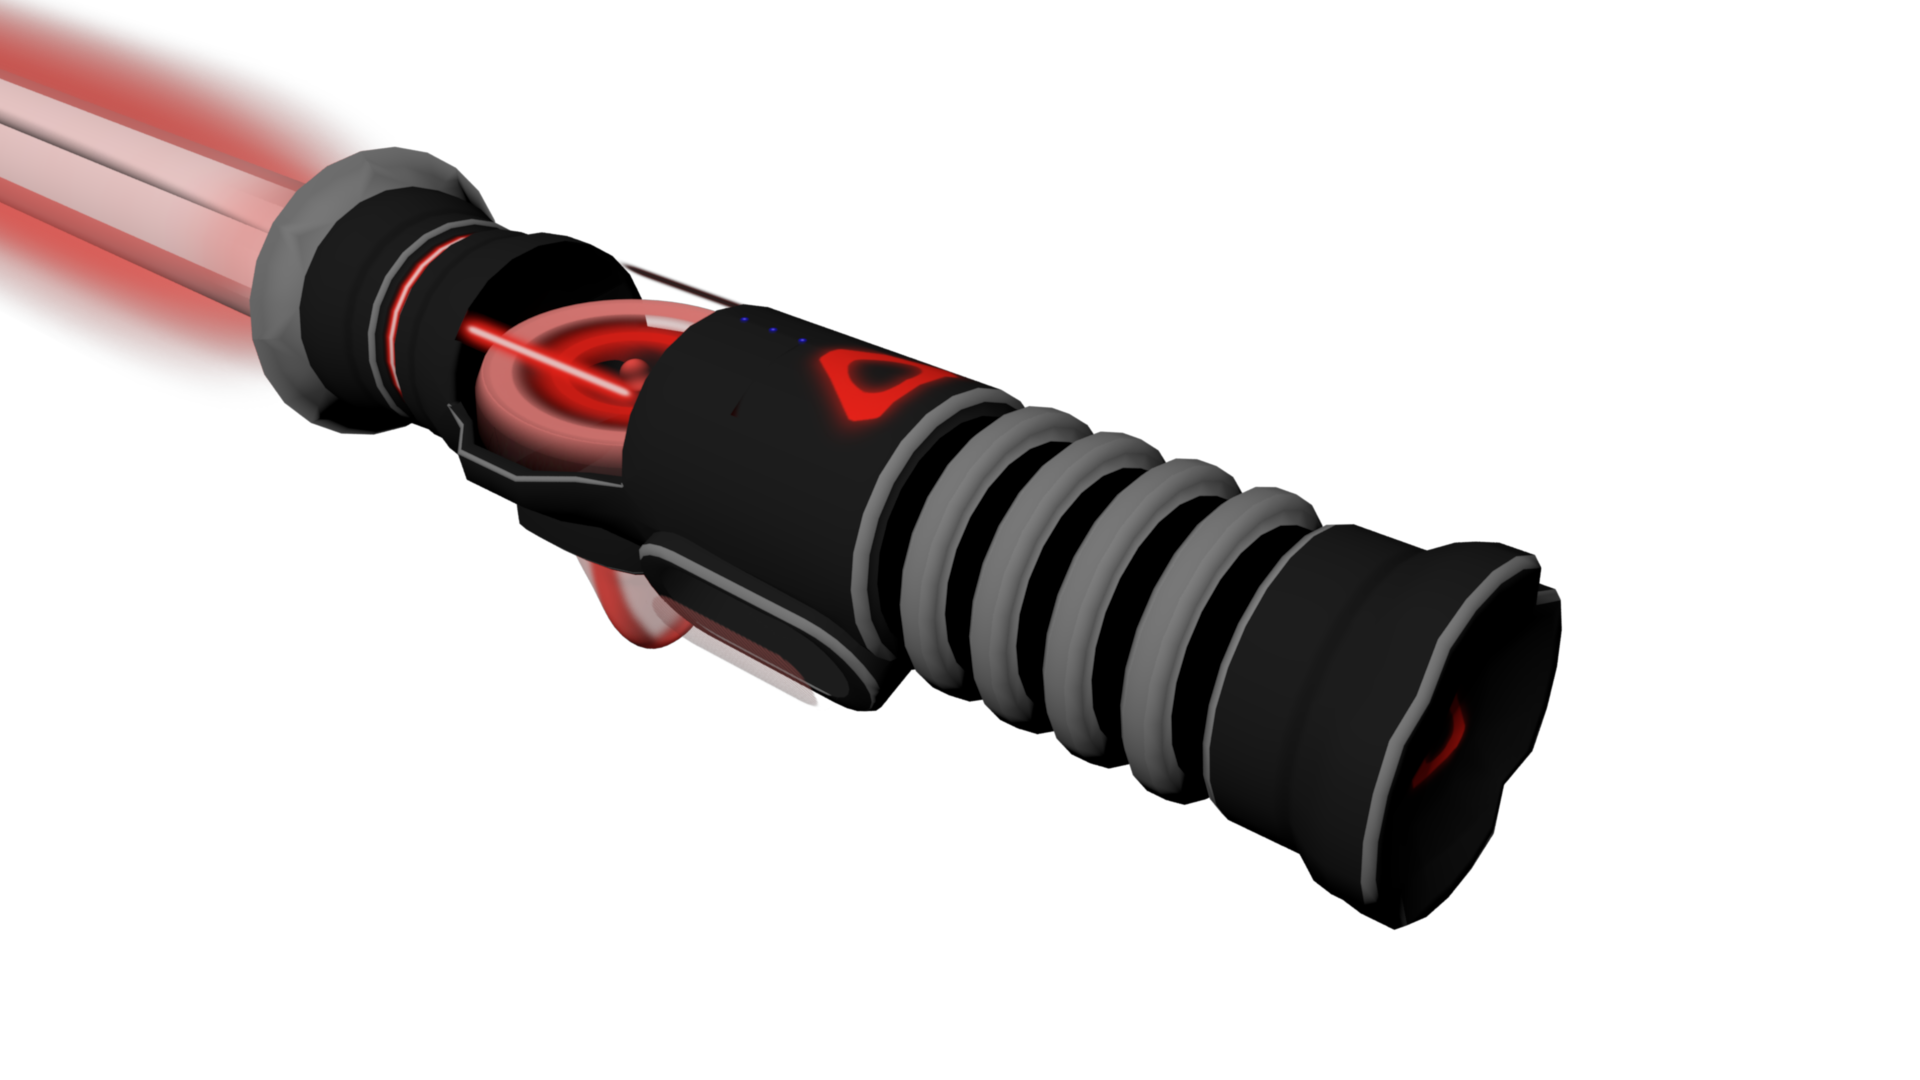
PS-I'd be happy with any decent hands or gloves model to replace the controller render model, but can't find any such thing. Animation would be very nice, but not mandatory.
Capt.Leberkaes Jun 19, 2019 @ 10:17am 
Also i found this here from user JOYBUTTON:

Sadly there is still no way to upload controllers and basestations. I had some in the works when I found out and it was more than a little dissapointing.

As for the reason? IMHO, Valve wanted Destinations to be the default for SteamVR, but a lot of us were doing environments and controllers outside of Destinations. Now if you want to customize that stuff you need to make an entire location for Destinations and you can't share any of the individual parts between locations.

It's a real bummer for titles that made use of custom controllers like Audioshield since you can only select from what was uploaded in the past.

Thread "Custom Basestations and Vive controllers" in Workshop>SteamVR>All discussions

Well, but at least you can use your own model on your computer...
Capt.Leberkaes Jun 19, 2019 @ 10:00am 
EXPORT SOLUTION for 3dsMax (tested with Version 2017):

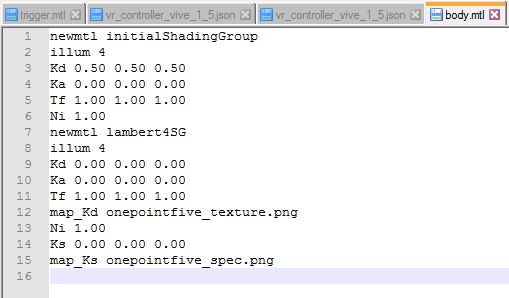
i finally found the correct export settings, guys...

Don't forget to "Reset X Form" in Max, nothing more to care about. (VertexCount, Holes, ...doesn't matter, i tried them all out. Even with way over 60k verts....)

-> obj-dialogue: turn ON the following settings. Uncheck every option i don't mention.

Flip XZ-axis, Faces as Triangles, Texture coordinates, Normals, Smoothing groups, Scale 1.0, Export Materials, Target PC/Win, Precision 4(whatever that means...)
Then under optimize: Vertex, Normals and Texture-Coord.
no preset in the dropdown.

That should do the job.

Don't hesitate to contact me if you're in trouble. Maybe i can help (but i have no clue about blender or so^^)

Happy modelling!
SoggyMicrowaveNugget Aug 31, 2018 @ 1:27pm 
The upload button for models is gone now :(
Calimero 0euf Jun 22, 2018 @ 4:18pm 
How do you upload ? I only have Upload environment, I can't upload my new controllers
SpAiK May 24, 2018 @ 1:14am 
This doesn't seem to work anymore. Is there any guide to make it work through new SteamVR Workshop tools?
Black Blade Mar 5, 2018 @ 10:00am 
Hey, I know some time pass, is there yet a known way to do it after they seem to have removed the ability to do it from the workshop menu as its now?