Space Engineers

Space Engineers

78 évaluations
Star Trek Mod Pack Guide
De Qarannia
This is a guide to the various blocks in the Star Trek Mod Pack.
4
2
2
3
   
Récompenser
Ajouter aux favoris
Favoris
Retirer des favoris
Introduction


Welcome to the Star Trek Mod Pack by Q-Tech. This is a collection of all my Star Trek themed mods assembled together into one pack. This mod pack requires WeaponCore to function, so make sure you have that loaded in your world.

This guide is an introduction to the different mods in the pack and is up to date for Version 5.8. There is also a German translation kindly done by NathorusLP; check it out at the Star Trek Mod Pack Guide (German).
Auxiliary Power Coil


The Auxiliary Power Coil is a battery block for large and small block grids.

MK1
MK2
Grid size
Large
Small
Power Output
10GW
2GW
Borg
There are two Borg weapons available and they work in tandem to deliver a lot of destruction in the hands of an alert player. First, there is the Borg Torpedo. This has its own unique launcher and a single torpedo type. A single torpedo is capable of knocking out the shields of even a large ship, but will cause no damage to hull armor or system blocks. However, these torpedoes are not the most agile and can be avoided if you're careful (or lucky).


Each salvo has three torpedoes with a 20 second reload time.


Once the enemy's shields have been neutralised by the torpedoes, it's time for the Cutting Beam to go to work. This does exactly what it says on the tin; it will cut straight through even the heaviest armor. But there is no AOE splash damage from the weapon itself, the beam has relatively short one second bursts, and will only fire 10 times before needing to recharge, which takes 20 seconds.


Both weapons have a range of 5km for the large grid variant and 2km for the small grid variant. As shown in the first image above, there are also a couple of Borg skin plates for slapping on your cube to give it that extra Borg feel. There is a 1x1 plate and a 3x3 plate. The 3x3 plate has a collision box only over the centre part so it is possible to place other blocks, such as lights for effect, on top of the 3x3 plate around the edges.
Bridge Seats


There are 10 Federation and four Klingon style seats and consoles that can be used for ship bridges or control rooms. The command seats feature 2x1 size LCD screens. The standing consoles feature three 1x1 size LCD screens and one 2x1 LCD screen on the side. The helm seats have four LCD screens that are approximately 11x5. If using Whip's Image Converter to load custom images then a custom resolution of 350x170 with "Maintain Aspect Ratio" turned off works quite well on these screens.


All seat and console blocks are cockpit blocks and can be used to control a ship or station.

There is also a Federation style small block shuttle helm and side console, as well as a Tritanium fighter cockpit.

Bussard Collector


The Bussard Collector produces liquid Deuterium used to power the advanced warp core and other ships systems. There are two styles of Bussard Collector. There is the red glowing dome, inspired by Star Trek: Strange New Worlds, which comes in three sizes for small and large grid, namely 3, 5 and 7 blocks diameter.

For other ships such as Klingon or TNG style ships, there is the "vent style" which is 1 block in size and comes in three variants for small and large grid; block, half block and slope. These are designed to be unobtrusive and can be placed anywhere on the ship, on the condition outlined below.


Bussard Collectors work by producing ice and extracting the Deuterium from it. They must be placed facing forward and will only collect if the ship is moving. The faster the ship moves, the more will be collected. Moving straight forward results in the highest collection rate, while moving in other directions will lower the collection rate. Moving backwards will result in a zero collection rate. Practically, there is no limit to how many collectors you can have, so you could place them facing all directions in various places on your ship. They must be conveyored to Deuterium Storage Tanks which are covered in the section on Advanced Warp Cores.
Captain's Chair


The Captain's Chair is a cockpit block designed to look a bit more like what you'd find on the bridge of a Fderation starship. There are two variants, both for large block grids.

MK1
MK2
Grid size
Large
Large
Orientation
For ships with an odd numbered width
For ships with an even numbered width
Characters


The Millenium font, as used for the names and registry numbers of many Federation starships, is available as a set of 1x1, 2x2 and 3x3 meshes. It is also available as a font for LCD screens.
Corridors and Turbolift


This is a set of blocks based on the corridors, doors and turbolift of U.S.S. Voyager. The set includes the following:

Corridor Block
Description
Straight
Straight corridor segment. Has a built in light that can be set like a normal Space Engineers light.
Corner
Corner corridor segment. Has a built in light that can be set like a normal Space Engineers light.
T Junction
T junction corridor segment. Has a built in light that can be set like a normal Space Engineers light.
Four Way Junction
Four way junction corridor segment. Has a built in light that can be set like a normal Space Engineers light.
Inventory Access
A straight corridor segment with a port for accessing the conveyor and inventory system.
LCD
Straight corridor segment with a built in corner LCD on the ceiling. Can be used to indicate directions or rooms.
Large LCD
Straight corridor segment with a built in large LCD on the side wall. Fully rotatable like a normal LCD.
Button Panel
Straight corridor segment with a four button panel built in. Each button is a square LCD.
Vent
Straight corridor segment with a built in air vent. Has a connector on either side allowing conveyor pass through as well.
Door
Straight corridor segment with a door at the end. This is an internal door which is not pressurized on opening.
Intersection Door
Intersection corridor segment with a door on one side. This is an internal door which is not pressurized on opening.
Side Door
Straight corridor segment with a door on the side. This is an internal door which is not pressurized on opening.
Airlock
Straight corridor segment with a door at the end. This is an airlock door which stays pressurized on opening.
Side Airlock
Straight corridor segment with a door on the side. This is an airlock door which stays pressurized on opening.
Small Door
This is a small block door designed to work with the small block connector. The small block connector looks like the inside U frame of the door. This is not an airlock door which stays pressurized on opening; however with the small block connector attached it will be airtight. There is a rectangular as well as a round version.
Docking Bridge
The Docking Bridge is an extendable bridge six blocks long when extended. It is designed to be used together with the Tritanium Corridor Connector. Because it is basically an Advanced Door it cannot have a built-in connector on the end to connect to ships. You need a docking bridge and a connector on one side and a door and connector on the other side in order for the system to work. There is a rectangular as well as a round version.
Door Plate
Thin colorable plate that can be placed over a door inside a room or on an airlock against the hull of a ship. Useful if the room or exterior of the ship has a different color scheme.
Connector
This specialised connector is designed specifically for use with the Docking Bridge and will not function as a normal connector. It is designed to lock on from a range of approximately 15 metres away. It forms an airtight corridor together with the Docking Bridge to allow movement between ships. The small block variant is designed specifically for the Tritanium Small Door to facilitate the airtight corridor on the Docking Bridge. There is a rectangular as well as a round version.
Turbolift
Local grid transporter. Has six buttons which can be set to other turbolifts. When pressed, a button will teleport you to the corresponding turbolift. The buttons are also LCDs that can be set from the terminal. Will only work on the grid it is placed on; it will NOT teleport you to another separate grid. The turbolift is a button panel with six buttons to the left of the door (seen from the inside). Place all your lifts and then click on one of the buttons. The standard button setup appears allowing you to choose the actions of those buttons. Find an appropriate lift on the chckerboard of available blocks, right click on it and select "Activate", the last option. That will set the chosen destination's lift as the button action for the selected button. The button screens are just LCDs that can be customised like any normal LCD.
Turbolift Door
A door plate that can be placed over the turbolift if it is embedded in a wall, for example. Why is this necessary you ask? Because the turbolift is already, according to SE, a button panel and cannot therefore also be a door. No compound blocks in SE, thank you Keen. The door plate is wider than a single block to hide the doors when they open. However, the parts overlapping neighboring blocks are not part of the collision model for the door plate so you can happily place other blocks there as well.


There are wide versions of many of these blocks as well to allow for corridors of any width to be created.

Some things to take note of with the corridor blocks:
  • The LCD, vent, door, airlock and turbolift blocks do not have their own light source.
  • Expand the radius of neighboring corridor block's lights to compensate.
  • Painting the blocks will change the emissive colors and some accents.
  • A turbolift can be placed behind a corridor door to control access as well.
  • The flat connector is quite tricky to dock with. SPUG's auto docking script is recommended.
  • On game load, the turbolifts may not have air in them if they are behind a door.

Deflector


The Deflector is an antenna block with an extended 500km range. It is available for large block grids only.


There are three variants, all of which feature a fully colorable emissive dish.

MK1
MK3
MK5
Grid size
Large
Large
Large
Size
One block diameter
Three block diameter
Five block diameter
Disruptor Cannon


The Disruptor Cannon is a bit different from the Phasers in that it will attempt to directly disrupt the systems of a ship by damaging them over time. This DOT does not directly do damage to armor, but damaged systems may explode, leaving holes in the hull. This weapon is very powerful but also very power hungry. It also builds up heat in the same way the Phasers do.

There are two variants of the Disruptor turret, turret and fixed, and both have beam and pulse variants, which are functionally identical though their ammo is visually different. The Fixed Disruptor does twice the damage of the turreted one, but at double the recharge energy requirement and a shorter range.

MK1 (Fixed / Turret)
MK2 (Fixed / Turret)
Size
Large grid
Small grid
Range
2km / 5km
1km / 2km
Charging Time
20 seconds
20 seconds
Power Draw While Charging
20GW / 10GW
1GW / 2GW
Fleet Support (Drones)


Fleet Support is a way of bringing a bit of extra firepower to bear on the enemy. The shuttle sized drones can be placed inside a ship's shuttle bay, while the Fleet Support Beacon can be placed around your ship as it conveniently retracts when powered off. The blocks are expensive in terms of PCU and each one has a 20 second reload time.

Fleet Support works like any conventional weapon. Put the block's "Shoot" command on your toolbar and fire it like any other WeaponCore enabled weapon. The small drones launch from the pad where they are parked, while the starship sized drones will warp in to attack the target. Some ships will orbit the selected target while attacking while others will dive in to attack with a variety of weapons. Once a drone has exhausted it's weapons it will do one of two things; the small drones will return to where they were launched from, while the starships will warp out.

Drones can be set, through their weapon's Terminal screen, to target an enemy's subsystems just like any other weapon.

Note: If the large drones are invisible then set your world's view distance to 20km or more for single player games. For servers, setting the sync distance to 20km should fix the problem.

Hangar Doors


A set of Tritanium hangar doors that range in size from two blocks high (the area that is opened or closed) all the way to 20 blocks high. The hangar doors also have a built in force field that shows up as a blue hexagonal mostly transparent field. The force field "simulates" air tightness on both sides so it doesn't matter which way round you place them.

The single block Force Field has a centred and offset variant, available for both small and large grids, and is airtight on five sides, with the forward facing side open to allow air into the block. When placing these, it is best to use BuildInfo to orient the block with the forward facing side facing inward in to your airtight room.

Holoscreen


The holoscreen is a transparent LCD block for both large and small grids with one major difference. The collision box does not cover the actual display part, only the emitter, so it looks more like a projected holographic image. They were designed for pretty much any use you can think of for a holographic image. They can be used as information displays on a ship's bridge or as signs protruding from a wall without taking up space in the walkway.

The image or information is displayed on both sides of the holoscreen and can also be rotated like a standard LCD block, so you can hang them from the ceiling or attach them to a wall.
Impulse Engines


This is a set of honeycomb style Impulse Engines. They come in a number of different shapes and they all have five different thrust strengths, ranging from decorative to 1,000MN for large block and up to 10MN for small block. They have no visible exhaust flame and no thruster damage.
Impulse Thrusters


Impulse Thrusters are a set of modular thrusters designed to have a bit of a Star Trek flavour to them. There are 13 different blocks catering to the basic block shapes in Space Engineers; namely 90°, 45° and 30° slopes. There are several full blocks for building and also several flat plates for placing on top of blocks for a more continuous look and feel.

The large block Impulse Thrusters develop 100MN each and the small blocks develop 1MN each. All thrusters use a maximum power of 1MW / MN. So a large block thruster at maximum output is going to use 100MN. The thrusters all deliver 100% of their available thrust in space and in atmosphere. In addition, these thrusters do not do any damage to blocks or characters. This means you can effectively stack them facing each other for maximum compactness.

I highly recommend the use of the following two mods in conjunction with these thrusters: The BuildInfo mod will allow you to clearly visualise which way your thrusters are oriented. This is important as the 30° Base and Tip blocks both have two possible orientations to allow for greater flexibility.

The [VSI] Recolorable Thrusters mod does exactly what it says on the tin. It allows you to recolor your thrusters to any color you like.

Industry


Matter Extractor
Matter Converter
Replicator
Deuterium Converter
Grid size
Large
Large
Large
Large
Function
Refinery with reduced speed and capacity. Can be built with vanilla ores.
Refinery with 20x speed and 4x capacity
Assembler with 20x speed and 4x capacity
Turns ice into Deuterium and Antideuterium to power the Warp Core
Isolinear Processor


The Isolinear Processor is a programmable block for both large and small grids. Why do we need another programmable block you ask? This one is built with Tritanium so it can take a bit more punishment in a fight before it disintegrates and takes your ship's vital functions with it. That's it, pretty much.
Long Range Sensor Array


This is a powerful sensor with a range of 10km for the large grid block and 5km for the small grid block. It can be used by itself as a normal sensor but can also be used in conjunction with Whip's excellent Radar script.
Name Plates


The Name Plates are transparent, frameless LCDs for ship names (or anything else really). There are six sizes, available for large and small block grids.

MK1
MK3
MK5
MK7
MK9
MK11
Size
1x1
3x1
5x1
7x1
9x1
11x1
Phase Cannon


The Phase Cannon is a retractable Enterprise NX-01 style turret. It utilises the same rapid Nadion frequencies as the Phasers. These frequencies will build up heat over time while firing. Higher frequencies, such as green and blue, are more powerful but will build up heat faster when used. Lower frequencies, such as red and orange, are less powerful but can be fired for longer periods before the weapon overheats. If a weapon overheats it has to cool down; dissipating 75% of its heat before it will start firing again. Take care when firing phasers to let them cool down before they overheat to avoid being left without weapons to defend youself! Phase Cannons can also be overloaded via Terminal or the tool bar. Overloading the Phase Cannon will do twice the damage but it will build up heat four times quicker. Additionally, if an overloaded weapon overheats it will explode and be rendered inoperative until repaired.

MK1A
MK1B
MK2A
MK2B
Weapon Type
Beam
Beam
Pulse
Pulse
Ammo Types
Red
Orange
Green
Blue
Red
Orange
Green
Blue
Red
Orange
Green
Blue
Red
Orange
Green
Blue
Grid Size
Large
Large
Small
Small
Range
5km
5km
2km
2km
Charging Time
20 seconds
20 seconds
20 seconds
20 seconds
Power Draw Idle / Charging
50MW / Ammo dependent
10MW / Ammo dependent
Phaser (Anti Personnel)


The Anti Personnel Phaser is a small energy weapon designed for use in the same way as the Interior Turret. It will only target biological entities. The weapon fires two shots per second and will fire for 30 seconds before it recharges. Recharging takes five seconds.

Note: After placing this weapon, be sure to select Target Biologicals to On in the Terminal.
Phaser Array


The Phaser Array is a TNG style turret. There are eight different types for both large and small block grids; MK1A-H and MK2A-H. All the phaser arrays are identical in range and power; the difference is in the length of the "runner" animation on either side. See the screenshot below for the ideal setup for each block.

These weapons utilise similar rapid Nadion frequencies to the Phasers. These frequencies will build up heat over time while firing. Higher frequencies, such as Type III and Type IV, are more powerful but will build up heat faster when used. Lower frequencies, such as Type I and Type II, are less powerful but can be fired for longer periods before the weapon overheats. If a weapon overheats it has to cool down; dissipating 75% of its heat before it will start firing again. Take care when firing phasers to let them cool down before they overheat to avoid being left without weapons to defend youself! Phaser Arrays can also be overloaded via Terminal or the tool bar. Overloading the Phaser Array will do twice the damage but it will build up heat four times quicker. Additionally, if an overloaded weapon overheats it will explode and be rendered inoperative until repaired.


MK1A - H
MK2A - H
Weapon Type
Beam
Beam
Ammo Types
Type I
Type II
Type III
Type IV
Type I
Type II
Type III
Type IV
Grid Size
Large
Small
Range
5km
2km
Charging Time
20 seconds
20 seconds
Power Draw Idle / Charging
50MW / Ammo dependent
10MW / Ammo dependent

The Support and Support End blocks serve two purposes. They are cosmetic in nature in that they provide the look of an actual Phaser Array when the animation is running. They also function as decoys and can be set in the Terminal to "mimic" various ship subsystems to attempt to draw enemy fire away from vital systems.
Phaser Cannon


The Phaser Cannon is a Star Trek DS9 style fixed weapon as fitted to the U.S.S. Defiant. It will build up heat over time as it fires and the firing rate will reduce if too much heat builds up in the weapon. The Phaser Cannon can also be overloaded for twice the damage at four times the heat build up rate, but will suffer the same catastrophic meltdown if it overheats while overloaded.

Although it is a fixed weapon rather than a true turret, the Phaser Cannon has 30° of azimuth movement either side of the centre position. This is mostly aesthetic as it will look like the cannons are converging on the target but it also helps a bit with hitting the target, although you still have to aim pretty well straight at the target on the elevation arc.

MK1
MK2
Grid Size
Large
Small
Ammo
Higher damage output than normal phasers
Range
2km
1km
Recharge Time
20 seconds
20 seconds
Phasers


The Phasers are more traditional phaser turrets made to fit the older style Federation ships. They utilise the same rapid Nadion frequencies as the Phase Cannon. These frequencies will build up heat over time while firing. Higher frequencies, such as green and blue, are more powerful but will build up heat faster when used. Lower frequencies, such as red and orange, are less powerful but can be fired for longer periods before the weapon overheats. If a weapon overheats it has to cool down; dissipating 75% of its heat before it will start firing again. Take care when firing Phasers to let them cool down before they overheat to avoid being left without weapons to defend youself! Phasers can also be overloaded via Terminal or the tool bar. Overloading the Phasers will do twice the damage but it will build up heat four times quicker. Additionally, if an overloaded weapon overheats it will explode and be rendered inoperative until repaired.

MK1A
MK1B
MK2A
MK2B
Weapon Type
Beam
Beam
Pulse
Pulse
Ammo Types
Red
Orange
Green
Blue
Red
Orange
Green
Blue
Red
Orange
Green
Blue
Red
Orange
Green
Blue
Grid Size
Large
Large
Small
Small
Range
5km
5km
2km
2km
Charging Time
20 seconds
20 seconds
20 seconds
20 seconds
Power Draw Idle / Charging
50MW / Ammo dependent
10MW / Ammo dependent
Point Defence Phaser


The Point Defence Phaser is a retractable energy beam weapon that targets projectiles, meteors and biological entities. Make sure to set Target Biological to On in the Terminal for the weapon.
Point Defence Torpedo


The Point Defence Torpedo is a retractable energy weapon that targets projectiles, meteors and biological entities with a stream of micro-torpedoes generated from the ship's power systems. Make sure to set Target Biological to On in the Terminal for the weapon.
Polaron Cannon


The Polaron Cannon has two ammo types. The Phased Polaron Beam doesn't do any damage to a ship; instead it is designed to shut down the systems of an enemy ship for a short time to allow other weapons to damage it, or to allow for a hostile boarding and takeover. The Charged Polaron Beam is designed to bypass the shields of a ship and directly damage the ship itself. This weapon is very powerful but has a long recharge time and a high power requirement. It also builds up heat in the same way the Phasers do.

MK1
MK2
Size
Large grid
Small grid
Range
5km
2km
Charging Time
60 seconds
60 seconds
Power Draw Idle / Charging
50MW / 5GW
10MW / 1GW
RCS Thrusters


This is a set of TNG style RCS thrusters. They come in a large number of different shapes and they all have five different thrust strengths, ranging from decorative to 1,000MN for large block and up to 10MN for small block. They have no visible exhaust flame and no thruster damage.
Spatial Charge Launcher


The Spatial Charge Launcher is a turreted flak type weapon as used by races such as the Malon from Star Trek: Voyager. The launcher will fire four spatial charges in rapid succession which will home in on the target. Unlike conventional torpedoes, however, spatial charges detonate around the target, damaging both shields and hull. Reload time is 20 seconds.
Starship Windows


A set of blocks with emissive shapes on the surface designed to mimic the appearance of starship windows without the performance cost of using lights. There are five armor shapes included; block, half block, slope, 30° slope base and 30° slope tip. Each block shape has 3 variants; single centred, double, and single offset windows. These can be mixed and matched vertically or horizontally to achieve the desired effect. The windows will change color when the block is painted.
Superweapons


The Phaser Spinal Lance, as seen in the TNG: All Good Things episode, is a large fixed phaser weapon that fires a devastating five kilometre long phaser beam. The weapon has five charges and must recharge for 60 seconds. Charging uses a maximum of 50GW; if you have less power than this then the weapon will charge slower.


The Romulan Plasma Weapon, as seen in the SNW: A Quality of Mercy episode, is an unguided single shot ball of plasma, capable of dealing enormous damage to a ship. Recharge time is 60 seconds if utilising the max recharge power of 50GW. Although the maximum range is 5km, the plasma starts to dissipate after travelling 2km and will only deal 25% of its nominal damage at maximum range. For greatest effectiveness, this weapon needs to be fired at close range.


The Volumetric Assault: Quantum (VA:Q) Launcher is a specialised torpedo launcher as seen in the Lower Decks Season 3 Finale, The Stars at Night. This weapons takes 60 seconds to load 12 VA:Q Torpedo magazines which it then fires in a continuous salvo. At very close range, each VA:Q torpedo will hit the target with the force of three Quantum torpedoes. However, at longer range they become even more destructive. After travelling approximately one kilometre, each torpedo will split into six individual torpedoes, each one with the same destructive power as a Quantum torpedo. So a single slavo from the VA:Q Launcher is equivalent to 72 Quantum Torpedos, assuming all of them hit the target. The VA:Q torpedos have about the same range as a standard Photon torpedo, so the Quantum torpedo is still better for long range first strikes.
Torpedo Launcher
The Torpedo Launcher is a fixed weapon for firing a variety of Star Trek type torpedoes. These torpedoes are not perfect and, depending on the type, have a limited ability to change course if they miss. That means it is possible to dodge torpedoes. Sitting still and soaking up the damage is going to lead to lots of hull breaches. The block itself is permanent black but the emissive inside the launch tube can be painted to glow any colour you wish, in the same vein as the Glowing Armor blocks or the Deflector.

There are also a number of different shaped plates to fit over the launchers to match a few of the more common armor slopes. These plates have two variants; one is black with a colorable emissive to match the Torpedo Launcher, and the other has no emissive but is colorable like a normal armor block.


MK1
Advanced MK1
MK2
Grid Size
Large
Large
Small
Ammo Types
Photon
Voyager Photon
Quantum
Transphasic*
Polaron*
Plasma
Spatial
Photon
Voyager Photon
Quantum
Transphasic*
Polaron*
Plasma
Spatial
VA:Q
Micro
Magazine Size
Photon - 3
Voyager Photon - 3
Quantum - 3
Transphasic - 1
Polaron - 1
Plasma - 1
Spatial - 3
Photon - 3
Voyager Photon - 3
Quantum - 3
Transphasic - 1
Polaron - 1
Plasma - 1
Spatial - 3
VA:Q - 1
Micro - 3
Fire Rate
Fires with a gap of 0.5 seconds between torpedoes if fired continously.
Loads and fires 2 magazines between reloads with 0.25 seconds between torpedoes if fired continuously.
Fires with a gap of 0.5 seconds between torpedoes if fired continously.
Range
Photon - 5km
Voyager Photon - 5km
Quantum - 10km
Transphasic - 2km
Polaron - 2km
Plasma - 5km
Spatial - 2km
Photon - 5km
Voyager Photon - 5km
Quantum - 10km
Transphasic - 2km
Polaron - 2km
Plasma - 5km
Spatial - 2km
VA:Q - 5km
Micro - 2km
Reload Time
20 seconds
20 seconds
20 seconds
Special*
Transphasic torpedoes (shield penetrating) require admin only component - Phase Transducer
Polaron torpedoes (energy draining) require admin only component - Energy Dampener
Transphasic torpedoes (shield penetrating) require admin only component - Phase Transducer
Polaron torpedoes (energy draining) require admin only component - Energy Dampener
-
Tractor Beam


The Tractor Beam is a retractable turret that will pull a ship towards you until it is within approximately 10% of the max range from you, then it will hold it in place. It also features an Anchor Beam built in that shuts down the thrusters of the ship being tractored. This is to stop your enemy from circling around you and potentially breaking the tractor lock. The ammo types are in reverse range order due to the way WeaponCore handles ammo cycling. So when you place / build a Tractor Beam block it will default to the longest range ammo. Each ammo fires for five seconds before a momentary recharge, so you have five seconds to cycle to a new range before the charge is depleted. Tip: If setting up an NPC grid, use the Shoot On / Off function to cycle the ammo to your desired range.

MK1
MK2
Grid Size
Large
Small
Range Based Ammo Types
1km
2km
5km
10km
500m
1km
1.5km
2km
Tritanium Armor
Tritanium Armor adds the following:
  • A set of 38 large grid armor blocks,
  • A set of 38 small grid armor blocks,
  • 58 large grid window blocks,
  • 58 small grid window blocks,
  • 21 large grid conveyor and connector blocks,
  • 11 small grid conveyor and connector blocks,
  • 27 large grid fully colorable glowing emissive blocks,
  • 27 small grid fully colorable glowing emissive blocks,
  • 16 large grid armor panels,
  • 16 small grid armor panels,
  • 16 large grid glowing armor panels,
  • 16 small grid glowing armor panels,
  • 5 large grid armor panels with cutouts, and
  • 5 small grid armor panels with cutouts. These cutouts are airtight on one side but all have collision boxes like corridors. This means that they will not stop physical objects passing through them, except at the outer edges, and they will also not take thruster damage.
Tritanium Armor is designed to have approximately the weight of Light Armor and the integriity (block hit points) of Heavy Armor. Additionally, all armor and external blocks have a 3x Energy resistance and a 1.5x Kinetic resistance built in to further strengthen them against enemy fire.

There are also three new ores to mine and refine. Tritanium is green in colour, Duranium is blue in colour and Aluminum is silver in colour. These ores spawn mainly in asteroids, but can also be found in surface nodes on planets or moons.


Tritanium Ore


Duranium Ore


Aluminum Ore
Tritanium Utilities
The Tritanium Utilities are a group of blocks that don't really fit into any specific category. They are versions of vanilla blocks with different models and are constructed using Tritanium and Duranium for greater durability.

The blocks consist of
  • Camera,
  • Cargo container with increased volume,
  • Gravity Generator with increased field range,
  • Gyroscope with increased power,
  • Inventory access console,
  • Ore detector with increased range (see note below),
  • Projector,
  • Remote control,
  • Timer,
  • Air vent full block and slope.

Modded ore detectors do not work very well in Space Engineers. They can be intermittent or just not work at all. I actually recommend not using the modded ore detector in this pack. Instead, use a vanilla ore detector and add the awesome Ore Detector Reforged script with it.
Warp Core


The Warp Core is a modular reactor system; each of the three parts is a reactor.

Class 1 Warp Core
Class 3 Warp Core
Size
1x1x1
3x3x3
Power Output
Large block - 10GW
Small block - 2GW
Large block - 30GW
Small block - 6GW

It is fuelled with Deuterium and Antideuterium produced in the Deuterium Converter from ice. The Deuterium Converter is an Assembler type block so fuel production must be queued as in a normal Assembler. This is to allow for precise control of fuel production. Both fuel types are required for the reactors to run. The emissives on the Warp Core can be colored any color you like by painting the block as you would a normal armor block.

A new ore type, Dilithium, is required to construct all three Warp Core parts as well as the Deuterium Converter.


Dilithium Ore
Advanced Warp Core
The Advanced Warp Cores are identical in style to the standard Warp Cores, except that they use liquid Deuterium produced by the Bussard Collectors.

There is a Deuterium Storage Tank available for small and large grid that will store Deuterium collected by the Bussard Collectors. There is also a Deuterium Extractor for small and large grids which can extract trace amounts of Deuterium from Ice. It does this at a slower rate than the Bussard Collectors.

Changing Weapon Colors or Ammuntion Types
Following numerous requests in the Mod Pack comments about how to change the color of the Phasers I have decided to add a small section on Ammo Cycling.

Ammo Cycling, or more properly now Consumable Cycling, is how WeaponCore handles weapons with different types of ammunition. This includes the different phasers and the torpedo launchers.

To change ammo types, or colors, it is first necessary to either deplete the weapon's current magazine or charge by firing the weapon until it reloads or use Force Reload. Once the weapon reloads it will load whichever ammo type or color has been selected. It is important to select the next ammo type or color that you want before the next reload starts.

Ammo Cycling can be triggered in three ways:
  • In the terminal entry for the weapon you can scroll down and change the ammo type.
  • From the control seat G-Menu you can add "Cycle Consumable" to your hot bar.
  • From the control seat G-Menu you can add "Force Reload" to your hot bar. Then you can cycle ammo to the required setting and press "Force Reload" to change the ammo type without firing. Be aware that this method may have unintended consequences for physical magazines, i.e. the torpedoes.
The advantage of the second option is ease of use and the ability to set your hot bar to change the ammo of groups of weapons.
Weapon Customisation Part 1
It is possible to customise the damage values for many of the weapons in this mod using the WeaponCore server configuration file. This file is automatically created when a world loads with WeaponCore in the mod list, and can be found at:


The WC Server Config[github.com] details what can be customised for each weapon. Using the <AmmoOverride> section between the <AmmoOverrides></AmmoOverrides> tags you can change many of the weapon damage output values to suit your gameplay.

Note: Some weapons, such as the Disruptor, use WeaponCore's EWAR system which is not open to change using the server config file.

The Ammo name for each weapon used in the AmmoOverride section is detailed in the table below.
Weapon Customisation Part 2
Weapon Name
AmmoName
BaseDamage
AreaEffectDamage
DetonationDamage
Borg Cutting Beam
Cutting L
Y
Cutting S
Y
Borg Torpedo
Borg Torpedo Primary
Y
Borg Micro Torpedo
Borg Micro Torpedo Primary
Y
Anti Personnel Phaser
AP Red
Y
Phaser Array MK1 A-H
Type I L
Y
Type II L
Y
Type III L
Y
Type IV L
Y
Phaser Array MK2 A-H
Type I S
Y
Type II S
Y
Type III S
Y
Type IV S
Y
Phaser Cannon MK1
Phaser Cannon Primary L
Y
Phaser Cannon MK2
Phaser Cannon Primary S
Y
Phaser Spinal Lance
Spinal Lance Ammo
Y
Y
Phasers MK1A Beam / Phasers MK1B Beam / Phase Cannon MK1A
Red BL
Y
Orange BL
Y
Green BL
Y
Blue BL
Y
Phasers MK1A Pulse / Phasers MK1B Pulse / Phase Cannon MK1B
Red PL
Y
Orange PL
Y
Green PL
Y
Blue PL
Y
Phasers MK1A Beam / Phasers MK1B Beam / Phase Cannon MK1A
Red BS
Y
Orange BS
Y
Green BS
Y
Blue BS
Y
Phasers MK2A Pulse / Phasers MK2B Pulse / Phase Cannon MK2B
Red PS
Y
Orange PS
Y
Green PS
Y
Blue PS
Y
Polaron Cannon MK1
Charged L
Y
Polaron Cannon MK2
Charged S
Y
Romulan Plasma Weapon Primary
Y
Spatial Charge Ammo Large Tertiary
Y
Torpedo - Micro
Micro Torpedo Primary
Y
Y
Torpedo - Photon
Photon Torpedo Primary
Y
Y
Torpedo - Plasma
Plasma Torpedo Primary
Y
Torpedo - Quantum
Quantum Torpedo Primary
Y
Y
Torpedo - Spatial
Spatial Torpedo Primary
Y
Y
Torpedo - Transphasic
Transphasic Torpedo Primary
Y
Torpedo - VA:Q
VAQ Torpedo Primary
Y
Y
VAQ Torpedo Secondary
Y
Y
Torpedo - Voyager Photon
Voyager Photon Torpedo Primary
Y
Y

More information about the server config file can be found on the Core Systems Wiki[github.com]. More information on where to find save game files and other such things can be found using Google.
Elite Dangerous: FSD
I prefer to use the Elite Dangerous: FSD mod instead of jump drives for my Star Trek ships. It works by teleporting the grid and anyone sitting in it forward X number of kilometres per second, where X is the speed you set.

I have added a new particle effect for the entry into warp sequence. For it to take effect, the FSD mod must be added below the Star Trek Mod Pack mod for single player games, or above it for servers. To make the most of this new particle, I advise changing the delay to warp from 10 seconds to 3 seconds. This can be done by configuring the FSD mod as follows.

The FSD mod can be configured in the world save folder for each saved game. In the Storage folder for the world save game will be a folder that ends in _WarpDrive. The XML config file is in there. Open the FSDriveConfig.cfg file in a text editor and change the number inside the DelayJump tag from 10 to 3. Save the file and load up your world.

If you don't want the new particle to overwrite the standard FSD warp entry particle then make sure the FSD mod is above the Star Trek Mod Pack mod in your mod list for single player or below it for servers.
Industrial Overhaul
One of the more popular mods for Space Engineers is Industrial Overhaul.

The Star Trek Mod Pack should be compatible with Industrial Overhaul and here are a couple of tips to help out with that:
  • The Matter Converter is a low end refinery that can be cheaply produced from vanilla ores but will allow you to process the custom Star Trek ores, albeit slower and less efficiently.
  • Place this mod pack at the top of your mod list if using Industrial Overhaul otherwise you cannot make Deuterium and Antideuterium for the Warp Cores. This tip is courtesy of Steam user MrWalker.
SE Toolbox
Space Engineers Toolbox is a really useful application for editing SE world saves and even importing 3D models into a game world. In this section of the guide I will outline the process for changing the armor of a ship from vanilla to Tritanium, as well as the process for importing a 3D model as a ship / station into a world save.

SE Toolbox can be found here[github.com].

Opening SE Toolbox will present you with an empty interface. Click the "Open" button and select one of your world saves. Once the world loads, which can take a little while depending on how many objects are in your world, you will have a list in the left pane of all the objects in the world. This includes ships, stations, NPC grids, floating objects, etc. You can use SE Toolbox to clear out some of the junk you don't want; just remember to save before exiting. Select a grid you want to modify and the grid's details will appear in the window pane on the right. Click on the "Cubes" tab and you will have a list of every block that makes up that grid. Select a block, or a group of the same blocks such as an armor block, and click on the "Replace" button at the top.


You will be presented with a small (too small if you ask me) drop down box with a list in it of all available blocks to select from. Scroll through it until you find the block you want to use and select it. Click "OK" and all selected blocks in the grid will be replaced with the new block you selected.


Rinse and repeat until you have replaced all the armor blocks with Tritanium. If you don't see the Tritanium armor blocks in the drop down list it's most likely because you don't have the Star Trek Mod Pack loaded as part of your world save.

To import a 3D model into your world save, click the "Import" menu at the top and click on "3D Model". In the window that pops up, select the 3D model file and set the parameters as you would like for block type and size.


Click "Create" and the model will be imported into your world save. You will have to do quite a bit of smoothing out and editing in-game as the import process is not perfect, but it can save you a lot of time in getting the basic shape.

Once you are done with all your editing, click the "Save" button and exit SE Toolbox. When you load up the world save in Space Engineers you should see the changes you made.

If you have changed armor types, the game will usually "forget" the skin that the previous armor had. The colors will be the same but you will have to re-do the skins as they will all default to "None". I recommend the excellent Paint Gun mod for this.
Tritanium Conversion
Jasper has made an awesome mod called Tritanium Conversion which allows you to convert light or heavy armor into Tritanium Armor in game. It works with small and large grids, but only with vanilla armor that has a direct equivalent in the Tritanium Armor set.
Troubleshooting
Sometimes things go wrong. Modding is not an exact science and sometimes things will break. If something doesn't work then it's tempting to just blame the modder; goodness knows we do mess up from time to time. However, before jumping on the internet and reporting bugs left, right and centre it can be helpful to do a bit of cleaning up first. Space Engineers leaves a lot of files lying around over time and cleaning these out is a bit like cleaning out your browser's cache. It can help remove old things that should no longer be there. Most of them are harmless and just take up space, but sometimes they can cause conflicts.

If a mod is not behaving the way it should, or your world won't load or your game crashes to desktop, run through the following steps to see if you can fix the problem yourself.
  • Unsubscribe from WeaponCore and the Star Trek Mod Pack.
  • Open Windows File Explorer to "User"\AppData\Roaming\SpaceEngineers\Storage.
  • Note: The AppData folder is hidden by default.
  • Delete everything in the Storage folder.
  • Subscribe again to WeaponCore and the Star Trek Mod Pack.
  • Create a new world in Space Engineers with just those two mods.
  • If the new world loads then try loading your original world again.
  • Sometimes you may experience an error that says your world is corrupted. This is often not the case; instead it is cause by Microsoft Windows locking up certain files that the game needs to load some of the mods. Clearing out the Storage folder before restarting the game can resolve that error.

Sometimes you will find that my mods conflict with other mods on the Steam Workshop. There is not much I can do about that I'm afraid.

If you've gotten this far without falling asleep, well done and I hope it was useful to you in some small way. Enjoy the mods!
211 commentaires
Qarannia  [créateur] 17 mars à 1h06 
@Proximus Cosmos An airlock should work just fine; it's just a door with the pressurize XML tag set to true.
Proximus Cosmos 16 mars à 8h03 
@Qarannia

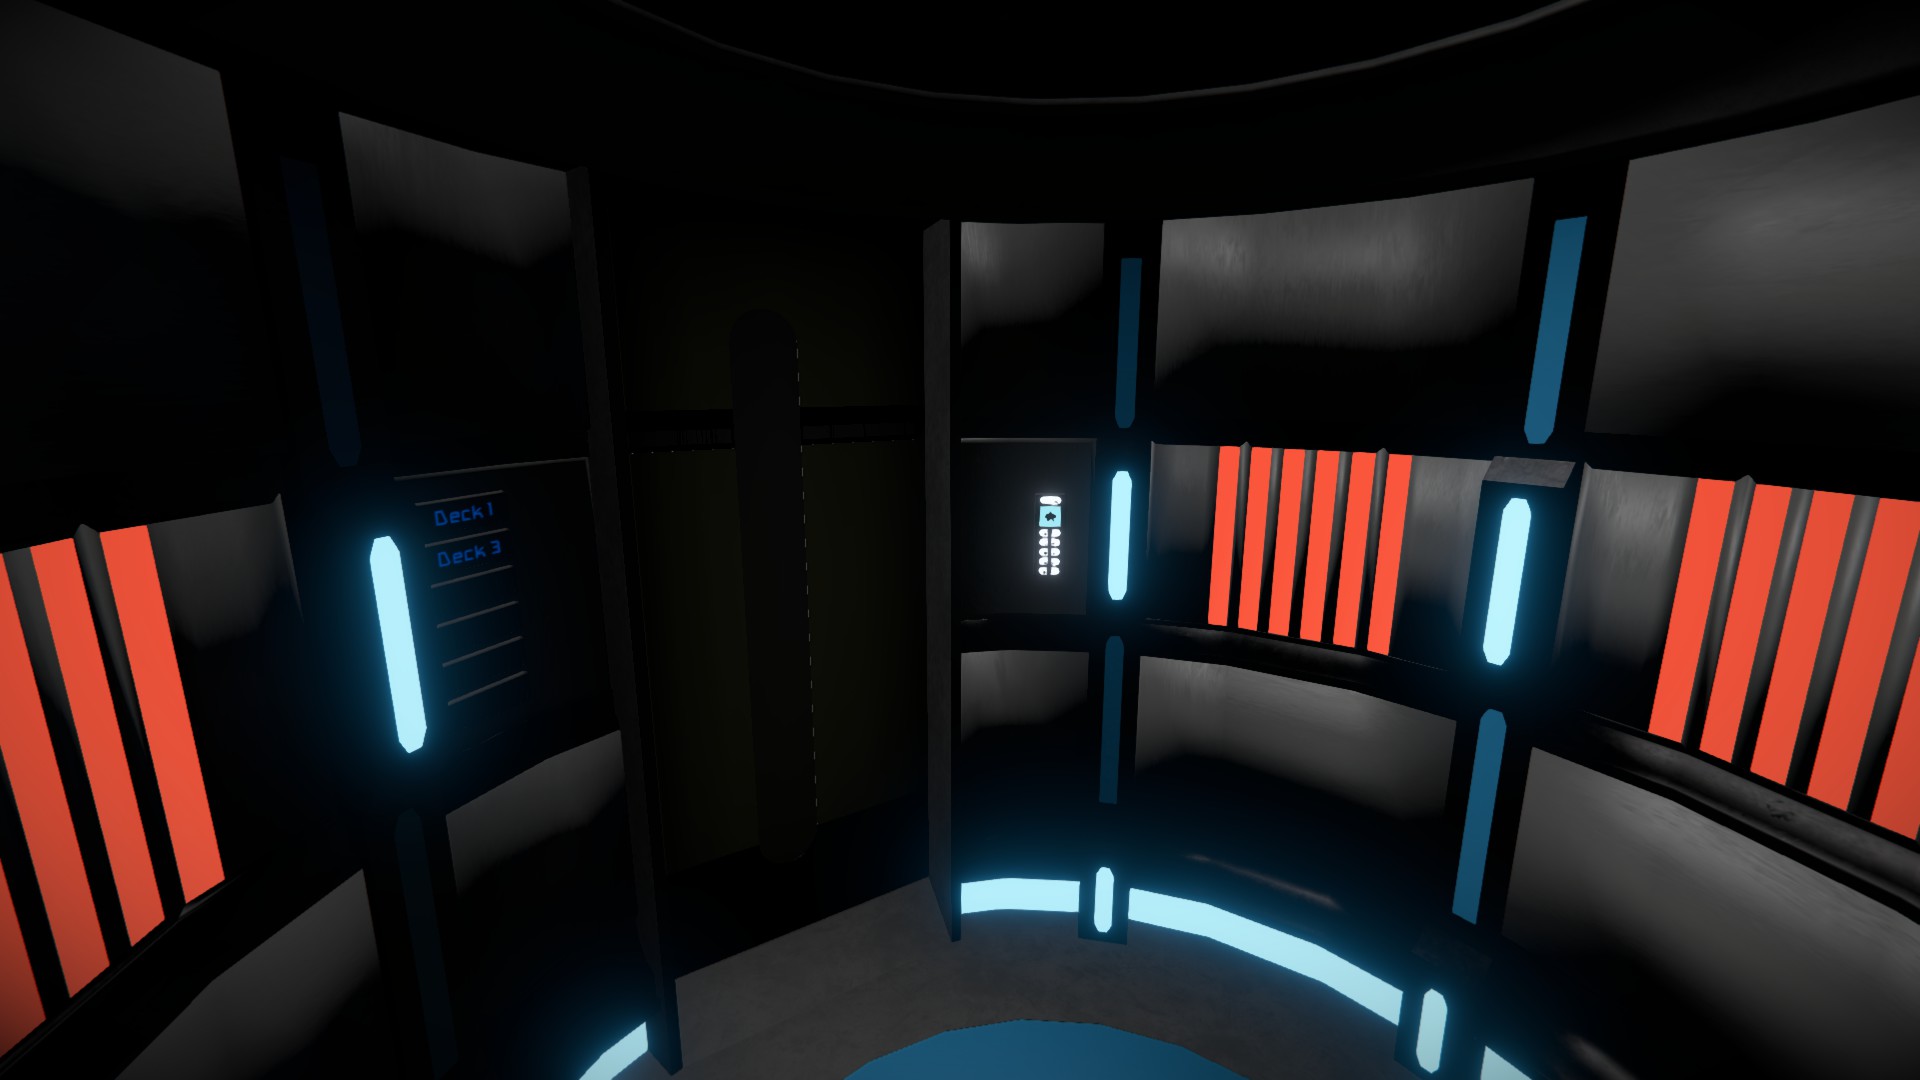
For the Docking Bridge, would an Air Lock block and Tritanium Corridor Connector work for the system or does it have to be a Tritanium Door
Mighty_Porgy 17 aout 2024 à 8h33 
@Qarannia thank you
Qarannia  [créateur] 17 aout 2024 à 6h40 
@Anakin52 By default they should fire automatically at any hostile or neutral target that WeaponCore deems to be a valid target. Check the Terminal settings to make sure AIShoot is selected as the mode of fire. If they're not firing it's because they're not picking up a target or WC doesn't consider the target valid. You can try selecting the target on the HUD using the mouse scroll wheel and see if that makes any difference.
Mighty_Porgy 16 aout 2024 à 14h29 
I am sorry to ask such a simple question but I can't figure out how to fire the phasers and such any help would be much appreciated
Qarannia  [créateur] 8 juin 2024 à 5h44 
@Proximus Cosmos I don't think it's the ice that's different: I think it's more a case of the Deuterium tanks are not designed to let anything in except the liquid Deuterium. That sounds like a Keen thing as I didn't explicitly design it to be like that.

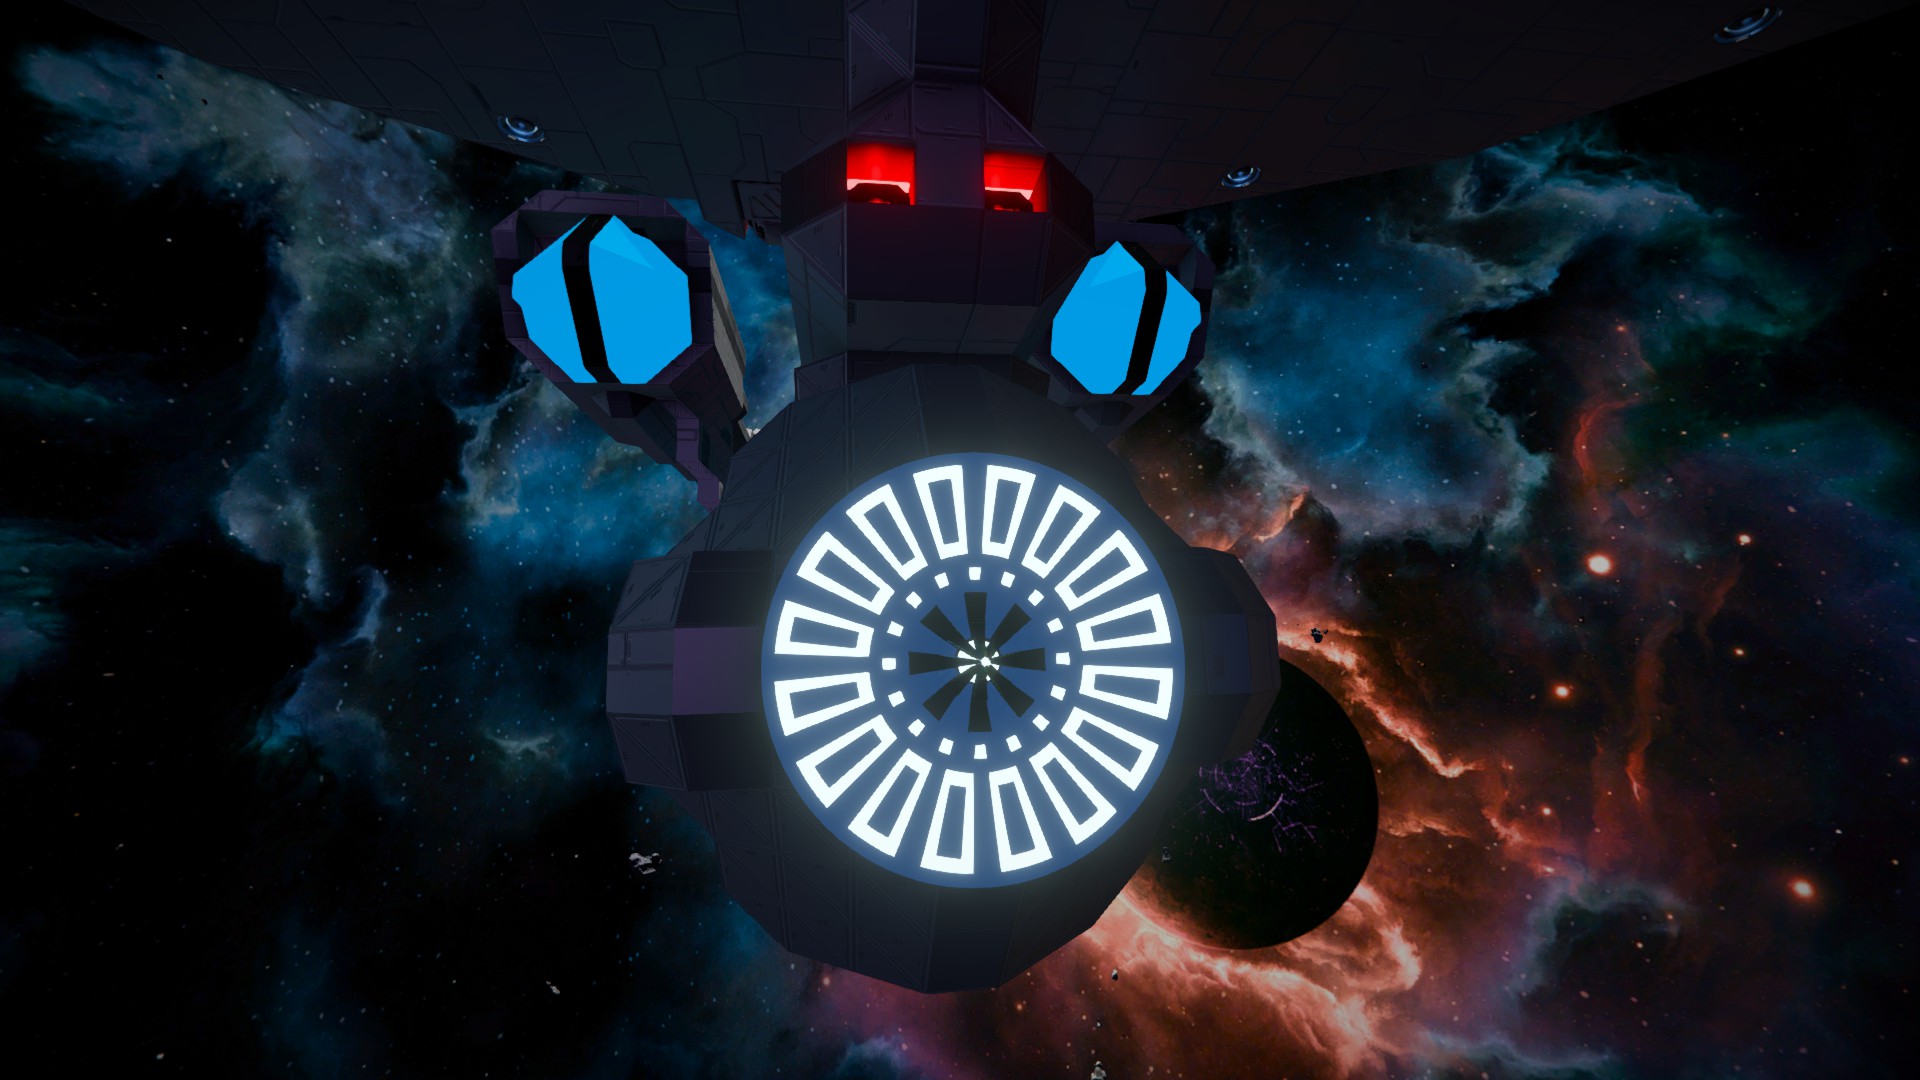
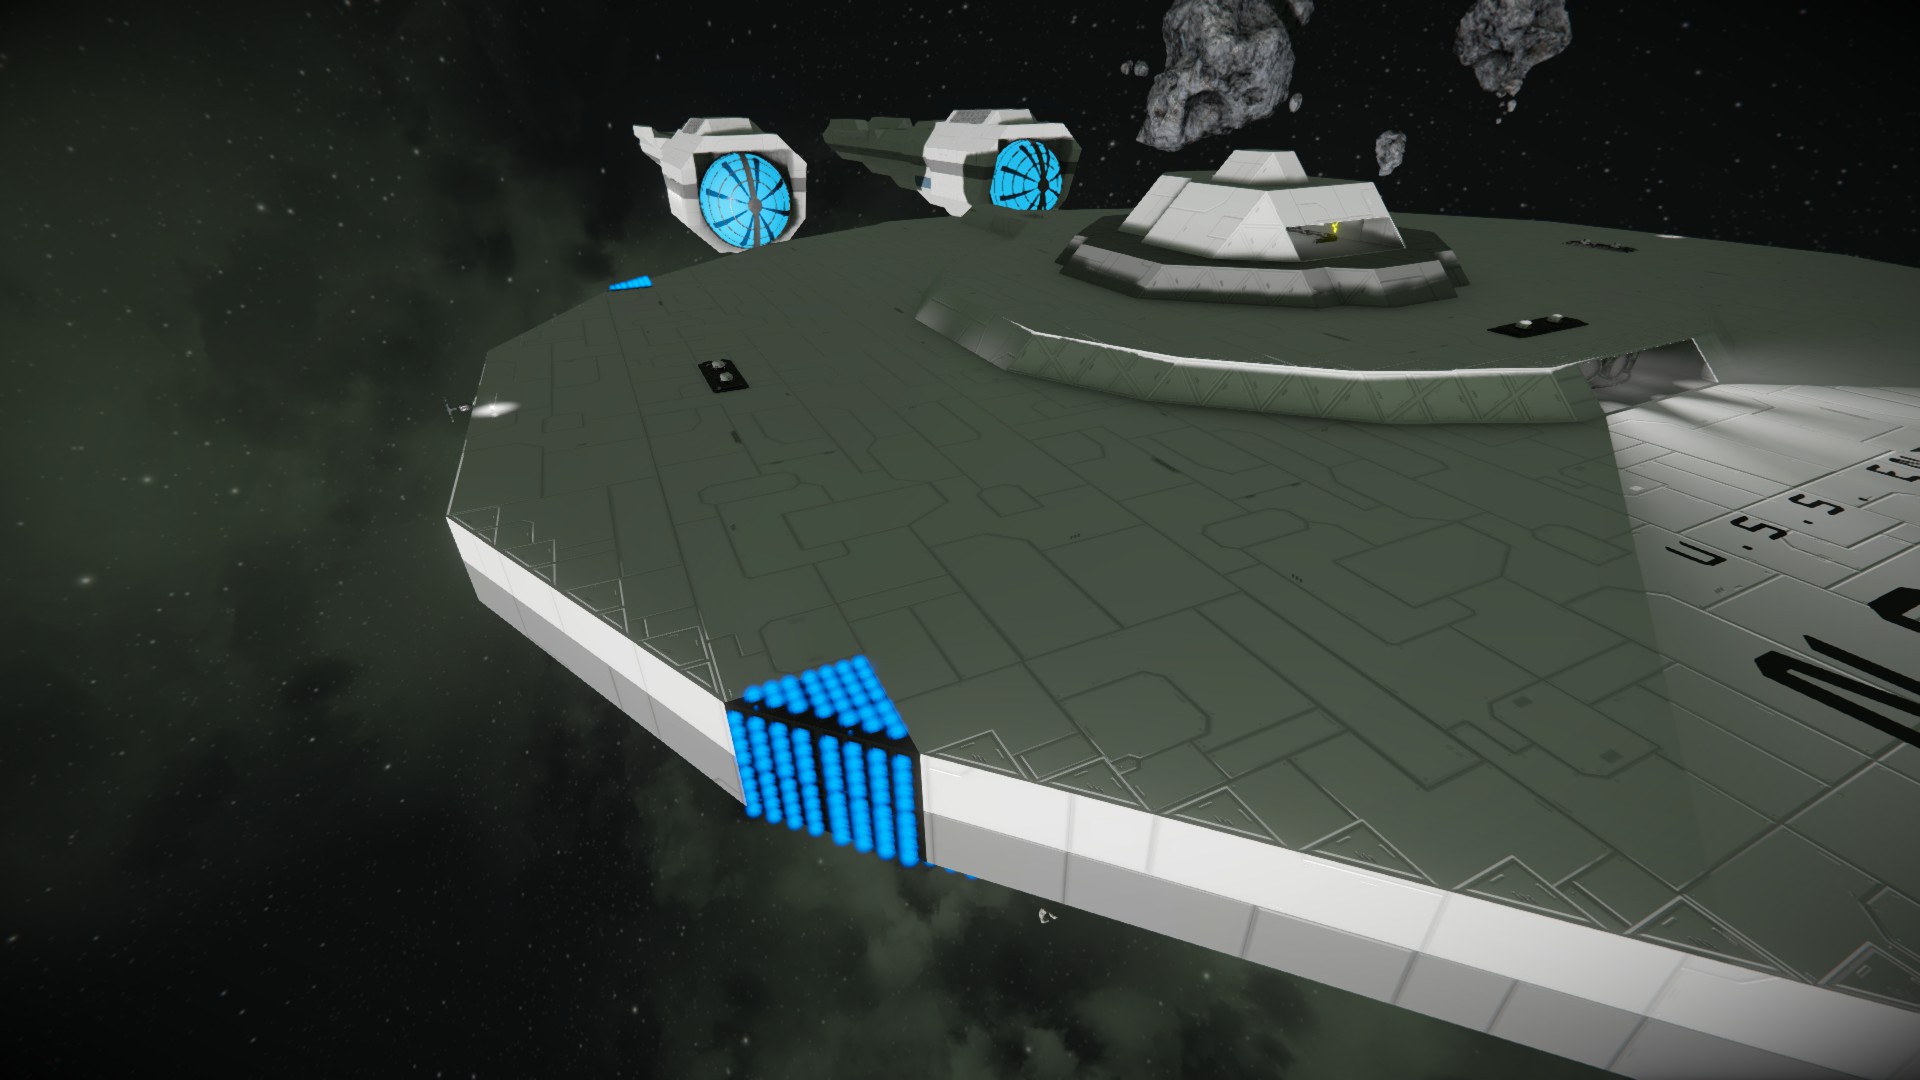
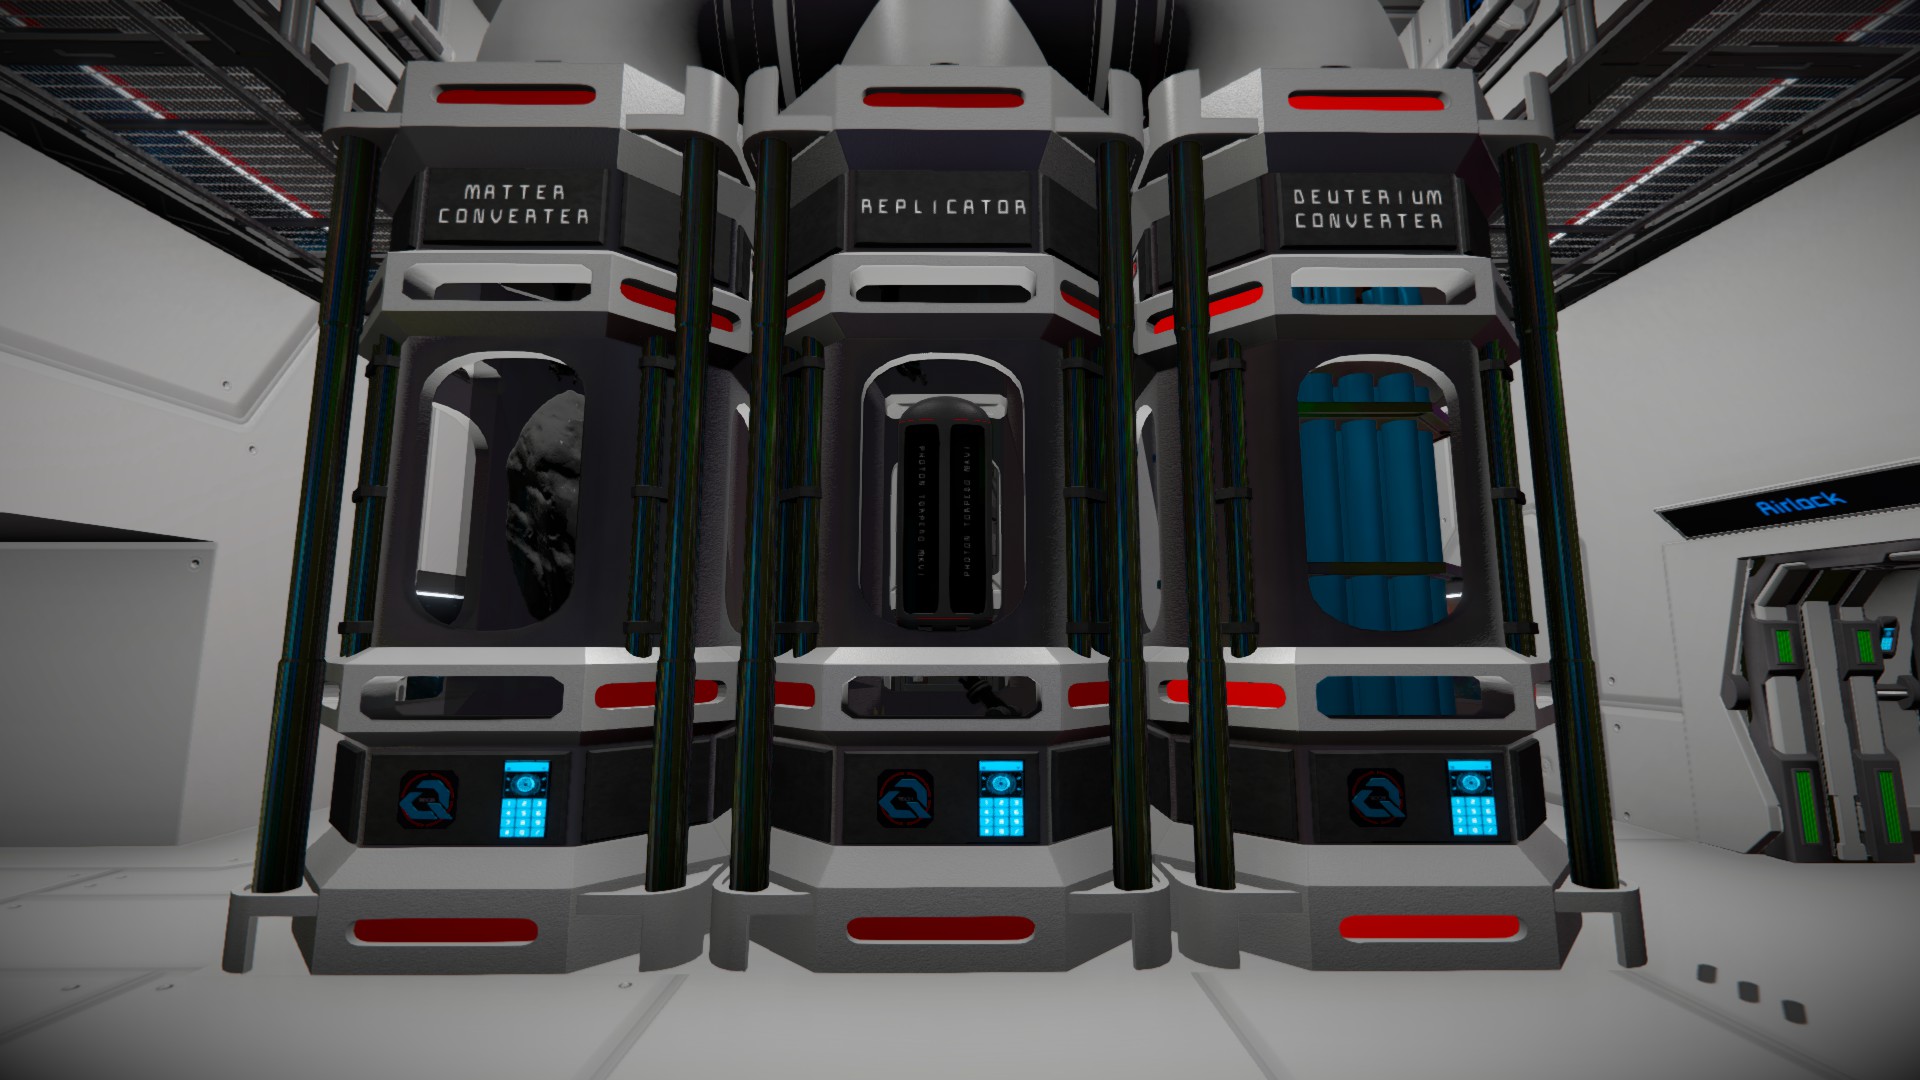
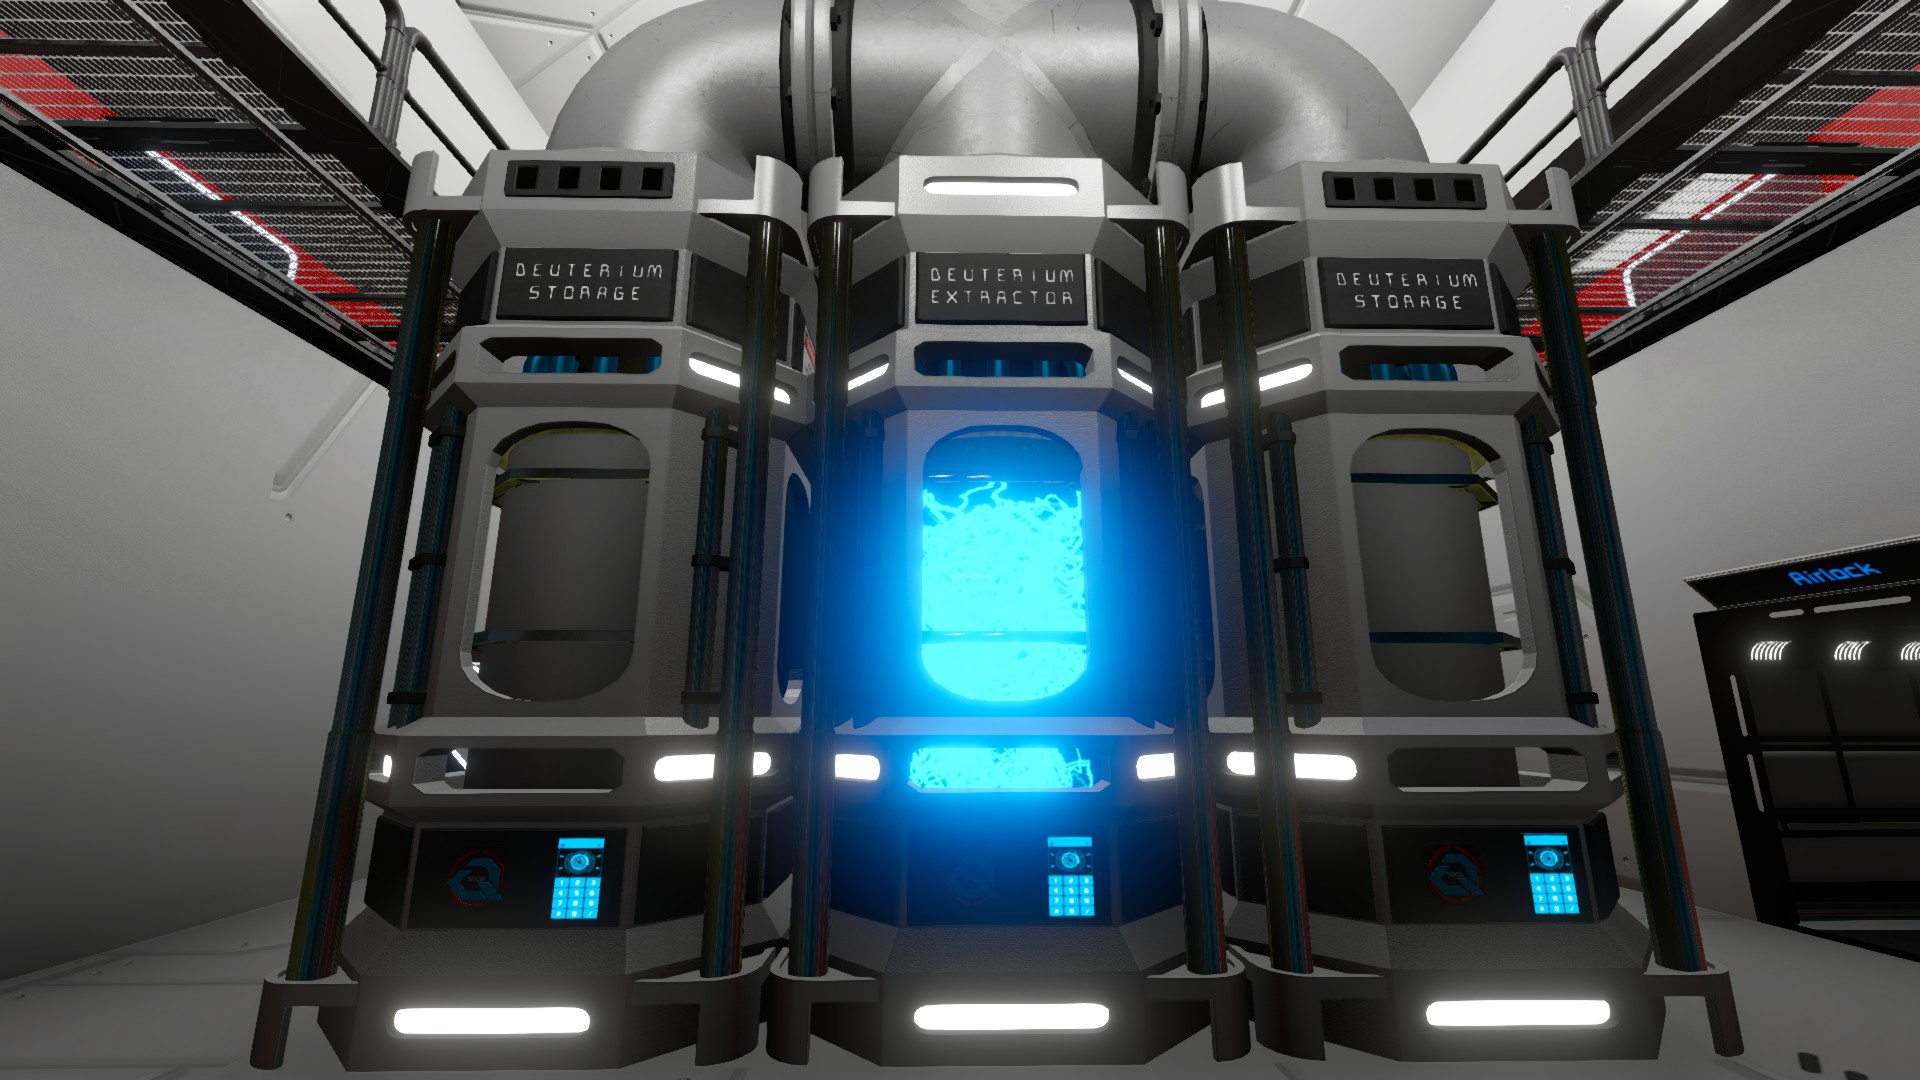
Also, ice from the Bussard Collectors is converted into liquid Deuterium; it's not really meant to be taken to the O2 generators. The easiest way to check though, would be to have the storage tank on a T shaped conveyor so the ice can travel past the tank to the O2 generator, rather than through it.
Proximus Cosmos 25 mai 2024 à 16h52 
@davidanttila1980

I did. And it does not look like it works because Bussard ice is different from normal ice it seems
davidanttila1980 24 mai 2024 à 16h40 
I say try it in a testing save and see what happens.
Proximus Cosmos 24 mai 2024 à 15h59 
@Qarannia

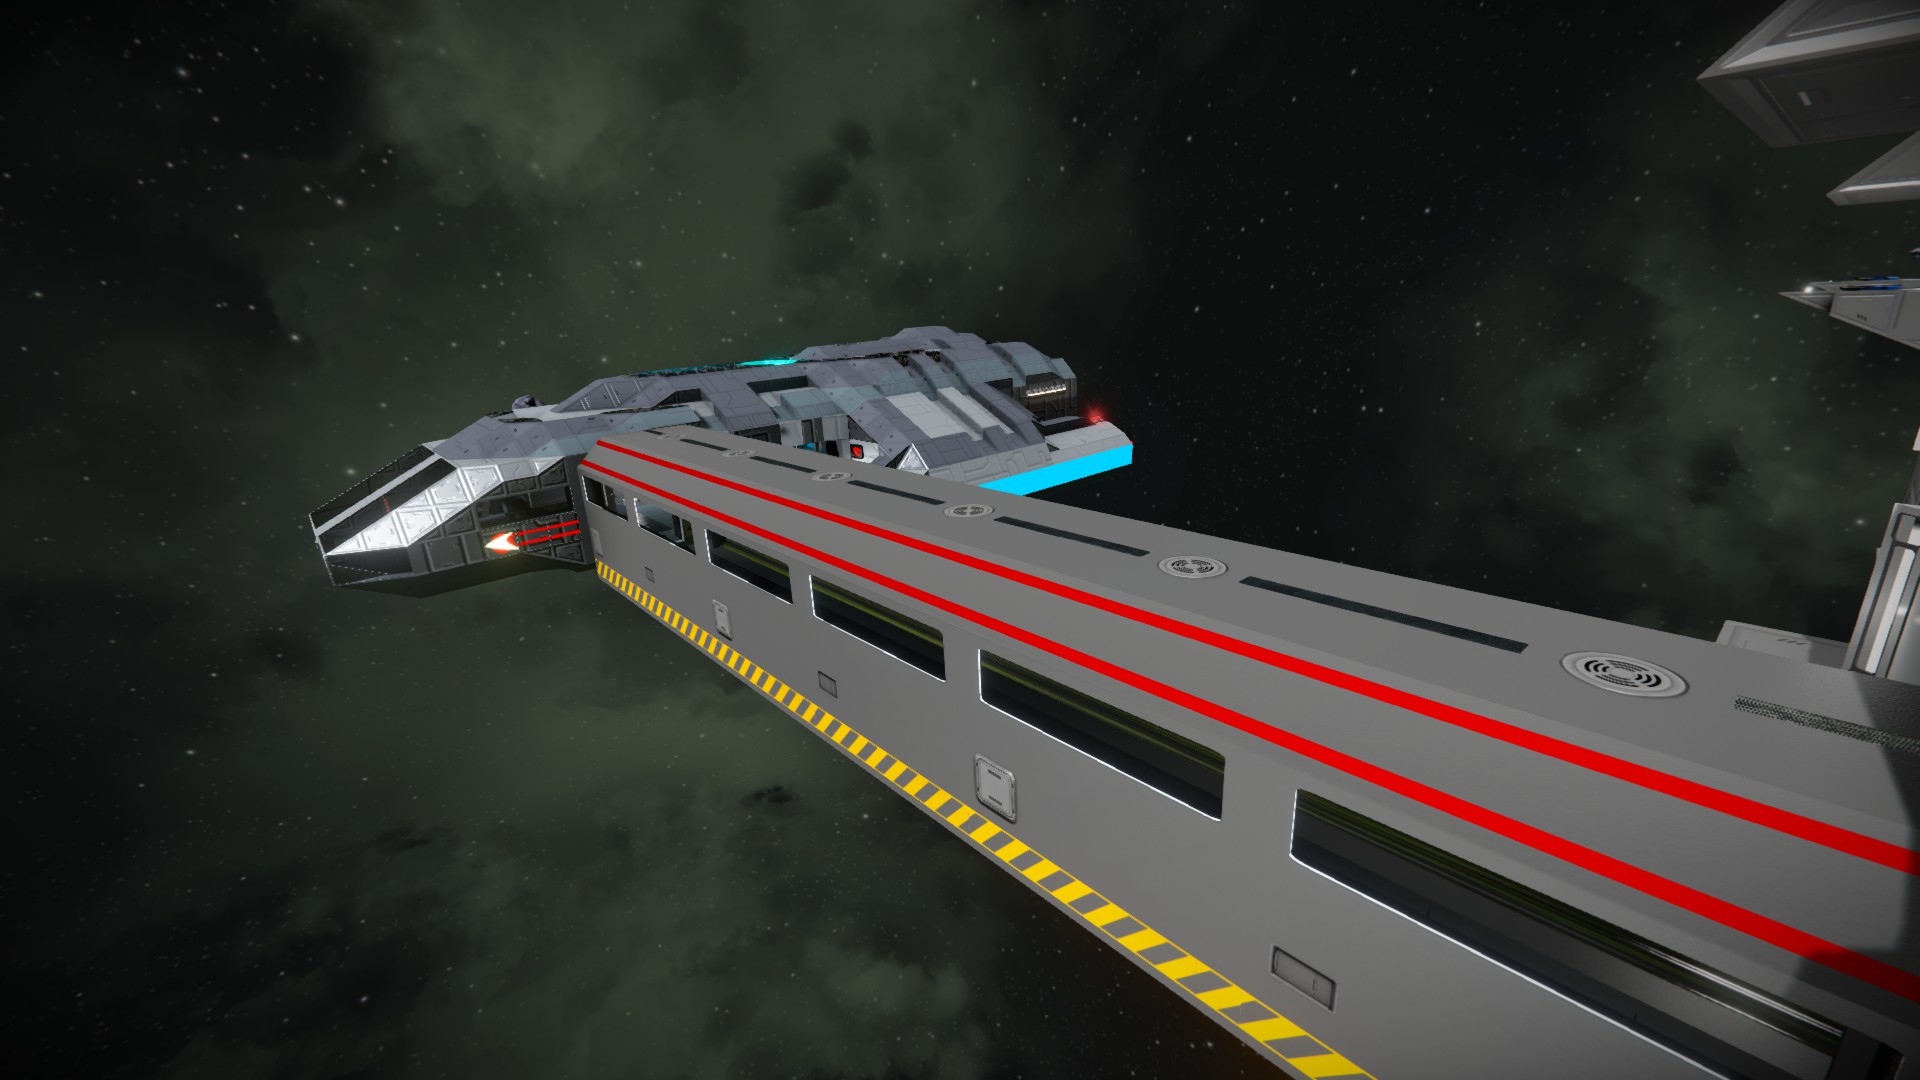
Asking because I'm working on a shuttle design and currently o2 generators are conveyored so that, assuming everything works. the ice from the bussard collectors travels through the DST and to the o2 Generator itself.

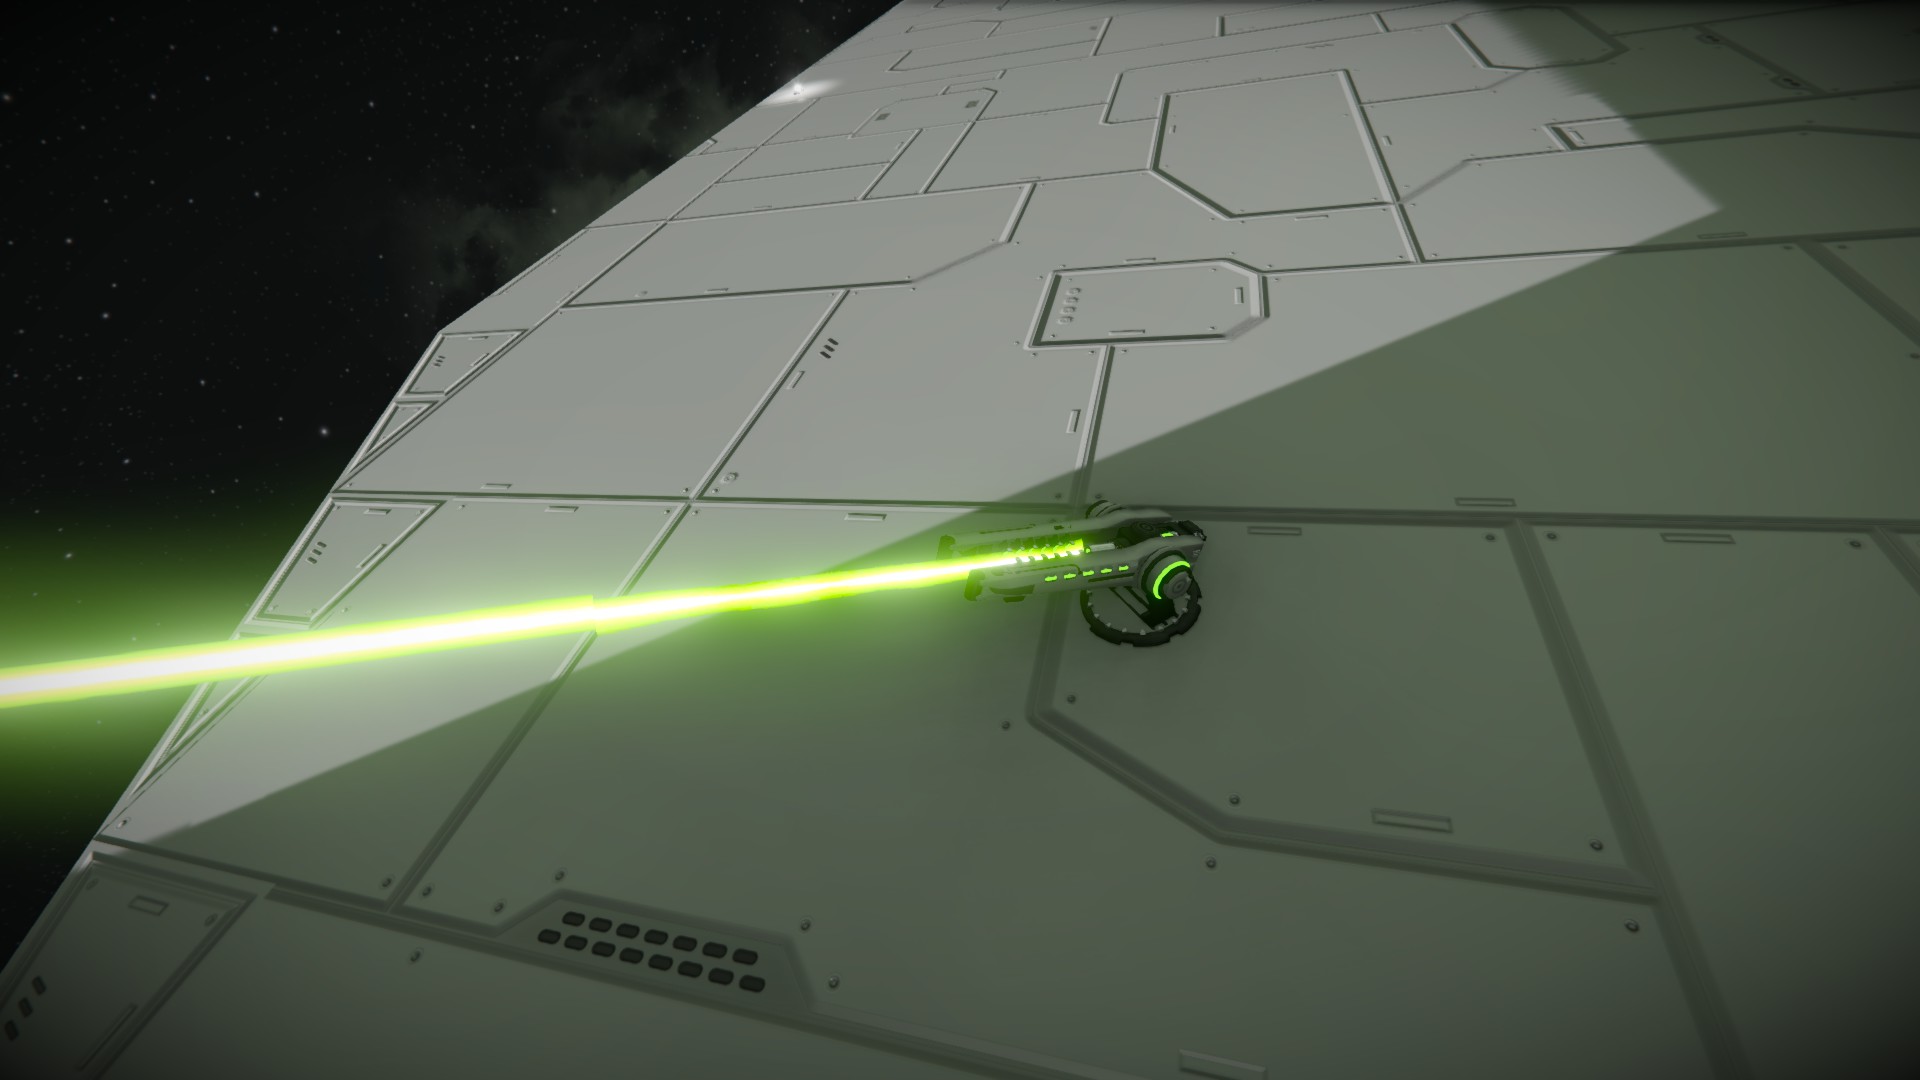
In hindsight I probably shoulda also mentioned the use of the bussard collectors in my first message.
Qarannia  [créateur] 24 mai 2024 à 15h26 
@Proximus Cosmos Hmmm, that is indeed a good question and one that I've never thought about. Does a block simply act as a conveyor if it's not designed to store a particular substance. I would have to test that to find out the answer.