Far Cry 2

Far Cry 2

136 ratings
★Conflict Strategies & Survival Techniques★ - Beating Checkpoints Malaria Gun Jams & AI
By thirdkeeper
All You Need For Beating Checkpoints Malaria Gun Jams And AI

Starting with the basics and continuing through actual combat this guide covers everything from
resource acquisition to navigation, best modes of travel, plotting safe pathways, vehicle selection,
approaches to conflicts, stealth techniques, and setting priorities for targets and missions.

- Includes Recommendations on
Buddy Missions, Weapons Shops, Safe Houses, Mission Selection, Scouting.

Special Section - How To Get A Jump Start In The Game - With NO Malaria -
Gather resources like diamonds and weapons, clear all safe houses, rescue
all buddies while remaining free of malaria attacks.

Added info for dedicated Vets:
Creating new challenges and designing your own missions to extend the game.
4
2
3
3
8
2
2
   
Award
Favorite
Favorited
Unfavorite
- Intro - Why I Made This Guide
________________________"Beyond Games' End"________________________
- Outside the playable map, looking back at the final airfield - and 12 years playing Far Cry 2. -

Preamble:

This guide is actually a community effort; Composed by myself, - inspired and spurred
on by those mentioned in the credits, including many unmentioned and without their
foreknowledge. ->(Surprise!) -

================================[EDIT]=================================
(( This guide was originally dedicated to all the contributors who inspired its creation, and -
believe it or not -> I was Banned for posting it! )) Details of the ensuing mess here for the
record - Enjoy ! ; )
https://steamcommunity.com/groups/FarCry2Crew/discussions/0/3079873787845480094/
====================================================================[E]

- Without their combined influence this composition may not have come into existence
by these hands, or if it had - it wouldn't have been nearly as accurate or complete.

However, to be clear: Everything in this guide except for obvious quotes and links is my
own work. - Navigation, Checkpoints, Malaria, Gun Jams, Extreme range gun-play, and
Dealing With AI have all been attained through extensive experimentation and testing
to ascertain, analyze and confirm.

====================================================================
- For example I played through the game three times at different difficulty levels using
only found weapons to confirm validity, and did the same procedure (three times each)
with no safe houses, no weapons shop missions or improvements, no buddy missions,
no boats vehicles or buses, no diamond collecting, and using pistols only. - I repeated
the experiment combining all of the above to confirm that it's possible for a player to
survive without any of these aids and using only found pistols. - (Though I did allow
myself machete and grenades)

- The only problem that I experienced was a lack of ammo at the highest difficulty which
forced me to occasionally perform machete raids for ammo and equipment. The exercise
taught me much about the games subtler nuances, ai behaviors, revealing some of the
games secrets, and taught me much about myself, my decisions motivations and attitudes
and how greatly they affected game play. - Just having to walk everywhere and never use
safe houses which demands that you play through the day night cycles exposed useful
details in map typography, ai placements, patrol routes and vastly expanded the adventure.
====================================================================

There are some other great guides available that have many more detailed facts about
the game. Useful info, but this guide focuses mainly on game-play; How to get the most
out of the game with the least hassle involved. - Judging the response - the work was
not wasted, and I'm very grateful to know it has been of help to others. -> Thanks ! 8 )

My friends who've been reading my posts have heard most of this already in different
posts (( you guys can skip right to the credits if you like but you might be interested in
my 'Mission Priorities' for the entire game, and 'Extending the Game' listed below.))

- and - Just for the inquisitive and diligent, there's an 'easter egg' in here somewhere, a
new, fun, and very effective tool that you can actually use in the game.- Many thanks
to the brilliant creator who quite selflessly donated his unique talents to the cause.

- I hope many find it -

=================================★=================================


I decided to compose this guide because I've seen that some first time players were
echoing the same complaints. - When I first tried it myself I was sorely disappointed
at the start. - Frustrated by the limited space that I could wander for an "Open World"
game, - not knowing that the limitations were just temporary.

- Played the training mission, wandered a short distance away and decided to go back
in for some reason, strolled into the area like I owned the place and was of course
immediately taken down by the respawns. - Outraged, I quit the game and didn't try
it again for nearly a year.

- When I rediscovered it and began to explore I was determined to take the experience
seriously and since then have spent many games experimenting with different ideas
that might give me advantages in survival. Just attempting the difficult can teach how
to overcome it.

- I hope that what I've learned will help you to avoid the pitfalls and mistakes that make
the game harder, take advantage of the unusual opportunities that are presented at the
start of each map, and get as much enjoyment from playing as possible.


=================================★=================================

If you want to copy anything from this guide

I understand that when you highlight text and right-click in Guides - the 'copy' function
doesn't work. - That's pretty inconvenient if you want to cherry pick information, so I've
made this entire guide (sans GFX or Links) available in copy-able text format here:

https://steamcommunity.com/groups/FarCry2Crew/discussions/4/3043859512561478071/

For added convenience there's a Link to return here for reference at the end of each chapter.
=================================★=================================

For ease of reading I've divided this guide into four chapters of five articles in each:

(1) - Addressing the main issues and complaints - Info all should know before playing.
(2) - Getting through the game efficiently and setting mission priorities.
(3) - All about conflict - preparation and approaches - combat and altering game difficulty.
(4) - Essential MAPS plus additional information and lore.


I'll be continually updating for a ' brief ' period to add related subjects.

Any comments are wholly welcome.


- Intro - Required to Launch The Game -
- ★To Assure that you don't end up with GAME ENDING BUGS ★ -

First - About Game Play Bugs -

Keep in mind that even Multi-Fix can't change certain game play bugs.

These are glitches that are generated when a player performs certain actions in the game.
In Far Cry2 the trigger is when you go to a faction and get an assignment to Free a Captured
Buddy. - The door will be locked and no Buddy there to rescue. = End Of Game


For game play security:

Be sure to -> Free Captured Buddies at these locations before doing the
Main Factions assignments to avoid Game-Ending Missing Buddy Bugs.

You'll start at one of these, so there are no buddies to free there, but you should do
the other three.

N. Map -

Slaughter House
Chicken Fights
Fresh Fish
Lumber Yard

- and remember - there are 2 in the South Map that you should do when you've
arrived safely at Mikes' Marina Bar:

Sediko
The Bowaseko Brewing Company

You can do other missions, just be sure to do these before you do the Factions
missions in each map.

===============================================================
If you get completely stuck there's a console fix generously supplied by DediBro
- Here:

Cosole Fix For Locked Door Bugs

(Unfortunately It has not worked on all systems)

Also Note -

Don't kill more than 5 buddies or you may have anomalies or problems in the end game.
================================================================

For all other fixes and features
- including the ever-valuable Set FOV 8 )

Imagine working through 40 hours or more only to lose it all at 84% complete.
I've been through it twice, and I'd hate to see anyone suffer the pain when this
simple fix is available

- Here's The Cure -
Always launch the game using FoxAheads' Multi-Fixer. -

- Fixes Bouncing AI
- Fixes Repeated Tape Bug in the south map
- Opens Bonus Predecessor Tape Missions
- Adds New Machetes

- Includes optional cheats for cheaters, but they have been known to cause anomalies
that could render a game impossible to complete - and possibly corrupt Saved Games.

Thanks ! - to:

Originally posted by FoxAhead:
Better support for game files recognition
(size, checksums etc.). Especially for Uplay version.

Update - Version 1.9.0.50

Changes:
Better version detection from dunia.dll with changed size.
If somehow dunai.dll size was changed, try to find the version string explicitly.

New Update
- 09/22/22
Originally posted by FoxAhead:
New version 1.10.0.72
https://github.com/FoxAhead/Far-Cry-2-Multi-Fixer/releases/tag/v1.10

Changes:
Added option for setting process affinity. Limits the use of cores by the game process. Can help run the game on modern fast systems with lots of cores.

Important ! - How to run in steam:

Put the multifix launcher in your Far Cry 2 Bin folder
Rename FarCry2.exe to FarCry2Game.exe
Rename the Multi-Fix launcher to FarCry2.exe

In your steam library there's a listing on the left
right click on the game and select properties

Path should look something like this:

"-exe [Drive] :\Program Files (x86)\Steam\steamapps\common\Far Cry 2\bin\FarCry2.exe"

Change " FarCry2.exe " to " FarCry2Game.exe "

Done.

You'll know it works when you launch. - A new menu appears with some extra launch
options including set FOV.

Leave max frames unless you want to chance bouncing AI and a dozen more glitches,
some that can ruin your progress.

Added Info generously supplied by BigTinz - Thanks !

Originally posted by BigTinz:
Along with using the multi-fixer, I recommend disabling
full screen optimizations, and running as an admin.

Both of these things are done by right clicking > properties of the fc2.exe file.

No reason to ever play this in DX10, IMO.

DX9 + V-Sync + Fox Ahead's Multi-Fixer solves 99% of problems.
#2

 
The above that BigTinz posted is the formula to launch and run the game without
issues.


- Lots more info here -


Thanks very much to FoxAhead for allowing me to host his thorough FC2 Fix Guide here:
https://steamcommunity.com/sharedfiles/filedetails/?id=1620638035

Out of respect for Ubi and it's players I'm including a caution expressed by Ubi administrators:

Originally posted by UbiBorealis:
Thanks for helping out, thirdkeeper and BigTinz!

Please note that Ubisoft Support is unable to promote the use of 3rd party software as a workaround, as this can conflict with game files[support.ubisoft.com] and cause issues running the game.

Players are welcome to try suggestions regarding 3rd party software, but you would be doing so at their own risk, and Ubisoft Support will be unable to assist regarding any issues that may result from using third-party software to modify game files in an unauthorized way.

Thanks!

- Ubisoft Support

Understood. Though from what I gather Multi-Fix is basically a frame limiter and
doesn't alter any game files, will include the above caution with any future
recommendation.

- Players have a right to know Ubi's position regarding game file modifications.

- Thanks for your past - and future ministrations - 8 )
----------------------------------------------------------------------

Additional info - FoxAhead has assured us that multi-fix does NOT affect internal game files
but just creates the right settings for the game to launch and run almost completely bug free,
and it has been thoroughly tested on thousands of systems over a period of several years.

There are a few for which Multi-Fix has had issues or has not worked, but they are very rare and since game files have NOT changed an uninstall is as simple as deleting the Multi-Fix launcher.

Careful ! - That you don't accidentally delete the FC2.exe !

If you followed the instructions for running in steam (above) be certain to rename the files
and command line names back to the original. - Just be sure you're deleting the Multi-Fix
Launcher, and NOT the FC2 executable.

------------------------------------------------------------------------

If there are any discrepancies or inaccuracies in any of the above - no matter how slight -
I most stridently urge those more fully informed than myself to speak up with the corrections.

To be clear - I'm quite confident, otherwise would not have committed this to print.


==================================================


- Intro - The Game should be Modded


I played quite happily for years in unaltered pure vanilla mode. - Having adapted
over time to the bullet sponginess of the ai. - Made it survivable (having to pour
fire into the enemy to take them down) but the normal fluidity of combat was missing.

The experience invariably was waiting for each target to fall before setting sights on
the next, and often taking hits from off sides in the process.

Nearly all encounters were frustratingly stalled and even successes tainted by the
annoyance.

- If you want realism and FUN -> This game should be modded.

I'd heard good things about Redux, the first and most important being that it balances
damage which makes your shots really count. - Ai go down much quicker, making all
conflicts much more fluid and natural feeling.

I happened to be in the middle of testing a found weapons only run and had to delay
testing Redux for a few weeks until I had completed the experiment, and when I finally
did it completely changed my entire world-view of the game.

I know for a fact that BigTinz spent many hours - tuning up and stepping back to refine
game play to create a living realistic experience for the player. - Game play and especially
gun-play improved a good 90% at least! - On top of that add these major tweaks and
refinements:


- Improved jump height and distance -
- Improved climbing abilities -
- Reduced Fall Damage -

These all allow the player access to before unreachable positions of scouting and
attack advantage - and provide shortcuts over the tops of mesas.

For those of us who love to explore - the FC2 world has become MUCH larger.


- AI can carry any weapons -

This is guaranteed to heighten your ai weapons awareness. - Especially when taking hits
from the higher power weaponry. Your target priorities change accordingly. - Great for
scavenging early in the game, and other 'perks' - Ever see ai accidentally incinerate their
buddies with a flame thrower?


- Competing Factions fight each other -

A vast improvement. Patrols engage with checkpoints, guarded safe houses and even bases,
creating a vibrant and active environment. You will often hear nearby gunfire and have the
option to ignore, engage, or witness the exchange.

Many times I've found myself high on a cliff watching a pitched battle take place and play
out in the valley below - and many times I've been pinned down, hurting and quickly growing
low on resources when a rival patrol shows up and creates enough of a distraction to save
me or actually finishes the job for me, driving off, and allowing me to scavenge the remains.


To aid in travel

- Chances of being chased by checkpoint AI reduced by 50% -
- A few of only-the-most annoying checkpoints were removed -


Added features include

- Ability to holster all weapons for a completely unobstructed and immersive view -

- Plus many other subtle adjustments that in combination improve over all game play -

+ Graphics enhancements included !

I'm sure other mods do similar upgrades, but I've been playing Redux for over two years
and for me it does all the right things without overdoing anything - In fact Redux makes
the game polished and complete for the player in a way that says "This is the way the
game was meant to be played". - Had the devs more time or ability to do the testing
and refinements.

I've not tried any other mods yet, and it's because Redux has been so rewarding;
Though I will try other mods when I've explored Redux's potential more thoroughly.

My advice is to try any mods you're interested in , but be sure to try Redux also,
it fixed everything for me and revitalized my enthusiasm for every aspect of the game.

--------- Update --------- ( 11/27/23 )

I've been testing the Realism + Redux mod for the past few months which is a bit
more demanding but has some fine improvements and great graphics enhancements,
especially the Scubrahs edition if you can find it.
------------------------------------------------------------------------------------------

Links for DL Redux and other mods are in the Credits section. - Thanks - yet again for
this great mod, BigTinz !


==============(1)==============
- - - - - Getting a handle on the bad stuff - - - - -

- Respawns -

If this is your first time through it would be a shame if you quit because of certain
aspects that are discouraging.

Addressing the three major complaints first:

Respawns Malaria and Weapons Degradation


Respawns


Note that despite what many believe the ai don't respawn until you are a good
distance away from the area. At my estimate that's about 180 paces, or roughly
121 meters, or 133 yards.
---------------------------------------------------------------------------------------

All those damned check points. - Yes, its a repetitive pain that gets old quickly.
I love driving but in this game whether you're on land or water there are constant
check points. - What saves time ammo health and hassle in the long run is traveling
on foot. You quickly learn the entire landscape and you can easily stealth passed
most conflicts.

A vehicle can plow through many check points without taking much damage, but
a vehicle instantly alerts ai in the area, you're recognized by the enemy at a much
greater distance. You will always waste ammo, health and your time trying to protect
it. - It's a very visible and unnecessary liability - especially when you realize that you
could have walked right passed that rats nest.

I discovered that I could sprint / walk anywhere on the map in 10 minutes or less as
long as I avoided AI. - At that point I gave up taking the bus and only used it again
when play-testing mods. I've had so many unique experiences walking that when
ever I got on that bus I felt like I was missing out on some of the adventure.

===========================================================


Driving

My feelings about driving have evolved over the years. - Once you've identified
enough checkpoints you can avoid nearly all of them by going off road, and even
the big war wagon can go almost anywhere that you can walk.

For the majority of the map the roads are the most dangerous and easily avoided.

- However, there are some stretches of road and large areas of desert that are sparsely
patrolled, and a rainy night is the perfect time for travel, especially on water..


Route Planning


Planning your routes and modes of conveyance is a big part of the game and will
spare you a lot of aggravation in the long run.

I've played nearly all the way through both maps driving everywhere using no more
than 4 vehicles total. - Only losing them when the mission(s) demanded it.

- Once I mapped out all the back paths that avoid checkpoints and patrols driving
became a lot easier.

There are many paths that avoid trouble - here are the two main ones that will give
you access to the entire N. map via the N and S deserts.

- Pala to the North desert in 1 1/2 minutes. - NE exit keeping left to blow through the
bridge check point; Only 2 or 3 there at any time and usually easy to hit one. - On
to the right hand cut-through just before the slaughter house north to Shwasana, left
at the fork on the cliff path and up the hill to the next left and right takes you down
to the E/W Desert road and one lone patrol on a 4 wheeler. easy to spot and avoid.

Once there and traveling in the desert you can get to any site - in the N east or N
west sectors safely.

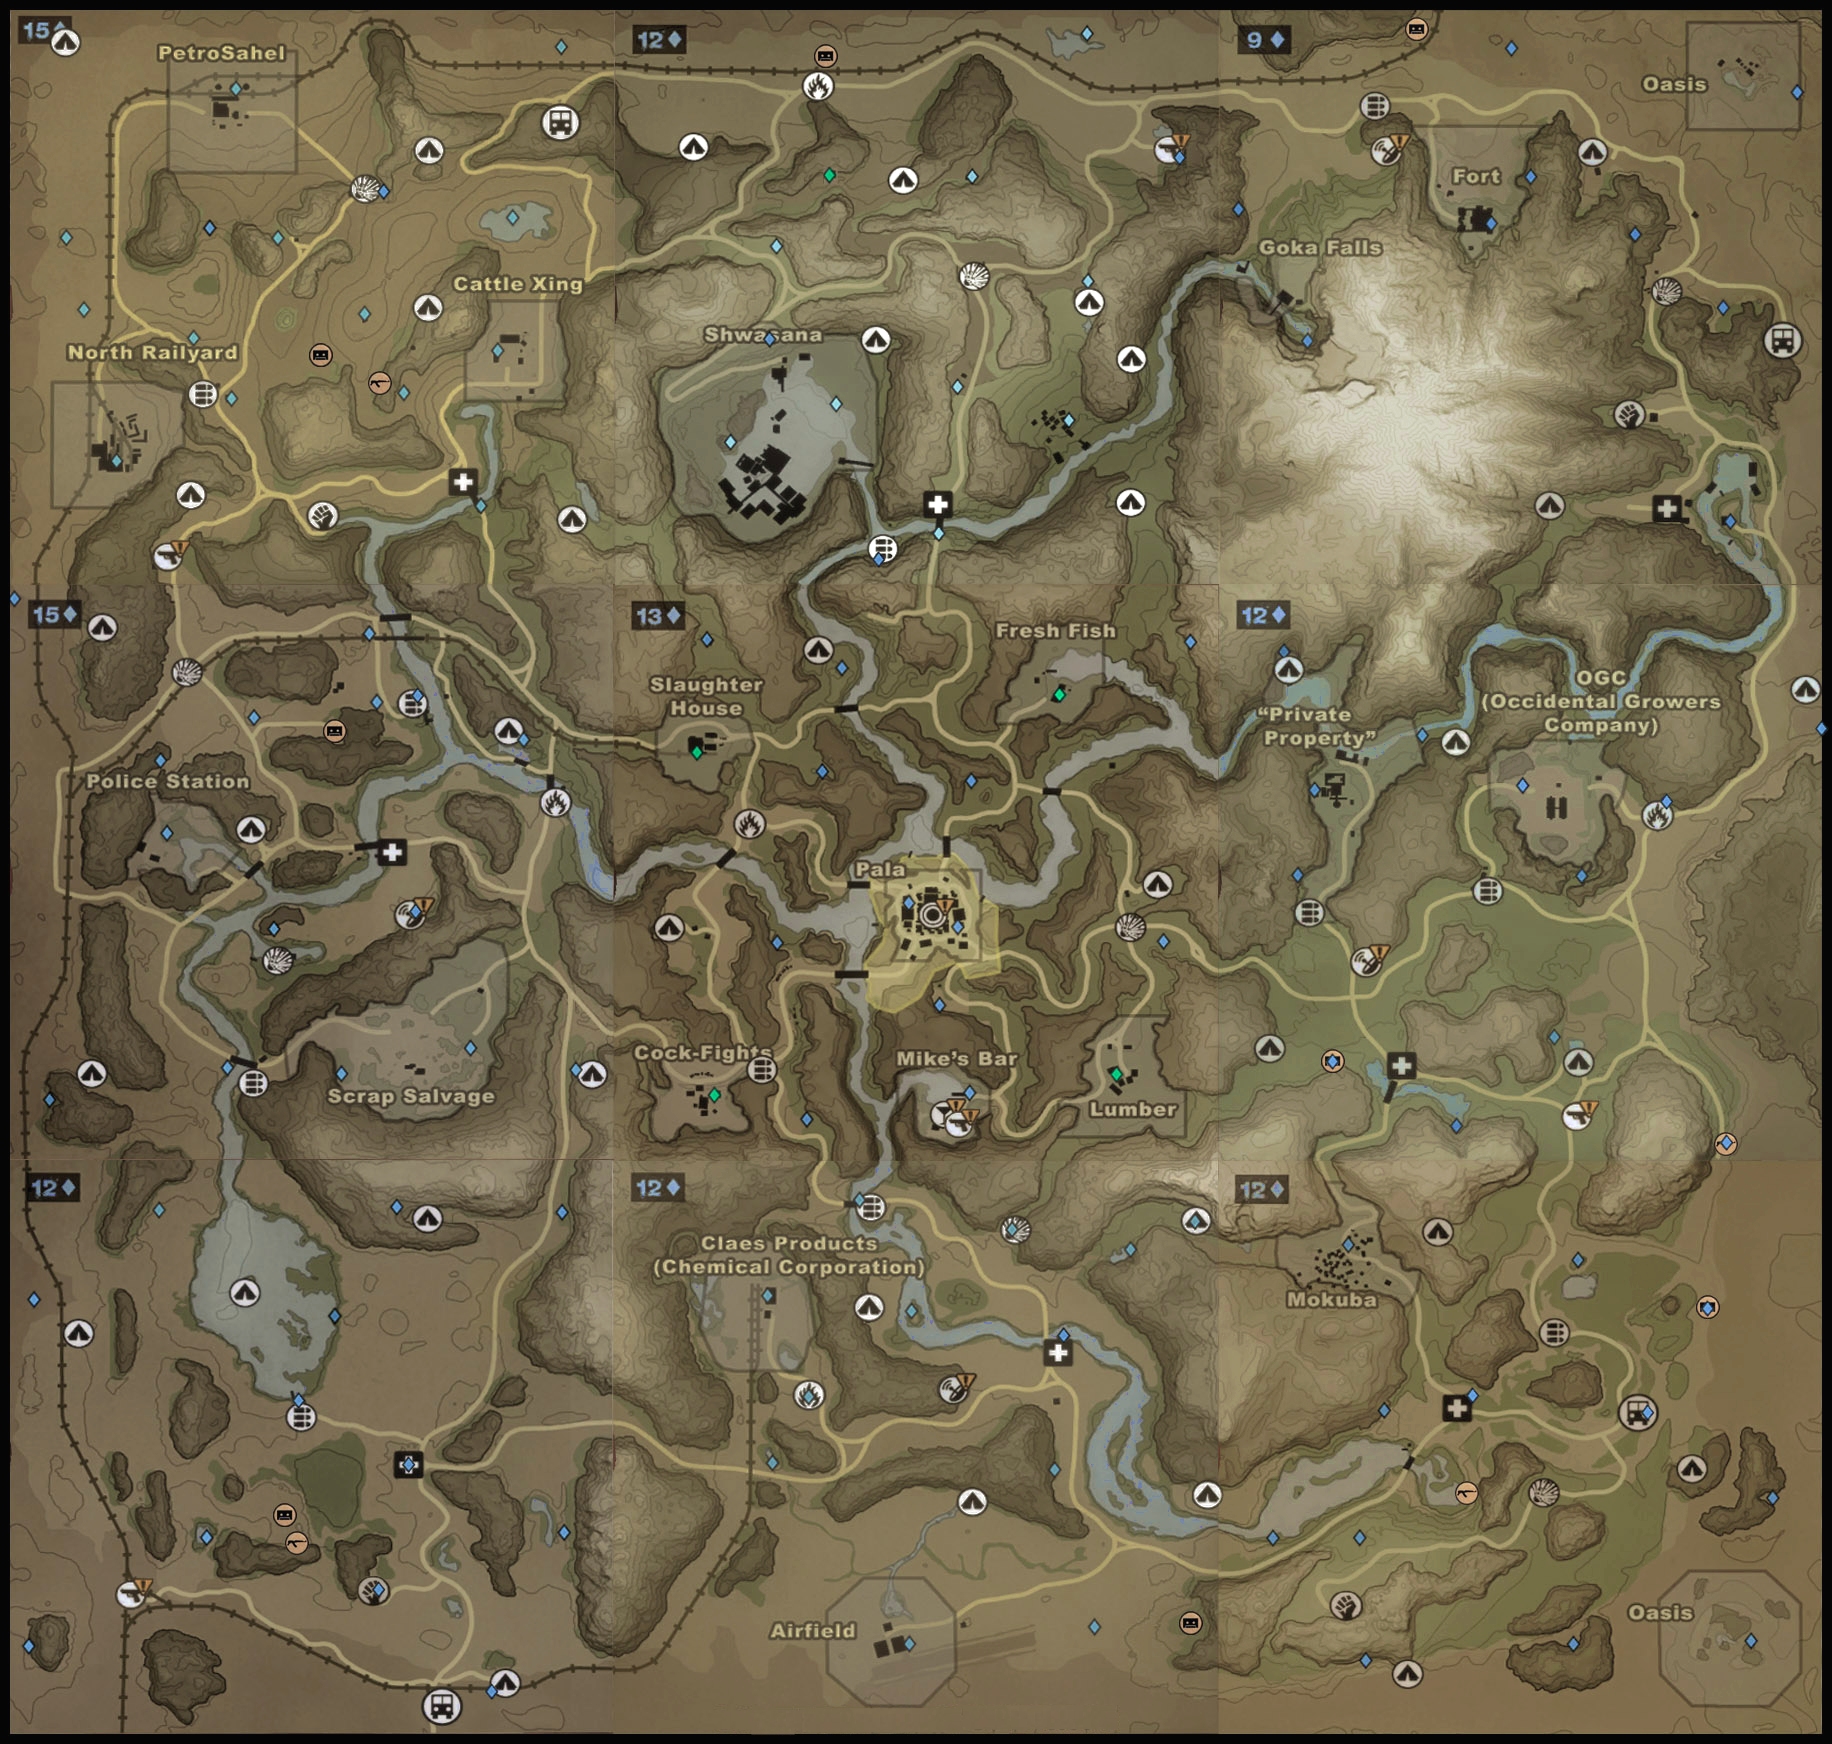
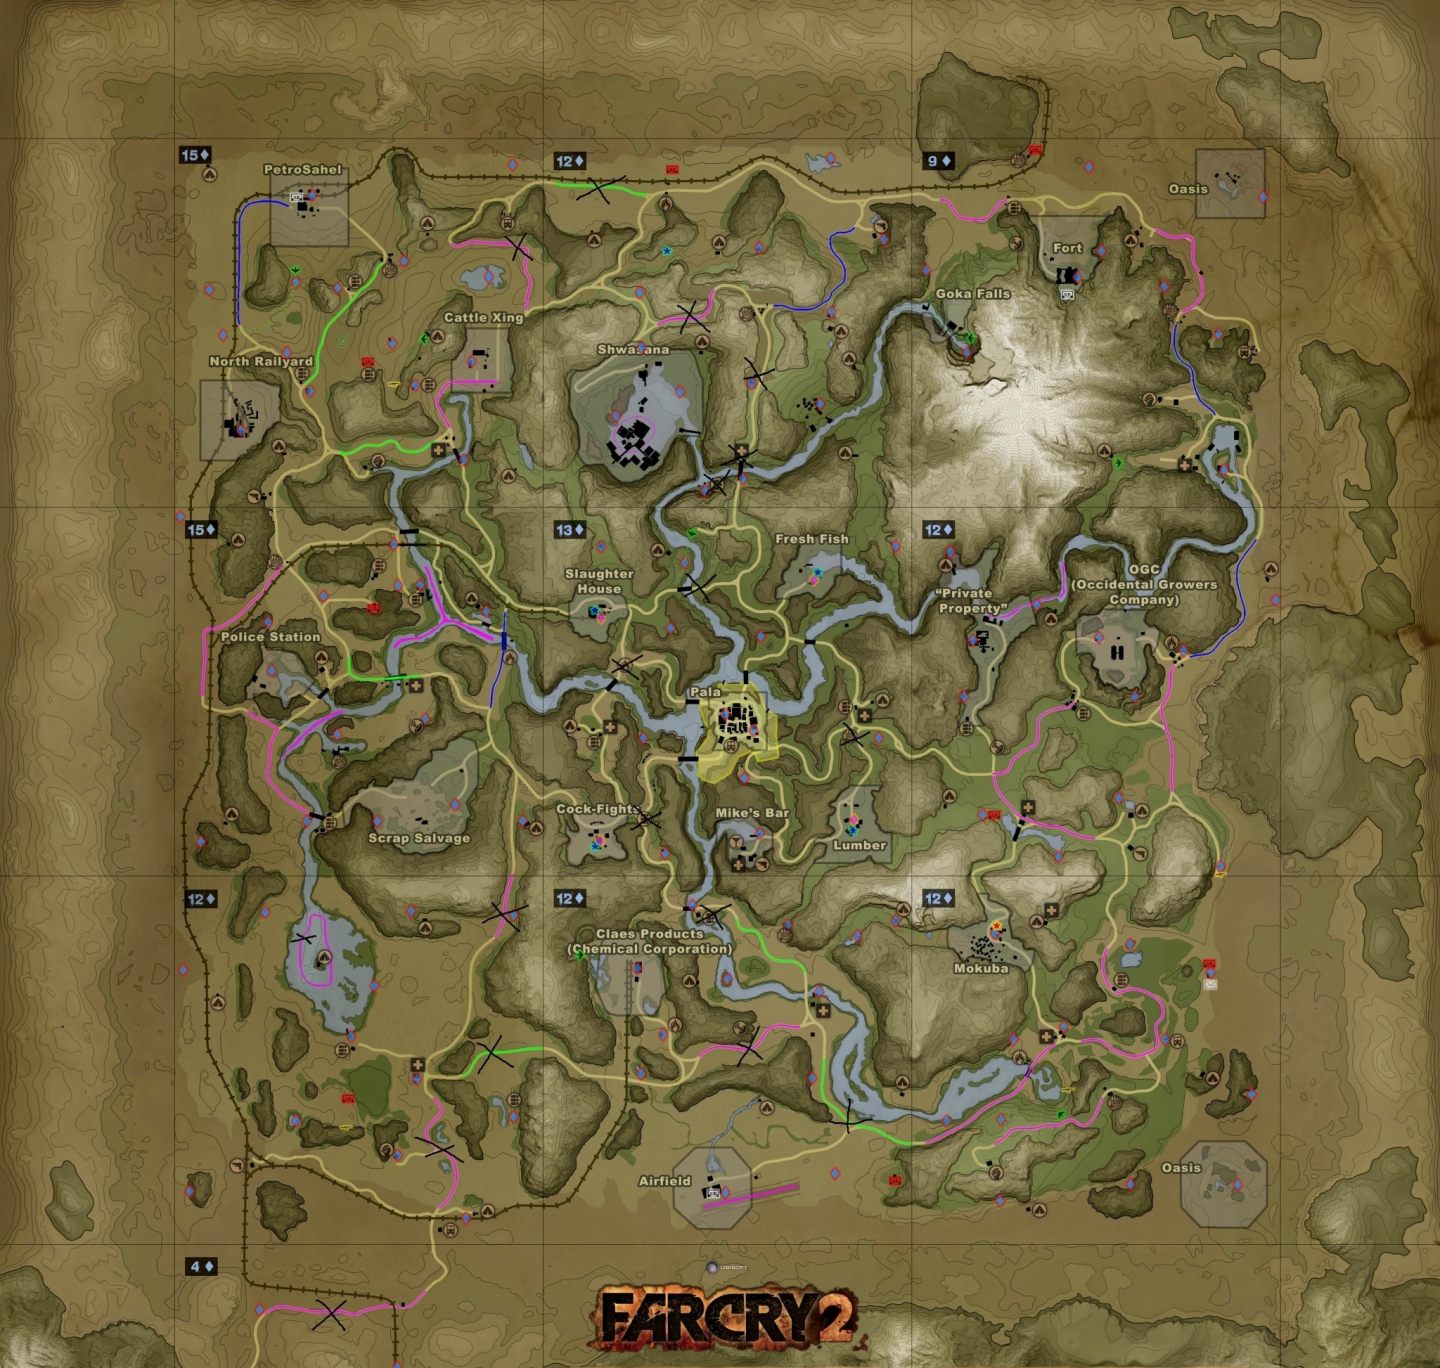
My most traveled routes - reaching all weapons shops, resistance and radio towers:
(04/14/24) The more detailed South Map is now available in Chapter (3) Fourth article:
The 'Flip' Side - Making The Game Harder? - "Travel and transport" - These and all
other maps are available for DL in Chapter (4) Second Article - M A P S - Section.

- Pala to South desert in 1 1/2 minutes. - SW exit to first left blowing through one check
point, at the turn just before the bridge go off road over a small hill bearing right to the
back path to Claes Chemical - bearing right close to the cliff to avoid being spotted and
following the pond south to the Rail tracks leading to the south road and to the west end
south of the air field where you have safe travel east all the away to the east weapons
shop and points north and west. - West to the south weapons shop and points north and
east. - No patrols.

Once you're past Claes Chemical you can get to any site in the S east or S west
sectors safely.


I never use the vehicles mounted gun unless I'm laying in wait to surprise them. - If
a patrol happens to spot me and gives chase I'll pull a sharp turn and use the vehicle
for cover and either pick off my pursuers or try to lead them far enough away that I
can grenade them without damaging my ride. - and - to keep it safe I always park it
in a safe area close to my target and go in on foot.

In these maps you can walk the entire map from corner to corner in 10 minutes,
and you can drive it in 5 or less.


By avoiding unnecessary conflicts you can tailor the game to be as trouble free or
as action packed as you like. - Pick your challenges carefully, and only engage
when you need or actually want to.


Don't let the game dominate you - take control


=====================================================
Cheaters Corner

Checkpoint Charlie here, just checking in to give you the easy cheat to eliminate checkpoints.


- - Deleted - -


=================================================================

Sorry, Charlie. - No one learns how to deal that way. - The designers created back pathways
and shortcuts that make travel easier, and the ai are there for a reason. No challenge-No skill.

By the time players reach the southern map they should be able to dominate with just
machete pistol and grenades.

Tested and confirmed playing all the way through many times over.

- My regularly updated - Current Stats - are now listed in chapter 3 of this guide ->
=================================================================


- Vehicles -
Vehicle Selection


-----------------------------Screenshot changes up to five times daily------------------------------

I won't go into great detail here, but I will say that the big War Wagon (FE) is my favorite.
Sure, it's a larger target but with the shielding blown off it has the best view over the grass
and scrub, and it can go over the larger rocks that stop the others cold.

The view is the most important for navigating rough terrain and especially for spotting
the enemy before they spot you, and standing on it's higher platform provides superior
scouting capabilities.

When an enemy patrol gives chase I pull a sharp turn, hop out and use the vehicle for cover.
It's much taller than the others providing better protection, and If I'd stayed in the vehicle to
use the 50 Cal I'd get torn up every time because you're just too exposed up there.

I rarely use the mounted gun unless I'm laying in wait to surprise them.

- I hardly ever use boats in the north map anymore. I use the War Wagon and maintain the
same vehicle for most of the north map, occasionally stealing new ones when necessary.

My map of 'War Wagon' locations (9 Plus 3 Patrols) below is based on the Realism+Redux Mod
- Right click on the map and select 'Open Link in New Tab' to zoom in and scan. -
-> Thanks so much to Reskal for the inspiration ! - Original thread:
https://steamcommunity.com/app/19900/discussions/0/3805029641867154419/


Vehicles used as weapons

Besides running the pedestrians down - a vehicle can be covered in IED's. driven at high
speed toward ai, then bailing out leaving it to roll into their midst before hitting the boom
button. - Also works with a boat or glider, but bailing out at a safe distance can be tricky.

Here are stats and descriptive commentary - generously provided by Raging Raider:
https://steamcommunity.com/sharedfiles/filedetails/?id=752784740&searchtext=vehicle
I intend to locate the coded stats for each vehicle to facilitate making exact comparisons,
which I'll be sharing here and with Raider. - I'll update this section as soon as possible.

-------------------------------------- Update ! -----------------------------------
Here's the problem I ran into when trying to acquire accurate and specific stats.
The games physics are far more complex than I'd imagined. Speed is based on mass,
power, gearbox (that's right, different for each vehicle) and surface incline. Possibly
other factors as well.

- From Boggalog's 'Almost Complete Guide To Modding Far Cry 2' -
Here's a brief sample of what I'm looking at:
-------------------------------------------------------------------------------------

Top speed
Decoding required
Base game vehicles - xx_vehicle.xml < entitylibrarypatchoverride.fcb (\patch_unpack\generated\)
DLC vehicles - 2_vehicle.xml < entitylibrary.fcb (\patch_unpack\downloadcontent\dlc1\generated\)

Land vehicle top speed is controlled by the “fGearBoxTopSpeed” stat in the “WheeledParams” section.

<object hash="279B86EC" type="WheeledParams">
<value name="fMass" hash="3D255EB4" type="Float">1600.0</value> <!-- type="BinHex" value="0000C844" -->
<value name="fEnginePower" hash="0CF4A9FC" type="Float">95.0</value> <!-- type="BinHex" value="0000BE42" -->
<value name="fExtraClimbEnginePower" hash="0585E2C2" type="Float">400.0</value> <!-- type="BinHex" value="0000C843" -->
<value name="fGearBoxTopSpeed" hash="8E3D52A5" type="Float">31.0</value> <!-- type="BinHex" value="0000F841" -->


Engine power
Decoding required
Base game vehicles - xx_vehicle.xml < entitylibrarypatchoverride.fcb (\patch_unpack\generated\)
DLC vehicles - 2_vehicle.xml < entitylibrary.fcb (\patch_unpack\downloadcontent\dlc1\generated\)

Land vehicle engine power is controlled by two stats, “fEnginePower” and “fExtraClimbEnginePower” in the “WheeledParams” section.

I don’t know exactly what “fExtraClimbEnginePower” does but I think we can infer it helps climbing hills.


<object hash="279B86EC" type="WheeledParams">
<value name="fMass" hash="3D255EB4" type="Float">1600.0</value> <!-- type="BinHex" value="0000C844" -->
<value name="fEnginePower" hash="0CF4A9FC" type="Float">95.0</value> <!-- type="BinHex" value="0000BE42" -->
<value name="fExtraClimbEnginePower" hash="0585E2C2" type="Float">400.0</value> <!-- type="BinHex" value="0000C843" -->
<value name="fGearBoxTopSpeed" hash="8E3D52A5" type="Float">31.0</value> <!-- type="BinHex" value="0000F841" -->


Gearing
Decoding required
Base game vehicles - xx_vehicle.xml < entitylibrarypatchoverride.fcb (\patch_unpack\generated\)
DLC vehicles - 2_vehicle.xml < entitylibrary.fcb (\patch_unpack\downloadcontent\dlc1\generated\)

Land vehicle gearing is controlled by the stats in the “GearEmulation” section.

---<snipped remainder>---

-------------------------------------------------------------------------------------
-------------------------------------------------------------------------------------

As you might have guessed - even unpacking all of these won't produce set values without
also making calculations for each variable.

- I'm now convinced that the most accurate and complete info - and certainly all that the player
needs is contained in the in-game observations made in Raiders Vehicle Guide. (above)


- Malaria -
First - Always take your meds the moment you get an attack. Your attacks over
time will reduce in severity and frequency. The longest I've been attack free was
40 minutes about half way through the southern map. - Ignore them and pay the
price in increased frequency and severity, and reducing stamina which lowers your
sprint distance. - Note that any loss in stamina may not be recoverable.


Understanding Stamina

Your stamina at first allows a 12 pace sprint and then walk for 10 before you can
sprint for another 12. In most conditions that's enough for a dive to cover.

Over time your sprint distance will increase to 24 or more paces. - I believe that the
more you sprint the more quickly your stamina increases, and the longer you play
(over 30 hours or so) can extend sprint distance well above the 'average' 24.

============================================================


- All players and especially completionists need to know -

You can play well over half of the game without malaria ! - No cheats involved.

The number of possible malaria-free missions is a full 30 !

4 Buddy Rescues at the start, 6 Signal Tower missions and 3 Predecessor Tape at mid game,
8 Buddy Favor, 6 Signal Tower, and 3 Predecessor Tape in the second act. If you can hold off doing any Signal-Tower until your third break at mid game.

At a minimum average mission-time of 30 minutes start to finish, that's 15 hrs.

A more realistic average is over 40 minutes, but to keep 'round' numbers to
make it easier - at 40 per mission that's a full 20 hrs of malaria-free Game-Play.

That's not even counting the time spent collecting diamonds and clearing safe houses ! 8 )


- Details below.-


==============================================================


- Exploiting The Malaria Mechanic -


You can make a huge amount of progress in this game before you have to commit
to the main missions - and malaria.

There are points in the factions missions when you will have an infinite supply of
meds as long as you don't start another faction mission.

The first is just after you visit the church for the first time.

There are also points in the game when you simply have NO attacks.

Your first break from attacks is during the very first mission. - The 'Training Mission'

Once you've completed the assignment and have gone to the weapons shop and
talked to everyone at the bar you'll be better armed and can now go anywhere on
the map;

- And you won't have another attack until you visit the church. -

This is an opportunity to explore - scout, clear safe houses, hunt for diamonds,
Gold AKs and *Rescue Buddies*.

Without having to deal with any attacks at all:

There are 'Free Captured Buddy' missions on each map.
Except for the Crashed Plane - one of the locations below will be where you'll
start your first 'Training' mission, and that location is determined by which route
you choose to escape the town.

There are no rescues where you start off. - So there are three buddies to rescue
at the locations below plus one at the plane crash site.

- If you want to experience the rescue at your start site you'll have to restart
and escape the town by a different route.

FREE Them All Before Doing The Factions Missions In Each Map
to avoid the dreaded Game-ENDing 'Missing Captured Buddy Bug'


Captured / Injured Buddy and Start Locations

Map 1

Escape Pala from________Start At_________Mission____Faction____Agent

North West Gate --------Slaughter House-----Chicken Fights----UFLL------Voorhees
South West Gate -------'Chicken' Fights-----Slaughter House----APR-------Quiepo
North East Gate -----------Fresh Fish----------Lumber Yard------UFLL------Carbonell
South East Gate ---------Lumber Yard-----------Fresh Fish-------APR-------Purefoy

- Crashed Plane - Near the northern edge of the map, just west of the half way
mark about 200 yards south of the rail tracks in a small valley between mesas.
( Clearly marked by Green Diamonds in the - Maps - section below. )


Free Captured Buddies Map 2

Sediko
Bowaseko Brewing Co.


Other Buddy now included in BigTinz Redux Mod - ( By Request Only )
Snake Bite - The wrecked train, western desert. Replaces The Sediko buddy

=========================================================

- Thanks to Lasercar who not only found this hidden pure Gold nugget,
but also found a way using original coding by razor-fin to implement the "Other
Buddy" in the game !8 ) - (Details in the Credits)

- This New mission that was buried in the code is a cool gift to long time players of the game! -

Thanks so much for unlocking and implementing this very cool hidden bonus !

- Lasercars NEW Buddy mission - By request only in Redux Mod, - See Credits -
=============================================================

- Free them all before going to the church,

then they'll be waiting in Mike's Bar to give you assignments that will increase
your reputation..

==========================================================
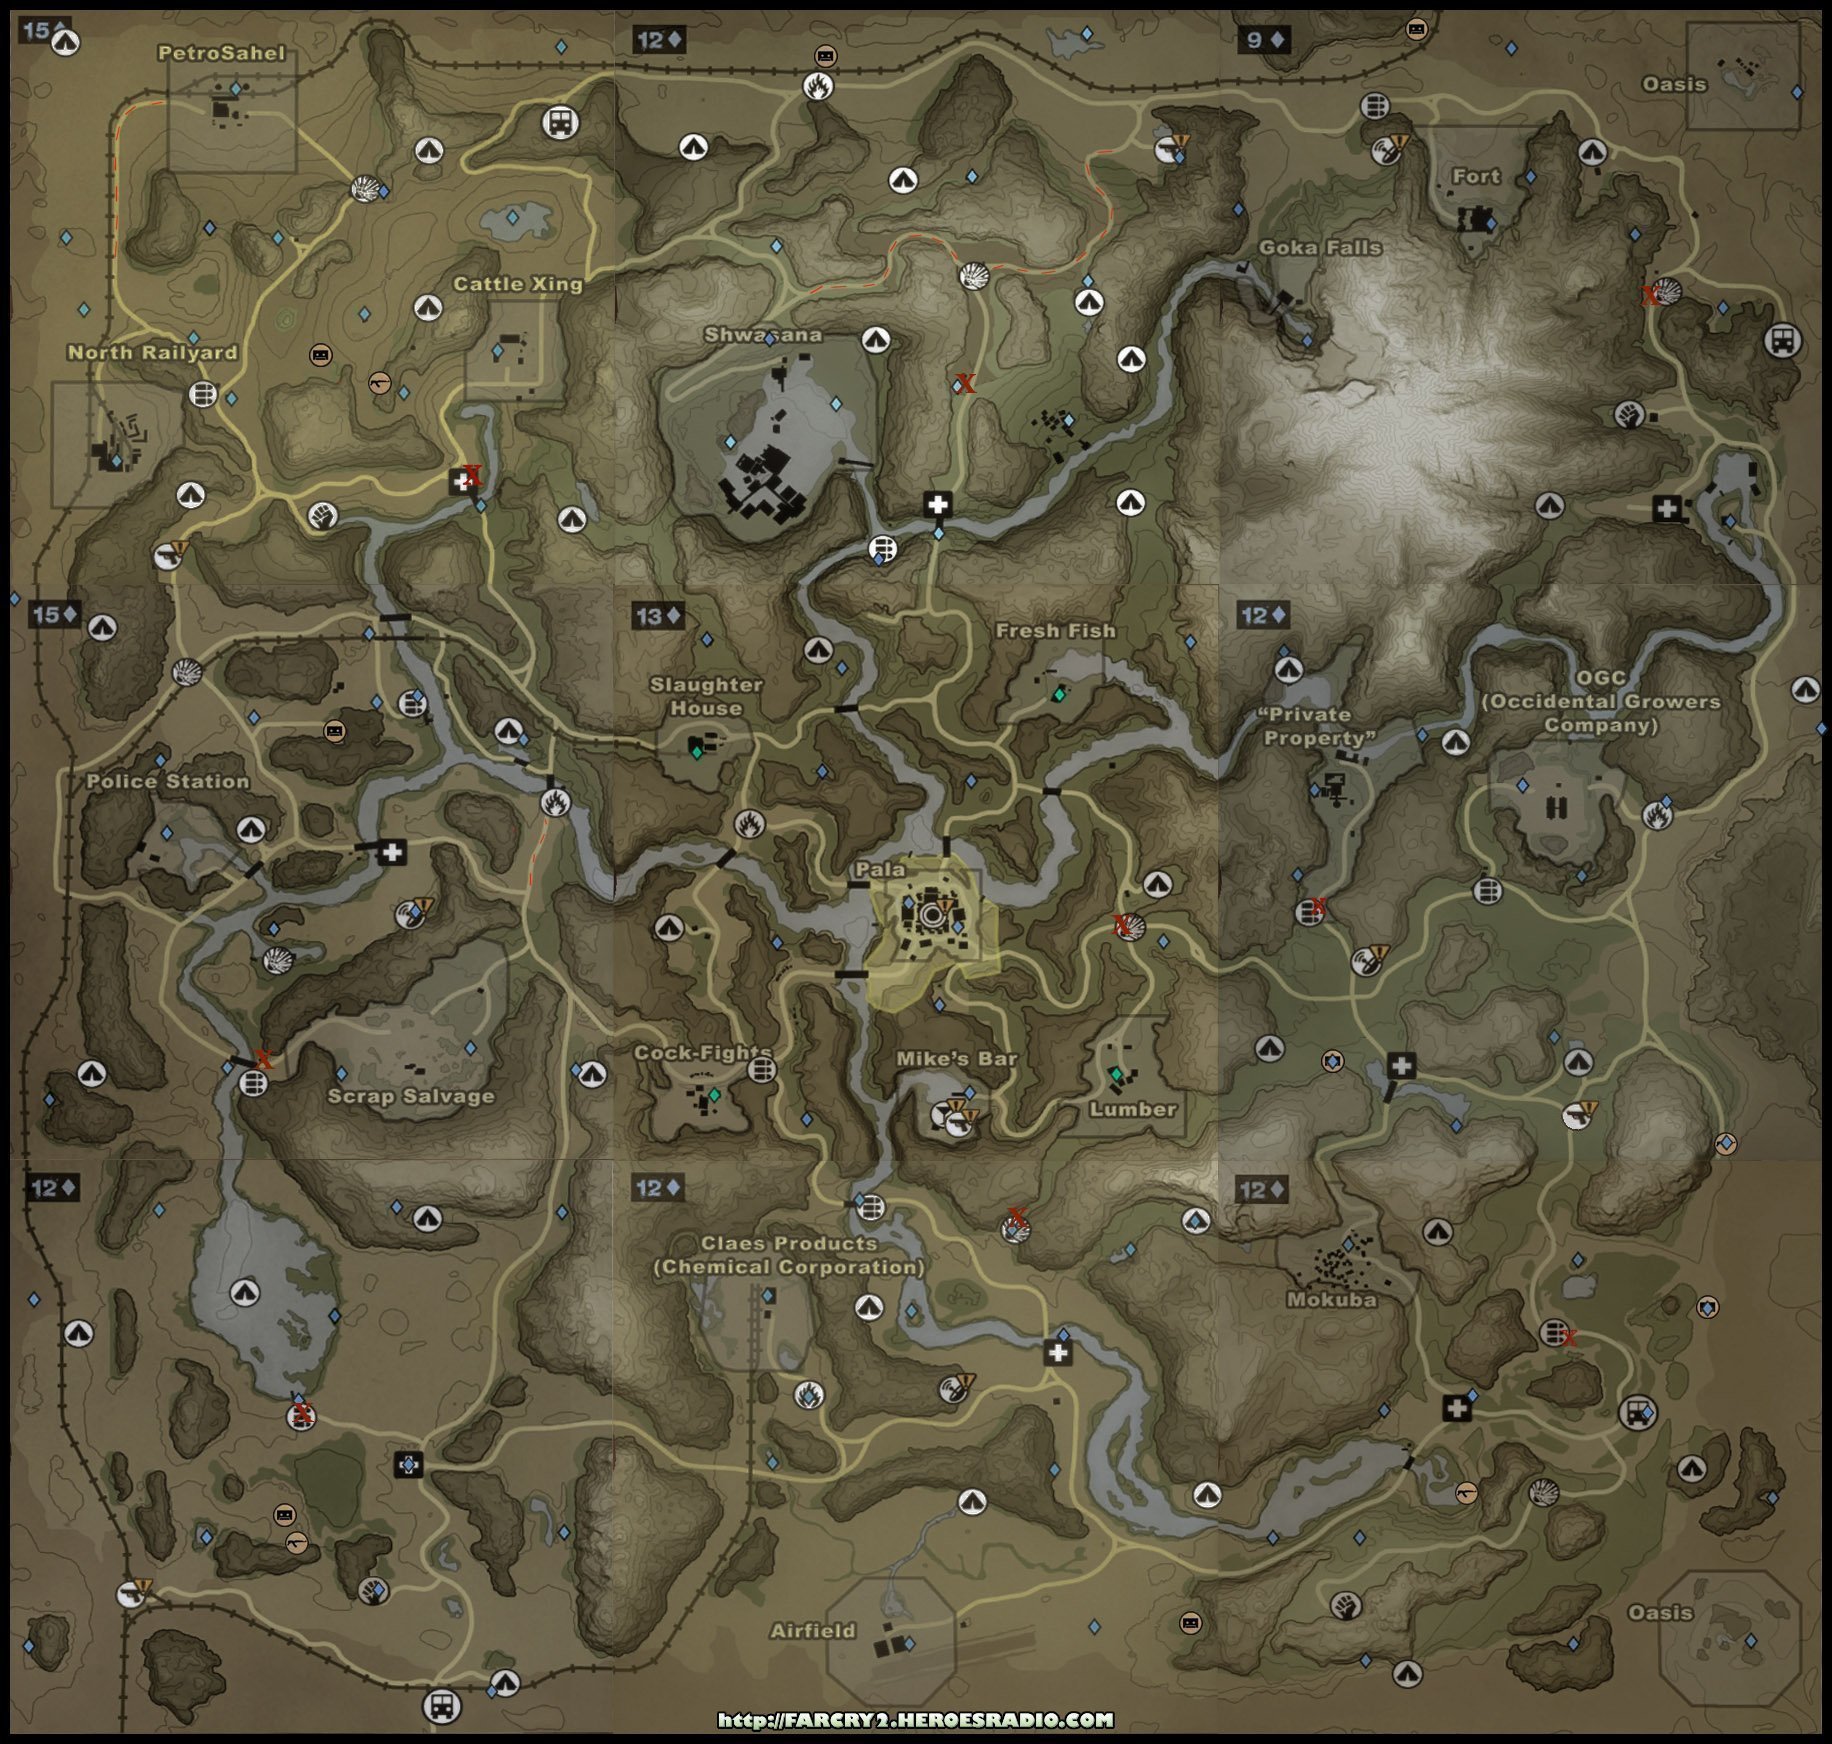
PLUS - The - MAPS - section (below) has the locations of all Diamonds, Gold AKs,
Free Captured Buddies, and just about everything else in the game - including Patrol
Routes, and the different vehicles used for each route.

- Essential for detailed route planning when you want to get as much done as possible
efficiently. Load them in any viewer prior to launch and pause the game and ALT+Enter
and Win Key (or 'Desk Top') to access your viewer. -
==========================================================


- Again -> You can make a huge amount of progress in this game before you have
to commit to the main missions - and malaria.

- I always spend a few days freeing buddies and getting everything I can from at
least half the map and collect enough to buy the new weapons as soon as they
become available in the shop.

- Remember your vacation from malaria attacks ends when you go to the church -

- BUT - at this point you'll have infinite meds and won't begin to run out until you
start the factions missions.

I spend this break doing all of the weapons shop missions and then all of the buddy
favor missions, clearing safe houses and collecting diamonds along the way.

- By doing all the 'Buddy Favor' Missions first you'll reach Level 1 Reputation even
before starting the first paid factions missions.

=====================================================


Your Second Break - comes after the sandstorm and the mission that follows.
You're free to go to the southern map, but as soon as you cross the N/S border
malaria will return.

You can complete remaining side missions in the N map malaria-free now or
save everything for your *Third* or *Fourth* malaria-free Run ::

=====================================================


Your Third Break - from malaria attacks happens in the first mission in the
southern map;

- Once you've protected the barge you'll have no malaria attacks until you go
to the doctor in town
.

Though you can't free any new buddies yet, you can spend this break collecting diamonds,
AKs, clearing safe houses and scouting checkpoints and bases which can help to prepare
for future conflicts.

Malaria will return after you've visited the Doctor - BUT - at this point you will have infinite
meds until you start your next Faction Mission.
- You'll be free to roam again after you've
arrived safely at Mikes Bar. - I use this break doing all of the Weapons Shop Missions while
freeing buddies and clearing safe houses. - Then, once I have the better firepower tackle the
remaining Buddy Favor Missions. and Radio Tower Missions.

You won't start to run out of meds until you begin the S.Map Faction Missions.


Your Fourth Break from attacks -
happens when you've completed the Bridge/Barge mission, depending on which missions
you chose. (I always save it for last). - It's at about 73% into the game.


Your Fifth Break - in malaria happens here:

after you escape the prison.

Details:

- Possible Spoilers -
Your vacation from attacks ends when you start this

Mission
https://steamcommunity.com/sharedfiles/filedetails/?id=2575250378
Location
https://steamcommunity.com/sharedfiles/filedetails/?id=2575250146

So I avoid the above mission until I complete all radio tower assignments,
often leaving those in the northern map unplayed just so I can do them all
better armed and malaria free.
_________________________________________________________


Dealing With Malaria


Normally in the beginning you will have an attack every 20 minutes.
Always wait until just after a malaria attack to engage in any conflict.

- I go to the mission site and scope things out while I'm waiting for the next attack to pass.
By following this one simple rule you will rarely become vulnerable at the wrong time.


- Weapons Jams -


Weapons Jams & Surviving on found weapons

Played through the game using ONLY found weapons. It required near constant
scavenging but I learned a lot about how to deal with degrading weapons.

I understand the doubts - "Why should I bother? I already have the shotgun and a
flamethrower, even the deadly and scoped crossbow GL."

Not saying that you should limit yourself to found weapons but pick up a powerful
one in the beginning (long before you can buy one) and use your others as backup.

I'm playing with Redux and have an advantage because enemies carry all weapons,
but even in Vanilla the SAW and PKM are commonly found.

I was a bit apprehensive when I embarked on the experiment but I quickly realized that
for years I'd been ignoring and stepping over completely serviceable and more accurate
and powerful weaponry that's been littered all over the map at every conflict.

Grab that SAW and use it to great advantage for your next conflict where you are quite
likely to find another. Found weapons are a boon - especially early in the game when
you don't have access to those in the shop.

With Redux the coveted AR is a common find, and apart from it's deadly scoped accuracy,
it's low recoil and great handling (maneuverability) it's the most reliable assault that can be
acquired early on. I've found one many times at the first safe house in the training mission,
and used found ARs all the way into the second map until I can buy a new one.

This is an easy and perfectly viable strategy to get a lead in the game. - You really have
nothing to lose by trying it out for yourself.

First keep in mind these important factors -

1 - When a weapon jams it's a little faster switching to an operable weapon than it is
clearing the jam. - Switch to another weapon first, then clear the jam when you've
secured your position.

2 - When you buy reliability for weapons those improvements affect all weapons of
that type, even found weapons. - So if your shop weapon fails in the field grab any
weapon type that you have already upgraded before choosing others.
( Thanks to BigTinz - creator of Redux MOD for this very helpful info! )

3 - Weapons start to degrade from the moment you pick them up, so when you've
cleared a hot zone and are searching for equipment only pick up that choice weapon
at the last when you've finished your search. The few extra minutes of reliability that
buys you will save you in future conflicts.

4 - When you swap for new found examine the find carefully and pick the cleanest
one before moving on.

5 - Found weapons will often jam on the first or second firing, so when you pick up
a found weapon always fire a few shots to get that first jam out of the way so it will
be less likely to happen at the wrong time. Note that any time a weapon jams twice
in a row it's time to swap for a fresh find.


Some weapons degrade much faster than others. - You can experiment to see which
lasts longer.- In my experience the weapons with simpler mechanisms like the flame
thrower and GL last the longest while the more complex high fire rate weapons like
the Uzi degrade quickly.

I was surprised to discover that if you keep swapping out with certain found weapons
at nearly every opportunity you will rarely experience jams. I've had the best luck with
the SPAS, GL, AR and SAW.

At the start I play with a found primary and special (AR and SAW) with a pistol as
reliable backup, then buy the PKM as soon as possible to replace the found SAW,
and the GL to replace the pistol.

Whatever found weapon you're using always carry a reliable backup as well.

No Malaria and AR 15 Right from the start

https://steamcommunity.com/groups/FarCry2Crew/discussions/4/2253433385443445797/


==============(2)==============
- - - -Planning through the game efficiently- - - -

- The good stuff and how to get it -
See the - M A P S - Section below for locations of everything in the game.

Once you're done with your malaria-free run (see above) and have been to the
church - do the weapons shop missions first so that you can acquire the proper
equipment as quickly as possible. As you go clear out any safe houses that are
on the way there and back.

==================================================================
Updated 12/04/22 :

Safe Houses

Aren't just to save the game or change time of day -

For the majority of the map it's usually easier to get to a safe house than to travel
to a weapons shop for fresh weapons ammo and health. - Even upgraded weapons
degrade quickly and you'll need to replace them about every 2 or 3 missions.

When you choose alternate missions suggested by your buddy on the phone, your
safe houses will be upgraded with health, ammo, gas, explosives and vehicles. Safe
houses are gradually transformed into a refuge of resources.

You can ignore your buddies call, but you'll lose the benefits of those upgrades and
end up working quite a bit harder to get through the game.

Thanks to Capitano Ano for posting the question that alerted me to this omission.
==================================================================

---- Update ---- 11/01/23

- Underground (Passports for Pills) Missions -


Originally posted by Banana Duck ඞ:
Damn, i completed 3 in north map which must mean
i missed one, i dont know how i missed it though because i done all Underground
missions which popped up. There isnt any reward for completing all Underground
missions though is there?

Thanks to your query I've finally sussed this one out. This issue has plagued many
players, especially those who don't want to miss anything in the game.

- I've been asked this a number of times before and was never able to provide any
more info than spending more time playing, which I knew to be correct but was
insufficient as to the reasons why, besides possibly that the designers wanted
players to take their time playing.

Every time I've rushed through the game and/or put off doing the missions when
they've first appeared I've missed out on completing them all in each map.

The longer you spend doing missions in the N. map the better chances of getting all
of the Underground missions. - Something like 20 to 25 hours.

You can shorten that time by always checking your Current Missions in your Journal
between each mission to see if an Underground mission is available instead of waiting
for your pills to run out. - Then do that mission before doing any others.

- The sooner you do it the sooner the next one will become available.

- I'm pretty sure the first time that happens is after completing your second Faction
Mission. Then a new one should appear every three or four Factions missions after that.

There are no rewards except for getting the pills, helping the locals and getting 100%+
in your Stats at the end of the game.

Sorry for the delay in responding, I had to scour my memory banks to get this one
confirmed. -

- Thanks to Banana Duck ඞ for the kick to the cranium, that knocked loose the log jam
of game quirks that had accumulated in my brain and all the clues finally fell into place.

Complete list of how to get 100% Plus! check The Perfection Guide in the last chapter.
=====================================================================


- More Money -


Between weapons shop missions ( or on the way back) the Signal Tower
missions are quick and pay well. I think 15-30 diamonds per mission.

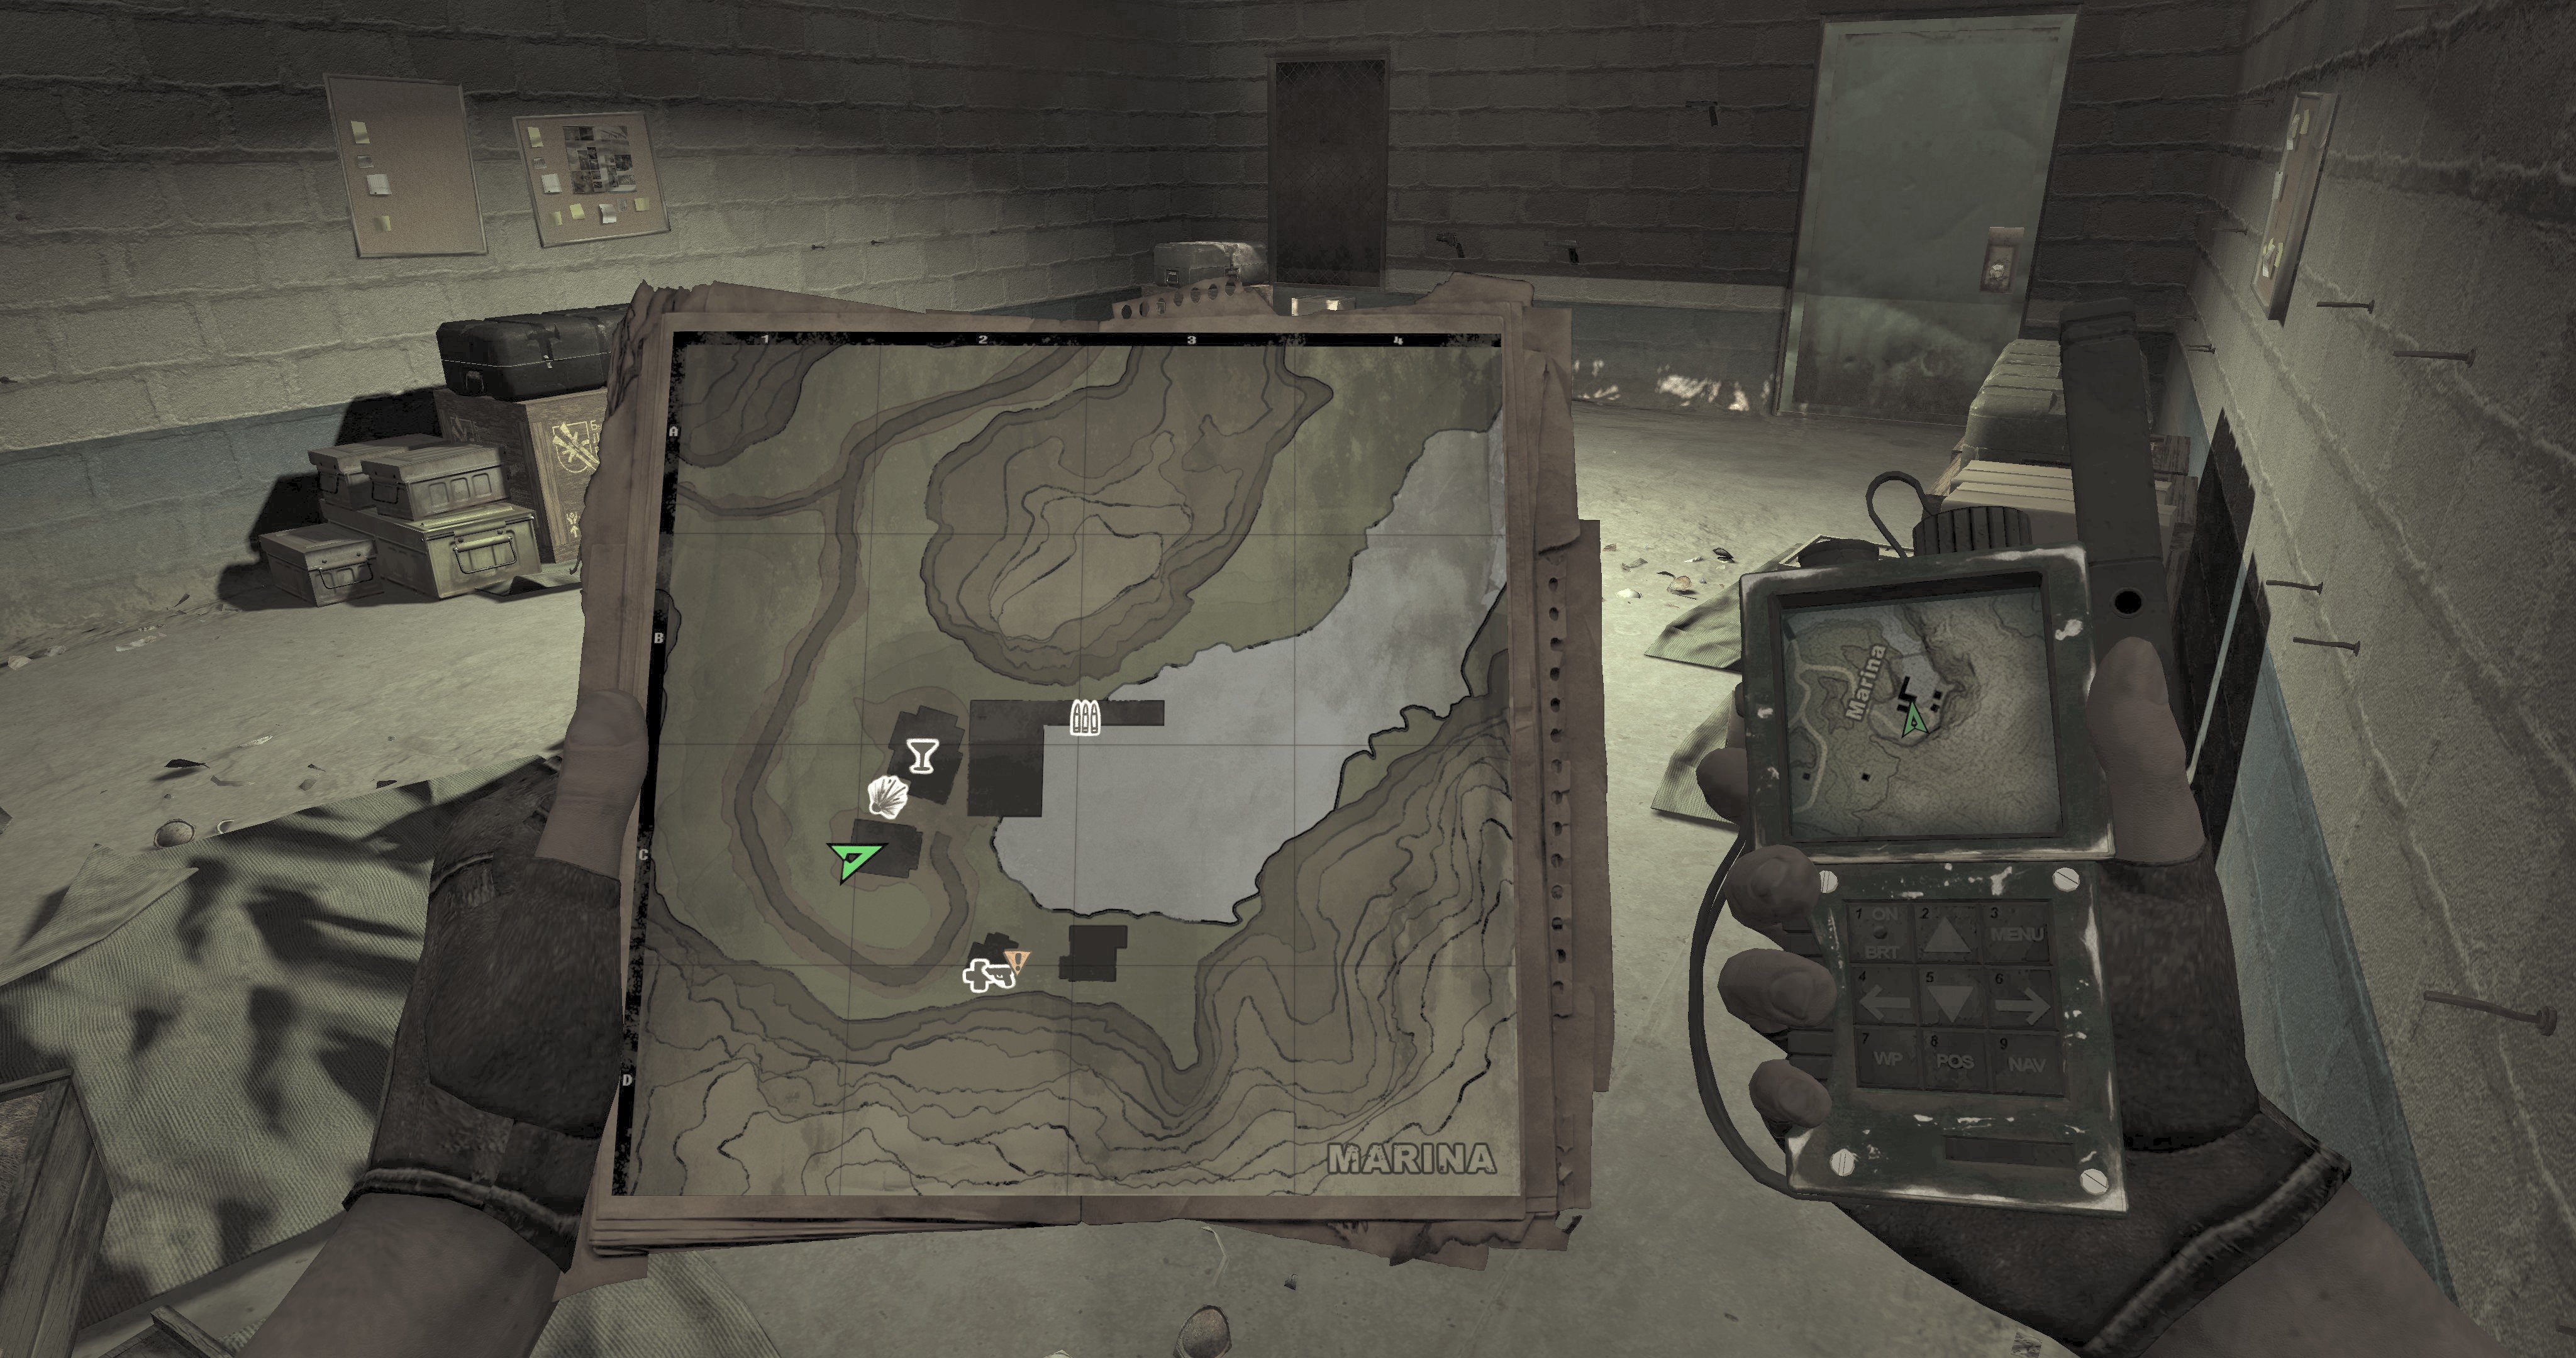
Keep a steady eye on your diamond detector when in vehicles, - on foot use your
map and GPS (has the blinking diamond detector) regularly.


------------------------------------------------------------------------------
UPDATE - ( 08/01/22 )
- Triggering Underground missions - before they're assigned to you

Thanks To BigTinz for this discovery 8 )
https://steamcommunity.com/app/19900/discussions/0/3455968575337164293/
-------------------------------------------------------------------------------


- As soon as you're outfitted and before you do any factions missions do all of
the Buddy Missions first
. This will give you a jump start by reaching level 1 rep
even before you begin the Factions Missions.
_______________________________________________________________

Contrary to what many believe you do NOT have to do any other missions between
'Buddy Favor' missions.

- To get a new buddy favor mission all you have to do is leave the area and return to
Mike's Bar. Just driving north as far as the mud puddle and returning will open up the
new missions.

The same holds true for the Predecessor Tapes missions. Normally you have to leave
the town and return twice to trigger a new Tape mission, but you don't have to perform
any other missions, just leave and return to the town twice.


Who's your next best buddy ? - Just got this confirmed today - (07/16/22)

Thanks very much to:

Originally posted by morshusprite:
Originally posted by thirdkeeper:
I'm pretty sure that is the way it works - although it could be determined by
the order in which you meet them. You could save the game and try it out..
Let us know the results ? : )

Just found out if your rescue buddy has the highest history then as soon as you start a faction mission they become your best buddy and your former best buddy becomes your rescue buddy. Good to know.

Source Thread
https://steamcommunity.com/app/19900/discussions/0/5710018482972532263/

________________________________________________________________


Avoid Buddy Bugs !

Free ALL Captured Buddies before the rescues are assigned to you, to avoid Missing
Captured Bugs at 27% 71-73% and 84%. (Locations on complete maps)

Don't kill more than 5 buddies or you may have anomalies or problems in the end game.
------------------------------------------------------------------------------------------

Buddy Missions

https://steamcommunity.com/groups/FarCry2Crew/discussions/4/2797250897491674911/


Even More on Buddies -

Thanks To UnKnOwN for the link

https://farcry.fandom.com/wiki/Buddies


- Mission Priorities -
================================================================

Timing Your Missions


- It's About Time -

I like a varied experience and having to adapt to whatever conditions that are presented
to me. It keeps it interesting - so I play straight through the day-night cycles and never use
safe houses for sleeping to change the time of day, but it can be useful for planning travel
and missions to know what time it is in the game. - You can check your watch in the safe
houses but what if you want to know the time when in the field?

You've loaded up a save game to find it's black as pitch and you just want to execute a
pre-dawn attack and are wondering how long you'll have to wait. - The days are long in
Far Cry 2. - A full 24 hr day night cycle in game-hours takes 4 hours to play through in
real-time.

You can estimate by the angle of the sun and moon whether it's prior to - or after noon
or midnight, and by about how much.

The sky from eastern horizon to western divided into 12 segments, each represents 1 hr
of game time, (or 10 minutes of real time) 6 game-hours from dawn till noon takes
1 hour in real time

Ex:
The sun rises at 6AM and sets at 6 PM - when it's half-way between the horizon and
directly over head (noon) it's 9 am, and that takes 1/2 hr in real-time.

When it's half-way from noon to sunset it's 3 pm. Ergo, for the moon it's 9 pm and 3 am.

(Shadow length and direction are also useful indicators, - If the shadow length is the
same as the height of the object casting the shadow it's either 9 or 3 respectively)

The dome method is more exacting for making accurate estimates. - Not hard to
envision 6 equal pie segments from noon to each horizon.


Time scale is 6X.
10 minutes real time = 1 hour game time. 1 hour real-time = 6 hours game-time.

Some of my most amazing experiences have happened at night - Stealth is easier,
fire fights much more dramatic. - It can be a great advantage for travel, especially
on the rivers. - Once you've played through a few full days / nights you get a feel
for accurately estimating the time.

================================================================


Setting Mission Priorities


>-> This is the way I've prioritized missions to get a hassle (malaria) free and successful
>-> start, and earning the highest reputation as early as possible.

>-> ( Jackal tapes and Predecessor Missions can be done at any time and have little to no
>-> affect on game play or the outcome, so I've omitted them from this list.

>-> Resistance / Passports for Meds are also omitted because they can only be done when
>-> you've run out )

>-> Be sure to take the alternate missions suggested by your buddies call to increase your
>-> rep. and earn health, ammo and vehicle upgrades to your safe houses.

>-> Avoid Buddy Bugs ! - Rescue ALL Buddies before going to the factions in each map
>-> to avoid Missing Rescue Bugs at 27% and 84%. (Locations on complete maps)

>-> Remember that if you want to get all 'Buddy Favor' missions one buddy has to die in
>-> each map for the game to replace them. - The new buddies will appear at Mike's Bar.

>-> Don't kill more than 5 buddies or you may have anomalies or problems in the end game.


1 - Before going to the church - (NO Malaria)
Free all captured buddies and the Plane Crash buddy,. Scout every checkpoint, clear
every safe house and collect every diamond in my path along the way.

2 - After the church - (Infinite Meds)
All weapons shop missions

3 - All buddy 'Favors' - As noted above (and for those just skimming these articles):

Contrary to what many believe you do NOT have to do any other missions between
buddy 'Favor' missions. To get a new buddy favor mission all you have to do is leave
the area and return to Mike's Bar. Just driving north as far as the mud puddle and
returning will open up the new missions.

Sometimes a buddy will disappear from Mikes Bar and not return.
To prevent that from happening I do one mission for each in the order in which I freed them,
then repeat in the same order. Once I was saving Paul for last but I'd neglected him too long,
and he disappeared.

I tested this by reloading an earlier save and including each buddy in the same order, and
Paul remained. - Note that if you want to get all buddy missions - 1 buddy will have to die
in each map for the game to replace them with new buddies.

4 - All Faction missions. -(Meds run out and have to be replenished)

** When you've completed the last faction mission after the sandstorm you'll have your
Second Break from malaria and can finish up any unfinished business before
heading South, or save them for your Third or Fourth break.**

- As soon as you cross the N/S borderline your attacks return, - but not for long:

5 - Routine for the southern map is the required first faction mission. - (No Malaria)
Protect the barge to the town docks. - Until you visit the Doctor you'll have no attacks
and can scout, clear safe houses, collect diamonds, Gold AK and useful intel.

- Once you reach Mikes Bar you'll start getting attacks again but now you'll have infinite
meds and can use this break to complete the following:

6 - Do at least 3 weapons shop missions to acquire the AR and the SAW, scouting clearing
and collecting along the way,

7 - Free all buddies - scouting clearing etc.

8 - Perform all buddy 'Favors' (same system as above)

9 - All factions missions - (meds run out and have to be replenished)

**Be aware that if there are any side missions you want to get done - do them first,
before you get the - Assassinate Leader and his Second at the Old Mine,
(API) or Sepoko,(UFLL)
mission, about 81 to 87% into the game.

That mission ends all side missions and triggers a chain of short assignments which
lead you directly to the point of no return,.**

I avoid the above mission until I complete all radio tower assignments, and I often leave
those in the northern map unplayed just so I can return better armed and do them all
malaria free.

10 - If you have no plans of returning after games end do all the remaining Weapons Shop missions. - (Once you've reached the prison - NO more Malaria until your next faction mission.
(About 73% to 81%) - See the details in the Malaria Chapter (above)

_________________________________________________________________

[[ Addendum ]] - I haven't confirmed this, but once I ignored the weapons shop missions
for too long and the guy at the weapons shop disappeared. - I think it was about
75 to 80% in the game.
_________________________________________________________________


11 - Signal Tower missions. These are all assassination missions and I really enjoy
ghosting them.

12 - Meet your new partner at the prison.


I like to come back after games end so leave the Signal Tower missions, keep a hard save
at the entrance to the prison and reload after finishing the game to come back well
outfitted and play my own missions at my leisure.

If you like returning and want more to do after the end game - Leave safe houses and
Signal Tower missions undone in the northern map and what ever is your preference in
the southern. - In one of my last playthroughs I left all diamond cases uncollected also.


================================================================
- Saved Games For Every Mission -
================================================================


- List of All Missions -


==================================================================
[EDIT] - Here are saved games for every mission. Some lost in a tragic
renaming snafu which I will repair when I have the time to create them. - Ill probably have
to start all over so that there's consistency in the game flow.

Packs 1 through 4 should be ok but one of the later packs is just duplicated files'

In the mean time posting one of my favorite saved games right here:

Malaria-Free_After_Bridge-Barge_Weapons_Shop - (at about 71%)
https://drive.google.com/file/d/1xSfeX7MPhHpzOeNl7wqZia5-IDryjM3z/view?usp=sharing.

at least 3 weapons shop missions plus 11 radio tower side missions remaining and the
predecessor tapes missions to do in both maps. No rescue Buddy and just my main buddy
left alive. - A Pistol Only run but have enough diamonds to get you well outfitted.

===================================================================[E]
Available for DL

In 7 chronologically recorded Mission-Packs - and played in the order outlined above.

Malaria-Free, Buddie Rescues, Weapons Shop, Buddy Favor and Factions Missions
clearly labeled in each file name.

Originally compiled for players who's progress was ended because of bugged saves.

With this collection players and testers can easily hop to their mission(s) of choice,
- even create their own Mission 'Play-List' 8 )

https://steamcommunity.com/groups/FarCry2Crew/discussions/3/4768721849831362357/


================================================================
- Weapons Selections - Comparisons -
The most fundamental weapon in the game is the machete.

- It's not just for busting through boards. - Since it can be equipped and utilized quickly
when your're desperate and close enough it's not only your last line of defense - it's
your first line of offense.

When timed right against unsuspecting enemies a checkpoint can be cleared in a few
seconds with little to no damage.

- You can thank the Jackal for the gift ! -


This is the price list that I have available (my old loadout) Descriptions follow.

( Remember that your shots are always more accurate from a crouched position )


A few Important Examples


- - - - - - - - - - - - - - - - - - - - - - - - - - - - - - - - - - - - - - - - - - - - - - - - - - -
Fortunes Edition Players

Double Barrel - A devastating blast close range, occasionally enemies will
be unaffected by the first shot if aim isn't dead on target. Wastes ammo.
Constant reloads in a cluster of enemies is deadly. Not versatile or practical.

Silenced Shotgun - Accurate and reliable, great handling, not as 'silent' as we'd like.
Not a silent kill in close proximity to other ai.

Crossbow - Light, scoped, accurate explosive delivery system. Great handling.
- - - - - - - - - - - - - - - - - - - - - - - - - - - - - - - - - - - - - - - - - - - - - - - - - - - -

Shotguns - I prefer the SPAS 12 but the Homeland is fine starting out,
and it's cheaper. Draw backs are less ammo in the mag -slower fire rate and reloads,
but more accurate / effective at longer range.


Dart Rifle - Extremely accurate and silenced making it more versatile than
other snipers.

- I abandoned snipers and other specials in favor of carrying the SAW or PKM.
Having a heavy hitting alternate to your primary can dramatically improve your
survival rate.

Silenced Makarov 6 P9 pistol - Coupled with the use of any scoped weapon or the
map-scope can be used as a sniper. - An oddity in the games mechanics allows you
to remain perfectly motionless even while changing weapons, so you can aim for a
head shot with a scope, then while remaining scoped and without moving - quickly
switch to the silenced Makarov and fire. With patience and timing many bases can
be stealthily cleared with the Makarov alone.

- Drawbacks
Secondary weapons slot.
Can't carry any pistol and also have access to IEDs or the town clearing M-79 GL.

Some weapons that become available about 4% into the game :

Ineffective machine gun and pistols:

[EDIT] 03/02/22 - Pistols in this game can be very effective - even for long range
shots if used discriminantly. - Head shots count, but because of fire rate and
limited magazine your accuracy and timing is essential for surviving with pistol only.

Listed by effectiveness, lowest first - the P9, Star and Eagle which has the best
stopping power. [E]

- MP5 silenced - Great handling, not very accurate at range and under-powered.
- MAC10 and Uzi spray like crazy which is devastating at very close range but
number of bullet hits decreases dramatically with distance. - Not efficient.


Incidentally, the MAC 10 and the PKM cost the same, but compared to the others the
PKM is deadly accurate at range, packs a heavy punch and with upgrades carries
100 in the magazine + 900 with extended ammo pouch. (Easy Mode)

- Has a hefty kick, so unless your target is close range fire in short bursts and aim
lower for longer shots.


IEDs - Extremely valuable for certain missions where enemies instantly spawn into
your location from out of nowhere. The Prince's gold is in an underground well.
As soon as you descend and plant explosives a host of enemies appear above all
around the site. - Plant IEDs first before descending at a range of roughly 10 to 20
paces from the well. - When you make the call in the well immediately switch to
your IEDs and hit the trigger.- Many times I've ascended into silence and a bunch
of very dead enemies.

Later Weapons Availability :

Assault Rifles - AR 16 is scoped, powerful with a good ammo capacity and fire rate.
(and it's cheap) Unfortunately it's not available in the shop until the southern map.

- SAW Much like the PKM, 400 ammo but with better handling. Also becomes available
later in the southern map.

You can get these last two early if you're willing to scavenge them.
- See "Weapons Jams" above.

Launchers -

M-79 GL - The one shot wonder can saturate a large area very quickly with a 3.5
second reload time. Excellent handling and with experience great accuracy at range.
- Best launcher in the arsenal.

MGL 140 - This 8 in the mag hog takes some getting used to. Great at extreme range,
accurate aiming decreases at short range. Handling is poor, reloads take much longer.
It also occupies your primary weapons slot, so no shotguns or other primaries can be
carried with it.

Rocket launcher - Fun in the first shot - a pain for the rest. Usually alerts all ai in
the area to your exact location. - Painfully slow reloads.

Mortar - Covers a wide area, aiming is tricky, set up is slow; could do the job more
quickly and precisely with the M79 GL which is also much more versatile.


Exploiting the versatility of the AR

Why carry two weapons when one can serve as both? - AND - free up an extra slot
to carry some heavy weaponry - The AR can do the job provided you run at hi-res
and can see your target.

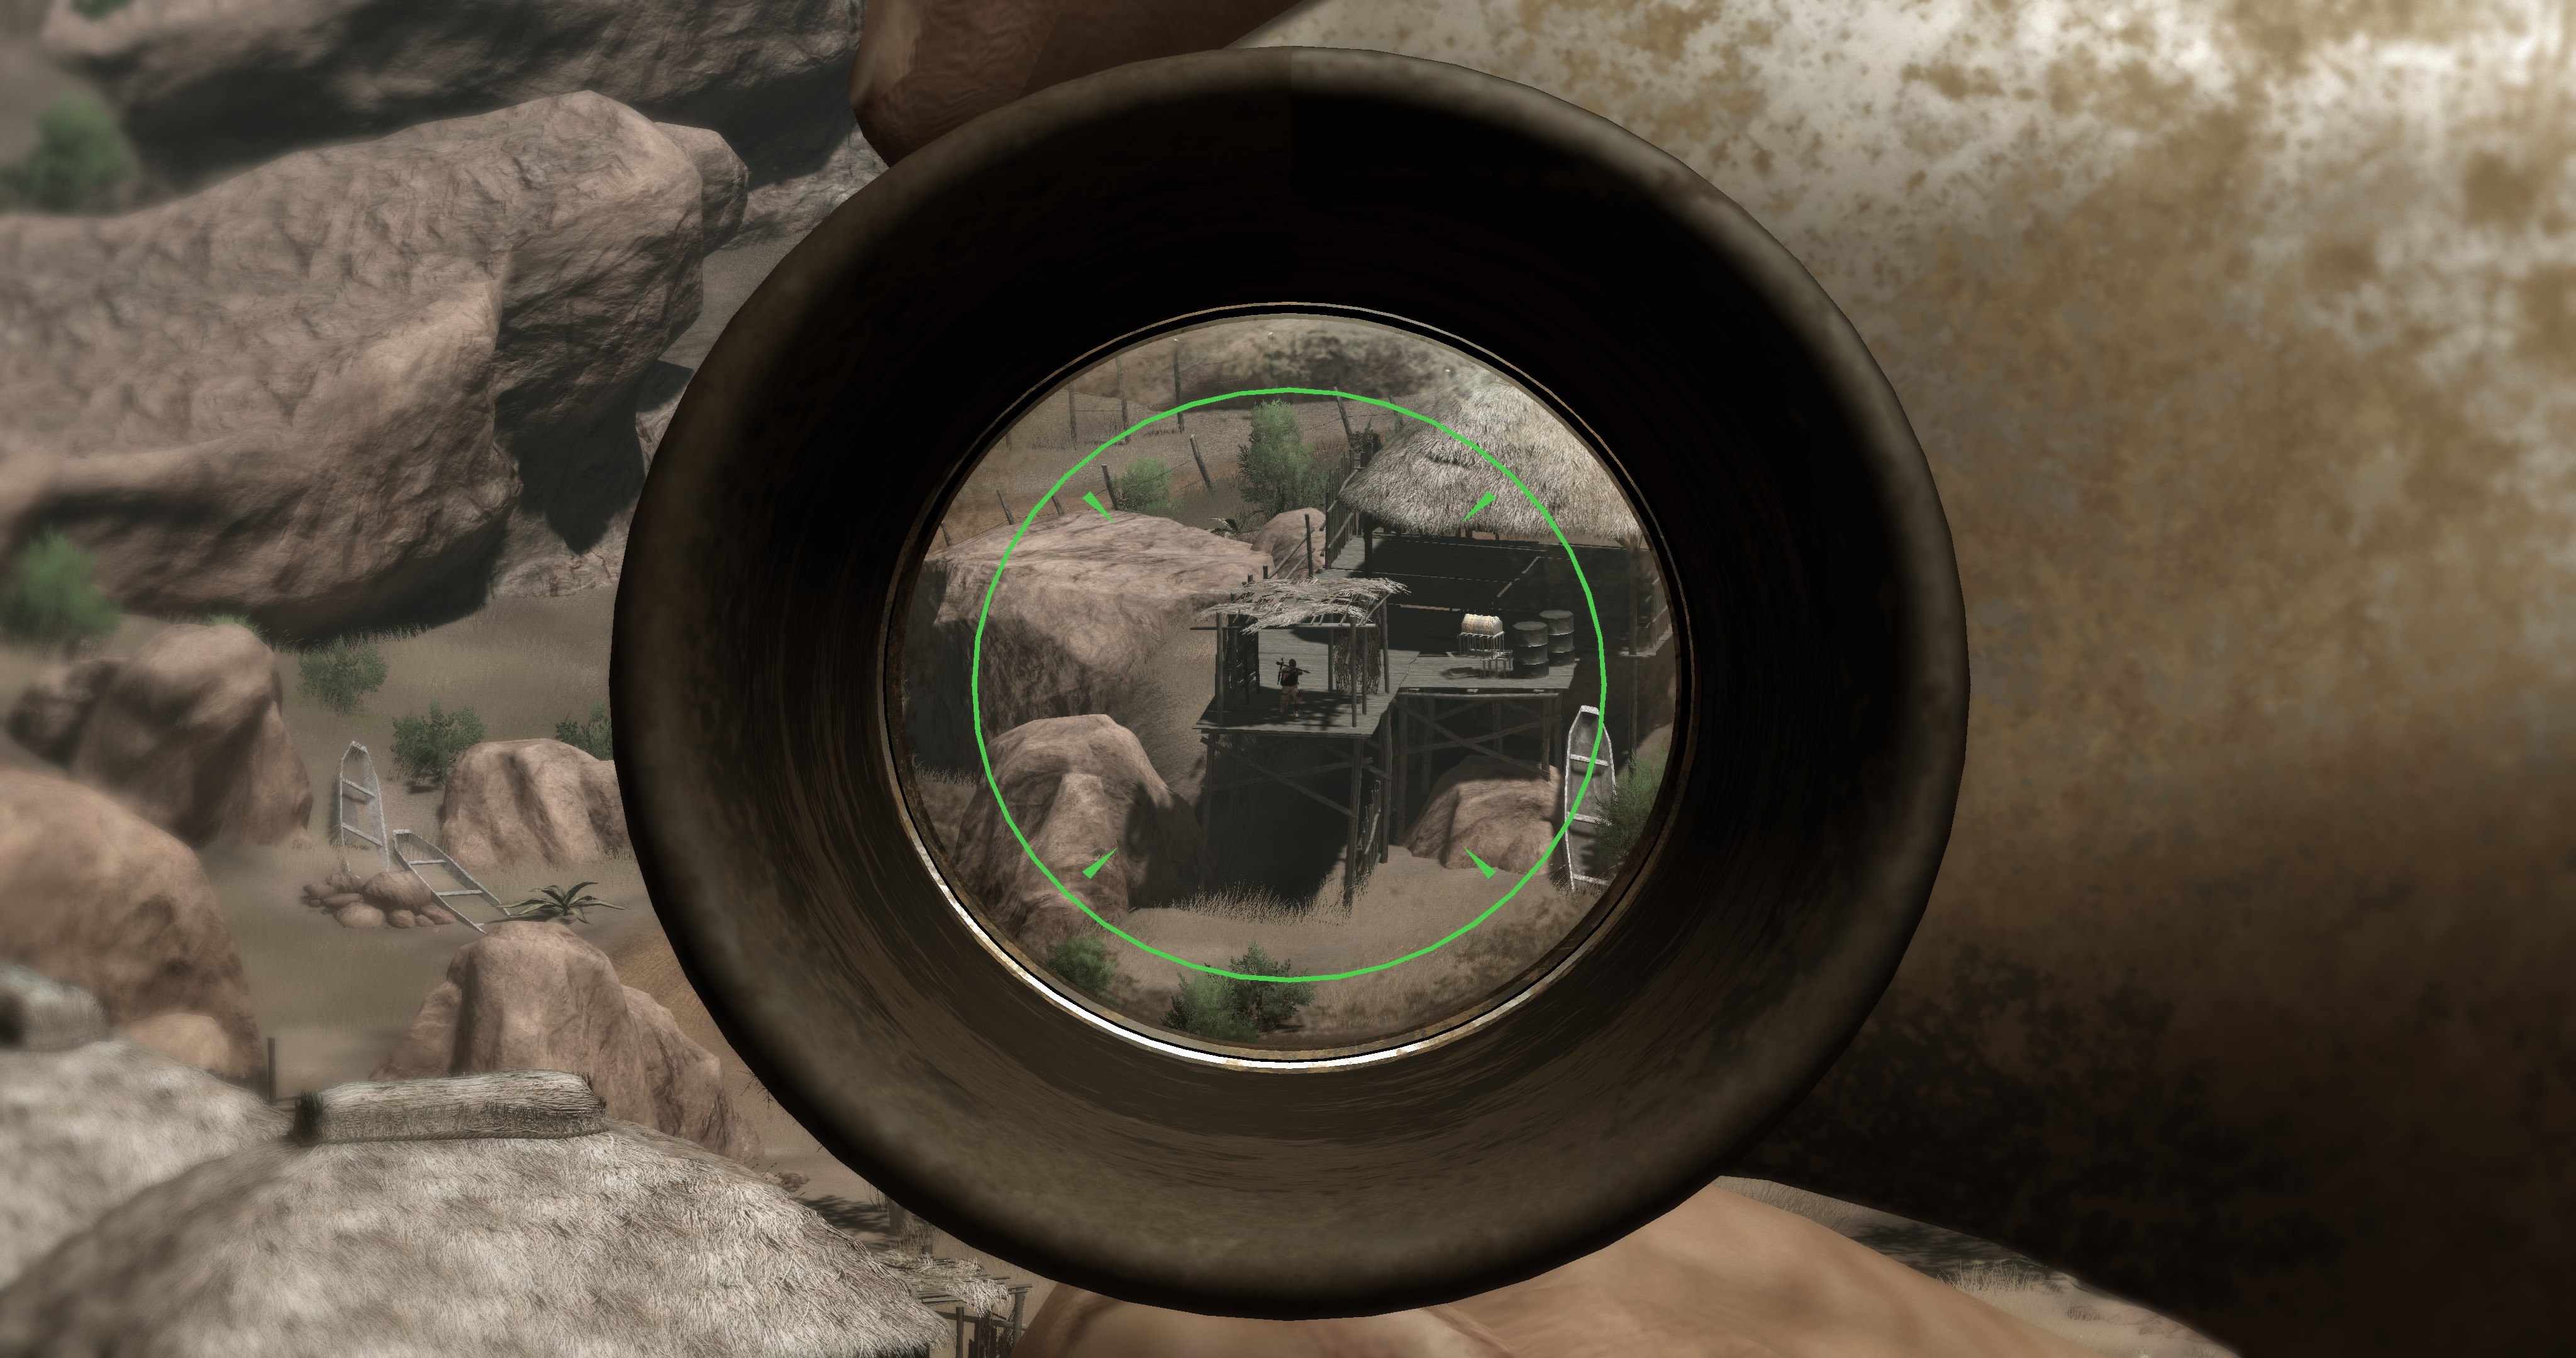
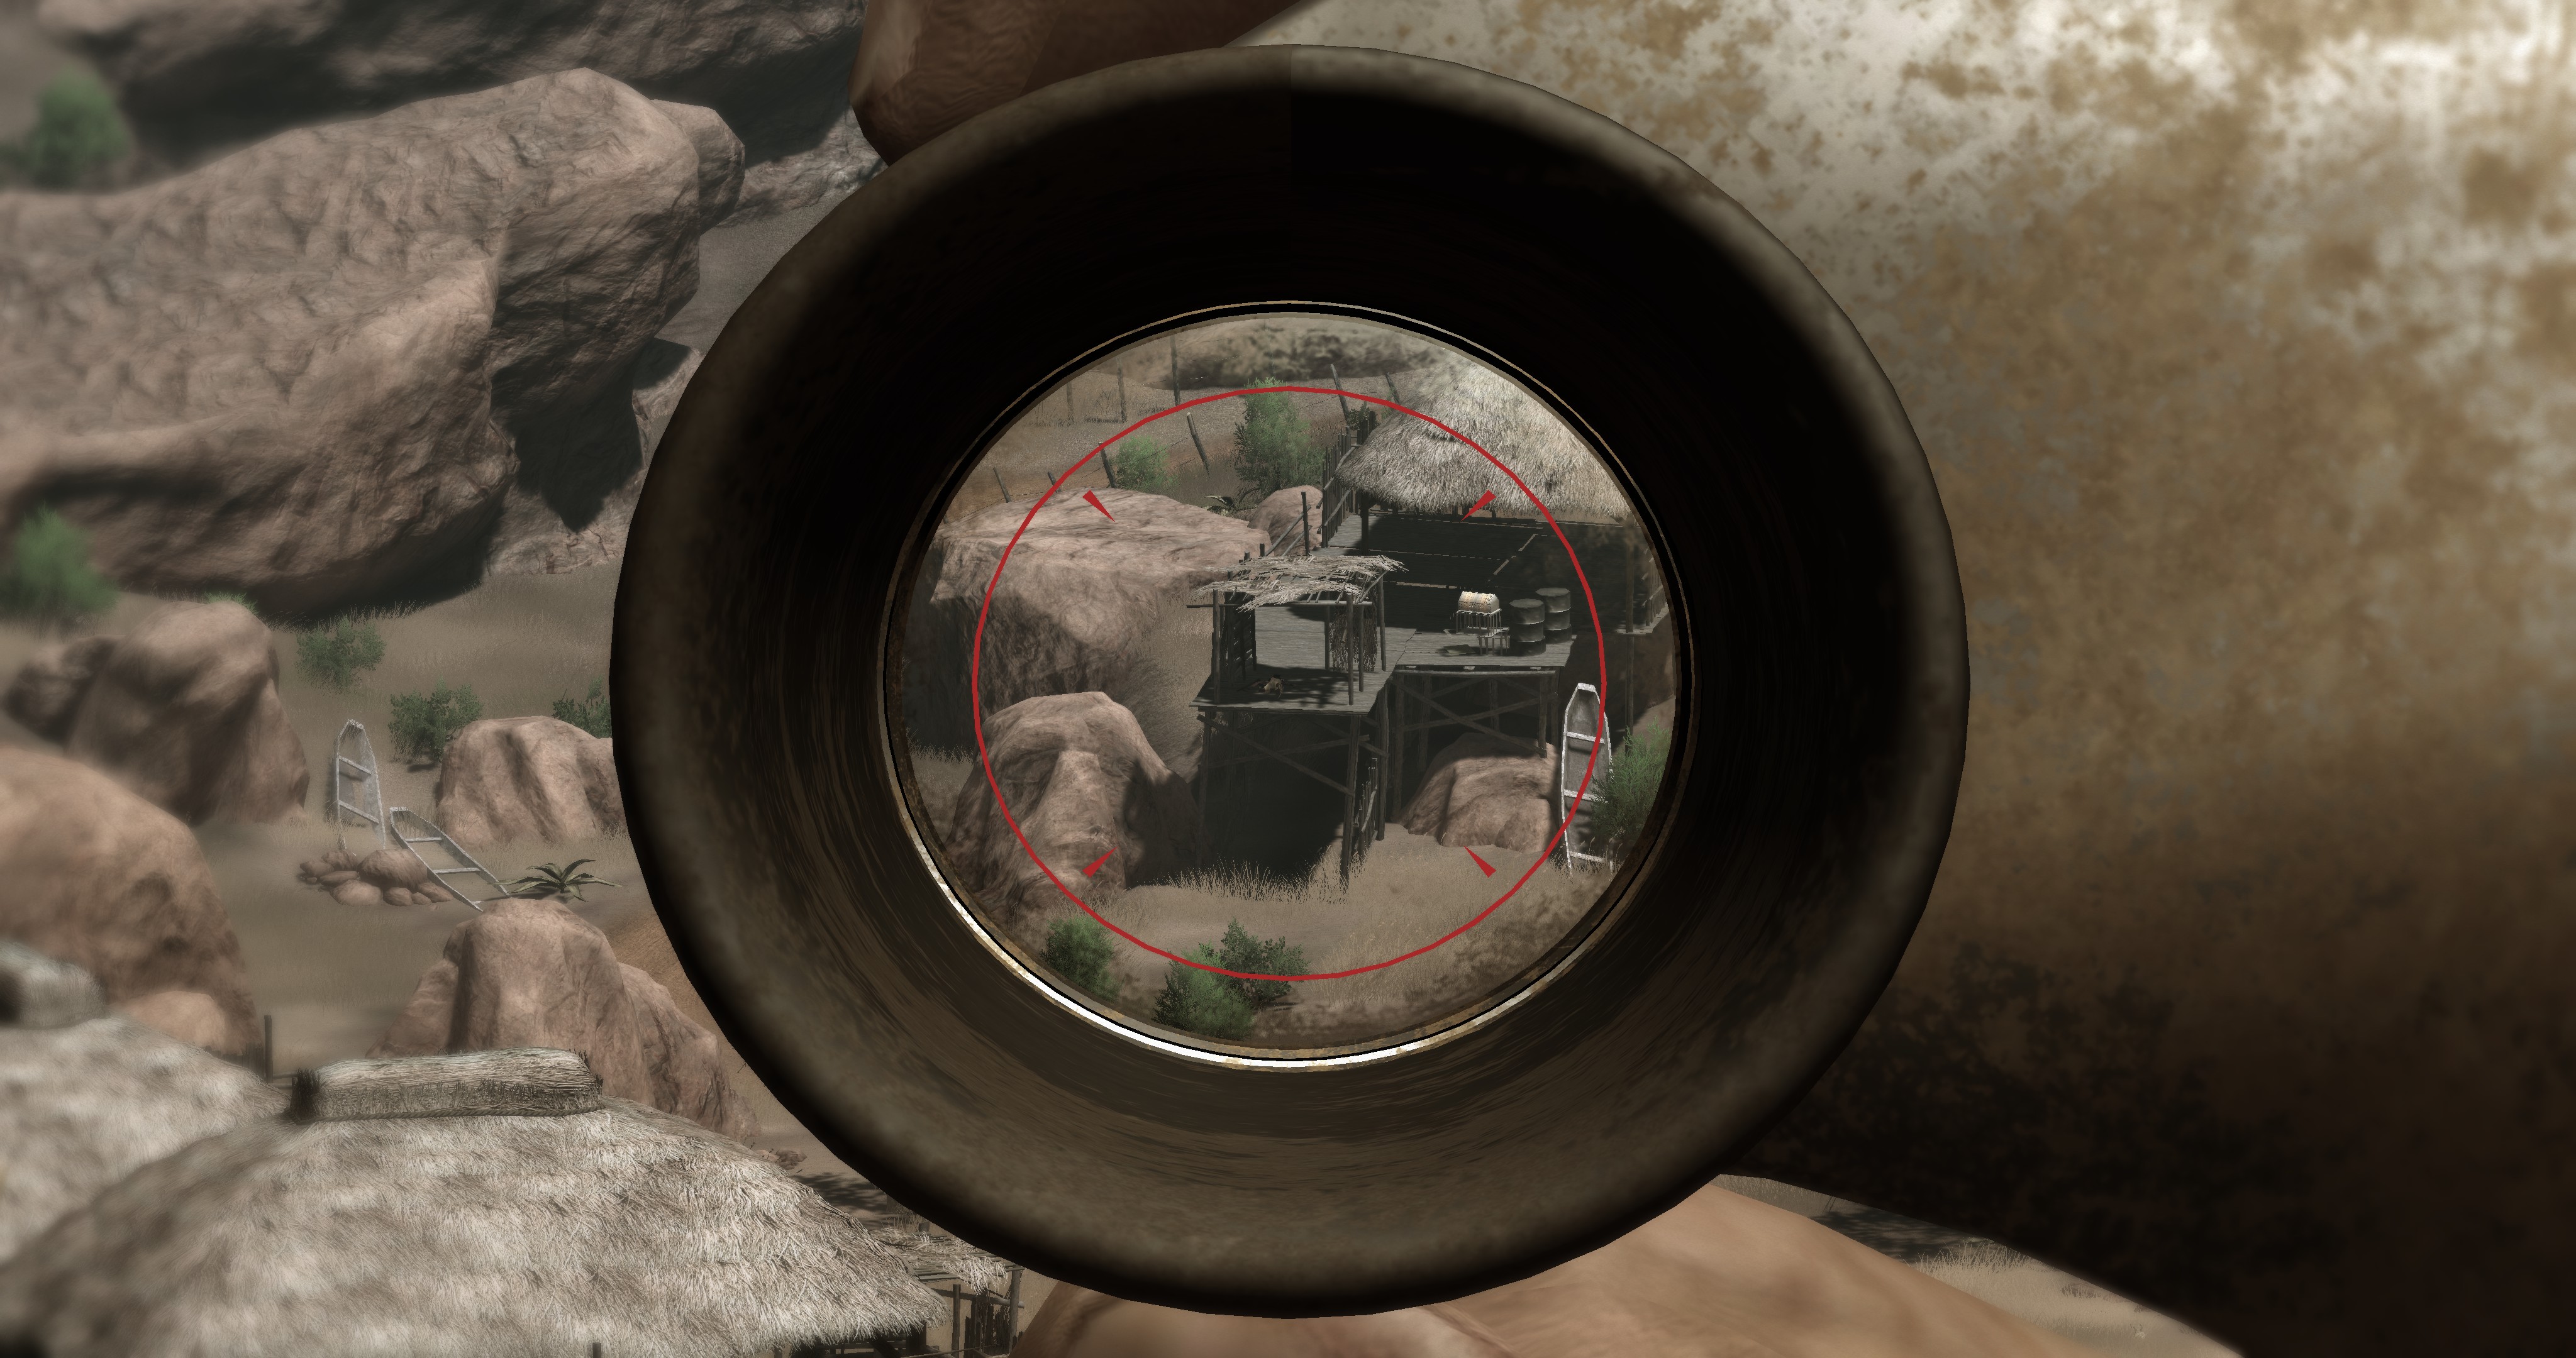
Here's a prime example - Using the AR at Extreme Range -


Lining Up


Sighting


Man Down - in just two very short bursts


I haven't bothered with sniper rifles in ages, the AR is just fine in varied ranges and the
extra slot provides for the heavy fire power of the PKM and SAW.


- After playing for years I've ended up with what I believe is the ideal loadout -

Map 1

Primary
Found AR - the only full auto to have near pinpoint accuracy at range. - Substitutes
for sniper. Great handling. Low recoil.

Secondary
GL79 - Once you understand the arc and velocity you can drop a hot surprise party
just about any where, even at great distance on moving targets. 3 1/2 second load
time is the best of the launchers. (swap out with IEDs only when needed)

Special
PKM - For its superior penetrating power and ammo capacity. The ideal mid to
close range stopper. Helps to conserve ammo for the longer range AR.

Map 2

Only difference is I get the AR and SAW as soon as possible to replace my
found AR and PKM.


- These are just my notes - Best Complete Weapons Guide is Here :

Thanks very much to the author - Neonetik - for the work:
https://steamcommunity.com/sharedfiles/filedetails/?id=534865078


- Maintaining Your Backup Armory -
=================================★=================================

Visit the weapons shop regularly to restock your weapons crates with fresh equipment
so that you'll always have it at the ready when you need it.

When a primary weapon fails in the field - in 90% of the map It's usually easier to get
to the nearest safe house than travel to the shop.

Once you use a fresh weapon from a safe house make it routine to set your next
mission to replenish your weapons crates from the shop. - Most weapons last for
three missions before failing; you'll find yourself on a 'replenish run' every three
missions at least.

It's not a bad ratio - after three consecutive missions I'm usually ready for a break
in the action and head back to the shop, and it gives me time to consider my next
objectives.

=================================★=================================


==============(3)==============
- - - - Turning Up ( & Tuning Up ) The Heat - - - -

- Part 2 - Conflict Strategies - Beating AI
========================================================

Stats for players health and ammo capacities in all difficulty modes for Vanilla and Redux Mod
Originally posted by Boggalog:
Right, I've done it! A bit of data entry reminds me of old ♥♥♥♥♥♥ jobs ;) The main difference for Redux is buffing the ammo upgrades.

Base Game
Max Health – Casual (1800), Experienced (1400), Hardcore (1075), Infamous (825)
Max syrettes - Casual (6+1), Experienced (5+1), Hardcore (4+1), Infamous (3+1)

Max Ammo
Pistols – Casual (40+40), Experienced (24+16), Hardcore (24+8), Infamous (16+8)
SMGs – Casual (150+150), Experienced (90+60), Hardcore (90+30), Infamous (60+30)
Shotguns – Casual (66+60), Experienced (42+24), Hardcore (42+12), Infamous (30+12)
Assault Rifles – Casual (150+150), Experienced (90+60), Hardcore (90+30), Infamous (60+30)
LMGs – Casual (400+500), Experienced (200+200), Hardcore (200+100), Infamous (100+100)
Snipers - Casual (45+40), Experienced (25+20), Hardcore (25+10), Infamous (15+10)
Dart rifle - Casual (9+10), Experienced (4+5), Hardcore (3+4), Infamous (2+3)
Flare Gun - Casual (17+6), Experienced (11+6), Hardcore (8+3), Infamous (5+3)
Flamethrower – Casual (500+500), Experienced (300+200), Hardcore (300+100), Infamous (200+100)
Rocket launchers/M79/IEDs/Mortar - Casual (4+3), Experienced (2+2), Hardcore (2+1), Infamous (1+1)
Explosive crossbow – Casual (7), Experienced (4), Hardcore (3), Infamous (2)
MGL140 - Casual (16+8), Experienced (8+8), Hardcore (8+4), Infamous (4+4)
Grenades/molotovs - Casual (+3), Experienced (+2), Hardcore (+1), Infamous (+1)


Redux
Max Health – Casual (1800), Experienced (1400), Hardcore (1075), Infamous (825)
Max syrettes - Casual (6+1+1), Experienced (5+1+1), Hardcore (4+1+1), Infamous (3+1+1)

Max Ammo
Pistols – Casual (40+40), Experienced (24+24), Hardcore (24+24), Infamous (16+24)
SMGs – Casual (150+150), Experienced (90+120), Hardcore (90+90), Infamous (60+90)
Shotguns – Casual (66+60), Experienced (42+32), Hardcore (42+32), Infamous (30+30)
Assault Rifles – Casual (150+150), Experienced (90+120), Hardcore (90+90), Infamous (60+90)
LMGs – Casual (400+300), Experienced (200+200), Hardcore (200+100), Infamous (100+100)
Snipers - Casual (45+50), Experienced (25+40), Hardcore (25+40), Infamous (15+30)
Dart rifle - Casual (5+15), Experienced (5+10), Hardcore (5+10), Infamous (5+10)
Flare Gun - Casual (17+6), Experienced (11+6), Hardcore (8+2), Infamous (5+2)
Flamethrower – Casual (500+500), Experienced (300+200), Hardcore (300+200), Infamous (200+200)
Rocket launchers - Casual (4+5), Experienced (2+4), Hardcore (2+4), Infamous (1+4)
M79 - Casual (4+3), Experienced (2+3), Hardcore (2+3), Infamous (1+3)
IEDs - Casual (4+3), Experienced (2+2), Hardcore (2+2), Infamous (1+2)
Mortar - Casual (4+9), Experienced (2+7), Hardcore (2+6), Infamous (1+6)
Explosive crossbow – Casual (7+3), Experienced (4+3), Hardcore (3+3), Infamous (2+3)
MGL140 - Casual (16+8), Experienced (8+8), Hardcore (8+4), Infamous (4+4)
Grenades - Casual (+3), Experienced (+2), Hardcore (+2), Infamous (+2)
Molotovs - Casual (+4), Experienced (+3), Hardcore (+3), Infamous (+2)

Original Thread Player stats in Vanilla and Redux Thanks to Boggalog for the work!


Preperation and Assault


Thanks to Azami
for the inspiration, and a pot of strong coffee that fueled these answers:


Originally posted by Azami:
I picked up this game because of how raw it actually is, and so far it's
actually really really fun.

I do have a few questions though.

Is the camo suit really that good? I tried stealth for a bit, but I really
just couldn't get into the groove of it,


You're dead on the money with these questions, - I'm already impressed!


Stealth


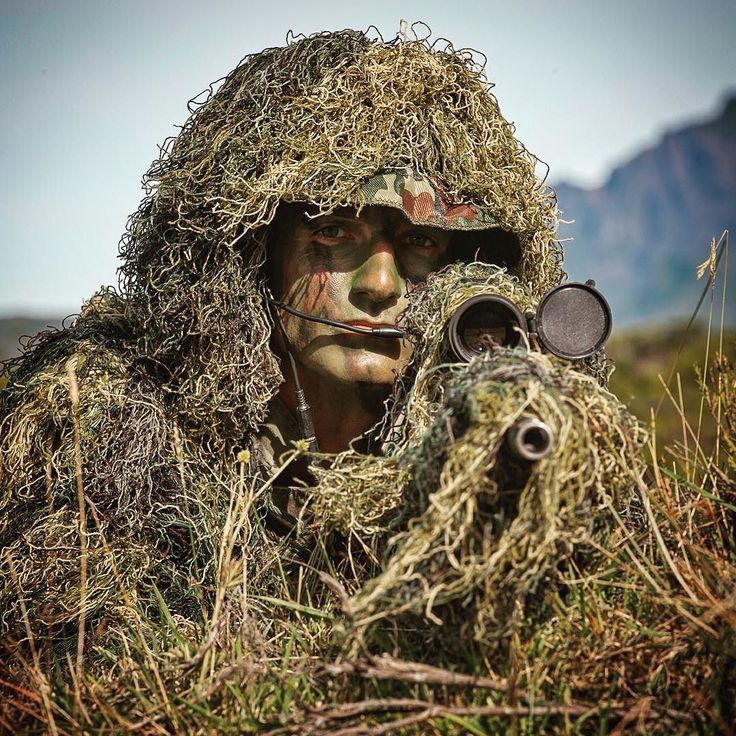
The camo has been proven to be very effective especially crouched in cover and
deep shadow. - Even alerted ai can walk right past while searching for you.

In some heavily populated / patrolled areas I've traveled the majority in a near
constant crouch, only standing for a second to get a better look around.

The camo can save your azz and make all of your engagements more effective.

But - don't take my word for it, here's not just the best guide on stealth I've ever
seen, but one of the best of any guides I've ever seen.

Thanks so much to Hara for allowing me to feature it here.
https://steamcommunity.com/sharedfiles/filedetails/?id=181803593


Originally posted by Azami:
and as a result I just run loud weapons. Am I handicapping myself or
is open firefighting a viable strategy?

It's certainly viable, but that approach opens you up to taking a lot of
unnecessary damage.

You can play it any way you like, but the more seasoned and practical approach
- the one that will save you health and ammo - is to take out at least one or two
before any are alerted to your presence. How you decide to go about that approach
is what the game is all about.


Take The Right Precautions

Always start any engagement with adequate resources.

Unless you've had a recent malaria attack (within the last 10 - 15 minutes)
Always wait for your next attack to pass before engaging.

Know when to heal
It takes a long time to heal when your health gets into the critical range;
In this sim half health equals no health.


Always Scout


Try to locate an elevated spot where you can oversee the entire complex, (or slowly circle
at a distance) and use your Map-scope to ID resources. The info will show on your map
and can be invaluable later on when you need supplies.


Note the combustibles and their proximity to targets
Barrels and round gas canisters will explode and the tall gas tanks will act like rockets
flying all over the place setting fires, setting off other tanks and ammo piles, and taking
out multiple targets in their path.

Grenades are powerful but when coupled with vehicles create a much larger lethal radius


Note the possible choke-points and bailouts

There's several situations where the responders will have to come through a single
doorway to get to you and you have at least one back window you can use if things
get too hot.

Goka Falls is the perfect example, but there are similar areas in the open where the
same tactics can be employed.


Note all patrols

If any come close to your target area you'll have to deal with them sooner or later.
The patrols with the shorter routes are worth taking out, and as far away from
your target as possible, but the - Longer routes will respawn. -

Remember that for some demolition missions you can lob one grenade from a
distance and get the job done.


Before you take action

Far Cry 2 on PC is very generous with saves, any time, any where. - I always save
before entering the arena and after a successful conflict.

- I strongly advise that if you die at any point don't let your buddy save you. Instead,
reload and approach things a little differently.

As a general rule - I approach low keeping in cover and shadows, and keep my
distance until I've figured out what looks like a good angle of approach. Lots of
cover where I can line up a bunch of AI before alerting them with fire.

- Remember that success is always about positioning and timing. -


- Always reload at every opportunity.

- Always heal before your health hits the half way mark.


=================================★=================================
- Taking Action -
=================================★=================================


- The Approach -


On the perimeter

I go after the roamers first and try to get them when they are well away from others
with either a machete or silenced weapon. Knowing that they've been eliminated I
won't have to be too concerned about them closing in when I'm engaging the others.


Once breached

The Stealth Approach
I go after snipers first if possible, sometimes just by sneaking up the tower and using
a machete. It's proven successful a number of times especially if you have any cover
up there. Some nearby are usually alerted but if you can stay hidden they eventually
wander back to their routine and that's when they're most vulnerable by sniping or by
machete attack from the ground.

- Gaining a tower can give the player a strong advantage to locate and nullify multiple
targets quickly.


Assault

It's very important to know where the other players are located so that you can
quickly access not only your next targets but your next succession of targets; Their
distances, where they're facing, - if they'll have to navigate around obstacles to get
you in line of sight, if they'll be able to charge right toward you.

When undetected you are initiating conflict with unsurpressed fire always try to position
yourself to get at least two in direct line with your sights to be more effective, and keep
firing until those first targets are down or until you are fired on from another quarter.


When the heat gets hot


Once alerted take out your closest open unprotected targets first. Range has a lot to do
with damage, closer targets will damage you more and your fire will damage them more.

Those attacking from cover will fire shorter bursts while those in the open will pour it
on to protect themselves.

Locate your nearest cover and the closest secondaries. It's always more effective to
work from cover and to continually relocate forcing the opposition to adjust to your
new position.

- Never let them flank you - continually flank them.

- In open areas that means more than a few side-steps. - It's more like a 10 meter
sprinting dive for cover and a right angle turn for another sprint and dive. (At least).

You should never get into a position of little cover or allow yourself to be flanked.
By leading them you can get them to follow and they'll eventually line up in your
sights for you. - A controlled retreat is a way to take control.

- Make them work for it.


Situational Awareness

__________________________________________________________
I know that many will ignore it but in good conscience I have to make the suggestion
to turn the music off. - The audio cues are helpful - you get warnings when trouble is
near, but it's essentially a cheat mode that unbalances the game. - The experience
should be honing the senses but the early warnings just facilitate careless play.

Directional sound is crucial to survival in this game. - At least a 5.1 surround system
or good directional headphones are strongly recommended.
___________________________________________________________

Listen for "Reloading" to acquire a vulnerable target, "Cover me" to acquire your
next probable threat direction.

In the complex heat of combat recognize opportunities that you can take advantage
of and the moments for decisive action.

Remember that your machete downs instantly. When caught reloading and weapons
fail you can take someone out in less than a second if you're close enough.


When you think it's all over

It's probably not. - Nice and quiet and time to search, but there are likely at least
one only wounded and just waiting for you to come close enough for an easy kill.

Keep low and ease around corners with caution until you're sure the job is done.


All of the above is noteworthy but always remember this:

No matter how you study and plan things will nearly always go differently than
you'd imagined. This game will often surprise you in completely unexpected ways,
so be aware that you will often have to adapt your tactics to the fluid circumstances.
You will need to be just as fluid in your play style.


===============================================================

- More on tactics follow in the next chapter -

My experience playing Redux Infamous with Pistol Only

Full post here:
https://steamcommunity.com/groups/FarCry2Crew/discussions/7/3425563679848108170/

-> The important stuff is below <-
=================================★=================================


- Detailed Tactics -


- Playing Redux Infamous with unsilenced pistol -

- Testing in the South Map - Game-Play and Impressions -


- A summary (of sorts) -

I can't brag about my successes. Redux does so much to finely balance the game
that all modes are a bit easier.

Just removing the ai sponginess making your shots really count, and coupled with
improved player movement makes all your engagements much more fluid and
natural feeling - PLUS - improved climbing ability opens up far more vantage points
for both scouting and attacks to take advantage of. - I sincerely doubt that I would
have been able to accomplish this trial with so few deaths and so many glowing
successes in Vanilla.

Don't misread what I'm saying; Redux Infamous Pistol Only is a rough tension filled
ride, but from playing through multiple times on infamous with a full loadout I'd
anticipated a much more difficult experience. Still, even after playing through multiple
times with great success - at the start of every mission I experience a strong
undercurrent of excitement tinged with a sense of apprehension and dread - but
here's the situation as best as I understand it:

Limited to pistol only rebalances the action requiring greater attention and focus
on the key elements of conflict; - positioning, timing, the element of surprise,
accuracy and evasive actions.

- All are equally important, but what gives the greatest advantage in every conflict
is the element of surprise, Whoever spots the other first and gets off the first shot
has the greatest advantage at the start, and positioning is what determines how
effective those first shots will be in determining the outcome.

Boiled down to it's most basic elements it's always about creating the greatest
opportunity to deal the most damage while taking the least.

This is my approach to every encounter -

Keep low and go in quiet - on foot.

Find a spot with adequate cover as close to the ai as possible

Watch and wait - ID the locations and movements of all ai.


Look for the ideal opportunity:

When at least two targets are in your sights or very close together, and most
have their backs to you, preferably walking away, and others will have to
maneuver to get a bead on your position.

Once alerted take out closest targets first, the most dangerous like snipers take
precedent, After that any in the open are fair game, but it's best to lose them as
quickly as possible.

Withdraw and relocate undetected with the knowledge that the remainder will
be converging on your last known location providing the opportunity for another
surprise attack from the flank or the rear.


By alerting ai to your location and then relocating you can create a target rich
environment by concentrating the ai at or near the site of your last location. Then
you have to ID ai positioning again and look for your next moment when you will
again have the advantage of targets in your sites and the element of surprise.


A small building at the edge of a hot zone can be ideal for limiting their approaches.
I often reveal myself around one corner then duck back behind it. They'll have to go
around to get to you and can only come at you from one or two sides. - Sometimes
both.

When you see someone approaching from the left and another a bit behind headed
to the right always go for the closest guy on the left first. Run to the left and meet
him as quickly as possible, then reverse course to take out the other one. If you wait
or go to meet the slow guy first you allow the closer one too much time to get behind
you. - Sure, seems obvious but how many times have you been firing on some distant
target when you get hit from off sides?

- Uh-huh.. Me too ; )

Some have asked; 'Why would you put yourself through that?'.

Perfectly reasonable, and that's exactly what I was asking myself when I began this
'trial'. Well, the answer is that I want to know what's possible. Speculating doesn't
count for anything without thorough testing, and what are the actual risks? -

Disappointment? Wasting time and energy? - Failures are just as valuable as
successes in determining viability, and what do I have to gain? - I didn't have a clue
when I started, and I can only express what I actually did gain.

I'm often surprised at how greatly new experiences can alter ones perspective. This
experience has given me a new outlook on the game.

No need for me to outline the irrelevant details of settings or scenarios. No matter
the situation my experience was always the same -

- A heightened sense of awareness with senses more finely keened to both sound
and movement,

There's a great deal of added tension that grows the closer that I get to my targets,
and when I exit my vehicle to make my final approach the sense of impending doom
intensifies.-

It only begins to let up when I'm in position and sizing up the situation;
Then an odd quiet calm settles in and takes over like the cool grey light of a
windless overcast day, all of my focus on the threats, and things slowly start to
become clear, the patterns of movement and ai facings begin to map themselves
out enough that my initial target(s) become obvious.

At that moment everything changes. The grey and calm evaporates.

Now it's as if arc-lights are starkly illuminating and tracking all targets, and the
tension rushes back as I wait for just the right moment to initiate that critical
first shot.

Now that I've ID'd my primaries I'm trying to anticipate the directions of the
secondaries movements when alerted.

I never know how long I'll have to wait,but eventually I'll recognize that most if
not all seem to be at the greatest disadvantage.(Either close enough to
confidently take out quickly or far enough away to evade and out maneuver.)

That moment may present itself quickly or I may have to sweat it out for 10
minutes or more for targets to get to optimal positions, always keeping in mind
that these first shots must hit their marks. Misses can nullify all the advantages
gained by the preparation.

Committed to the engagement, 'trapped' and waiting; Finally, the decisive act, and
the world view abruptly and dramatically changes yet again - this time to a bright
technicolor, - I'm finally liberated from concealment and holding back fire. - My first
volley completed, I'm now free to disappear and relocate for my next.

- The rest plays out much the same. - Keeping to cover, eluding but keeping track
of ai, surprise attacks, luring them when it's convenient. One by one removed from
the equation, - and when I'm down to the last I'm always a bit surprised that I
survived;

Especially having played through so many times with much more powerful weaponry.
for example Shwasana, The Old Mine, Weelegol Village The Post Office -

The relief is huge, and the reward is completely satisfying..

By the time I'm heading back to my ride - usually with full health and ammo - and
realizing that I've cleared out another tough challenge with just the pistol - it feels
like I'm practically weightless, and the world glow for a moment is less formidable
and much more welcoming.

The trip back is often far more relaxing than the trip out. Going through stages of
decompression, and usually by the time I arrive I'm already charged up for the next
assignment.

(Died once in the South Map)

What I love about this is that this extreme situation makes all of your decisions and
actions have a far greater effect on your chances of success or failure.- It forces the
player to refine all aspects of engagements.

Now that I've played 7 runs (23/10/01) with UNsilenced pistol - much as I love certain
weapons - like the SPAS, AR, PKM and SAW - I doubt that I'll play any other way for
quite a while.

I highly recommend that anyone with substantial experience - understanding safe
navigation and the basic FC2 combat dynamics should give this a try. - I've explained
as best I can what there is to gain..

What have you got to lose ? ; )


The 'Flip' Side - Making The Game Harder?


- Everything above was an effort to make the game easier -

but some have complained that the game - even In vanilla infamous mode is still
"too easy".


Augmenting the existing difficulty settings to your liking


There's another way to increase difficulty besides changing the settings. You can
avoid doing some things that make it easier.

Here are a few suggestions you can consider trying to make the game more interesting
and more of a challenge.

- I strongly advise that you try one at a time first, then add or mix and match when
you've succeeded - or are at least confidant you're ready for more of a challenge.

- These are all things I've tried myself, (individually, and in concert) and sustained
throughout the game.
-------------------------------------------------------------------------------------


A couple of things I consider to be an excellent challenge and exercise.


- Travel and Transport -


- Walk everywhere -

I did this for a couple of years taking a boat ride occasionally and only at night
when it's safest. - Think it's stupid? Want to get through the game as quickly as
possible? Probably not a good idea for you. - But - What's the rush? - It is the
safest way to travel, and you become much more familiar with the character and
nuances of the landscape surrounding hot zones; - The scouting spots, approaches
and attack positions.


- Preserve your Vehicle -

Drive everywhere - Using the same vehicle for as long as possible. You will have to
take some round-about routes , especially in the southern map, and you'll have to
leave your ride in a safe place to clear some checkpoints on your routes but this
will actually help you in the long run. - It forced me to recognize the safest routes
for vehicles which I've used routinely ever since.

Most traveled including conflict approaches - White=Boat Red=Vehicle Green=Foot.
Some foot travel goes over mesas and are high pathways available in Redux mods.


===========================================================


The following are all excellent challenges that are fun and beneficial in expanding
knowledge and honing skills in all aspects of conflict and survival.


- Stealth -

It's well worth it to attempt to stealth every mission. - To not be seen and never have to
fire a single shot

Exposes holes in AI defenses. - If you just take time to observe AI movements and pick the
right moments to move you can accomplish many missions taking zero damage in just a few
minutes that otherwise would have taken much longer and incurred unnecessary damage
from alerted AI.

- The exercise will help you to refine your approaches, evasive and exit maneuvers even
when you go in hot with guns blazing.

- Buddy Favors -

Reputation? - Not needed at all, but I highly advise trying to stealth them all because
many present unique circumstances not available in other missions.

Don't think of discovery and having to fight your way out as a failure. I've had to do it
many many times, and dealing with being caught in a tight spot can hone your evasive
skills.

Just think back to when you may have made a wrong move.

I always save the game before entering the arena, and save again after a successful
conclusion. I advise all players to do the same, and never let your rescue buddy save
you. Instead, reload and try a different approach.

You will undoubtedly discover that what seems impossible can actually be very easy
with careful positioning and timing.

-------------------------------------------------------------------------------------


- Found Weapons -

Get yourself a reliable back up (or not) and use only found weapons. - Which means:


- No Weapons Shops -

You have to buy one in the beginning, but you can get through the game without them,
and you won't have a care for diamonds at all. - I still advise you to get the Camo suit
as soon as it's available.


- No Best Buddy (phone call) Missions -

Means no safe house upgrades, and the game progresses MUCH more quickly.


- No Safe Houses -

Your only resource for health and ammo is at the Weapons Shops, Factions HQ and
what you can find in the field.

Leave them uncleared to maintain a more threatening environment. - This also means
no sleeping but for the few unguarded safe houses. - Except for the first mission
requirement I've never slept in this game.


- No Diamonds -

You earn more than enough from the Paid Missions to get well outfitted. There's no need
to search for diamonds at all.


Yes, it's proven to be true. -

These are all things you don't need to get through the game.

Pick any one (or more in combination) for an enhanced challenge to game play. You can even
take on all at once, Just be aware that no Weapons Shops/using only found weapons requires
constant scavenging - but it also frees you up from diamond collecting.


- Reduce Your Fire Power -


- No Snipers - No Silenced Weapons

Sitting up on a hill picking off helpless AI is boring and skill-free. Very little danger
and no challenge at all. - I gave them up years ago in favor of alerting AI on my first
shot.

There are advantages to letting AI know your location - getting them to move in your
direction and then relocating to set them up for attacks from off sides,and repeating
the strategy. - Understanding their alert/search movements is very important for
predicting probable locations of your next threat / targets.

They often move like Knights on a chess board - making right angle turns in their progress.


Pistol Only


This is the last trick I've tried, and so far is my favorite and most enjoyable way of
playing. After going to Hard Core and playing for a while I noticed that I hadn't died
for quite a while so I stepped up to Infamous but eventually I noticed the same thing was
happening so I decided to try Un-silenced Pistol Only. (Still allowing grenades on vehicles
and the machete for close combat.)

You actually don't need any upgrades or any new weapons above a found pistol.

-----------------------------------------------------------------------------------------------------

- To those who view limited fire-power as deprivation -

I can only say that what you're most likely to gain can't be bought in any shop.

Knowledge, experience, confidence and a much broader awareness of what the game
actually offers. Is exponentially more beneficial than carrying the most powerful weaponry..


In conclusion -

You can learn a lot, improve skills and expand the adventure with just a little experimentation.

Fools Gold is everywhere on the surface, the most valuable finds are just a bit deeper ; )

- Don't be afraid to Dig ! -


Special Thanks to m4custom1 for the initial inspiration :
https://steamcommunity.com/groups/FarCry2Crew/discussions/0/3115906960351291277/


- Current Stats -

<------------For the last 7 playthroughs this has been my loadout - Rep Level 4------------>

In my 7th Pistol Only run, Testing a mash up of R+R + Scubrah's Mod for the first time
- Only picked up the Star at the very beginning.


If you pick up a primary or special or even use a mounted gun it appears on your
list as "favorite " even if you never fire it.

- I use the mouse wheel to cycle through weapons, normally 4,
now it's just a quick toggle for pistol or machete.

Entering the armory can be weird - I just stop in for a fresh pistol and occasionally
grenades, and I don't bother getting weapons cases. I refresh at the weapons shop
between each mission and never experience gun jams. - At Mike's Bar, South Map:

- The only other weapon I bought was the Flare Gun because you have to buy
a weapon to complete the training mission, and the first Star I picked up lasted
through three Safe Houses, four Buddy Rescues and one Weapons Shop.
Not a single jam in 3 1/2hrs of game play. You'll notice that I didn't even bother
getting the P9.

- Also collected 105 diamonds along the way; More than enough for the new Star,
Camo and upgrades.

Another hidden perk is that I've gotten pretty creative with grenade tossing now that I'm
without the GL. - It was my near constant secondary for.. holy crap - 14 yrs !

For any wondering - the answer is Yes, I sniped the rocket guy and the mortar
guy from the Barge with the Star. It's not that hard

Previously:
-------------------------------------------Update-----------------------------------------------
--------- Testing a mash up of R+R +Scubrah's Mod 58% into the game - Rep Level 3 --------

Sometimes the Barge is remarkably easy, as it was in this last run.

With the aid of the jump height provided by the Redux mod elements - after
running down to touch the deck and trigger the barge to get moving I raced
back up and got up on the sandbags in front of the bridge and from there leapt
atop the bridge itself, got into a crouch position and readied my grenades for
the onslaught from both sides to come. (Quick save) - Have to get pretty close
and it's easy to misjudge and throw too early. Two well placed to the right and
two to the left and we were safely clear with no damage.

Raced down to the sand bags for cover on the front right side and used the map
scope to ID the rocket guy dead ahead. He got off the first shot which went past
me setting off the ammo pile there. I took a few hits and the barge was disabled
but I had him down in two shots with the Star. - Ran back to do the repair as I
heard the mortar marker shot land on the bow where I'd just been working.
Used a syringe and ran to the safe room where the spare grenades are located
and waited for the mortar to hit a few seconds later. Then did another repair and
ran back to my position to scope for the mortar location.

Just a speck in my sights and moving, I gave him a few more seconds to stop
and set up. The movement of the barge delayed my shots because I had to keep
readjusting my sights. The first shot might have winged him but he'd already got
the marker off and it landed next to me, but the next shot took him down before
he could launch the kill shot.

I'd taken a bit of damage from the patrol boats and used another syringe and
searched for patrols armed with the mounted GL. Spotted one coming up on the
stern which was easy to sight because there was little side to side movement
and had the launcher guy down in one shot. Ran back to the safe room for cover
and luckily there were no other grenade attacks as we made our way into harbor
with a heavy escort. - Grateful that the machine gun fire has little affect on the
barge. Even with the boats all over us got a 'Mission Complete' and taking fire
was on my way into Mosate Saleo.

<--------------------------------------------------------------------------------------------------->

Malaria Free Saved Game #4

- This is one of my favorite points in the game when there's the fourth break in malaria.

I'm well armed with the Desert Eagle, and there's plenty left to do before continuing with the
last Factions missions (which will start the malaria attacks again). - I've included a link to this
saved game (Below) so you can see for yourself if you like. -


For any doubters and for my own saved game file collection this is when I take a break from
the main missions and the Southern map to finish the side missions in the North, before
returning to clean up the remaining side missions in the south - all malaria free.

Malaria-Free_After_Bridge-Barge_Weapons_Shop

Malaria Free Save 4[drive.google.com]

At least 3 weapons shop missions plus 11 radio tower side missions remaining and the
predecessor tapes missions to do in both maps. No rescue Buddy and just my main buddy
left alive.

- A Pistol Only run but have enough diamonds to get you well outfitted.

================================================================


<---------------------------------------Current Update--------------------------------------->

- In Progress

[EDIT]
- Sorry for delays. I took a month off because I'd been playing FC2 exclusively for
the past few years and needed to indulge in other pastimes for a while to be able
to return refreshed again. - I even avoided other FPS's.

I've since restarted, and am attempting to record my pistol only exploits in video
which I'm having trouble getting to work properly. If I can get the gremlins out of
the machinery I'll be posting VID updates here regularly.

- Thanks for your patience - Wish me luck !

<--------------------------------------------------------------------------------------------------->
==============(4)==============
- - - - - - - - - Essentials and Extras - - - - - - - - -

Summary - What to expect from FC2 -
If there's anything lacking in the game it's a pre-assignment briefing.

Certainly our protagonist would have something more to go on than just "Kill the Jackal",
and he'd likely get the intel from someone who'd gone before, and it would undoubtedly
have been filtered through the State Department.

Tapes are the easiest way to keep notes when you're on the move and our predecessor
is no different.

Typed Excerpt rendered from a tape found in Pala:


_/_/_/_/_/_/_/_/_/ _/_/_/_/_/_/
.. in summation:

Africa, and especially South Africa is a hard place, The roads are heavily
guarded and patrolled. It's always better to avoid them and find back
routes to my targets, often having to switch between vehicle river and
foot travel to get around.

Navigation is somewhat hampered by the broken landscape. I've had to
spend plenty of time studying the maps and making careful plans to avoid
unnecessary conflicts.

None of my previous assignments required such rigorous and dangerous
travel; This place is different. Most of the job is just trying to survive
while getting from one place to another.
___________________________________________

After a few weeks here I've determined that foot travel, travel by night,
and in the rain are the safest. Once I had the camo suit I realized that
I could stealth right past most checkpoints, and I was able to get closer
to my targets without detection.

I've had to do more walking in this place than on any other assignment,
but I've gotten used to it, and I've learned many back paths now and
don't feel so lost or disoriented anymore..

Place is growing on me, made some side trips to just explore that payed
off in finding strategic vantage points, good weapons, diamonds and
safe areas that I've used for refuge many times. It pays to know the
landscape as much as possible.

Without these maps and route planning I wouldn't have lasted a week
in this place. Navigation is necessary here and it's worth taking the
time to plan, it's made this assignment so much easier.
___________________________________________

There are so many job offers that I'm often not sure what my next move
should be. It seems that no matter what I chose the other offers remain
open so I can pick and choose without missing any opportunities.

Working for both factions is a change in procedure. Paid, free agent mercs
are a dime a dozen, they come and go and have no allegiances and aren't
expected to like the dedicated loyalists. They're realists in that sense. This
is strictly a business arrangement, and like any in war the high risk jobs
are valuable. They also know that if they don't hire me some one else will.
They can't afford to care as long as I get the job done.

Met a few 'Buddies' here. I like some of them but I know that their first
reason for being here is profit, and if I happen to fit into their plans I'm
their "Best Bud". Yeah, I take that with a grain of salt. I was sent here
on assignment, these are all free agent mercs who're working for their own
interests, and that's where it ends. I can trust them as long as I'm useful.
I have to admit, I'm using them too. Earning a reputation has made me
more valuable to the factions.
___________________________________________

Africa is a hard place and I struggled to get used to this job, but I've
found that once I was well acquainted with the demands and the solutions
I've actually started enjoying the place. Earning the confidence to move
freely has made all the difference for me.

Can't wait to get home to my family, but despite the horror I'll have some
tales to tell, and I know a part of me will always miss this place.
___________________________________________

I've decided to leave these tapes with the priest in Pala. It's too risky
carrying them around and there are only two people I can trust. The
journalist is reliable and would get them to the right people if anything
happened to me, but he's had trouble with the locals who don't want
any info to reach the outside world. They'll be safer with the priest.
After everything I've been through I'd hate to lose them.

Just finished a stint in Goka Falls that should get me one step closer to my target.
Now headed for the Lumber Yard. Hope the fresh assignment will be a bit easier.


Granted, It's not a lot to go on - so I'm including some of my own notes:


Prefer a more 'Linear' game ?

FC2 on PC is a game worth extensive exploration and continually taking independent
actions apart from the games' directives.

Most games demand nothing from the player except to follow directions. - There's
too often no thought required besides what weapon to use, and even those decisions
are sometimes denied. - Ammo and health handed to you before and after a mission
with check-point auto saves determining your progress with no going back.

Often - you're just a robot following instructions, - all you have to do is survive
and the game plays out exactly the same for everyone.

It does make it easier if there's only one way to go and you're told what to do every
step of the way. - But it's not 'your' game - you're not doing things in your own way in
your own time so there's little sense of accomplishment - you just did what you were
told and survived.

FC2 is the ONLY game I've found that gives you complete freedom to do whatever
you want without any guidance whatsoever. - You can even do most of the missions
any time - even repeatedly - if you chose - without having them assigned to you first.

It's your decisions - not the games' - that makes the adventure a unique experience
to you and you alone. No other player will experience the game in the same way,
and you will not have the same experience of others.

- In essence you are creating the gaming experience as you go. - This makes all of
your decisions and actions much more important than just following the yellow brick
road. - The adventure itself is created and directed by you.

II's not just about what you decide to do but much depends on how you go about
doing it. - By how you approach and handle every element of the game.

You can just run straight through the missions doing only what you're assigned in a
few days, but you'll be missing out on what careful planning and experimentation can
provide in satisfaction, and a sense of accomplishment that comes with achieving
completely on your own.

FC2 was primarily designed for serious players who take the time to take the game
seriously. - The game itself is structured so that players have to make decisions and
act independently.

Your map is the most important tool, planning routes and scouting approaches your
most important actions in defining - even tailoring - the game experience.

Those who invest in extensive exploration of the map and the games' freedom of choices
discover a nearly inexhaustible fountain of new and different often unique experiences;
Many which are unique only to FC2 and not to any other FPS title.

FC2 is no overnight game and not a week long game either. It takes more than that to
learn what the environment has to offer.- You won't experience much if you play straight
through in vanilla without extensive independent exploration.

=================================★=================================
- M A P S - All Objects - Highest Detail -

_______________________Finding Your Way In Far Cry 2______________________


- Learning the landscape makes travel a breeze -

Best maps that have everything - except 2 missing diamonds in SW of the north map
and 2 in the NW of the southern map

You can save any of these images by left clicking on the image, then right clicking
on the address bar and selecting 'Copy Link Address' - Then paste it into the
search bar of your browser.


DL and instructions for viewing in-game - here:
https://steamcommunity.com/groups/FarCry2Crew/discussions/3/2270321250016816144/
============================================================================

The following is based on the Vanilla version.

Whoa! - Just found these today (06/27/21) Thanks to Hara for asking for them.

Super detailed - ALL objects including * Patrol Routes * @ 1440


Here are originals @ 5.12 K !

N. Map

https://1drv.ms/u/s!AjjKh3bXBDopdZqxH-X0dWUu41w?e=CPItkw

S. Map
https://1drv.ms/u/s!AjjKh3bXBDopdpA2aK3lG4paAzE?e=tyvisd


- My map of parked and patrolling 'Utility Truck' locations is based on the Realism+Redux Mod. - Nine parked and three patrols.

Thanks so much to Reskal for the inspiration !

Safe Driving Routes North


Safe Routes South - Red=Vehicle White=Boat Green=Foot

===========================================================================


=================================★=================================


Spoilers - Killing Buddies & The Jackal Himself ! -
~~~~~~~~~~~~~~~~~~~~~~~~~~~~~~~~~~~~~~~~~~~~~~~~~~~~~~~~~~~~~~


Killing Buddies

_______________________________________________________

Avoid Buddy Bugs !

Rescue ALL Buddies before the rescues are assigned to you, to avoid Missing Rescue
Bugs at 27% 71-73% and 84%. (Locations on complete maps)

Don't kill more than 5 buddies or you may have anomalies or problems in the end game.

-----------------------------------------------------------------------------------------


There's a reason to kill off buddies:

I've avoided this subject for a couple of reasons. - I hate to spoil anything that would be a
big surprise to the player, and it's just not my play style. In fact, it really goes against my
basic play philosophy.

- It's one thing to level your sights on someone who's armed and trying to do you harm,
quite another to take them down when they are trusting, unprepared and may have fought
at your side.

An enemy is someone who believes in their own cause enough that they're willing to risk
their own lives to fight for it. They are as equally dedicated and committed as their opposition.

- Betrayal is the one wild card risk that can't be predicted in the conflict equation, and is the opposite of integrity in motivation. - If you can't trust your own in the field.. Well, suspicion
alone is enough to kybosh a single mission, weaken an entire company, command or campaign.

- Betrayal is having a lifelong trusted brother breaking allegiance to turn against you without
just cause.

SO - I have a hard time rationalizing killing Buddies. - even though it will spare me from
having to defend myself by killing them when they all team up to attack me late in the game.
BUT - no matter what my feelings are I have the responsibility to supply any and all info
that can aid others in the game.

It's a twist no one expects, and it's much more dangerous because damage is increased for
this part of the game. - So it is a good idea to take as many out as you can prior to entering
the prison.

- If you take out all that you can during the game you'll only have to deal with 2 at the Drop Site.


- Thanks to BigTinz for supplying the info on how many you can take out, and the detail about
extra damage.


Killing The Jackal


For those who must have proof:


Please remove your hats, be seated and quiet during the eulogy.

(on review - I can't possibly be the only one to have discovered this. May be old news
for some but was quite a revelation for me.)

- Update - Found 2 others who have achieved this:

Cap'n Saccade fired through the gate, (thanks for the info Cap'n 8 ) and someone whose
handle is a Chinese character that I can't copy to reproduce here - posted a Dead Jackal
screenshot in 2018.

Yes, it can be done, and it's not hard at all. You have just one opportunity, and doing so
will end all missions leaving the last "Meet The Jackal" unfinished. It happens at a very
convenient time and place in the game, and as some have guessed it's when you're to
meet the Jackal at the Prison.


- Don't know why it never occurred to me before. .With the improved climbing ability of
Redux I was able to get atop the rocks outside the wall where I lobbed grenades.

- It can't be done in vanilla.

Thanks to BigTinz for the quiz that prompted me to confirm or I would have missed this. [E]

- I was certain that they'd made him invincible. All key characters in other games are
protected until their time comes, otherwise the game can be broken by players. I guess
that was one hole that they missed. - I've thought about this quite a bit and I believe that
there is only one player-damage-stats model used for all characters. It saves a lot of
unnecessary coding if they can get away with it.

Changing the resistance-damage stats affects all players? Just a guess, but that may
be why the Jackal has no life insurance. - I was quite shocked to find him dead.

Yes, it ends all assigned missions there, a fine place to be if you've played through
the Swamp before and don't feel like going through that last slog again.


Game Broken? - or - Mission Success?

- You'll remember at the beginning the Jackal is reading from your assignment folder:


"..orders are to terminate."


- I'm calling it 'Mission Success'! - And - you are still free to return to the main maps to wander
and wreak havoc at will 8 )

Be aware that if there are any side missions you want to get done - do them first,
before you get the - Assassinate Leader and his Second at the Old Mine mission, (API)
- or- Sepoko (UFLL) - about 73% into the game.

That mission triggers a chain of short assignments which lead you directly to the point
of no return, and all other side missions are no longer accessible


- Multi-Player -


Eagerly looking forward to MP in FC2
and 4, (just for starters) ; ) as soon as I
have cable installed.

===========================================================
===========================================================

- Far Cry 2 Co-op -

Did you do a search for a Co-op guide? - This guide is only listed because I have info
on 'co-op' play; - It doesnt exist ! -

- Here's the inside scoop:

The other "guide" listed isn't a guide at all. - It's actually a pretty shameless advertisement
for a mod made up of stolen code from other modders and who got kicked off MDDB for
plagiarism,

- I play-tested for him when he was developing it - Or, I should say hap-hazzardly slapping
sht together. I tested for a couple of weeks and gave up when he didn't like my reports -

He'd dumbed down the AI so badly that the lower level AI - over 10% - were deaf and blind
That can be a complete game killer -and it can also get you killed if undetected AI suddenly become aware. - This happened to me several times.

- Just so you're informed - it's a Franken-mod - all stolen, and in some ways broken.

- There Is No Co-op Play -

=============================================================
=============================================================


https://steamcommunity.com/sharedfiles/filedetails/?id=1837673393&tscn=1628612486
Thanks to halvors zenoy and Lasercar for allowing me to host this link to their MP Guide


Originally posted by halvors:
The FC2MPPatcher should solve all your problems with multiplayer.

https://github.com/halvors/FC2MPPatcher/releases

We're also taking measures to ensure that we can continue to play even after Ubisoft actually shuts down their backend that they said they would do on June 1st. We are still waiting for that :D

Also please do not remove this information, hardest thing about this is to actually get the word that Far Cry 2 multiplayer actually does work out there.

Please do not start another group, we are trying to keep the community togheter on https://discord.link/FC2, please join that instead and spread the word, it has been around for years.


Source thread:
https://steamcommunity.com/app/19900/discussions/0/5190945662877001492/


Thanks To :

Originally posted by son0203:
Multiplayer still works and servers are up - in case you re still up on purchasing the game-
"do it" :)Just make sure you connect to the English 1 network. (The guide says English 2.)

Head to https://sonwars.com to get detailed informations on how to get MP started!


Originally posted by H84Gabor:
hi. the guide for the online is: install the latest multiplayer patch.
https://fc2mp.com/Online-Multiplayer-patch/

The activity now days is not so great (sadly due to technical issues in the past Ubi never
fixed) but once Ubisoft ends the online support (should happen during the next few months)
our community back end will take it over and the current VPN only players will start playing
online too and it will be okay.

In the meantime, VPN will be used as well:
https://fc2mp.com/Multiplayer-on-VPN/

To play in ranked mode via the community back end, one will need to register an account and
a place for that will be available once Ubi pulls the plug.

The future of the MP looks okay, considering all the big issues it had in the past. (Thanks to
the community support.)


Grateful to host his Guide(s) - Here: MP Fix
https://steamcommunity.com/sharedfiles/filedetails/?id=2415008350&tscn=1629268178

And Here: MP Info
https://steamcommunity.com/sharedfiles/filedetails/?id=2398910511&tscn=1629267793


Apologies for any redundant info above. - I prefer to be 'All-Inclusive'.


For FC2 Vets - How To Extend The Game
Well you've seen it all and done it all, why bother going back ? - What else is there to do?
To that I can only reply - Did you enjoy the game? - and - Would you like to keep playing?

If your answer to both is yes, why not? - With just a little creativity you can design amazing
missions on your own. You don't need to be assigned canned missions to have fun in the
game. - Just use the maps included above to plan your paths and challenges.

I've created a number of examples to which you can modify and add whatever
stipulations that you might find interesting to make them more or less challenging.

It's pretty easy to make it rewarding for you, and a solid structure is necessary to
achieve that.

- Consider these to be the 'Rules of the game' -

So first pick a place that you'll use as a 'Home Base' where you'll start and end your
missions. - For convenience it's better to have it be a favorite safe place at or near a
weapons shop. - To establish it's validity you'll be working from there for at least two
missions before moving on.

It's a good idea to divide the map up into quadrants or smaller and focus on your
most liked areas first. Decide on your home base and start charting your paths to
mayhem.

Focusing on smaller areas and limited range can make for quick hot
sorties with plenty of action, and makes designing missions easier.

Mission Assignments.

You need three missions (at least) for each Home Base. Having choices is very important.

Always have a Primary and Secondary objectives in different locations for each mission.

Give each conflict zone a different objective.

- I'm not just going to play Shaswana I have to stealth into a specific place (IE - "The
ammo on the low platform that the patrol boat cruises by") - Just something specific that
you have to accomplish, a reason for being there beyond just slaughtering everyone
in the place.

Add extra challenge Specifics - Pick just one target, get in close unseen with machete
only and get out without firing a shot. - Pick three.

The above are just suggestions, examples of how to think about stipulations.

The objectives are either to:
kill 1 or more,

Steal something (just getting to a specific object or place),

Get in and out undetected, or

Blow something up;

- Or any combination of the above. -


Give yourself consequences, - Make it matter.

1.)
Fail any part of the objectives and it's mission failure.

2.)
Die and it's mission failure.

3.)
Make it real - Failure means you can't just go back and retry the mission, you'll have
to do another mission first. - You wanna play hardball? - Make it two missions.

4.)
Make it just a little hard. - Go somewhere you usually avoid. Limit yourself to just a
pistol or machete, Stealth only etc.

5.)
Give yourself an added optional assignment for 'credit' if you succeed which can be
used to nullify a past or future fail of any main missions. (Primary and Secondary)

Cannot be used to nullify a fail of the Main Mission (Primary and Secondary) in which
you acquired it. - It's only good for past or future missions.

Primary, Secondary are just that, and have to be done in that order.
Optionals can be done at any time during the mission.

- Optional Successes can't be collected, only one can be saved at a time
- There's NO penalty for failing an optional.

- Because of their value Optional Assignments should be quite a bit harder.

- Making it to your objectives and accomplishing the task(s) AND returning to Home Base
in the manners specified by the assignment is Mission Success.

Two Successes advances you to the next quadrant of choice, and the option of staying
(in that sector) to try other missions before moving on without any penalty for failures.

Game is 'Won' by succeeding in all sectors. - I believe quartering the map is ideal.

I hope this is starting to make sense to some of you.

Designing missions is easy and a few little details can make it very interesting,

To do it right you'll have to mark up a few maps for each sector. It can be done
with any simple paint program or image editor in just a few minutes.

Pathways and objectives can be detailed with simple marks.

Objectives
k - Kill (##)
s - Steal
gh - Ghost (stealth)
b - Blow it up.

Objects - Targets
A - Ammo
F - Fuel
E - Explosives
C - Car
B - Boat
P - Pump
GN - Generator
SN - Sniper
R - Rocket guy

Limitations
g - hand gun only
m - Machete
gr - grenade
sn - Sniper Rifle
ns - no suppressed weapons

'sC' would be "Steal Car", mk would be "Machete Kill". ghbC would be "Ghost Blow up Car"
'gsB' -Ghost Steal Boat" - etc.

Modes Of Travel can be specified by the marked pathways.

Red for Vehicle
White for Boats
Blue for Foot travel

So a blue pathway can go to a certain location like a guarded dock and change to white
to specify "sB"

With a few simple marks mission details can be very specific. You'll need to be able to
consult your mission map while playing. - Load them in any viewer and minimize prior
to launch, then in the game use Alt-Enter, and the Win key to access the tool bar to view.

Last -

- Give your map a name.

Please don't use anything 'funny' or 'clever'. It should be descriptive and brief in the same
format as the one(s) below for ease of reference. Ie:

"FC Mission", Quadrant ( "NW", "NE", "SW' "SE"), Primary location and Secondary Location.
You can add any details using the code combinations above at the end of your map name.

Maps can be easily swapped for more adventures.

I have a number of missions made - I'll post a few more examples if anyone is interested.

Here's one with no specifications except for travel - just pathways to 4 major conflicts,
plus Steal one car and two boats. Working from Mikes' Bar and about to move my Home
Base to Goka Falls. - If I succeed.

FC Mission NE Shwasana - Private Prop Loop02


I just rebuilt this mission map, (06/04/23) - One of many that were lost when my old
system died.

Inspired from the idea of meeting head on all the places I always avoid. There's
not much reason to take these paths except for the diamonds.

Had several names for it, Checkpoint Challenge 1, Hells Path, Hot and
Bothered - but I'm releasing it as Four Diamond Run - Extended.

Was a three checkpoint run from the diamond bridge on the west straight north
through three of the hottest checkpoints. this is the extended version renamed
Four Diamond Run for release. - It's a bit friendlier.

8 conflicts that now include three safe houses Fresh Fish and the Hillside River
Complex south west of Goka Falls.

Mix and match, any order, ignore diamonds, safe houses. No rules except what you
might make for yourself. Make a plan - play it by ear - stealth passed anything you
can, any way you play it it's sure to be an action filled ride'


DL Here:
Hard Knocks Run[steamuserimages-.akamaihd.net]

- Unjoy - ; )


Does anyone have any interest in this? - with just a few participating there would be
a lot of missions to pass around. - I'll be posting more missions here in the hopes of
inspiring others to try it out.

I'd be very interested in any feed back. - Thanks for considering.


==========For Even More==========
- - - - - - - - Fixes And Helpful Guides - - - - - - - - -

- - - - Enhancement & FIX Archive - - - -


- Cool Enhancement Settings For Nvidia -
Thanks very much to HyEkko for this guide:

https://steamcommunity.com/sharedfiles/filedetails/?id=3173028350


A Collection of Fixes for getting FC2 running properly - All gleaned from the
Steam FC2 Forum. - Clean Launch and stability regardless of OS or hardware.
-------------------------Thanks to all who contributed -------------------------


- FC2Crew Tech Forum -


==============================================================


The Most Complete Far Cry 2 Guide


I overlooked this guide for a long time because I thought it was a basic bug-fix guide;
Boy, was I wrong. - Delighted to find thorough info on nearly every subject. If you still
hunger for all the details you'll find them here:


https://steamcommunity.com/sharedfiles/filedetails/?id=819645832

- Thanks very much to Cap'n Saccade for this impressive work !


Settings & Modes FC2 Restoration Guide


Here's another great guide by Burnedfood and resurrected by Virago -> Thank you Virago!

- All the facts and tweaks in great detail:
https://steamcommunity.com/sharedfiles/filedetails/?id=2777274300


ULTIMATE MAPS FC2 SURVIVAL GUIDE

For a short time this listing was titled
"- This Space Reserved -

- For Wonders Yet To Come -"


..and I wasn't exaggerating.

THE FC 2 Survival Guide


I could tell at first glance that this was a thorough and beautifully done guide,
but on further inspection discovered MUCH more !

Nearly passed out when I checked out his interactive maps that he went the
extra 1000 miles to create:

-> Pop-up screen shots of every item on the map - AND - including detailed
descriptions for each. - ..Hundreds.. it's mind boggling.

Just seeing that easily convinced me that the entirety of the guide was produced
with the same level of dedication to quality and care.

Thanks to hkjjh for requesting the address in the FC2 forum -and
Thanks to BigTinz for supplying it ! 8 )

- and of course -
Thanks very much to Thomas for this astounding gift! to the FC2 community !8 )
- and for being so kind in responding favorably to my request for this inclusion:

'Wonders Yet To Come'
- THE FC 2 Survival Guide[farcry2.zsg.dk] -

(too many smiley faces? - can't help it, this guide is great ! )


- enjoy -


How To Get 100% - Perfectionists Guide
All You'll Need To Get Everything In The Game


Far Cry 2 is one of the most difficult games to end with 100% completed.

This guide goes even farther than the in-game stats recorded in your journal.
It contains all the info needed to collect and accomplish absolutely everything
that the player can achieve in the game, all clearly defined in succinct detail
and including all the numbers and unique maps to help you get there.

A perfect companion piece to all other Far Cry 2 guides including this one, as it
contains all the stats that others don't.

- This is without a doubt The Ultimate Perfectionists Guide
https://steamcommunity.com/sharedfiles/filedetails/?id=3047619277

Many thanks to DediBro for the massive amount of work that went into collecting and
condensing all of the info into this brilliantly designed At-A-Glance reference for the
determined player. - Well worth 110% at least !


==============================================================


============~ End ~============
- - - - - What I Wish For All FC2 Players - - - - -


=================================★=================================


I sincerely hope that something of the above will prove helpful - especially in taking
a pro-active stance in tailoring the game to meet your satisfaction.


It's certainly been rewarding for me.

- Best of Luck ! - *


=================================★=================================
=================================★=================================
- Credits -> Guides
=================================★=================================

Thanks !


- The Contributors -

->To Virago for the encouragement

Guides - In order of their appearance here :

To DediBro for creating of the Locked Door Console Fix Guide

To FoxAhead of FoxAheads' Multi-Fixer for saving FC2 for all of us.!

Raging Raider - for allowing me to host his engaging and informative Vehicle Guide

Neonetik - for his amazing Weapons Guide and allowing me to feature it here

Hara - for one of the best guides I've ever seen - thorough and well written on Stealth


Multi-Player

halvors, zenoy and Lasercar - for allowing me to host their MP Guide 8 )

H84Gabor for allowing the inclusion of his Multi-Player Guides 8 )

To son0203 - for his contributions to Multi-Player FC2 !

To Fezfezpasha - for inciting MP enthusiasm in the FC2 forum ; )


Great Guides

To HyEkko - For creating the Nvidia Enhancement Settings Guide - Top of the list
in the 'For Even More section' - MUCH appreciated !

To Cap'n Saccade - for allowing me to feature The Most Complete Far Cry 2 Guide' -
AKA - 'Revisiting Far Cry 2 Complete/ Bug Fix' - Any details / subjects missing here
you'll find there in plenty.

To Virago - (again) for reviving Burnedfoods' Far Cry 2 Restoration Guide - All the
facts and tweaks in great detail; - And for sharing the link featured here.

To Thomas for his astounding web page guide - 'The FC2 Survival Guide'
Ultimate maps that include views of every location with detailed descriptions.

( That discovery was my first actual 'OMG' moment. ) Quite a gift to the FC2 community!
Many thanks to hkjjh for mentioning it and to BigTinz for supplying the link.
    
A very special thanks to DediBro - For the the creation of a unique and sorely
needed Perfectionist Guide. - An at-a-glance Completest Masterpiece!

------------------------------------ Fine work , everyone 8 ) -------------------------------------
Thanks so much for allowing me to make your guides available here for convenient access
All very valuable references that I'm sure readers will use and benefit from, and have greatly
helped to solidify the substance and integrity, and to complete the breadth of this guide.
__________________Grateful to be in such good company____________________


- Credits -> The Mods


- The Modders -

A very grateful Thanks ! to the modders for all their hard work and determination in making
vast and detailed improvements to nearly all aspects of the game, and their generously sharing
vital information helping to enhance and expand the modding community.

- Honorable Mention to Lasercar for contributions to the 'Lost' Buddy Mission -

>OUCH< ! - BIG mistake! - So sorry it took me this long to find out.. LET me start over:

Honored to feature this great find - that Lasercar discovered - The Lost Buddy Missions -
in all probability the singular most rare of FC2s unique hidden gems -

Thanks To Lasercar for this fantastic discovery,

- And - to razor-fin for creating / engineering the following:

Originally posted by Lasercar:
.. it's not really a modified client, more of a custom one. Razor was working on co-op through a custom far cry 2 client (which loads a custom engine) of his that attaches/works alongside the Dunia engine (dll), allowing him to experiment with it along with his own code (that and his custom engine allows for the loading of the files as unpacked from the dat archives).

Thanks to the above for the work that went into implementing these missions for us all -> !
=====================================================================


To BigTinz, of BigTinz's Redux MODS for Far Cry 2, 3 - and 4 ?? WoW !:

BigTinz - 07/22/21:
"The mod has been updated to include intro and map options."

https://www.moddb.com/mods/far-cry-2-redux
https://www.nexusmods.com/farcry2/mods/286

https://www.moddb.com/mods/far-cry-3-redux
https://www.moddb.com/mods/far-cry-4-redux

=================================================================

NEW - as of 10/05/23 - Far Cry 2 Patched "Bug Fix" Mod - Realism+ Scubrah's:

Feature Rich - Announcement and Link -
https://steamcommunity.com/app/19900/discussions/0/3194740972130711104/?ctp=3

=================================================================

NEW - as of 08/30/22 - A combination of 2 great mods -

Redux+Toms' Realism+

Originally posted by BigTinz:
This is an extensive mash up of Tom's Realism+ and my Redux mod.

I recommend everyone here give it a shot. It's truly the best way to experience FC2, IMO.

Only intended to be played on the Infamous Redux difficulty.

The user MUST start a new game with any mods to have a steady experience.

A full feature list will come soon with a proper Mod DB and Nexus page.

Off the top of my head:

- Store changes from Realism+
- Machete from Realism+, but NOT the instant stealth kill
- Art and graphic improvements from Realism+ (Black AR and Wood FAL from Redux)
- Holster is an updated version from Redux, which now doesn't holster after healing
- The weapon properties are a mix from both (more flamethrower enemies ala Redux)
- Longer respawning outposts from Realism+
- Animations from Redux
- Anonymous merc from Realism+ (originally by scubrah, I think)
- Most other stuff is Redux, I guess?
- Infamous Redux difficulty is still recommended, and what the mod was balanced for.
- Moves a rescue buddy from the buggy Sediko to the train car "snake bite" rescue from Redux (originally by Lasercar)

It's really a 50/50, I think.

Far Cry 2: Realism+Redux available for download.

https://www.moddb.com/mods/far-cry-2-realismredux/features/far-cry-2-realism-redux-return-to-the-heart-of-darkness


Originally posted by Boggalog:
I've just finished the upload to Nexus Mods [nexusmods.com] too.

It's been really fun to put this together and I'm excited for everyone to to have a great experience with the best of mine and BigTinz mods. A big thanks to BigTinz for taking the lead on this and thanks to the FC2 modding community as so much of this is built on the work of others.


Many thanks to BigTinz and Boggalog, and contributors Lasercar and Razor-Fin (above) for this
amazing Mash Up !


Copy of First Announcement:
BigTinz's Redux + Realism+ MOD Announcement


====================================================================


- To Boggalog, (Tom) of Toms' Vanilla+ MOD - Very popular enhanced version

[EDIT] - UPDATE! (07/16/22) - Now in 4 flavors ! - Including Realism+

Boggalogs MOD Announcement

[E]


HD Texture packs:
https://steamcommunity.com/app/19900/discussions/0/3096760955425095446/

Update ( 08/01/22 )

- Look Ma, - No Hands! - Eliminating most on screen prompts

Thanks to Tank for the inquiry:
.https://steamcommunity.com/app/19900/discussions/0/3455968050316133993/

and "An Almost Complete Guide to Far Cry 2 Modding" - Updates here:
https://steamcommunity.com/app/19900/discussions/0/3110266045073395300/

What a host of quality / play-style refinements ! - Great Work - Thanks so much 8 )
==============================================================

To Glam Stachee☆ Creator of the G O R E mod released in late 2021

"G.O.R.E seeks to turn Far Cry 2 into the most realistic experience of a civil war it can
be. Civilians are added, vehicles and weapons have been rebalanced, combat is much
harder, nearly everything in the game has been changed and tweaked to make it more
fun to play. Hardcore and Infamous are the recommended difficulties to play on. "

Glam Satchees G.O.R.E. MOD Announcement

https://www.moddb.com/mods/gore-glams-overly-realistic-edits-another-realism-mod/downloads/gore-glams-overly-realistic-edits-definitive-edition

Very Glad to include your unique take on the game. Thanks for all the considerate work
that went into this fine creation ! 8 )

===================================================================


To EVERGREEN of Evergreens' Reshade - In depth controls for color lighting detail, and more -
https://reshade.me/

Making a dull palate into a vibrantly rich experience through an equally rich and conveniently
built-in custom UI. - A HUGE amount of work went into this - and it shows ! - Thanks 8 )


- For their remarkable fixes and improvements in gfx and the overall game play experience -
____________________________Thank You !___________________________


- Credits -> Consultants


My personal thanks to many mentioned above and to those (and others) mentioned below;
All of which contributed in inspiring conversation, enthusiasm and many generous acts of
kindness and sharing, and served up in guileless candor, ( Both critical and reassuring) that
has made the research, creation and maintenance of this guide a truly invigorating experience.

-> Thank You !

Special Thanks To Azami ! for just the right questions to inspire the article above.


A personal thanks to those who participated with feed back - !

Very special thanks to Boggalog For posting his stats for players health
and ammo in all difficulty levels in both Vanilla and Redux Mod. Now included in
Chapter 3 Article 1, - Conflict Strategies - Beating AI - Much Appreciated !

- BigTinz Virago Bullett00th BushmanZ Regulator XavierHG and Exceed -

For their input and support during required experiments that fueled much of the
information above.

To m4custom1 - for conversations on difficulty settings.

Very special thanks to Xavier H.G. for aid in confirming the accuracy of the number
of playable game missions.

And - Also to morshusprite - for info on the order in which new buddies appear.
Thanks so much for this info 8 )

Thanks To UnKnOwN for Even More on Buddies -

To DediBro for conversations on Fixes, Buddies and game-play, and creating
The Console Fix Guide and the amazingly well designed Perfectionist Guide.

To ttv Tears For Fears for always showing up with the right words at the right time. 8 )

Thanks to Capitano Ano for alerting me that I'd not adequately covered Safe Houses.
->Much Appreciated !

Thanks To Banana Duck ඞ for his query about Underground Missions and how to get them all.

The info now resides in this guide under 'The Good Stuff And How To Get It'

A Special Thanks To: Reskal for inspiring the creation of the War Wagons Locations
map now featured in the - Vehicles - chapter. -> Much appreciated !

===========================================================
A VERY honorable mention to UbiBorealis and Ubi-WheelyDuck for their considerate
respectful and well reasoned assistance to the Far Cry Discussion Forums. A credit to
the position and in kind service to the community ->Thanks !

A very important mention and special thanks to Ubi-Pegasus for his kind endorsement
in the Far Cry2 Descussion Forum. - He really 'Gets It' ! 8D
https://steamcommunity.com/app/19900/discussions/0/3819658451381778024/
============================================================

To Checkpoint Charlie - for checking in to offer his own warped brand of 'help',
and who's been abruptly transferred to a remote post with limited access ; )
- Say "Goodnight." Charlie..


To the Montreal Team that put this wonderful mess together.

To CLINT HAWKING - Who labored extensively guiding the production through to
finality against the head winds of time, countless anomalies, puzzles and failures and had
the wisdom and fortitude to resist pressures to include BS immersion destroying 'features'
to keep the game a pure realistic experience and a true living adventure for the player.
Everything that's good about the game we owe to his dedication leadership and guidance.

Hats off - Full bow to the waist - I wish that I could meet him just to thank him personally.


To The Jackal - for the machete !


- and - To all who've been kind enough to offer critical feed back and affirmations that
have been very helpful to my works in these forums. - You know who you are ! ;~)

Great Going, Everyone - MUCH Appreciated ! 8^D

~~~~~~~~~~~~~~~~~~~~~~~~~~~~~~ Best of Luck to All ~~~~~~~~~~~~~~~~~~~~~~~~~~~~~~


★★★★★★★★★★★★★★★★★★★★★★★★★★★★★★★★★★★★★★★★★★★★★★★★★★★★★★


- Sources -


Nearly all of the content for this guide (with quite a bit of editing) originated here,
where you'll find Links to all of the above. - Mods - Tech Help - Mission Walkthroughs,
Vids and much more.

Continually updated since its inception on April 12th 2020 with any useful and at times
entertaining information that I can find. Steam calls it a "Group" but that's not what it
was intended for. - I created it to be your local Information archives with sub-forums for
separate subjects to make it easier to locate what you need.

Membership appreciated but never required - feel free to harvest at your leisure.
- Comments ( + or - ) Welcome! - ( I can take the heat and keep on cookin' ! ; )


FC2Crew
https://steamcommunity.com/groups/FarCry2Crew

=================================★=================================

I have to add that BigTinz REDUX has revitalized the game and made it much more
playable and far more unpredictable and exciting.


=================================★=================================

!__________Thanks__________!
!!!!!!!!!!!!!!!!!!!!!!!!!!!!!!!!!!!!!!!!!!!!!!!!!!!!!!!!!!!!!!!!!!!!!!!!


MORE Thanks ! - To YOU - The Readers

I just want to take a moment to thank everyone who've graced this project with positive
recognition in the form of comments, thumbs up, favorites and very generous awards !

-> THANK YOU ! <-

It's heartening to know that the work has been of help or interest to anyone.

Not just for my guide - but also for the other guides included:

If you enjoyed or benefited from the read(s) please respond with a comment or a thumbs
up to let the various authors know that their work is valued by the community - Thanks!

- I DO wish that all could have a great time playing - just as I have for so many years.

If you want to thank me with awards save your points for any that deserve encouraging,
just hit the 'Favorite' button instead !; )


================================== ! =================================
- - - - Please post any Tech Questions Here - Steam Far Cry 2 Discussion Forum - - - -
50 Comments
thirdkeeper  [author] Mar 26 @ 10:49pm 
Happy third birthday you demanding SOB. - Thanks to all who've visited in these,
the first meager years, and in gracious kindness left a mark in their passing; Each
a beacon in the silence that illuminates these pages for those to follow and draw
sustenance from. Pop the cork and raise the cup to all.

- Long may you serve -
thirdkeeper  [author] Feb 6 @ 9:19am 
Hey Yeevik - Thank you !:steamhappy: :honor:
thirdkeeper  [author] Aug 1, 2023 @ 1:32pm 
y v w! - Just so glad that the work has payed off for some. - Thanks for the wave and the
goofy smile I'm wearing !%D
Penis Parker Aug 1, 2023 @ 12:39pm 
Saved my life! tysm!
thirdkeeper  [author] Mar 19, 2023 @ 9:24am 
Hi Ewgene - Thanks so much for the recognition and the gift !

"Uniquely alive" is a great description 8 )

- Best Wishes -
Ewgene Mar 19, 2023 @ 6:03am 
This is a lot of dedication for a relatively small and fairly old game, but apparently it's uniquely alive all the same. Have my award
thirdkeeper  [author] Nov 15, 2022 @ 7:19am 
wow - Thanks for saying so, Niko ! 8 )
Johnny Silverhand Nov 14, 2022 @ 7:27am 
OMG! Best guide to this game I ever see the best
:Doomsday:
thirdkeeper  [author] Jun 30, 2022 @ 10:28pm 
Man! - This warm reception is a bit unexpected but quite gratifying -
and very glad to be able to share all that I've discovered in the game.

- Thanks for the smile - ! 8 - D