Counter-Strike 2

Counter-Strike 2

593 értékelés
Creating and Publishing a Weapon Finish
Készítő: Jimo
I will give you a basic understanding of how you can create and submit weapon finishes to the CS:GO Steam Workshop.
   
Díjazás
Kedvenc
Kedvenc
Törlés
Introduction
This guide will give you a basic understanding of how you can create and submit weapon finishes to the CS:GO Steam Workshop.


If you like the finish demonstrated in this guide you can vote for it on the Steam Workshop below.

http://steamcommunity.com/sharedfiles/filedetails/?id=188738456
Getting Started
Before we get started you are going to need a few tools so you can follow along with the guide.

You will need some form of image editor. In the guide I will be using Adobe Photoshop CS5 but other versions of the program should work just fine. You can use GIMP or PAINT.NET as a free alternative to Photoshop as well.

Additionally you will need VTFEdit (Valve Texture File Editor) which is a tool used to convert your image in to the game world. I have provided links to all of the required software below.


We will also need the CS:GO resource package provided by Valve. This package contains the UV Sheets which we will be using for reference.

Creating a Pattern in Photoshop
3D models are unwrapped to form a UV sheet. The UV sheet will determine which areas of the texture file are visible when applied to the model.

Below is the UV sheet for the AWP. If we were to overlay our pattern, the only areas which would be visible would be the areas within the green border. The black space in between would be ignored.


In this tutorial we will be creating a basic digital camouflage pattern using Photoshop filters. This guide has been created to get inexperienced users started. There are many different methods and techniques when it comes to creating weapon finishes.

Open up Photoshop and create a new 2048 by 2048 pixel image. The size of your texture must always be a power of two with a maximum of 2048.


Set your primary and secondary color pallets to a solid white and black. Once you've set your colors click on Filter > Render > Clouds. You should then have something which looks similar to what I have below. If one color is dominating the other you can re-render your clouds by clicking on the menu option again.


We're then going to add a High Pass filter. To do this go to Filter > Other > Highpass. Set the radius to around 250 pixels.


Next we're going to do Filter > Brush Strokes > Spatter. Set the spray radius to around the 15 mark and the smoothness to 7. In Photoshop CS6 this option can be found in Filter > Filter Gallery.


We will need to make our image look less like clouds. To do this select Image > Adjustments > Threshold. Adjust the slider until you have something which looks like the following:


The next step is to pixelate it. Select Filter > Pixelate > Mosiac. Set the cell size to around 25.


At this point it might looks slightly blurry around the edges. This can be resolved by selecting Image > Adjustments > Threshold once more. Adjust the slider until you have something which looks like this:


We then want to remove the white areas of the image. Go to Select > Color Range and sample the white background. Once you click ok the only areas that will be selected will be the white parts. Click Delete on your keyboard to remove them.


We can then use blending options or the bucket tool to fill in our colors. Because we want to adjust the colors using the workbench you'll only want to use primary colors such as bright Reds, Greens and Blues.[upload.wikimedia.org] Your image will store the properties of these colors on their own channel which CS:GO will read when it's imported. It's a good idea to create a new layer for every color you add so it's easier to adjust later if need be.

You can also play around by duplicating layers to create more variance in your pattern. Additionally you can add an Alpha channel[help.adobe.com] if you'd like areas of your design to have some form of transparency.


You'll eventually wind up with something which looks similar to this.


At this point you can resize your texture if you need to. To do this select Image > Image Size. You want your texture to be the lowest power of two possible without sacrificing quality. You might need to play around with this to see what looks best for your design. You can learn more about texture scaling on the CS:GO workshop FAQ.


All that is left to do now is save the image. Navigate to File > Save As and save it as a Targa File (.TGA).


Ensure you have 24 bits/pixel selected before clicking ok. If you're using an alpha channel you should select 32 bits/pixel.

Creating the VTF
Before we can use the CS:GO workbench we will need to convert our TGA file into a VTF (Valve Texture File). This can be done using a free program called VTFEdit[nemesis.thewavelength.net].

Within VTFEdit navigate to File > Import and select your TGA file.


Once your import settings look the same as mine select ok.


Our TGA file will now be loaded in VTFEdit. There are a number of different settings you can choose, but for this example we're going to keep it simple and leave everything default.

Select Save > Save As to save your VTF. Save it in the same folder that your source TGA is saved in as we will need to use both later.


Using the Workbench
Before you can use the workbench you'll need to have the developer console enabled within the game settings.

If the developer console is enabled click on the tilde key (~) to pull it up. Into the input box type in the following line and click submit.

workshop_workbench

With the workbench pulled up we will need to select our weapon and finish. Refer to the CS:GO weapon finishes guide to get an idea of which finish will work best for you. In my example I'll be using Anodized Multicolored.


Once you have your weapon and finish selected click on the Choose Pattern button and navigate to your VTF.


When your texture is initially imported it will be grey and white. On the left side of the workbench you can choose four different colors to apply to the weapon. These colors will replace the colors we set earlier. You can also increase and decrease the pattern scale using the pattern_scale option. There are a lot of settings you can play around with here to get the most out of your texture.


Additionally you can adjust the X & Y offset and the rotation of the texture. This will adjust which parts of the texture file are visible on the surface of the weapon. At any point you can click the UV Chart button to see how your design is mapped.

You can also increase and decrease the wear slider to see how your pattern looks with different weathering effects.


You can set the minimum and maximum offset, rotation and wear within the Random Range Parameter settings on the left of the workbench. This will allow you specify the range of possible outcomes your finish can have when dropped in-game. Having a wider range means more variance, you can cycle through random variants of your finish by selecting the Variant button.


When you're done editing your weapon in the workbench select Save to export a .txt file with your workbench variables.
Uploading to the Workshop
Once you've saved your .txt file you'll be able to select Submit from the workbench to upload your creation to the Steam Workshop.

The submission screen will request the workbench .txt, the source .tga and your .vtf file. You'll also need to fill out a title, description and upload a preview image.


When you're ready to submit your creation read and accept the Steam Workshop contribution agreement and select Publish.


Once your submission is done uploading you'll be taken to your workshop page. Before it will be made public you'll need to need to set your revenue sharing percentages. If the creation was a joint effort you can add another user by selecting the button. The revenue sharing determines who gets a split of the money if Valve decides to add your creation to the game. Once Finalize has been selected no changes can be made.


You can also customize your workshop page by adding links and media by selecting the links in the owner controls box. From this area you can also adjust the privacy setting and the title/description.


Once your submission is public users will be able to rate your finish and provide feedback.

At any point while your submission is pending you can edit the files by loading the CS:GO SDK via Steam and opening the Workbench Editor.


If your weapon finish was chosen to be selected you'll be notified via email by Valve with how to proceed.
226 megjegyzés
MAKUROSU 2024. jún. 26., 19:04 
This tutorial still work 2024?
LAXAE 2020. febr. 4., 3:21 
Can somoone help me with my skins in worshop?
PertinaxCL 2020. jan. 22., 18:05 
Dead post!
PertinaxCL 2020. jan. 16., 14:00 
Hello, Ive created my skin but this always appears tagged as a M4A4 (its an AWP). How can I fix it? My weapon is not showing in the proper section because of this. Thank you!
[UA/SK] Divine Lotus 2019. júl. 1., 10:32 
GIMP Users (pasting my info to relative guides):

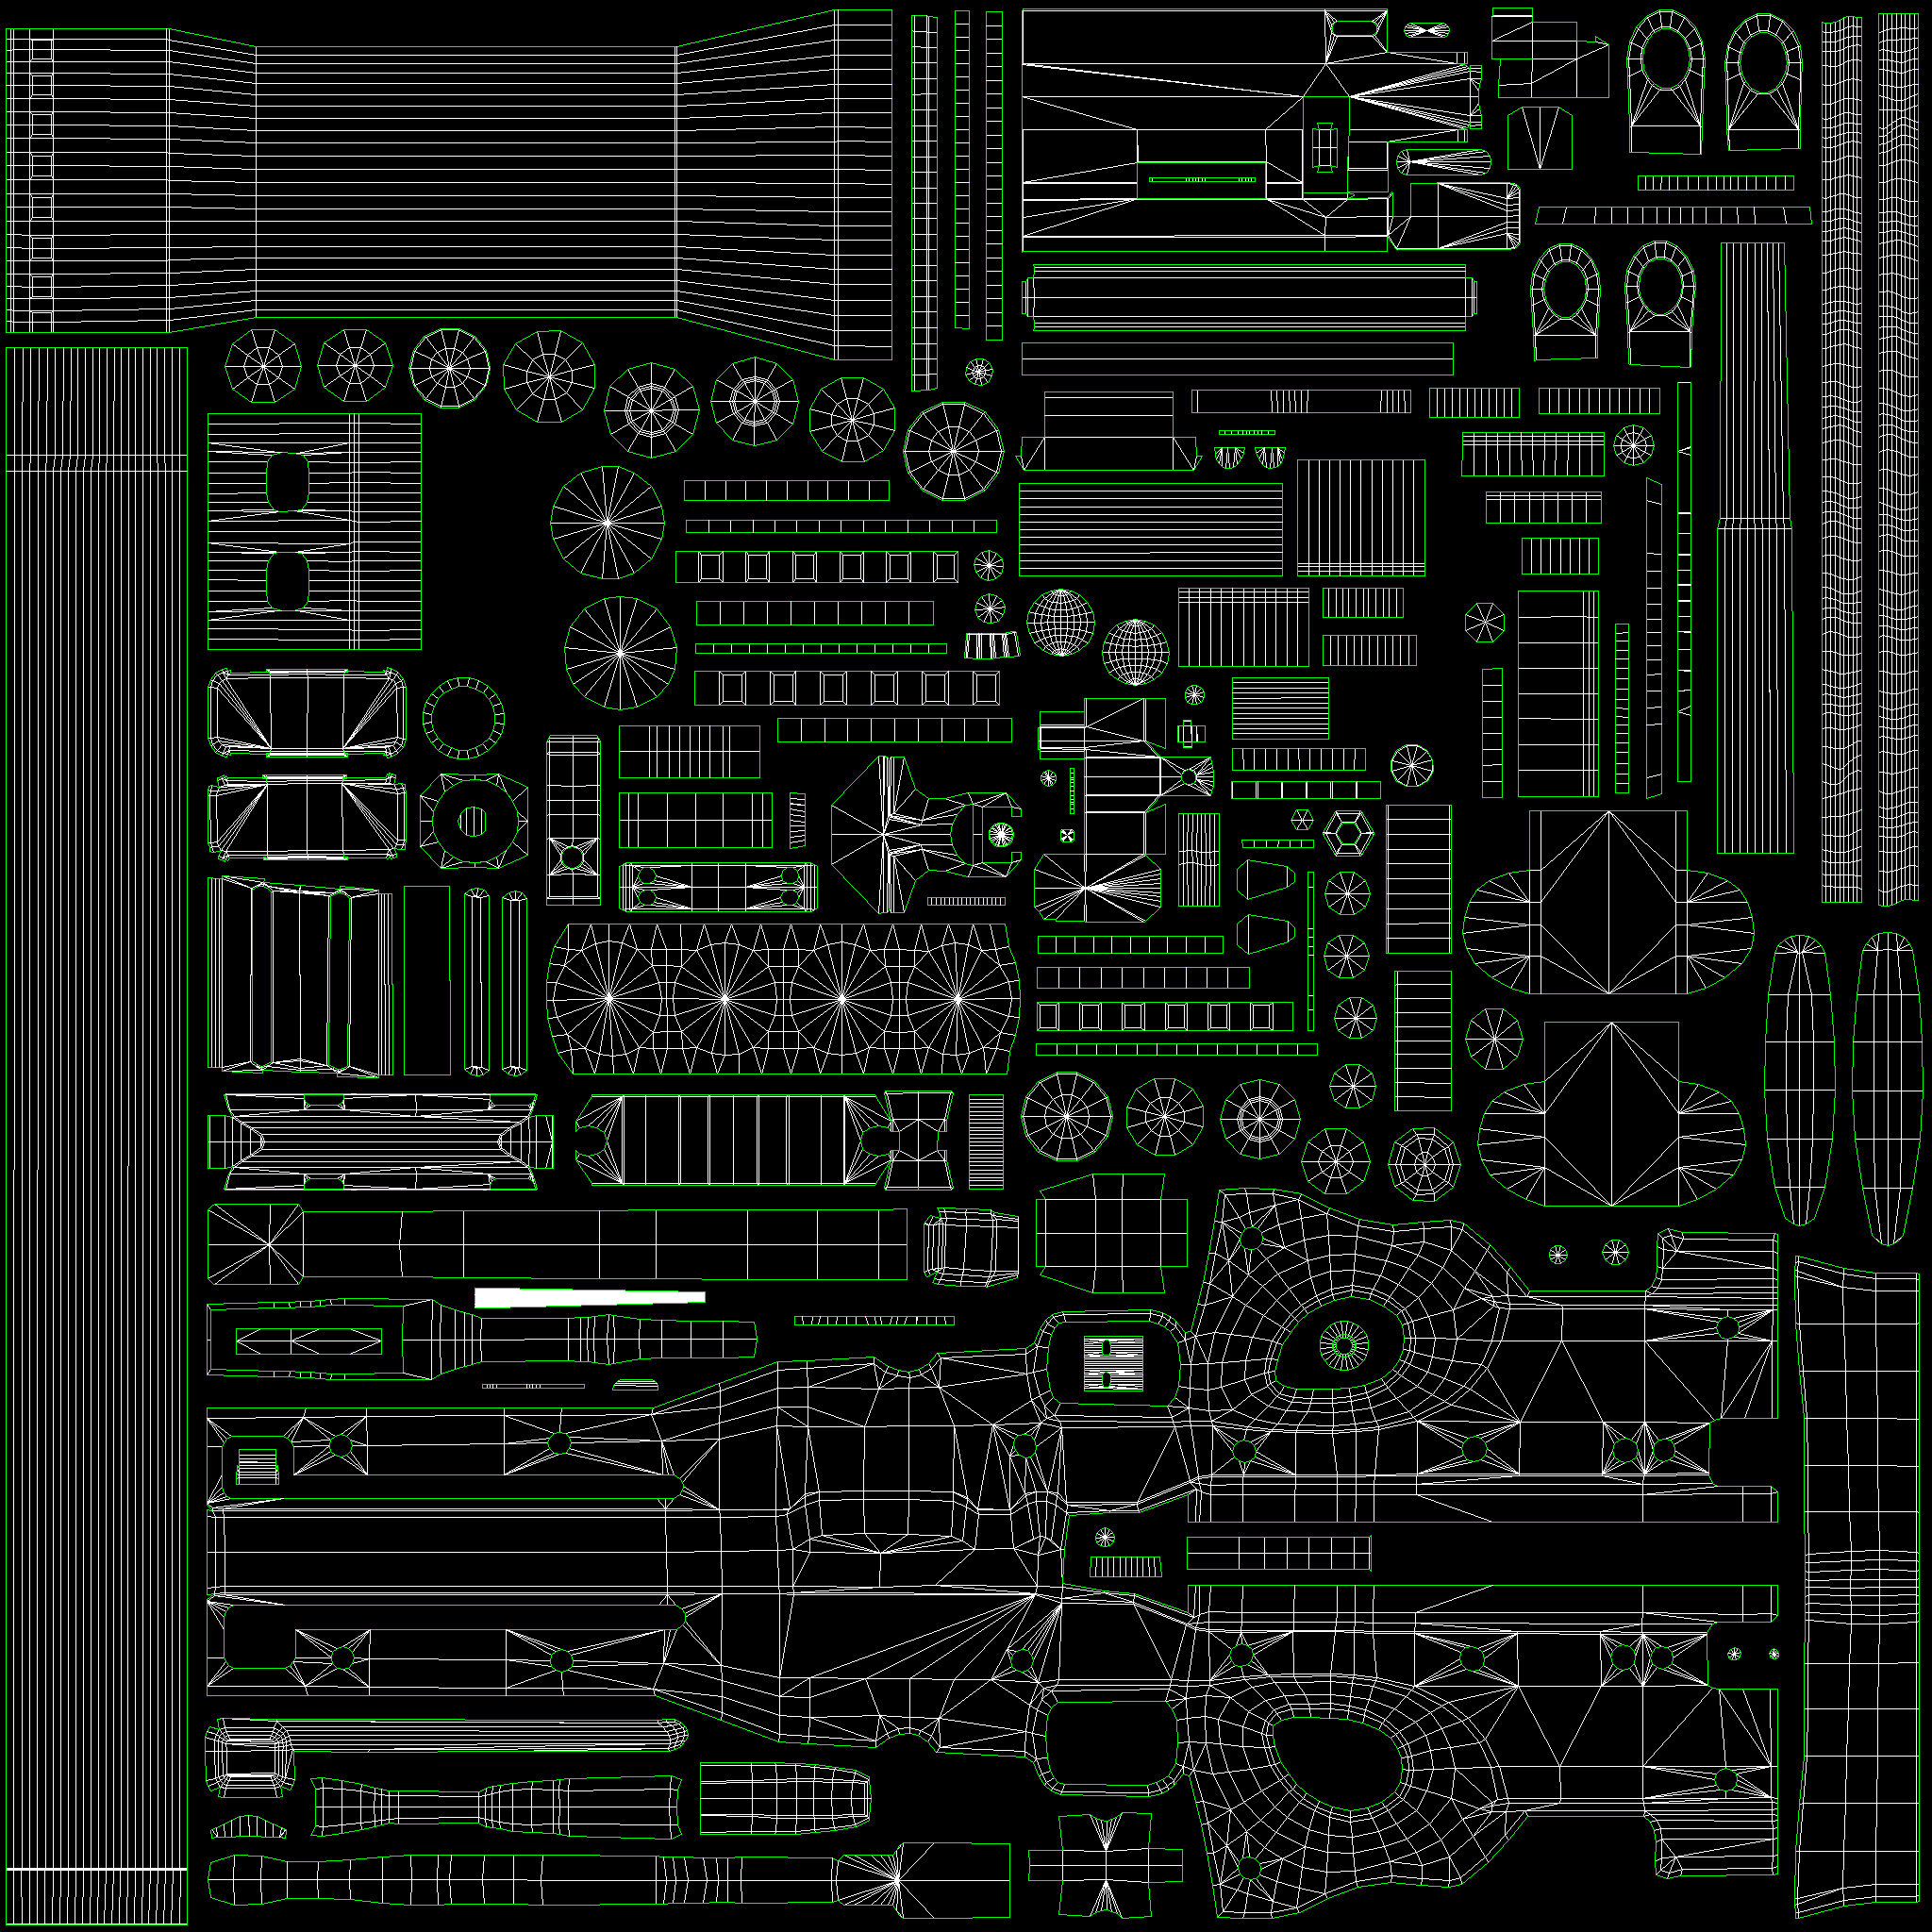
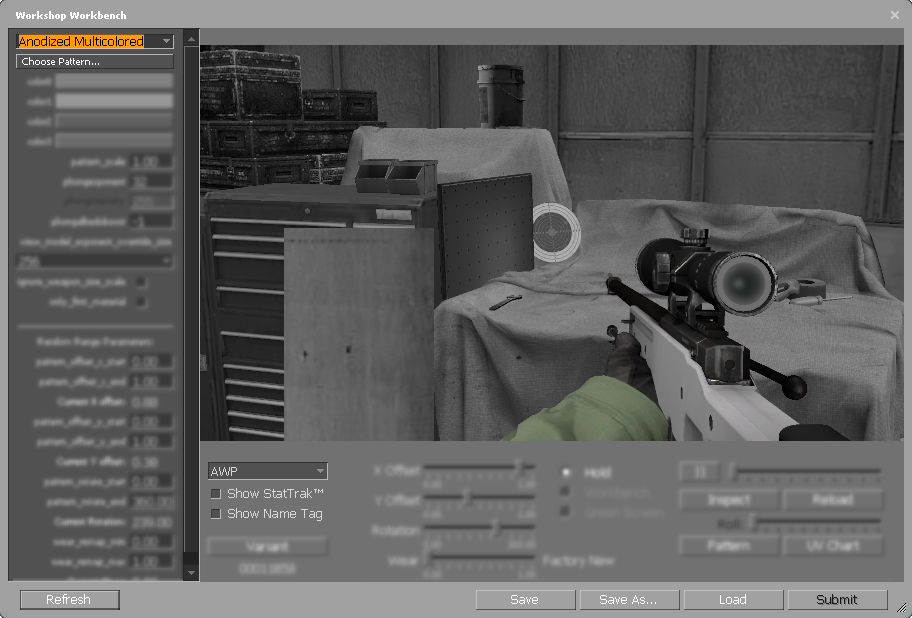
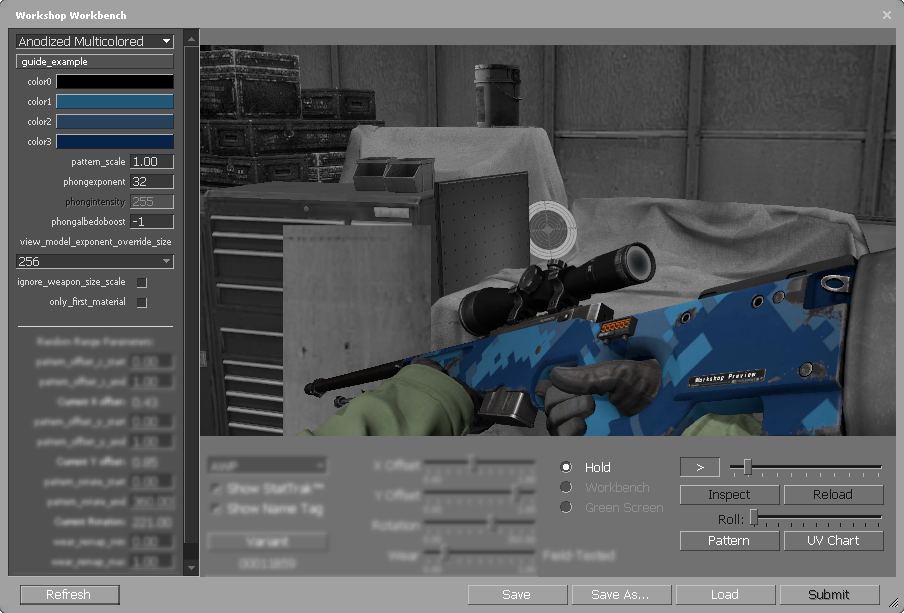
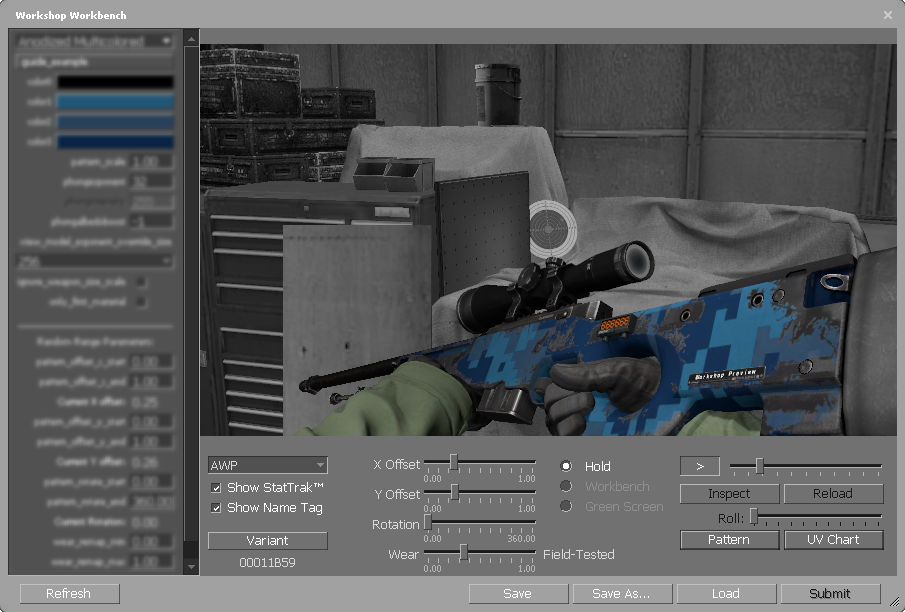
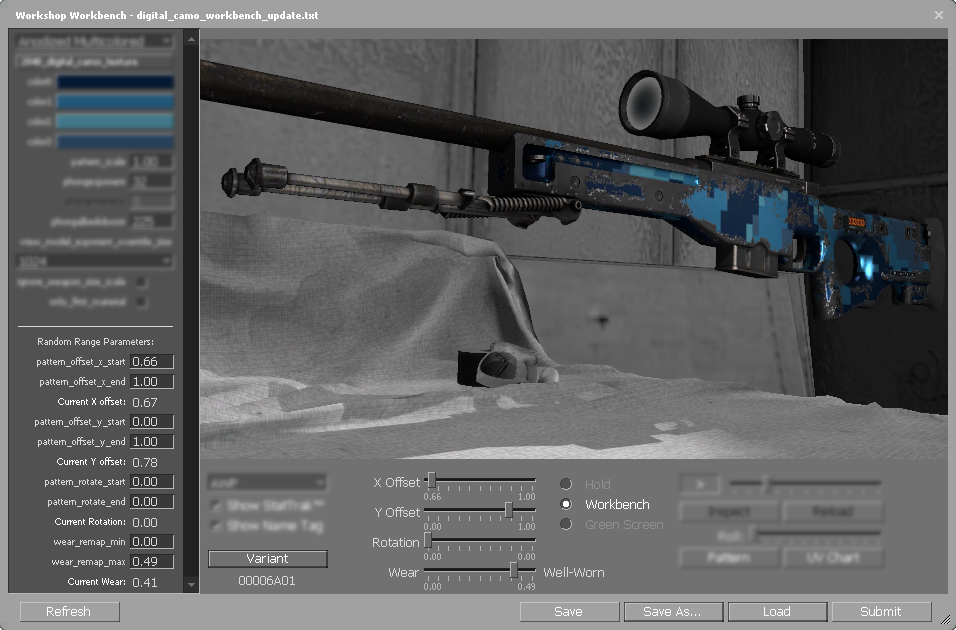
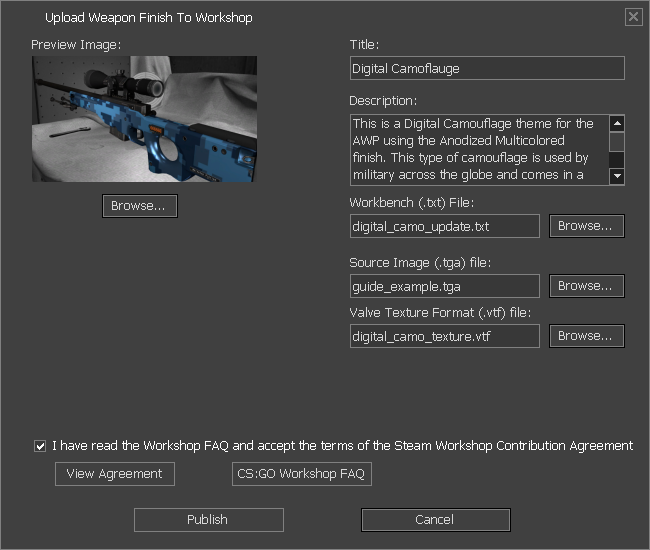
Look into the official Valve SDK Doc for insight on how materials work in CSGO's Source engine, linked below:
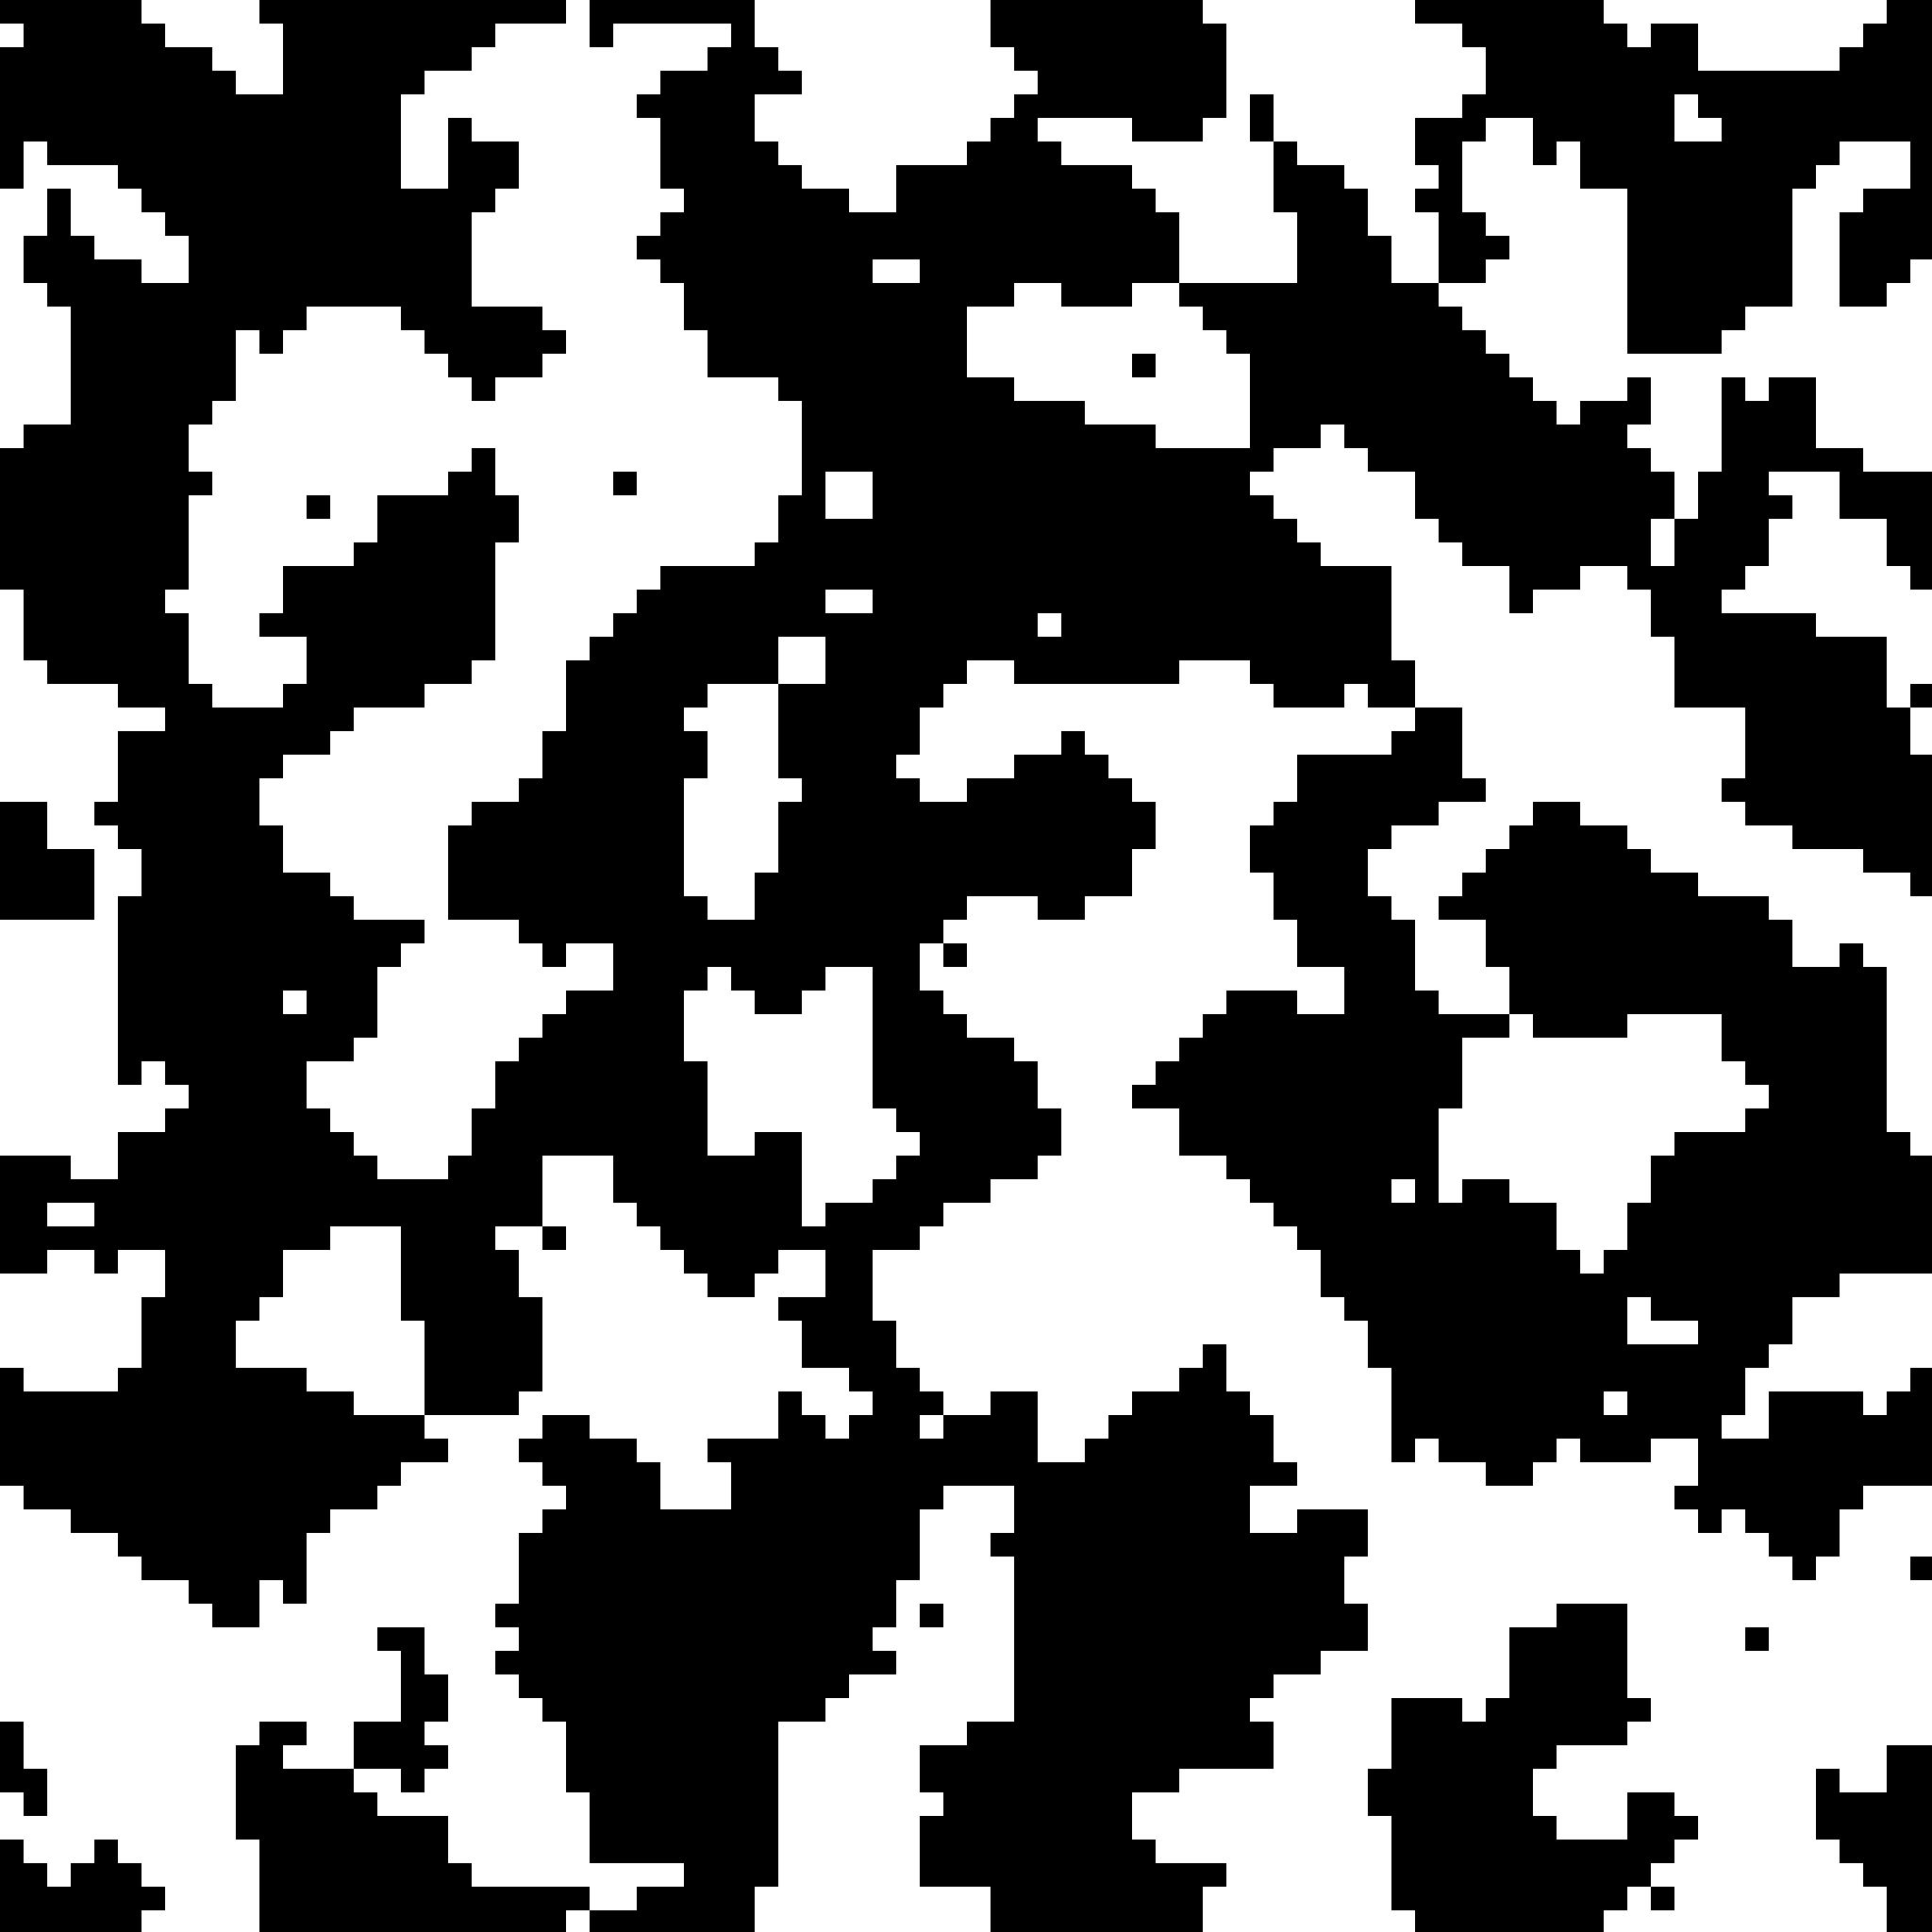
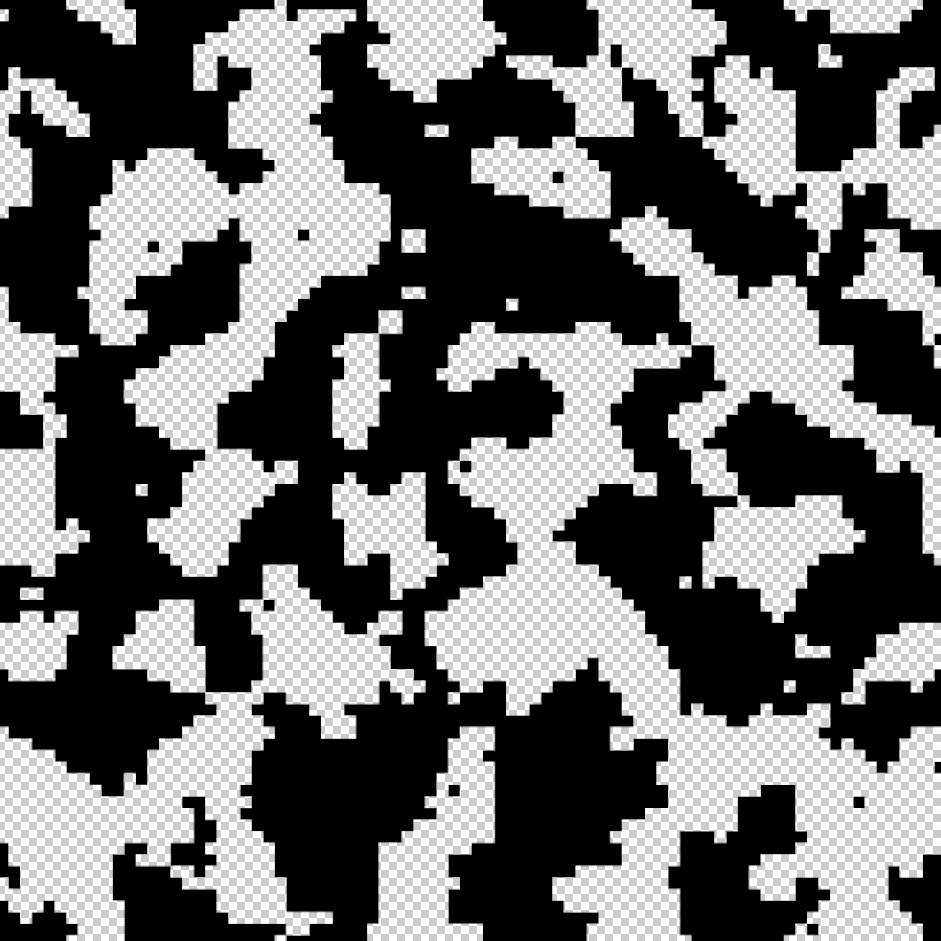
GIMP alpha channel
https://developer.valvesoftware.com/wiki/GIMP

GIMP Alpha channel vids:
https://m.youtube.com/watch?v=LQCziSTNJgQ
https://www.youtube.com/watch?v=A9aZdPqs17M

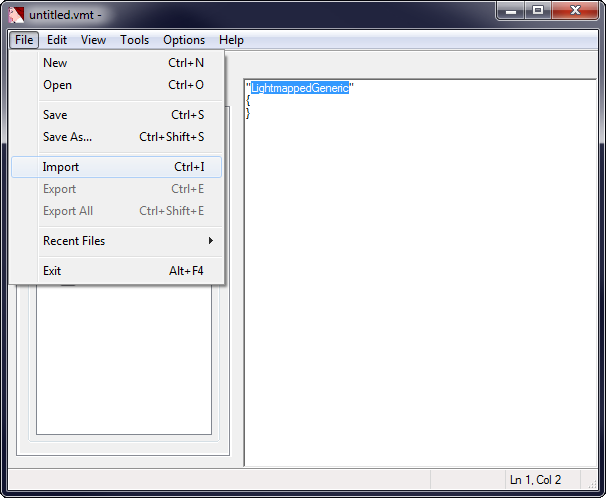
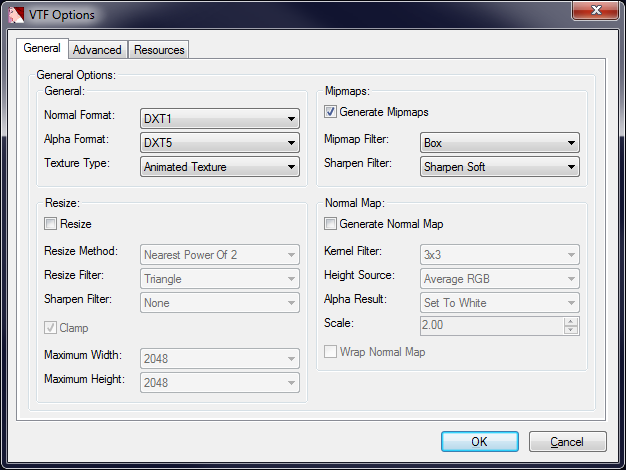
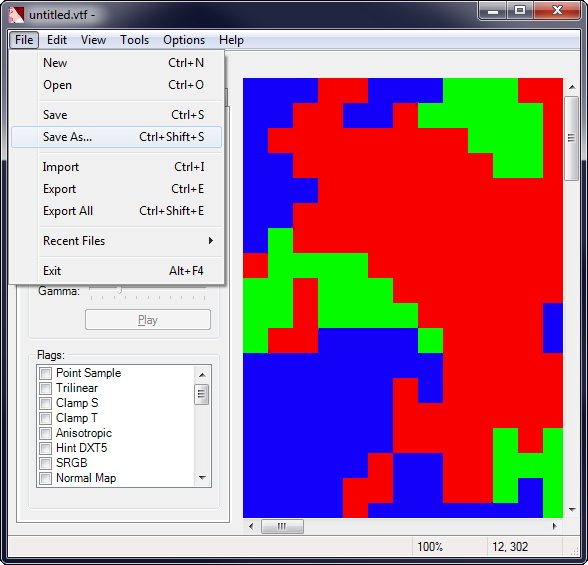
Using GIMP VTF plugin?
Be sure you're using GIMP 2.8.0

Not using it? Follow this:
https://developer.valvesoftware.com/wiki/Creating_a_Material

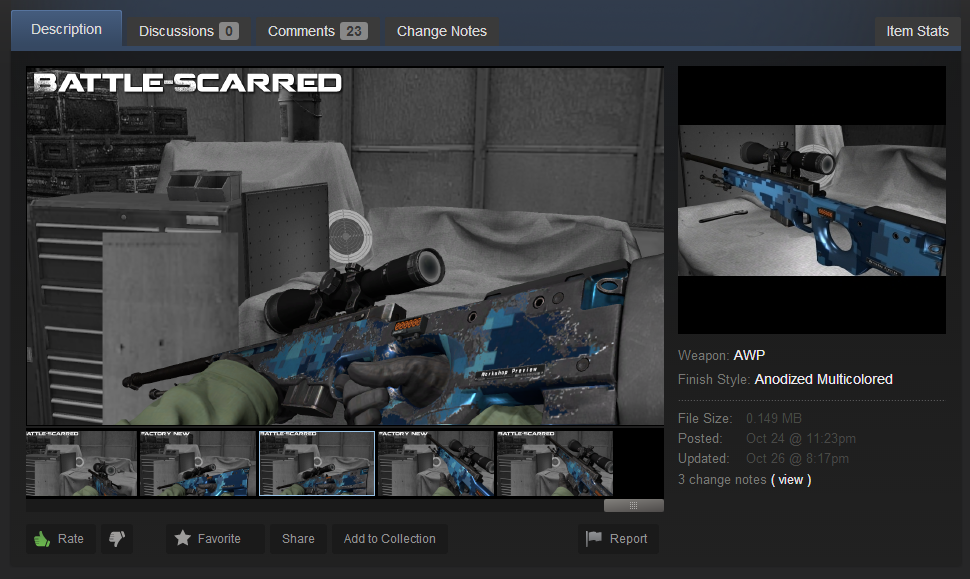
This wiki has info about making skins / modding: https://steamcommunity.com/sharedfiles/filedetails/?id=1501754039
Workaround "GIMP Tools" > "GIMP 2.8.x" of the wiki

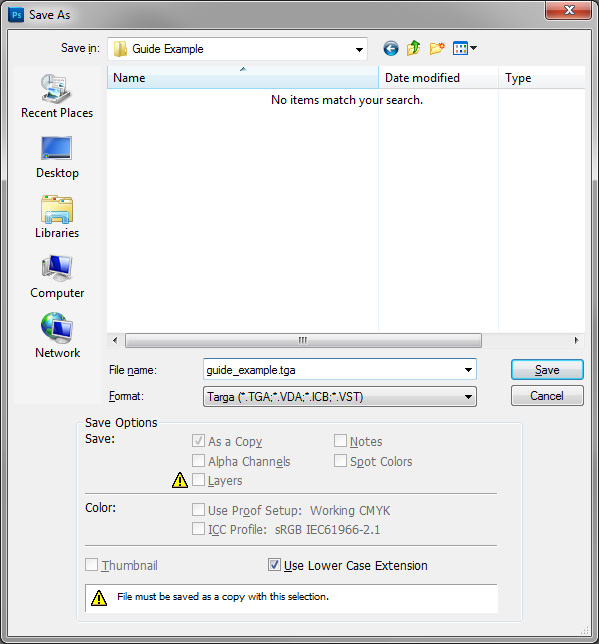
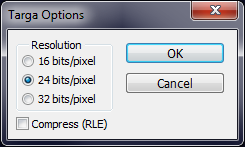
Use .tga or .tiff image types instead of .jpg or .PNG They're lossless and supports alpha. More info in the Valve Source SDK Doc

3D = Use Blender with GIMP. Formost accurate lighting, use in-game workbench
Non-GIMP Users I recommend reading the Valve SDK Docs for better understanding
膩I嶮薤篝爰曷樔黎 2018. szept. 18., 1:40 
WOW...Niiice Basic Tutorials......Thnks XD
猫 | niraK 2018. máj. 29., 6:37 
https://steamcommunity.com/sharedfiles/filedetails/?id=1381111636
Please help my boyfriend. He´s very talented and every upvote could help him c:
2024 Nissan Z 2018. márc. 8., 18:02 
I dont have a workbench txt errrrm