Terraria

Terraria

27 hodnocení
Terraria Boss Ideas Part 5 [Bosses 61-80]
Vytvořil: Okami Tomato
As you can probably tell from seeing this I had some more ideas I'd worked on, as well as allowing me to reach a certain milestone in boss designs.

As usual: This isn't a guide. This is just the only place I can sort things in this specific way on Steam still (...I dread the day they invent another place and I have to migrate all 200-odd bosses elsewhere)

Also as usual, feel free to leave feedback and boss suggestions in the comments (I have a small backlog at the moment so it may take a while when I get around to finishing off the backlog)

Anyways, enjoy :)
   
Ocenit
Přidat do oblíbených
Oblíbeno
Odebrat z oblíbených
[News Segment]
As with before I am going to be putting forth some more news about these pages that relates either to this specific page or to pages 4 and 5 as a whole in other cases, though I will do my best to distinguish them.

1. The damage reductions given to bosses has been increased further upon realising that it STILL isn't balanced to Calamity standards.
-60% Damage Reduction granted to all bosses
-50% Damage Reduction granted to all normal enemies
...As with before this may get changed again in the future. Hopefully this will be the end of this, though.
[General]

2. All Chaos Mode enemies and bosses now inflict the Chaos Surge debuff that deals 50 damage per second to players, though often doesn't last very long. They will not be listed under each individual boss, so bear this message in mind.
[General]

3. For the time being I am going to try and calm down with the Chaos Mode and Post-Moon Lord bosses and start looking back in Pre-Hardmode and Hardmode for a bit.
-Simply because I have added way too many bosses for those modes recently and the other two need some more love from these pages... I mean the last time I mainly looked at Hardmode was back in Boss Page 2... over a year ago.
[This Page]

4. Any time I've said Frostbite I meant Frostburn. I've started going back to attempt to fix some of these errors, but there's likely to still be some scattered around. Whoops!
[General...?]

5. The BIGGEST bit of news is the potential introduction of the Grim Pantheon, Chaos Indulgence, and finally 'The Romance Option'. While I would normally do this without a prior mention it each is a massive list of changes to both vanilla and modded bosses along with my own that make the game harder, but also require tons of explaining per boss. If I hear some positive responses to them I may add them, but I don't want to waste potentially days re-writing entire boss fights if people don't really care all too much:
-Grim Pantheon: Every Pre-Hardmode and Hardmode boss are given Post-Moon Lord stats and alterations to their attack patterns where needed. They will also have new drops that are worthwhile obtaining Post-Moon Lord. As expected this is a Post-Moon Lord item that triggers this.
-Chaos Indulgence: Each boss gets better stats and alterations to their attacks, but are made in ways as to potentially work alongside things like Calamity's Revengeance/Death Mode for people who apparently hate themselves enough to go through Hard Mode's Hard Mode's Hard Mode's Hard Mode.
-The Romance Option: A joke method for defeating bosses. Throwing enough hearts at them ends the fight and grants additional dialogue. Usually it is harder than just using weapons and provides no additional benefits outside of comedy and/or additional challenge. However, there is one upside in not triggering some bosses' later phases.
Please bear in mind all 3 would require me looking at bosses from Vanilla, my own pages, Calamity, Thorium and (maybe) Spirits and writing down massive blocks of text for their differences: So not only is it hard work but also doesn't bring any 'cool aesthetics' as having sprites alongside the pictures normally has for these things.
[Potentially General]

Anyways, with all that stuff aside, enjoy :)
61 - Earthworm
Appearance: A massive worm made seemingly of grass and dirt. Each segment of its body appears either made of or covered in dirt and has patches of grass growing over each of them. Greyish-brown spikes protrude from parts of its body; most notably the tail and head, with the latter's being larger and bent inwards like teeth.

Summon: Use the Earthern Root anywhere in the player's world. The boss doesn't despawn if taken to any specific biomes, depths, or times; only if all the players in the current world are dead. It will chase players across the map if it needs to. It spawns in the ground a fair distance from the player to reduce the changes of cheap damage at the start of the fight.

[Fought: Late Hardmode]

Stats:
Health: 500,000 (850,000)
Attack:
-200 (450) (Head) (Inflicts Nature's Wrath)
-65 (180) (Body) (Inflicts Nature's Wrath)
-75 (200) (Shockwave) (Inflicts Dazed in Expert)
-60 (150) (Spikes) (Inflict Venom)
-58 (140) (Leaves) (Inflicts Nature's Wrath in Expert)
Defence:
-45 (Head)
-80 (Body)
[Immune to most debuffs except On Fire!, Cursed Inferno, Frostbite, Daybroken and Shadowflame]

Debuff: Nature's Wrath:
-Decreases player's defence by 15 and deals roughly 8 health per second in DoT

Attacks:
The Earthworm, as with most enemies, burrows through the ground, using various attacks at seemingly-random intervals to ensure it to still be a threat even to things outside its melee range. Like the Destroyer it can 'fly' if the player stays too high up for it to reach.
-It can fire rapid barrages of leaves from its segments in the player's general direction. They are fairly fast and very, very numerous
-It can release floating spikes that home in on the player and follow them for a while until they despawn.
-It can also release large bursts of arcing spikes from segments under heavy fire; usually being the head.
-If travelling from air to a block the Earthworm's head may release a large 'shockwave' of spikes along the ground that travel out both ways for about 10 blocks. It does this mainly when burrowing out of, or in to, the ground.
As the Earthworm's health lowers it begins getting faster and attacking with increased frequency. (The speed and frequency increases are larger and more apparent in Expert Mode)

Defeat: Explodes into massive chunks of dirt.

GelTech Info:
-Made by the Dryads long ago as a defender of the earth, since then corrupted by the evils of this world. Destroying it has returned it to what it once was.

Drops: Various dirt-themed weapons including a gun that fires exploding mud rounds, a sword that fires mud and spikes, and an upgrade to the Dirt Rod that either launches dirt-like projectiles at the cost of mana or picks up dirt blocks with alt-fire that can also be used to deal damage. Also drops a heck of a lot of dirt. In Expert Mode it drops a special accessory that provides buffs based on the player's biome.

Extra Info:
-The Earthworm's main debuff is actually a sort-of combination of the world evil debuffs Ichor and Cursed Inferno. It has defence drops to signify Ichor and damage-over-time for Cursed Inferno
--This may be a reference to the GelTech saying it had been corrupted by the world evils, or just merely for gameplay.
-Two of the Earthworm's drops are actually pseudo-upgrades to other items. The gun is essentially a better Sand Gun and the staff a better Dirt Rod
-In Expert Mode if the Earthworm spends a lot of time near the surface he can potentially 'chain' the player with shockwaves as the debuff would stop the player being able to reliably escape a 2nd, and so on and so forth.
--Arenas with lots of platforms also share this problem as the shockwaves would be created every time the boss ascends or descends down a row, potentially making the fight harder than it needs to be.
-It is recommended to stay underneath the Earthworm as little as possible during this fight due to not only putting you in more danger of being hit by the shockwaves or trapped by the worm, but also since the spikes released by damaging a particular segment too much all fall downwards not long after being launched
--The player can create lag or even max out the projectile limit by using piercing weapons to trigger the effect across several segments at once.
[Added: 21/5/19]
62 - Steampunker
Appearance: A goldish-bronze worm with several cogs protruding from several parts of its body. Its frame is quite minimal compared to other worm bosses, with several holes that reveal numerous glowing green 'rods' travelling through it. Its tail appears to be sword-like, as well as using the same colours as the green rods inside of its body.

Summon: Use the Steampunk Worm anywhere in the player's world. The boss is unaffected by time and place except for in the Underworld.

[Fought: Late Hardmode]

Stats:
Health:
-285,000 (500,000) (Worm)
-65,000 (95,000) (Mini-Worms)
Attack:
-195 (350) / 245 (450) / 500 (1000) (Head Melee)
-65 (100) / 115 (150) / 350 (700) (Body Melee)
-58 (90) / 108 (140) / 300 (600) (Laser/ Mini Worm Melee) (Lasers inflict Cursed Inferno)
-70 (120) / 120 (170) / 400 (800) (Steam Geyser) (Inflicts Broken Armour and Warmth)
Defence:
-65 / 35 / 225 (Worm Head)
-140 / 110 / 500 (Worm Body)
-85 / 55 / 325 (Mini-Worm)

1 - Normal Stats (Under most conditions)
2 - Underworld Stats (If taken to the Underworld)
3 - Enraged Stats (If the Dual-Mechanics haven't been defeated yet)

Attacks:
Burrows through the ground throughout most of the fight, launching various types of attack at the player. It may also summon minions at random intervals (though in Expert Mode at least 2 will be alive at any given time)
-It may release a capsule which falls down before exploding into a smaller version of itself (a 'mini-worm'). The capsules don't do damage but the worms do as soon as they become active upon the capsule's explosion.
-It may fire a rapid barrage of lasers at the player which travel through blocks and inflict Cursed Inferno on hit
-If the player gets close to its body but doesn't make contact in 3 seconds the segment closest to the player will release a burst of steam out to its left and right, dealing moderate damage and inflicting Broken Armour and Warmth.
-It may release bronze spheres with cogs sticking out which linger in the air and fire out jets of steam in the cardinal directions. They linger for a very long time and can only despawn after enough time passes as they are immune to damage.
At 10% (30%) health the Steampunker will stop burrowing and instead become airborne; flying overhead while occasionally swooping down to the ground or moving in loops around the player in an attempt to trap them. It uses the same attacks outside of now flying.

Defeat: Explodes into gibs consisting of green crystal shards and large chunks of metal. The shard gibs in particular have green fire particles radiating off of them.

GelTech Info:
-A mechanical marvel at the time of its original conception. Since it was created it has been upgraded time and time again with archaic, yet effective, technologies.

Drops: Several weapons using similar colour schemes and/or a steampunk theme. A sword that launches arcing cog projectiles, a staff that launches fiery cogs, and a steampunk flamethrower to name a few. All attacks that can inflict fire-based debuffs inflict Cursed Inferno.

Extra Info:
-For whatever reason this boss will be in an enraged state if fought prior to the Dual-Mechanics, though this may be since the Steampunker's summoning item actually uses the Dual-Mechanics' summoner in its recipe.
-The boss' design and attacks are obviously based off of the Destroyer's, though having been given a steampunk aesthetic complete with new colours and effects.
-The Steam Burst attack released when close to its segments is actually more dangerous than being hit by the segments themselves. If you are unsure if you can dodge it or if you are trapped by its movements it may just be best to tank being hit by the body's melee damage as opposed to the increased damage and debuffs of the steam.
--However, if the head is the segment you are closest to and are at risk of hitting, the steam blast is the preferred option here since contact damage from its head is, as with most worms, very high
-Despite having a sword tail it does not deal additional damage when attacking using its tail.
[Added: 21/5/19]
63 - Dual-Mechanics
Appearance: Two mechanical eyes made using similar colours to the Steampunker boss seen previously. They are essentially steampunk versions of the Twins, dubbed 'Rotatanazer' and 'Steamatism'
-'Rotatanaser' has a large cog continuously rotating in the middle of its body; visible from its sides. It has a large pinkish-red eye and several smaller ones placed around it. It has three other pink orbs at the back of its body.
-'Steamatism' releases small jets of steam from the pipes at either side of its body, though it is merely for aesthetics. It has a green eye surrounded by 'plates' of metal which end on more green crystals. Even more green crystals line other parts of its body, with another larger one near the middle of its body.
(Bear in mind that both names are trashy placeholders at the moment until I can come up with better puns based on their original names).

Summon: Use the Steampunk Eye anywhere in the player's world, though it must be at night. The boss will become enraged if the player doesn't kill it before daytime.

[Fought: Late Hardmode]

Stats:
Health:
-48,000 (80,000) (Steamatism)
-37,500 (70,000) (Rotatanazer)
Attack:
-50 (85) / 250 (425) / 74 (130) / 370 (650) (Steamatism Melee)
-55 (92) / 275 (460) / 70 (114) / 350 (570) (Steamatism Fire)
-45 (78) / 225 (390) / 65 (120) / 375 (600) (Rotatanazer Melee)
-56 (95) / 280 (475) / 78 (138) / 390 (680) (Rotatanazer Laser)
Defence:
-50 / 250 / 65 / 375 (Steamatism)
-44 / 220 / 60 / 300 (Rotatanazer)

1 - Phase 1, Not Enraged (Above 60 (75)% life, Nighttime)
2 - Phase 1, Enraged (Above 60 (75)% life, Daytime)
3 - Phase 2, Not Enraged (Below 60 (75)% life, Nighttime)
4 - Phase 2, Enraged (Below 60 (75)% life, Daytime)

Attacks:
Phase 1:
Steamatism will fly horizontally to the player, firing cursed fireballs which explode on contact with solid objects, then it will perform 5 charges in succession, each covering large amounts of ground, before going back to firing fireballs. The fire inflicts Cursed Inferno.
Rotatanazer flies diagonally and fires two streams of lasers that move in a double-helix shape. They pass through blocks and ignite the player on hit with the On Fire! debuff. After a few laser shots it charges at the player 12 times, though each individual charge doesn't cover much ground.
When either get to 60 (75)% health they transition into Phase 2, spinning round and transforming into their alternate forms (as you would expect from bosses that are essentially steampunk versions of the Twins).
Phase 2:
Steamatism flies towards the player, spraying three jets of fire from its mouth with one travelling forwards and the other two at slight angles (In expert mode it also still spits the exploding fireballs). After a while it will begin performing up to 8 short-distance chain dashes at the player, then goes back to the flamethrower attack. The fire inflicts Cursed Inferno.
Rotatanaser now fires 3 intertwining lasers at a time that inflict On Fire! on hit that pass through blocks. After a few attempts at hitting the player with them it begins to fire a stream of lasers at the player instead for a few seconds, then goes back to the triple-lasers.

Defeat: When either is defeated they explode into gibs of their respective crystal colours and chunks of metal. The crystal gibs radiate particles of their respective fire colours.

GelTech Info:
-Mechanical monstrosities created in an age long past. For some reason they seem to have received continuous upgrades since their inception despite the fact every upgrade has still used technology from their original time.

Drops: Both drop weapons based on their colours and/or a steampunk theme. Flamethrower, fire staff and flaming sword for Steamatism and a flail, wand and summoning staff for Rotatanazer.

Extra Info:
-Like the Steampunker boss it is 'partnered' with, this boss also has an enraged mode that multiplies its stats if the player activates a situation that it doesn't like which, for this boss, is bringing it into Daytime
--However, it is still possible to beat the boss during the day, but it is much harder and provides no additional rewards and thus isn't recommended
--The player is required to kill this boss to stop the Steampunker activating its enraged mode during its battle, virtually forcing the player to beat the Dual-Mechanics before being allowed to face the Steampunker itself.
--Much like with the Steampunker their fight is very similar to the original Twins battle, though with a few new attacks and improved stats to go with a new look
-Only two of the three mechanical bosses actually receive steampunk forms in this mod, as Skeletron Prime doesn't receive one while everyone else does
--This is because Tremor, still quite a popular mod, has the Cog Lord; its own steampunk Prime which acts for most as the face of the entire mod (and, to put it simply, I can't make a better-looking steampunk prime.)
-Despite the fact Rotatanazer's sprite is actually larger than Steamatism's they still end up looking smaller as the former's sprite has made smaller and the latter's sprite larger when fought.
[Added: 21/5/19]
64 - Doombringer's Pillars
Appearance: Three large pillars made of solid substances wrapped partially in vines. Each has two visible power cores; one at their base and one partially visible behind a plate in their middles.
-The Pillar of Flame is made of large chunks of obsidian held together by strands of flowing lava. Its core uses lava colours, as you would expect.
-The Pillar of Frost is made of ice and has vines coating its upper body and inner parts around its core. Small flowers of frost grow on these vines, but are hard to see. The core uses the colours of the frostbite flames.
-The Pillar of Death is made of smoothed bones, coated in many brown and seemingly-dead vines. The vines are covered in small thorny spikes. Its core uses yellows and oranges.

Summon: Use the Threefold Undoing at night. All 3 bosses spawn at once and begin attacking the player immediately. They will follow the player across the world and, as long as there are active players and it isn't daytime, they will remain active.

[Fought: Post-Moon Lord]

Stats:
Health:
-1,000,000 (1,950,000) (Flame)
-1,250,000 (2,450,000) (Frost)
-1,500,000 (2,950,000) (Death)
Attack:
-195 (340) (Flame Melee)
-150 (230) (Flame Attack 1/ Death Attack 2)
-170 (285) (Flame Attack 2/ Frost Melee)
-140 (216) (Frost Attack 1)
-160 (254) (Frost Attack 2)
-145 (223) (Death Melee)
-130 (200) (Death Attack 1)
Defence:
-60 (Flame)
-80 (Frost)
-100 (Death)

[Flame's attacks all inflict On Fire! and Oiled, Frost's attacks inflict Frozen and Frostbite, and Death's attacks inflict Venom and Nature's Wrath]

Attacks:
Each pillar flies towards the player most of the time, using one of their 2 attacks. All 3 attack at roughly the same time, usually having one use its 2nd (and more powerful) attack while the others use their more standard 1st attacks. (In Expert Mode there are no limitations like this)
Each pillar has 2 unique attacks and a teleport ability that they each use differently.
-Flame attacks by firing arcs of 3 fireballs at the player for their first attack, releasing stationary exploding fireballs as their 2nd (more deadly) attack and their teleport has them vanish and then re-appear almost off-screen where they then dash across the screen at the player. (Expert mode has the charge also launch fireballs at the player while the charge is in effect and increases the number of exploding fireballs in the 2nd attack).
-Frost attacks by releasing small clusters of snowflakes that after launch eventually slow down and 'poof' away for their first attack, summon icicles that rain down from above almost-randomly for their 2nd attack and when teleporting will teleport nearby before orbiting the player entirely at least once. (Expert mode has the orbit release icicles when above the player and makes the icicles larger and more numerous in attack 2).
-Death attacks by firing large barrages of spikes at the player for their 1st attack, fires a burst of spikes in every direction for its 2nd, and teleports off-screen to heal for the teleport. When healing it heals 200 (500) health per second while stationary until attacked, where it stops healing and begins attacking again.

Defeat: Whenever anyone is defeated they explode into flames matching the colours of their cores and leave large gibs of whatever materals they were predominantly made of (Obsidian and flames for Flame, Ice and frostbite for Frost, Bone and 'orange stuff' for Death)

GelTech Info:
-Believed by a lost society to signal the bringing of the end, the sentient monolithic figures you witnessed have mysteriously been reactivated. Could this be a sign that the people of the lost society were correct... or mere coincidence?

Drops: The final one killed drops all the items. They drop an accessory based on each that boosts certain stats (Damage for Flame, Defence for Death, and a mixture for Frost) that aren't based on which is killed last. Also drop materials used to craft lots of different weapons and armours. (In Expert, depending on which you killed last, they will drop accessories that provide mini versions of the pillars that provide small buffs and act as summons)

Extra Info:
-The 3 pillars each have a specific role that they play in their fights: The Flame pillar is offence, Life is defence, and Frost is rather neutral; having stats roughly in the middle of the other two
-Due to the Pillar of Death being defensively based and having healing abilities it is likely that the Death pillar, ironically, would be the most likely to survive longest when compared to the others
-Due to the Pillar of Death having a debuff that reduces defence and enhanced longevity when compared with the others it may be recommended to either target it first so that you don't have to worry about the defence drops, or more likely target it last so that you can get the other two pillars out of the way first.
-In total there are actually 4 damage-over-time debuffs in this fight, none of which are actually blocked by an Ankh Charm. 2 of them also partner well with the Oiled debuff, which is also inflicted by one of the pillars.
-The Pillar of Flame's ability to inflict On Fire! and Oiled simultaneously means that the player will always be taking increased damage from the fire.
-The boss, accidentally, has some similarities with Thorium's final boss the Ragnarok: 3 different bosses representing fire, death and ice (which is just solid water) that fight the player at the same time, each using their own respective attacks. The one representing death is the tankiest of the three and often will take the longest to kill. They can only be spawned at night and their locations are unimportant and finally they are both Post-Moon Lord bosses, even if fought at different times after the Moon Lord's defeat.
-Originally, only the Pillar of Death was designed for the boss, with the other two being designed later. The Pillar of Death also ended up the only one not based on some sort of particular element like the other two.
[Added: 21/5/19]
65 - Tomato
[200 Boss Special]

Appearance: Hey it's me!

Summon: Use the Ultomatom anywhere in the player's world during the day. Biome is unimportant, as with a lot of bosses.

[Fought: Chaos Mode]
[Special Boss: Rarely dropped by Tomato Plants in Chaos Mode; uncraftable and unlisted summon]

Stats:
Health: 25,000,000 (35,000,000)
Attack:
-300 (465) (Melee/ Tomato Summon Melee)
-340 (560) (Sword/ UFO Summon Melee, Laser)
-325 (545) (Bow, Magic Bolt/ Jetpack Melee)
-400 (700) (Colossus Tomato Melee)
Defence: 184

[Tomato's attacks all inflict Nature's Wrath, the small Tomato Summon inflicts Nature's Wrath, the UFO inflicts Electrified, the Jetpack inflicts Dazed, and the Colossus inflicts Withered Armour and Broken Armour]

Attacks:
Phase 1:
Tomato moves and jumps around quite quickly, though stops when performing attacks. He uses a mixture of a bow, sword and staff for attacking normally.
-With the sword he will perform several swings that move him forwards followed up an upward leap that leads into a downward strike. The leap aims directly at the player and passes through blocks, though the down strike doesn't.
-The bow fires rapid barrages of holographic green arrows that leave brief lingering spore trails. The arrows pass through blocks.
-The staff fires an arc of 4 magic bolts, followed by a barrage of 5 shots in rapid succession, followed by an arc of 7 bolts more tightly packed together. The bolts explode on impact with solid objects or after travelling their limit.
At 80% health Tomato pulls out a summoning staff and attempts to summon a minion. The minion summoned is a small Tomato enemy (like those seen all the way back in the Tomato Arena).
Phase 2:
Tomato's attacks are exactly the same during this phase, though there is the added difficulty caused by the addition of a new summon.
-The small Tomato summon hops around, attempting to get below the player, before performing super-jumps to reach them and deal contact damage. When performing super-jumps it can sometimes ignore blocks if players are behind them. It essentially acts like a slower-moving Slime summon for the boss.
At 60% health Tomato brings the summoning staff out again and goes to summon another tomato. This time he summones one wearing a jetpack which flies around.
Phase 3:
Things stay mostly the same. Tomato's attacks get a little stronger, though the 1st Tomato minion remains exactly the same.
-Tomato's sword swings are slightly faster and the bow and staff fire a couple of extra projectiles.
-The Jetpack Tomato summon flies close to the player and then charges into them at high speeds. After a charge there is a 3 second cooldown before another one can even be attempted. It is quite fast, though is still only around the speed of Hermes Boots when close-by. However, then the Jetpack Tomato is too far from the player it can accelerate constantly until it gets close again.
At 40% health Tomato pulls the staff out again to summon a 3rd minion. This time he summons the 'UTO'; a summon that has a Tomato piloting a tiny UFO.
Phase 4:
Tomato, the Tomato Summon, and the Jetpack Tomato remain the same.
-The UFO summon flies above the player and tries to rain down thick, but slow-moving, lasers. They always move vertically downwards and are fired continuously for as long as the player is in range.
Finally, at 20% health, Tomato tries one last summon. This time he summons a massive version of the Tomato Summon, far larger than Tomato himself, which wields a makeshift wooden 'hammer'. Tomato briefly looks dumbfounded but then begins attacking again.
Phase 5:
Everyone except Tomato remains the same. All the minions from before remain active as usual.
-Tomato's attacks gain more projectiles and the sword swing is faster and the downward strike now has the blade horizontally instead of vertically, increasing the hitbox.
-The Colossus Tomato slowly jumps towards the player, attempting to either jump up and land on the player with the hammer held horizontally, or they attempt to get a good swing in when players get close. They can ignore blocks with their jumps if needed, like with the small Tomato summon.

Defeat: All of the minions are despawned into puffs of smoke, with the Colossus leaving behind its hammer. Tomato is sent tumbling away, dropping the drops instantly upon defeat. While rolling he continues going under most circumstances; dropping down pits and literally rolling up walls. However he despawns into a puff of smoke if he encounters something that hinders movement completely.

GelTech Info:
-*( ' ')

Drops: The drops are mostly based on the items used by the Tomatoes throughout the fight. Tomato can drop his sword, bow and staff. The Bow and Staff act as in the fight and the Sword either fires holographic tomato projectiles or performs a chain of swings with the alt-fire that grant brief invulnerability. Also drops a summoning staff, a jetpack, and a staff that fires UFO lasers. In Expert Mode it also drops Yggdrasil's Bark, a material used for upgrading items.

Extra Info:
-Tomato was given a boss battle as a milestone of now having reached (roughly) 200 boss designs over the last few years. Some bosses weren't counted for different reasons, but most were; so I'll consider it 200.
-Tomato's fight is a strange one as, unlike most boss fights, the phases don't really affect Tomato himself much, but instead the army of minions he boasts and it gradually increasing in number every phase.
--This means that, unlike other bosses with varying attack pattern changes over Phases, Tomato's are almost always definitely going to be harder than the last, even if only by a small margin.
-Tomato is one of few bosses to predominantly use excessive amounts of minions, but also have them be invulnerable as well.
-Tomato's GelTech description is just an ASCII image of himself.
--Technically, this isn't the first time someone has had this though. Shockal's GelTech description was just his 'eye-screen', for example.
-Many of Tomato's summons are actually based on enemies from the original Tomato Armies event from the 1st guide. The only summon that wasn't was the Colossus Tomato, which is entirely unique for Tomato's fight.
-Tomato's post-defeat tumble can continue on from one end of the world to another, as long as there are no obstacles blocking him from continuing. Of course, it takes a while.
[Added: 21/5/19]
66 - Antlion Queen
Appearance: Essentially just a massive Antlion. It has several spines coating its back and a few on its head that are stretched round to vaguely resemble a crown.

Summon: Use the Antlion Nest in the Desert. The time of day is unimportant, though the boss will despawn if the player spends too much time outside of the desert after it is summoned.

[Fought: Pre-Hardmode]

Stats:
Health: 3,500 (5,000)
Attack:
-65 (110) (Melee)
-45 (90) (Sand Ball)
Defence: 18

Attacks:
The Antlion Queen flies towards the player like the Antlion Swarmers do for most of the fight. It uses one of three attacks occasionally. Antlion Swarmers and Chargers spawn continuously throughout the fight.
-It may perform a single long-ranged charge aimed at the player
-It may speed up significantly and try to stay 'on top of' the player, however it is slightly affected by knockback during this attack
-It may spit 3 arcing sand ball projectiles at the player

Defeat: Explodes into gibs, as with most bosses.

GelTech Info:
-Likely the queen of a nest of antlions. In fact, considering how close she was to the surface, it is likely the entire colony may be right beneath your feet.

Drops: Royal Mandibles, a material used for upgrading several desert-themed items including the Mandible Blade, Sand Gun, and Fossil Armour. Mandibles can also be used for an accessory that boosts mining speed when equipped. Expert drop is an Antlion Swarmer mount.

Extra Info:
-The Queen actually has quite high damage output for a Pre-Hardmode boss, with its contact damage rivalling Hardmode enemies and being potentially able to 2-shot players who only have around 120 health (and can outright 1-shot a player without heart crystals or good armour in Expert Mode)
-The Antlion Queen is used as minions for a Hardmode version of the fight seen later, though they are stripped of all of their special attacks except the charges (Including summoning Swarmers and Chargers).
-Since one of its melee attacks has it become slightly vulnerable to knockback it can actually be held off to an extent through use of weapons like the Minishark.
-The Queen actually uses behaviours found in all 3 types of vanilla Antlion enemies. It has the Antlion's sand spit attack, the Charger's charge abilities, and the Swarmer's appearance and basic attack.
[Added: 21/5/19]
67 - Albino Antlion Queen
Appearance: Like the Antlion Queen seen prior, though it now is much paler and shinier. It uses the colours of the Albino Antlion enemy; one which is not seen in the PC release of the game.

Summon: Use the Antlion Idol in the desert. Time of day isn't important, though the boss will despawn if the player strays too far from the desert during the fight.

[Fought: Hardmode]

Stats:
Health: 16,850 (22,000)
Attack:
-80 (134) (Melee)
-55 (100) (Crystalised Sand Ball)
Defence: 50

Attacks:
Uses similar attacks to the Antlion Queen, which makes sense. The A.A.Q. flies towards the player at high speeds, using a few attacks to try and hit the player. Antlion Queens spawn throughout the fight, though are limited to only flying at the player or using attacks other than their sand ball projectiles.
-A.A.Q. may perform a series of 3-4 long-range chain dashes at the player in succession
-She may stay still and vibrate her wings, causing 1-2 more Antlion Queens to spawn
-She may stay still and fire a large but inaccurate volley of silvery crystalised balls of sand.
-She may line up with the player horizontally and perform a high-speed dash towards them

Defeat: Explodes into shiny, but messy, gibs.

GelTech Info:
-Beautiful yet deadly; one of the desert's top predators. If spotted in the wild it can often be seen preying on giant scorpions, using its claws and fangs to pierce their hard shells with ease. Much of this brutality was also focused at you not long ago.

Drops: Silver Insect Plates and Albino Mandibles; both materials used for crafting a series of items. The plates are used for an armour set and wings while the mandibles are used to upgrade many items including the upgrades of the Sand Gun and Mandible Blade established in the Antlion Queen section, the Minishark (makes it into an Antlion Cannon), and the Hornet Staff (makes it summon Antlion Swarmers instead). Expert Mode has it drop an accessory that grants the player an Albino Antlion minion.

Extra Info:
-Much like with the Antlion Queen seen prior, the A.A.Q. seems to sacrifice defensive capabilities for outright damage output. This is evidenced by, despite her being an early Hardmode boss, her damage being comparable to some of the Moon Lord's attacks.
-The A.A.Q. actually uses the Antlion Queen bosses as minions during her fight. However, they cannot spit sand balls and don't drop any items upon being killed like if they were summoned by their respective summoning item.
--If any of A.A.Q.'s minions are alive the summoning item for the Antlion Queen cannot be used as it counts as her already being active in the player's world at the time of use.
-As mentioned prior the boss' colour scheme was based on the Albino Antlion enemies seen in only a select few versions of the game currently. It is likely they will only grow rarer as other versions of the game also get updated.
[Added: 21/5/19]
68 - Water Spirit
Appearance: A vaguely human form made almost entirely out of water. The only part of the spirit's body that isn't made of liquid water is a large band of ice around her waist.

Summon: The player needs to drop a Frost Core into glowing lakes; small biomes found in the underground which contain a glowing blue body of water isolated inside a small temple. Dropping the Frost Core in the lake destroys it and the Spirit spawns a few seconds later. The boss doesn't despawn unless it has no targets; being unaffected by time of day or biome.

[Fought: Hardmode]
[Special Boss: Unlisted summon, no summoning item*]

*An item is used for summoning it, but it isn't used how other items are used

Stats:
Health: 31,200 (50,000)
Attack:
-40 (80) (Melee) (Inflicts Wet 'debuff')
-55 (105) (Water Bolt)
-60 (112) (Homing Bolt)
-85 (150) (Giga Water Bolt) (Inflicts Wet 'debuff')
Defence: 0

[If the player is inflicted with the Wet/Slimed debuff and takes contact damage from the boss the Spirit is healed by 500 (2000) health]
[Boss is immune to most debuffs except Ichor and Electrified]

Attacks:
Spends most of the fight slowly flying towards the player, attempting to deal contact damage, while using various other abilities while doing so.
-She may turn into a blob of water, fall into the ground and disappear, and then re-emerge elsewhere from the ground as a sort of 'teleport'
-She may summon up to 5 'water bolt' projectiles in succession at the player. They act the same as the ones fired by the water bolt, but are a lighter blue colour and are larger.
-She may fire pale blue blobs that slowly follow the player, passing through walls to chase them. They eventually despawn either on contact with the player or after being active for too long
-Finally, she may summon a colossal water bolt projectile. This acts like a water bolt, but also launches 3 of its own smaller water bolts at the player while active. (It also explodes into 6 more water bolts after it expires in Expert Mode)

Defeat: Breaks down into a large blob of water and disappears into the ground, similar to her 'teleport' animation. Drops items instantly upon defeat, not upon disappearing into the floor.

GelTech Info:
-Awoken by the chilling energy of the Frost Core dropped into its home, the Spirit seems to have been quite disgruntled. Usually, they are quite peaceful and don't interact much with anything except other Water Spirits.

Drops: Drops a slightly stronger water bolt and a summoning staff that summons water droplets that act like Slime minions. Drops a few accessories that either grant buffs in water, water breathing, or increased damage dealt by water and ice weapons. In expert mode she also drops an accessory that grants the player a water spirit minion as well.

Extra Info:
-Despite having some of the highest health of any hardmode boss and having a healing factor, the Spirit can actually be fought almost as soon as the player gets into Hardmode.
--Also, despite having tonnes of health, she actually has no damage reduction of any kind; taking full damage from all of the players' attacks and also being weak to Ichor
-As expected, the Spirit is immune to most debuffs since she lacks a proper physical form like most other entities have.
-The Spirit is able to heal herself upon dealing contact damage to a player already inflicted with the Wet or Slimed debuff. Those debuffs inflicted by other enemies or the Water/Slime Gun also count and thus heal the boss as well
-The Love Potion actually neutralises the boss in Normal Mode, ending the fight immediately and still dropping drops. However, this doesn't do anything in Expert Mode.
--This is mainly just a joke as to make the Love Potion an actual worthwhile craft for something, as well as calling back to the Spirits' normally-peaceful nature
[Added: 23/5/19]
69 - Factory Heads
Bosses that, according to a few small bits of lore, are apparently Slimey's assistants alongside Pinky. However, they don't really get as much lore as the others as they are overall less important characters.

Each one drops materials used for crafting several other boss' summoning items; including both Slimey fights, Pinky, Bastion, and Technicus Juggernaut.

69A - Ringo
69B - Midori
69C - Indigo

GelTech Info: (Dropped by the first one defeated by the player)
-Slimey's lab assistants when designing or building many of his mechanical creations. Many of the items they use were actually designed in the labs or, in one case, they themselves were.

Extra Info:
-The description for the bosses says that many of their items were made in the lab. This is likely Midori's mech suit and Indigo's spear.
--It also says that one of them may have actually been made in the lab as well, which is probably Ringo due to his weirdly abstract design
-Each one of the bosses either has a name based on their colouration or on their design.
-While most of the factory heads wear black suits, Midori is seen instead donning a white suit instead.
-[Obligatory 'I didn't make no. 69 a sexual innuendo/ joke boss haha' message here]
[Added: 23/5/19]
69A - Factory Head Ringo
Appearance: A very weird tall man in a black suit. The most noticeable thing about him is his head, which is instead a large metal ring with no facial features to speak of.

Summon: Use the Rounded Key anywhere in the player's world. The boss spawns shortly after and doesn't despawn unless it lacks a target (either by everyone dying or moving too far away from it).

[Fought: Post-Moon Lord]
[Special: Summoning item dropped by enemies and cannot be crafted]

Stats:
Health: 565,000 (870,000)
Attack:
-158 (285) (Melee)
-178 (330) (Drop-Down)
-150 (270) (Soundwave)
Defence:
-80 (Normal)
-Invincible (Gleaming Pose/ Player too far)

[If the player is too far away from the boss it will begin dodging all their projectile attacks completely by making various victorious poses. He continues attacking even during the poses, however, so this doesn't stun-lock him even with continuous projectile spam]

Attacks:
Spends most of the fight jumping around hastily, being able to leap up to 65 blocks high into the air and up to 40 blocks horizontally per jump (but often only performs smaller jumps depending on how close the player is). It uses 'attacks' every few jumps.
-It may jump above the player, flex its nonexistent muscles, and drop down while still posing. A 'shockwave' of wind makes his hitbox bigger when falling
-It may spin around with its arms out with his legs together. He falls slower while doing this (like a player with a Featherfall Potion) but can still move horizontally without limitations until he either hits the ground or 5 seconds pass.
-He may strike a pose while stationary. When doing this pose sparkle effects radiate from him and he is immune to damage. After a few seconds he will stop posing, become vulnerable again, and go back to attacking.
When under half health he gains 2 new attacks which he adds to his roster. There is no indication of this until he begins using them.
-He may stand still and then fire a massive barrage of soundwaves from the hole in his face. They are 'rows' of white rings that bounce off of solid blocks they hit. They are launched at the player, but are rather inaccurate overall.
-He may perform 3 short jumps, each with a soundwave being fired at the player upon landing.

Defeat: He spins around, dramatically falls to the floor, and holds up a small flower. After a while he gets back up and performs a massive leap upwards until he is off-screen, where he despawns.

GelTech Info:
-One of the 'Factory Heads' that works under Slimey. He is believed to have been created, or at least heavily modified, within Slimey's workshop at some point, though it is never stated who actually did this.

Drops: Drops Metallic Onion Rings, both a consumable and a material. Eating them heals the player 1 health but has no cooldown while as a material it is used for many boss summoning items and for an armour set; including Slimey and Bastion's summons. Drops a few other items, including a stretchy fist weapon and a tesla coil staff.

Extra Info:
-Ringo is shown to be an excessively goofy, even if still difficult, boss. His movement consists of energetic leaps and are interrupted by his attacks, which also consist mainly of poses or flexes. Even his defeat animation is over-the-top and cartoonish and his main drops are literally called 'Metallic Onion Ring'.
-Ringo's health is quite low for when he is fought in the game, though this is due to his small hitbox, continuous fast movements, and his invulnerability either as an 'attack' or when the player is too far away from him.
-Ringo's jumps, as with most other bosses with jumping for mobility, can pass through blocks if they need to reach the player. This is done mainly to stop the player just trapping Ringo in a box, as his projectiles cannot pierce through solid blocks.
-Ringo's projectiles are both very fast and can ricochet off of blocks they even so much as brush against. This makes them especially deadly in cramped areas like most underground caves and arenas and so it is best to fight him in the open where they have limited blocks to bounce off of.
[Added: 23/5/19]
69B - Factory Head Midori
Appearance: A green slime in a white mech suit. Midori appears to have given herself some slightly more human-looking features including eyes and what seems like hair. The suit, while mostly white, also has areas where what appears to be cursed flames are visible from parts of the suit; mainly around the waist and parts of the arms and legs. The suit also has a red gem-like core in the centre of the chest which also seems to be glowing, though glows dimmer than the flames.

Summon: Use the Kinetic Key anywhere in the player's world. The boss, like Ringo, only despawns without a target; unaffected by time and biome.

[Fought: Post-Moon Lord]
[Special Boss: Enemy drops summoner, uncraftable summon]

Stats:
Health:
-1,450,000 (2,200,000) (Midori)
-150,000 (300,000) (Drone)
Attack:
-148 (284) (Melee) (Inflicts Cursed Inferno)
-165 (314) (Flare Bomb) (Inflicts Cursed Inferno)
-155 (298) (Drone Flamethrower) (Inflicts On Fire!)
-190 (370) (Drone Explosion) (Inflicts On Fire!)
-220 (430) (Kinetic Burst) (Inflicts Dazed for an extended time)
Defence:
-78 (Midori)
-100 (Drone)

Attacks:
Unlike the other Factory Heads Midori actually has the ability to levitate and thus is able to basically fly around as opposed to jumps or hanging in the air. Most of her movements are either fast flying above the player or teleportation to reposition herself suddenly. She is stationary when attacking, however.
-She may summon several fireballs behind her before launching them all at the player at high speeds. They explode on contact with solid objects.
-She may summon several fireballs around herself that float into the air and then dive back down again vertically at slight angles. These fireballs also explode on contact with solid objects.
-She may summon drones that fly at the player using small flamethrowers. These drones eventually explode either after firing 8 flamethrower blasts or upon reaching 0 health. (In Expert Mode they launch themselves in the player's direction when planning on exploding and just explode either upon being hit by another attack or after hitting a solid object.)
At half health she gains a few new attacks, though there isn't any indication of changes until she begins using new attacks alongside her old ones.
-She may summon several fireballs near the player that all launch at the player suddenly
-She may summon fireballs that continuously home-in on the player for a few seconds before continuing off in 1 direction until they explode on contact with a solid object.
-The red gemstone in her chestplate may glow and a pink ring will appear around every player. After a while the ring stops moving and releases a powerful flash that damages players inside the ring(s). (The time between the rings stopping and the damaging flashes is smaller in Expert Mode)

Defeat: The red gem shatters and the green flames in her suit are extinguished, leaving some grey and glassy tubing visible. Midori then teleports away.

GelTech Info:
-Another of the Factory Heads that works under Slimey. Midori was a slime with some strange telekinetic abilities that just seemed to appear one day and make her way to Slimey's workshop. A suit was fashioned for her to make them easier to use, complete with specific details she asked for.

Drops: Green Ember Wisps; materials used for crafting recipes for other bosses (Like Slimey, Bastion and Technicus) and for a mage armour set. May also drop the Ruby Core, an accessory that grants levitation, and in Expert Mode the 'Telekinesis for Dummies' which acts as a stronger Dirt Rod that can both pick up blocks and damage enemies with them at the cost of mana.

Extra Info:
-Midori's name just means 'green', which makes sense since she is basically just a green slime
-Midori's design is rather obviously based on the Pokemon Gardevoir; with green and white features and a red 'core' in her chest.
--Her psychic abilities were also inspired by Gardevoir
---Originally she was going to use a series of different weapons; mainly missile launchers, grenades, and mines, before the re-work changed her to be a little more original with her attacks
-Her Kinetic Burst is both hard to dodge and punishes the player heavily if they are hit by it due to the Dazed debuff it grants lasting a long time.
-Despite having telekinetic powers she never actually uses them to move the player, though does use them to bring out drones and alter her fireballs' paths
--She also seems to be able to teleport things due to her ability to continuously summon fireballs and drones out of seemingly nowhere without consequence.
[Added: 23/5/19]
69C - Factory Head Indigo
Appearance: By far the most human-looking of the Factory Heads. Has purple hair and a black suit like Ringo's, though also carries a purple and grey halberd.

Summon: Use the Biohazard Key anywhere in the player's world. Like the other Factory Head bosses she doesn't despawn unless she lacks a target due to an absence of players. Biome and time are, as with the others, unimportant.

[Fought: Post-Moon Lord]
[Special Boss: Uncraftable summon dropped by enemies]

Stats:
Health: 1,400,000 (2,050,000)
Attack: 130 (250) (Inflict varying debuffs)
Defence: 92

Debuffs:
-Contact damage doesn't inflict any debuffs
-Armour Breaker inflicts Shadowflame, Dazed and Broken Armour
-Energised Strikes inflict Shadowflame, On Fire!, Cursed Inferno, and Frostbite
-Cursed Edge projectiles inflict Shadowflame, Ichor and Cursed Inferno
-Withering Aura inflicts Nature's Wrath, Withered Weapon, Dazed and Confused
-Wither Bubble inflicts Nature's Wrath, Withered Armour, Withered Weapon, Ichor, Cursed Inferno, Shadowflame, On Fire!, Frostbite, Dazed, Broken Armour, and Confused

Attacks:
Indigo moves much like how Storm and Ember did in boss page 4; moving at a speed almost akin to teleporting and hanging stationary in the air to attack. She uses various attacks, though a lot of them have melee-based aspects to them.
-She may perform 3 swift charges at the player; each incredibly fast but made easier to dodge by her smaller hitbox
-She may hold her halberd back before releasing a powerful swing. The swing is made artificially larger by a light purple 'slash' effect seen creating an after-image of the slash. They player is inflicted with Shadowflame, Dazed and Broken Armour if they are hit.
-She may perform a chain of 6 slashes, moving slightly forwards with each slash. The attack only takes about 1.5-2 seconds in total and has a larger hitbox created by more after-images. If the player is hit they receive the Shadowflame, On Fire!, Cursed Inferno and Frostbite debuffs.
-She may swing the halberd around while in-place, creating a multitude of crescent-shaped projectiles that accelerate towards the player's location and pass through blocks. These projectiles, if they hit the player, inflict Shadowflame, Ichor and Cursed Inferno.
At half health she gains a few new attacks to add to her arsenal, though this isn't indicated until the begins incorporating them into her attacks.
-She may stay still and then suddenly release a burst of energy in a large aura around herself. The radius is quite large so it's easy to get caught off-guard. This attack inflicts Nature's Wrath, Withered Weapon, Dazed and Confused.
-Her final attack is to summon a large purple and green blob of gel in the air. This stays in place for a while before she then charges through it; cutting it in half and causing it to explode into more massive globules that disperse outwards. The droplets cannot pass through blocks and are mildly affected by gravity but move very fast and inflict numerous debuffs including Nature's Wrath, Withered Armour, Withered Weapon, Ichor, Cursed Inferno, Shadowflame, On Fire!, Frostbite, Broken Armour, Dazed and Confused.

Defeat: The halberd is broken and begins dripping more of the sludge as seen in the Wither Bubble attack. Indigo gets angry and dashes away.

GelTech Info:
-She carries a specialised halberd that as several small stores of numerous lethal substances which she can freely mix at any time for an attack. It is unknown why Slimey made this for her, as she originally seemed to have almost no connection to him whatsoever.

Drops: Drops Sludgy Amalgam; a crafting material used for making an armour set, some weapons, and the summoning items for other bosses like Slimey and Technicus. Drops a couple of other items including an accessory that sometimes removes damage-over-time debuffs from the player and, in Expert Mode, drops a Broken Halberd; an upgradable weapon which resembles Indigo's

Extra Info:
-Despite Indigo seeming to have rather low damage for a mostly melee-based boss and for using an actual weapon, this is made up for by her massive assortment of debuffs she can potentially inflict upon the player.
-All of her attacks outside of contact damage inflict massive assortments of debuffs; with many also being ones that lower the players' stats (like defence, mobility, and attack) or damage-over-time effects.
-Since she can inflict Broken and Withered Armour alongside Nature's Wrath and Ichor, she can actually reduce a player with as much as 140 defence to 0. Both the Armours reduce it to 35, Ichor to 15, and finally Nature's Wrath to 0.
--Therefore, anyone with less defence risks being taken into negatives which also causes its own damage-over-time effect as well
---The highest amount of damage over time is with On Fire! (-4), Shadowflame (-15), Cursed Inferno (-6), Nature's Wrath (-8), and Frostbite (-8). This means the player may actually be taking up to 41 damage per second.
[Added: 23/5/19]
70 - True Dragon King, Garagon
Appearance: Garagon, though with a better-looking sprite. While he appears smaller he wouldn't be in-game (the sprite is just a mockup at the moment, he'll be larger... much larger.)
As with the original sprite he is a massive red dragon with golden eyes and ruby-like crystalised spikes running down his back. More spikes are present on his knees and tail and a couple near his neck. He has an orange underbelly and the insides of his wings are also orange.

Summon: Use the Emblem of the Dragon King at the surface. Biome and time of day are unimportant. Garagon only despawns if he doesn't have a target (e.g. all players are dead or too far away). Summoning item is made using one of the drops from Dragon King, Garagon as well as a couple of late-game Chaos Mode items.

[Fought: Chaos Mode/ Post-Game]
[Special Boss: Post-Chaos Revenge Boss]

Stats:
Health: 165,000,000 (300,000,000)
Attack:
-550 (750) (Melee)
-450 (636) (Fireball) (Inflicts Dragon King's Flame)
-512 (698) (Flame Breath) (Inflicts Dragon King's Flame)
-455 (643) (Rainbow Flarestorm) (Inflicts Dragon King's Flame and another debuff based on colour)
-530 (726) (Fire Tornado) (Inflicts Dragon King's Flame)
-390 (550) (Cinder) (Inflicts Dragon King's Flame)
-440 (623) (Golden Scythe) (Inflicts Dragon King's Flame)
-470 (667) (Giga Fireball) (Inflicts Dragon King's Flame)
-520 (714) (Flare Bomber) (Inflicts Dragon King's Flame)
Defence: 250 +20% Damage Reduction

[Immunities: Garagon is immune to Ichor, Damage-over-time debuffs, fire-based debuffs, and anything that reduces his damage. Titanium Armour's Shadow Dodge also doesn't work against Garagon's melee damage]
[Like with the other Post-Game bosses he cannot take over 2,000,000 damage in 1 hit. If this happens he instead takes no damage.]
[Additional debuffs inflicted by Rainbow Flarestorm: On Fire! for orange, none for yellow, Nature's Wrath for lime, Cursed Inferno for green, Emerald Flames for blueish-green, Frostburn for blue, and Shadowflame for purple]
Debuff: Dragon King's Flame
-Deals 20 damage per second to players inflicted with it.
--Deals 500 damage per second to enemies inflicted with it.

Attacks:
Phase 1:
Like with the original battle Garagon will perform 3 charges at the player before firing off one of numerous attacks. After using the attack he will take a quick 1-second pause and repeat the cycle.
-He may fly near to, but not directly at, the player while breathing out a long stream of fire breath. The flame breath will leave cinders on blocks that they hit, damaging the player if they make contact with those blocks before the cinders expire.
-He may summon fireballs around himself in two rings, one travelling clockwise and the other anticlockwise. After a couple of seconds he sends the outer ring at the player as individual fireballs launched in succession and the inner ring is launched as the entire ring.
-He may flap his wings and launch massive amounts of fireballs in the player's general direction at varying speeds.
At 85 (90)% health he transitions into his second phase, signalled by dialogue.
"You may indeed be as strong as the others say after all..."
Phase 2:
He retains all of his attacks from before, though he now also has a few new attacks and also changes up his charge pattern a little. He now charges 4 times instead of 3, and the time between the last charge and the attack is a little shorter.
-He may launch 2-3 large fireballs that explode into fiery tornadoes after a couple of seconds. These tornadoes are similar to Duke Fishron's cthulhunadoes, though are made of a golden flame instead of water. These tornadoes spit out little cinders which arc downwards and linger on the ground for a few seconds. The tornadoes eventually disperse into small fireballs which travel out a couple of blocks before exploding.
-He may fly in a loop; summoning several fireballs as he moves. These all then suddenly accelerate towards the player as soon as he has finished the loop.
At 60 (65)% health he transitions into another new phase, also signalled by dialogue
"I must push you to your limits to see what you are capable of, young one"
Phase 3:
Gains some new attacks which he adds to his arsenal. Charge pattern doesn't change.
-He may launch several large fireballs in the player's general direction that eventually all explode outwards into 8 (10) smaller fireballs
-He may perform a short-distance charge at the player that ends with Garagon spitting out a massive barrage of inaccurate, but plentiful, fireballs towards the player
-He may summon a multitude of large golden crescent-shaped projectiles that accelerate as they move. They pass through blocks and infinitely pierce until they despawn.
At 40 (50)% health Garagon transitions into another new phase, signalled by further dialogue.
"I am greatly impressed by these feats you have accomplished"
Phase 4:
Garagon's 4th charge now ends with him cloaked in fire, increasing the size of his hitbox. Each charge is also faster and covers even more ground. He gains a couple of new attacks as well.
-He may launch a colossal volley of fireballs at the player, though they are of varying colours (most from the rainbow). While they are rather inaccurate their additional debuffs and large multitude make them hard to dodge as Garagon keeps locked-on to the player throughout, meaning you cannot just move out of the way of the stream.
-He may disappear for a moment while several fiery explosions happen overhead. Chains of explosions descend downwards, with each explosion triggering another in the line. Garagon re-appears after a few seconds of the explosions being active.
At 20 (30)% health Garagon reaches his last phase. More dialogue signals this.
"You remind me of my glory days; back when my master was still around..."
Phase 5:
It is very different based on what difficulty the player is on. In Normal it becomes easier and in Expert even harder.
-In Normal Mode he transitions back to a slower version of Phase 1; likely tired from the fight
-In Expert Mode he becomes an even faster variant of his Phase 5, with attacks covering more ground and projectiles being both faster and larger.
When Garagon is at 10,000 health he will become invulnerable, signalling the end of the fight, and also stops attacking. He cannot deal contact damage or move when invulnerable.

Defeat: Garagon stops, says his last few lines of dialogue, and then flies away. He drops loot after he has finished speaking.
"I will admit I am extremely surprised with what I have witnessed from you"
"The others informed me of one they found worthy of my attention... but I have underestimated you"
"I see no more need to continue this fight; you have proven yourself already"
"I hope you use your power wisely in the future"
"Anyways, I shall depart, though I shall leave a gift for the trouble"

GelTech Info:
-The real Garagon, not some faker this time around. It is very unusual to see him go out of his way to seek someone others have given word about, so this is an anomalous occasion. To prove yourself to him in combat must mean that you possess some of the greatest skills one can accomplish in a fight.
[Wear this knowledge with pride; having had the Dragon King himself assess your talent]
70 - True Dragon King, Garagon (Continued)
Drops: 'True' variants of a lot of the weapons the previous 'Dragon King, Garagon' dropped, as well as things like a summoning staff that summons small dragon minions. May also drop items used to upgrade several of the 'tiered' weapons dropped by some of the other bosses. Drops several accessories that either boost stats, grant the player the ability to inflict additional debuffs, a pair of powerful wings, an item that grants immunity to a lot of damage-over-time debuffs, an item that grants the player a flaming shield that sometimes blocks damage with a cooldown, and an accessory that sometimes causes projectiles to be imbued with the Dragon King's Flame; increasing damage and inflicting Dragon King's Flame on hit on top of other debuffs they may have already caused. In Expert Mode he drops the Lost King's Hilt; an upgradable melee weapon which becomes extremely powerful when fully upgraded.

Extra Info:
-This is now the 3rd time I have sprited Garagon and still might end up altering it. However, next time I probably won't be remaking his fight again
--His original fight is now canonically a fake Garagon; masquerading as him for attention
-While the sprite itself seems small in-game it is much larger; making him still one of the largest bosses (smaller than, say, the Leviathan from Calamity but still larger than Duke Fishron)
-Garagon has his own signature damage-over-time debuff which deals massive damage and lasts for a few seconds
--This, combined with Garagon's massive damage output and ability to ignore 50% of the player's defences due to Chaos Mode, makes any hit from Garagon a deadly one
--He also has an attack which allows him to inflict other damage-over-time debuffs, which means that he can potentially stack up to around 50-DPS
---Also, since one of the debuffs is Emerald Flames, a water source could be useful nearby since it doesn't expire on its own
-Garagon is the only enemy other than than Emerald Dragon that can inflict Emerald Flames
-This Garagon doesn't destroy Glass or Water during phase transitions like the previous one did
-This is one of the only Post-Game fights that are accessed upon defeating Chaos Doppelganger's Revenge. The others include 'Chaos Doppelganger', Chaos (Endurance) and Lunar which are all also very difficult.
-The other people mentioned during his dialogue may be talking about characters like Slimey, Pinky, Ember and Storm as they all have associations with Garagon. Other characters, like the Dryad, Prism Knight, Frost, etc. are also said to have as well at varying points.
--Speaking of characters Garagon also briefly mentions his 'former master'; the previous king before him.
---He even seems to have one of the broken weapons his master used to use and, in Expert Mode, gives it to the player.
[Added: 24/5/19]
71 - Chaos Dragon
Appearance: A large black dragon with a large assortment of heads growing in unusual places around its body. It has red wings, horns, claws, and a red underbelly and purple eyes and tongues. 3 heads grow from necks, two make up its arms, another has grown on the end of its tail and numerous other misshapen and malformed heads grow in other random places across its body, bulging out unnaturally.

Summon: Use the Crying Dragon Pendant at night. The boss will leave very abruptly if it reaches daytime, though biomes and depths don't cause any problems. The Pendant itself is made using the drops of the 6 Gilded Guardians and a few post-Moon Lord and Chaos Mode items.

[Fought: Chaos Mode]
[Special Boss: Either requires items to be transferred or use of a Chaos Mode crafting table to get said items legitimately]

Stats:
Health:
-50,000,000 (64,512,855) (Chaos Dragon)
-3,000,000 (4,950,235) (Dragon Apparition)
Attack:
-500 (850) (Melee) (Inflicts Shadowflame)
-485 (825) (Eldritch Ember) (Inflicts Blackfire and Shadowflame)
-450 (780) (Blackfire) (Inflicts Blackfire)
-435 (750) (Blackfire Ember) (50% chance to inflict Blackfire)
Defence: 72

Debuff: Blackfire:
-Heals enemies that inflict it by 500 health per second while dealing 10 damage per second to players
-Heals players 5 health per second that inflict it while inflicting 35 damage per second to enemies

Attacks:
An airborne boss that, when not flying either above or directly towards the player, will use one of a few attacks. There isn't any particular order to any of his attacks.
-Each of its heads may spit a small 'ember' of flame. They arc downwards and linger on the ground for a couple of seconds. This attack can be performed whenever it is close to or above the player and has the shortest wind-down of any of his attacks.
-He may perform 3 long-range, high-speed charges with only mild breaks inbetween. This may sometimes be followed up almost immediately by another attack.
-He may spit a massive volley of blackfire fireballs from its mouths towards the player. While they are inaccurate they do have a mild homing effect when close to the player and can pass through blocks. This may be immediately followed by the first attack.
-He may launch up to 3 groups of purple and black fireballs. Each 'group' consists of 2 fireballs, one purple and one black, travelling around each other in a spiral helix-like pattern whilst moving. They home in on the player until they eventually disappear. The attack is called the Eldritch Ember.
-He may summon a transparent purple copy of himself called the Dragon Apparition which uses weaker versions of most of the actual Chaos Dragon's attacks (2 charges that are slower, only the larger heads spit embers, smaller and less plentiful blackfire fireballs are spat, no Eldritch Embers may be used).

Defeat: Explodes into massive clouds of black and purple, with tonnes of purple glowing particles being left behind as well. Any Apparitions the boss summoned will not disappear and must be manually destroyed by the player or despawned by teleporting far enough away.

GelTech Info:
-Believed by some groups to be a living manifestation of anger and hatred, by others a sign of the end, and by further still just some sealed-away dragon banished for aggression. Whatever may be the truth one can see why people could mistake it for these things.

Drops: Numerous weapons that inflict Blackfire, an accessory that allows attacks to inflict Blackfire, and a mount in Expert Mode of a smaller version of the boss that both flies and fires Blackfire fireballs at nearby enemies.

Extra Info:
-The Chaos Dragon was another enemy brought back from the original guide. However, it has received massive changes to its overall design that make it almost entirely different from appearance alone (though hopefully positive improvements).
-The Chaos Dragon has no apparent relation to Chaos Doppelganger, despite similarities in their naming
-The Chaos Dragon is one of the three dragon bosses that has their own signature debuffs, with the others being Garagon and the Emerald Dragon
--However, the Chaos Dragon's debuff is overall the weakest in terms of raw damage output, though the healing factor is quite useful
-The Chaos Dragon deals massive damage with each of its attacks and thus the player should take caution and play more on the defensive to minimise the chances of taking a hit
--In Expert Mode this is even more apparent as less tanky builds have the potential to be outright 1-shot by the boss or brought within Blackfire's kill range even if they do barely survive.
---This is made even worse by him having some of the highest health of any non Post-Game boss with a massive 50,000,000 health in Normal Mode alone
[Added: 24/5/19]
72 - Gilded Guardians
The Metal Guardians are a group of Hardmode bosses based on the 6 'Hardmode ores' (Cobalt, Palladium, Mythril, Orichalcum, Adamantite and Titanium). Each of them is also based on a mythological animal (Wyvern, Griffin, Amarok, Cockatrice, Aethon and Longma, respectively). The three based on the original three ores simply have a specific stat that they specialise in while the three based on the ores added later have gimmicks based on their armour sets.

Cobalt Wyvern: A blue dragon-like enemy which offsets its relatively low health with high speeds.

Palladium Griffin: An orange-coloured griffin who offsets its own low health with a powerful healing ability.

Mythril Amarok: A large greenish-coloured wolf who boasts very high damage but limited vertical movement.

Orichalcum Cockatrice: A pink cockatrice who has the passive ability of launching petals at the player whenever they are facing them. It isn't a very good flyer.

Adamantite Aethon: A large, red eagle-like bird who boasts very high defences and a mild healing factor.

Titanium Longma: A scaly pegasus-like creature with high defences and brief periods of invulnerability.

GelTech Info: (Dropped by the first one defeated by the player)
-Once thought to be the 6 animals that sealed away the power of a mystical but deadly dragon, their sudden and unexpected return worries many elders. Each possesses powers absorbed from the metals in the ground beneath your feet.

Extra Info:
-The 6 creatures are all mythological animals from various cultures from across the world
-Of the 6, the Amarok is the only one to not actually have wings
-Each of the 6 use the respective colours of their represented ores as their entire colour schemes except for their glowing white eyes
--This gives each of the 6 a metallic and unnatural look to their design. This may or may not be intentional.
-The 6 are also partnered into 3 groups based on their ores as well
--The Cobalt and Palladium Guardians are both used as symbols in England on different illustrations. Their fighting similarities are mainly their low health pools being offset by having methods of avoiding or recovering damage.
--The Mythril and Orichalcum Guardians share a very aggressive nature when fighting, as well as having limited vertical mobility that they can offset with special 'jumps' or other countermeasures.
--The Adamantite and Titanium Guardians have high health and flight, as well as slight additions to keep them alive longer, though don't share any other similar abilities, parallels or origins with each other.
---Also, since neither really have many specified abilities in their lore, they have both been given similar weather and elemental-based abilities to keep things interesting
-The 3 groups of Guardians also have similar biome specifications to each other:
--The Wyvern and Griffin are fought in biomes that go down to almost the very bottom of the world, or can be fought in one of the 1.3 biomes
--The Amarok and Cockatrice can be fought in surface or underground versions of their biomes, as well as both of their biomes being susceptible to contamination from the Corruption, Crimson or Hallow
--The Aethon and Longma are fought in the same places and will become enraged if taken out of their biomes instead of just despawning like the others.
-The 'mystical but deadly dragon' mentioned in their descriptions is the Chaos Dragon
--However, despite this, not only was the Chaos Dragon sprited and finished first, but also there is an entire portion of the game separating the Guardians from him (Post-Moon Lord)
-The 6's task of sealing away the dragon mainly refers to them continuously bombarding it with attacks to stop it from overpowering them and escaping
--The Wyvern and Griffin are not tasked with damaging the Chaos Dragon, but instead with supporting roles to help the others
[Added: 24/5/19]
72A - Cobalt Wyvern
Appearance: A blue wyvern with a body seemingly made or plated in cobalt. As opposed to using the Terraria-styled Wyverns it uses the original differentiation from a dragon: having two legs as opposed to 4.

Summon: Use the Cobalt Dragon Tooth either in the Jungle or a Marble Biome. However, due to space, the former is usually recommended. The boss becomes enraged it taken out of its respective biome, increasing its speed and damage. The summoning item is made of Cobalt, Feathers and Souls of Night.

[Fought: Hardmode]

Stats:
Health: 9,000 (14,500)
Attack:
-65 (110) / 90 (145) (Melee)
-58 (100) / 83 (135) (Magic Bolt)
Defence: 30

[1. Normal stats / 2. Enraged stats]

Attacks:
The Wyvern flies very fast and often doesn't spend much time on-screen; flying around either in massive figures of eight most of the time. Its attacks mostly consist of charges, with only few magic attacks.
-It may perform a series of chain dashes towards the player
-It may perform a high-speed long-range charge that curves in the player's direction
-It may charge diagonally at the player and then charge at them again almost immediately after
At half health it begins using actual magic attacks against the player, as well as becoming even faster. It retains all of its previous attacks.
-It may fire up to 3 magic bolts whilst flying above the player. These magic bolts explode into 4 smaller bolts after hitting a solid object. The 4 bolts either move in an 'x' shape or in the cardinal directions.

Defeat: Explodes into chunks of cobalt, with the glow of its eye remaining in-place until it vanishes.

GelTech Info:
-The Cobalt Wyvern was tasked originally with keeping intruders away from the vile dragon's cave, using both speed and aggression to its advantage. With the Wyvern having been destroyed, the cave may now be rediscovered by friends and foe alike...

Drops: Cobalt Bars and Cobalt Wyvern Scales; materials used to craft a few sets of armour and weapons. In Expert Mode it can also drop a pair of fast wings that have low flight time or, more rarely, the Wyvern Bolt; a magic weapon that fires projectiles similar to the ones the Wyvern itself fired.

Extra Info:
-The Wyvern has overall the least notable changes when transitioning into phase 2. It gains one new attack and a bit of speed, though nothing else.
-The Wyvern and the Griffin are the only two of the 6 Guardians that aren't specifically tasked with continuously weakening the dragon and are instead tasked with more support-based roles. The Wyvern specifically keeping people from finding the cavern the other guardians and the dragon are present in.
-The 'vile dragon' refers to the Chaos Dragon; the boss the 6 Guardians were tasked with keeping dormant.
[Added: 25/5/19]
72B - Palladium Griffin
Appearance: A griffin made of, or plated in, Palladium. It is one of the 6 Gilded Guardians.

Summon: Use the Palladium Claw in either the Hallow or in the Granite Biome. The Hallow works at any depth. The boss will despawn if taken out of its biome for too long. The Claw is made of Palladium Bars, Pixie Dust, and Souls of Light.

[Fought: Hardmode]

Health:
-8,500 (14,500) (Griffin)
-30 (70) (Healing Feather)
Attack:
-45 (90) (Melee)
-50 (93) (Energy Bolt)
-35 (60) (Healing Feather)
Defence: 20

[If the Griffin makes contact with one of the feathers it will heal 250 (400) health and destroy the feather]

Attacks:
Flies around, but not directly towards, the player. It sometimes stops to use one of a few attacks.
-It may stop briefly before performing a long-ranged charge towards the player
-It may fly overhead and fire up to 3 energy bolts at the player. They explode upon contact with solid objects or players.
-It may fire an arc of 5 bolts, followed by an arc of 4, followed up by another arc of 3.
At half health the Griffin will enter its 2nd phase, becoming faster and gaining attacks. It also begins regenerating 10 (12) health per second.
-It may charge, leaving feathers that linger in the air, and then charge back along the feather trail to regain health. Destroying the feathers prevents it from healing.
-It may rain down feathers randomly which slowly fall down from the sky. The Griffin may touch these during other attacks if they are not destroyed.

Defeat: Explodes into chunks of Palladium. Like with the other Guardians its eye remains stationary and glows for an extra few seconds before it also fades away.

GelTech Info:
-One of the 6 Guardians. The Griffin's role was to heal the others who had been wounded in the struggle against the vile dragon. Without its assistance it may only be a matter of time before the dragon is able to overpower the others.

Drops: Palladium Bars and Palladium Talons; materials used to craft a few different items. In Expert Mode it also drops an accessory that grants the player increased regeneration and another that sometimes drops healing feathers the player can collect to heal themselves with.

Extra Info:
-While the Griffin overall has the least health of all of the Guardians it still has high survivability due to its ability to both slowly regenerate health and to get it back from collecting the feathers it drops during some of its attacks.
-If the player catches the AI on a 'bad day' it may never actually get a chance to use a healing attack before being defeated. The same can also be said for using weapons with very high DPS that can defeat it before it gets to use many (or any) of its phase 2 attacks.
-It is recommended that players prioritise the destruction of any of the feathers it produces due to them having far less health than what would be healed to the Griffin if it touched them.
-Of the Guardians the Griffin was the last to receive a finished sprite.
[Added: 30/5/19]
72C - Mythril Amarok
Appearance: A large wolf plated in or made of Mythril. While it looks similar to the normal Wolf enemies it is larger (a lot larger in-game) and has fluffier and more unkempt fur, a longer tail, and most noticeably the Gilded Guardians' signature white eyes.

Summon: Use the Mythril Fang in the snow biome at either the surface or underground. Time of day is unimportant, though taking it out of biome for too long will cause the boss to despawn. A Blizzard always spawns upon the Amarok being summoned. The summon is made of Mythril Bars, Frost Cores, and Souls of Might.

[Fought: Hardmode]

Stats:
Health: 22,500 (38,000)
Attack:
-70 (200) (Melee)
-65 (170) (Ice Shards)
Defence: 30

Attacks:
Continuously attempts to melee the player with charges and leaps. As it runs it accelerates continuously up until around 120 mph, making it much faster than most players. Wolves also continuously spawn while it is alive.
-If the player is too high to reach with normal jumps then it may perform a super jump; passing through blocks and jumping to a max height that is a little over the player's current height.
-It may sometimes freeze in place and roar, launching a series of ice spikes at the player. They are all fired from positions close to the Amarok and are all launched with only mild delays.
At half health the Amarok will enrage and 'roar'. Upon doing so he will become much harder to see within the blizzard, though his eyes are still very visible. Otherwise, not much changes in the 2nd phase.

Defeat: Explodes into chunks of Mythril. As with the other Guardians the glow of its eye persists for a few seconds until that, too, fades.

GelTech Info:
-One of the Guardians who kept the vile dragon at bay. Using its raw might it pinned the dragon down, preventing its movement. Without it, it is likely the others will struggle keeping it contained.

Drops: Mythril Bars and Mythril Pelt; materials used for crafting a few items (mainly weapons and armour). Also drops two Expert Mode items in a giant wolf mount and an accessory that acts like an upgrade of the Shark Tooth Necklace.

Extra Info:
-The damage that the Amarok may deal when attacking the player is extremely high, with its normal damage being comparable to some bosses fought much later and its expert damage being comparable to some post-Moon Lord enemies.
--The expert damage has the potential to kill players in 3 hits, even with 500 health from Life Fruit.
-If the player is worried about dodging the boss they could potentially use the wolves that spawn to damage-boost and avoid being hit by the Amarok itself
-There is no association between this boss and the Yo-yo of the same name. However, the boss can drop it due to it being fought in the correct biome.
-While its sprite is one of the smallest of the Guardians it is actually one of the largest in-game
[Added: 28/5/19]
72D - Orichalcum Cockatrice
Appearance: A Cockatrice, a mythical creature whose appearance is somewhere between that of a dragon and a cockerel, seemingly made of or coated in Orichalcum. It is one of the Gilded Guardians.

Summon: Use the Orichalcum Egg in the desert at the surface or underground. The boss will despawn if taken out of the biome for an extended period of time, but is unaffected by time (though daytime is recommended due to lower enemy spawns and higher visibility). The summoning item is made using Orichalcum Bars, Birds, and Souls of Sight.

[Fought: Hardmode]

Stats:
Health: 22,000 (36,750)
Attack:
-65 (110) (Melee)
-55 (100) (Orichalcum Petals)
Defence: 32

Attacks:
Will spend most of its time grounded, attempting to ram into the player. It attacks based on player movement and positioning.
-If the player is high above it, then it will perform a leap and try to match the player's height, passing through blocks as it does so. It can also fall at a decreased speed, like that of the featherfall potion, by flapping its wings.
-If the player is facing towards the Cockatrice at any time then pink petals will fly in from off-screen and attempt to hit the player. This happens only if the Cockatrice is also facing the player as they are looking at it.
Upon reaching half health it lets out a shriek and begins moving faster and jumping more often. It doesn't gain any new attacks during this phase, however, despite the increased aggression.

Defeat: Explodes into pink-coloured chunks. The glow of its eye remains in-place until it eventually fades away.

GelTech Info:
-One of the 6 Gilded Guardians that helped keep the vile dragon at bay. Using its deadly gaze it limited the dragon's sight and regenerative capabilities, though without the gaze the beast's regeneration may be too much to handle.

Drops: Orichalcum Bars and Orichalcum Chicken Scales; materials used for crafting a few different items. Also drops an Expert accessory that launches petals when enemies are on-screen and a weapon that does AoE damage around the player.

Extra Info:
-Originally, a Basilisk was going to be used for this boss. However, with its design turning out to what could only be called 'a depressed armadillo', it got changed.
--The fight would have been the same, except that the Basilisk would have almost no vertical movement options, making it worse even for a boss
-The boss theoretically would never attack a player who is always facing away from it. However, with the movement and biome limitations this causes, this is hard to do
--Also, when dodging, players may accidentally sometimes face the boss to dodge a projectile, which then creates a chain of continuous projectile summons
-Despite having wings, the boss cannot fly.
--Despite not having wings, the EoC, BoC, Skeletron, Twins, Prime, and the Moon Lord can fly in vanilla alone.
-The Cockatrice's death-gaze ability, combined with the Orichalcum Armour set's bonus, were the combined inspiration for this boss' main form of attack
[Added: 28/5/19]
72E - Adamantite Aethon
Appearance: A large, red eagle. It appears to be made of, or at least plated in, Adamantite due to its colour scheme and shininess. Its design is based on Aethon, the bird which ate Prometheus' liver after he had given fire to humanity, as well as Adamantite ore.

Summon: Use the Adamantite Wing at the surface or in space. Time of day is unimportant but taking him to any other depths will enrage him, increasing speed and damage. The Adamantite Wing is made using Adamantite Bars, Feathers and Souls of Fright.

[Fought: Hardmode]

Stats:
Health: 38,550 (55,000)
Attack:
-65 (108) / 95 (158) (Melee)
-68 (113) / 98 (198) (Hand of Prometheus) (Inflicts Prometheus' Hold)
-55 (100) / 85 (140) (Red Feather)
Defence: 40

[1st column: Normal circumstances. 2nd column: Enraged stats]

Debuff: Prometheus' Hold:
-The player cannot move or use items while under this effect

Attacks:
Aethon will fly around, usually staying above the player as much as possible. Attacks will have him reposition himself before the attacks, giving brief but useful warnings.
-He may stop moving for a little less than a second (only 0.5) and then charge at the player at high speeds.
-He may begin moving towards the player, attempting to deal contact damage.
-He may move to a point where he is diagonal to the player and launch a large cluster or arc of red feathers. They don't pass through blocks but their speed and numbers make them hard to dodge.
At half health Aethon will let out a screech and flap his wings. This causes a debuff similar to Mighty Wind to be inflicted upon the player. Two large, red, transparent hands also become active.
Phase 2:
-The hands attempt to charge at and grab the player, leaving them unable to move or free themselves for a few seconds. This not only deals lots of damage and stops the player using items but also leaves them entirely at Aethon's mercy for a few seconds. The hands cannot grab the player for another 5 seconds after they escape to stop the player being chain-grabbed.
--If Aethon is above 25 (30)% health he will charge at the player, dealing melee damage, before they are released
--If Aethon is below 25 (30)% health he instead roosts and begins to heal 300 (420) damage every second for 5 seconds, healing a total of 1500 (2100) damage before the player breaks free.
-Aethon retains his previous attacks, though may now also screech again and change the direction of the Mighty Wind debuff

Defeat: Aethon explodes into a shower of Adamantite chunks, the glow of his eye remaining in-place until it eventually fades. Both Hands of Prometheus despawn as soon as Aethon is defeated.

GelTech Info:
-To keep the vile dragon at bay Aethon was forced to attack its many heads on a daily basis, stopping it from being able to fully recover. Without this, the vile dragon may see the world once more...

Drops: Drops a lot of Adamantite and Adamantite Feathers as well; crafting materials used for some weapons and armour. In Expert he drops the Adamantite Crest, which grants effects similar to, but stronger than, the Shield of Cthulhu's. An uncommon Expert Drop is also the Prometheus' Fist, which fires transparent red fists which can latch onto enemies and deal additional damage.

Extra Info:
-Since both hands can only move when charging, Normal Mode players can abuse this by distancing themselves from both hands before they charge, getting them to slowly align themselves and leaving only '1' hand to worry about.
--In Expert Mode this doesn't work because one hand moves half a second after the other, so they don't align properly or for very long.
-Both hands, despite also having parts of the arms visible, can only damage and grab the player if they make contact with the hands specifically.
-Defeating Aethon while being grabbed by a hand (either in Multiplayer or with damage-over-time/traps) will cause the player to be stuck helplessly in mid-air for the duration of the debuff, even after the boss is dead and the hands have despawned.
-Aethon was the first of the 6 Gilded Guardians to have had their sprite finished
-Aethon's role was to prevent the Chaos Dragon (referred to as the 'vile dragon' in the GelTech) from regenerating more heads as both punishment and to keep it imprisoned. This mirrors Aethon's role in mythology of him eating Prometheus' liver as punishment for giving fire to humans.
-Aethon is the only one named after a character as opposed to a species of the 6.
[Added: 25/5/19]
72F - Titanium Longma
Appearance: A winged horse-like creature covered in scales seemingly made of or coated in Titanium. It is one of the 6 Gilded Guardians.

Summon: Use the Titanium Dragon Scale at either the surface or space. Time of day is unimportant, but the boss will become enraged if taken elsewhere. The summoning item is made of Titanium Bars, Unicorn Horns, and Souls of Flight.

[Fought: Hardmode]

Stats:
Health: 35,000 (42,400)
Attack:
-65 (108) / 95 (158) (Melee)
-68 (113) / 98 (198) (Lightning Bolt)
-55 (100) / 85 (140) (Tornado)
Defence: 44

[Any time the boss manages to make melee contact with the player it will become invulnerable for 3 (5) seconds. This still occurs if the player was in some sort of invulnerability state of their own like Shadow Dodge]

Attacks:
Flies towards the player throughout most of the fight, stopping frequently to use an attack.
-It may perform up to 3 charges in succession which don't cover too much ground but are very fast
-It may release a projectile that appears to be a small tornado that tries to follow the player horizontally as it slowly falls
-It may release a tornado projectile that chases the player until it eventually despawns
At half health the boss will summon rain and gain new attacks. It is more noticeable than some of the others if rain wasn't already present when the fight began.
-It may drop up to 3 lightning bolts down from the sky onto the player.
-It may let out a cry which is followed by 5-6 lightning bolts falling from the sky randomly close-by

Defeat: Explodes into chunks of Titanium. Its eye remains stationary and continues glowing for a few seconds until it eventually fades.

GelTech Info:
-One of the 6 Gilded Guardians who kept the vile dragon at bay. Using its lightning it scorched the dragon's wings, preventing it from being able to fly away and spread destruction within its wake. Without its help the others will struggle at keeping the dragon down.

Drops: Drops Titanium Bars and Titanium Scales; used to make weapons and armour. In Expert Mode it can also drop a powerful set of wings and a magic weapon that drops lightning bolts from the sky towards the cursor.

Extra Info:
-While the Longma's body is similar to the Unicorn enemies in-game it is larger than them due to the sprite being slightly resized.
-The Longma's signature ability of invulnerability can only activate if it manages to make contact with the player. This still triggers even if the player is in their own state of invulnerability (e.g. with the Shadow Dodge debuff, Black Belt dodges, or during invulnerability frames after taking a hit).
--Therefore, if the player avoids getting hit by the boss' melee attacks, it can never get to use its signature ability
-The boss' high defence means that players will have to pick high-damage weapons to effectively deal damage to the boss. Weapons like the Megashark, due to their low base damage, may not be very effective against it (especially in Expert Mode).
[Added: 30/5/19]
73 - Abyssnail
Boss suggestion by Sorrow

Appearance: A completely black snail. However, they are never alone.
-Abyssnails are lone, black snails.
-Snail Swarms are masses of snails clustered together, appearing as large black masses.

Summon: Use the Abyssal Shell in the cavern layer. The player's screen dims and gains black borders, obscuring the player's vision. The snails do not follow the player out of the cavern layer and despawn if the player leaves for too long. Many, many snails spawn at once.

[Fought: Pre-Hardmode]
[Special Boss: Summon dropped rarely by Snails or Giant Snails]

Stats:
Health:
-(Infinite) (Snail Swarm)
-50 (100) (Abyssnail)
Attack:
-0 (0) (Snail Contact) (Inflicts Abyssnail's Clutches as long as they make contact)
-35 (80) (Snail Smother) (Inflicts Suffocated)
Defence: 8

Debuff: Abyssnail's Clutches:
-Decreases the player's movement speed by 50% and jump height by 70%. Grappling, teleport and dashes do not work. Lasts for 1 second after the snails have let go of the player.

Attacks:
The snails and snail swarms crawl towards the player, travelling up both background walls and blocks. They may pass through blocks if players are behind walls. Snail swarms are slightly slower than the snails.
-Snail Swarms release individual Abyssnails once they are near to the player. They inflict Abyssnail's Clutches if they make contact with the player and can inflict Snail Smother after making contact for 2 seconds; completely covering the player.
-Abyssnails are faster and can drop off of surfaces to catch the player. They inflict Abyssnail's clutches but cannot inflict Snail Smother until 4 of them have caught up to the player at once. After 2.5 seconds of 4 of them making contact they inflict the debuff.
After surviving 4 minutes of the onslaught there is a message that says 'The Abyssnails have retreated into the depths again' and the snails leave, with the closest swarm to the player dropping the items.

Defeat: The individual snails, upon defeat, explode into small black particles upon defeat. Upon the boss being defeated they all slowly crawl away from the player.

GelTech Info:
-The most dangerous swarms to inhabit the caverns. While they seem small their seemingly-indefinite numbers mean they can overwhelm those who underestimate them.

Drops: Snail-themed items, including an item that summons a giant snail mount in expert mode.

Extra Info:
-There is little point going out of your way to kill the snails due to them respawning infinitely. This can, however, be useful if the player is at risk of being trapped
-While running away may seem a good idea with hermes boots this might not work as they can spawn from anywhere. They can drop on the player's head or rise up from other parts of caves.
-This boss can potentially reach the spawn limit due to them spawning continuously from their swarms and from other places off-screen
-Their colouration can make them hard to see and their signature and powerful debuffs make escape very difficult
--Escaping the swarms once caught is almost impossible without Lightning boots and/or Asphalt due to the massive speed and jump debuffs and mobility limitations.
-The snails can crawl up nonexistent walls in the cavern layer, though this is sometimes hard to notice due to the lowered light levels present during the boss
[Added: 26/5/19]
73B - Abyssnail Queen
Abyssnails still the idea of Sorrow

Appearance: The monarch of the Abyssnails. Its head appears to have a spiral-patterned shell atop with two antennae-like strands coming down either side. Its eyes glow white and no other features are visible on its face. It dons very basic robes with minimal visible detail. The most noticeable aspect of her design is her lack-of colour, only using black, grey and white (colours very fitting for the Abyssnails).

Summon: Use the Shell of Spiraling Depths in the cavern layer. Attempting to take the boss out of the cavern layer will immediately begin causing a slow blackout effect on the player which, if not stopped by re-entering the cavern layer, will kill the player outright. The only way to get the summoning item is to get the Abyssnail's summoning item and to right-click it against the Lihzahrd Altar Post-Golem.

[Fought: Late Hardmode]
[Special Boss: Summon not crafted. Material for summon is a drop which in itself is a secret item]

Stats:
Health: 44,000 (69,000)
Attack:
-45 (80) (Melee)
-60 (150) (Watcher)
-65 (130) (Snail Smother) (Inflicts Suffocated)
Defence: 10

Attacks:
The fight is, for the most part, the same as the Abyssnail fight from pre-hardmode, though the snails are faster and deal more damage when they have caught the player. The snails also do not despawn after a time limit; only when their Queen has been defeated.
The Queen spawns after 30 seconds of the snails being active. The Queen floats around, teleporting after every 5-6 seconds.
-While the Queen floats she leaves small circular projectiles with eyes that stay in-place for a long time to act as more obstacles for the player.

Defeat: Black particles radiate from her as she takes damage; with more particles the lower her health is. Upon being defeated she disappears into a cloud of particles which fade over the next few seconds. The snails leave after she is defeated; even ones latched onto the player.

GelTech Info:
-Believed to be important to the Abyssnails for one reason or another. Much like with the snails they commands, its origins are mostly unknown as well.

Drops: A few shell-themed items. A couple of accessories grant defensive buffs at the cost of other stats like health, attack, and speed. The Expert Mode drop is a shell that gives the player 50% damage resistance against 1 hit every 30 seconds.

Extra Info:
-The Queen was an after-thought who was invented after the creation of the Abyssnails themselves.
-The Queen's design was inspired by Hollow Knight's Snail Shamans. Hollow Knight was also partially the inspiration for her monochrome colour scheme; with the other part simply being down to the Abyssnails' own lack of colour.
--Due to only being made out of three colours she has one of the most simple designs of any boss I have ever designed
---Her attack patterns were also designed to be very simplistic as well, but this was mainly due to the Abyssnails still being the majority of the danger during this fight from their actions (even if wings and more mobile accessories make them a little easier to deal with)
[Added: 29/5/19]
74 - Malignance, The Guardian
Appearance: A large, mechanical worm. Its body is covered in a multitude of interlocking metal plates for protection. Its numerous eyes and two of its front fangs glow golden colours, similar to that of Ichor. It is one of the 4 members of the King's Order.

Summon: Use the Kingworm at Night. The biome and depth are not important. The boss will only despawn if there are no active players in a world (e.g. all players are dead) and will follow players from one end of the world to the other if necessary. The boss will become enraged and gains greatly increased stats if it survives until daytime (Doubled attack, 10x defence).

[Fought: Post-Moon Lord]

Stats:
Health:
-6,450,000 (9,999,999) (Malignance)
-112,000 (200,000) (Drone)
Attack:
-500 (950) (Head Melee) (Inflicts Withered Weapon, Withered Armour and Ichor)
-202 (365) (Body Melee) (Inflicts Withered Weapon, Withered Armour and Ichor)
-185 (340) (Golden Disc) (Inflicts Withered Armour and Ichor)
-250 (420) (Golden Deathray) (Inflicts Withered Armour and Ichor)
-160 (300) (Golden Laser) (Inflicts Ichor)
Defence:
-100 (Head)
-20,000 (Body)
-124 (Drone)

[The boss is immune to almost every debuff]
[Contact with the boss' segments only provides 50% of the normal immunity time]

Attacks:
Malignance continuously attempts to ram into the player, as with most worm bosses. If the player is close to the ground he will burrow but if the player remains airborne he will be able to fly; becoming even more dangerous. Malignance's attacks, while rather infrequent, are deadly.
-Damaging Malignance will cause it to spawn drones. Drones orbit players while periodically firing lasers at the player. The amount that spawn scale with players.
-Malignance may charge up a colossal 'deathray' from its head. It locks on to the player until the last second where it then fires the laser. As it moves the deathray is fired towards the same point, causing it to appear to 'sweep'.
-It may fire a massive barrage of golden lasers from all of its segments. They move fast but cannot pass through blocks
-It may summon large golden ring around each of its eyes. Then all of the rings are launched at the player simultaneously. The rings pierce infinitely and pass through blocks, only disappearing after travelling over 300 blocks.
At 75% health 3 drones are summoned around each player, regardless of distance from the boss
At 50% health 5 drones are summoned around each player, regardless of distance, and the boss will speed up slightly
At 25% health 8 drones are summoned around each player, regardless of distance, and the boss will attack with slightly increased frequency

Defeat: Explosions erupt from many of its segments, seemingly randomly, for a few seconds before it explodes into gibs. The gibs are mainly of its metal plates, but also include its fangs and part of its main eye.

GelTech Info:
-"Oh great and noble king, I shall defend these lands you proclaim.
Until you return once more when you are complete again."

Drops: Reinforced Metal and Michorian Souls; both materials used to craft post-Moon Lord items like weapons and armour. The Metal is mainly for armour and new weapons while the Souls are mostly for being able to upgrade Hardmode weapons. In Expert Mode it also drops the Ichor Shield; an item which inflicts Ichor onto all nearby foes when damaged.

Extra Info:
-Malignance's drones are ordered as such that they do not overlap. If one ring around the player is filled then they will begin spawning on a new layer slightly further out.
-The drones should be dealt with as soon as possible since they will always remain close to the player and are often quite difficult to dodge, especially in large numbers.
-Like other bosses with defence-dropping debuffs Malignance can drop some players' defence to zero if they have 40 defence or less. However, due to how late into the Post-Moon Lord game Malignance is fought, this is unlikely.
-Malignance's body segments do not have any sort of damage-reduction on them. However, their defence will still reduce almost every attack to only 1 point of damage.
--The player would need a weapon that deals over 10,000 damage to harm him in Normal Mode and around 15,000 in Expert; numbers not normally reached by any weapons until the player is into Chaos Mode.
-The reduction in immunity frames provided when taking contact damage from Malignance means that the player is likely to be hit more than once if they accidentally make contact.
--To add further insult to injury making contact with Malignance will cause defence-reducing debuffs which means it is likely the subsequent hits will deal even more damage than the first
-Malignance is apparently one of the King's Order; another sub-group of bosses linked to each other by their following of an unnamed king
--The king they follow appears to not be Garagon due to them saying he is 'incomplete' and await his apparently-scheduled return
---It is also likely not Garagon's former master either due to his apparently-kindhearted nature
----Other characters, like Scourge and Chaos, are also quite unlikely for their own reasons; whether it be Scourge never using attacks based on them or Chaos never mentioning them or being referred to as a 'king' elsewhere (plus both of these characters are far from absent)
-The 'Michorian Souls' names are combinations of the words Might and Ichor; referring to Souls of Might (dropped by the Destroyer) and Ichor (which explains the debuff and golden colouration of the boss' eyes and projectiles)
--Unlike other mentions of Ichor this one doesn't appear to be used as toilet humour (like the Golden Shower), but instead more based off of the blood of Greek gods (as is the main definition of Ichor)
[Added: 31/5/19]
75 - Acrimonious, The Devoted
Appearance:
Acrimonious himself is a masked figure in a robe. The mask is orange and featureless, covering his entire face while also being partially obscured itself by his hood. The robes he wears are bright red and gold which cause him to stand out from his surroundings.
The Crimson Maw is a spherical monster with a design like that of the Eye of Cthulhu's 2nd form. Tendrils and spikes protrude from its back and the front of its body is mainly a giant mouth. 2 separate rows of teeth are visible; with the 2nd row seemingly elevated on their own set of jaws.

Summon: Use the Kingseye at night. The biome and depth are unimportant and do not affect the boss. The boss will become enraged during the daytime; causing the Crimson Maw to begin chain-dashing at the player while Acrimonious gains 99% damage reduction. The boss only despawns when there are no live players in a world.

[Fought: Post-Moon Lord]

Stats:
Health: 5,450,000 (8,000,000)
Attack:
-150 (250) (Acrimonious Melee)
-178 (303) (Acrimonious Flame) (Inflicts Crimson Flame)
-200 (368) (Crimson Melee) (Inflicts Crimson Flame)
-180 (307) (Crimson Flamethrower) (Inflicts Crimson Flame)
-170 (289) (Crimson Fireball) (Inflicts Crimson Flame)
Defence: 102

Debuff: Crimson Flame:
-Inflicts 6 damage-per-second, though often lasts for a long time. Timer ticks down 5x faster in water as opposed to being immediately extinguished by it.

Attacks:
Acrimonious often levitates in-place, performing an attack before teleporting to a new location in a similar fashion to the Lunatic Cultist. However, his attacks are quite slow to be used.
-He may summon several red flames at the player's location over a few seconds. The player needs to keep moving to avoid being hit
-He may launch up to 8 flames at the player in rapid succession. However, they will all arc towards the player instead of being launched in a straight line.
-He may summon numerous flames from the ground that slowly rise up. They pass through blocks and continue travelling for a long time.
At 90% health Acrimonious summons a Crimson Maw. Crimson Maws will spend a lot of their time cycling between charges and fire-based attacks. Acrimonious still attacks on his own while the Crimson Maw is active.
-It may charge at the player 3 times in succession. They move fast and cover a lot of ground with each charge
-If players are close to it while it isn't charging it will spew out columns of red fire towards the player.
-If the player is too far away while it isn't charging it will continuously launch red fireballs at the player. The fireballs explode on contact with solid objects or after travelling too far.
At 40% health a 2nd Crimson Maw will be spawned alongside the first. Acrimonious continues to attack during this phase as well.

Defeat: Acrimonious holds his head while red particles erupt from him and the Crimson Maws spin around while also erupting with particles. Eventually, all 3 of them explode into clouds of red mist. Acrimonious also leaves gibs of fabric and a part of his mask as drops.

GelTech Info:
-"I serve my master vigilantly until the day of his return,
And to those who've wronged him or his men I swear to you that they shall burn"

Drops: Crimson Essence and Crimsyt Souls; both are used in the creation of armour and weapons. The Essence is mainly used in new items while the Souls are mainly used for upgrading earlier gear, like that obtained in Hardmode. His Expert drop is an accessory that summons a small Crimson Maw minion.

Extra Info:
-Acrimonious, despite having connections to the Crimson in name, colour scheme and drops, can be fought in both Crimson and Corruption worlds.
-'Crimsyt' is a combination and corruption of Crimson and Sight; once again paralleling the Twins in a similar way to how Malignance paralleled the Destroyer.
-The Crimson Maws summoned look like the Eye of Cthulhu's 2nd Phase, but also share Spazmatism's attacking types with its fireballs and flamethrower abilities.
--However, unlike with Spazmatism, it can alternate between them as it sees fit and lacks the limitations of movement when using the attacks (e.g. can keep moving when using the flamethrower and doesn't need to stay horizontal to the player with the fireballs).
-Like with the other members of the King's Order Acrimonious' GelTech description seems to be a line in a song or poem
-While each part of the boss has attacks that would otherwise be fairly easy to dodge on their own the combination of all three may prove extremely difficult to work around.
-Much like with a lot of the other human-like bosses Acrimonious' hitbox for damage is larger than his contact hitbox, making it easier to hit him while not running the risk of having his hitbox seem too large when taking contact damage.
[Added: 31/5/19]
76 - Malevolence, The Warrior
Appearance: A large seemingly-inorganic creature made of stone and fire. The colours of its body are like that of the Solar Pillar; bright oranges and reds. The stone parts of its body make up what appears like a mask and torso and cone-shaped 'spikes' for legs, with the fire making up wings at his sides. A large, orange-coloured gemstone sits in his torso.

Summon: Use the Kingskull at night. The depth and biome are unimportant and do not affect the boss. If it reaches daytime the boss become enraged, multiplying all of its stats by 10 and causing it to chase players at very high speeds in order to ram into them. It only despawns when there are no more players active in the world (e.g. they're all dead).

[Fought: Post-Moon Lord]

Stats:
Health:
-6,000,000 (9,500,000) (Malevolence)
-8,500 (15,000) (Kindled Spirit)
Attack:
-195 (356) (Melee) (Inflicts Daybroken)
-145 (265) (Fireball) (Inflicts On Fire!)
-220 (410) (Daybreaker Laser) (Inflicts Daybroken)
-180 (320) (Ring of Fire) (Inflicts On Fire!)
-160 (298) (Kindled Spirit Melee) (Inflicts On Fire!)
-155 (292) (Kindled Spirit Magic) (Inflicts On Fire!)
Defence:
-180 (Malevolence)
-200 (Kindled Spirit)

Attacks:
Malevolence spends most of its time flying over the player's head in a small figure of eight. While doing so it may use varying attacks.
-It may begin moving a lot slower while releasing large quantities of fireballs from its body in random directions. The fireballs pass through blocks.
-It may stop moving and its crystal will begin glowing. 3-4 thin 'tracer beams' will be visible as a forewarning. After roughly 1.5 seconds Malevolence will fire 3-4 large 'daybreaker lasers' in the directions the tracers had shown. These lasers can pass through blocks and deal high damage on hit, so the player should be wary.
-It may release between 1-3 small circles of fire from its crystal. After a few seconds they rapidly expand into large rings of fire which linger in-place for a long time. The player's life regeneration is boosted mildly inside of the rings, but safely getting inside of them is nearly impossible so it often isn't worth attempting.
At half health Malevolence will let out a 'roar', signalling a slight change to its attacks. It gains two new attacks which it adds to its existing roster.
-It may stay still while its crystal glows. It then fires out numerous daybreaker lasers in succession, each one forewarned briefly by more tracers. After between 10-14 lasers (roughly 5-7 seconds) it will stop.
-It may create small wisps of flame on the ground that eventually turn into Kindled Spirits. Kindled Spirits are fire-coated skeletons that each have their own form of attack.
--Red-robed Spirits will shoot fireballs that explode when they reach the player's last location, similar to how Diabolists work. They teleport in-between attacks.
--Orange-robed Spirits shoot pseudo-homing fireballs at the player. They also teleport in-between attacks.
--Yellow-robed Spirits fire arcs of fireballs at the player that cannot pass through blocks. They also teleport in-between attacks

Defeat: Malevolence's flames begin to go out, followed by its crystal shattering. Upon the crystal breaking Malevolence himself will explode into gibs. The gibs are all of the stone parts of his body, all still in-tact.

GelTech Info:
-"My core burns ever bright in devotion to my master,
The time of your return, it seems, approaches ever faster."

Drops: Solar Stone and Solight Souls; materials used for crafting various weapons and armours. Solar Stone is mostly used for new items while Solight Souls are used mainly for upgrading items used earlier in the game, like in Hardmode. In Expert Mode he also drops a sword that gains both Magic and Melee boosts and uses mana to shoot projectiles.

Extra Info:
-Malevolence is the last of the three King's Order members and is overall the least intimidating of the three.
-Despite being summoned using a skull-based summoning item Malevolence doesn't appear to be skeletal or really linked to Skeletron.
-His soul drop, the Solight Soul, is a combination of Solar and Fright, as well as Light. It is the only one of the three souls to be a combination of three words instead of two.
-He is the only one of the three to drop a weapon in Expert Mode instead of an accessory
-Malevolence shares a few similarities with some other bosses, intentionally or otherwise.
--His design is similar to both Providence (Stone and yellowy fire) and the Eclipser (yellowy fire spouting from an otherwise-solid body). His laser attack is also similar to that of Neoradiance's lasers (High-damage rapid-fire deathrays fired mostly-randomly with tracers before each shot).
-The life regeneration bonuses inside the Rings of Fire are like that of the Heart Lamps. However, there are few safe ways of getting these. The Rod of Discord would work, but due to the limited room inside each ring and the boss' frantic attacks it is unlikely the player would be able to buy enough time to be able to run out the Chaos State debuff.
[Added: 31/5/19]
77 - The King's Order
Appearance: The King's Order, broken and dishevelled after their individual defeats at the player's hand. Each one appears like they did before, though with mild differences to their designs.
Malignance's dark-grey shell beneath its armoured plates has seemingly been removed, exposing large amounts of flowing Ichor. Further amounts of Ichor are also seen leaking from its various eyes.
His name has been changed to Malignance, The Degraded
Acrimonious' robes have become duller in colour and a lot of the gold has come away. His mask has also lost a lot of colour and cracked in several places. The Crimson Maws have thinner teeth, but they are more numerous. It also has a third jaw alongside the other two it had prior, also complete with further teeth.
His name has been changed to Acrimonious, The Defiled
Malevolence has become very dull. His crystal is gone; leaving an empty hole in his body. The stone has turned a greyish blue and its original solar flames have been replaced with Shadowflames.
His name has been changed to Malevolence, The Desecrated

Summon: Use the Seal of the King at night. The biome and depth are unimportant. The bosses only despawn if there are no live players left in the world, like they used to before. The summoning item requires the drops of all three, plus numerous Chaos Mode items. If taken into daytime all 3 bosses become enraged; multiplying their damage and defences by 3 and 20 respectively.

[Fought: Chaos Mode]

Stats:
Health:
-7,950,000 (12,000,000) (Malignance)
-6,950,000 (10,000,000) (Acrimonious)
-7,500,000 (11,500,000) (Malevolence)
--28,400,000 (33,500,000) (Total)
-200,000 (300,000) (Malignant Drone/ Kindled Spirit)
Attack:
-950 (1500) (Malignance - Head Melee)
-440 (800) (Malignance - Body Melee, Golden Deathray/ Acrimonious - Maw Melee/ Malevolence - Daybreaker Laser)
-330 (585) (Malignance - Golden Disc/ Acrimonious - Maw Flamethrower/ Malevolence - Ring of Fire)
-315 (567) (Malignance - Golden Laser/ Acrimonious - Flame, Maw Fireball/ Malevolence - Melee, Kindled Spirit Magic)
-298 (542) (Acrimonious - Melee/ Malevolence - Fireball, Kindled Spirit Melee)
Defence:
-300 (Malignance Head, Malevolence)
-320 (Malignant Drone, Kindled Spirit)
-250 (Acrimonious)
-50,000 (Malignance Body)

[All of Malignance's attacks inflict Broken Armour and Ichor]
[All of Acrimonious' attacks inflict Crimson Flame]
[All of Malevolence's attacks inflict On Fire! and Daybroken]

Attacks:
Each one uses their own respective attacks from each of their boss fights. However, there are still changes made to make the fight less daunting.
-Each boss only attacks roughly half as often as what they did during their original fights. This means that it is less likely for the player to be hit by numerous attacks at once.
--Each time a boss is killed the other bosses attack with increased frequency. When no bosses are dead it is around 50%, after 1 is killed it goes to around 80% and, upon only 1 boss being left, roughly 120%.
Malignance, The Degraded:
-Spawns drones less often and only spawns 2, 4, and 6 at 75%, 50% and 25% health, respectively.
-No longer speeds up when below 50% health
Acrimonious, The Defiled:
-Crimson Maws spawned at 85% and 25% health instead
-Crimson Maws move slower than they used to, though speed up with every boss killed (60% -> 85% -> 110%)
Malevolence, The Desecrated:
-Takes slightly longer to fire the daybreaker lasers
-Flame projectiles made slightly smaller

Defeat: Each boss has their own death animations upon defeat:
-Malignance's body begins to explode before it bursts into gibs of Ichor and plating.
-Acrimonious and his maws begin releasing red particles while he holds his face, then they vanish into clouds of red.
-Malevolence' flames go out and his body crumbles into dust.

GelTech Info:
[As opposed to receiving one piece of info, the player is instead granted 4; one for the group as a whole and the other three for each individual member.]
King's Order:
-A group of powerful entities who were united under a lost monarch. They cling desperately to their memories; hoping that some day he may return to lead them once more.
Malignance:
-Formerly a Giant Worm bathed in what their king had called 'the blood of gods'. The flow of Ichor through his veins granted him power beyond his burrowing brethren.
Acrimonious:
-The lost king's former right-hand man; a powerful summoner who travels with his mysterious pets. He sacrificed his individuality for his king, leaving him the most distraught upon his master's disappearance.
Malevolence:
-A statue brought to life by a strange but powerful artefact bestowed upon it by their monarch. The gem's destruction would cause its life force to grow chaotic and unstable, until it eventually destroys his form.

Drops: Malignance drops Golden Plating, Acrimonious drops Arcane Fabric, and Malevolence drops Energised Dust; all 3 of which are crafting materials used to make other items. In Expert Mode all 3 are dropped in the bag (so that defeating one or two at a time isn't sufficient) but still has the expert-exclusive drops based on which one was defeated last. If Malignance is defeated last he drops a shield that allows the player to dash and inflict Ichor and Betsy's Wrath onto foes hit by the dash. If Acrimonious is defeated last he drops a summoning staff that summons mini Crimson Maws. If Malevolence is defeated last he drops an accessory that grants defensive buffs and allows weapons to sometimes deal additional damage and inflict Shadowflame.

Extra Info:
-Of the three, Malevolence is the one to have had the most changes overall to his designs. His entire body is a completely different colour, one of his core components (the gem) is missing and his defeat animation has changed completely.
-All three of them have had changes to their titles, all changing for the worse
--All three of their new titles begin with 'de'; something only true for Acrimonious back in their original fights.
-Their king, even in their final appearances, is never seen or even named. However, it is still a fair assumption to say that it is likely it isn't the same king Garagon speaks of.
-The descriptions for Malignance and Malevolence say that they were relatively-normal entities until the king altered them to make them what they were. Acrimonious, however, was still a summoner even before the king.
--Acrimonious seems to have actually worsened upon joining the king due to his unhealthy devotion to him. This only worsened when the king disappeared, as he then had no true identity nor anyone to follow anymore.
-The Crimson Maws are estimated to each have over 120 teeth each.
-It is recommended that the player think carefully about which bosses they will defeat first. Malignance's large body, projectile bombardments and numerous minions make him a candidate for the first to be slain, while Acrimonious' Crimson Maw minions would be bad to trigger while all 3 are still alive (as it would force the player to dodge even more attacks).
[Added: 31/5/19]
78 - Titus
Idea by Cadmar

Appearance: A humanoid entity donning what seems to be a heavily-modified and mechanised version of the Titan Armour set. His face seems completely plain and entirely white; with no facial features to speak of. He uses two different types of weapon: the Slipstream (A blueish-silver and red bow with a glowing string) and the Titan Slayer (A gun that looks like a very heavily-modified Vortex Beater). A small extension from his arm connects to these weapons to provide them with both energy and ammunition.

Summon: Use the Activation Key anywhere in the player's world. The boss only despawns when there are no players nearby; being unaffected by both time and place. The summoning item is made of some very early Post-Moon Lord items; making it quite an early fight for the Post-ML game.

[Fought: Post-Moon Lord]

Stats:
Health: 250,000 (400,000)
Attack:
-88 (155) (Melee)
-70 (130) (Energy Arrow)
-85 (150) (Nuclear Arrow)
-67 (125) (Titan Bullet)
-100 (185) (Titan Burst)
Defence:
-400 (Normal)
-40 (Overheated)

Attacks:
Titus will often move to a location, then remain stationary while he attacks. After an attack he will often reposition himself again to use a new attack. If the player is in the air he will activate boosters from his shoes and back that allow him to fly.
-He may charge at the player in a slight arc. This can only happen if he is airborne.
-He may fire a volley of energy arrows at the player in rapid succession. These arrows pass through blocks and don't arc, though have no other particularly special properties.
-He may suddenly fly up and bombard the player with a heavy but inaccurate barrage of 'nuclear arrows'. These arrows leave aesthetic golden trails as they fly and explode violently on contact with solid blocks.
-He may use the Titan Slayer to fire a volley of bullets at the player. Due to their velocity and number they are hard to dodge without the use of walls; which they cannot pass through.
-He may charge up Titan Slayer to fire a large burst of fiery energy. Upon it hitting a block it expodes extremely violently and launches smaller blasts outwards randomly after exploding. It cannot pass through blocks, but the explosion may still damage players through walls if they are too close.
After attacking for 20 (30) seconds he will overheat. During this time he is completely immobile, cannot attack, and has only 10% of his normal defences. After only around 5 seconds in this state he will cool down again and go back to his normal attacks.

Defeat: Sparks for a few seconds, then eventually explodes into gibs of his armour.

GelTech Info:
-A mechanical drone who went rogue after a malfunction caused a chain reaction within his processor. He was designed originally as a defence mechanism, though by the end of his time was closer to that of a bounty hunter.

Drops: Titan Plating; used to make a few items including a set of Titan Armour. May also drop either the Slipstream or Titan Slayer. In Expert Mode he also drops the Overclocked Chip; an accessory that allows the player to increase their damage output briefly with the downside being a speed and defence-reducing cooldown after use.

Extra Info:
-Sadly, items that use fire or heat to attack do not reduce the time taken for him to overheat.
-Titus seems to be wearing a modified version of the Titan Armour set, though made more mechanical.
--Due to the design of the armour and the mention of it being designed as a defence drone, it is most likely that Slimey or someone within his employ created it.
---It is also likely that these defence drones mentioned in the GelTech descriptions were later replaced with Technicus; a far stronger defence mechanism.
-Even if he is defeated in his overheated state he will still drop the silvery-blue gibs of his normal form.
[Added: 1/6/19]
79 - Vile Worm & Dryads
A trio of 3 bosses who fight alongside each other.
Vile Worm: A fully-overrun version of the Earthworm boss. Half of its body has been corrupted; growing mushrooms and additional spikes, while the other half has been crimtaminated; growing more mushrooms and more twisted spikes. Thorns of both types also grow in-between the clumps of grass that grow on it.
Corrupt Dryad: A Dryad who has succumbed to the effects of the corruption. A strange disconnected pair of wings grants her flight.
Crimson Dryad: A Dryad who has succumbed to the effects of the crimson. A strange disconnected pair of red wings grant her flight and what seems like some sort of horn is growing from one side of her head.

Summon: Use the Corrupted Cluster anywhere in the world. The boss will only despawn if there are no players active in the world (e.g. all dead). However, the boss is affected by certain biomes; with all 3 gaining additional boosts when the player is within these biomes:
-In the Crimson the boss gains a 10% boost to its attack
-In the Corruption the boss gains a 30% boost to its defence
-In the Hallow the boss gains a 20% boost to its speed

[Fought: Post-Moon Lord]

Stats:
Health:
-1,200,000 (2,300,000) (Vile Worm)
-569,000 (960,000) (Corrupt Dryad)
-500,000 (840,000) (Crimson Dryad)
--2,269,000 (4,100,000) (Total)
Attack:
-416 (700) (Worm - Head Melee)
-170 (300) (Corrupt - Enchanted Flare/ Crimson - Enchanted Flare)
-150 (255) (Crimson - Magic Burst)
-132 (220) (Worm - Body Melee, Shockwave/ Corrupt - Magic Burst/ Crimson - Leaves)
-120 (200) (Worm - Spikes, Leaves/ Corrupt - Leaves)
Defence:
-65 (Worm Head, Crimson Dryad)
-90 (Corrupt Dryad)
-200 +60% Damage Resist (Worm Body)

[All of the Vile Worm's attacks, Crimson or Corrupted, inflict Nature's Wrath]
[All Crimson attacks inflict Crimson Infection and Bleeding]
[All Corrupt attacks inflict Corrupt Infection and Weak]
[Crimson Magic Bursts inflict Ichor]
[Corrupt Magic Bursts inflict Cursed Inferno]

Debuff: Crimson Infection
-Deals 9 damage-per-second to the player and reduces the player's defence by 10%
Debuff: Corrupt Infection
-Deald 8 damage-per-second to the player and reduces the player's attack by 10%

[If the boss is hit by Holy Water they receive 4,800 damage and they take 6,500 damage if hit by Purification Powder]

Attacks:
Worm:
The worm acts identically to how the Earthworm boss worked, though with the addition of having some of its attacks be Crimson and others Corruption.
-The leaf barrages and spike bursts will be a mixture of Crimson and Corrupted. However, none of its other attacks have these changes.
Dryads:
Both Dryads will fly near to the player, with the Corrupt Dryad flying to the left and the Crimson Dryad flying to the right of the player most of the time. They each have one of three different attacks which they can use:
-They may fire a quick burst of leaf-shaped projectiles at the player. They cannot pass through blocks and all travel at slightly different angles and speeds.
-They may create 'Magic Rings' at the player's location. After a second they trigger. Once triggered they will explode into Magic Bursts either when the player next enters the ring or after 8 seconds have passed. They inflict their biomes' respective debuffs if the player is hit by the bursts.
-They may stay still while charging up an attack. They then launch a large projectile, coloured either red or purple, which then releases explosions as it travels. These pass through blocks and deal high damage.

Defeat: Each one has a different defeat animation based on both who is defeated and how they are defeated. The others' patterns also change with each one who is defeated.
-Worm: The worm explodes into large gibs upon defeat, as well as dropping large chunks of dirt blocks. Both Dryads begin to attack more frequently and move faster.
-Dryads: The Dryads explode into particles of their respective colours upon defeat normally, but if defeated with either Holy Water or Purification Powder they instead turn into Town NPCs. If the Crimson Dryad is defeated the Worm gains a 10% attack boost and if the Corrupt Dryad is defeated the Worm gains 10% damage reduction from the player's attacks.

GelTech Info:
-Dryads who believed that they could utilise the powers of the Crimson and Corruption to keep the Moon Lord at bay. However, before they could turn this power against him, their minds became too corrupted and they became violent and were subsequently banished.

Drops: The Worm drops a few corruption and crimson-based weapons and accessories. The Dryads do not drop anything in Normal Mode, but have 2 accessory drops in Expert Mode; where they drop items that sacrifice health for either damage or defence. The NPCs sell several items of their own, including their wings, some weapons, and crafting materials.

Extra Info:
-The GelTech's description, and the Dryads in general, were based off of the recently-added lore for Terraria which mentions that numerous Dryads held off the Moon Lord's advances.
-The Vile Worm, while at first glance appearing like a simple recolour of the Earthworm, actually has large differences between its sprite and the Earthworm's.
-Since there are 3 enemies in this boss the player has to be careful with their movements, and also must be very careful with landing due to the Vile Worm being a large grounded enemy.
--Luckily, he no longer has the ability to inflict Dazed with his shockwaves, though can now inflict 3 different types of stat-reducing damage-over-time debuffs.
-If the player is inflicted with all 3 debuffs they recieve 25 damage-per-second, 10% reduced damage, and defence drops of both -10% and -15.
--Luckily, the defence drops are very unlikely to drop the player to 0 defence, as to do so the player would need only around 17 defence and to have the percentage drop be inflicted first.
-The Worm's body segments can have an extreme amount of defence given to them.
--It starts at 200 defence +60% reduction, then can go to 260 defence and a 60% reduction in the Corruption, then to 260 with 70% when the Corrupt Dryad is defeated, and finally technically at 260 with 73% reduction if the player has the Corrupt Infection debuff.
[Added: 1/6/19]
80 - Revenant
Appearance: A pale blue, circular spectre. Its body is covered in a large multitude of glowing white eyes or varying sizes. A giant mouth is seen in the centre, filled with numerous teeth. Small tendrils protrude from its back. Its design looks a lot like the 2nd phase of the Eye of Cthulhu, though with the colours of Ectoplasm.

Summon: Use the Phantasmal Wisp at night. The biome and depth are unimportant. The boss will teleport to players who get too far away from them as opposed to despawning, though if it becomes daytime the boss will disappear suddenly and take all active players and NPCs to 1 HP and, for a minute, inflict Revenant's Curse.

[Fought: Chaos Mode]
[Special Boss: Dungeon drop if a certain number of bosses are defeated]

Stats:
Health:
-4,850,000 (8,400,000) (Revenant)
-4,085,000 (7,000,000) (Leech)
-6,350,000 (11,000,500) (Worm)
-6,000,000 (9,825,000) (Vicious)
--21,285,000 (36,225,500) (Total)
-650,000 (1,100,000) (Maw Minions)
-550,000 (945,000) (Leech's Tongue)
Attack:
-350 (580) (Revenant Melee, Leech Melee, Worm Body Melee, Spirit Bomb)
-300 (507) (Minion Melee, Vengeful Spirit, Seeker Spirit)
-1,000 (2,000) (Worm Head Melee)
-500 (920) (Vicious Melee)
Defence:
-255 (Revenant, Maw Minions, Leech, Worm Head)
-300 (Vicious)
-8,500 +85% Damage Resistance (Worm Body)

[All attacks inflict Revenant's Fury for varying amounts of time]

Debuff: Revenant's Curse:
-The player is completely unable to regenerate life. Instantaneous health still works (e.g. Hearts, Potions, the Nurse) though the player cannot regenerate back any life over time.
Debuff: Revenant's Fury:
-Deals 100 damage-per-second to players, though the debuff often lasts less than a second.

Attacks:
Phase 1:
The Revenant will fly near to the player, either overhead or diagonal to them, while releasing numerous projectiles.
-It may move horizontally to the player while releasing Vengeful Spirits. Vengeful Spirits travel in a straight line and pass through blocks, pierce players, and accelerate as they move. They linger for over 1,000 blocks.
-It may fly in a large arc over the player going from the left to the right or vice-versa. As it does so it sometimes releases large barrages of Vengeful Spirits at the player.
-It may perform up to 4 charges in succession. Each charge is extremely fast and covers a large amount of ground.
-It may release up to 5 'Seeker Spirits' which follow the player until they eventually despawn on their own. If the player travels in a straight line for too long then they may accelerate to catch up to the player.
-It may release up to 6 small 'Spirit Bombs'; blue spherical projectiles which eventually explode into 8-10 randomly-spaced Vangeful Spirits. They very lightly home-in on the player.
Upon reaching 0 health it will transform into a new form and gain back more health.
Phase 2:
Enters the 'Leech' form. Gains new attacks alongside its previous attacks.
It summons two 'Revenant's Maw' enemies which charge at players when they are close. If they are killed new ones will be spawned in their place.
-It may grab the player with a large tongue. While it is attached to the player the Revenant will heal back 5,000 health per second until it is destroyed. The Revenant, while the tongue is attached, gains 95% damage reduction and flies near to the player but doesn't attack.
-It may release 3 bursts of up to 7 Vengeful Spirits in rapid succession. Each of the 7 is slightly faster than the previous one, causing all 7 per burst to overlap at one point before the ones fired last overtake the ones fired first.
Upon reaching 0 health again he will transition once more into a new phase.
Phase 3:
The Revenant's 'Worm' phase. It burrows through the ground if the player is close to the ground, but can fly if the player is too high from solid ground. It retains most of its previous attacks in this phase, as well as gaining new ones. Each segment can attack individually.
-It cannot charge due to now being a Worm, nor use its Tongue attack from the Leech phase. However, all of its other attacks remain.
-It can release a larger version of the 'Spirit Bomb' which explodes into 22-30 Vengeful Spirits upon exploding. It can also explode prematurely if it is close to the player. They very lightly home-in on the player while moving.
-It can release a wall of vertical or horizontal Vengeful Spirits.
At 0 health it once again transitions into a new phase. However, this is its final Phase.
Phase 4:
The Revenant's 'Vicious' phase, as well as its final one. It gets back all of its previous attacks, as well as gaining some new ones. Up to 3 Revenant's Maw minions may be active at a time now as well.
-Both small and large Spirit Bombs can fly in from off-screen at any time. Smaller ones are more common while larger ones are rarer.
-It can now summon horizontal or vertical bullet-hells made of Vengeful Spirit projectiles.
At 2,500 health it becomes stationary, gains 99.9% damage resistance, and transitions into its true final phase:
Phase 5:
Remains immobile throughout this phase, though also has extremely high resistance. Has very few attacks it can still use.
-It retains the bullet-hells and the off-screen spirit bomb summons.
-Minions are still able to be spawned, though only 2 may be active at a time. (The 3rd doesn't despawn, but it also won't respawn if defeated)

Defeat: Releases 3 powerful light-blue surges before releasing a brilliant white light. After the light fades the time is set to 6:00 AM and the boss is completely gone, leaving only a couple of small blue particles and its drops. Minions and projectiles despawn once it is defeated.

GelTech Info:
-A collective multitude of cantankerous spirits, all foes you have defeated along your journey. Defeating is has put their souls to rest properly at last, restoring some balance to the world.

Drops: A massive amount of spirit and ghost-based items. Many weapons and accessories are also based off of earlier bosses the player has likely fought prior. Some items include a more powerful Slime Staff for King Slime, a bow based on the EoC, sword for the EoW, laser rifle for WoF, a staff for Duke Fishron, etc. A few other items are based off of the Revenant itself, plus Phantasmal Essence; a material used for crafting a few Chaos Mode items.
80 - Revenant (Continued)
Extra Info:
-The Revenant is apparently, according to the GelTech description, a combination of the souls of various other enemies and bosses the player has defeated over their journey.
--Considering the boss is in Chaos Mode, this means it is likely quite a large list.
--This is also the reason why the item is a rare enemy drop (forces the player to kill lots of enemies for it) only found after a certain amount of bosses have been defeated (a large number at that).
---Since the amount defeated is based on a percentage instead of just a number, mods will actually increase the amount of bosses the player needs to defeat as opposed to giving the player more options of which to defeat.
----This can also be problematic for any mods with bosses that cannot be summoned, as they still add to the total.
-The Revenant's Fury debuff the boss' attacks cause is one of the most powerful damage-over-time effects in the game. However, due to how brief it is, it isn't likely to kill the player outright.
-The Revenant's Curse debuff is only seen if the player doesn't kill the boss before daytime and isn't used in the boss' actual fight.
--This is because the Revenant's Fury debuff is rather obsolete as the Revenant's Fury debuff already makes regeneration extremely hard.
-The Revenant never 'leaves' in a way the player can see. It never flies away nor drops gibs, instead disappearing if there are no targets/ it becomes daytime/ it is defeated.
-The boss' ability to regenerate health gives it an additional boost to its endurance, which goes well alongside its high health.
-Revenant is one of the few Chaos Mode bosses not given a title. There are very few bosses who also fall into this category; though many of them are actually Post-Game instead of just Chaos Mode bosses.
[Added: 1/6/19]
Final Note
Due to what I can only call an 'ever-increasing workload' I am sad to say that the size and/or quality of a few of the sprites may have deteriorated a little. However, I may hopefully come back and make them look better in the future

Anyways, as with before if you have any suggestions feel free to leave them in the comments, as I am still trying to sprite every suggestion I get given (though it is quite hard to do, so please bear with me)

https://steamcommunity.com/sharedfiles/filedetails/?id=1727747319
https://steamcommunity.com/sharedfiles/filedetails/?id=1673027776
https://steamcommunity.com/sharedfiles/filedetails/?id=1652869689
https://steamcommunity.com/sharedfiles/filedetails/?id=1617364334
Also, feel free to check out some of the other bosses I've made in other guides. Guides 4 and onwards have the best sprites overall :P

Sweet, this guide managed to make it to the top of Terraria's trending guides and thus wins a badge

Anyways, hope you enjoyed another lot of sprites :)
Počet komentářů: 31
Okami Tomato  [autor] 26. bře. 2020 v 14.58 
'aight
blingo cringlo 25. bře. 2020 v 11.42 
U COME UP WITH BAD IDEAS:steamfacepalm:
Okami Tomato  [autor] 22. pro. 2019 v 7.11 
Joined Calamity before, got called a liar and received a bunch of random criticism within about 15 minutes of joining the server :P
fossil2020 22. pro. 2019 v 3.18 
i just wanna say my guy - u should join the calamity art server cause honestly with art like that you'd probably be great at helping out with the texture pack
Okami Tomato  [autor] 19. čvn. 2019 v 16.05 
It has wings, it's just that they are down in the sprite at its sides (though, to be fair, I won't lie they are quite hard to see :P)
chimaera. 19. čvn. 2019 v 14.17 
Had an idea, Titanium Longma could be able to sprout wings and fly if you go to far, so it cant be cheesed
Okami Tomato  [autor] 16. čvn. 2019 v 11.21 
Thanks :)
Okami Tomato  [autor] 15. čvn. 2019 v 14.59 
williamranderson: Since it's a worm it's not as bad as it seems, since you have to bear in mind that this is late Hardmode (so Post-Golem) so it isn't too bad. Plus it's more of a defensive boss anyways so high durability overall.
PMAN/Degausser: Thanks :)
Emsabelle: You should've seen Pages 1 and 4 then :P
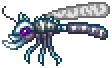
Luke_Skywagon: The Pillars currently fill that role (#64), though a more 'focused' boss on each may be made some time in the future (I don't know, for all I know I might end up re-making them some time later)
Okami Tomato  [autor] 15. čvn. 2019 v 14.54 
Mass Comment:
yoshi: Would like to, but currently lack the skill and time for making functioning bosses, nor do I know anyone who does currently so I'll have to wait.
Asdeligeon: Yeah I just make these for fun nowadays, also the Tomato NPC was a thing back in Guide 1, but was for killing a Moon Lord-tier boss
nuggetron: more of a server command than a mod thingy, also strange to see another Nyan Cat profile pic in the comments right after another :P
Cmaner: Lack the skill and know-how currently as stated prior
Okami Tomato  [autor] 15. čvn. 2019 v 14.48 
So for whatever reason I apparently got unsubscribed from my own comments section so I now have to do a massive comment response thingy like I used to do...