Slay the Spire

Slay the Spire

157 avaliações
Slaying the Spire for Dummies (The Silent Edition)
Por Blood Flowers
The title may or may not be a trademark infringement, but this guide consists of my original thoughts on how to play Slay the Spire. This guide is focused on the Silent but some of the general ideas will hold true for the other characters. The goal of this guide is to teach you how to think about Slay the Spire more than a step-by-step walkthrough. We will be working under the assumption that you roughly know how to play the game and are here to learn how to play better. Together, we shall go through an A20 run and I will try to explain my decision making process to you. I think this guide is exceptionally good because I started writing it at the same time as I was doing the run thus leaving the fate of the run completely uncertain.

Updated to Patch V2.2.
5
3
3
   
Premiar
Adic. a Favoritos
Nos Favoritos
Desfavoritar
Disclaimer:
This guide is written under the premise that you are running on A20 difficulty. The reason for this is that anything that works in A20 will work in A0-A19, but not vice-versa.

There may be snarky comments. You have been warned.
Status: 95% Done
The A20 Heart Kill was performed on Patch V1.0.
The guide has been mostly updated to Patch V2.2.
This guide was last updated on 12/20/2020.

This guide is basically complete. There are a few things that I might consider cleaning up or adding, but I'm busy. I have things to do and bills to pay. If you want me to finish this guide faster - too bad. It will be done in the spare time of my spare time (namely, when I'm bored enough to work on it).

Finished:
A20 Heart Kill with screenshots of deck building/decision making points
Overall run analysis
Appendices:
-Explanation of Elites
-Explanation of Boss Relics
-Explanation of Bosses
-Explanation of Potions

To Do:
-Clean up the analysis to make it look nicer.
-Some of the stuff to which I said that I would go back and add more details.

Maybe:
-Relics to consider buying at shops
-Event choices
-Discussion about starting bonuses
-Cards to avoid/generically good Cards/maybe just some Card discussion
The Silent:
Starting Stats:
  • 59/66 (current/maximum) HP
  • 99 gold
[You start each run damaged (A6+) and have lower max HP (A14+)]

Starting Deck:
  • 5 Strikes (5 damage)
  • 5 Defends (5 block)
  • 1 Neutralize (3 damage and apply 1 weak)
  • 1 Survivor (8 block and discard 1 card)
  • 1 Ascender's Bane (curse, unplayable, cannot be removed, and only if playing at A10 or higher)
Act 1 (Part 1):
Starting:
When you start your run, you are offered a starting bonus by Neow (henceforth referred to as "Deceptively Awesome Teammate of Aspiring Spire Slayers" or DATASS for short).

You will be offered either 2 options (if you did not reach the first boss in your last run) or 4 options (if you did) for starting bonuses.


Consider your starting options carefully, as they may have a significant impact on your early routing.

Now look at the map:


Many thanks to Siri for providing us with this image.

Note that there are 5 starting positions in this map, 1 of which (left-most) that only gives you a singular path until near the end of the Act.

You should plan to fight at least 2 elites in this act, but with a little leeway (so that you can opt to fight an extra or one less depending on how the run is going). It is also important to note that the first 3 hallway fights of this act are taken from an "easier" pool. I won't go into the details on that (you can google it... and I might eventually put a link here).

Seeing that the left-most path involves fighting the flaming elite as the first elite, you would pick this route if you want to start over right away to get that "enemies in your next three combats have 1 HP" buff for your next run.

Numbering the four paths on the right 1-4 (from left to right), Path 1 allows you to visit a store really early on. However, our starting bonuses do not give us any gold and we're unlikely to be able to buy anything good with just ~110 or so gold. Path 2 is pretty much the same as Path 1, but you cannot visit that early store. Path 3 and 4 are pretty similar to each other, except Path 4 gives a double early store.

Thinking back, we said that we would like to fight at least two elites this run. Paths 3 and 4 allow us to fight a maximum of 3 elites but there will only be three campfires on that path (if we have to get at least two elite fights). Paths 1 and 2 allow us to hit four campfires and two elites. Since we don't really care about early shops, I would choose to take either Path 1 or Path 2. Of those, Path 1 gives you the option of the guaranteed store if you need it for some reason. Thus, we choose Path 1.

Now, go back to looking at our starting bonus options:
  • The first option, "Upgrade a Card", is a guaranteed positive bonus. However, the value is minimal as the only cards we have remotely worth upgrading are Survivor and Neutralize.
  • The second option, "Obtain a random common Relic", is also a guaranteed positive bonus. It has pretty decent value.
  • The third option, "Take 15 damage Obtain a random rare Relic", is generally a net positive bonus. Losing 15 HP for a Relic (especially a rare Relic) is a really good trade. However, since the Relics are random, it's hard to say if a random Rare is going to be much better than a random Common this early into the game. Moreover, because we're opting to take either Path 1 or Path 2, we're only going to have 2 guaranteed chances to pick up cards before our first elite fight. This means taking 15 damage for something that may be only equal to option 2 is probably not worth it.
  • The fourth option, "Lose your starting Relic Obtain a random boss Relic", is a gamble. However, since you're here reading this guide, you're probably trying to improve your win rate. Go to a casino if you want to gamble.

Thus, we pick option 2, "Obtain a random common Relic", for our starting bonus.
Act 1 (Part 2):
So, the common relic we obtained was the Bag of Preparation (At the start of each combat, draw 2 additional cards). This is pretty great for the Silent overall, as she is very dependent on getting vital cards out on her first turn. However, it's pretty worthless this early in Act 1 as drawing an additional strike and defend on the first turn is still useless.

I will be skipping talking about fights, as that tends to be simple math and learning enemy patterns. Here was the card choice for killing the first enemy (a Cultist).


  • Bane is pretty decent in Act 1 if you have some way to poison your enemy. We don't, so we're not taking it.
  • All out Attack (AoA) is a really good card to take this early. It's good for hallway fights and it's really good for Sentries. It even does okay in Act 2.
  • Footwork is pretty much the bread and butter of the Silent. Since I have 9 cards on my starting turn, I figure there are fairly high odds that I will draw Footwork on my first turn in most combats. This, combined with how well it scales, means I'm taking it over AoA even if it's probably not as good right now.

I go to the ? room and I get this event:


7 damage to remove a Strike is not the worst thing in the world, though it's a little sketchy since we still don't really have a good method of killing Gremlin Nob or Lavagulin (not that the Strike would help much). We remove the Strike over a Defend (if you are considering removing Survivor, Neutralize, or the Footwork we just picked up at this point you may need to consider that Slay the Spire is just not for you) as we have a Footwork in our deck. Even if we didn't have the Footwork in our deck, 5 block is worth more than 6 damage.


However, this puts us in a sketchy position. We have either 2 ? rooms, 1 easy hallway fight, and a campfire or 1 store, 1 ? room, 1 easy hallway fight, and a campfire before the elite. If either of those ? rooms are a hallway fight, we should be okay with skipping the store. However, if neither is a hallway fight, we may be lacking in terms of cards to win the elite fight. Thus, even though we don't have enough gold to purchase anything spectacular, we still need to go to the store.


  • Quick Slash (QS) is bad right now. We don't need card draw and 8 damage is the same as Dagger Spray except it doesn't hit multiple targets and does the same damage when upgraded. QS would be better if the next elite is Lagavulin (as the debuff hits Dagger Spray twice) but is worse in almost every other scenario.
  • Dagger Spray (DS) is pretty decent. It's good for Sentries, hallways fights, and is okay in Act 2. We also desperately need some way to deal damage.
  • Dodge and Roll (DR) is really good with dexterity (which it just so happens footwork gives us). However, if we take this, we still do no damage and thus die to the elite.
  • Distraction just sucks. It's halfway decent (but not quite) if upgraded, however a 1 energy cost card that basically replaces itself with a random skill adds volatility to our run. Remember that thing about gambling? Go to a friggin' casino.
  • Footwork has already been explained. However, it suffers from the same problem that DR does right now.
  • Deep Breath (Crappy Colorless Card 1 or CCC1) is useless. We still die to the elite.
  • Violence (CCC2) will put our strikes into our hand. Yes, I want to lose.
  • The Relics are for people with money. This is why you should graduate from college and get a real job.
  • Vulnerable Potion (VP) is nice. However, your attacks currently suck so it's pretty much a waste.
  • Poison Potion is nice. It does 21 damage over 6 turns. We happen to really need damage and our fight against the elite is likely to be really long since our attacks suck so far.
  • Steroid Potion (SP) is good if you have a multi-hit attack. We have strikes.
  • Card Removal is for people who already have cards and have spare money to use on this. It's a luxury. Remember though, we're poor.

Thus, I buy a DS and a Poison Potion.

The next ? room is an event:


The game is mocking me.
If we take the money, the curse will kill us in the elite fight. It's sort of like getting paid to donate an organ. Except instead of one of your kidneys you decide to donate your brain because you're clearly not using it anyways.

The easy hallway fight gives us these card choices:


  • Predator is useless as we don't need delayed card draw. We do need damage, but the damage is 3 more than 2 Strikes. Useless.
  • Well-Laid Plans (WLP) is an amazing card. It's one of the best cards for the Silent. It has so much utility. It's also remarkably useful against Gremlin Nob and Lagavulin since you can carry the Neutralize (only 1 turn of weak unupgraded) to an important turn.
  • Dagger Throw does 9 damage and draws a card while discarding a card (net 0 cards gained). You sometimes pick this card up if you need card draw for a Grand Finale deck. We don't have a Grand Finale. We do need damage and it is giving us much more damage per energy than Predator, but it's really not that good of a card. Moreover, we can probably survive the next elite fight (barely) with the Poison Potion.

So we take Well-Laid Plans.


At the campfire we choose to upgrade a card. 52HP should be enough to survive the elite fight... plus the rest would heal us for more health than we're missing.

  • We're not upgrading a Strike or a Defend. Sorry. We're just not doing it. I don't care how much you want to.
  • Survivor+ doesn't do damage. We need to do damage.
  • Neutralize+ is just 1 more damage but an extra turn of weak. However, we're not desperately in need of that second turn of weak because of WLP.
  • Footwork+ also doesn't do damage.
  • DS+ is 4 extra damage to all targets. That's amazing for sentries, decent for Gremblin Nob, and sort of bad for Lavagulin (since the first round of debuffing will immediately negate this upgrade). However, it's the best damage option we have so far.
  • WLP+ is the ability to retain 2 cards instead of 1. That's not damage.

We upgrade DS to DS+. It'd be cooler if it was DS to 3DS, but then we'd be Nintendo.

So, the elite fight turns out to be Lavagulin. It was sort of close, but I'm not even sweating.


The Relic we get is Meat on the Bone (heals for 12 HP after every combat if you end combat with 50% of max HP or less). I'm a happy cat.

  • Endless Agony (EA) is not a terrible card. However, it's not a very good card either. You can sort of apply the same descriptors to EA games.
  • Unload does damage and doesn't exhaust. We happen to have an elite fight coming up after only one guaranteed hallway fight. It also discards all non-Attack cards, which includes statuses, such as the Burns that Hexaghost will throw into our deck. Not my favorite card on the Silent, but pretty useful for us right now.
  • Acrobatics is card draw (net 2 card gain). We don't need card draw right now. It doesn't matter if we draw 15125234234 Strikes.

We take the Unload.

At the campfire, we rest.

Q: Isn't that stupid? You have Meat on the Bone!
A: GO TO THE CASINO ALREADY.
Act 1 (Part 3):
We pick up an Orichalcum (6 block if you end your turn without block) at the Chest. Sapphire Key does nothing and 6 block without having to play cards is sometimes useful. Sometimes useful is always better than never useful.

At the next ? room, we luck out and get to find two free potions.


It's a poison potion and a weak potion. Nothing to write home about, but it's better than nothing.


We choose to upgrade a card at the campfire. We're not resting because we're not in danger of dying to a hallway fight and Meat on the Bone will heal us after the fight. The only new addition to our deck is Unload. As it turns out, we're still in need of damage and Unload+ is an increase of 4 damage for one energy.

The unupgraded Strikes cry together in the corner.


After winning this hallway fight, we heal 12 HP to get to 45HP (maximum amount of health that we could be at right now). I used the Weak Potion so as not to take damage to have the maximum amount of health I could possibly have in preparation for what is potentially Gremlin Nob. More importantly, the odds of getting a potion after a fight starts at 30% and increases by 10% after every fight you haven't gotten a potion. Since we hadn't gotten any potions yet, we were pretty likely to pick one up this fight. We get another poison potion. Turns out, Gremlin Nob is gonna be toast.

  • Accuracy is like that one underdeveloped kid who gets bullied in middle school. Maybe one day he becomes someone great, but more often than not he just becomes an average person with mental scarring.
  • Sneaky Strike is... pretty awful. This card is probably even worse off than Accuracy. This is when that kid moves to a different school because the bullying got so bad.
  • Catalyst is all sorts of useless if you have no way to apply poison and all sorts of great when you do have ways to apply poison. As it turns out, our deck has no way to apply poison. BUT WAIT! We have those two Poison Potions. My god, that's potentially 24 poison! Gremlin Nob would literally cry! Plus, if we're lucky, we'll only need to use one poison potion on Gremlin Nob and then we can save another for Hexaghost... meaning the Catalyst won't be a dead card! If we don't find any poison cards after that though... then it's super useless. Remember what I said about gambling? I lied. We can gamble here. We just have to make sure our odds are better than casino odds. Those two Poison Potions? Those increase our odds from like 33% to 95%.

Turns out the next elite is Gremlin Nob. The game could have given us Sentries, but no, it's Gremlin Nob.


After killing Gremlin Nob, we pick up this lovely Preserved Insect (Elites have 25% less HP and are much cuter). That would have been nice to have had earlier...

  • Expertise gives card draw and while we're somewhat short on card draw, Expertise is really gimmicky and just not really worth picking up right now. It's sort of like when you're at the bar alone and you find someone who's like a 4 out of 10. You'd like the companionship, but you're not really desperate enough to go for that yet.
  • Choke is okay in decks that play a ton of cards. We don't do that.
  • Backflip is a great card for the Silent. Generally it's better later into the game, but we already have dexterity scaling from Footwork and we do need a little bit of card draw...

We take the Backflip.

The next ? room is a fight.


  • Backflip is good, but we probably don't need two of them this early.
  • Cloak and Dagger is a nice card. It's sort of like the equivalent of Iron Wave on the Ironclad except it has synergies with tons of things on the Silent. It also has some anti-synergy with a few things, but those aren't going to happen anytime soon.
  • Expertise is still a 4 out of 10 but we're already chatting up an 8.

We take the Cloak and Dagger.

At the campfire we choose to upgrade because 41 HP is plenty for Hexaghost. Usually. It's actually a little scary with our current deck, but we should be okay with the Poison Potion and Catalyst.


  • Catalyst+ would triple the poison (for 18 poison) but it'd be a little bit dubious since we might not pick up a poison card any time soon.
  • Footwork+ is still a pretty decent upgrade. Increasing our block against Hexaghost wouldn't be awful. It's better now that we aren't starved for damage.
  • WLP+ allows us to retain two cards. It's also not particularly awful but we don't really have two cards worth retaining each turn anyways.
  • Backflip+ is basically the same as upgrading a defend.
  • Cloak and Dagger+ gives us two shivs. It'd be really good if we had something that synergized with shivs. We don't.

Footwork+, baby!
Act 1 (Part 4):
We fight Hexaghost and win (barely).


  • Phantasmal Killer is usually a pretty bad card when alone. It's not too bad with WLP since you can at least hold a powerful attack for the next turn. As it turns out, Unload+ does 18 damage and doubling that wouldn't be awful. (Edit: As of v2.2, Phantasmal Killer is MUCH better since it only costs 1 energy to play).
  • Grand Finale is a joke difficult card to play. I'd actually take it here if I could actually reliably play it even in just the next few fights. However, 19 cards means that if I don't get WLP before Grand Finale and Grand Finale isn't in the bottom 5 cards for the first cycle through the deck, I pretty much won't be able to play it that fight.
  • Nightmare is a pretty great card. Nightmare and Footwork make for a great combo. WLP is also great for setting up Nightmare. However, odds are I'm never going to be able to play Nightmare before Act 3. I'd be happy to carry a dead Nightmare to Act 3, but our deck isn't strong enough to do that.

We cry at how RNG is screwing us and take the Phantasmal Killer.


Our relic options are underwhelming.

  • Orrery is is fairly decent. We happen to be in need of decent cards at the moment... especially poison cards for our dead catalyst.
  • Broken Crown means we pretty much lose. Our deck is not strong - at all. We need to be able to see more (decent) cards.
  • Hovering Kite also means we pretty much lose. We don't have the card draw to sustain discarding 2 cards every turn (we can afford it on turn 1, but that's it). Honestly, I just never take Kite.

We take the Orrery and pray for usable cards.


  • Sneaky Strike is still awful. The world's changed a bit around it, but it sure hasn't.
  • Bouncing Flask has such great synergy with Catalyst. 18 poison, Wow!
  • Poisoned Dagger is actually a pretty decent card, but Bouncing Flask is much better. 9 upfront damage and 3 additional damage after 2 more turns is great for one energy.

We take the Bouncing Flask.


  • Sneaky Strike again. You just keep coming back. Stop. Please.
  • Piercing Wail (PW) is a great card for Act 2. Lots of enemies in Act 2 have multi-hit attacks and thus PW is significantly more effective against them. Moreover, a lot of Act 2 fights are against multiple opponents and thus PW is great since it is Area-of-Effect (AoE) mitigation.
  • Slice is sort of like a slightly better Strike in a deck that doesn't have the energy to play all the cards it wants to play. We don't really have that problem and slightly better Strike is still pretty awful.

We take the PW.


  • Flechettes is an interesting card that is only good if you have a ton of card draw AND a large portion of your deck is made up of skills. It's actually not awful if we draw this turn 1 for our deck (since we have a 9 card first turn for a maximum of 32 damage without any additional card draw) but it sort of feels like its too dependent on the stars aligning properly.
  • DS is a nice card, but less nice now that we already have one.
  • Backstab is pretty good in Act 1. It's okay in Act 2, but the key thing is that this card is Innate AND it exhausts (thus not clogging up our deck on later turns). We have 9 cards on turn 1. We have literally no way of playing 9 cards on turn 1. Backstab costs 0 energy. We can play Backstab on turn 1. Logic.

We take the Backstab.


  • Backflip is a good card. Now that we're drafting a lot more cards into our deck, I think a little more card draw wouldn't hurt.
  • Poisoned Stab is also a good card. However, we already picked up Bouncing Flask so it doesn't seem particularly necessary.
  • Blade Dance is a decent card when upgraded and mediocre not upgraded. We have a lot of other cards that we'd like to upgrade and we don't really have any shiv synergies.

We take the Backflip.


  • Slice was already mentioned.
  • Sneaky Strike can go die.
  • Sucker Punch is not a very good card, however our deck is really starved of weak (just the Neutralize).

We take the Sucker Punch.

Onward to Act 2!
Act 2 (Part 1):
Let's look at the map for Act 2:


Many thanks to Siri for providing us with this image as well.

Things to take into consideration:
  • We got the Hyper Beam boss (does he even actually have a real name...?). This is exceptionally good news for us, as he doesn't cleanse debuffs and his minions do not respawn after being killed. The Catalyst gamble is paying off big time.
  • We are running on 3 energy and our AoE damage and AoE mitigation is... lackluster at best. Even with Meat on the Bone and Preserved Insect, I don't think this deck survives two elite fights if they are Gremlin Leader and Slavers (we actually do decently against Book of Stabbing).
  • We have a lot of gold and definitely want to hit a shop this Act. We could potentially survive until Act 3 to use our gold but it would be really close. Moreover, in Act 3 we are locked into whatever path the flaming elite is on and that path might not have a shop. Let's not gamble with casino odds.
  • Act 2 Hallway Fights extra suck. We don't really want to take them. We also really want to get decent cards, especially if we can't do two elite fights and thus will be down a relic this run comparatively. For this, I would like to try to back-load the harder hallway fights while still taking a few.

There are 4 starting positions (referred to as Paths 1-4 from left to right):
  • Paths 1 and 2 are the same. At the fork, there is the option to take a flaming elite or the normal elite. If that flaming elite is Gremlin Leader or Slavers, we die with our deck as-is. The other side of the fork makes us take one hard hallway fight but we get to shop before the elite (unfortunately the campfire is after it). Our current amount of gold is pretty good (definitely enough to buy something) but rare relics are out of our purchasing power while common relics will leave us with no gold left to do anything. After that the next fork gives us the option to die to two back to back elites or a bunch of hard hallway fights and a campfire.
  • Path 3 and Path 4 are similar (only differing at the start). Path 3 means we need to take a hard hallway fight. Path 4 doesn't. I like Path 4 more than Path 3. We definitely want to take the right side of the fork as it gives us a campfire before the elite as well as a campfire after. We also need to hit that shop as by that time we should have something like 400 gold. Then there are potentially 4 hard hallway fights that are backloaded (hey didn't we say something about really wanting that?).

Tentatively, I'm opting into Path 4 right side of the fork at each fork.

First fight are the birds. This fight can be awful, but we have a DS+ in our deck as well as the ability to poison the birds and have them die to that.


We lose 1 HP that fight. That's pretty good for birds.

  • Bane is pretty decent... in Act 1 if you have a way to apply poison. If this Bane were upgraded, I'd actually consider it (20 damage is much better than 14) but as is, we have too many cards that need to be upgraded.
  • Prepared is awful. It doesn't actually draw you cards. It does cycle your deck slightly, but honestly, it's not a good card unless you have very specific needs to draw and discard 1 card. Prepared+ is okay, but not great and we definitely aren't wasting an upgrade on it.
  • Acrobatics is pretty decent, but we already have pretty decent card cycling and retention with 2 Backflips and a WLP. I don't think we can really afford to use one energy to just cycle our deck anyways.

This is a skip for me.

At the ? room we get this fun event:


Obviously we're not paying them. Our deck is strong enough to kill one of them in one or two turns (probably). After that, the fight is fairly trivial (plus we have Meat to heal us after the fight). Also, the relic they give us happens to apply 1 AoE weak on turn one. Remember that part where I didn't have enough weak?


I had to use the block potion, but it turned out fairly decent. They gave us a thorns potion (which I'm hoping to hold until the Heart, but we'll see).

  • Bane+ appears. Are they listening in on me or something?
  • Blade Dance is not useful as we have no shiv synergies.
  • PW is really good. However, we picked up the Red Mask for some AoE mitigation and we already have a PW in our deck. I'm not terribly sure we need a second right now and I could really use some damage to kill the minions that Hyper Beam guy spawns.

I take the Bane+.

At the next ? room I get the Council of Ghosts event:


This is actually a really good event most of the time. The problem is, you need to upgrade the Apparitions you get (to make them not ethereal). Apparition+ is amazing with WLP. However... we're back to the point where you have to realize that I have a ton of other cards that need to be upgraded. Phantasmal Killer is pretty much a dead card on 3 energy. WLP would really like to be WLP+. I'd love to get an upgrade on Neutralize for more consistent weak application. Moreover, Catalyst+ and Bouncing Flask+ are pretty much necessities for the Hyper Beam boss. The deal breaker for me, though, is that we have Meat on the Bone. Since our Max HP ties into when Meat heals us, lowering our Max HP makes getting that heal a LOT scarier. It also makes that heal worth more (percentage-wise) and we'll tend to take less damage, but I'm concerned that our deck isn't strong enough to win some of the harder fights in the 3 turns of intangibility. For me this is a pass, but it may come back to bite me in the butt.
Act 2 (Part 2):
The next hallway fight is an easy one. I decide to take some damage to half HP exactly for Meat value.


  • Bullet Time (BT) is great. If I draw this turn 1, I get to play 8 more cards. It also has insanely good synergies with WLP. It also solves my 3 energy problem. Wow!
  • Cloak and Dagger is still the same as before.
  • Flying Knee is pretty decent... in Act 1. If I didn't already have a bunch of weak attacks, I'd consider taking this (if it were standalone and not trying to compete with Bullet Time).

We take the Bullet Time.

At the next ? room we get this fun event:


Luckily, with Backstab and Unload+, we melt the red slaver and just tank the damage from the blue slaver since we have Meat on the Bone and Orichalcum. That part was pretty trivial. Next up is the option to fight Middle Slaver (from the Slaver Elites) and a Gremlin Nob. With Preserved Insect and the fact that our deck was already designed to be able to kill Gremlin Nob, I think this fight should be pretty trivial.


The fight gives us a nice little steroid potion. This works pretty well with our Bane+ and DS+.

We get a Mango (gain 14 max HP, which also heals your current HP by 14). I'm crying. Ghost Council, please, take me back! We also pick up an Ornamental Fan (every time you play 3 attacks gain 4 block). I hesitated slightly in taking this since it actually has anti-synergy with Orichalcum in a deck that doesn't have shivs... but it could be decent on a turn with Bullet Time. Plus, Orichalcum isn't worth much at this stage of the game.

  • Catalyst has synergy with... Catalyst. Four times is much better than just two times.
  • Blade Dance is actually okay now that we have a Ornamental Fan. However, it's really not that good.
  • Bane is not Bane+. I also probably don't want a second Bane+ anyways.

Second Catalyst, get!

At the campfire we choose to upgrade as we want to stay around half health to maximize the value of Meat on the Bone. Plus, our deck has rounded out enough now that we should probably be fine winning against any of the elites.


We have a lot of choices here:
  • Bullet Time+ would go to 2 energy allowing us to play a Backflip first. This isn't incredibly useful, but it has potential.
  • WLP+ is still nice, but not an immediate necessity.
  • Phantasmal Killer+ would stop being a near dead card. However, we're fully indexed on the poison route now with 2 Catalysts.
  • Catalyst+ could be nice, but we only have one source of poison so getting to a Catalyst+ before we get that poison down would be worthless.
  • Bouncing Flask+ gives an additional bounce. This is nice when there are multiple enemies and some of the bounces go onto targets that aren't the one you want it to bounce to. This is also good for Hyper Beam guy since it could stack 12 poison on him on turn 1 if we're lucky.

I choose to upgrade to Bouncing Flask+.

Now, we're praying this elite is Book of Stabbing, since that'll be ridiculously easy, or Gremlin Leader since that'll be less painful that Slavers by a little bit.


It was Gremlin Leader. We only lost a little bit of health, so it's not too bad overall. We got another Steroid Potion (so it's a bit of a waste that we never used the original one) but I'd rather hold the Thorns Potion for the Heart rather than take another Steroid Potion. We also get a Blood Vial (heal 2 HP upon entering combat). It's a pretty okay Relic.

  • Concentrate is an okay card when you're running on three energy and have a 9 card turn one. It's not amazing because subsequent turns it sort of sucks if unupgraded (and remember how many cards we would like to upgrade).
  • Wraith Form (WF) is love. Wraith Form is life. How do you counter Hyper Beam guy? WLP and Wraith Form. How do you win heart runs with poison stacking? Poison stacking and Catalyst a bunch of times then WLP and Wraith Form.
  • Backstab is also okay for the same reasons as before. However... Wraith Form is love. Wraith Form is life.

We take the Wraith Form. I like it so much that I'm not even using the abbreviation.

Next campfire we upgrade again for the same reasons as before.


Here we upgrade the Wraith Form. Not much else has changed and Wraith Form upgrade is a very high priority.

At the chest we get the option between Bag of Marbles (apply 1 vulnerable to all enemies at the start of combat) or a Sapphire Key. Remember that part about how sometimes useful is always better than never useful? Plus, Bag of Marbles works well with Backstab and it will remove a stack of artifact from Hyper Beam guy allowing us to stack poison on him even faster.

Now for the store (please, o' great gods of RNG, give me something good).


So, the scummy gods of RNG have decided to give us crap.

  • DS is useless at this point.
  • Unload is also useless at this point.
  • PW is okay, but we already have one and it's not really worth purchasing.
  • Outmaneuver is a weird card. It's actually somewhat okay when you have WLP and are at 3 energy, but I don't think we really need it and on the turn you draw it, it's actually -1 energy and takes up a card slot. I'm hoping we can just pick up an energy relic after this boss fight.
  • WLP is great. However, the second copy is significantly worse.
  • CCC3 and CCC4 are bad. I'm saving some time here.
  • Whetstone is a bad buy. 4 of my 6 unupgraded attacks are Strikes. 1 is Neutralize. 1 is Sucker Punch. No. Just No.
  • Dreamcatcher is awful and can very rarely be okay for people who rest if they give it to you for free. We have Meat on the Bone.
  • Prismatic Shard is... questionable. It adds a lot of volatility to this run. We don't want volatility.
  • The potions are nice, but I sort of like the potions that I have now.
  • Card Removal is a luxury. We happen to have a lot of money and nothing to spend it on. Hey, we can afford luxuries!

So we remove a Strike and move on.
Act 2 (Part 3):
The next hallway fight is a hard hallway fight. We're pretty stupidly strong now though, especially with a Wraith Form. It's cake.


  • Flying Knee is still not a great pick up.
  • QS is still not a great pick up.
  • Deadly Poison is actually pretty good here. I only have one source of poison right now and it costs 2 energy to play AND I need to shuffle my deck to get to it again if I don't play it the first time around. This helps increase our consistency a bit.

I take the Deadly Poison (the obvious abbreviation for this one is a little sketchy...)

Now our next choice is between another hard hallway fight or the ? room. We've already encountered the two really sketchy events and got through them both unscathed. We also have a blood vial which makes the vampire event pretty decent... though having removed that Strike at the store then becomes sort of stupid. I'm partial to the ? room since a lot of the remaining events are pretty good for us.

We get the Ominous Forge event (could someone send me an image of this event, I forgot to screenshot it). I don't want to take a curse into my deck, so I'm upgrading a card.

WLP+ is the obvious choice at this point. I have a Wraith Form+, a Bullet Time, and 2 Catalysts. Being able to hold a second card is very important now.

Next hard hallway fight. I should probably stop including the "hard" part at this point. These are really easy with our deck now.


  • Poison Stab has already been talked about. We don't need another source of poison.
  • Deadly Poison has already been talked about. We don't need another source of poison though since we already picked up a copy.
  • PW has also already been talked about. It's also free this time. Sure, why not?

We take the PW.

Next hallway fight:


  • Noxious Fumes (NF) is so good. If you can only take one poison card, then this is the one. It is scaling AoE damage. You know what our deck has been missing this whole time? Scaling AoE damage.
  • Blade Dance still isn't very good.
  • Finisher has no synergy with our deck at all.

I'm sorry gods of RNG. You're not scummy after all. I take the NF.

At the campfire we upgrade because I'm pretty sure Hyper Beam guy is already dead and he just doesn't know it yet. I also picked up an Energy Potion after one of the hallway fights and traded out the Steroid Potion for it. We mainly kill things with Poison and I wouldn't complain about being able to have a little extra energy every now and then.


Nothing's changed except we now have Noxious Fumes. The Noxious Fumes upgrade is also really good. I could go into a long explanation about it, but for now, just settle for the fact that it's really good.


Hyper Beam guy basically implodes. Another run where I still haven't learned his name because it just wasn't worth the energy of hovering over the character.

  • Glass Knife is pretty decent in Act 1 and okay in Act 2. We're heading into Act 3 where all the elites and some of the normal enemies have >100 HP.
  • Tools of the Trade is really bad. It's just an awful card. Here is a link to JoINrbs' more detailed explanation: https://www.youtube.com/watch?v=EOYyV8apUaw&feature=emb_title
  • Malaise is extremely strong. It's great against multi-attacks. It's another source of weak. A lot of the remaining enemies have multi-attacks. We wouldn't mind another source of weak.

Malaise!

Now for the relics, I'd really like an energy relic, but honestly I'd settle for something decent like an Astrolobe.


I hate this game.

  • Calling Bell will throw 3 curses in our deck and give us 3 random (non-boss) Relics. We don't really want 3 curses (though with as much gold as we have, we could definitely remove some of them). We're not terribly pressured for Relics at the moment though. This is another gamble. This one has odds that are slightly better than casino odds, but it's not much better. Note: This relic has been changed to now give 1 unique (non-removable) curse and is much better.
  • White Beast Statue gives us a potion after every combat. Keep in mind that we want to hold that Thorns Potion for the Heart fight. This essentially means we just have one open potion slot and if we get any good potions (Ghost in a Jar or another Thorns Potion) then we have no potion slots and White Beast Statue becomes useless.
  • Eternal Feather heals you every time you go to a campfire by 3 HP for every 5 cards you have in your deck. We have around 30 cards so this will heal us 18 HP every time we go to a campfire. It doesn't work well with Meat on the Bone, but it doesn't have any real downside either (aside from the fact that it's useless if we don't take damage). We're not too heavily indexed on defense (mainly relying on the Wraith Form+ as a closer) so perhaps this is a good pick up.

I take the Eternal Feather after a grueling debate about which Relic is the least awful.

Note: As of patch V2.0, White Beast Statue and Eternal Feather are no longer boss relics.
Side Note: For those of you who make threads complaining about bad RNG... this is the sort of situation in which you should complain about bad RNG.
Act 3 (Part 1):
Let's look at the map for Act 3. Keep in mind that we have to take the path with the flaming elite in order to reach Act 4.


I merged this one. *insert growing Pinocchio nose*
It was still thanks to Siri.

Things to consider:
  • We need to fight the flaming elite to reach Act 4.
  • There are two bosses for Act 3 on Ascension 20. We know for sure that the first boss is Donu & Deca. This is probably the worst boss for us as they each start with 3 artifact and there are two of them which messes with Bouncing Flask+. Red Mask and Bag of Marbles will remove 2 stacks each though.
  • The second boss for Act 3 should not be a major issue regardless of which one it is. We would probably prefer Time Eater over the Awakened One though since Time Eater doesn't have helpers and his cleanse will not do much if we nuke him with two catalysts before he hits half HP.
  • We have a LOT of gold. It'd be nice to hit some shops.
  • We would like to pick up some relics. Our deck is pretty strong now and we shouldn't have too much difficulty against elites.

There are four starting locations (referred to as Paths 1-4 from left to right). All four paths can reach the flaming elite. Path 1 gives us the opportunity to visit an early store. The other 3 paths have more hallway fights. Our deck is already pretty strong (and rather filled at >30 cards) so we probably don't need to take a bunch of hallway fights to look for more cards. Path 1 is just significantly better.


The first hallway fight:


The fight rewards us with a Dexterity Potion. Dexterity is really nice on the Silent, but we're pretty content with Wraith Form - meaning our Energy Potion is probably more valuable.

  • Calculated Gamble is nice for cycling through your deck but it has anti-synergy with WLP. It'd be a pretty decent pick up if I could bottle it and get it on turn 1 where we have 9 cards, but there's no guarantee of that.
  • Deflect isn't awful, especially considering how we have only 3 energy and a Footwork for the dexterity scaling. However, it's not entirely necessary as we are mainly using Wraith Form for survival.
  • Crippling Cloud is an amazing card. It functions as AoE damage and AoE mitigation. Since we already have a lot of poison application, it's also not an important card to upgrade for the damage.

We take the Crippling Cloud that we would have liked to have found at the start of Act 2.

The ? room is a hallway fight.


  • Poisoned Stab+ is a really nice card to have early on in the game. It's even pretty decent later into the game. However, we already have a ton of cards and a ton of poison application.
  • Dodge and Roll scales extremely well with Dexterity (2 scaling for 1 energy). We only have 1 Footwork+ and after we play Wraith Form our Dexterity decreases every turn (in theory the fight should be over after playing Wraith Form so this shouldn't be a problem). However, again, this has anti-synergy with Wraith Form.
  • Slice+ is like a better Strike+ in a deck that doesn't have energy. We don't have energy but we sure don't need a better Strike+ either.

This is a skip.

Next hallway fight:


We used the Energy Potion and picked up an Entropic Brew. I might just hold this Entropic Brew straight up until the heart since it'll give me two potions after I use the Thorns Potion.

  • Acrobatics would be nice for us, but we don't really have the energy to be able to play it.
  • Backflip is still a good card for us. We have a lot of cards now so the card draw wouldn't hurt. It also blocks, unlike Acrobatics.
  • Poisoned Stab has already been mentioned. We already passed on the cooler 2.0 version so we're probably not looking for the older model either.

We take another Backflip.

Now to the store. Hopefully we can get something good.


  • All of these cards have been mentioned before. We're not taking a second Noxious Fumes as the second copy is significantly worse than the first (the first one essentially means whatever poison you apply will not decrease and will only increase).
  • Blind would have been a decent pick up (since once upgraded it applies 2 weak to all enemies) if we hadn't already picked up the Crippling Cloud earlier.
  • Thinking Ahead isn't terribly useful for us (is it ever useful...)
  • Centennial Puzzle (draw 3 cards the first time you lose HP each combat) is fairly decent. We wouldn't mind some more card draw but I think I'd rather hold out since we have two more guaranteed stores ahead of us.
  • Omamori (negates the next two curses you pick up) isn't useful this late into the run. Probably. Where the heck was this when I had the option to pick up a Calling Bell?
  • The Waffle (Increase Max HP by 7 and then full heal) is okay, but we're going to be full health at the next campfire and 7 Max HP isn't super stellar for us at this point.
  • The potions are nice, but the ones we're holding onto are better (since Entropic Brew is essentially two potions).
  • Card Removal is a fair option since our deck is pretty big and we'd like to get rid of the Strikes.

We remove a Strike and move on.

The next ? room is the Duplicator event:


What's better than 3 turns of intangibility? 6 turns of intangibility. We duplicate the Wraith Form+.

At the campfire, Eternal Feather heals us to full so we're not resting. Here's what we can upgrade:


  • Backflip+ is not a good upgrade. +3 defense is the same as upgrading a defend.
  • Cloak and Dagger+ is not a good upgrade for the reasons listed before.
  • Phantasmal Killer+ would make it playable, but we aren't really using attacks for damage.
  • PW+ is 8 strength vs 6. It's not really worth it.
  • Backstab+ is just 4 damage on a card that exhausts. That's pretty useless.
  • Bullet Time+ is still a decent upgrade, but not a high priority one.
  • Crippling Cloud+ is a decent upgrade, but also not a high priority one.
  • Malaise+ is good if you want to play the card (and have it have an effect) on 0 energy. We're not terribly concerned about that right now though.
  • Deadly Poison+ is nice, but not a priority.
  • Catalyst+ would be really nice right about now. The average HP of enemies has skyrocketed.

We upgrade to Catalyst+.

Now for the flaming elite. It's the Nemesis (his bonus is that he starts with 4 strength).


We lose a ton of health and end up just barely outside of Meat on the Bone range. It's not too bad though, since we'll probably be able to activate Meat next fight and then Eternal Feather will heal us at the next campfire.

We get the Emerald Key and a Toxic Egg (when you add a skill to your deck, upgrade it). This Toxic Egg would have been really nice to get before the Council of Ghosts event.

  • DS is not useful at this point.
  • Reflex+ is not useful for us either, as we only have one card that discards (Survivor).
  • Skewer works really well with WLP and Phantasmal Killer, but we only have 3 energy which makes Skewer sort of awful.

This is a skip for me.
Act 3 (Part 2):
The next ? room is a shop:


  • QS is not good anymore. Card draw is nice but 8 damage is awful.
  • DS is still not good anymore.
  • Burst+ is amazing for us. Remember those 2 Catalyst cards that we have? Yeah. Once those are both upgraded, Burst+ followed by Catalyst+ and Catalyst+ will multiply poison by 81 times.
  • Blur+ is pretty decent. I don't think I want to spend money on it though since we're mainly using the Wraith Form+ cards.
  • Envenom is good for shiv decks. We're not a shiv deck.
  • Enlightenment+ is still useless for us. We have a lot of costly cards, but reducing them to 1 cost still only means we can only play 3 cards.
  • The Bomb+ is not very helpful for us as we probably do much more than 50 damage with poison after 3 turns. It's not a bad card... but it's not very helpful for us in this particular run.
  • Happy Flower is perfect for us right now. Remember how we don't have any energy? Happy Flower gives us 1 energy every 3 turns. It's not the most useful thing in the world... but it's better than nothing.
  • Pen Nib (every 10th attack does double damage) has really good synergy with Phantasmal Killer. It's a pity we don't have any good attacks (Unload+ no longer counts in Act 3).
  • Toolbox (at the start of each combat add a random colorless card to your hand) is not terrible when you're in need of card draw as a lot of the colorless cards provide card draw. However, it's not worth the price - plus it's more volatility that we don't really need.
  • The potions can't compete with our potion.
  • Card Removal is nice, but we won't have a lot of gold left after our other purchases and we only have a few Strikes left in the deck anyways. Plus, we'll be at 35 cards after buying Burst+ so that way Eternal Feather gives us 3 more HP.

We buy Burst+ and Happy Flower.

At the next chest, we have to take Sapphire Key regardless of what the Relic is. This is the last guaranteed chest that we see and we want to go to Act 4.


I feel no pain at all as I ignore the Act 3 Anchor (10 block at the start of combat).

The next ? presents us with the option to fight two Orb Walkers for a rare Relic.


I'm hoping that we'll be able to take a little bit of damage from this fight so as to activate Meat on the Bone.


Instead, we fail to take any damage but still end up +2 HP from Blood Vial. The event rewards us with The Specimen (when an enemy dies, transfer all poison on that enemy to a random enemy). This basically just guaranteed that we win the Donu and Deca fight as well as the Act 4 Elite fight. Ah... the RNG gods are really taking me on a ride this run.

  • Backflip+ is fairly good for all the reasons that Backflip is fairly good.
  • Deflect+ isn't significantly better than Deflect.
  • QS is still bad.

We take the Backflip+.

At the fork, I opt for the left path because it gives us an elite fight for more relics and we still have plenty of gold that we can use at the shop. Plus we can upgrade our other Catalyst at the campfire.

We don't heal because Eternal Feather heals us.


I kind of already gave away what we're going to upgrade, but it's the Catalyst. We haven't added any cards to our deck (except ones that were already upgraded) since the last time we were at a campfire so all the same reasons still hold true.

Second Catalyst+ means that this run is hopefully in the bag.

Now for the elite fight. It's the Giant Head (this fight is really easy when you have Preserved Insect since the issue with the Head is to try to kill it in the 3 turns in which he is counting down and he has an obnoxious amount of HP - it's even easier for us since we have 2 Wraith Forms to extend that time even further).


We kill the Giant Head.

  • Dagger Throw is still not very good for the reasons we listed all the way back in Act 1.
  • Blur+ is pretty decent. It's not worth spending money on, but hey, this one is free! The reason why it's not a bad pickup is because the Heart spends every 1st turn of a 3 turn cycle buffing itself and not attacking. Having a way to retain block on those turns isn't awful.
  • Masterful Stab+ is actually pretty good if you never get hit (which we don't really get hit). However, 16 damage is rather underwhelming... especially when you consider that 95% of our damage is coming from Poison.

We take the Blur+.

You may notice that I didn't mention the Relic that the Giant Head gave us. If you didn't, you should probably work on your observational skills.


The Weak Potion can't compete with what we already have, so that's a skip. The Bottled Flame (select an attack to draw on turn 1 of each combat) is an interesting Relic. It's often really good if you have a powerful attack that you want to use on turn 1 all the time (for instance, if you have something like Whirlwind and a bunch of turn 1 strength increasing relics). Did you know? Our attacks suck. I'd even argue that Backstab sucks at this point since we want to see our other important cards at this time, even if we can't play every card in our 9 card turn 1. Bottling a card will prevent you from removing it and so we're not going to bottle the Backstab either, even if it doesn't actually change anything draw-wise. So this is one of those rare instances in which you skip a Relic as it is actually worse to take it.
Act 3 (Part 3):
Next up is another store:


  • QS is still bad. It's like that clingy ex of yours that keeps trying to get back together even though it was just an awful relationship in the first place.
  • Eviscerate is a really weird card that is really hard to play. Speaking of which, we pretty much can't play it so it's definitely not going into our deck.
  • Dodge and Roll+ is nice, but we're not taking it because we pretty much always end up with negative Dexterity with two Wraith Forms.
  • Acrobatics+ is sort of nice, but we still don't have the energy to spend on card draw by itself.
  • Footwork is also nice, but it has anti-synergy with Wraith Form.
  • Panic Button+ is an odd card. I don't think it's ever really that good on the Silent (since she almost always works around Dexterity scaling and generating lots of block every turn), but it probably wouldn't actually be that bad this run.
  • Hand of Greed is... bad? I would have to kill 9 non-minion enemies just to recoup my initial investment.
  • Strawberry (+7 Max and Current HP) is pretty decent, but we're not hurting for max HP at the moment.
  • Bottled Tornado (select a power card and start each combat with that card in your hand) is perfect for the Silent. You know what improves consistency? When you can guarantee that you draw one of your important powers on turn 1.
  • Sling of Courage (start each elite combat with 2 strength) isn't very helpful for us since we don't really have anything that scales with strength and there's only one elite fight left in the entire run.
  • The potions again don't really compare with the two that we already have.
  • Card Removal is a luxury. We can't afford luxuries after we buy groceries (Bottled Tornado).

We buy the Bottled Tornado.
I choose to bottle WLP+. Why? Because it improves the consistency of my deck more than any other power. Being able to retain 2 cards starting from my 9 card first turn gives me a lot of options.

The next hallway fight is against the Writhing Mass:


This fight is fairly trivial with our deck, but it's important that I hold an attack every turn with WLP just in case it tries to stick a Parasite (curse) into our deck. I prefer to just kill it with poison so as not to try my luck with RNG.

It gives us a Skill Potion, which we skip because Skill Potions tend to be the worst types of Potions and we already have two great potions.

  • Deflect+ is still a skip for reasons stated before.
  • Accuracy is still being bullied.
  • Heel Hook+ is pretty underwhelming this late into the game. We do have enough weak application to use it... but honestly, I'd rather not stick it in my deck at this point.

So we skip.

At the campfire, we have to Recall to get the Ruby Key to go to Act 4.


Now it's time to fight Donu and Deca.


Having The Specimen makes this fight a lot easier, however, with this sort of turn 1, we're probably still going to take some damage. I'm going to play WLP+, Backstab Donu (always focus Donu since he continually buffs their strength), PW to remove the artifact, then use two Defends. I'm electing to take some minor damage this turn so as to conserve my intangibility since we didn't get to apply any poison this turn.


After a rather long and grueling battle, we defeat Donu and Deca while losing 36 HP in the process (ouch). On to the next boss, who is Time Eater (we lucked out). Awakened One would have probably forced us to burn both potions.


The Time Eater fight is trivial. We managed to heal 2 HP from Blood Vial and take no damage.

Now for Act 4.
Act 4 (Part 1):
Here's the map of Act 4. I merged this one all on my own.


Things to consider:
-Nothing really. We have no money so that shop is just there to taunt us.

At the campfire, we get healed to full thanks to Eternal Feather (this has actually had surprisingly high value this run... usually it's useless). Now what do we want to upgrade...


  • Cloak and Dagger+ is actually just bad against the Heart (if you don't have a kunai/shuriken).
  • Phantasmal Killer+ is pretty darned useless for us.
  • PW+ is literally going to be the same as PW for the bulk of the fight against the Heart.
  • Backstab+ still sucks.
  • Backflip+ still sucks.
  • Survivor+ still sucks.
  • Defend+ still sucks.
  • Strike+ especially sucks.
  • Sucker Punch+ is... not the worst. The extra turn of weak could be pretty strong against the Heart... assuming I'm not already intangible for that turn.
  • Neutralize+ is slightly better than Sucker Punch+ since it does the same thing and is 0 cost.
  • Deadly Poison+ wouldn't be awful... however it's important to note that once I apply 200 poison to the Heart, there's no reason to apply any more poison since the Heart can only take 200 damage each turn.
  • Crippling Cloud+ is also not awful, but Deadly Poison+ would be better since it's only one energy for the same amount of poison.
  • Malaise+ is not terribly useful. Malaise is good against the heart for one cycle, but the heart will cleanse strength down debuffs during its buffing turn.
  • Bullet Time+ is still decent since we would be able to play a Backflip first and we have 4 Backflip cards in our deck so the draw chance on a turn in which we have Bullet Time would be fairly high.

This is a really tough decision - but I think I will go with Deadly Poison+. The reason behind this is that what I really want to do is to apply 23 poison as quickly as possible and then Burst+ and Catalyst+. Then all I have to do is sit around with Wraith Forms and I'll just auto-win.

Here's what was in the shop:


We can't buy anything except Sneaky Strike, so I'm not going to talk about anything else. Though, if I recall correctly, earlier I had told Sneaky Strike to go die.

Okay, I said I wasn't going to talk about anything else, but Runic Dodecahedron is actually a decent energy relic for us, since with any luck, we won't take any damage from the elite fight and very little damage from the Heart.

Now for the elite:


Not a bad turn 1. I'd have liked to have seen a Wraith Form this turn so that I could hold it with WLP, but it shouldn't be a big deal.


Did I mention that I hate this game? I didn't draw either Wraith Form until turn 4... (I didn't use my potions because Spire Spear was dead from poison last turn and thus this fellow would die to the Specimen on this turn). Oh well, Meat value I suppose...


They gave us the Unceasing Top (draw a card if you have no cards in your hand). Super useless.

  • Finisher is not good in our deck because we have no synergies.
  • Caltrops is actually really good against the Heart, but we no longer need damage as we already know our win condition is from stacking 200 poison and then waiting in Wraith Form. Adding this card just delays our ability to draw into our more important cards (Burst+, Catalyst+, Wraith Form+, etc)
  • Sucker Punch is not good at this stage of the game as we're no longer desperate for weak.

It's a skip.

Now to take down the Corrupt Heart.
Act 4 (Corrupt Heart):
Now, I figured that now that we've reached the final fight, I wouldn't mind showing you guys my step-by-step decision process in combat. Now that I've decided to do this, there's probably going to be some cosmic imbalance and I'm going to lose this fight.


On Ascension 20, the Corrupt Heart starts with the Beat of Death (BoD) passive at 2 stacks (deals 1 damage per stack for every card you play - this effect occurs after all card effects are resolved).
Turn one is a debuff that applies 2 stacks of weak, vulnerable, and frail to you (in that order) and that adds a Burn, a Void, a Daze, a Slimed, and a Wound to your deck.

Alright, here we go.


I use my Thorns Potion so that I can break my Entropic Brew into two potions. It gives me a Dexterity Potion and a Vulnerable Potion.


I use the Dexterity Potion. I hold onto the Vulnerable Potion because I don't need it yet.

On this turn, I can only generate a maximum of 14 block (reduced to 10 by BoD) if I use Burst+ and a Defend. That'd be a terrible waste of Burst+ though. So we can only generate a maximum of 7 block (reduced to 5 by BoD). That means I can only play 2 more cards this turn if I don't want to take damage.

I know that on my next turn, the Heart will either use his 2x15 attack or his big hit (I don't know the damage value off the top of my head, but it should be like 45 or so). I now need to remember that I will be inflicted with vulnerable (take 50% more damage) and frail (generate 25% less block). If the Heart decides to do its multi-hit, it will be hitting me for 3x15 damage due to the vulnerable on me. As it just so happens though, after using the Defend, I will have exactly 2 energy left. Malaise with 2 energy will lower the Heart's attack by 2 making it a 1x15 attack and the weak will reduce the 1x15 to 0x15. Wow, I could take 0 damage! Plus, the weak lasts for 2 turns so even if it's the big hit, it's a valuable amount of damage mitigation.

With that decided, I use Defend, Well-Laid Plans+, and then Malaise in that order. I end my turn and retain Burst+ (because we want to Burst+, Poison Card, Catalyst+) and Piercing Wail (because it gives me the most mitigation of all my options).


It decides to do the multi-hit so we are taking 0x15 damage. We would have been fine even if it had been the big hit as we drew our Wraith Forms on this turn. Unfortunately, we drew BOTH Wraith Forms on this turn. Notice that we have 28 cards remaining in our draw pile. That's really bad, because if we discard one of these Wraith Forms to hold onto Burst+, we'll likely not see that Wraith Form again until 4-5 turns later... or worse until 7-8 turns later. I decide that since we're not really doing anything this turn, we may as well attempt to draw a poison card with Backflip.


No luck. We drew a Slimed and a Defend. While I could have used Burst+ with the Backflip (since we're discarding the Burst+ anyways) I would have had to take 2 damage to do that and it would have put us at 1 energy meaning if we drew Bouncing Flask+ or Crippling Cloud they would both be unplayable. Crippling Cloud wouldn't hurt too much, but Bouncing Flask+ literally must be played since we're not likely to see the Burst+ again for a long time.

Instead, I just play the Slimed and end my turn. We retain the two Wraith Forms.


I forgot to screenshot the start of this turn, but we had 4 energy because of Happy Flower so I used a Backflip to draw two additional cards (Survivor and Dazed).

It seems pretty much like a no-brainer as to what I should do next:
Bullet Time into Wraith Form (now I am at 0 block but I took no damage because Wraith Form reduces BoD's damage to 1) into Survivor where I discard the Burn (it's important that you discard the Burn - not because it deals damage, since you would block it anyways, but because it discards itself at the end of your turn anyways. This way, you can retain the Wound and not have to draw into it again). Then I just play the rest of my cards.

Q: Why didn't you hold onto the other Wraith Form?
A: This is turn 3.
Turn 3: Big Attack -> Intangible 6
Turn 4: Buff -> Intangible 5
Turn 5: Attack -> Intangible 4
Turn 6: Attack -> Intangible 3 (if I didn't double Wraith Form, I would likely have to on this turn for 3 energy)
Turn 7: Buff -> Intangible 2
Turn 8: Attack -> Intangible 1
Turn 9: Attack -> not intangible

Now if I hold onto that Wraith Form for use on turn 8-9, I may be forced to use it anyways on turn 6 but I would have to pay 3 energy to do it (effectively meaning I can't do anything else on that turn) and I should be okay to kill the heart by the end of turn 8 anyways.


I keep forgetting to screenshot the start of the turn. Anyways, all I did here was use Deadly Poison+ and Catalyst+ (lost 2 HP). Now, it's important to hold onto both Piercing Wail and Sucker Punch for this next turn. The Heart will cleanse off the strength debuff and gain 2 artifact at the start of the next turn. That's really bad, because we still need to apply more poison with another Catalyst+. Plus, if the Heart decides to use its multi-attack, 1x15 is still very painful when you only have 26 HP.


So the Heart decided to use the multi-hit attack this turn. Unfortunately, we drew the void on this turn meaning that we don't have enough energy to play all the cards that we would like. With the Vulnerable Potion, we can remove one stack of artifact from the Heart. Using Sucker Punch (lose 1 HP), we can remove the second stack of artifact.

Now, I played this part poorly in retrospect (or not poorly, it's really a matter of perspective). If I use Catalyst+ on this turn, it's lethal, but I take 9+1 damage.

Math:
This turn -159HP, I lose 11HP
Next turn it does big attack and -158HP, I lose 0HP
Next turn it buffs itself and -157HP, I lose 0HP
Next turn it does whatever attack and I lose at most 9HP but it gets -156HP.
Next turn it doesn't matter what it does because it dies to -155HP.

Instead, I used Piercing Wail (lose 1HP) to take 0x15 damage and hold Crippling Cloud and Catalyst+ for the next turn (which is still lethal and I instead take at most 13 damage instead of at most 20 damage).


It has occurred to me that I am really bad at remembering to screenshot the start of the turn. Anyways, I use Crippling Cloud and Catalyst+ (-2HP) and we have achieved lethal.


I just screw around a bit on this turn. Doesn't really matter since it's lethal. Just avoid killing yourself from BoD (which isn't possible because I don't think I even have enough energy to kill myself before the Heart dies).


More screwing around. -9HP.


Bye.

Post-Run Analysis:
Cameo from DATASS:


Score Breakdown:


Run History:


Analysis:

This part may take a while. Bear with me as I slowly update it. I'm probably going to add things in as I think of them at random. I'll also eventually go back and make the formatting suck less.

An interesting point was brought up in the forums about my choice of starting bonus and path selection in Act 1. Khor brought up a valid point that you could gamble with "Take 15 damage Obtain a rare Relic" start and then take Path 3. [I'm going to ask him if I can borrow his screenshot of his run through Act 1 of the seed]

Anyways, his screenshot shows him being far better off than I was at the end of Act 1 (but this is mostly due to card reward RNG).

Here's why I still don't agree with his strategy, even in retrospect:
The goal of this thread is to improve your win rate. Improving your win rate is slightly different than just trying to win. The strategy given by Khor is a good one for just trying to win. What I mean by this is this strategy goes in with the mindset that you have a 10% chance to win and a 50% chance to lose and 40% chance of either depending on RNG (this RNG being the rare Relic pool - if you draw something that has immediate value then add that 40% to win... but if you draw something useless early on like Girya or Calipers then you add that 40% to lose). If that 40% chance ends up being on the side of "win" then you are sitting at a 50% chance to win. However, if that lands on "lose" then this run becomes 90% chance to lose. Taking the common Relic instead just puts you at 30% to win and 70% to lose. What does this mean? It means if you're just trying to fish for a single win in A20, Khor's strategy potentially puts you in a better position to win. If, however, you are trying to be able to win consistently, then taking the common Relic and not taking damage is probably better.

During the elite fight in Act 2, I ended up taking a bit of damage because I did not use the Steroid Potion during the fight. At that point, I think I was at like a 70-80% chance to get a potion after that fight, so I probably should have used that Steroid Potion just to save HP. 20/20 hindsight indicates that because it gave me a Steroid Potion after the fight, I would have traded even on potions (instead of potentially something that would have been worse than Steroid Potion - such as a Skill Potion).


Author's Thoughts:
I may add some more stuff to this guide like what to consider if it was X boss and how to fight Y elite.


My impressions during the run (statements in bold print turned out to be true):

How Act 2 will go:
  • After Act 1: I'm sort of expecting that this deck is going to struggle to beat Act 2 (maybe barely).
  • After Act 2: I ended up stomping Act 2.

How Act 3 will go:
  • After Act 1: I might be able to scrape by in Act 3 depending on RNG.
  • After Act 2: I'm probably going to win Act 3. However, what the heck are those Act 2 boss relics?
  • After Act 3: That was friggin' easy. I'm a little sad that I didn't find more elites to fight.

How Act 4 will go:
  • After Act 1: It definitely loses in Act 4 unless I pick up some real good relics and cards.
  • After Act 2: This deck now has a decent chance to beat Act 4. That chance increases if I pick up some nice relics on the way. A lot will come down to what cards are in my hand on turn 1 of the Heart fight.
  • After Act 3: No problem. Easy. Won't even be close.
  • After Act 4: I hate you RNG. Eternal Feather low-key carried me to victory though... (Not really, since it didn't heal me for 12 hp. But hey, it's still fun to meme about.)

When people complain that you cannot beat the the game on 3 energy or that small decks are arbitrarily better:
Send them here :)

The Title:
Also, please, someone enjoy the pun on how this is called "The Silent Edition" and the entire guide is text and images. No audio included. Ha ha ha.

...

Okay, I'll see myself out.
Appendix 1 (Elites):
Act 1:

Gremlin Nob: It always does buff (gain STR when you play a skill) on turn 1, followed by 8 damage and apply 2 vulnerable on turn 2, followed by deal 16 damage on turns 3 and 4 respectively. Because of the existence of Gremlin Nob, it is not always advisable to pick up too many skills in Act 1. Also, during the Gremlin Nob fight, it is very important to consider Gremlin Nob's remaining HP and the amount of damage you will likely be able to do on the next turn. You will have to carefully consider whether or not it is worthwhile to play skills on the current turn but make Gremlin Nob stronger on the next turn (e.g. if Gremlin Nob has 18 health remaining and your current hand consists entirely of skills while your draw pile contains 5 cards, 3 of which are Strikes, it is worthwhile to attempt to mitigate damage on this turn by playing useful skills). Cards such as Dash, Terror, Sucker Punch, Glass Knife, and others are very good for killing Gremlin Nob.

Lavagulin: This is typically the most painful elite to get if you're choosing to path into an early elite. Lavagulin is tricky to handle without poison, as most of the Silent's attacks do lackluster damage (especially after you get hit with the debuffs). Lavagulin is asleep for 3 turns (will be woken up if it takes damage) so use those turns wisely to prepare. It is important to note that if you wake up Lavagulin before the end of your turn, it will not attack on that turn so there is rarely a reason to wait until it wakes up naturally on turn 4. Lavagulin will always cycle through 2 turns of attacking (20 damage each) and 1 turn debuffing you after it is woken up. It is generally better to take damage from Lavagulin's attacks early on, before you are hit with the debuff, in order to get more damage out and hopefully kill it before it kills you. Cards such as Noxious Fumes, Crippling Cloud, Leg Sweep, and other similar cards are very good for killing Lavagulin.

Sentries: They are the easiest elite to handle in Act 1. You will rarely find yourself dying to Sentries, even if your cards are awful. However, the typical strategy for Sentries is to kill one of the outer ones (whichever has lower health) before then killing one of the remaining two (whichever has lower health). It is advisable to take damage early to kill off one of the outer sentries rather than have both outer sentries stay alive longer. Picking up cards like Dagger Spray and All Out Attack will help with killing the Sentries.

Act 2:

Book of Stabbing:
This elite is a race against time. It tests your deck's ability to put out a high amount of single-target damage while also mitigating damage from multi-hits. Whenever the Book of Stabbing deals unblocked damage to you, it will add a wound to your discard pile; in combination with its multi-hit attack that iteratively increases the number of attacks each time it is used, this effectively puts you on a serious deadline for killing this elite. If you think your deck is kind of weak when you encounter this elite, I recommend focusing more on dealing damage than mitigating since the multi-hit attack will constantly increase in number. Effective cards against the Book of Stabbing are strength lowering cards such as Malaise or Piercing Wail and cards that apply weak such as Crippling Cloud or Leg Sweep.

Gremlin Leader:
This elite is also a race against time. Gremlin Leader spawns with 2 gremlin minions (can be any of the gremlins) and has three actions: it can choose to buff (increases the strength for all enemies), summon more minions (at most 2 at a time to a maximum of 3), or it can do a 3-hit attack. Gremlin Leader, done properly, can be extremely easy (as he sometimes just never attacks) or reasonably difficult. The trick to this elite is that it has a very high probability of choosing to summon if you kill the minions (fairly high probability if there is only 1 minion alive). The turn after it summons, there is a fairly high probability that it will choose to buff. You can abuse this by killing the minions on the turn they are spawned and thus Gremlin Leader will (hopefully) enter a cycle of endless summoning/buffing until you kill him. Multi-target cards tend to be very high value here (for instance, an upgraded Dagger Spray from Act 1 or Corpse Explosion).

Taskmaster, Blue Slaver, and Red Slaver:
If you hadn't guessed by now, the theme of Act 2 elites is a race against time. It is recommended to kill the Red Slaver as soon as possible. It applies 2 vulnerable (guaranteed on turn 1), which hurts real badly with three enemies hitting you. It also has a chance to apply Entangled (starting from turn 3) which will hinder you significantly if your deck relies on attacks (or not at all if your deck doesn't). After killing the Red Slaver, you can choose to kill either the Taskmaster or the Blue Slaver based on the situation. Typically, if I kill the Red Slaver quickly enough (1-3 turns), I will kill the Blue Slaver since he tends to be lower health and to get rid of the weak application. However, if the Taskmaster has been adding tons of wounds (3 per attack) to my deck over several turns, I may focus him down if my deck does not have sufficient card draw. Cards that provide multi-target damage mitigation and multi-target damage are of high value against this elite (e.g. Crippling Cloud, Corpse Explosion, Piercing Wail).

Act 3:

Reptomancer:
This elite tests... I'm honestly not sure what this elite tests. Reptomancer is such a weird fight. You should have so many ways to deal with this fight by Act 3 that it's typically trivial even when it's the flaming elite. Turn 1 it is guaranteed to summon 2 daggers. Daggers deal 9 damage on the turn they are summoned and then deal 25 damage on the next turn and die. Reptomancer itself does fairly trivial damage so just kill the daggers it summons (it can have at most 4 summoned and it has a 33% chance to summon 2 daggers if 2 or less daggers are alive). Alternatively, just apply some poison to the Reptomancer and use a Catalyst+. Honestly, I don't even know what advice to give, this fight is so easy if you have a half-decent deck.

Giant Head:
This elite tests your ability to deal large single target damage. It has a debuff that makes it take an additive 10% increased damage for each card you play. Starting from Turn 4, it starts to deal 40 base damage that increases by 5 per turn up to 70. There are so many ways to deal with this boss. Some decks with sufficient dexterity/block generation can just straight up tank him forever if need be. Other decks can just kill him in 1-2 turns. Trivial boss unless you have neither single target damage nor good block generation. It is a race against a head with no legs...

Nemesis:
It goes intangible every other turn, but it deals low damage (for Act 3) and has low health. The only real concern is the 5 burns it sometimes adds to your deck. Fairly trivial elite by Act 3.

Act 4:
Spire Shield and Spire Spear:
Honestly, the biggest gimmick of the Act 4 elite is simply that it forces you to draw 2 burns on turn 2. The other gimmick is that you also take 50% increased damage from the enemy that you are not facing (you can use cards and potions that target a specific enemy to change which direction you are facing). Kill the Spire Spear first, since it has a multi-hit attack and gains strength. There are a few ways to deal with the 3 card turn 2 gimmick that can be essentially summed up as having a sufficiently strong turn 1 that you don't really care what happens on turn 2 or having a method to have additional cards on turn 2. Useful cards against the Act 4 elite are Wraith Form, Well-Laid Plans, Piercing Wail. Corpse explosion is a fun way to save a little time, but doesn't really add anything to this fight since the fight is trivialized once the Spire Spear dies.
Appendix 2 (Bosses):
Act 1:

Slime Boss:
Slime Boss is the tax collector (and probably the hardest boss for the Silent). Rest before this fight because it hurts. Once at or below 50% (75) HP, Slime Boss splits into an Acid Slime (L) and Spike Slime (L). Slime Boss attacks in a cycle of add 5 Slimed to discard pile, do nothing, and deal 38 damage. Ideally, you want to get him as close to 76 HP as possible and then on the subsequent turn get him as low as possible. Then kill the smaller slimes before you die.

The Guardian:
The trick to beating this boss is that it deals fairly trivial damage if you can force it to change into the spike form quickly. Stacking poison and then just blocking while waiting for it to die tends to trivialize this fight.

Hexaghost:
Hexaghost basically gives you a bunch of free turns to kill it before hitting you with a 6x6 attack and tons of burn+ statuses. It has an attack on turn 2 that will hit you 6 times based on your current health (less at lower hp). If you can stack poison, this fight is fairly trivial. If you can't stack poison and have garbage single-target damage, this fight becomes really rough race against time.

Act 2:

The Collector:
This fight is extremely obnoxious if you reach turn 4 as it applies a 5 weak, 5 vulnerable, 5 frail debuff on you. Either burst the Collector or if you're in for the long haul, make sure to kill one of the minions (whichever has more strength) so as to lower the amount of attacks.

The Champ:
The difficulty of the Champ depends on whether or not you have a Catalyst+ (and some poison stacking). The first phase is fairly weak and deals trivial damage. The second phase is reached when it falls below 50% (220) HP. It removes all debuffs and starts to deal tons of damage. Sort of like Slime Boss, your goal is to burst it for tons of damage before he starts attacking during Phase 2. Ideally, you want to stack enough poison so that it kills it (or puts it very low) in 2 turns while it is still in phase 1 (first turn puts it under 50% and second turn kills it before the cleanse).

Bronze Automaton (AKA Hyperbeam):
This boss is extremely easy or extremely hard depending on your deck. If you have a way to guarantee significant mitigation on specific turns, this fight is trivial (e.g. Well-Laid Plans and intangible). If you have a way to stack enough poison to kill it before its big attacks begin, this fight is trivial. Typically you want to kill the minions first (as they each steal one of your most rare cards), but bursting hyperbeam guy is also an option. If you're forced into a drawn out fight, having cards that apply multiple turns of weak is highly valuable.

Act 3:

Awakened One:
If your deck relies on powers, you are going to have a bad time. If you rely on cards that exhaust, you are going to have a bad time. Kill the two cultists immediately. Play powers as necessary (but be careful, since the Awakened One will gain strength for each power you play during its first phase). There is a trick with Piercing Wail (and Dark Shackles) where if you use it on the turn that you kill the first phase, the second phase will revive with a permanent strength debuff (down to at minimum 0). Consider this when playing powers: is the power necessary for you to kill the Awakened One? Will it mitigate more than 2 damage each turn (+2 strength per power and the x4 attack is 25% chance)? Additional consideration: if you are already blocking all of the normal attacks, but are losing health to the multi-hit, is playing the power worth it?

Time Eater:
If your deck relies on spamming lots of cards, you are going to have a bad time. If you don't have sufficient card draw, you are going to have a bad time. Time Eater will end your turn (and gain strength) each multiple of 12 cards played. It will also heal to half HP and cleanse all debuffs on the turn you get it under half HP. Avoid ending your turn if the counter is at >8 cards since your subsequent turn will be severely limited. You can sometimes burst Time Eater in 2 turns (1 turn to get it under half and another to finish it before it heals). Decks that play a lot of cards per turn are sometimes okay against Time Eater if you can consistently play 12 cards per turn and end the fight fairly quickly.

Donu and Deca:
This fight tests your ability to kill Donu quickly. The bosses alternate turns attacking/buffing. Donu gives 3 strength to both enemies. Deca gives some block and 3 plated armor to both enemies. Poison is ideal for this fight, since it ignores block. Kill Donu as soon as possible since he increases their damage by 6 every other turn. Corpse Explosion helps make this fight easier since you will only need to kill one of the two.

Act 4:

Corrupt Heart:
Turn 1, it will always apply 2 vulnerable, 2 weak, 2 frail and add 1 of each dazed, slimed, wound, burn, and void statuses. It starts with 2 beat of death (deals damage equal to number of stacks per card played) and can only take 200 damage on each turn (note that poison is applied on the next turn). After this first turn, it will always do a multi-hit attack (2x15) followed by a big attack (45) or the reverse, followed by a buff then repeat. The buffs will remove all strength debuffs and give it 2 strength plus an additional buff (2 Artifact, then another Beat of Death stack, then Painful Stabs (wound per unblocked hit), then Strength +10, and then all subsequent buffs are Strength +50). This means Malaise is only moderately useful since it will be cleansed. It also means if you for some reason use Piercing Wail or Dark Shackles on the turn it buffs... you have just given it more strength. I recommend only using energy on Malaise during the first cycle to try to mitigate the initial 2x15 damage. The heart fight is a race against time where you want to be dealing as much damage as possible. You only need to mitigate enough damage to stay alive for longer than the heart. Make sure to save Wraith Form for both damage turns (and note that intangible is less useful against the multi-hit attack but also applies to beat of death) but Wraith Form+ can be used on any turn. Things that are strong against the heart: Thorns, Catalyst+, Intangible, After Image, Torii, Tungsten Rod, weak, Piercing Wail, Dark Shackles.
Appendix 3 (Energy Boss Relics):
Philosopher's Stone - excellent energy relic for the Silent - You don't really care about giving enemies 1 STR, especially with as much access to weak/STR down/block as is available.

Coffee Dripper - excellent energy relic for the Silent - You have access to tons of damage mitigation meaning resting is not always necessary depending on the strength of your deck. I would take this unless you know your deck is very weak for the upcoming act (e.g. no AoE mitigation or damage and heading into Act 2). Other reasons to take this are if you have access to significant healing outside of resting (bites, toy ornithopter & potion source, etc).

Cursed Key - excellent energy relic - Curses are removable and having one or two in your deck will generally not be a major issue. This is better if you receive it as an option after the Act 2 boss (as then there is only one guaranteed chest) than if you receive it after the Act 1 boss.

Sozu - good energy relic - Potions tend to be more valuable in Act 2 (i.e. a 20 damage fire potion is pretty useful for finishing off a slaver in Act 2 but useless vs Giant Head in Act 3). There are obviously some exceptions to this (Ghost in a Jar). Still, it's not terribly bad to go without potions (and you can still save the ones in your slots for when you need them). Obviously this is bad if you have things like potion belt, sacred bark, white beast statue, alchemize, etc.

Runic Dome - good energy relic This is a better pick after Act 1 because the enemies in Act 2 have far more predictable patterns than the enemies in Acts 3 and 4. Note: This is only a good relic if you know the attack patterns fairly well. If you have access to consistent intangibility, then Runic Dome becomes incredibly powerful. This has anti-synergy with Piercing Wail (since you won't be able to tell if multi-hit attacks are coming for enemies that choose their attacks based on percentages).

Ectoplasm - mediocre energy relic - Picking this up after Act 1 will often cost you ~700 gold and it still feels bad even after Act 2, but far less bad (especially because the thieves do not appear in Act 3).

Slaver's Collar - mediocre energy relic - This is not too bad if you pick it up in Act 1 with no better options. You get free energy against elites and bosses with no negative effect. The obvious downside is that you will not get the energy for hallway fights, but hopefully you will not need the energy as badly there.

Busted Crown - bad energy relic - Picking this up after Act 1 will probably lose you the run. It is still bad in Act 2, but less so if you already have a fairly strong deck. Some exceptions for when you can take this are if you have a Question Card.

Fusion Hammer - bad energy relic - The Silent has a lot of cards that are significantly better once upgraded (Noxious Fumes, Wraith Form, Well-Laid Plans, to name a few) and she does not function well without upgrading her cards. This is less bad if you take it after Act 2 and already have a lot of your core cards upgraded. Exceptions where it would might be good to take hammer: You already have either Frozen Egg or Toxic Egg, you already have Apotheosis (preferably bottled), or you are otherwise offered Tiny House and Wristblade.

Velvet Choker - bad energy relic for the Silent - Choker is better when you have less cards to play, but the Silent has a lot of 0 or 1 cost cards, card cycling, and energy gain. You will tend to have less card draw/energy/etc in Act 2 than Act 3, so this is less painful when you pick it up after Act 1. Additionally, since the patch that buffed the viability of shivs, Choker should be taken with even lower frequency.

Hovering Kite - variable energy relic - This was reworked to grant 1 energy the first time you discard a card each turn. It becomes very powerful if you have access to consistent discards (tools of the trade, acrobatics, calculated gamble, etc). It's also absolutely useless if you cannot discard. Bear in mind that even if you have tools of the trade, hovering kite is not a guaranteed energy source until after you play the card (this can be offset by drafting a couple acrobatics to improve card draw + discard options).

Snecko Eye - variable energy relic - The confused debuff/buff is dependent on the base energy of the cards in your deck. If your deck is heavily filled with 2 (or greater) energy cost cards (such as Crippling Cloud, Leg Sweep, Dash, etc) then Snecko Eye becomes more valuable. It also makes it so that you do not need to upgrade cards where the only change in the card is the energy cost (as that will be irrelevant with the confused debuff/buff) and it enables you to pick up cards that would otherwise require an upgrade to make the card efficient energy-wise. If your deck is heavily filled with 1 or 0 energy cost cards (such as Footwork, Defend, Strike, Backflip, etc) then Snecko Eye will probably be more harmful than helpful. Some noteworthy synergies and anti-synergies: Runic Pyramid is extremely bad in conjunction with Snecko Eye (you will end up with a hand full of high cost cards that you cannot play and then you will also be unable to draw any new cards), Orange Pellets can cleanse the confused making it so that even if you have a lot of low cost cards Snecko Eye becomes useful just for the card draw.


Note: Some of the descriptions are specifically for the Silent and may be less correct for other characters (though it also may be correct for the other characters). Relics that are not available to the Silent are not mentioned.
Appendix 4 (Other Boss Relics):
Runic Pyramid: - good boss relic - Very powerful relic for the Silent, but necessitates some card cycling ability. It has great synergy with Concentrate and Calculated Gamble. It has negative synergy with Well-Laid Plans because it is essentially a forced Well-Laid Plans for all the cards in your hand (and you get it from turn 1).

Ring of the Serpent: - good boss relic for the Silent - It increases card draw which means the consistency of your deck is improved (as long as you spend more than 2 turns). Has some negative synergy with decks that are looking for specific cards on turn 1 and Gambling Chip.

Astrolobe: - good boss relic - This is like a safer version of Pandora's Box and it upgrades the cards too. It's a good way to get rid of your strikes.

Calling Bell: - usually good boss relic - As of Patch V2.0, this relic has become significantly better. For the price of a single unplayable, unremovable curse, you are now given 3 relics. This becomes even better if you have other relics that have synergies with curses.

Eternal Feather: - decent boss relic for the Silent - This is no longer a boss relic as of Patch V2.0. Still fairly decent on the Silent.

Empty Cage: - decent boss relic - You remove two cards. It's not amazing, but it's not mediocre either. Removing two strikes improves the consistency of your deck. I'd still take one of the better energy relics over this in most cases, but it's definitely an okay boss relic.

Orrery: - decent boss relic - As of patch V2.0 this is now longer a boss relic. It's probably not worth wasting your gold on if you have to buy it in the shop except in specific situations.

Lizard Tail: - bad boss relic - In most cases, you'd probably rather have something that prevents you from being in a situation to need to be revived. It's still got decent value though (probably worth more than Tiny House at least). This is no longer a boss relic as of patch V2.0.

Wrist Blade: - bad boss relic for the Silent - Underwhelming for a boss relic. The bonus damage can be useful in Act 2 (so take after Act 1 boss) if you have synergies (typically shivs) already. I no longer call this relic completely awful just because of the increased viability of shivs early.

White Beast Statue: - bad boss relic - As of patch V2.0, this is no longer a boss relic (which actually makes this quite a good relic).

Tiny House: - awful boss relic - This is like... maybe worth 150 gold on average. Worse, because if you had the 150 gold you could at least choose what to buy at a store. I would only ever take this if I was literally offered Wrist Blade, Tiny House, and Busted Crown on Act 1 while I had literal garbage cards.

Black Star: - variable boss relic - You are basically forced to hunt as many elites as possible in order to get value out of this, especially if you take this in Act 2. I typically only take this if my other options are bad, or I have a reasonably strong deck by the end of Act 1. It can make the game trivially easy if you get enough relics though.

Sacred Bark: - variable boss relic - This was added in patch V2.0 and it doubles the effectiveness of potions. This relic is awful with Sozu. It becomes significantly better if you already have White Beast Statue or Potion Belt. You pretty much need Alchemize if you don't have White Beast Statue to get good value out of this. This can be a complete game winner with potion belt, 2 Alchemizes and a Burst (effectively 8 potions every fight). Throw in a Toy Ornithopter and you just pretty much win.

Pandora's Box: - variable boss relic - Very risky. If you high roll some good cards it can make your deck incredible. If you roll some useless cards you have basically lost your run. Only take this if you have enough block outside of your standard defends to make your deck still reasonably playable. You also lose value on this if you have already removed several strikes/defends.


Note: Some of the descriptions are specifically for the Silent and may be less correct for other characters (though it also may be correct for the other characters). Relics that are not available to the Silent are not mentioned.
Appendix 5 (Potions):
Potion rarity is 65% for a common potion, 25% for an uncommon potion, and 10% for a rare potion. Potion drop rates start at 40% at the beginning of each act and will increase by 10% (if a potion does not drop after combat) or decrease by 10% (if a potion does drop after combat).

Potion usage guidelines: potion usage is typically based on individual decision making in each situation. Typically you want to try to maximize the value of each potion while retaining certain potions for difficult fights such as elites or bosses.

Common Potions:
  • Attack Potion - Most of the Silent's attacks are lackluster, so just use this whenever it would help finish off an enemy or you need some extra damage.
  • Blessing of the Forge - Added in patch V2.0, this is extremely powerful on the Silent (not sure why this is a common potion, but hey I'm not complaining) due to the 7 card turn 1.
  • Block Potion - This is a decent potion in the first two Acts that becomes fairly lackluster by Act 3/4. Use it whenever you would block 12 damage with it (or if you have full potion slots and need to block any damage while expecting a potion drop soon).
  • Colorless Potion - On average, this potion is fairly lackluster for the Silent. In some edge cases, it can be amazing (e.g. Apotheosis).
  • Dexterity Potion - An incredibly strong potion for the Silent. It's two free dexterity. Use immediately in any fight where you expect to need the dexterity boost.
  • Energy Potion - A generically good potion since it just gives two free energy on demand. Use it whenever you deem necessary since it isn't exactly mindblowing.
  • Explosive Potion - This is really only good in Act 1 (and maybe very early in Act 2 if you need help with birds). If you have Slime Boss, save this potion.
  • Fear Potion - This potion is only useful if you have an attack heavy deck. Unless you are going a shiv deck, this potion should probably just be burned on any elite or boss. Generically decent in Act 1.
  • Fire Potion - This potion is only really useful in Act 1. Save it for Slime Boss on the turn you intend to split him.
  • Poison Potion - This is a generically good potion. It's a free 21 damage even if you have no other poison. Significantly speeds up your initial poison stacking. Great potion for any elite/boss. Incredible synergy with Catalyst and other poison cards.
  • Power Potion - Incredibly powerful potion on the Silent since you have many incredibly powerful powers. Typically you want to use it early (unless you are hoping to roll a Wraith Form on a specific turn, in which case you want to use it on the turn you need it... but that's a rare situation).
  • Skill Potion - The Silent has pretty decent skills on average (but she has a lot of skills, so the odds of getting a particularly good one is also fairly low). Use it fairly liberally - similar to how you would use an energy potion.
  • Speed Potion - Use this whenever you need to block on steroids. Powerful surge of dexterity if used in conjunction with artifact/debuff cleanse.
  • Flex Potion - Pretty garbage on the Silent unless running a shiv deck or for some reason are running a bunch of multi-hit attacks.
  • Strength Potion - Same as the Flex Potion, but typically a little better in Act 1 since you will need to cycle a lot of strikes against most Act 1 elites.
  • Swift Potion - Treat as you would a Skill Potion or an Energy Potion and use it liberally whenever you need a little extra card draw.
  • Weak Potion - Save this for certain enemies with big hits. You can still use it fairly liberally.

Uncommon Potions:
  • Ancient Potion - Gaining 1 Artifact is surprisingly really powerful. It can be used in conjunction with a Speed potion to gain 5 dexterity for the rest of that combat. It is also especially useful in Act 2 since many of the enemies apply frail and you can also use it against the Chosen since the Hex debuff is obnoxious. It also tends to block vulnerable against most of the bosses that apply multiple debuffs.
  • Cunning Potion - This potion can range from lackluster (non-shiv deck with no strength scaling), to decent (burst of damage in Act 1), to amazing (dead branch/shiv deck). Use as your situation dictates.
  • Distilled Chaos - Generically pretty decent potion. Depending on the average energy cost of your deck, it is essentially a free 3-4 energy (though with less control over the efficiency). Be careful using this if you deck relies heavily on a single Catalyst (or other cards that exhaust).
  • Duplication Potion - I try to save this potion for important fights as much as possible. The Silent has so many cards that have great synergy with this potion. Some examples: Catalyst, Wraith Form, Footwork, Noxious Fumes, Crippling Cloud, Adrenaline, and more.
  • Essence of Steel - Honestly kind of garbage. Just use it whenever you need an additional 4 block.
  • Gambler's Brew - This potion is AMAZING for turn 2 of Act 4 elites (if you have no way to deal with the 3 card turn 2, this potion basically solves it for you). Additionally, it's very powerful for decks that need specific cards on turn 1 (since you have a 7 card turn 1 with the starter relic). It's also just generically good on most Silent decks. Use or save as your situation dictates.
  • Liquid Bronze - If you for some reason have trouble with Birds, this is a wasteful way to solve that problem. If you need help against Hexaghost (or Guardian for some odd reason) this potion can also help. Ideally, however, you want to save this potion for the Heart since it is a free 48 damage every cycle.
  • Liquid Memories - This potion has potential to be very impactful on the Silent in specific scenarios. If you are playing a deck that does not have Well-Laid Plans and rely on card combos such as Burst/Catalyst or Nightmare/Whatever, this potion is very helpful in setting up those combos.
  • Regen Potion - Free 15 HP. If your potion slots are full, use it immediately whenever you can heal 15HP. Otherwise, wait to use it since many events cause you to lose less health the lower your current health.

Rare Potions:
  • Cultist Potion - This potion ranges between basically useless (poison decks in later Acts) to insanely powerful (Hexaghost with a weak deck or against anything with a Shiv deck).
  • Entropic Brew - Generally very powerful potion. Insanely good if you have a potion belt. Use whenever it is your only potion and you desperately need some extra power.
  • Fairy in a Bottle - Save it for a rainy day. Sometimes this potion isn't very useful if you're not expecting to be killed with your current deck. Other potions may improve your current consistency more than this potion. Significantly better as of patch V2.0 (gives 30% max HP).
  • Fruit Juice - Use this the instant you get a third potion (or whenever you need an extra 5HP to survive something).
  • Ghost in a Jar - A turn of intangible on demand. I typically use this if it would save me >30 damage (or a killing blow obviously). Typically, I try to save this potion for the Heart or one of the Act 3 bosses.
  • Smoke Bomb - This potion is pretty awful. Use it in the very rare scenario where you might take >30 damage on a hallway fight.
  • Snecko Oil - I will admit to having used this potion like twice ever (and that was prior to the patch V2.0 changes). As of patch V2.0, it's still not super useful but has niche scenarios where it can help and the negative effects are lower. Use or toss liberally.
33 comentários
Aurora Solaris 8 abr. 2024 às 2:34 
" It's sort of like getting paid to donate an organ. Except instead of one of your kidneys you decide to donate your brain because you're clearly not using it anyways."

You bought me on this
Blood Flowers  [autor] 25 jan. 2021 às 20:18 
@Casinocaster
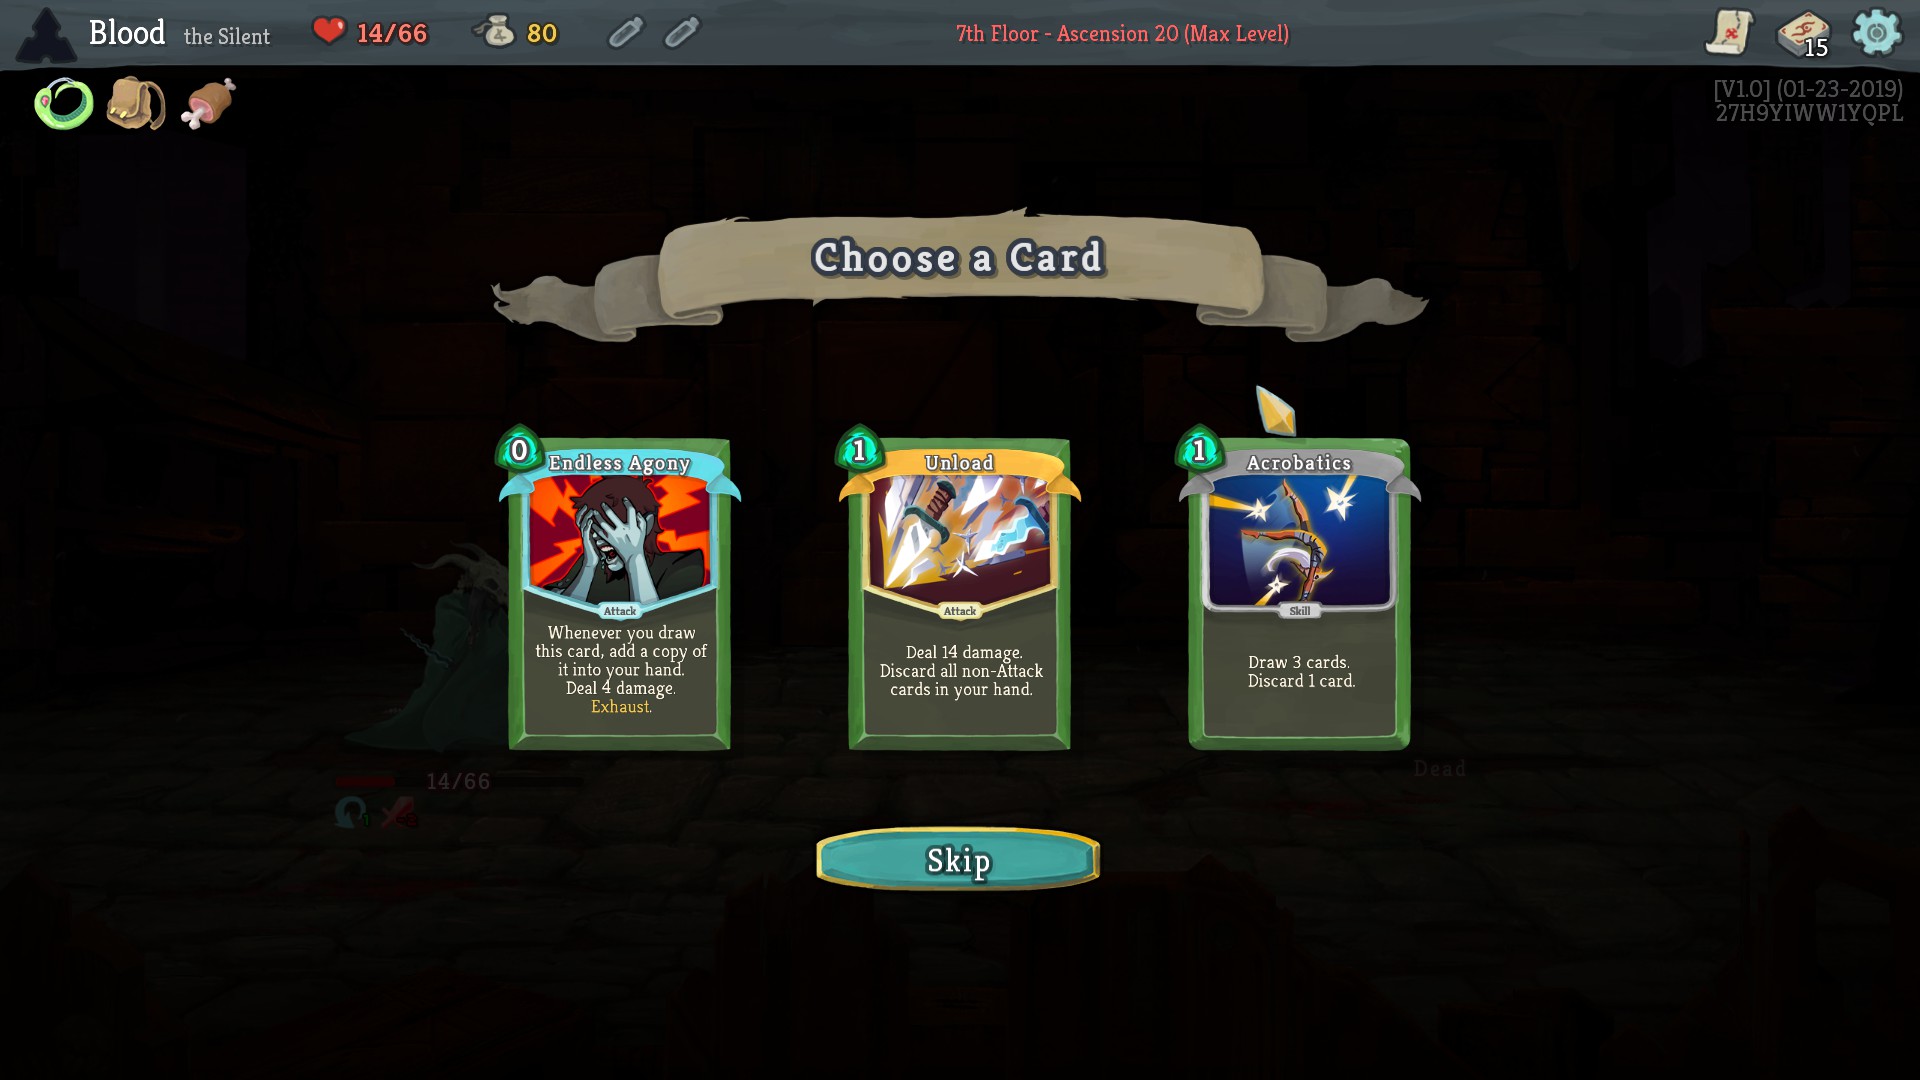
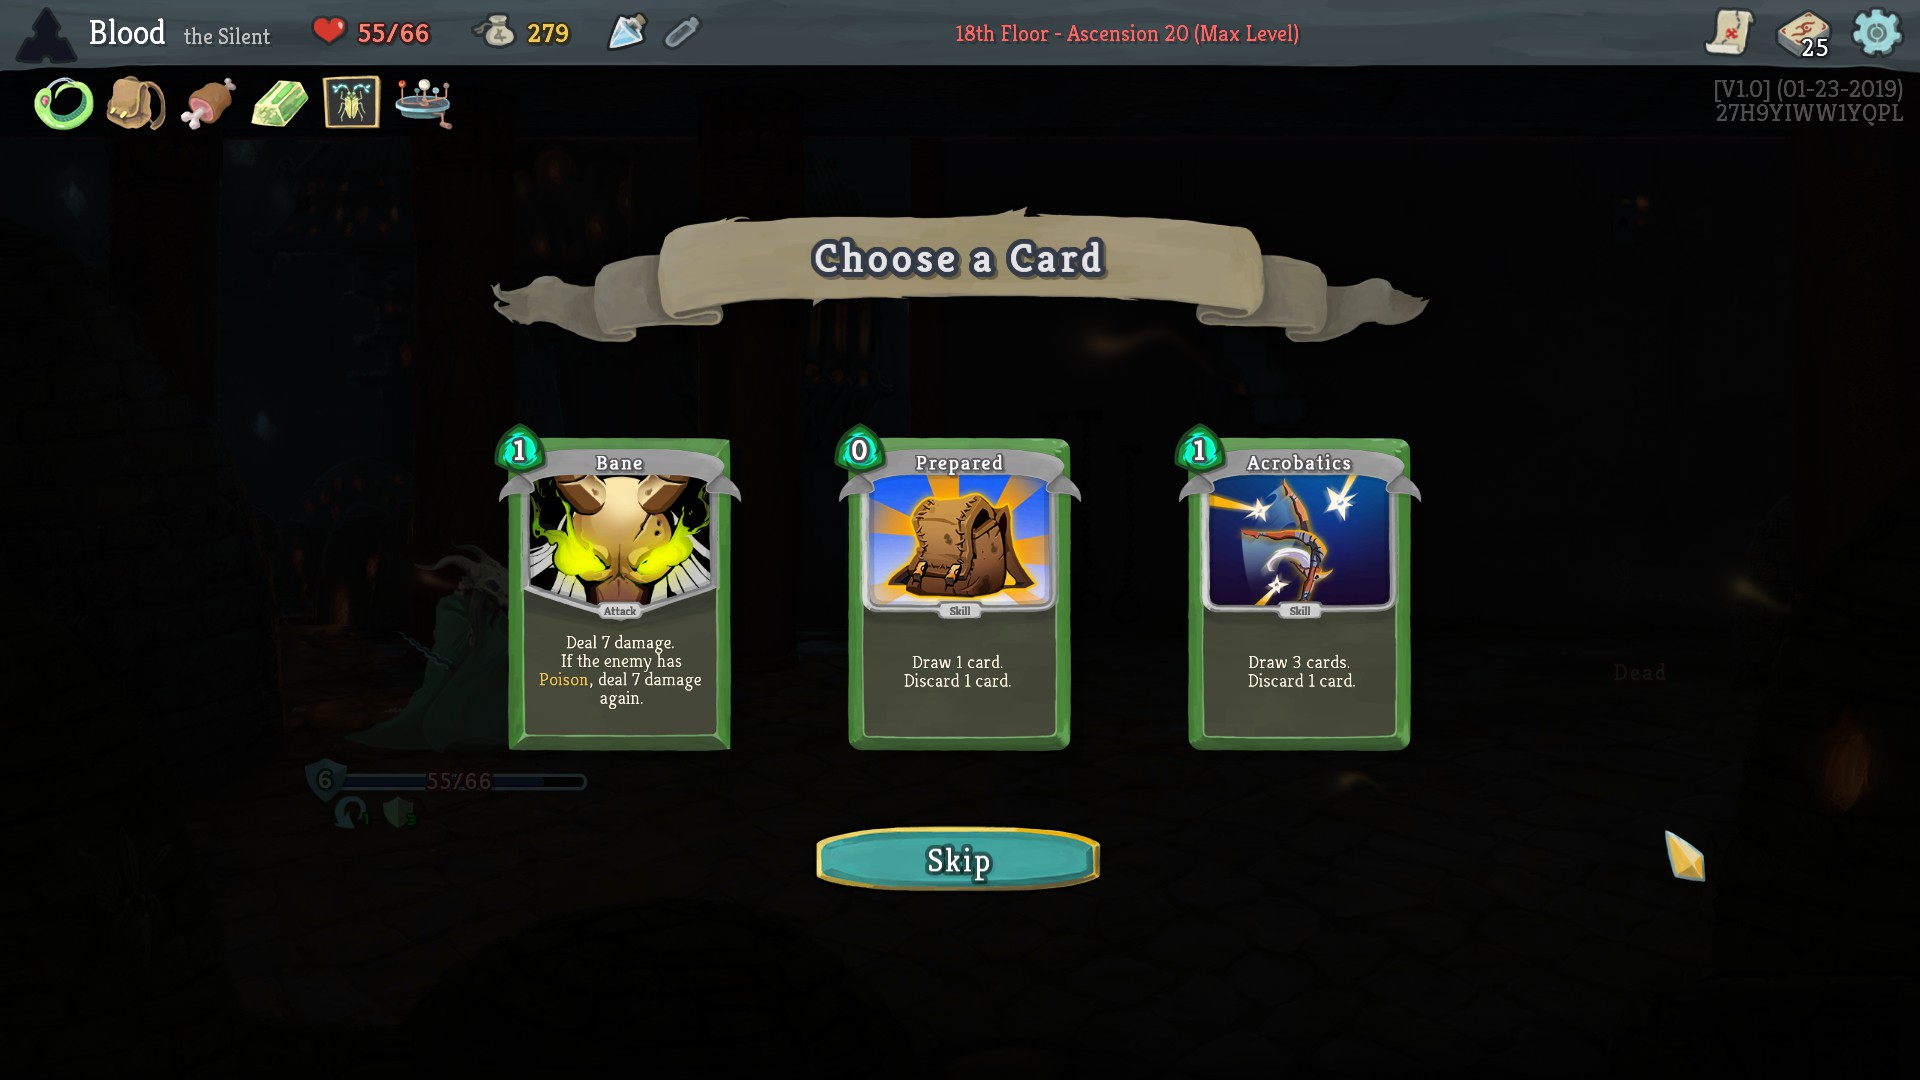
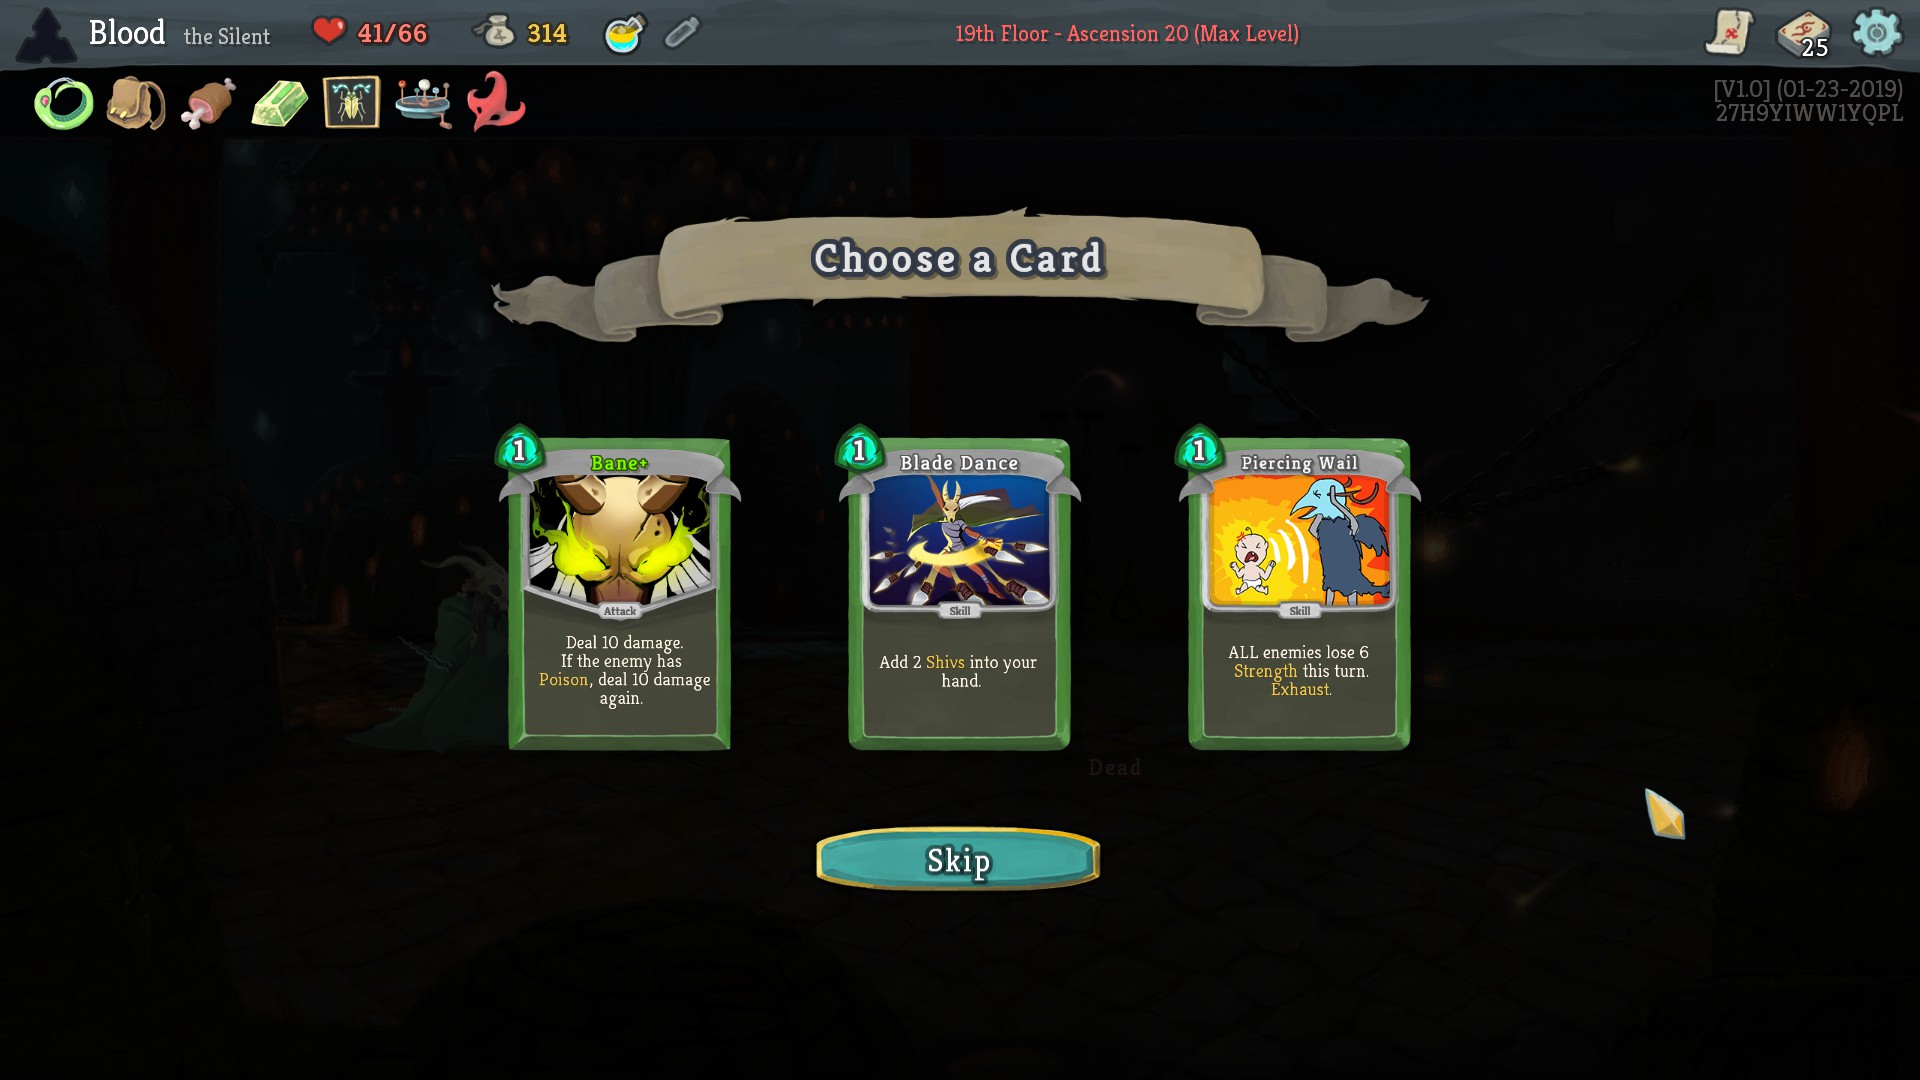
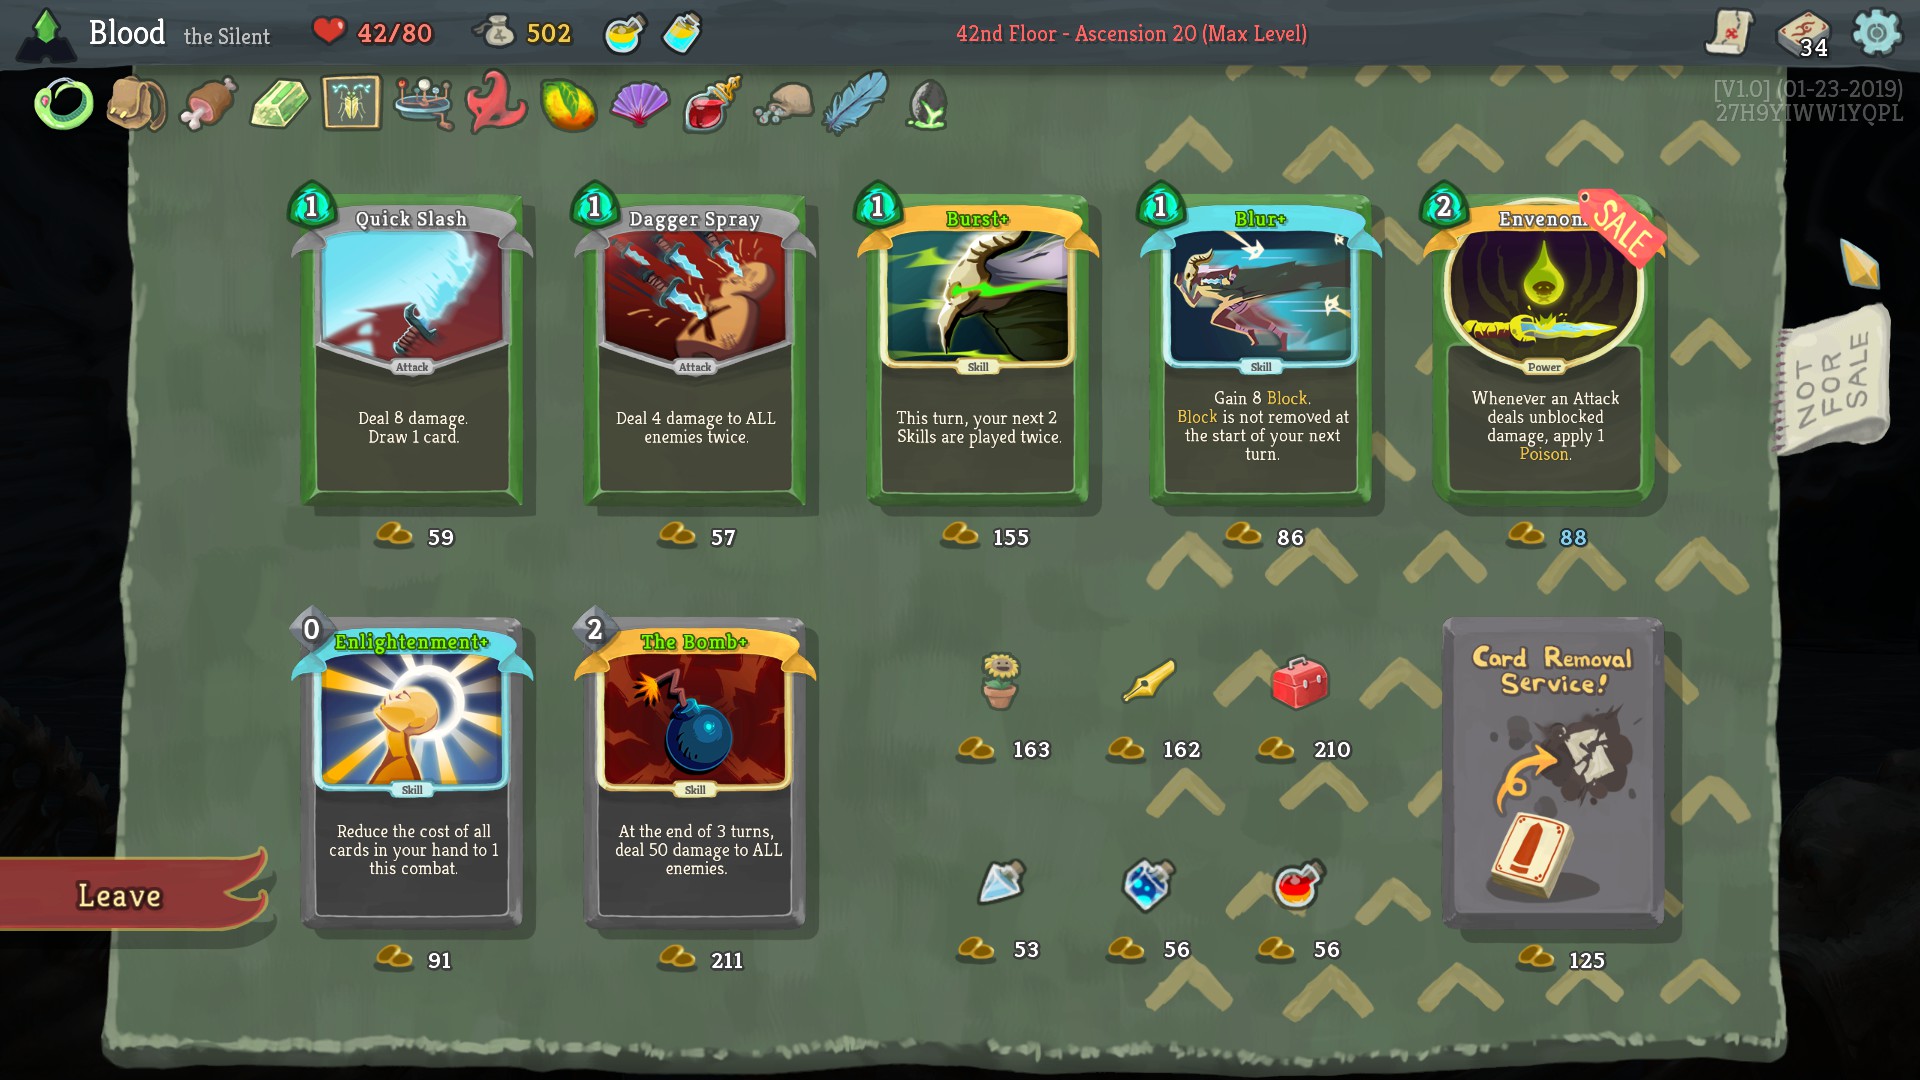
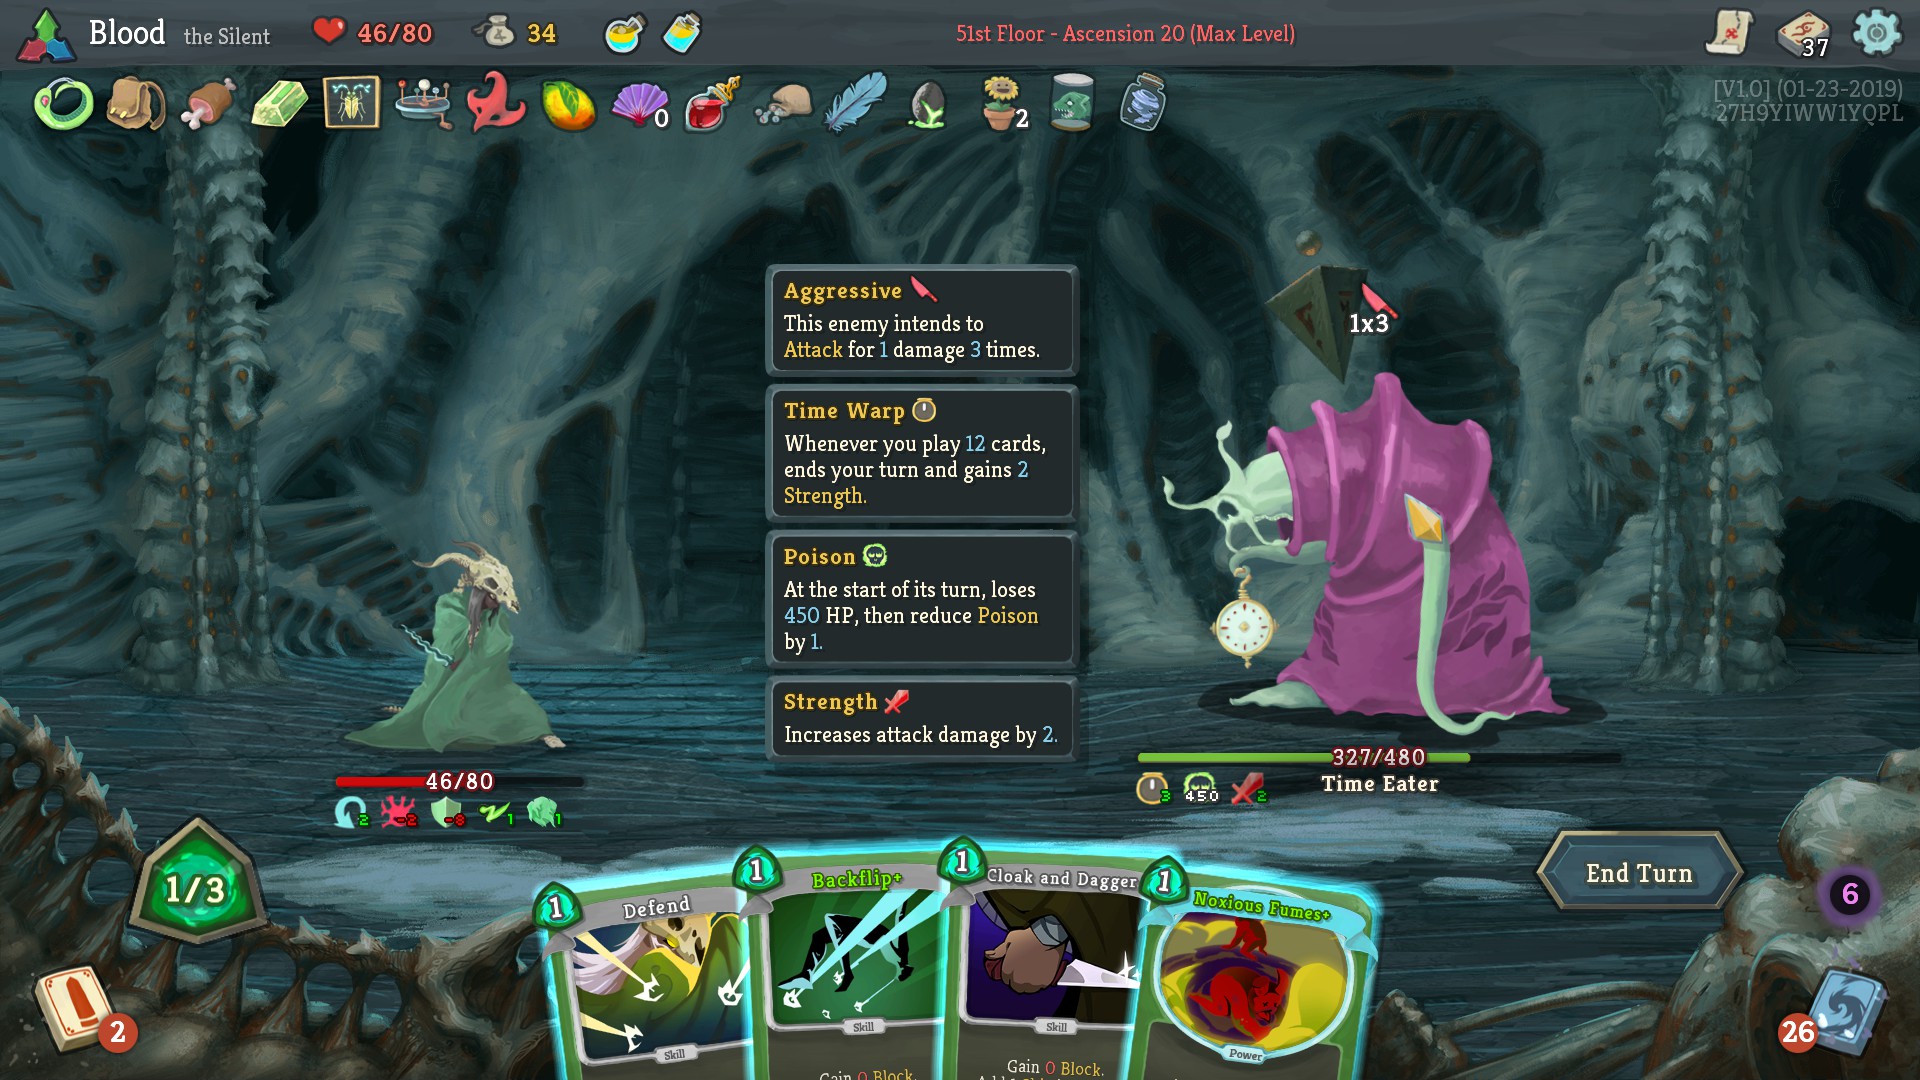
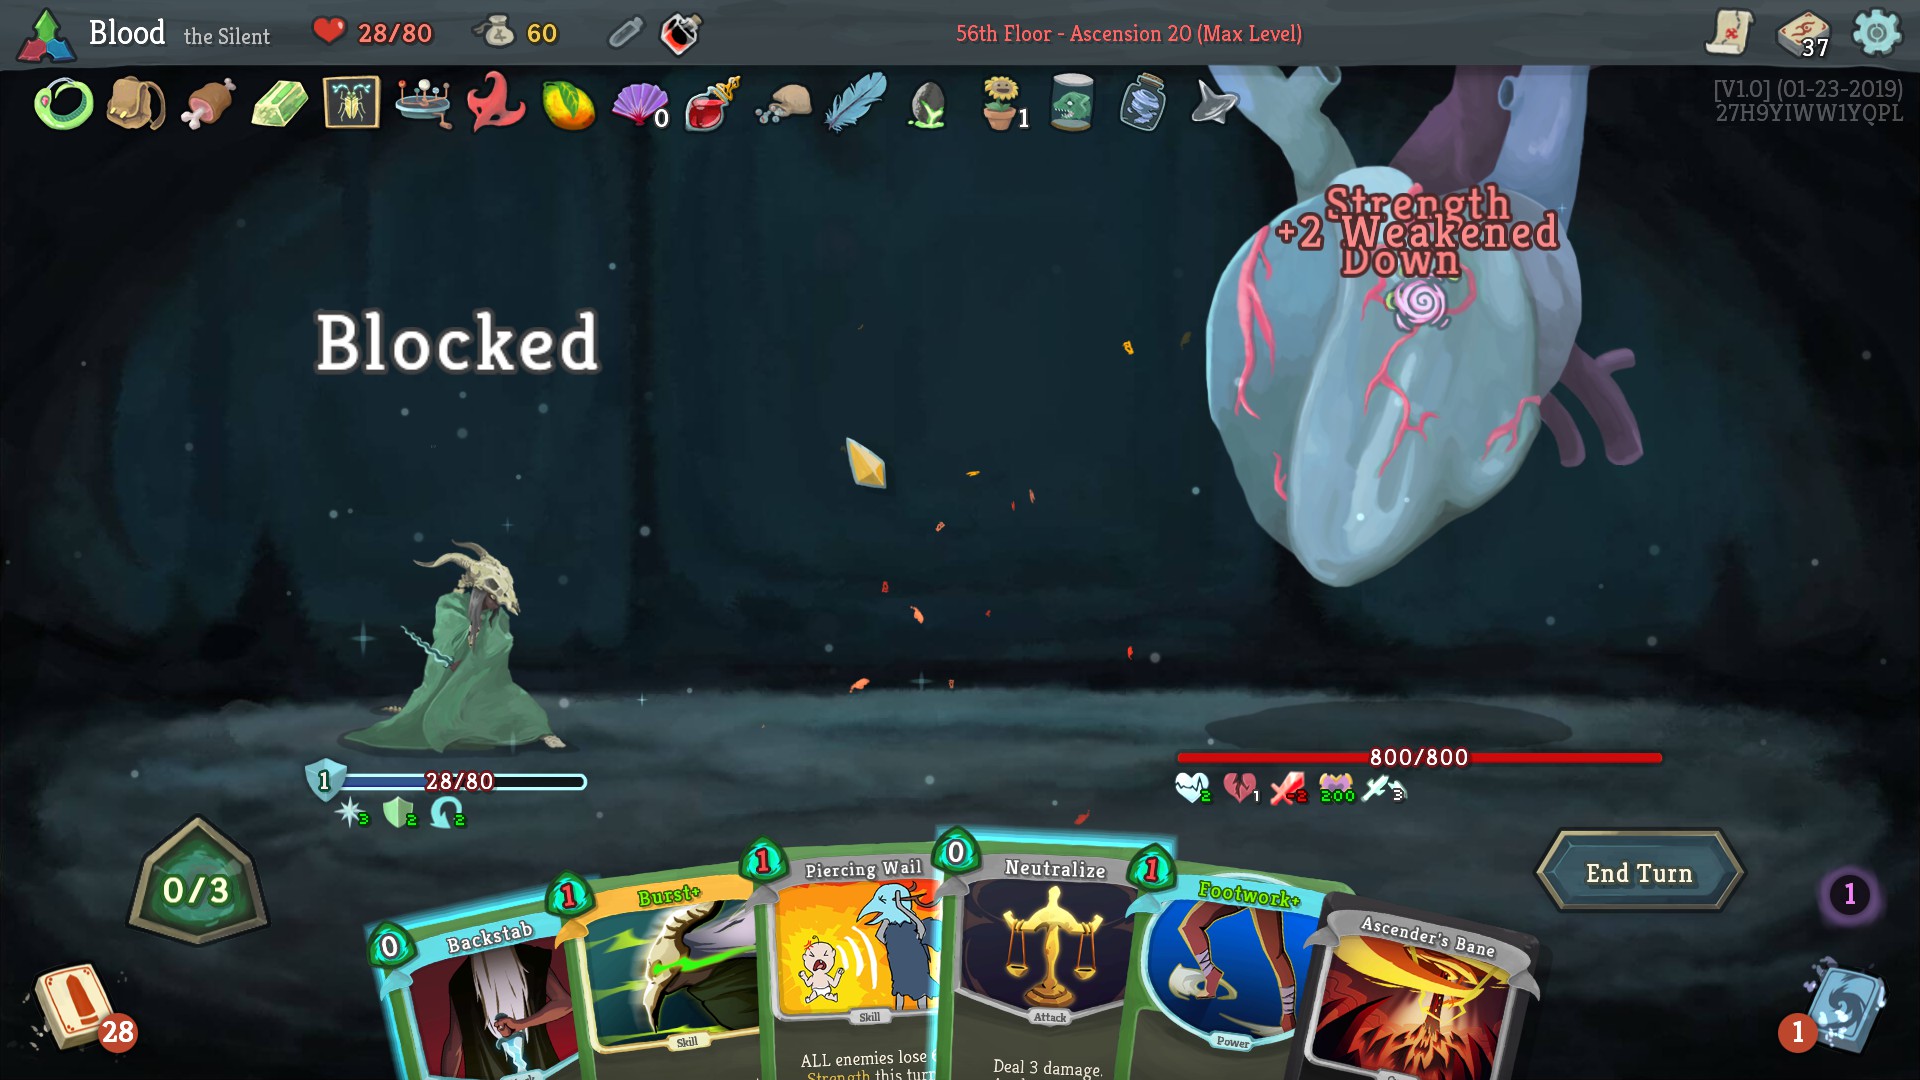
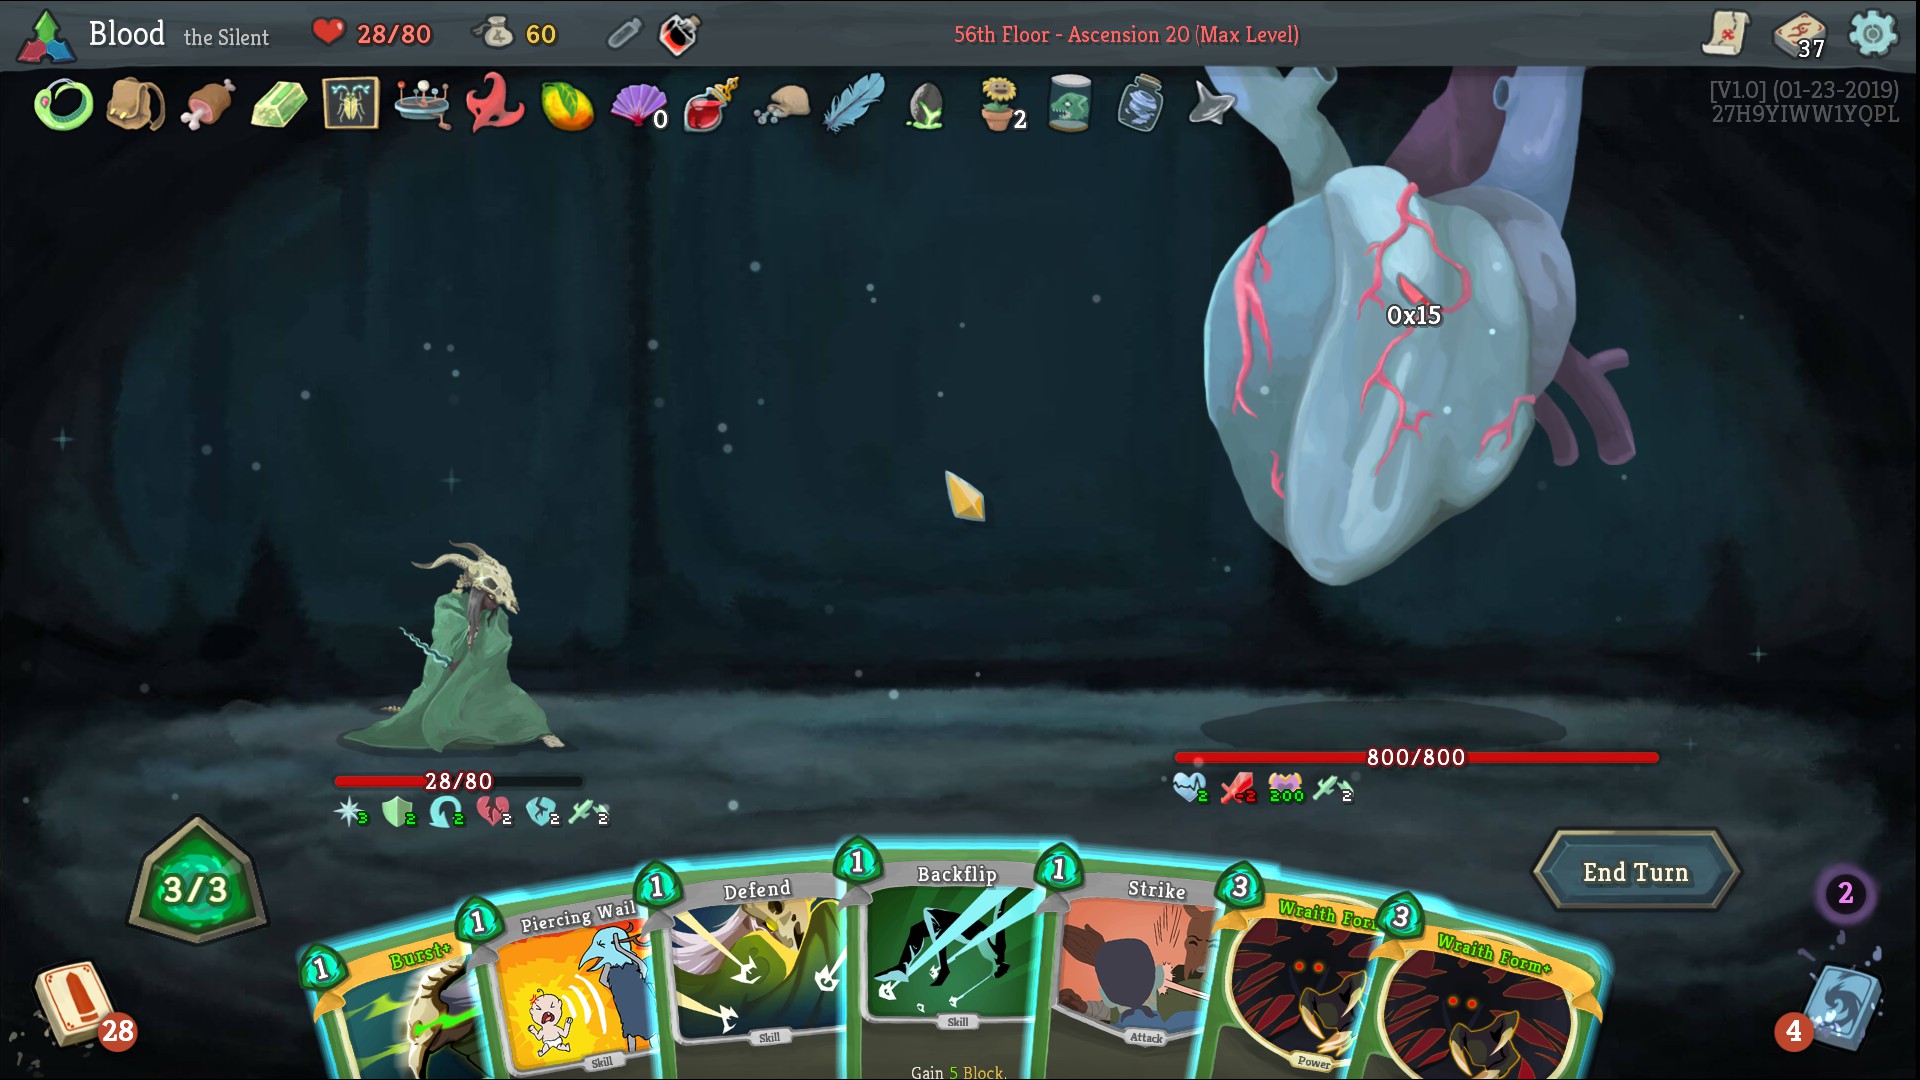
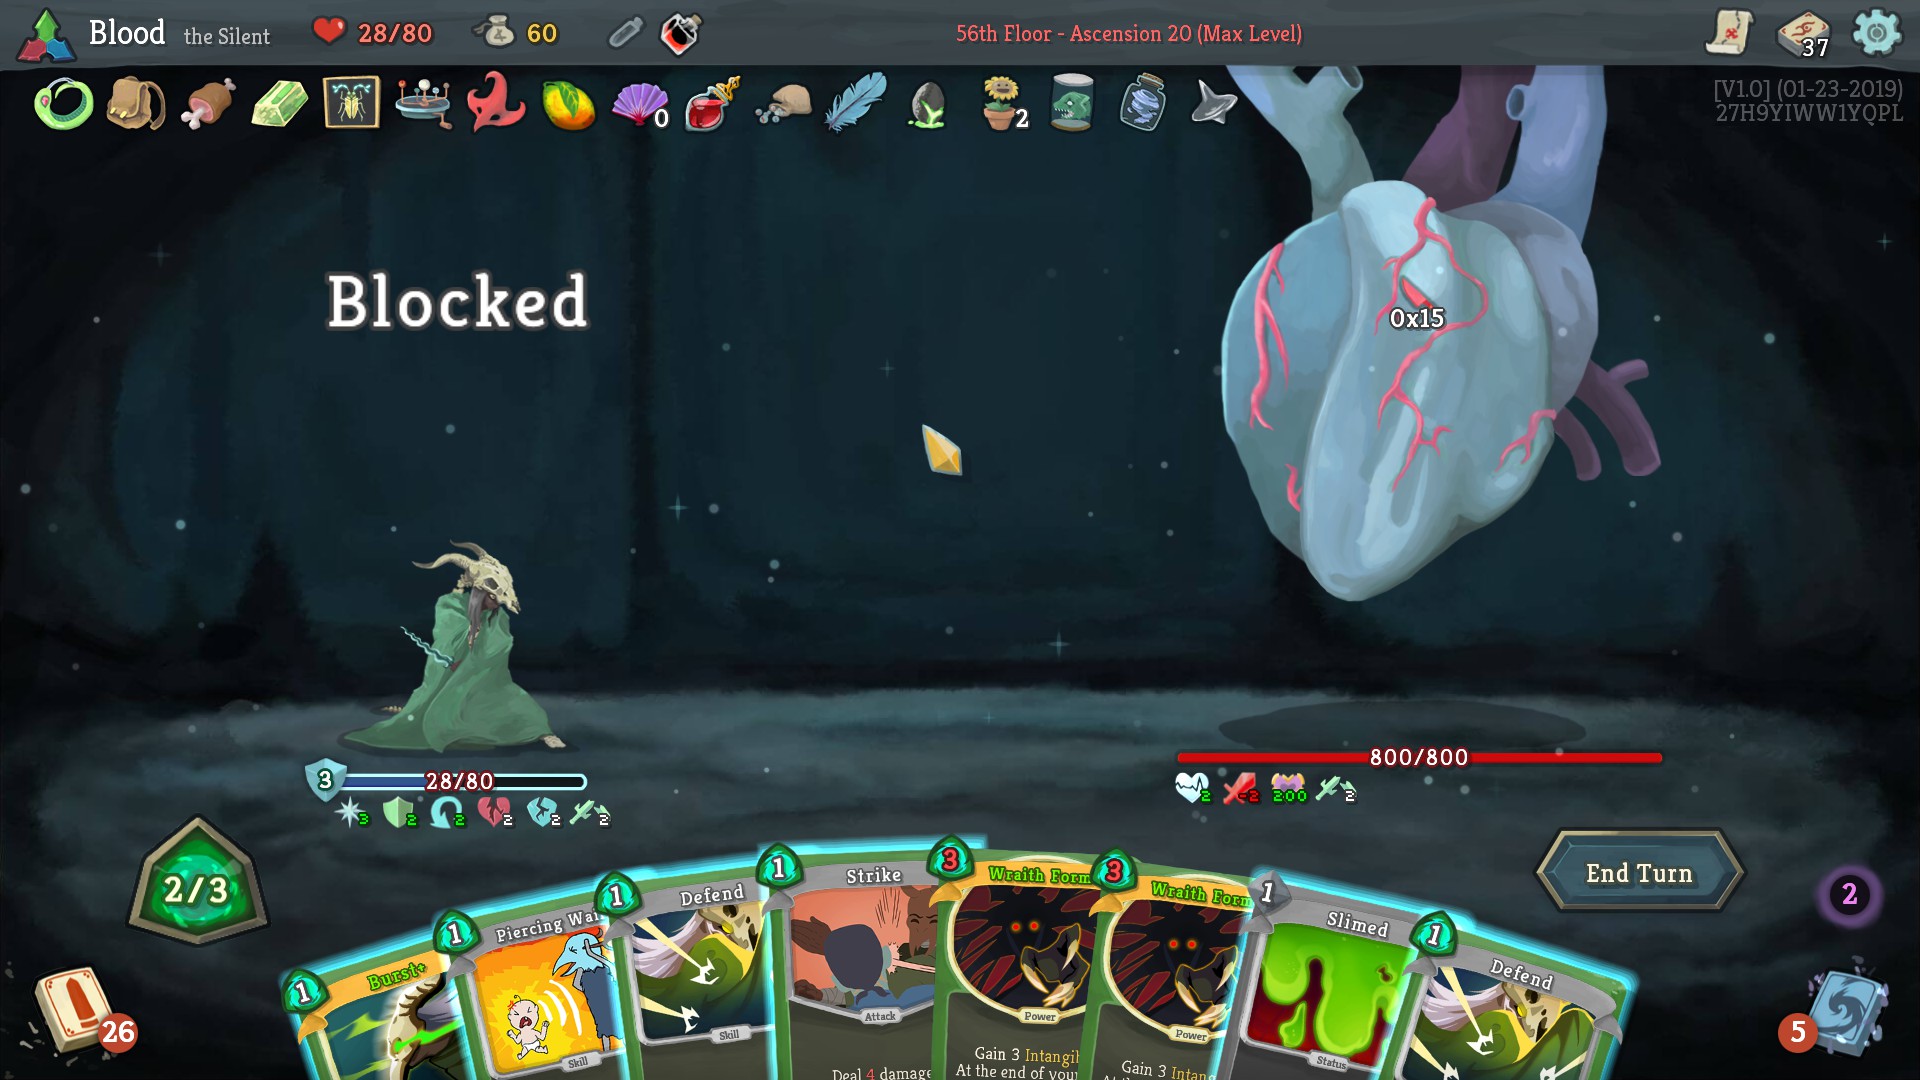
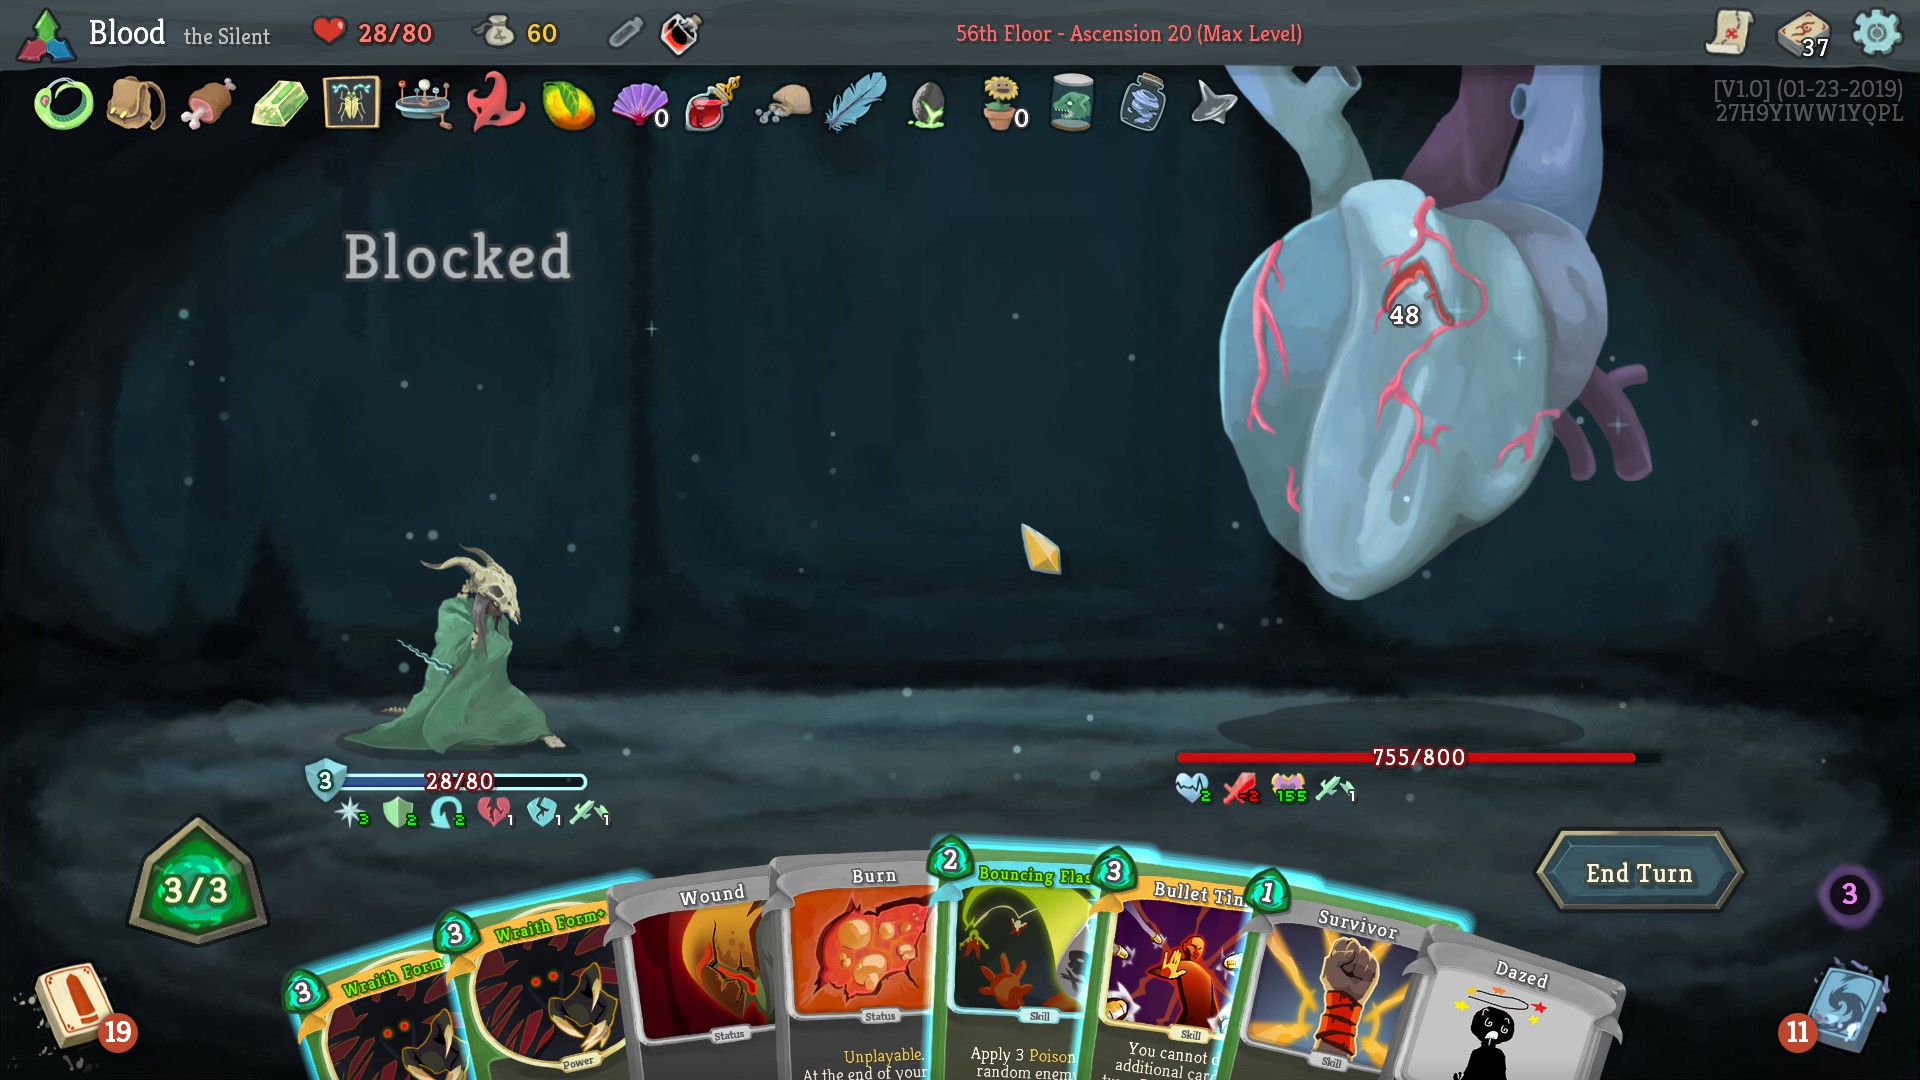
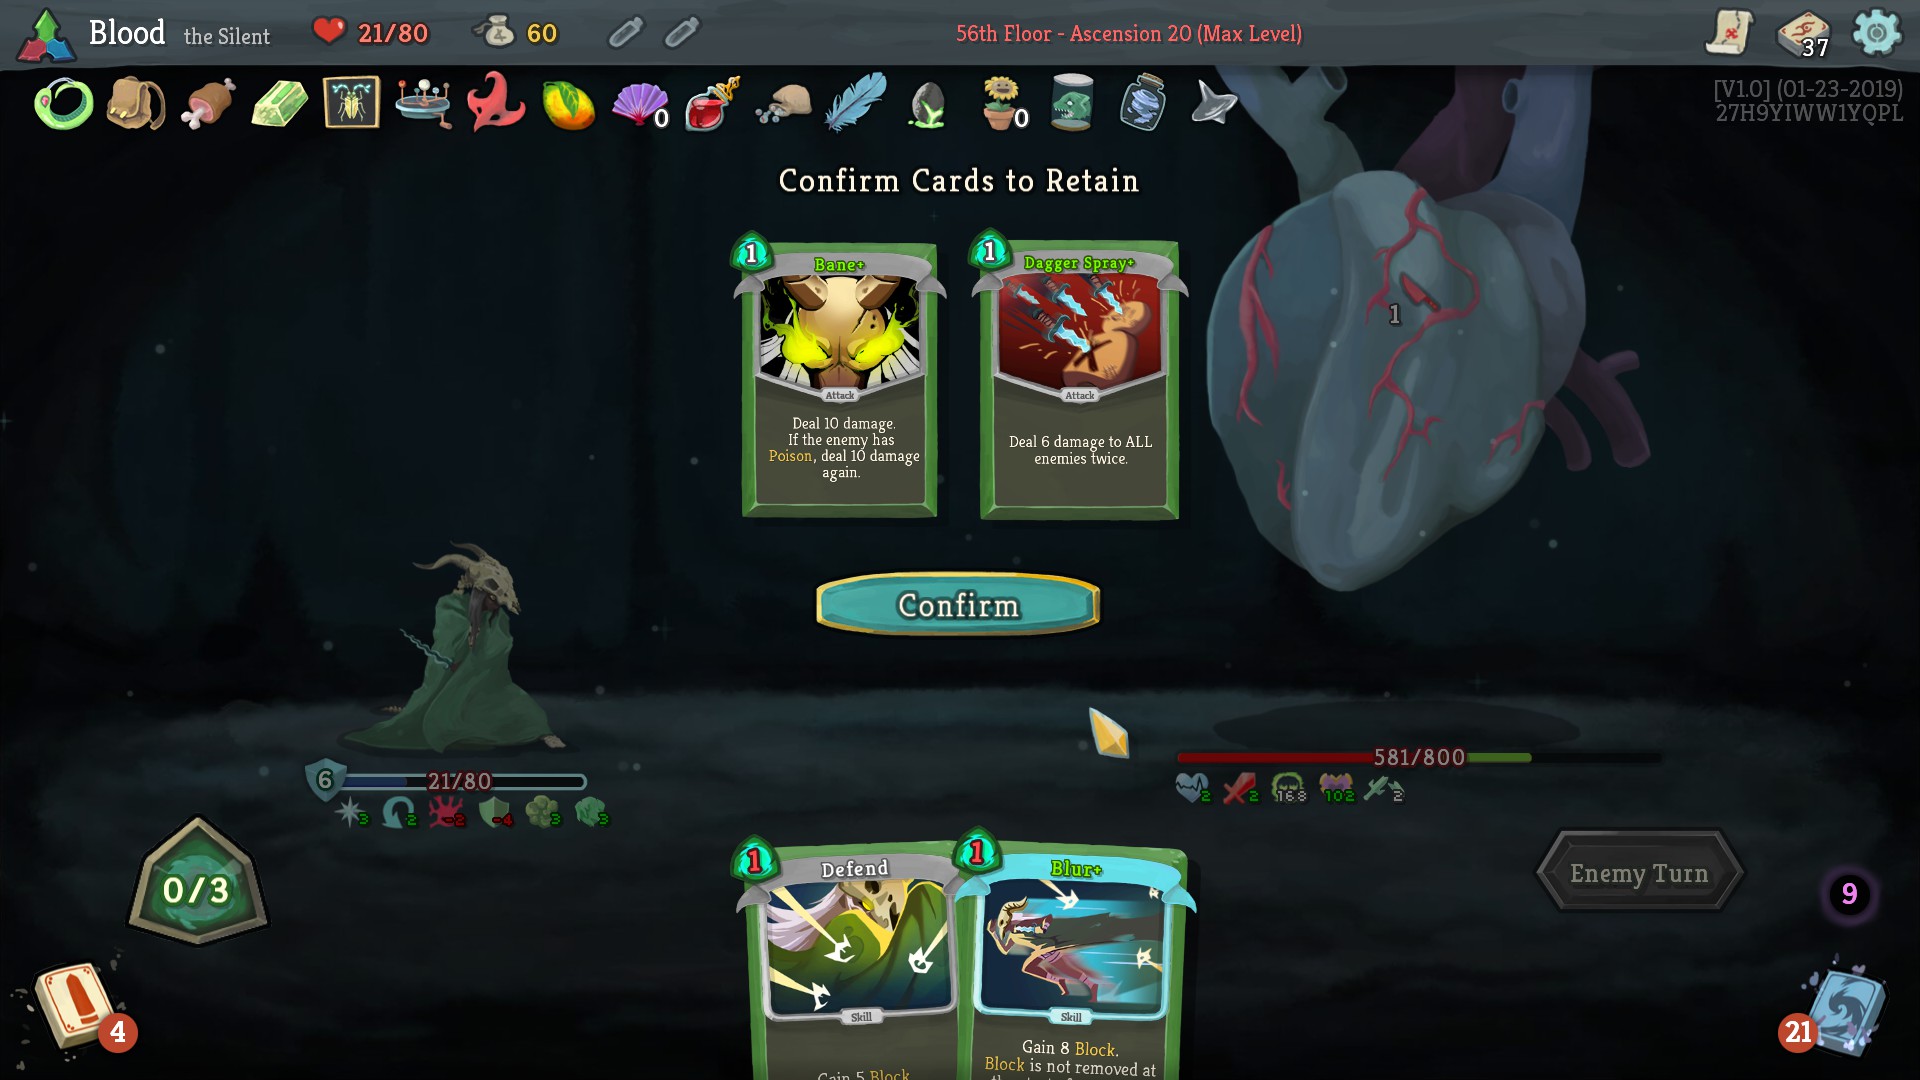
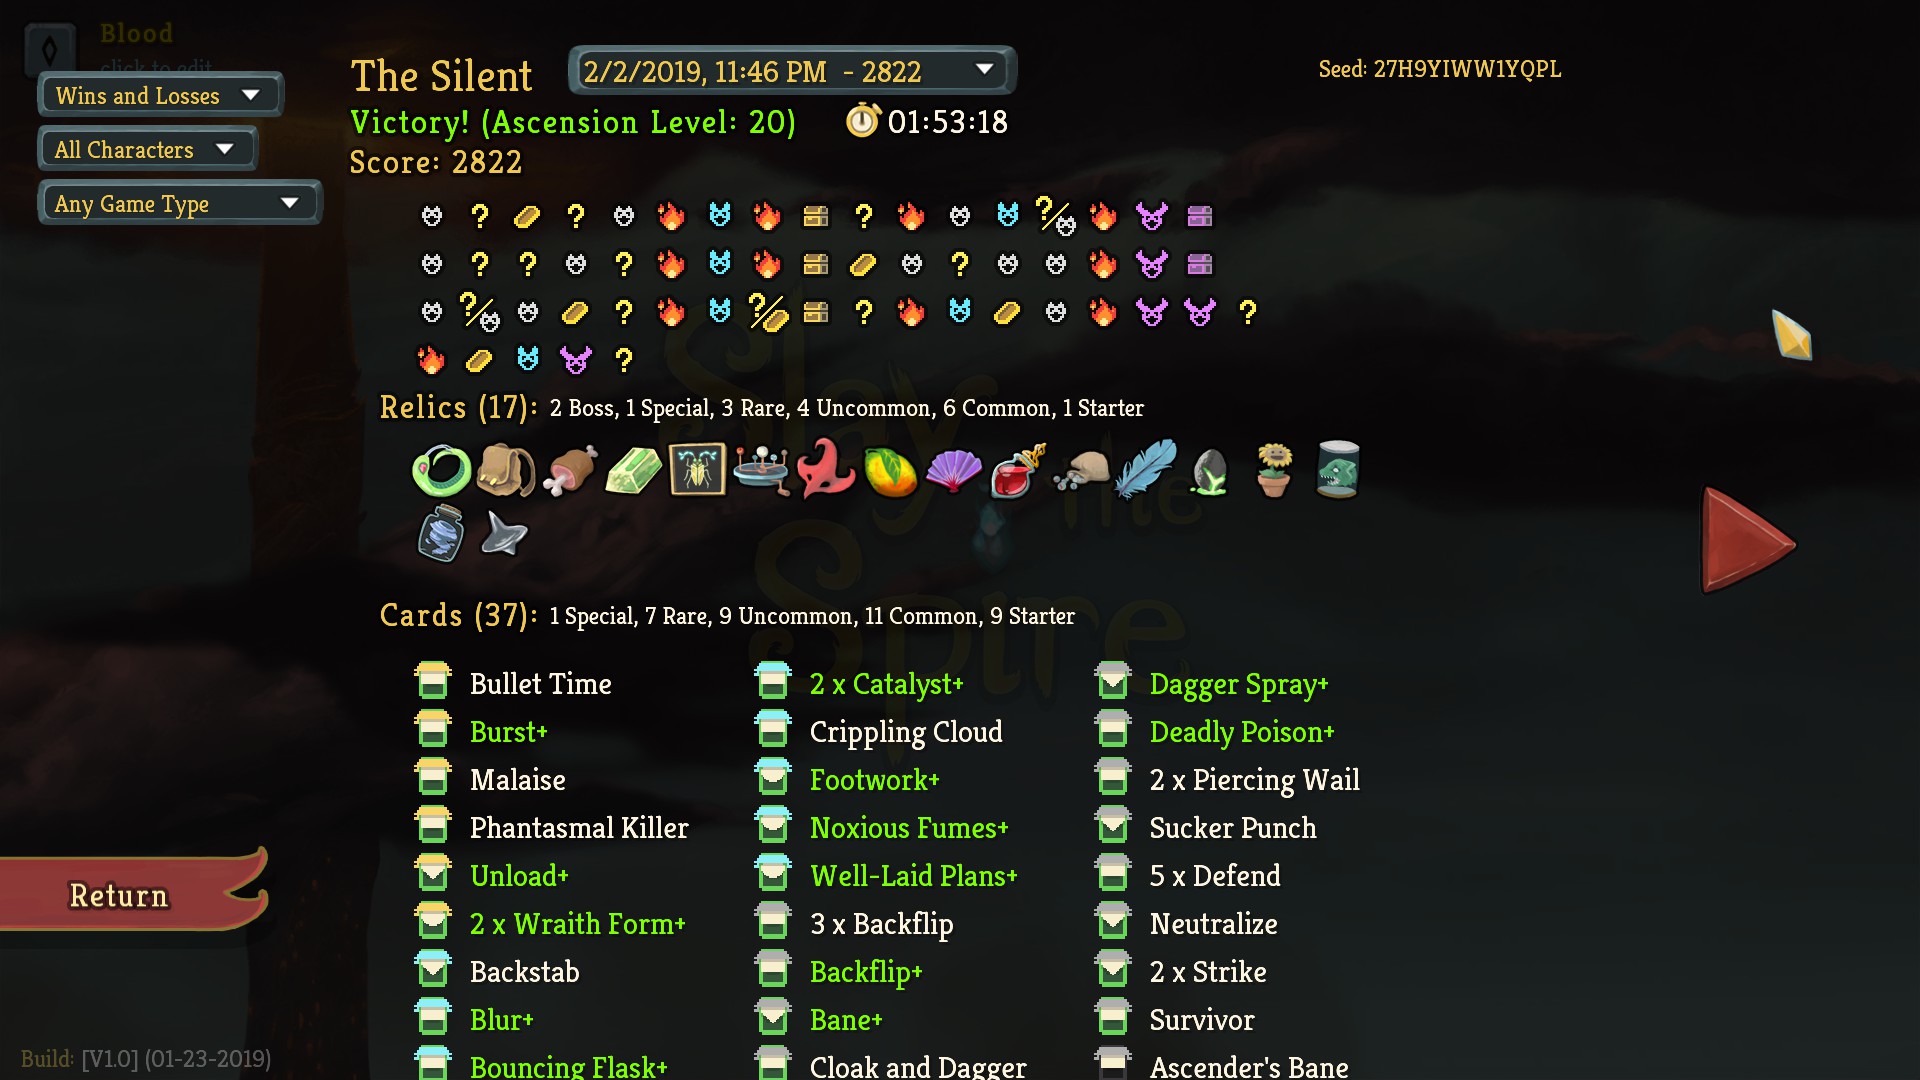
I'm glad the guide could be of some help. Shivs + Wrist Blade is an okay synergy, but it's not enough alone (as 8 damage per Shiv is pretty underwhelming against Time Eater's 480 health for example). Typically, it's hard to justify hard pivoting into Shivs without picking up a Kunai/Dead Branch/Shuriken/other major synergies. That being said, with the right combination of relics, taking a Wrist Blade when you have Shivs and other synergies can be decently good.
Casinocaster 25 jan. 2021 às 18:45 
I got stuck after reaching A14, I decided to look for good quality guides and now that I have read this I realise I still need to learn how to play properly (lol). For starters I thought shiv decks with Wrist Blade were the bomb
Thanks for taking the time to write this so carefully!
Blood Flowers  [autor] 20 dez. 2020 às 20:49 
For anyone interested, the guide has been updated to V2.2. (Obviously the run is still the same, but I have updated the appendices/added some comments on card choices relevant to current patch).

@RapperGerste Thank you! Best of luck, you'll be getting A20 heart kills before you know it.
@INnoVation Thanks! It's responses like these that motivate me to keep writing guides ^.^
@Tylenol Jones I see, I will update that then. I appreciate the heads up.
Tylenol Jones 24 nov. 2020 às 22:30 
Your title is certainly not copyright infringement. "For Dummies" is not copyrightable.

You're infringing trademark, not copyright.
Enchanted♪Waffle 14 jul. 2020 às 17:49 
Very well written and I really enjoyed reading it. Thank you.
RapperGerste 14 jul. 2020 às 6:56 
Exceptionally well written, the side punches hurt but were enjoyable nevertheless. I think I learned a lot by reading this and hope I can make use of this knowledge to beat my first run :)
Blood Flowers  [autor] 6 ago. 2019 às 12:06 
It's pretty dependent on the cards and relics you have. Sometimes, a small deck for the Silent is fine if you have the right relics. Likewise, a large deck is preferable for Ironclad if you have a exhaust-based deck since you'll need to have cards to exhaust. Though, typically, I do prefer larger decks on the Silent (>30 cards) and medium or smaller-sized decks on Ironclad (20-30 cards). I don't really specialize in Ironclad though (only beat A20 Heart a few times with him compared to probably 40-50 wins with the Silent), so take my advice for him with a grain of salt.
Watereaters 6 ago. 2019 às 7:19 
I noticed something, while big decks are good for the Silent, I've found small decks to be good for the Ironclad.

I'm guessing this is because of how they work

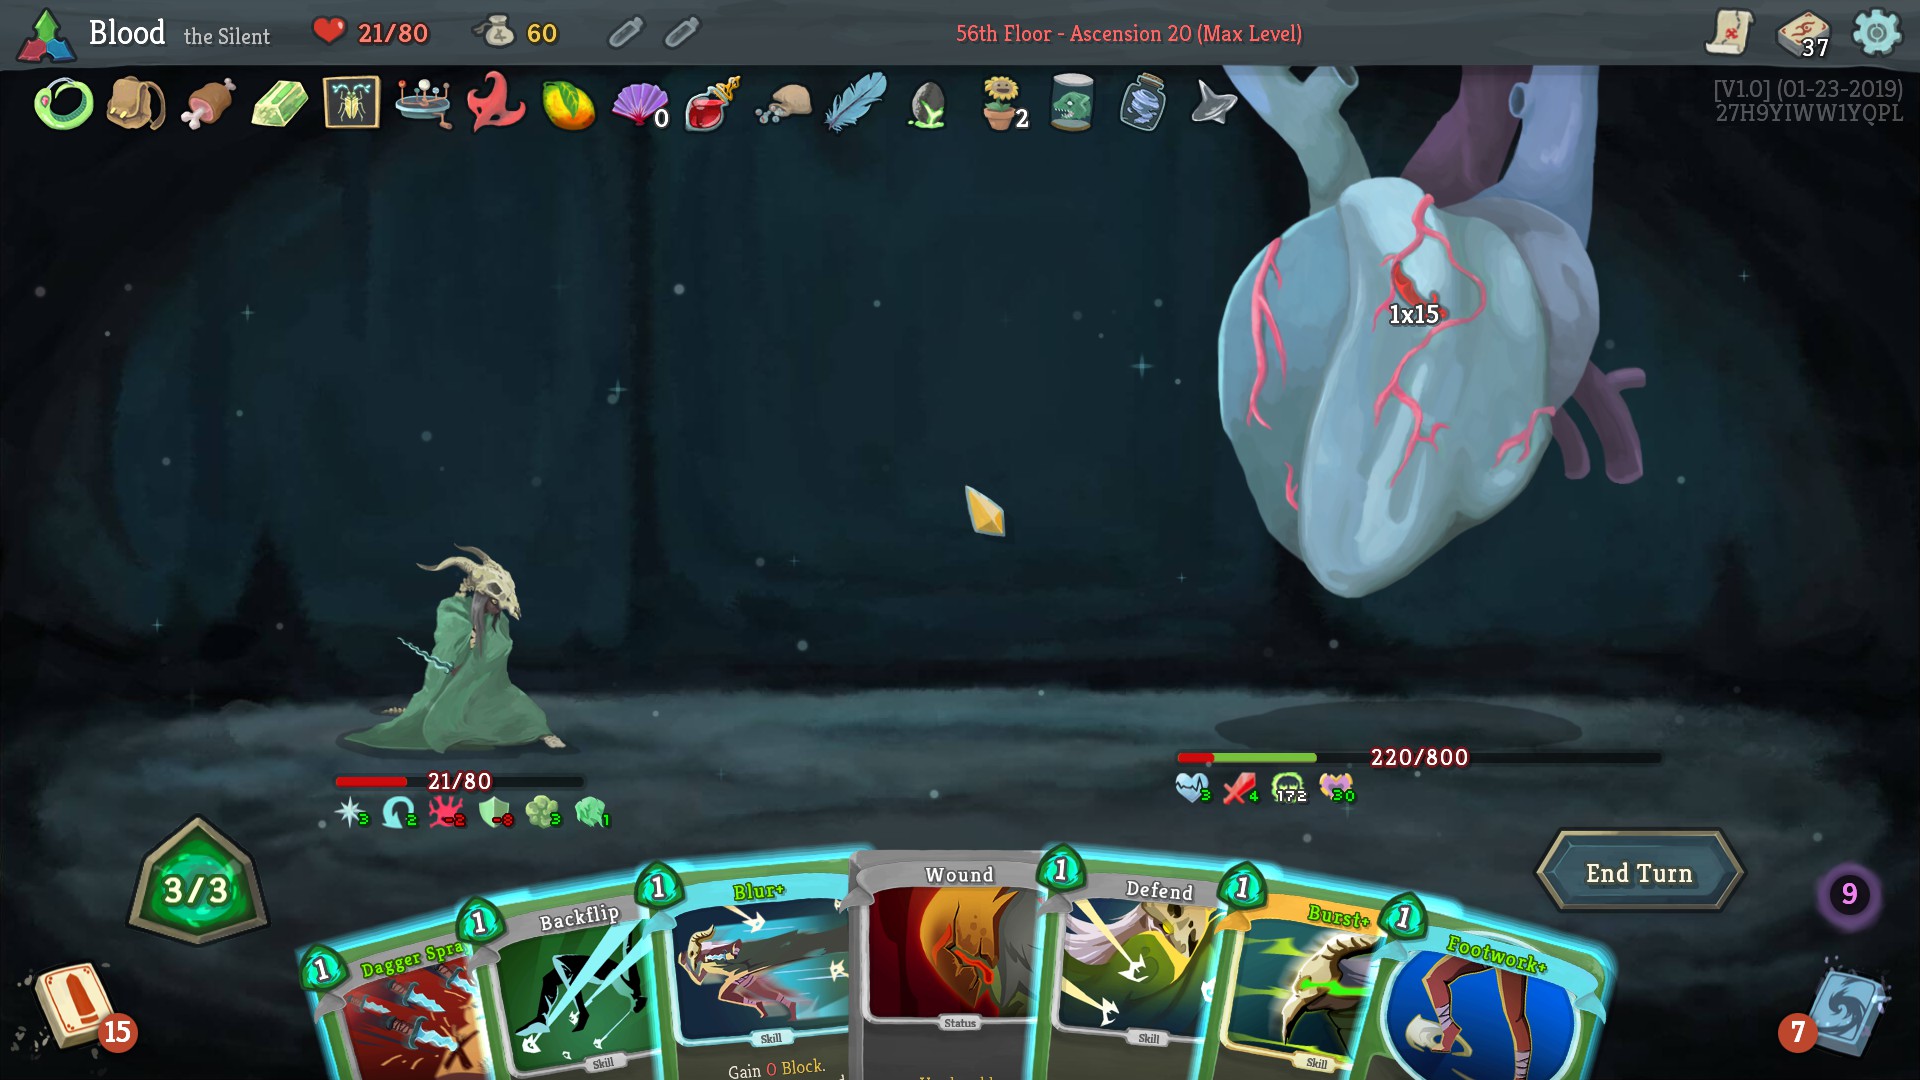
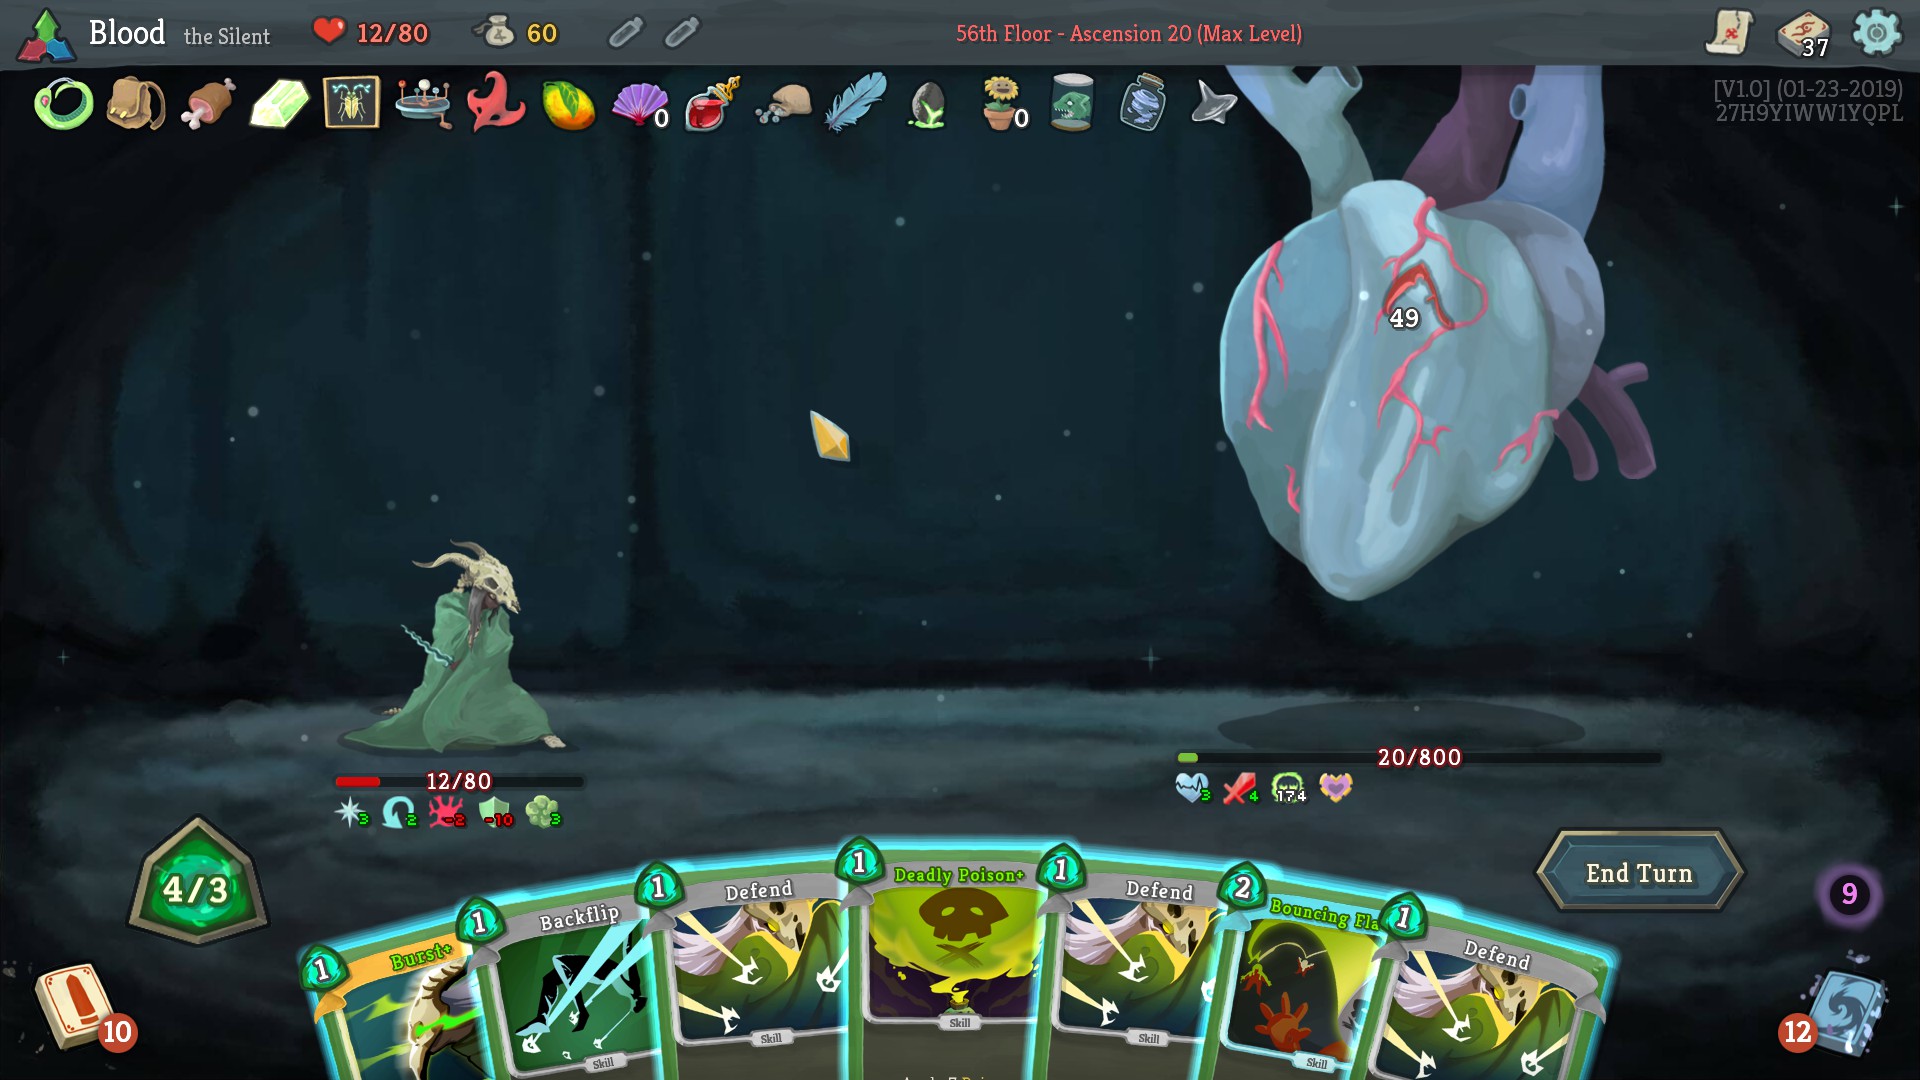
Ironclad's cards are simple and can work in many situations, but he has poor control over his deck (only decent deck controller is Battle Cry) so a small deck would be good to get the powers and attacks you want quickly.

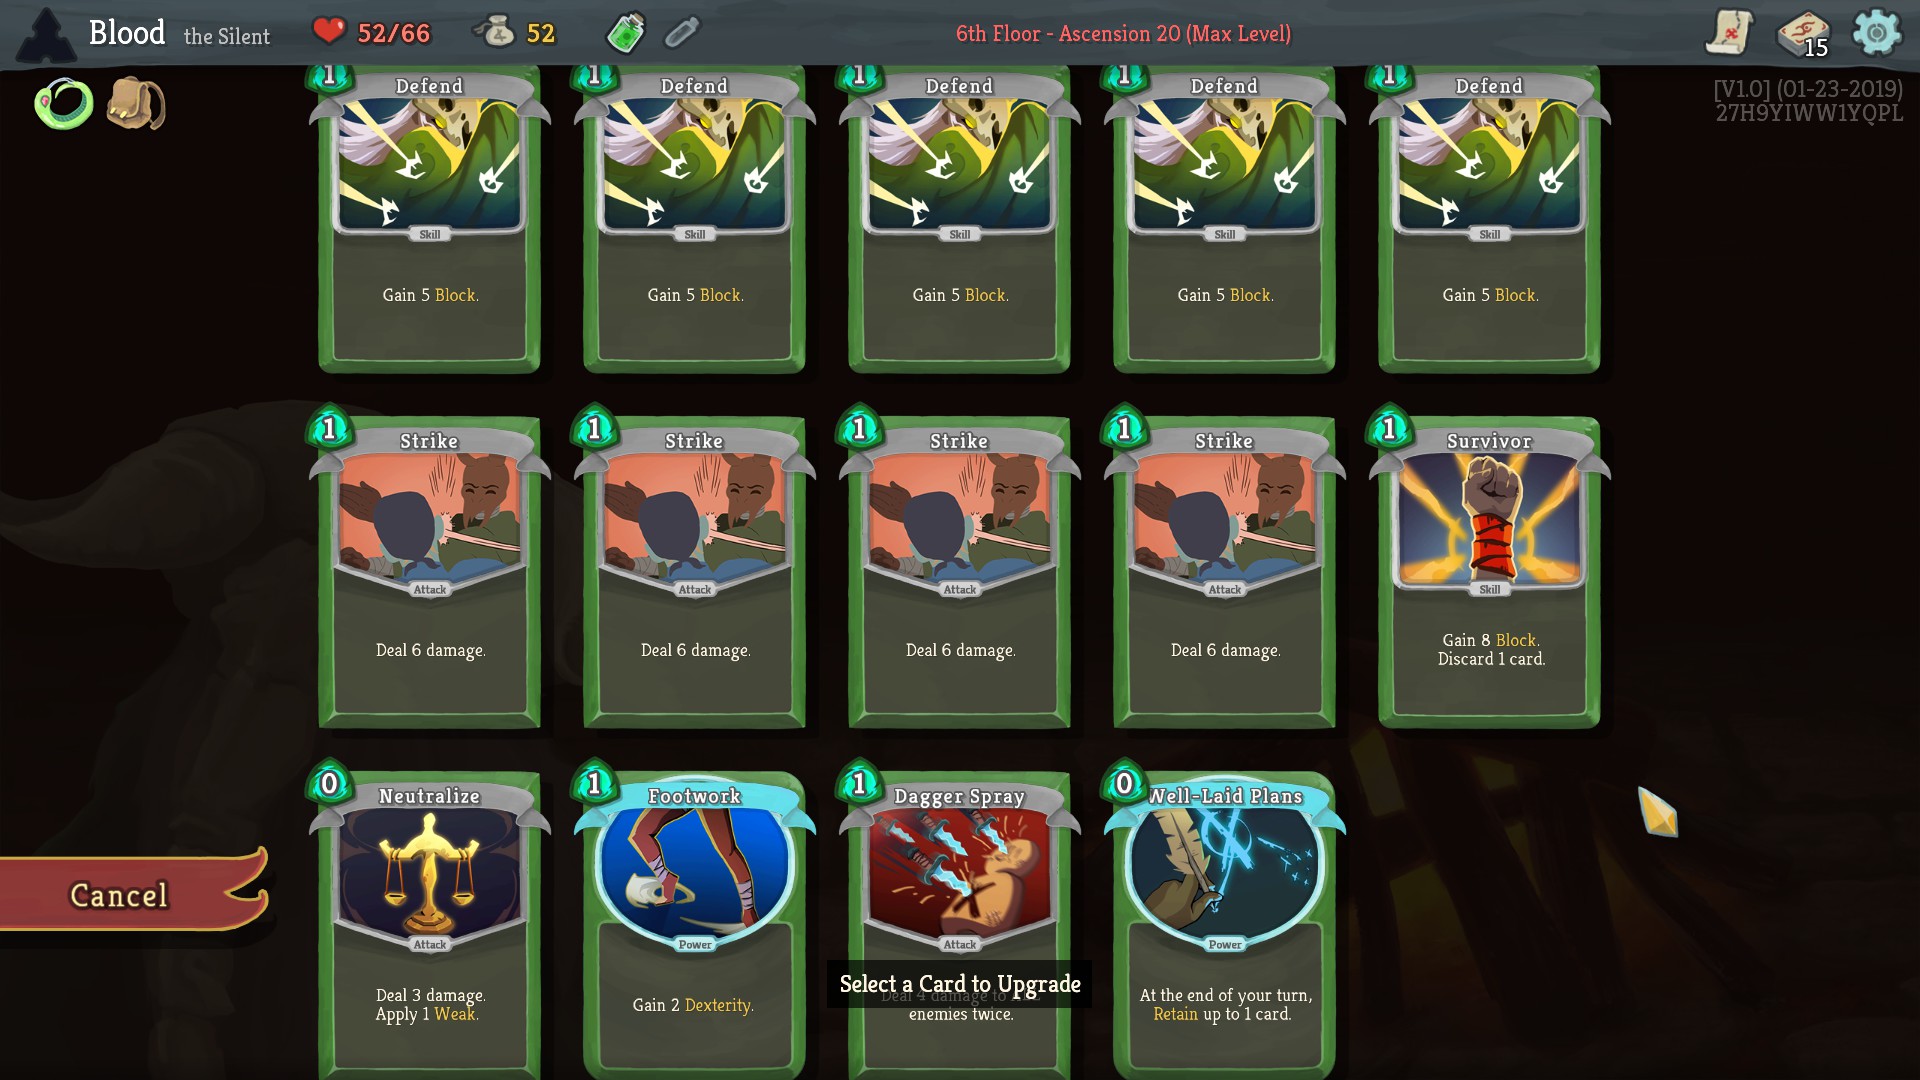
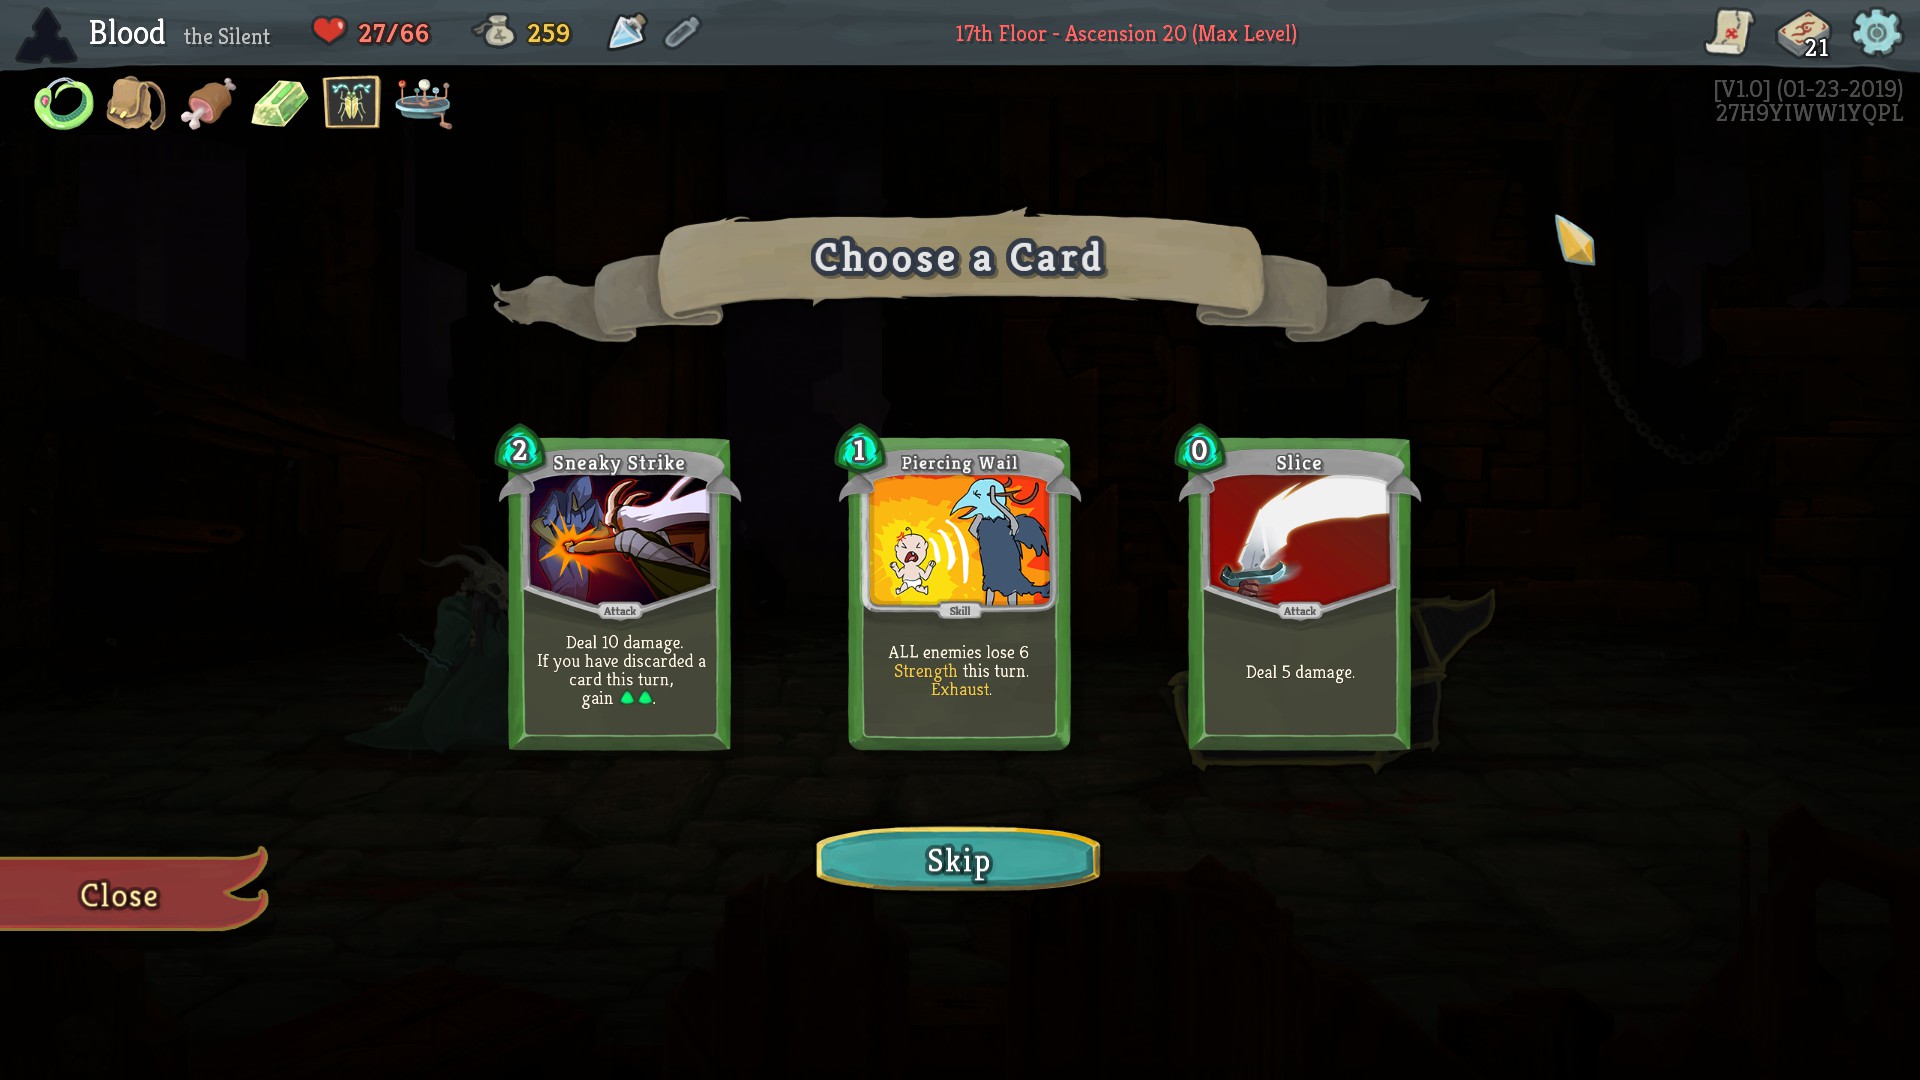
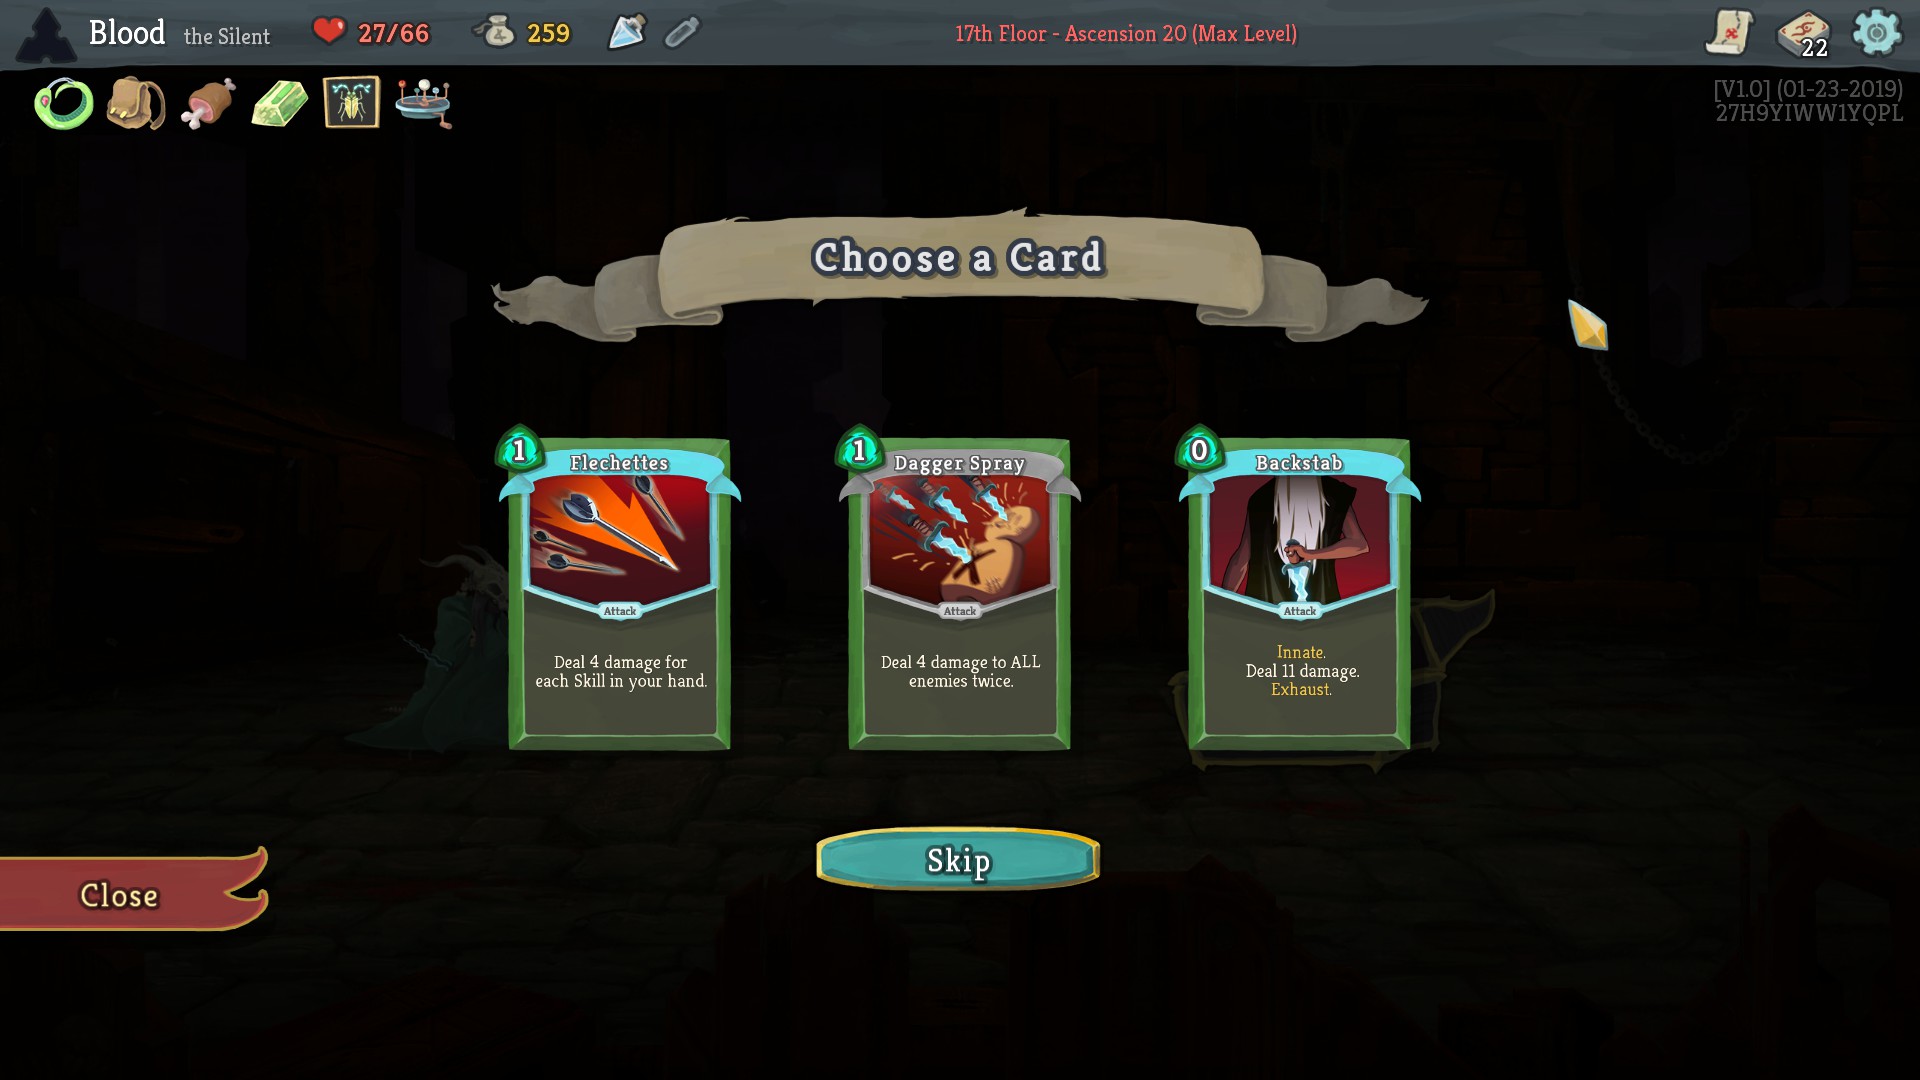
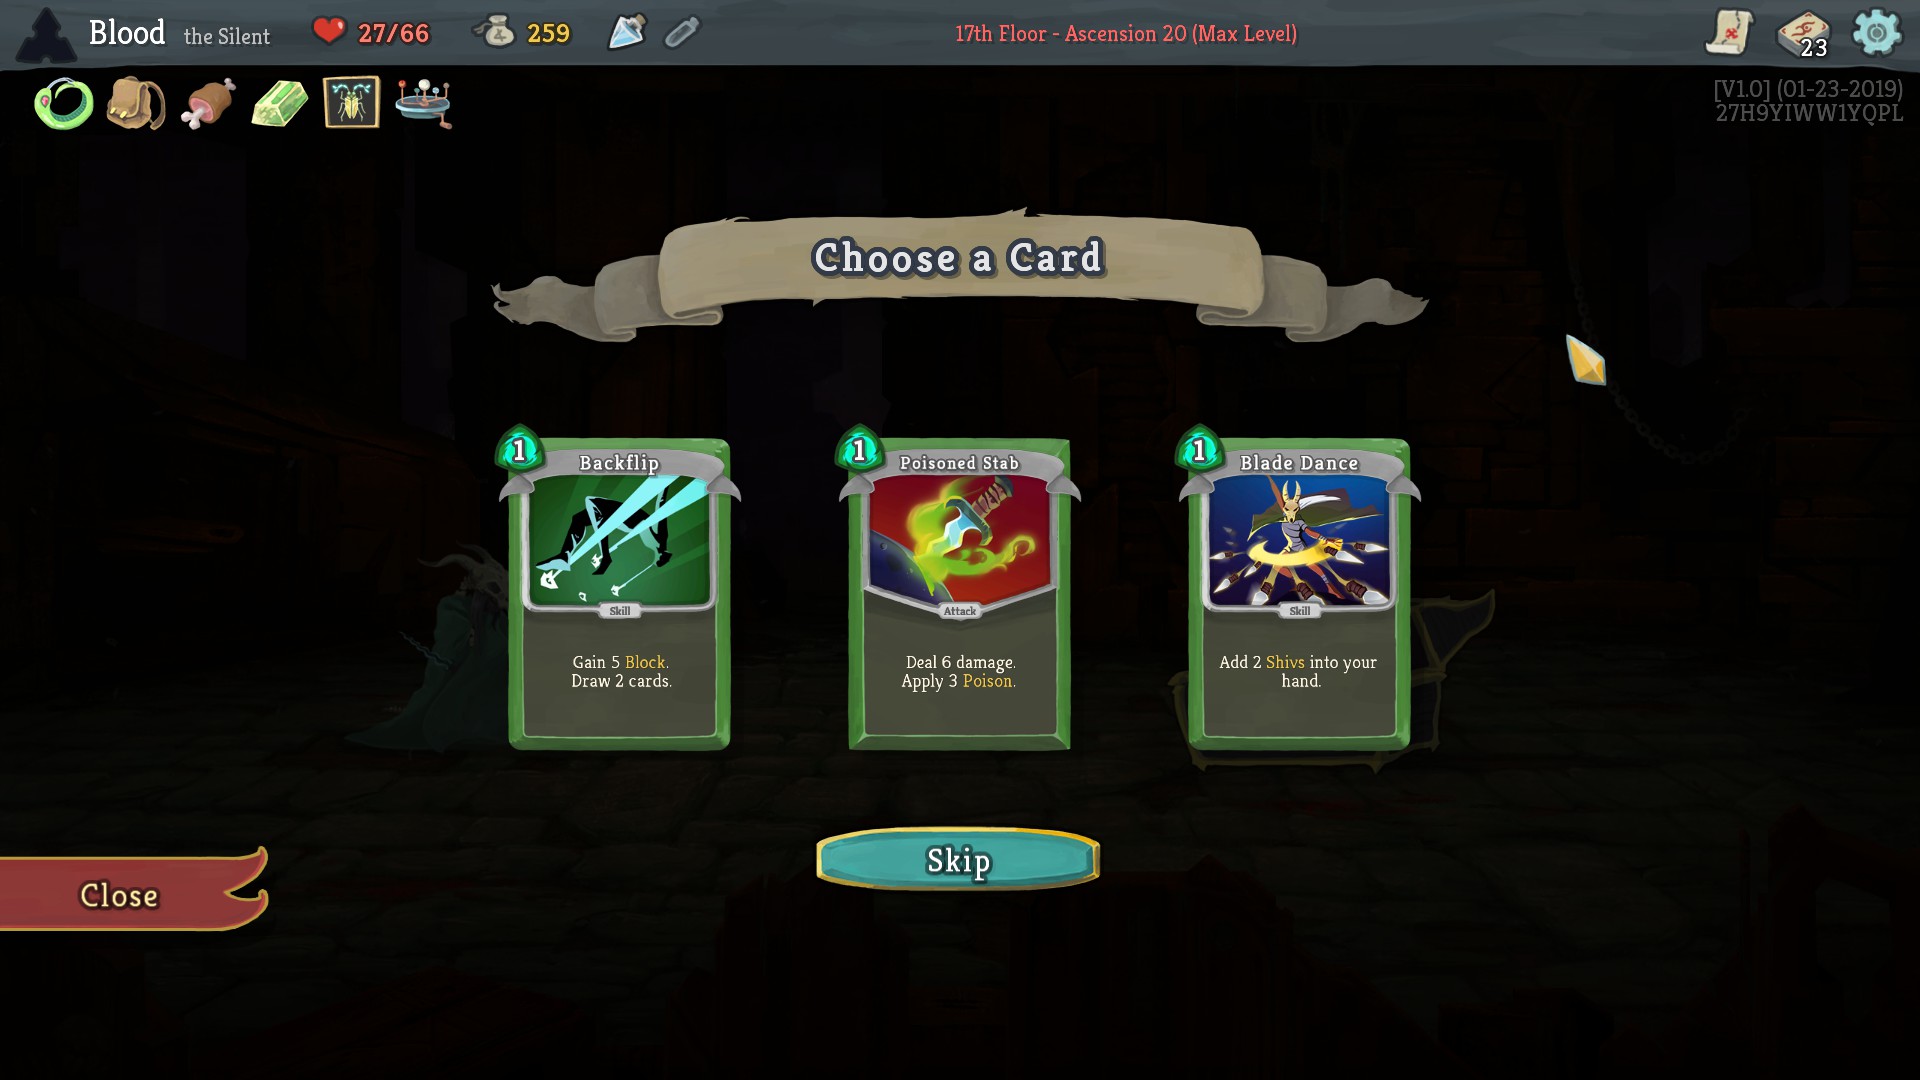
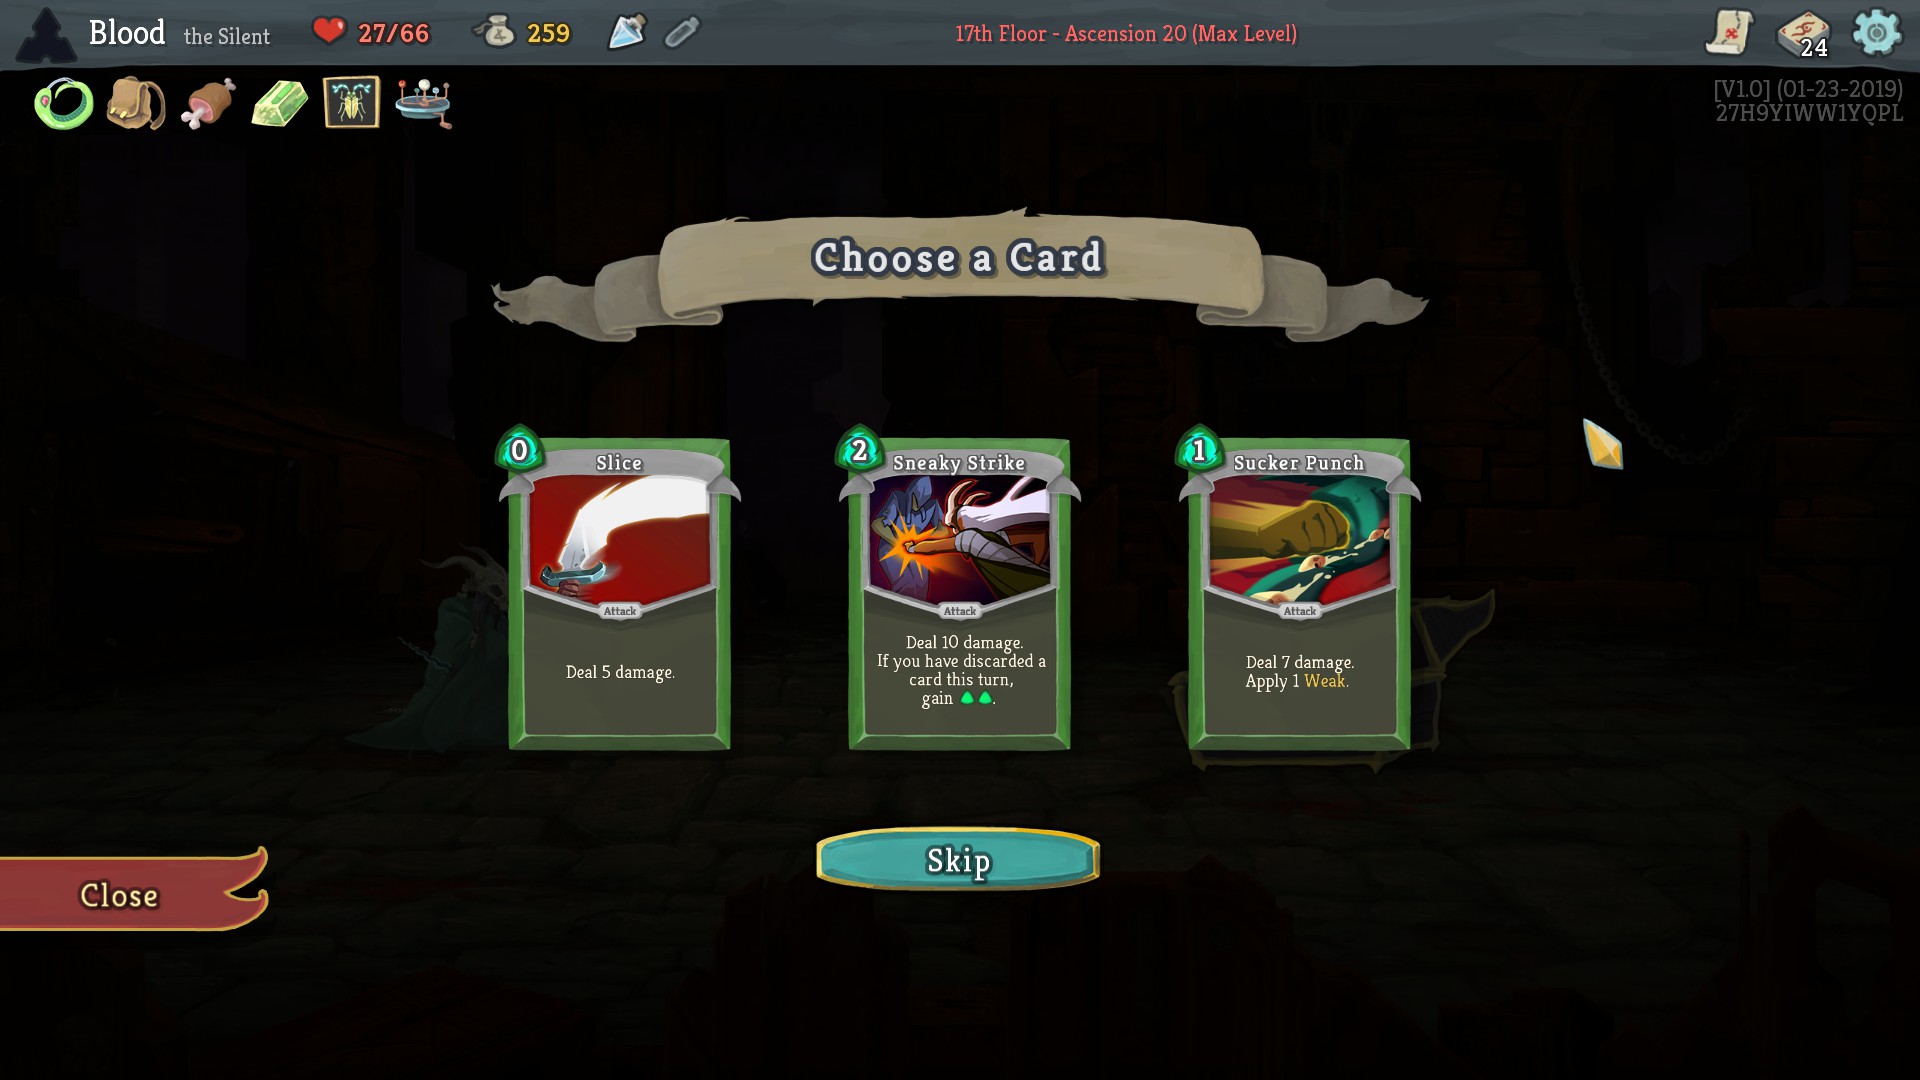
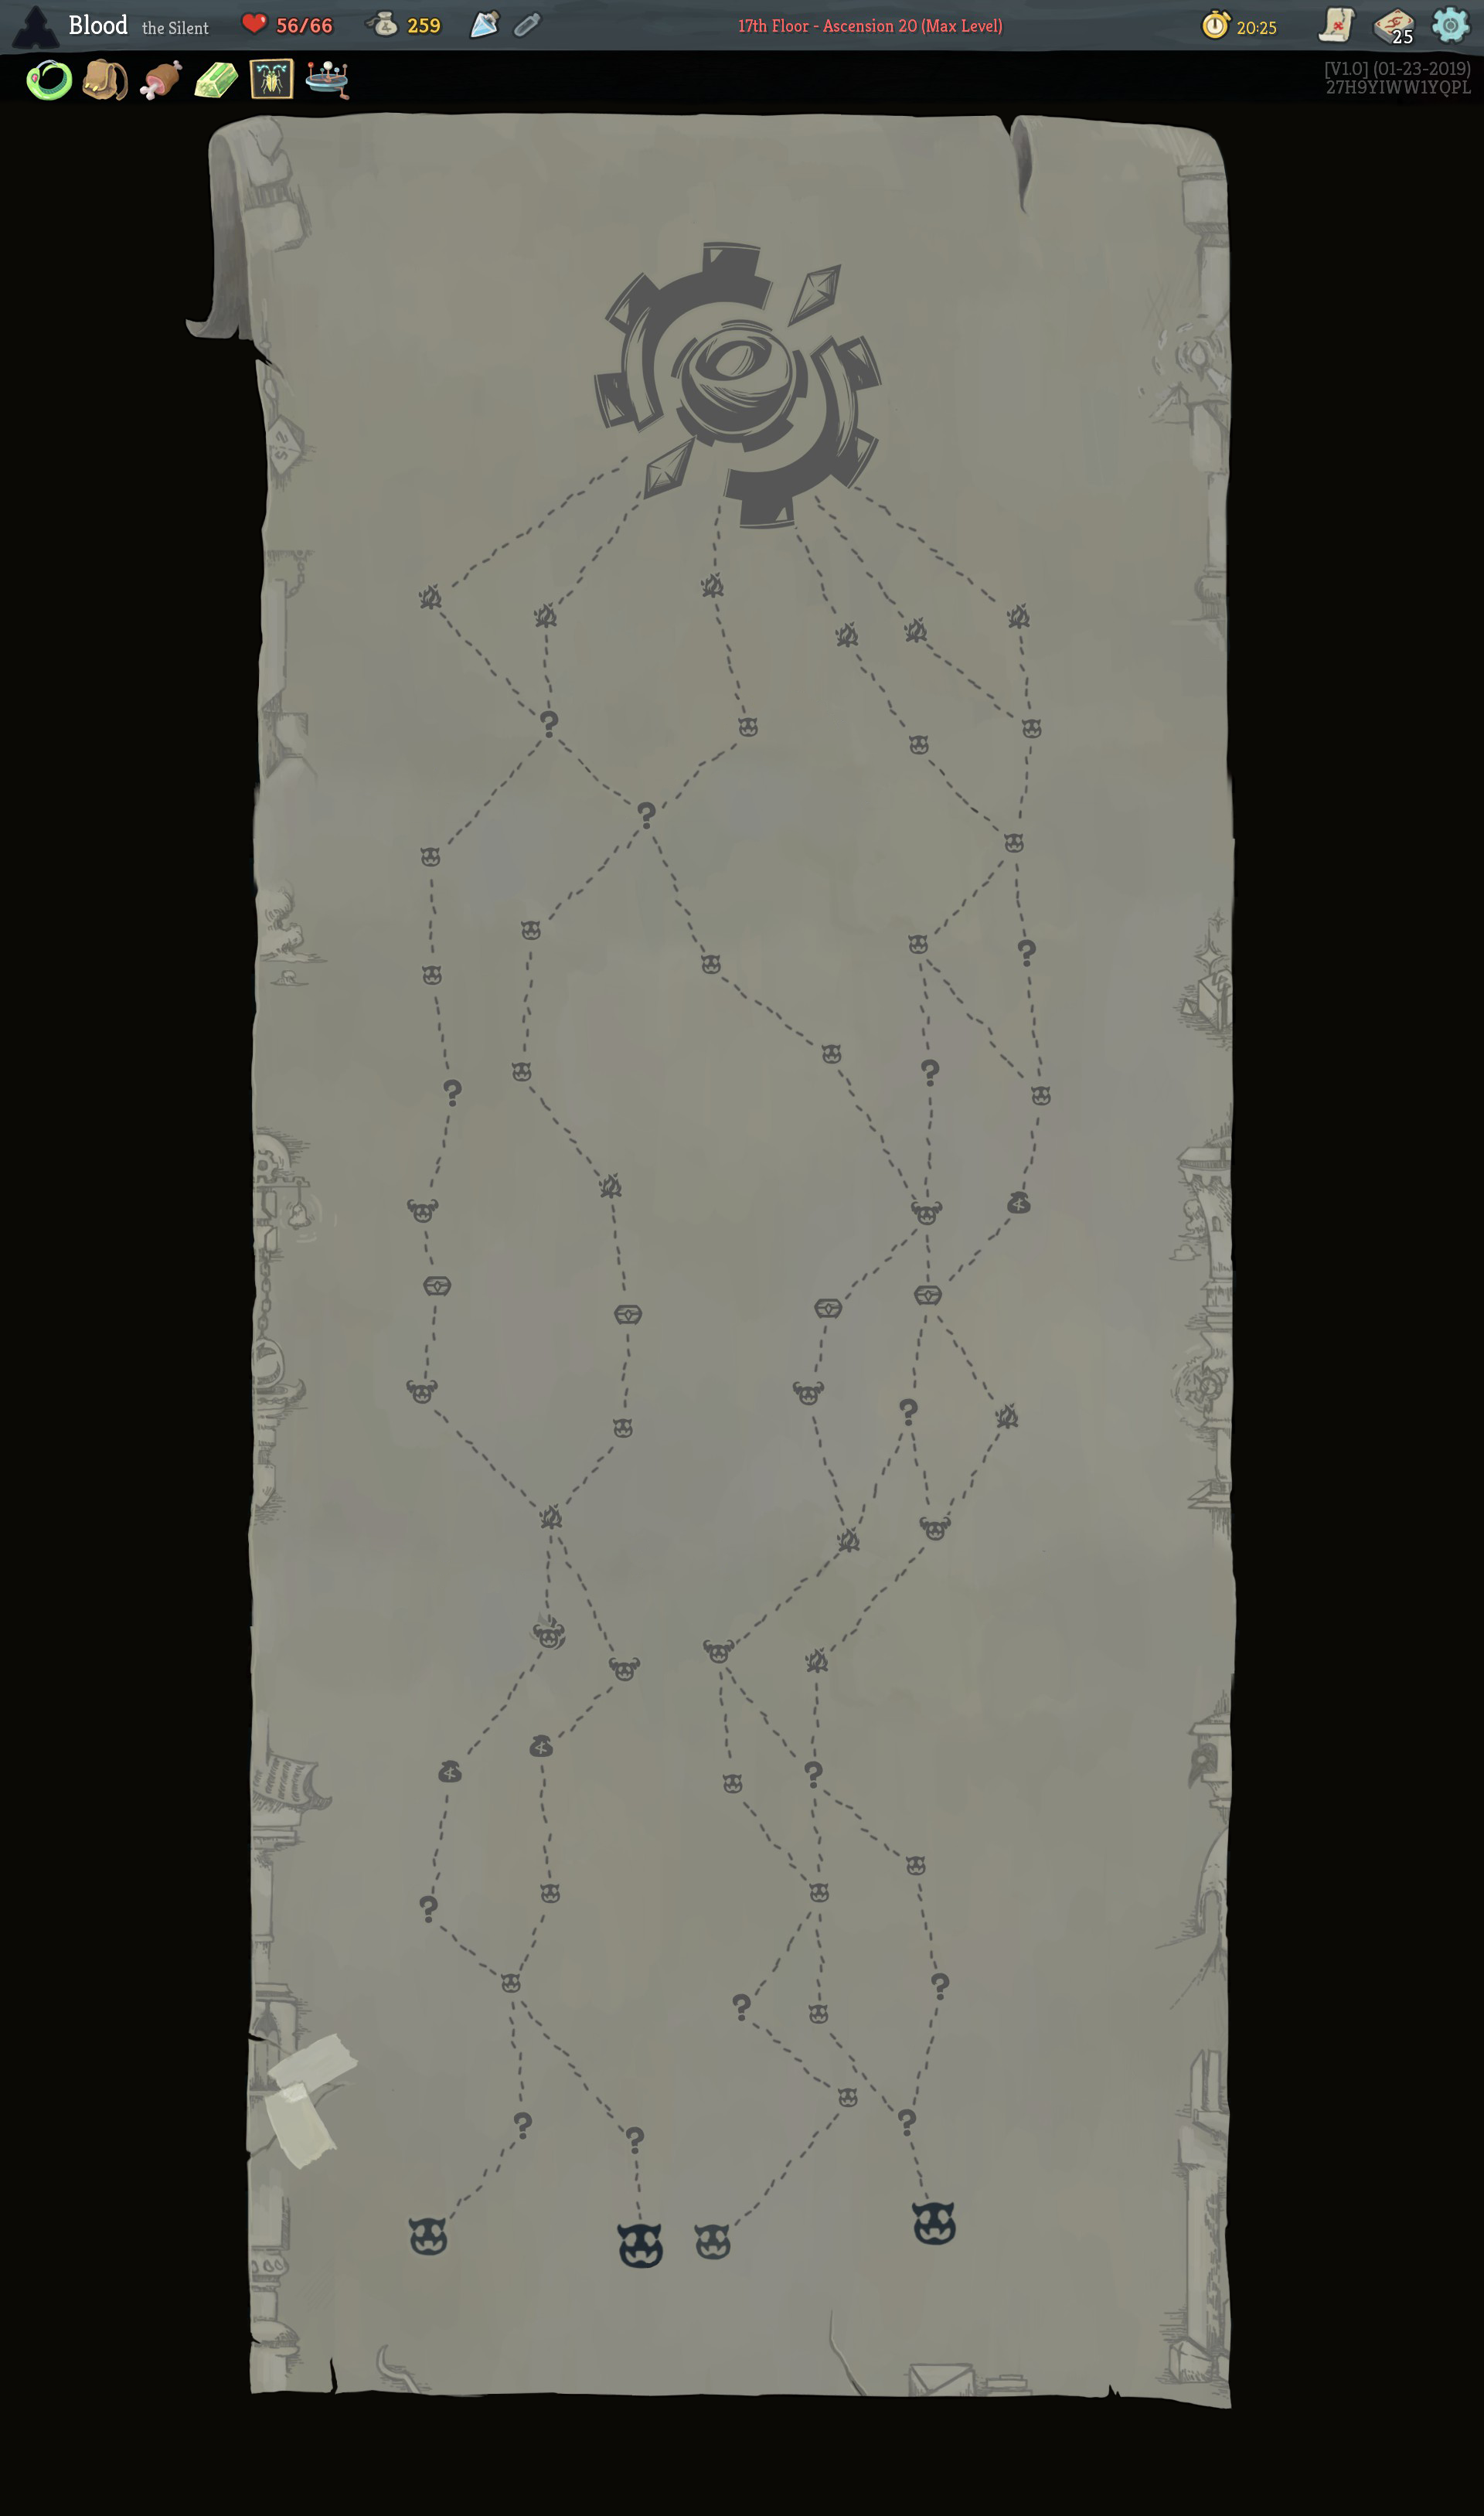
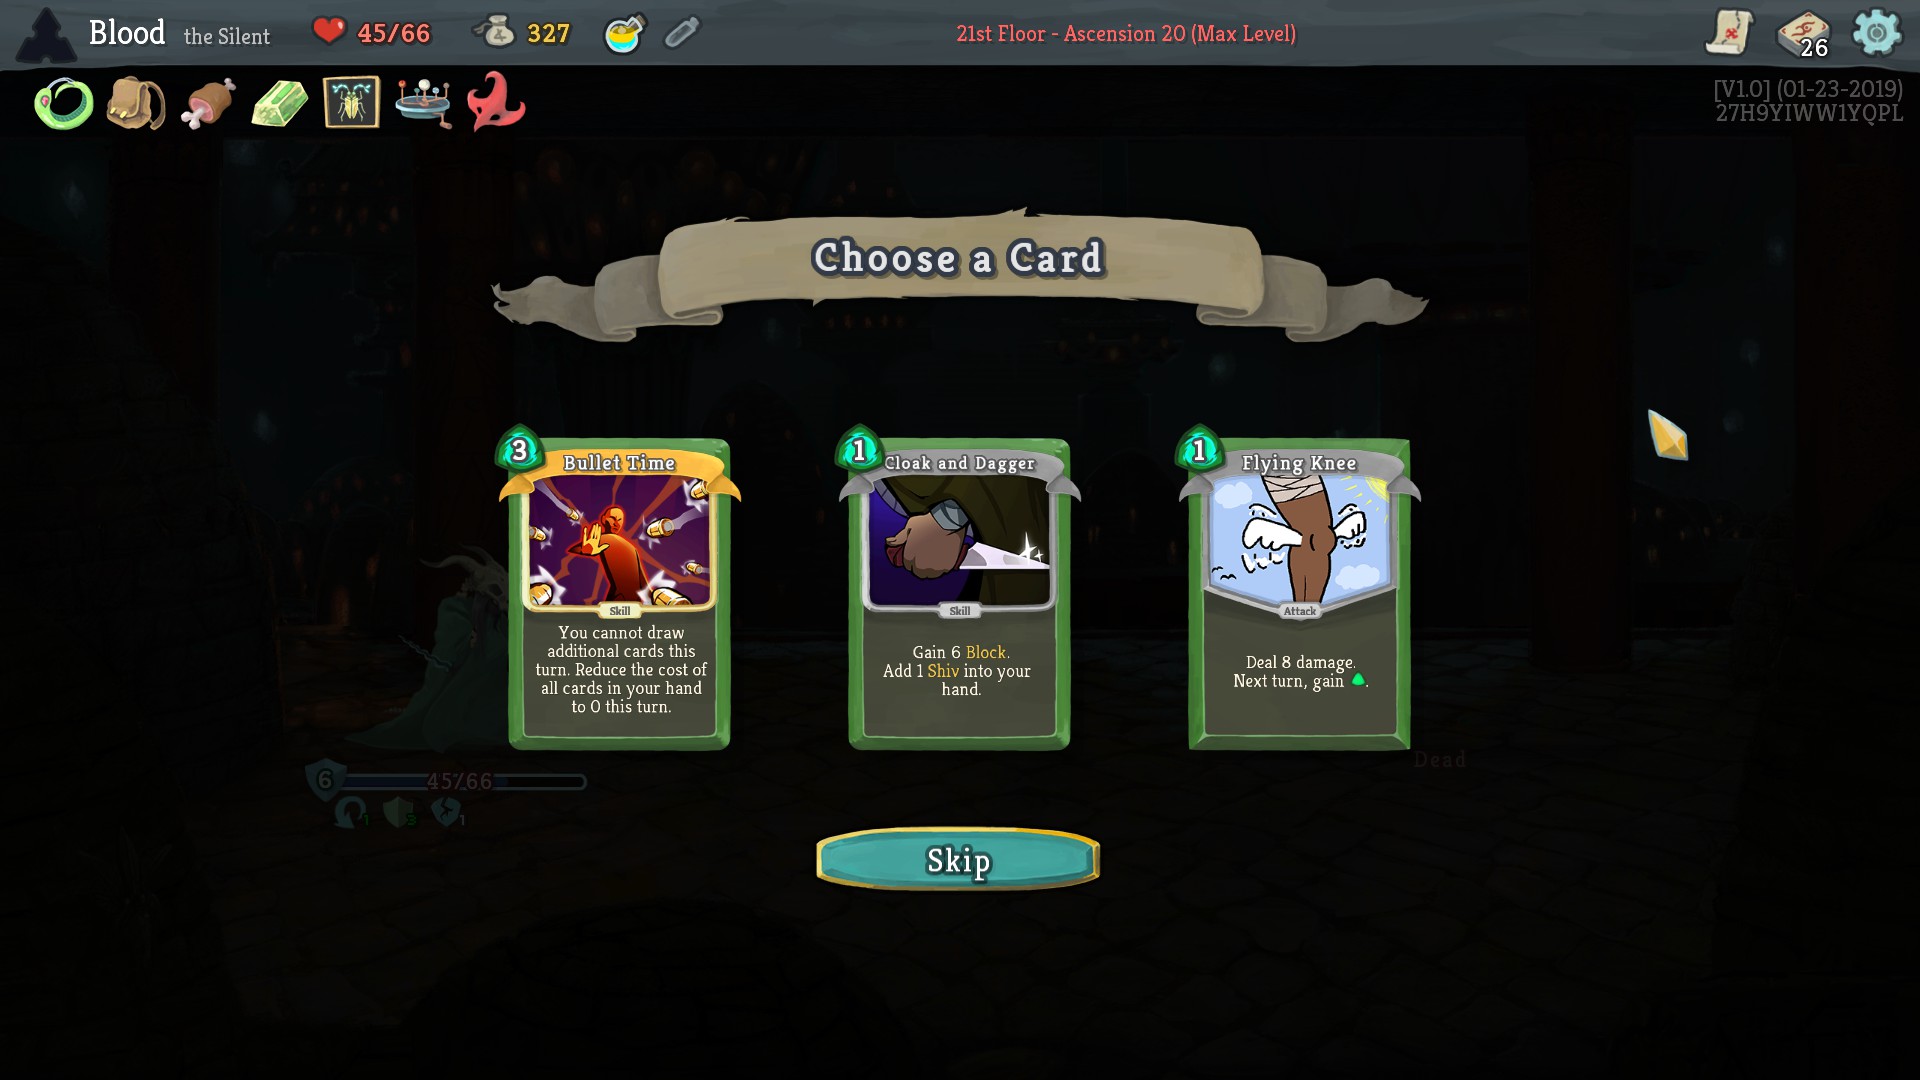
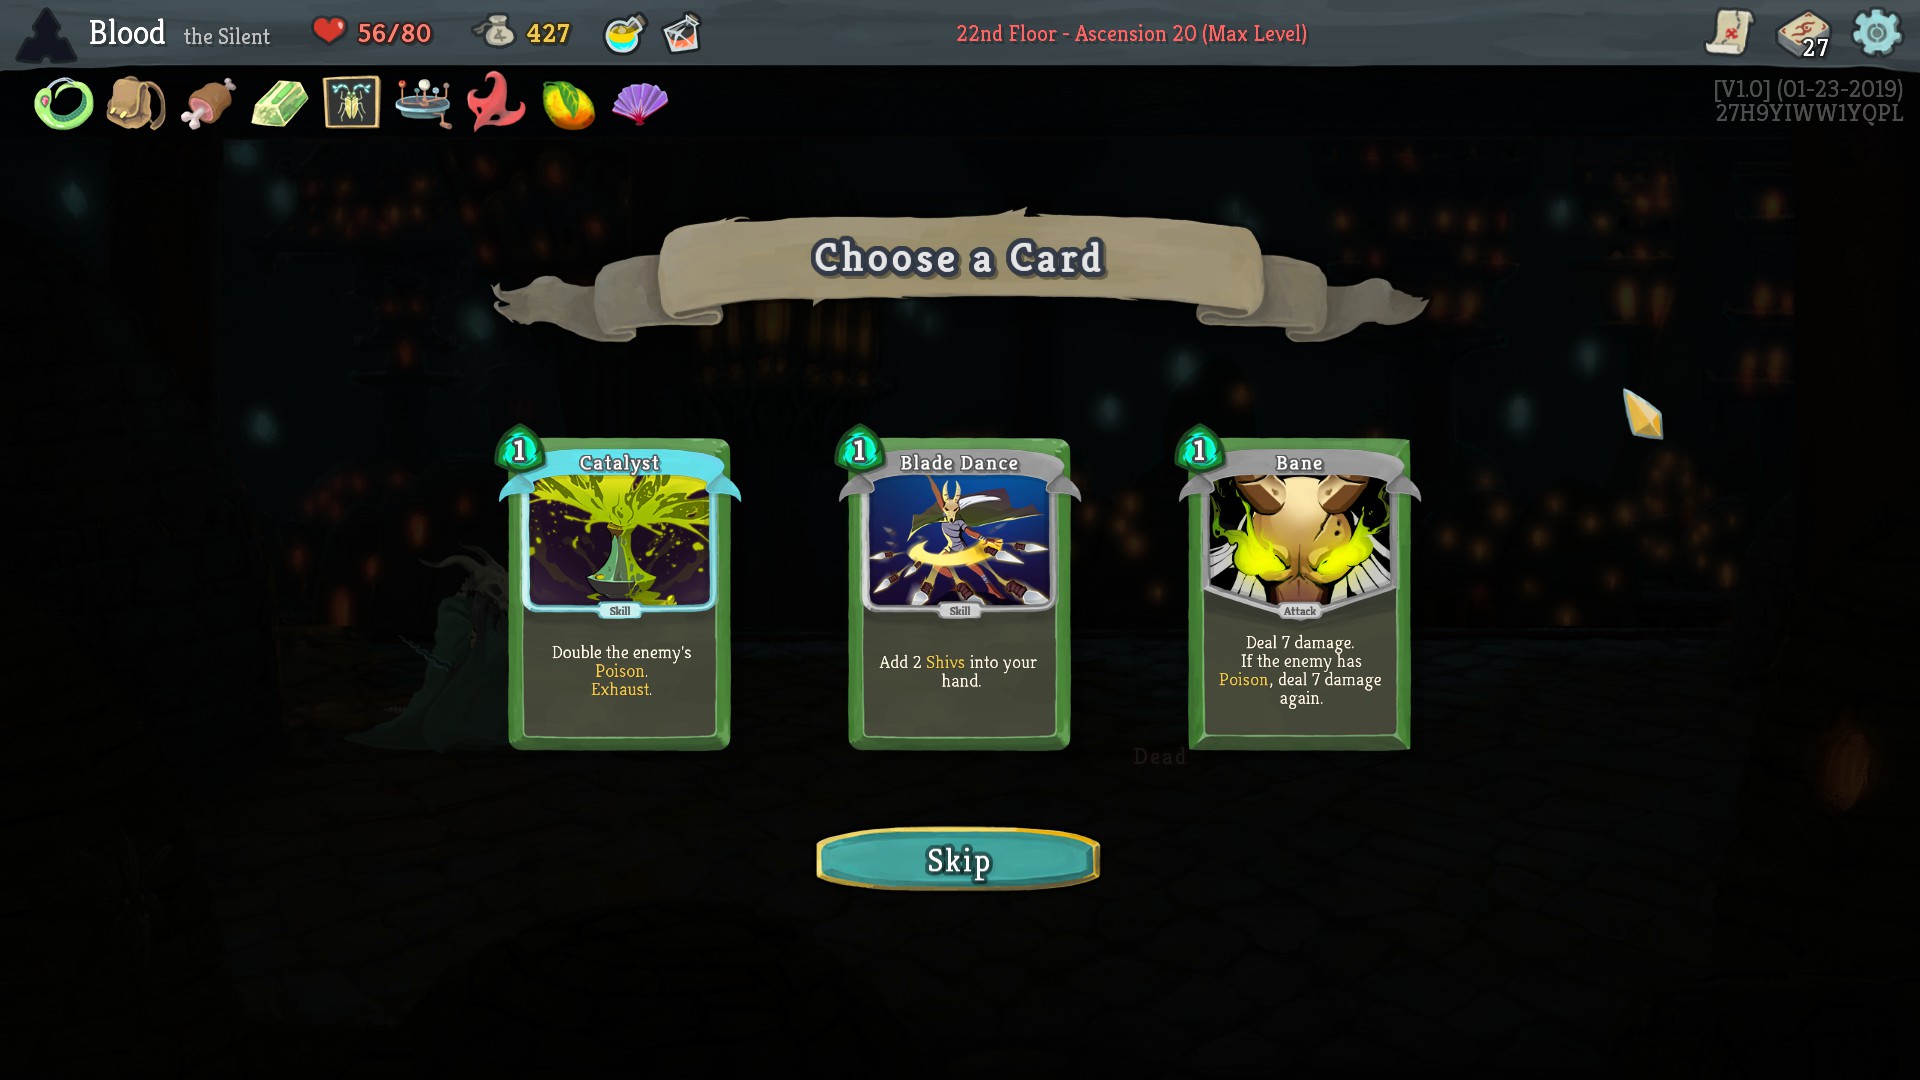
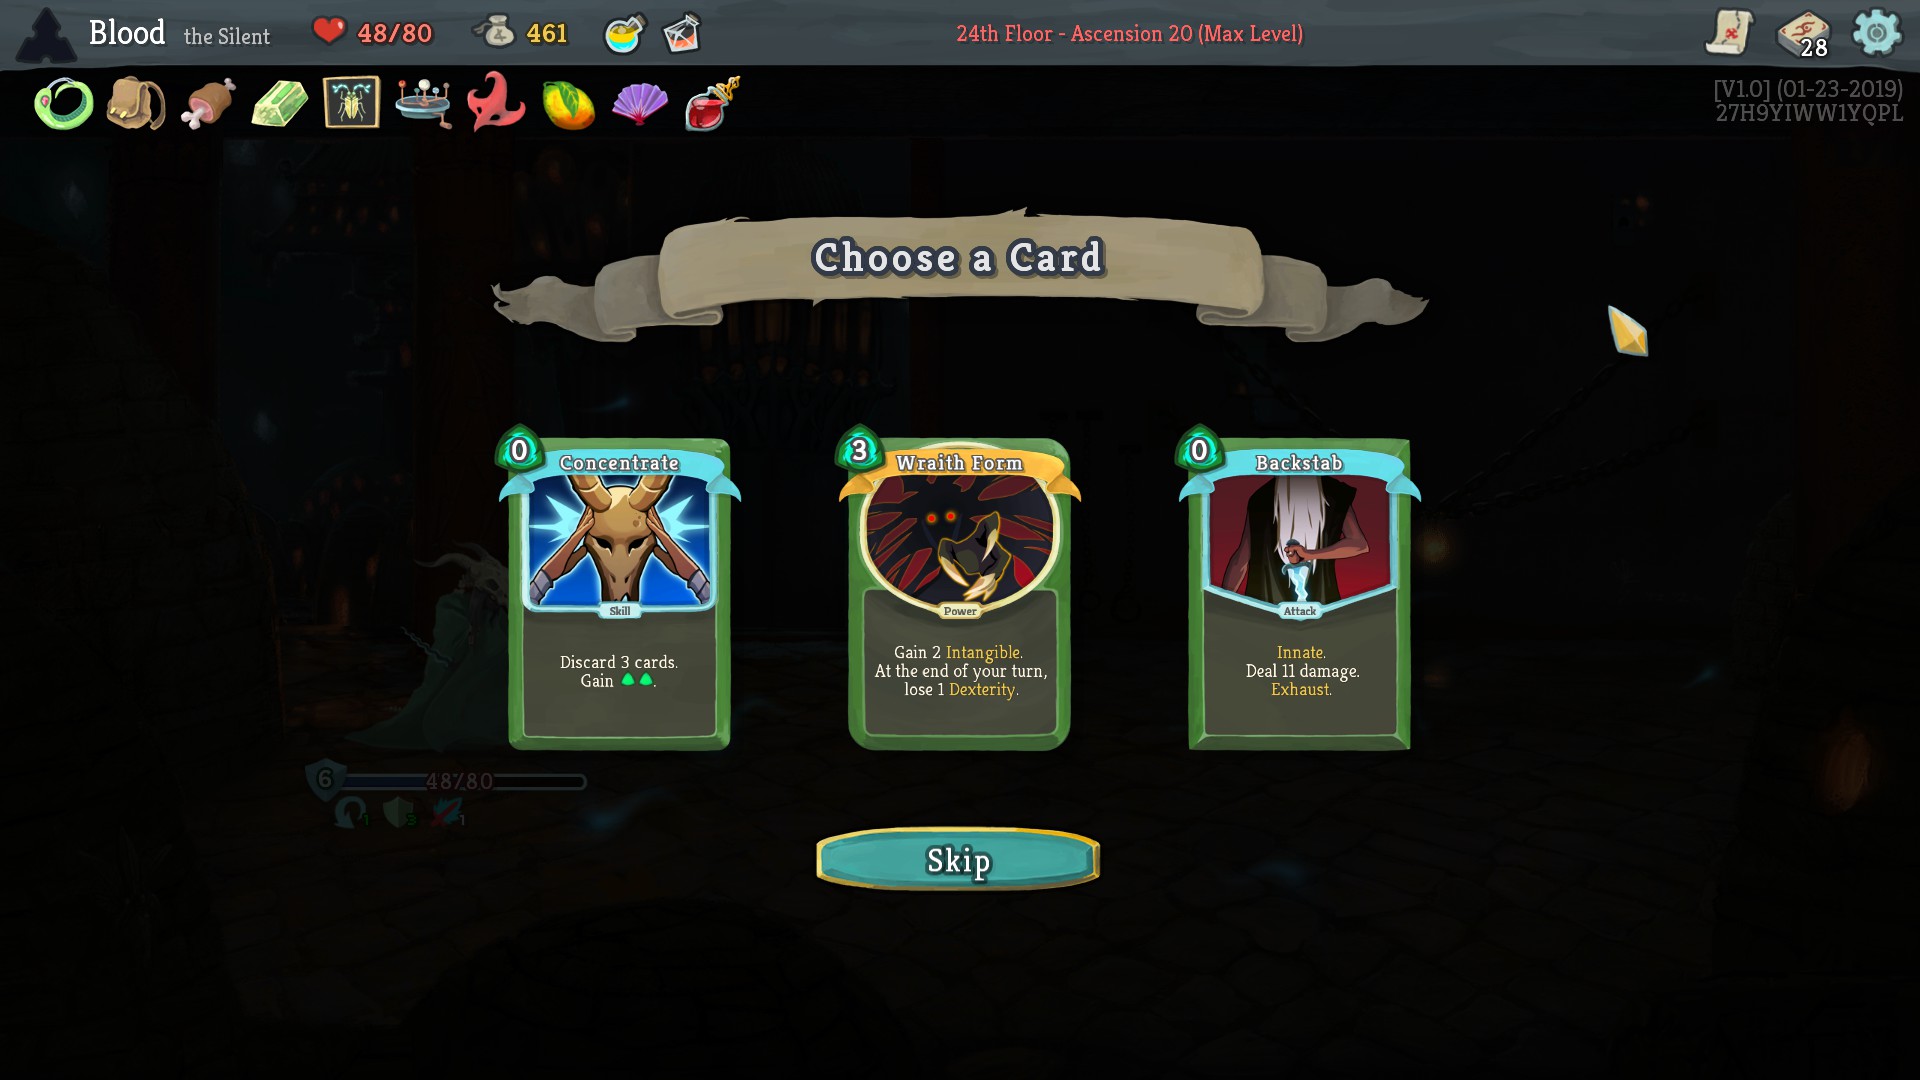
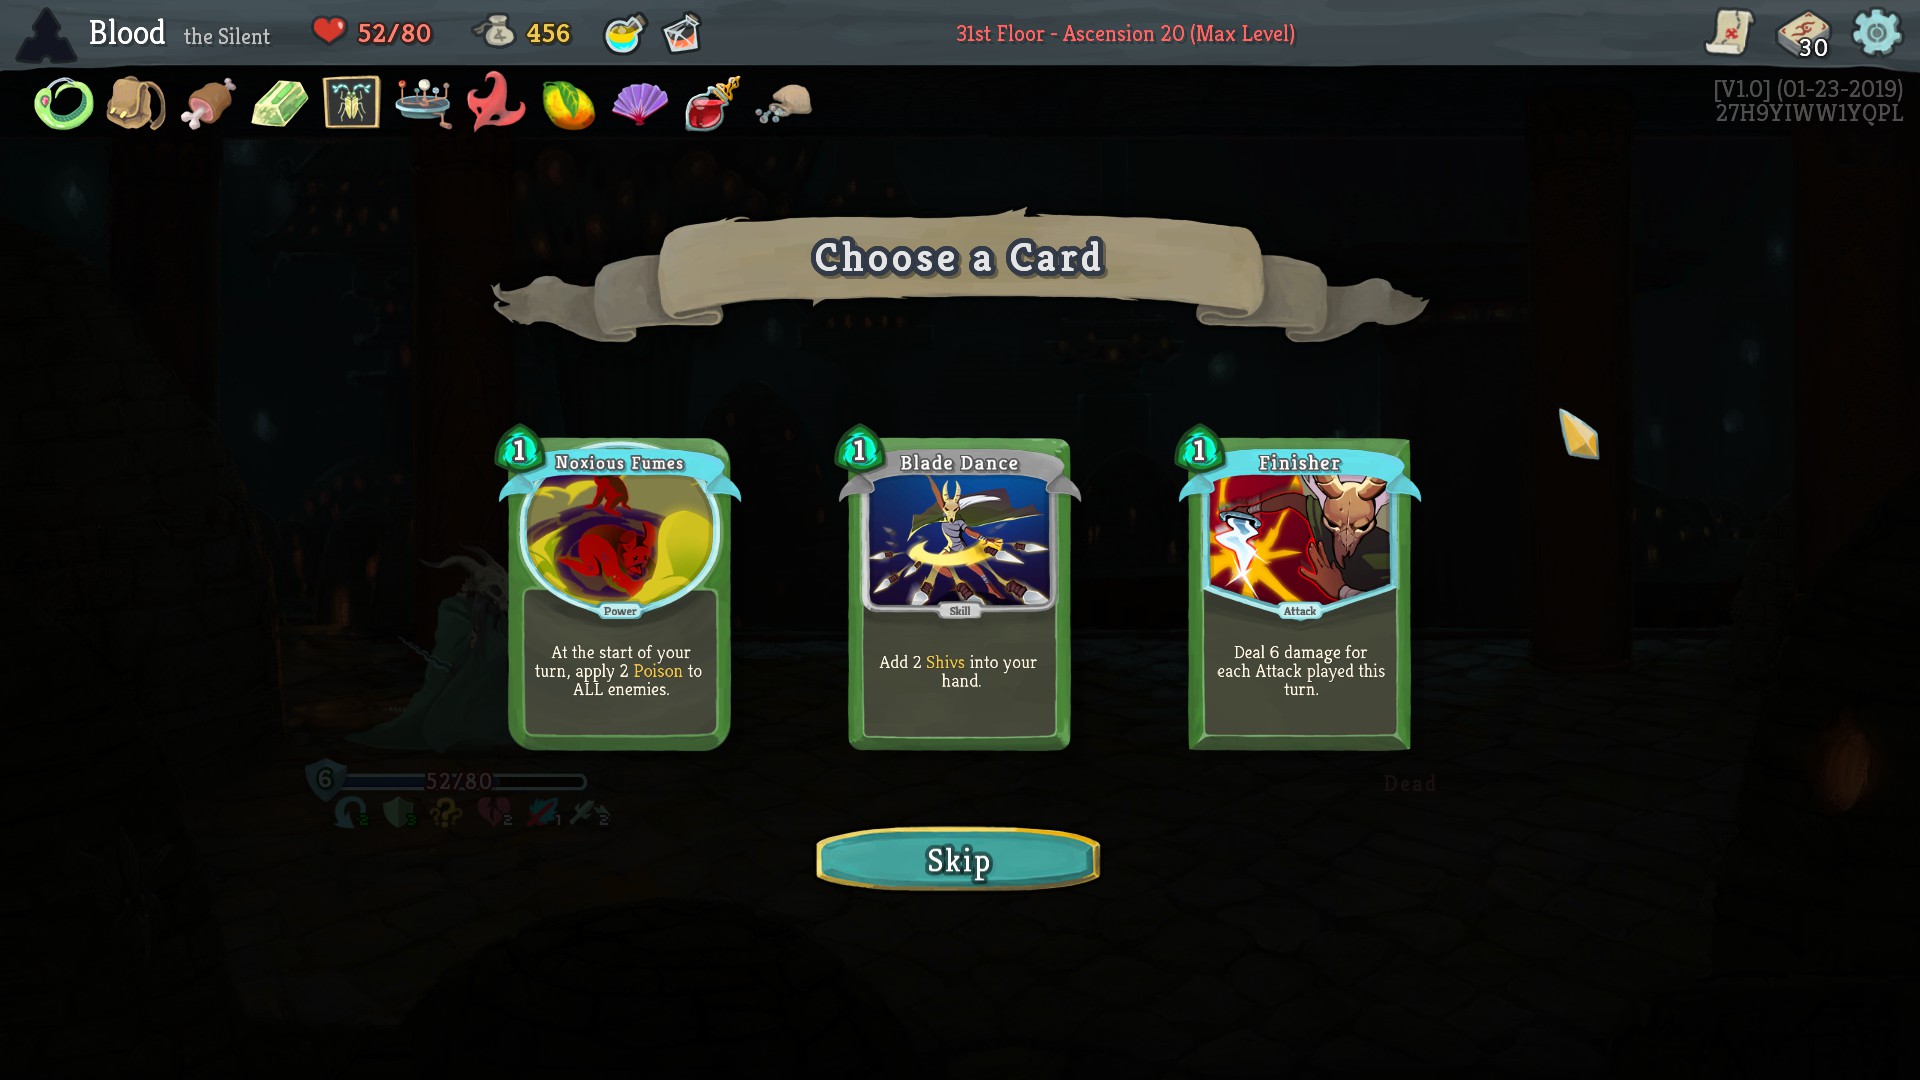
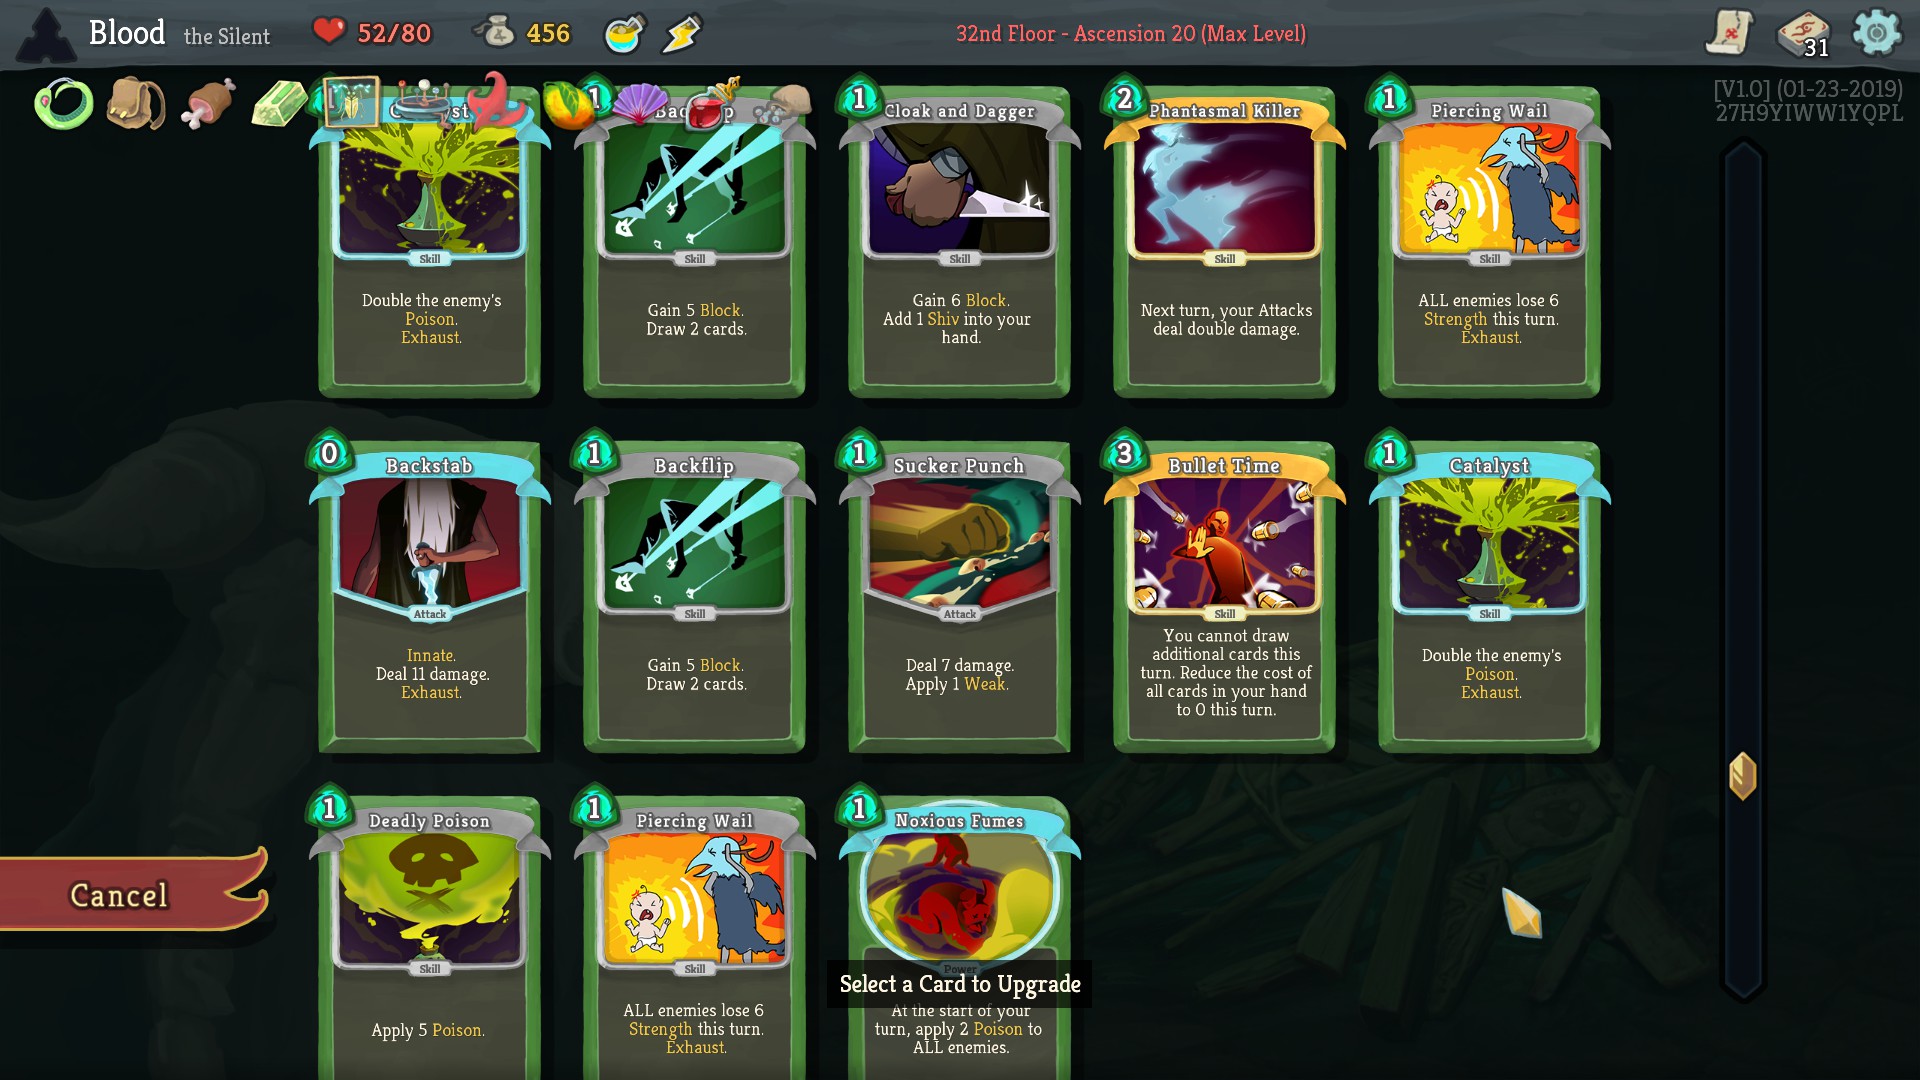
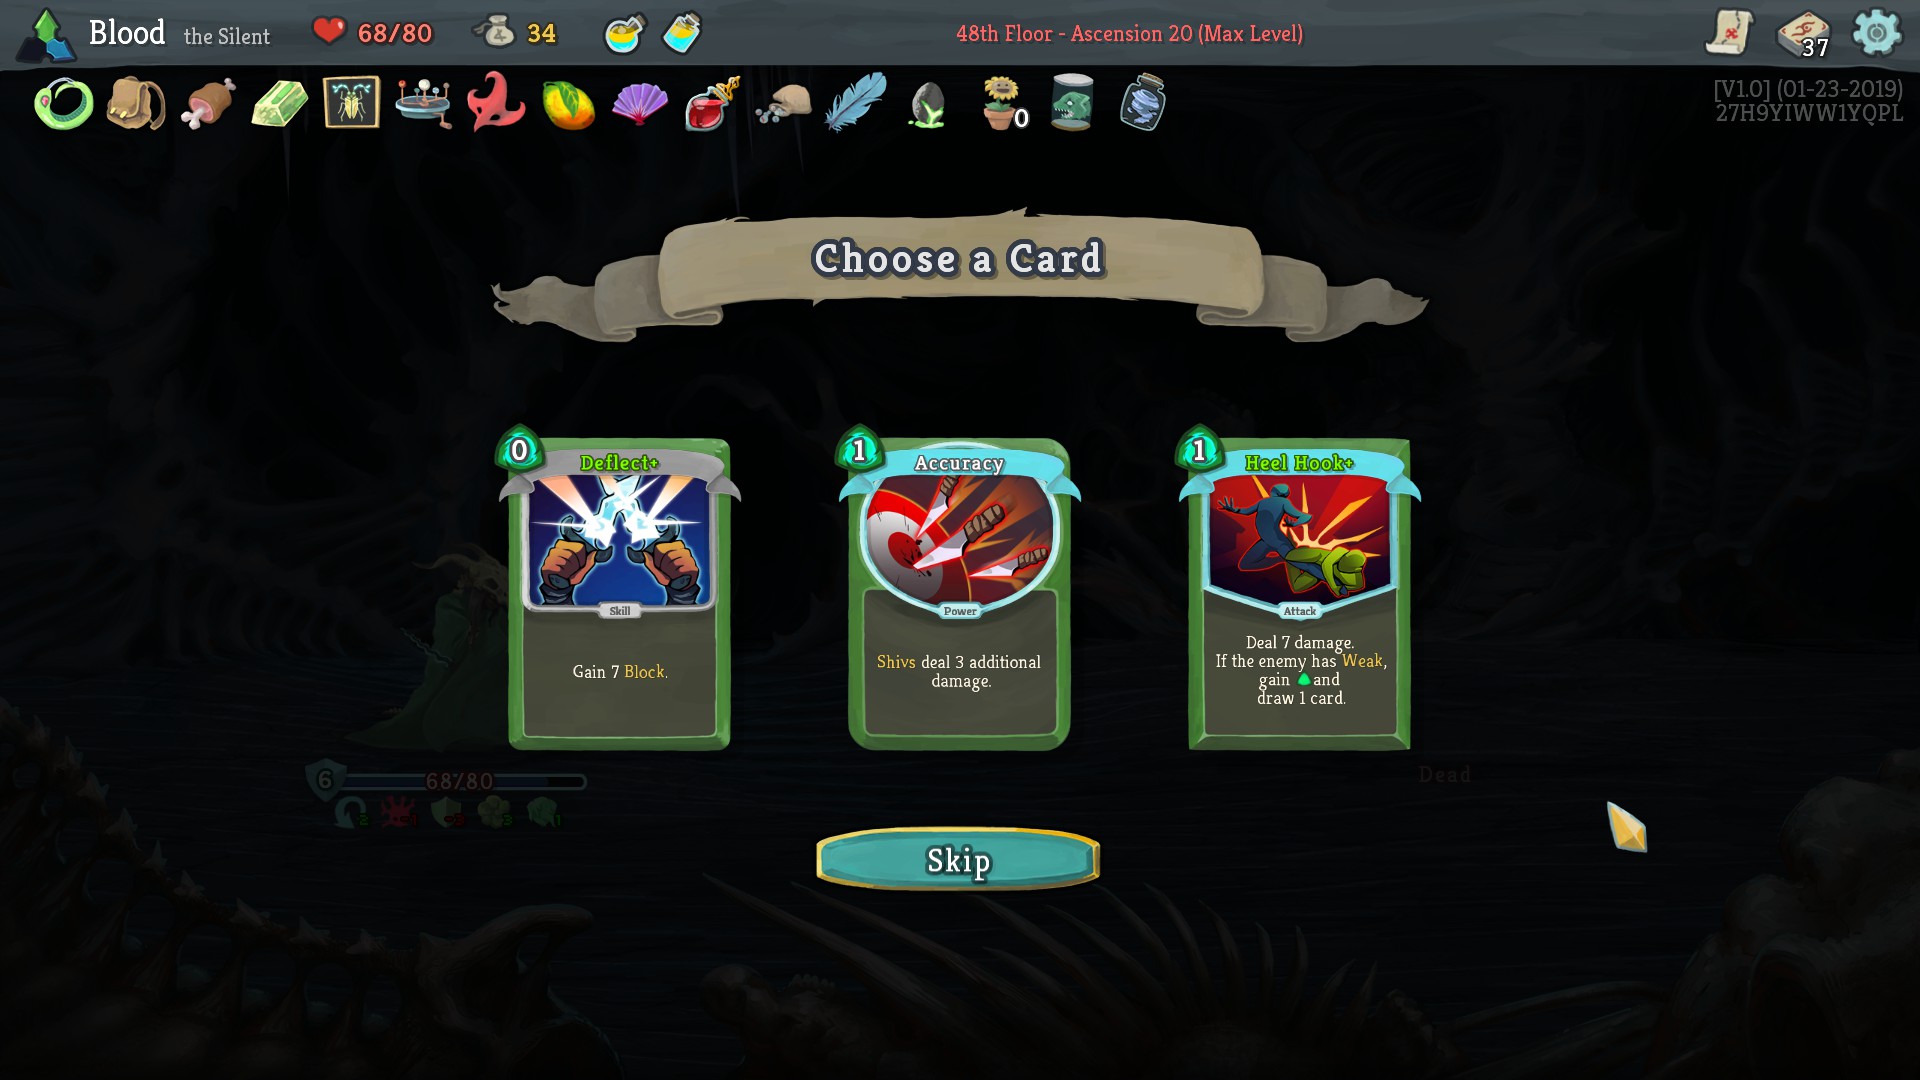
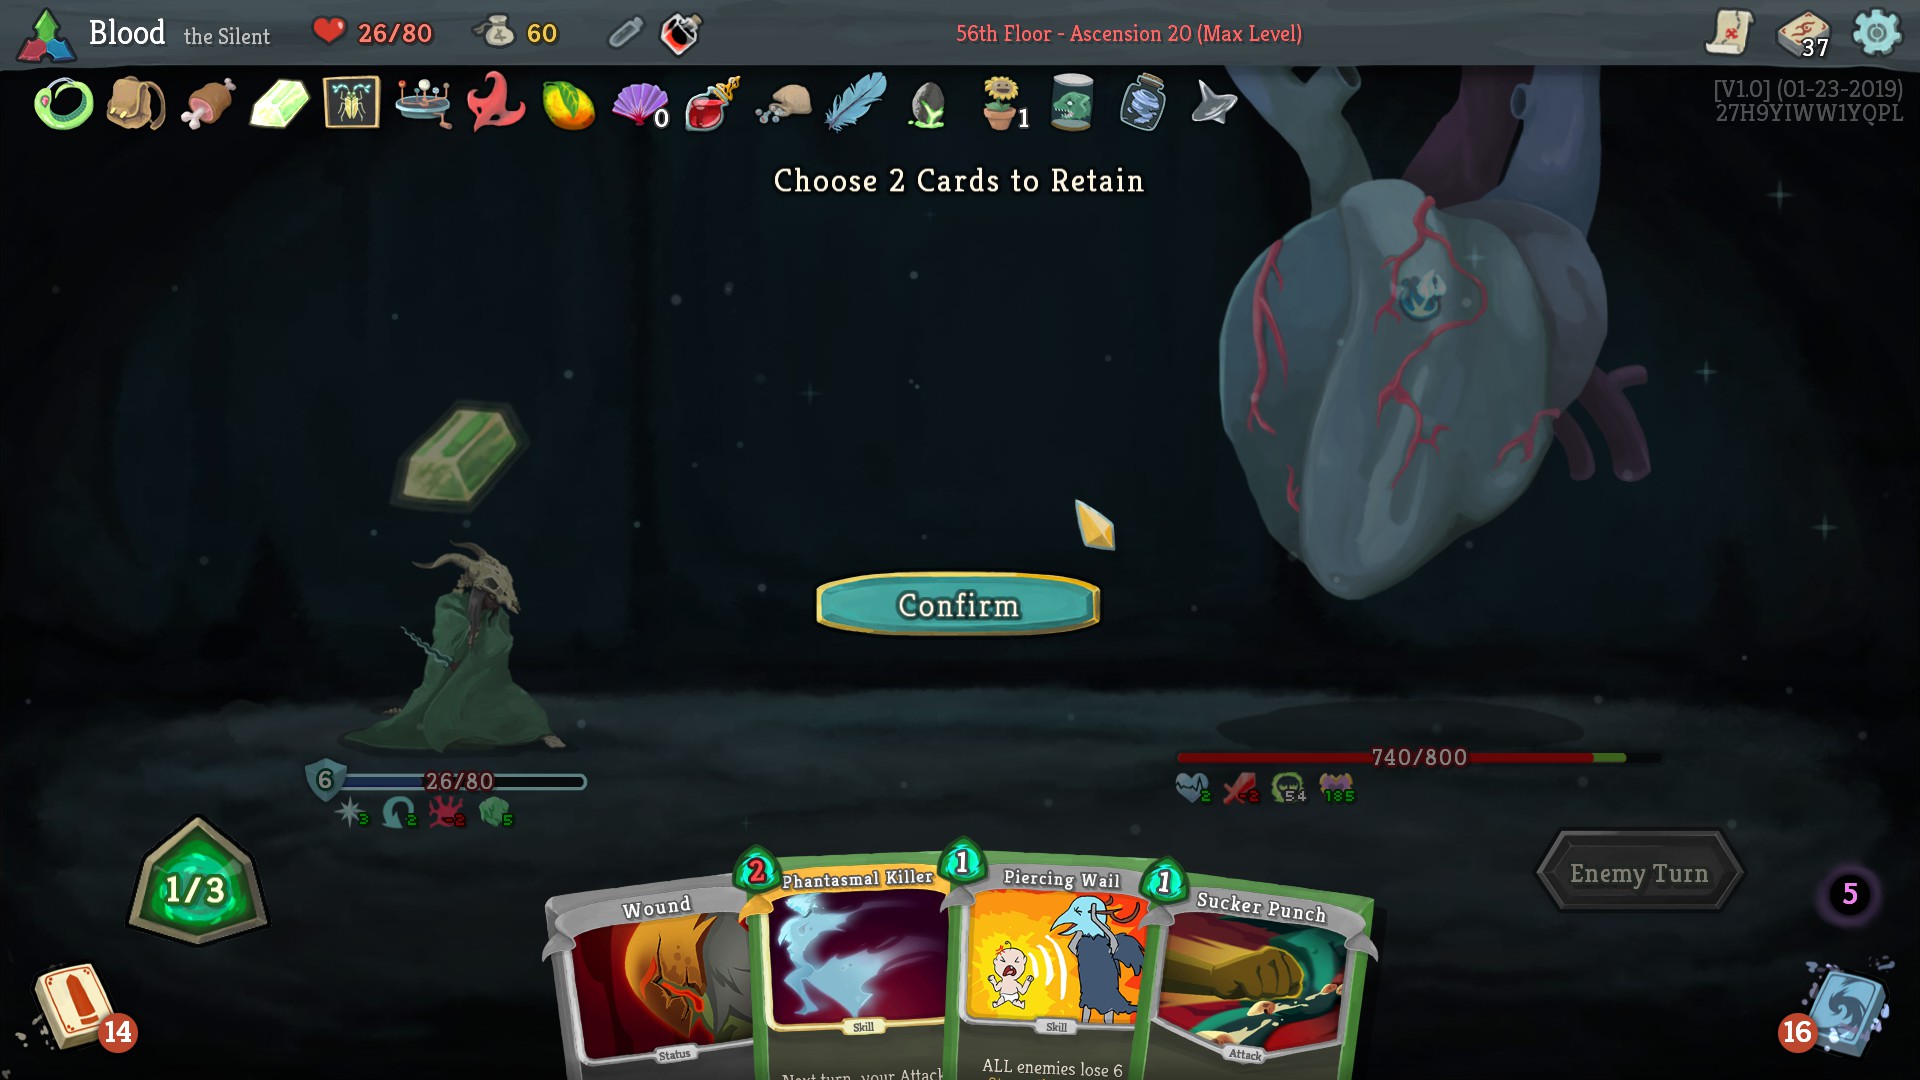
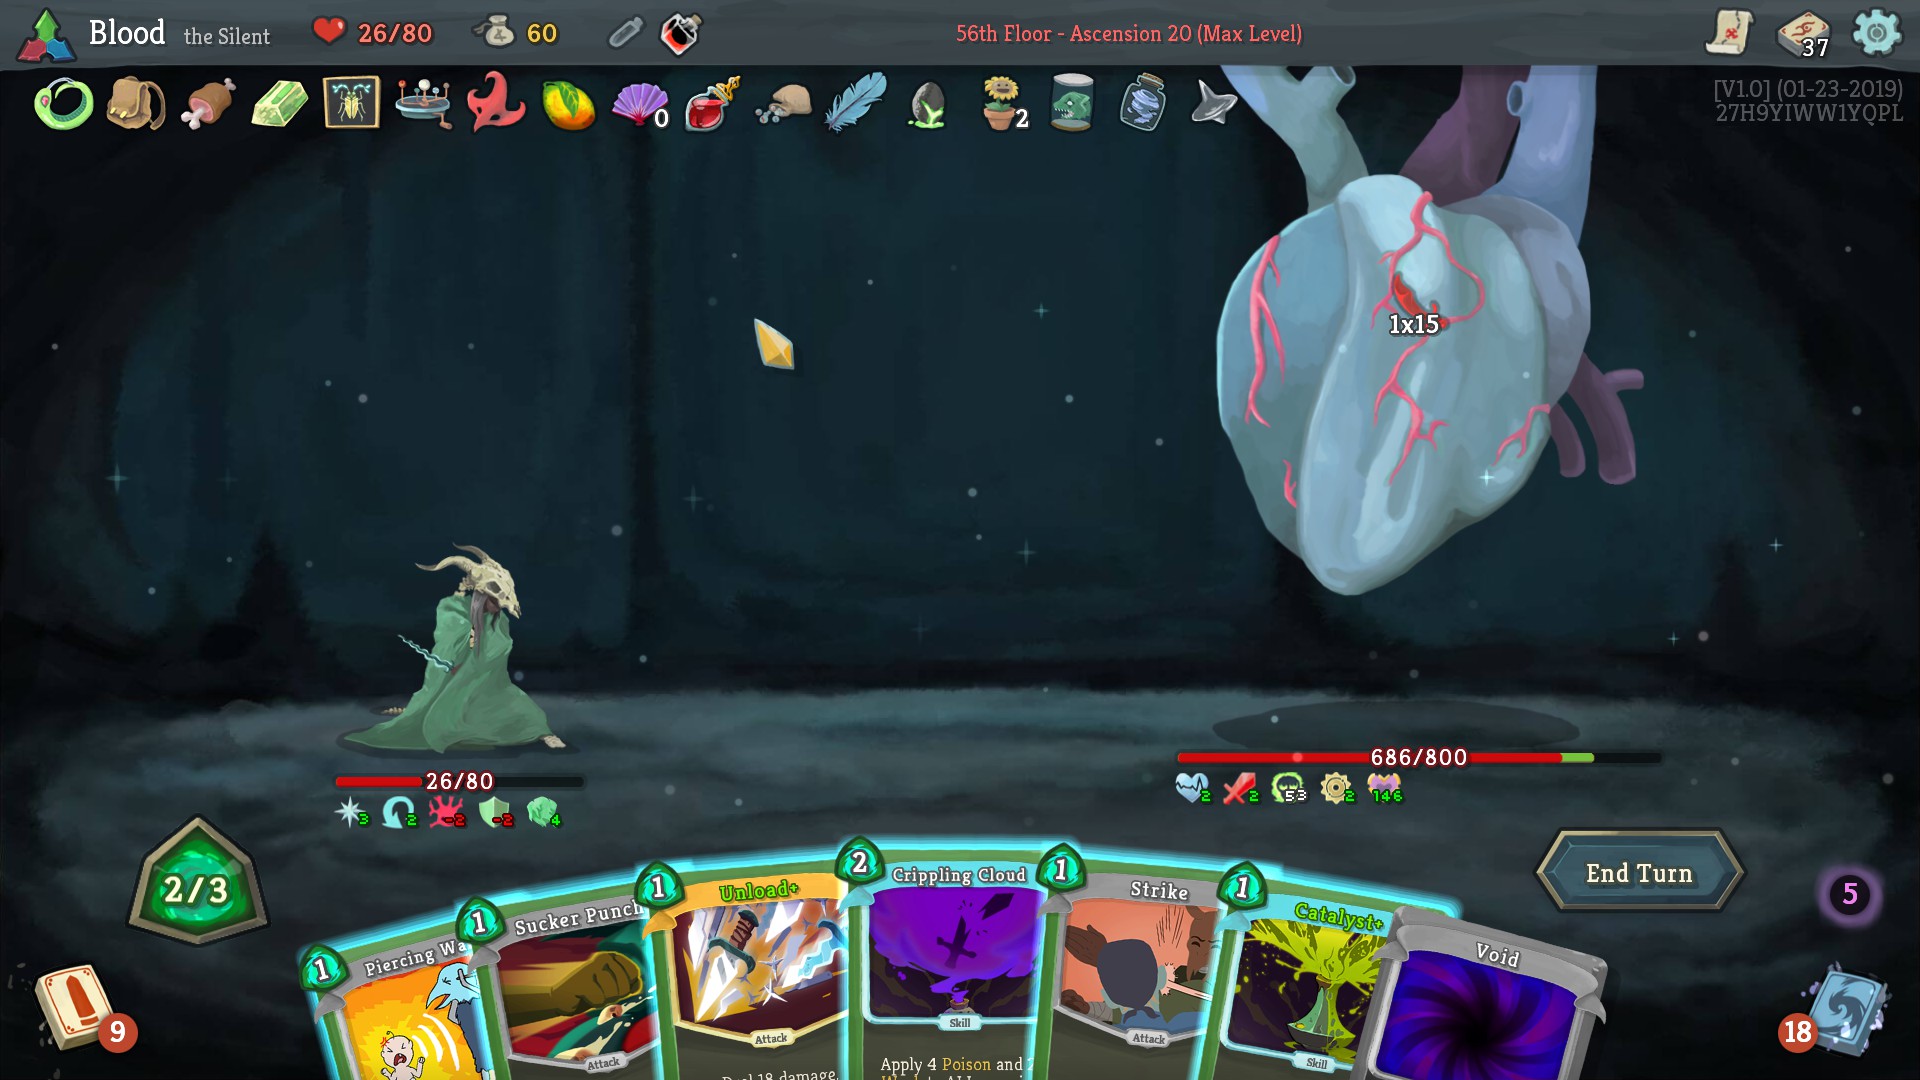
The Silent's cards are more specialised, some are designed around discarding, some are poison cards, and some are based around shivs. This makes a big deck more viable since you can pull off more tricks using your deck, and card controlling isn't a problem thanks to WLP.

What do you think?
Blood Flowers  [autor] 23 fev. 2019 às 9:38 
Yes, that's it exactly. Adaptability is pretty vital in this game.