Source Filmmaker

Source Filmmaker

80 ratings
A Complete Guide for Using Crowbar
By Pte Jack and 1 collaborators
This will be an indepth user guide on the functionality of this MOST useful program. It will contain a lot of pictures, narrrative and will probably deserve the TL:DR award (see my note to the more advanced user below if you think it qualifies.)

Crowbar is a multi-environment program, it will decompile and compile assets for "most" of the Valve Game Engined games out there (84 flavours as of Ver 0.51 if memory serves me correctly). I do know that Crowbar (version 0.51) does not support type 53 models (Titanfall 2) and there are still some problems with type 49 (I think it is, L4D2) animation models. Zeq is working on the type 49 problems as I type, but don't expect type 53 support anytime soon. I do believe he plans on looking into them, but right now wants to get the type 49 problems and some other small gitches rectified first.

As far as I know, Crowbar is the most current and most advanced tool of its kind out there. It decompiles Gold Source (GoldSrc) and Source Game engined models to SMD format and include all the other support files (lod, VTA Flex Animation, Phy, Animation models SMDs, QC, etc). It will decompile HWM models. I current don't know of any decompiler that will export to DMX format. I don't think any exist. Nor does it currently support assets created for the Source2 game engine (ie Dota2) and to be frank I don't know of any 3rd party tools that do yet.

A note to the more experienced and advanced user:

Yes, this guide could be 6 to 8 times shorter, I don't need to be told this in the comments. Like most of the tutorials I do, either written or recorded screen, I do them for the new user, the people who only know how to push the power button to turn on the computer. I personally know just how hard it is to find material for that level of user and is why I do my stuff the way i do. If you need something, go directly to the section you need, be big boys and girls by cutting through the babble and get what you need. If you have a question on a higher level and can't find the answer in the simplified version, ask the question in the discussion area or contact me directly.

Note for everyone:
Flaming, raging, rudeness and discussion highjacking will not be tolerated. These type of activities will be deleted. Violators will be reported and blocked.
4
   
Award
Favorite
Favorited
Unfavorite
Intro - Why Crowbar?
Prior to 2013 there were a few really useful decompiler/compilers available for the Valve Modding Community (Cannonfodder's Complier/Decompiler and Cra0kalo Enhanced Compiler to name a couple... and if you guys are reading this Thanks! Those tools kept my modding interest peeked)

These tools were used to decompile and compile resources for the various Valve Games such as HL, TF, L4D, and the older Goldsource versions and were prime elements used to stock the Mann Store with new Misc and weapons for TF2 and convert models for use in Garry's Mod.

However, with the Steam move to the new Pipeline delivery system in early 2013, the change restructured the filepaths to the various Valve games, the change of the resouce library being changed from GCF to VPK and the realease of more complicated models, such as the HWM models types, these tools became almost unusable. They would either cause system hang ups or would just simply roll over and die during a compile or decompile operation.

The tools themselves had been around since the original GoldSource games were released and the changes were most likely just too great for the original authors to modify and keep up with based on the code they were written in. (This is an assumption, not a fact.) With a lot of tweaking, one could get the old tools to work, but they could not handle the newer models that were being released and a huge hole in modding abilities for the community was developing.

That was until ZeqMacaw stepped up to the plate and released Crowbar.

I found Crowbar when verion 0.12 was released in Nov of 2013 and I haven't looked back at the older tools since. (Well maybe a couple of times, but Crowbar became my decompiler/compiler of choice very quickly.)

At the time of this writing, Crowbar has hit version 0.51 (released Nov 2017) and between the first release and now, it just kept getting better with each new version.

What I love about this tool is that it is actively being worked on and new functionality and/or bug fixes are added with each new release.

It appears Zeq is making this tool an All-in-One/One Stop Modding tool. Moving from just being a Compiler/Decompiler for (now) over 80 Valve Game Engine based games, to now having the ability to unpack the VPK files for these as well. (making it a much needed contender for GCFScape. Don't get me wrong, GCFScape is a valueable program to have in your Library, but it too is an older program even though Ryan (Nem's Tools) has kept it up-to-date with the changing technology. The latest release of GCFScape was ver 1.8.6, released or bug fixed in Jan 2017. )

But, one of the best features of Crowbar that I like is that it is a Portable App. What I mean by portable is that I can put it on any drive, in any folder on my computer and it will run. I do not have to "Install" it onto my computer like I had to with the older compilers and GCFScape (which I believe were written in a variant of C or C# and required an installer.)

Crowbar itself is written with VB.Net and although it was intended to be a Windows Only type application, people have gotten it to work in the Linux and in the Mac OS environments (most likely with add ons to the Systems like Wine for Linux and BootCamp for Mac.)
Another outstanding feature is that if you want to take a crack at programming or just see at what makes Crowbar tick, Zeq makes his source code available for download.

Well that's enough for an opener. If you want to see the development history of this tool, go here ...

http://steamcommunity.com/groups/CrowbarTool#announcements?p=1

and look at the effort and enhancements Zeq has put into Crowbar between his releases from ver 0.12.
Downloading Crowbar
The Crowbar Modding Tool area on Steam is NOT a Hub. It is a Public Group that was started by Zeq. If you want to keep up to add with the tool, you have to subscribe to (join) the group.

Downloading Crowbar is simple.

You can get it one of 2 ways. Either by logging into Steam and finding the Crowbar [Source Modding Tool] Group using the Steam Client or by doing an Internet Search with a Browser.

Steam Client - Groups

1) In the Steam Client, Hover your cursor over your username and select Groups.

2) Copy and Paste or Type:
Crowbar [Source Engine Modding Tool]
in the search bar and click the Group Icon that appears
Note:
The reason I say Copy and Paste or Type and put the reference on its own line to make it easier for you to get is that the Steam search engine places the group Icon way down in the results list if it isn't typed out fully.


Internet Browser - Web Search

1) Open your Browser and go to your favourite Search engine (Google, Yahoo, Bing, whatever)
2) Copy and Paste or Type:
Crowbar [Source Engine Modding Tool]
in the search bar
3) Find the link that says


and click the link

Using either method is going to bring you here...

(1) Click the link to download Crowbar.
But while your here consider the following,
(2) Join the Group , this way you can keep up to date with Crowbar Development and Updates
(3) Join in to the Discussions.
Got a problem or need help, ask about it here,
Found a bug, Report it here,
Think you know of a feature you'd like to see in Crowbar, well there's an area under the Discussions Tab for that too.
(You must be logged into your Steam account to Join and/or use the Discussion areas)
(4) Need immediate help? Check and see if anyone is in the chat area. Maybe they can answer your question right away.

Clicking the Download link will bring you here... Don't Direct link this page as the address does change from time to time and Zeq has no control over that. Link to the Group and you'll always be able to find this.
This page offers a whole lot of stuff, like alternate download sites and links to other useful modding programs. I did not screen shot the whole page or this image would have been a couple of pages long. Go into it and have a look.

What is in this shot are the various links to where you can download Crowbar from. I'm going to follow the main link which is the most current version highlighted in the yellow box.

This link is going to open a window in your default Internet Browser and will take you to Zeq's google drive. It is going to display the following:
The reason why the browser displays this page is that the File Type being offered doesn't have a Browser picture for the browser to display, so it thinks there is a problem and reports it. Just click the Download Button anyway and you'll be presented with the normal download option for your browser. Download it and save it to wherever, I'm just going to put it on my DeskTop.

The file downloaded will be a 7zip file and should have a file name like
Crowbar_ReleaseDate_Version.7z (Like Crowbar_2017-11-19_0.51.7z)

The 7z file is a compressed file, like a Zip or RAR file. It can be decompressed with a program called 7Zip or with WinRAR. I'm not sure WinZip will decompress a 7z file, I think it will. But like WinRAR, I do not think it can create a 7z file. (Which is not required here anyway, we only want to be able to decompress it. That was just another piece of useless information I thought I'd pass on.)
Installing Crowbar
Now that you have the Crowbar_RD_Ver.7z (Crowbar_2017-11-19_0.51.7z) file downloaded to someplace on your computer, it's time to get it installed.

You can put this "anywhere" you want on your computer as long as Crowbar.exe and the accompaning Data folder are in the same file folder.

To install, open a File Compression program that works with 7z files (WinRAR, WinZip, 7Zip)
Select File Open and point the browser to the Crowbar_{RD_Ver}.7z file and open the file.
Inside the compressed file you'll find Crowbar.exe and a Data Folder.
Inside the Data folder you'll find a file called Crowbar Settings.xml. Crowbar writes information from the last open session of crowbar to this file so it remembers what it was doing and how it was set up the next time you open it.

I'm going to install this copy to my desktop, then I'll show you something neat about portable applications.

So, Open compressed file extraction program. (I use WinRar.)
Point it at the Crowbar.7z file on my desktop
Right click the the .7z file and select Extract to Specified Folder
This will open the extraction browser which should be specifying the desktop then the .7z filename as an extraction path. This is exactly where the compressed data needs to decompress to.
Press OK.

That's it. That's all. The extraction program will create the folder whereever you tell it to and insert the exe, the data folder and the xml. Crowbar is installed. All you have to do is drill into the newly created folder and double click the Crowbar.exe file. If you're going to leave this folder on your desktop you can create a shortcut to the exe fils and place that on your Desktop, taskbar or start menu.

Now the cool thing about portable applications like this is as I said before, they can be located anywhere on your computer. I have a folder for portable apps located on my secondary drive located in my {username} folder. This where I place all my portable aps, like Blender, filenaming If I want to take these types of programs off my desktop and keep them out of my out of my program files folders, I can just move the folder that the app is in from where it is now to that PortableApps folder.

Now you can right click the Crowbar.exe file and create a shortcut and place that on your DeskTop and/or send a link to your Start or Task Bar so it is easy to start any time you need it.


Just remember one thing, Crowbar remembers the settings from the last operation when it was closed. If you have the Unpacker set to a folder that has VPKs in any of its subfolders, it will appear that Crowbar is not responding or is crashing. Select the Unpacker tab, and look for the Cancel Listing button and click it.

It might take a few seconds for Crowbar to finish the loop it's in, but it will stop and list the items that it has already read.

Tip
Zeq is an incredible programmer and is constantly updating or fixing minor glitches, but sometime he can slip up and break things as well in the process. The reason why I name my Crowbar containment folder with the version number is that if you noticed in my PortableApps folder from blowing up the Move GIF above, I have at least versions installed all the time. The Current and 2 backward versions. This way if (and I mean IF) I stumble on a bug in the new version and I know it worked in the older version, I can send Zeq a bug report, bounce back to the older version and carry on working without having to go looking past versions to reinstall.


OverView of Crowbar Screens
Now that you have Crowbar download, installed in a folder of your choice and working, let's look at the tool.

Crowbar is comprised of 9 important screens here and 84 possible set up requirements (if you want to setup Crowbar to work with the entire currently supported games.) Each of these screen are a separate tool.


1) VPK Unpacker
2) PreViewer
3) Decompiler
4) Compiler Interface
5) Viewer
6) Crowbar Options
7) Help Link
8) About
9) Game Set up Screen

All screens are important, however the 2 most important for Crowbar to work properly are the Game Set Up and Options screens.

I'll cover the purpose and use of each of the 9 screens in its own section so you can go to it and concentrate on that 1 screen.

We'll Start with the screens that set Crowbar Up. The Options and the Game Set Up screens then work out from there.

The Log Screen area available in ALL Work Tabs is extremely useful, You can Select the text from an operation, Right clcik the screen, then copy it (or the entire Output in the Screen) to your Clipboard then paste that into a Text Editor. Extremely hand when debugging a failed Compile or Decompile.
Tab 6 - Crowbar Options Screen

This is an Optional process but it can be time saving when you're rapted into a project and don't want to be having to use Explore session browsers to load things into Crowbar.

Zeq has built Auto-Open and Drag and Drop abilities into Crowbar so that if you Double Click or select then drag and drop a file type known to Crowbar onto the Crowbar.exe, Crowbar will recognize it and open the itself to the screen required and set itself up to operate. He has also included this to ability to recognize folders that contain known file types.

File type that can be dragged and dropped are,

VPK, Valve Binary .MDL, QC, and Folders

Here in the Options tab, you set up the action Crowbar will take for the 2 different operations - Double Click and Drag and Drop.

Defaults for both operations is everything is enabled. VPK is set to Unpack (currently the only option), and the others are set to Decompile with the exception of QC, which is set to Compile.
You can use the radio buttons to have Crowbar open and set itself up the way you want when it see a file type it knows.

Because Crowbar doesn't have an installer, before it can carry out any Auto Open operation, Crowbar has to be recognized by Windows as a the default program for opening the File Type. Zeq has programmed a simple step into Crowbar to assist in setting up the Default and it is done like this:

When you start Crowbar, it checks to see if it is the Default Program for VPK, .MDL and QC files. If isn't Crowbar will display


at the bottom of the Options screen.

If you want this Crowbar to become the default for these 3 File Types, simply click the Apply Button. Crowbar will write the necessary Open File commands to the registry and the ICon for the file type will change to the Crowbar Icon.

Once applied, this option will disappear and not be visible the next time you launch Crowbar.

Now, If you already had a Default program set up for the File Type, the next time you double click a file of that type, Windows will display the "How Do You Want to Open This File?" screen and list the known programs it can use to open it

Click Crowbar. If you want it to be the overriding default program, click Alway Use this app


NOTE: If you set Crowbar up in custom folders like I do so I can bounce between versions, if I want a certain version to be the default, I have to APPLY the version I'm using each time I want to change it. When you click the Apply Button the path to the Crowbar.exe applied is written to the registry and default set if the Use this app to always open is clicked. If you want newest version of Crowbar to always be the default no matter what, then when you install it, Overwrite the older version with the New to the folder that was used to make it default.

We'll get into Drag and Drop operations when we look at the screens that allow it.

Steam Library Folders
Before we get into this, you need to know if your machine is using a 32bit or 64bit Operating System. You can find this info by going to the Systems screen using the Windows Control Panel.


On a 32bit machine, Steam installs programs to the C:\Program Files folder by default. On a 64bit machine, Steam installs programs to the C:\Program Files (x86) by default {this is where most 32bit programs get installed on a 64bit system}.

As Zeq has no idea what Operating System (32/64 Bit) you have, what games you own, what games you want to mod for, or where you have them installed on your computer, he has sets up all the Valve flavours that Crowbar supports as if you have a 64bit Operating System and everything installed to the Steam Default folders on the C: drive, it's up to you to change this in the Game Setups for Crowbar if you've installed things differently on your machine.

If you have a 32bit OS, then you have some changes you have to make for every game set up in Crowbar because your install folder is different from what Zeq has set the defaults to. But fear not, it's pretty simple and well look at that in a minute.

Steam Library Folders
Steam allows you to set up Game Libraries on your computer so that you can place games and software on different drives of your computer.
You set up Steam Libraries through the Steam Client - Settings - Downloads page....


You can even set up Steam Libraries on Thumb Drives and SD cards so you can transport between computers. (Just make sure they are big enough to hold the game files you want to put there.)

Zeq has created macros in Crowbar that allow you to set Crowbar up to reflect the Steam Library Folders and make game set up easier.

First, let's look at a Game Set up screen and explain what is required. As I mod mainly for SFM and this guide is in the SFM Guides section, I'll start there.

To Access the Game Setup screen, Find the button the that says "Set Up Games". It's available on the 2 Viewer and the Compiler Screens.


Clicking the Dropdown arrow you will see all the Valve games and software currently supported by Crowbar.


Select the game/software that you want to set up (or check on) then click the "Set Up Game" Button

This is the Setup Screen for SFM and it explains the various text boxes, radio and command buttons on the form.


These are the Default Setup Screens for SFM and TF2... As you can see they are almost exactly the same.

Thankfully 99.9% of the Valve programs use pretty much the same paths off their main folders to reach the programs required by Crowbar and Zeq has included utilities that make it fairly easy to set up Crowbar to meet your system's requirements.

At the bottom of the Game Set Up screen, there is a box called Steam Library Folders, as I pointed out earlier, Steam allows you to create Library Folders across multiple drives on a computer. You can set up 1 folder per drive. Zeq has Implemented a macro that is useable in Crowbar to point out to these Library folders and makes it changing things easier if you decide to move your games around your computer drives.

As most people have 64bit computers and usually only have 1 library folder, Zeq has set Crowbar to default the Library1 macro to the C:\Program Files (x86)\Steam folder. When used, this macro passes the that path to the text boxes it is assigned to. What this means is that any of the Text Boxes in the upper portion of the screen that have a <library1> start to them means that the path Crowbar receives is C:\Program Files (x86)\Steam and then anything that follows the <library1> macro name as path and filename for that text box.

If the value of <library1> is set to C:\Program Files (X86)\steam
then this statement
<library1>\steamapps\common\Team Fortress 2\tf\gameinfo.txt
would equate and point to
C:\Program Files (x86)\steam\steamapps\common\Team Fortress 2\tf\gameinfo.txt
as far as Crowbar is concerned.


The Crowbar Steam Libraries box should reflect your actual Steam Library set up. It doesn't matter what game set up screen you choose to set up the libraries in Crowbar, the info in this portion of the screen is used by all set ups in Crowbar.


To add a new library folder to Crowbar, Click Add, select Browse in the new macro window, surf to the library you want to add, drill into the folder so it is selected and click OK.


Now for those still using 32bit machines. Steam usually installs to the C:\Program Files\Steam folder. All you have to do to set Crowbar up is point your Library Macros to where Steam lives on your machine and all the Valve games and software settings in Crowbar will find their corrrect locations.


Now that The Library macro is set up for your Steam Libraries, the rest of the set up is going to be a snap.

Setting Up Valve Games and Software Already In Crowbar
For simplicity sake I am going to say each Valve game uses it's own versions of Valve Game Engine (the game executable), Gameinfo.txt file (that calls various config files for and sets up the game for game play), Studiomdl (for compiling), Half Life Model Viewer ((HLMV) for viewing models), Hammer (for creating maps) and VPK extractor (for unpacking game VPK cache files based on the modified Valve game engine that the games used). Crowbar needs to know where the program files are located for each game you plan to mod for so that it can pull the correct program versions for the task you're trying to complete. With Old compilers, one would have to ensure that the game you were modding for was the current game configuration file setup on your computer by using that games SDK to setup the configuration. Which meant if you didn't run the SDK configuration utility, the files would be compiled for the one that was currently configured as the Default or the compiler would crash regularly.

Crowbar doesn't need this type of setup because each game is setup by using paths that point directly at the files required. These paths are found in the Text Boxes on the setup screens and Crowbar ensures that the correct versions of the required programs are called using the information contained in the Text Boxes. (See points 5 - 11 and 14 below)


Now, if you look at this picture closely, you'll see that the only game Crowbar supports I have on my C: drive is Source Filmmaker and the rest of the games are on my D: drive. Now I could sit here for a couple of hours going through and set all these games up manually by selecting each game I own, then opening the Setup page for that game and using each of the browse buttons to find the required program for it the text box it represents. But I have 5 Computers that I would have to do this on and they are all set up differently. (and I why I say HOURS instead of minutes to set things up.)


However, there is a secret way of doing this really really quickly. Actually not a secret, just well hidden if you don't know where to look.

By selecting the library I want to assign the right clicking on the library I can change the library maco in all text boxes of the currently open setup screen or of all games currently set up in Crowbar.


Now that I have my Steam Library folders set up in Crowbar, to setup my current system I only have to perform 2 operations which I can perform from the SFM Setup Screen.
First I open the setup screen from any game and use the DropDown List box to Select Source Filmmaker.
I then Select and Right Click on the <library2> marco in the Library section.
Using the Change All Game settings, I select Change to this macro in all game setups. This will change the prefexes in all the games setup in Crowbar to point to the Path setup in <library2> (D:\program files (x86)\Steam) and press Save. Every game set up in Crowbar will now use Library2 and point where it needs to to find the required files.

Now with the SFM set up screen open, I can select <library1> and right click to open the options, select Change to this macro in selected game in the upper portion of the options and the text boxes for SFM only will change to use <library1> (meaning it will point to C:\program files (x86)\Steam) as its prefix. I press Save and Close and I'm done. Crowbar is now set up to the way I have my Valve games installed on the system.

Just like this. (watch the Use Count and the Text Box Prefixes change as I change the library used.)


Unfortunately if you have a setup that is more complex that this, you can't multiselect certain games from the drop down and set those up. As fara as I can tell, you can only set up the current screen open or everything that Crowbar knows about. One or All...

If I want to make sure that the paths are correct in a setup screen, all I have to do is press the "Browse" button beside the Text Box i want to check. Pressing the browse button "should" open the file browser and bring you to the correct folder containing the executable you want to confirm.
If it doesn't, point the browser to the correct folder where the executable you're lookin for lives.
Deleting, Adding, and Changing Game Information
We're almost finished with the Crowbar Set up but what if a new game comes out or I've accidentally deleted a game from Crowbar and I need it back before Zeq puts out the next version. Well, set up is pretty easy.

First, there are a lot of games in the Crowbar Library that I don't mod for and I want to trim down the list so I don't have to search for the ones I do mod for. I can delete games from the Crowbar list simply by loading the setup page for the game I don't want (or if the setup screen is already open, use the game list box to find the one I don't want to load the set up screen for it) then press the Delete Button.

I'll delete SFM here because I need something to Add in a minute.


Realizing my mistake now and the fact I mod for SFM I need to add it back in.

I can do this one of 2 ways. I can use the Add Button or I can Clone an existing game's setup and change the required fields in the Text boxes.

Using the Add Button

When you press the Add button at the top of the set up screen in Version 0.51, the setup page is going to open with all the set up text boxes defaulting to Left 4 Dead 2. This is only because this is the game that Zeq mods mostly for and he doesn't like to leave anything empty so Crowbar will not crash because of a blank text box if you press save. You can change this to a more suitable game (ie one that is in the same library that you're setting the new game up to) by simply selecting a game using the game list box.

Using the Clone Button

When you press the Clone button the setup page will open using a duplicate of all the settings for the setup page that you had opened as defaults. The name will be changed to "Clone of {name of the game cloned from}"

Using either method you must now use the Browse Button next to the text boxes and point the box to the required programs.
  1. Select Add or Clone
  2. Type in the name of the new game
    This is the name that will be displayed in Crowbar's Games List Box used for selecting games
  3. Select the Valve Game Engine for the game being set up.
    • GoldSource or GoldSrc (The old Half Life, TFC, CS 1.6, Ricochet, Day Of Defeat type games)
    • Source (Half Life Source, Day of Defeat Source, TF2, HL2, L4D, Portal type games)
    Crowbar does not support Valve Source2 Engine games (Like Dota2)
  4. Now use the Browse button and point to the new game's
    • liblist.gam file for Goldscr Engined games or
    • gameinfo.txt file for Source Engined games.
    These files are usually found in the game's main folder\game name path, (ie team fortress 2\tf, for SFM it's Source Filmmaker\game\usermod)
  5. Browse to the game's main executable file (ie HL.exe, HL2.exe, Cure.exe, Potal2.exe, etc)
    This is usually found in the game's main folder. (ie Steamapps\Common\Team Fortress 2, Steamapps\Common\Source Filmmaker, etc)
  6. This text box is for any special start up commands the game uses and has to be manually typed. For Most games, this box can be left blank.
  7. Browse to the Studiomdl that the game uses to compile models.
    NOTE: As mentioned earlier, most games are unique and require their own flavour of Studiomdl to compile their models. However, some games require the use of the Studiomdl found in the SourceSDK versions. You're going to have to research the new game being set up to determine exactly what version of Studiomdl is required. For example TF2, SFM, L4D(2), Portal(2), use their own versions of Studiomdl which are usually found in the games main folder\bin path.
    Whereas many of the Goldscr type games like Devil may Cry, Day of Defeat, Half Life (the originals not the games with Source in their game names) use a common version of Studiomdl found in the Steamapps\common\Half-Life SDK\Model Tools\ path.

  8. Browse to the version of Half Life Model Viewer (HLMV.exe) the model uses {See the note in Step 7 The sme thing applies to HLMV)
  9. Browse to the version of Hammer (Map Editor) the game uses. {Again the Note in Step 7 applies to Hammer.}
  10. Browse to the version of VPK.exe the game uses. {Again the Note in Step 7 applies to the VPK.exe file. Each game is unique and uses its own flavour.}
    In Version 0.51, the box refers to GMod's GMad.exe as a valid option. I tried setting up GMad and found it crashes crowbar. I've requested that the reference be moved until it works properly.
  11. Browse to the Steam Executable.
    This is the main Steam.exe used to launch the Steam Client and found in the Steam Main folder (ie {Drive}:\Program Files or Program Files (x86)\Steam).
  12. (Optional) When you browse and select the required information above, the text boxes will be hard coded to the Folders selected (ie C:\program files (x86)\steam\steamapps\common\and path\whatever.exe). You can select the library, right click and assign the Library macro to the entries.
  13. Zeq has made it impossible to close the Setup screen without saving the entry. So, you have 2 options, Save or Save and Close.
    • If you press Save, the game will be saved to the XML file and will be available to you when ever you start Crowbar. You can now use this Setup screen to set up another game (just like pressing Clone).
    • If you press Save and Close, The game will be saved to the XML and the Set Up screen will close to the Crowbar Main Screen.

Changing a SetUp

To change a game's setup simply open the current setup and follow steps 3 - 13 above or try the tip below. (Yup, you have to do it manually.)

If it's just a library change because you've moved the game between your Library folders, you only have to do Step 12 and 13.

TIP : Speeding up Set Up Operations
If you notice, when you click the browse button beside the the text boxes, the file browser is whisked away to the folder path of the game that is currently being used as the Default. Once you've got the first text box pointed to the correct folder, just copy the
drive:\{Program file folder}\steam\steamapps\common\{game folder}
portion of the box and replace the same info in the other boxes.

Instead of having to pointing to the required file, you are now just confirming that Crowbar is pointing to the correct version folders and that the required file exists.

If the file browser doesn't find the folder or filename it needs, then you have to point it to where it needs to look.

Using the Various Crowbar Functions
Tab 1 - The VPK UnPacker
Because games and the assets used in them became bigger and more complex, in 2013 Valve changed the Game Cache file packing method from the GCF to the VPK Packing Method. A VPK file is nothing more than a container file, and affords easy updating of game assets and orhter utitlies. It is also allows for the Valve Game engine to pull assets on the fly instead of having massive folders holding assets "just in case" they might be used. This is great for the end user, the games take up less hard drive space and games run faster.

When the change occurred, there weren't any unpackers available for modders to gain access to the assets in the new format until Ryan Gregg of Nem's Tools amended GCFScape to do the job starting with version 1.84 through to the current 1.86.

VPK has become the standard for passing assets around, it is now being used to pack things like GMod assets, maps and is used heavly if you grab things from sites like mods.tf, maps.tf, SFMLab, deviantarts, gamebanana, etc.

Zeq wants to make Crowbar a one stop shop, so in Version 0.48 started to include his VPK Unpack utility.

Remember, Crowbar IS a Work In Progress so there are bound to be a few hiccups along the way. I found that the VPKs from mods.tf were not being extracted properly in, I think Version 0.49, I raised a Bug report using the Crowbar Group Bug Reporting section and found it fixed in the next release.

Using the Tool

The tool itself is pretty straight-forward and extremely powerful in what you can do with it but it currently only unpacks VPK type files. However look at the way Zeq has Crowbar setup, it looks like there may be further development happening in the wings (maybe future Crowbar versions may allow packing of VPK files or the unpacking and packing of GMA type files as well. This is pure speculation and it may not happen at all.)

The tool itself has 3 levels that it can extract VPK files from,
  • Single File, (ie Somefile.vpk)
  • Folder Level where there are no other VPKs in any of the underlying subFolders (ie the TF folder)
  • Folder/subFolders Level (ie the SteamApps\Common folder where the underlying game folders all contain VPK files.)
-OverView-

Let look at this tool and dissect it.


  1. VPK Input - This line consist of list box, text box and 2 command buttons (Browse and Goto)
    this is the line that you use to identify what it is you want to UnPack. The main things you're going to be concerned with is the Browse and the Goto command buttons.
    Clicking the Browse button will open a file browser window. You can point this directly at a VPK you want to open, a folder that contans multiple VPKs or a folder that contains file folders that contain VPKs. Press OK to commit the selection.
    Crowbar will then determine what type of operation it needs to perform (File, Folder, or File/subFolder) and display the operation type in the List Box. The text box will display the Drive, Path (and will stop there if folder operations) and the Filename of the VPK (if a file operation).
    Once the text box is populated, you can use the Goto button to open the location in a file browser.
  2. Output To - Again a list box, text box and 2 command buttons (Browse and Goto)
    This line is used to Identify where you want the UnPacked Files to go.
    Here you need to tell Crowbar if you want to UnPack the files to a "Work" folder or to a folder that Crowbar will create under the folder the VPK is unpacked from. You do that using the List box.
    • If you choose Work Folder. Crowbars defaults the text box to your C:\users\{username}\Documents folder. You can change this by using the Browse Button.
      Clicking the Browse button will open a file browser window. You can point this anywhere on your computer however, if you want these extracted files to work in the game your extracting them for, you have to point the work folder to the correct game folder for that game's custom content. (for example I want to extract the TF2 Game Cache VPKs to SFM. I would create a folder in the SFM\game folder (say TF2Extract) and point the Work Folder to that new folder.

    • If you Choose "Subfolder (of VPK Input)", Crowbar will create a new folder under the folder the VPK is located in. Crowbar will default the name of the folder to "unpacked (crowbar version number like unpacked 0.51)" and create it when you start the unpack. You can change this default by editing the OutPut To Text box.
  3. This text box displays the selecton path from the VPK root folder in Window 4.
  4. Folder Tree - this will expand as you select folder paths
  5. Folder Contents - Just like a normal File/Folder Browser this window will show the contents of the Folder Selection in the Folder Tree. This is where you select things for extraction.
  6. If you want to create a log file of your operations, check this box on. This is a great tool if you want to report a bug you've found.
  7. There is a hidden search box here. If you hover your mouse over the area, a blue box will appear. Click in the box and type what you want to search for. It is a literal search, meaning wildcards like * and ? are not supported. For example, if I want to find all model files in a vpk file I would select the root folder in the Folder Tree, hover my mouse over the Search Area to expose the box, type mdl in the box (not *.mdl) and press the search button (the magnifying glass). This will create a Search Folder in the Folder Tree window showing the number of hits for the search. I can then click the + to expand to the actual files found. You can have multiple searches and the searches can be removed by right clicking a Search Folder and selecting Delete search or Delete All Searches.
  8. Once you've selected what you want unpacked, the Unpack button will become available. After you click that, Crowbar will start the operation and the Skip Current and Cancel Unpack buttons will become available.
    • Skip Currrent VPK - While extracting you can skip the operation on the VPK that Crowbar is working on. Crowbar has to finish the loop before it will move on to the next VPK if multiple are selected,
    • Cancel Unpack - This will cancel the whole operation. Again Crowbar has to finish the loop it is working on before it aborts.

    When Crowbar finishes, the Use All in Decompile button will be available.If you plan to decompile the models extracted, click this button and the info will be passed to the Decompile tab.
  9. Operation Log - This window will display everything that Crowbar has done. You use this window to inspect the operation for errors. If want to report a bug and haven't selected the Create Log File option (6), you can select and copy this info to the clipboard for pasting to a text file if required.
  10. This area contains a List Box, 3 Command buttons (Use in Preview, Use in Decompile and Goto). After the unpack finishes, the list box will display what has been unpacked. For example if you unpack a materials folder, the VMTs and VTFs will be displayed, if a models folder, all the mdl files that were extracted. HOWEVER, if you unpack say a Root folder, or any folder that contains .mdl files, ONLY the MDL files will be displayed in the list box. Only when you select a MDL file will the Use Buttons will be available.
    • Use in Preview - when a mdl file is selected and you click the Use in Preview button, Crowbar will open the Preview tab and list the info for the mdl.
    • Use in Decompile - when a mdl file is selected and the Use in Decompile button is clicked, Crowbar will pass the info for the mdl file to the Decompile tab and open the tab.
    • Goto - Selecting a file in the List Box and clicking the Goto button will open a file browser and take you to the folder the unpacked file selected is in.
Tab 2 - The Previewer
This Tab is used to view information about your model. You can launch the Half Life Model Viewer (HLMV) for a specific game and view the selected model. You can view selected models as what they are named or as replacement models. You can just launch a specific HLMV or you can launch a specfic game. But we'll get in to that as we walk through what each panel does.

The Preview Tool

  1. The first line in the tool as a Text Box (MDLFile) and 2 Command Buttons (Browse and Goto).
    you can load models into the previewer many different ways.
    • Drag and Drop a .mdl file from a File Browser onto the Text Box
    • Manually typing the path and filename of the .mdl file into the Text Box
    • Using the Browse Button to open a File Browser surfing to the model location, then double clicking the .mdl file you want to load.
    • or if you have a model loaded in Crowbar, by using one of the "Use In Preview" buttons in Crowbar

  2. Once a .mdl file is loaded, Crowbar will dissect the model and display text information about it in this Window.
    This information can be particularly useful when trying to find out why a model isn't working in a particular game. All this inforamtion is stored in and retrieved from the model and includes:
    • MDL file type ID
    • MDL file version
    • MDL stored file name
    • MDL stored file size
    • MDL actual file size
    • MDL checksum
    • List of the Model Files it contains
    • Material Folders ($CDMaterials lines in QC file -- folders where VMT files should be, relative to game's "materials" folder)
    • Material File Names (file names in mesh SMD files)
    The Path to the model in line 1, the MDL Stored File Name, the $CDmaterials information and the Material File names are vital information when troubleshooting a broken model.
    (Note to self: Add Using the Crowbar Previewer to my guide on My Model is nothing but Bones and My Model has CheckerBoarded Textures and put link to the guides here.)

    Once a model is loaded you can use the "Goto" button to open a file browser and it will automatically goto the location the loaded MDL file is in.
  3. This line has a List Box (All the games Crowbar is set up for) and a Command Button (Setup Games)
    Use the list box to point to the game you want Crowbar to use the HLMV for. This will determine what flavour of the viewer will be opened and used when you click the Command buttons on line 4 and 5.
    Use the Setup Games button to launch the Setup screen we've already talked about when we set up Crowbar. See that section if you have to set up a new game or make changes to the one you want to use.

    Now, I've broken this line of Command Buttons in to 2 sections because they work differently when used. Personally I think they should be reordered because when using the first 2 buttons in Area 4, HLMV will usually crash or the model does not display properly. This is not Crowbar's fault, it's Valve's, because of the way that each flavour of the game engines used require model and material files to be placed in a hierarchy. But we'll go through them any way.
  4. Area 4
    The first 2 buttons (View and View as Replacement) will launch the Half Life Model Viewer (HLMV) for the game selected in the List Box above.
    If the folder containing the model Corwbar has loaded is outside the selected game's hierarchy of folders, Crowbar will create a folder in the games hierarchy and place the Model and Materials into that folder. It will then add a command line to the game's gameinfo.txt file so the viewer should be able to find this new folder then launch the viewer and attempt to load the model. (This usually fails for Source Filmmaker because of the finickiness SFM has for how model and material paths have to be perfectly correct. Games like TF2 the buttons work fine and the model will be displayed.

    Now the difference between View and View as Replacement buttons is how Crowbar actually places the model into the hierarchy of folders. I believe "View" adds a folder path like "game\gamefolder\crowbar\-preview" to the file hierarchy and places the models and materails folders into that folder, where "View as Replacement" adds a path like "game\gamefolder\crowbar" into the hierarchy and loads the models and materials folders there.
    Games like TF2 are flexible and it seems it doesn't matter how models are loaded into the hierarchy, the HLMV works. SFM, on the other hand, does not allow replacement models and if the path and/or the model filenames are not perfect (as reported by the model in the info sect), then the SFM HLMV is crash when it is launched. This is where the Command Buttons of Area 5 come into play.

    The last button in Area 4 is "Use in Decompile". Clickng this button will send the model information of the loaded model to the Decompile Tab.

  5. There are 3 Command buttons in this area Open Viewer, Open Mapper and Run Game
    These are fairly self explanitory.
    • The Open Viewer button will open a blank session of the HLMV for the selected game.
    • The Open Mapper button will open a blank session of the Hammer Mapping tool for the selected game.
    • and the Open Game button... Guess what that does... No, it does not goto the fridge and dig you out 3 scoops of Ice Cream and serve it to you. It runs the game selected in the list box above.
  6. This is just a simple log window that reports actions taken by Crowbar

This is an example of using the Previewer as a debug tool for a model that doesn't work in SFM.

This is based on a VPK download from mods.tf. As we ALL know, mods.tf downloads are replacement items for common misc items used in TF2. They don't work in SFM when they are just extracted and ported into SFM.

Tab 3 - The Decompiler (Part 1)
This tool may require 2 sections to explain. It just does SO MUCH!

The Tool
  1. Mdl Input -
    Just like the unpacker, this tool allows you to decompile models at the single model, folder and folder/subfolder levels. You can load models just like the Previewer and the Unpacker,
    • Drag and drop a .mdl or folder from a file browser into the text box.
    • Manually type the path or path and .mdl filename into the text box of what you want to load
    • Use the Browse button to open a file prowser and surf/point to what you want to load.
    (If there are .mdl files in folders under a folder put into the Text Box, the selection mode will change automatically from File or Folder to Folders and subFolders depending on what Crowbar finds.)
    Once a path or an item is in the Text Box you can use the Goto button to open a File Browser and go to that item.
  2. OutPut To -
    Just like the Unpacker you can place the decompiled model files anywhere on your computer. The List Box has 2 options, Work Folder and SubFolder (of MDL Input)
    • Work Folder - This option allows you to use the Browse button to point to a folder or type a path into the Text Box that you want the model(s) to decompile into.
    • SubFolder (of MDL Input) - This will instruct Crowbar to create a folder under the folder that the .mdl file was loaded from. The Default folder name is decompiled (and the version number of Crowbar you're using Like "decompiled 0.51"). You can change the default by typing the name you want the folder called in the Text Box after selecting the option.

      If you've changed the default folder name and want to go back to the default "decompiled 0.51" setting, click the "Use Default" button. Ive asked Zeq if there should be a Goto Button there as well so you can get to the output folder quicker. Let's see what he comes back with. But as this folder is only one level down from the .mdl file, you can use the visible Goto button to get to the main folder then here.
  3. Re-Create Files - This Area is the meat of the decompiler. This is where you tell Crowbar how to decompile something, what to files to create, what to put into them, how to segregate different models when writing files, etc. There are 21 check boxes and a command button. I don't want to get into modelling so I'm going to keep the explanations as simple as possible.

    The area is broken down into sections, each section has a purpose and can either be turned on or off by selecting or deselecting the Check Box nex to the heading.
    • QC File
      Check this on if you want a QC file to be automatically created for you as Crowbar Decompiles the model. The QC file is the driver file behind Compiling a model, it instructs the compiler how to put a model together.
      • Group into QCI Files - Crowbar can create a Single QC file for the model OR it can break the QC into multiple QCI (QC Instruction) files. (To keep explanations simple, these QCI files are basically a series of files that are called by a compiler and contain various commands that are generic to a series of models so you only have to write it once and it can be called during the compile sequence for all models it pertains to.)
      • Each $Texturegroup Skin-Family on Single Line - This check box instructs Crowbar on how to write Texture Groups into the QC if they are encountered during the Decompile operation. If checked the textures are written in a group on a single line command, if unchecked, they will be grouped with each texture written on a separate line. Example:
        $Texturegroup "skinfamilies" { { <"some material"> <"some other material"> } { <"some Changed material"> <"some other material"> } } vs $Texturegroup "skinfamilies" { { <"some material"> <"some other material"> } { <"some Changed material"> <"some other material"> } }
      • Only Changed Materials in $texture Group Lines
        In the code above, the Some Other Material is the same material used in the 2 different skins. If this box is checked, then the only thing written to the QC would be:
        $Texturegroup "skinfamilies" { { <"some material"> } { <"some Changed material"> } } vs $Texturegroup "skinfamilies" { { <"some material"> } { <"some Changed material"> } }
        The Some Other Material would be dropped because it doesn't change between skins.

        It can get a little more complicated when there are a lot of different skins and different changes in a model, but Crowbar figures this out for you and writes the QC accordingly.
      • Include $definebone lines. - When a model is compiled if a bone does not have mesh assigned to it or the bone is not physically connected to another and it is not an inbetween bone, the compiler will drop (optimize) the bone from the model.

        For example, in my Swat Van I have a lot of placement bones for lights and stuff that have no mesh attached to them, are not inbetween bones and are not physcially connected to other bones. The $definebones option instructs a compiler that they must exist and where they are located so that they are not dropped.
        If one bone has a $definebone statement in a QC, on compile, ALL Bones that you want in the model must have a $definebone statements as well or they will be optimized out of the model if they don't.
        On Decompile, ALL bones that are in the model will be put into the resulting armature (skeleton). Having this option checked will create the $definebones statements for all bones the model has in the QC.
      • Use MixedCase For Keywords - this is a visual aid in the QC to help identify Commands versus Comments.

    • Reference Mesh SMD File - If you're planning on modding the model, you definately want to have this checked on. This is the highest Level of Detail (LOD) mesh the model has. However, there may be times where you just want to decompile a QC. Uncheck this box to prevent this SMD from being created.
      • Remove Path from Material File Names - If this is left unchecked, the SMD will contain the path information to the material being used for each material in the model. When you import this into a 3D editor (like Blender) and look at the Materials for the model, the entire file path will be in the Blender material name. Blender Source Tools has a limited number of characters it can import in a text string and with filenames for materials getting longer and longer. (like this
        models\workshop\player\items\all_class\etf2l_2014_6v6_group_winner\etf2l_2014_6v6_group_winner_color.vtf)
        Blender Source tools might trunicate it down to
        models\workshop\player\items\all_class\etf2l_2014_6v6_group_winner\etf2l_2014_6v6_group_winner
        as there are muliple materials that use this name and the name is not the actual name of the VMT intended, the model will compile but will become black and purple checkerboarded and unfixable unless recompiled and the materials fixed in Blender.
        If this option is checked, the material name in blender will become
        etf2l_2014_6v6_group_winner_color (as it should be)
        The path to the material will be written into the QC using the $CDMaterials command as
        models\workshop\player\items\all_class\etf2l_2014_6v6_group_winner
        On compile the model will recieve the correct path and filename information and will be able to find the material and will display properly.
        Note: Crowbar does its best to remove file path information. I have found that sometimes it does miss the mark and includes part of the path in the SMD when Imported into a 3D editor. ALWAYS check material names and ensure that only the filename is present in a Blender material.
      • Apply Right Hand Fix (Survivor L4D2 Characters only) - As the itle suggests, there is a problem with the right hand on L4D2 Survivor characters. Check this on if you are decomiling them to fix the problem.
Continued in the next Section
Tab 3 - The Decompiler (Part 2)
  1. and
  2. Are in the previous Section
  3. Reference Mesh SMD File - Continued
    • Bone Animation SMD Files - These are the SMD files that contain things like Sequences and Taunts. They are usually Bone Only type files and contain the animations used by the model.
      • Place in "anims" SubFolder - this is usually where 3d Editors like Blender place animation model files when they are exported. It helps keep animation files and mesh files separated (housekeeping) and is generally a good idea. (I always check this on.)
      Next Column
    • Texture BMP Files (GoldSource) - The model structures of the old HalfLife, the original Team Fortress, Counter Source 1.6, Ricohette, DOD, etc models are quite different than the models compiled for the Source(1) engine. Back then models were small, chunky and not well defined and the materials for them were packed into the .MDL files. If you are Decompiling models for the original Valve (GoldSrc) engine and want the BMPs textures to be extracted, check this on.
    • LOD Mesh SMD Files - LOD stands for Level Of Detail. Game models have multiple meshes they use in the world, the mesh used is based on how far it is away from the viewing camera. The further away, the bulkier a model can be, the closer the more detail needs to be shown. As mentioned before, the Reference model has the highest level of detail (or usually LOD0) lower level meshes usually have names like LOD1, LOD2, LOD3, etc. The Higher the number the less detail.
      Check this on if you want these LOD files decompiled.
      Note: SFM does not use LOD levels, you can leave this uncheck if modding for SFM.
    • Physics Mesh SMD Files - This is also known as the Collision Model. It is an extremely low level (usually just boxes, cylinders and spheres) that outline a model and are yused to determine if a model has bumped into something.
      Check this on if you want the Phy files decompiled.
    • Vertex Animation (VTA) File - This is the file that contains any Flex Animations, (ie Face movements controlled by sliders, not bones). If a model has Vertex Animations, this file will create the shapekeys (or Blendshapes) for the model when imported into a 3D Editor.
      Check this on if you want the VTA files decompiled.
    • Procedural Bones, The VRD file - The bones in this file are Not to be confused with Jiggle Bones. The bones in this file are the Helper Bones like twist bones and contain information on what they should do if a main bone rotates or moves a certain way or gets too close to something.
      Note: Jiggle Bones and most procedureal twist bones are part of the main reference SMD will be decompiled and placed in to the model's decompiled files with the rest of the bones if they exist. Jiggle Bone definitions writtien into the QC file on Decompile if the VRD check box is checked or not.

    • Options - The Next Colunm
      • Folder For Each Model - A housekeeping option that will create a new folder for each model that is being decompiled.
      • Format for Strict Importers - Some 3D editors have strict rules for importing the SMD and VTA files. I use Blender with Blender Source Tools as the importer and I have never had to use this option. The only way to determine if you need it is to try and Import a SMD file. If you have problems with your importer, click this on, decompile and try the import again.
      • Write a Debug File - Checking this will create a Text Based log file that can be used for diagnostics and Bug reporting.
      • Decompile - info comments and files - This will create a file called {modelname} decompile-MDL.txt and it will add a few commented out lines to the QC for things like material VMTS used by the model. The {modelname} decompile-MDL.txt list the various elements found during the decompile process and their names. I think this is more a debug tool more than anything else.
      • $DeclareSequences QCI file - All Valve models must have at least one sequence included in the model file be it a RagDoll or an idle or some animations, but there ust be at least one. When working with QCI files, the Sequences are usually coded into the {model}_Animation.qci file. This file is created as a qci and list animations that are to be included in the model as sequences (declare them).
      • Use Defaults - Click this button to reset check boxes their default state.
  4. Area 4 has 4 Command buttons, Decompile, Skip Current Model, Cancel Decompile and Use All in Compile.
    • Decompile - Once you have the items you want to decompile loaded and the options set up, click this button to start the ecompile process.
    • Skip Current Model - Only available while Crowbar is decompiling. If you're doing a folder operation and you decide that Crowbar is working on a model that you don't really need, you can click this button to skip over it and move on to the next model. But you had better do it quickly, Crowbar is that fast.
    • Cancel Decompile - Only available while Crowbar is decompiling. Useful button if you start decompiling he wrong model or your in a folder operation and want to just quit. Click this button to about the entire Decompile.
    • Use All in Compile - Clicking this button will send the current decompile project to the Compiler Tab.
  5. This area is a Log Screen. It will display all operations that Crowbar does during the Decompile process. Use this to check for Decompile Errors or if you discover a bug and didn't turn on the create a log file option, you can copy and paste the contents into a text file to send to Zeq when you report the bug.
  6. This area consists of a list box and 2 command buttons (Use in Compile and Goto).
    The list box will contain all the QC files that were created during the decompile operation. You can use it to select one then use the Use in Compile Button to send the information to the Compile tab, or click the Goto Button to open a File browser that will automatically take you to the location of the QC file. (Useful for when you want to inspect a generated QC and make changes to it.)

General Notes:

  1. When decompiling HWM models your going to find lines in the QC VTA declarations that look like this:
    %PuckerLipUpL = (left_PuckerLipUp * (1 - left_Platysmus)) // WARNING: Expression is an approximation of what can only be done via DMX file. %PuckerLipUpR = (right_PuckerLipUp * (1 - right_Platysmus)) // WARNING: Expression is an approximation of what can only be done via DMX file. %PuckerLipLoL = (left_PuckerLipLo * (1 - left_Platysmus)) // WARNING: Expression is an approximation of what can only be done via DMX file. %PuckerLipLoR = (right_PuckerLipLo * (1 - right_Platysmus)) // WARNING: Expression is an approximation of what can only be done via DMX file.
    These are commands for flexes that can only be accomplish by exporting DMX Files and using Advance Shapekey declaration. Usually these are what are known as corrective shape and are used to control the amount a flex moves using combined flexes with dominators and suppressors to create and actual shape key used on the model.

    For example the PuckerLipUpL flex is created using a corrective shape called left_PuckerLipUp which is combined with and multiplied by (1 - corrective shape left_Platysmus). This is the SMD VTA approximation of the actual DMX flex setup. Hardware Morph shapes are almost impossible to code using the sub standard VTA code.
  2. Crowbar cannot decompile Source2 Engined games (like Dota2), nor is it currently able to decompile type 53 valve Models (Titanfall2)
  3. Be careful when doing Fold/SubFolder operations. Crowbar will chug along and happily fill a harddrive without warning. Make sure you have enough harddrive space for the operation you've chosen.
  4. Spelling mistakes in the documentation here are intentional. A measuring tool to count ppl who complain.
In Action
Tab 4 - The Compiler (Part 1)
Crowbar IS NOT a Model Compiler in itself, it IS a Compiler Interphase. What this means is, Crowbar does not compile models, it is a tool used pass variables to the Valve StudioMDL Compiler. It IS the StudioMDL compiler that actually does the work. If something fails and you receive an error message, it IS NOT Crowbar that is creating the Error. It IS StudioMDL. Crowbar is just passing the info back to you through the logs that are produced by StudioMDL.
So one really really important thing to remember here, and that is unlike the Decompiler that pulls information from the model file being decompiled to determine how it has to be decompiled, the compiler must be set up for the game that you are compiling the model for. Remember my simple statement from the start of the guide? Each Valve game has its own unique flavour and uses its own version of the StudioMDL compiler. The tool here is an interface to those compilers and merely passes information to them. It's the actual version of StudioMDL that compiles the source SMD files into a useable model for the game. If you don't set Crowbar up correctly to use the right compiler, you could end up with model files all over the place.

The Compile Tool

The compile process happens in 3 stages. The set up, the compile, then the error checking.
So, let go through the screen and the processes.
  1. Setup Stage
    1. QC Input - Like the unpacker and the Decompiler, the compiler can compile QCs on 3 levels, single, Folder and Folder/SubFolders. Individual QCs and Folders can be loaded in same 3 ways:
      • Drag and drop from a File Browser
      • Manually typing the Folder Path or Path and Filename into the Text Box
      • or by using the Browse button to open a File Browser and pointing to the thing you want to load.
      The Type of Operation list box will change automatically depending on how many QCs are found in the information given to the Text Box.
      Once the Text Box is populated, you can use the Goto Button to open a File Browser that will automatically go to the Folder listed in the Path.
    2. OutPut To - The are are 3 options in the List Box. Game's Models Folder, Work Folder, or SubFolder of QC Input. Be careful what you select here. If you want to be able to open your model in a HLMV, the model has to be in a folder that the game you're compiling for knows about. For SFM, your model should go to the game path set in your QC and the mod folder will be UserMod.
      (I really see no sense in having the other 2 options as the compiled model is a Binary file and can't be modified with other programs, Also, a model located in folders other than that stated in the QC's $modelname statement won't load in the HLMV.)
    3. Game That Has the Model Compiler - This is an important step. As I keep saying (and for simplicity sake) Every Valve Game uses its own version of the Valve Game Engine and to that its own version of StudioMDL for compiling assets. It is important that you choose the the Game that you want to compile for here in the List Box, otherwise your model is going to be compiled and end up in the game folders for the game that is currently select.
      If you haven't got a setup for the game you want to compile for, use the SetUp Button to open the set up screen and go back to the Game Setup section of this guide and set it up.
    4. Options Check Boxes - There are 4 Option Check boxes, 2 are checked on by default and as far as I know, they should always be on.
      • Write a Log File - There is a log window below the Options boxes but sometimes things go wrong while compiling and having a text copy of the log in a text file so you can get close and personal with it in a text editor to perform troubleshooting is great. It is also handy if you find a bug. you can send the Log File to zeq so he can dissect it. Just check this box on to create a log file.
      • NoP4 - This suppresses a warning about not being able to load the P4lib.dll module. You should never uncheck this.
      • Verbose - All this does is shortens or culls out totally useless information being output to the log file. Leave this checked on unless you think there might be info needed to debug something if you turn it off.
      • Define Bones - (Something I asked to have added to Crowbar... Thanks Zeq)
        If bones do not have meshes assigned to them or they are not in-between bones or they are not physically connected to another bone when SturdioMDL compiles the model (Notice I did not say When Crowbar Compiles.) the bone will be "Optimized" (dropped) from the finished model. These are bone like weapon bones or bones used as attachment points, things like that. These bones must be defined in the QC in order to pervent StudioMDL from deleting them.
        If you check this option on and try to compile, StudioMDL will NOT compile a model, it WILL create a text file of all the bones in the SMD/DMX files and make $definebone statements for them. You can then copy and paste theses statements into your QC and compile your model. Because the bones are defined, these bones that are not connected to anything will not be Optimized out of the model and will be available in the compiled model.
        An important thing to remember when defining bones in the QC, if you define one bone then you have to define ALL the bones you want in the model. It's All or none...
        • Create QCI file (in same folder as QC). - Instead of creating a txt file checking this box will tell StudioMDL to create a $definebones QCI file (and put it in the same folder as your QC file.)
      • Use Defaults - This just resets the check boxes back to the Crowbar Defaults, NoP4 and Verbose checked on and the rest, checked off.
    5. The Text Box in line 5 is for adding any additional options that there are no check boxes for (and there are a ton of them...) These are some of the additional options (and brief explanation of what they are for) allowed to be passed to StudioMDL:
      -a <normal_blend_angle> -checklengths -d - dump glview files -f - flip all triangles -fullcollide - don't truncate really big collisionmodels -game <gamedir> -h - dump hboxes -i - ignore warnings -minlod <lod> - truncate to highest detail <lod> -n - tag bad normals -perf report perf info upon compiling model -printbones -printgraph -quiet - operate silently -r - tag reversed -t <texture> -x360 - generate xbox360 output -nox360 - disable xbox360 output(default) -fastbuild - write a single vertex windings file -nowarnings - disable warnings -dumpmaterials - dump out material names -mdlreport model.mdl - report perf info -mdlreportspreadsheet - report perf info as a comma-delimited spreadsheet -striplods - use only lod0 -overridedefinebones - equivalent to specifying $unlockdefinebones in .qc file -stripmodel - process binary model files and strip extra lod data -stripvhv - strip hardware verts to match the stripped model -vsi - generate stripping information .vsi file - can be used on .mdl files too -allowdebug -ihvtest -overridedefinebones -makefile -verify -fastbuild -maxwarnings -preview -dumpmaterials -basedir -tempcontent
      I'm not going to even attempt to explain these. If you want more info on them, check out the modelling section in the Valve Developer Wiki (here https://developer.valvesoftware.com/wiki/Studiomdl )
      But for sake of an arguement here's an example. Say I wanted to dump the information on hitboxes for this model I want to compile. I would add -h to this Text Box and compile the model. This is the result in the log file.
    6. This is the command line that will be fed to StudioMDL.
    7. Once everything is ready, Press the Compile Button.
Tab 4 - The Compiler (Part 2)
2. The Compile Stage
    During the comple stage the 2 Command Buttons to the right of the Compile Button will become available, and the Log Window will display the operations that StudioMDL is performing... Notice I did not say the operations Crowbars is performing. Crowbar in the comile stage is just a go between, StudioMDL is doing the work.

(Don't Blink)
  1. The Command Buttons -
    • Skip Current Model - When doing compiling multiple QCs, you can skip over a model if you push this button.
    • Cancel Compile - This will cancel the entire compile operation.
  2. The Log Screen - This screen records the output from StudioMDL for the entire compile operation. As I have not compile more than 4 or 5 QCs at the same time, I don't know if there is a limit to the number of lines Crowbar retains in the Text Area before it starts deleting lines at the top of the of the output so it can continue to log the operation. If you are compiling with a large number of QCs (like a folder with subFolders, I would suggest clicking the Create Log File check box in the Options so the entire operation is written to a text file. It will be easier to debug if you have problems with the compiled models.
    You can Select text, then Right Click in any of the Log screens in Crowbar and copy it or the entire contents to your Clipboard, then paste that into a Text Editor for debugging.

    Also, when working with Multiple QCs, if StudioMDL encounters a problem in the batch of QCs and it will abort the process on the QC that has the Error. Because the list of QCs is passed as a batch, StudioMDL will move on to the next QC in the batch and start the compile process for that model. This cycle will continue until all QCs have been processed. You'll have to go back through the logs to see if any failed.

    For example, I have 3 QCs available for models in a Folder and SubFolder operation from my Desktop. Crowbar passed the Batch of QC names to StudioMDL. StudioMDL started compiling the first QC and found an error and aborted the process on that model, then carried on and finished the next 2 QCs.


3. Compile Completed or Compile Aborted - The Checking For Errors Stage

The Compile in the above GIF was successful. As you seen in the GIF above, StudioMDL will report that the Compile process is complete and leaves a log behing for you to go through and check for errors. Well that's great, let's look at the output from a failed compile.

This is my QC for that model. I've (purposely) created errors in it.
Let see what happens:
StudioMDL found the first error, reported it and aborted. The cause of the error (bad Command - Mostlyopaque) is clearly shown in the log. Usually, the number in the error in brackets signify\ies the line number in the QC that the error happens on. Yup, this is the case in this report. This is one of the reasons I strongly suggest using a text editor (like NotePad++) that displays line numbers.

Ok, let's repair that first error and run the compile again.

All I have to do is make the correction in the QC, save it and click the Compile button again.
This time StudioMDL finds the error (ERROR: model has no sequences) but there is no line number in the error.

The ERROR: model has no sequences is a Common Error most modders encounter and the error can be a hard one to find.

When we inspect the QC, we see there is definately a $Sequence statement and the statement is correct. We think StudioMDL has gone insane or Crowbar is broken and start firing bug reports, or open discussions looking for help. But the Error is usually yours and is in your QC.


When the line number in the Error reported doesn't make sense or when there isn't a line number, it usually indicates that you've forgotten or missed a Quotaion Mark or a Curly Bracket in one of your Command Statements. In this case, there is a missing Closing Quotation mark in the $texturegroup statement.

Finally the bottom line of the screen contains a List box and 3 Command Buttons (Use In View, Recompile and Goto). When you have a good compile these will become available. (Everytime you compile a model, StudioMDL will delete any existing model of the same name from the game file folder the model is being comiled to. If StudioMDL fails and Errors out, no model is created and the old model, if it existed, is gone. If no .mdl file exists, this area will not be available or will only list models that have been successfully compiled.
  • List Box - This will contain the .mdl references of all the models you have compiled in this session. When you select a .mdl from the list, it drives the activity of the Command Buttons against the selected .mdl.
  • Use in View - this will pass the selected model's info to the View Tab. You can then use that Tab to view information or open it in a HLMV session. (See the Section Tab 7 - The Viewer for more inormation.)
  • Recompile - If you click this button, Crowbar will pass the information based on what you have in the QC Input box at the top of the page. If you're doing a Folder or Folder/SubFolder operation, all QCs will be processed again (not just the selected model).
  • Goto - Clicking this button will take you to the folder the selected model compiled to.
Tab 5 - The Viewer
This Tab is used to view information about your model. You can launch the Half Life Model Viewer (HLMV) for a specific game and view the selected model. You can view selected models as what they are named or as replacement models. You can just launch a specific HLMV or you can launch a specfic game. But we'll get in to that as we walk through what each panel does. It works exactly the same as the Preview Tab and to be frank, when I put the Previewer and the Viewer side by side, I really don't see a difference between the two tools.

The View Tool

  1. The first line in the tool as a Text Box (MDLFile) and 2 Command Buttons (Browse and Goto).
    you can load models into the Viewer many different ways.
    • Drag and Drop a .mdl file from a File Browser onto the Text Box
    • Manually typing the path and filename of the .mdl file into the Text Box
    • Using the Browse Button to open a File Browser surfing to the model location, then double clicking the .mdl file you want to load.
    • or if you have a model loaded in Crowbar, by using the "Use In View" button found on the Compile Tab

  2. Once a .mdl file is loaded, Crowbar will dissect the model and display text information about it in this Window.
    This information can be particularly useful when trying to find out why a model isn't working in a particular game. All this inforamtion is stored in and retrieved from the model and includes:
    • MDL file type ID
    • MDL file version
    • MDL stored file name
    • MDL stored file size
    • MDL actual file size
    • MDL checksum
    • List of the Model Files it contains
    • Material Folders ($CDMaterials lines in QC file -- folders where VMT files should be, relative to game's "materials" folder)
    • Material File Names (file names in mesh SMD files)
    The Path to the model in line 1, the MDL Stored File Name, the $CDmaterials information and the Material File names are vital information when troubleshooting a broken model.
    (Note to self: Add Using the Crowbar Viewer to my guide on My Model is nothing but Bones and My Model has CheckerBoarded Textures and put link to the guides here.)

    Once a model is loaded you can use the "Goto" button to open a file browser and it will automatically goto the location the loaded MDL file is in.
  3. This line has a List Box (All the games Crowbar is set up for) and a Command Button (Setup Games)
    Use the list box to point to the game you want Crowbar to use the HLMV for. This will determine what flavour of the viewer will be opened and used when you click the Command buttons on line 4 and 5.
    Use the Setup Games button to launch the Setup screen we've already talked about when we set up Crowbar. See that section if you have to set up a new game or make changes to the one you want to use.

    Now, I've broken this line of Command Buttons in to 2 sections because they work differently when used. Personally I think they should be reordered because when using the first 2 buttons in Area 4, HLMV will usually crash or the model does not display properly. This is not Crowbar's fault, it's Valve's, because of the way that each flavour of the game engines used require model and material files to be placed in a hierarchy. But we'll go through them any way.
  4. Area 4
    The first 2 buttons (View and View as Replacement) will launch the Half Life Model Viewer (HLMV) for the game selected in the List Box above.
    If the folder containing the model Corwbar has loaded is outside the selected game's hierarchy of folders, Crowbar will create a folder in the games hierarchy and place the Model and Materials into that folder. It will then add a command line to the game's gameinfo.txt file so the viewer should be able to find this new folder then launch the viewer and attempt to load the model. (This usually fails for Source Filmmaker because of the finickiness SFM has for how model and material paths have to be perfectly correct. Games like TF2 the buttons work fine and the model will be displayed.

    Now the difference between View and View as Replacement buttons is how Crowbar actually places the model into the hierarchy of folders. I believe "View" adds a folder path like "game\gamefolder\crowbar\-preview" to the file hierarchy and places the models and materails folders into that folder, where "View as Replacement" adds a path like "game\gamefolder\crowbar" into the hierarchy and loads the models and materials folders there.
    Games like TF2 are flexible and it seems it doesn't matter how models are loaded into the hierarchy, the HLMV works. SFM, on the other hand, does not allow replacement models and if the path and/or the model filenames are not perfect (as reported by the model in the info sect), then the SFM HLMV is crash when it is launched. This is where the Command Buttons of Area 5 come into play.

    The last button in Area 4 is "Use in Decompile". Clickng this button will send the model information of the loaded model to the Decompile Tab.

  5. There are 3 Command buttons in this area Open Viewer, Open Mapper and Run Game
    These are fairly self explanitory.
    • The Open Viewer button will open a blank session of the HLMV for the selected game.
    • The Open Mapper button will open a blank session of the Hammer Mapping tool for the selected game.
    • and the Open Game button... Guess what that does... No, it does not goto the fridge and dig you out 3 scoops of Ice Cream and serve it to you. It runs the game selected in the list box above.
  6. This is just a simple log window that reports actions taken by Crowbar

This is an example of using the Viewer as a debug tool for a model that doesn't work in SFM.

This is based on a VPK download from mods.tf. As we ALL know, mods.tf downloads are replacement items for common misc items used in TF2. They don't work in SFM when they are just extracted and ported into SFM.

Tab 7 - HELP!!!
This tab displays links to Zeq's Help document. You must have an inet connect to use it. Clicking the link(s) here will open your Default Internet Browser and wisk you away to a website where you'll find info on how to use Crowbar.
Tab 8 - About
One this tab you'll find the Version information of the Crowbar session you have open. There is a link to the Community Group page for Crowbar and you find Zeq's credits to the people who have helped him develop the tool.

Plus a handsome picture of himself, sitting pretty! lol
42 Comments
I'm trying to convert some Cry of Fear assets to SFM but I don't know how. I was wondering if Crowbar has an easy method to do this
Moonify May 24, 2023 @ 9:29am 
$modelname "Path\MdlName.mdl"

$bodygroup "Bodyandorcloths"
{
studio "collection.dmx"

}
$bodygroup "Bodyandorcloths"
{
studio "Clothsorbody.dmx"
blank
}

$surfaceprop "flesh"

$contents "solid"

$illumposition -0.069 -4.195 36.297

$mostlyopaque

$maxverts 100000

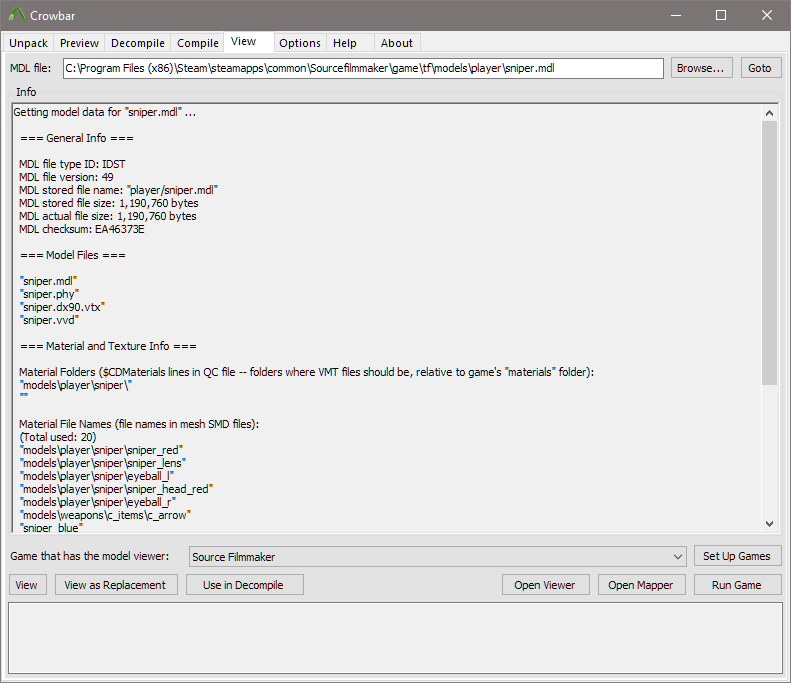
$cdmaterials "models\Fortnut\HighWire\Moony"

$sequence "ragdoll" {
"anims\ArmatureAction.dmx"
fadein 0.2
fadeout 0.2
fps 30
}
Shen Dec 25, 2021 @ 8:51pm 
Very helpful, thanks for taking the time and effort. Community appreciates it, especially 'Beginners'! :steamhappy:
N_5278 Oct 11, 2021 @ 4:03am 
The model compiles crookedly.
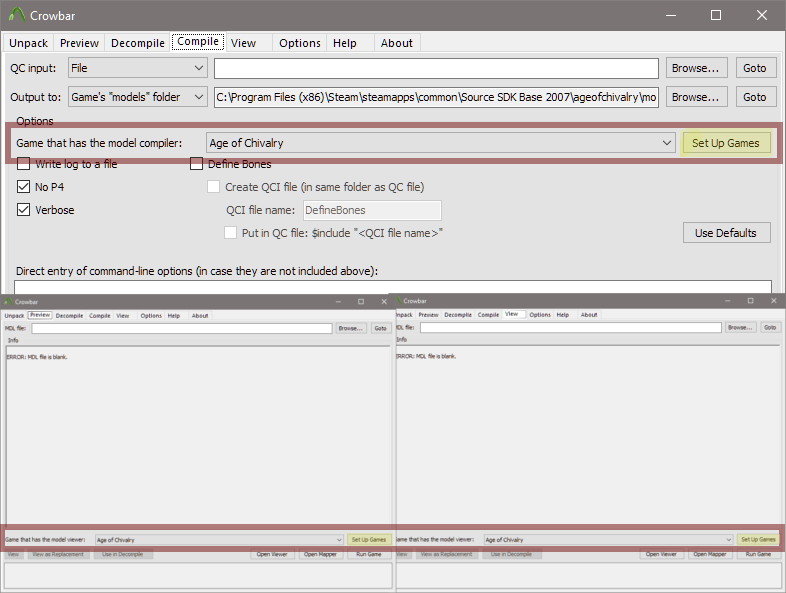
I wanted to port the Vault from Half Life Alyx to Portal 2.
It seems to have been done in order
1. Import into a Blender.
2. Export as .SMD
3. Compiled into Crowbar
But the model has no textures(IN GENERAL, there is not even an Error texture)
And has only 1 non-working animation
Animations in .QC I asked 2.
Why is that?
Here 's mine .QC

$modelname "props_combine\combine_structures\combine_vault\combine_vault_act4"

$surfaceprop "metal"

$illumposition 203.868 -31.646 1058.203

$cdmaterials "models\props_combine\combine_structures\combine_vault"

$cbox 0 0 0 0 0 0

$bbox -977.321 -690.393 -63.667 1040.614 1098.13 2180.073

$definebone "root" "" 0 0 0 0 0 0 0 0 0 0 0 0


$sequence "entrance" {
"anims\entrance.smd"
fadein 0.2
fadeout 0.2
fps 30
}

$sequence "idle" {
"anims\idle.smd"
fadein 0.2
fadeout 0.2
fps 1
}
New a ccount read description Sep 23, 2020 @ 7:09pm 
Alright, thanks for the help.
Pte Jack  [author] Sep 23, 2020 @ 7:08pm 
This guide doesn't go into creating GMA files. That option wasn't available when I wrote this guide. You might want to go to the Crowbar Group page and ask a question about it there.
New a ccount read description Sep 23, 2020 @ 6:55pm 
I tried to create a .gma file for Garry's Mod but it requires a .json or else it causes errors.
Pte Jack  [author] Sep 23, 2020 @ 6:21pm 
You didn't miss it because there is no addon.json that needs to be created for Crowbar.
New a ccount read description Sep 23, 2020 @ 6:11pm 
Hello, I might have missed the part where you create the addon.json file, but I can't find the part. I need to make the .json file in order to publish an add-on to the workshop. Are you able to help?