Rising Storm 2: Vietnam

Rising Storm 2: Vietnam

415 ratings
Rising Storm 2: Vietnam: The Field Manual
By Beskar_Mando and 3 collaborators
A guide explaining the basics, hints, tips, and information about Rising Storm 2: Vietnam, made in collaboration with Tripwire & Antimatter developers for the good of the community.

Due to the parallel development of this guide and the game itself, certain statistics, data and information may be inaccurate or outdated. Because this guide is still a work in progress despite months of work, content & information may continue to be updated.
4
3
2
   
Award
Favorite
Favorited
Unfavorite
Introduction
Credits
BeskarMando - Writing & Images
BloodMalice - Writing
Nattyfrank - Writing
Ska Cat - Writing
Zachery Moe - Writing

Many thanks to Tripwire Interactive & Antimatter Games for their assistance.
Tripwire Interactive: http://www.tripwireinteractive.com/
Antimatter Games: http://www.antimattergames.com/
Rising Storm 2: Vietnam Wiki: TBA
This manual would not have been possible without the help and cooperation of these people.
Introduction
This guide is intended to provide detailed information, suggest effective tips, and provide an overall manual for Rising Storm 2: Vietnam to the audience. This guide will cover the basics as well as other vital information that may be of use to the player. It will discuss a variety of sections, organized by theme, listed in the table of contents. All the information gathered in this guide has been researched thoroughly, as well as tested and calculated, and in many cases confirmed by the game developers themselves.
▃▃▃▃▃▃▃▃▃▃▃▃▃▃▃▃▃▃
NORTH VIETNAM

                                                                “Determined to win.”

The North Vietnamese armed forces are not as well trained nor as well armed as their foes, but they make up for this disparity through their superior scouting abilities and public support from their homeland. Their actual fighting force is irregular, composed of North Vietnamese soldiers and guerrilla sympathizers from both sides of the border. Their tactics are not to be trifled with; using hit and run techniques, they melt into the jungle before their enemy has a chance to fire back. Many fighters are armed with a mixture of foreign firearms and improvised homemade weaponry, but what they lack in firepower they make up for with guile, stealth, speed, and an unbreakable will to defend their homeland.
Weapons

The following is an overview of the available weapons for the North Vietnamese faction, and a description of each weapon's characteristics. It provides basic information about the possible variants and features, the ammunition and magazine capacity, and the power and accuracy of each weapon.
AK-47
Avtomat Kalashnikova

Statistics:
Weapon Type: Assault Rifle, Magazine-fed
Classes: Rifleman, Radioman
Variants: Yes
Fire Modes: Semi-automatic, Automatic
Caliber: 7.62 × 39 mm Soviet
Weapon Variant
Features
Rounds per Magazine
Magazines
Rate of Fire
Type 56
Folding Bayonet
30 Rounds
4 Magazines
650 rpm
Type 56-1
Folding Stock
30 Rounds
4 Magazines
650 rpm
AKM
Attachable Bayonet
30 Rounds
4 Magazines
600 rpm
SKS
Samozaryadnyy Karabin Simonova

Statistics:
Weapon Type: Carbine, Clip-fed
Classes: Rifleman, Sapper, RPG, Radioman, Commander
Variants: No
Fire Mode: Semi-automatic
Caliber: 7.62 × 39 mm Soviet
Features
Rounds per Clip
Clips
Folding Bayonet
10 Rounds
8 Clips
RPD
Ruchnoy Pulemyot Degtyaryova

Statistics:
Weapon Type: Light Machine Gun, Belt-fed
Classes: Machine Gunner
Variants: No
Fire Mode: Automatic
Caliber: 7.62 × 39 mm Soviet
Features
Rounds per Belt
Belts
Rate of Fire
Folding Bipod
100 Rounds
3 Drums
700 rpm
DP-28, "Dinner Plate"/"Record Player"
Pulemyot Degtyaryova Pekhotnyy

Statistics:
Weapon Type: Light Machine Gun, Drum-fed
Classes: Machine Gunner
Variants: No
Fire Mode: Automatic
Caliber: 7.62 × 54 mm Rimmed Soviet
Features
Rounds per Drum
Drums
Rate of Fire
Folding Bipod
47
4 Drums
550 rpm
IZh-43
Hunting Shotgun

Statistics:
Weapon Type: Shotgun, Double-barrel
Classes: Scout, RPG
Variants: Yes
Fire Modes: Single-shot, Double-shot
Weapon Variant
Shell Options
Hunting Shotgun (Long)
32 Buckshot Shells
32 Rifled Slugs
16 Shells, 16 Slugs
Coach Gun (Medium)
32 Buckshot Shells
32 Rifled Slugs
16 Shells, 16 Slugs
Sawn-off Shotgun(Short)
32 Buckshot Shells
For more information on various shell types, see the section "Weapons Continued," subsection "Shotgun Shell Types."
PPSh-41
Pistolet-Pulemyot Shpagina

Statistics:
Weapon Type: Submachine Gun, Magazine-fed
Classes: Sapper
Variants: Yes
Fire Modes: Semi-automatic, Automatic
Caliber: 7.62 × 25 mm Soviet
Weapon Variant
Rounds per Magazine
Magazines
Rate of Fire
35-round Magazine
35 Rounds
5 Magazines
950 rpm
71-round Drum
71 Rounds
2 Drums
950 rpm
MAT-49
Pistolet-mitrailleur du Manufacture Nationale d'Armes de Tulle

Statistics:
Weapon Type: Submachine Gun, Magazine-fed
Classes: Scout, Commander
Variants: Yes
Fire Mode: Automatic
Caliber: 9 × 19 mm Parabellum, 7.62 × 25 mm Tokarev
Weapon Variant
Features
Rounds per Magazine
Magazines
Rate of Fire
9 × 19 mm Parabellum
Collapsible Stock
32 Rounds
4 Magazines
600 rpm
7.62 × 25 mm Soviet
Collapsible Stock
35 Rounds
4 Magazines
600 rpm
Mosin-Nagant
Vintovka Mosina M1891/30

Statistics:
Weapon Type: Rifle, Clip-fed
Classes: Guerilla (NLF Rifleman)
Variants: No
Fire Mode: Bolt-action
Caliber: 7.62 × 54 mm Rimmed Soviet
Features
Rounds per Clip
Clips
Attachable Bayonet
5 Rounds
10 Clips
Mosin-Nagant Sniper
Vintovka Mosina M1891/30 PU

Statistics:
Weapon Type: Rifle, Individually Fed
Classes: Sniper
Variants: No
Fire Mode: Bolt-action
Caliber: 7.62 × 54 mm R Soviet
Features
Rounds per Clip
Clips
PU 3.5× Scope
5 Rounds
8 Clips
Dragunov
Snayperskaya Vintovka Dragunova

Statistics:
Weapon Type: Designated Marksman Rifle, Magazine-fed
Classes: Sniper
Variants: No
Fire Mode: Semi-automatic
Caliber: 7.62 × 54 mm Rimmed Soviet
Features
Rounds per Magazine
Magazines
PSO-1 4× Scope
10 Rounds
8 Magazines

Secondaries & Equipment

The following is an overview of the explosives and other materiel available to the North Vietnamese faction. It explains the characteristics and intended uses of each type of equipment, the key bindings to use these weapons, and the roles that carry them.

TT-33
Samozaryadnyy Pistolet Tokareva


Statistics:
Weapon Type: Self-loading Pistol
Classes: Scout, Machine Gunner, Sniper, Commander
Variants:
No Fire Mode: Semi-automatic
Caliber: 7.62 × 25 mm Soviet
Rounds per Magazine
Magazines
8 Rounds
3 Magazines
Type 67 Fragmentation Grenade


Statistics:
Weapon Type: Fragmentation Grenade
Classes: Rifleman, Machine Gunner
Variants: No
Characteristics: Throwable
Maximum Throwing Range: 35 Meters
Lethal Radius: 7 Meters
To cook the grenade, left-click. Release to throw.
To cook the grenade for a short underhand throw, middle-click. Release to throw.
RDG-1 Smoke Grenade


Statistics:
Weapon Type: Smoke Grenade
Classes: Scout, Radioman, Commander
Characteristics: Throwable
Smoke Color: White
]Maximum Throwing Range: 30 Meters
Used for concealment.
To prime the grenade, left-click. Release to throw.
To prime the grenade for a short underhand throw, middle-click. Release to throw.
RPG-7
Ruchnoy Protivotankovyy Granatomyot


Statistics:
Weapon Type: Rocket Launcher
Classes: RPG
Characteristics: Self-propelled
Rocket Lethal Radius: ? Meters Backwards, ? Meters Forwards
Penetrating Lethal Radius: ?
Backblast Lethal Radius: ?
Recommended for anti-helicopter use.
DShK
Degtyaryova-Shpagina Krupnokalibernyy Pulemyot

Statistics:
Weapon Type: Heavy Machine Gun, Belt-fed, Tripod-mounted
Variants: No
Fire Mode: Automatic
Caliber: 12.7×108mm
Rounds per Belt
Belts
Rate of Fire
50 Rounds
Unlimited
600 rpm
Punji Trap


Statistics:
Weapon Type: Pressure-activated Trap
Classes: Rifleman
Carried: 1 Trap
To place the trap, left-click while looking at ground.
The trap will automatically activate when an South Vietnam soldier steps on it.
To deactivate, press F while close and looking at the trap.
Tripwire Trap


Statistics:
Weapon Type: Tripwire-activated Explosive Trap
Classes: Scout, Sniper
Lethal Radius: 7m
To place trap, left-click while looking at ground. Do so twice, once for each end of the wire.
The trap will automatically activate when an South Vietnam soldier walks through it.
To deactivate, press F while close and looking at the trap.
MD-82B Mine


Statistics:
Weapon Type: Anti-personnel Mine
Classes: Sapper
Lethal Radius: 3 Meters
To place trap, left-click while looking at ground.
The trap will automatically activate when an South Vietnam steps on it.
To deactivate, press F while close and looking at mine.
Pick Mattock


Statistics:
Classes: Squad Leader
Used to dig squad tunnels, or as an improvised melee weapon.
To place the tunnel, hold right-click while looking at the ground.
Binoculars


Statistics:
Magnification:
Classes: Commander, Squad Leaders
Used to mark targets for Commander support, for observation, or as an improvised melee weapon.
Roles

The following is an overview of the available roles for the North Vietnamese faction, and a description of each role's abilities and tasks in combat. It provides basic information about the possible armament of each role, the role's strengths and weaknesses, and the basic responsibilities of a player in that role.

Rifleman (PAVN) / Guerrilla (NLF)
Weapons
Pistol
Equipment
AK-47
SKS-45
Mosin (NLF only)
Type 67 Grenade × 2
Punji Trap × 1


The Rifleman is the standard infantryman and the main element of front-line assaults. Their armament allows them to be versatile in engaging enemies at both short and long range, using semi-automatic fire to suppress and kill at a distance and controlled bursts in closer engagements. Lastly, they have the ability to plant Punji Traps that spring up and kill unsuspecting South Vietnam soldiers.
Scout
Weapons
Pistol
Equipment
MAT-49
IZh-43
TT-33
RDG-1 Smoke Grenade × 2
Tripwire Trap × 2

Using their ability to spot and disarm South Vietnam traps such as C4 and Claymores (highlighted in red at X meters), the Scout can notify teammates of enemy traps and safely clear the way for others. They can also provide smokescreens in assaults and can plant Tripwire Traps, which have a wider lethal radius than the Rifleman's Punji Traps.
Machine Gunner
Weapons
Pistol
Equipment
RPD
DP-28 (NLF only)
TT-33
Type 67 Grenade × 1


The Machine Gunner is a vital support role, crucial for laying down heavy firepower to either suppress or eliminate enemies. On the offensive, they provide cover for advancing teammates by suppressing defenders. On the defensive, they slow the enemy advance by forcing the attackers to stay in cover and by cutting off routes to the objective.
Sniper
Weapons
Pistol
Equipment
Mosin PU Sniper
Dragunov
TT-33
Tripwire Trap × 1


With a powerful rifle and attached magnified scope, Snipers are suited to position themselves at range and on high ground. Although weak in close engagements, their strength is in accuracy and stopping power at range. After safely securing a well-hidden firing position, they must prioritize high-value targets, such as enemy snipers, machine gunners, squad leaders, and commanders, before engaging less valuable targets. They can also place a Tripwire Trap to protect their vulnerable rear or flanks.
Sapper
Weapons
Pistol
Equipment
SKS-45
PPSh-41
MD-82 Mine × 6


The Sapper's task is to plant mines in obscure locations and choke points for unsuspecting South Vietnam soldiers. Since friendly soldiers cannot detonate their mines, they can safely place mines anywhere. However, given their choices in armament, they must focus on either long or short-ranged combat—not both.
RPG
Weapons
Pistol
Equipment
SKS-45
IZh-43
RPG-7


With the ability to launch rockets at range, the RPG is a versatile support role for either anti-air or anti-infantry applications. Although ideal for helicopter hunting, they can also eliminate large clusters of enemy infantry or even a troublesome Machine Gunner or Sniper nest. However, they must always be aware of friendly soldiers behind them, as the backblast from their rocket (reaching X meters) can easily kill. Their choices in armament allow them to fight in either long or short-range combat when not using the RPG.
Radioman
Weapons
Pistol
Equipment

AK-47
SKS-45
RDG-1 Smoke Grenade × 1


With their portable radio, the Radioman provides a mobile way for Commanders to call in their abilities. Both Radiomen and the Commander must be conscious of each other's whereabouts on the battlefield. When not needed, they can play the role of a typical Rifleman, except that they carry smoke rather than grenades.
Commander
Weapons
Pistol
Equipment
SKS-45
MAT-49
TT-33
RDG-1 Smoke Grenade × 1
Binoculars


The Commander calls in support abilities through radios scattered around the map and coordinates the movements of the team to capture or defend objectives. They should know where their Radiomen are, the location of the closest static radio, and communicate with their Squad Leaders to place artillery marks. If all of their radio abilities are on cooldown, they should get in the fight as well.
Squad Leader
Note: The Squad Leader is not a selectable class like the others. Instead, no matter a player's class, they will be given the role and its associated equipment upon creating a squad, or upon being promoted by a squad leader who wishes to give up the role.


The task of the North Vietnamese Squad Leader is to coordinate their Squad and provide a static spawn for them, which the Squad Leader does by placing Spawn Tunnels. Although these tunnels can be detected by South Vietnam aerial recon, it's still best to conceal them as much as possible—perhaps under foliage or behind barriers. In Territories, a Squad Leader should place their artillery marks on the enemy's route to an objective. In Supremacy, a mark on top of an objective is also useful.
Commander Abilities

The North Vietnamese Commander, like his teammates, does not have access to the most up-to-date or impressive weaponry, but his abilities are still vital in battle. They are outlined in the table below. He must also be aware of the locations of all radios on the map.
Using the Radio
To find a radio, open the map (default M) or open the tactical overlay (default T). Simply look for the radio icon, shown to the left, and go to it. Stand within a few feet of the radio, look at it, and press the use key (default F) to open the radio overlay. Click on a mark to select it for use, and then click on an ability icon to the left of the map to call in that ability.
North
Support
Type
Duration
Cooldown
Salvos/Bursts
Radius

Barrage
Mixed Fire Support
Three salvos of artillery and rockets will destroy the targeted area, killing anything within it and denying access to the enemy during the duration.
Duration
Map Dependent
4 Salvos
40 meter radius

SAM
S-75 Dvina Surface-to-Air Missile
Activates a Surface to Air Missile station. Automatically targets all enemy support aircraft and helicopters above an altitude of 75m.
60 seconds
180 seconds (inclusive)
Infinite during active period
Any Aircraft above 75 Meters

Scout Recon
Ground Scout Reconnaissance
Hidden Scouts deliver reports of enemy movement to friendly players' maps. Stay near the Radio to receive position updates.
Duration
Map Dependent
Salvos/Bursts
Entire Map

Ho Chi Minh Trail
Decreased Respawn Time
Deployment time and reinforcement tokens are reduced by 50% for the entire team. Lasts for 60 seconds.
Duration
Map Dependent
Salvos/Bursts
Entire Map

Ambush
Respawn All Dead Teammates
Instantly deploys all dead team members on your current position. Useful for surprise attacks on objectives.
Map Dependent
Salvos/Bursts
On Commander's current location.
Mechanics, Tactics and Strengths

Many weapons in the North Vietnam's arsenal are surplus or homemade, meaning that the North Vietnam's Soldiers cannot always rely on pure firepower or on accuracy. However, they have an advantage in certain special mechanics, many of which are related to concealment or are designed to counteract South Vietnam's technological superiority. This focus leads the North Vietnam's Soldiers to rely on stealth and hidden routes in order to close with and engage the enemy. Although they have apparent weaknesses, The North Vietnam Faction is more than capable when their weapons, tactics, and strengths are employed properly and effectively. They may seem less powerful in a head-to-head fight, but they still have many strengths which they can use to great effect to overpower their enemies.
Spawning

North Vietnam's soldiers have the option to spawn on a stationary tunnel placed by their squad leader. The tunnel's fixed position makes it easy for the enemy to hunt down using map markers or the sudden appearance of a spawning player, so Squad Leaders must take care to place the tunnel somewhere safe and possibly concealed. Because the Squad Leader needs only to place the tunnel in order to give his squad a forward spawn point, the SL can play with much less caution than his South Vietnam counterpart. This "extra-man advantage" helps make up for the weakness of much of the North Vietnam's arsenal. However, the immobility of tunnels makes them almost a secondary objective that the squad must defend, and the ease with which they can be destroyed means the Squad Leader can't relax; at any second, a new tunnel might be needed. Thus, squad tunnels require an agressively protective, yet stealthy, style of play.
Making Tunnels

In order to place a spawn tunnel, the squad leader must equip the pickaxe. Tunnels can only be placced fifty meters or further from an objective. When the squad leader looks at the ground, a semi-transparent tunnel shape will appear at their feet, representing the possible location of a tunnel. If the tunnel is red, a tunnel cannot be placed there. If the tunnel is white, the squad leader must left-click and hold to begin tunneling. After the tunneling meter fills, the tunnel will become active and the squad leader can move away.
Ambushing Transport Helicopters

....
General Tactics

Most of North Vietnam's weapons are specialized for either close or long ranges, so a soldier with an AK, MAT, PPSh, or shotgun must try to avoid long-range combat, while a soldier with an SKS, Mosin, or SVD must try to keep the enemy at range. Knowing the best range for your weapon is very important. Using tunnels, both spawn tunnels and actual tunnels built into the map, is very effective for its surprise value. Lastly, since warfare is so fluid and rapid in the age of helicopters and assault rifles, aggressive and decisive actions are very effective.
Camouflage

Unique to the North Vietnam Faction, whenever a soldier of this faction is crouched or prone in vegetation or inside a building, a vignette overlay will slowly fade in over a few seconds at the bottom of the screen. When fully faded in, the player cannot be detected by spotting aircraft such as the recon plane or the Loach. The soldier will continue to remain unseen even if you crawl while prone.
REPLACE WITH NEW OVERLAY
Identifying Northern Soldiers

Since teammate names might not always show up, and will only do so under certain distances, Properly Identifying soldiers is important to know based on appearance. Though the presence of character customization means that a lot of features are not always the same for each team, there are still plenty of signs to look for. A few include:
  • What is the most common color of the character's uniform? If brown, beige-green, black, or gray, North Vietnam. If leaf-green, South Vietnam.
  • How many hands does the character have on their rifle when sprinting? If one, North Vietnam, if two, South Vietnam.
Beyond these common points, experience with the various customization options and their appearance will be necessary in order to pick out friendlies and enemies.
Strengths

For almost any type of weapon in the game,South Vietnam field slightly better form of that weapon type than the North Vietnamese. However, every North Vietnamese weapon is still very effective if used correctly. North Vietnamese riflemen, with their powerful Kalashnikov rifles, can successfully outgun the South Vietnam, but other Northern fighters must use concealment and their stealthy tunnel systems to move around the map. Weapons used by the North Vietnamese are often designed with either power or rate of fire in mind, so most North Vietnamese roles do best in close quarters, where South Vietnam weapons are unweildy or less powerful. Those with longer rifles or carbines, though, must know how to use stealth to make up for their slow rate of fire.
Stealth and Guile
In order to close the distance to the enemy and level the playing field, the North Vietnamese can use various stealth tactics. The aforementioned squad tunnels can allow them to appear unexpectedly at any point on the map, while their normal tunnel systems allow them to cross the map from one area to another without being seen.
Close Quarters Combat
Many North Vietnamese weapons are ill-suited to long-range combat, or at least less so than their enemy's weapons. The AK rifles are powerful at range, but their recoil is hard to control, and the North Vietnamese submachine guns and shotguns are all very weak at range. Thus, players using these weapons have to engage the enemy where their volume and rate of fire can overwhelm and suppress. All of these weapons can be used with their stocks collapsed or sawn off, another useful attribute in close-quarters fighting.
The RPD can be used in close quarters, too. When fired from the hip, it has strong recoil, but at point-blank ranges its great rate of fire and ammunition capacity can outshoot almost anything.
Long Range Combat
The North Vietnamese weapons that are strong at range, such as the Mosin, the SVD, and the SKS, are very specialized in their function. Thus, players using these rifles have to stay at range when possible, and use stealth and cover to surprise enemies and make their shots count when up close.
Once again the RPD can make a strong showing at range, as its bipod, when mounted to cover, makes it unusually controllable for its heavy volume of fire.
▃▃▃▃▃▃▃▃▃▃▃▃▃▃▃▃▃▃
SOUTH VIETNAM
                                                "Hearts and minds. Shock and awe."

The United States military is the most well-funded and well-equipped armed force in the world. Motivated by fears of spreading Communist influence, the United States provides weaponry and manpower to assist the South Vietnamese government's fight against North Vietnam. In battle, the United States military uses brute force, heavy firepower, and devastating aerial support to destroy and overwhelm their enemies.
Weapons - US

The following is an overview of the available weapons for the United States faction, and a description of each weapon's characteristics. It provides basic information about the possible variants and features, the ammunition and magazine capacity, and the power and accuracy of each weapon.
M16A1
Rifle, Caliber 5.56 mm, M16


Statistics:
Weapon Type: Assault Rifle, Magazine-fed
Classes: Grunt, Radioman
Variants: No
Fire Modes: Semi-automatic, Automatic
Caliber: 5.56 × 45 mm NATO
Weapon Variant
Rounds per Magazine
Magazines
Rate of Fire
20-round Magazines
18 Rounds
8 Magazines
900 rpm
Note: 20-round magazines
in Vietnam issue would often
jam if loaded all the way.
Most troops just loaded them
to 18 rounds as a result.
30-round Magazines
30 Rounds
4 Magazines
900 rpm
Note: This variant is only
accessible in the steam
development kit, not in the
game as it is now. It may
see a return in potential
late-war maps.
M14
Rifle, Caliber 7.62 mm, M14


Statistics:
Weapon Type: Battle Rifle, Magazine-fed
Classes: Grunt, Radioman, Commander
Variants: No
Fire Mode: Semi-automatic
Caliber: 7.62 × 51 mm NATO
Features
Rounds per Magazine
Magazines
Attachable Bayonet
20 Rounds
6 Magazines
M60, "The Pig"
Machine Gun, Caliber 7.62 mm, M60


Statistics:
Weapon Type: Light Machine Gun, Belt-fed
Classes: Machine Gunner
Variants: Yes
Fire Mode: Automatic
Caliber: 7.62 × 51 mm NATO
Weapon Variant
Features
Rounds per Belt
Belts
Rate of Fire
100-round Box
Folding Bipod
100 Rounds
3 Boxes
600 rpm
200-round Belt
Folding Bipod
200 Rounds
1 Belt
600 rpm
M3A1, "Grease Gun"
Submachine Gun, Cal. .45, M3


Statistics:
Weapon Type: Submachine Gun, Magazine-fed
Classes: Pointman, Engineer, Commander
Variants: No
Fire Mode: Automatic
Caliber: .45 ACP (11.43 × 23 mm)
Features
Rounds per Magazine
Magazines
Rate of Fire
Collapsible Stock
30 Rounds
4 Magazines
450 rpm
M37
Ithaca Model 37 Shotgun


Statistics:
Weapon Type: Shotgun
Classes: Pointman, Engineer
Variants: Yes
Fire Mode: Pump-action
Weapon Variant
Features
Shells per Magazine
Shells Carried
Trench Gun
Attachable Bayonet
6 Shells
35 Shells
Stakeout
None
6 Shells
35 Shells
Duckbill Trench Gun
Wide, flat shot spread
8 Shells
32 Shells
For more information on various shell types, see the section "Weapons Continued," subsection "Shotgun Shell Types."
M40
Sniper Rifle, M40


Statistics:
Weapon Type: Sniper Rifle, Individually Fed
Classes: Marksman
Variants: No
Fire Mode: Bolt-action
Caliber: 7.62 × 51 mm NATO
Features
Rounds per Magazine
Rounds Carried
3-9× Redfield Scope
5 Rounds
40 Rounds
XM21
M21 Sniper Weapon System


Statistics:
Weapon Type: Sniper Rifle, Magazine-fed
Classes: Marksman
Variants: No
Fire Mode: Semi-automatic
Caliber: 7.62 × 51 mm NATO
Features
Rounds Per Magazine
Magazines
3-9× Redfield Scope
20 Rounds
4 Magazines
M79, "Thumper"
Grenade Launcher, M79


Statistics:
Weapon Type: Grenade Launcher
Classes: Grenadier
Variants: Yes
Fire Mode: Single-shot
Caliber: 40 × 46 mm Grenade
Damage Radius - High Explosive: 15 Meters
Minimum Arming Distance - High Explosive: 14 Meters
Weapon Variant
Grenades Carried
HE Grenades
9 Grenades
HE and Smoke Grenades
6 HE, 2 Smoke
HE and Buckshot Grenades
6 HE, 6 Buckshot
Secondaries & Equipment - US

The following is an overview of the explosives and other materiel available to the United States faction. It explains the characteristics and intended uses of each type of equipment, the key bindings to use these weapons, and the roles that carry them.
M1911A1
Pistol, Caliber .45, Automatic, M1911A1


Statistics:
Weapon Type: Self-loading Pistol
Classes: Pointman, Machine Gunner, Marksman, Grenadier, Commander, Pilots
Variants: No
Fire Mode: Semi-automatic
Caliber: .45 ACP (11.43 × 23 mm)
Rounds Per Magazine
Magazines
7 Rounds
3 Magazines
M9A1-7 Flamethrower


Statistics:
Weapon Type: Flamethrower
Classes: Engineer
Characteristics: Heavily Decreased Movement Speed
Effective Range
Maximum Range
Fuel Time

20 Meters
30 Meters
8 Seconds, Continuous
M61 Fragmentation Grenade, "Lemon"


Statistics:
Weapon Type: Fragmentation Grenade
Classes: Grunt, Machine Gunner
Characteristics: Throwable
Maximum Throwing Range: 30 Meters
Lethal Radius: 7 Meters
To prime grenade, left-click. Release to throw. To begin the fuse before throwing, middle-click.
To prime grenade for a short underhand throw, middle-click. Release to throw.
AN-M8 Smoke Grenade


Statistics:
Weapon Type: Smoke Grenade
Classes: Pointman, Radioman, Commander
Characteristics: Throwable
Smoke Color: White
Maximum Throwing Range: 30 Meters
Used for concealment.
To prime grenade, left-click. Release to throw.
To prime grenade for a short underhand throw, middle-click. Release to throw.
M18 Smoke Grenade


Statistics:
Weapon Type: Smoke Grenade
Classes: Commander, Squad Leaders
Characteristics: Throwable
Smoke Color: Purple
Maximum Throwing Range: 30 Meters
Used to mark targets for Commander support.
To prime grenade, left-click. Release to throw.
To prime grenade for a short underhand throw, middle-click. Release to throw.
M34 White Phosphorus Grenade, "Willie Pete"


Statistics:
Weapon Type: Incendiary Grenade
Classes: Engineer, Grenadier
Characteristics: Throwable
Maximum Throwing Range: 30 Meters
Lethal Radius: 7 Meters
The smoke cloud left behind will kill within a 3 meter radius for approximately five seconds after explosion.
To prime grenade, left-click. Release to throw. To begin the fuse before throwing, middle-click.
To prime grenade for a short underhand throw, middle-click. Release to throw.
M18 Claymore Mine


Statistics:
Weapon Type: Anti-personnel Mine
Classes: Pointman, Marksman
Lethal Range : Forward 40 meter cone (60 degrees), 2 Meter Radius around Claymore.
Effective Range: 25m
Detonation Range: 50 Meters
Detonated by trigger.
To place mine, left-click while looking at ground. If trigger does not appear, right-click.
To detonate, left-click while holding trigger.
To deactivate, press F while close and looking at mine.
Does not explode when shot.
C4 Explosive


Statistics:
Weapon Type: High Explosive
Classes: Engineer
Characteristics: Throwable
Lethal Radius: 8 Meters
Detonation Range: 50 Meters
Detonated by trigger.
To place mine, left-click while looking at ground. If trigger does not appear, right-click.
To detonate, left-click while holding trigger.
To deactivate, press F while close and looking at explosive.
Binoculars

Statistics:
Magnification:
Classes: Commander, Squad Leaders
Used to mark targets for Commander support, for observation, or as improvised melee weapon.
Roles - US

The following is an overview of the available roles for the United States faction, and a description of each role's abilities and tasks in combat. It provides basic information about the possible armament of each role, the role's strengths and weaknesses, and the basic responsibilities of a player in that role.
Grunt
Weapons
Pistol
Equipment
M16A1
M14
M61 Grenade × 2


The Grunt is the standard infantryman and the main element of front-line assaults. Their armament allows them to be versatile in engaging enemies at both short and long range, using semi-automatic fire to suppress and kill at range and controlled bursts while in closer engagements. Although the M16 may be weaker than the AK-47, it provides more accurate and controllable firepower.
Pointman
Weapons
Pistol
Equipment
M3A1 “Grease Gun”
M37 Trench Gun
M1911A1
M8 Smoke Grenade × 2
M18 Claymore × 2


Using their ability to spot and disarm North Vietnamese traps such as MD-82B Mines and Tripwires (highlighted in red at X meters), the Pointman must notify teammates of enemy traps and safely clear the way for others. They can also provide smokescreens in assaults and have the ability to plant Claymore mines, which must be manually detonated.
Machine Gunner
Weapons
Pistol
Equipment
M60
M1911A1
M61 Grenade × 1


The Machine Gunner is a vital support role, crucial for laying down heavy firepower to either suppress or eliminate enemies. On the offensive, they provide cover for advancing teammates by suppressing defenders. On the defensive, they slow the enemy advance by forcing the attackers to stay in cover and by cutting off routes to the objective.
Marksman
Weapons
Pistol
Equipment
M40
XM21
M1911A1
M18 Claymore × 1


With a powerful rifle and attached magnified scope, the Sniper is suited to position himself at range and on high ground. Although weak in close engagements, their strength is in accuracy and stopping power at range. After safely securing a well-hidden firing position, they must prioritize high-value targets, such as enemy snipers, machine gunners, squad leaders, and commanders, before engaging less valuable targets. They can also place a manually-detonated Claymore to protect their vulnerable rear or flanks.
Combat Engineer
Weapons
Pistol
Equipment
Grease Gun
M37
M34 WP Grenade × 1
C4 × 2
Flamethrower
M1911A1


The weaponry of Combat Engineers allows them to be extremely aggressive in clearing out rooms and fortified enemy positions. Even if targets aren't immediately visible, their indirect explosives and incendiary weapons can still kill effectively. However, the Engineer is limited at range, and since much of their arsenal is imprecise or causes splash damage, they must be careful that there are no friendly soldiers near their target.

Grenadier
Weapons
Pistol
Equipment
M79
M1911A1
M34 WP Grenade × 1


With the ability to launch explosives long distances, the Grenadier is powerful, if limited in application. Although they should ideally focus on knocking out enemy Machine Gunners or Snipers, their grenades can also force enemies to disperse or pick less effective positions. Given their armament, they are best suited for ranged and indirect combat.
Radioman
Weapons
Pistol
Equipment
M16A1
M14
M8 Smoke Grenade × 2


With their portable radio, the Radioman provides a mobile way for Commanders to call in their abilities. Both Radiomen and the Commander must be conscious of each other's whereabouts on the battlefield. When not needed, they can play the role of a typical Rifleman, except that they carry smoke rather than grenades.
Commander
Weapons
Pistol
Equipment
M14
Grease Gun
M1911A1
M8 Smoke Grenade × 1
M18 Purple Smoke × 1
Binoculars


The Commander calls in support abilities through radios scattered around the map and coordinates the movements of the team to capture or defend objectives. They should know where their Radiomen are, know the location of the closest static radio, and communicate with their Squad Leaders to place artillery marks. If all of their radio abilities are on cooldown, they should help out in the fight.
Squad Leader
Note: The Squad Leader is not a selectable class like the others. Instead, no matter a player's class, they will be given the role and its associated equipment upon creating a squad, or upon being promoted by a Squad Leader who wishes to give up the role.


The task of the South Vietnam Squad Leader is to coordinate their Squad and provide a mobile spawn for them, which they do by staying alive and safe. Since dying means a long hike for their squad members, they should let their squad members play aggressively for them, and only advance when they know the way is clear. In Territories, a Squad Leader should place their artillery marks on the enemy's route to an objective. In Supremacy, a mark on top of an objective is also useful.
Weapons - AUS - WIP

The following is an overview of the available weapons for the Australian faction, and a description of each weapon's characteristics. It provides basic information about the possible variants and features, the ammunition and magazine capacity, and the power and accuracy of each weapon.
L1A1 SLR
Rifle, Caliber 7.62 mm, L1A1


Statistics:
Weapon Type: Battle Rifle, Magazine-fed
Classes: Grunt, Radioman, Commander
Variants: No
Fire Mode: Semi-automatic
Caliber: 7.62 × 51 mm NATO
Features
Rounds per Magazine
Magazines
Attachable Bayonet
20 Rounds
6 Magazines
M16A1
Rifle, Caliber 5.56 mm, M16


Statistics:
Weapon Type: Assault Rifle, Magazine-fed
Classes: Grunt, Radioman
Variants: No
Fire Modes: Semi-automatic, Automatic
Caliber: 5.56 × 45 mm NATO
Weapon Variant
Rounds per Magazine
Magazines
Rate of Fire
20-round Magazines
18 Rounds
8 Magazines
900 rpm
Note: 20-round magazines
in Vietnam issue would often
jam if loaded all the way.
Most troops just loaded them
to 18 rounds as a result.
30-round Magazines
30 Rounds
4 Magazines
900 rpm
Note: This variant is only
accessible in the steam
development kit, not in the
game as it is now. It may
see a return in potential
late-war maps.
L2A1
Machine Gun, Caliber 7.62 mm, L2A1


Statistics:
Weapon Type: Light Machine Gun, Magazine-fed
Classes: Machine Gunner
Variants: Yes
Fire Mode: Semi-automatic, Automatic
Caliber: 7.62 × 51 mm NATO
Features
Rounds per Magazine
Magazines
Rate of Fire
Folding Bipod
100 Rounds
3 Boxes
700 rpm
M60, "The Pig"
Machine Gun, Caliber 7.62 mm, M60


Statistics:
Weapon Type: Light Machine Gun, Belt-fed
Classes: Machine Gunner
Variants: Yes
Fire Mode: Automatic
Caliber: 7.62 × 51 mm NATO
Weapon Variant
Features
Rounds per Belt
Belts
Rate of Fire
100-round Box
Folding Bipod
100 Rounds
3 Boxes
600 rpm
200-round Belt
Folding Bipod
200 Rounds
1 Belt
600 rpm
Owen Gun, "Digger's Darling"
Machine Carbine, Caliber 9 × 19 mm, Owen


Statistics:
Weapon Type: Submachine Gun, Magazine-fed
Classes: Pointman, Engineer, Commander
Variants: No
Fire Mode: Semi-automatic, Automatic
Caliber: 9 × 19 mm
Features
Rounds per Magazine
Magazines
Rate of Fire
Top-mounted Magazine
30 Rounds
4 Magazines
700 rpm
F1
Submachine Gun, Caliber 9 × 19 mm, F1


Statistics:
Weapon Type: Submachine Gun, Magazine-fed
Classes: Pointman, Engineer, Commander
Variants: No
Fire Mode: Semi-automatic, Automatic
Caliber: 9 × 19 mm
Features
Rounds per Magazine
Magazines
Rate of Fire
Top-mounted Magazine
30 Rounds
4 Magazines
625 rpm
M37
Ithaca Model 37 Shotgun


Statistics:
Weapon Type: Shotgun
Classes: Pointman, Engineer
Variants: Yes
Fire Mode: Pump-action
Weapon Variant
Features
Shells per Magazine
Shells Carried
Trench Gun
Attachable Bayonet
6 Shells
35 Shells
Stakeout
None
6 Shells
35 Shells
Duckbill Trench Gun
Wide, flat shot spread
8 Shells
32 Shells
For more information on various shell types, see the section "Weapons Continued," subsection "Shotgun Shell Types."
XM21
M21 Sniper Weapon System


Statistics:
Weapon Type: Sniper Rifle, Magazine-fed
Classes: Marksman
Variants: No
Fire Mode: Semi-automatic
Caliber: 7.62 × 51 mm NATO
Features
Rounds Per Magazine
Magazines
3-9× Redfield Scope
20 Rounds
4 Magazines
M79, "Thumper"
Grenade Launcher, M79


Statistics:
Weapon Type: Grenade Launcher
Classes: Grenadier
Variants: Yes
Fire Mode: Single-shot
Caliber: 40 × 46 mm Grenade
Damage Radius - High Explosive: 15 Meters
Minimum Arming Distance - High Explosive: 14 Meters
Weapon Variant
Grenades Carried
HE Grenades
9 Grenades
HE and Smoke Grenades
6 HE, 2 Smoke
HE and Buckshot Grenades
6 HE, 6 Buckshot
Secondaries & Equipment - AUS
Roles - AUS
Helicopters - General

Pilot roles and their associated helicopters may seem almost like a mini-game of their own, but they still have a large role to play in the ground war. Understanding the armament and abilities of each helicopter is necessary in order to play the roles effectively from a tactical perspective.
Combat Pilot
Pistol
Vehicle Access
M1911A1
AH-1G "Cobra"
OH-6 Cayuse "Loach"

The Combat Pilot has access to the most powerful weapon systems in the game. Even the weaker of the two helicopters, the Loach, is easily capable of wiping out whole squads at once. However, this power can easily be wasted, so the pilot should communicate with the Commander to find out where their fire would be most effective. Since a single well-placed RPG or DShK round can take down any chopper, the helicopter's great advantage is agility. A good pilot remembers that, despite their strength, they are vulnerable, and must always fly fast and stay alert.
Transport Pilot
Pistol
Vehicle Access
M1911A1
UH-1H "Huey"

While the Transport Pilot lacks heavy weaponry, their abilities can still turn the tide of battle. When a pilot is linked to a Squad Leader, members of that squad can spawn in their helicopter and be dropped off almost anywhere on the map, and thus surprise and overrun enemy positions from unexpected angles. Since the Huey is relatively unable to defend itself from attack, it's important to remain mobile, agile, and fast, and the time spent on the ground should be as short as possible, unless otherwise safe. However, the constant spawn of players in a helicopter means that it's easy to waste time being airborne between dropoffs, so the pilot must always be concious of his passengers and drop off troops whenever possible.
AH-1G "Cobra"


Type: Combat Helicopter
Seats: 1 Pilot, 1 Gunner
Weapons
Ammunition
M134 7.62 × 51 mm NATO Minigun
3000
40 mm Grenade Launcher
50 Rounds
M195 20 mm Rotary Cannon
950 Rounds
FFAR Rockets
21 Rockets
Sight Recticle (Gunner):


Sight Recticle (Pilot):
OH-6 Cayuse "Loach"


Type: Observation/Combat Helicopter
Seats: 2 Pilots, 1 Passenger (Commander)
Weapon
Ammunition
M134 7.62 × 51 mm NATO Minigun
2000
Sight Recticle:
UH-1H "Huey"


Type: Transport Helicopter
Seats: 2 Pilots, 4 Passengers, 2 Machine Gunners
Weapon
Ammunition
Mounted M60D × 2
500
Helicopters - Basics

Helicopters are much more versatile than planes, being able to perform pinpoint landings and still offering rapid insertion and extraction. However, mastering helicopters will take hours of work. Here are some basics to get started.
Controls
...
Basics
...
HUD
...
Commander Abilities

The South Vietnam Commander, like his teammates, possesses some of the most modern and destructive weapons available. His abilities can easily destroy the enemy, but he must be careful with where he places them. They are outlined in the table below. He must also be aware of the locations of all radios on the map.
Using the Radio
To find a radio, open the map (default M) or open the tactical overlay (default T). Simply look for the radio icon, shown to the left, and go to it. Stand within a few feet of the radio, look at it, and press the use key (default F) to open the radio overlay. Click on a mark to select it for use, and then click on an ability icon to the left of the map to call in that ability.
South
Support
Type
Duration
Cooldown
Salvos/Bursts
Radius


Artillery
M101 Howitzer Battery
Five airburst salvos are fired on the selected target area, killing anything within it and denying access to the enemy during the duration.
Duration
Map Dependent
5 Salvos
25 Meters

"Spooky"
AC-47 Gunship
AC-47 "Spooky" gunship will orbit your selected target, firing bursts of its Miniguns and providing area denial for a long duration.
60 - 180 seconds depending on the map.
Map Dependent
Multiple Bursts
Radius

Napalm
F4 Phantom Napalm Run
F4 Phantom drops two canisters of Napalm on the selected target, instantly killing all enemies caught in the blast.
Duration
Map Dependent
1 Strike - 2 Canisters
Radius

Aerial Recon
Piper L4 Cub Recon
Reconnaissance aircraft that will automatically spot enemies that are on the move or in the open. Stay near the radio to receive position updates.
Duration
Map Dependent
Salvos/Bursts
Entire Map

Force Respawn
Respawn Dead Teammates
Instantly deploys all dead team members at their selected deployment points.
Map Dependent
Salvos/Bursts
Radius
Mechanics, Tactics and Strengths

The United States has the world's largest and most productive economy, and it brings this technological superiority to the battlefield. The South Vietnam riflemen are equipped with the most modern rifles yet invented, and have access to the most powerful and mobile vehicles and weapon platforms in the world. The technological might of the U.S. lets South Vietnam strike at range and up close with equally deadly force.
Spawning
South Vietnam infantrymen have the option to spawn on the location of their Squad Leaders. This makes the South Vietnam Squad Leader's life very important, as his death means not only a small gap in the line, but a massive hole, due to the time it takes his squad members to reach the battle from the rear spawn. Because of how important they are to the team's coordinated effort, Squad Leaders must play cautiously and take as few unnecessary risks as possible, letting squadmates do the dirty work for them. The same is true for the ability to spawn in transport helicopters; the pilot's life and the helo's flyability are very important.

However, the ability to spawn on a teammate has its advantages, since it allows South Vietnam to appear suddenly at unexpected locations. If the team is having trouble entering an objective, it only takes one squad leader to probe for and find an unwatched flank and move up. His squadmates can then exploit this gap, turning the tables on the enemy and making their approach to the objective difficult. Thus, the ability to spawn on teammates causes a more noticeable division between roles, but one that can be exploited to great effect.
Destroying Tunnels

Any South Vietnam can destroy a North Vietnamese spawn tunnel by simply looking at it, being withing a few feet, and holding f down the use key (default F) for 5 seconds. However, this often exposes the South Vietnam to enemy fire for an uncomfortably long time, so there are other methods available. Engineers can throw and remotely detonate C4 charges on spawn tunnels, destroying them immediately, and Grenadiers can collapse tunnels by landing an M79 explosive grenade on or right next to it. If a tunnel is destroyed, the squad leader who placed it will have to wait for a while before placing a new one, so destroying them can greatly disadvantage the enemy.
Tunnel Systems

...
Huey Raids

...
General Tactics
Because so many South Vietnam weapons are effective in almost any situation, South Vietnam do not need to specialize as strongly as their enemies: a single soldier or marine can snipe, suppress, and fight up close with equal skill. However, there is a strong tendency to get complacent as South Vietnam. Just because your weapon is so useful does not mean that it alone can win the battle. Constantly look for weak points and exploit them, and coordinate with the technology available.
Identifying Southern Soldiers
IMAGES NEEDED
Though character customization means that there are few universal identifying features for each team, there are still plenty of signs to look for. A few include:
  • What is the most common color of the character's uniform? If leaf-green, South Vietnam. If brown, beige-green, black, or gray, North Vietnamese.
  • How many hands does the character have on their rifle when sprinting? If two, South Vietnam. If one, North Vietnamese.
Beyond these common points, experience with the various customization options and their appearance will be necessary in order to pick out friendlies and enemies.
Strengths
Breaching and Clearing
Since South Vietnam are usually on the offensive and have to clear the area of enemies, effective breaching and clearing techniques are often necessary. Grenades can be very deadly, but they have their downsides: if you don't kill everybody with a grenade, they will be alerted to your presence, and the surprise that comes with a sudden breach will be lost. When clearing a room, use the 'cutting the cake' technique (see below) in order to expose as little as possible to angles that have not been confirmed safe. Move quickly and keep the enemy on their toes, but never forget about doors to rooms that remain uncleared, as enemies may still be in them.
Long Range and Short Range Combat
South Vietnam weapons do well at long range in general, or at least better than the enemy counterpart. The M16, M14, M40, and M60 are all exceptionally accurate and powerful at range, so while fighting in close-quarters is necessary while attacking, South Vietnam should generally try to keep the enemy as far away as possible while defending. Those projectile weapons that are not so strong at range, such as the M3 and M37, are still more accurate than the North Vietnamese equivalent, even if only slightly. The flamethrower is very restricted in range, though, so its user must move quickly and use cover to reach the enemy. The M79 grenade launcher is somewhat unclassifiable: it loses no power at all at range, and can still be used with buckshot at close range, but its slow firing speed makes it hard to use. In general, South Vietnam weapons require less skill to use precisely, but more skill to suppress the enemy or to spray down areas with, so players must stick to the strengths of their weapons.
Fire Support
Since the South Vietnam commander has so many options for support missions, he can force the enemy team to play the way he wants. Napalm is good for destroying everything in an area and making it easier for friendlies to occupy. Artillery is deadly, but its real function is keeping all players out of an area for a sustained period, so placing it on the cap zone your team is trying to take can often hurt as much as help. The Spooky is also useful for area denial, and its lack of explosive power is balanced by its unexpected lethality. Both artillery and gunship support are best placed right behind the objective, between it and the enemy spawn. Recon will reveal the rough locations of enemy troops, and is useful before attacking a capture zone. Each takes a few minutes to cool down, though, so the commander must remember not to waste them in short succession.
▃▃▃▃▃▃▃▃▃▃▃▃▃▃▃▃▃▃
GAME MECHANICS
This Section consists of Game Mechanics, and Systems. In here you will find information about the Heads Up Display (HUD), Movement, Weapon and other Mechanics and Systems.
Game Modes

In Rising Storm 2: Vietnam, there are three game mode variants: Territories, Supremacy, and Skirmish. Veterans of the franchise will instantly recognize the Territories game mode since previous games in the series have primarily featured this mode. Supremacy and Skirmish, however, are new additions to the franchise; the former is a more mobile, nuanced variation on Territories, while the latter is designed for small-scale, competitive play. Each game mode relies on control over objectives, but each differs in terms of how objectives affect the overall gameplay of the maps. No matter the mode, though, a team must have more men than the enemy in an objective for a certain amount of time in order to capture it.
Territories

The goal of Territories for the attacking team is to capture all of the defending team's objectives before the round timer runs out; if they do so, they win immediately upon capturing the last objective. The defending team wins by holding at least one objective until the round timer runs out, or by holding until the lockdown timer beings after [X minutes] and runs out after three minutes; by which point, the assault is effectively stalled and the attackers are "locked down." Lastly, either team can win by exhausting the other team's reinforcements and, either kill all surviving enemies or wait for the lockdown timer that begins to run out.

Objectives will unlock and become contestable as previous ones are captured by the attackers. The status of an objective is depicted as either dimmed, meaning that it's locked or fully lit, meaning that it's available to be attacked. Typically, objectives will lock and become impossible for defenders to recapture as soon as the attackers capture them. But sometimes when there are more than one contestable objectives at once, none will lock until the attackers have captured all.

.
Overhead map of Hill 937 "Hamburger Hill" for Territories

...


The same situation, represented by the Tactical HUD.

Supremacy

Supremacy is designed to reflect the lack of clear front lines that was characteristic of rural fighting in the Vietnam War. Due to the increased mobility allowed by South Vietnam helicopters or by the North Vietnamese knowledge of the area, objectives cannot be considered entirely safe from assault and so do not lock when captured. Thus, both teams can attack and defend simultaneously, and the victory conditions are not as simple as in Territories.

A feature specific to Supremacy is that objectives only produce points for the team that controls them, and only if they are connected to that team's home base. The goal of Supremacy is to completely drain the enemy of points earned from captured objectives, oftentimes done by cutting off said objectives. If isolated, they contribute nothing to their team until reconnected. Further, should the enemy lose their home base, they won't gain any points until its recaptured, regardless of how many other objectives they control. Alternatively, a team can win by capturing all objectives, following a one-minute timer in which they lose control of none of them. Because of this system, a game can end early regardless of the round timer or reinforcements. Depending on the number and value of objectives each team holds, only the difference in points each are earning contribute towards draining the team that holds less total points.

For example, if the Team A controls 9 points worth of objectives and the Team B control 7 points worth, the Team A will gain the difference of 2 points. Every five seconds, this amount is deducted from Team B and added to the Team A. In the Tactical HUD, this is represented by the white arrow marker on the points bar pushing the gains of the Team A in blue with every tick into the shrinking Team B. The larger the difference, the faster the arrow marker moves. If it reaches one end of the bar and thus leaving only one team's color in the bar, that team wins. So teams need not only several--or simply more valuable--objectives, but they need to hold them for a period of time too. Each team begins with 250 points, for a total of 500.

Overhead map of Song Be for Supremacy


...

Skirmish

The goal of Skirmish is to eliminate every member of the enemy team after depleting their reinforcement timer. The reinforcement timer is depicted as two bars at the top-center of the tactical HUD, each for their corresponding team. These bars will slowly drain over time from their original count of two minutes. In order for dead players to continue respawning, their living teammates must continue to capture objectives, which will then add forty-five seconds to their team's reinforcement timer.

Since there are no reinforcements in the way that they exist in the other game modes, players are represented by icons beneath their team's reinforcement timer bar in the tactical HUD. Any time a player is eliminated, a corresponding player icon is crossed out--otherwise, uncrossed if a player is alive or respawns. Players will continue to respawn until their team's reinforcement timer runs out. Should a team exhaust their timer, they become susceptible to defeat.

A team wins by eliminating every member of the enemy team while the enemy is unable to respawn. However, if this does not happen within the allotted five-minute round timer, a two-minute instant death timer will initiate, disabling all objectives and removing each team's respawn ability. Should the round remain inconclusive after the instant death timer runs out, the team with the most surviving members will be victorious.

Overhead map of Jungle Camp for Skirmish

...

Victory Conditions
Territories
To achieve victory as the attacking team, the attackers must capture or destroy all available objectives or eliminate the entire defending team's reinforcements and their remaining tickets. To achieve victory as the defending team, the defenders must defend their objectives until either the game's time runs out, if lockdown timer is depleted, or if all remaining reinforcements and their tickets are eliminated.

Supremacy
Victory is awarded when a team has achieved has drained the other team of their tickets and remaining reinforcements, completion of their progress bar at the top, or the most points contributed to the progress bar by the end of the game's time limit. Points contributed to the progress bar occurs when objectives are linked to the team's main base; the more objectives, the more points earned, although if the main base is captured or supply lines are cut off, points are not awarded to the team.

Skirmish
A team wins by eliminating every member of the enemy team while the enemy is unable to respawn. However, if this does not happen within the allotted five-minute round timer, a two-minute instant death timer will initiate, disabling all objectives and removing each team's respawn ability. Should the round remain inconclusive after the instant death timer runs out, the team with the most surviving members will be victorious.
Squads

Squads in Rising Storm 2: Vietnam allow players to form small and coordinated groups within a team. When a squad mate is nearby, bonuses such as buffs and benefits come into play, reducing suppression and providing bonus points for contributing and interacting with the squad.
The Squad Leader

The Squad Leader role is open to any Role except for Pilots and Commanders. The Squad Leader helps lead smaller groups throughout the battlefield and provide spawns for the Squad. Squad leaders can also accept or decline orders from the commander and provide suggested artillery coordinates. The South Vietnam forces spawn directly on their Squad Leader while the North Vietnamese Forces spawn from a constructible Spawn Tunnel built by a Squad Leader.
Joining a Squad
When joining a squad, the player is granted better statistics when near their squad mates. The maximum amount of players a squad is six. When joining a squad, the first person who joins is automatically elected as Squad Leader.
Renaming a Squad

The default name of all the squads is in alphabetical order using the NATO alphabet. The Squad Leader has the option to change a Squad's name to anything. Since the game only supports basic Latin alphabet and numbers, anything that goes out of that range will be viewed as a hash.
Promoting a Squad Member to Squad Leader

A Squad Leader is allowed to promote anyone in their squad as a Squad Leader at the cost of demoting themselves. The Squad Leader's abilities will transfer over after the promoted Squad Member dies.
Inviting people

The Squad Leader is allowed to invite anyone on their team to his squad. Squad invitations allow players to accept or decline an offer, as well as letting them into a locked squad the invitation came from.
Locking/Unlocking

The Squad Leader has the ability to lock or and unlock a squad. When a squad is unlocked, anyone on their team can join. When a squad is locked, only players currently occupying a slot, invited by the Squad Leader, or a friend of the Squad Leader can join the following squad.
Kicking a Squad Member

The Squad Leader has the ability to kick any Squad Member out of their squad. To prevent them rejoining the squad, the Squad Leader can lock it as well.
Squad Bonuses
...
Score and Point System

Many actions will earn points, which count both towards the player's total number of points in their career, and towards the team's total points for that match. The table of point rewards for point-earning actions is below.
Type
Trigger
Points
Captured Objective (Attacking)
Inside an Objective when captured
+50
Captured Objective (Defending)
Inside a held Objective when captured
+50
Capture Bonus (Team)
Points per friendly Inside an Objective when captured
+1
Capture Bonus (Squad)
Bonus points per Squad member inside Objective when captured
+2
Kill
Killing an enemy
+5
Kill Assist
Damaging an enemy who is then killed by a friendly
+2
Kill Assist (Squad)
Damaging an enemy who is then killed by a Squad member
+5
Killed Self
Comitting suicide
-5
Objective Kill (Attacking)
Killing an enemy who is inside an Objective
+2
Objective Kill (Defending)
Killing an enemy while the player is inside an Objective
+3
Protected Commander
Killing an enemy while near the Commander
+5
Protected Squad
Killing an enemy while near another Squad member
+5
Recon Plane Kill
Shooting down a Recon Plane
+5
Spotting Assist
Spotting an enemy who is then killed by a friendly
+2
Spotting Assist (Squad)
Spotting an enemy who is then killed by a Squad member
+5
Supplied Ammo
Giving a Machine Gunner spare ammo
+2
Trap Disarm
Disarming an enemy trap
+5
Team Kill
Killing a friendly Player
-25
Team Damage
Damaging a friendly Player who is then killed
-5
Tunnel Destroyed (Friendly)
Destroying a friendly Spawn Tunnel
-10
Tunnel Destroyed (Enemy)
Destroying an enemy Spawn Tunnel
+10
Honor System


Every point earned counts not only towards the team's match total, but also toward the player. This is the Honor system. Reaching higher honor levels unlocks new cosmetic items, and a high honor level usually corresponds to high skill.
Heads Up Display

Rising Storm 2, like other first-person shooters, uses a Heads-Up Display to convey information about the player. However, the HUD in RS2 is more minimalist than most games. There is no crosshair, no ammo counter, and kills are by default not displayed until a few seconds after death. Many similar HUD features, or lack thereof, make for a game in which using your eyes and ears is necessary for skillful play.
General HUD

When you boot up the game for the first time, you will see some HUD and controls options.

We'll discuss some of these later, but two that affect your HUD are "Use Consistent Friend and Foe Team Colors" and "Squad Color." For the purposes of this guide, we'll assume that you have the first off and the second set to green, although this is just preference, and if you prefer to have them set differently in-game that's okay.

When you first spawn, the HUD will contain very little information. Objective markers appear faintly in the direction of the corresponding objective, kills are displayed in the top right of the screen, and if you're in an objective, an icon will appear at the bottom center. This icon shows what the objective's name is, what team controls it, and, if applicable, the fact that it's being captured and how quickly.

When you press T, the Tactical HUD will appear. This is a more detailed version of the default HUD. Objective markers become opaque, resupply box markers and friendly artillery/air support markers appear, the game progress bar and the current objective status indicators appear at the top, a squad roster with dead members grayed out appears at the left, and various other bits of information appear at the bottom. From left to right, they are the compass, the number of spare magazines, the number of grenades carried, your weapon's rate of fire setting, your weapon's range setting, and the map grid coordinate reference you are in.

The compass tells you where you're pointing. North is the top of the map you see when you hit M to open the map. The number of magazines you are carrying does not include the one in your weapon, but it includes magazines that are only partially full. If you reload in the middle of a magazine, the bullets are not aggregated together into a sum from which magazines are magically created; instead, that magazine, with that number of bullets in it, does not combine with others, and when you run out of full magazines, you will begin to reload partials. Always make sure you have a full magazine before clearing a building or peeking a new angle, or you're liable to get a nasty shock when you run out after three bullets. Instead of being told by the HUD how many bullets are left in the magazine you've loaded, though, you must hold down the R key to remove the magazine and feel its weight, look at the belt, or open the breech to inspect it. You will then be given a rough estimate of how much ammo is left: all of it, more than half of it, less than half, or almost none. If you're empty and check, you will reload. There is also an option that determines whether you reload automatically upon attempting to fire an empty weapon.

The number of grenades is self-explanatory. To see how many C4, tripwires, or other equipment apart from grenades you have, though, you must take out that equipment to see. One bullet means semi-automatic or bolt-action, depending on the weapon, while five means automatic, and two means that, in the case of double-barrelled shotguns you will fire both barrels. Range setting is not very important, as most engagements in-game will occur at under 100 meters, and for those that don't, drop-off is very slight until 300 or 400 meters, at which distance enemies are very hard to see in the Unreal engine, so unless you have a cartridge with a lot of dropoff like a submachine gun round, sigh adjustment is rarely necessary.
Skirmish

1. Time remaining.
2. Surviving player. Dead players will be crossed out.
3. Time remaining until spawning is disabled.
4. Spawn time bar. A visual representation of the time remaining.
5. Empty space. A visual representation of the time since the most recent capture by your team.
6. South Vietnam-held objective.
7. Neutral objective.

If lockdown is less than three minutes away, the timer at the top of the HUD will show the time until lockdown instead of the total time.
HUD - Tactical HUD

The Tactical HUD can be shown by pressing the T Key (Default), and it contains more information than the default HUD. It shows information like your squad composition, the current objectives and time remaining, and weapon status like fire rate and sight range. More information is available in the Tactical HUD than in the normal HUD, but it is also more cluttered than the default.

...
HUD - Overhead Map

The overhead map displays information about your position, like in other first-person shooters. It shows the location of objectives and team members and the general layout of the map.

The tactical map for a game of Territories.
Assuming that you have Consistent Friend/Foe Team Colors off, South Vietnam-controlled objectives will be blue and have an eagle-shaped icon, while North Vietnamese-controlled ones will be red and have a star-shaped icon, no matter the mode. Objectives that are locked are not visible from the HUD, even with Tactical HUD on, and they will be semi-transparent on the map. Capturable objectives will be semi-transparent in the HUD and opaque in the map.
Grid Coordinates

...
Table of Icons
[Image]
Name
Description
MG Ammo
A Friendly player needs ammo.
Image
Static MG
Static Machine Gun Emplacment
Static Tunnel
Non-destructive passage into an underground tunnel.
Squad Leader
Squad Leader's current position.
Spawn Tunnel
Spawn Tunnel's current position.
Spawn
Selectable default spawn.
Image
Soldier
Current position of a soldier.
Rally Point
Regroup order by a Squad Leader or Commander.
Static Radio
Stationary radio for Commanders.
Helicopter Landing Zone
Helicopter Landing Zone request from a Squad Leader or Commander.
Helipad
Helicopter spawn and resupply.
UH-1H Huey
Current position of UH-1H Huey.
Recon Plane
Current position of Recon Plane. Provides reconnaissance of enemy activity when active.
OH-6 Cayuse
Current position of Recon OH-6 Cayuse. Provides reconnaissance of enemy activity when active.
AH-1G Cobra
Current position of AH-1G Cobra.
Follow
Follow order command from a Squad Leader or Commander.
F4 Phantom
Current Position of F4 Phantom. Drops napalm canisters on targeted position when active.
AC-47 Spooky
Current position of AC-47 Spooky. Provides aerial fire from above on targeted location.
Enemy Spawn Tunnel
Possible location of a nearby Enemy Spawn Tunnel from reconnaissance.
Enemy
Possible location of a nearby Enemy from reconnaissance.
Defend
A Defend order given by a Squad Leader or Commander.
Deathl
Recent located death of a friendly.
Attack
An Attack order given by a Squad Leader or Commander.
Artillery
Current position of a friendly artillery strike.
Ammo Supply
Stationary resupply area.

HUD - Communication Rose

The communication rose is a quick way to communicate with teammates about your tactical situation. It is best used if there is no time to type out a message, if you don't have a microphone, or if you are engaged in a firefight and can't speak.

...
Communication

Good communication is the key to a successful match, but it can also lead to your downfall if not used correctly...
Command Rose
...
VoIP

...
Public
Every player from the match can hear you speak...
Team
Every player from your team can hear you speak...
Squad
If you are in a squad, every player from your squad can hear you speak...
If you are in a vehicle, every player from your vehicle can hear you speak...
Text
It is better to use a mic when encountering a fight but typing a text could be useful in several occasions...
Public
Everyone from the match can see your text...
Team
Every player on your team can see your text...
Squad
If you are in a squad, every player from your squad can see your text...
Weapons

Weapons in Rising Storm 2 are more realistically modelled than in most games, while still having smooth feel and handling. Various true-to-life elements are incorporated into the weapons, such as realistic iron-sight misaligment, actual separate magazines with bullet counts, and physically-accurate bullet drop, arc, and penetration. Each of these factors must be accounted for in order to use weapons accurately.
Recoil

The backwards kick of a weapon when fired. Each projectile weapon has different recoil depending on its weight, caliber, and rate of fire. Crouching, going prone, or supporting the weapon on a surface can mitigate this recoil somewhat. Machine guns must have their bipods extended to get the full benefit of recoil reduction.
Sway

Because of your character's breathing and involuntary movements, your weapon will sway slightly in your hands. Sprinting will increase sway, while resting the weapon, especially with the bipod deployed, will decrease it.
Breathing / Controlled Breathing

Breathing affects the state of your weapon when trying to aim. Sprinting causes heavier breathing. Crouching will allow you to get your breath back more quickly; going prone even quicker still.
MG Barrel Temperature

Firing automatic rifle-caliber weapons for long periods of time will heat up the barrel. When smoke begins to emanate from the barrel, the weapon is in danger of warping and becoming very inaccurate. Fire in controlled bursts to avoid this.
Reloading / Check Ammo

As in other games, weapons are fed by magazines or clips, and these must be reloaded. A feature specific to this series, though, is the lack of a clear ammunition counter. Instead, holding down the reload key will check the amount of ammunition left in the magazine. Another special feature is that each magazine is considered a separate thing in your inventory. Instead of always having a full magazine ready, if you reload in the middle of a magazine and then run out of full magazines, you will begin to reload magazines that are not full. Therefore, simply reloading after every shootout is not an option; ammunition must be managed, and reloads must be timed .
Image
Percentage
X
100
X
75
X
50
X
25
Melee Attacks
Bayonet

The ability to attach or deploy a bayonet on a specific selection of weapon or variants for melee combat. Bayonets provide more damage compared to melee bashing. A downside to the bayonet is that it decreases your accuracy when attached by using the C (Default) key. The bayonet can be unmatched by pressing the C (Default) key again.
Melee Bash

Melee Bash is present on a majority of weapons and is the default melee attack. Melee bash lacks the amount of damage it can give compared to a bayonet normally, but can be more effective when charging.

Switching Fire Modes
A fair majority of the weapons in the game feature two fire modes rather than one. Changing firemose allows for the adjustment of ammunition conservation, recoil reduction, and suppressing the enemy. Changing firemodes is done by the X (Default) Key.
Automatic

Automatic is the default select fire for automatic weapons. In this mode, automatic weapons fire as long as the trigger is held down, at anywhere from 400 to 900 rounds per minute. Although automatic fire allows for much more suppressive capability overall and a much greater chance of hitting at very close ranges, it causes much stronger recoil than semi-automatic fire.

Burst

Burst is present on a select few weapons. In this mode, the weapon fires a burst of three bullets each time the trigger is pulled. Burst fire, like automatic fire, has the advantage of putting multiple rounds down range, but it lacks the disadvantage of wasting ammunition easily. None of the guns in game actually have this. Consider removing it.

Dual

Dual fire is only an option for weapons with two barrels. In this mode, the weapon shoots two slugs or shells at a time. This causes a wider spread and a higher chance of hitting the target, but with the downside that the weapon must be reloaded right away, without the chance for a follow-up shot.

Semi-automatic

Semi-automatic fire is optional on many automatic weapons and default on battle rifles and carbines. In this mode, the weapon will fire a single bullet each time the trigger is pulled, and cycle so that another is ready to be fired as soon as the trigger is released. Although this firing mode is less suppressive than fully automatic fire, it conserves ammunition and produces less recoil.

Bolt action

Bolt-action fire is the only option for a few rifles in the game. It is much more difficult to suppress or make follow-up shots with bolt-action weapons, but they are very accurate and powerful. Because of this, in the more technologically advanced South Vietnam militaries, bolt-action weapons see little use except as sniper rifles. However, for the North Vietnamese, who lack a full-power semi-automatic rifle, bolt-action rifles still find a role as a high-power, accurate weapon for the average rifleman.
Bullet Drop

All bullets in the game are affected by gravity, and thus begin to fall towards the ground. The rate of dropoff is directly related to muzzle velocity, so machine guns and assault rifles will experience less dropoff at a given range than submachine guns and pistols.
Ranging Sights

Adjusting your "zero" is useful when your target is at long range, since bullets will begin to drop off the further they fly. Firing at an enemy with the wrong zero will often result in missing your target. While aiming high will also adjust for long ranges, changing the sight position will obstruct the target less.
Bullet Penetration

Bullets will penetrate objects made of thin or weak materials like corrugated steel. Larger rounds generally travel at higher velocities and carry more energy, so they are more likely to penetrate heavier materials like drywall or wood. Smaller rounds, though, can barely penetrate a thin sheet of steel. Penetrating power is lost at greater angles of deflection, so shooting at the material straight-on is more likely to cause penetration than shooting at it from an oblique angle.
Weapons Continued

Weapon Resting

Resting your weapon decreases the amount of sway and recoil when firing a weapon. This only occurs when there is a solid object below the player's weapon.
Bipods

Deploying a weapon's bipod and placing it on a surface or obstacle will greatly reduce the amount of recoil. The player can place their bipod nearly everywhere when prone, and on many obstacles when near them. Although it makes the weapon much more controllable and accurate, it leaves the player stationary with reduced spatial awareness, and will often expose them unnecessarily. To avoid being shot in this fragile state, the player can hold the crouch button to duck behind cover with their bipod still place. The player also has the option to retract their bipod to prevent placing it on surfaces unintentionally.
Scopes

Scopes help the player view targets at a greater distance. A downside to the scope is that it limits their view of the battlefield when aimed in, meaning that scoped weapons are very ineffective at close range. Some scoped weapons include ironsights, but even if the player changes to the iron sights or looks down the line of the rifle by pressing the alternate-fire key, the low rate of fire of sniper rifles makes them difficult to use on close targets. Scopes, as with any type of sight, must be adjusted for range.
Iron Sights

Most weapons in the game have iron sights. Aiming with iron sights helps steady one's aim, as well as reducing recoil and spray. Using sights zooms the camera slightly to represent concentration, for the tradeoff of reduced peripheral vision. When aiming with iron sights, mouse sensitivity is lowered. For some scoped rifles, iron sights can be switched to when fighting at closer ranges.
Fixed HMG

A stationary heavy machine gun emplacement intended to deal with aircraft. The emplacement can penetrate stronger materials than any other rifle, and can literally tear apart enemy infantry. Although powerful, the fixed HMG exploses the user to other forms of danger, as they are stationary. To reduce their exposure, the player can duck for cover while mounted, and can blind fire the emplacement.
Retractable Stocks

Specific weapons and variants have the ability to retract their stocks. This is useful when engaging in close-quarters combat in enclosed places, as walls and obstacles tend to prevent you to fire. Although useful, negative effects may occur, such as an increase of recoil and unaligned sights.
Resupply

A static entity on the various places of a map that allows the player to resupply their ammunition, equipment, and bandages. When nearby a Resupply Cache, the player will manually recover any missing ammunition, bandages, or equipment in their inventory over time until it is full. The Resupply Cache will not replenish any weapon lost or dropped.
Traps

Traps can be placed in the ground for unsuspecting enemies, and are exclusive to the North Vietnamese forces. The trap is triggered when an enemy soldier runs over or into the trap. Tripwire traps and punji traps are the only traps that require dirt or soil in order to be place, but can be more easily camouflaged than toe-poppers. The Pointman is the only class that can see traps as glowing red objects at close range and inform their team, but all classes can disarm traps. When an objective is captured, any nearby traps will disappear.
Explosives

Explosives, issued to the South Vietnamese forces, can be placed on any surface and detonated manually. Explosives are very dangerous, as they cover a longer lethal range than the North Vietnamese traps. They can also be detected by Northern Scouts at close range as glowing red objects, and though all classes can disarm them, it must be done manually, not by explosive. Other players can also pick up unused explosives, unlike North Vietnamese traps. When the player dies, any placed explosives will disappear.
Grenades

Grenades are throwable explosives that explode, causing a deadly concussion and propelling lethal fragments of shrapnel around it at high speed. There are two ways a player can toss grenade: an overhand throw for longer distances, or an underhand throw for shorter ranges or over obstacles. Grenades can also be cooked by pressing middle-mouse, so that they will explode more quickly after being thrown, but if cooked for too long, they will explode in the player's hand. Grenades also have the ability to destroy certain destructable objects like as well as Squad Tunnels. Players can also jump and crawl onto live grenades to protect their friends.
Shotgun Shell Types

Shotguns can fire using multiple types of shells. The default American and Vietnamese shell is 00 buckshot, a large shot, with each ball being 0.33 in (8 mm) in diameter. For American-issue shotguns, the Trench Gun and Stakeout variants can also fire No. 4 buckshot, a smaller pellet, at 0.24 in (6 mm). The Soviet IZh-58 shotgun can, when used as a hunting gun or coach gun, fire 1 oz. slugs, which launch a single unrifled bullet. In general, larger pellets, like 00 and slugs, fly more slowly than smaller ones and thus are more affected by dropoff and become inaccurate more readily. Smaller pellets also have the advantage of being more accurate, penetrating flesh better, and having a higher hit probability, as more can fit in a single shell. However, smaller pellets do not stop the target as effectively and are not as lethal.
Health, Damage and Suppression

The health system in Rising Storm 2 is not quite like that of any other game. It is much more realistic than in many games, while still not being clunky or hard to understand.
Health and Damage

Health is not represented by a single value for the entire body as in other games; instead, each part of the body has its own health points which are out of 100. Rifles do more than 100 damage, while pistol rounds do about half that, but this number drops very slightly as a function of range to simulate lost velocity. The head and heart are instant-kills, usually, but otherwise, a multiplier is used. When a bullet connects with a player, the damage it still has is multiplied by some number depending on the body part — by one in the torso, but by numbers smaller than one for limbs. Thus, limb shots are less likely to kill than torso shots, and pistols less likely than rifles. Also, the damage done after the multiplier is added to a total damage meter, so that, even if individual shots do not kill the player, they will not survive something ludicrous like fifteen pistol rounds.
Bleeding

Bleeding occurs when the player is hit by a bullet under what conditions? Ask the devs. If the player is bleeding, they will move very slowly and will die if the bleeding is not bandaged. Different rates of bleeding will kill the player after different amounts of time. When bleeding, the player is informed that they are able to bandage.
Bandaging

When a player is bleeding, they can bandage their wounds, and when bandaging, a progression bar appears, showing the amount of time still required. The player is issued two bandages but can resupply their bandages when near a Resupply Point. Although bandaging can save players from bleeding to death, it also leaves them stationary and exposed to enemies and threats nearby. If it is absolutely necessary for self-defense, bandaging can be canceled, but the player will have to start again.
Suppression

Suppression occurs when a friendly dies near the player, or when the enemy is putting accurate, aimed fire near the player. Suppression prevents the player from performing effectively, blurring their vision and throwing off their aim. The presence of nearby squadmates can lower suppression. Artillery, explosives, and weapons with high rates of fire such as machine guns are most effective at suppressing the enemy.
Movement and Stamina

Movement in Rising Storm 2 is similar to other games, but it still may be difficult to get used to. Players can fight from standing, crouching, or prone, and can lean, sprint, walk, and steady their breath.
Stances
Standing

Standing is the player's default stance. It lets them move more quickly than other stances and see more of the battlefield, but it presents a large target. The player will have poor control of recoil, sway, and aim when in this position.

Crouching

Crouching presents a smaller target than standing and reduces the player's risk of exposure to enemy fire, especially when behind cover, at the cost of slowing the player down somewhat. Crouching provides more control of aim, sway, and recoil than standing.

Prone

Going prone exposes the player to very little enemy fire when behind cover, but if outflanked, it can present more of the body than any other stance. Prone provides a great amount of recoil, sway, and aim control, but it slows the player down greatly. Prone also allows the player to regain stamina much more quickly than usual.
Sprinting

Sprinting lets the player run faster than the normal jogging speed. The more equipmet they are wearing and the heavier it is, the slower the player sprints. The player is also allow to melee charge or toss grenades when sprinting. Although sprinting allows the player to move with more aggression and spend less time in the open, it quickly drains stamina, making it difficult to aim, or control breathing and sway. Stamina can be regained when stationary, and more quickly if crouched or prone.
Crouch-sprinting

A special feature of the RO/RS series is crouch-sprinting, which allows the player to move more quickly than normal jogging while still presenting a small target. However, it reduces movement speed compared to normal sprinting, so its utility is limited. Though crouch-sprinting may seem like the obvious choice, in reality it's best to avoid using this stance unless there is no downside to losing speed and an advantage to the reduced profile, such as in a trench or behind a wall or small hill.
Charging

Charging occurs when the play is sprinting while holding down their melee button. When charging, the player will be able to inflict more damage with their weapon when bashing their weapon more than when they are not charging. When finishing a charge attack, the player will have a short delay from thrusting their weapon. Charging can be canceled by clicking the right mouse button.
Crouch-sprinting from Prone

If the player is prone and tries to sprint, they will automatically raise themselves to a crouch before beginning to sprint, and automatically go prone again when the sprint key is released. This reduces the number of key presses needed to sprint from prone, but it may annoy players who are used to using sprint to hold their breath. If the player does not want to go prone after sprinting, they can simply double-tap the crouch key right before stopping, in which case they will stay crouched when the sprint key is released.
Diving to Prone

If the player hits the prone key while sprinting, they can dive forwards to prone. Diving can surprise the enemy and make the player harder to hit in the last few meters before reaching cover, but its effectiveness is limited, as it is not as controllable or predictable as just running into cover.
Leaning

The player can lean to their left or right when stationary in any stance. Leaning is useful when a player is behind cover, allowing quick peeks around an obstacle without exposing too much of the player's body.
Climbing

An interactive obstacle that allows the player to climb such as ladders. These objects will often be shown as glowing objects to inform the player of its intended use. Climbable obstacles such as pipes and lines are only climbable to the North Vietnamese forces and will also appear as a glowing ojbject to those players. Unfortunately, climbing can expose the player to their surroundings.
Mantling

Allows the players mantle over obstacles and cover that are the player's way. Mantling at the wrong time can be threatening, as players are expose for a couple to few seconds, giving enemies the chance to take advantage of a situation.
Mantling From Lethal Heights

Endangers the player to inevitable damage or possibly death. Mantling from high heights will break the player's legs, largely decreasing their speed for a few seconds for enemies to take advantage of. Although it may seem unnecessary, it allows the player to escape tight situations such as explosives and pursuing enemies.
Stamina

As the player sprints, their stamina will drain. Though stamina does not affect the speed the way it does in other shooter games, low stamina will make it much more difficult to hold weapons steadily. There is almost no random bullet spread, so bullets will still go where the barrel is pointed, but having low stamina will make the barrel harder to point in one direction controllable.
Encumbrance

The equipment and weapons each have a weight associated with them. The more equipment and weapons the player carries the more encumbered the player will become. Encumbrance effects the stamina depletion and regeneration rates of the player. The more encumbered a player is the faster the player's stamina will decrease, and the longer it takes to regenerate.
Incline Throttling

Incline throttling models how sloped surfaces affect the player's speed. When moving up a slope, the player will move more slowly, but when moving down a slope, the player will run more quickly, no matter what speed they are trying to move at.
Spotting


A special feature available to all players is spotting. Spotting allows the player to point at areas of where enemies are or could be and notify others. When spotting, a pinpoint image on their HUD will appear for the spotter determining the distance between him and the suspected enemy position. To other players, they will not be able to see this on their HUD, although they'll be able to check their maps of the possible location. The downside to this mechanic, though, is that even if the player spots something, it may be possible that there is no enemy present in the area, and in spotting enemies the player might give away their own position.

The spotting mechanic is not just limited to spotting infantry in general, but classes in particular. When spotting an enemy, the player will yell out the specialty and role of the enemy. Although useful information, it is only limited to to non-rifleman classes, as basic classes would be classified as normal infantry. Special classes include, but are not limited to: helicopters, snipers, RPGs, machine gunners, and grenadiers.
▃▃▃▃▃▃▃▃▃▃▃▃▃▃▃▃▃▃
Maps

The following is a list of maps in Rising Storm 2, as well as some pertinent data about them. As new maps are added, this list will be updated, and popular custom maps will be added as they attract notice.
An Lao Valley

Date
Location
Game Mode
April 1967?
An Lao Valley
Binh Dinh Province
South Vietnam
Supremacy
Details:

...
Song Be

Date
Location
Game Mode
1968?
Song Be Base Camp
Phuoc Long Province
South Vietnam
Supremacy
Details:

...
Hue City

Date
Location
Game Mode
February 1968
Hue City
Thua Thien Province
South Vietnam
Territories
Details:

...
Cu Chi

Date
Location
Game Mode
January 1967?
Saigon
South Vietnam
Territories
Details:

...
Hill 937

Date
Location
Game Mode
May 1969
Ap Bia Mountain
Thua Thien Province
South Vietnam
Territories
Details:

...
Firebase

Date
Location
Game Modes
February 1968?
Khe Sanh
Quang Tri Province
South Vietnam
Skirmish
Territories
Details:

...
Compound

Date
Location
Game Modes
January 31, 1968
United States Embassy Compound
Hue
South Vietnam
Skirmish
Territories
Details:

...
Jungle Camp

Date
Location
Game Modes
February 1968?
X
Skirmish
Details:

...
▃▃▃▃▃▃▃▃▃▃▃▃▃▃▃▃▃▃
SETTINGS
This Section consists of the various adjustable settings in the game. In here you will find information about the Graphics (Video), HUD, and Audio, as well as other Settings.
Settings - Gameplay

Gameplay Settings adjust the game's features and general settings related to gameplay.
Mouse
Reverse Mouse
If enabled the mouse's Y-Axis input will be inverted.

Mouse Sensitivity In-Game
The speed of sensativity and reaction applied to the mouse.

Mouse Sensitivity when using Iron Sights
The speed of sensativity and reaction applied to the mouse when aimed.

Mouse Smoothing
.............


Weapon Options

Free-Aim when using Iron Sights
If enabled Free-Aim will be present while in Iron Sights.

Manual Bolt/Pump gun using Fire
Allows the player to manually bolt or pump their weapon, which is much quicker compared to automatic bolting/pumping.

Automatic Reload
WIll automatically reload the weapon if the weapon run out of ammunition.

Automatic Reload when Check Ammo is Low
Will automatically reload the weapon if Check Ammo is low.

Default to Semi-Auto Firemode
Will default all weapons with Semi-Auto to Semi-Automatic Fire.

Show Check Ammo as Text
If enabled it will convert Check Ammo icon to Text form.

Aircraft/Vehicle Options

Helicopter Collective Sensitivity
.............

Advanced Flight Model
Converts the helicopter controls to be more casual-friendly

Collect (Lift) Controls
.............

Mouse Turning
.............

Keyboard Turning
.............

Freelook KeyBind
Binded to selected key, allowing players to toggle Freelook mode.

Invert Aircraft Y-Axis
The Aircraft controls are inverted Y-Axis.

Enable Freelook by Default
Freelook is enabled at all times.
Settings - Player View & HUD

Player View & HUD adjust visuals not related to performance and quality, as well as various adjustments to the Player's HUD System.
Player View

Field of View
FOV in degrees, the higher the more the player can see of his sorroundings.

Disable Non-Iron Sight Zooming
If enabled, the player will not be able to zoom in when not in iron sights.

Blood & Dismemberment
.............

Tips & Hints

Gameplay Tips
.............

Show In-Game Tips
If enabled tips in game will appear, reccomended for new players.

Show Menu Tips
If enabled tips in the Menu will appear, reccomended for new players.


HUD Options

HUD Icon Opacity in Iron Sights
The Opacity of the HUD Icons when in Iron Sights.

HUD Icon Opacity when Directly Aimed
The Opacity of the HUD when in Iron Sights.

Show Player Name/Icon Max Distance
The Maximum distance in meters that a player's name or icon is shown.

Show Tactical View On Objective Capture
When an Objective is Captured, the Tactical HUD is shown.

Time to fade out the Tactical view
The Amount of time it takes to fade out the tactical view, after releasing the Tactical view key.

Show Climbable Obstactles Glow
When near climbable obstacles they will glow if this setting is enabled.

Always Show Important Icons
.............

Toggle Tactical View
Toggling instead of holding down the Tactical HUD key.

Toggle Orders Widget
.............

Squad Color
.............

Use Consistent Friend and Foe Team Colors
.............

Communication / Orders Mode
.............


Messages & Chat

Show Kill Messages[/b]
If disabled Kill Messages will not show up for the player.

Kill Feed Displayed As
.............

Kill Message Scale
The Scale of the Kill Messages.

Kill Message Opacity
The Opacity of the Kill Messages.

Chat Message Opacity
The Opacity of the Chat Messages.
Settings - Video

Settings optimize your gameplay to strike the perfect balance between quality and performance. It is recommended to experiment with these settings to maximize performance while maintaining quality for the best experience.
Standard

Window Mode
Windowed -
Borderless Windowed -
FullScreen -

Aspect Ratio
4:3 -
5:4 -
16:9 -
16:10 -

Resolution
.............

Quality Level
Ultra -
High -
Medium -
Low -
Lowest -
Custom - See Advanced below.

Post Process Style
Authentic -
Enhanced -
War Movie-
Woodstock Experience -

Vsync
.............

Brightness
Adjusts the overall brightness of the game.

Hardware Physics
.............


Advanced

Word Detail
Adjusts the amount of detail objects in the world.
Low -
Medium -
High -
Ultra -

Character Detail
Adjusts the quality and detail level of characters.
Low -
Medium -
High -
Ultra -

Texture Detail
Adjusts the quality of world textures.
Lowest -
Low -
Medium -
High -
Ultra -

Shadow Quality
Adjusts the quality level of shadows.
Low -
Medium -
High -
Ultra -

Particle FX
Adjusts the quality of particle effects.
Low -
Medium -
High -

Anti-Aliasing
Adjusts the level of Anti-Aliasing.
Off
FXAA Low -
FXAA Medium
FXAA High -

Post Process Quality
Adjusts the quality of post-processing effects.
Low -
Medium -
High -
Ultra -

Lighting Quality
Adjusts the Quality of the lighting
Low -
Medium -
High -
Ultra -

Foliage Detail
Adjusts the amount of foliage (grass, leaves, etc)
Low -
Medium -
High -


Bloom
.............

Motion Blur
If enabled Movement and Motion will cause blurring.

Light Shafts
If enabled Light Shafts will be rendered.

SSAO
Enables Screen Space Ambient Occlusion.

Depth of Field
Enables Depth of Field

Framerate Smoothing
.............
Settings - Audio

Audio Settings Ajust and alter settings related to audio, microphone input, and what is heard in game by the Player.
General
Master Volume
Overall Volume of the game.

In-Game Music Volume
Volume of Music while Playing.

Menu Music Volume
Volume of Menu Music while in the Main Menu.

SFX Volume
Sound Effects Volume, Volume of explosions, gunshots, etc.

Dialog Volume
Volume of Character and Player Dialog.

Announcer Volume
Volume of the Announcer.

Battle Chatter Frequency
The frequency of Battle Chatter In-Game.
Voice Chat
Voice Recieve Volume
Volume of other Players In-Game over VoIP.
Microphone


Configure Microphone
Settings - Key Bindings

...
...

...
▃▃▃▃▃▃▃▃▃▃▃▃▃▃▃▃▃▃
Glossary

The following is a glossary of military terms used in the field manual. Since Rising Storm 2 is a realistic game, many of these terms are required for accurate descriptions of the game's mechanics.
Cartridge, Round, Bullet, Casing
A bullet is only the object that will be fired from the weapon. It does not explode, and only one is fired each time the weapon fires. The casing holds the explosive, or propellant, that will cause the bullet to move, and also the bullet. A cartridge, also called a round, is the entire package of the bullet, casing, propellant, and a small charge that ignites the propellant. Almost every bullet is rifled, meaning it spins in midair for more accuracy. Rifles used to be the only rifled weapons, but now, it is more or less only shotguns that are not rifled.
IMG

Shell, Slug, Shot
A shotgun fires either shot, many small pellets, or a slug, a bullet that does not spin. A shell is the equivalent of a casing: it holds the propellant and shot or slug. However, since the shot is concealed in the shell before firing, shell can refer to either a fired or unfired casing.

Also note that artillery guns fire shells, but in that context, "shell" refers to the object being fired out of the barrel, which is more like a bullet with an explosive in it than like a shotgun shell.

Rifle Cartridge
A rifle cartridge is a type of round containing a bullet that usually weighs between 10 to 13 grams (150 to 200 grains) and travels between 800 and 1000 m/s (2600 to 3200 fps). The bullet is usually around 7.5 mm (0.3 inches) in diameter, and is accurate and deadly up to a kilometer (0.6 miles) away. However, these cartridges are quite heavy to carry, and cause strong recoil.

Pistol Cartridge
A pistol cartridge is a type of round containing a bullet that usually weighs between 7 to 16 grams (100 to 250 grains) and travels between 250 and 450 m/s (800 to 1500 fps). The bullet is usually from 7.5 to 11 mm (0.3 to 0.45 inches) in diameter, and is accurate and deadly up to only 100 meters (300 feet) away. These cartridges are very light and easy to carry, but are not very precise or lethal.

Intermediate Cartridge
An intermediate cartridge is a type of round containing a bullet that usually weighs between 4 to 7 grams (60 to 100 grains) and travels between 800 and 1000 m/s (2600 to 3200 fps). The bullet is usually from 5.5 to 7.5 mm (0.2 to 0.3 inches) in diameter, and is accurate and deadly up to 500 meters (0.3 miles) away. These cartridges are a compromise between the lethality of a rifle round and the lightness of a pistol round: they are easier to carry than full-power rifle rounds, but are still nearly as accurate and powerful, and almost more so at ranges under 300 meters (1000 feet), where most combat happens anyways.

Rifle
A rifle is a weapon that fires a rifle round and can be easily and controllably fired from the shoulder or hip, in any stance. Automatic rifles are difficult to control, so most are semi-automatic or bolt-action. Most semi-automatic rifles use the gases created by the explosion of the propellant to move the bolt backwards and load the next round.

Machine Gun
A machine gun is a rifled weapon that fires automatically. These weapons are often quite heavy in order to withstand the strain of automatic rifle fire, so they are designed to be fired from a mounted position. Light machine guns can be carried with relative ease, while medium machine guns are too heavy and must be mounted. A heavy machine gun fires a bullet that is closer to 12 mm (half an inch) in diameter. They can be gas-operated or recoil-operated.

Submachine Gun
A submachine gun is a rifled weapon that uses the backwards force of an exploding cartridge to let it fire continuously. They fire small pistol rounds, and thus can be quite light and compact, but they lack power.

Assault Rifle
An assault rifle is a compromise between the lightness and repeated fire of a submachine gun and the power and accuracy of a rifle.

Accuracy
  • See MOA

Automatic
    AutomaticBallistic CoefficientBuckshotCaliber
    • 5.56mm
    • 7.62mm
    • 9mm
    • 12.7mm
    • 20mm
    • 40mm
    CartridgeDamage
    • Radius
    • Rating
    • See Also,
      • Energy Transfer
    Energy TransferGrenade
    • High Explosive
    • Smoke
    • incendiary
    Suppression
    • Rating
    MOAMuzzle Velocity
    • See Also,
      • Damage
      • Energy Transfer
    Secondary
    • See Pistol
External Resources

For more information about Rising Storm: 2 Vietnam, please check out these Resources below:
Guides:
http://steamcommunity.com/sharedfiles/filedetails/?id=919995941
http://steamcommunity.com/sharedfiles/filedetails/?id=920527570
Community:

Official Discord: http://discord.gg/rs2vietnam

Official Facebook: http://www.facebook.com/rs2vietnam

Official Forums: https://forums.tripwireinteractive.com/forum/rising-storm-2-vietnam

Official Reddit: http://reddit.com/r/rs2vietnam

Official Twitter: http://twitter.com/rs2vietnam
Official Website: http://www.rs2vietnam.com/
Rising Storm 2: Vietnam Wiki: TBA
33 Comments
Smoked May 14, 2022 @ 10:26pm 
L1A1....shows a M14 instead of FAL....
Dragonfist Nov 21, 2020 @ 8:00pm 
Man this is really outdated.
markus_persson.päron_i_rumpan Feb 7, 2020 @ 1:46pm 
update with new guns plez
金竹卧虎鸡面风水 Jan 8, 2020 @ 8:12am 
I can't hit SHIT when I'm trying to hit the vietnamese, but I always manage to just impulsively fire upon teammates who turn the corner too quickly and startle me
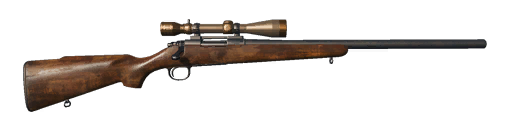
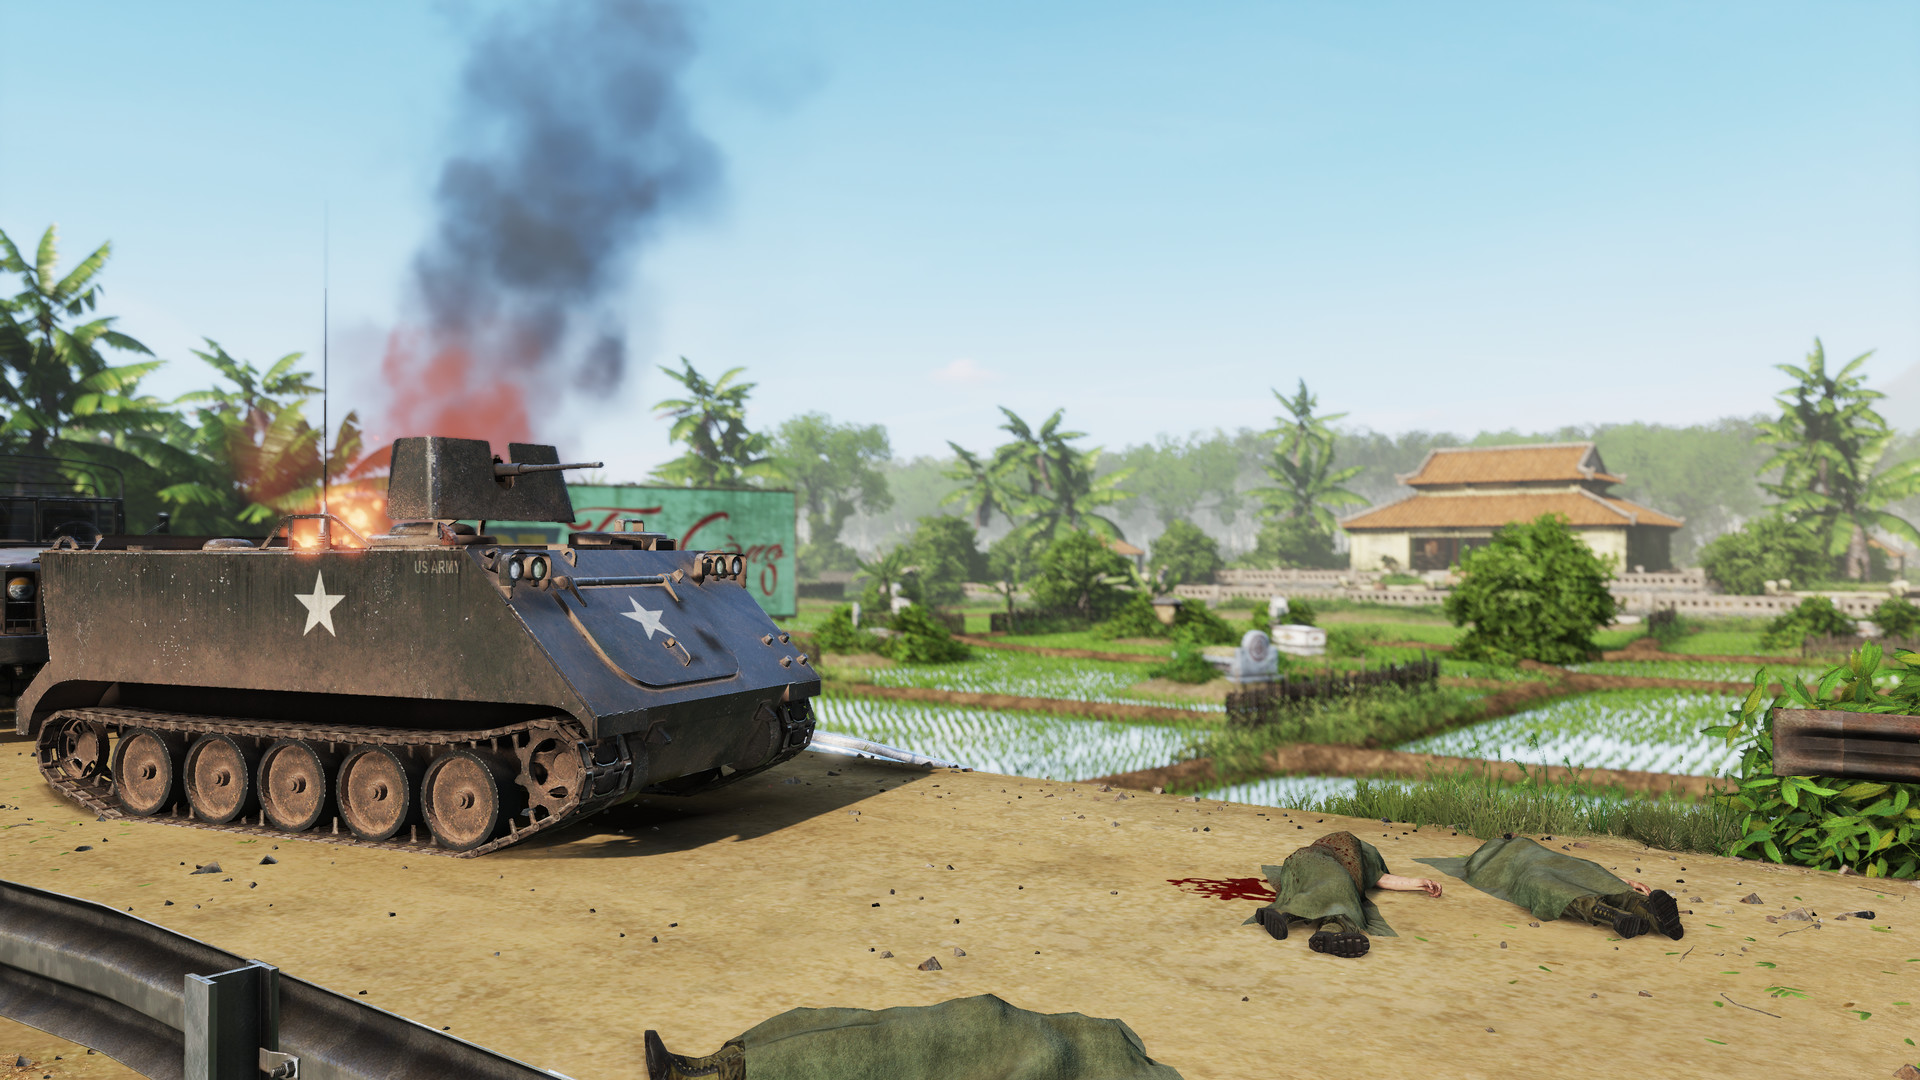
And then I either get an instant shot to the head or an instant shot to the heart, insta-killing my only support for fucking miles
Bourbon Kid Oct 13, 2019 @ 4:19am 
I was searching the internet for days to get an explanation for the shotgun shell types. Now i find this little information on this well structured master piece. Thank you. :cleancake: Now i am ready to make some more Teamkills... damn this game is hard. :steamsad:
KhorneHub Jun 3, 2018 @ 3:05pm 
Do you plan to add ARVN?
Snowbeat Apr 17, 2018 @ 1:40am 
very good looking guide
Ska Cat  [author] Mar 4, 2018 @ 9:49pm 
@pensy95
Thanks for the feedback, although atm myself in particular is busy with stuff to work on this. Hopefully the other guys can make some correctiosn and additions to this later, but in other words...
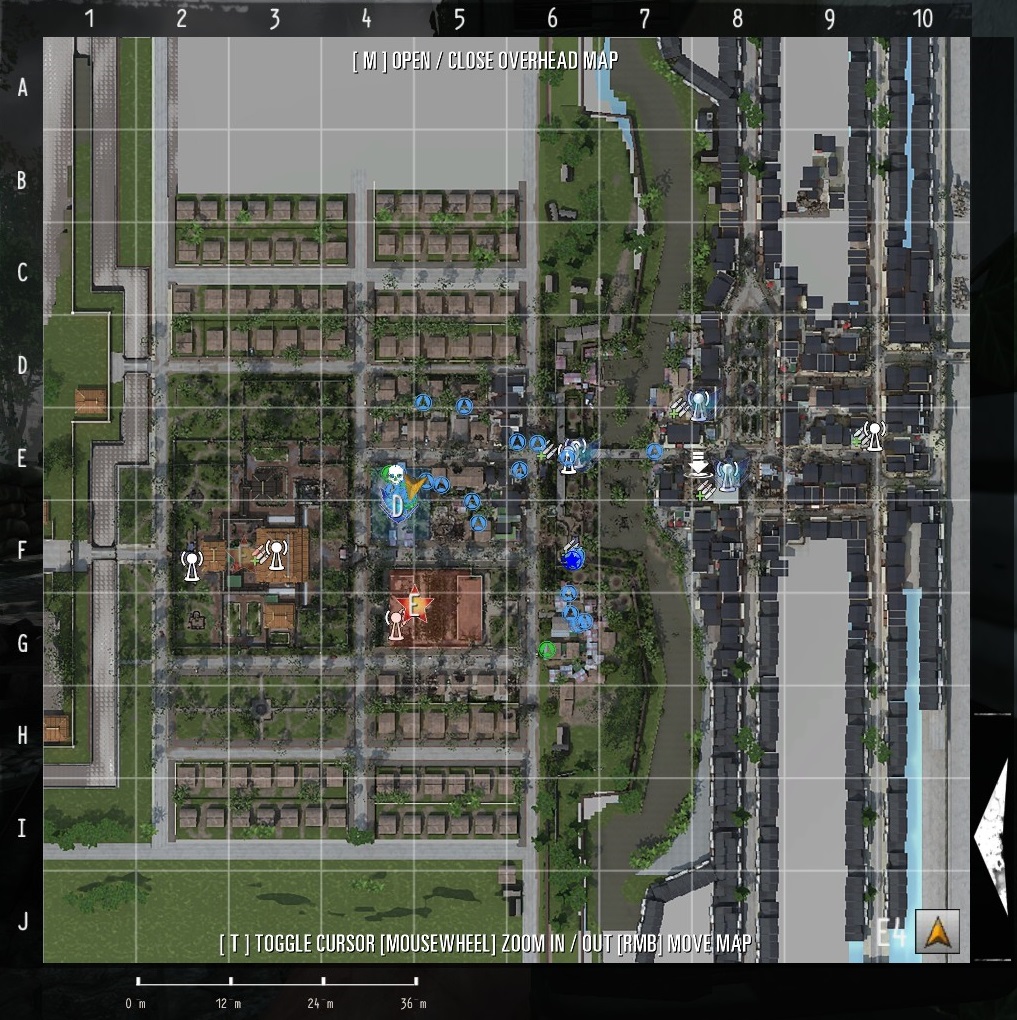
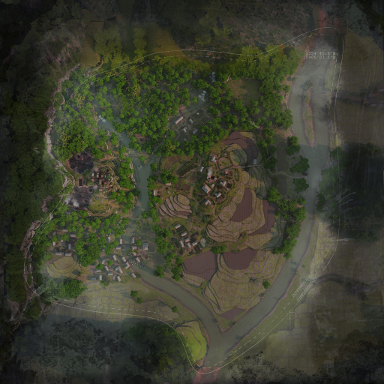
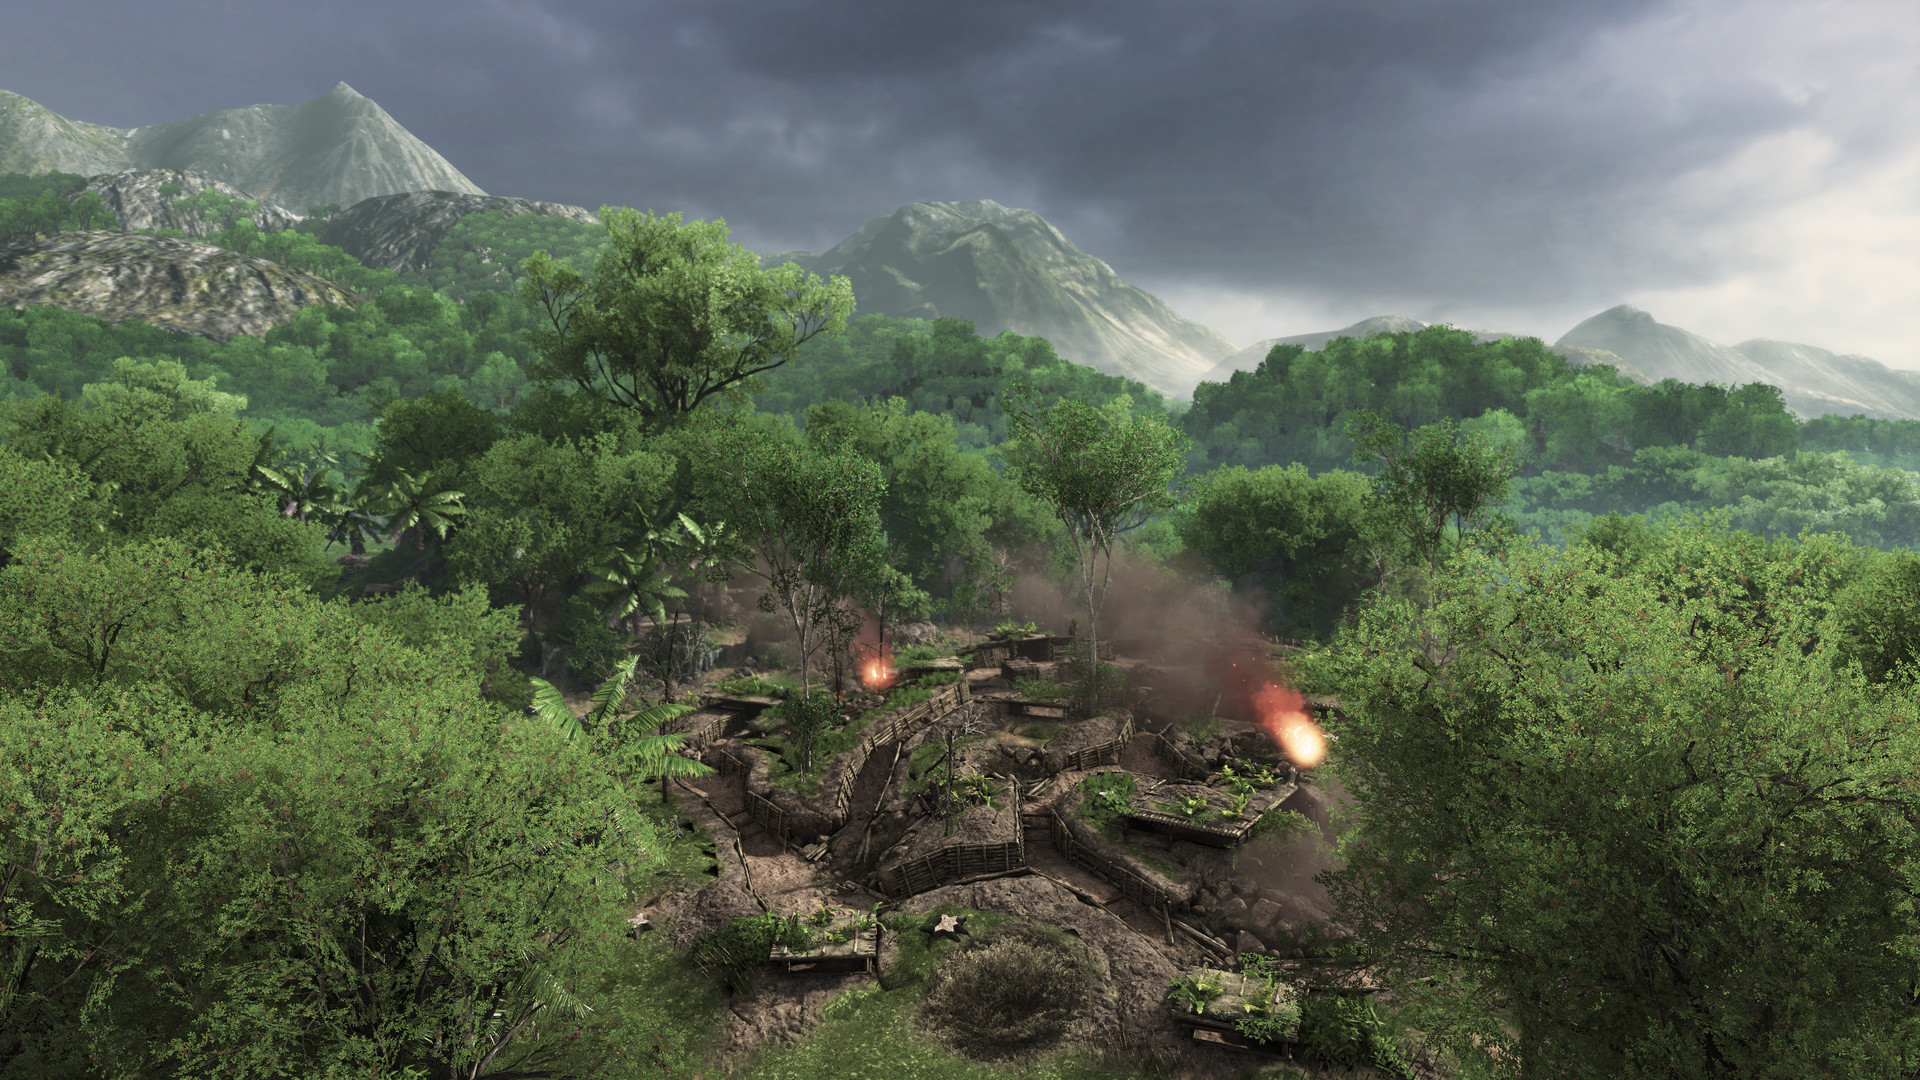
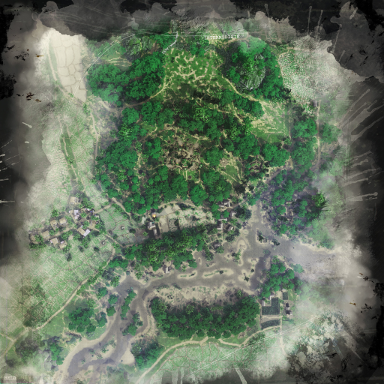
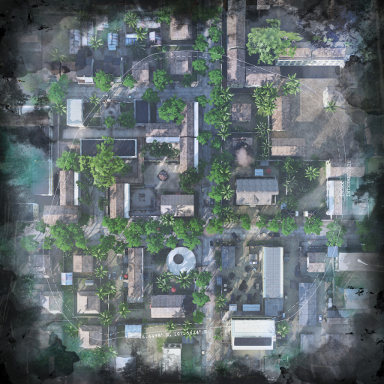
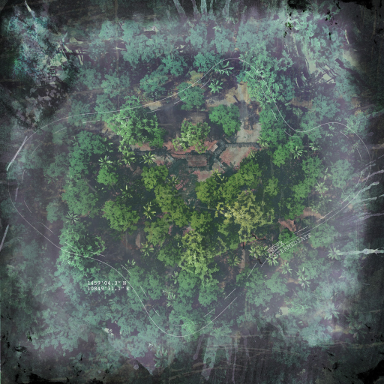
From what we got from the developers, An Lao Valley has not relations to the real life An Lao battle and is actually quite fictional, since according to PsychoPigeon, the game takes place from 67+ (well for the Americans that is)
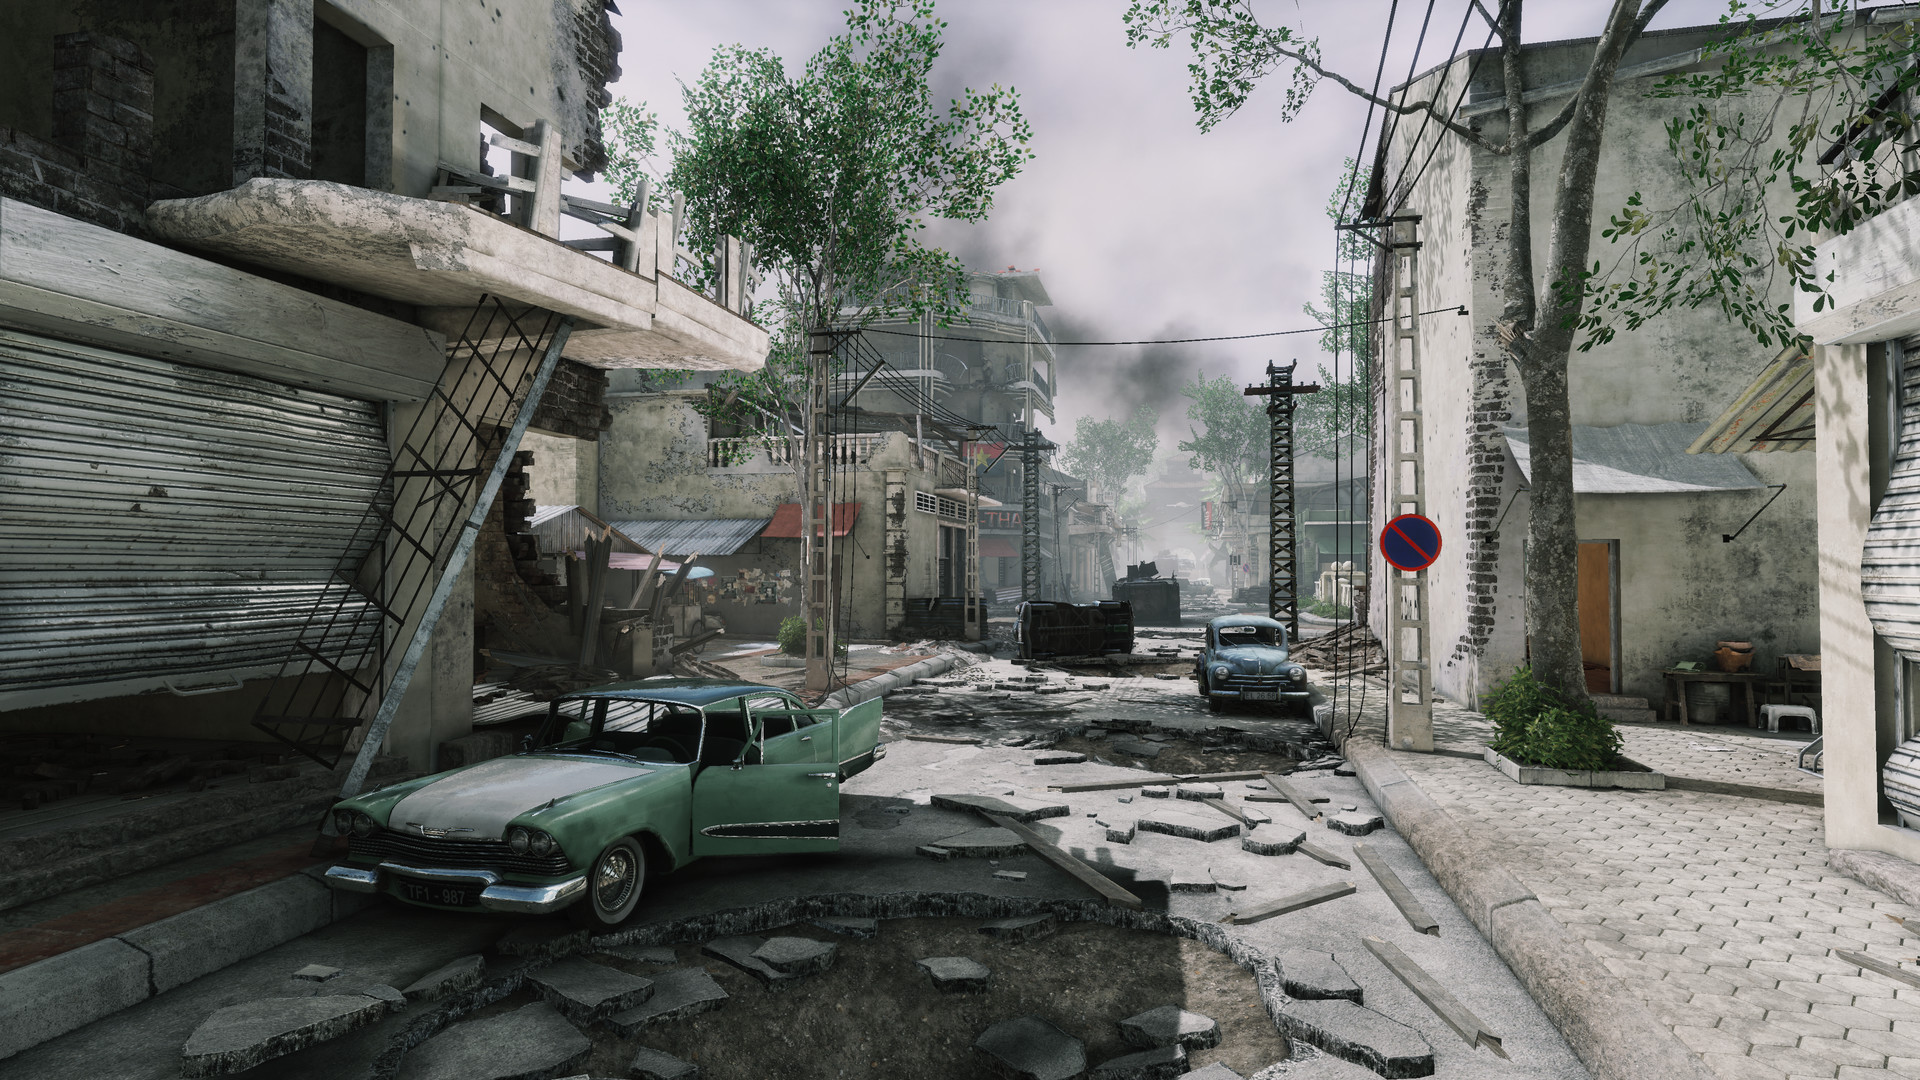
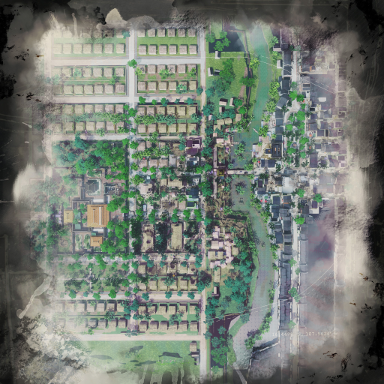
In terms of Cu Chi, it is based off of a 101st Airborne operation in Bến Cát District.
pensy95 Mar 4, 2018 @ 9:35pm 
Also, with the Mosin and SKS, remember in your terminology that the rifle is still magazine-fed, not "clip" fed. You do indeed use stripper clips to charge the magazine, but the clip itself is useless without the magazine. For modern audiences, I know it's automatic to think of a detachable box magazine when the word "magazine" is mentioned, but unless you have a muzzleloader or a single-shot breechloader like a Rolling Block or Martini, your rifle has a magazine, whether that magazine is detachable or not. Both rifles have magazines, they're just internal and not detachable like most people associate with the term "magazine".
pensy95 Mar 4, 2018 @ 9:20pm 
Rung Sac: January 1969. This battle was officially known as Operation Goodwood, but is commonly called the Battle of Hat Dich to avoid confusion with the Battle of Caen during World War II, which the British called Operation Goodwood. It was fought between December 3rd, 1968, and February 19th, 1969, in the Rung Sat region. It was fought between the 1st, 4th, and 9th Battalions of the RAR (The 4th included New Zealanders among its ranks, for those of you Kiwis out there) with supporting American, South Vietnamese, and Thai units, and a mixed force of North Vietnamese regulars and Vietcong guerillas.