Dota 2
Pas assez d'évaluations
Green TD Reborn Guide
De Kimber Prime
The Green TD is a quite popular tower defence custom game mode so I thought I'd make a guide for it.
   
Récompenser
Ajouter aux favoris
Favoris
Retirer des favoris
Basic Information
Green TD Reborn is a remake of a the very populair Warcraft tower defence Green TD. Your goal is to build towers to defend your ancient from the incoming creep hordes.

This is a mode for 1-6 players with 1 lane of creeps spawning per player. The top 2 lanes of the map won't spawn any creeps even with max players so do not build there. A common set-up for max players is having 2 players build where the top 2 lanes meet, then 1 on each side of the map below the next spawn points, and then 2 more where the lanes meet at the bottom of the map.

You will get gold equal to half the gold you would recieve from killing 1 entire lane bonus from completing each round.
Heroes
There are 6 heroes available in this mode:
- Crystal Maiden
- Drow Ranger
- Vengeful Spirit
- Templar Assassin
- Lina
- Pudge

Every hero has 4 abilities:
Build arrow tower - builds an arrow tower
Build frost tower - builds a frost tower
Build siege tower - builds a siege tower
Build aura tower - builds an aura tower

Out of these heroes Pudge is the only one with a different ability. He can use hook to drag a creep towards him, however the creep will walk back to where it came from and continue on it's way like nothing happened. This ability is useful if a boss gets through since you can pull him back to your towers to finish him off.

There is no difference between the other heroes other than looks.
Towers
There are 4 types of towers:
- Arrow Towers (Sniper)
- Siege Towers (Warlock Golems)
- Frost Towers (Ancient Apparition)
- Aura Towers (Ward)

They can be placed by your hero anywhere on the grass area, and can also be sold for half their value.

Arrow towers are the basic shooting units that can target all enemies.
Cost: 10/50/100/150/200/750/5000
*Has true sight at lvl 1*

Siege towers deal aoe damage but cannot attack air units.
Cost: 150/100/200/500/2500

Frost towers will slow enemy units.
Cost: 25/150/450

Aura towers will buff nearby units around them. There are 2 different types: Speed and Damage, each increasing either the attack speed or damage towers deal. When towers are build you can chose which path to upgrade the tower with. Each path can be upgraded once more after being selected.
Cost: 900/999
*Currently the same aura of different levels will stack*
Rounds
*Please note that this section isn't quite 100% done. The info about what each wave is wasn't always shown (+ there seems to be some variation between what it says the wave is and what it actually is). It also got a bit too intense at the end for me to record all the info. If you can fill in any of the blanks please leave a comment, otherwise I will do my best to figure them out soon.*

There are currently 30 waves in the mode, with each wave being different. The types of waves are:
Normal - Normal units.
Immune - Cannot be slowed by cold towers.
Air - Cannot be damaged by siege towers.
Invisible - Requires true sight to be seen.
Speed - Moves faster than other waves.
Boss - Only one tougher unit will spawn per player.

Wave 1: Chicks Kokoko
Normal - Cluckles the Brave

Wave 2: Na'Vi
Normal - Na'vi Weasel Crow

Wave 3: *no name*
Air - Visage Familiars

Wave 4: *no name*
Normal - Pudgling

Wave 5: *no name*
Immune - Dire melee creeps

Wave 6: *no name*
Normal - Dark Troll Summoner skeletons

Wave 7: *no name*
Invis - Radiant mega creeps

Wave 8: *no name*
Normal - Beastmaster

Wave 9: *no name*
Air - Porcine Princess Penelope

Wave 10: *no name*
Boss - Pudge

Wave 11: *no name*
Normal - Butch

Wave 12: *no name*
Speed - Sheep

Wave 13: *no name*
Air, Immune - Black Dragon (also has evasion)

Wave 14: *no name*
Immune - Year Beast

Wave 15: *no name*
Invisible - Spiderlings

Wave 16: *no name
Normal (Slow) - Crystal Maiden

Wave 17: *no name*
Immune - Storm Spirit

Wave 18: *no name*
- LD Panda Spirit Bear

Wave 19: *no name*
Normal - Jakiro

Wave 20: *no name*
Boss - Pudge

Wave 21: *no name*
Normal (seems to be Immune as well) - Terrorblade

Wave 22: *no name*
Air (slow) - Morok's Mechanical Mediary

Wave 23: *no name*
Invisible - Kobold Foreman

Wave 24: *no name*
Speed - Hellbear Smasher

Wave 25: *no name*
Invisible - Dragon Knight

Wave 26: *no name*
- Nyx Assassin

Wave 27: *no name*
- Radiant Mega Creeps

Wave 28
Fast - Lone Druid spirit form

Wave 29:
- Tombstone Zombies

Wave 30:
Boss - *round is bugged atm and won't start*
Items
There is a shop in the middle of the map (the spawn location) which sell 2 items:
- Sentry wards (20 gold for 2 wards)
- Blink dagger (1 gold)

Sentry wards can be used to reveal the invisible enemies, but they run out just like in normal games.

Blink dagger is used for moving quickly around the map but it is not necessary.
Tips and Tricks
- Lvl 1 Arrow towers can be used instead of sentries since they also have true sight, cost 10 gold each, and last till you destroy them.

- Build a variety of towers and not just all 1 type. Arrow is great for single targets like bosses but lack AoE, Seige is great for AoE but can't attack air, Ice will give your towers more time to attack the creeps as well as cluster them for AoE to hit, and Aura towers give great buffs well worth their money. You will need every type of tower if you want to win

- Aura towers with the same buff of the same lvl don't stack, however if you have a lvl 2 damage aura tower and a lvl 1 damage aura tower they will stack.
How to win
This is one method you can use to win the game. Note that it will require 4 players in total and great sacrifice from 2 of those players, as well as teamwork from everyone.

This method was suggested by Erza Scarlet and 4 of us decided to give it a try.

It involves having 2 players being 'carries' and building towers at the choke points off the lanes while the other 2 play 'support' and only build Aura + Ice towers.

In this game VS and myself as Pudge were playing the 'supports' while CM and Lina were the 'carries'.
CM and Lina built arrow and siege towers at the choke points both where the lanes first meet, and where they collide again lower down (as shown in the pictures). The middle island was also build on.

The carries are responsible for killing the wave while the supports, well, support them. The excessive amount of ice towers helps completely clump up the enemies and destroy them when they reach the defences. The main weakness to this strategy is the Immune waves which aren't slowed by the ice towers, therefor quite a few high level Arrow towers must be build.

The 'carries' will have to build the first aura towers themselves since the 'supports' won't get the gold required to build them in time from the gold income they receive. Supports however will build all the Aura towers after those initial 2 put down by the carries.
Supports get 0 kills unless an Ice tower happens to get the killing blow on a creep. They rely 100% on the gold given out after each wave, and all that gold will be spent on Aura towers and Ice towers. Ice towers should be spaced out evenly and not just be near the towers. The more spread out ice towers you have, the more they will clump up. All Ice towers should be upgraded to level 3 ASAP.

Also note that this method will cause a lot of effects to be happening on screen. The host will need to be able to handle this and looking at the effects will cause severe lag for everyone.

We played the game with this method and got to round 30, where the boss didn't spawn and we got stuck. If you try this method yourself feel free to come back here and comment on how it went, and what you think could perhaps be improved. When more rounds come out and/or round 30 has been fixed we will play through with this method again ourselves and I will make changes to this guide if needed.
Known bugs
Chicken army
- An army of about 30 random chickens can be right next to your ancient when you just start the game. As soon as round 1 starts they will attack the ancient.

My stealth…fails me.
- Invisible enemies cannot attack the ancient.

No boss?
- Wave 30 will not spawn

Dah! There goes the whole shootin' match!
- You can command towers to stop shooting, but the attack command button does not work. You need to simply click on an enemy target for it to resume attacking after giving the stop command.

What the?!
- Enemies can sometimes have glitches like these Butch couriers that had already laid down and accepted their fate before they were killed.
Thanks
Thanks for taking the time to read this guide. I hope it was helpful to some of you.

Please note that since this is a new mod and it will keep getting changed, that this guide will need to be constantly updated. If you guys notice something that isn't correct anymore please leave a comment stating what it is. =)
8 commentaires
马克西米利安 26 juin 2016 à 0h01 
:steambored:
马克西米利安 26 juin 2016 à 0h01 
lol
Kimber Prime  [créateur] 23 janv. 2016 à 16h25 
@ Cryptton
I've added in a note about it now. I personally wasn't the one who had towers stop attacking but others in the games I played were mentioning it. Thanks for letting me know. =)
MrCryptton 23 janv. 2016 à 11h33 
Nice guide. Just a side node regarding the known bugs: Towers don't stop attacking by themselves, you must've accidentally pressed S (stop) at some point. When you do that, they stop. You can select the tower and when an enemy reaches it's sight, just right click the enemy.
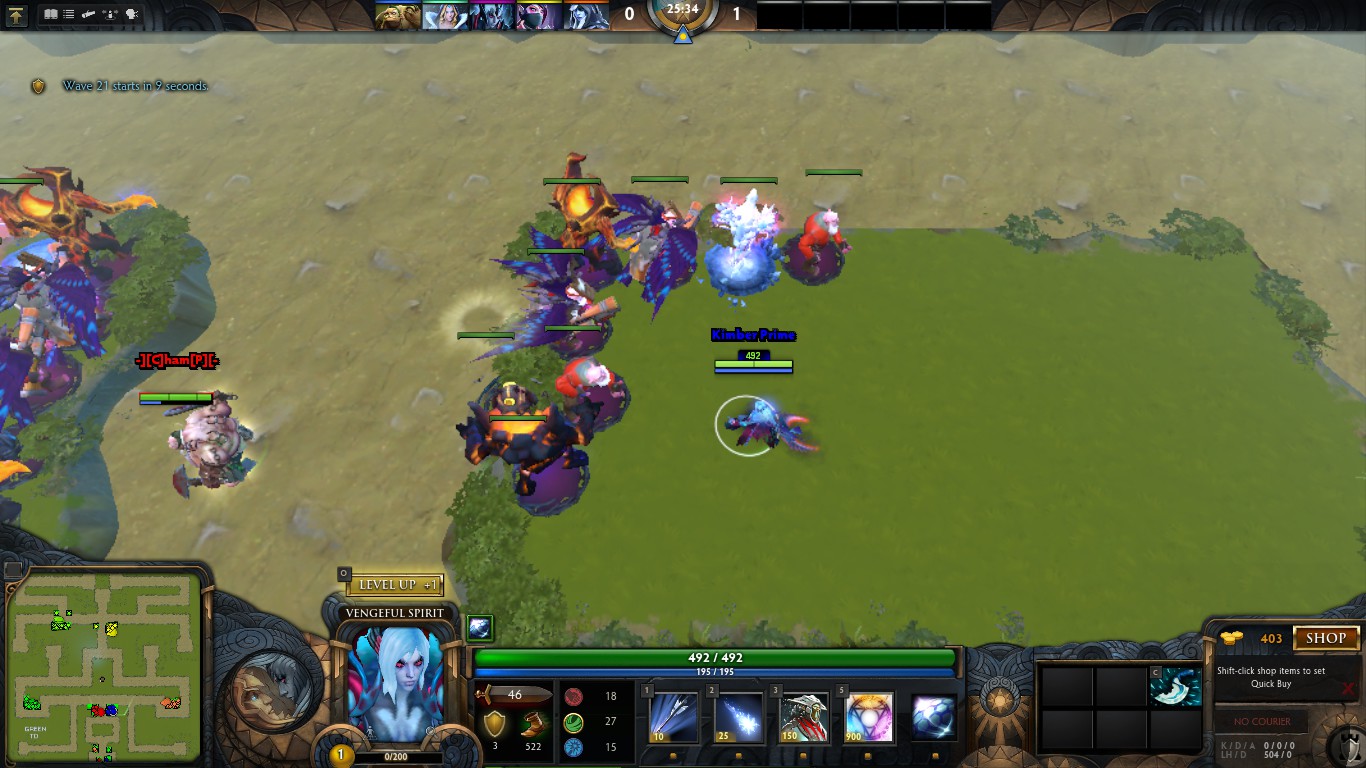
However, even if the Stop command works, the "Attack" command doesn't. When you try 'A" on someone (or whatever the bind is), it will keep saying "Can't move". That's annoying since you can't tell your towers to 'Attack" an area and you have to manually do this with right click on the first enemy it sees.
Skog! 25 juil. 2015 à 6h10 
nice
Cherry Ghost 23 juil. 2015 à 6h50 
bite my weenis
Island E 19 juil. 2015 à 17h28 
Cant wait till all heroes have abillities
Dusty Don 19 juil. 2015 à 6h42 
Nice guide,found this quite helpful