Team Fortress 2

Team Fortress 2

1,297 ratings
MVM : The complete list of things that work
By Quenquent the babysitter
The main fault I see in the majority of the MvM players is that they don't know what works and what doesn't. The knowledge of the typical MvM player tends to be restricted to the Two Cities meta at best. The goal of this guide is to speak about everything that works in MvM, all of the present playstyles, and even team compositions.
9
7
47
5
10
3
8
7
3
2
3
3
2
   
Award
Favorite
Favorited
Unfavorite
Introduction
It is true that, technically, anything can work in any mission in MvM. Any weapons and team composition can beat any mission if the players are experienced enough. This is the goal of the all class runs, where all the players use the same class on a mission, and this for every classes on every missions. Here, I will be speaking about everything that works when playing with average-level players, that knows how TF2 works and the basics of MvM.

In this guide, I will speak about :
  • Which weapons works in MvM
  • Which playstyles works in MvM
  • Which team compositions works in MvM

I will also refer a lot to the Meta of roles, that is commonly used by high-level MvM players. It is not officially called that way, but high-level players came in agreement that, in your team, you need the following :
  • Money collector
    The guy(s) in charge of grabbing the money. Money is an important part of MvM, as it allows you to upgrade and so get stronger. A team generally have one player dedicated to money collection, like a Scout or a Spy, but two money collectors can work.
  • Medic killer (or Medic picker)
    Uber medics are a known threat for most of the teams, and dealing with them as fast as possible tends to be a necessity if you don't want to get pushed back by an Uberred Giant or any other robots. The Medic picker's role is to deal with them in a simple way : killing them all in one-shot (dealing more than 150 damages in one attack). A sticky-based Demoman or a Sniper are the two fitting this category. This role isn't needed in missions where there's no Uber Medics.
  • Tank Buster
    Tanks are a major danger in any mission that contains them, since they have a large health pool and their own bomb. Teams will generally have to assign one player on Tank busting to deal with them. A Pyro or a Beggar Soldier can solo any Tank without too much trouble.
    • Semi-Tank Buster
      Instead of having one Tank buster, teams can also have multiple Semi-tank buster, classes than can't take out a Tank by themselves, but can with other Semi-Tank busters. Having two Semi-Tank busters is the best case scenario, but three can work too. However, having more on Tank busting duty can cause the players fighting the robots to not have enough firepower with them to fight against the robots. Also note that any Semi-tank buster fighting a Tank will have troubles fulfilling their other roles, especially Money collecting and Medic picking. Soldier, Demoman and Heavy are good Semi-Tank busters, but Scout and Sniper also fit this category under a specific playstyle.
  • Ammo
    Even with only 6 players and ammo packs in the map, ammo will be a pretty big issue really fast without a reliable ammo source. The only reliable ammo source right now is the Engineer's dispenser.
  • Damage
    Dealing damage to robot is THE most needed role, but since most of the classes can do that, it's not really hard to have players dealing damages. Damages can be split between Crowd damage and Giant damage. Your team will generally need a mix of both to be able to deal with the smaller robots and the Giants.

Anything else that helps but isn't needed, such as healing and damage boost, will be in the Support category, the most vast role of them all. Support isn't truly needed but most of the classes can bring some. Medic is a specialist in this category.

For the guys that don't want to read or that might find explications too complicated to know if something works or not, I've set in place a simple image-based system :

The weapon or playstyle works and is viable in the majority of MvM. They can be used by anyone with basic MvM knowledge or above average-level players. If you are a new player, look for those.


The weapon is not viable or is a straight downgrade compared to other options. Some of these weapons CAN be viable when used by more experienced players, but they either need high experience in MvM or the weapon itself brings nothing to the player. We won't speak about non-viable playstyles, so don't look for this image in the playstyle category.

The weapon or playstyle can be viable, but caution must be used. Either it vastly differs from more traditional playstyles, or it is still debated in the MvM community, or it is still under experimental use. New players should avoid those.


In the parts about playstyles, we will also speak about 5 kinds of upgrades :
  • Early upgrades : Upgrades that should be bought first before anything else. You should have these upgrades maxed out on the early waves (unless stated otherwise)
  • Midgame upgrades : Upgrades to buy after the early upgrades are bought.
  • Late game upgrades : The less needed upgrades, but that still helps. On mission without a lot of money, these upgrades are never bought.
  • Situational upgrades : Must-buy upgrades, but only if a particular situation is met and the early upgrades are bought. Best example are the crit resistance upgrades that should be maxed out when facing crit robots.
  • Preference upgrades : Upgrades to buy after the early upgrade, but only depends on the player's preferences. A player can max these upgrades or never buy them. It is advised to not buy the late game upgrades until these upgrades are maxed.
  • Useless upgrades : Upgrades to avoid, as they are either useless or detrimental to the playstyle.
I) Scout
In MvM, the Scout is commonly used as the main Money Collector of the team, thanks to his increased money collection radius and high speed. The money he collects also gives him health and overheal. Collecting money is the main source of healing and survival for the Scout. He tends to be used as a Support class, but high-level players prefer to use his high single target damage to directly help with Giant killing and Tank busting.


Weapons

Primaries


The stock Scattergun is an excellent weapon for any Scout that either wants to pick some lone targets or help their team's DPS. Scouts that want a bit more space between them and the robots will prefer the Shortstop, thanks to its more decent medium-range damage, and also comes with a nice shove to help with bomb resets and overall crowd control (just don't spam it on a Giant, PLEASE !) As for the Soda Popper, it is the Scout's primary with the highest DPS. Its hype also helps with overall mobility and dodging.


As a Scout, you will take a lot of damage. The only way to actually avoid this damage is to jump, a lot, to dodge. Both will keep the Baby Face's Blaster's boost meter at zero, making the speed bonus nearly inaccessible. As for the Back Scatter, getting mini-crits from behind tends to be complicated when you always need to be in movement or to strafe around Giants. Plus, there are better ways to deal mini-crits as a Scout in MvM.


Despite what is commonly said about the Force-a-Nature, its knockback can both be a blessing and a curse. Yes, you can knock robots back and reset the bomb, but the knockback will mess with your team's aim, especially Sniper and Sticky-based Demoman trying to lay a trap. It's strongly discouraged to use this weapon if you are a Damage-based Scout.

Secondaries


The Mad Milk is considered THE secondary weapon for Scout in MvM. Not only does the heal on hit is formidable for damage classes against Giants, but it can be upgraded to slow down Giant Scouts massively (please, don't buy slowdown if there's no Giant Scouts, you won't need that upgrade until they come). However, the Bonk! And Crit-a-Cola are also viable options. The Bonk! is a nice tool for low-level Scouts to help with their survivability, but also for more experienced ones to help with getting the money after a respawn, distracting the robots, or for bodyblocking. While the Crit-a-Cola is mostly used by Damage Scouts that doesn't have a Buff Banner Soldier to help them on Tanks or Giants.


A Scout will generally never use his secondary to deal damage. Their primary weapon will dish-out more damage than any of their secondary can. This is why weapons like the stock Pistol and the Flying Guillotine are pretty much useless. The Pretty Boy's Pocket Pistol's health regen isn't that useful considering a good Scout will stay overhealed most of the time. As for the Winger's jump height bonus, that only helps with dodging, this is nothing a jump height upgrade or a double jump can't solve.

Melees


The Sandman and Fan O'War are mostly used for support against Giants, as they can Mark for Death one robot at a time (making this particular robot take mini-crits from any damage source). However, the Sandman needs a 500$ upgrade to do so (the mark can be applied both from the ball and a melee hit). Due to that, players prefer to use the Fan O'War and use the Scout's speed and mobility to melee hit Giants with it. However, despite popular opinion, the Atomizer is also a viable option to help with overall mobility and so help with money collection. It is mostly used by Damage Scouts that don't want to spend time marking Giants and prefer shooting.


The goal of the Boston Basher and Wrap Assassin are to deal bleed damage to the target. Bleeding is absolutely useless in MvM, and Scouts deal more damage with their primaries. It's even worst for the Sun-on-a-Stick, as you need a Pyro or a reliable fire source to deal more damage with it. As for the stock Bat, it is not a bad melee, but Scout got better options. If you don't have anything else however, having a Bat won't stop you from doing your main role.


The Candy Cane is a good support weapon for Damage Scouts, as you will drop a small medkit for each kill (and there's plenty of robots to kill) that cannot be used by robots. However, the weakness to explosion can be troublesome for beginners. Only use this melee if you do not focus on support and you know how to dodge.
Scout's playstyles
Scout is the main money collector of the team, so no matter his playstyle, he should focus on Money Collecting. This is also a necessity because collecting money is his main tool for survival. But Scout can do much more than money collecting. Due to this, a Scout will never, ever, need health regeneration and health on kill upgrades.

The Pure Support Scout
Main roles : Money collector, Support (Super Scout slowdown, Healing, Damage increase)


There are two big schools of MvM Scouts, but the majority of MvM players never left elementary school and play as a Pure Support Scout. The Pure Support Scout is only here for Money and Support. He use the Sandman or the Fan O'War to mark Giants to help his team take them down, and use the Mad Milk to help even more on Giant killing and to slowdown Super Scouts, thanks to the slowdown upgrade. The Pure Support Scout also focus on resistance upgrades to help with his own survival. This playstyle is the best way to start playing Scout, and new players can even replace the Mad Milk by the Bonk! so they can learn Money collecting without dying every two seconds.

Basic loadout :

Early upgrades : Movement speed, Blast resistance, Bullet resistance, Mark on hit (Sandman only)
Midgame upgrades : Secondary's recharge rate
Late game upgrades : Slowdown (Mad Milk only), Primary weapon's upgrades
Situational upgrades : Slowdown (Mad Milk only, when Giant Scouts appears), Crit resistance (when crit robots appear)
Preference upgrades : Jump height
Useless upgrades : Health regeneration, health on kill, melee upgrades

Hybrid Scout
Main roles : Money collector, Giant killer, Support (Super Scout slowdown, Damage increase)
Secondary roles : Semi-Tank Buster, Support (Healing)


The Hybrid Scout is a mix between the Pure Support Scout and the Damage Scout. This Scout will collect money, mark Giants and slowdown Super Scouts, but will also deal damages himself. Instead of upgrading his resistances, the Hybrid Scout will upgrade his primary weapon to increase his damage output, and efficiently collect money to keep his health high. Who needs resistances when you have 500hp anyway ? It is also a good way for players used to Pure Support scout to transit toward the Damage Scout playstyle. The primary weapon used by Hybrid Scouts depends on playstyle, but the Shortstop is commonly used due to his efficiency at medium range, which allow the Scout more space to dodge while dealing decent damage. These Scouts also know how to collect money and mark robots efficiently, so they forget the Bonk! and Sandman to save money.

Basic loadout :

Early upgrades : Movement speed, Reload Speed (Stock Scattergun only), Fire rate (Shortstop only), Clip Size (Soda Popper only)
Midgame upgrades : Fire rate, Damage (Stock Scattergun and Soda Popper only), Clip size (Shortstop only)
Late game upgrades : Damage (Shortstop only), Clip size (Scattergun only), Blast resistance, Bullet resistance.
Situational upgrades : Milk Slowdown (when Giant Scouts appears), Crit resistance (when crit robots appear)
Preference upgrades : Jump height, ammo capacity, milk recharge rate
Useless upgrades : Health regeneration, health on kill, melee upgrades

Damage Scout
Main roles : Money collector, Giant Damage, Semi-Tank Buster
Secondary roles : Support (Damage increase)


Damage Scouts are considered as THE best way to play Scout among high-level players. This Scout completely throw away all the Support he does and focus on dealing damages. Some might keep the Mad Milk, but the Crit-a-Cola is still a favorite when facing Tanks. A Damage Scout with the Soda Popper is the third highest DPS on Tanks, behind Phlog Pyro and Tap-Beggar Soldiers, but can't always focus on the Tank due to his money collector role. Yes, this is not because you focus on Damages that you should forget about the money. The Fan O'War tends to still be used for increased team DPS, but the Atomizer and Candy Cane are also used by these Scouts.

Basic loadout :

Early upgrades : Movement speed, Reload Speed (Stock Scattergun only), Fire rate (Shortstop only), Clip Size (Soda Popper only)
Midgame upgrades : Fire rate, Damage (Stock Scattergun and Soda Popper only), Clip size (Shortstop only)
Late game upgrades : Damage (Shortstop only), Clip size (Scattergun only), Blast resistance, Bullet resistance.
Situational upgrades : Crit resistance (when crit robots appear)
Preference upgrades : Jump height, ammo capacity, Crit-a-Cola recharge rate
Useless upgrades : Health regeneration, health on kill, melee upgrades
II) Soldier
The Soldier is the Jack of All Trades in MvM. He can fill a large array of roles while never being the best at them. He's mostly considered a Trash killer class, but he's also efficient against Giant and Tanks. His banners also allow him to give to his team various supportive attributes. His versatility allow a team to have multiple Soldiers without doing unnecessary sacrifices.


Weapons

Primaries


You can't be wrong by using the Stock Rocket launcher. Good damage and explosion radius, this weapon is the bread and butter of any Soldier. The Black Box is also a good option. One less rocket in the clip is a negligible downside for extra survivability, as the health on hit helps both against group of robots and Giants (note that it doesn't work on Tanks). The Cow Mangler is also a good weapon. Not being able to do crits isn't truly a problem, even with a Kritz Medic (who should be using his Kritz on a Pyro, Demo or Heavy), but the infinite ammo capacity isn't a big upside either. It's a small downside for a small upside.


Players might think the Direct hit is a good weapon against Giants. Despite the damage bonus, the Direct hit will deal the exact same damages as the Stock Rocket launcher when halfway in the mission. This is because the Direct hit only have 3 Damage upgrades, while other Rocket Launchers have 4. Additionally, the damage bonus isn't worth sacrificing any trash killing abilities. And you cannot even compensate it with maxed out Rocket Specialist. As for the Liberty Launcher, the Stock Rocket launcher deals more damages than this weapons, and his other upsides aren't worth anything in MvM. And the Rocket Jumper... Well, it doesn't deal damage at all.


The Beggar's Bazooka is the highest DPS primary for the Soldier in MvM, but you must know how to use it. Uneducated players will try to use it as a barrage-style weapon, upgrading clip size and fire rate, while it is better to tap the fire button and upgrade reload speed and damage. The Air Strike is also a decent weapon, but also suffer from bad upgrading and misuse. The increased fire rate on rocket jump is only useful against Giants or Tanks, as it reduces your explosion radius making it useless against groups.

Secondaries


The Soldier will deal a lot of damage, which makes the banners really useful. Banners charge from the damage dealt by the Soldier, and gives bonuses to himself and teammates close to him for 10 seconds. A lot of players think only the Buff Banner, which makes the Soldier and his team deal mini-crits (35% damage increase), is viable. But in reality, all the banners are viable. The Battalion's Backup damage reduction and immunity to crits, and the Concheror's speed increase and health on hit are as useful as the Buff Banner against robots. But it is true that the Buff Banner is more effective against Tanks.


The stock shotgun, the Reserve Shooter, the Panic Attack and, sadly, the Righteous Bison all have the same problem most of the secondaries have : the primaries available for the Soldier will deal more damages than his secondaries. It makes those weapons useless. As for the Mantreads, the stomp mechanism will never deal more damages than a Rocket launcher and the knockback reduction isn't really useful in MvM. Finally, the B.A.S.E Jumper will just make you a flying target for bullet-based robots. True that it does mess with projectile-based robots, it is not worth being an exposed target or sacrificing a banner, even if you use the Air Strike.


Even if myself I do not consider the Gunboats as viable, it can be used for a more aggressive playstyle based around rocket-jumping : jump into the robots face-to-face and rocket jump away. Absolutely discouraged for new players.


Melees


Soldier's melee doesn't really matter. The stock Shovel is a good all-rounder, the Escape Plan helps with going to a dispenser, ammo pack, health pack or the upgrade station when at low health and the Disciplinary Action can help bring slower teammates to the frontlines. The Equalizer however, once upgraded and at low health thanks to the Soldier's primary, can be an effective method to damage Tanks.


In MvM, you will never need to capture a point, making the upside of the Pain Train useless. And even if you could, it isn't worth a weakness to bullets.


A small warning to the ones that want to use the Half-Zatoichi : meleeing a robot as a Soldier can be hard, and you got other more effective sources of healing (like a dispenser or Health on kill on your primary). It does allow you to one-shot kill Samurai Demoman, but they can also one-shot you ! As for the Market Gardener, it is a rather situational weapon. Just don't try to take out a Giant only with this.
Soldier's playstyles
The Soldier is all about dealing damage to everything he can. How the Soldier bring Support to the team depends on his banner of choice (damage increase, damage reduction or healing). A Soldier not dealing damage and not using his banner all the time (whenever robots are present) is a bad Soldier.

The Standard Soldier
Main roles : Crowd damage, Semi-Tank Buster
Secondary roles : Giant damage, Support (banner dependant)


The most classic way to play Soldier. Upgrade your primary, shoot at the robots, help with the Tank, use your banner. A pretty simple and effective way to play Soldier. These Soldiers tends to use either the stock Rocket Launcher or the Black Box, but the Cow Mangler is also a good option.

Basic loadout :

Early upgrades : Health on kill (one point only. Yes, even if you take the Black Box), Reload Speed.
Midgame upgrades : Damage, Firing rate.
Late game upgrades : Clip size, Blast resistance, Bullet resistance, Health regeneration, Health on kill.
Situational upgrades : Crit resistance (when crit robots appear)
Preference upgrades : Banner duration, Ammo capacity, Rocket Specialist (one point only)
Useless upgrades : melee upgrades, Rocket Specialist (more than one point)

The Tap-Beggar Soldier
Main roles : Crowd damage, Tank Buster, Giant damage
Secondary roles : Support (Banner dependant)


For Soldiers that wants to reach the highest DPS possible. The Tap-Beggar Soldier focus on getting his reload speed maxed out first, then tap the fire button instead of holding it. It will make the rockets go out one by one, but really fast (Rocket launcher with maxed firing rate fast). They can pretty much solo Tanks, as they have the second highest DPS against Tanks, right behind Phlog Pyros. Tap-Beggar Soldiers also need less money to be fully upgraded, as they don't need clip size and firing speed upgrades, and only focus on reload, damage and ammo capacity.
In depth guide :
http://steamcommunity.com/sharedfiles/filedetails/?id=424077241

Basic loadout :

Early upgrades : Health on kill (one point only), Reload Speed.
Midgame upgrades : Damage, Ammo capacity.
Late game upgrades : Blast resistance, Bullet resistance, Health regeneration, Health on kill, Clip size, Firing rate, .
Situational upgrades : Crit resistance (when crit robots appear)
Preference upgrades : Banner duration, Rocket Specialist (one point only)
Useless upgrades : melee upgrades, Rocket Specialist (more than one point)

Air-Strike Soldier
Main roles : Crowd damage, Giant damage, Semi-Tank Buster
Secondary roles : Support (banner dependant)


The Air Strike requires a completely different playstyle to be viable, but it can also be really rewarding. Against basic robots, nothing will really change. Just keep shooting while keeping your feets on the ground. When a Giant comes by, rocket jump in the air and rain hell on him. The increased firing speed while rocket jumping can be devastating, but it won't work on groups of normal robots due to the reduced splash radius while rocket jumping. The upgrade path is similar to the Standard Soldier one, but you have to get the Rocket Specialist upgrade early, so all the damages from your rocket jump attacks doesn't suffer from fall-off.

Basic loadout :

Early upgrades : Health on kill (one point only), Reload Speed, Rocket Specialist (one point only).
Midgame upgrades : Damage, Firing rate.
Late game upgrades : Clip size, Blast resistance, Bullet resistance, Health regeneration, Health on kill.
Situational upgrades : Crit resistance (when crit robots appear)
Preference upgrades : Banner duration, Ammo capacity
Useless upgrades : melee upgrades, Rocket Specialist (more than one point)
III) Pyro
The Pyro tends to be the dedicated Tank Buster of the team, as he is the best Tank Buster of the game. Despite what the majority might thinks, he isn't only good against Tanks, but also with robots globally.


Weapons

Primaries


The choice of primary for the Pyro is pretty open. The stock Flamethrower and the Dragon's Fury tends to play the same way, the Backburner is a really good weapon if you can get behind the robots (especially Giants). And the Flamethrower that is considered the king here is the Phlogistinator. The highest DPS against Tanks, its Mmmph allows for some massive destruction against both Tanks and robots. The lack of airblast is barely a problem, as Pyros rarely use airblast in a well-coordinated team.


The Degreaser is worst than the other flamethrowers, but this is for barely anything. The upsides are worthless in MvM, but the afterburn and airblast penalties, even if it makes this flamethrower worst than the stock primary, are negligible.

Secondaries


Pyro's secondaries are mostly used as a tool when he can't get close to the robots. The Shotgun and Panic Attack can do this just fine, but the Flare Gun, the Detonator and the Mannmelter can be more effective with some aim. Additionally, the Detonator can do explosive jumps for more mobility, and the Mannmelter can extinguish teammates if you don't have/can't airblast, like with the Phlogistinator. The Thermal Thruster, with the Stun on landing upgrade, can allow to jump into the fray of robots without having to worry about flanking and helping with crowd control.


The Reserve Shooter is an inferior version of the shotgun as it have a smaller clip for a nearly never used advantage. You will barely use the mini-crits this weapon can offer.


The Scorch Shot can be pretty useful to do some quick, long range ignition on groups of robots. It is a good weapon as long as you don't upgrade it. Yes, do NOT upgrade it. Despite what people tends to think, "Scorch Shot spam" is harmful for you and your team. True that it allows to push every robots for ever, but it barely does any damage to them. It is slowing down everything for no reason. The time spent in pushing away this Giant could be spent on killing it. The knockback mess with your team's aim, prevent Snipers from doing headshot, prevent Demoman from laying effective sticky traps, push the robot out of sentries range, and reduce your overall team's damage due to damage fall-off. This isn't only true for the Scorch Shot, but for knockback in general in MvM.


If you have any respect for this poor gamemode, do not use the Gas Passer. This weapon is way too strong on an already strong class. And the upgrade that make it so overpowered only cost 400$, on the cheapest class of the game. However, it would be dishonest to categorize this weapon as "bad". Do note that player's opinion on a Gas Passer Pyro varies a lot. If you simply want to win, that you do not care about the journey but only the destination, go for the Gas Passer.

Melees


The Powerjack is a pretty useful mobility tool used to get in the frontlines faster, or to help with flanking. The health on kill however is useless, as you can get better results with a flamethrower upgraded with health on kill. The Homewrecker is for the most Support-based Pyro that wants to help the Engineer deal with Spies. Only truly useful in waves with Spies, it can save buildings in certain situations.


The other Pyro's melee weapons are useless since his primary deal more damages than any other melee can. You won't even do combos with the Axtinguisher. as it's faster to hold M1 on the robots, including Giants. Some might think the Third Degree can be good against Uber Medics, it does require a Crit canteen or a Medic with the Kritzgrieg in the team. It's much easier and less expensive to have a Sticky-based Demo or a Sniper in the team. The Neon Annihilator is outclassed by the Homewrecker that can destroy sappers in one hit and the only reliable ways to make robots wet are Mad Milk and Jarate, while not being as rewarding as using your primary on them.


This weapon have a minor upside for a big downside, but it is worth mentioning. The damage increase allows the Pyro to melee-kill an Uber Medic without triggering his Uber. However, not only this is not as effective as a dedicated class for Uber Medic killing, but it comes at the cost of less healing from Dispensers and Medics. Note that it does not affect Health on kill and Health regeneration.
Pyro's playstyles
The Pyro is primary about killing Tanks, and he can do this alone with any flamethrower. True that the Phlogistinator got the best DPS out of them all. He can also bring some support thanks to his airblast, which can push the bomb carrier in a pit (this is called "Resetting the bomb)". However, airblast can be harmful if used too much and in bad situations, only allowing the bomb carrier to get as many buffs as possible. Because the Pyro is generally in the fight, he's generally close to the money. One Pyro can't be an efficient Money collector, but he can help with it. Two well-coordinated Pyros can do the money collection just fine.

Standard Pyro
Main roles : Crowd damage, Giant damage, Tank Buster
Secondary roles : Money collector, Support (Bomb resetting (unless the Phlogistinator is equipped))


There's not a lot of ways to play Pyro. Upgrading speed, damage, ammo, learn bot aggro (how robots behave so you can attack them properly), solo the Tanks... Playing Pyro can be hard at first, but is also really rewarding once mastered.

Basic loadout :

Early upgrades : Movement speed, Health on kill (one or two points), Damage, Ammo capacity.
Midgame upgrades : Blast Resistance, Bullet resistance.
Late game upgrades : Health regen, Health on kill.
Situational upgrades : Crit resistance (when crit robots appear)
Preference upgrades : Airblast force (unless Phlogistinator equipped)
Useless upgrades : melee upgrades, secondary upgrades, Afterburn damage, Afterburn duration
IV) Demoman
The Demoman is the most versatile class in MvM, being able to fill vastly different roles depending on his loadout. However, compared to Soldier, he has troubles being able to fill up multiple roles at once. The Demoman can be considered a specialist in MvM. Sadly, the majority of players only consider the Demoman as a Medic killer and nothing else, since only the Sniper can also fulfil this role.


Weapons

Primaries


The stock Grenade Launcher is a good weapon for all situations, no matter if it's used as the main way to deal damage or as a backup weapon. The booties are mostly useful for the Demoman that do not use his primary as his main way to deal damage. The Iron Bomber, despite being stock with a smaller blast radius, isn't THAT defavored in MvM.


The problem with the Loch-n-Load is that it is, at least in MvM, strictly inferior to the stock Grenade Launcher. The damage bonus against buildings of the Loch-n-Load is really situational (and even then, there's better ways to take out Engiebot's nests) and faster grenade speed, which does not justify the smaller clip size and explosion radius.


The Loose Cannon can be really tricky to use. If you look to do Double Donks, you might lose DPS due to the time spent charging his fuse. But if you don't and simply spam the M1 button, you lose the DPS given by Double Donks. You can with some training find the perfect distance to do Double Donks without having to charge the weapon's fuse. Note that Double Donks are mostly efficient, easy and worthwhile to do on Giants, while it is the complete opposite on smaller robots.The Loose Cannon's knockback can also be useful, but if used without care, can hinder your team (similar to the Scorch Shot's knockback situation). In short : you will deal less damage to small robots, but you might deal better damages to Giants, just look out of the knockback.

Secondaries


The stock Sticky Bomb launcher is a classic for every Sticky-based Demoman, but the Scottish resistance tends to be a favorite. These two are an excellent way to deal high burst damage and take care of any Uber Medics that comes by. The stock version is after that, better to set traps to be detonated fast and overall DPS, while the Scottish Resistance offers more burst damage. If you don't want to play with stickies, the Chargin' Targe is a good option to help with survivability. The 50% fire resistance isn't a ground-breaking upside, but the charge ability and explosion resistance really helps with overall survivability.


It's pretty obvious, but it isn't worth to bring a weapon that doesn't deal damage in MvM. The mobility gained with the Sticky Jumper isn't worth the lack of damage dealing, even if you don't play as a Sticky-based Demo.


The Splendid Screen and the Tide Turner are only useful if you play as a Demoknight, as they offer less resistances than the Chargin' Targe for advantages only a Demoknight can exploit. The Splendid Screen's increased impact damage is far from useful against Giant but can help initial a killing spree (if you don't kill your target with your charge that is), while the Tide Turner is more for flanking, hit and runs and other non-direct charges, as it charges for less longer as you get shot at (and you WILL get shot at). The actual situation of the Quickiebomb Launcher is rather tricky. The damage penalty makes Uber Medic killing harder but not impossible, while the faster charge can make it more effective against crowds and Tank but having a primary upgraded will deal more damages that that. It's a rather hybrid weapon but might be inferior to more specialised choices.

Melees


Demoman's melee of choice mostly depends on if he's a Demoknight or not. But even there the stock Bottle and the Scotsman's Skullcutter are viable in any playstyle. The Skullcutter is even a good solution against Tanks with some swing speed upgrades (even better than the Grenade launcher and Sticky bomb launcher for less money)


Excepted the Ullapool Caber, all of these weapons are mostly used for Demoknights. It is true that the Eyelander can give you increased health and speed, which is not negligible, but you should not forget to use it when you can. Otherwise, it's simply a 25 health reduction for no upside. The Claidheamh Mòr's increased charge duration isn't really that great, but the +25% charge on kill however can help closing the gap between group of robots. For a non-Demoknight, it's only a 15% damage vulnerability for nothing. The Half-Zatoichi can make the Demoknight ignore Health on kill upgrades in the early waves without any downsides, which can pretty much make it a straight upgrade to the stock Bottle. It can also be used by non-Demoknight Demos but the same caution should be used as if you are using this weapon as a Soldier. The Persian Persuader can be insane on the right hands, doing charge after charge and never leaving any space between the Demoknight and the robots. Charge time that even be further reduced with swing speed upgrades. Obviously not recommended for non-Demoknights as you get less ammo with it. I hesitated in making the Ullapool Caber as non-viable, but considering how non-Demoknights barely use their melee, it can help on these rare occasions.
Demoman's playstyles
The Demoman is mostly as a Medic killer class, but he can do much more than that thanks to his loadout diversity. However, keep in mind that upgrading multiple weapons is a BAD idea. Focus on one weapon that you will primarily use. The big exception here is the Scotman's Skullcutter when facing Tanks, but even there you should only upgrade its melee swing speed.

Sticky-based Demoman
Main roles : Uber Medic Killer, Crowd damage.
Secondary roles : Giant damage, Semi-Tank Buster.


The most common way to play Demoman. Upgrading the Sticky Launcher to kill Uber Medics in a single trap and helping overall with small robots. A Sticky-based Demoman can also be really good against Giants (even able to one-shot them with crits), but they are generally weaker to constant DPS rather than burst damage. Same can be said for Tanks that simply cannot be killed in one detonation. These Demos tends to prefer the Scottish Resistance, as it can deploy more stickies and are easier to manage.

Basic loadout :

Early upgrades : Health on kill (one point), Reload Speed.
Midgame upgrades : Firing speed, Damage.
Late game upgrades : Health regen, Health on kill, Blast Resistance, Bullet resistance, Clip Size.
Situational upgrades : Crit resistance (when crit robots appear), melee Swing speed (when using the Scotsman's Skullcutter (but can work with other melees), when Tanks appears and when acting as a Semi-Tank Buster)
Preference upgrades : Ammo Capacity
Useless upgrades : other melee upgrades, primary upgrades (unless using the Ali Baba's Wee Booties)

Grenade-based Demoman
Main roles : Crowd damage, Semi-Tank Buster, Giant damage.
Secondary roles : Uber Medic Killer


Less commonly used, but as viable as a Sticky-based Demoman, his Grenade-based brother trade burst damage for constant damage. This makes him much more viable against Tanks and, when equipping a shield, increase its tankiness. The lack of fall off and ramp up on the grenade launchers makes him great at middle range and always consistent when facing Giants and Tanks. A Grenade-based Demoman can still be the main Uber Medic killer if he replace his shield by any sticky bomb launcher (generally switching weapon for waves with these robots) as you can kill them without ever upgrading your secondary. Note that, due to its increased potential against Tanks, a Grenade-based Demoman is not forced to use the Scotsman's Skullcutter (and DPS differences can vary depending on upgrades and random crit chances).

Basic loadout :

Early upgrades : Health on kill (one point), Reload Speed.
Midgame upgrades : Firing speed, Damage.
Late game upgrades : Health regen, Health on kill, Blast Resistance, Bullet resistance, Clip Size.
Situational upgrades : Crit resistance (when crit robots appear), melee Swing speed (when using the Scotsman's Skullcutter, when Tanks appears and when acting as a Semi-Tank Buster)
Preference upgrades : Ammo Capacity
Useless upgrades : other melee upgrades, secondary upgrades

Pure Demoknight
Main roles : Tank Buster.
Secondary roles : Giant damage, Money collector, Crowd damage.


Mostly considered a less powerful and expensive Pyro, the Demoknight can be viable if the mission provides enough money and the player is skilled enough. The main advantage of having a Demoknight in the team is having a Tank Buster that will never need ammo and a noticeable distraction force. A bad Demoknight will provide a lot of medium ammo boxes and dead bodies.

As I do not really know how to play as a Demoknight, I will not post any suggested loadout and upgrade pathing advices. Feel free to comment about it.
V) Heavy
The Heavy is the big damage dealer of the team. After you get the major roles fulfilled and you don't know what to take, a Heavy is never a wrong idea. It is also a good starting class in MvM, as you simply rev up your gun and aim at the general vicinity of the robots. But despite what players are thinking, the Heavy can be much more complex than it seems.


Weapons

Primaries


The stock minigun tends to be the go-to weapon for Heavy, staying as good no matter the player's skill. Natascha, despite its damage reduction, can still deal enough damage and slowdown faster robots, like Giant Scouts. Finally, if you really don't want to use your brain and only have everything you point your gun at die, the Brass Beast is your gun of choice.


The Tomislav has a slower firing speed for no redeeming qualities. It's a straight downgrade from the stock minigun.


The Huo-Long Heater can deal gigantic DPS, but only if the targets are on fire. This can be done by either a Pyro or the Heavy itself : the Huo-Long Heater gets a halo of fire that sets enemies close to the Heavy on fire. With ramp-up bonuses, this can demolish Giants in seconds. The ammo consumption when spun-up is a moot downside in MvM, as you will generally have an Engineer in your team with a Dispenser up.

Secondaries


Edibles are a nice tool for the Heavy. Sandvish and Second Banana for health recovery, Dalokohs Bar for a neat health increase (mostly useful if you are without a Medic). But the Buffalo Steak Sandvich do have a rather interesting use : with someone melee swing speed upgrades, meleeing a Tank can be more effective than using your minigun. The Buffalo Steak actually does NOT increase the melee DPS enough to make it worthwhile in the long run. However, it is still useful only when the Tank is spawning : instead of waiting patiently for the Tank to get in melee range, doing nothing in the meantime, you can eat the Steak for better early Tank damage (and in theory, increase your random crit chance even more).


Same problem than most of the secondaries, there's no point in having a secondary that deals damage if the primary deals more damage. It's even more true for the Heavy that have absolutely devastating primary weapons.

Melees


The Heavy will not commonly use his melee weapons, which is why the choice of melee weapon doesn't matter that much, so going stock is not a bad idea. The KGB can give some nice crit if you manage to melee a lone bot. As for the GRU, it can help going to the frontlines faster, but not that useful considering you will have a teleporter most of the time. The Fists of Steel helps when retreating or moving under a Sniper's fire. Finally, the Warrior's Spirit is, when combined with the Buffalo Steak Sandvish and some swing speed upgrades, a powerful weapon against Tanks. In term of Tank DPS, it tends to be close to the Brass Beast's Tank DPS.


Sadly, the Holiday Punch doesn't work at all in MvM as robots are completely immune to laugh. A crit with this weapon will only be a non-damaging attack that does nothing else. The Eviction Notice is only a less stronger version of the GRU in MvM, as the speed gain is far inferior to it.
Heavy's playstyles
The Heavy is all about damage, so his playstyles will be about, well, dealing damage. However, even without upgrades, the Heavy have a high DPS.

Firing-speed based Heavy
Main roles : Giant damage
Secondary roles : Crowd damage, Semi-Tank Buster


The most straightforward way to play Heavy. Upgrade your firing speed and deal damage. He's not as good as other classes against groups and Tanks, but can still be effective against them. Do note that the Warrior's Spirit isn't really worth it in this playstyle against Tanks, since you have an upgraded primary that is already upgraded for that.

Basic loadout :

Early upgrades : Health on kill (one/two points) or Health regeneration, Firing speed.
Midgame upgrades : Blast Resistance, Bullet resistance.
Late game upgrades : Health regen, Health on kill.
Situational upgrades : Crit resistance (when crit robots appear)
Preference upgrades : Ammo Capacity; Projectile Penetration (one point max), Projectile Destruction (when facing Rapid-Fire Giant Soldiers/Demomen).
Useless upgrades : melee upgrades, secondary upgrades.

Resistance-based Heavy
Main roles : Giant damage
Secondary roles : Crowd damage, Semi-Tank Buster


Because the Heavy is already a high DPS class without upgrades, some players prefer to use this in combination with damage ramp-up to decimate everything at close range and tank damage for their team. A resistance-based Heavy will upgrade his resistances first and go hug the robots. High level players tends to prefer this way of playing. The Warrior's Spirit is much more viable here against Tanks since it is rather cheap to upgrade and your primary isn't upgraded.

Basic loadout :

Early upgrades : Health on kill (one/two points) or Health regeneration, Blast Resistance, Bullet resistance.
Midgame upgrades : Firing speed.
Late game upgrades : Health regen, Health on kill.
Situational upgrades : Crit resistance (when crit robots appear), melee Swing speed (when using the Warrior's Spirits, when Tanks appears and when acting as a Semi-Tank Buster).
Preference upgrades : Ammo Capacity; Projectile Penetration (one point max), Projectile Destruction (when facing Rapid-Fire Giant Soldiers/Demomen).
Useless upgrades : other melee upgrades, secondary upgrades.
VI) Engineer
The Engineer is considered the most useful class in MvM, mostly because of his Dispenser and Teleporter. The Dispenser is THE source of ammo for the team and an excellent healing source (working nicely alongside a Medic, Health on kill and Health regeneration upgrades) while the Teleporter allow the team to come back to the frontlines after death (which happens a LOT). Compared to these buildings, the Sentry gun isn't actually the best tool the Engineer have, dealing low damage when compared with other power classes. It is mostly used to sentryblock Giants like Super Scouts. An Engineer is all the Support a team needs.

Weapons

Primaries


Honestly, you can't be wrong with your primary. Stock and the Panic Attack are good self-defence options (mostly against Spybots). The Frontier Justice's crits tends to be overestimated, but useful nonetheless. The Widowmaker is an excellent option against Tanks when upgraded. The Rescue Ranger is the most commonly used primary due to how it makes building management more versatile. The Pomson isn't that great against Uber medics, but is a known cheesy tactic against Giant Medics.

Secondaries


The Wrangler tends to be the obvious choice, allowing a bigger damage output against Giants. It also allows the Sentry to take much more damage, but it should truly only be used against Giants as the auto-aim feature of the Sentry is better than manually aiming normal robots.


Same problem that with the majority of secondary : others are more useful than the Pistol. Also, the main damage output will come from the Engineer's sentry. But if the Pistol is the only secondary you have, it's not the end of the world.


The Short-Circuit also helps against some Giant Soldiers and Demomen, but is less effective against groups of Soldierbots and Demobots. It's a weapon that can be good but is more situational than the Wrangler.

Melees


The Stock Wrench, the Southern Hospitality and the Jag allows you to have a Sentry and keep care of your buildings without any major downsides. The Jag does repair less compared to the other two, but the difference is insignificant.


Even if the Sentry isn't the Engie's main building, having the Gunslinger is looking for troubles. The mini-sentry is so much weaker than a normal Sentry it doesn't justify the health boost on it. Battle Engineer is NOT viable in MvM (at this guide's release). The Eureka Effect reduce all of your repairing abilities for no worthwhile upsides. Every second spend dead or in your spawn is a second when you buildings can be destroyed. Additionally, the Teleporter will extremely rarely get destroyed, so having its cost reduced won't change anything.
Engineer's playstyles
The Engineer tends to be the only needed class in MvM and it's not because of his sentry. Still, his playstyle will be all about his buildings and helping his team with ammo supplying. Keep in mind that this also an Engineer's role to keep an eye on the bomb : always have the sentry where the bomb is. The goal of MvM is to prevent the bomb from going forward, not to protect the hatch.

Default Engineer
Main roles : Ammo, Support (Healing, Teleporter, Bomb guarding, Sentry blocking)
Secondary roles : Crowd damage, Giant Damage, Semi-Tank Buster


There's not 300 ways to play Engineer. Have your sentry on the bomb, the dispenser with your team and the teleporter where your team can reach any part of the map fast. When Giant Scouts comes by, have your sentry near an outer-corner to sentry block him. The Sentry will only help dealing damage. Despite its high damage output and auto-aiming features, having a single Sentry as the main team's damage dealer will doom the team on higher difficulties. You can however increase this damage output against Giants with the Wrangler and with the Widowmaker/melee against Tanks. But keep in mind your most important role : always have your dispenser up and near your team.

Basic loadout :

Early upgrades : Dispenser range, Metal capacity (one point max)
Midgame upgrades : Building health, melee's swing speed.
Late game upgrades : Metal capacity, Blast Resistance, Bullet resistance, Health Regeneration, Movement speed.
Situational upgrades : Crit resistance (when crit robots appear), Widowmaker's firing speed (when using the Widowmaker and on Tank waves)
Preference upgrades : Sentry's firing speed (one point max)
Useless upgrades : other melee upgrades, secondary upgrades, Two-way teleporter, Disposable Sentry, more than one Sentry firing speed upgrade.

Additional notes :
- The early point in metal capacity is to help when both your Sentry and Dispenser are down. That way, you can rebuild them both without having to get metal in-between.
- Due to a bug, having more than one point in Sentry's firing speed is useless. In short : you can reach max firing speed with only 1 point in this upgrade but two will guarantee it. There's no statistics about what are the chances you reach full firing speed with only one point, but since damage isn't your primary concern having one point is enough.
- Two-way teleporter can help in the later waves to upgrade faster between waves (without having to kill yourself or change class in-between), or to go back-and-forth during the wave to quickly buy canteens (even if I advise against doing so), but is only truly useful on big map and on classes that can't afford suicide.
VII) Medic
The Medic tends to be over-estimated by the typical MvM player. True that his healing abilities can't be matched, but there are other reliable sources of healing, like Health upgrades, Dispensers, Mad Milk and the Concheror, and having a Medic tends to be overkill. He's far from needed, but not useless. The only reasons he's popular in Two Cities is because of the Two Cities update and the lack of dangerous Tanks in this mission (making him "replace" the Pyro in the Mecha Engine meta, where the basis of the Two Cities meta comes from).


Weapons

Primaries


The choice of primary for the Medic doesn't matter that much, as he will be mostly focused on his Medigun. The stock Syringe gun and the Overdose do have access to the Mad Milk Syringes upgrade, which can help the ones using it. The Crusader's Crossbow is also a useful tool for long-range healing, but less for burst-healing (as you can upgrade your Medigun to beat this burst-healing abilities).


Even if it is also able to get Mad Milk Syringes, the Blutsauger's major upside is useless if never used. It is a weapon for more aggressive and active Medics. Otherwise, it is a noticeable impact on Medic's survivability and a straight-up downgrade.

Secondaries


The Kritzkrieg is considered the best MvM Medigun for a rather straightforward reason : MvM is about dealing damage and the Kritzkrieg's Ubercharge allows for more damage. However, this doesn't stop the stock Medigun and the Quick-Fix from being efficient. If your team stays alive longer, it can deal more damage. All the Mediguns actually are equals in MvM. Stock and the Kritzkrieg either use a healing-based upgrade path or an Uber-based one, but the Quick-fix do encourage healing-based upgrading more.


The Vaccinator is as good as the other Medigun, but it makes some upgrades useless. The Uber Duration and Overheal Expert upgrades have barely any impact on the Vaccinator, so they should be avoided. And since it also have access to only one Uber rate upgrade, this makes the Vaccinator the cheapest Medigun in MvM. This is the most usefull Medigun for revives thanks to its 4 Ubers storage. The resistances given by the Medigun are also good considering subwaves tends to only have one damage type (two in the worst cases).

Melees


The Ubersaw is the go-to melee for Medic. Not because getting Uber on hit is good, but because the other melee doesn't offer anything for MvM. The easiest way to get Uber with the Ubersaw is against Sentry Busters, but you can also get some from distracted robots like Giants. Just be sure you're not the robot's primary target before going melee on them.


As said above, the problem with other melee is that they bring nothing in MvM. The Amputator's health regen is not passive, the Vita-Saw's Uber on respawn mechanic is useless considering how Uber isn't as impactful as it is in PvP and how easy it is to get it, and the Solemn Vow's ability to see enemies health is useless as you can already see Giant's health by default. The Stock Bonesaw isn't a bad choice if you don't have the Ubersaw, but it is way inferior to it.
Medic's playstyles
The Medic is all about support, either it being from healing, Ubers or his shield. The "best way" to play Medic in MvM has always been a heated subject in the MvM community and will certainly always be. But no matter how you help your team, you are good to go as long as you do something helping your team.

Healing-based Medic
Main roles : Support (Healing, Shield, Revive, Ubercharges (Medigun-dependant))
Secondary roles : Crowd Damage


The most common way to play Medic. Upgrade the healing abilities of your Medigun and keep your team alive. The faster healing will also charge your Projectile Shield faster and help even more keeping your team alive. Ubercharges are not that common but also not your primary focus, but showing your Ubersaw on some passing bots or Sentry Busters can help.

Basic loadout :

Early upgrades : Projectile Shield (one or two points).
Midgame upgrades : Healing Mastery, Overheal Expert (if not using the Vaccinator).
Late game upgrades : Blast resistance, Bullet resistance, Movement speed, Health regeneration, Ubercharge rate, Ubercharge duration (if not using the Vaccinator).
Situational upgrades : Crit resistance (when crit robots appear).
Preference upgrades : Ubersaw's melee swing speed.
Useless upgrades : other melee upgrades, primary upgrades.

Uber-based Medic
Main roles : Support (Healing, Shield, Revive, Ubercharges (Medigun-dependant))
Secondary roles : Crowd Damage


The second most common way to play Medic. Spam Ubercharges to enhance your team (depending on the Medigun you choose) and revive them quickly when they die. Even if you don't get as much healing done as a Healing-based Medic, it is compensated by the pure amount of Ubercharges you provide. Note that you should avoid upgrading Overheal Expert as it messes up with Ubercharge rates.


Basic loadout :

Early upgrades : Projectile Shield (one or two points).
Midgame upgrades : Ubercharge rate, Ubercharge duration (if not using the Vaccinator).
Late game upgrades : Blast resistance, Bullet resistance, Movement speed, Health regeneration, Healing Mastery.
Situational upgrades : Crit resistance (when crit robots appear).
Preference upgrades : Ubersaw's melee swing speed.
Useless upgrades : other melee upgrades, primary upgrades, Overheal Expert.

Shield Basher Medic
Main roles : Support (Healing, Shield, Revive), Crowd Damage.


A variant of the Healing-Based Medic that focuses more on spamming Shields and dealing damage himself. This Medic's main reason to heal his teammates is to generate his shield and shove it into the robots. I did make a guide about it if you want to know more :
https://steamcommunity.com/sharedfiles/filedetails/?id=561054554

Basic loadout :

Early upgrades : Projectile Shield.
Midgame upgrades : Healing Mastery, Overheal Expert.
Late game upgrades : Blast resistance, Bullet resistance, Movement speed, Health regeneration, Ubercharge rate, Ubercharge duration.
Situational upgrades : Crit resistance (when crit robots appear).
Preference upgrades : Ubersaw's melee swing speed.
Useless upgrades : other melee upgrades, primary upgrades.
VIII) Sniper
The Sniper tends to be an under-estimated class by the majority. But high level players agrees that he's one of the most powerful classes in MvM if not the strongest. Thanks to his Explosive Headshot upgrade and his ability to headshot, the Sniper is excellent against both crowds and Giants. The Explosive Headshot upgrade allows the Sniper to deal heavy damage to the robots around the headshotted target and makes him an excellent Uber medic killer. True that some classes outclass the Sniper in term of Giant and Tank damage, he is still a rather open class for his specialised role in the team. Additionally, he collects the money of everything he kills with his primary, headshot or not (and instead drop "red money", money with red dollar signs that only gives health to a Scout). And before someone says "But you have to know how to aim to play Sniper", know that it's really easy to shoot slow targets moving in a predictable pattern, especially Soldiers, Heavies and Giants.

Weapons

Primaries


Sniper is all about Explosive Headshot, so a weapon that is able to reliably trigger those is viable, like the stock Sniper Rifle. Even if the Sydney Sleeper cannot technically do headshots, he can still do Explosive Headshots. Additionally, any target hit by the Explosive Headshot will be covered in Jarate. Not really useful against most basic robots, as the Explosive Headshot can kill them in two hits, but more useful against Giants and bigger commons like Fists of Steels. The Bazaar Bargain is more for the player that wants to focus on Giants, with the weapon's charge rate increase on headshot kill. Do note that Explosive Headshots do NOT increase the head count of the Bazaar Bargain, and even with charge rate upgrades, it can't go above +100%. The Machina tends to be over praised due to his penetration ability on fully charged shots (which require Charge Rate upgrade to make effective, and the Penetration upgrade does better for the same price), but since it can still do Explosive Headshots reliably, it's viable. The Hitman's Heatmaker is considered the godlike weapon of the Sniper thanks to his Focus ability. Not only it allows better damages on headshotted targets, it also makes aiming and chaining Explosive Headshots easier and faster. The Focus ability is extremely easy to charge and to keep active in MvM due to the huge amount of kills the Sniper gets.


Due to the lack of Explosive Headshot upgrades, the Huntsman is really weak even compared to the Sniper's stock primary. True that a good Sniper can deal a decent amount of damage with this weapon and even be able to kill Uber medics thanks to his Penetration upgrade, he will never reach the power of Explosive Headshots. As for the Classic, the Explosive Headshot only works when the weapon is fully charged, making it hard and annoying to use.


Secondaries


You won't be using the Jarate against smaller group of robots, as it is better and faster to simply kill them yourself, but instead against Giants to help your team, especially Super Scouts if you have the slowdown upgrade. Do note that it doesn't stack with other mini-crit sources like the Fan O' War and the Buff Banner, so the Jarate tends to be useless when playing with a Support Scout. The Cozy Camper tends to be a favorite thanks to its passive health regeneration. The Sniper tends to rarely take damage, but 1+1+1 can eventually kill you. The Cozy Camper nullify those small amount of damage you will take. The Cleaner's Carbine's Crikey can charge on Tanks. It is a rather new but effective tactic to take the Bushwacka and melee a Tank while under the Crikey's mini-crit effect.


Like the majority of secondary weapons, the stock SMG doesn't bring anything to the Sniper. If you don't have any other secondary, you can still take this weapon and do your job, but it's better to have something else.


The Razorback and the Darwin's Danger Shield are both good options but out-shined by others, since these two are really specialised against a particular type of robot (Spies for the Razorback and Flare guns Pyros for the Darwin's Danger Shield) that are not always present.

Melees


The Sniper is rather free in term of melee choice, but a notable one is the Buskwacka. With some swing speed upgrades and the Cleaner's Carbine or a Soldier with the Buff Banner, the Sniper can be a destructive force against Tanks.
Sniper's playstyles
The Sniper is all about Explosive Headshots. So no matter your primary, you have to upgrade and adapt your playstyle around it. Don't try to be a Giant killer, other classes are better at that than you. You are not a single target DPS, you are dealing with crowds.

Standard Sniper
Main roles : Crowd Damage, Uber Medic killer
Secondary roles : Money collector, Giant damage, Semi-Tank buster (if using the Bushwacka with the Cleaner's Carbine and/or a Buff Banner Soldier), Support (Slowdown and mini-crits, when using the Jarate)


Because of this need of the Explosive Headshot upgrade, there's not a lot of ways to play Sniper. What you can change in your playstyle will be loadout-dependant. But your role will always be the same : kill groups and Uber Medics. You can extend your array of roles depending on your secondary and melee too.

Basic loadout :

Early upgrades : Explosive Headshot (at least one point)
Midgame upgrades : Reload Speed, Explosive Headshot (maxed out)
Late game upgrades : Health on kill (one point max), Damage, Charge rate.
Situational upgrades : Crit resistance (when crit robots appear), Jarate's slowdown and charge rate (when Giant Scouts appear), Bushwacka's Swing speed (when Tanks appear and when having the Cleaner's Carbine and/or a Buff Banner Soldier on the Tank).
Preference upgrades : Penetration, Ammo capacity.
Useless upgrades : Other secondary upgrades, other melee upgrades, other body upgrades.
IX) Spy
Like the Sniper, the Spy tends to be underestimated by the majority of MvM players. In the hands of a good player, the Spy is the best Giant killer of the game. He is highly specialised in this domain but being able to take down any Giants almost, if not entirely, by himself is a strong point that should not be ignored. Thanks to his ability to disguise and cloak, the Spy is also an excellent money collector. Do note that if you both have a Spy and a Scout in your team, it will be the role of the Scout to get the money and not the Spy's.

Weapons

Primaries


Spy's primary doesn't really matters as his main mean of damage will be from his melee. The two notable choices are the L'Etranger, which increase your total cloak time, and the Diamondback, which gives you crits on backstab, which can help a bit for some rare cases where you need self-defence and Tanks. Do note that you only get a crit for the Diamondback on backstab kills.

Secondaries


Same thing with the sappers, as their effects doesn't change on robots. Do note that the stock Sapper is more effective against Engiebot's sentries, as they destroy these faster and you cannot sap anything while its sapping a building. Simply backstab the Engiebot first then sap the sentry.

Melees


The bread and butter of the Spy, his melee. You can do your job with the stock Knife without any trouble. You simply won't get any upside and downside for it. The Big Earner is also a commonly used knife, using the speed boost on backstab to help with money collection and escaping.


People using these weapons think that they are smarter than the rest. Your Eternal Reward actually have an MvM-specific nerf : you have a 3 seconds delay before disguising on a backstab. This is the same time it takes to actually disguise, so you earn nothing between manually disguising and using this weapon. The Spy-cicle helps against Pyros, yes, but the 15 seconds it takes for the weapon to regenerate are 15 seconds where you are useless. This is way too long.


The Conniver's Kunai is more for the higher-level spies that wants to have a health boost after a successful backstab, but it's harder to pull-off against Giants. Do note that you will never get above 210hp no matter your backstab damage and your taget's health.

Watches


Due to the hit-and-run nature of Spy's gameplay, the best watch is by far the Dead Ringer. Do your backstabs, activate the Dead Ringer and run away. Even the various nerfs this weapon took didn't stop the Dead Ringer from being the best in MvM.


Which makes the other two watches absolutely useless. If you really don't have the Dead Ringer, prefer the stock Watch as the Cloak and Dagger isn't really practical for MvM. If you need to travel into the robot horde, your normal disguise will fool any robots anyway (as long as you are not on fire or covered in liquids).
Spy's playstyles
Spy is about doing two things : backstab Giants and grab the money. He is extremely specialised which means he can't do much else. Before someone ask, Spy is NOT about using his sappers on robots. It is considered a waste of potential as Spy can deal the highest damage on Giants without the use of canteens or external help. Additionally, other classes can deal with Uber medics much efficiently than Spy can. He can help on this if the main Uber Medic killer is dead or not doing his job, but you shouldn't expect a Spy to deal efficiently with Uber medics.

Standard Spy
Main roles : Giant damage, Money collector
Secondary roles : Uber medic killer, Support (slowdown, Engiebot killer)


This high specialisation also forces the Spy on a specific playstyle. Focus on the Giants and get the money if you don't have a Scout. You can also kill in one backstab the bigger common bots, like Fist of Steel Heavies or Samurai Demos. Other than that, you can help with Engiebots and occasionally sap robots.

Basic loadout :

Early upgrades : Movement speed, Armor Penetration.
Midgame upgrades : Swing speed.
Late game upgrades : Blast resistance, Bullet resistance, Sapper power, Health on kill.
Situational upgrades : Crit resistance (when crit robots appear)
Preference upgrades : Health regeneration.
Useless upgrades : Primary upgrades, Crit-on-kill.

Additonnal notes : the number of backstabs you can do on a Giant will depend on if he's shooting at someone else and your Swing speed upgrades. Below 3 Swing Speed upgrades, you can only land two backstabs on a Giant before he turn around. At 3 and 4, you can land 3 backstabs. The most daring Spies can land 4 backstabs when fully upgraded. However, Armor Penetration is still much stronger than Swing Speed on his melee.

If you want a good Spy guide video for MvM, I highly, HIGHLY, recommend Underscore gaming's video :
https://www.youtube.com/watch?v=8uLTixBXTPM
Team compositions
Before going into the main part of the subject, I want to speak about a big misconception in MvM : class stacking

About duplicate classes and class stacking

A lot of players thinks having multiple players using the same class is a bad thing. This is the goal of the All Class runs I was speaking about at the start of this guide. Even when playing with random players, you can make class stacking works. You have 4 major roles to cover for 6 players, and some classes can even cover multiple roles. As long as those 4 major roles are covered, your team composition doesn't matter that much. I will speak about the various class stacking and how it affects team composition and gameplay.

Multiple Scouts

Well I say class stacking isn't a bad thing and I start with a bad example. The problem with stacking Scouts is money. The main source of healing the Scout have is the money dropped by the robots. The more Scouts there is, the less healing they will get. However, if all the Scouts are not playing Pure Support Scout, they can be a really effective distraction force and single-target damage output.

Multiple Soldiers

Certainly one of the most fun. Having multiple Soldiers doesn't only mean more overall damage, but also being able to do Banner stacking : have the Soldiers use different banners and add their effects to each other. Combining mini-crits, damage resistance and heal on hit can be an effective and fun way to play MvM. But that also means that above 3 Soldiers, the only thing the 4th one will bring will be damage.

Multiple Pyros

This can be complicated at first, since the Pyros needs other teammates to distract the robots to be truly effective, but once you get a decent rhythm, multiple Pyros can dominate close-range encounters. Tanks also doesn't stand a chance with more than 1 Pyro. Due to the close range nature of the class, multiple Pyros can in theory get the money themselves, without needing a Scout or a Spy. So note that if there's a Spy in the team, the Pyros will need to cooperate with him to prevent the Spy from being targeted first and unable to land backstabs (by doing things like circle-strafing)

Multiple Demomen

The Demoman is a versatile class. If you have more than one, you can simply share all of the needed roles between the Demos. Like having a Sticky-based one for Uber medics and a Grenade-based one for Tanks. Despite being rarely used, multiple Demos is an easy to do and fun tactic.

Multiple Heavies

A Heavy will need ammo to be effective. More Heavies will need the same thing. Have an Engineer and you can safely stack Heavies. Hell, this is a common tactic used in the Gear Grinder tour. Heavies will only bring pure damage, but opposed to Soldier, this damage output will be bigger. It's hard to mess up with multiple Heavies.

Multiple Engineers

Having multiple Engineer by itself isn't that bad. But the majority of new players will do this really, really badly and even overestimate this strategy (and ultimately think that class composition is above player's skills and mission difficulty). Making multiple Engineer work in MvM is really close to making multiple Engineer works in PvP. Spread the sentries, help your fellow engineers and help your team as much as you can. The little bonus here are Sentry Busters. Not only more Sentry Busters will spawn, but the damage needed to make one spawn is reduced by 10% for each additional Engineer. They will be the Engineer's major foe.

Multiple Medics

Medics are all about Support and, in theory, more support is always good. However, a Medic is only good if he have someone to give his support to. The number of Medics shouldn't be above the number of power classes in the team (Soldier, Pyro, Demoman and Heavy). If the Medic doesn't have someone to give his Ubers to, then what's the point ?

You can also do Uber chaining : have two Medic with the stock Medigun and the Ubersaw, upgrade that Ubersaw's Swing speed and keep Ubering each other. Damage-wise, it's not that great, but it's pretty good in term of distraction and support. This is also a pretty original way to collect the money. Additionally, melee are known to be effective against Tanks thanks to their high crit rate and the fact that they don't use ammo. Two Medics with a Semi-Tank Buster can generally deal with Tanks efficiently.

Multiple Snipers

The worst thing that can happen is Sniper stealing each other's targets. But when a Giant comes there's enough robot head for multiple Snipers. More than 1 Sniper can deal with all the crowd damage a team might need, meaning all you will need afterwards is enough Giant and Tank damage, alongside a bit of money collection since Snipers automatically collect the money of the robots they kill.

Multiple Spies

One of the trickiest ones. Without speaking of the reduction in overall crowd damage, Spies can hinder each other when backstabbing Giants. Either by meleeing each other instead of their target, or by aggroing the robots on each other. Cooperation will be needed between the Spies, but it can work.


Now that you know what works in MvM, you can make your own team composition.
- Have an Engie (unless you want to try that Engieless team composition we were speaking earlier in the guide)
- A way to deal with Uber meds (unless there are no Uber Medics this mission, like Bavarian Botbash)
- A way to deal with Tanks (unless there's no Tanks, like in Mannhattan)
- A way to collect the money.
And you will be good to go.

Knowing what works in MvM is an important skill making the difference between your stereotypical meta worshipper that do not even try to understand this gamemode, and a true professional and high level player that know what this gamemode is about.
Closing words
Thank you for taking the time to read this guide. It was a lot of works over a few months to complete it.

If you want more informations about MvM overall, you should check Jet's guide :
https://steamcommunity.com/sharedfiles/filedetails/?id=500673166
This guide also have a lot of links about the in-depth of all the classes and how to play them.

You should also check the big changelog of Mann Vs Machine[docs.google.com], a big list of suggestions by the MvM community for Mann Vs Machine.

If you have any suggestions or questions, feels free to comment on this guide.

If you do not agree with how I rated a specific weapon/playstyle, please read why I rated it that way instead of saying "why is it warning, it's ok for me".
287 Comments
Liberty Mann Mar 10 @ 10:48am 
Second comment because I hit the character limit:

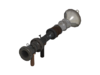
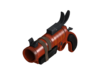
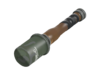
3: Air strike soldier and both pill and sticky demo can use ammo canteens arguably better than crit canteens. Crit canteens might provide better burst dps, but with larger clip sizes and slower reloads the sustained damage of ammo canteens shines like gold. Just shoot your clip and reload for a mere 25 credits. Bonus points to air strike with the buff banner for the minicrit damage stream.
Liberty Mann Mar 10 @ 10:47am 
Excellent guide, however I might argue that:

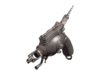
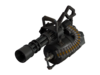
1: Natasha is questionable at best. Its damage is absolutely pitiful against tanks, it hinders heavy at the thing he does best, and its only "niche" that it can do (killing super scouts) is outdone by just bodyblocking them, something literally any other minigun could ironically do better by just deleting the super scout. Speaking of which...

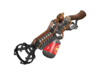
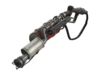
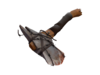
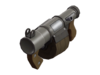
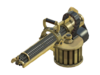
2: The huo long heater should be where the natasha is now. It is literally just better than stock if you play heavy properly and abuse damage ramp up. It is at least on-par with the brass beast at killing anything except tanks, even without a pyro simply due to the damage bonus combined with the lack of spinup penalty.
meow Oct 17, 2023 @ 11:52am 
cool guide, thanks dude
Gary Allen Sep 27, 2023 @ 11:40am 
Entire gas passer hating team is BABIES
old Sep 8, 2023 @ 5:13am 
Gas passer take is so delusional lmao it hurts my brain.

Your take is purely subjective on it. Saying pyro is already too overpowered with it is such a stupid way of putting you have strong distaste for people speedrunning the gamemode using it. And MvM frankly speaking is a money pit, nobody plays for fun anymore.

Let people use what they want to use. It's your problem that this pisses you off so much. It's a fun secondary regardless.

I never had issues with anyone using it. I do have issues with people that can't mind their own business in a gamemode that's not even competitive or requires you to be highly skilled when it has mostly become a place to gamble your money away
Ice Sonic Sep 6, 2023 @ 11:11pm 
scout is a good $ grabber
Defi Aug 21, 2023 @ 8:26am 
It might seem rather inconsistent (especially to newer players) wether you advice weapons that are good or weapons that perform poorly.

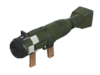
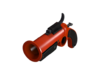
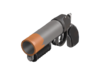
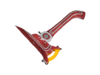
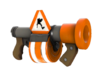
You mention the scottish resistance which has the highest burst weapon of any weapon in MVM but frown upon the Gas Passer for moral reasons?
Living Meme Jul 29, 2023 @ 8:34pm 
imagine complaining about a weapon that speeds up the process of completing a tour, under the guise that it's about "the journey"

cope harder, high tour dumbass

or is the sunk cost fallacy getting to your head to the point where you feel the need to cry and seethe about a single weapon that doesn't let you show off your "skills" and cosmetics on soldier?
soup May 10, 2023 @ 11:51am 
USE THE PIPCA GASSY PASSER