The Talos Principle

The Talos Principle

234 évaluations
Three Endings Guide (text only)
De NoMercy Rider
So you've completed all the puzzles in Worlds A, B, and C... now what? This guide will provide the remaining steps needed to unlock all three endings. This includes solutions to all of the tower puzzles and all the star level gray sigil pieces.
2
   
Récompenser
Ajouter aux favoris
Favoris
Retirer des favoris
Introduction
This guide is the final iteration of my text-only puzzle solution guide. In writing these puzzle solutions, I have assumed that you have completed all the Green/Yellow/Red Sigil puzzles in Worlds A, B, and C. If you haven't, you can refer to my other guides below for assistance. Feel free to leave any comments about the guide, especially if my instructions are confusing. I would love the feedback!

Other Talos Principle Puzzle Guides:
http://steamcommunity.com/sharedfiles/filedetails/?id=354777976
http://steamcommunity.com/sharedfiles/filedetails/?id=355116461
http://steamcommunity.com/sharedfiles/filedetails/?id=355579339
http://steamcommunity.com/sharedfiles/filedetails/?id=356434276
Three Endings
Transcendence (Elohim - BASIC)
If you have already completed all the puzzles in Worlds A, B, and C, then this ending is already unlocked for you. Simply walk through the giant door in the World C hub area to start the ending sequence. WARNING: After the ending, the game will start over from the beginning, but you don't have to play through the game again! Simply go the the menu and reload a checkpoint from before the ending. At this point you can freely pursue the other two endings without starting over.

Ascension (Tower - MEDIUM)
If you have unlocked the basic ending, then you have all the sigil pieces necessary to star the process for this ending. The process entails ascending to the top of the tower in the hub Nexus world by solving puzzles in each floor. The collected red sigils are used to unlock the gate in each floor. Additionally, starting on the third floor, you will need to unlock the sequential floor by using a computer terminal. The necessary password is typically found in one of the terminal documents. The ending is completed once you reach the very top of the tower.

Transformation (Messenger - HARD)
This is the most difficult ending to reach in the game. In order to complete the ending, you need all 30 stars in the game (you can miss three star locations if you decide to use Sigils of Elohim unlocks). Since there is already a great guide for all the stars, I will refer you to that guide rather than create my own walkthrough. Once you have all 30 stars, you need to access the Star Worlds in each hub area and solve the three gray sigil puzzles in each world. Once you have all nine, you need to unlock Floor 6 to complete the ending. You may be wondering what the password is to unlock the final floor... (spoilers) in each star world is a sign with one of the password digits. The code is randomly generated for each playthrough to prevent bypassing game sequence. For a 821 code for example, world A will show 8 * *, B will show * 2 *, and C will show * * 1.

http://steamcommunity.com/sharedfiles/filedetails/?id=354991567
Tower - Floor 1
Once you exit the elevator, go ahead and solve the block puzzle to head through. Enjoy the view, then enter the next room and go through the purple puzzle gate. Grab the connector on the left, target the transmitter and receiver through the two narrow windows. Place the connector as far left and forward as you can go while maintaining LoS between the two targets. Pick up the next connector and target the previous connector and the receiver. Place this one as far right as it will go. If done correctly, a constant beam should go through and open the energy gate to the terminal.

Go into the terminal, head into the device manager, and then hit floor access control. Hit #2 to unlock the next floor. Exit the terminal.
Tower - Floor 2
Head back into the elevator and go up to Floor 2. Solve the block puzzle to proceed through to the next area. Enter the purple puzzle gate to complete the next obstacle. Place one box on the fan on the right side (there is a box above). Then place the other box in front of the fan. You can now stair step up these boxes to bring the third box down. Now pick up the fan and place it on the wall receptor. Pick up a box and jump into the fan, at the peak, you should be able to place it on a nearby ledge. Drop back down, pick up another box, and jump back into the fan. Drop the box into the wall fan air stream and the box should rise up and lift you higher. Pick up the box from the ledge and place it on the even higher ledge. Drop back down. Pick up the third box and jump back on the fan (this should knock the second box back to the ground). Now place this box on the lower ledge. Okay, drop back down for one last time and pick up the final box. Jump into the fan to rise up. Systematically drop each box into the wall fan to slowly lift yourself up. Picking up each box on the ledge as you go. With all three boxes under you, jump onto the top ledge and head down the ladder.

Access the terminal and then the device manager. Go to unlock Floor 3. It is asking for a code, what could it be? How about that convenient sticky note attached to the monitor? Type in that code and the next floor should be unlocked.
Tower - Floor 3
Head up the elevator to the next floor and solve the block puzzle to gain access to the next area. Enter the purple puzzle gate, start the recording, and jam the first energy gate. Let the recording go for a few more seconds and then stop. During playback, pick up the jammer, walk through the disabled energy gate, and disable it from the other side. Hit the recorder again, pick up the jammer and disable the second energy gate. Give yourself a few seconds, then jam the first gate again so you can go back through and stop the recording. During playback, pick up the jammer when the ghost player goes through, and use it to jam the third and final energy gate.

Access the terminal, then open "OsirisPassword.txt". There is a three digit code within this document, remember it and head into the device manager. Use the code to unlock Floor 4, then return to the elevator.
Tower - Floor 4
As usual, head up the elevator and solve the block puzzle to gain access. Walk through the purple puzzle gate, go up the tall ladder, and bring the box down. Place the box in front of the middle elevated platform and start the recording. During recording, pick up the box and place it under the keys (there is a yellow square painted on the floor to help you. Pick up the platform and stand next to the elevated platform for several seconds. Walk to the box, jump on top of it, and then jump in a stationary position a few times. Head back and stop the recording.

During playback, jump on the box and then up onto the elevated platform. Pick up the box behind you. When the ghost player comes around, place the box on the platform, then jump onto the platform yourself. The ghost player will jump onto the box, and while he is jumping, reach for the keys to pick them up. Use the keys to open the locked door.

Access the terminal and open "SacredNumbers.txt". Remember the three digit code in this document. Open the device manager and use the code to unlock Floor 5. Head back to the elevator.
Tower - Floor 5
Okay, time for a pretty challenging puzzle. Pick up the fan from the floor and place it on the pressure switch to unlock the gate. Stand back while the mine moves through the doorway. Quickly bring the box and the jammer out from the room. When the mine goes back into the room, remove the fan to lock it inside (for now). Place the fan back in the receptor and place the box on top of the fan. Grab the jammer and disable the fan directly above on the second floor. Walk up the ladder, pull the fan off from the nearby wall, and place it on the pressure switch.

Walk through the door, take the jammed fan off the wall and place it on the floor temporarily. Drop down the hole and remove the jammer. Now go back up, pick up the fan off the floor, and place it back in the receptor such that you don't get blown with it (use the narrow walkway on the left side). You will see a pressure switch to the left of the wall fan on the first floor. Drop down on top of it and watch the box rise up to the second floor. Circle around and use a fan to lift yourself back up to the second floor. Pick the fan off the wall (again), and bring it to the next room, placing it in the receptor facing the turret.

Pick up the fan from the pressure plate, and place it in the receptor that blows into the previously placed fan's airstream. Put the box on the pressure plate. Start the recording, then drop to the area with the pressure plate used to lift the box up to the second floor. Stand on the pressure plate a good 30 seconds, then ride the fan back up and stop the recording. During playback, take off each fan from the wall mount and place them on the receptor closest to the pressure switch and the one through the unlocked gate. If done correctly, all four receptors on the second floor should have regular/ghost fans. Drop down to the first floor and use the jammer to unlock the energy gate and free the mine. If done correctly, the mine will be flung up onto the second floor and blown through all the fans into the turret, destroying them both. Before the ghost player steps off the pressure switch, pick up the jammer and ride the fan up to the second floor.

Drop the jammer near the recorder for now and pick up any fan and head to the turret hallway. Place the fan in the floor receptor, then place the box on the pressure switch. Start the recording, pick up the jammer and head up the fan. Jam the first energy gate at the top and let it sit there for several seconds. Head back down and stop the recording. During playback, pick up the jammer and head up the fan as well, this time jamming the second energy gate. Head on through and you will find freedom. Head up the stairs outside to begin the final ascension.
Tower - Ascension
Alright, done climbing the countless stairs? Now begins the rather cool cooperative/uncooperative puzzle solving to ascend the final areas. Head through the purple gate, pick up the connector, and use it to connect the blue transmitter/receiver through the narrow window. This will free The Shepherd, who will unlock the energy gate for you. Stand on the pressure switch to bring a platform to him, then step off to send him to the other side. He will place a red connector nearby. Hop on the pressure switch again to send him back. Pick up the connector and target the red connector and receiver through the windows to unlock the next area. Take the elevator to the next level.

Up here you will find Samsara, who will continually try to block your progress. Pick up the connector and target the blue transmitter/receiver (by the fan) to send The Shepherd to the other side. He will lower a walkway for you to cross. Pick up the connector and follow him and then jump into the fan he activates. Drop the connector here for now, climb the ladder and cross to the other side. Pick up the box, place it in front of the fan, and step on the switch to send it flying. Go back to the connector and place the box on the switch. Pick up the connector and jump into the fan. Use the connector to target the red transmitter/receiver to unlock the energy gate. Pick up the jammer and target the gate near the Shepherd to let him through. He will jam the gate next to you, allowing you to disable the final gate. Ride the elevator up to another level.

Pick up the box, place it on the platform, then step on the pressure switch to deliver it to The Shepherd. He will use it to unlock the nearby connectors and place one back on the platform. Step off the switch to bring it to you, pick it up, and target the red connector/receiver to continue onward. Head up to the next level.

Pick up the jammer and target the energy gate near Samsara. Pick up the connector and target the blue transmitter and all three receivers. Samsara will try to stop you, but the fan will blow her into the room. When she gets pushed into the room, remove the jammer to trap her for good. Use the jammer to disable the nearby floor fan (place the jammer as close as possible to the fan), and then place the box on top of the fan. Jump on the box, then pick up the jammer to send yourself skyward. Use the jammer to unlock the following energy gate and head up to the next level (almost there).

Use the jammer on the energy gate to head through. Hit the switch to send the elevator down to the previous level, then hit it again to bring The Shepherd up. When he gets off, send the elevator back down (this will be needed later). Follow him down until he stands on the pressure switch, freeing the jammer. Pick up the jammer and disable the energy gate from the other side to let The Shepherd through. Now use the jammer on the next energy gate to let him through. Now circle around the back and you should be able to target the next energy gate with the jammer (the elevator was previously in the way). Finally, jam the energy gate in front of the red transmitter, allowing The Shepherd to power up the fan nearby. Jump on in and enjoy the ending!
Star World A
Dumb Dumb Mine (Gray)

Before we get into the nitty gritty of this puzzle, we must first bring an axe and a jammer into the puzzle from the outside. Pick up the axe and walk into the central courtyard in the hub, you should see a set of stairs and a wooden barrier. Use the axe to break down the barrier to gain access to the jammer. Also within this courtyard, you should see an angled fan. One by one, use this fan to bring both the jammer and axe into the puzzle.

Use the jammer to disable the energy gate protecting the mine. Sneak past the mine and pick up the keys. Use the keys to unlock the gate, then bring the jammer through (keep the mine out in the open) and disable the next energy gate. You will notice that a tree blocks the mine's progress. Use the axe to chop it down. Chop down the next tree through the unlocked gate that impedes the mine's progress. Use the keys on the following locked gate and standby. The mine should make its patrol through the puzzle and destroy the turret beyond. The gray Sigil is yours.

Nerve-Wrecker (Gray)

Okay, this one is hard to explain in step-by-step instructions, so I will give general strategies. You will need to use the two jammers to juggle through energy gates, while also avoiding the mines. You can use jammers to throw off the synchronicity of the mine patrols, either by disabling them or placing the jammers in their path. As you make your way through, you can send the first courtyard mines to the entry area and close the gate behind them. That way you don't have to worry about them any more. You can also do this with the mines that patrol directly down the center. In the second to last courtyard, you need to jam one of the mines to safely walk through. Use the other jammer to throw off the synchronicity in the final courtyard mines and then make a run for the Sigil.

Jammed from Within (Gray)

Head through the puzzle until you come across a jammed energy gate. Wait for the mine to wander by, then run to the left and pick up the jammer. Disable the next energy gate and follow the mine closely through the gate and take a dive to the left when you have an opening. Climb the ladder and then pick up the following jammer. To the left is a long hallway with two mines. Use the jammer to first unlock the energy gate on the left, then unlock the one on the right to bring both mines into the righthand courtyard. When the long hallway is finally clear, head down there and pick up the keys. With that out of the way, reverse the process to send the mines back into the long hallway. Unlock the nearby locked gate and bring the jammer through to disable the next energy gate.

Carefully avoid the two zig-zag patrol mines and pick up the keys. Pick up the jammer and use it disable the righthand energy gate to return to the first courtyard area. Carefully avoid the mine and make your way back to the first jammer. Use the jammer to unlock the energy gate that was disabled at the start of the puzzle to head through to the puzzle entrance. Use the keys on the locked gate to retrieve the Sigil.
Star World B
Peekaboo! (Gray)

Start the recording and stand on the pressure switch to the right for a few seconds, then step off and stop the recording. During playback, run through the opened energy gate, pick up the connector, and place it in front of the recorder. Hit the recorder again to start recording. Pick up the connector and target the blue transmitter/receiver. Place the connector halfway between the two windows, and as far in one direction you can go while still maintaining LoS. Step on the pressure switch and stay there for a good 15 seconds, then go back and stop the recording. During playback, pick up the connector, target the transmitter, receiver, and ghost connector. Place the connector as far back in the opposite direction as the ghost connector. If done, you should have two triangles that look something like this: <|>. When the ghost steps on the pressure switch, it should activate the blue beams and maintain a constant stream to the receiver, unlocking the Sigil.

Merry Go Round (Gray)

Pick up the connector and target the blue transmitter (through a window) and receiver to head through the first energy gate. Pick up the jammer, disable the same energy gate from the inside, and bring the connector through the other side. Use the connector to unlock the next energy gate and repeat the process with the jammer to bring both connector and jammer through the other side. Now target the red transmitter/receiver to unlock the following gate and bring the jammer to the end of the hallway. Disable the following energy gate and pick up the unlocked connector. Work backwards, utilizing the jammer as necessary, to bring this second connector to the blue transmitter area.

Head past the blue transmitter and you should be able to place the connector such that it unlocks the energy gate opposite the courtyard (the energy gate that was previously protecting the connector). Make your way to the red connector and jam the targeted energy gate to bring both items through to the other side. Utilizing the blue connector through the narrow windows, use the next connector to unlock the following energy gate. Pick up the jammer and use it to disable the final energy gate protecting the Sigil.

Cat's Cradle (Gray)

This one requires really tricky LoS and juggling, hope my text walkthrough helps you out. Walk through the red receiver unlocked energy gate to pick up the connector. With connector in hand target the blue transmitter and a receiver that can be seen "through" the nearby energy gate (the receiver protecting the red transmitter). A beam won't connect, but will be used later. Pick up the other connector, target the previous connector and the same receiver and use LoS to unlock the energy gate. Pick up the third connector, target the red transmitter, the receiver at the nearby energy gate, and the red transmitter way in the distance that was protecting the very first connector we picked up. Pick up the second connector (that is now useless) to stop the beam conflict and set it aside. This allows us to walk through the gate and pick up the box and bring it to the main courtyard. This also eliminated the annoying crisscrossing beams at the dual locked gate.

Pick up the blue connector (which will reactivate the energy gate), target the same entities, but also the blue receiver at the dual lock gate and place it in the same spot. Repeat the process with the second connector to unlock the red transmitter gate. Pick up the red connector, target the same targets, but also the dual lock red receiver, and place it accordingly. Move the second connector out of the way to stop the beam conflict and the dual lock energy gate should open. Bring the box through and place it on the pressure switch to retrieve the Sigil. Whew!
Star World C
Unreachable Garden (Gray)

Take the platform off the pedestal and start the recording. Pick up the connector, target the blue transmitter and both nearby blue receivers and place it on the pedestal. Pick up the platform and stand next to the ledge (this ledge has a ladder on the other side if you cant figure out where it is located). Run to the recorder and stop the recording. During playback, pick up the connector and target the ghost connector and blue transmitter. Place the connector so that it has LoS to both targets to open the two energy gates. Once the gates are open, pick up the connector again and head through the second gate. Again target the ghost connector and the receiver for the third energy gate. Pick up the box from within and place it next to the ghost player and platform. Pick up the connector one more time, jump on the box, on the platform, and finally on to the upper ledge. Target the ghost connector and the blue receiver at the end of the puzzle to unlock the Sigil.

Nexus (Gray)

This is a multi-chambered level that is actually quite fun and relaxing. Pick up the connector and target the blue transmitter/receiver to unlock the energy gate. Use the next connector on the red transmitter/receiver to unlock the following energy gate. You may need to readjust the connectors to avoid beam conflicts. I placed the red connector immediately in front of the transmitter. Climb the ladder to head to the next area. Use the two connectors to trace a beam from the blue transmitter to the receiver in the narrow window to unlock the gate. Climb the ladder and place the following box on the pressure plate. Use two connectors to bring the blue beam previously used to the next receiver. Use the third connector to target the red transmitter/receiver and place it on the box to avoid beam crossing.

Climb the ladder in the next area and use the jammer to disable the first energy gate. Place the nearby connector on the following pressure switch to bring out a second connector. Use the two connectors to bring a blue beam from the transmitter to the receiver near the jammer. Use the jammer on the following energy gate and climb the ladder. Pick up the connector, target the receiver, and place it next to the narrow window. Climb the next ladder, use the two connectors to form a chain, always placing them in front of the narrow windows you encounter. Climb into the final chamber and use the last connector to complete the chain. Backtrack and you will find the energy gate protecting the Sigil is unlocked.

Cobweb (Gray)

Okay, upon first entering this puzzle, all the beam blockers can be overwhelming. Lets deconstruct the puzzle one by one. Pick up a connector, head to the right window, and connect to the transmitter and receiver on the right side. Place this connector as far right as you can go, right in front of the window. Pick up the next connector and walk right down the middle of the puzzle, maintaining view of the blue transmitter through the middle window. At a narrow location, you should be able to get LoS of the other connector in the gap in the wall. Target the transmitter, the same receiver, and the other connector and place it here.

If done correctly, the energy gate should stay open, go ahead and bring the other connector and box out. With this connector, do the exact same thing with the first connector, except with the left window and left receiver. Pick up the middle connector again, do the same thing, but this time also target the connector and receiver on the left side. The two energy gates should remain open. Place the box immediately behind the left energy gate and pick up the fourth and final connector. Target the red transmitter/receiver and place it on top of the box. You should get a brief window to grab the Sigil.

Image of Cobweb Puzzle Solution
25 commentaires
Xcyiterr 14 mai 2024 à 0h46 
also, for Unreachable Garden, there's a cheese alternate solution where with the help of both your recorded self holding a platform, and a hexahedron next to the ledge with the ladder, jump up to the ledge and bring the hexahedron up with you

then, you can place the hexahedron on the furthest tip wall connected to the ledge sticking out into the level, and use that as a start to jump over to the other taller wall in the middle of the level

at that point, you can do a bit of wall parkour from there, onto the castle walls at the edge of the level, and over the barrier to the gray sigil, and restarting the level to get out
Xcyiterr 14 mai 2024 à 0h41 
there's an alternate solution for Cobweb that I did that involves one of the connectors being in the centre of the level connected to the blue transmitter and both of the blue receivers on top of the hexahedron at an angle where it can see the transmitter without ever being interrupted by a moving blocker in the area you can't access (but still being blocked by the blockers closest to the blue receivers without further help)

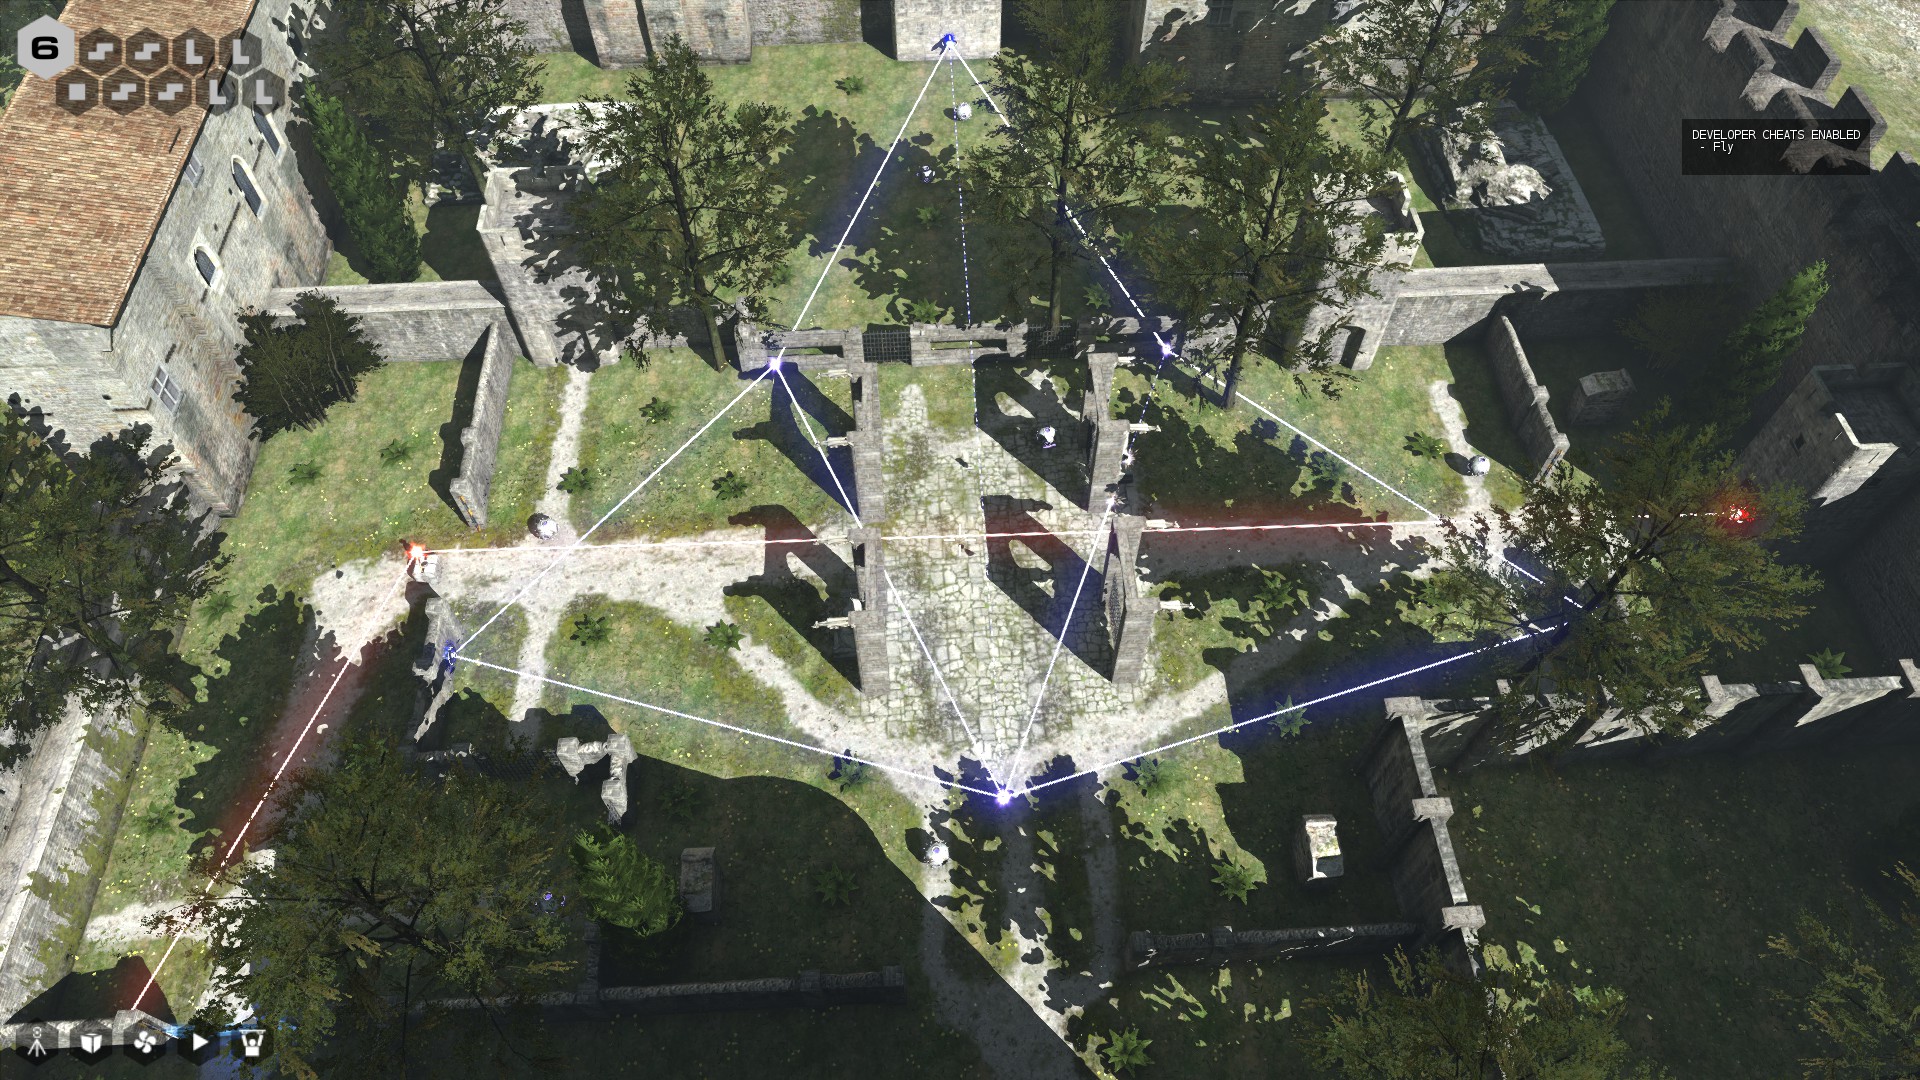
then, use 2 other connectors you get to both transmit the red beam and block the moving blockers on both the left and right sides of the level closest to the blue receivers, with the last connector right in the middle of the level up against the wall with the hole to the blue transmitter at such an angle where the beam never gets blocked

the red beam connector on the side with the red receiver should also be at an angle to connect to the red receiver as well

a bit hard to explain without a picture, but it exists
Omnises 4 janv. 2023 à 12h03 
I want to say that for "Peekaboo!", you can also solve it by using the blue laser from the "Merry Go 'Round" by using the two connectors to get the blue laser to the door.
It's a bit easier and faster if you happen to do "Merry Go 'Round" first.
Interfector 8 avr. 2021 à 19h44 
Hi,

In fact, there are 4 endings. For the second (Ascension), you have the same ending, but there is an additional element for more trouble in perception of the simulation meaning (in my point of view).

For activate this, you need to go wold B, door 7, at right in desert, there is a tool on rock near the main wall, you can use it behind the dune with the small statue, just in front. Do that you can (with tool), and go finish the game like for ascension (tower lvl 5, stair, end in sky. You'll see the difference a the end of cinematic.
Enjoy :)

It's not really one more end, but an alternative for the second.
Glowbfan457 31 janv. 2021 à 8h59 
Holy crap i did the cobweb puzzle wrong:mocry:
Bramnet 15 nov. 2020 à 11h23 
Really thankful for these guides, most of the puzzles I'm able to solve myself but there's a few of these that are really confusing. I did want to ask if Unreachable Garden is correct though, because the ladder is in an unreachable location until you do a few steps beforehand. Anyone also using this guide that needs help with this puzzle, I found https://www.youtube.com/watch?v=cN2EsSeDb7c which was pretty helpful.
NoMercy Rider  [créateur] 6 févr. 2020 à 12h21 
Thank you! Makes me happy to see that people are still enjoying this game for the first time.
Simonay 6 févr. 2020 à 9h18 
This is an excellent set of guides, let it be known they're still helping people even now!
Sk3lecreeper 17 aout 2018 à 17h31 
halp meh pls


Sk3lecreeper 17 aout 2018 à 17h31 
WHERE do u complete the messenger ending sigil puzzle?