HumanitZ

HumanitZ

45 ratings
The ULTIMATE(ish) HumanitZ Map Guide, Patch 0.907 (SPOILER WARNING)
By anrkyuk
A detailed grid square by square guide to the map of HumanitZ with comprehensive POI markers and index.

***WARNING*** This guide is very, very large and contains a large number of Screencap images..
4
2
3
2
   
Award
Favorite
Favorited
Unfavorite
COPYRIGHT.
If you are reading this guide on any website other than Steamcommunity.com then this content has been stolen.

If you wish to read this guide free from adverts, spyware, malware and viruses please go to...

https://steamcommunity.com/sharedfiles/filedetails/?id=3131183334

A growing number of "Game Guide" sites are appearing on the web that simply harvest guides from Steam using bots, Ads are then placed alongside the guides and site owner then profits from the hard work of others. Indiefaq, Steamlists, Steamah & Steamsolo are the biggest culprits, please do not support these content stealing cretins.
PLEASE READ FIRST.
This is the end
Beautiful friend
This is the end
My only friend, the end.

Yes, this guide is over just as it got started. It is incomplete and never will be, it is however still extensive, and I hope of use to some. Allow me to digress...

As you read through this guide, you will likely notice that the points of interest (POI's) for each Grid become far more detailed for Grids E1 though E5. This is because when I reached Grid E1 I made the decision to add far more detail than I had originally planned.

The problem is, once I had finished Grid E5 I was very, very low on materials, in fact at the time of writing I am now completely out of Fuel, Repair Kits, Ammo, Crowbars, Duct Tape, Lockpicks and a bunch of other materials.

See, when I started this guide I spent some time farming items so I had what I thought would be enough to drive Grid by Grid searching every square inch in preparation for this guide. I have spent around 40 hours on this as it is, if not more.


As such, to go back over Grids A1 to D5, I would need to spend at least half as long grinding for items and adding the detail that exists in E1 to E5 to the other Grids, and, to be brutally honest, I can't be bothered.

I want to move on, I've spent over 200 hours in game, I've got every achievement, with the exception on the Hardcore achievements and I'd like to start a new game to get those achievements and take a break, and play something different for a while.


As such, this guide is what it is, it's very detailed, but not as detailed as it could be and it is incomplete, and it likely always will be. The Devs have been publishing patches about every 3 weeks and by the time I come back to the game, this guide could possibly be entirely irrelevant, or at the very least, very outdated.

I am sorry it isn't "complete", I just hope someone finds something useful within.
Search Is Your Friend.
This guide is rather large, and I'll happily admit it got away from me and became something far greater than I initially planned on.

Search is your friend, hold CTRL and tap F to search the guide if you are trying to find something specific, such as possible RV or Dog locations, if not kick back, grab a drink and enjoy the guide that gives the Lord of the Rings trilogy a run for its money.
DISCLAIMER (this guide might be useless).
It is sadly entirely possible that this map and indeed even this entire guide is completely useless, for multiple reasons.

Firstly, this game is in early access and is being updated every 3-4 weeks, so things will likely over time change, so if anything, it will eventually become outdated. I would advise checking the comments section before going out in the wild, trying to find something in the game indicated in this guide.

The second reason is RNG. I know for a fact that rare vehicles have multiple random factors, the first being which you might get in your world when it is generated, second, how many there are of each type, and lastly where they spawn with multiple possible locations. This I know as fact.

What I do not know however is how far the RNG goes. Are the ore nodes locations random, is what ore they provide random, I don't know, the same could also be said for even common vehicles, lootable police SUV's, and to an extent, some ammo containers.

At military locations they are going to exist there, but their exact location might not be the same, in houses and other locations it could be completely random, I honestly just do not know at this point until I get some feedback from other players base on the locations shown on my map.

ADDENDUM (ORE NODE LOCATIONS)
With the assistance of a couple of fellow players (General Tan & Pommesgabel), we have been able to confirm that the location of ore nodes seems to be static, and not random and that the ore that they provide is also a constant and not random.

(SOURCE: https://steamcommunity.com/app/1766060/discussions/0/4031350783734091537/)

ADDENDUM #2 (MILITARY CRATE LOCATIONS)
Just noticed a post by Dev "gumbydust", when discussing military crates (the crates marked on my map by blue squares), they said that "There are a few hidden around the map but their spawn is RNG"

(SOURCE: https://steamcommunity.com/app/1766060/discussions/0/7091547412718586182/?ctp=2

As such, sadly my markers for these crates are likely to be of little use, not knowing how many possible locations there are for these to spawn, as such you may find a few where mine are marked, or you may fine none where mine are marked.

ADDENDUM #3 (BACKPACK LOCATIONS)
Thanks to fellow player GrenadesAndHamm (in the comments section of this guide), it would appear that the backpack spawn locations are also RNG. Specifics are unknown but I assume that there are a set number of possible spawn locations and at each there is a chance one will spawn and which bag appears is also random.

I state this as GrenadesAndHamm didn't find a bag at one location marked on my map and at a location marked on the map with a 1-4 row bag he found one with 5 rows. As such you may find a few where mine are marked, or you may fine none where mine are marked.
Known Errors.
Excluding a bunch of Chicken Coups and Fishing locations that I have failed to mark and the unmarked locations of 8 Vans, which at the time of starting this guide are now in my base and being unable to recall their starting locations to mark them. I am aware of one backpack that I marked on the map as being greater than 4 rows, but was in fact only 3 rows.

If I find it I'll change it. Other than this, I believe everything else to be accurate, at least, in my game world anyway.

If you find anything wrong, please post a message below to let others know, just be aware of RNG, not everything is the same in every game, to what exact extent, is yet unknown.
The Map.


This map in itself isn't that useful as frankly it's just a mess, by all means click to enlarge if you wish to behold the chaos, I have however added zoomed in images of each grid below, which are far easier to see,
The Map Index.
CROSSES
There shouldn't be any, if there are, ignore them.

SQUARES (Loot)
Red = These are fixed location air drop containers, the same as dropped...by airdrops. These CAN contain (but not always) items that can only be obtained from an air drop container (or perhaps very rarely also in a military crate).

These fixed location air drop containers are found in two locations on the map, at each location there are two containers in close proximity. These containers are not locked and do respawn loot.
They are found in toxic zones where a gas mask & filter are required otherwise you will take DOT, there are also Zed's a plenty.

Green = These are ammo crates/boxes. These contain ammo and gun parts are not locked and do respawn loot.

Often, at least more often than not where there is an ammo container there is a weapon crate in close proximity. I have chosen not to mark weapon crates on the map as it is just too difficult to place multiple map markers in such close proximity, so if you were hoping for weapon container markers, I apologise.

Blue = These are red military crates. military crates are locked, they respawn loot and each time they respawn loot the lock resets and they need to be picked again to get the goodies within.


Military crates are like a weapon and ammo crate all in one with a slight chance to get something that you might otherwise find only in an airdrop container. I might have got a Katana from one I can't be sure, but I definitely got a night vision helm from one.

PLEASE NOTE, after posting this guide, I discovered that the placement of these crates on the map is random, and not fixed. I do not know how many possible locations there are and so you may find some, or possibly none of these crates at the location marked on my map, as the locations may differ in your game.

CIRCLES (Backpacks)
Yellow = Backpacks with a size of 4 storage rows or less.

Green = Backpacks with a size of 5 or 6 rows of storage.

TRIANGLES (Ore nodes)
White = Stone.

Red = Iron.

Yellow = Coal or Saltpeter (sorry there are only so many colours, also note that in a few instances there might only be one yellow triangle, but there might be both a Coal and a Saltpeter node, they were just too close together to accurately mark them both.

Green = Copper.

Blue = Zinc.

HOUSES (Locations)
White = Churches.

Red = These are auto shops, here you will find wooden crates (the number varies by location) that contain car components (batteries, fuel pumps, etc.) as well as car repair kits and fuel cans (empty or full). There is also sometimes additional items on shelves.


Yellow = These are self storage units, you'll need to break into the units to get inside each one where you'll find all manner of goodies, there is even a vehicle in one, some however are empty.

Green = This is where I built my base.

Blue = These are Hardware stores, here you will find tools, gears, building materials, fertiliser and seeds, among other items. Check the crates and shelves, there can also be crates outside, round the back.


CARS (Vehicles/locations)
White = These are petrol (Gas) stations. On the forecourt, the pumps may or may not have fuel, if they do, you will need a hose and a funnel to siphon the fuel into an empty cans. You can only loot a pump once, when it's empty, it stays empty. Sometimes there are empty or full fuel cans sitting on the ground near pumps as well. Inside the station store/kiosk, you'll find fridges that might have drinks and sometimes there might be some food on the shelves.

Yellow = These are common types of vehicle the player can drive, once working components are installed and they are fuelled. There are always missing parts and only have a tiny amount of fuel.

Green = These are Vans and other rare types of vehicle the player can drive, I've added further info about cars in the next chapter.

Blue = These are "Survivor SUV's", despite looking like a usable vehicle, they are not, they are however a decent source of loot. They are locked and when the loot within respawns the lock resets, they often have ammo, but only a little.


SKULLS (Warnings)
Red = These are Hostile human camps. Expect 4+ hostiles (the most I've seen at one camp was 15) most with guns and some with armour, and sometimes even hostile dogs. Their camps often have walls and structures you can break, or you could just move in and take over, placing a spawn beacon. Multiple ammo and weapon containers usually found here.


Green = Toxic zones, during the day there is a thick green fog, at night the zone is much harder to navigate as it is pitch black with a green hue. You will take damage over time if not wearing a gas mask with a filter, good loot and lots of Zeds.

FIST (More loot)
Green = These are gun shops, a little disappointing, some loot laying around that doesn't respawn and a weapon container in the back room that does.


Blue = Broken down police SUV's, you can't drive these but they have good loot in the back (shotguns, shells, body armour, etc) that respawns.

ANIMAL PAWS (Animals)
Yellow = Chicken coups, you can loot eggs here but sadly you cannot take the chickens or move the coup. Note, I only started marking these quite late into my project and likely missed quite a few from the map, so, sorry about that.


Green = Where I found the canine companion in my game. Note it can spawn at multiple locations, I've marked all the locations that I am aware of.

FISH (Fishing locations)
Blue = Fishing locations, like the chicken coups, something I started marking late and not all are marked.

Cars.
Yellow car icons on my map indicate generic, non special cars like SUV's, pickups and smaller vehicles that the player can drive once fuelled and working parts are installed.

Green car icons indicate vans and rare vehicles that are only found in limited numbers, if at all.

Vans have the second third highest storage capacity of any vehicle and are a common find, sadly when I started making this map I had already transferred 8 to my base so most are not marked on the map.

Other "rare" vehicles include RV's, Zombigini's (supercar), military jeep's, military APC, police SUV's, security SUV's and the recently added box truck. I've read a couple of posts (1 or 2) of people claiming that there is also a "military truck", given that there are only a couple of people claiming it exists and having seen no video or screenshot evidence, I suspect they mean the military jeep or APC.

Unlike other common vehicles, rare vehicles do not exist in everyone's game/world.

Example, in my world with over 200 hours in the same world, searching inch by inch I found...
0 RV's
2 Zombiginis
1 Military jeep
2 Police SUV's
0 Security SUV's
0 Box trucks
0 Military APC's

Boy did I get screwed over.


Honestly, when it comes to rare vehicles, what you get will be luck of the draw, not only that but the actual location is also random, although the number of possible locations is limited. I'll add what I know for certain in the grid info chapters below.
Canine Companion.
So far I have come across three possible locations for the German Shepherd companion that I have read/seen and I personally found mine at a different location, making at least 4 possible locations for the dog to be in your game. Those are Grid C5, D1, D3 (where I found my forever friend) or E3.


For further information on how to actually obtain the dog as a companion, I refer you to a video posted by the Dev... https://www.youtube.com/watch?v=-pjMnRvUduI
"Toxic Zones".
There are two "toxic zones" (I don't know what they are actually called) in the game, one located at Grid B1, north west of the radio tower, the other at Grid C5 at the southern end of the airport runway.

When you approach a toxic zone, the air will develop a green hue, this is a warning to either stay in your vehicle (where you will be safe), or to put on a gas mask, with a filter attached. If you enter the toxic zone without a gas mask, you will take damage over time, constantly, the entire time you are in the area. You have been warned.

If it is day time, the area will be covered with a thick green fog, a torch helps but viability is still terrible...


As bad as that looks, it's far worse at night, instead of a thick green fog, the area is pitch black with a green hue and even with a torch, you can hardly see your hand in front of your face.

Each of these two areas has two static air drop containers located almost side by side, these containers are the same as those dropped by an air drop, but their location is permanent and static. Once looted, they respawn loot like any other container in the world, as per the loot respawn settings for your game.

Also, in these areas you will find other containers... and lots of Zeds, see the Grid chapters below for further info on what other goodies await you.
GRID A1.


INDEX
Car, White = Gas station.
Car, Blue = Survivor SUV.
Fist, Blue = Lootable Police SUV.

POI - PRISON
Where the 3 Police SUV's are located on the map is a Prison. Two of the Police cars are at the entrance gate to the prison and the third is in the car park.


The Prison is a large square structure with two cell blocks inside, you can go left or right with a yard in the centre. The yard is split into three sections, one for each cell block, which is accessed at the rear of the prison, and a service area of the yard which is accessed by the first security checkpoint on either the left or right side of the prison.

At the entrance to the Prison, a horde of Zeds will be waiting for you with rarely, if any to be found inside. There are multiple (at least 4) locked police weapons lockers to be found inside, pretty much the same stuff you find on police Zed's and in police SUV's, just more.

There are many, many locked gates inside the Prison, each needing to be picked or opened with a crowbar. You are going to need a lot of lockpicks or if using brute force, a few stacks of duct tape to repair your crowbar.

To do a quick smash and grab at the Prison, enter Block B, pick or smash the first two gates, then pick or smash the door to your left into the security room. Loot the two containers here, then enter the yard through the unlocked door, opposite the door you entered from. Enter the yard and follow the wall to the left to another door, this door is also unlocked and leads to the security room for Block A and contains another two lockers to pillage.


If you want to explore further, the cell block wings are mirrored, and in the back corner of each block you will find another security room each containing another 2 locked police lockers and a medical room each containing two medical containers. All in all it took me a Crowbar with 3/4 health and 4 rolls of duct tape to get access to all the containers within the prison, then you would need another 4 to break open the locked containers.

That said, given the number of doors it's too much of a hassle and the above mentioned instructions for a smash and grab only requires bypassing 3 doors to access 4 containers of ammo, amour, guns and locks.

A word of warning, the gates inside will re-lock themselves, I do not know what determines when they do but I visited the Prison multiple times and each time all the doors I had previously unlocked were once again locked.

I have also read a cautionary tale of someone that logged out when in the Prison and when they logged back in all the doors they had unlocked, were once again locked and they didn't have enough lockpicks to get out and no crowbar to break the doors open. They ended up having to respawn and come back to get their stuff. You have been warned.

After I read about this incident, I noticed that when I was at the police station @ Grid C3, I fired my shotgun at a Zed near a prison cell gate in the station (looks identical to those in the Prison) the blast damaged the gate (a health bar appeared above the gate).

The gate was locked, so I fired a few more shells at the gate, the health bar depleted and it unlocked. Knowing this, I went to the Prison and started shooting at a locked gate, that looked identical to the one at the police station cell and nothing, a few more shells, again nothing, so yeah, make sure you have the means to exit, just in case something happens while you are in there.

POI - INVISIBLE BUILDINGS
To the left of the Prison, the map indicates that there are some buildings here, there are not, there are however some items you can collect here that are floating above the ground, as though they were supposed to be on a table or kitchen counter, not many, but a few.


Perhaps the location of future content where items have erroneously spawned.
GRID A4.


INDEX
Square, Green = Ammo crate.
Circle, Yellow = Backpack with a size of 4 storage rows or less.
Triangle, Red = Iron.
Triangle, Yellow = Coal or Saltpeter (sorry there are only so many colours).
Triangle, Green = Copper.
Triangle, Blue = Zinc.
House, White = Church.
Car, Yellow = These are common types of vehicle the player can drive.
Car, Blue = Lootable Survivor SUV.
Skull, Red = Hostile human camp.
Fist, Blue = Lootable Police SUV.
Animal Paw, Yellow = Chicken coup.
Fish, Blue = Fishing location.

POI - HOSTILE HUMAN CAMP
At the T-junction on the left side of the Grid is a hostile human camp. The loot to look out for here comprises of two ammo containers on one side of the road near the survivor SUV and an ammo container, weapon crate and a locker on the other side of the road. As for the hostiles, there is usually three.


POI - POSSIBLE RV LOCATION
The yellow animal paw icon located furthest to the right in this Grid is the location of a farm, this farm is one possible location of the RV, it should be noted it may or may not be here, there are other possible locations, and as explained earlier in this guide, you may not even have an RV in your world, I didn't.


(If there is an RV in your game somewhere near this barn is one of the possible locations that it might spawn).

Source: Common knowledge, mentioned in multiple discussion threads, I don't know who the OP was for this info.
GRID A5.


INDEX
Triangle, Green = Copper.
Triangle, Blue = Zinc.
Car, White = Gas station.
Car, Yellow = These are common types of vehicle the player can drive.
Car, Blue = Lootable Survivor SUV.
Animal Paw, Yellow = Chicken coup.
Fish, Blue = Fishing location.

POI - POSSIBLE TRADER LOCATION
At the northern most blue car icon is a road that heads north to what looks like a building marker on the map, this is a campsite. There is a very basic custom map I saw on Reddit that indicated that there was a trader here, I've also read multiple posts of people confirming it, in my world, I did not find a trader here.


I went to this location 4 times and never found anyone, friendly or otherwise, not even Zeds. I've also read on the discussion boards that other people have also claimed not to have found a trader here, another example of RNG in the game perhaps.

Source: Common knowledge, mentioned in multiple discussion threads and shown in a custom map found on Reddit, I don't know who the OP was for this info.
GRID B1.


INDEX
Square, Red = Static air drop container.
Square, Green = Ammo crate.
Circle, Yellow = Backpack with a size of 4 storage rows or less.
Circle, Green = Backpacks with a size of 5 or 6 rows of storage.
Car, White = Gas station.
Car, Yellow = These are common types of vehicle the player can drive.
Car, Green = These are Vans and other rare types of vehicle the player can drive.
Skull, Green = Toxic zone.
Animal Paw, Yellow = Chicken coup.

POI - TOXIC ZONE (STATIC AIR DROP CONTAINERS)
A toxic zone is located here as indicated by the green skull icons. This zone is surrounded by a wire mesh fence (the toxic cloud actually extends beyond the fence but there goodies you are here for are behind the fence) and there is only one way in and out.

Starting at the gas station (white car icon), head north and take the first right. Following this road you will reach a point where there is a path/road going north and south bordered by a wooden fence.


The north path goes to a farm, the south path... goes somewhere, keep going forward and you will reach multiple barricades blocking your path, this is the entrance to the toxic zone and you will have to proceed on foot.

Inside the fenced off area you will find two static air drop containers surrounded by three Military tents, one has 3 ammo containers, one has 3 weapon crates and the last has 3 medical containers.


The area, as you would imagine, is swarming with Zeds.

POI - VAN
The green car icon in this Grid is for a van.


POI - BEARS
The farm north of the toxic zone usually has 1-2 bears wandering close by, good source of fat for crafting fuel, far more than other forms of fauna.
GRID B2.

INDEX

Square, Green = Ammo crate.
Circle, Yellow = Backpack with a size of 4 storage rows or less.
Circle, Green = Backpacks with a size of 5 or 6 rows of storage.
Car, Yellow = These are common types of vehicle the player can drive.
Car, Blue = Lootable Survivor SUV.
Skull, Green = Toxic zone.
Fist, Blue = Lootable Police SUV.

POI - MILITARY CHECKPOINT
The T-junction with three ammo container icons, near the centre of the Grid is a military checkpoint. The loot to look out for here comprises of an ammo container and weapon crate outside near some barriers opposite the junction, to the right of these is a military tent containing four ammo containers.

At the foot of the sentry tower is another ammo container, on its own by the side of the road. On the opposite side of the road to this lonesome ammo container is a second military tent containing a single weapon crate, and nothing else.


The area will be swarming with Zeds and the road is blockaded so you will need to navigate with care if just driving through, if you are here to loot, don't forget to check soldier/police Zeds as they can drop ammo, weapons and armour.
GRID B3.


INDEX
Square, Green = Ammo crate.
Square, Blue = Military crate.
Circle, Yellow = Backpack with a size of 4 storage rows or less.
Triangle, Yellow = Coal or Saltpeter (sorry there are only so many colours).
House, White = Church.
House, Red = Auto Shop.
Car, Yellow = These are common types of vehicle the player can drive.
Car, Blue = Lootable Survivor SUV.
Fist, Green = Gun Shop.
Fist, Blue = Lootable Police SUV
Animal Paw, Yellow = Chicken coup.

POI - HUDDSON "THE CITY" NORTH ENTRANCE
The road north, heading into/out of the city is a bridge, there is a gap on the right side that you can just squeeze a van through to gain entrance to the city from this side.


There is also a gap in a wall to the right of the bridge that you can get through as well.


POI - HUDDSON "THE CITY" NORTH EAST ENTRANCE
Most road entrances to the City are difficult to navigate, like the northeast entrance, there is a checkpoint, blockades, many broken down cars/wrecks and a whole lotta Zeds.


The best entrances to the city are found off road either through holes in walls or on the west side where there is no wall and you can simply drive off road to enter a parking lot.
GRID B4.


INDEX
Square, Red = Static air drop container.
Square, Green = Ammo crate.
Square, Blue = Military crate.
Circle, Yellow = Backpack with a size of 4 storage rows or less.
Triangle, Yellow = Coal or Saltpeter (sorry there are only so many colours).
House, White = Church.
House, Red = Auto Shop.
Car, Yellow = These are common types of vehicle the player can drive.
Car, Blue = Lootable Survivor SUV.
Skull, Green = Toxic zone.
Fist, Green = Gun Shop.
Fist, Blue = Lootable Police SUV.
Animal Paw, Yellow = Chicken coup.

POI - THE MOUNTAIN
The southern section of this Grid, covered with a warren of roads on the map is a large hill/mountain. The roads are narrow and lined with a wooden fence on both sides making it very difficult to cut across off road as there are very few gaps in the fences.

There are three sets of two buildings located on the hill/mountain, with little in the way of loot to make it worth the effort. Other than the lone ammo crate there are a couple of survivor corpses at the house at the top that can have a few nice, but common things, and they do respawn loot. Given the effort getting to the top, and the difficulty cutting across, I ended up just avoiding this place.

On a PVP server, a backup base or hidden emergency stash point could be well placed around here and easily go unnoticed.

POI - MILITARY CHECKPOINT
The T-junction with four ammo crate icons on the map, to the left of the Mountain, in the bottom left of the Grid is a military checkpoint. The loot to look out for here comprises of an ammo container and weapon crate in a military tent, another ammo container and weapon create locate outside by an outbuilding located southeast of the tent.

Northwest of the tent by a car crashed into a barrier there is another ammo container and weapon crate, the final ammo container is also located with another weapon crate and is located under a gazebo, to the right of the military tent, on the opposite side of the road.


The area will be swarming with Zeds and the road is blockaded so you will need to navigate with care if just driving through, if you are here to loot, don't forget to check Soldier/Police Zeds as they can drop ammo, weapons and armour.

POI - AIRPORT CARPARK
The two yellow car icons in the lower right of the Grid mark the Airport car park, the entrance to it is from the south, the road leading to the car park however is not shown on the map. Access is from the road running horizontally, south of the Mountain, be aware that if coming from the right side of the map, the road cuts through the airport which is blocked off so you will have to skirt around the Airport perimeter wall.

There are a couple of vehicles here you can drive, a bunch of lootable police SUV's and a survivor SUV as well. While you can enter the airport from the car park at this location, you can only do so on foot as barriers prevent you driving into the airport from the car park.


GRID B5.


INDEX
Square, Red = Static air drop container.
Square, Green = Ammo crate.
Square, Blue = Military crate.
Triangle, Yellow = Coal or Saltpeter (sorry there are only so many colours).
Triangle, Blue = Zinc.
Car, Yellow = These are common types of vehicle the player can drive.
Car, Blue = Lootable Survivor SUV.
Skull, Green = Toxic zone.
Fist, Blue = Lootable Police SUV
Animal Paw, Yellow = Chicken coup.

POI - MILITARY CHECKPOINT
On the road to the right of the Airport there is a military checkpoint, marked with three ammo containers and a military crate on the map. The loot to look out for here comprises of three ammo containers each with a weapon crate adjacent, in the Military tent which contains one of the ammo containers and weapon crate also contains the Military crate.


The area will be swarming with Zeds and the road is blockaded so you will need to navigate with care if just driving through, if you are here to loot, don't forget to check Soldier/Police Zeds as they can drop ammo, weapons and armour.

POI - AIRPORT
The easiest entrance to the Airport is on the road to the right of the Airport, just south of the military checkpoint there is a breach in the wall/fence. This is easily spotted by a bunch of barricades and cars on the road with a dirt road leading to the left, the hole is easily noticed by the tank parked next to it (which you sadly cannot use).


At the square building on the map to the right of the runway, you'll find a police SUV and an ambulance to loot, a military tent containing a weapon crate, ammo container and two medical containers, and a second tent containing just two weapon crates. On the south side there is also a row of shipping containers that you can climb on to access another weapon crate.


The square building on the left side of the runway is the main terminal, which you cannot get into and cannot drive around. On this side you'll find two police SUV's and two Ambulances to loot as well as an abundance of luggage to loot for clothing.

Be aware that in one of these two areas, or even both, there will be a large group of Zeds, they usually appear in the middle of the runway, I have a few times seen a group on each side, these groups can be rather large.


At the northern end of the runway is a giant ramp that would indicate an interesting way to exit the Airport. Given the distance from the ramp to the wall... and the height of the ramp, I'll confess to not having tried using it as I suspect the damage it would cause would be catastrophic. Between the ramp and the wall is a lone survivor corpse to loot.


At the southern end of the runway is the second toxic zone, this is covered in chapter Grid C5.
GRID C1.


INDEX
Square, Green = Ammo crate.
Square, Blue = Military crate.
Circle, Yellow = Backpack with a size of 4 storage rows or less.
Circle, Green = Backpacks with a size of 5 or 6 rows of storage.
Triangle, Red = Iron.
Triangle, Yellow = Coal or Saltpeter (sorry there are only so many colours).
Triangle, Green = Copper.
Car, White = Gas station.
Car, Yellow = These are common types of vehicle the player can drive.
Skull, Red = Hostile human camp.
Fist, Blue = Lootable Police SUV
Animal Paw, Yellow = Chicken coup.
GRID C2.


INDEX
Square, Green = Ammo crate.
Square, Blue = Military crate.
Circle, Yellow = Backpack with a size of 4 storage rows or less.
Circle, Green = Backpacks with a size of 5 or 6 rows of storage.
Triangle, Red = Iron.
Triangle, Yellow = Coal or Saltpeter (sorry there are only so many colours).
Triangle, Green = Copper.
House, White = Church.
House, Red = Auto Shop.
House, Yellow = Self storage facility.
Car, White = Gas station.
Car, Yellow = These are common types of vehicle the player can drive.
Car, Green = These are Vans and other rare types of vehicle the player can drive.
Car, Blue = Lootable Survivor SUV.
Skull, Red = Hostile human camp.
Fist, Blue = Lootable Police SUV.

POI - RADIO TOWER
The radio tower is located in the northeast quarter of the Grid and is the means of calling in air drops (the frequency determined by server settings in multiplayer or game settings when creating a world in single player).

The radio tower itself is located upon a hill and is guarded by a handful of Zeds, the building located in the northeast most of the Grid. To get the radio tower to function, you must first install four items....


The car battery, wire and electronics are common items easily found, the radio receiver however is a unique item found only in one place, the back storage room of Skoobz Sounds located in the northeast quarter of the city @ Grid C3

Once these four components are installed, click the activate button and air drops will commence as per game settings. It should be noted that the air drop can occur at any point on the map, which will be indicated by a red circle on the map. Once you locate the drop container, you will find it guarded by a small group of Zeds or hostile gun toting humans.

I believe from my experience that the drop remains for one in game day before disappearing.


Of the four components installed in the radio tower, the battery drains over time and will need to be replaced with a new one, rather often. I found in my game that regardless of the condition of the battery I installed, after every air drop I had to replace the battery.

When you replace the battery, the old one has a condition of 0%, you can put this in a vehicle and then use a repair kit in the vehicle to improve the battery condition, personally I used the 0% condition batteries for creating new vehicle repair kits.

There are two ways to access the tower, from the road which leads through a military camp, which is full of Zeds and has some loot (covered in the next POI), or just go off road and drive straight for the tower as it not fenced off like the adjoining base, useful if you just want to quickly replace the battery.


POI - RADIO TOWER MILITARY CAMP
Following the snaking road north that enters Grid C2 from Grid D2, the second exit to the left leads to a military camp (and the radio tower), the area is easily identified as it looks like a military checkpoint, but there is no loot to be found at the junction beyond a lootable police SUV.

The area is marked on the map by 5 ammo container icons in close proximity. Starting from the road entrance leading into the camp you will first be greeted with a sentry tower on the right with a single ammo container at its base.


Proceeding further up the road, there is another sentry tower, this time on the left, again with an ammo container at the base. Facing the tower, with the ammo container to the left, there is also a weapon crate to the right, next to a shack (the shack itself is empty).


Continue to follow the road for a short distance to enter the main body of the base and directly in front of you will be an ammo container and a weapon crate on the ground.

Walking clockwise around the perimeter of the base you will find, a single ammo container at the third sentry tower.


Keep following the perimeter clockwise, and you will come to the fourth sentry tower, again with an ammo container at its base. Directly to the right of the ammo container, you will also find an auto shop crate and an ice chest near the sandbags.


Continue to follow the perimeter clockwise, and you will come to a military tent containing a single weapon crate. Exiting the tent out the other side you will come to the fifth sentry tower, also with a weapon crate at its base.


Directly to the right of the fifth tower is the road that leads to the Radio tower, continuing clockwise around the perimeter of the base you will end up at a fenced off area near the start with a military tent, yellow medical tent and an EMS cabin.


Inside the military tent is one ammo container, one weapon crate and one medical container. Inside the yellow tent there are two medical containers and inside the EMS cabin you will find one more medical container.

Be aware that there are multiple large groups of Zeds around this camp, again, don't forget to check soldier Zeds for ammo, weapons and armour.

POI - POSSIBLE APC LOCATION (Radio Tower Checkpoint)
The junction on the road leading north/south that turns off towards the radio tower camp is one of the possible locations of the APC as claimed by Steam user :WTF: Grendel "Military checkpoint near radio tower is where I found in one." Source: https://steamcommunity.com/app/1766060/discussions/0/4031350479980971480/


POI - MASS GRAVES
If you head south from the Radio tower base or north from the military checkpoint, you will encounter a fenced off dirt with a couple of ambulances, this path leads to a mass grave.


After dispatching the Zeds near the entrance, loot the ambulances for some medical supplies and follow the path. The EMS cabin is empty, so proceed to the main grave site ahead. Here if you have a shovel you can rob some graves, only the dirt mounts can be looted with the aid of a shovel, and not the body bags.

To dig up a grave, equip the shovel and hold "F", be aware however that if you are overloaded you will not be able to dig, I think you need at least 50 stamina, it's definitely more than 30.


Once the grave is dug up, a zombie will attack you and once dispatched you can loot the grave like a container, for what is usually very little, honestly, unless you are desperate, it isn't worth the effort.

Note that graves are also found near churches and in a few instances near campsites and even the backyard of some houses.
GRID C2 POI's Continued...
POI - HOSTILE CAMP
South of the military checkpoint, at the bottom very centre of the Grid a hostile human camp is located at a farm just off the road. The actual dirt path to the farm is about halfway between the military checkpoint and the bottom of the Grid, evident by a tractor partially blocking the road, near a cluster of ore nodes, or you can just get there off road.


Entering the farm from the dirt path, a house sits directly in front of you with an ammo container and weapon crate on the porch floor, along with a backpack (4 rows of storage).


Exiting the house, to the right is a red barn with a couple of boxes to loot inside and a weapon crate out the front. Exiting the house and turning left is a brown barn containing just some mushrooms growing on the floor.

Facing the red barn, to the left are a couple of fenced off areas, one of these contains a chicken coup that I failed to mark on my map, other than that the area is pretty sparse. As for hostiles there are usually 3 human enemies at this camp.


POI - MILITARY CHECKPOINT
On the road north of the hostile camp at the first T-junction is a military checkpoint as marked by an ammo container icon on either side of the road.


Entering the camp from the south, the military tent on the left side of the road contains a single ammo container, exiting the tent through the north exit reveals a single weapon crate on the ground outside.

On the opposite side of the road between the empty military tent and sentry tower is a small cabin fortified with sandbags, on the roof of this building you will find a single ammo container and weapon crate.

The area will be swarming with Zeds and the road is blockaded so you will need to navigate with care if just driving through, if you are here to loot, don't forget to check soldier/police Zeds as they can drop ammo, weapons and armour.

This POI is also one of the possible locations for the APC, as claimed by Steam user Ronnie "right below the radio tower." with a screenshot indicating this location Source: https://steamcommunity.com/app/1766060/discussions/0/4032473829609031801/

POI - POSSIBLE APC LOCATION (Military Checkpoint)
See previous POI.
GRID C3.


INDEX
Flag, Green = Skoobz Soundz music store (Radio Receiver location).
Square, Green = Ammo crate.
Square, Blue = Military crate.
Circle, Yellow = Backpack with a size of 4 storage rows or less.
Circle, Green = Backpacks with a size of 5 or 6 rows of storage.
Triangle, Red = Iron.
Triangle, Yellow = Coal or Saltpeter (sorry there are only so many colours).
Triangle, Green = Copper.
House, White = Church.
House, Red = Auto Shop.
House, Yellow = Self storage facility.
House, Blue = Hardware store.
Car, White = Gas station.
Car, Yellow = These are common types of vehicle the player can drive.
Car, Green = These are Vans and other rare types of vehicle the player can drive.
Car, Blue = Lootable Survivor SUV.
Skull, Red = Hostile human camp.
Fist, Blue = Lootable Police SUV.
Animal Paw, Yellow = Chicken coup.
Fish, Blue = Fishing location.

POI - HUDDSON "THE CITY" WEST ENTRANCE
The west entrance to the city is impossible to enter in a vehicle, at least via the road.


To the left of the road there is a small hole in the wall to the police station car park that you can just squeeze through however.


Also to the right, if you drive between the wall and the fence you can enter the city into the car park of the postal depot.


The easiest way to enter the city in this area is simply to go off road just south of the Church where you can enter the city driving into the gardens of some residential homes.

POI - HUDDSON "THE CITY" SOUTH ENTRANCE(S)
South of the city, the road that enters Grid C3 from D3 splits into 2 directions, this junction is almost entirely blocked off with barricades and vehicles, you can get into the junction, but you have to drive around it rather than through it.


On the side of the junction closest to the city, on the left side, there is a blue topped gazebo and a cabin. Under the gazebo, you will find a military jeep, as marked on the map with a green car icon. Outside the cabin you will find one ammo container and one weapon create on each side of the cabin.


On the opposite side of this junction, nearest the city you will see a road with no markings on it which will lead through a suburb and into the city.


POI - POSSIBLE MILITARY JEEP LOCATION
See above POI.

POI - HUDDSON "THE CITY"
Navigating the city is a massive PITA, there are so many obstacles blocking the road with even some routes impassable in a vehicle, and there are many, many large groups of Zeds with little in the way to replenish the ammo you will use properly exploring. Honestly, I only came here when I needed to (mainly to kill lots of Zeds for the 10k achievement). As such, the map icons are neither complete or extensive, and there might be some goodies I have missed and not marked.

The only reason to come here is for the Zombigini, police SUV, Radio Receiver and perhaps to loot the police Station and hardware store which are both easily accessible and perhaps the self storage facility, ah yes, and to kill Zeds.

POI - SKOOBZ SOUNDZ (RADIO RECEIVER LOCATION)
From the left side of the city, driving past the self storage facility, take a right and the third building on the right is Skoobz Soundz, a unique location, containing the unique item "Radio Receiver" required to get the radio tower operating.


POI - POSSIBLE ZOMBIGNI LOCATION
The green car icon on the south side of the city is the possible location of a Zombigini supercar.


POI - POSSIBLE POLICE SUV LOCATION
The green car icon on the northeast side of the city is the possible location of a police SUV (in the police station car park).


POI - POLICE STATION
The police station is in the northwest corner of the city and can easily be accessed without actually entering the city (See POI - CITY WEST ENTRANCE).

The entrance is guarded by a horde of Zeds, and dispatching them in the car park will likely lure more from the surrounding area and from inside the station. Ensure to check the police SUV's and police Zeds for loot, inside the station, in the northeast corner you'll find a room with a couple of locked police lockers containing ammo, weapons and armour and there should be some items on the shelves as well.


I marked this room on the map with an ammo container icon, although it should be noted that there is no actual "ammo container" in here. There is also another room in the middle of the station that has some shelving that might have some items of interest.

POI - HOSPITAL
The hospital is located in the southeast corner of the city, there are two entrances by road from within the city, one from the west side of the hospital the other from the north side. The north entrance is impassible in a vehicle, but the entrance on the west side, near the possible Zombigini location is passable in a vehicle on the right side of the road.


It is possible to enter the hospital grounds from outside of the city from the road that runs parallel on the right side, this involves driving over a ridge from the road, but beware that you run the risk of getting your vehicle stuck if you do.

Entering the hospital grounds from within the city on the left side, driving around the grounds clockwise you will find an ambulance at the urgent care entrance to loot, driving past this on the left are two gazebos, one with a medical container and an EMS cabin with another medical container and some other loose loot.

Continuing clockwise, you will come to the hospital car park and the north entrance to the grounds and the main hospital entrance. There are plenty of cars in the car park to loot and scavenge as well as a police SUV and four ambulances.

Again, continuing clockwise around the corner from the car park you will find two yellow medical tents, outside one tent you will find a medical container and inside the other tent you will find one more.


Just beyond the tents you will find a side entrance into the hospital and around the corner continuing clockwise you will find another EMS cabin with some loose supplies, followed by a fenced off area filled with body bags. Driving past this you will arrive back when you entered the hospital grounds, note the medical container on the ground.

Inside the Hospital, you'll find pretty much what you expect, medical supplies. There is at least 7 medical containers, almost as many luggage containers, a bunch of loose medical supplies and a vending machine. Honestly, the only real reason to come here, is that you are pretty much guaranteed to find a syringe, there's one loose laying around if none are in the containers.

GRID C3 POI's Continuied...
POI - MILITARY CAMP
Located southeast of the hospital is the main military camp, as marked by four ammo container icons in close proximity on the map.

The camp can be entered via a road lined with a wooden fence, just off the road running east of the hospital, or you can go off road and enter the camp from the rear through some gaps in its surrounding wall.


Entering the camp from the road, you will first come across a military tent, opposite a Humvee, containing a single weapon crate. Just past the tent, on the same side of the road, just before an open gate and the sentry tower, you will find an ammo container sat upon a box.

Passing through the gate and into the camp itself, on the left there is an ammo container just outside the second military tent and inside the tent you will find two lockers and another weapon crate. Exiting out the back of the tent lies another weapon crate on the floor beside a large empty skip/container.


Proceeding forwards around the camp clockwise, there is a single ammo container and another weapon crate under a gazebo. Looping round passed the Humvee is a tank with an ammo container on a table, just to the right of the tank is a locker.

Walking back round to the entrance gate is a cabin with a campfire and ice box on the roof which can be accessed by climbing up the pallets. As always, don't forget the check the soldier Zeds for weapons, ammo and armour.

POI - POSSIBLE APC LOCATION(S)
Grid C3 is home to multiple possible locations of the APC, three no less.

The first is at the main military camp, sadly I cannot recall where I read this, so I cannot post the sources (sorry if it was you, I'm not trying to steal your thunder).

The second and third possible locations come from Steam user PureHTDz, claiming "most of the time i find the apc in Hudson City or the check point going to Hudson city,the road looks like a arc with barbed wire on the map" Source: https://steamcommunity.com/app/1766060/discussions/0/3881597531963753184/

Their statement that "the road looks like a arc with barbed wire on the map" leads me to believe that they also mean the main military camp, it is also possible that they mean within the actual city or or of the checkpoints into the city located in the northeast or northwest corner of the city, it is hard to be certain.
GRID C4.


INDEX
Square, Red = Static air drop container.
Square, Green = Ammo crate.
Square, Blue = Military crate.
Circle, Yellow = Backpack with a size of 4 storage rows or less.
Triangle, White = Stone.
Triangle, Red = Iron.
Triangle, Yellow = Coal or Saltpeter (sorry there are only so many colours).
Triangle, Green = Copper.
House, Red = Auto Shop.
Car, Yellow = These are common types of vehicle the player can drive.
Car, Blue = Lootable Survivor SUV.
Skull, Red = Hostile human camp.
Skull, Green = Toxic zone.
Animal Paw, Yellow = Chicken coup.
Fish, Blue = Fishing location.

POI - HOSTILE CAMP
To the left of the military camp @ Grid C3, there is an unmarked hostile camp, noted on the map with not one, but 4 red skull markers. I have put this many icons here to mark the camp as IMHO I believe this to be the most dangerous place on the map.

Access to the camp is from a dirt road turnoff from the road running east to west located north of the camp. There is however nothing preventing you just driving to it off road.

As noted, this place is dangerous, there are usually 11 hostile armed humans and 2 hostile dogs, you will need an assault rifle such as the AK, Scar or whatever the name of the M16 is in this game, ideally a MK18 which is scoped and silenced.

The reason I say this is these guns can zoom out giving you a greater range, the hunting rifle fires too slowly and the shottys just don't have the range. Go in without decent armour and without an AR, and you will die.

If you have a MK18, approach crouched on foot and with your silenced rifle you'll be able to pick them off in small groups. Get too close in a vehicle or fire off a weapon that isn't silenced, and you'll be dealing with the whole camp at once.


Entering the camp from the dirt path walking around it in a clockwise direction, walk past the first tent and prefab structure (which only contains a campfire), you'll arrive at the military tent, which contains two ammo containers, two weapon crates and a medical container.

Exit the tent out the opposite side and you'll be at a cabin, behind this cabin, you might find a Zombigini, if you're lucky.


The cabin offers no special containers, just some general containers and loose loot. Back outside, walk past the second tent and you'll come to a blue shipping container with its doors open on one side, inside you'll find two more weapon crates.

Outside the walls of the camp you can find multiple cars too loot and scavenge.

POI - POSSIBLE ZOMBIGNI LOCATION
See previous POI.
GRID C5.


INDEX
Square, Red = Static air drop container.
Square, Green = Ammo crate.
Square, Blue = Military crate.
Circle, Yellow = Backpack with a size of 4 storage rows or less.
Triangle, White = Stone.
Triangle, Red = Iron.
Triangle, Yellow = Coal or Saltpeter (sorry there are only so many colours).
Triangle, Green = Copper.
Triangle, Blue = Zinc.
House, Red = Auto Shop.
Car, Yellow = These are common types of vehicle the player can drive.
Car, Blue = Lootable Survivor SUV.
Skull, Green = Toxic zone.
Animal Paw, Yellow = Chicken coup.

POI - AIRPORT TOXIC ZONE (STATIC AIR DROP CONTAINERS)
A toxic zone is located here indicated by the green skull icons. This zone is located within the airport grounds, at the south end of the runway.

Assuming you enter the airport grounds in a vehicle on the right side, simply drive south down the centre of the runway until you encounter the tell tale green hue in the air, the area is quite large but the loot you have come here for is all centred on the runway in close proximity.

While there are some barricades and fences, unlike the other toxic zone you can drive right up to the loot containers within this one. That said, if you do, make sure to equip your mask and filter BEFORE you drive inside, otherwise you will immediately start taking damage, the second you leave the safety of your vehicle.

Assuming you walked/drove south, straight down the middle of the runway, you will come to a blue shipping container on the runway surrounded by boxes and pallets, this is the location of the loot.


Facing south, looking at the container, you will find an ammo container and two weapon crates on the floor near two static air drop containers, to the right of the container, and a second ammo container on top of the blue shipping container.

The area as you would imagine is swarming with Zeds.

Driving past the static air drop containers, slightly further south on the runway there is also a downed helicopter with an ammo container and two weapon crates in close proximity. There are a couple of points of note regarding this however...


Firstly, the containers at the helicopter do not respawn loot like other similar containers found in the world (this applies to any downed helicopter that you might find), and secondly, I do not know if this is a fixed POI or a random occurrence.

I say this as I recall reading some time ago that there was a chance a called in air drop from the radio tower has a chance to crash, I do not know if this is true or not, but in my world I found 2 downed helicopters, that said, the other that I found, I'm fairly sure I found before I fixed the radio tower.

So, these might be a fixed POI, or a random occurrence, I just do not know, there might even be some fixed crash sites and there also might be a chance of an incoming air drop crashing, I just do not know, just know if you find one, the loot found nearby is one shot.

POI - POSSIBLE CANINE COMPANION LOCATION
Located at the bottom centre of the Grid is a small community of houses, cabins and tents, noted on the map with a military crate, ammo container and chicken coup markers, among some ore nodes and survivor SUV's. This is also the location of another possible spawn point for the canine companion.


To find the dog (if it is here), go to the ammo container and face the ammo container, with the fence behind the container, do a 180. You should now be facing the blue tent with two scrap cars in from it it and a cabin to the right.


Walk forwards, past the tent and cars, walk past the cabin to the right and there should be a slightly larger cabin in front of you with a skip to the left of it, if the dog is here, it should be inside the cabin.

Source: https://www.youtube.com/watch?v=XPNnY7p1cho
Credit: Black Dragonrider Gamer
GRID D1.


INDEX
Square, Green = Ammo crate.
Circle, Yellow = Backpack with a size of 4 storage rows or less.
Circle, Green = Backpacks with a size of 5 or 6 rows of storage.
Triangle, White = Stone.
Triangle, Red = Iron.
Triangle, Yellow = Coal or Saltpeter (sorry there are only so many colours).
Triangle, Green = Copper.
Triangle, Blue = Zinc.
House, White = Church.
House, Blue = Hardware store.
Car, White = Gas station.
Car, Yellow = These are common types of vehicle the player can drive.
Car, Green = These are Vans and other rare types of vehicle the player can drive.
Car, Blue = Lootable Survivor SUV.
Skull, Red = Hostile human camp.
Fist, Blue = Lootable Police SUV.

POI - POSSIBLE CANINE COMPANION LOCATION
The building located at the most southeastern point on the map with an ammo container marked on the building and two lootable police SUV's near it, is a police station. This is a location that people have reported finding the canine companion (he was not here in my world).


Source: https://steamcommunity.com/app/1766060/discussions/0/4031349199263028919/
Credit: Steam user Madckt
GRID D2


INDEX
Square, Green = Ammo crate.
Circle, Yellow = Backpack with a size of 4 storage rows or less.
Circle, Green = Backpacks with a size of 5 or 6 rows of storage.
Triangle, White = Stone.
Triangle, Red = Iron.
Triangle, Yellow = Coal or Saltpeter (sorry there are only so many colours).
Triangle, Green = Copper.
Triangle, Blue = Zinc.
House, White = Church.
House, Blue = Hardware store.
Car, Yellow = These are common types of vehicle the player can drive.
Car, Green = These are Vans and other rare types of vehicle the player can drive.
Car, Blue = Lootable Survivor SUV.
Skull, Red = Hostile human camp.
Fist, Blue = Lootable Police SUV.
Fish, Blue = Fishing location.

POI - POSSIBLE POLICE SUV LOCATION
The green car icon on the road running east to west on the southern outskirts of the small town is the possible location of a police SUV.

GRID D3.


INDEX
Square, Green = Ammo crate.
Circle, Yellow = Backpack with a size of 4 storage rows or less.
Circle, Green = Backpacks with a size of 5 or 6 rows of storage.
Triangle, Red = Iron.
Triangle, Yellow = Coal or Saltpeter (sorry there are only so many colours).
House, White = Church.
House, Red = Auto Shop.
Car, White = Gas station.
Car, Yellow = These are common types of vehicle the player can drive.
Car, Blue = Lootable Survivor SUV.
Skull, Red = Hostile human camp.
Fist, Green = Gun Shop.
Fist, Blue = Lootable Police SUV.
Animal Paw, Yellow = Chicken coup.
Animal Paw, Green = Where I found the canine companion in my game.
Fish, Blue = Fishing location.
Flag, Green = Possible location of a downed Helicopter.

POI - HOSTILE CAMP
In the northwest corner of the Grid, a hostile human camp is located at a farm, a fence lined dirt path connects the farm to a road running north/south from Grid D3/C3, or you can just drive offroad from the road that runs east to west just south of the camp.

Entering the farm from the dirt path, following the fence you will first encounter a blue shipping container in front of a red barn. Inside the barn, you will only find a single box and locker to loot.

Exiting the barn out the other end, to the right you will see a brown barn. Inside this barn there is a locker, auto shop container, ammo container and a weapon crate to loot and a backpack can also be found here.


Back outside the brown barn, with the barn behind you, just to the left is a house. Outside the front of the house is another weapon crate and inside you will find another backpack. There are also a number of vehicles to loot and scavenge, as for hostiles there are usually 4 human enemies at this camp.

POI - POSSIBLE DOWNED HELICOPTER LOCATION
The green flag icon on the map marks the location of a downed helicopter with two weapon crates and an ammo container adjacent, note that the contents of these containers unlike others in the world does not respawn.


As noted earlier at the other downed helicopter location I found, I do not know if this is a fixed POI or as a result of a crashed air drop. That said I am 99% certain that I found this helicopter before I repaired the radio tower, so I suspect that even if air drop crashes are a thing, this one might be a fixed POI.

A word of warning, multiple bears usually spawn near here.

POI - POSSIBLE CANINE COMPANION LOCATION
The green animal paw icon on the map located in the southeast corner of the Grid is the location of a junkyard, which is where I found the canine companion in my world.


It should be noted that this is just one possible location that the dog might be found.


To get the dog to become a "companion", you will need to craft a dog bowl at the workbench and place it on the ground in front of the dog.
GRID D4.


INDEX
Square, Green = Ammo crate.
Square, Blue = Military crate.
Circle, Yellow = Backpack with a size of 4 storage rows or less.
Circle, Green = Backpacks with a size of 5 or 6 rows of storage.
Triangle, White = Stone.
Triangle, Red = Iron.
Triangle, Yellow = Coal or Saltpeter (sorry there are only so many colours).
Triangle, Green = Copper.
Triangle, Blue = Zinc.
House, Red = Auto Shop.
Car, White = Gas station.
Car, Yellow = These are common types of vehicle the player can drive.
Car, Blue = Lootable Survivor SUV.
Skull, Red = Hostile human camp.
Fist, Green = Gun Shop.
Fist, Blue = Lootable Police SUV.
Animal Paw, Yellow = Chicken coup.
Animal, Green = Where I found the canine companion in my game.
Fish, Blue = Fishing location.

POI - HOSTILE CAMP
At the T-junction that heads east into Grid D3 on the road that runs north/south is a hostile human camp marked with a red skull.


This is a rather small hostile human camp comprised of just a couple of tents atop shipping containers, on top of one, there are two ammo containers and on the other an ice box, some luggage and a couple of loose weapons. There's also a bunch of vehicles to loot and scavenge, one that's even driveable, as for hostiles there are usually 4 human enemies at this camp.

POI - ABANDONED SURVIVOR CAMP
Near the centre of the Grid marked on the map, you will see a blue square and a yellow animal paw in close proximity marking the locations of a military crate and a chicken coup. This is the location of an abandoned survivor camp.


At this location, aside from the military crate and coup, you will also find a prefab structure with a water collector, cooking stove and a chest. Useful if you need water or to cook some food in a pinch, but as for a base, it's far too exposed and requires too many materials to fortify, there are much better options out there, perhaps more feasible as an emergency shelter/stash point.
GRID D5.


INDEX
Square, Green = Ammo crate.
Square, Blue = Military crate.
Circle, Yellow = Backpack with a size of 4 storage rows or less.
Circle, Green = Backpacks with a size of 5 or 6 rows of storage.
Triangle, White = Stone.
Triangle, Red = Iron.
Triangle, Yellow = Coal or Saltpeter (sorry there are only so many colours).
Triangle, Green = Copper.
Triangle, Blue = Zinc.
Car, Yellow = These are common types of vehicle the player can drive.
Car, Blue = Lootable Survivor SUV.
Fist, Blue = Lootable Police SUV.
Animal Paw, Yellow = Chicken coup.
Fish, Blue = Fishing location.
Cross, Blue = When the map shows a grey object on the map, it is usually a structure of some sort, sometimes it's just an outcrop of rocks, this marker on the map, like the marked buildings in Grid A1, are nonexistant. There is nothing here.

POI - BOARDED UP HOUSE
The yellow car icon in the northeast corner of the Grid indicates a vehicle that the player can use (a pickup truck in my case), adjacent to this vehicle is a house that has all of its windows are boarded up and the doors are blocked.


To get in you are going to need to break the barrier covering one of the windows, either with a crowbar (preferred method), or with a lot of ammo. Inside, apart from the usual residential house loot, there is a weapon crate in the bedroom.


Note that the area is swarming with a large group of Zeds including some police/soldier types, which are always worth looting.

Just before the turn off to the house, check the ambulance, not only is there loot inside it, there is also a medical container on the ground near the back as well.

GRID E1.


INDEX
Square, Green = Ammo crate.
Circle, Yellow = Backpack with a size of 4 storage rows or less.
Circle, Green = Backpacks with a size of 5 or 6 rows of storage.
Triangle, White = Stone.
Triangle, Red = Iron.
House, Red = Auto Shop.
House, Blue = Hardware store.
Car, White = Gas station.
Car, Yellow = These are common types of vehicle the player can drive.
Car, Blue = Lootable Survivor SUV.
Skull, Red = Hostile human camp.
Fist, Green = Gun Shop.
Fist, Blue = Lootable Police SUV.

POI - SUNRISE (TOWN)
The town of Sunrise to the south of the Grid, partly located in Grid E1, mostly in Grid E2 is home to a gas station, gun store, hardware store, supermarket (containing a hostile human camp), a Royale burger, two live bait shacks, a general store and a bunch of homes, some with garages, some with greenhouses and a couple hiding ammo containers.


POI - HOSTILE CAMP
The hostile camp marked on the map by a red skull on the map is located at the supermarket, opposite the rear of the gun store and is usually home to 8 hostile humans, although I once encountered 15, yes 15.


Note that some of the hostiles (4-5) are usually out the front of the base, possibly even so far away as the T-junction, if they are, you might be lucky enough to have some Zed's occupy one or two of them while to eradicate them.


Two or three more hostiles are found near the entrance and another one or two are found inside, and these are the most dangerous. Even with a weapon that can zoom out to shoot further, you cannot do so while inside a building, so regardless of what weapon you use your range is limited, the hostiles, well they do not have this limitation and if they have AK's they are going to outgun you, so play smart and use the terrain to force them to come to you.

As for the loot, when you enter the supermarket, take a left and follow the wall, you'll first come to a couple of tents with two ammo containers, a weapon crate and an ice box on the floor with a nearby campfire.

Continue walking around the store in a clockwise fashion and you will encounter a second set of tents, with two ammo containers, two weapon crates, a toolbox, an ice box and two parcel boxes in close proximity.


There's some general loose supermarket fare to loot on the shelves, a gruesome sight in the back store room and some vehicles in the parking lot to loot and scavenge with one being a survivor SUV.

POI - POSSIBLE BOX TRUCK LOCATION
The box truck is the "New large vehicle" that was added to the game in Patch 0.906X.4 and I have thus far only seen two possible locations mentioned for this vehicle, one of which is as per Steam user PXZ "I found it in E1 where the bandits are" Source: https://steamcommunity.com/app/1766060/discussions/0/4031351002391518686/

In my world near the hostile human camp at Grid E1, there are no box trucks to be found anywhere near, searching the entire town of Sunrise, only reveals one box truck in the car park of the hardware store and that is non interactable.

POI - HOVERTON (TOWN) SUBURB
The reverse L shaped road located just off the southern road that runs east, then north is the road into the town of Hoverton, located in Grid D1. Just outside of town is a small campsite, as for the road that leads into town, that is lined with a number of houses, some with garages, one with a hidden ammo container, two with backpacks (one of which is 5 rows) and also a barn.

GRID E2.


INDEX
Square, Green = Ammo crate.
Circle, Yellow = Backpack with a size of 4 storage rows or less.
Triangle, White = Stone.
Triangle, Red = Iron.
House, Red = Auto Shop.
House, Yellow = Self storage facility.
House, Green = This is where I built my base.
House, Blue = Hardware store.
Car, White = Gas station.
Car, Yellow = These are common types of vehicle the player can drive.
Car, Blue = Lootable Survivor SUV.
Skull, Red = Hostile human camp.
Fist, Green = Gun Shop.
Fist, Blue = Lootable Police SUV.

POI - SUNRISE (TOWN)
The town of Sunrise to the south of the Grid, part located in Grid E1, mostly in Grid E2 is home to a gas station, gun store, hardware store, supermarket (containing a hostile human camp, see Grid E1 for details), A Royale burger, two live bait shacks, a general store and a bunch of homes, some with garages, some with greenhouses and a couple hiding ammo containers.

POI - ESELWOOD (TOWN)
The town of Eselwood is found mostly in the northwest of the Grid, with a small part of the town encroaching into Grid E1. Inside the town you will find an auto shop, laundromat, coffee shop, antiques store, two general stores, two restaurants, a post office depot and a train station.


The town largely comprises of residential homes, about half with garages, two of the homes contain ammo containers and two others contain small backpacks. There is also two police SUV's and an ambulance to loot (near the train station), at least one driveable vehicle (A Yotata SUV in my case).


POI - MILITARY CHECKPOINT
The T-junction with two ammo container icons marked on the map with a nearby Iron node, near the centre of the Grid is a military checkpoint.

Entering the checkpoint from the south, there is a single ammo container on the ground by a barricade in the centre of the junction and walking slight north is a single weapon crate on the floor in front of a Humvee.


Back at the junction, take a right and there is another ammo container and weapon crate located on the ground among some porta loos and pallets, in front of a military tent, the tent itself, is empty.

The area will be swarming with Zeds and the road is blockaded so you will need to navigate with care if just driving through, if you are here to loot, don't forget to check soldier/police Zeds as they can drop ammo, weapons and armour.
GRID E3.


INDEX
Square, Green = Ammo crate.
Circle, Yellow = Backpack with a size of 4 storage rows or less.
Triangle, Red = Iron.
Triangle, Yellow = Coal or Saltpeter (sorry there are only so many colours).
House, Red = Auto Shop.
House, Yellow = Self storage facility.
House, Green = This is where I built my base.
House, Blue = Hardware store.
Car, White = Gas station.
Car, Yellow = These are common types of vehicle the player can drive.
Car, Blue = Lootable Survivor SUV.
Fist, Green = Gun Shop.
Fist, Blue = Lootable Police SUV.
Animal, Green = Where I found the canine companion in my game.

POI - ERRINGTON (TOWN)
Grid E3 is home to the town of Errington, a town which is IMHO the best starter location for a base, because Errington is home to just about everything, including trees and bushes.


On the eastern edge of town there is a hardware store and a motel where you will find two ammo containers inside and a survivor SUV to loot in the car park. The southern side of town is home to an auto shop and a gas Station can be found on the western edge of town along with a police SUV to loot.


In the town centre you will find a car wash, with a survivor SUV to loot, three general stores, three restaurants, a post office depot, a soup kitchen, a Williams corner shop, two antique stores, a coffee Shop and a gun store.


While there are a large number of residential homes at Errington, few have garages to loot. Among the homes however, you will find four with small backpacks and one with an ammo container. There is also a total of four survivor SUV's to loot and at least 3 driveable vehicles.

The pièce de résistance is the second largest self storage facility with 8 units, located just north from the gun store. Here you will find a five Lockers, four store boxes, three ice chests, four auto shop crates, a washing machine, a toolbox, six ammo containers, five weapon crates, three parcel boxes, a fridge and two pieces of luggage. A pretty decent haul to have respawn regularly if you set up home in Errington.


In my world, one of the units was also home to a driveable vehicle, one of three I found in town. As for the base location in town, I'll cover than in the next POI.

POI - THE BEST IMHO STARTER BASE LOCATION
In the town of Errington, just south of the gun store is a builders yard called "Dozer Brothers Construction", this is the final cherry on the cake that is Errington, which is an excellent place to set up home when you have nothing but lint in your pocket, with the boon of being near the easy starter location.


The site is largely already sealed off just requiring a couple of fences at the rear and a couple of fences and a gate at the front to fully secure a rather large compound featuring two skips and a toolbox outside for early storage and a cabin containing another two toolboxes inside.


Thanks to the pallets and barrels near the cabin you can climb on top and expand on a second level and also you can climb atop the skips to also create a second level there as well.


It is even possible to climb up on a barrel and onto the shipping container in the corner opposite the cabin near the skips for even more storage options (and a great sniping location).


My personal base layout perhaps isn't exactly optimal, I'll admit on my next run I'd probably construct all the way around the fence linking the cabin roof to the skips so that you could climb up on either side and walk all the way around, putting my crops and water collectors in the centre. That said, I'm not sure how well the camera angle would work with such a setup.


A word of warning, not really specific to this base, but really any base. Even with a spawn marker placed and active within a base, sometimes hostile zeds/humans can get in. When you place a spawn marker it prevents regular hostiles spawning near your base, but, from time to time however a small horde of Zeds or Hostile humans can spawn near you and move in for the attack.

At least twice this has happened to me as I have been entering my base causing them to spawn very close to my base, with a couple of hostiles each time spawning on my fence and glitching into my base. Be warned when they do this, they will attack your structures.

POI - POSSIBLE CANINE COMPANION LOCATION
I have read that E3 is another possible location to find the canine companion, although specifics are lacking, the only reference I can find is "a house in E3 above the gas station where the road curves".

Source: https://steamcommunity.com/app/1766060/discussions/0/4031349199266278847/

If you drive directly north from the centre of the gas station forecourt, you end up driving past the car wash, just to its right. To the right of the car wash is a large brown house, or if you continue north past the car wash and up the hill, you come to another large brown house, I suspect, although am not 100% sure they are probably referring to one of these houses as the possible location of the canine companion.


GRID E4.


INDEX
Square, Green = Ammo crate.
Circle, Yellow = Backpack with a size of 4 storage rows or less.
Circle, Green = Backpacks with a size of 5 or 6 rows of storage.
Triangle, White = Stone.
Triangle, Red = Iron.
Triangle, Yellow = Coal or Saltpeter (sorry there are only so many colours).
Triangle, Green = Copper.
Triangle, Blue = Zinc.
House, Blue = Hardware store.
Car, Yellow = These are common types of vehicle the player can drive.
Car, Green = These are Vans and other rare types of vehicle the player can drive.
Car, Blue = Lootable Survivor SUV.
Fist, Blue = Lootable Police SUV.
Animal Paw, Yellow = Chicken coup.
Animal, Green = Where I found the canine companion in my game.

POI - TRAVELLING BETWEEN GRID E3/E4
The line on the map, to the left side of the Grid is not a road, it is a rail track and to the right of the track is a body of water. The northern section of the track that leads into Grid D4 is a bridge that traverses the body of water, as a result it is not possible to travel directly from E3 to E4.


The shortest route from E3 to E4 is to follow the track over the bridge, just be aware that the opposite side of the bridge is blocked with a train carriage and there are barriers flanking the train, there is a gap, but it is narrow and literally only just large enough for a van to squeeze through, there are also Zeds in the area as well.


This route will take you into D4, and as you leave the rail track you will join a road, turn right and this will take you into Grid E4.

POI - CLUSTER OF BUILDINGS TO THE NORTH
Entering the Grid from the northern road from the previously mentioned route, and travelling south, you will eventually come to a road turning left that is not marked on the map, with an ambulance to loot.


This road will lead you to a cluster of residential buildings, some with garages, greenhouses and even some graves. About half the buildings in Grid E4, the other half in D4. As you enter, keep driving straight and you will come to three self storage units to loot containing three store boxes, a parcel box, a washing machine, three pieces of luggage, two ammo containers, a locker, two weapon crates and a toolbox.


Out the front of the storage units, there is also a skip and a couple of dumpsters. If you drive to the right of the storage units, behind the fence, and follow the fence, it will lead you to three ore nodes, one iron, one coal and one saltpeter.


Note that the storage units and ore nodes are technically in Grid D4, rather than complicate things I've listed this area that is half in one Grid half in another, into one section.

Other loot to look out for in the area other than the usual residential items is an ammo container in a house to the south, a small backpack in a house to the north and a driveable vehicle to the east (A Leap Being Chief in my world), located inside a garage.


Beware that there are several large groups of Zeds in this area with the first encountered at the very turnoff road into the cluster. There are often Zeds also in houses and firing any non silenced gun will almost always attract more hostiles to the fight.

POI - CAMPSITE
Located on the very northern edge of the Grid is an ammo container icon marker, this is the location of a small campsite with a couple of outbuildings. Here you will find a single ammo container and an ice box guarded by a few Zeds, beware of the possibility of wolves nearby.


POI - POSSIBLE VAN LOCATION
The green vehicle icon marker to the east of the Grid in the middle of nowhere is the possible location of a driveable van.


POI - STARTER SPAWN
From the road entering the Grid from the north (Grid D4) and driving southeast, driving past the turnoff to the cluster of buildings to the north, past the lootable police SUV, you will eventually come to another turnoff to the left side of the road, which leads to the easy start spawn location.


Walking down the entrance road you will encounter a house (containing a small backpack) and a garage on the right side of the road, with a driveable vehicle nearby and a chicken coup at the end of the road.


Following the direct path to the left, you will find a saltpeter and coal node on the right side of the path, followed by a cabin with a zinc node behind it. On the opposite side of the path there is a garage containing another small backpack and a toolbox, lastly, to the right of the garage there is a copper node completing everything you need to make bullets in one area.


GRID E5.


INDEX
Square, Green = Ammo crate.
Circle, Yellow = Backpack with a size of 4 storage rows or less.
Circle, Green = Backpacks with a size of 5 or 6 rows of storage.
Triangle, White = Stone.
Triangle, Red = Iron.
Triangle, Yellow = Coal or Saltpeter (sorry there are only so many colours).
Triangle, Green = Copper.
Triangle, Blue = Zinc.
House, Blue = Hardware store.
Car, White = Gas station.
Car, Yellow = These are common types of vehicle the player can drive.
Car, Green = These are Vans and other rare types of vehicle the player can drive.
Car, Blue = Lootable Survivor SUV.
Skull, Red = Hostile human camp.
Fist, Blue = Lootable Police SUV.
Animal Paw, Yellow = Chicken coup.

POI - POSSIBLE RV LOCATION
If you enter the Grid via the road from E4 and follow the southern road, you will eventually come to a T-junction where you will find a gas station with two forecourts. This gas station is one possible location of the RV, it should be noted it may or may not be here, there are other possible locations, and as explained earlier in this guide, you may not even have an RV in your world, I didn't.

Source: Common knowledge, mentioned in multiple discussion threads, I don't know who the OP was for this info.


POI - POSSIBLE BOX TRUCK LOCATION
The box truck is the "New large vehicle" that was added to the game in Patch 0.906X.4 and I have thus far only seen two possible locations mentioned for this vehicle, one of which is as per Steam user [FuFo] Mortucus "parked at the gas station in the lower east of the map" Source: https://steamcommunity.com/app/1766060/discussions/0/4031351002391518686/

In my world near the gas station "in the lowers east of the map", which I assume is Grid E5, there is a box truck near the junction, two out the front of the hardware store and another two behind the hardware store and none of them can be interacted with.


POI - GAS STATION
The area near the gas station at E5 is also home to a general store, laundromat, and a hardware store (with a small backpack in the office), there are also two police SUV's and an ambulance among a plethora of other vehicles to loot and scavenge, one, just south of the gas station which is driveable.


POI - POND
Southwest of the gas station you will find a fishing pond. Located around the edge of this pond you will find two iron, one zinc and one coal node to mine, be warned that if mining the nodes nearest the hardware store without first clearing the Zeds from the hardware store carp park will likely attract their attention.

POI - HOSTILE CAMP
Located northeast of the gas station, following the road north from the T-junction, past the roadblock and iron/stone nodes on the left side of the road you will encounter a hostile human camp.


This camp is usually home to 4 hostile humans and a hostile dog. Facing the camp from the road, the camp comprises of two homes with a carport situated between them. The homes have just the usual residential loot, with one weapon crate been found in the southern home being the only special container. Located in the carport you will also find a locker, toolbox and an ice chest.


The only ammo container you will find at this camp is located near the road, on top of one of the shipping containers that you can climb up onto.


There's also a few vehicles to loot and scavenge, and also there is a skip near the road, but other than that as hostile camps go, this one is pretty sparse when it comes to loot.

POI - LOGGING CAMP
If you follow the road north from the hostile human camp a short distance, just past the stone node on the right side of the road, you will see a dirt road that leads off to the left, if you follow this a short distance you will come to a logging camp.


When you reach the point in your game that you have a vehicle and you are looking to start building a base, this is the first place you should visit as laying on the ground near the north of the camp you will find a pile of logs ripe for the picking (yes you can put logs in a vehicle).


I cannot recall exactly how many logs are... were here as I look them all way before I started this guide, It's at least 10, could be as many as 20, I just don't remember, sorry.

While you are here, there's a 3 row storage backpack on one of the picnic tables, some loose loot laying around inside the cabin on the northern side of the camp there are a couple of caravans/trailers to loot along the dirt road entrance.


POI - CLUSTER OF HOMES/TRAILER PARK
Continuing north up the road from the logging camp, there is yet another dirt road leading off to the left, flanked by a copper node on the left and an iron node on the right. Following the road a short distance take you to a fenced off ramshackle of cabins, carports, trailers, tents and cars.


Located scattered through all the cabins and carports you will find two ice boxes, a toolbox and two lockers. One of the homes has an adventure backpack (6 rows) and another has a pair of binoculars. There is also another backpack at this location, found outside on the floor, among some rubbish in front of the largest trailer/caravan.


Finally, there are a bunch of cars to loot and scavenge, two of which are driveable.
Many Thanks.
I want to take this final opportunity to thank all the regular posters on the discussion boards, YouTubers and Discorders, and indeed anyone that has taken the time to post information about the game, although mostly the discussion board regulars, you know how you are ;)

Every time you start a new game, a multitude of things are different and I wouldn't have been able to create this guide entirely on my own with only my own little world as a reference, simply because not everything in the game, is in my game and so your help and posts have been invaluable.

HumanitZ has a small although growing community of great folks and I encourage you all to continue sharing any new finds as the game expands, as I said at the start of this guide, I expect it to become out of date sooner rather than later and I hope as I take a break from the game for pastures new, others take up the mantle to carry on the process of sharing information on changes made.

I'd also like to thank the Devs for creating HumanitZ and the time that they are putting into not only expanding the game but also interacting and communicating with the games community.

22 Comments
anrkyuk  [author] Jan 3 @ 5:17pm 
Thanks for the thanks and compliments crpgnut, LAMEN & Jalpenim, glad to see people are still finding this useful given how often the game gets patched, hope you are all enjoying the game :)
Jalpenim Jan 3 @ 11:52am 
Excelente trabalho :) muito OBRIGADO!!!!!!:steamthumbsup::steamthis:
LAMEN Dec 26, 2024 @ 1:07am 
It's very useful and amazing guide, thanks for your sharing
crpgnut Aug 20, 2024 @ 11:49am 
I use your guide constantly. Would love if you made your map file from appdata available ;)
anrkyuk  [author] Jul 21, 2024 @ 12:52pm 
Thanks for the thanks Kittekassitar, hope you are enjoying the game :)
Kittekassitar Jul 21, 2024 @ 9:26am 
<3 Thanks
anrkyuk  [author] Jul 7, 2024 @ 12:11am 
Yellow houses are storage facilities, there is one at C3 and E3,
lab_secjadas Jul 6, 2024 @ 11:53pm 
In grid topics, it says house, yellow but on the actual image it does not have any yellow houses on the image. Please fix
samuhpkmn Apr 26, 2024 @ 1:41pm 
Oh, I see! I was searching for that back back since forever XD
anrkyuk  [author] Apr 26, 2024 @ 10:32am 
Hi there samuhpkmn, glad to hear you managed to find the doggo eventually :)

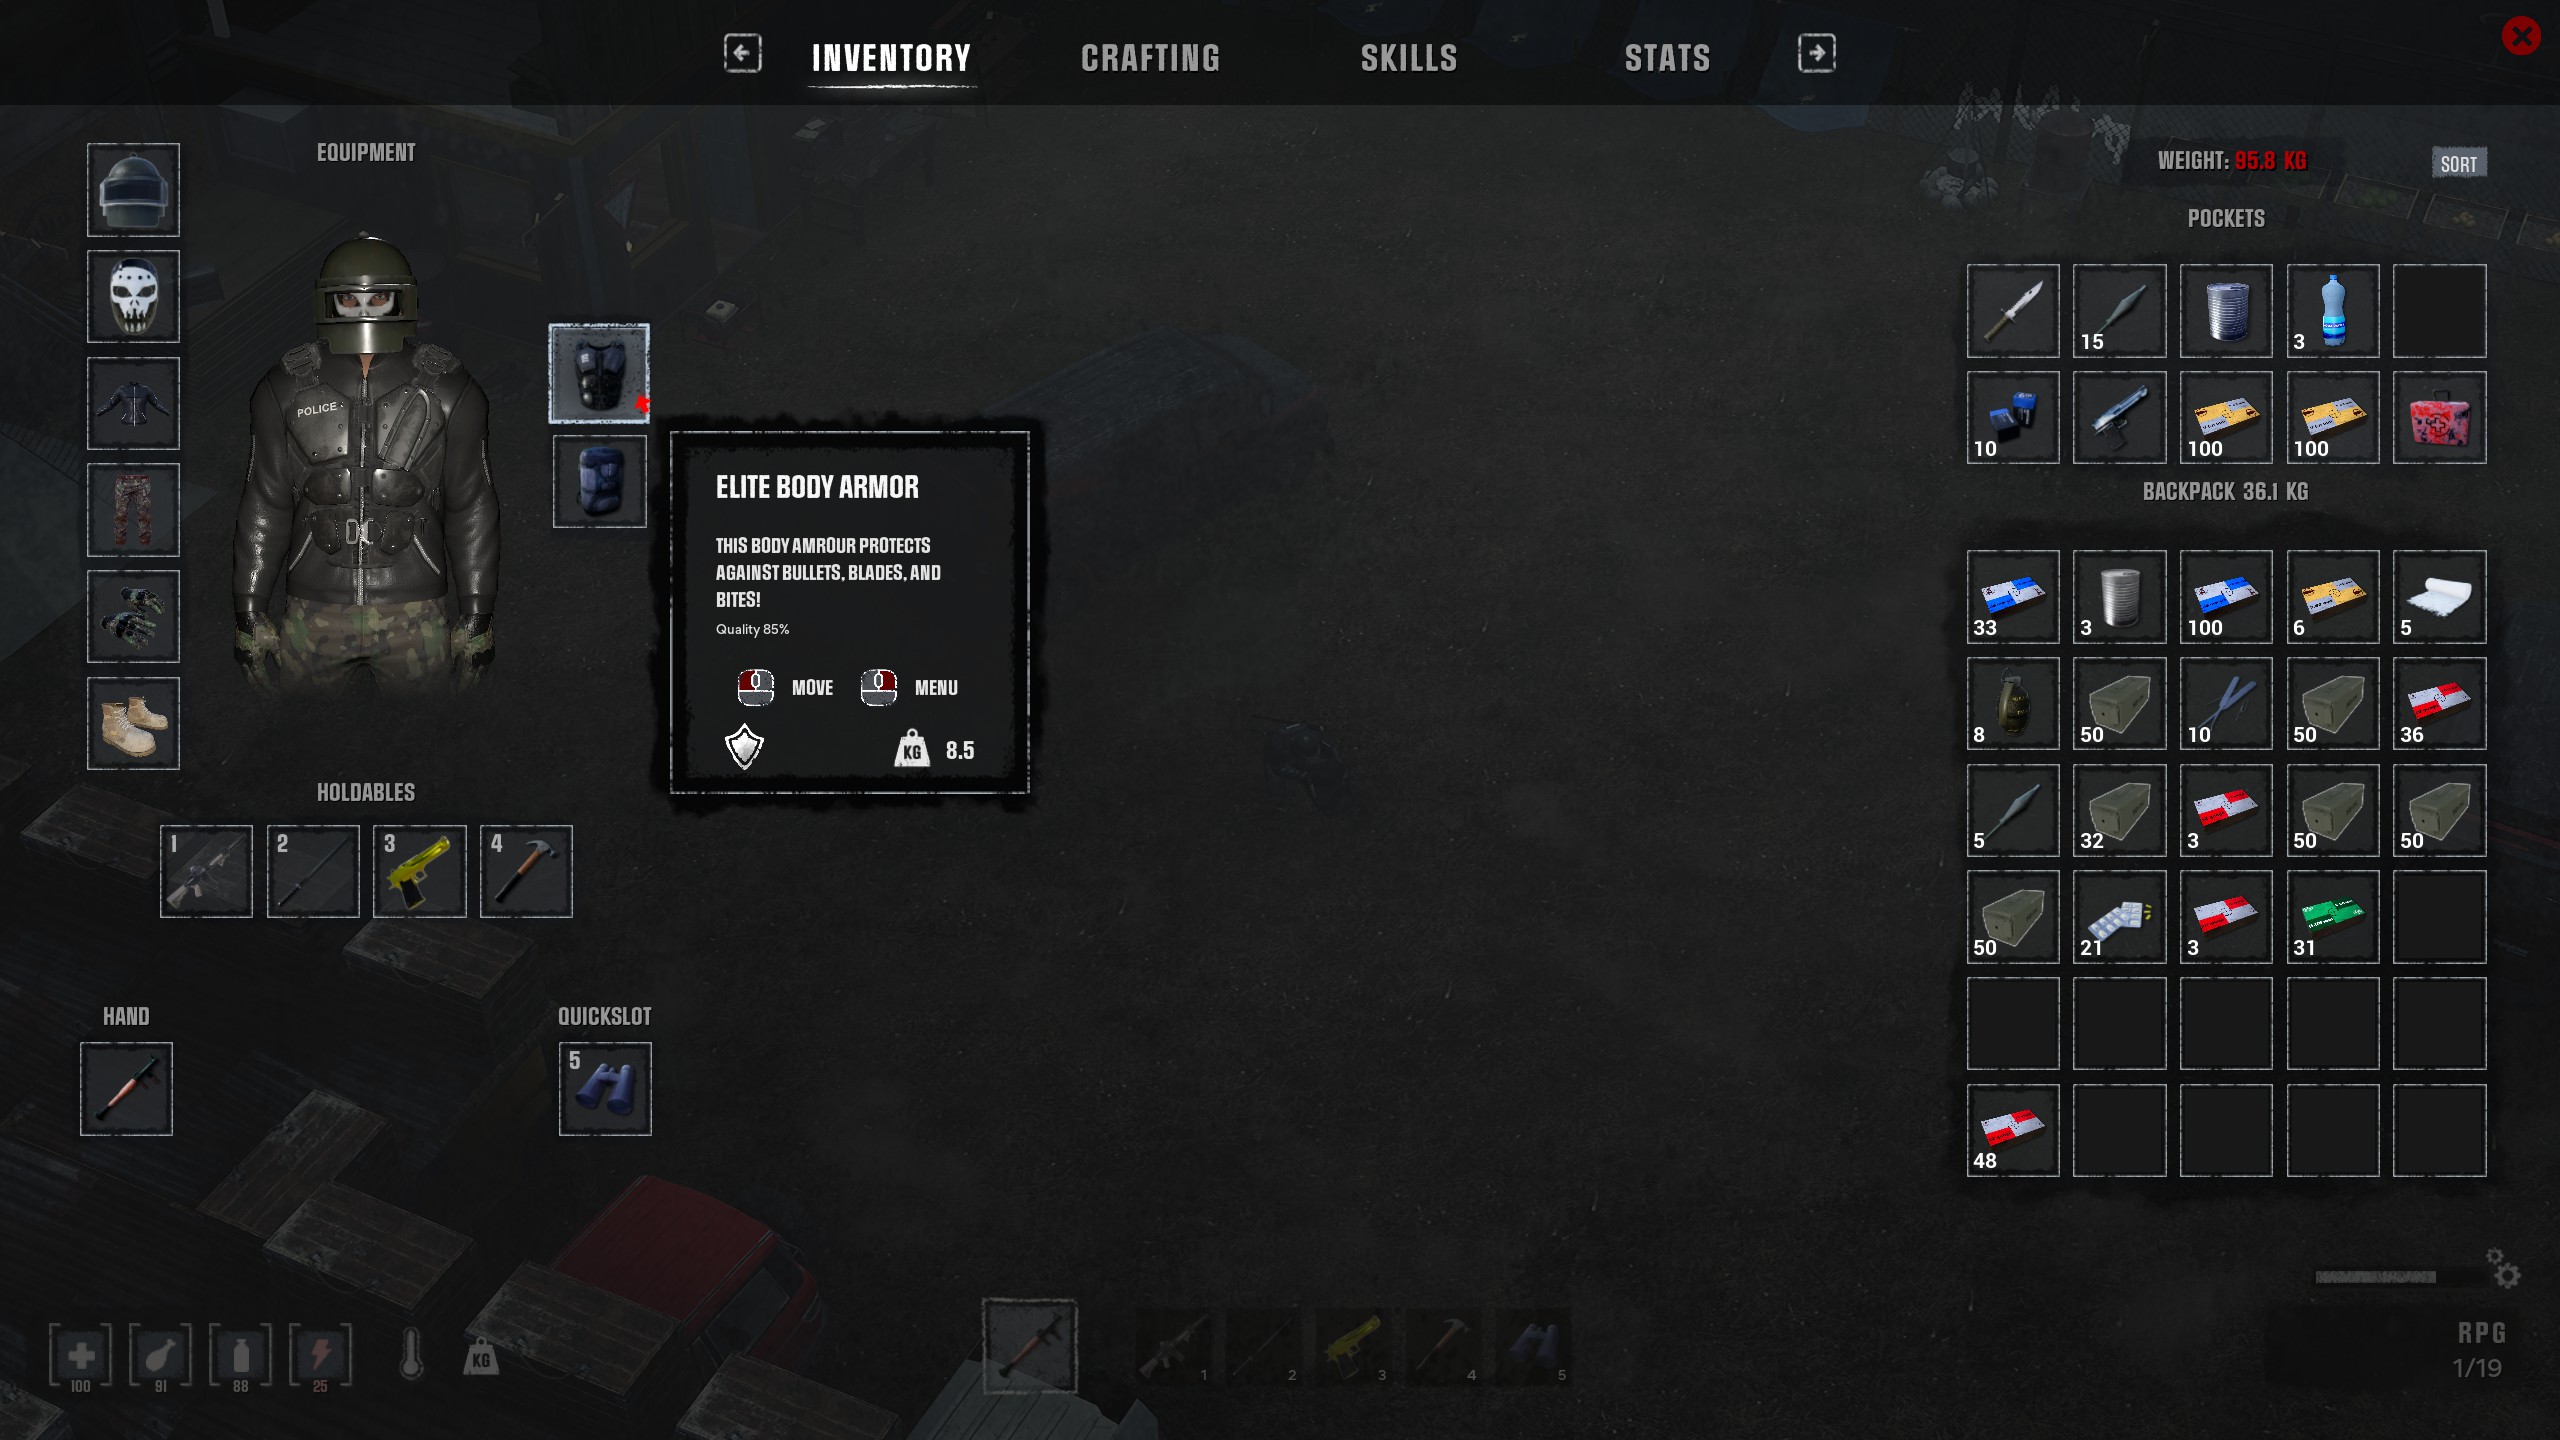
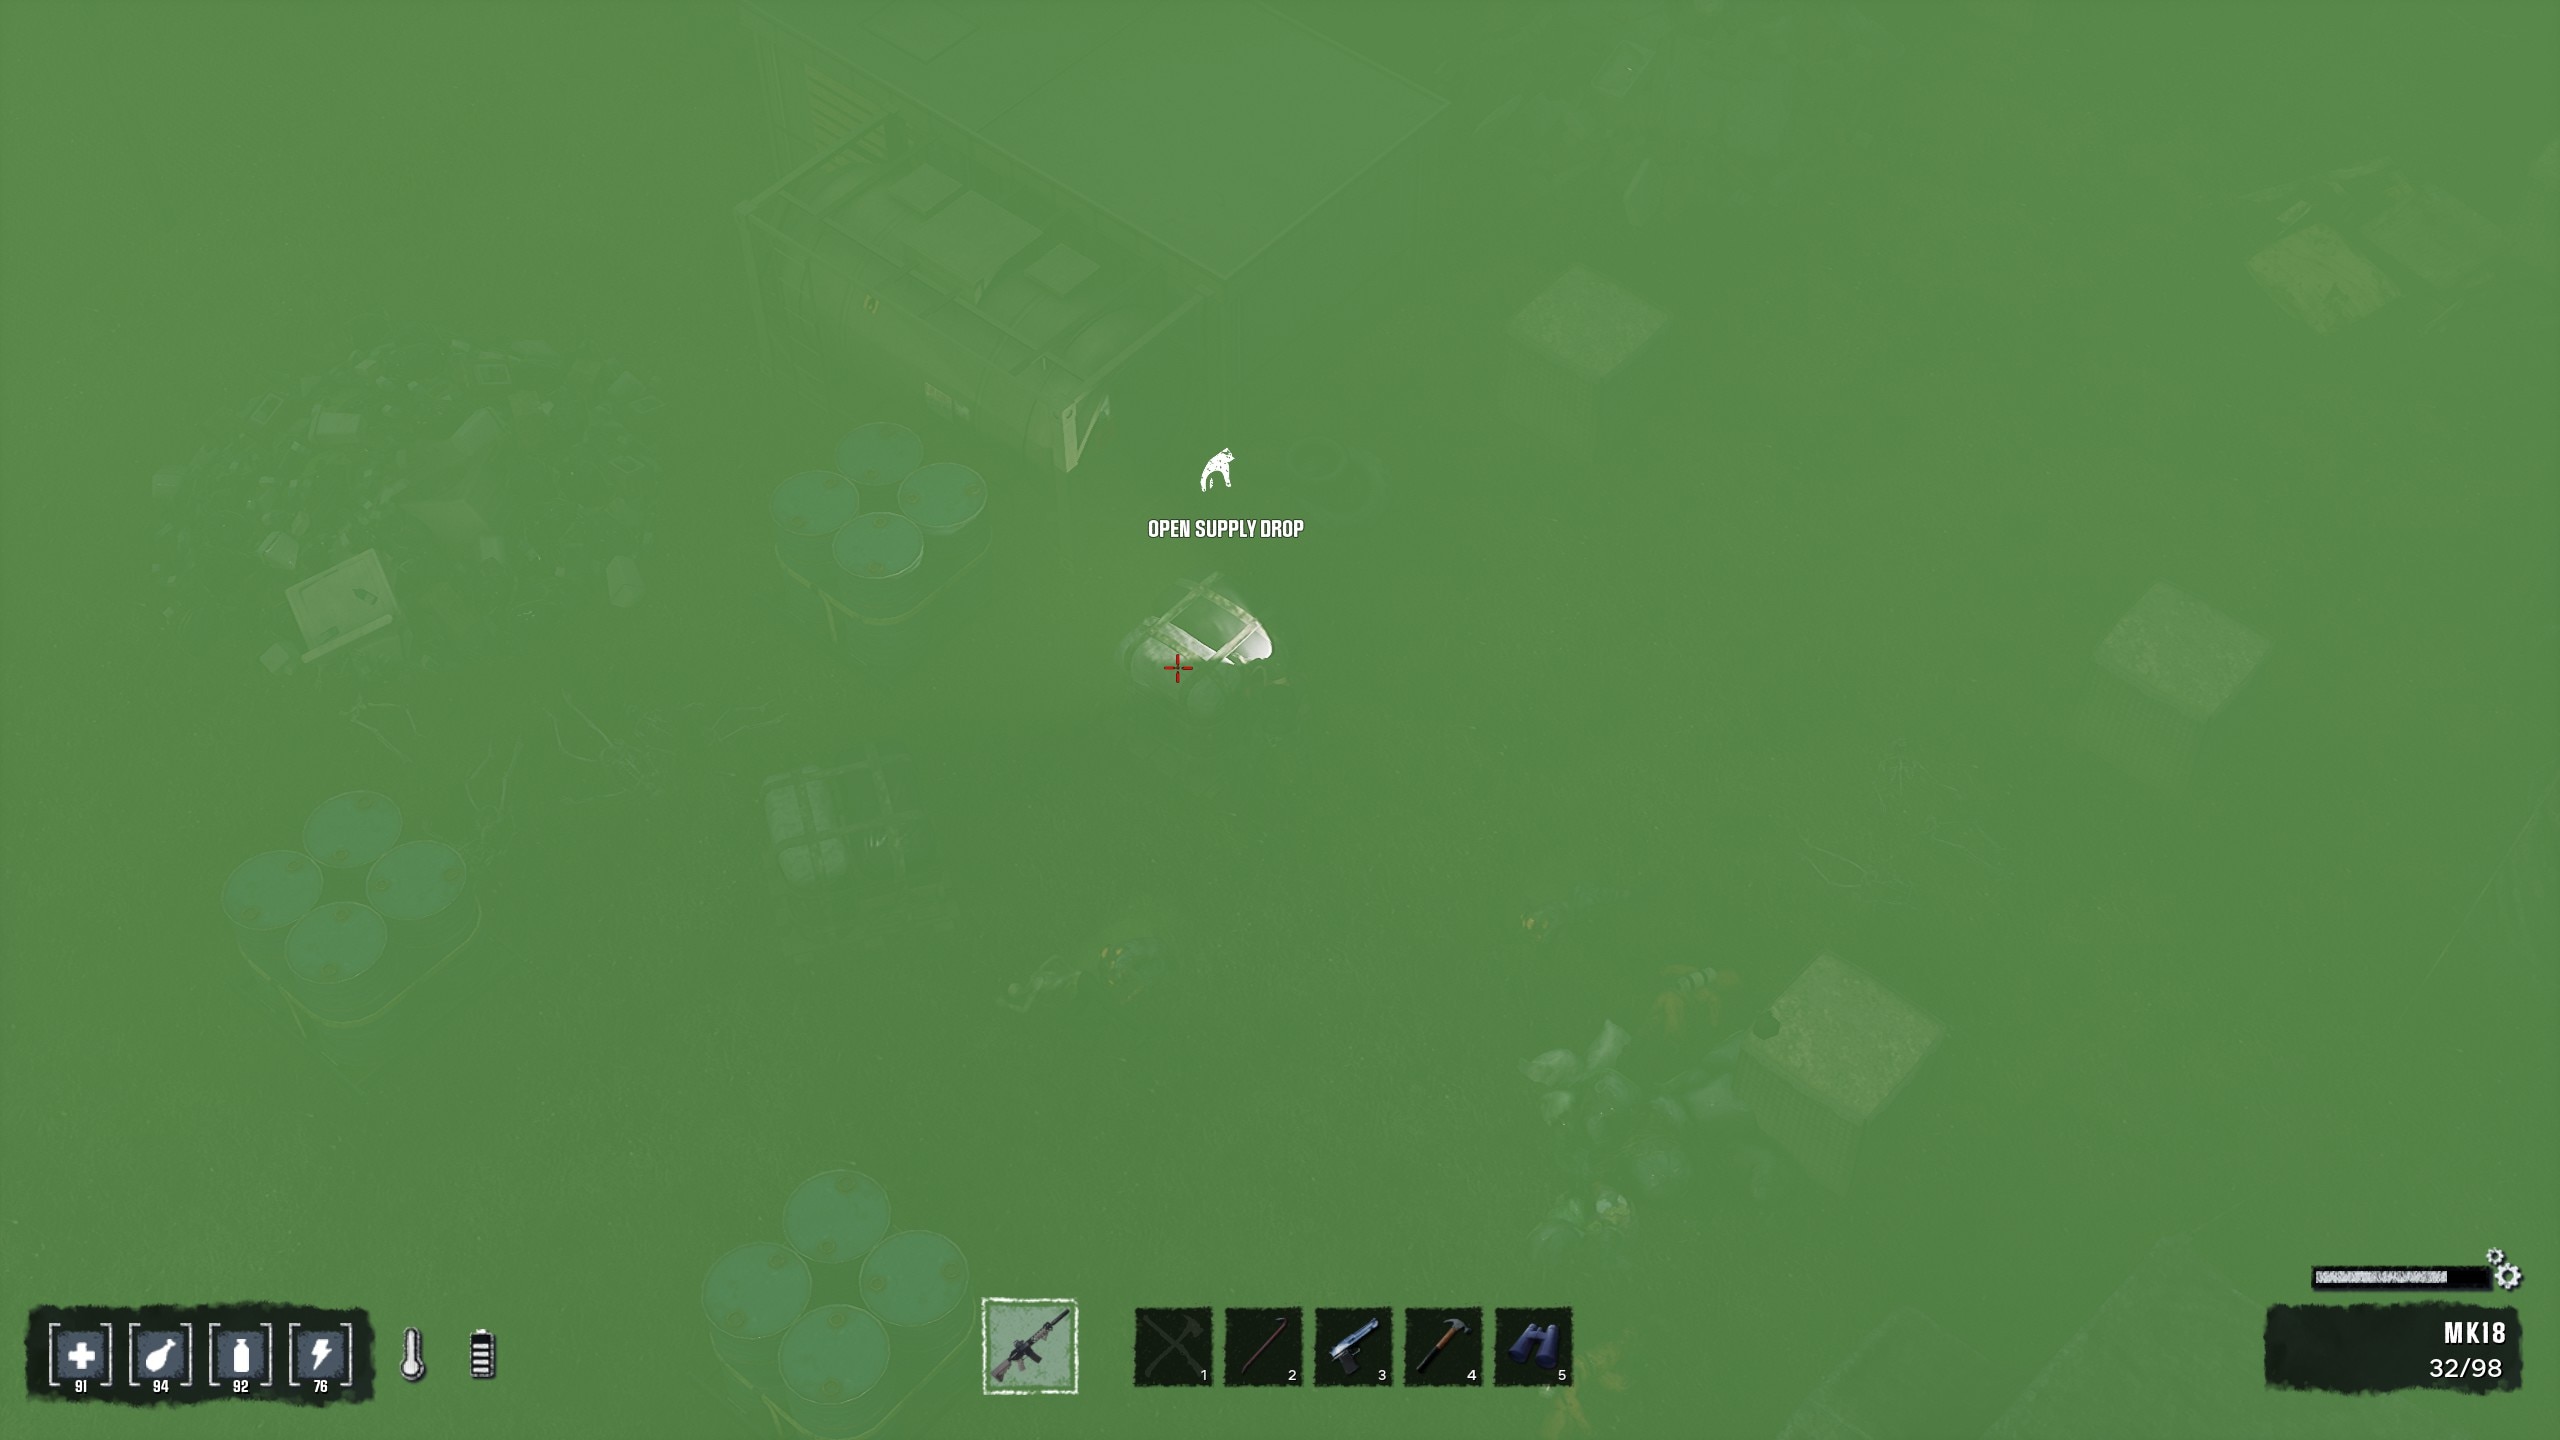
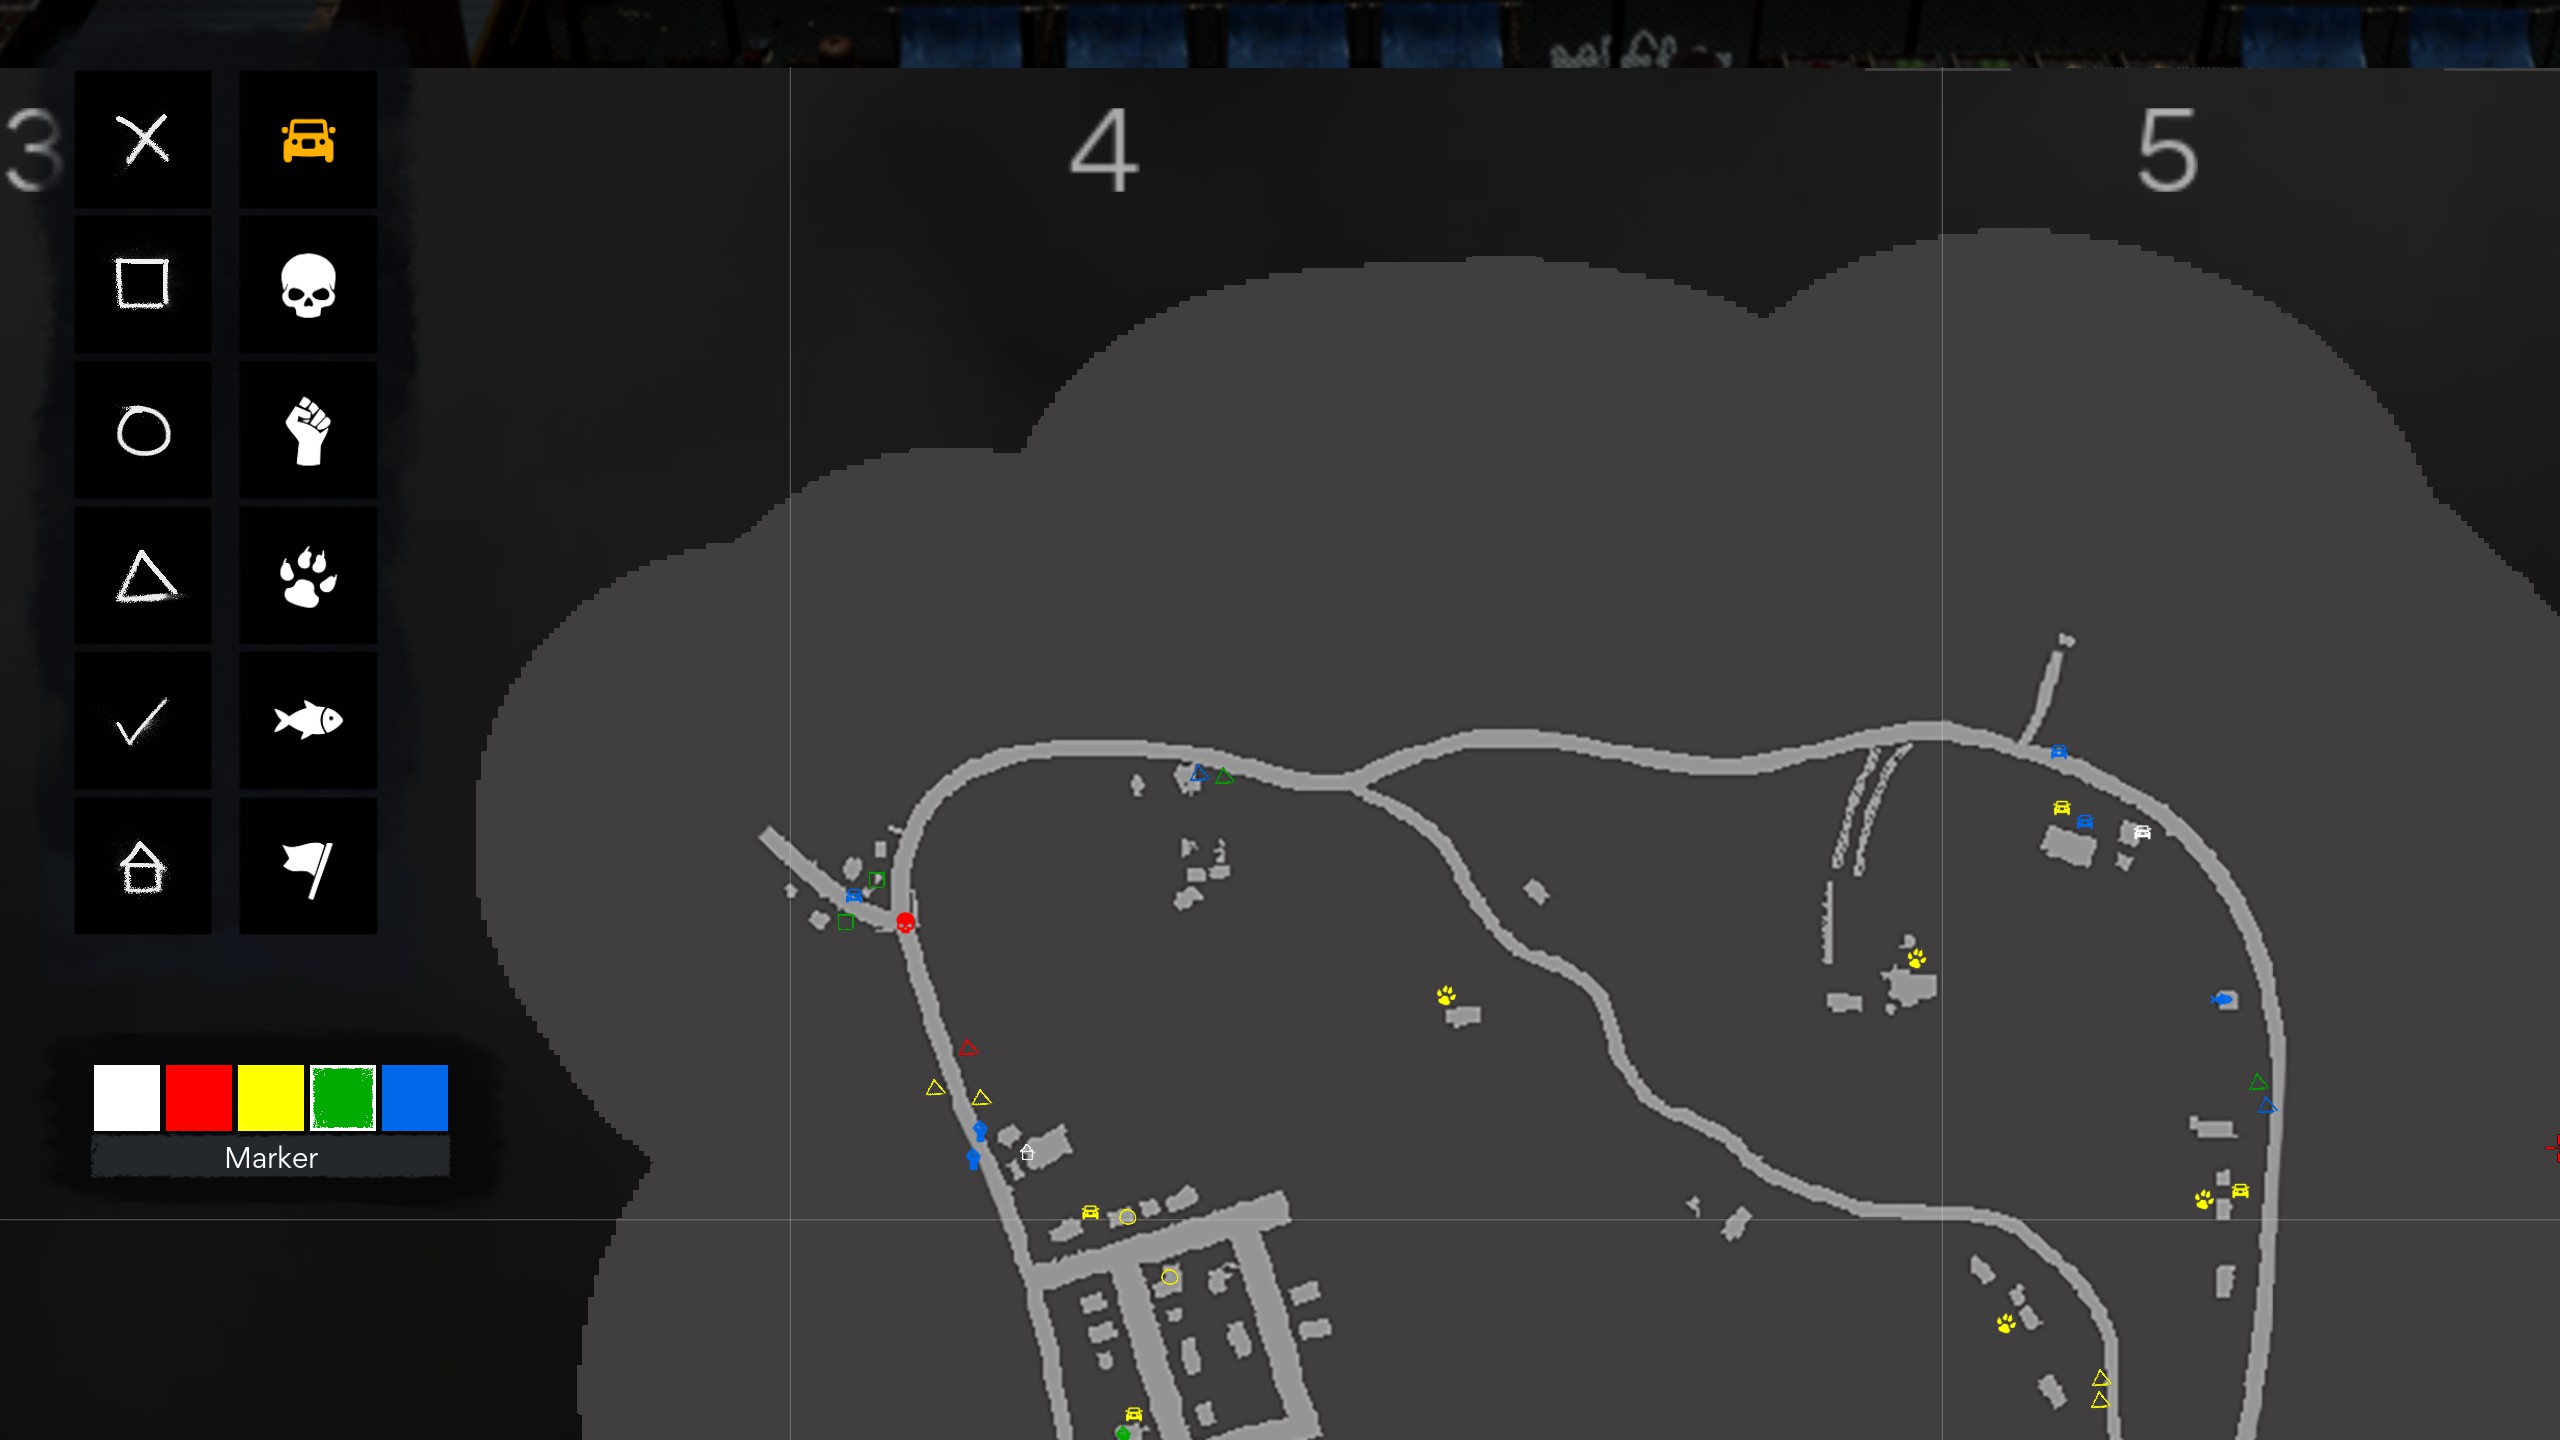
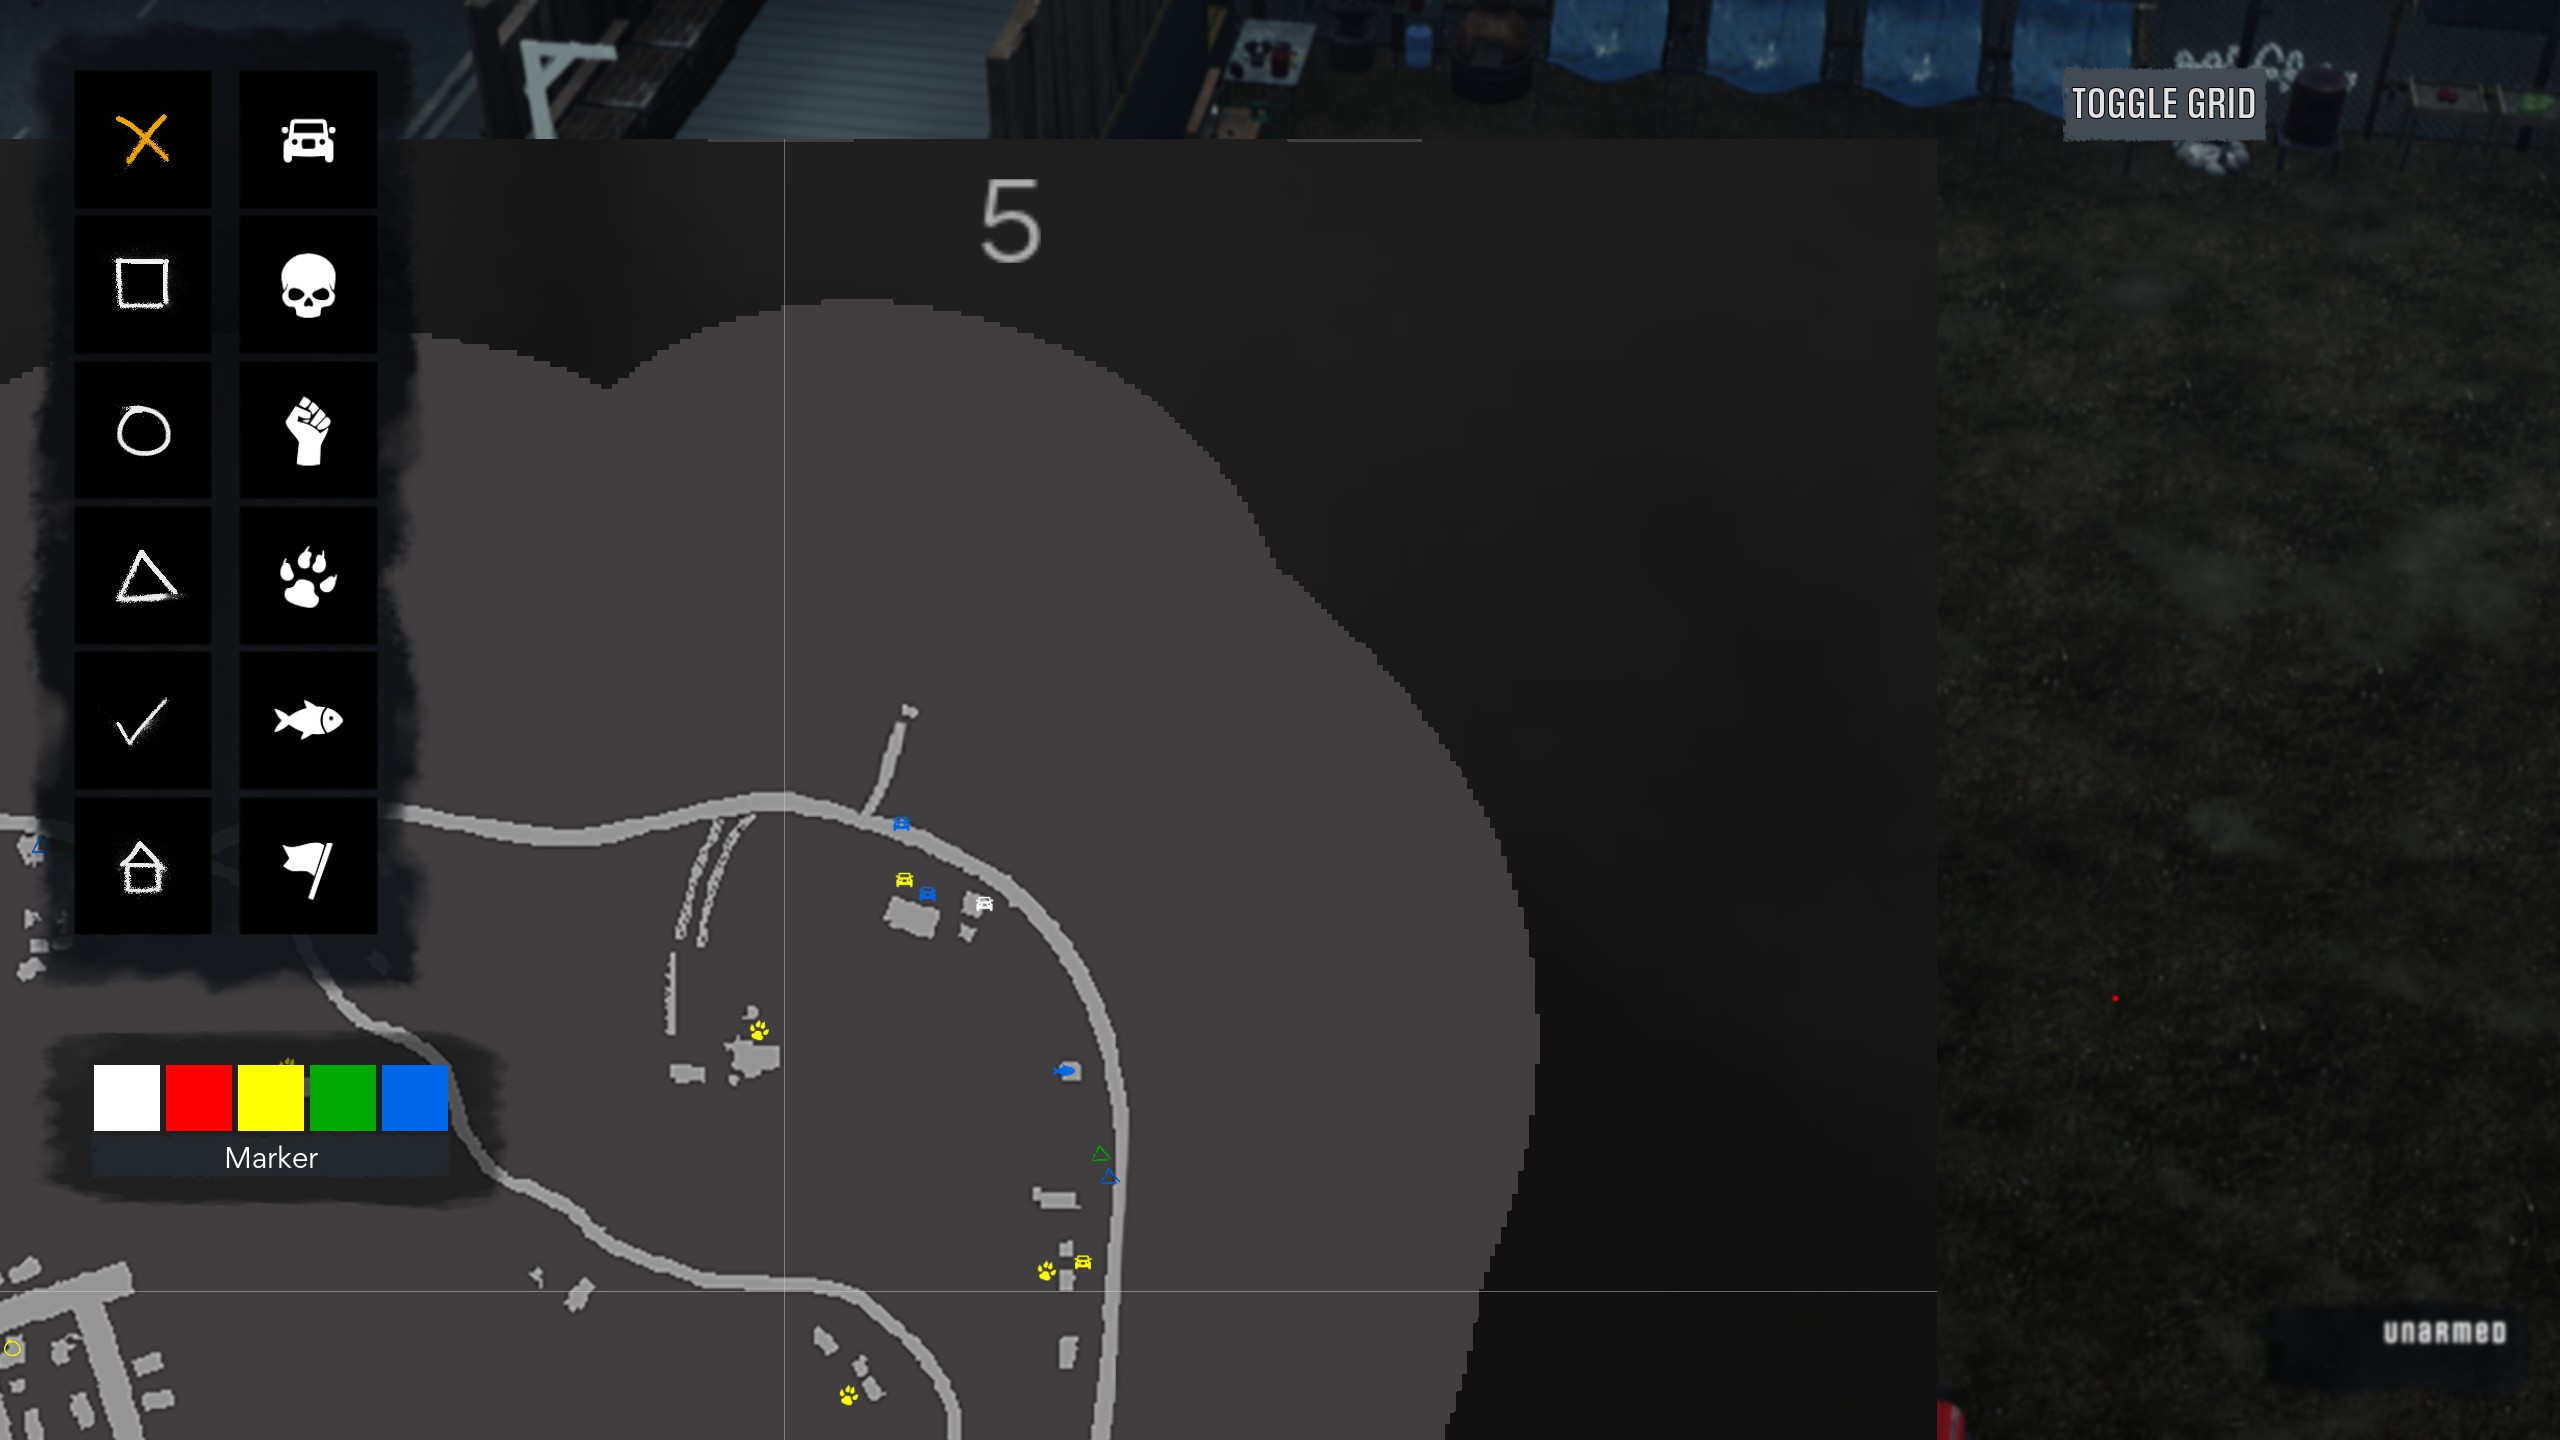
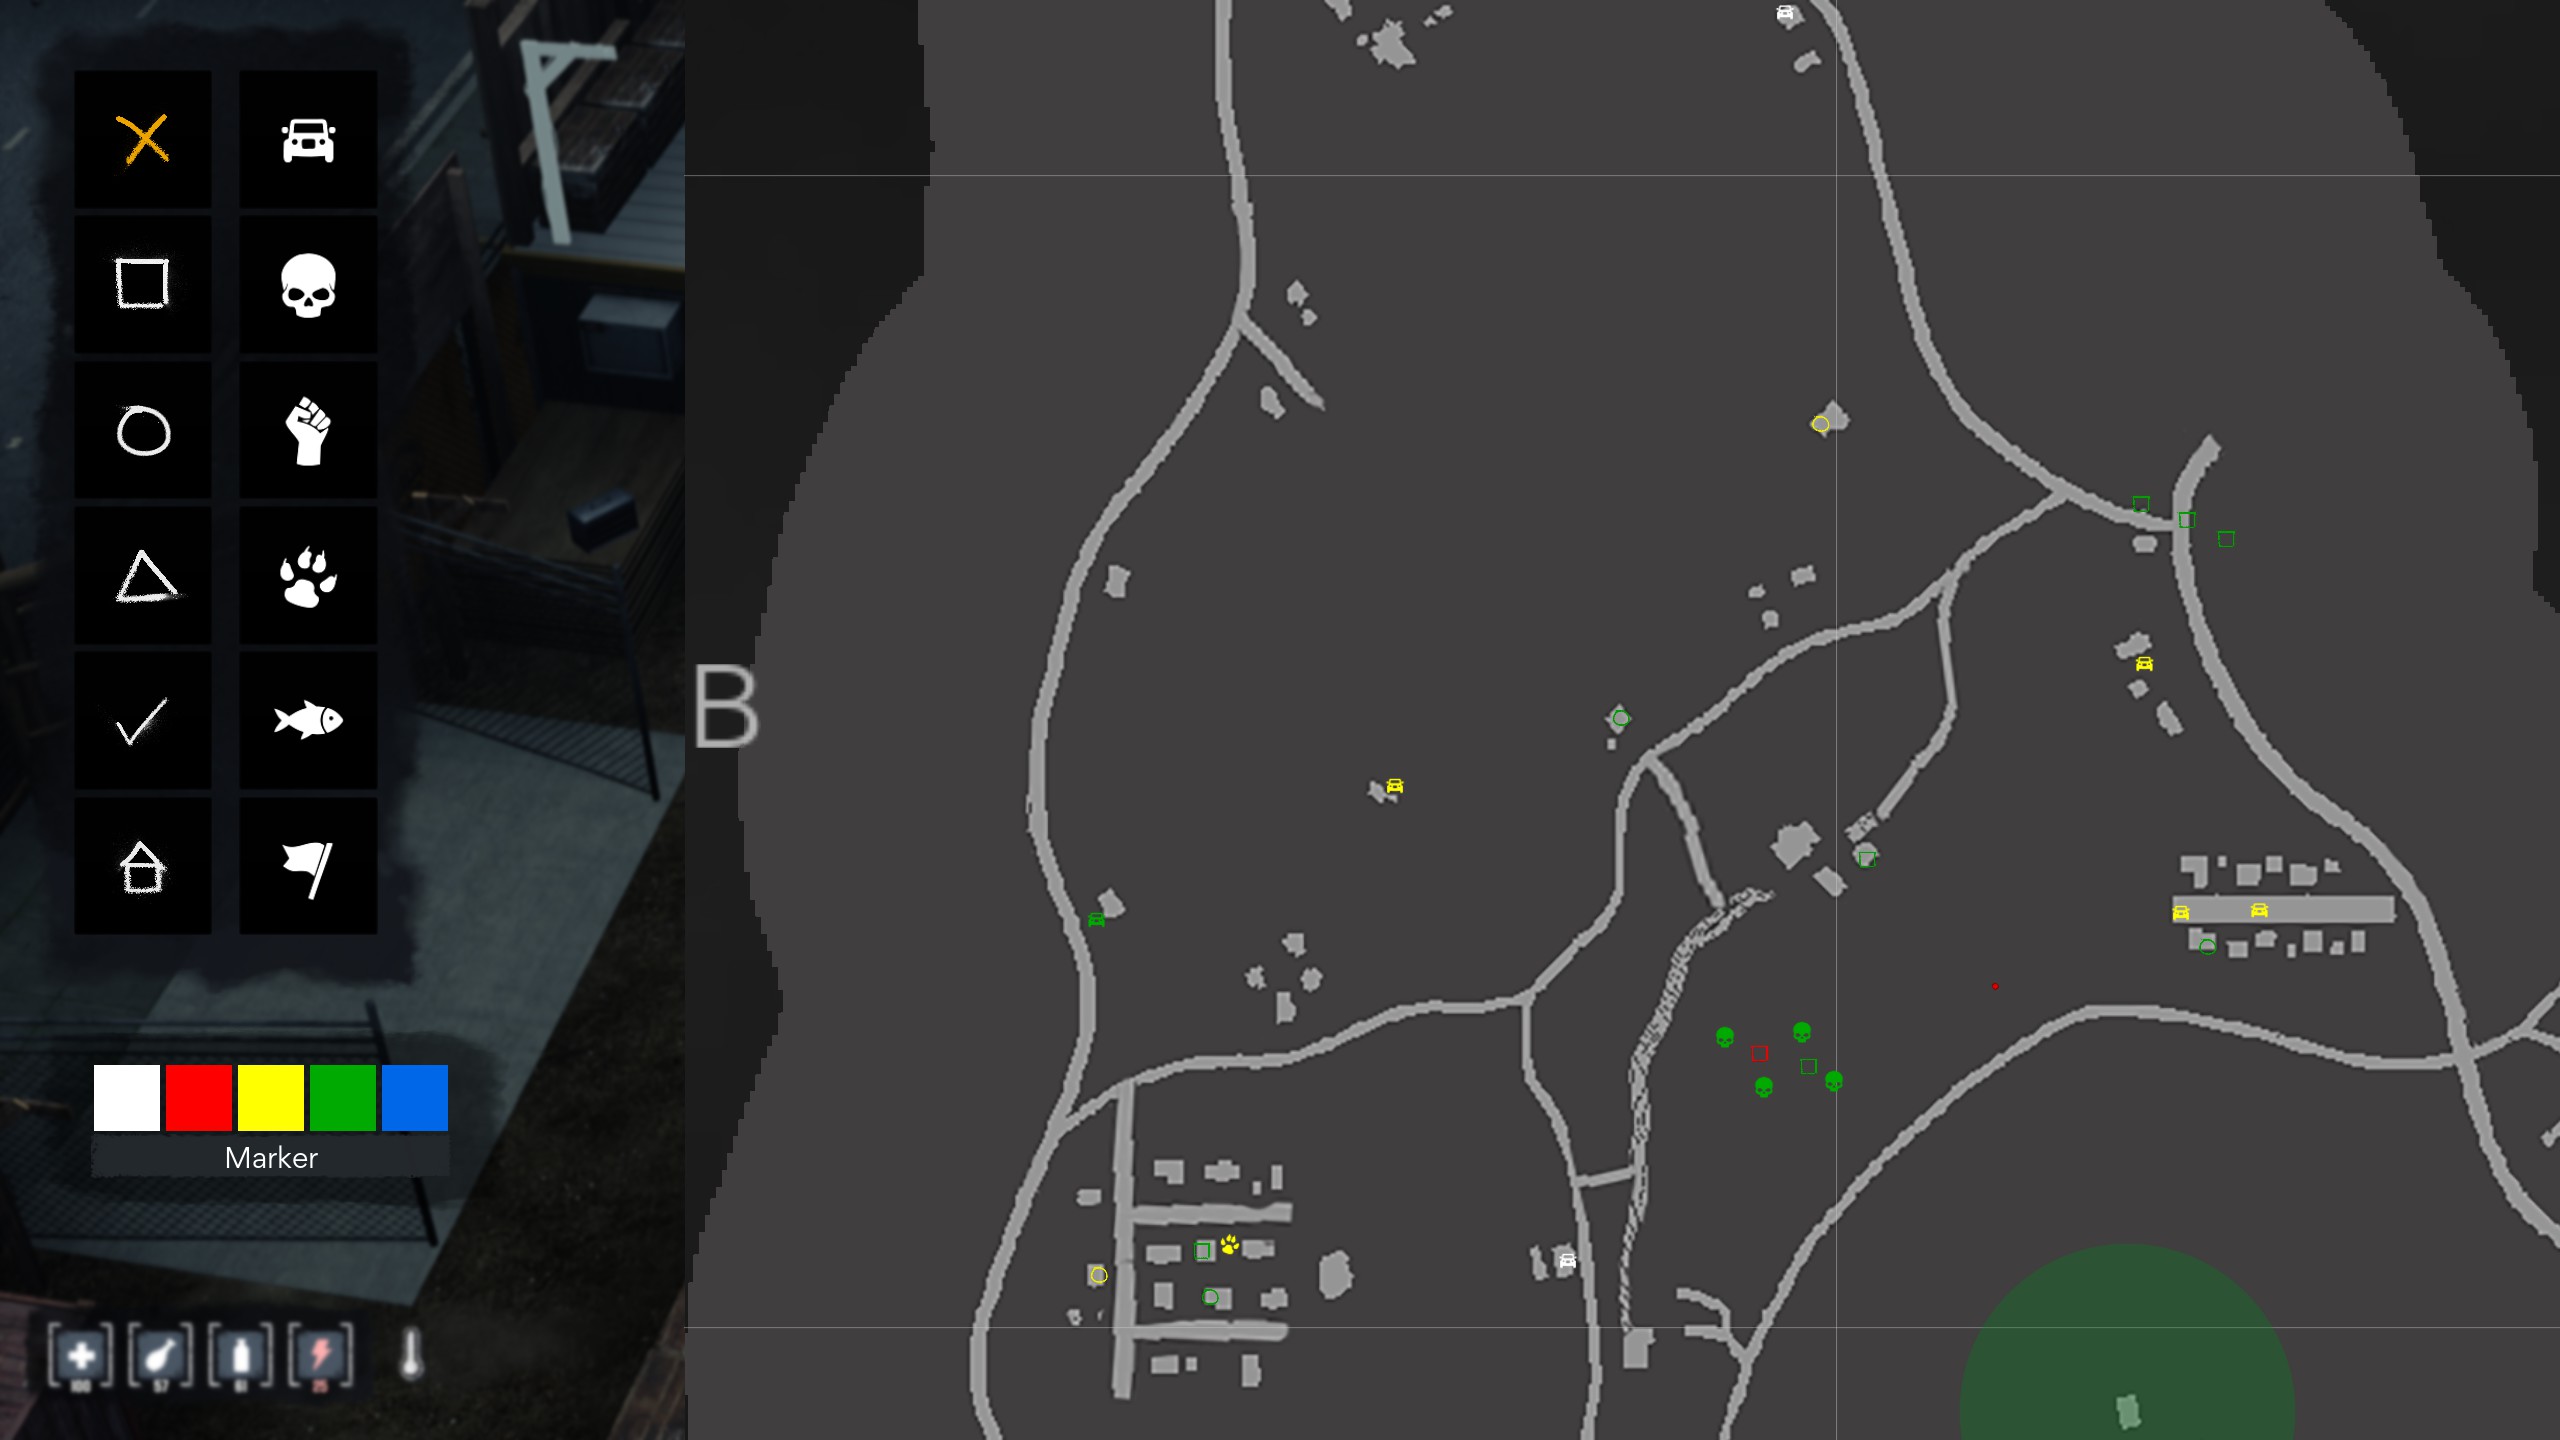
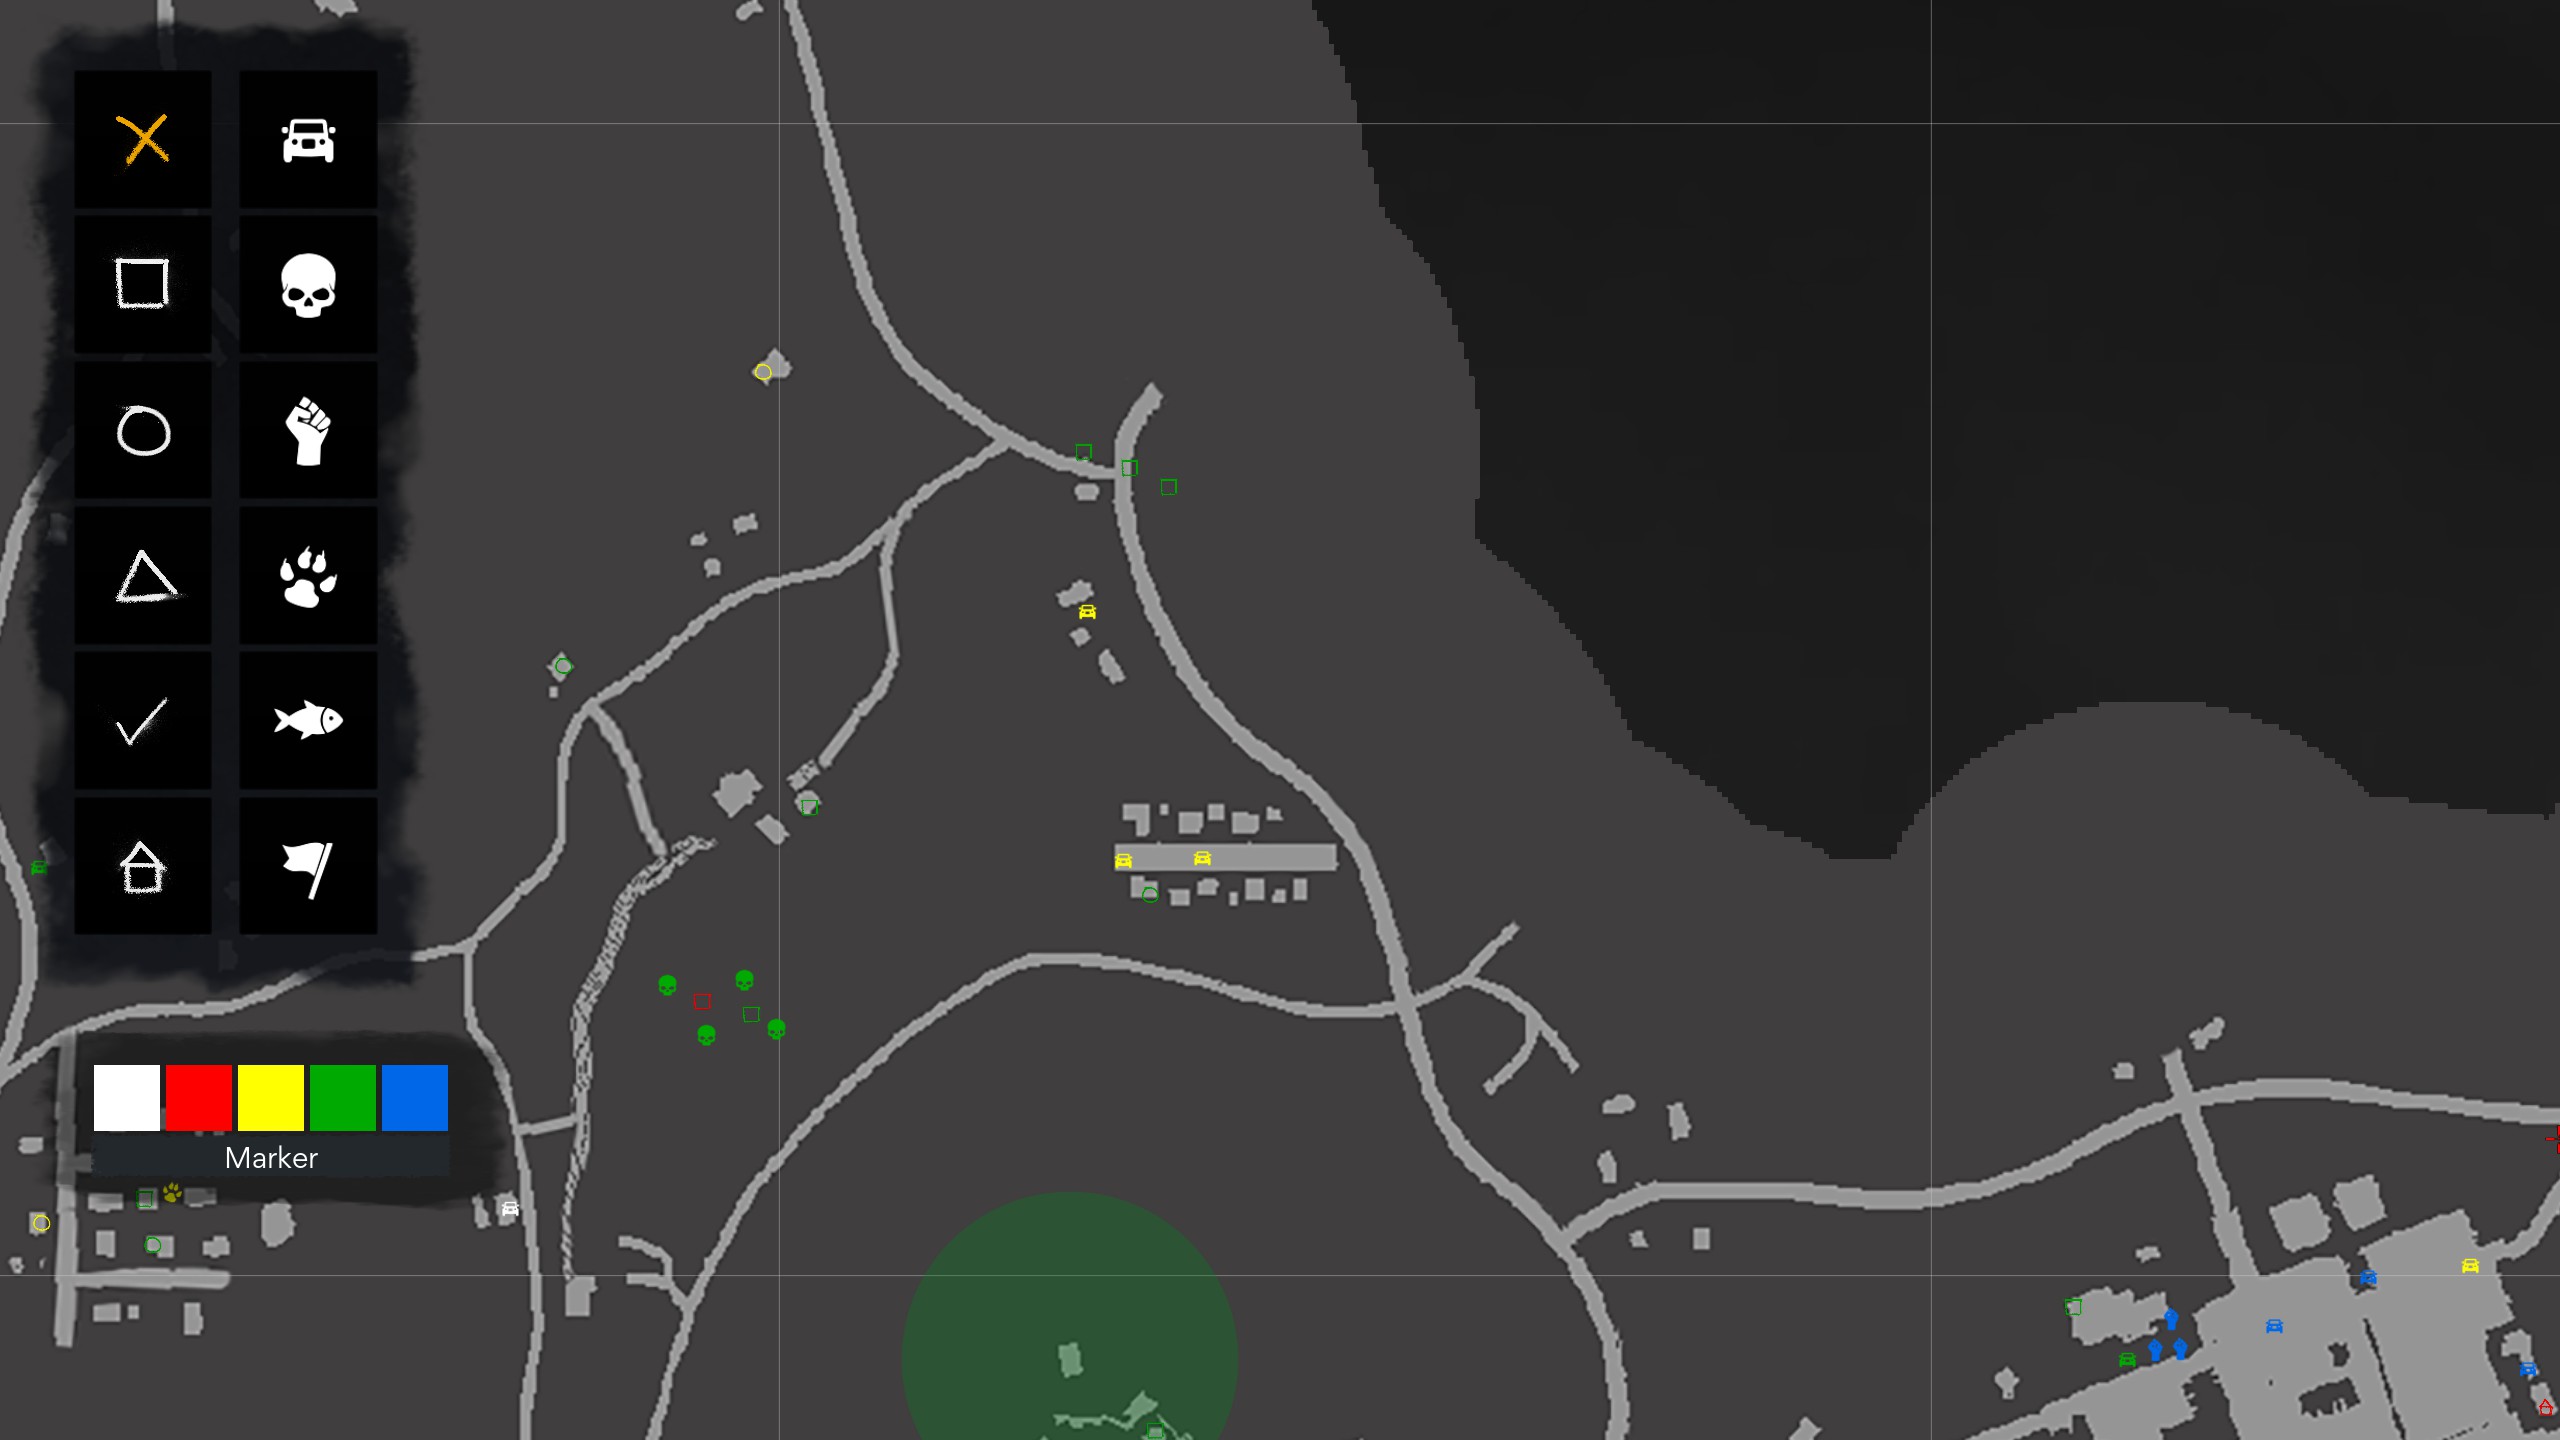
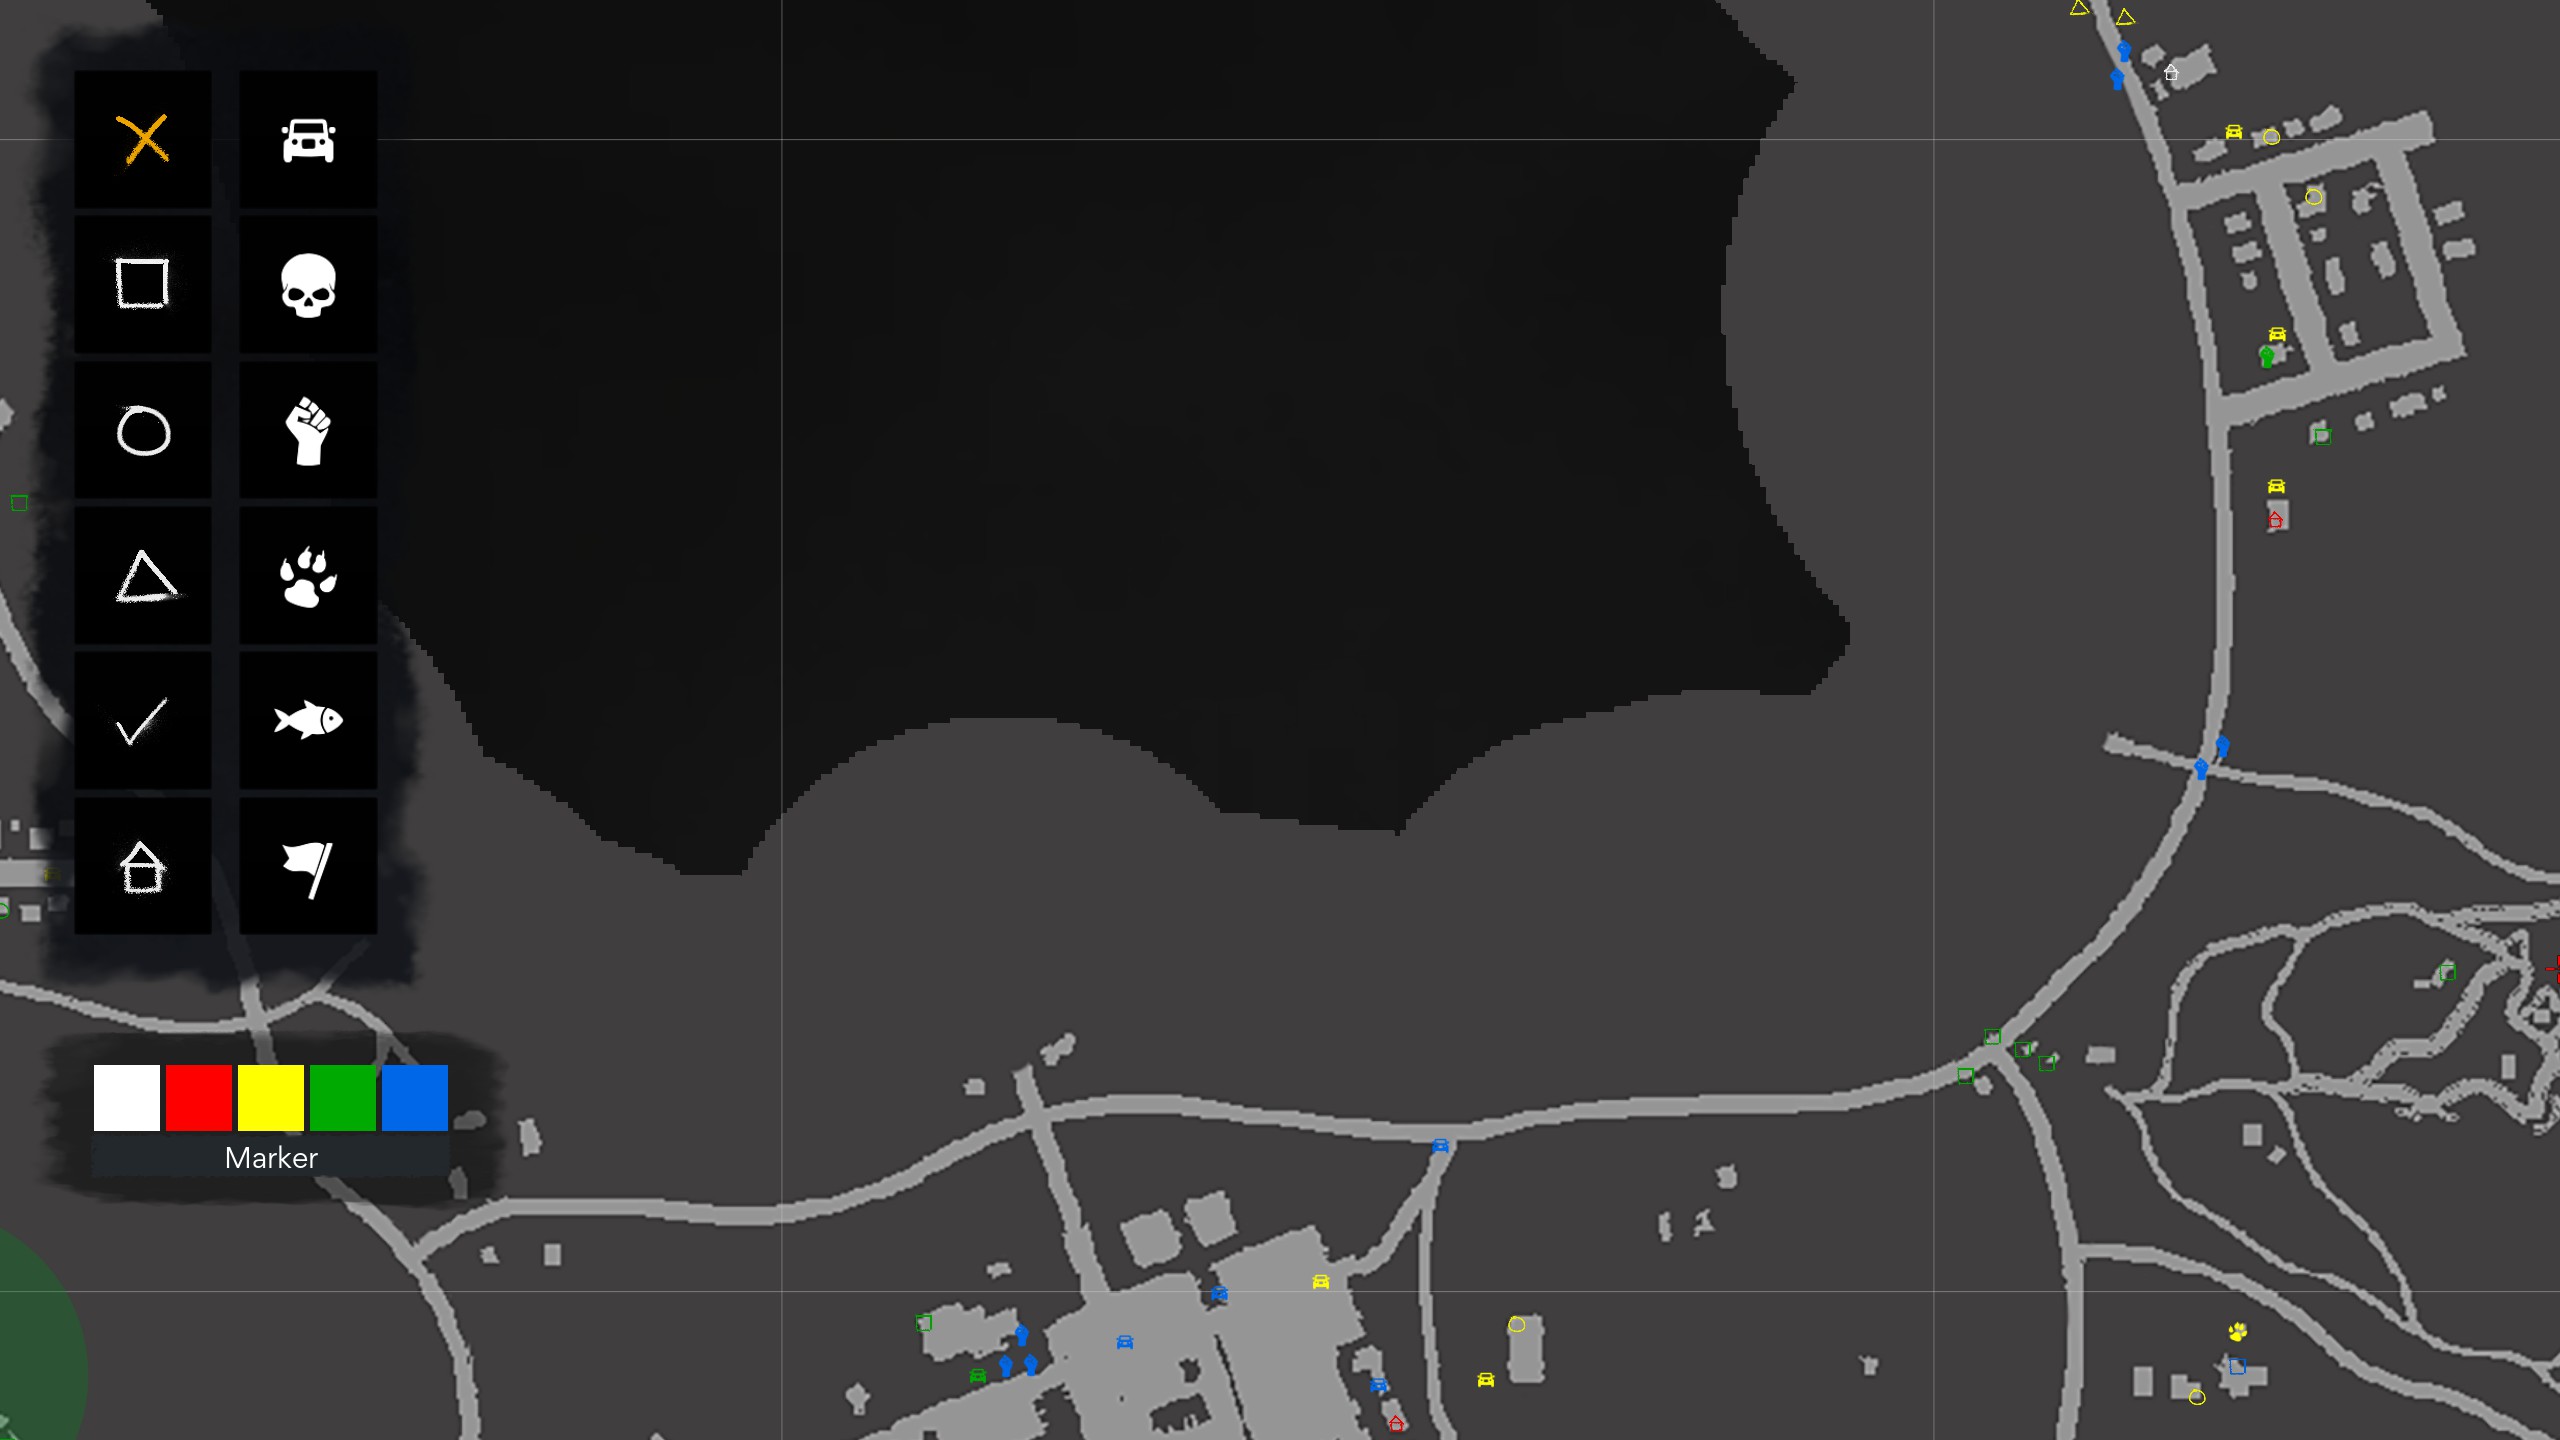
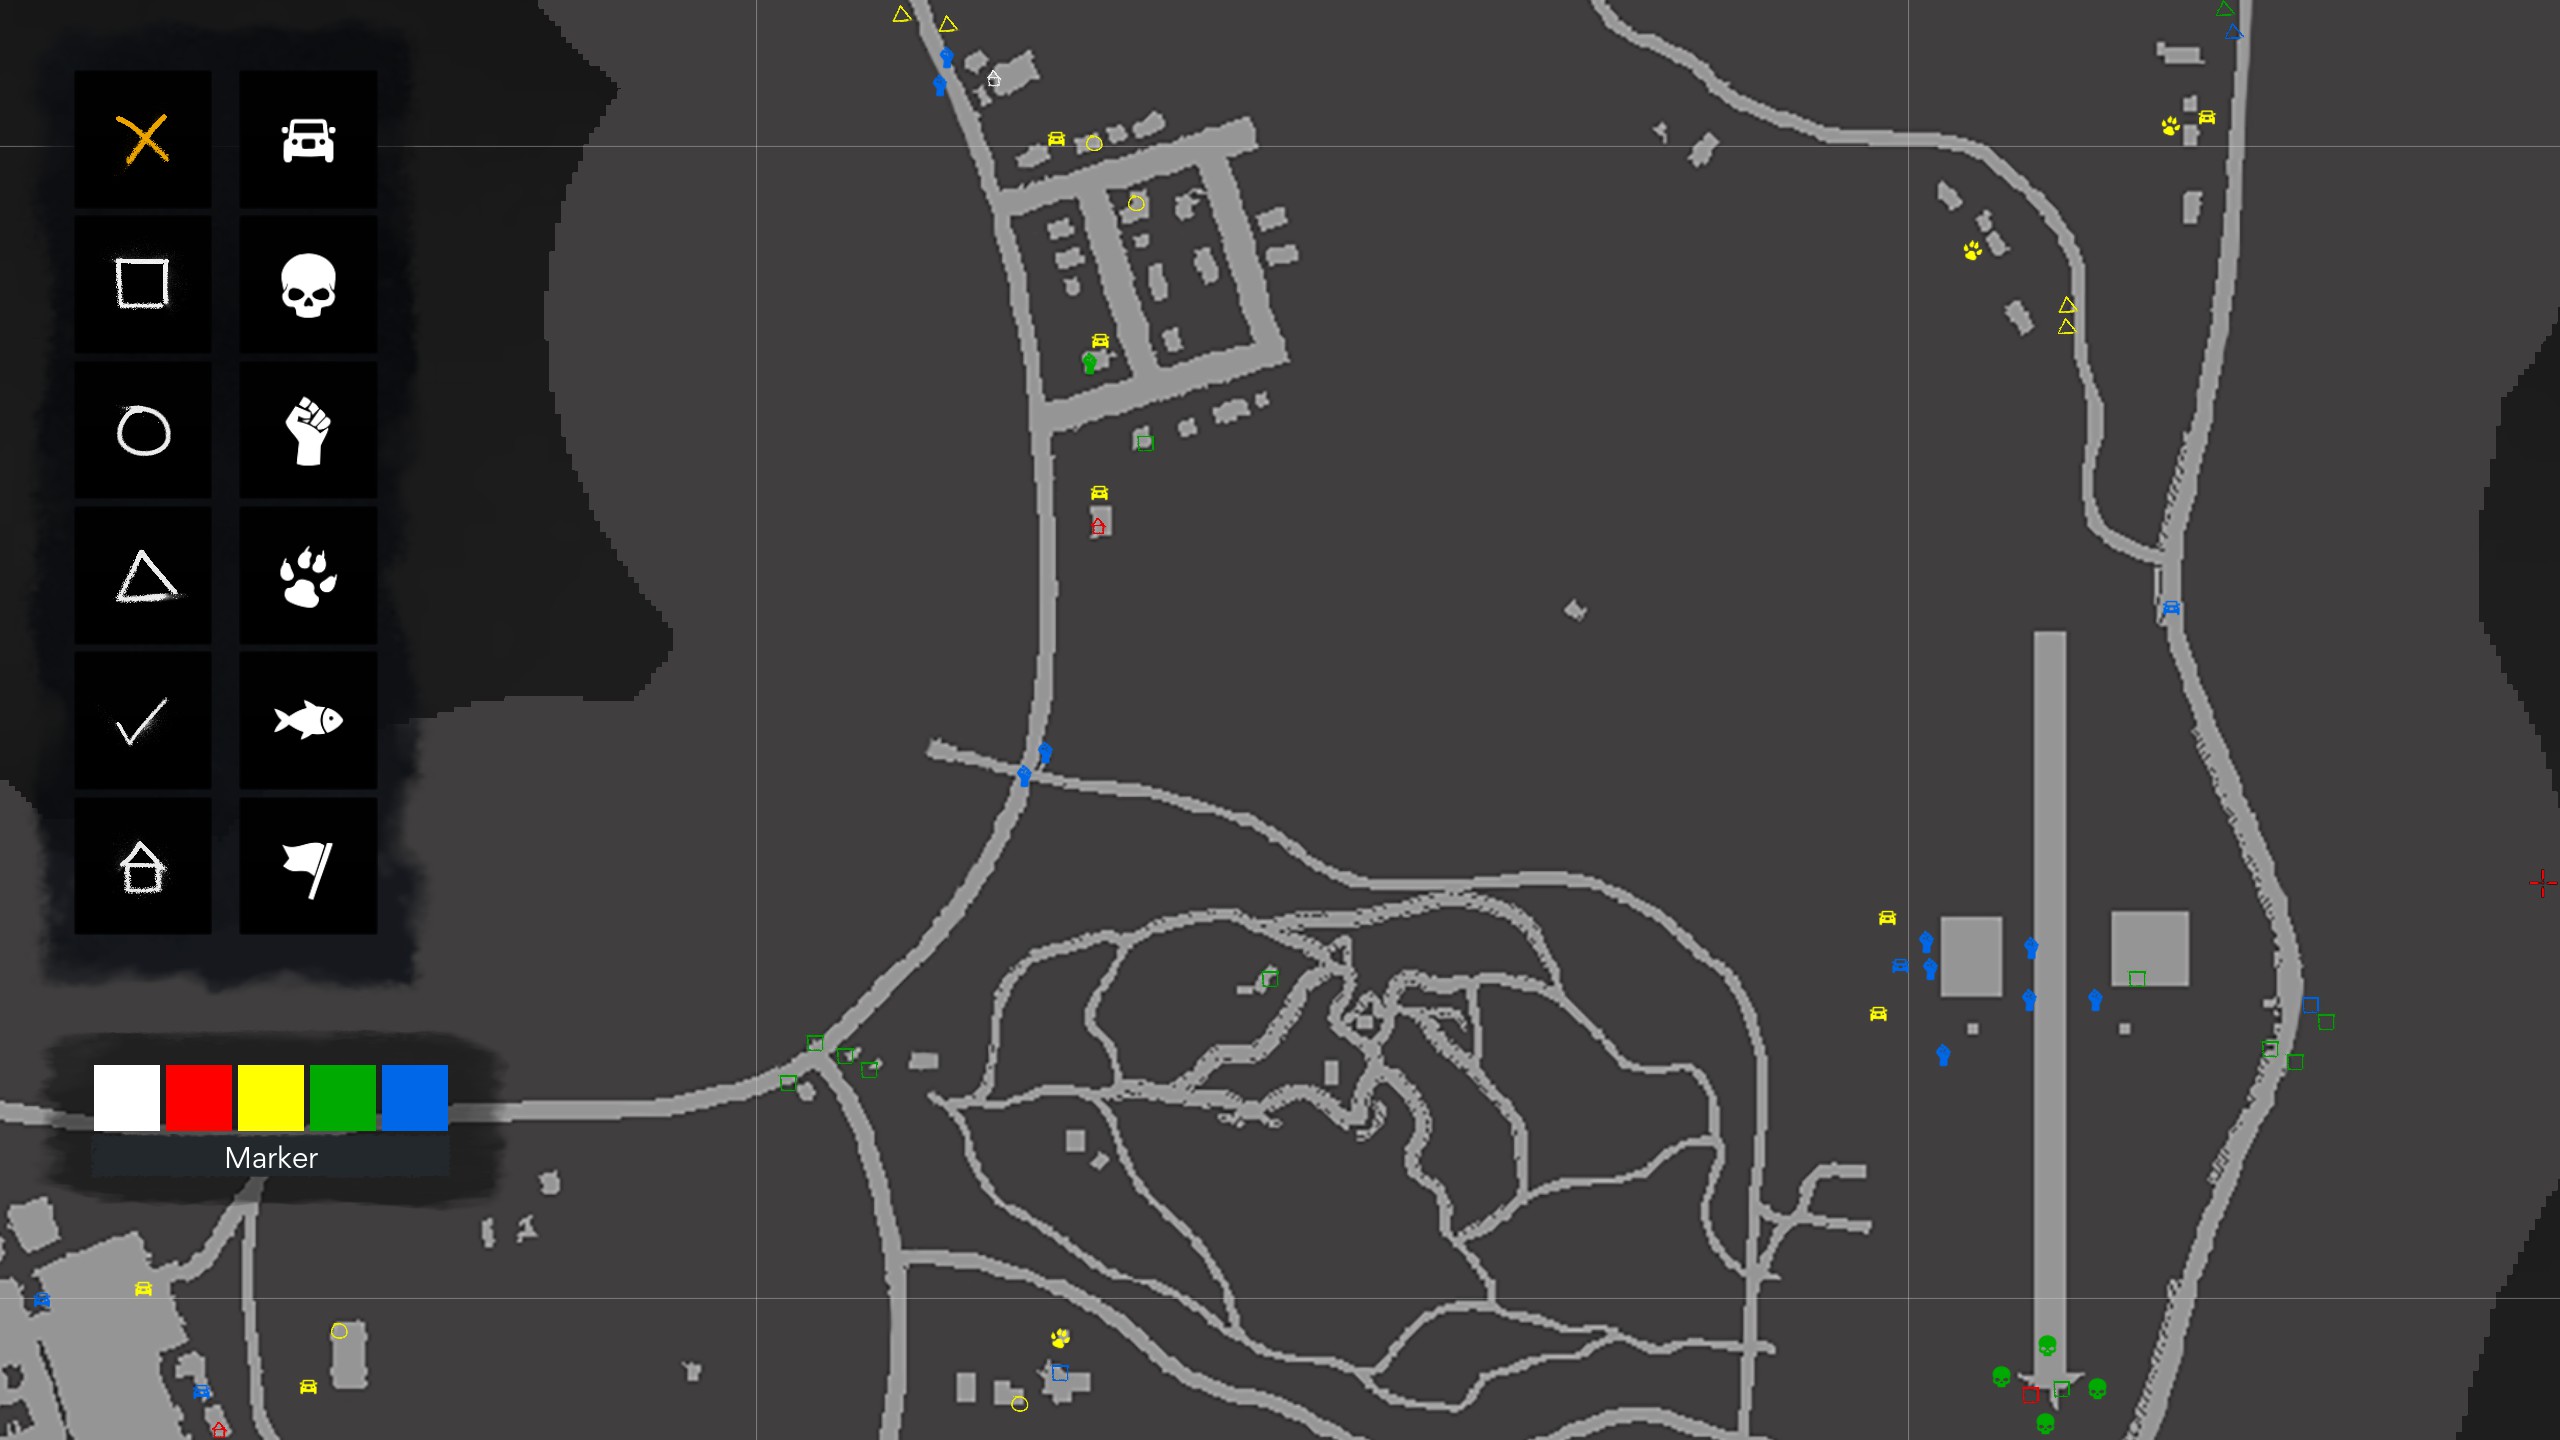
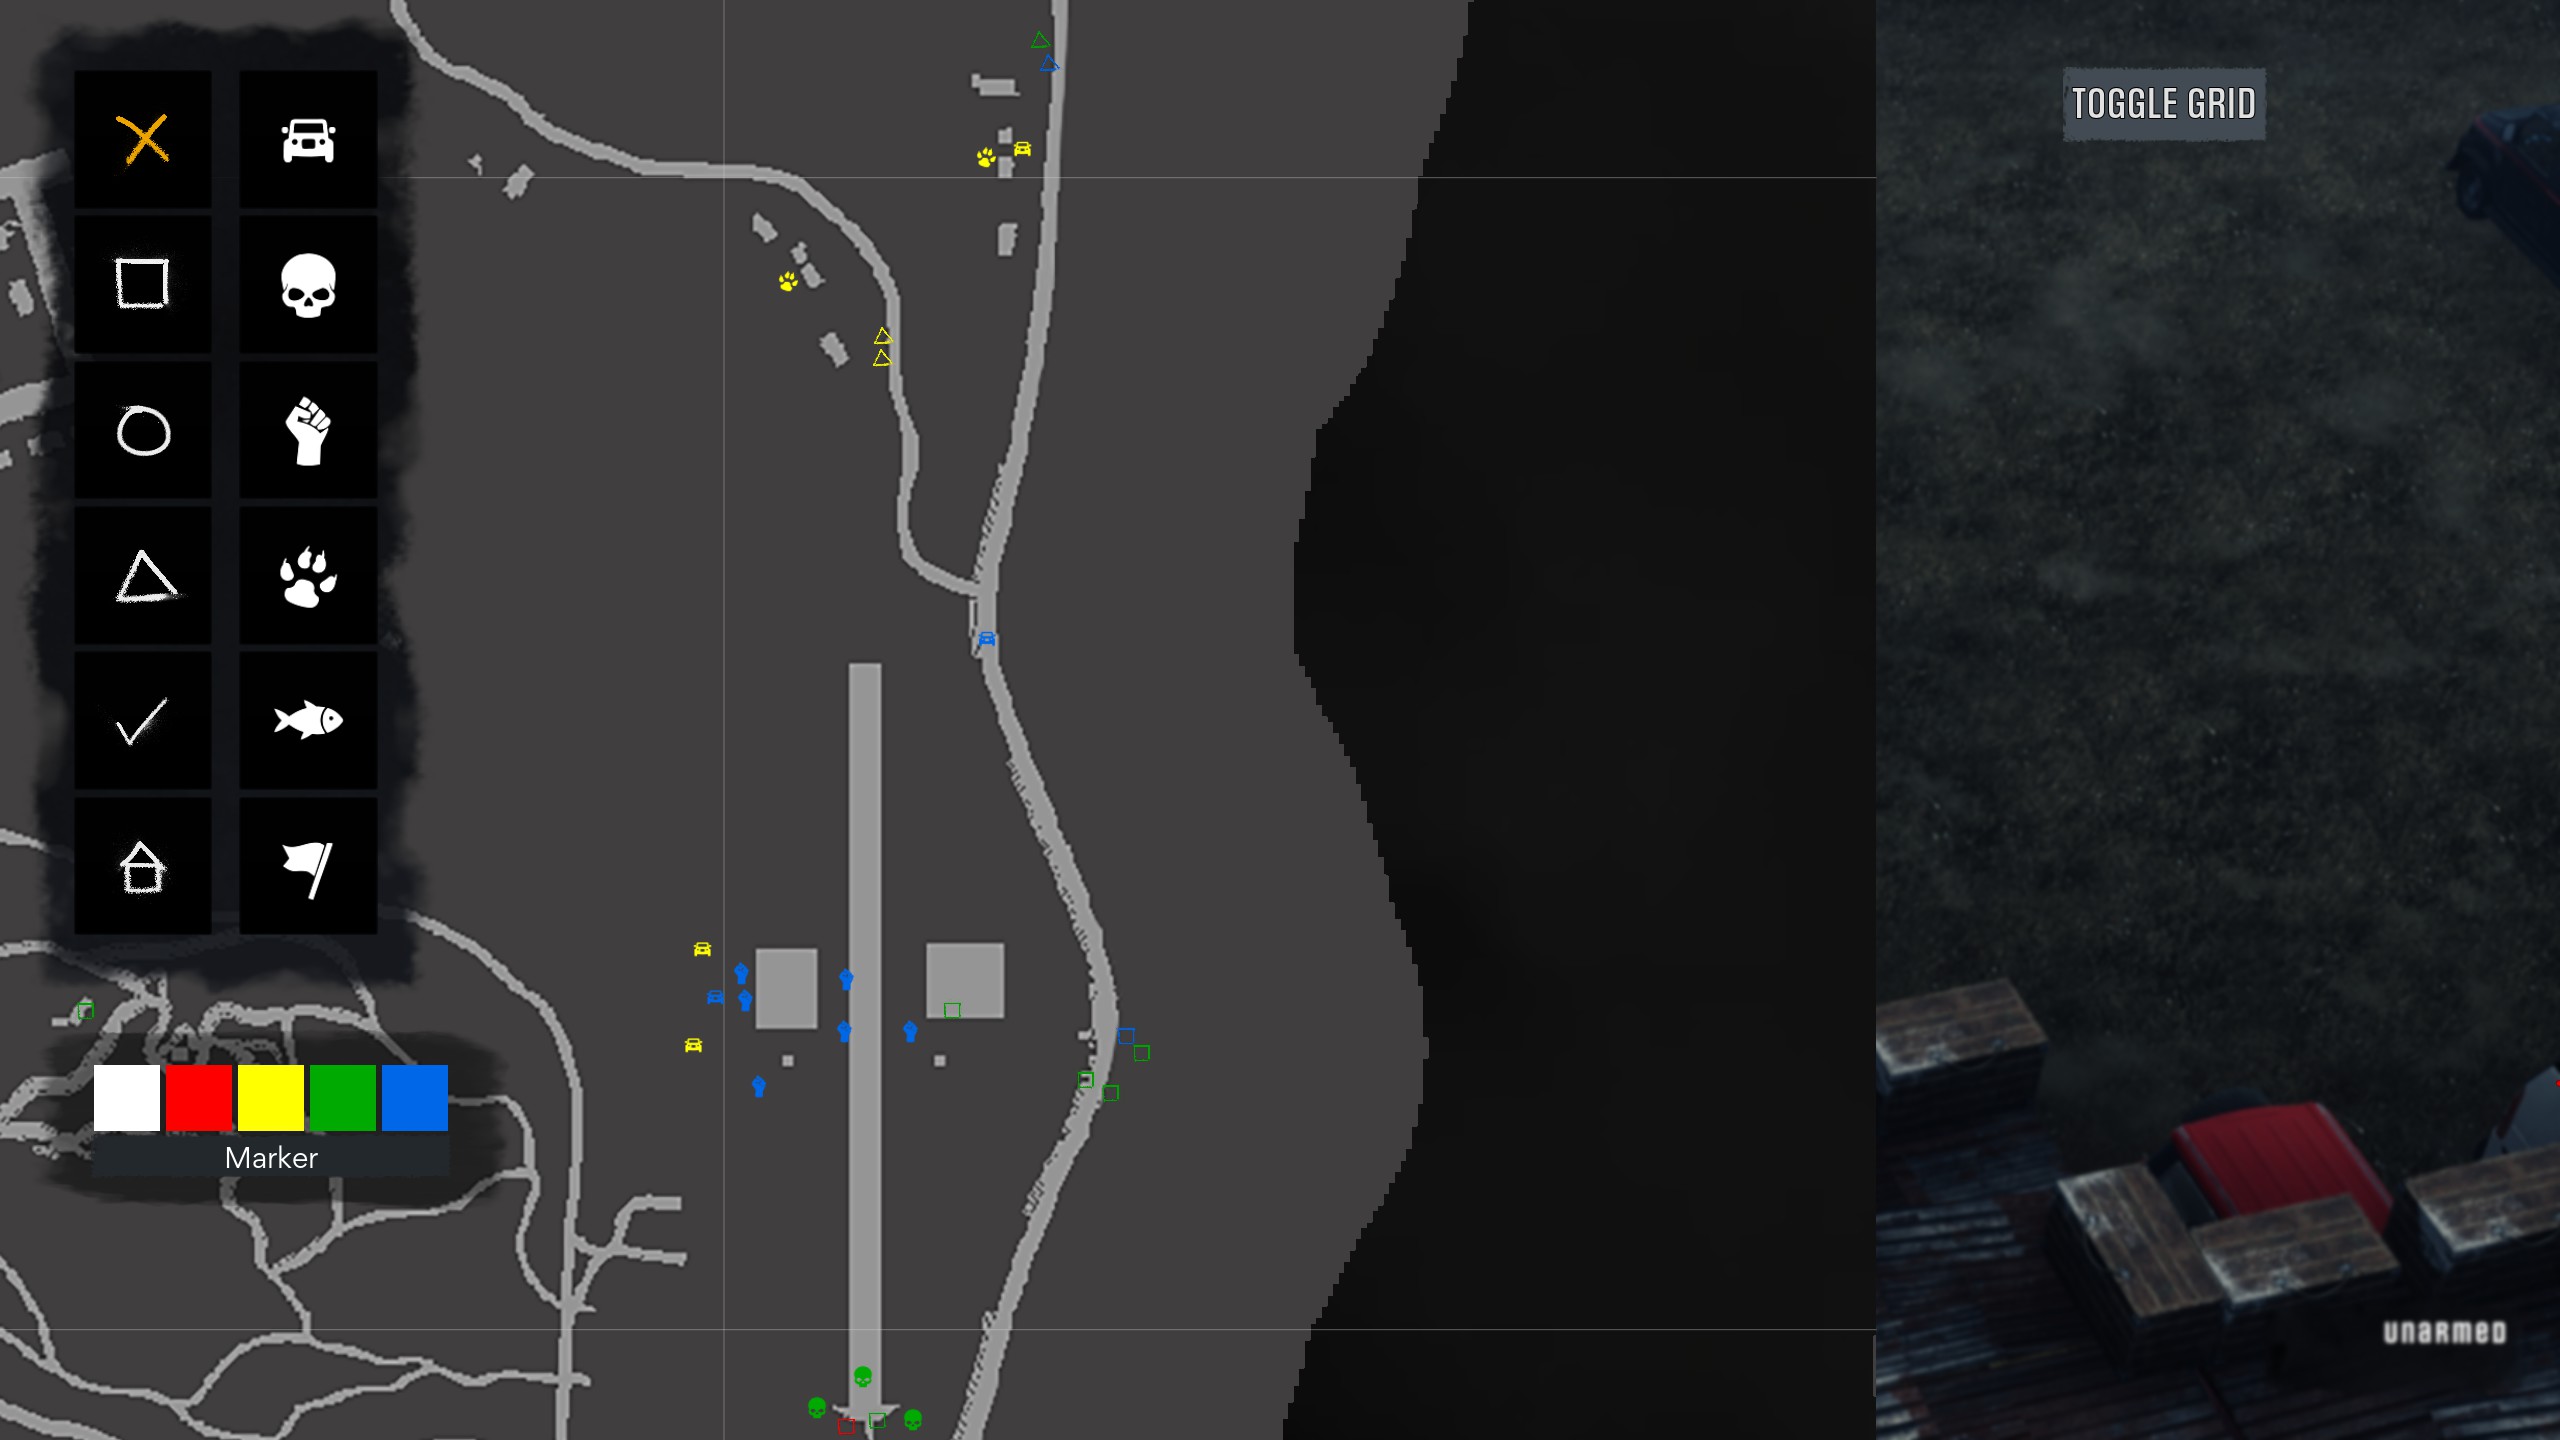
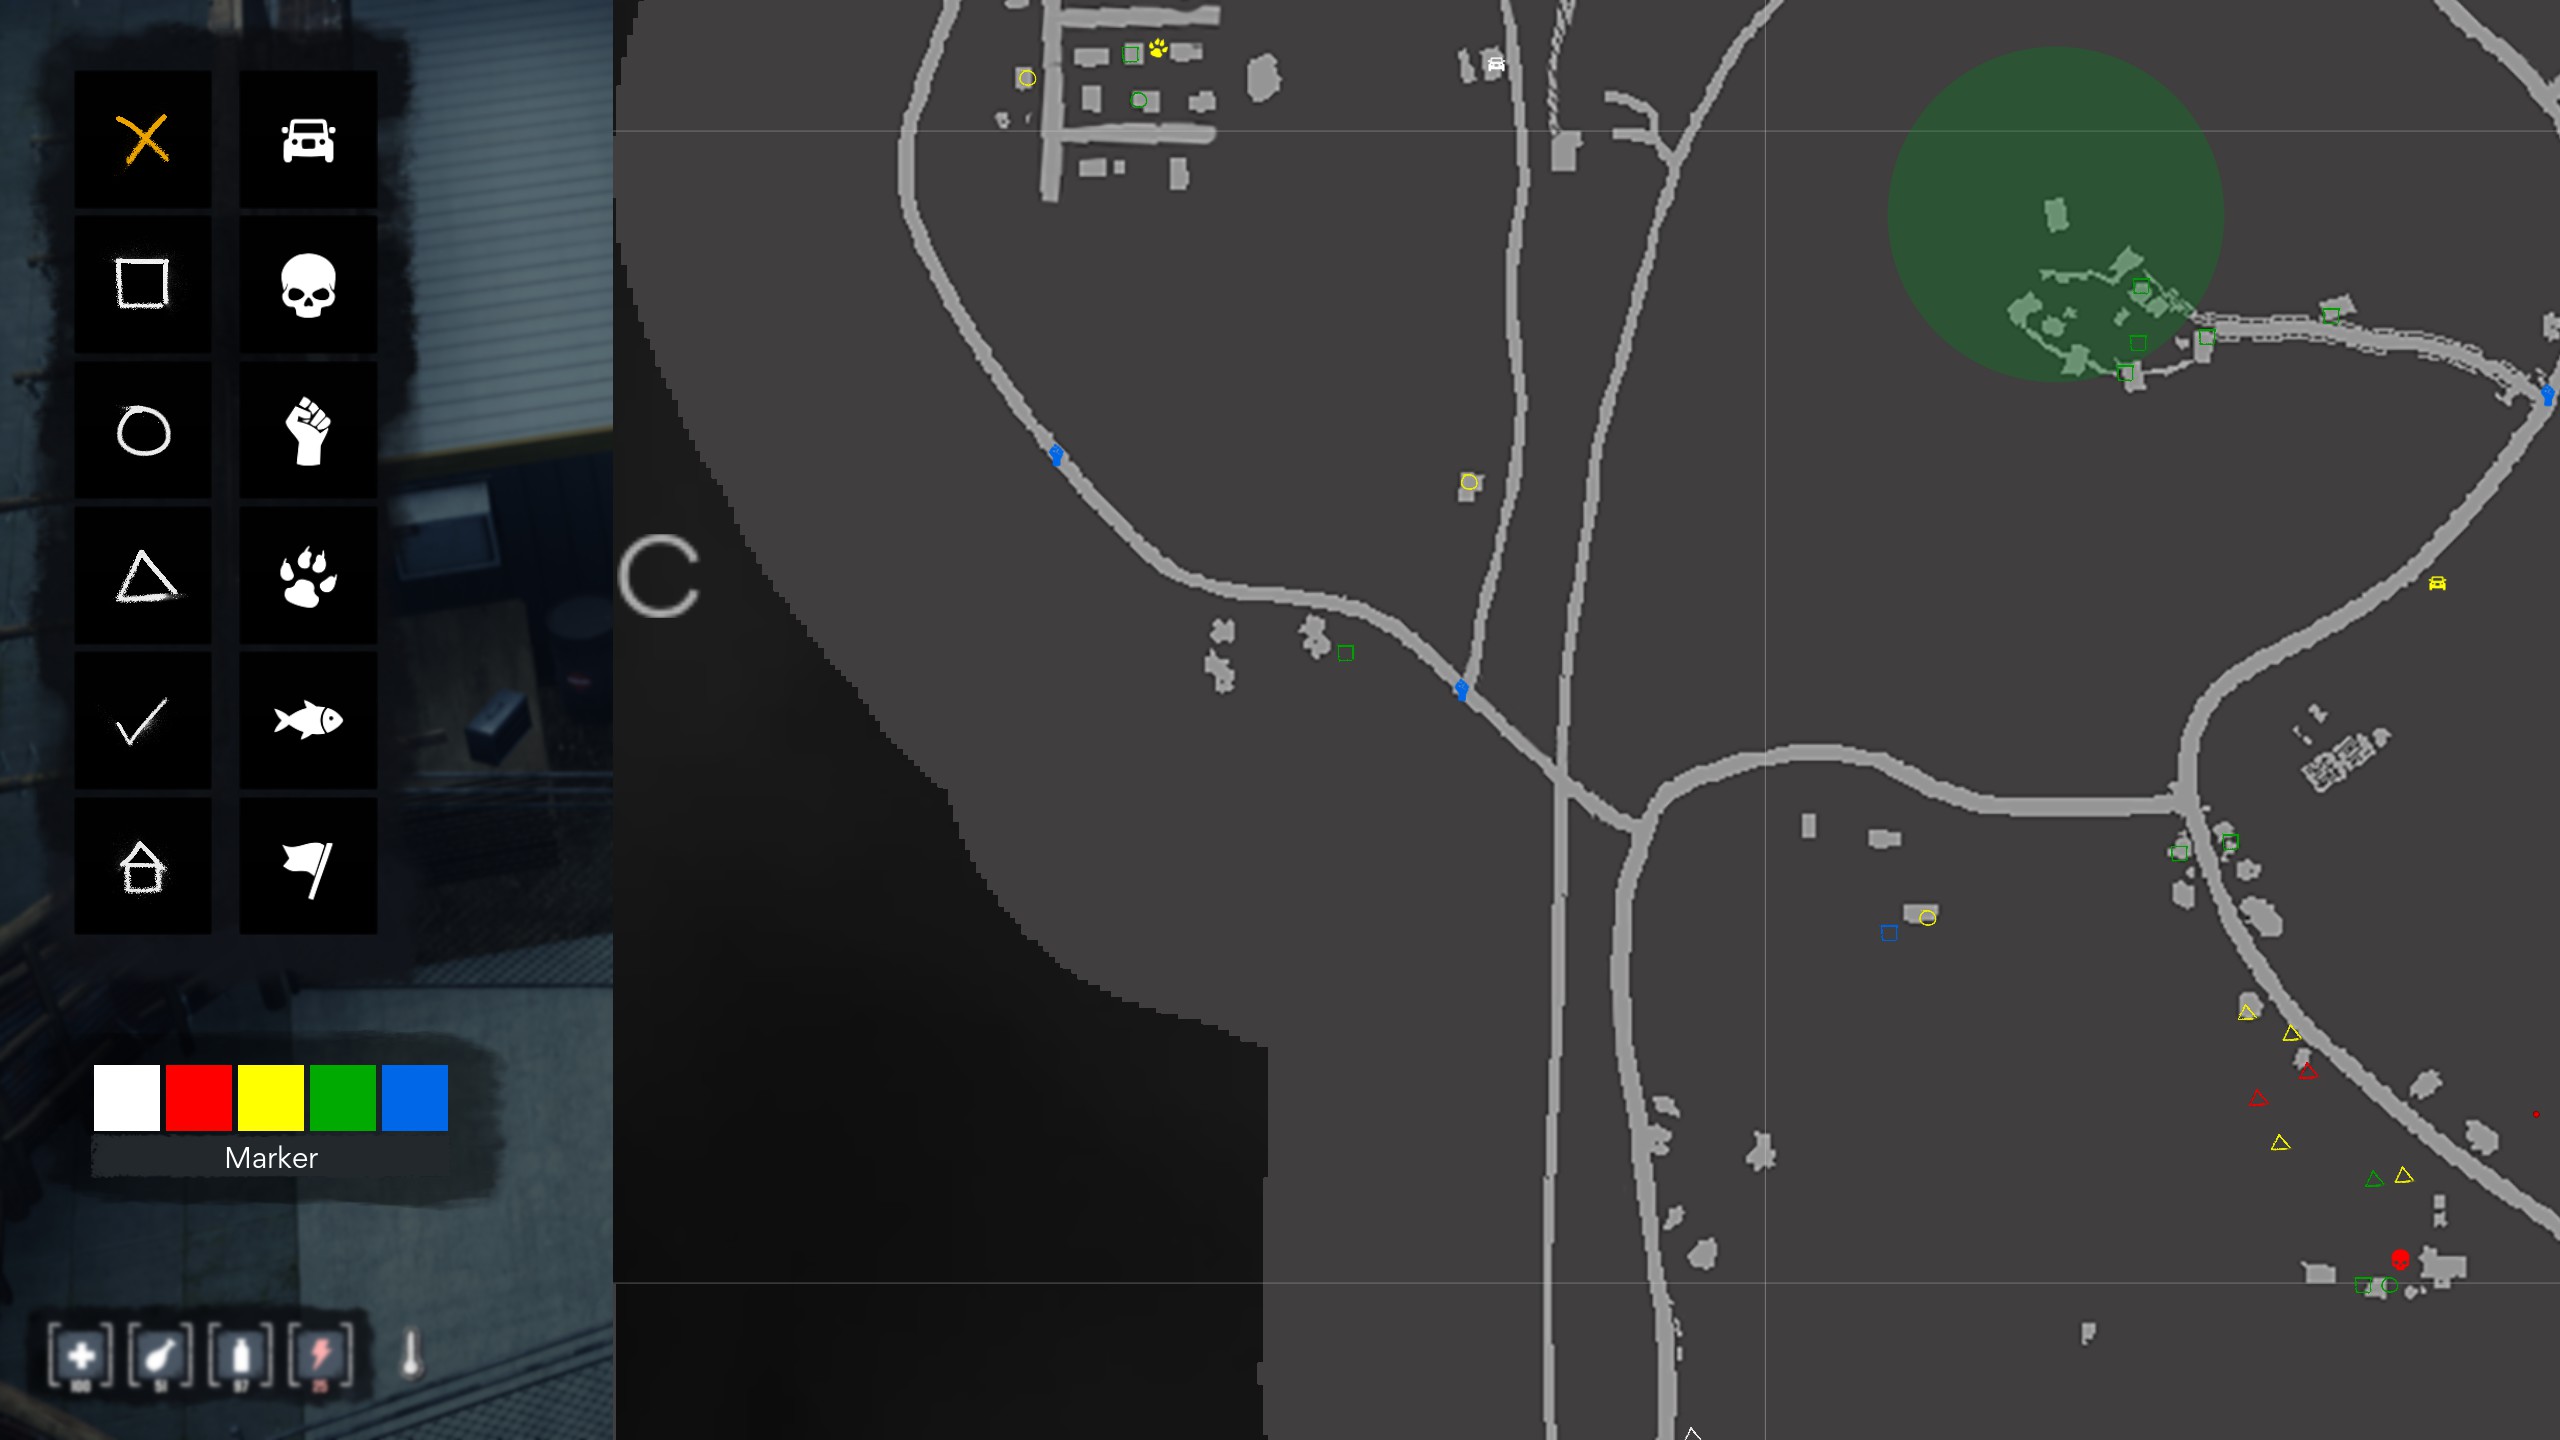
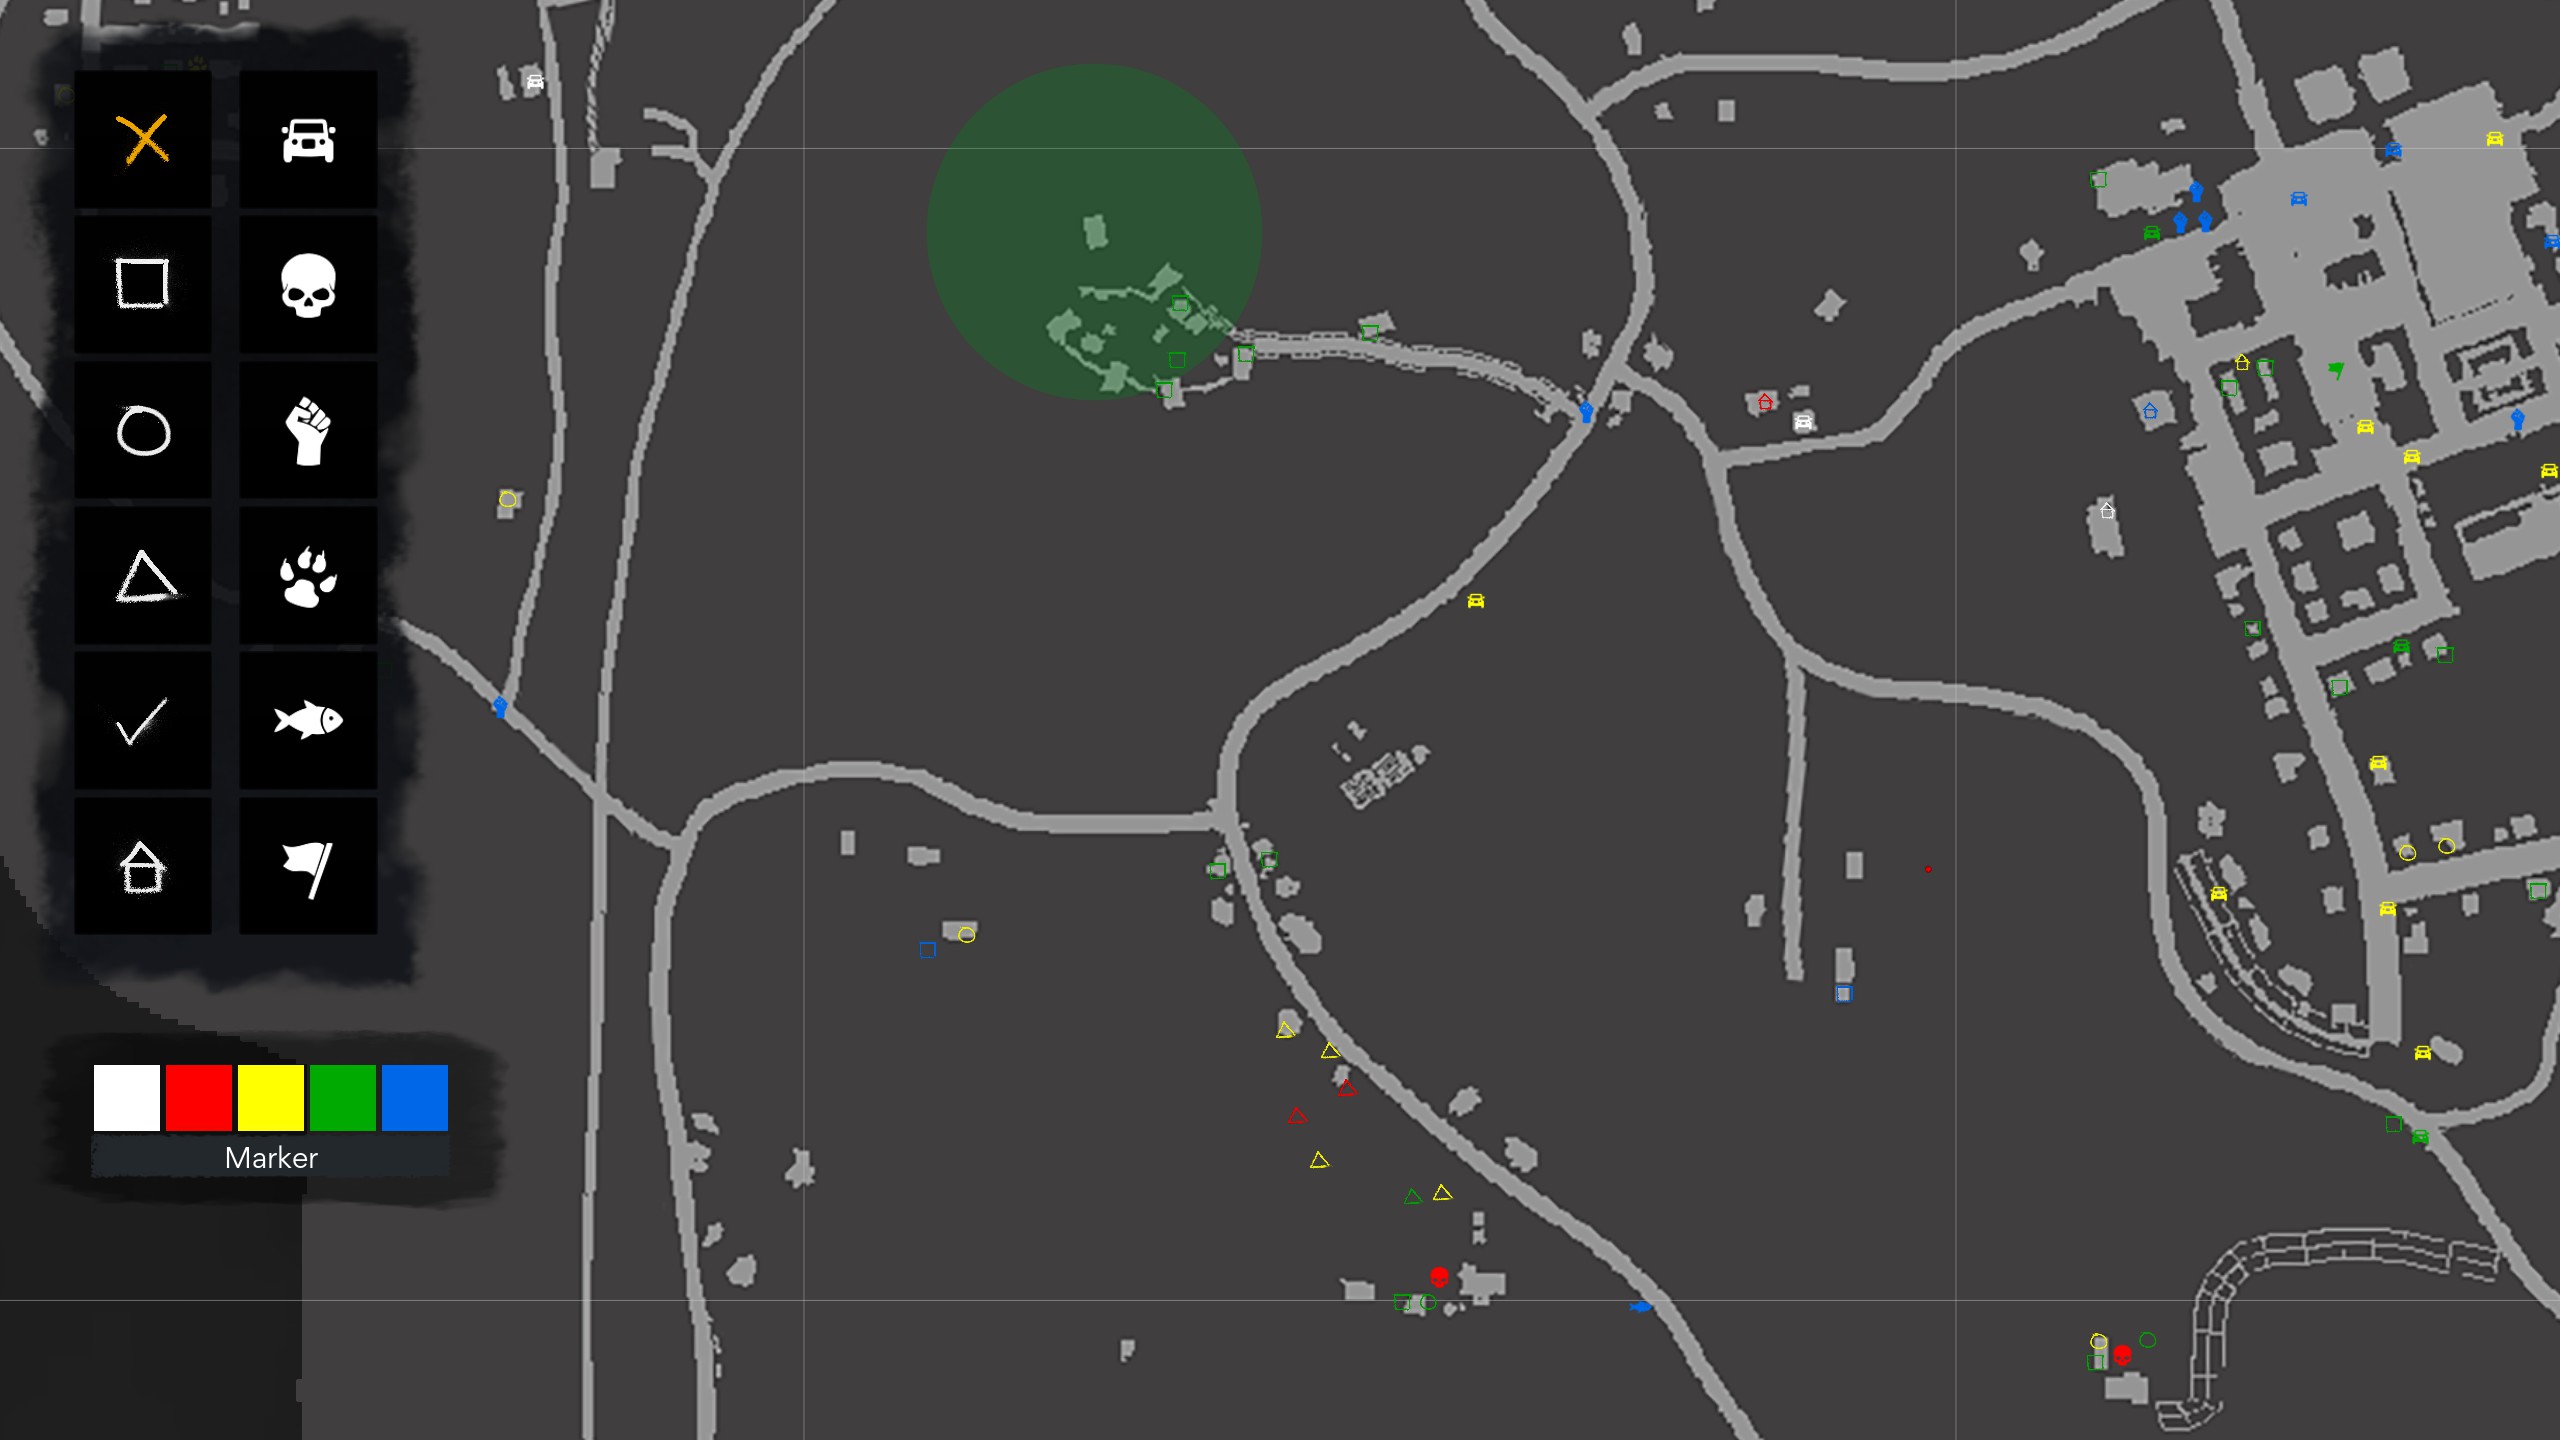
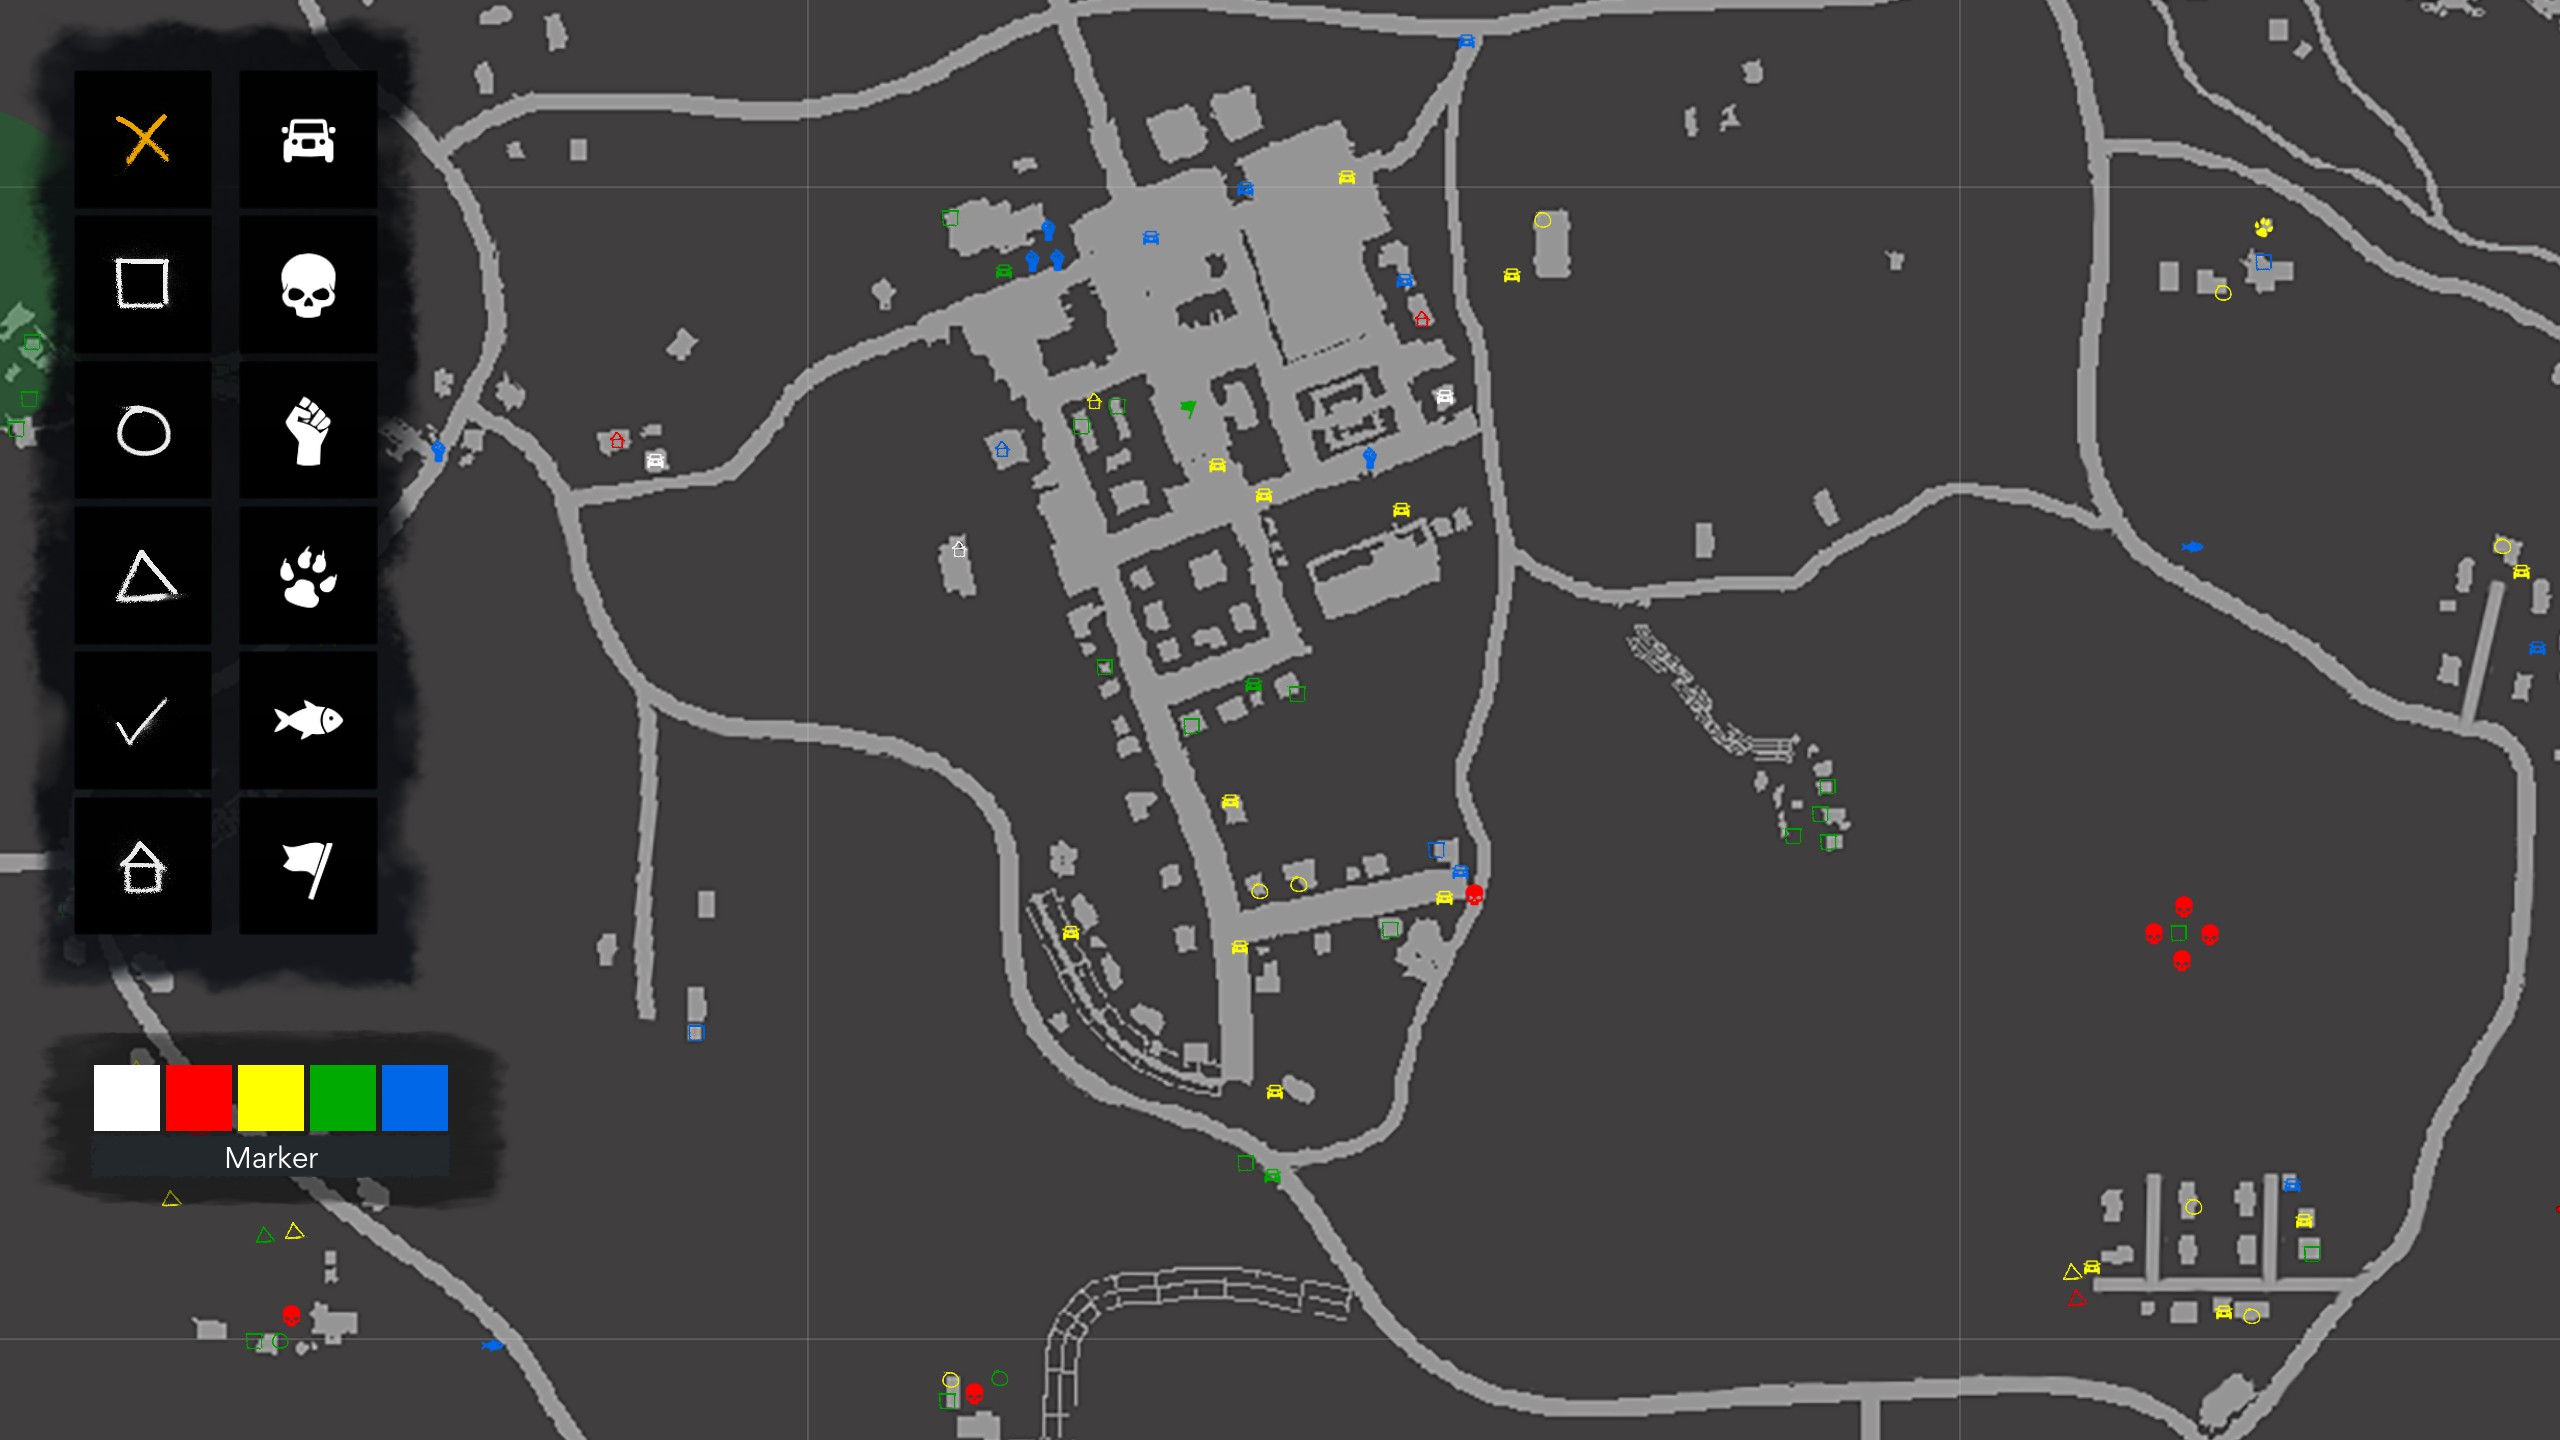
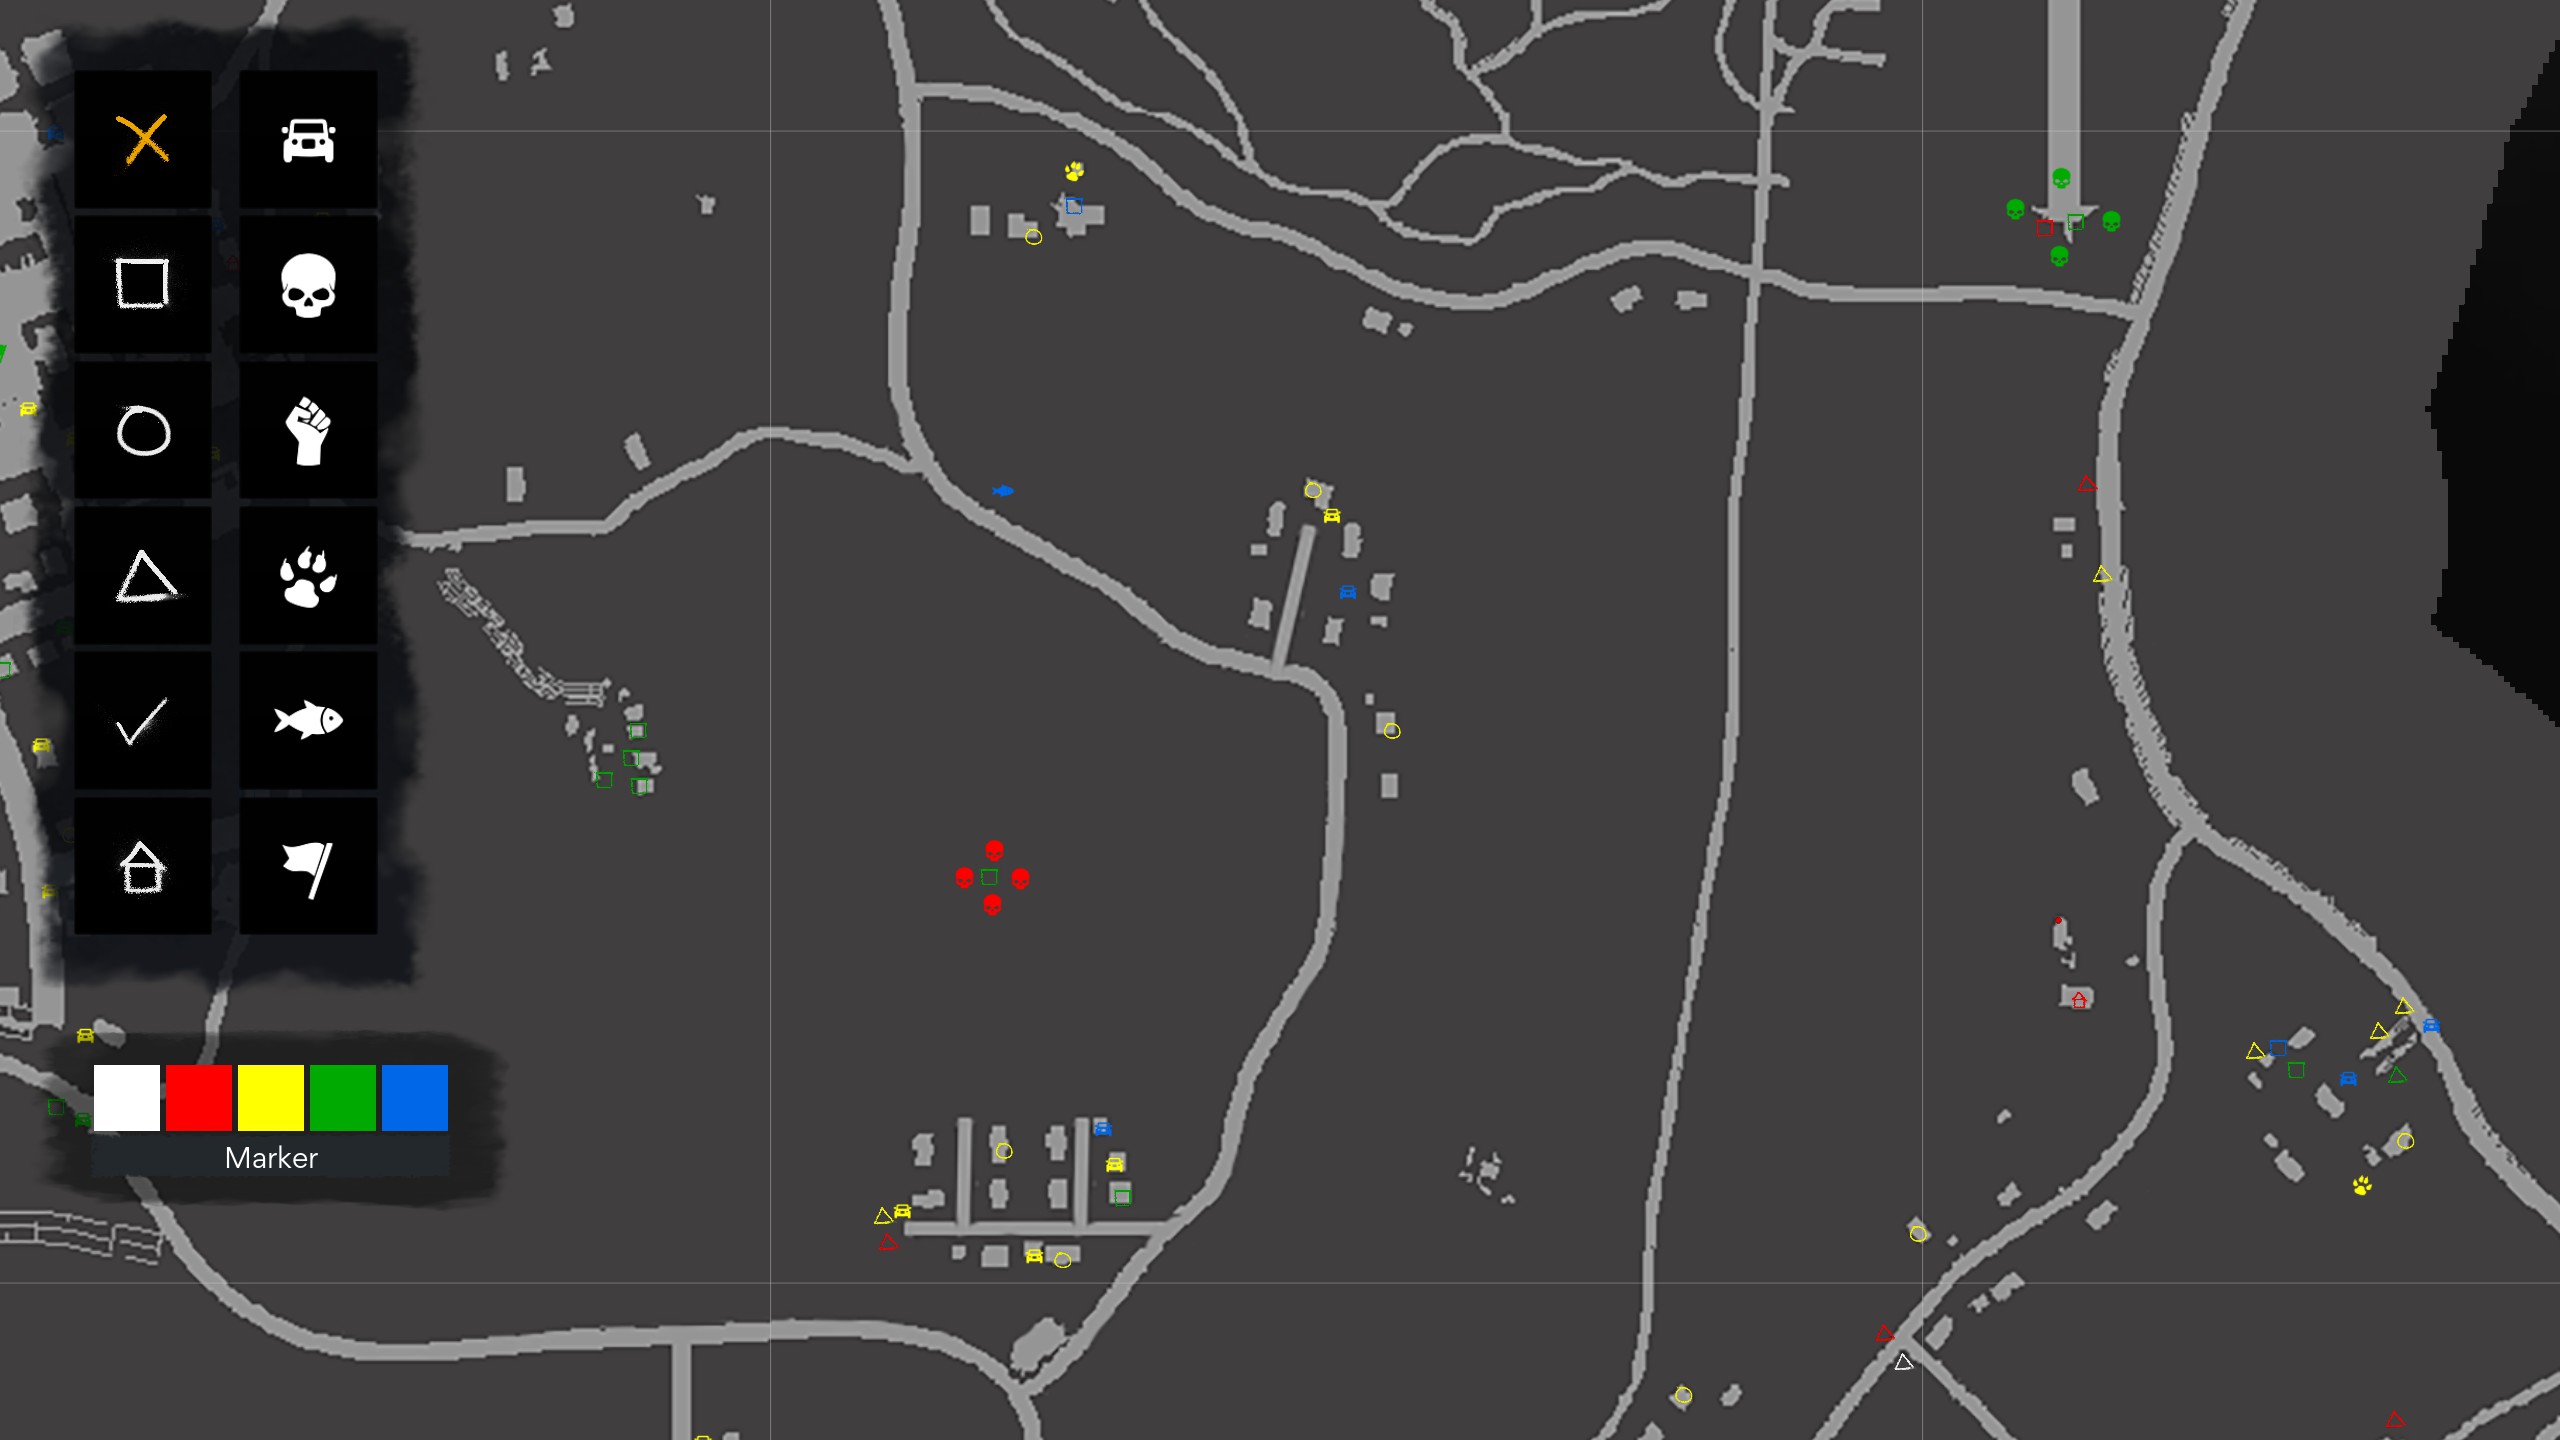
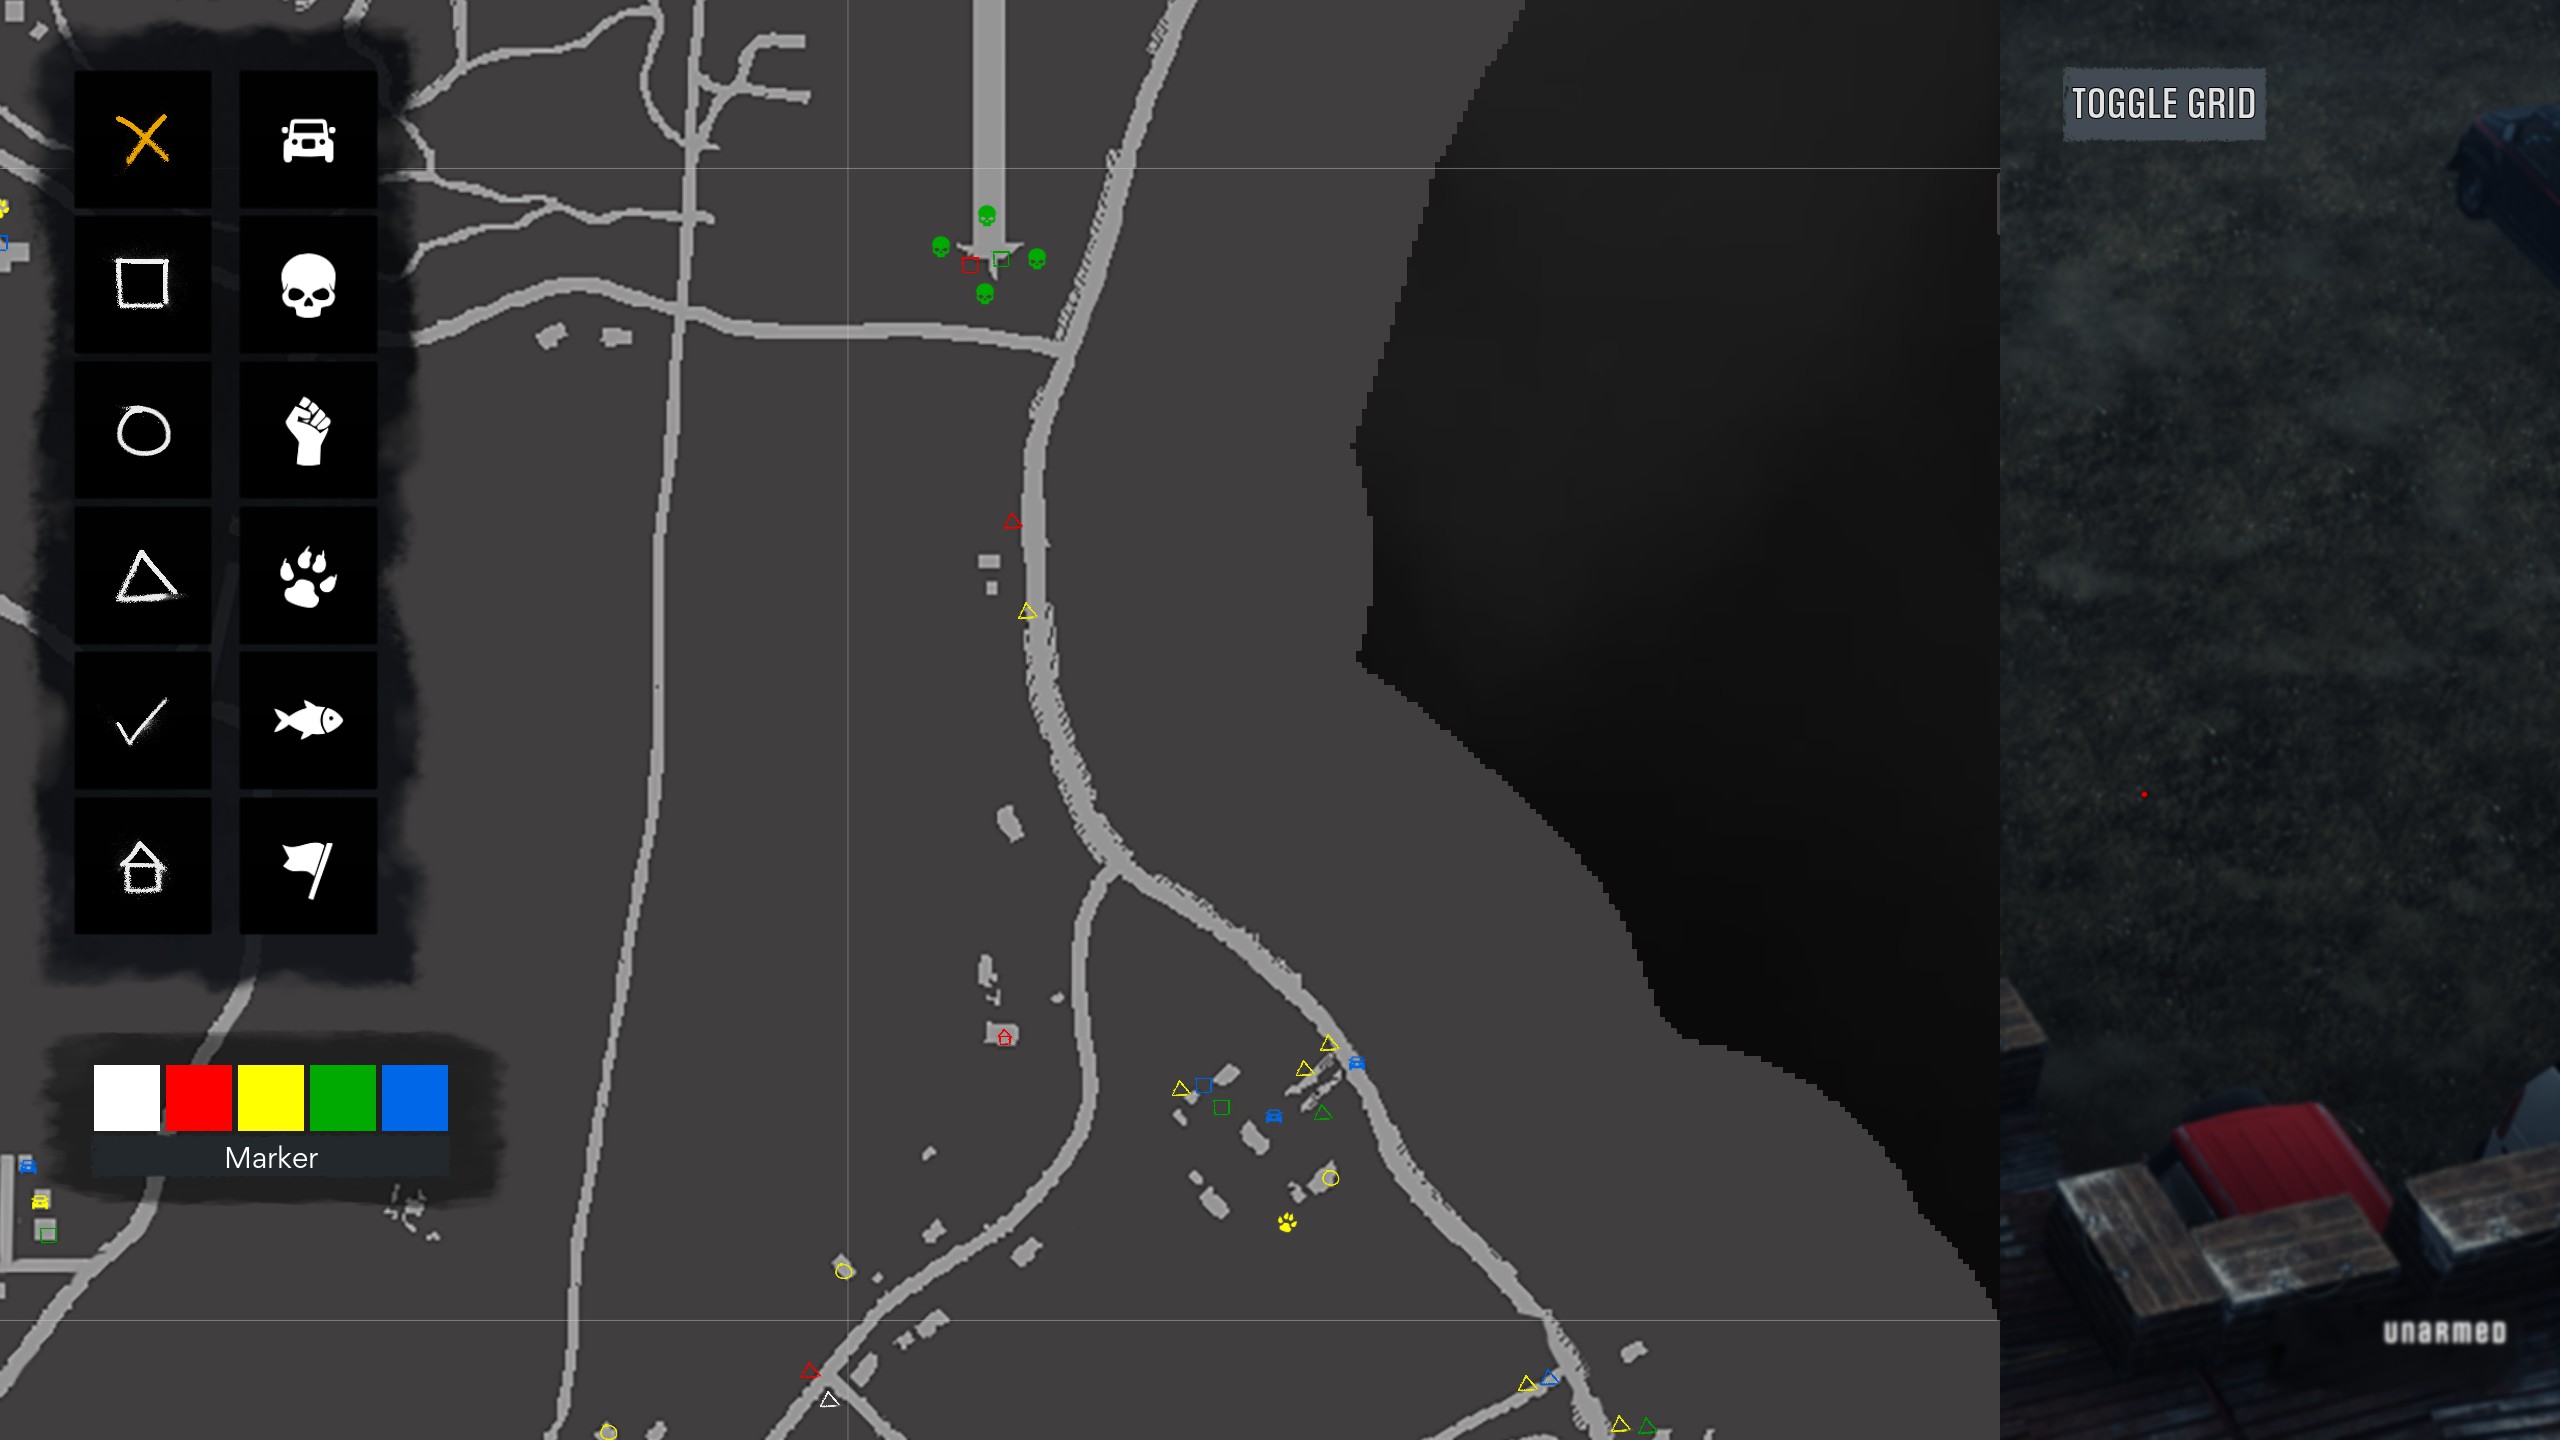
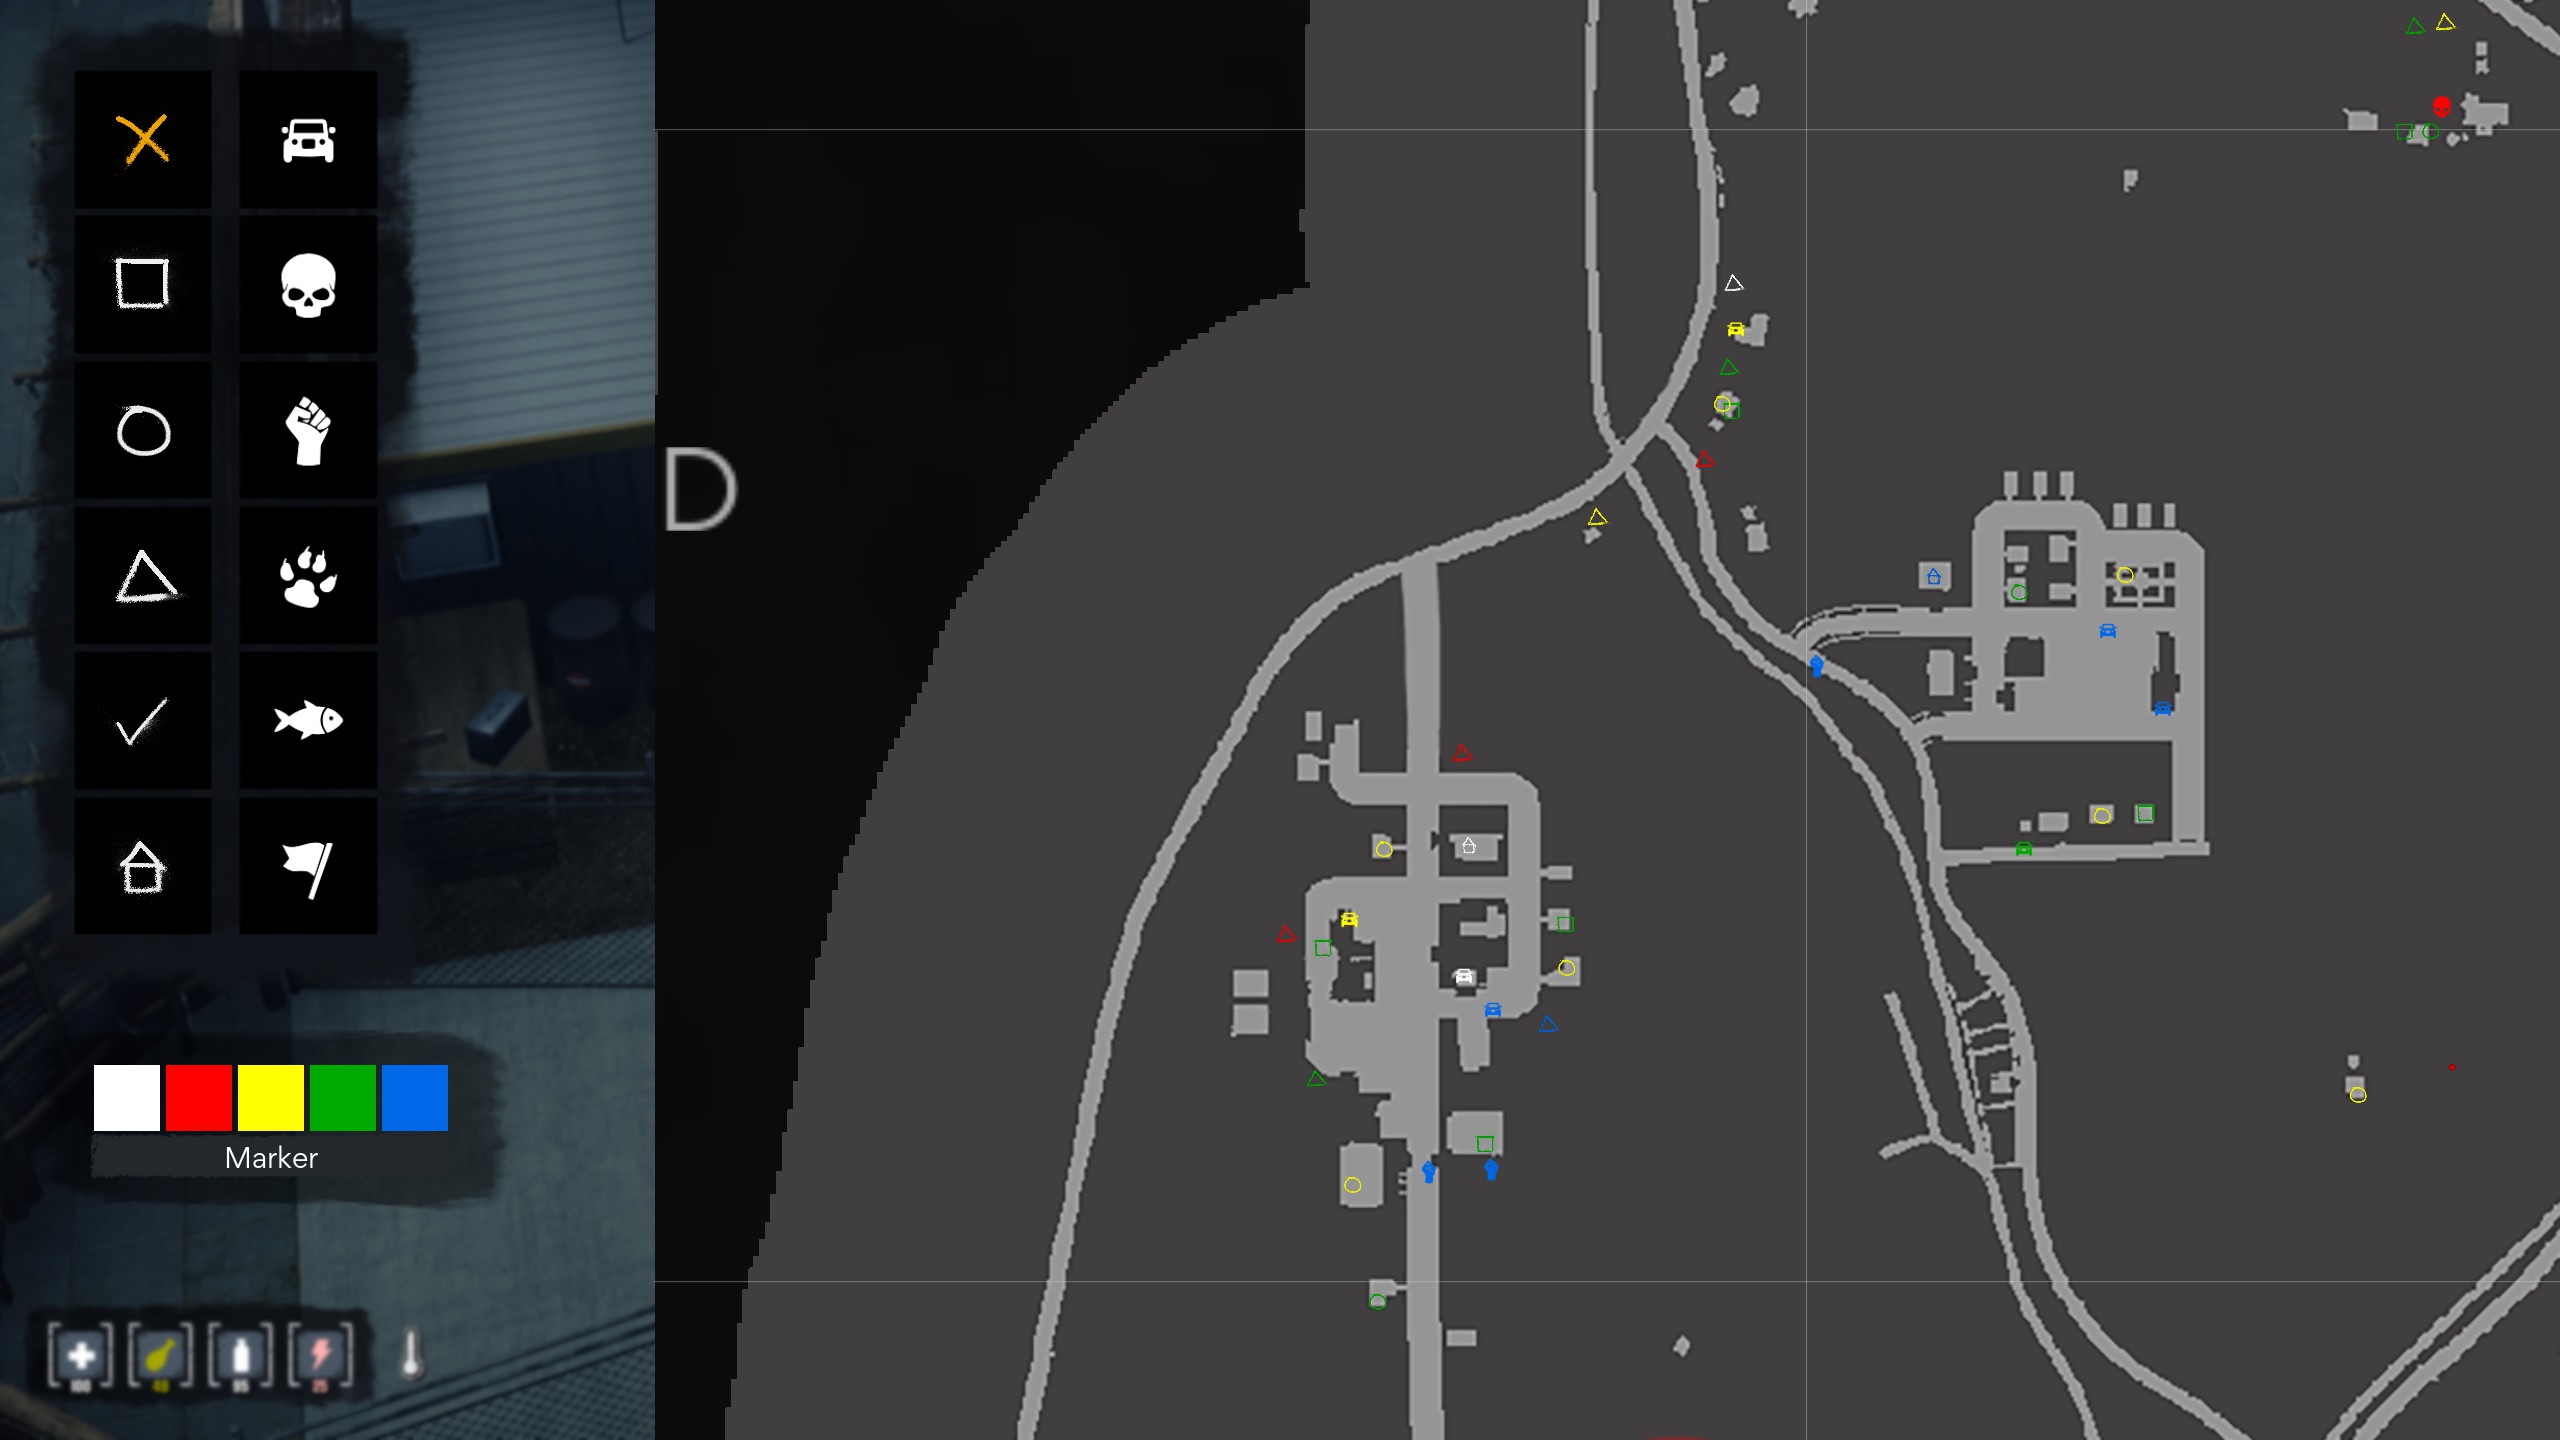
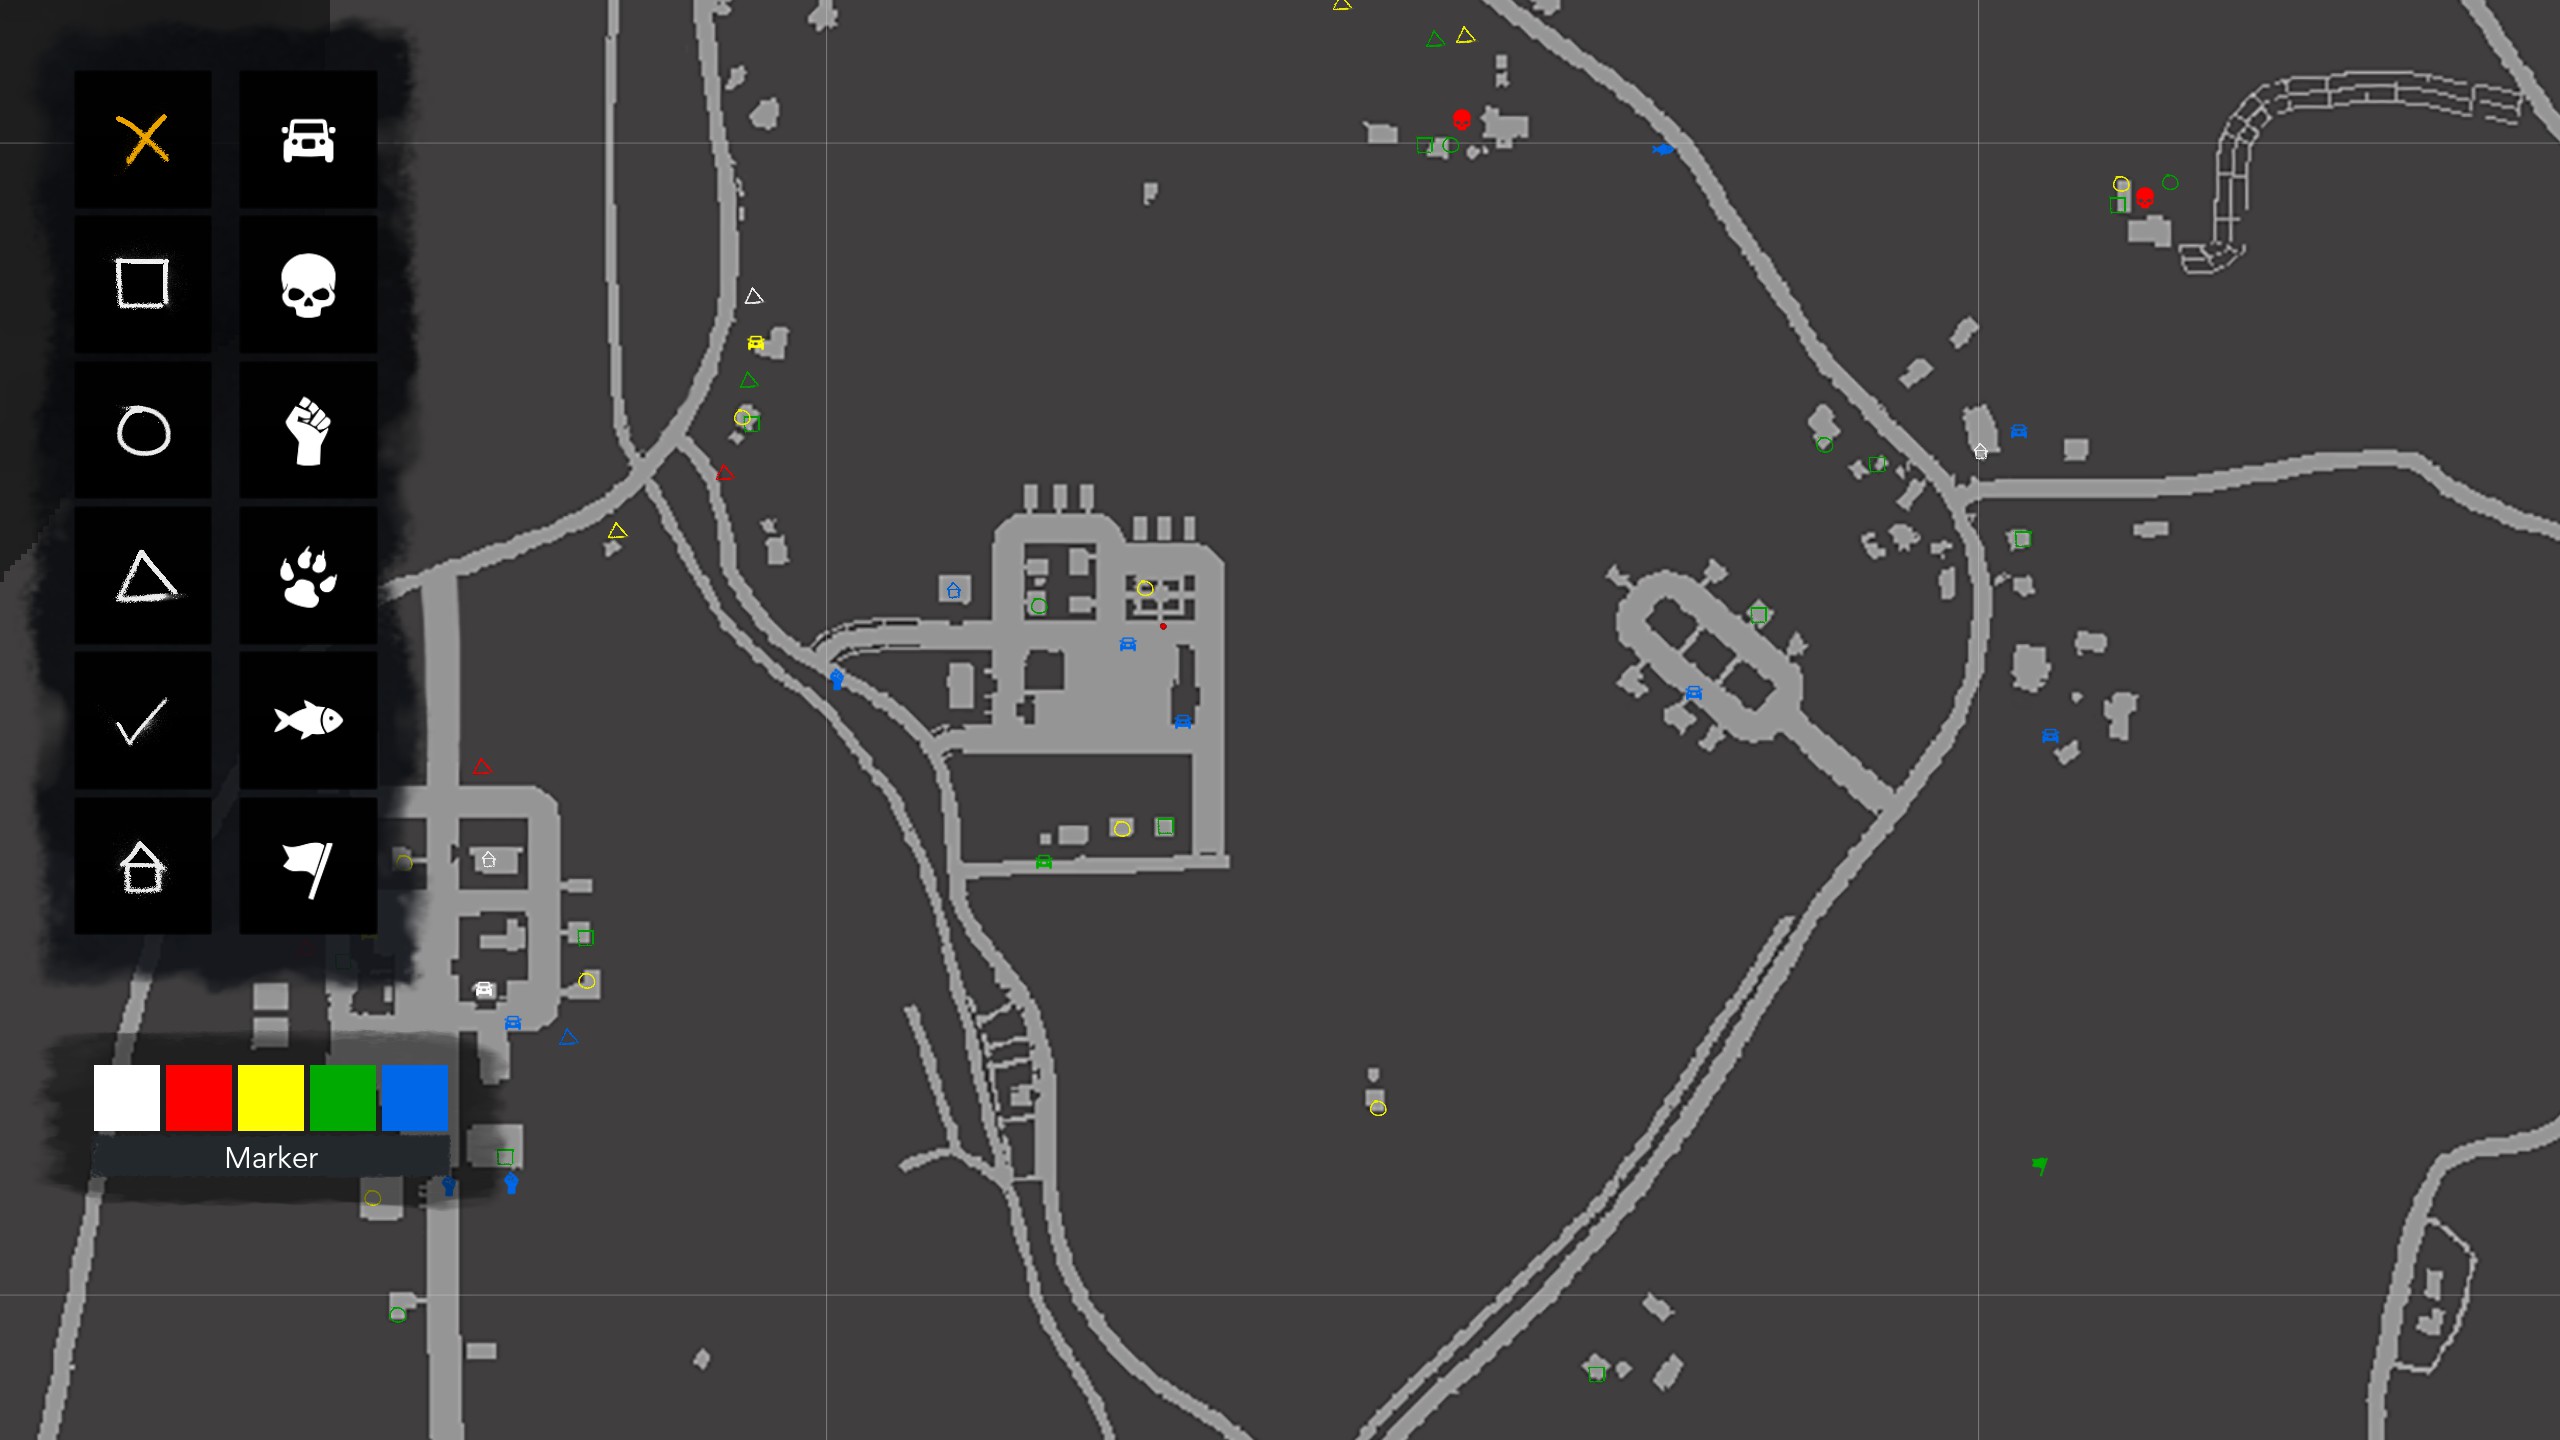
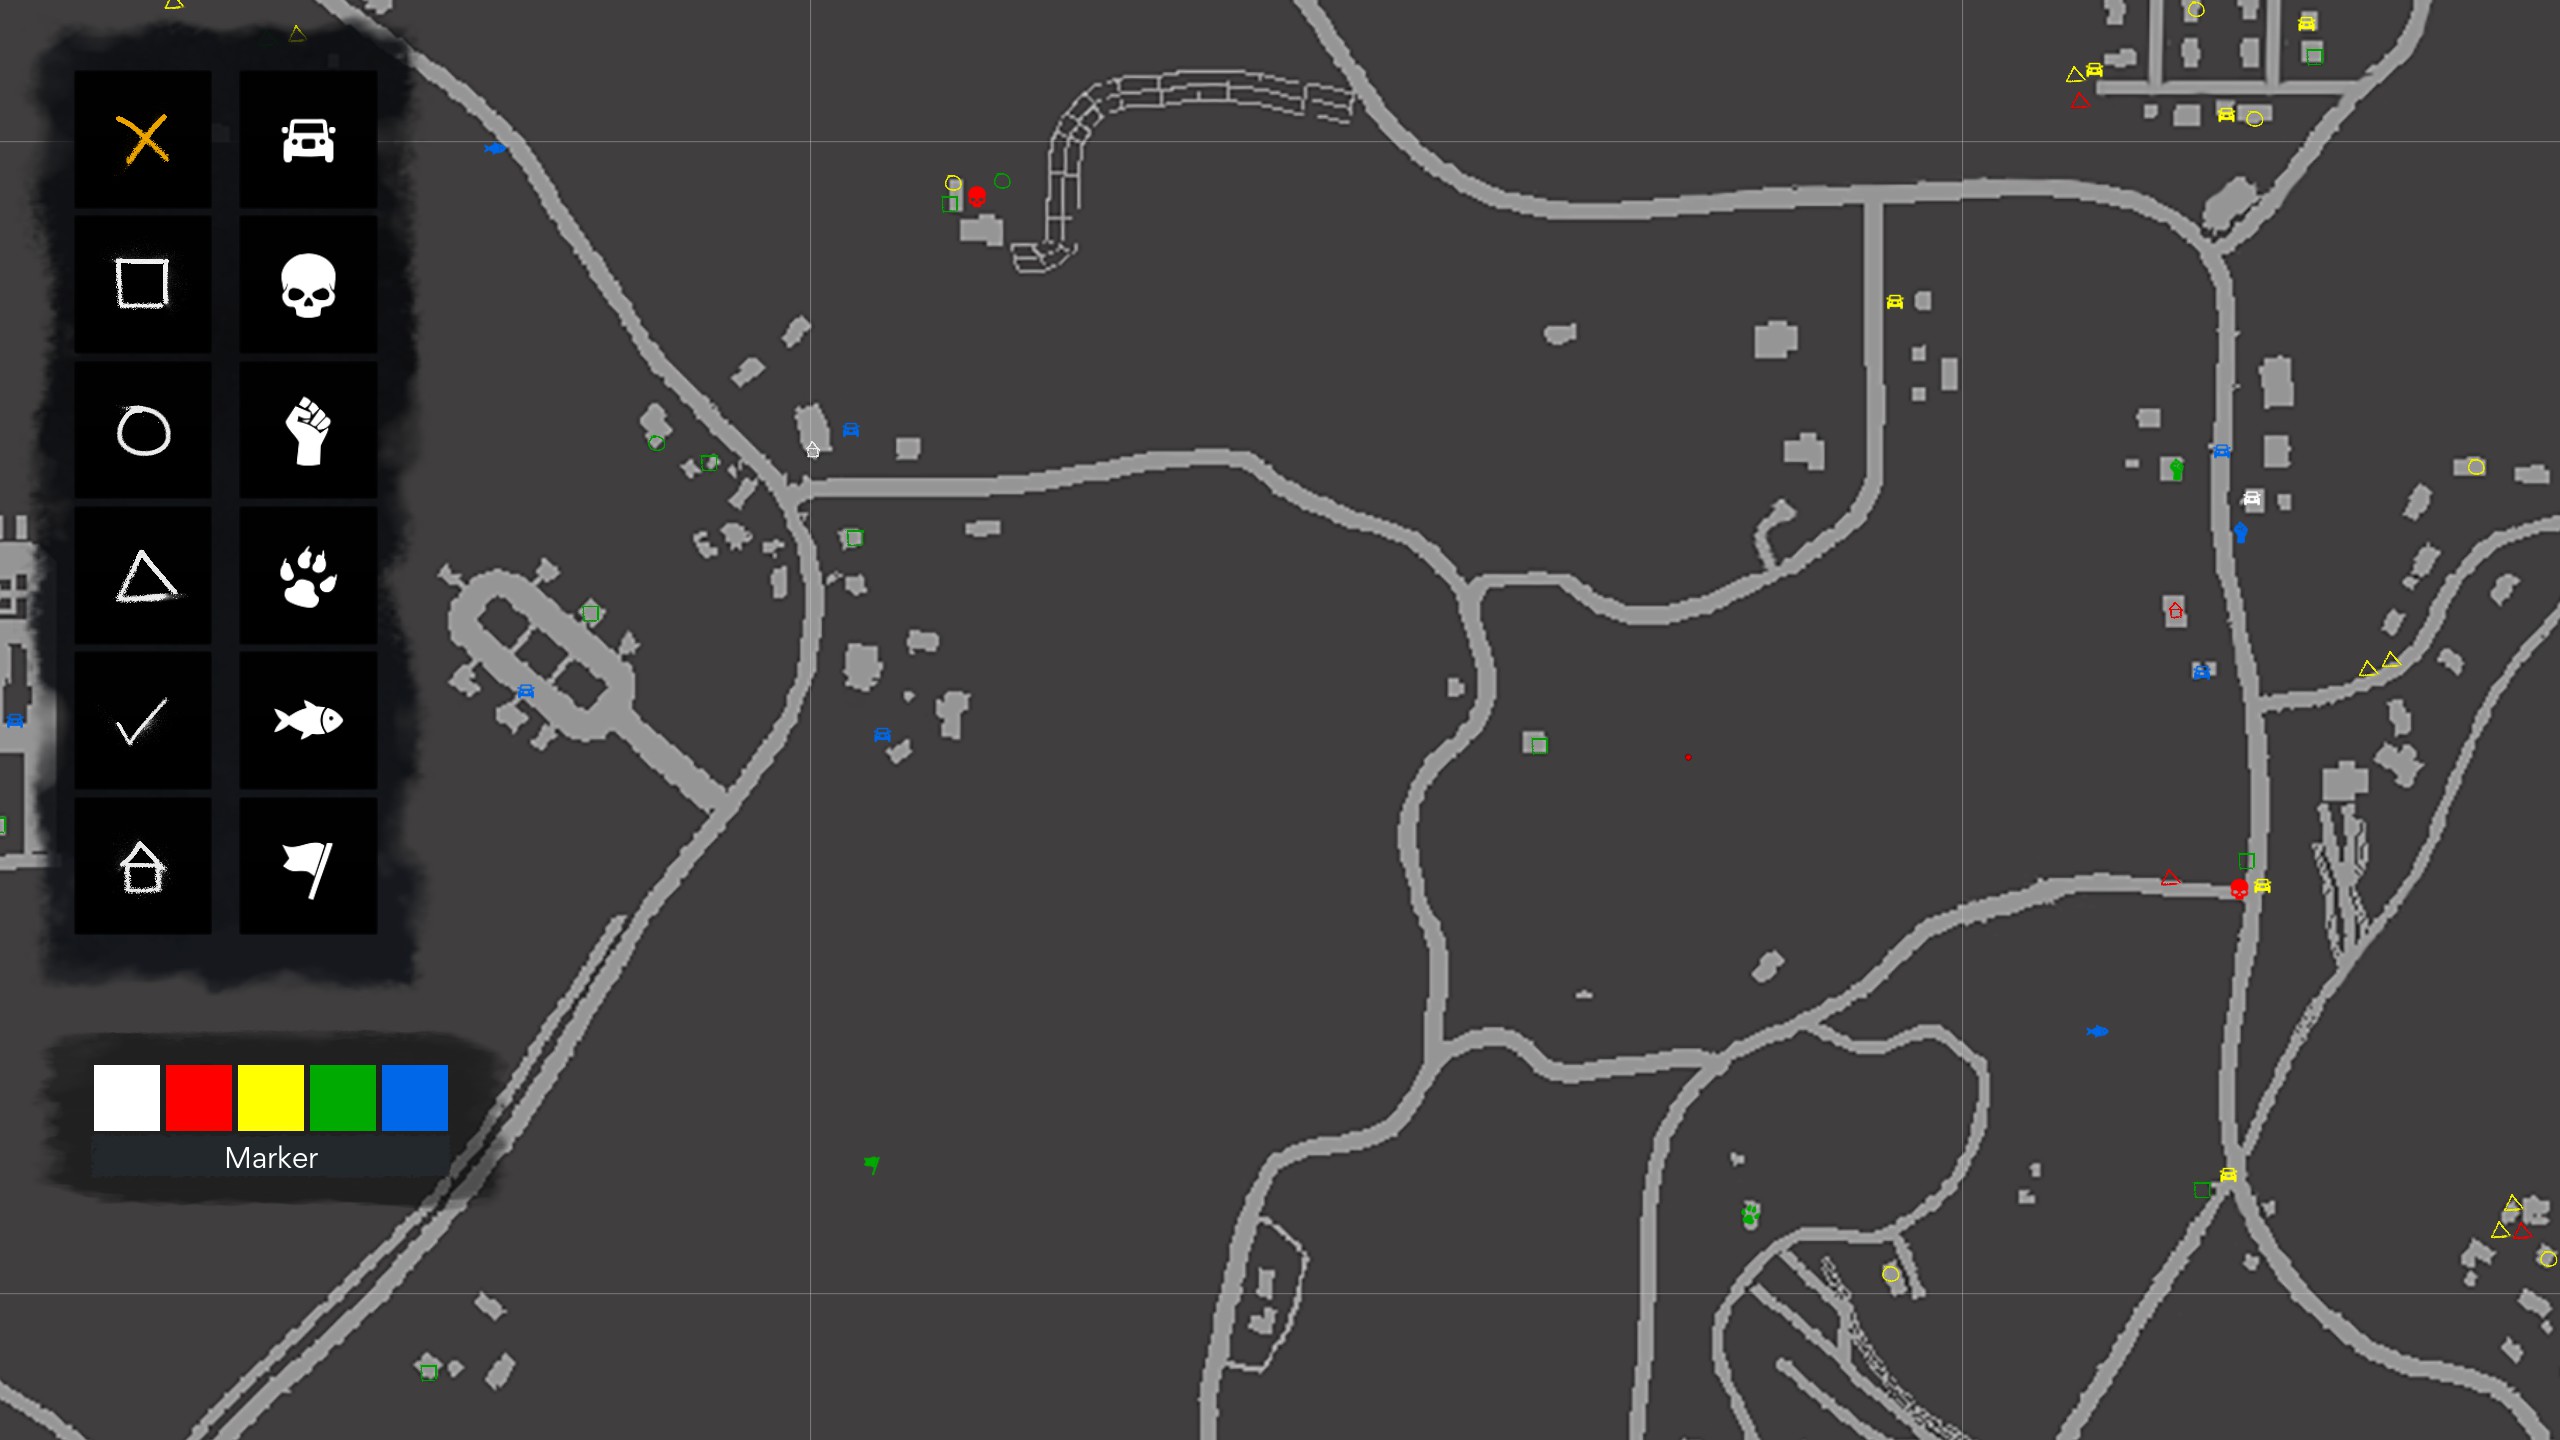
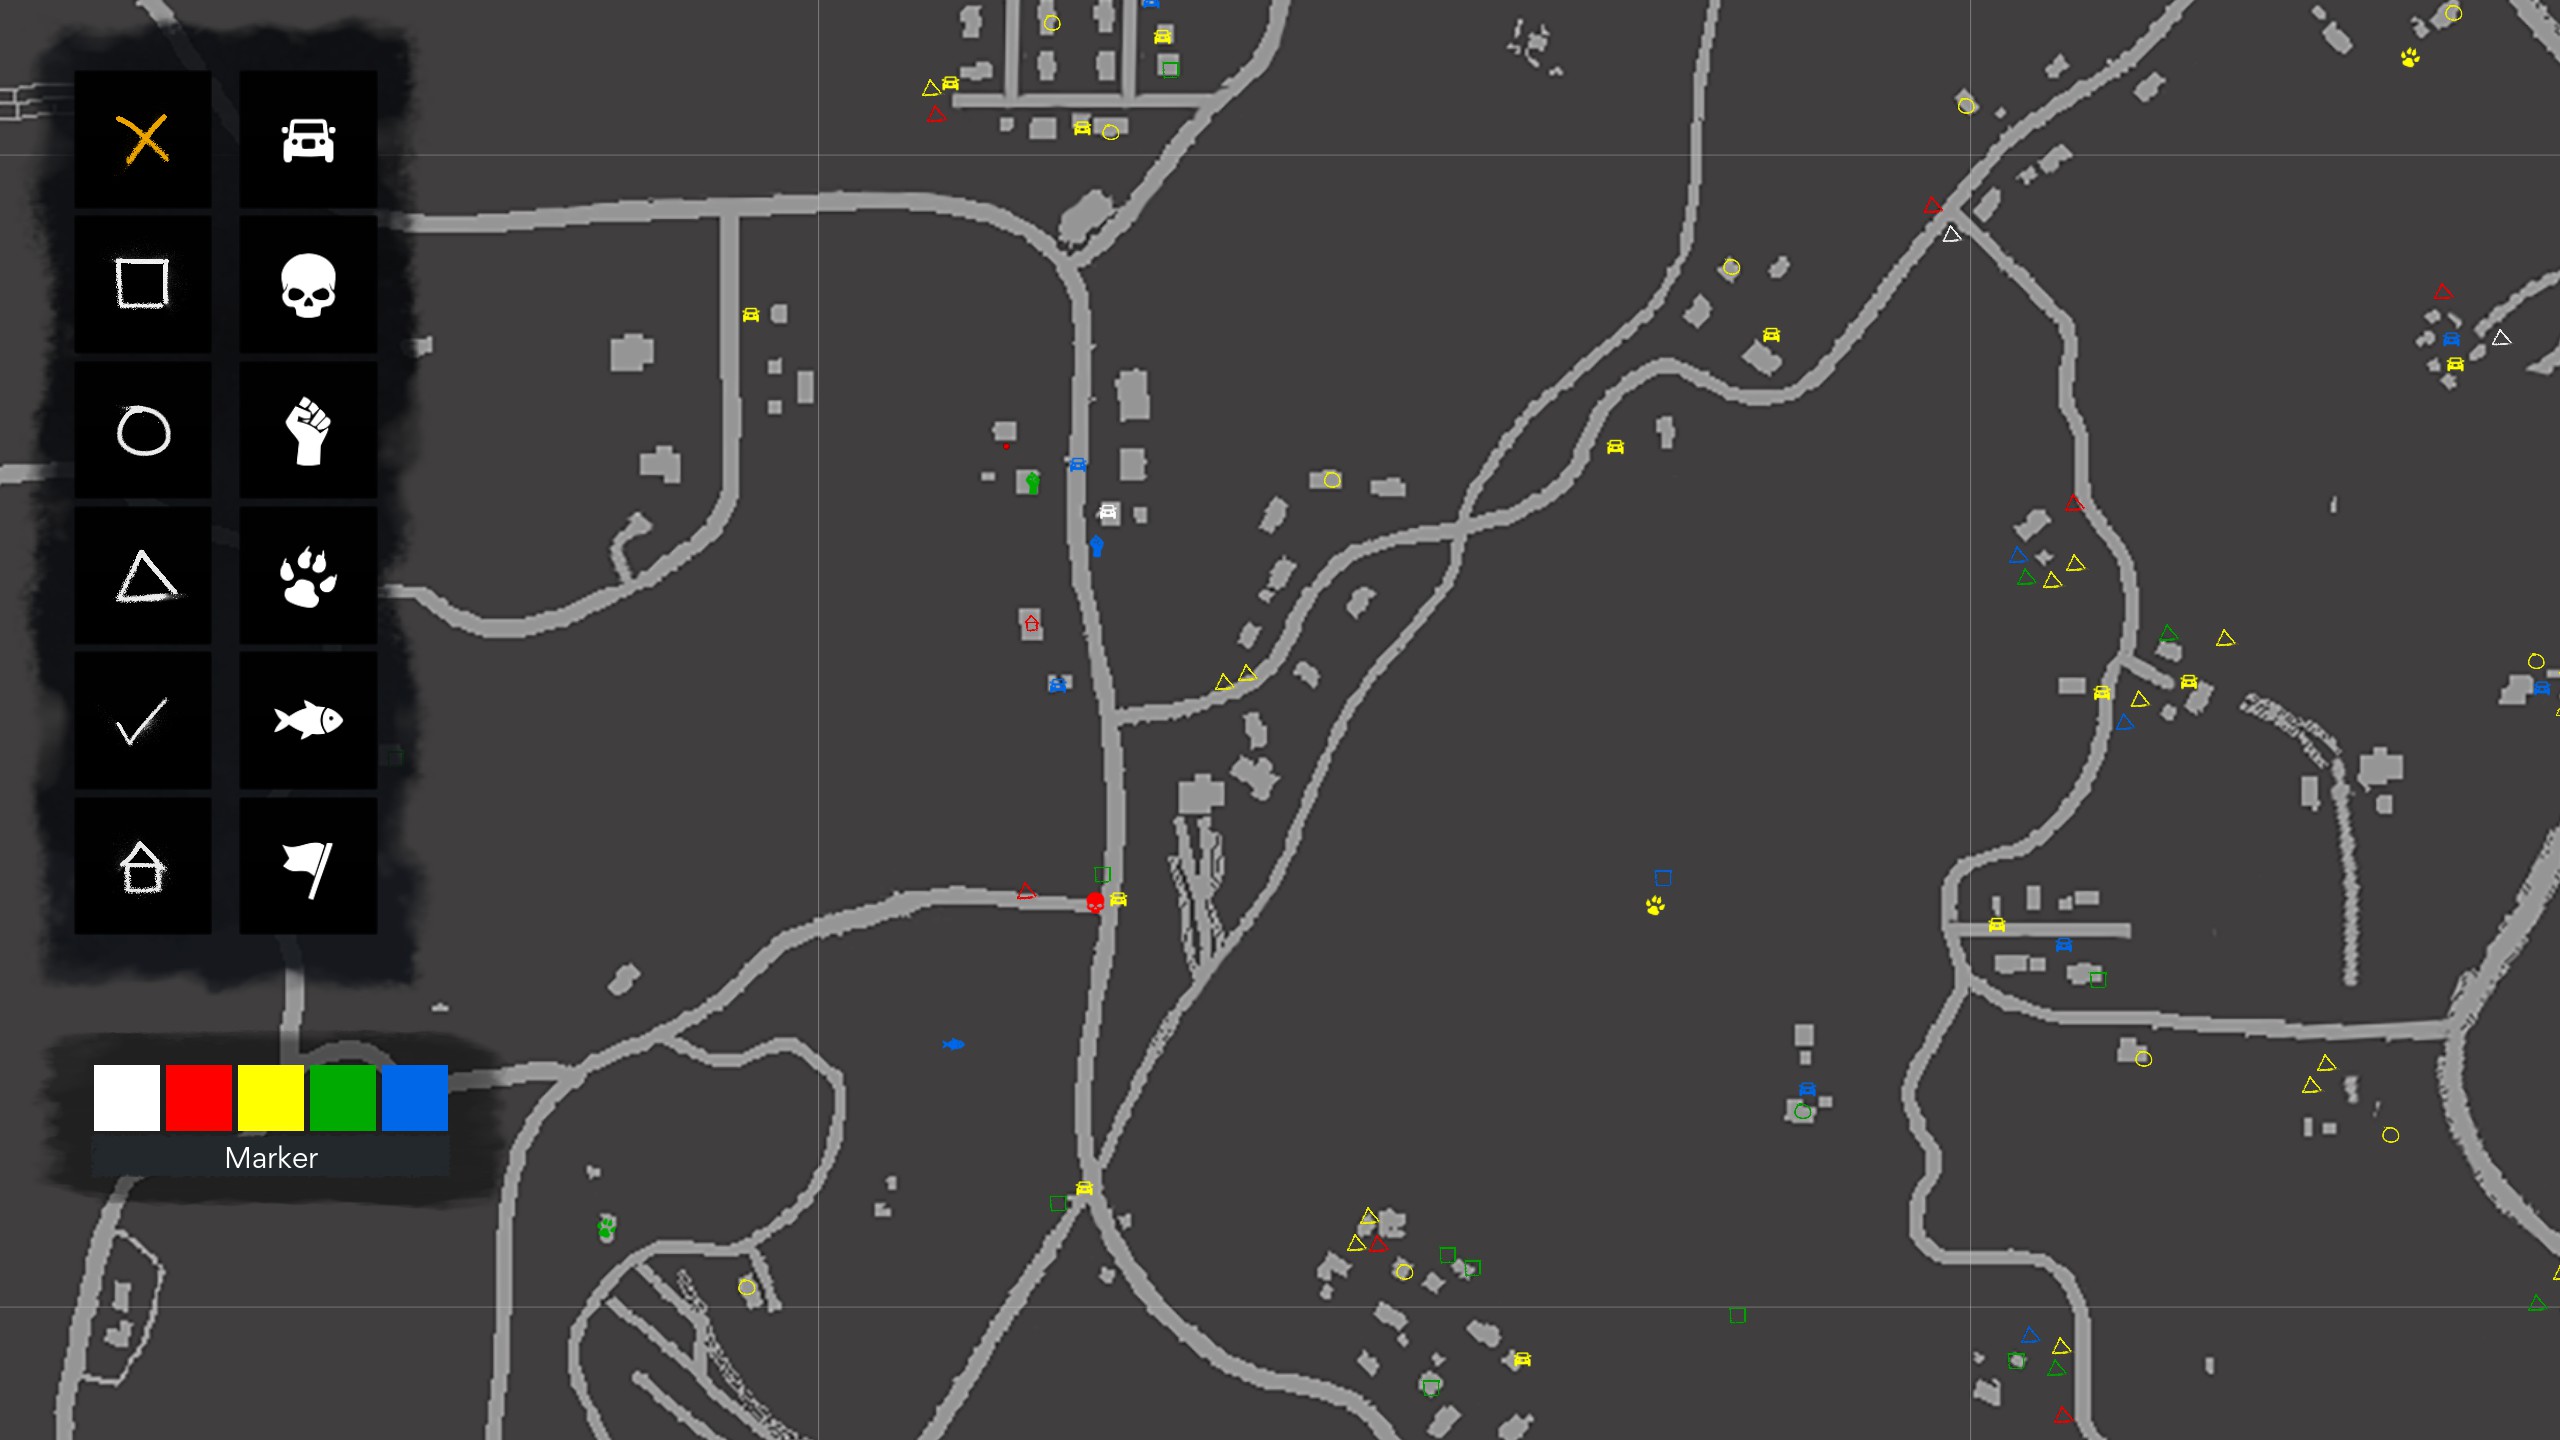
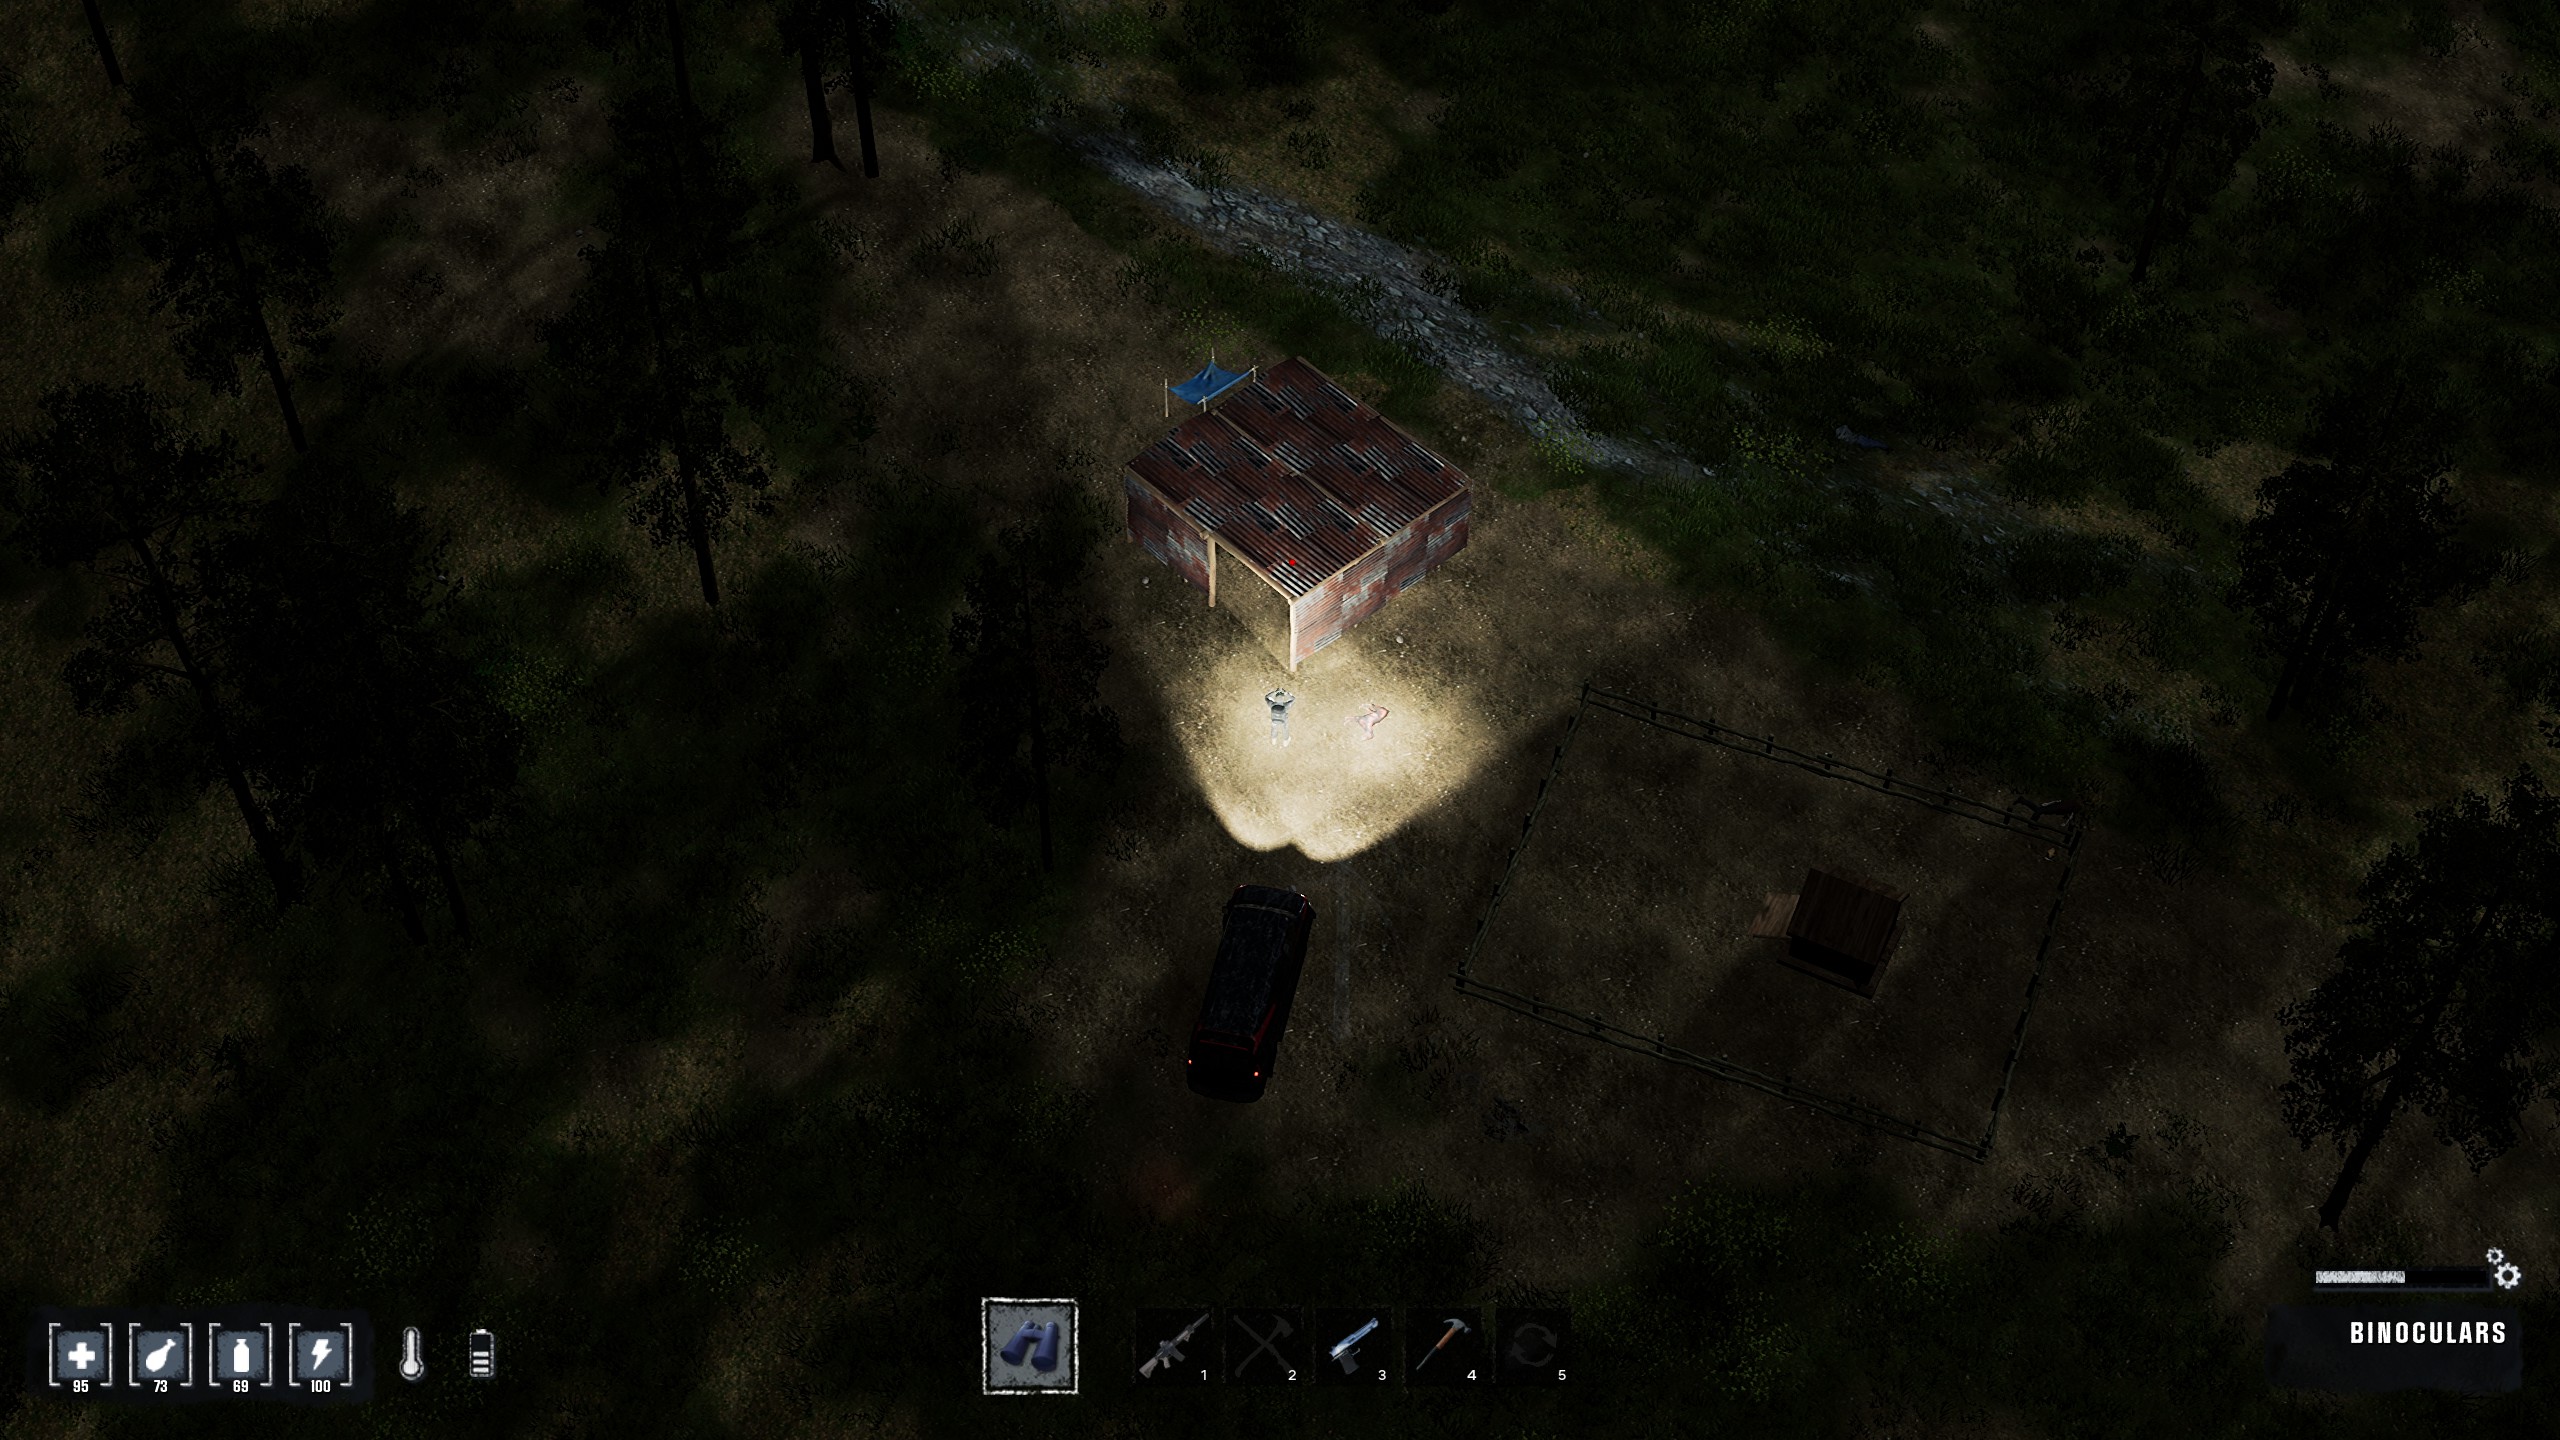
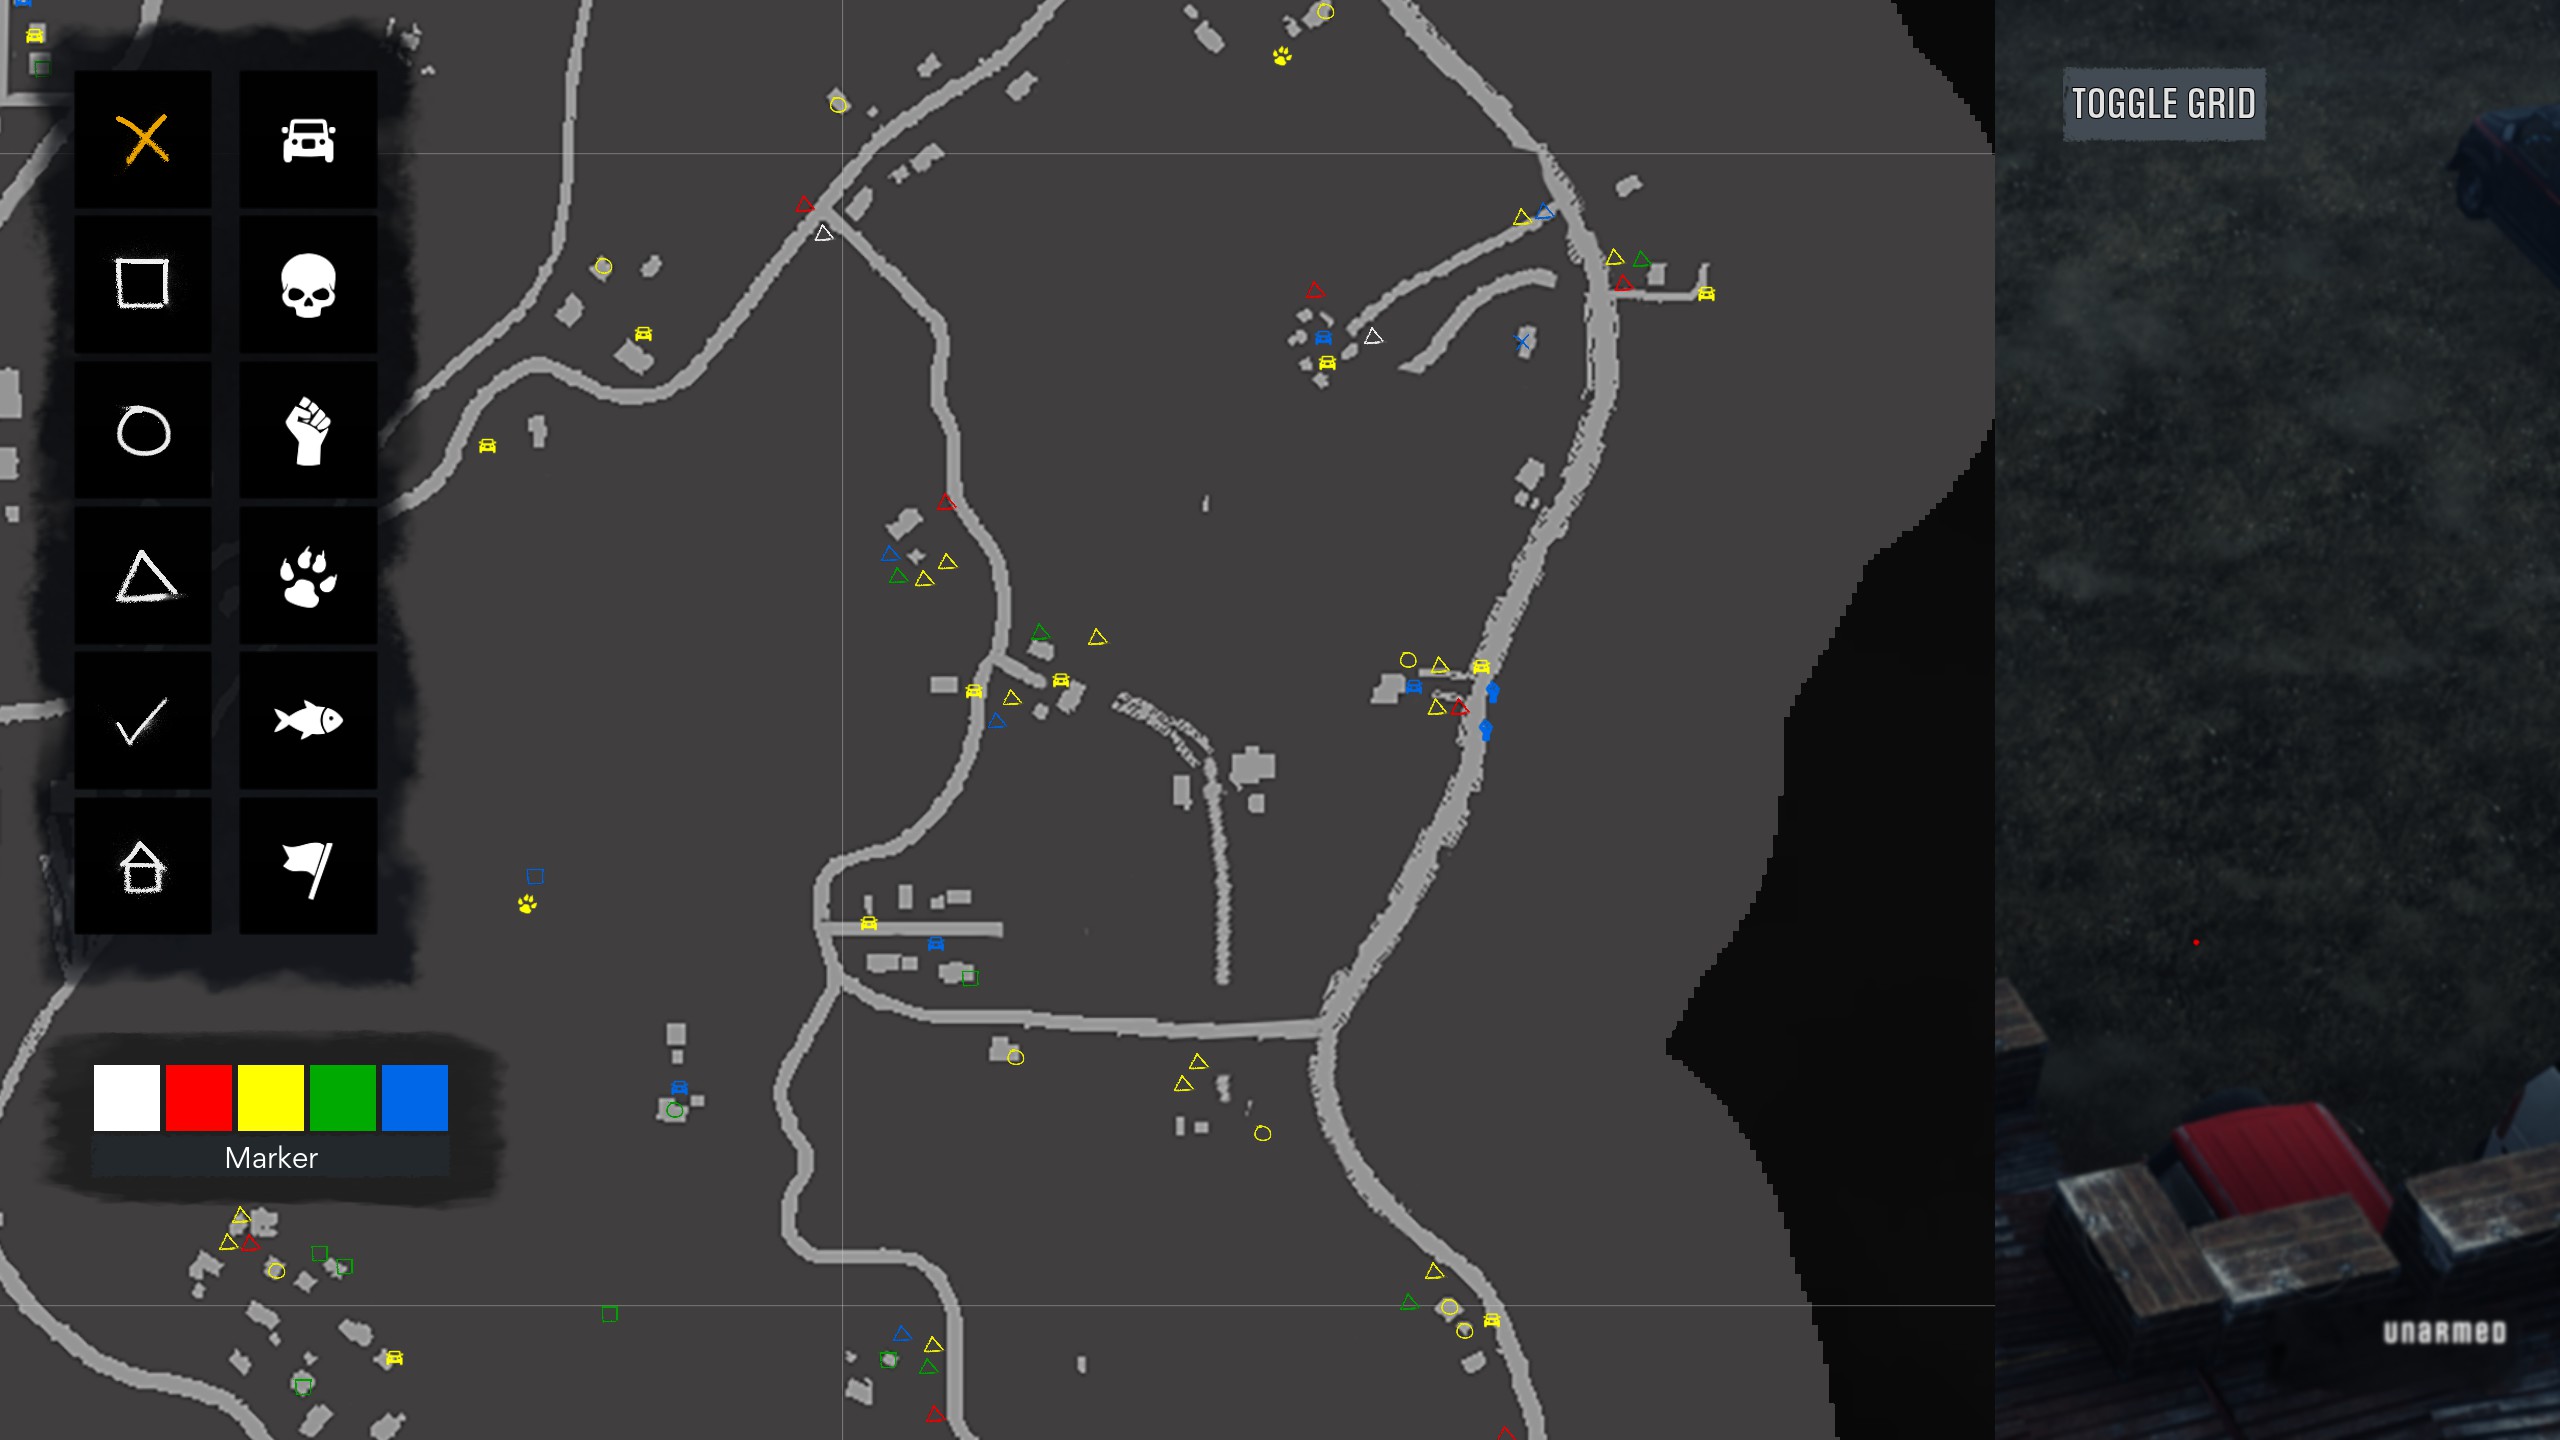
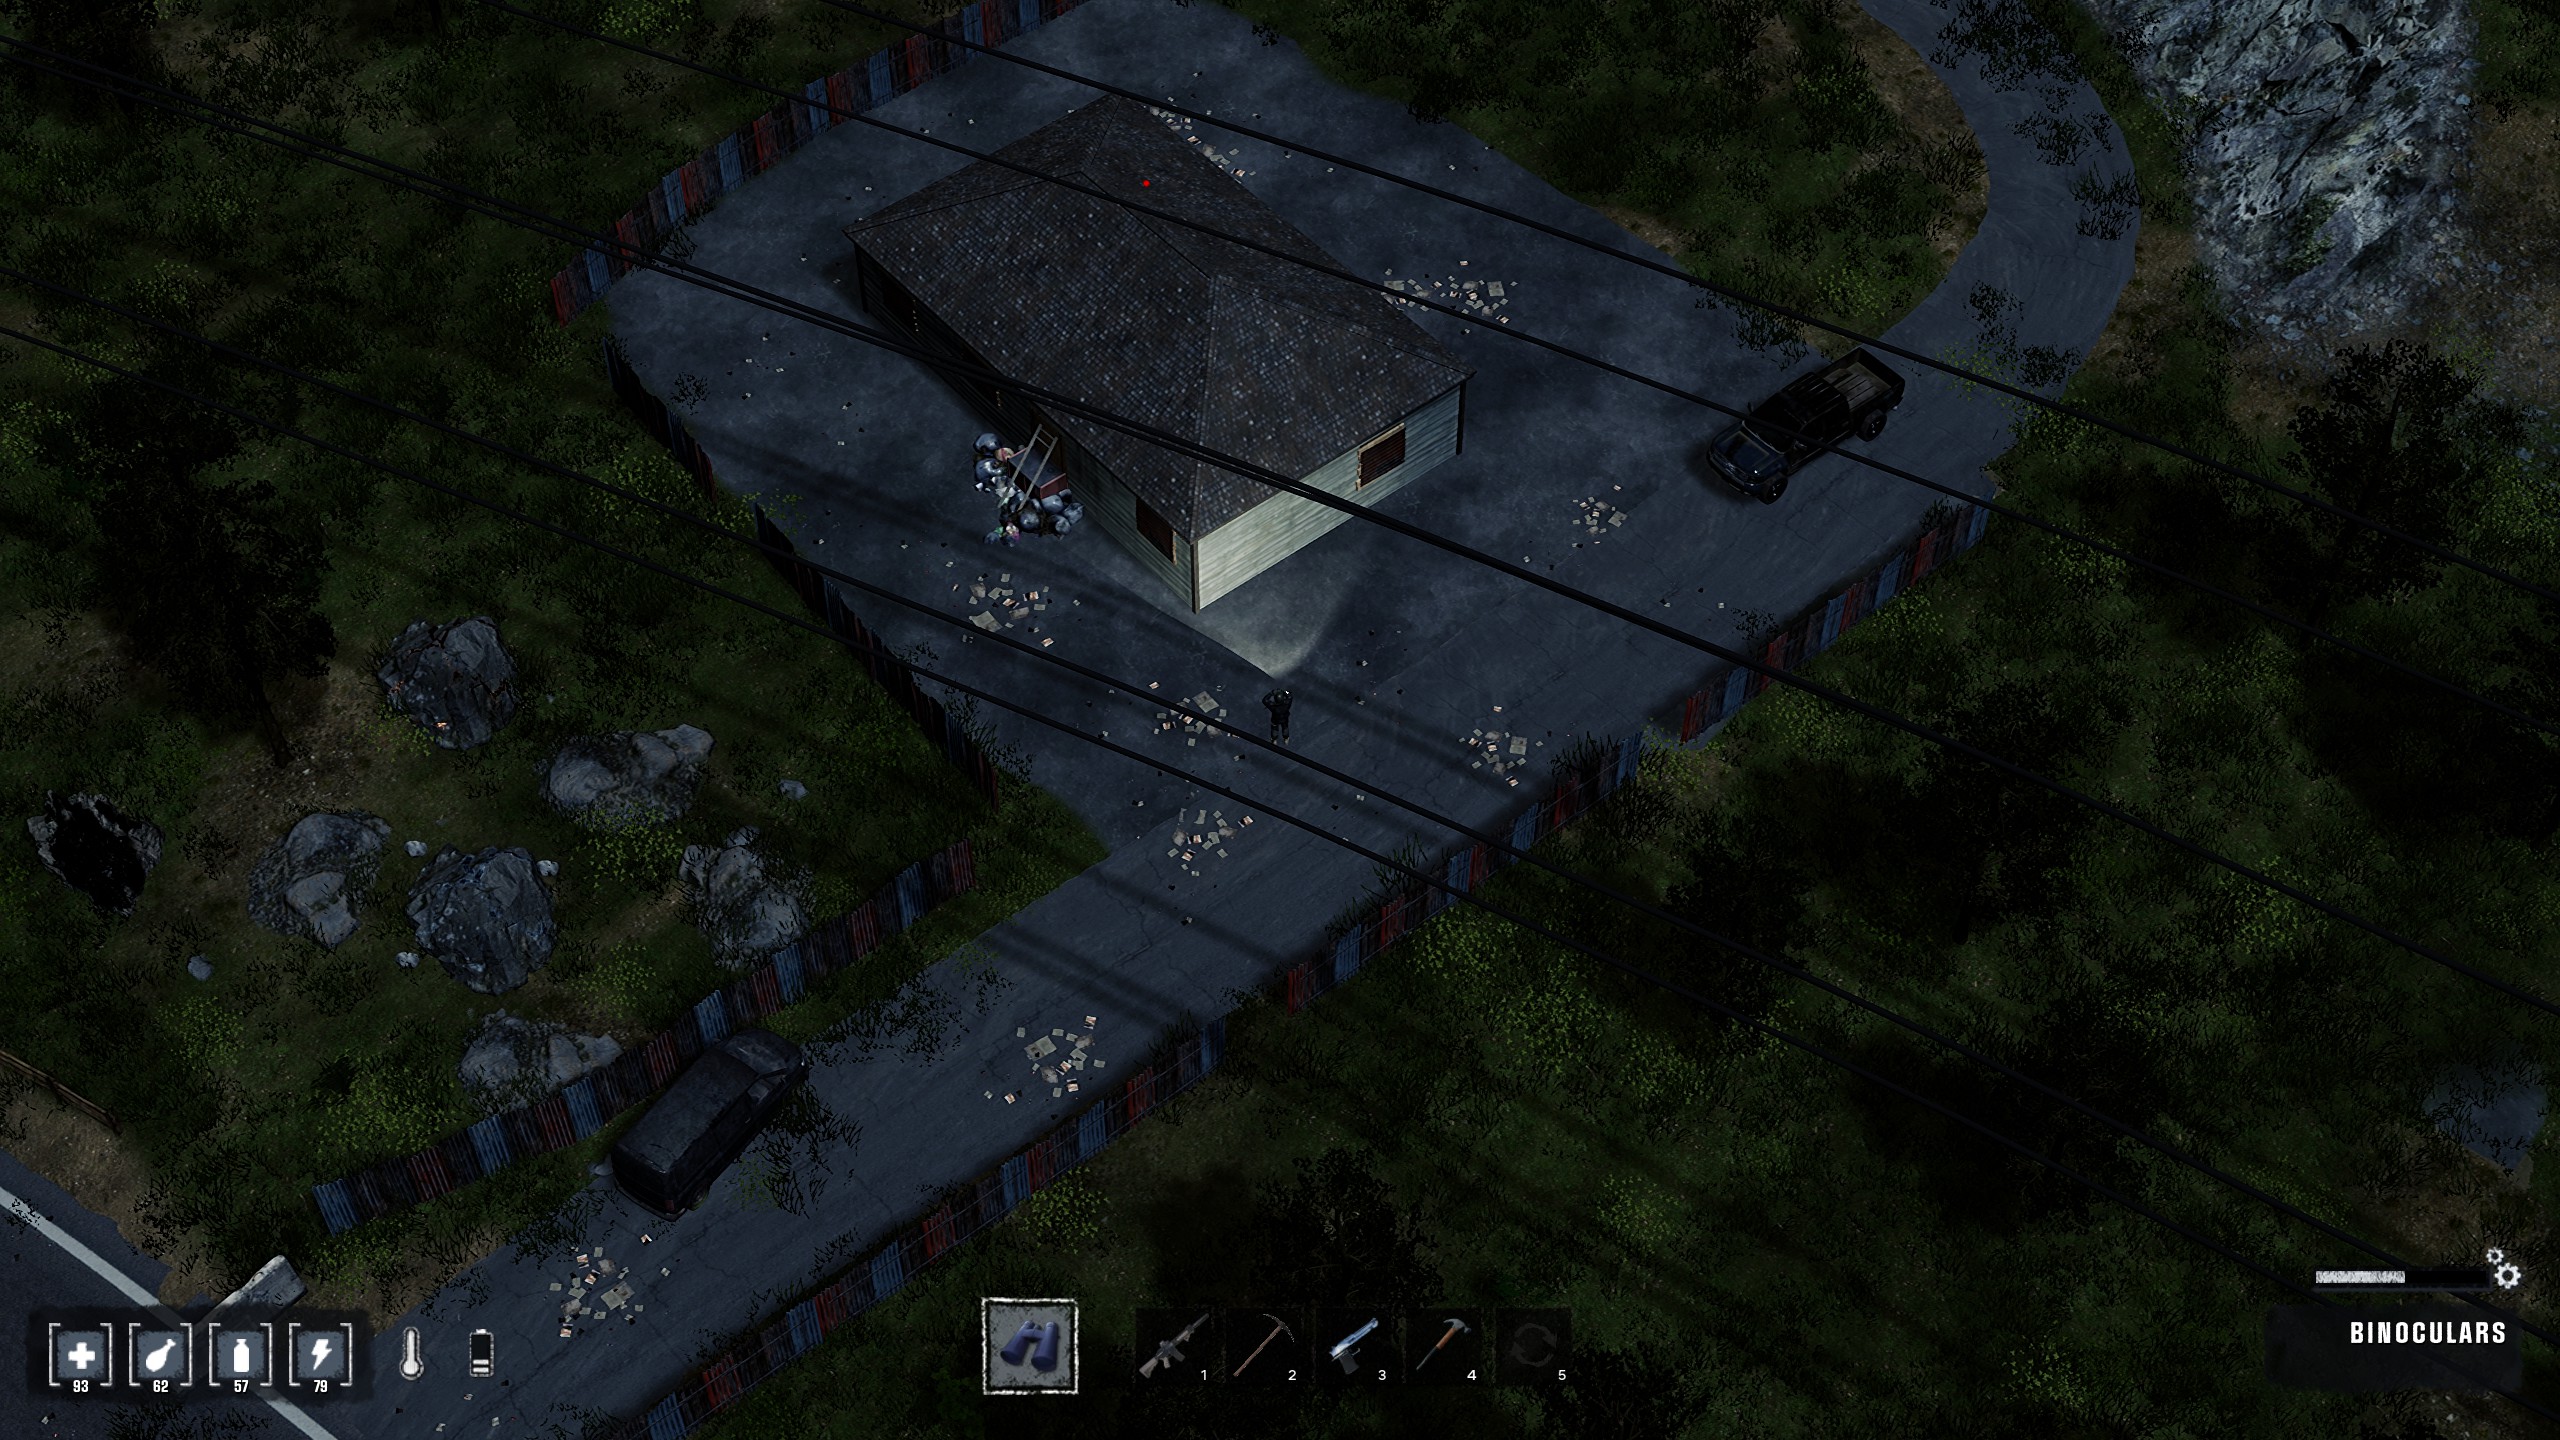
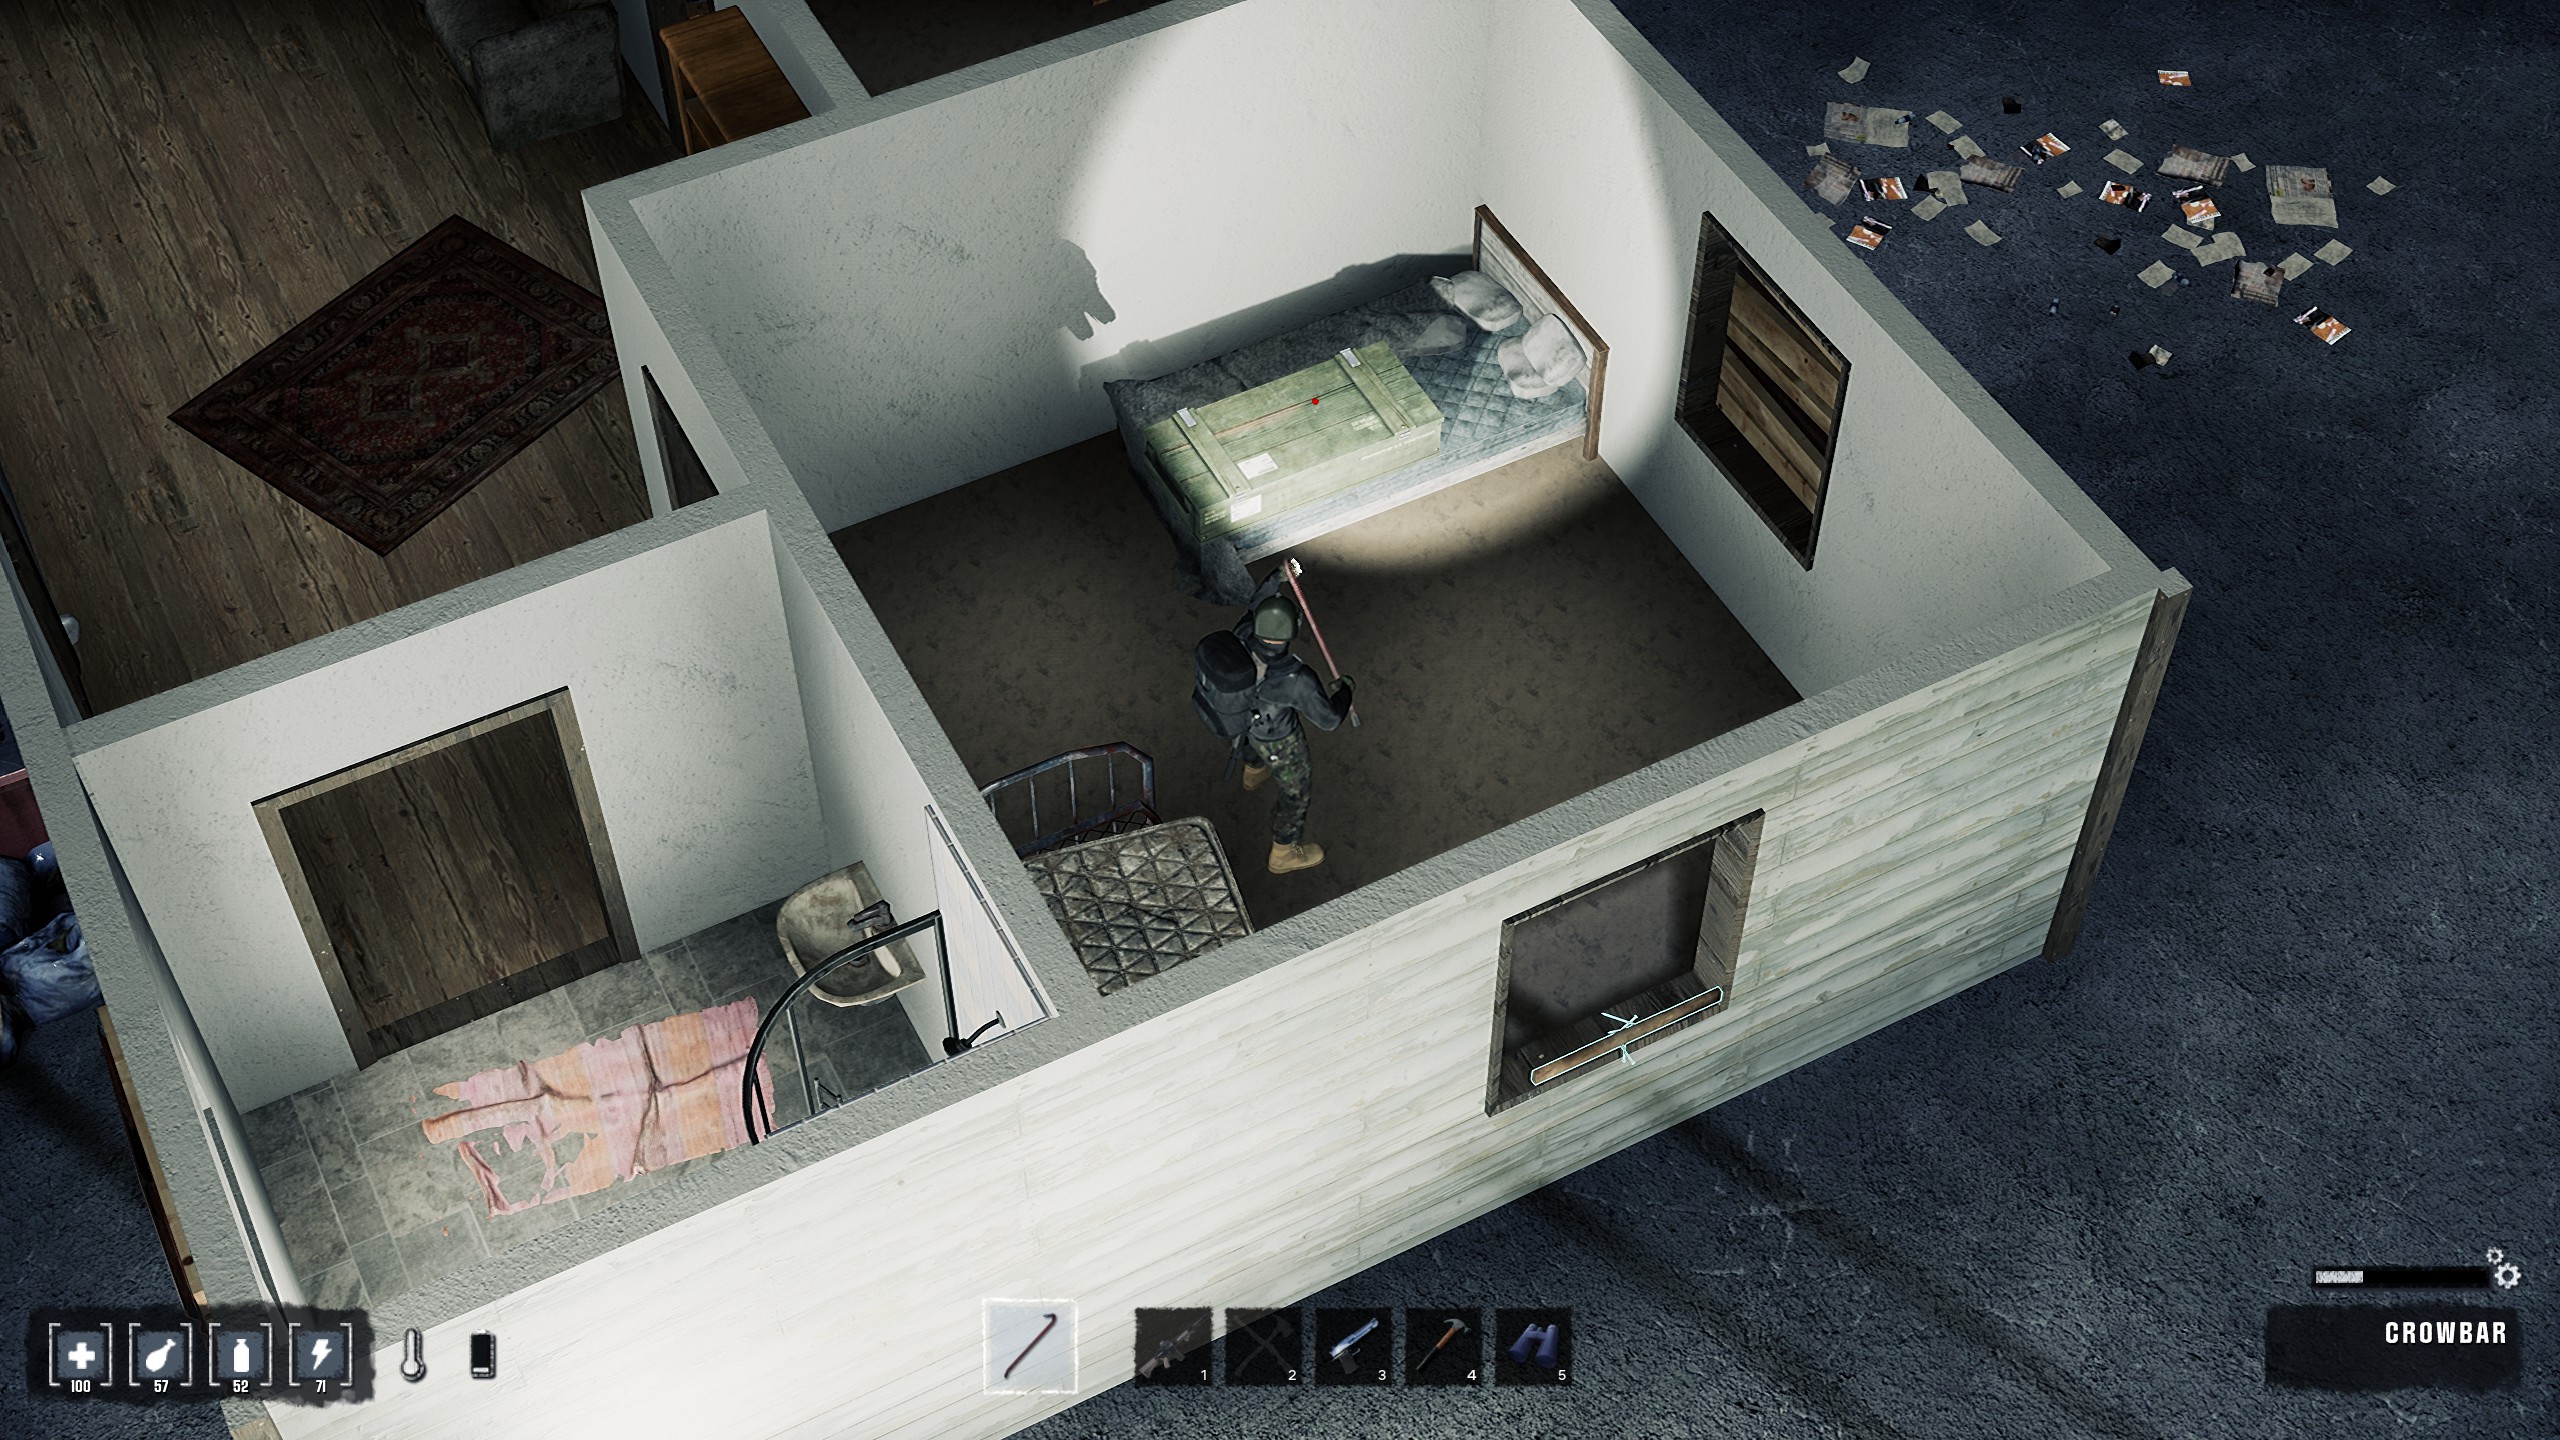
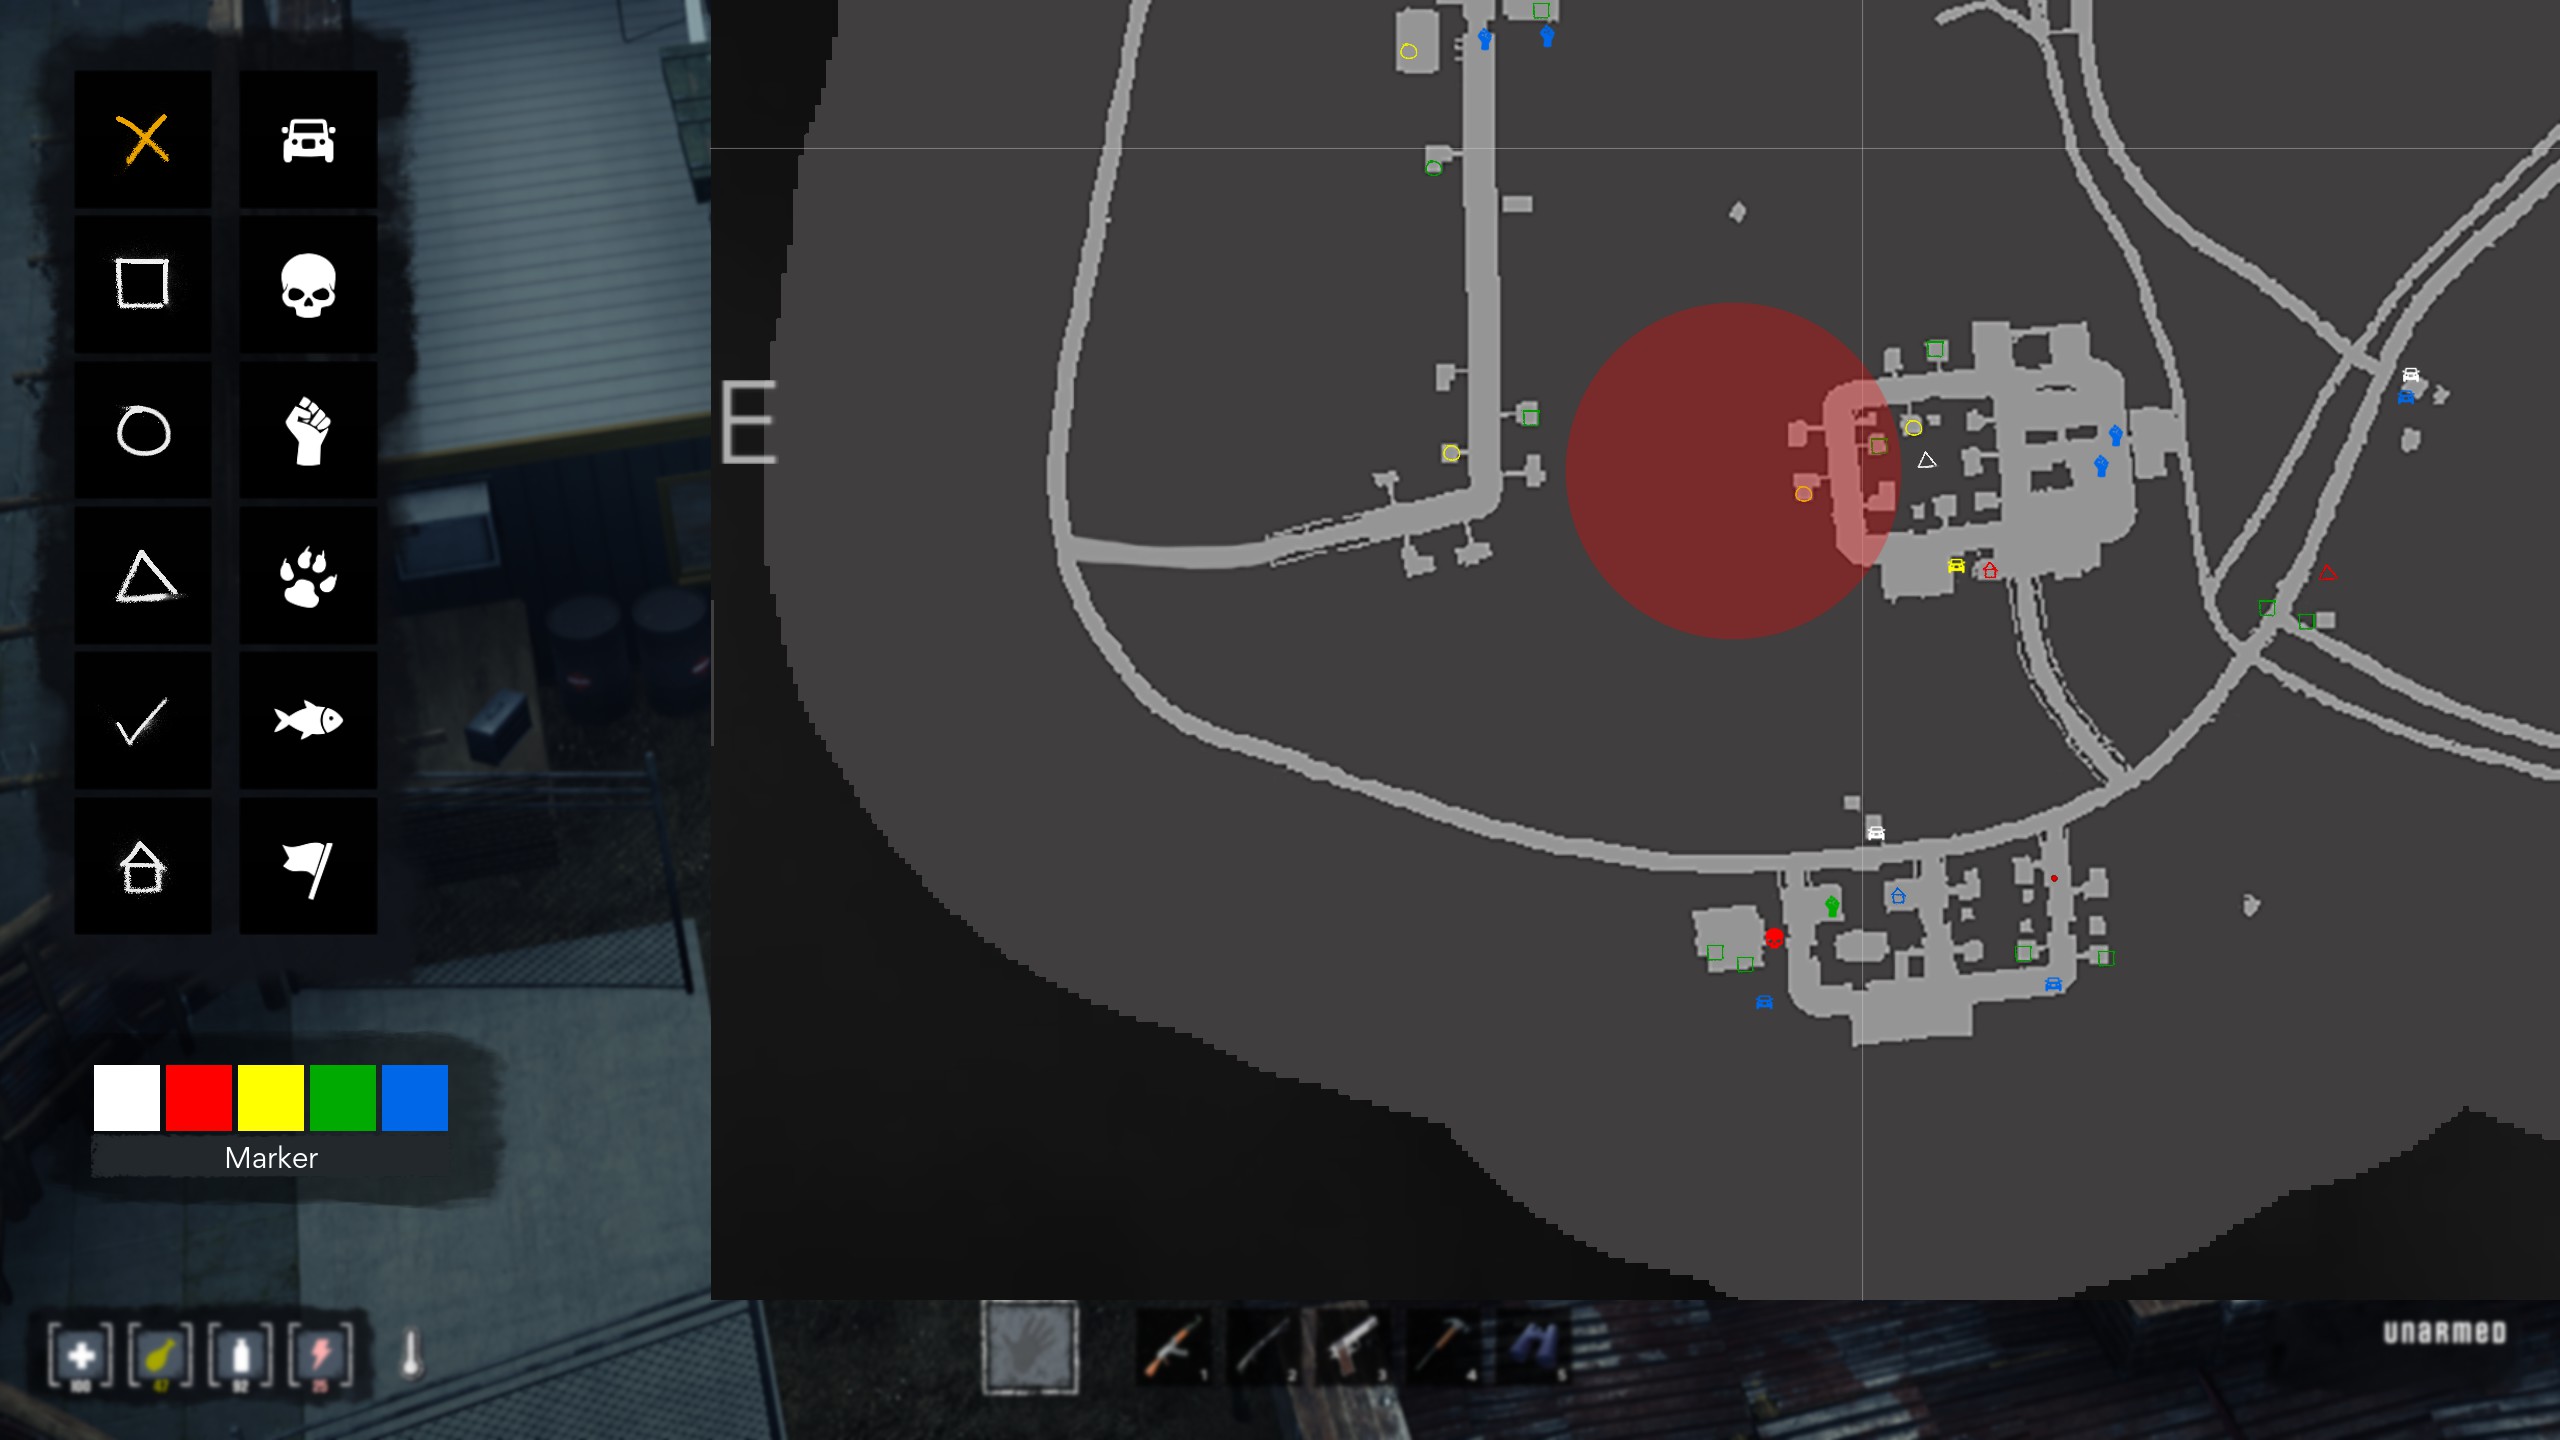
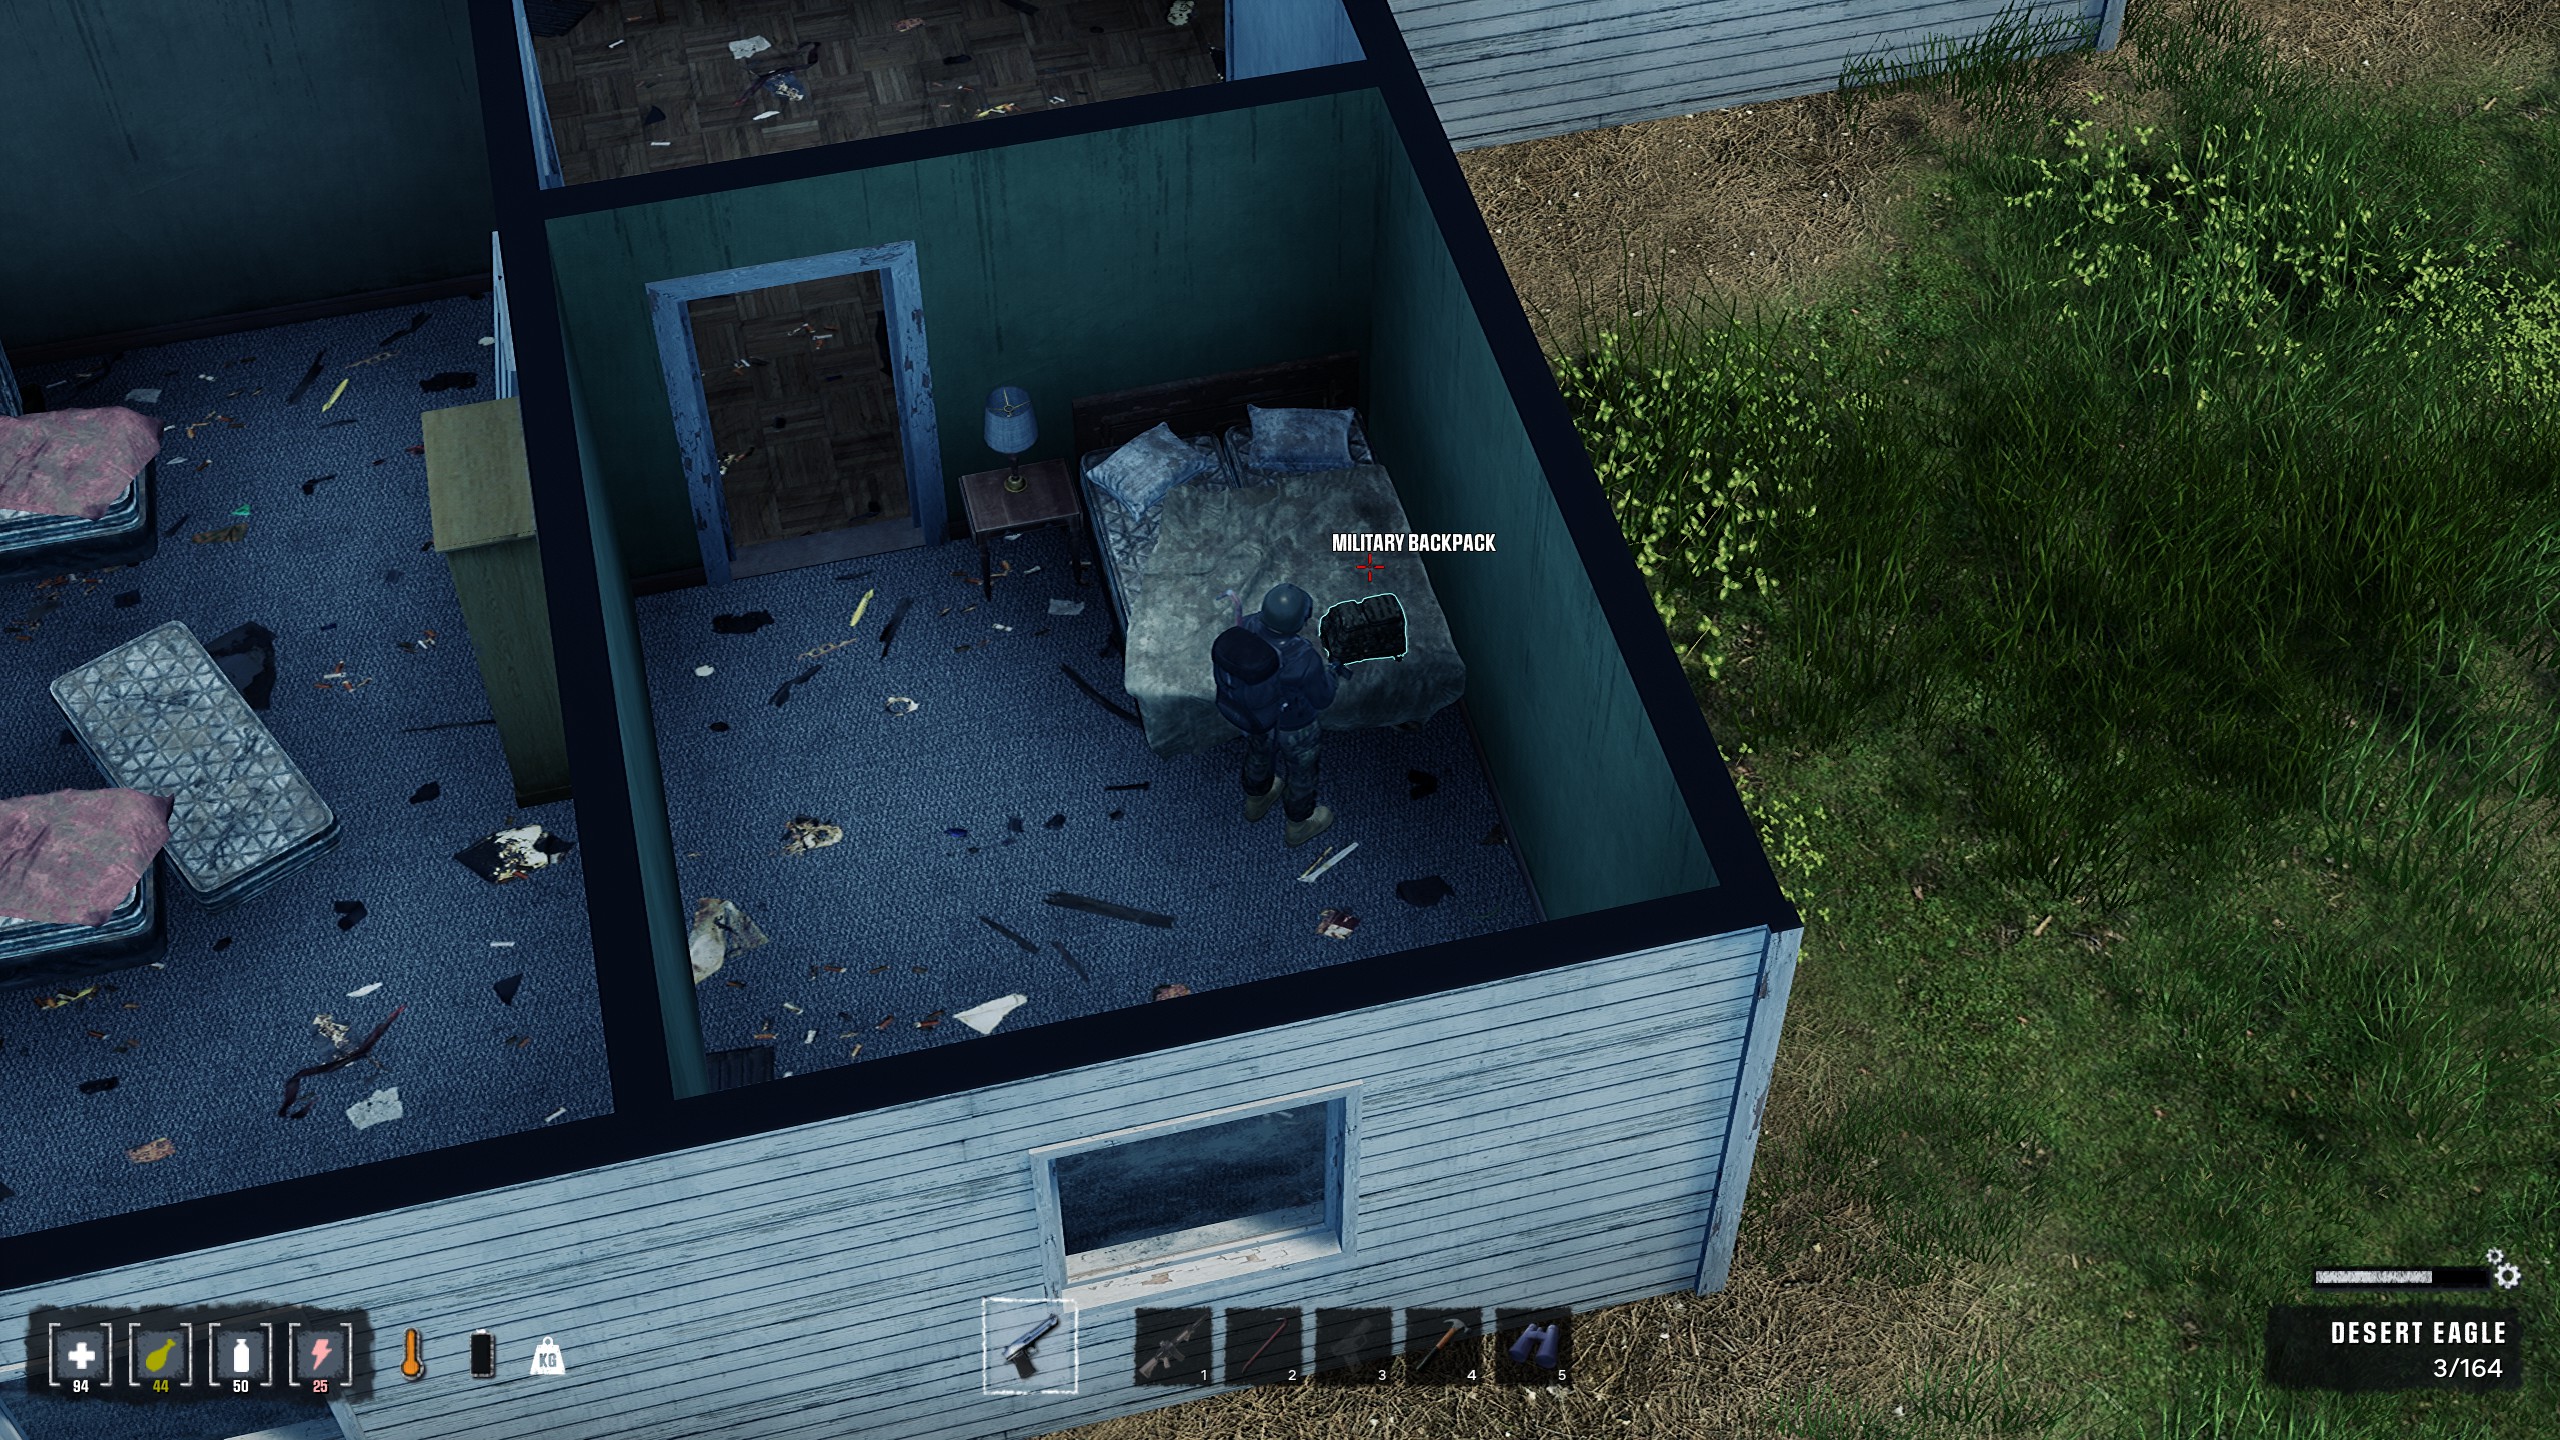
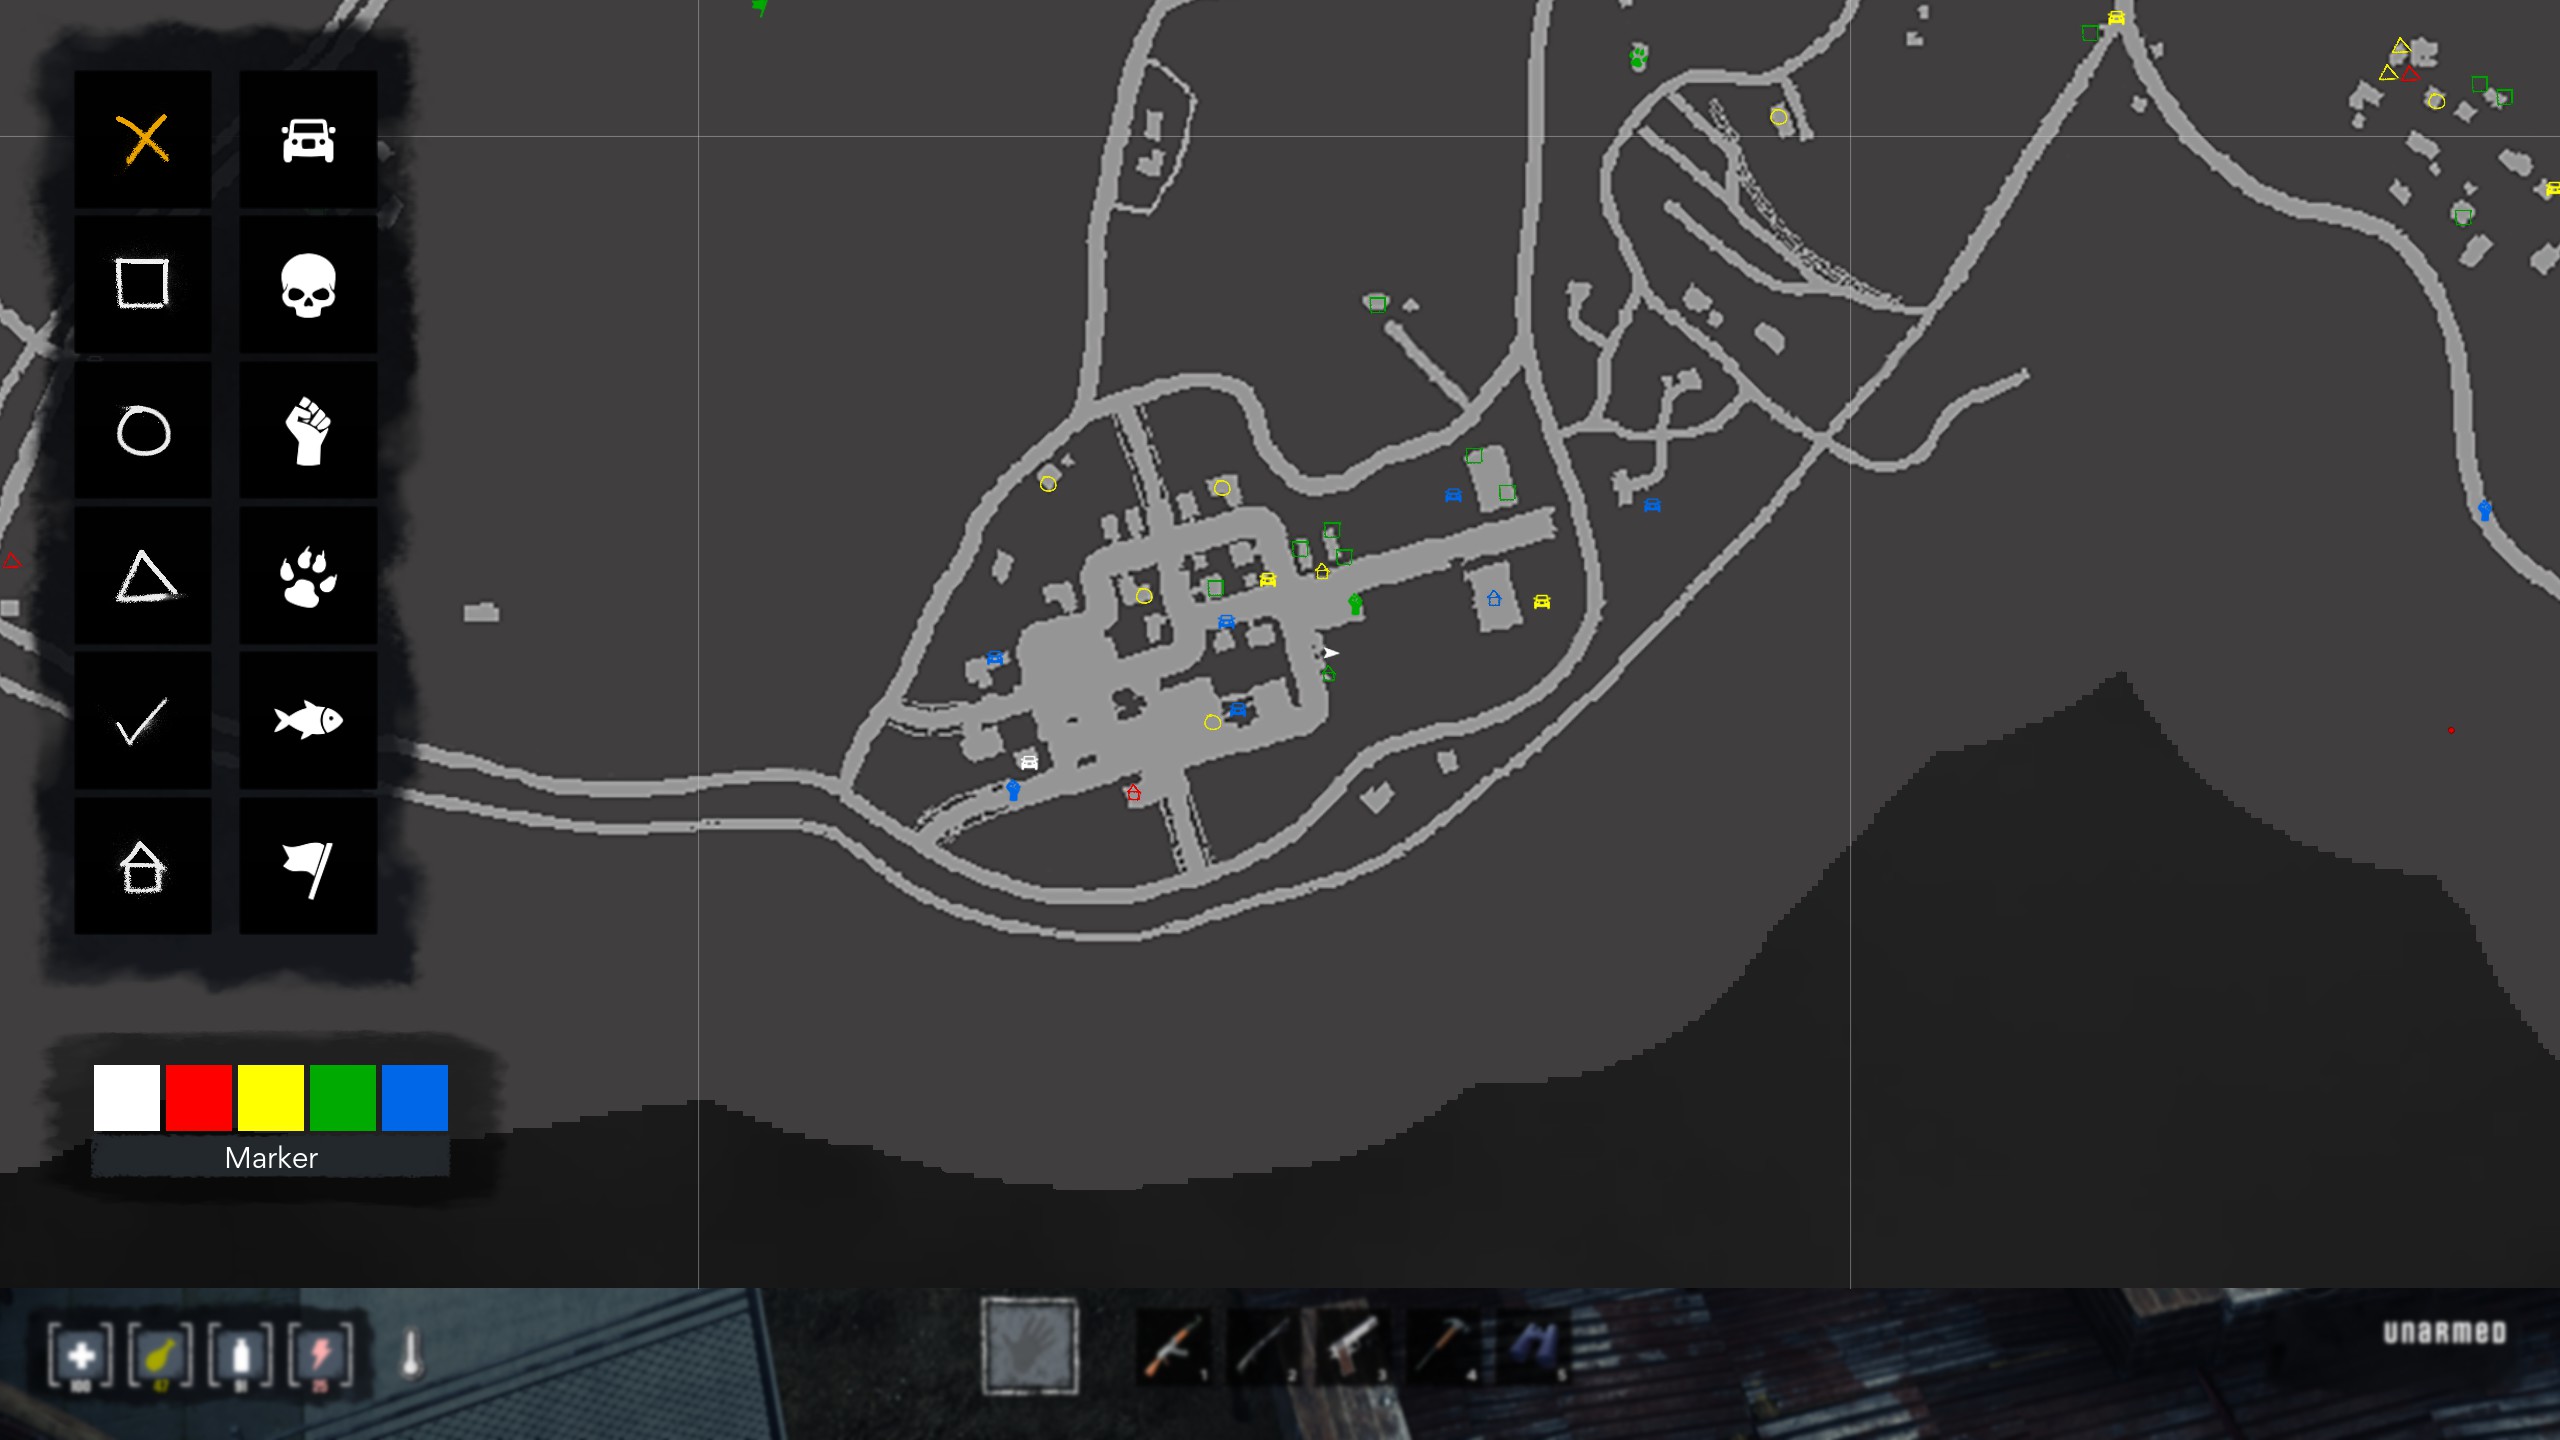
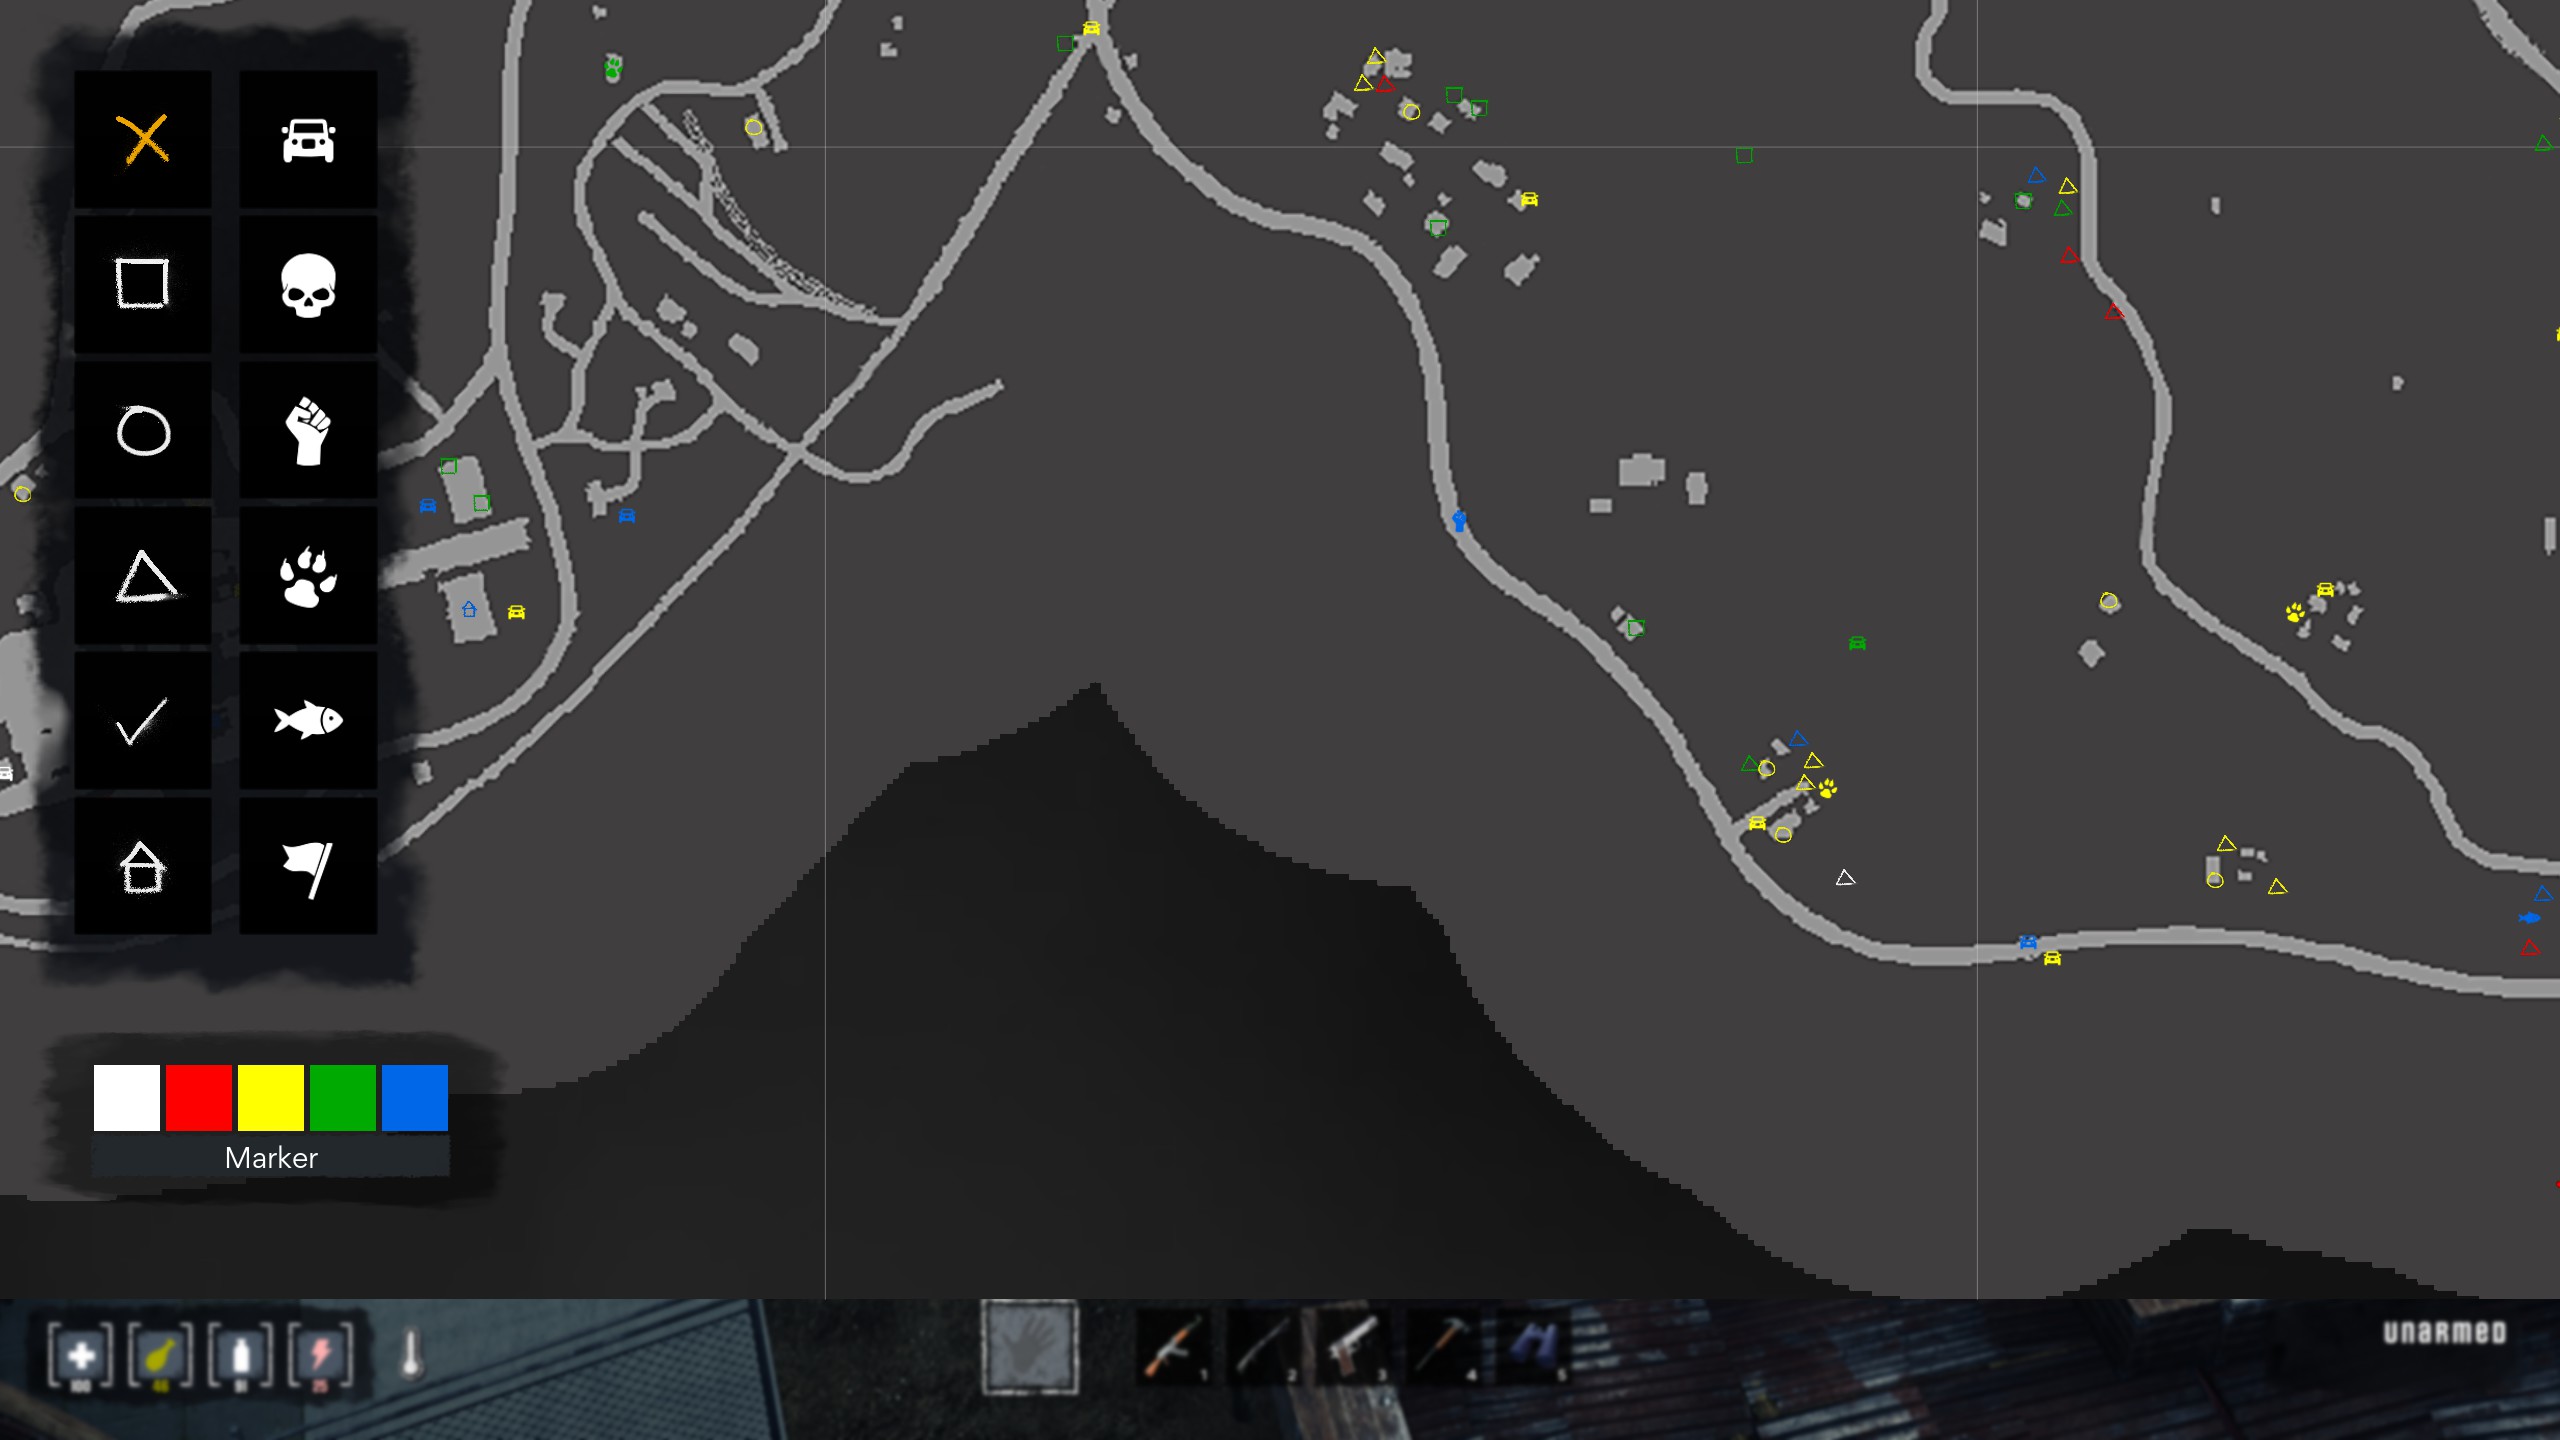
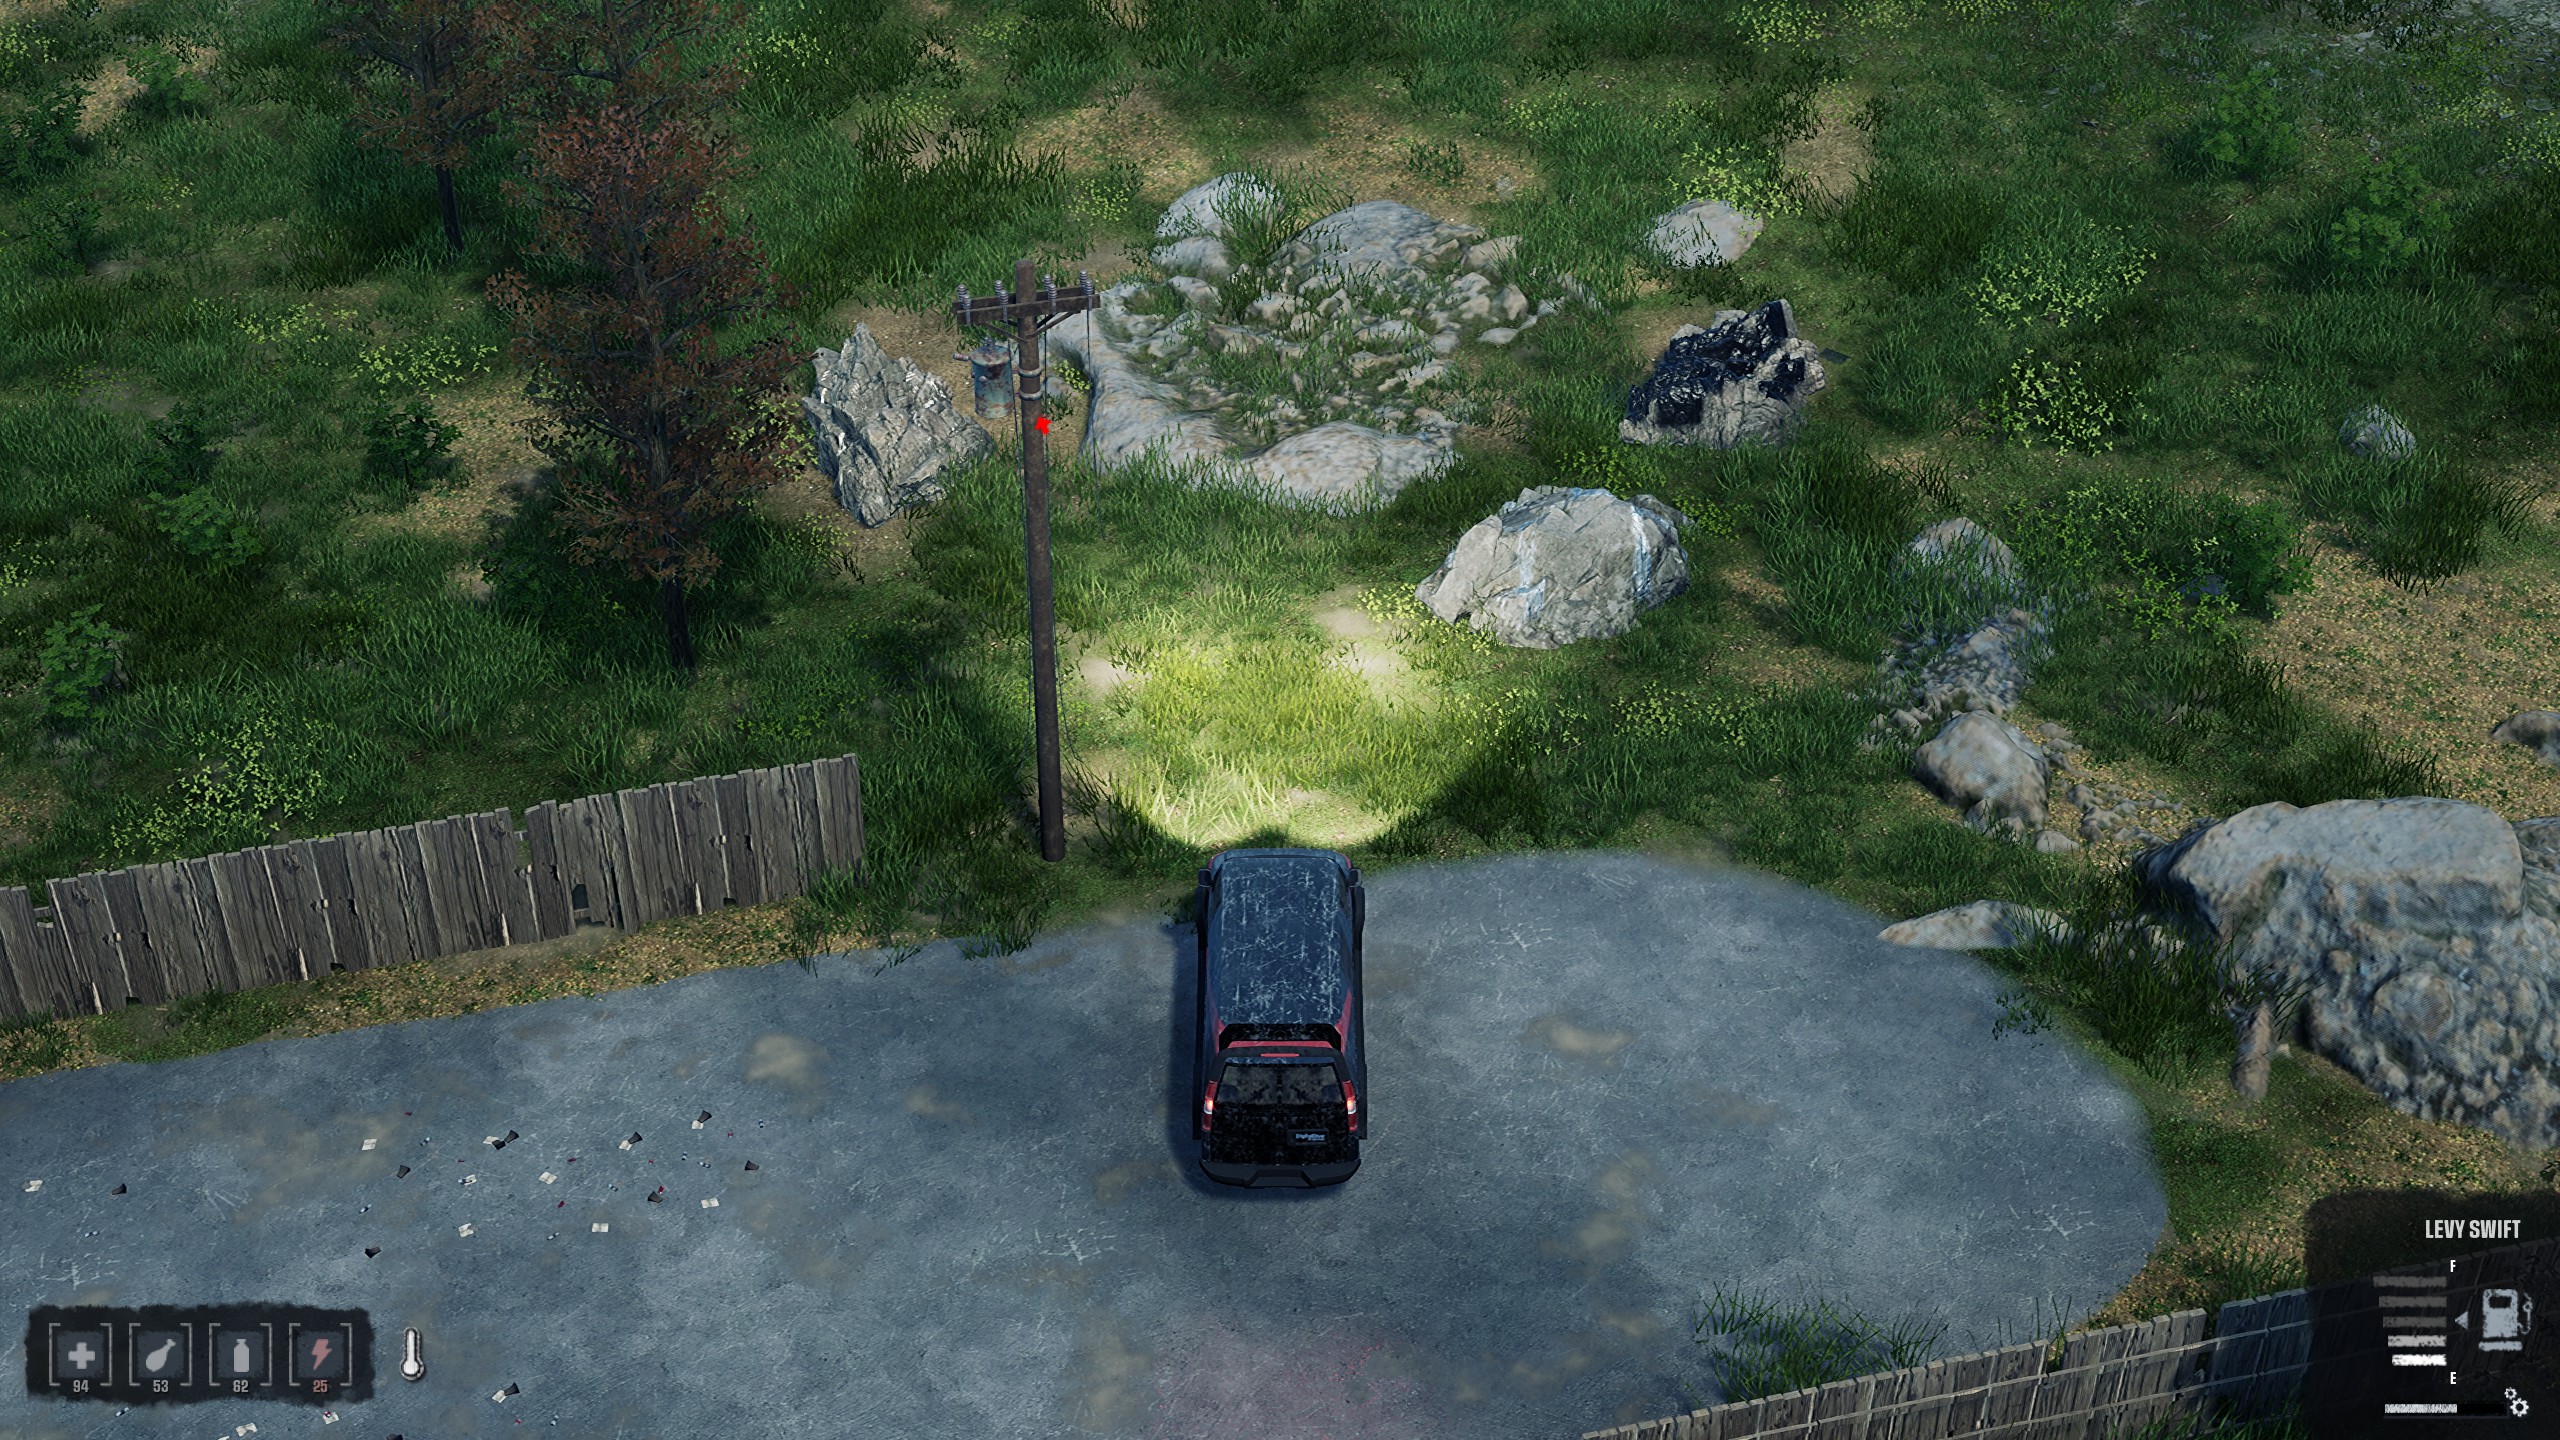
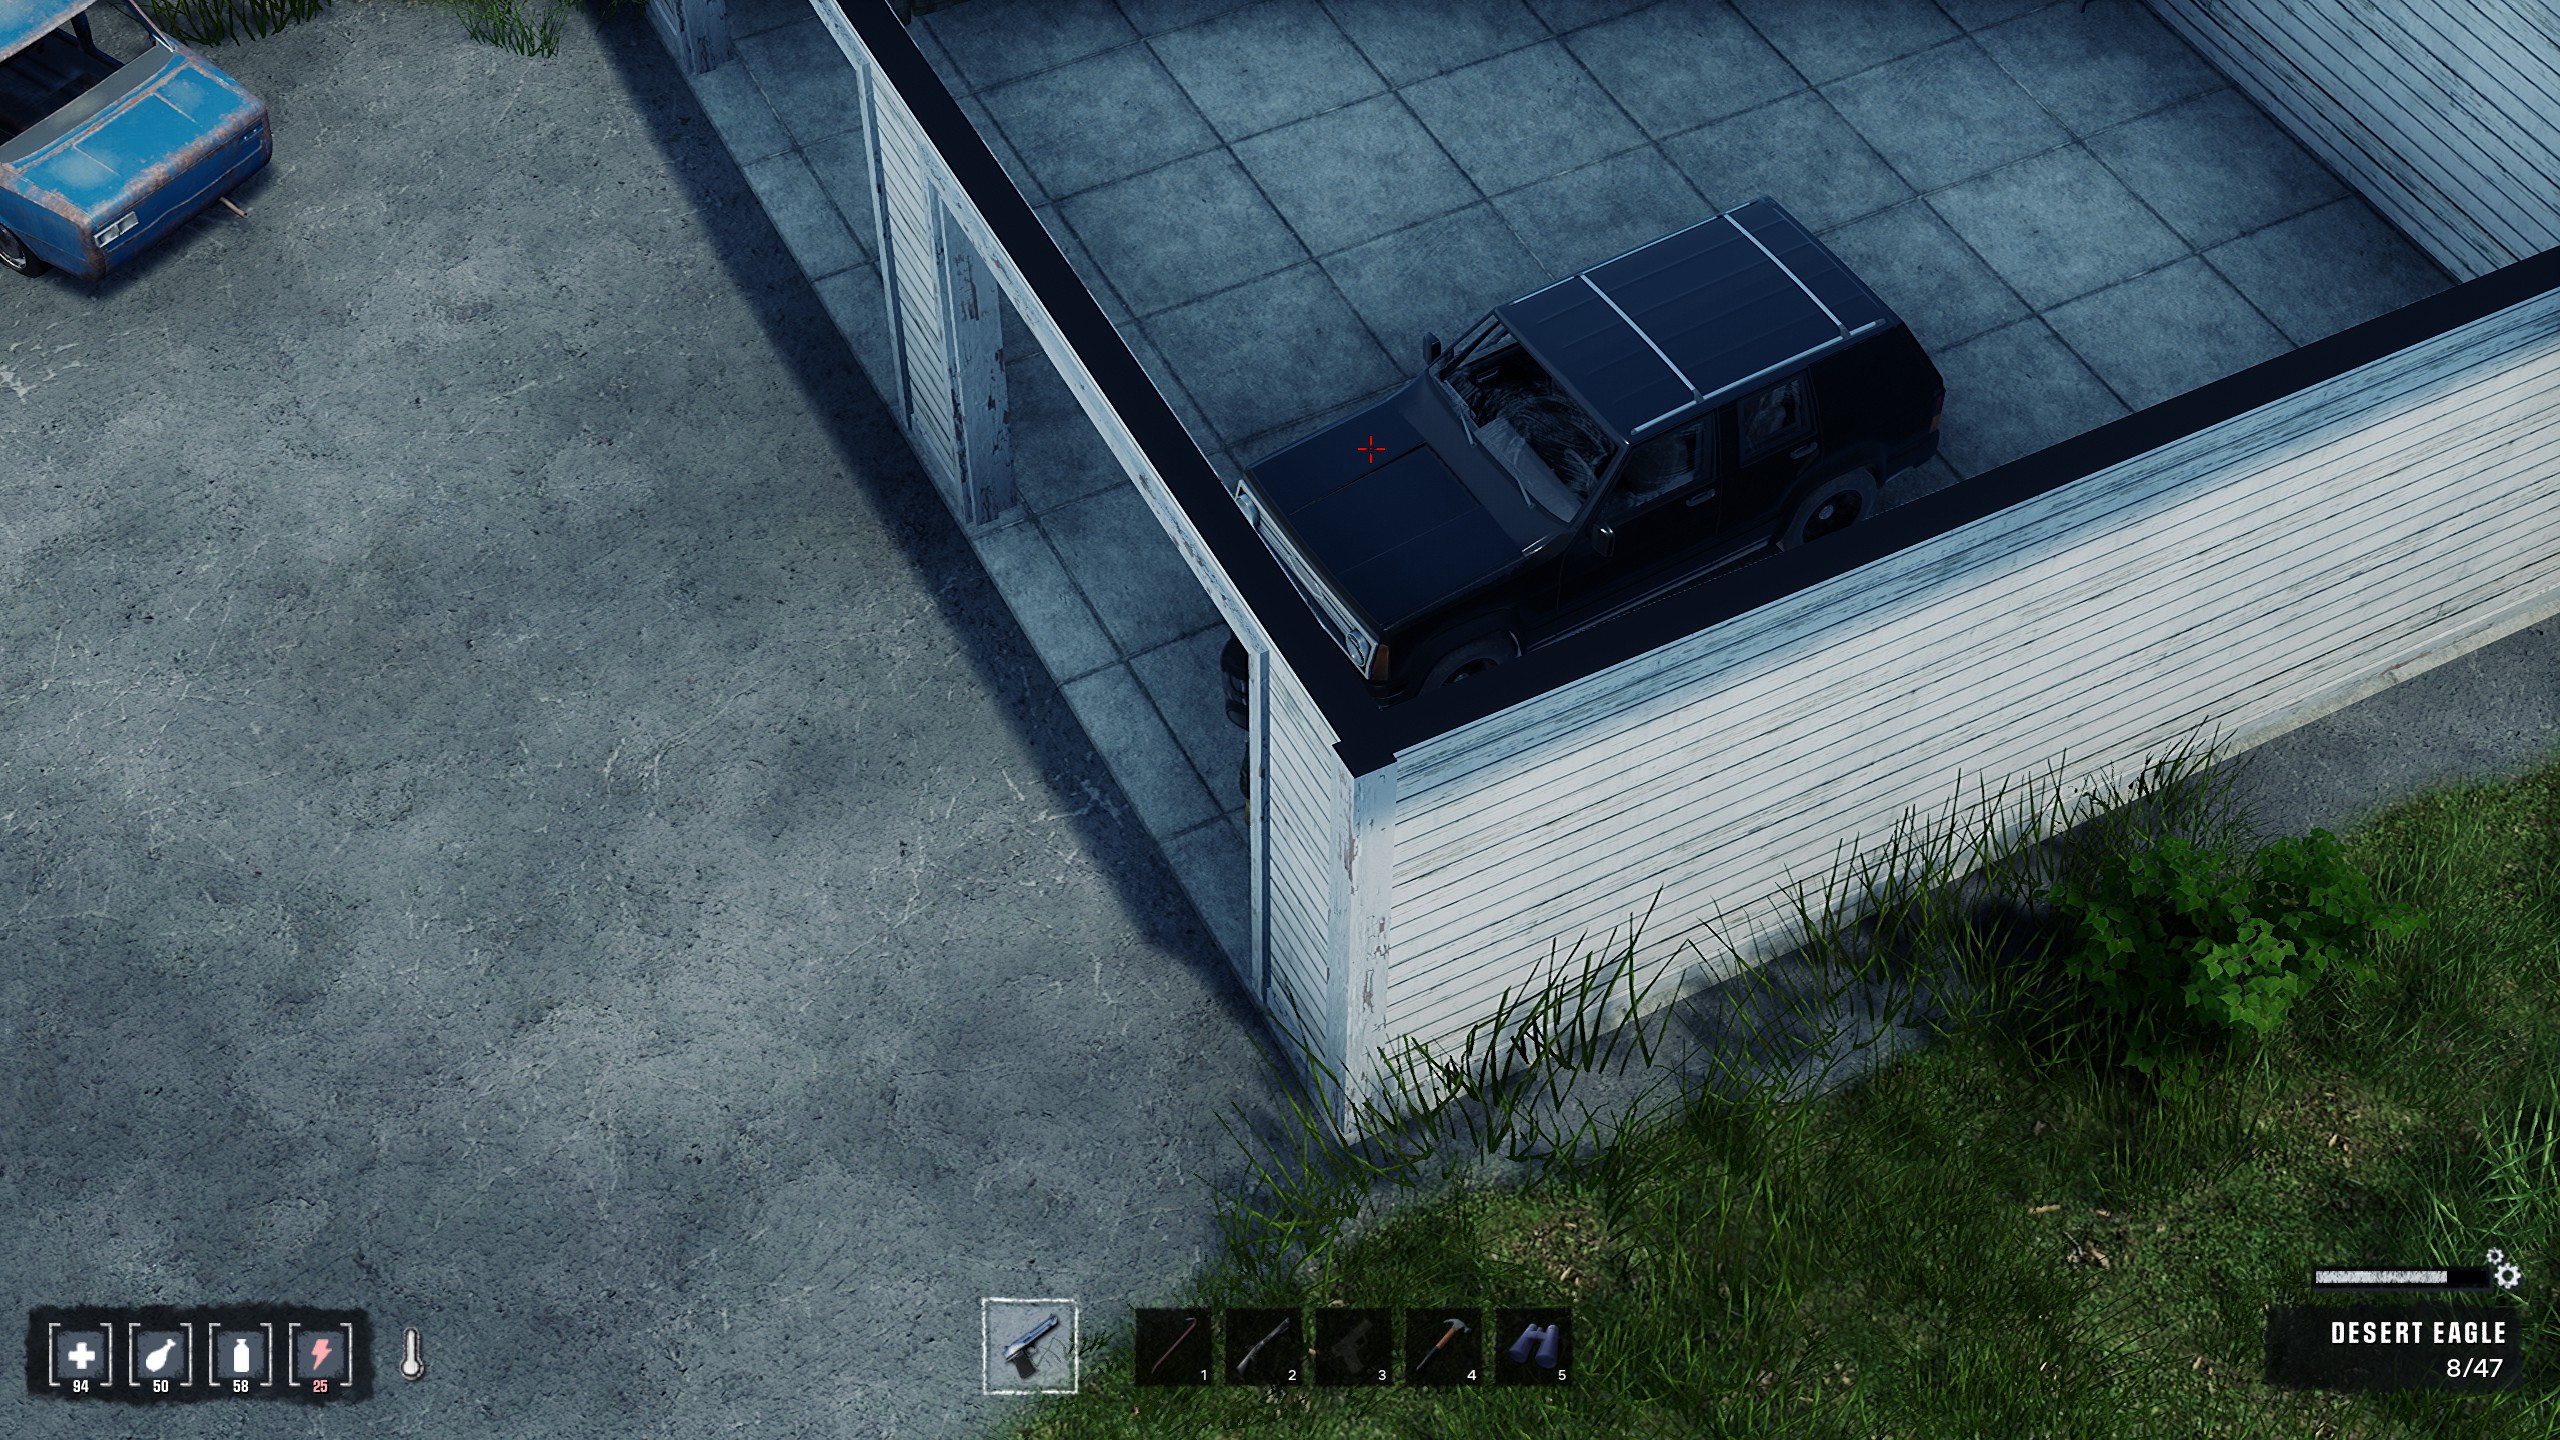
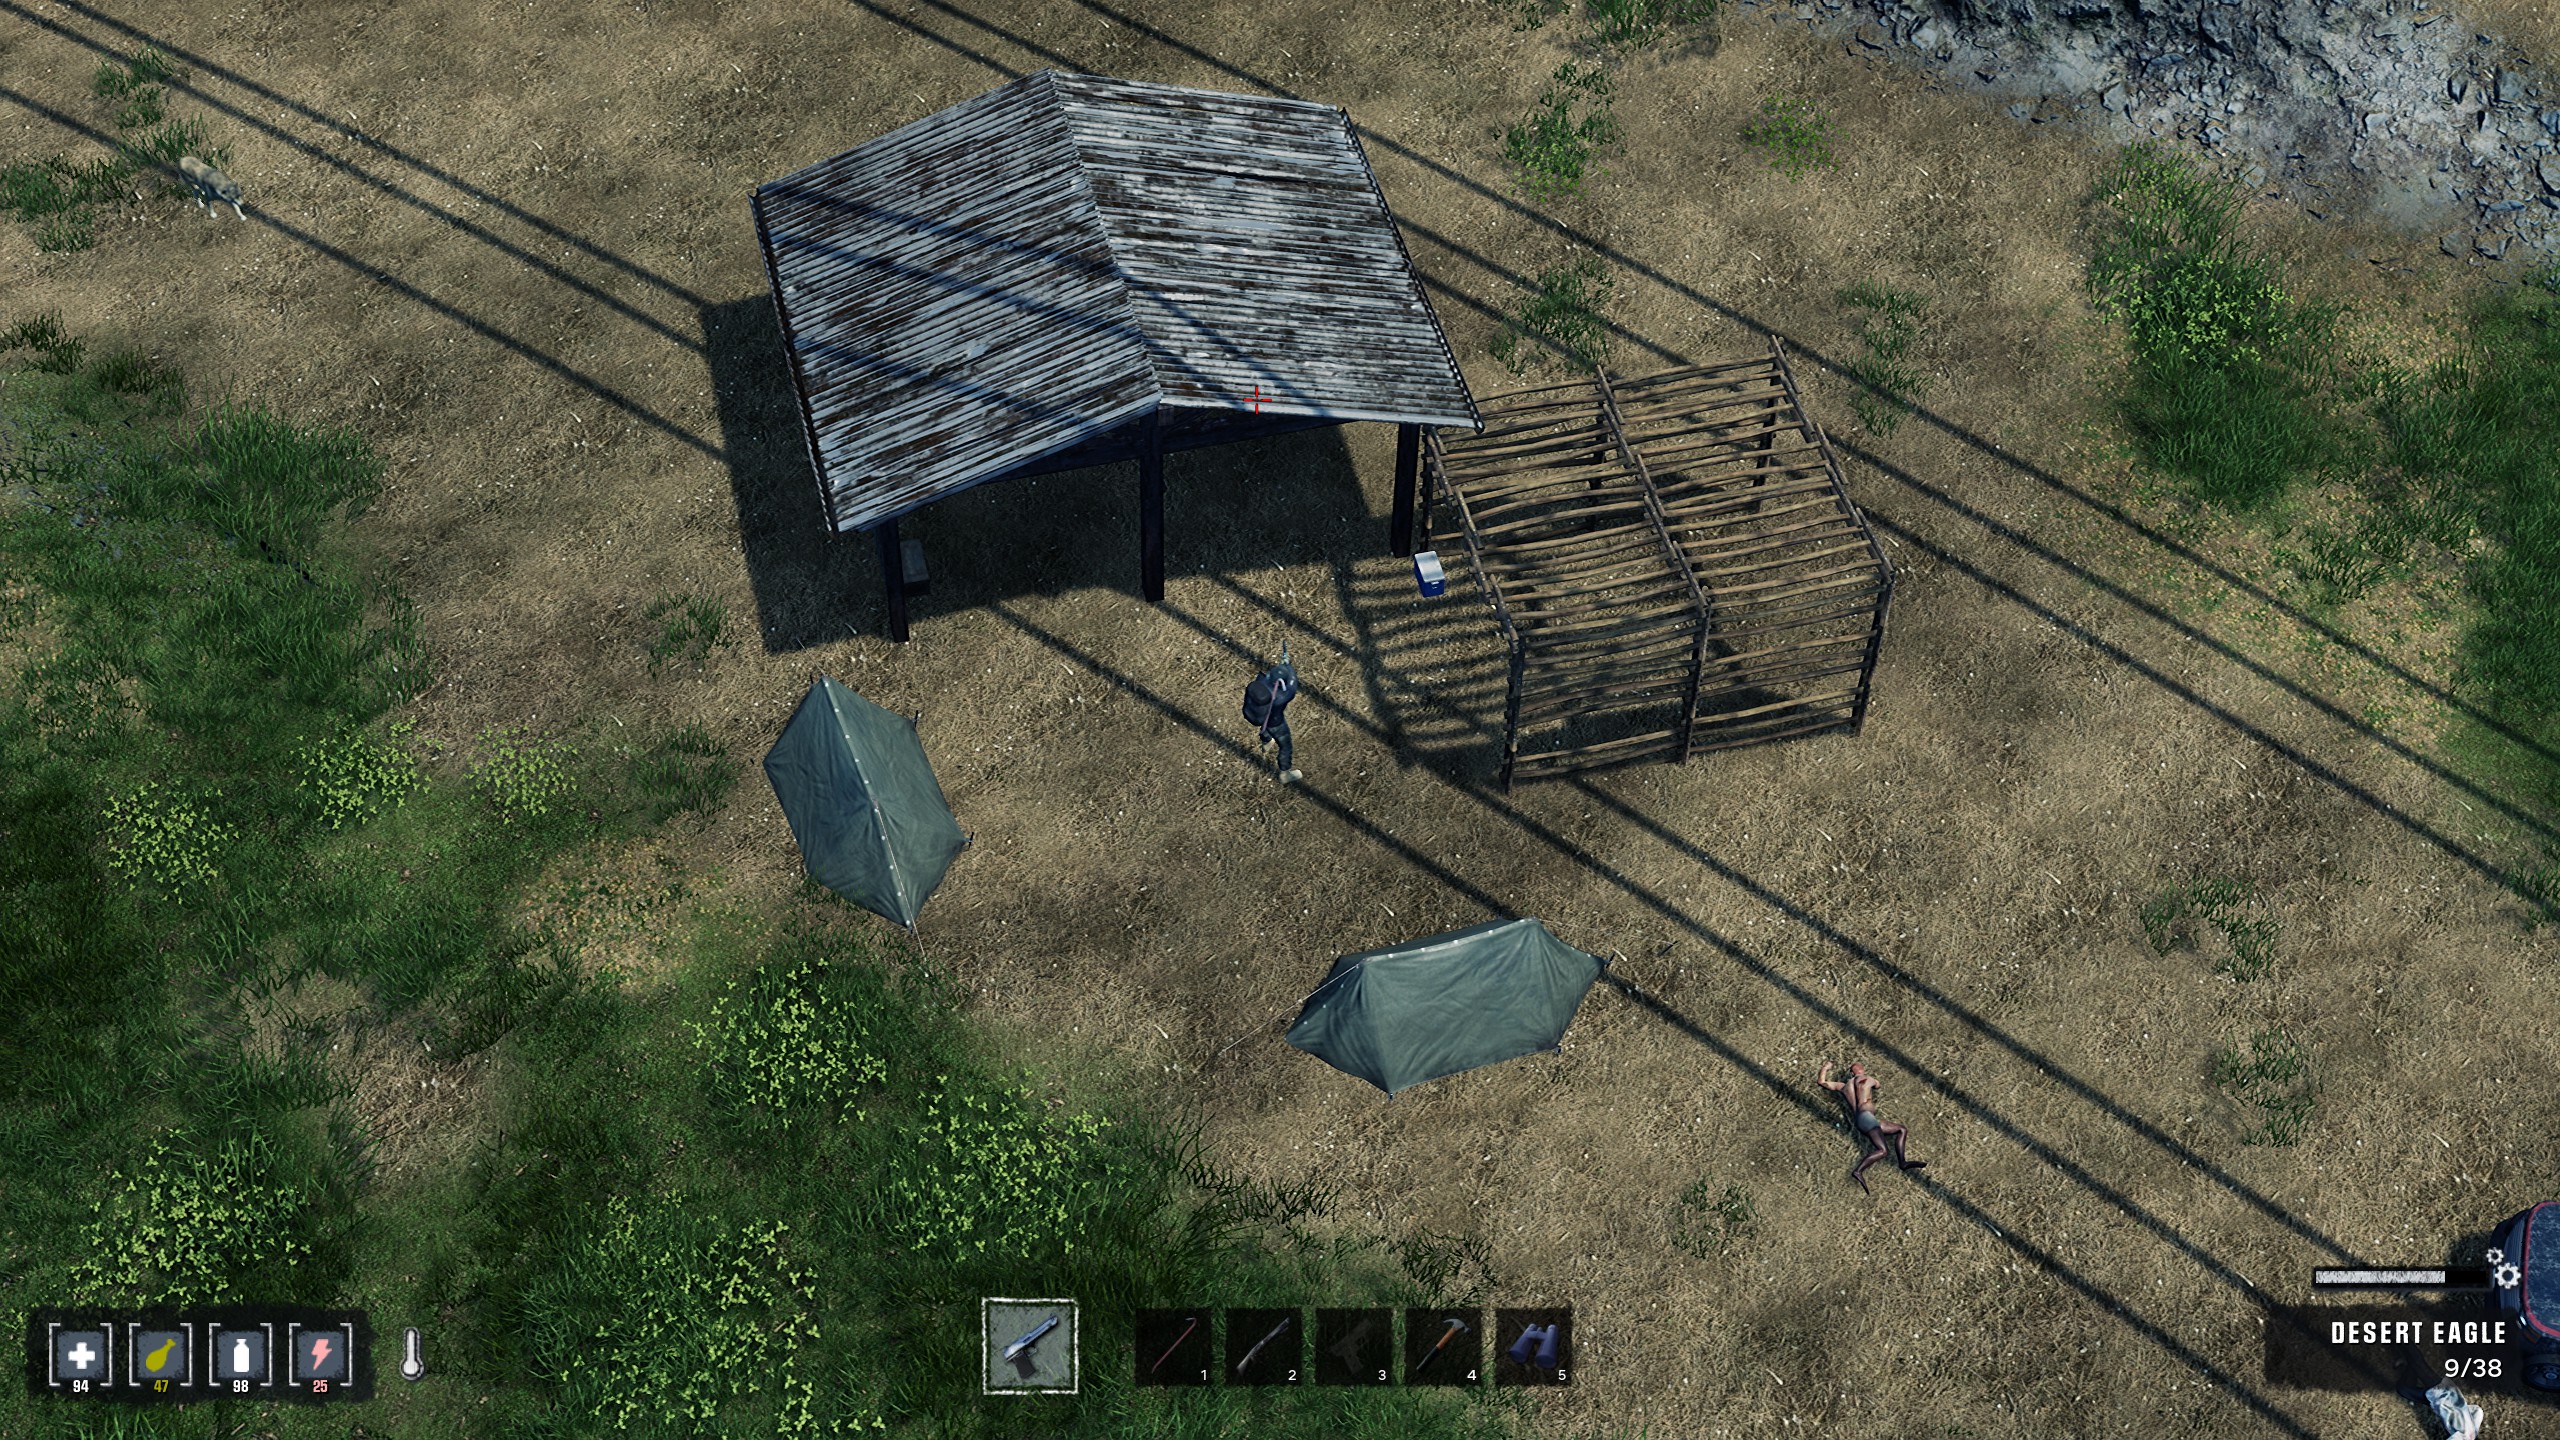
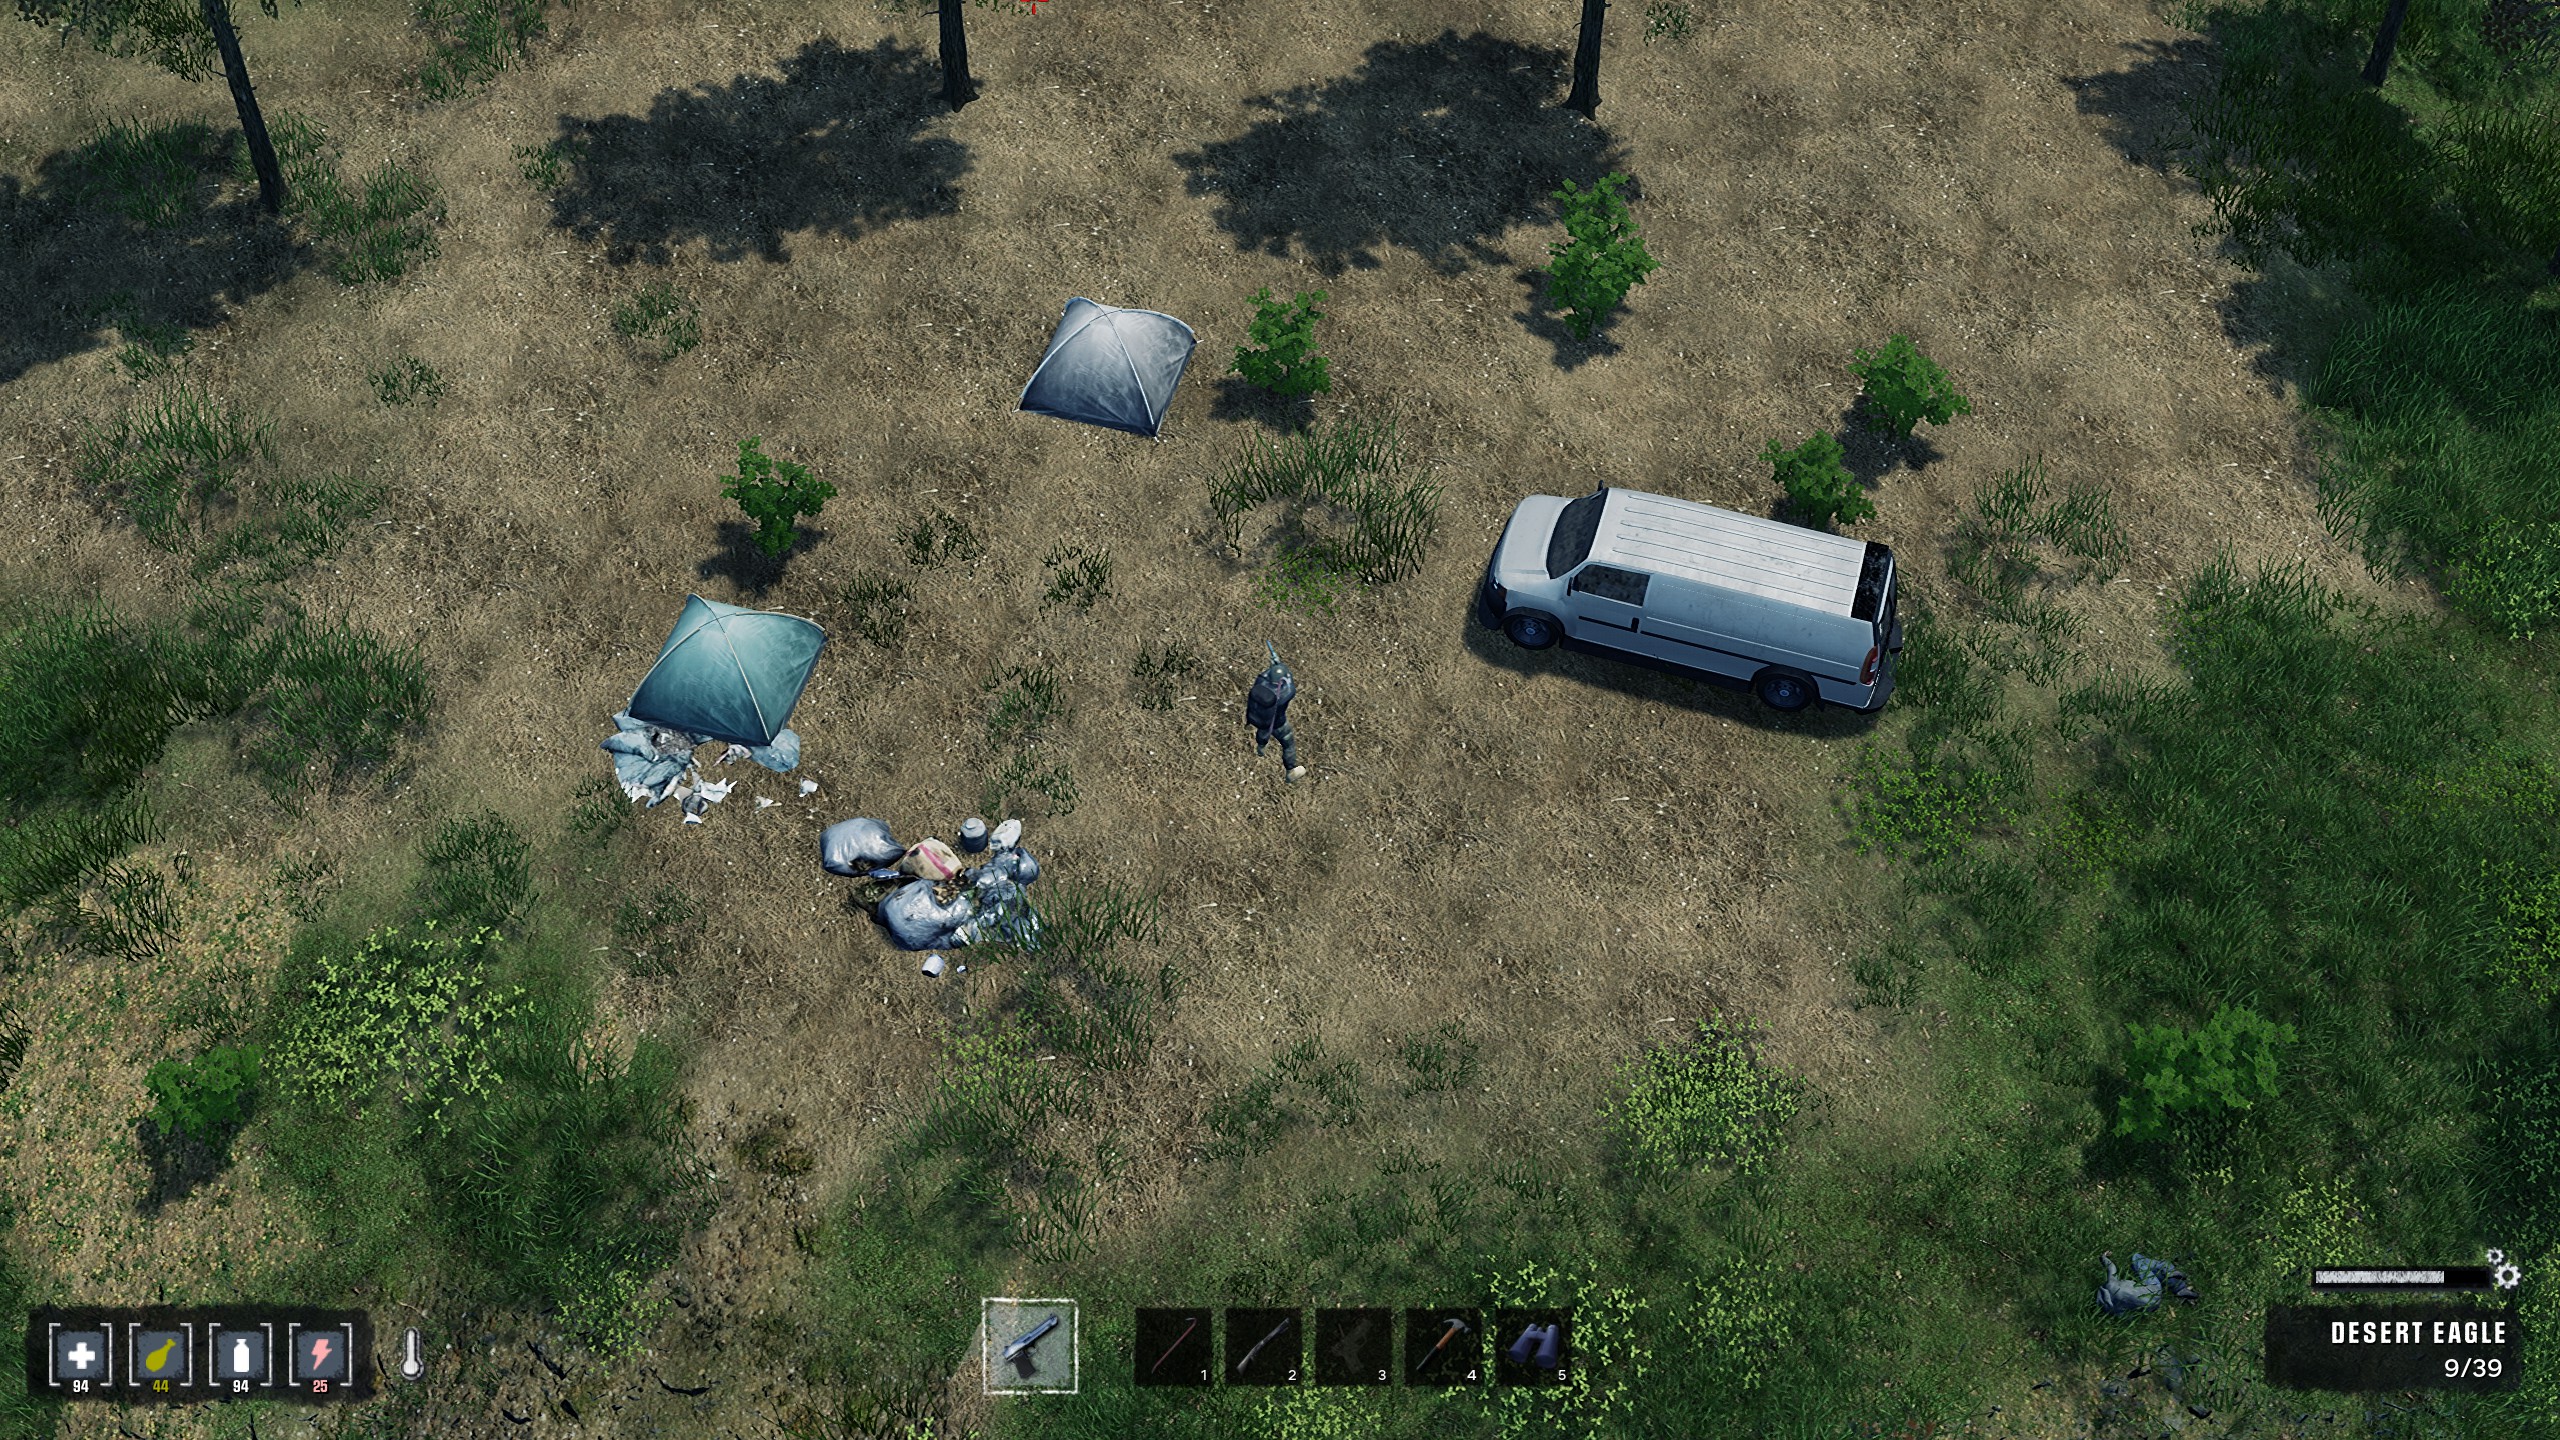
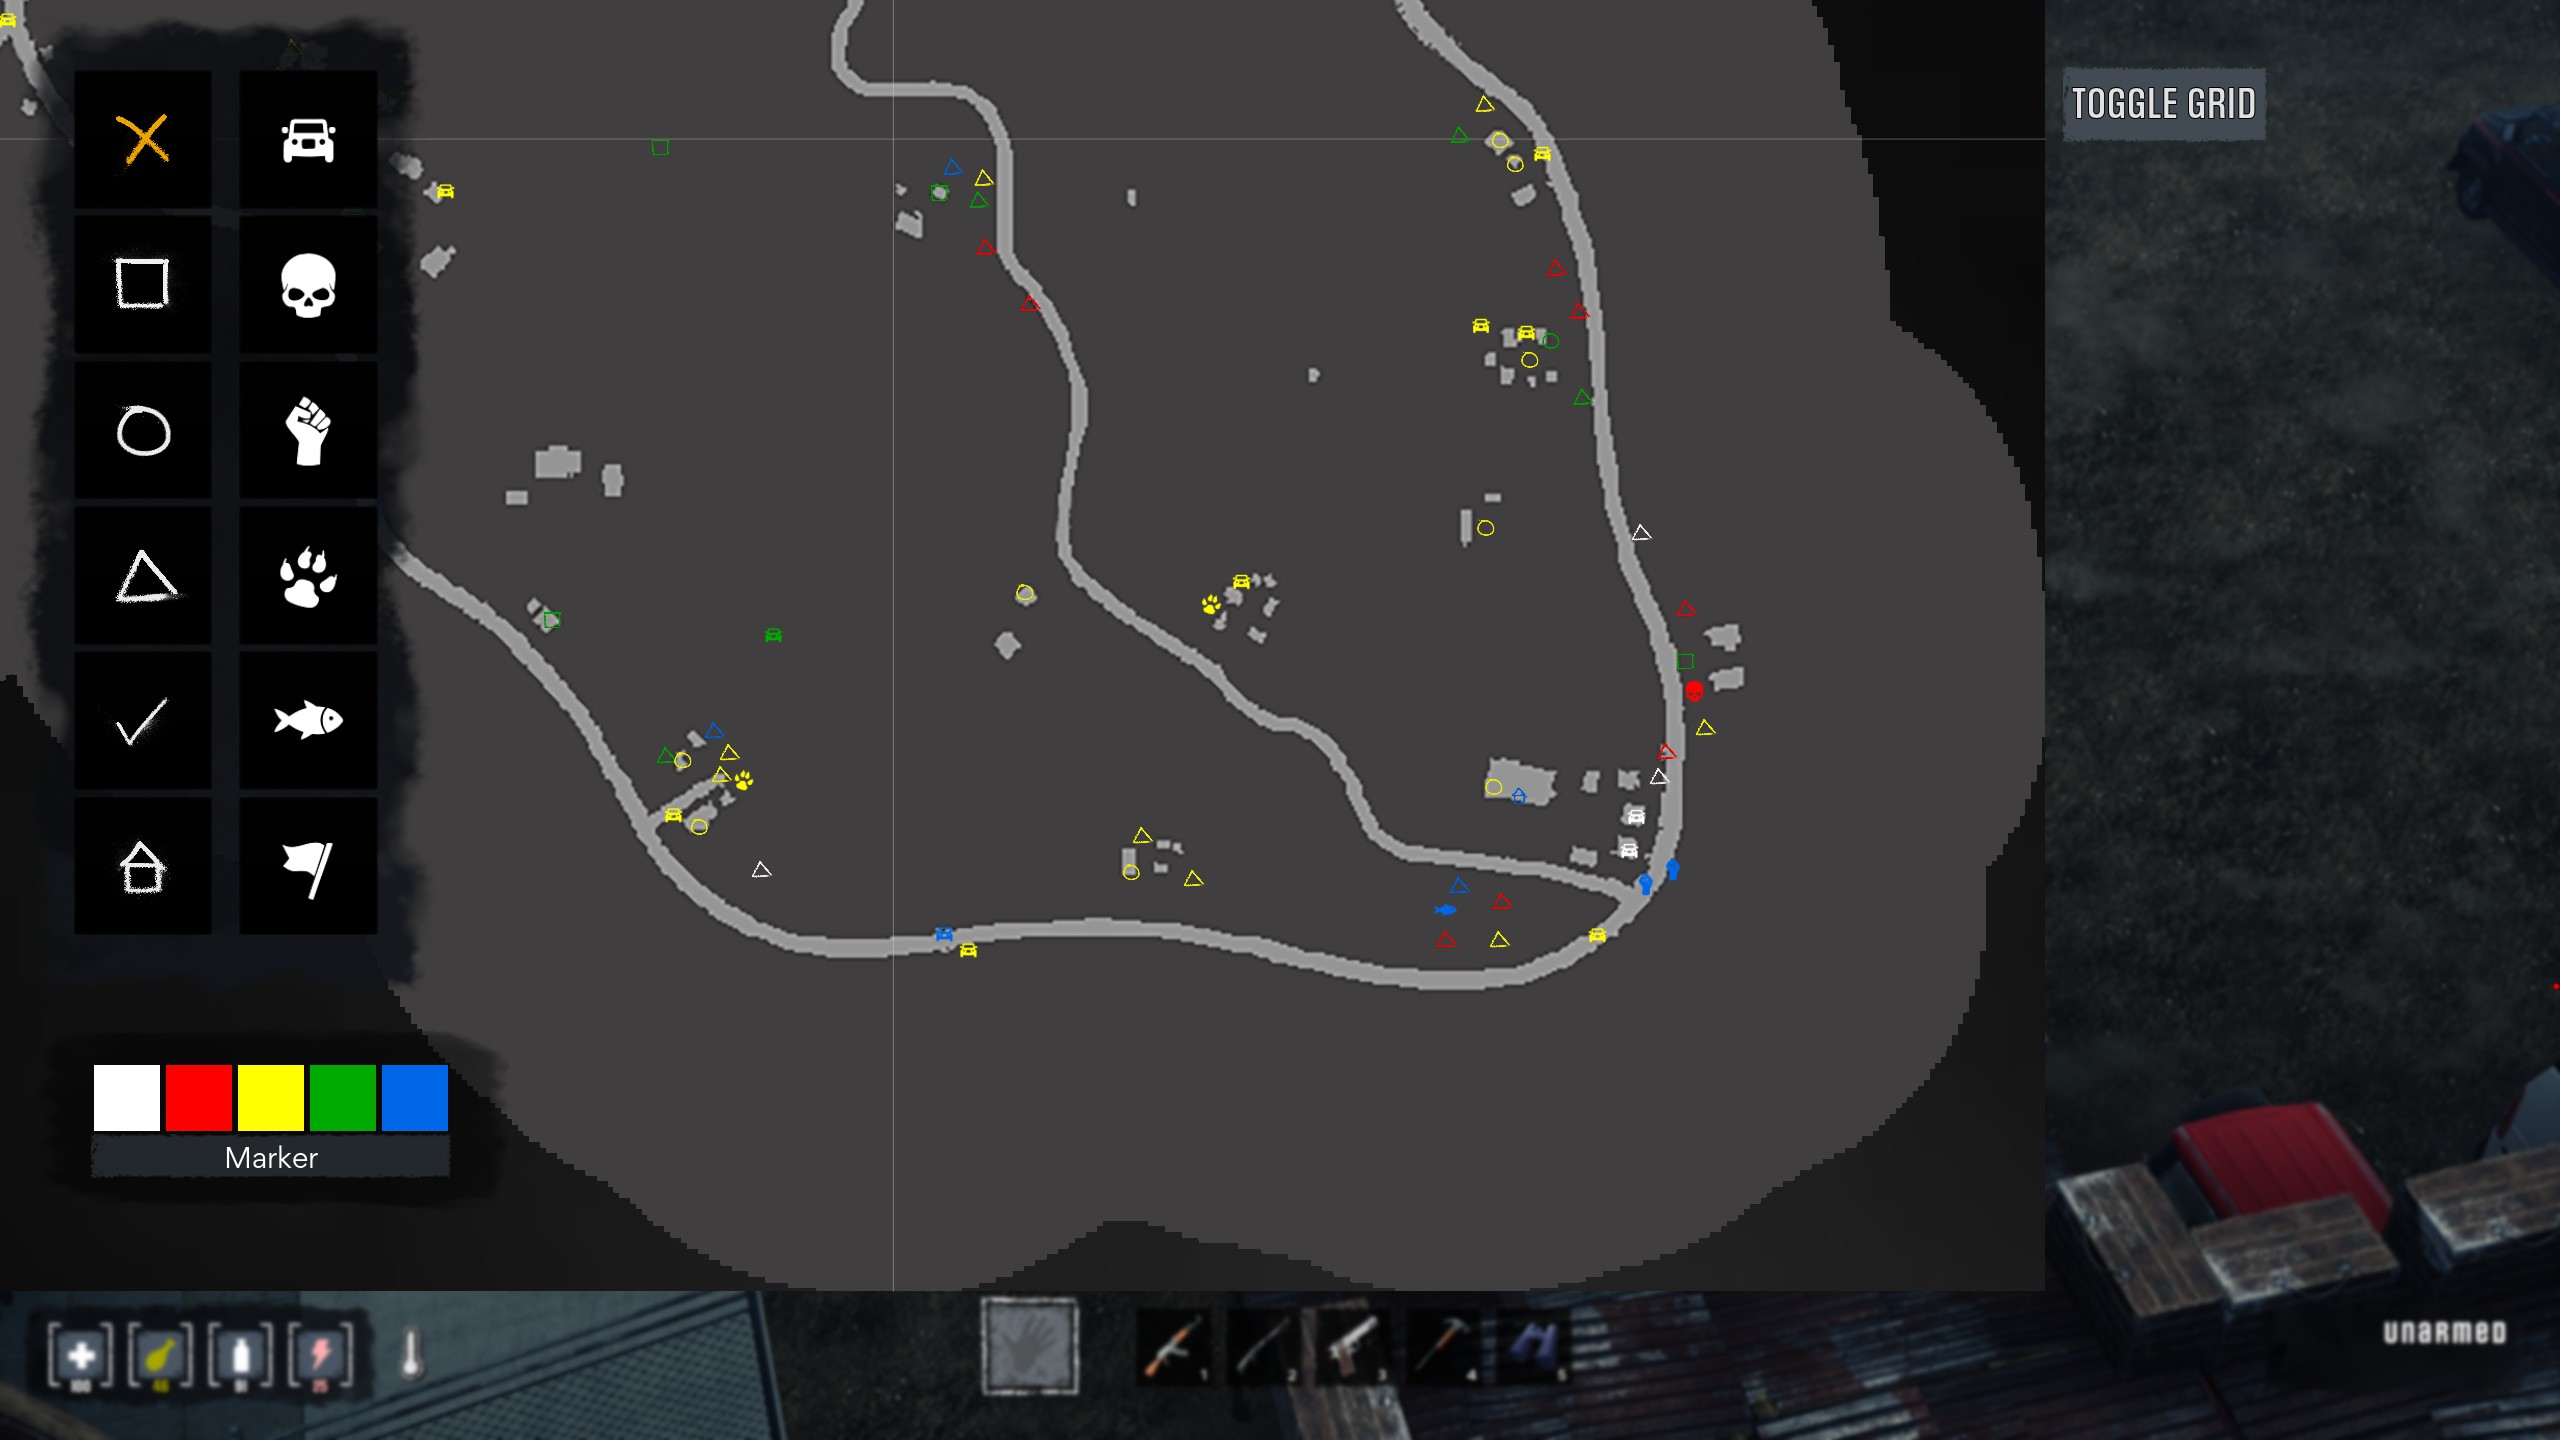
With regards backpacks it came to light thanks to the help of some other posters that they are not of a fixed location. There are a set number of possible spawn points for backpacks, in your world one may spawn at a location or it may not and exactly what bag will spawn appears to be random.

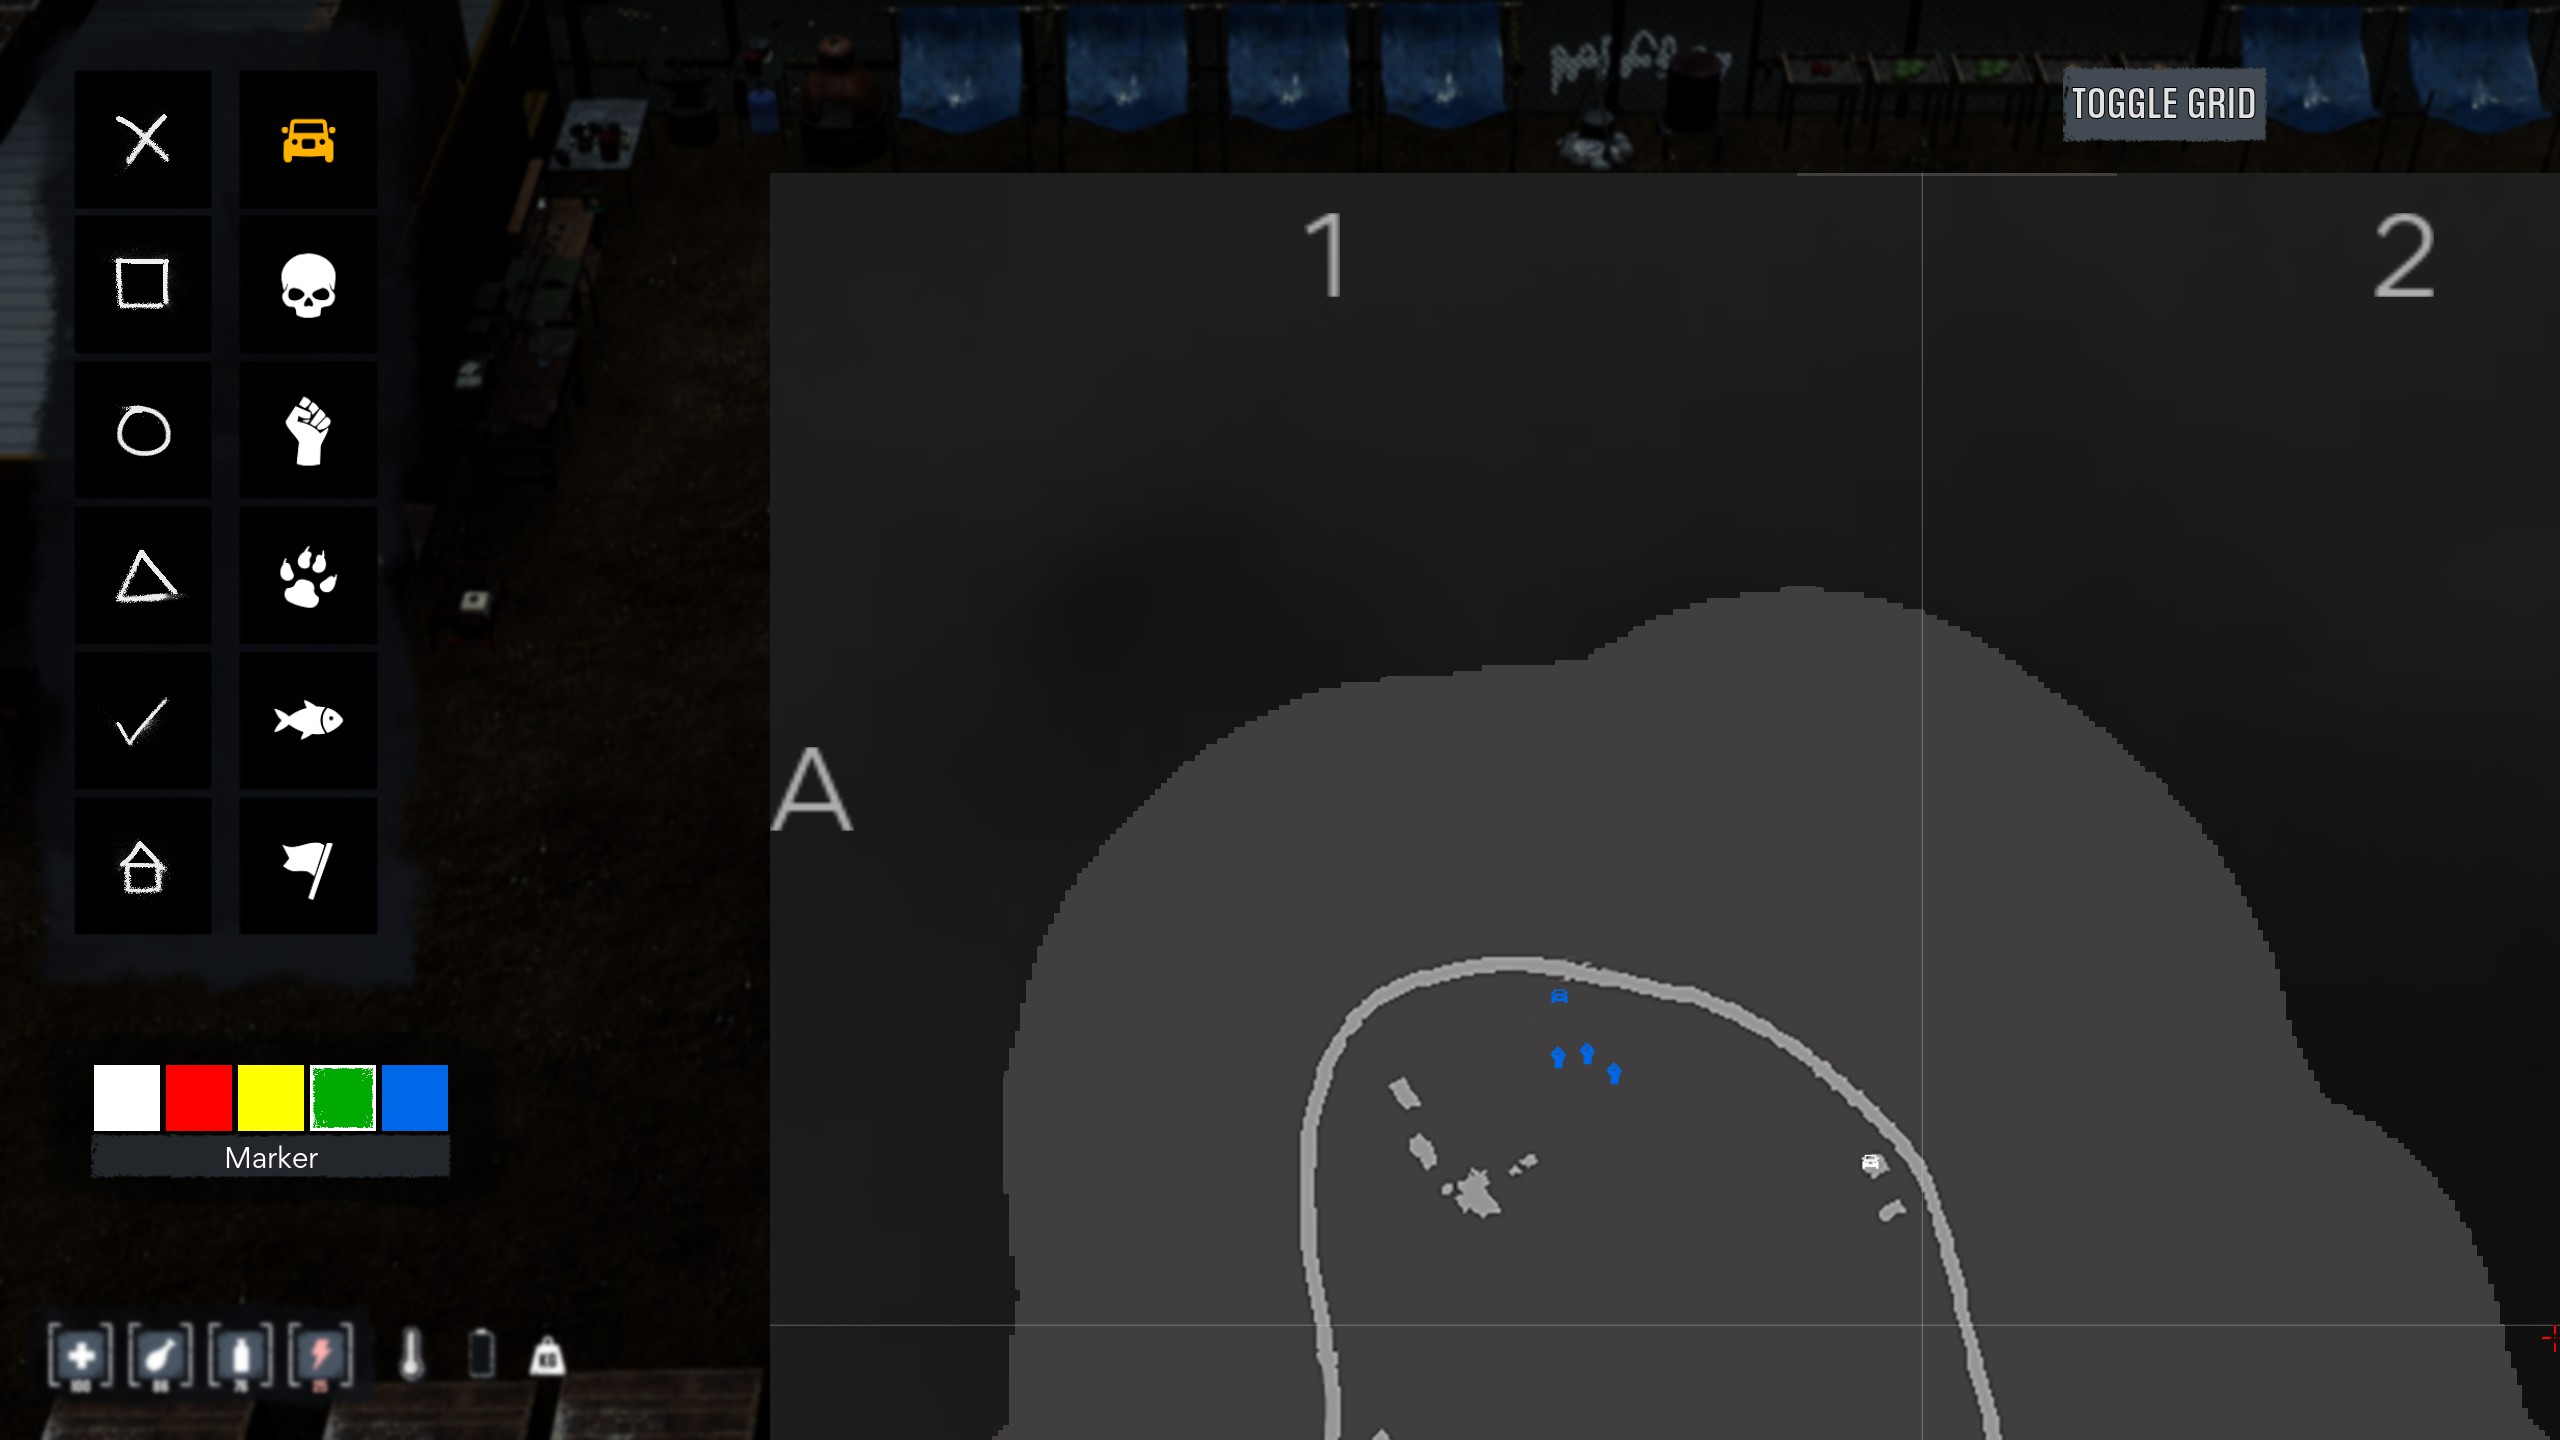
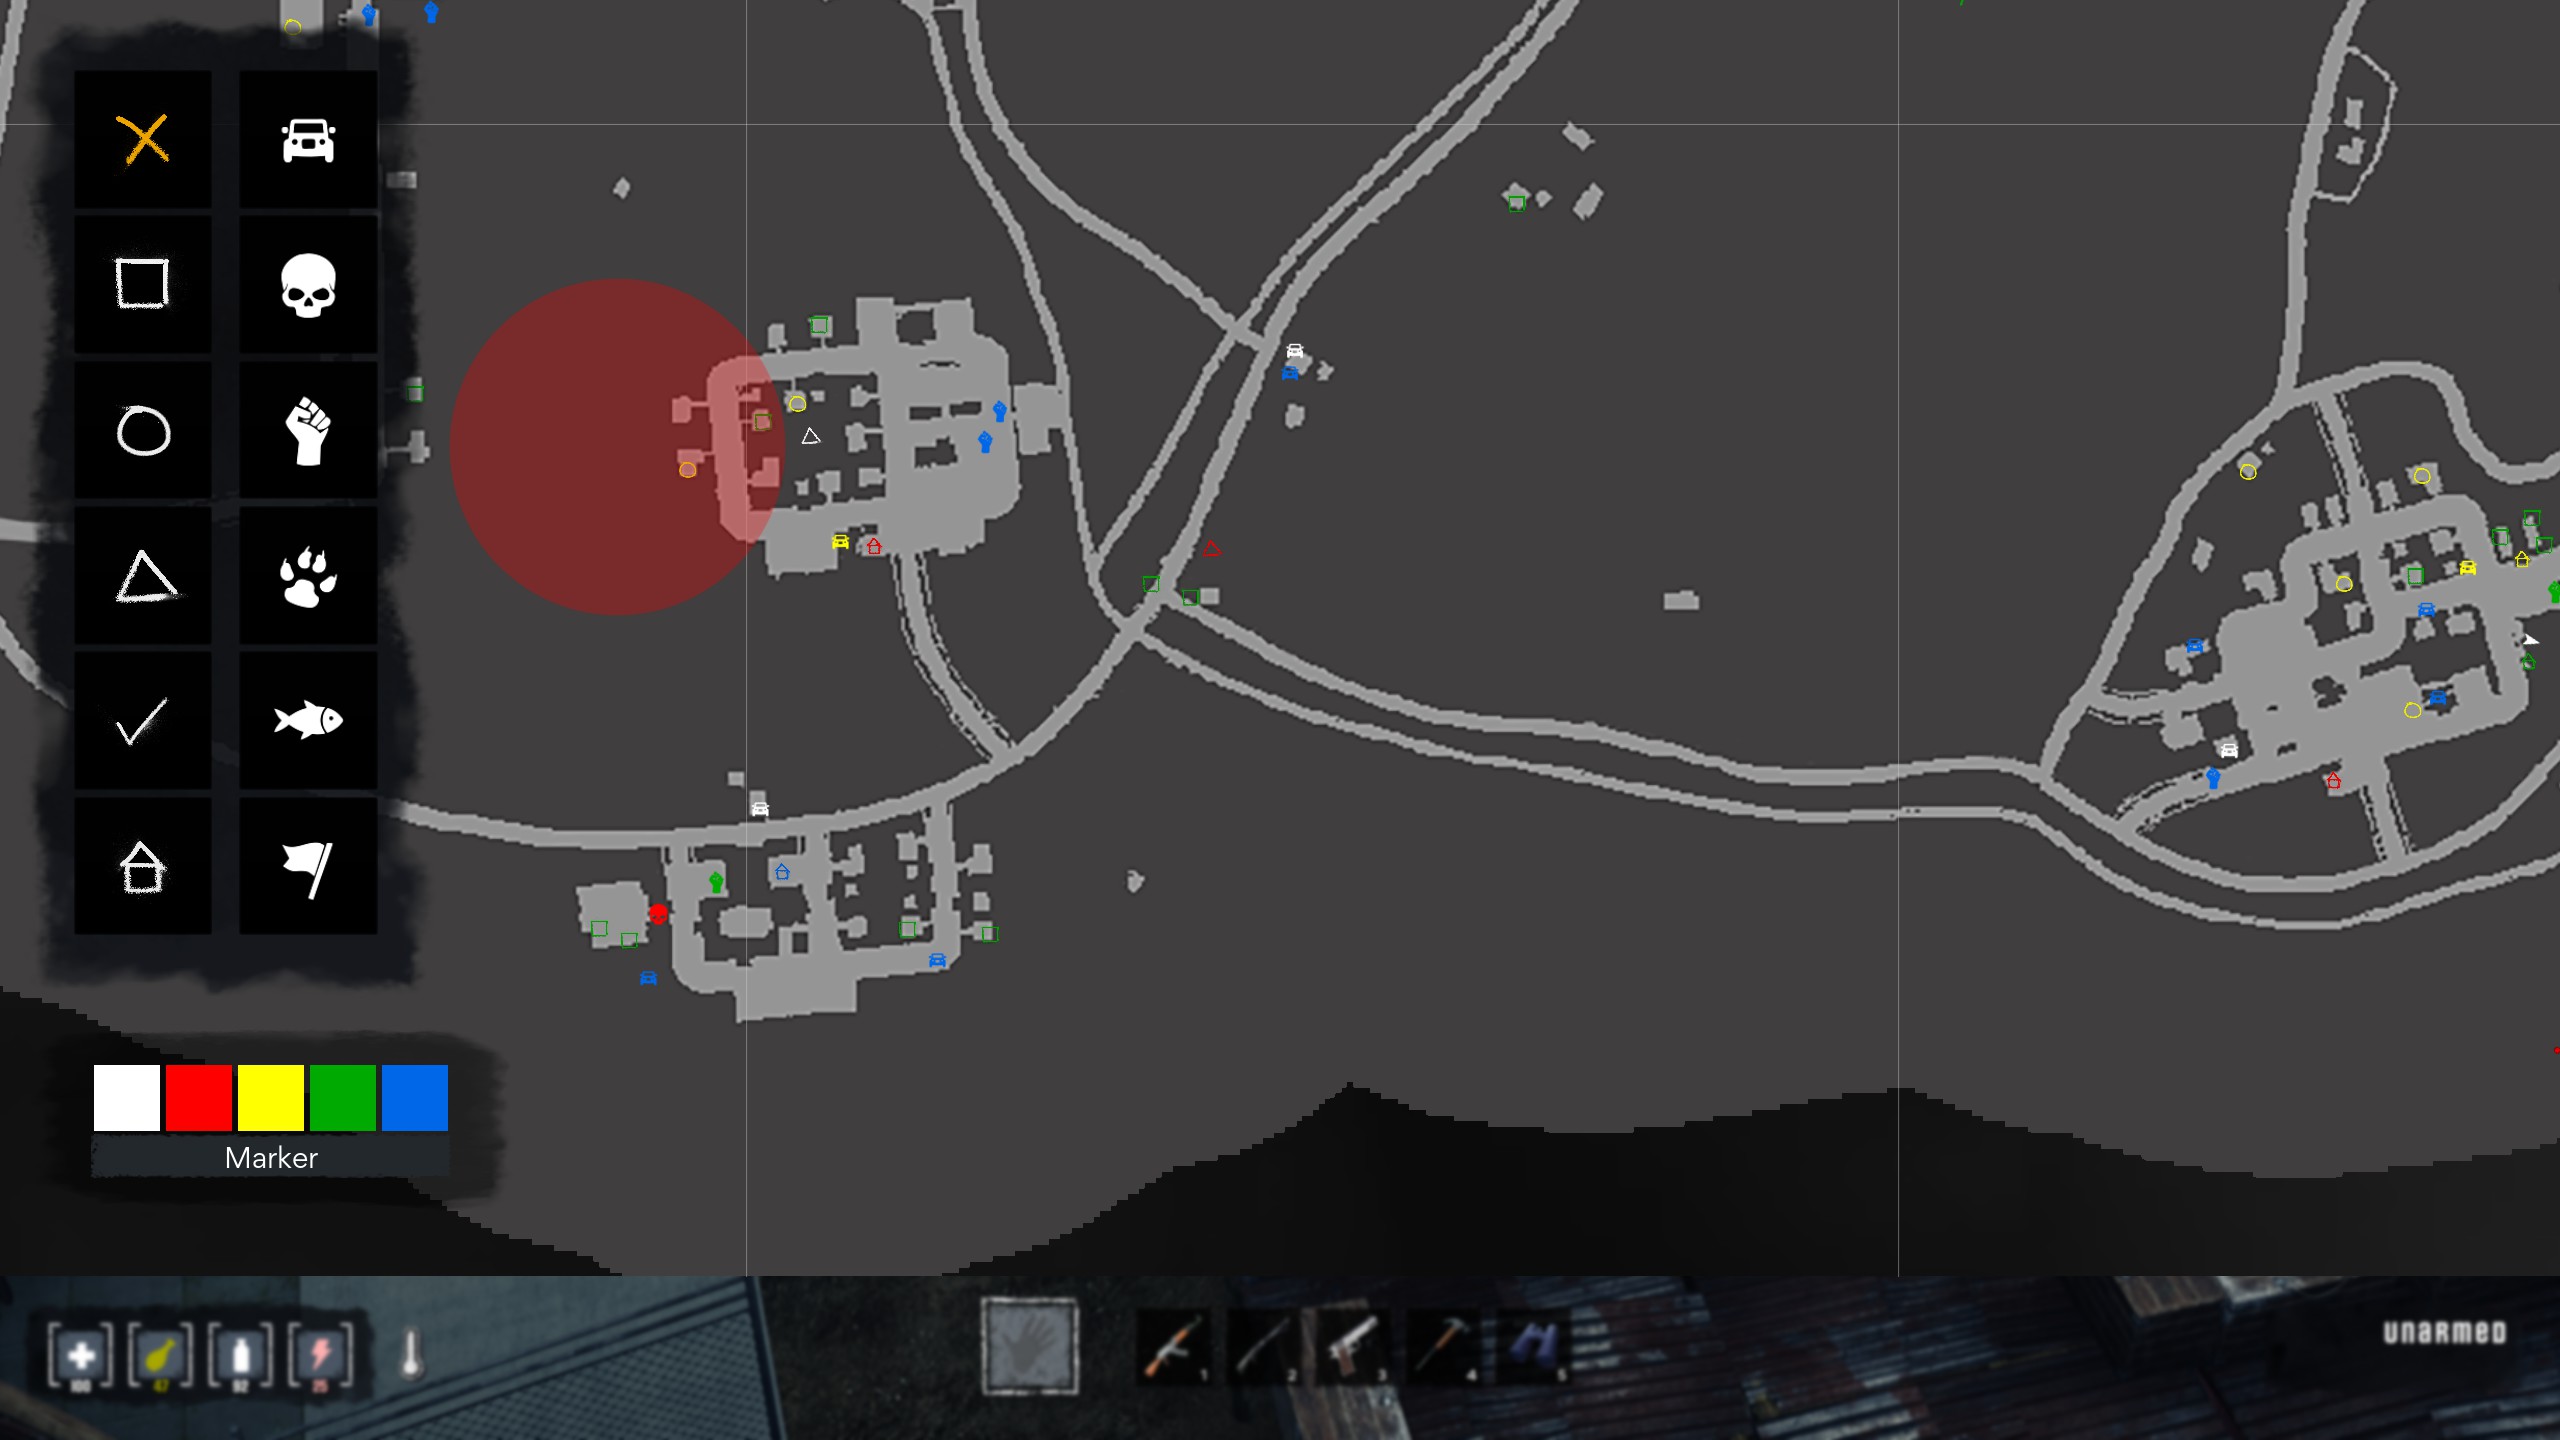
As such the locations marked on my map for bags MAY contain a bag and if it does which one is unknown. It also means that there are possible spawn locations for bags that are not marked on my map.

The only thing we managed to work out is that ore node locations are fixed and not random.

Hope this helps
A