Space Engineers

Space Engineers

1,037 ratings
Practical shipbuilding for practical people
By rule .303
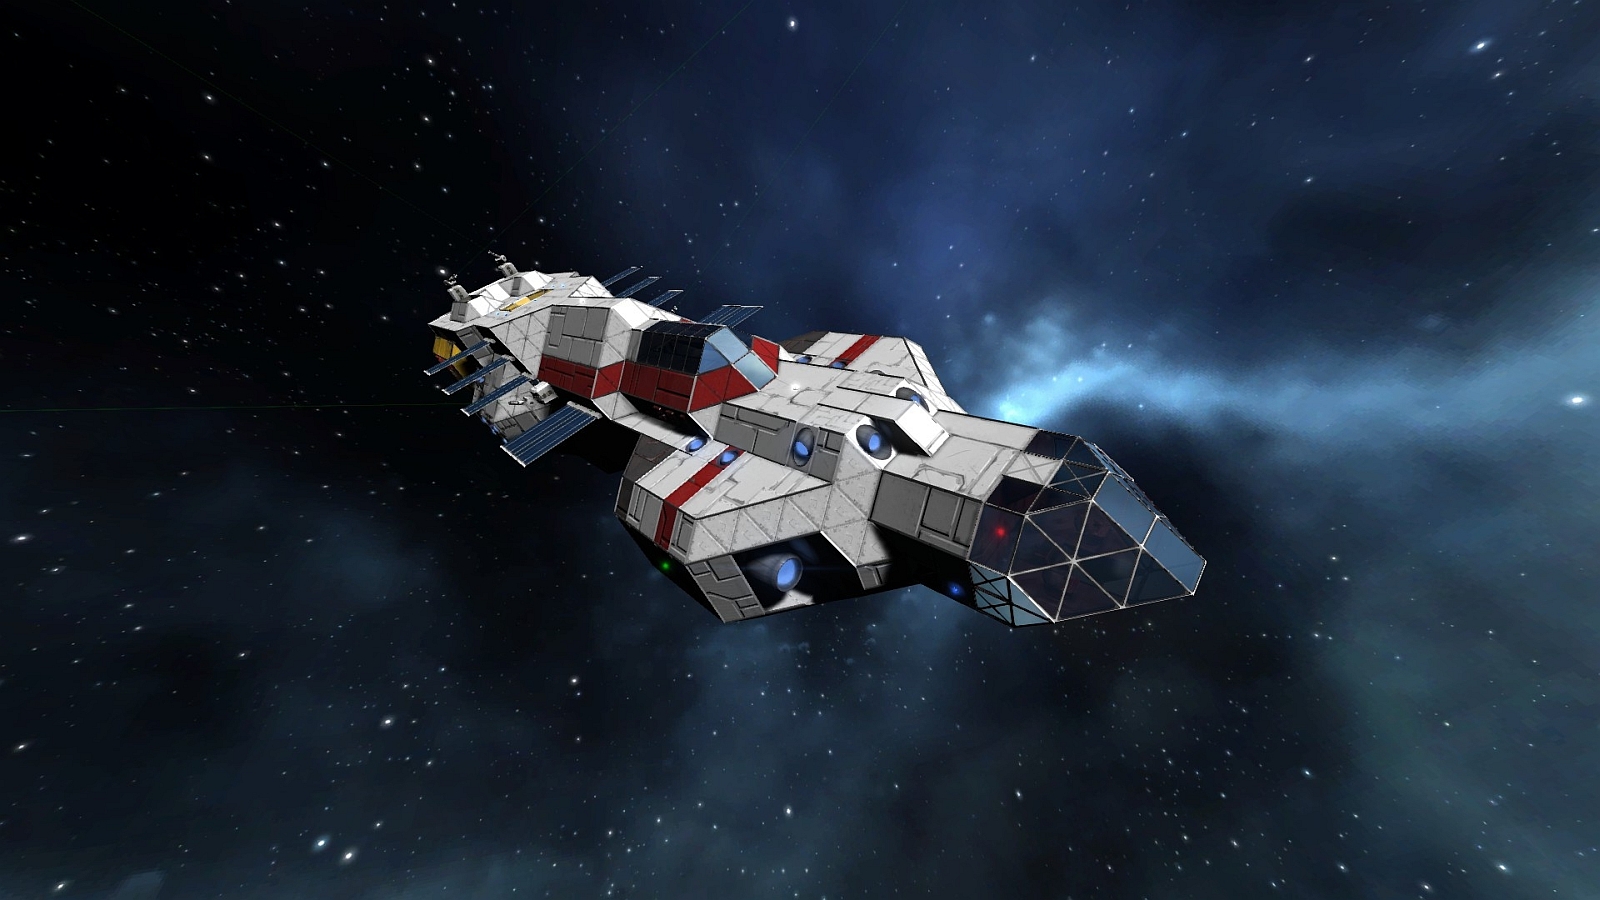
Stuck for ideas on how to lay out your ship? Sick of being run over roughshod in multiplayer? Get some useful pointers on ship construction and take back the advantage!

This guide is a work in progress, and so not all sections will be complete. Check back regularly to see new additions!
2
3
4
3
   
Award
Favorite
Favorited
Unfavorite
Introduction
Space Engineers presents almost limitless possibilities, but this brings with it a very important question: just what are you going to do with this potential? You could build a replica of a ship from your favourite movie or videogame, you could build a "city" on an asteroid... or, if you're like me, you might be more concerned with building a more believable ship, something with practical applications and more realistic design.

This isn't easy, though; in many ways, it's actually harder than just building some grandiose vessel. You have to try and actually think like an engineer as well as an artist or architect. If I put the engines here, will they be too prone to damage? Have I got redundant controls or is the ship doomed if the cockpit is hit? Does my airlock ruin the ship's lines, will I have to move it or deal with the ship being ugly?

The larger and more complex your ship is, the more difficult this becomes. Small ships are generally not too hard to design, but a large carrier or colony ship brings with it all kinds of conflicts between structural integrity, aesthetics, capacity, and utility. The larger your rooms are, the weaker your ship will be. The more interior bracing your ship has, the less space you will have. The heavier your framing, the more difficult it will be to maintain a nice shape. Building a practical ship is a careful juggling act between many different aspects of design at every level.


The goal of this guide is to help you maintain this balance by presenting examples of design problems and some possible solutions. These can be applied individually as needed or can be implemented holistically to build a new ship from the ground up. At the end of the day, however, you should always ensure that your ships fulfill your own goals and desires.
General layout
Role

First of all, just what are you designing a ship for? What are its objectives, and what kind of environments will it be operating in?

Are you designing a cargo hauler, with a skeleton crew and many modular containers that can be added or removed by cargo tugs? Is it a commerce raider, with emphasis on range and capacity and just enough firepower to scare civilians? A factory ship needs an easily-accessible, centralised conveyor system and a maximum number of refineries and assemblers for a minimum of space - does yours have these? What good is a mining support ship without a hangar properly equipped to handle small mining vessels?

Don't just decide to build a battleship by sticking a bunch of turrets on a transport - give some serious thought to what it is exactly that your ship will do, and how to best design it to achieve those goals. Think about where and how it will pursue them. Perhaps your freighter needs some defensive turrets if it will be travelling long distances through uncharted systems, or maybe a fighter ship you designed will be expected to operate planetside too and needs wings. In fact, that last example is a good demonstration: not only do wings provide plausibility for dual-purpose, Space Shuttle-like fighters, but those wings also give you more real estate for mounting weapons. Think of real-world examples - many attack helicopters have stub wings to carry more weaponry.


The Goon Construction Vehicle Mk.III is a perfect example of a ship designed around its role, rather than the inverse. With no space wasted, the GCV has a great capacity for its size and can squeeze into even the tightest of work sites. (GCV Mk.III designed & built by PartyAlarm)

Production considerations

Just how many of these ships will you be building? One-offs can be lovingly crafted, but utility ships and smaller warships need to be kept simple enough to produce in large batches. As Antoine de Saint-Exupéry once said, the true mark of a perfect design is not when there is nothing left to add, but when nothing more can be taken away. Simplify production as far as possible without impacting on your ship's functionality, and try to keep its arrangement logical. This is especially important if other people may need to assist in construction, or if they will be building the ship themselves.

The GCV Mk.III's design proved so simple that within an hour of seeing one built, another player was able to establish a full-blown production line without any assistance from the original creator - and many others soon joined in building the little ships and restoring them even from the most shattered wreckage.

Survivability

Nobody likes losing hours, days, or weeks' worth of work. Before you get carried away with sweeping promenade decks, high-ceilinged halls or mile-long corridors, stop and consider what these will mean for your ship and its crew. Can a hull breach risk explosive decompression of your entire vessel? Could one well-aimed missile or unlucky asteroid sever your connection to your engines, or cut your ship in half? If you lost part of your ship, would you be left drifting helplessly because all of your gyros were there? Reundancy is only one step, careful design is another.

Following are some ground rules for those who value practicality over splendour. Compartmentalise your ship. Ensure your bulkheads are solid enough. Keep vital areas in the centre of the ship, and/or spread around - not in a giant clump which begs to be shot away. Have a course of action planned for each eventuality, a backup to each system, an out for every potential disaster. Make sure you've thought your lighting through - nobody enjoys blind collisions or falling down a long access shaft to their deaths.

Consider also the ease with which your ship can be repaired if it does get damaged - can you easily access all of its major systems to repair them? Are there some parts of the ship you can afford to cannibalise to patch a hole elsewhere? These sorts of questions, and your answers to them, can be the difference between limping to a safe port or drifting into eternity.

Versatility

Does your ship have more than one task, or will it need to use different tools to complete its missions? Consider using the new merge blocks as tool attachment points. This can allow your ship to seamlessly switch from one task to another without needing to undergo an extensive, costly (and probably time-consuming) refit every time something comes up.

During a redesign of the standard lifeboat, I added a downwards-facing merge block just behind the pilot's seat and another by the airlock, with the idea of using them to dock the ship to stations or attach tool rigs to it.


The simple addition of the merge block under the cockpit turned the standard expendable lifeboat into a ship worth keeping, as I built a large grinder attachment that could be clamped on when needed and then removed when not in use.

Mobility

Depending on the role of your ship, it may not need to be fast or agile. For work ships like the GCV shown earlier, excellent control response and even thrust distribution is more important than speed. For interceptors and blockade runners, speed and agility means everything. Freighters, meanwhile, need enough power to get them moving in a straight line - turning is optional.

Be sure that you are properly accounting for this need as you build. Underpowered fighters are doomed to fail; if you lose power to an overloaded reactor in the middle of a dogfight, it will probably be your last. On the other hand, superfluous gyroscopes on a freighter or factory ship are just wasting space that would be far better used for more cargo storage or machinery.

Remember, it's a good idea to have redundancy in those systems most important - giving a fighter more gyroscopes than it actually 'needs' isn't a bad idea, and nor is providing a backup reactor for a factory ship.

Comfort

There's a fine line between cozy and cramped, but if there is one thing practically-minded shipbuilders should avoid, it's wasted space. Hallways should provide enough room for two or at most three people to pass, and perhaps some conduit space - no more. Make use of idle floorspace by adding seats, desks, cargo modules, or backup systems. Make sure people can see where they're going and look at using some form of colour-coded system to help your crew navigate larger vessels without getting lost.

When planning crew areas, consider what you would find on seafaring vessels of equivalent weight class and role. You may not need bunks on a tug, and perhaps your shuttle only needs one or two - but your cruiser will definitely need quarters, a mess, and recreation space.


Make the best of what space you have - even a seemingly tiny and cramped space can always be utilised in some way. In this case, the interior of my refit lifeboat still seems cozy rather than cramped, even after the addition of a double-length bunk, separated cockpit, and even an internal airlock.

Keep in mind that civil and military vessels will differ in interior design, and the ship's size will also factor in. Larger civilian ships should feel more open and luxurious, while military vessels tend to be cramped and claustrophobic regardless of size. Small merchants and shuttles should feel cozy rather than cramped or spacious.
Size versus complexity: the resolution problem
Due to the block-based nature of the game, it's inevitable that larger ships can achieve a better 'resolution': they are able to contain far more detailed systems and shapes than smaller ships. However, this in turn comes at a price, and if you get too hung up on intricacies your ship's size may balloon out of control.

When you begin your design, it's best to plan for a certain size or a certain level of detail - you cannot reasonably plan for both. By making the decision between one or the other, you are helping to prevent the tendency to get carried away in the pursuit of something that realistically does not contribute to your design. I grapple with this issue a lot myself, and find that my best ships tend to be those where I had a concrete idea of exactly how big I wanted them to be.

If you are trying to design a shuttle or perhaps even a frigate or destroyer, there's no point planning for a proper HVAC system, electrical conduits, and piping. Space Engineers already does away with the need for some of these more grognardy details by allowing any block, regardless of size, type, or completion state, to transfer power across a grid. Although this perhaps takes away some potential depth in damage control (say, having to cope with the consequences of a major cable run being cut), it does allow for much simpler shipbuilding and much more compact designs. If we had to run cables and pipes through everything, it's not hard to imagine even the simplest space yacht growing out of control until it's the size of a large carrier.

Although many parts that add realistic touches to ships are now available thanks to the mod Workshop - including cable conduits, air ducts, and piping segments - you should always ensure before adding them that they actually contribute significantly to your ship's design, and be aware of the impact they will have on its available internal volume and its overall dimensions and mass. Perhaps you could just throw a grating panel down instead of a full HVAC system, or only show wiring where it'd be exposed? This is typically how I work on my smaller ships, as it makes them much easier to design and build, and much more aesthetically pleasing in the end.
Manned or unmanned?
With the recent addition of functional remote control into the game, it is now possible to make controllable, practical unmanned vessels no matter what your level of building experience is. Previously, controlling a ship remotely involved manually adjusting parameters for each thruster or gyroscope, and it could be difficult or impossible to see the result of your inputs; sensor blocks made things a little simpler, and auto-follow drones and rudimentary guided missiles became possible.

Now, with the combination of remote control units, cameras, and the quick function toolbar, we can all set about building drone ships and guided weapons, and also control them a lot more precisely. However, there are times where you may not want to rely on drones entirely.

Occasionally, drones may need to be rescued from situations which cannot easily be resolved remotely. Here my mining drone Malyutka got jammed in its own tunnel and was unable to turn or proceed further forwards or to the rear, so I had to fly over and manually clear space for it to move.

Combat vessels

Sometimes, you just need a human's reflexes and situational awareness. I have kept the majority of my militarised designs manned, because simple camera systems do not offer nearly as much awareness. Space Engineers doesn't appear to model any kind of control latency regardless of distance, but in the event it does, this is another big strike against combat drones - the further they get from their command centre, the slower their response will be. In combat, split-second decisions and rapid control response are critical - part of the reason we are still seeing manned fighters in the real world, even though drone technology is advancing quite rapidly and they are now a common feature of modern warfare.

This doesn't mean drones are totally unsuited to military duties in Space Engineers, though - they can still make quite handy sentries if you don't want to risk leaving your base, and allow for low-risk scouting in dangerous areas. If the drone is downed or captured, you needn't worry about losing one of your engineers with it. A further benefit of using drones as scouts is the much smaller volume requirement compared to a manned fighter, with most cockpits being roughly 3x3x3 or 4x3x3 blocks in size, versus the single-block remote control unit and then however many cameras you want. Smaller size makes for better agility and a harder target - but it also means you have more space to play with for fuel or ammunition.

Mining/industrial vessels, utility vessels

This is probably the biggest area for potential development. The space saved by omitting the pilot from a miner makes it far more efficient, able to carry more ore and more drills. Similarly, worker ships and industrial vessels can be shrunk down to improve efficiency and utility and then controlled from a safe location. Previously hazardous environments can be worked in without the risk of injury or death, and lost ships are less costly to repair or replace. Just remember - you can't turn your head and look around behind you. Be sensible with your camera placement, and make sure you have as few blind spots as possible. Try to place cameras near things like connectors or tools, so you can line them up easily.

Drone ships, like this miner, can be built much smaller and lighter due to the lack of a cockpit. My previous miner was manned, and approximately twice the size.

Large ships

Although it is entirely possible to control a larger ship remotely, anything much larger than the standard lifeboat should probably be crewed. This is to account for the much higher maintenance demands of a large and complex vessel, and also for reasons of space efficiency - anything that doesn't need a crew should not be that large, and anything that large should be able to cater to at least a small crew of two or three people. The crew also helps to present a deterrent against piracy, and can defend the vessel even in the event that weapons systems are taken offline.
Framing, bulkheads & hull structure
Framework & hull structure

The use of framing largely depends on the size and type of ship you intend to build. For smaller merchant ships, it is often easier to just build the hull as a shell and then add bulkheads as needed. Think of this as a more insect-like approach: the hull is an exoskeleton, and provides the structural integrity of your ship. Be aware that the size of your ship, the size of its compartments, and the number and size of the bulkheads will determine exactly how much damage it can take. A ship designed using the 'exoskeleton' approach but with large rooms and narrow, light armour bulkheads will not be able to survive much damage before breaking apart.

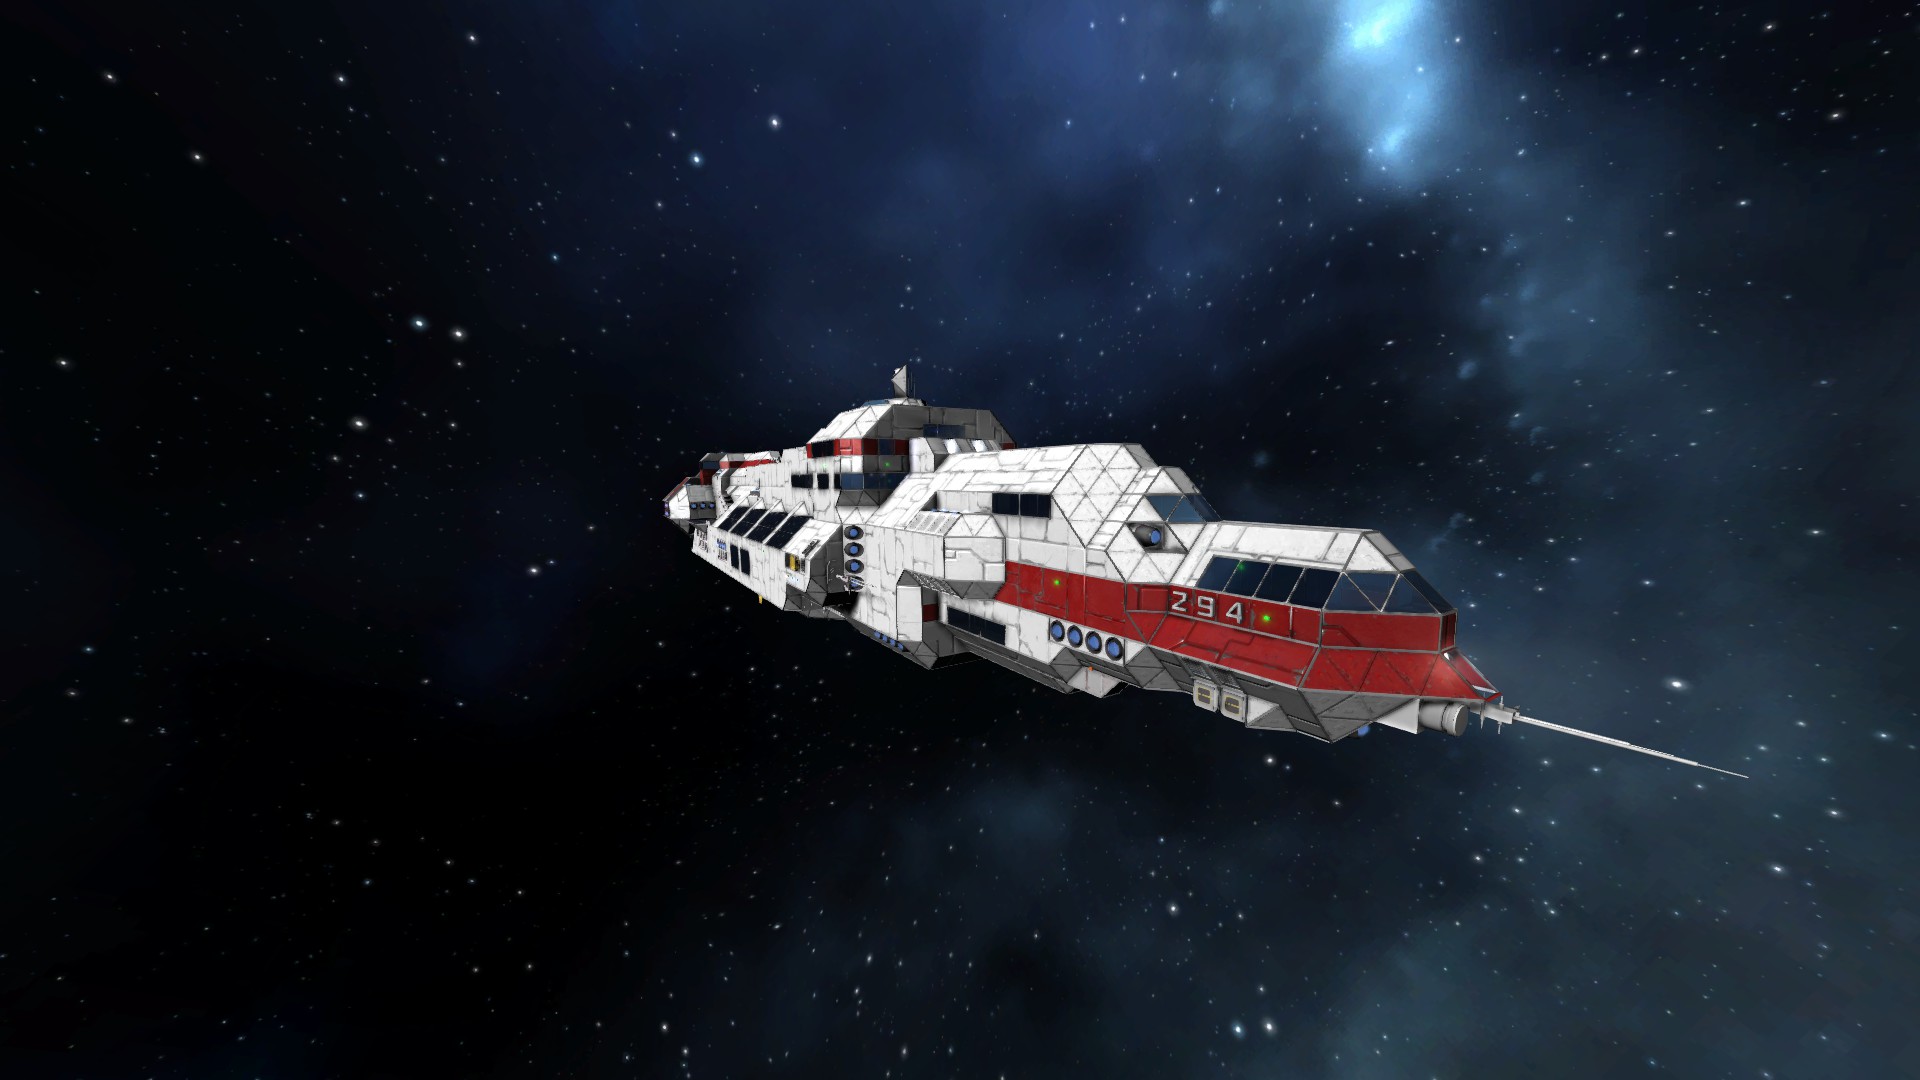
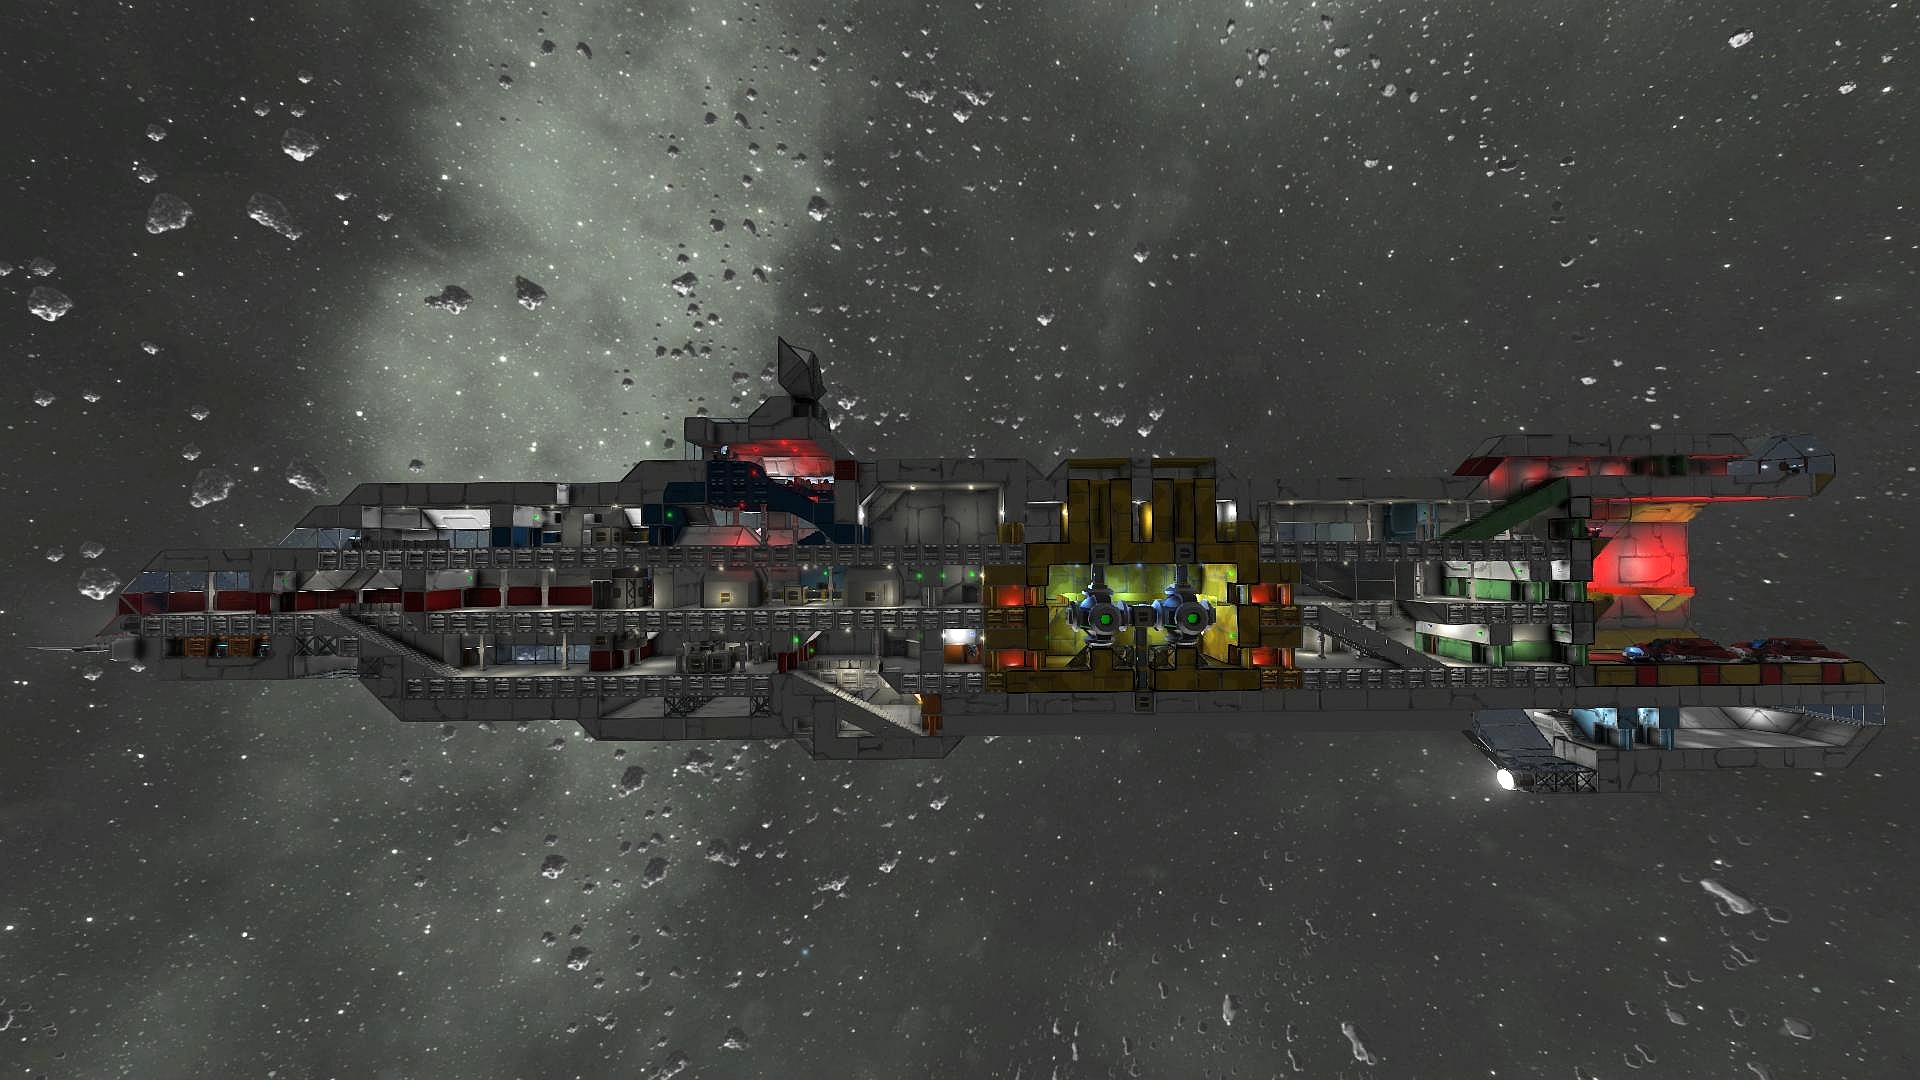
Let's look at an example - here's a cutaway view of my Nadezhda-class scientific cruiser, taken some time ago before I had started furnishing the interior:


As you can see, the ship's exterior is simply a single block layer of light armour. The interior floors are interior plate, and the interior bulkheads are also all light armour - and they are not consistent between decks. In fact, the only heavy armour plates in the entire vessel are the shielding for the reactor room and also the floor and bulkhead wall of the hangar bay. The interior compartments vary from small rooms to large chambers. This is fine as long as the ship is not damaged, but it becomes a problem as soon as something hits the vessel.

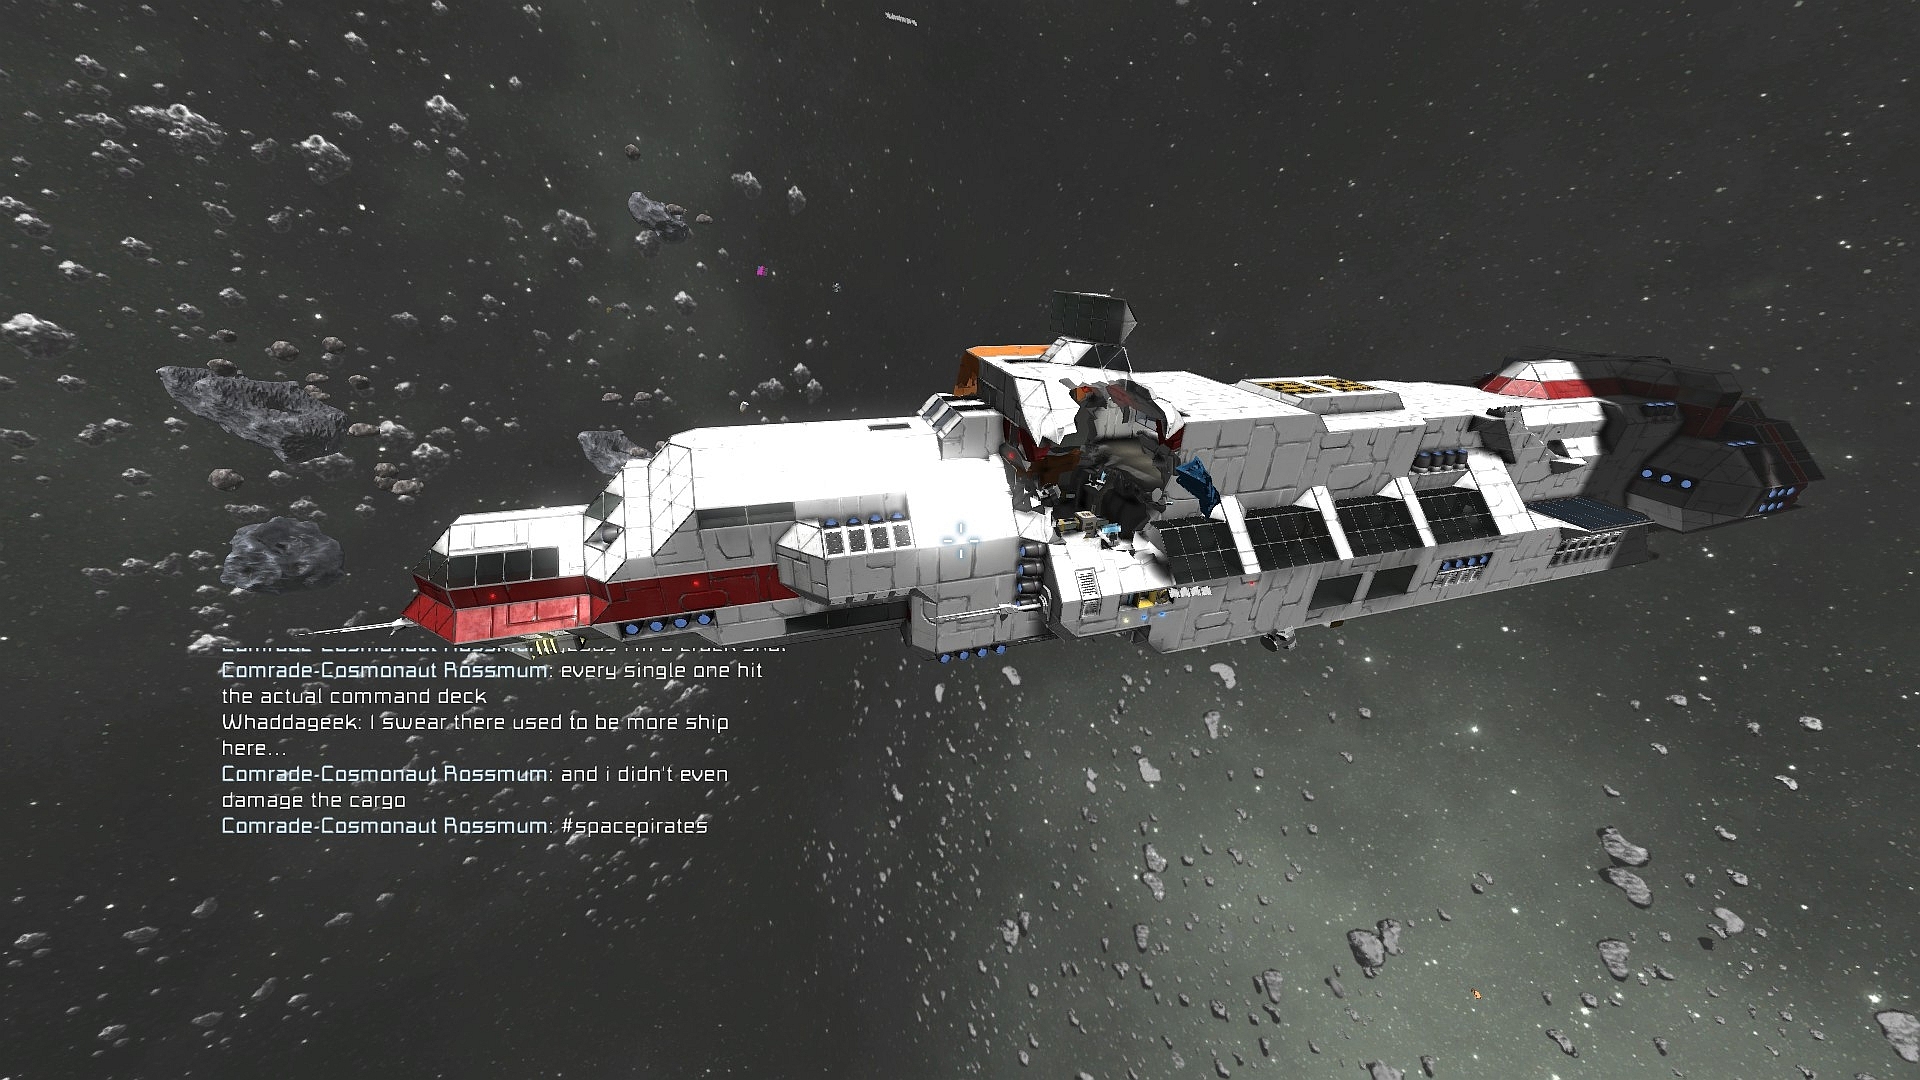
I copy-pasted the ship into a creative server where another goon had a very large revolving gravity cannon. We decided to test it, and so I painted the plates surrounding command deck bright orange and took aim from two kilometres away. Here are the results, I think they speak for themselves:


Six projectiles fired from a range of two kilometres not only penetrated the hull, but completely obliterated the command deck and the bulkheads on either side of it. They also tore out the floor below (albeit without damaging the actual cargo system, a feat of space pirate marksmanship I was quite proud of). In a combat scenario, this ship is dead in space. Nadezhda does have a backup control station in the nose, but the damage to the ship was so severe that its handling worsened significantly and the loose debris would only have worsened the damage.

A second barrage of shells severed the ship in two.

Obviously, this won't do for combat vessels or larger ships (Nadezhda is a little over 200 metres long, and weighs about 7,000 tons, and is at the upper limit of what I would consider a safe size for an 'exo' design). For these vessels, building an embedded heavy armour frame which the rest of the ship is formed around is often a safe plan.

There are many different takes on this design theory, ranging from a simple 'spine' that runs the length of the ship and which all of the most critical systems are hung off of through to a fully-fledged network of framing not unlike what you would see on real ships or aircraft. Each method comes with its own pros and cons. In the 'spine' example, it provides some additional structural integrity to the ship, but it still doesn't prevent whole chunks of the ship being blown off. A true framework provides some protection from damage and also holds the ship together no matter how badly perforated the actual compartments themselves are, but it is bulky and time-consuming to build.

A more balanced approach which I have been considering recently is a more organic approach inspired by nature. It combines the lightweight nature of the spine with the more thorough protection of the framework, by building what is essentially a skeleton for the ship. A spine runs along its length, with all vital components held safely within a ribcage. Less important areas are simply suspended off the spine, as it doesn't matter so much if they are blown away. Engines are connected to the spine via limb-like extrusions.

At the end of the day, which method you use should be influenced by the size and role of your ship. There's no point fully framing a shuttle, but it might be worth it on a supercarrier or a colony ship.

Compartmentalisation

As well as providing a boost to the ship's structural integrity, compartmentalisation helps to ensure damage control is easier for the ship's crew. Compartmentalisation is absolutely vital in order to ensure proper pressurisation and prevent a catastrophic depressurisation of the entire ship in the event of a hull breach. In addition, the ability to isolate each compartment can help combat fires, boarding, gas or radiation leaks, or all manner of other nasty problems.

As a general rule, I try and keep one room per compartment, but you can just as comfortably squeeze multiple rooms into a single compartment to save on space and reduce overall complexity. Each bulkhead should completely seal the compartments off from each other and should be at least one block thick. Two or three block layers may provide even stronger bulkheads, with integral airlocks - these are useful in high-risk areas like reactor rooms or in areas that will often be depressurised, like hangar bays. However, they do significantly impact on your ship's available interior space and its mass and size, so often it is best to use them sparingly. I would argue that they aren't really viable on a ship less than 300 metres in length, except in the aforementioned areas.

Bulkheads can be built of any kind of block that completely seals a cube space, but I would recommend armour plates. Light armour is acceptable for smaller ships or less important areas, but heavy armour bulkheads are a good idea around vital systems or where necessitated by the ship's structure. Remember that in the Nadezhda example, the bulkheads were only partial - and remember an infamous historical example of this as well, RMS Titanic. Full bulkheads are preferable (and if I was to build Nadezhda again from scratch, I would have used them).
Armour plating: types & layouts
Armour distribution and type

Although just building your entire ship out of heavy armour might sound like a good plan at first, the impacts on handling will probably not be worth it in the end. As such, it is often better to save heavy armour for vital systems and predicted areas of attack. For instance, encasing your reactor chamber and your command deck in heavy armour is a good idea, while your leisure areas and less important passageways can probably get away with only having light armour shielding. Remember that spaced layers of light armour (including double hulls or pressure hulls, think of a submarine's design) can often provide adequate protection all on their own, while being much lighter and easier to build. This will be covered in more detail shortly.

If you do decide to use heavy armour on your design, it may be worth placing it to deflect attack rather than to form the actual structure of an area. For example, you may build an angled plate of heavy armour that protects a part of your ship from attacks launched from above and in front, because that is the direction you most expect fire to come from. Only using plates where you expect inbound attacks saves a lot on weight and can also provide more interior volume for you to put systems inside. These heavy armour "inserts" can be coupled with spacing techniques to further improve survivability.

Advanced armour theory

In addition to simply deciding between light or heavy armour blocks, their thickness, and where to place them, you can also adopt more advanced techniques such as adding spaced armour or sloped armour. These are seen in the real world, with both becoming popular for tank design during the Second World War. However, they have been in use much longer than this; the concept of sloping armour dates back to the days of earthen forts. Let's take a look at how these can be applied in Space Engineers, and what makes them work in the real world.

Sloped armour

The benefit behind adding a slope to an armour plate is twofold. First of all, the angle makes an incoming projectile more likely to simply bounce off of the plate. Although a well-designed projectile normalises to a certain degree (that is to say, it "bites in" and strikes at a less extreme angle), it is still very difficult to get a good angle of attack against the armour. In the real world, shells striking sloped plates often shatter or deform in addition to simply ricocheting off of the plate.

The second advantage is that by sloping the plate, there is more armour for a shell to travel through than a plate that is perpendicular to the incoming projectile but otherwise exactly the same thickness and hardness. Think about the length of a square's diagonals compared to its sides - the diagonal is considerably longer. The steeper the angle, the more thickness the armour presents to an incoming projectile. For a plate sloped back steeply, the effective distance needed for a shell to penetrate may be double or more the actual thickness of the armour plate itself.

This approach does have some shortcomings, however, many of which became apparent during early experiments with sloped armour on tanks. Sloping the armour decreases the useful interior volume, leaving narrow corners that are useless for crew or equipment storage and which can be difficult to get at for maintenance purposes. Another disadvantage comes if the incoming projectile strikes the armour face from a perpendicular (known as normal) angle. This situation could present itself if something fires downwards at an angle at a sloped plate below it - for instance, firing diagonally downwards at a 45-degree plate will totally negate its slope.

Because of the way blocks work in Space Engineers, you will need two sloped half-blocks back-to-back to simulate real sloped armour plates. Just like in real life, projectiles (generally missiles) in the game have been observed to both normalise to and bounce off of armour plates, depending on the angle of impact with respect to the armour face. This means sloped armour can be an effective way of protecting your ship, although it will limit your useful interior space.

Spaced armour

Like sloped armour, spaced armour has featured prominently in tank design, as well as limited application in military aircraft (usually to protect engines, ammunition, and aircrew). Spaced armour is exactly what its name suggests: two or more pieces of armour plate, separated by empty airspace. In an atmospheric environment, the air between the plates serves to add friction and slow the incoming projectile. In space, this is not an option, but two pieces of separated armour may have a better chance at stopping an incoming projectile than a single double-thickness layer. My own trials have certainly proven very effective.

Usually, a single block gap will be enough, and you'll seldom need more than two layers of armour. Spaced light armour is very effective and good value for mass - it can prevent hull breaches by two or three consecutive missile hits to the same area.
Conveyor systems
With interior space at a premium, there is considerable incentive to place your conveyor systems outside the hull rather than inside - but this also comes at a cost, with exposed systems being vulnerable to damage or piracy. Worse yet, a damaged tube may result in parts being vomited out into space or the system backing up and disrupting production.

With this in mind, you will need to weigh up the importance of your conveyors and the cargo they will be moving. Multiple, isolated systems are recommended. I typically keep ammo, fuel, and cargo on three separate circuits. This makes management of ammunition and fuel much easier as you don't have to worry about accidentally trading away your own reserves to other vessels or stations, and if one system goes down, the others will still continue functioning. In addition, I like to keep secure storage for things like crew tools or weapons separate completely, in isolated cargo containers.

In the majority of cases, I would recommend double-hull construction for any ship where you plan to have complex conveyor networks. This gives you all the space between the pressure hull (where your actual crew compartments and important systems are) and the outer hull (which protects your ship) to run your conveyors through, while the outer hull shields them from damage and keeps pirates away. For particularly at-risk vessels, it may be wise to build actual armoured covers to cap off your exterior access points when not in use. This prevents someone sneaking up to your ship and latching onto a connector.

When using redundant or isolated systems, try to avoid running them all through one narrow conduit, as this largely defeats the purpose of having multiple systems in the first place. Spread them out so that a hit to one will not also destroy the others.

Interior conveyors can be used where space allows. When running a conveyor through a bulkhead or compartment wall (anywhere that would be pressurised or provides structural strength, essentially), use an actual conveyor block to fill the entire cube space. This maintains pressurisation while still allowing the conveyor through. Conveyors can be run along ceilings or under floors (grates, catwalks, or glass panels can be used to provide a safe and even walking surface over conveyor conduits), as well as alongside walls.

Sometimes conveyors have to be placed inside your ship's compartments, but they don't have to get in the way. Run them along walls, floors, or ceilings in order to avoid crowding your crew out.
Cockpits and command centres
Command & control centres: glass or armour?

This is one area where military and civilian ships tend to differ vastly. In many civilian vessels, a large, spacious bridge with a good view is preferred, particularly for haulers and luxury liners. However, military ships require a protected nerve centre nestled somewhere deep within the ship's armour to ensure that its entire command crew cannot be "sniped" by a single well-aimed shot (as in the earlier screenshots of Nadezhda, a civilian vessel). Although a flight bridge is still a good idea in order to avoid collisions and provide a decent view while in safe areas, the bulk of the ship's controls and command crew should be housed in an armoured citadel somewhere close to the centre of the ship's mass (but preferably not directly on top of the reactor chamber).

Ships not intended for combat and not expected to be subject to piracy can often get away with glass flight decks, offering a much better view of the stars and better situational awareness in exchange for less structural integrity. However, these may still prove vulnerable to collisions with meteors or space debris.

The rationale behind central placement of a combat ship's control centre is simple, and follows the same line of thought as for reactors: if it is placed towards the extremities of the ship, there is less intervening structure to act as a damage buffer for it, and it is more likely to be blown off of the ship altogether. Unless you've got some kind of roleplay reasons to do so, there's no reason to design easily-targeted weakspots into your ship, so don't!

A basic flight bridge is not necessarily a bad idea on a combat ship, although it provides an obvious weakspot to focus fire on. Flight crew should be kept out of this area when in combat, and if possible, there should be armour plating inserts between it and the rest of the ship - as well as airlocks. Spacing from other ship compartments is also a good idea.

From the same vessel as the above flight bridge, we can now see a separate command centre. This centre is windowless, and is buried deep within the centre of the ship. This is where the crew operate from during combat, with the aid of a CCTV system that allows them to maintain situational awareness.
Reactors, gyroscopes & thrusters: other critical flight systems
Ship powerplant

Your powerplant should be built with the ship's purpose in mind. Ships with lower energy demands may be able to survive on solar power alone, with only backup reactor systems and batteries; warships will generally need several reactors in order to deliver a high power overhead for combat manoeuvres. No matter which power system you decide on, backup systems are a good idea - any moderately sized ship should have at least 30 minutes of battery power in case of systems failure.

When building fighters weighing less than 40-50 tons, one large reactor will often be more than enough to deliver your power needs without forcing your ship to be problematically large. Small reactors can also be used, but the more thrust your ship demands, the more you will need to use until the tradeoff between volume and power is no longer viable. There are other guides regarding the optimum reactor setups on the Workshop, and I'm terrible at mathematics, so I'm not going to include one here. Really all that needs saying is that when your cluster of small reactors and associated piping takes up an area approaching the size of a large reactor, just go with the large reactor instead. You'll get more power out of it anyway.

While solar and battery power are well-suited to civilian needs, military craft should rely primarily on nuclear energy. Reactors should be well-sited, roughly in the middle of the ship and encased in some kind of heavily-armoured chamber (this is true of all ship types, but especially combat vessels). Exposed reactors, or reactor rooms near the outer parts of the ship, are asking to be destroyed. Small backup reactors and/or battery banks should be placed throughout the ship in case the main powerplant is taken offline, and should provide enough power to run critical control and life support systems for 30 minutes or more.

Gyroscopes

Like the ship's powerplant, the gyro requirements will vary based on your design's size and role. Small construction ships typically only need a single gyro, as do smaller vessels built on large ship blocks (such as the default lifeboat, or a shuttle). Fighters can often fit redundant gyro systems; my fighters are generally quite small but feature between four and ten gyroscopes with the power settings adjusted accordingly. Don't be afraid to set the power lower than 100% in order to keep your ship controllable, especially if it's a relatively small and light design. Too much gyro power will result in rapid, jerky movement that is difficult to control, makes aiming near impossible, and can cause oversteer that is very hard to counter.

On larger ships, it is often necessary to build a great many gyroscopes to provide any useful level of handling. A ship with too few gyros will display little or no roll response unless it is already in motion, a good way of gauging your gyro power needs.

As the default gyroscope often needs to be plastered on every available surface to keep large (over 10,000 ton) ships controllable, it may be worth considering some modded parts. Advanced gyroscope mods are available on Workshop at time of writing, providing much more power for a single-cube sized part (the actual model itself is slightly larger than the standard model, with a bracket that allows connection on both ends of its vertical axis rather than just one attachment point). Larger gyroscopes with scaled power outputs are also available.

Should you decide to stick with the stock part, you will need to be resourceful in finding places to house your gyro banks. Due to their critical nature and the sheer number you will need, it is imperative to avoid putting them all in one location. Spreading gyro banks throughout the ship can prevent total loss of manoeuvrability due to battle or collision damage. Some ideas for placement include service bays within the actual hull of the ship, spaces between decks, or spaces between hull layers (particularly on double-hulled designs or between armour plates).

Thrusters

Although as of October 2014 the game does not yet require realistic thruster placement, I like to pair off thrusters to provide a feasible means of manoeuvring in the absence of things like RCS blocks. This also has the bonus effect of built-in redundancy. When placing thrusters, they don't have to be perfectly balanced - they just have to be spaced enough apart and far enough from the centre of mass to be worthwhile. Putting a pair of thrusters bracketing the centre of mass by only one or two blocks isn't going to do be very helpful - remember your basic machines. It's more efficient to put your effort further from your fulcrum rather than closer to it.

The size and number of thrusters you will need generally comes down to the size of your vessel and what you want it to do. For straight-line speed, a lot of large thrusters will see you through. For example, when building my fighters, I often put a pair of large thrusters in the back for speed and then add paired or quadded thrusters to every other axis to provide agility. Obviously, the more thrust is available on the other axes, the better turning response will be at high speed.

One important note here is that the amount of power a thruster can output is tied to what is controlling it. Player control inputs allow for roughly 66% of thruster power to be used, but the ship's inertial dampeners will use 100% of the thruster's available output. This means that in order to make a tight corner or loop in a dogfight, you should periodically release the controls in order to allow the inertial dampening system to fire and help you "bite in" to the turn. Trying to turn under manual control alone will cause you to skid out along your original velocity vector and simply rotate around your centre of mass. Remember, this is space, not atmosphere - angle of attack has very little meaning here.

Thrusters are typically a weakpoint in a ship's armour, and their destruction can have dire consequences. Some larger ship designs alleviate this by simply building the thrusters wholly inside the ship, but although this works ingame, it's always felt a little cheap to me. Other counters could include recessing them into armour plates, or building spaced armour baffles around them. This ensures that only a directly aimed, accurate shot has any chance of hitting the thruster. Vents can also be used (with appropriate standoff to avoid heat damage).
Life support and utility systems
Atmospherics, ventilation, and air scrubbers

Oxygen and pressurisation are here! You can now build basic life support systems into your ship with unmodded parts. It's also possible that we'll see further life support in the future; modders have already added rudimentary food and water processing systems.

So, how do you go about incorporating the pressurisation system into a ship?

First of all, any access to space should be via an airlock of some sort, to avoid decompression every time somebody opens a door to go on EVA. This is simple enough (in fact, it's probably the easiest thing in this entire guide to do). Don't forget to place a pressuriser in your airlock - you may need to make it a little larger than usual in order to fit, as I've found that the smallest possible airlocks are too small to pressurise consistently.

All compartments should be sealed. Even if a block is in place, if its collision model does not fully "seal" the interior from space I like to add another block in front of it or behind it which does, just to be sure. This does seem to be a factor ingame, as merge blocks (which have miniscule gaps around the edges where they're bevelled slightly) seem to prevent compartments from pressurising properly. One of the easiest examples of areas which may need additional attention is conveyor systems. In order to seal these, I simply use an actual conveyor cube as the sealing block while running the pipe in one side of it and out the other. This can get more complicated in smaller ships or with particular blocks, so just play around and see what works. If you can't completely seal a compartment, don't sweat it just yet - you can redesign the compartment to be intentionally unpressurised, or find another way around the problem.

Ventilation is not something that is easy to do for smaller vessels, on account of the resolution problem I talked about early in the guide. In these cases, it's easier to just handwave the whole thing - maybe throw an oxygen scrubber in here and there and leave internal doors open to ensure airflow. This could all fall apart if compartments need to be locked down, but beggars can't be choosers. If you're genuinely worried, you may need to compromise by upsizing your design to accomodate a more complex life support system, or build from small blocks to allow more detail in the same amount of space.

Larger vessels allow room for conveyor piping or duct parts, which in turn allows for full HVAC (Heating, Ventilation, Air Conditioning) systems. In turn, this allows for the construction of a service system somewhere in the ship, allowing for the control and maintenance of these systems and including components like air scrubbers and oxygen tanks. This should be somewhere safe, due to its critical life support function. These more complex systems can allow for better resistance to damage, but remember that redundancy is still very important. You don't want your entire HVAC system to be knocked out by a single broken pipe. As well as the air scrubbers themselves, you can place additional oxygen storage tanks wherever they'll fit, conforming to your ship's design, perhaps fitting them between hull layers or compartments.

Water and waste management

Running water, while extremely useful, is a comparative luxury and so does not carry the same importance as HVAC systems. However, large ships with fixed crews will likely find themselves needing some basic crew facilities at the very least. Due to the nature of space travel, water may need to be recycled in order to allow longer endurance and less waste of a precious resource. Again, a systems room with water purifiers and filter systems would prove useful on larger ship types.

Food and nutrition

Some ships may benefit from food processing facilities, including hydroponic farms. Large farms are most useful on very large ships, while smaller vessels may need only one or two small hydroponic planters to provide some of the crew's food. Traditional kitchen facilities are also useful, ranging from a small crew break room through to a large industrial kitchen. When considering the scale of your food processing facilities, bear in mind the size of your crew, the size of your ship, and the expected duration between port visits.

Medicine and surgery

Similarly, medical facilities should be scaled based on the size of ship and crew, as well as the expected mission. Warships will need much more capacious and well-equipped hospitals than a light civil vessel, for reasons that should be obvious. It's always better to have something and not need it than the reverse, but at the same time, having a hospital with every machine under the sun and beds for 50 in a small industrial vessel or transport with a crew less than 500 is lunacy.

Due to their nature, medical bays are one of those things you'll want to keep safe, towards the centre of your ship - putting it moderately close to your command centre is decidedly not a bad idea. Very large ships may even benefit from multiple medical bays, spread throughout the ship. As well as providing the ever-important feature of redundancy, this also ensures that the time required to get treatment is kept to a minimum no matter where on the ship disaster happens to strike.
Cargo containers, factories, connectors & modular utility mounting clamps
Cargo containers - fuel & ammunition

Due to the important nature of these containers, it is a good idea to have redundancy. Spreading multiple containers throughout different areas of the ship can provide a large capacity for both critical supplies, while ensuring that you do not lose everything to one well-placed shot. Mixing container size can be a good idea, too - instead of having to set aside large spaces for large cargo containers, you can have a few large containers and a lot of small containers scattered throughout the ship as conformal fuel/ammunition tanks. Keeping at least some of these containers shielded by heavy armour or buried deep within the ship is a sound idea, as it guarantees you will always have at least some fuel and ammo even if your other containers are destroyed in combat or a collision.

Cargo containers - high value

High value cargo containers that are likely to be targets of piracy should be kept within the ship's inner hull, and may even need to be piped up to a separate network. Using a manually-controlled connector "switch" to hook the high-value containers into the main cargo circuit may be possible for larger ships, and can prevent the accidental loss or deliberate theft of precious cargo through the normal system.

Cargo containers - low value

These can be scattered throughout the ship in any available space, or stored between double hulls if space is at a premium inside. Due to their low-value nature, these containers can be permanently connected to external access ports (such as connectors or collectors).

Crew storage

Crew storage can be either hooked up to the main conveyor system (as a form of "mailing chute") or isolated throughout the ship (for personal items, weapons, tools, and the like). Some external cargo containers providing tools and small arms ammunition may prove useful for crew members partaking in EVA, but remember that cargo containers are not armour - be sparing with these external containers, or place them behind armoured baffles.

Factory systems

For purpose-built factory ships, it may be useful to isolate some containers in the same manner as the high-value containers described above. This can prevent the ship's factory machinery from pulling excessive resources from cargo storage or filling the cargo containers with components in a disorganised fashion. However, this option is unnecessary on smaller ships or ships which do not have large processing facilities, and may also be made redundant by automatic sorting systems.

Connectors & collectors

As a general rule, connectors should be in easy-to-access places on the outside of the ship, or inside hangars on the ship. Collectors are best used in pits, either with a single collector set at the bottom of a slope-sided hopper chamber or a bank of collectors set into a flat surface. For obvious reasons, an active gravity field should cover the area of the collector, to avoid loss of resources into space.

Access points connected to systems of high importance such as fuel, ammunition, or valuable cargo storage should be concealed or covered over by articulated armour hatches, allowing access only when needed. Another possibility is to leave these systems uncovered, but provide adequate defensive firepower and camera systems around them.

Merge blocks & their uses for utility attachments

One of the more practical uses for merge blocks is the creation of modular sections or tool rigs for ships. Placing merge blocks at sensible locations around the ship can allow for the building of rigs for grinding or welding, or even mining. Merge blocks can also provide anchor points for modular sections, meaning you can build a ship that is little more than a command and control centre, reactor, and engines and then hang sections from this frame that incorporate cargo systems or additional living space. Just remember that when a merge block deactivates through damage or destruction, it may cause the merged module to break away - use more than one block for anchoring large modules.
Weaponry - offensive, defensive, deterrent measures
Offensive weapons - large ships

Large ships provide an excellent basis for diverse weaponry. In addition to actual weapon blocks (such as turrets, fixed gun emplacements, missile and torpedo launchers, and so on), many players have devised weapons of their own for capital ship combat. Most commonly, this takes the form of a gravity cannon - similar to a railgun, but using gravitational fields rather than magnetic fields in order to accelerate a projectile.

Because this weapon is limited only by the available construction and power resources of its designer, gravity cannons are often built to immense sizes, launching projectiles that weigh many thousands or even tens of thousands of kilograms. More sophisticated designs often include some form of automatic loading mechanism.

However, gravity cannons have some disadvantages. Due to their relative size and complexity, they are often ineffective on smaller ships, causing the design of the vessel to blow out in size and mass until it is no longer economically sound. Depending on their size and power, they can also disturb or be disturbed by the gravity field of the ship itself, necessitating one or the other to be switched off when not in use. This vulnerability to interfering gravity fields also renders these weapons almost totally ineffective when fired at ships which employ a form of gravity shielding, and can cause well-aimed rounds to dip away from a target as they enter its gravitational influence. This can be countered in turn by increasing the complexity of the projectile so that its artificial mass is deactivated at a safe "arming distance", but this in turn requires more time and resources to be sunk into single-use ammunition.

Another form of gravity weapon is the gravity torpedo. Due to the potential for immense acceleration and motive force provided by gravitational fields, these are less like traditional naval torpedoes and more like extremely high velocity kinetic weapons, spearing through a ship and ripping it apart as the ship's own gravitational field acts on the torpedo's artificial mass. Again, however, these are sensitive to gravitational fields and can be easily thrown off-target. They also need to be very large and heavy to achieve worthwhile damage output, making them less useful in combat and perhaps better suited for a coup-de-grace on an already crippled capital ship.

Moving away from gravity weapons, more conventional solutions are available than ever thanks to the efforts of modders and new features added by KSH. As well as pre-made turret blocks, often with inbuilt AI control as per the stock turrets, players can build their own heavy armament turrets using fixed weapon mountings and rotor and conveyor systems. These turrets are generally quite bulky compared to their modded counterparts, but can provide heavy firepower in a well-protected package, having much better potential survivability than single-block parts.

Thanks to programmable blocks, we can also build centralised fire control systems, like those of a World War II warship. Instead of controlling each turret individually, you can build an (unarmed) fire director tower on a portion of the ship that has good visibility in as wide a field as possible - thanks to the three-dimensional nature of space combat you may need one on both the top and bottom surfaces of your ship - and then use this director to control azimuth and elevation inputs of all weapons at once. This was previously only possible through bulky and easily-damaged mechanical linkages. In either case, the centralisation of fire control and superior survivability of manually-built turrets makes them an excellent choice for long-range offensive weaponry.

More traditional torpedoes and guided missiles are also a potential course of weapons development, allowing for precise, long-range delivery of enormous explosive payloads.

[to be continued]

Offensive weapons - small ships


Defensive weapons - large ships


Defensive weapons - small ships


Deterrent measures - large ships


Deterrent measures - small ships
Camouflage, concealment & deception measures: part I
The best way of avoiding attack is to avoid detection altogether or, failing that, to make engagement so difficult and frustrating for your enemy that he abandons his pursuit in favour of an easier, more obliging target. There are several ways of doing this. We'll look at four main methods.

Camouflage paint

Sounds simple enough, right? We're in space, just paint the whole ship black!

...Actually, that would not be the best of ideas. The purpose of camouflage is to trick an observer into not seeing something by breaking up the outlines, colours, reflections and textures that allow us to identify objects. Painting something the same colour as the environment is a start, I guess, but we can do better than that!

Right off the bat, the first problem with one-colour "camouflage" is that you aren't doing anything to break up the distinguishing visual features of an object, you're just making it slightly harder to see against the background. The ship will still reflect sunlight in a distinctive shape, it will still have a clear silhouette against backlighting or different coloured objects, and it will still have a distinctly metallic texture.

If you look at modern military camouflage, there are often two to six colours involved and many different patterns and shapes, too. Camouflage schemes are extremely diverse and vary in effectiveness, but the general idea is the same: to break up the outline and colour, and possibly texture, of an object. Looking at real-world examples can help you devise a scheme, but simply trying to replicate a pattern as you see it on the internet isn't foolproof. Test your camouflage, and play around until you feel you have an effective pattern. Grab some friends to help you test it - ask them to try and find the camouflaged ship without telling them where exactly it is, only the general area to look.

There are many tricks you can emply to enhance the effectiveness of your camouflage paint, and many of these were inspired by nature.

Countershading can be seen on birds and sharks - a dark colour on top and a light colour on the bottom can make something appear two-dimensional, making it difficult to see against certain backgrounds. Historical human examples include the countershading used on some WWII German aircraft and British tank crews' attempts to make Sherman Fireflies appear to be regular Shermans from a distance.

Similarly, use of contrast can help break a silhouette. Light areas with dark shapes running through them can make it difficult to perceive a straight edge, or can be used to make a corner disappear. You can also use this to force somebody to notice a certain part of your ship but not another - hiding weapons, doors, or other likely targets in plain sight.

By using a four-colour camouflage pattern with white, pale grey, medium grey, and black, this fighter may be visible up close but disappears completely from a distance. It looks like a cluster of stars, or a mangled piece of space debris.

Remember, camouflage isn't always about not being seen - sometimes, it's the opposite! Dazzle camouflage was popular on warships and merchant vessels during the First World War (and in some cases, persisted into WWII). This kind of camouflage used bold, starkly-contrasting colours and bizarre abstract shapes that would make a ship easy to spot, but difficult to identify. In fact, it even made it difficult to tell which way the ship was moving, or what course it was on relative to the observer. This can prove particularly handy in avoiding boarding ships or gravity projectiles.
Camouflage, concealment & deception measures: part II
Concealment

Sometimes, fancy paint isn't enough to hide your ship. Perhaps you are being chased by pirates, or have drifted into a sector where your paint no longer works so well. That's okay! As long as there is a star and/or asteroids or debris nearby, you're not out of options.

One of the oldest tricks in the aerial combat book is to hide in (and attack from) the sun. This means putting yourself directly between your enemy and the sun - he can't see you, because looking into the sun is a really bad idea and tends to have adverse effects on the human retina. Even if he's crazy enough to try, the sun is so bright that the light "bleeds" around you and hides your outline - think of oldschool HDR back when the tech was still new, so you'd walk outside and suddenly there would be so much bloom you couldn't look at your monitor. Same deal, just on a bigger scale. Remember, though, that this is less effective the closer you are to the enemy and the larger your ship is. Large ships or those which are very close to the observer will blot out the sun, rather than vice versa.

Using a nearby star as concealment can be very effective, but depends heavily on the size of your ship and your distance from the point of observation. As with most forms of camouflage, the further away you are from your enemy, the better concealed you will be.

Shadows can be used to hide in a variety of ways. Simply sitting completely in shadow is one way, and its effectiveness depends on the type of shadow.

Cast shadows (for example, hiding behind the far side of an asteroid or behind a floating hulk) are useful in a pinch, but their effectiveness depends on the size of the object casting them, the angle and brightness of the light, and your own positioning. Be mindful that light may catch edges of your ship or of an asteroid, leaving a telltale silhouette that can be discerned even if your ship itself cannot.

An example of cast shadow: my asteroid base can only be distinctly seen because of the running lights and engines of the ships around it. The ships themselves are almost pitch black.

Contained shadows (hiding inside an object, like a derelict ship or a cavern) are much better concealment, as you are completely shielded from the incoming light. Always opt for contained shadows where you have the option.

In addition to using light or shadow alone, you can combine the two. By exposing only certain parts of your ship to light, you can help break up its outline or create the impression it is smaller or unarmed. For instance, you may want to cast a shadow across your weapons to hide the fact you're not a helpless civilian freighter, or you might need to try and make your ship look smaller than it actually is by "cutting" it in half with a shadow. You can also hide on the edge of a dark shadow and a very bright light to really mess with people - the stark contrast makes it nigh impossible to see anything.

Important note: Be mindful of your ship's light signature. Interior lighting exposed to windows, vents, or open doors can shine out and give you away. Thrusters are easy to spot from a considerable distance and also provide an easy way of assessing a ship's size and shape even if you can't see the ship itself. Conveyors, merge blocks, and connectors all have lights on them that cannot be turned off even if a ship is fully powered down, as do all blocks featuring keypads. Beacons, obviously, are a dead giveaway. While door keypads and connector alignment lights may not be so easily seen from more than a few hundred metres away, larger light sources can be. If you need to hide, power down as many light-generating systems as possible. For purpose-built stealth vessels, look into screening any lit blocks (for example, placing vents over thruster nozzles or building metal plate collars around doors).

Light discipline is critical to concealment in shadows.

Important note: Due to the way Space Engineers currently renders shadows, even at maximum settings and with a dark skybox, distant objects will still appear lit on their sunward side. For this reason, hiding in shadows is most effective against nearby pursuers.

Physical camouflage: deception & mimicry

So, you want to go all-out? Excellent. Let's look at physical camouflage now - the practice of actually putting things on your ship (that aren't paint) in order to break up its form or mask it as something else (a practice known as mimicry, prevalent in the animal and plant kingdoms alike).

While you can use paint to break up your ship's silhouette and texture, gluing random junk to the outside of it in ways that catch light or cast shadows is even better for it. However, you do pay in other means - it can make your ship heavy and sluggish, it can limit the field of fire of your weapons, and it can get in the way of docking. You also run the very real and highly embarrassing risk of not being able to tell one end of your own ship from the other.

Mimicry, meanwhile, allows you to retain some more functionality. Essentially, you want to take another ship's face and wear it as a mask - say, make your commerce raider look like a mining rig, or your valuables transport look like a frigate or destroyer. How far you take this is up to you - from simply building a hollow shell around your ship to actually building the features of your chosen disguise into the vessel itself. Just remember, the effectiveness of this kind of disguise rapidly trails off with closing distances. Keep threats at arm's length to avoid your ruse being called.

One final point to consider when planning physical camouflage and deception is the concealment of individual parts of your ship with retracting covers. This can be achieved by using a rotor and some plate to form a cover or screen that conceals weapons, docking ports, or even extra sprint thrusters that can be used to make a quick getaway. Get creative!
Living quarters - creature comforts & effective use of space
Ergonomics

Placing things willy-nilly just won't do. Think of how easily your crew will be able to access things. Instead of placing desks in the middle of a hallway, place them up against a wall or in a corner. Systems that need to be accessed frequently should be placed prominently, in easy-to-access positions. Less important systems can be pushed out of the way, placed in side rooms, crawlspaces, or inside walls. Bear the movement of your ship in mind - try to avoid large drops or staircases unless they have railings, to prevent sudden course changes sending people or objects spilling over the edge.

Support beams or struts should be placed in as unobtrusive a manner as possible - although their purpose generally means they must be placed towards the centre of a compartment, think of ways to make them functional as well. Adding consoles to larger support beams, or bulging a corridor outwards to ensure walking space around them, should be considered.

Areas should be lit according to their purpose - brightly in work areas or recreation areas, dimmer in sleeping areas. Combat stations should be lit using coloured light instead of white light (red is most often used in real life, but blue or green are also seen) to avoid jarring differences in brightness. Remember how light works - if you're going to light a room with red, painting things blue will make them appear black. Button panels can be used as light switches, allowing for quick and easy operation.


Using coloured light to illuminate airlocks not only reminds crew not to just open all the doors at once, but also serves as a way to adjust from the blackness of space to the brightly illuminated ship interior.

Space concerns

Although you should be considerate of your crew, there can definitely be such a thing as too much free space. Try and make empty space functional - add things like desks or monitors, or perhaps recreational facilities. Try to avoid excessively long walkways, and keep compartments just large enough for their intended purpose with a little to spare. Try to avoid cluttering. Although you may need to place many objects within close proximity to each other in order to achieve a good balance of space and purpose, ensure you have left enough to allow freedom of movement.

This ship's mess allows free movement throughout, while taking up a minimum amount of the ship's interior volume.

Building in confined spaces can be difficult since the change from collision model to bounding box block editing, and painting now has to be done before you place objects as you cannot paint around them any more. I am hoping that Keen implement an option to switch between the two modes of building, but in the mean time, this is something you will need to bear in mind and work around.

These two rooms are nearly the same size - the crew quarters compartment has a slightly higher ceiling.

Making your ship feel more (or less) homely

One of the easiest ways of alterating the atmosphere of your ship's interior is the balance between polish and pragmatism. If you're not sure what I mean, consider the interior of a cruise liner versus a destroyer, a military helicopter versus a civilian one, or an old trusty Land Rover compared to a luxury SUV.

Military, police, or purely industrial ships will tend to have exposed machinery or framework, with little or no effort to conceal these messy inner workings. Any interior fittings will be spartan in nature and crammed wherever they fit best without getting in the way (this aspect overlaps a bit with the ergonomics aspect I mentioned earlier).

In contrast, space liners, shuttles, or more luxurious commercial vessels could be expected to have completely covered-over mechanisms, with utility rooms accessed via well-concealed maintenance walkways. These ships prioritise comfort and a feeling of security and luxury over practicality, and so things will be placed in a manner that is more aesthetically pleasing and ergonomical rather than one which takes up a minimum of space or materials.

Although either extreme is perfectly acceptable, feel free to explore compromises between the two. Perhaps your ship has lavish living quarters for officers, and rough bunks for enlisted crew. Perhaps your ship's form will follow function. One of my favourite examples of engineering brilliance is the Supermarine Spitfire; it has a beautiful shape to it, but that shape does not negatively impact its performance (actually, it is the cause of it). The world is full of compromises! Why should your ship be an exception?


An example of design compromise: the SN-4-N1 lifeboat is intended to be small and functional, but has a cozy interior with clean lines that still gives a sense of luxury.
118 Comments
Cooldude101011 Nov 10, 2023 @ 11:58pm 
Hopefully this is updated soon.
Pickle Mar 8, 2022 @ 9:11am 
Thank you for such an in-depth guide. Excited to see that new ship you are building
rule .303  [author] Feb 17, 2022 @ 9:09am 
My new PC can finally run this game again, so I'll probably be able to work on this guide more in the not-too-hopelessly-distant future. I can't guarantee it'll be soon though as I've been very busy for the last few years. On the plus side, a bunch of features I always wished were in the game are now natively supported, and time away from the game has helped me improve some of my own shipbuilding concepts.

For the past couple of days I've been working on a 200m long, 15,000 ton fast cruiser. As I expand the guide I'll probably use a lot of screenshots from that build, since it uses a lot of techniques I suggested here long ago.
ZDuke Jul 11, 2021 @ 1:16pm 
Reading this was an experience, but the knowledge gained was worth it.
Rasstis Livingston Jan 13, 2021 @ 7:56am 
Great insights!
Merddyn73 Feb 6, 2020 @ 10:30pm 
Outstanding Guide, Brother! I'm looking forward to it's completion. This was very helpful. Thank you!
kirbcake Nov 9, 2019 @ 8:03am 
And then there is me, still trying to figure out how to get my plane to fly
Elspeth Apr 16, 2019 @ 11:25am 
Thank you, this has so many helpful details!
thenixieproject Dec 22, 2018 @ 8:36pm 
7.8/10 too much Space Engineers
Whitehawk Nov 18, 2018 @ 11:08pm 
10/10 IGN
"Whitehawk Approves"