
Install Steam
login
|
language
简体中文 (Simplified Chinese)
繁體中文 (Traditional Chinese)
日本語 (Japanese)
한국어 (Korean)
ไทย (Thai)
Български (Bulgarian)
Čeština (Czech)
Dansk (Danish)
Deutsch (German)
Español - España (Spanish - Spain)
Español - Latinoamérica (Spanish - Latin America)
Ελληνικά (Greek)
Français (French)
Italiano (Italian)
Bahasa Indonesia (Indonesian)
Magyar (Hungarian)
Nederlands (Dutch)
Norsk (Norwegian)
Polski (Polish)
Português (Portuguese - Portugal)
Português - Brasil (Portuguese - Brazil)
Română (Romanian)
Русский (Russian)
Suomi (Finnish)
Svenska (Swedish)
Türkçe (Turkish)
Tiếng Việt (Vietnamese)
Українська (Ukrainian)
Report a translation problem


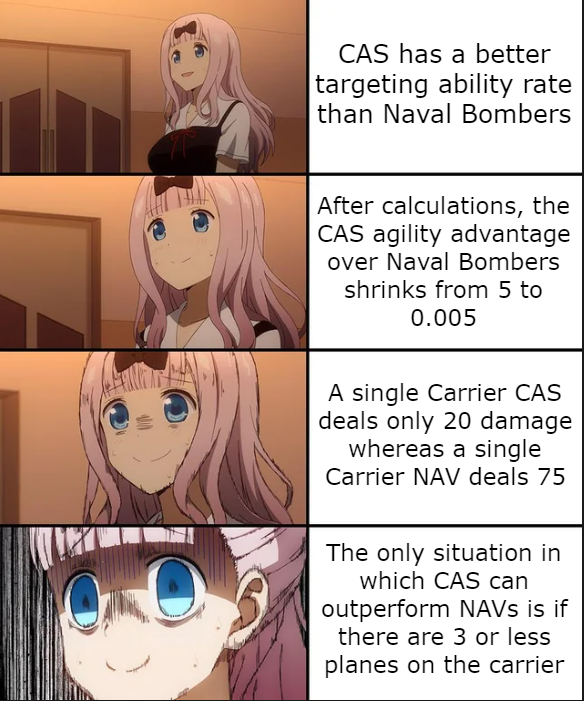

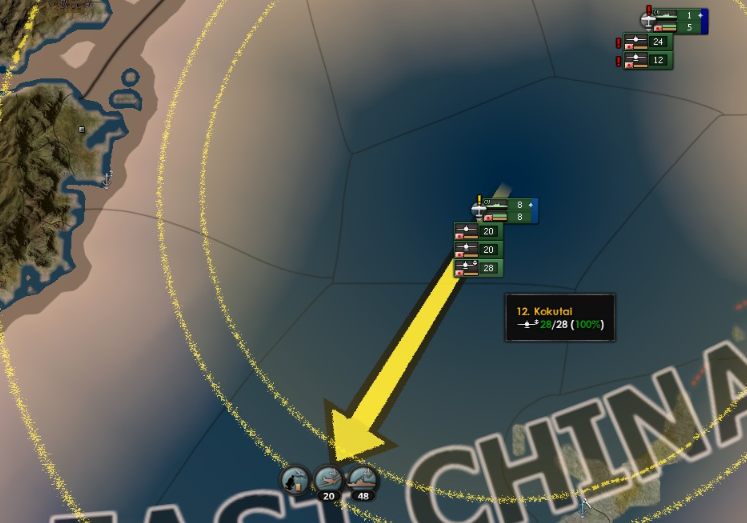


C1: Full Naval bombers
C2: Full Naval bombers
C3: Full Naval bombers
C4: Full Naval bombers
C5: Full Naval bombers + 10 Fighters + 10 CAS
It works out as 7 airwings and the 20% airwing penalty malus will only apply to the fighters and CAS (assuming you did it correctly and those are placed on the last carrier and bellow the naval bombers)
as 7*0.8=5.6 [game drops decimals for this calculation so 5]
Meaning you essentially have 5 carriers full of naval bombers
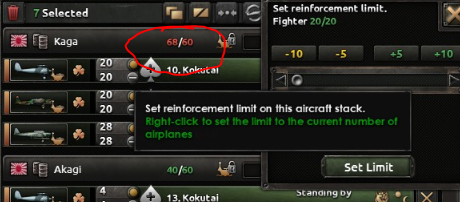
C1: Full Naval bombers
C2: Full Naval bombers
C3: Full Naval bombers
C4: Full Naval bombers
C5: Full Naval bombers + 10 fighters
C6: Full fighters + 10 naval bombers + 10 CAS
9*0.6=5
Still 5 full carriers full of naval bombers (minust the 10 space wasted on fighters on carrier 5)
with carrier 6 being more or less full of fighters which all participate in the battle.
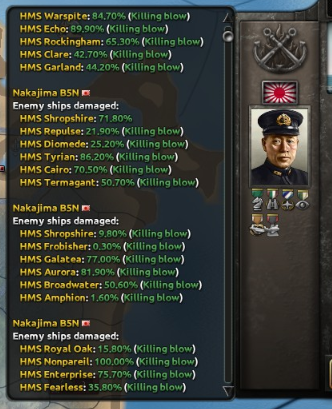
Again, AA Cruisers need to have a Heavy Turret (classifying them as Capital Ships) or the enemy NAV will rarely ever target them (it still may go for heavily-damaged Light Cruisers on occasion).
AA ships should always use DP guns, though- so they actually can deal some damage (it's far more cost-effective than separately arming other ships more heavily)
You're wrong about anti-air cruisers, in particular. If you put just a single Heavy Turret on one, it's enough to get it classified as a Capital Ship (Heavy Cruisers are Capital Ships), and it will be targeted by NAV often despite most of the rest of its equipment being AA.
That said, it's still uneose unless your fleet
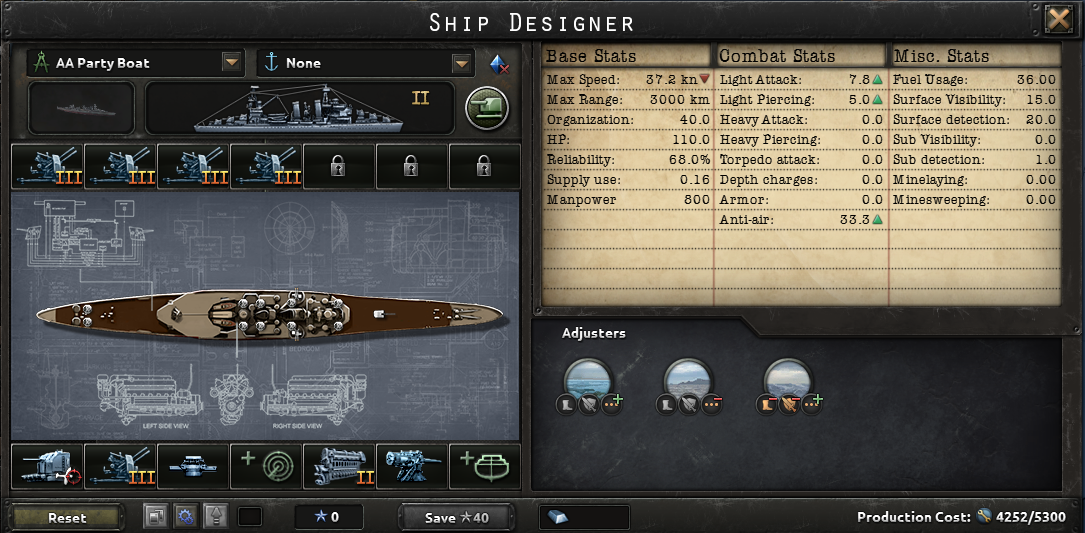
Another question: What stats determines efficiency of port strike?
When I am testing in BBA with Kaiserreich mod, naval bombers with high naval targeting doesn't work quite well against ships in ports, yet they seem to work much better once the ports are occupied by armies and the fleet is forced into the sea.
Hence, I wonder if port strike has a different calculation mechanism from naval strikes.
Also the new planes have surface/sub detection stats, yet seems they are talked about nowhere. The wiki hasn't even updated for air designers yet