Timberborn

Timberborn

322 ratings
Beaver Basics and Other Information
By Althis
A guide to Timberborn of "gee, I wish I knew that" and other useful information
14
8
30
5
3
3
2
3
2
   
Award
Favorite
Favorited
Unfavorite
Beginnings of Beaverton


Welcome to Timberborn!

You are about to enter the post-apocalypse where the only survivors are water dwarves, colloquially known as beavers.

This industrious tree-munching folk are good at building dams and growing crops, and together, you and them will mold the land to fit your needs: growth of industry by renewable resources.

This guide will hopefully give you some insight into how to work with your beavers to survive and thrive. There are some mechanics that I struggled with, and I want to pass on my knowledge to others so that they don't have to go through the same struggles.

I may not cover all topics, as my focus is to cover some basics and then discuss what I feel are some oblique or maybe obscure mechanics or byproducts of mechanics that I have stumbled across.

I can not write a be-all, end-all guide, but I do hope I can share some insights with you. Please, feel free to leave me constructive ideas to add, but please don't nitpick at my every word. If there is anything you want me to elaborate, let me know!

With that out of the way, in the wise words of Dwarf Fortress, let's strike the earth!

========================================================================

There is a Russian translation of this guide! Check a look!
https://steamcommunity.com/sharedfiles/filedetails/?id=2604579643
========================================================================
Basics on Resources
Resource: an Overview:

There are multiple visible resources, and several resources which are not immediately visible but also must be tracked, in Timberborn.

Resource management is important when building and planning your beaveropolis. Most resources are renewable and can be generated quickly and managed easily. We will look at the ones immediately visible on the UI first.

At the top of the screen, you will see this bar. From the left, we have:


Well-being | Science | Various Goods | Food | Logs | Stored Water

We are going to break them down in reverse order.

Stored Water:

Stored water is the amount of water your beavers have stored in water towers across the town. This is the overview of the amount of water you have saved for when drought comes. This is not all available water, as water trapped in a reservoir is a different resource. Beavers will die of thirst without stored water.

Logs:

Logs are raw timber, which can be used to make most basic buildings, and can be processed into planks and then into other materials. Logs are harvested from trees, with varying returns based on tree types.

Food:

Food is the stuff that keeps your beavers beavering. If there is no food, the beavers will starve. Food comes in multiple types, with multiple ways of acquiring it. In the early game, berries harvested from berry bushes will keep your early populations running. Later on, food will become more available as wheat and potato fields cover the land.

========================================================================
Stored water, logs, and food make up the backbone of your beavers civilization. Without them, there is no growth.
========================================================================

Unprepared Food:

These are food items that can not be eaten by themselves and require more processing before being considered food, i.e. potatoes become food when they are grilled.

Various Goods:

Various goods is an overarching term for a lot of other goods that are available to be produced and stored. Various goods are building materials and medicine, and also contain items that need to be processed i.e., logs can be milled into planks, the first advanced good needed.

SCIENCE

SCIENCE is created by inventors and stored as points. New buildings can be unlocked using these points. Be warned that some things can be unlocked out of order: i.e. in order to create a platform, planks are required. However, the platform can be unlocked before planks can be created, leading to an unlocked tech that can not be built.

Well-being

Happiness is the overall score that determines how content the population is. The higher the score, the more productive our little industrious water dwarves will be. The thing about happiness is that it has multiple requirements, and comes with a handy-dandy sheet, which is available by clicking on the happiness stat.


Raising the quality of life of the beavers will give bonuses that can be seen if a beaver is clicked on.


The three different items are growth speed, movement speed, and life expectancy. Growth speed determines how fast a beaver reaches maturity, movement speed increases how fast the beavers run, and life expectancy increases the maximum age of a beaver.

Maximizing well-being isn't incredibly complicated, and is very rewarding.
Beaver Basics and Other Resources
Let's Talk Beavers:

Beavers are, by definition, our most valuable resource. After their well-being stated above, there are other important beaver-related information to cover.

Population:


Beaver population is broken down into "adults" and "children". Adults are your working population, and they can produce more children. Children, of course, need time to mature into adults.

There are also bots, but those are going to be discussed later

When it is time to sleep, beavers will sleep anywhere they want, though they prefer to sleep in proper housing. Housing provides comfort, which is a stat in the Well-being group.

Providing adequate housing for our beavers is also important because Folktails will reproduce when there is extra housing. As far as my games have gone, beavers will not produce new beavers if there is not adequate room! This also means that overbuilding housing can cause a baby beaver boom.

Note: the only way to get more beavers is to produce more beavers. They do not seem to have sexes, and so two beavers in the same lodge with downtime and an empty lodge space will produce a child.

(Iron Teeth work differently, and I will write about that when I get a chance to play them.)


This tab will track your employment. Unlike most city builders, unemployed populations do not seem to drag down happiness. They will idle around, eat food, drink water, and visit leisure buildings and wait for work. The life of an unemployed beaver is apparently really good.

They are a resource to use, though, and tracking our unemployed beavers is important. Migrating the unemployed to underemployed districts is the key to successful growth and expansion to new areas. Likewise, it is better to be able to have a sustainable population with unemployed, as it means that gaps will fill immediately in the case of beaver death.


Let's Talk about Hidden Resources

"Hidden" resources are ones that are not expressively visible in the UI or the game itself. They are not secret, but rather may not be things that are thought about or discussed. However, they are important bits of information to be aware of.

Land:

Probably the most obvious, and yet probably extraordinarily underlooked is land.

Land comes in two types: arable and non-arable.


Arable land is green, and is caused by water being nearby. The distance can be changed by terrain height, type of water source, but not depth of water.

Pay attention to land during the non-drought seasons. This land is valuable, as it is the land that can sustain agriculture. Tracking river and lake's ranges and the arable land produced is important when choosing to dam or change river flows. Using arable land for buildings can sometimes strangle food and timber production.

Creating more arable land requires use of either irrigation towers (Folktail only):


Or building large structures like an aqueduct:


Or terraformed by dams and lakes.


Personally, I do not recommend using irrigation towers, as the rate of water loss is very high for the amount of arable land produced (math for evaporation is below, in the water section). Instead, it is recommended to fit in small lakes when possible:


Non-arable land still has its value, though. It can be transformed into arable land by various methods, both mentioned above and beyond. However, non-arable land is also useful for building housing and industry on, as the beavers do not mind where they live. Finding areas of land that are not going to arable leads to great places to set up housing centers.


In this photo, you can see that roughly half of the districts' land will be arable, and roughly half will not be. Try to focus building buildings in the non-arable land, so that the arable land can be used for agriculture. The stacking buildings mechanic can be a major boon for this building style.

And remember that buildable land can be created:


Be aware that some buildings must be built on solid ground, like the campfire and the temple.

Learning to use land effectively will increase our chances of survival.

Time:


A weird little concept we humans stick to, is time. Our denizens will work according to this clock, which we can set via the +/- buttons. The dark section of the circle is, of course, nighttime, and should be reserved for sleeping.

By default, our beavers will work for 16 hours a day, and sleep for 8. This will leave little time for socialization, leisure, or producing new beavers, unless they are not working (or unemployed). By reducing the work hours to 15 or 14, this will reduce production of goods, but will allow the beavers to have leisure time.

If you are having population issues, make sure there is extra housing available and try giving the beavers some downtime.
Consumption per Day per Beaver


TEST 1:
The setup is a district that is cut off and a distance away from other districts.

The work schedule was set to 14 hours. During the evening, I sent an unemployed beaver to the new, not populated but well stocked district and waited for one day to pass before checking results. The new beaver was "employed" at the district center as a builder and spent their days relaxing. They had access to water, food, their workplace, and a single bedroom.

Setup:
Water: 30 units
Food: 151 units

End of Day 1:
Water: 28 ( -2 )
Food: 149 ( -2 )

End of Day 2:
Water: 26 ( -2 )
Food: 146 ( -3 )

End of Day 3:
Water: 25 ( -1 )
Food: 144 ( -2 )

End of Day 4:
Water: 23 ( -2 )
Food: 141 ( -3 )

End of Day 5:
Water: 21 ( -2 )
Food: 139 ( -2 )

TEST 1 RESULTS:

It looks like beavers will consume about 1.8 water and 2.4 food per day.

There is a complication with this test, which may result in a second test. This complication is that the food source was mixed: berries, grilled potatoes, and bread. Beavers may consume more food per day if the food is varied so that they have as max Well-Being as is available.

TEST 2:

This setup is exactly the same as above. The only difference is food. Instead of varied food, the beaver was given only grilled potatoes to eat.

Setup:
Water: 30 units
Food: 200 units of grilled potatoes

End of Day 1:
Water: 28 ( -2 )
Food: 198 ( -2 )

End of Day 2:
Water: 26 ( -2 )
Food: 196 ( -2 )

End of Day 3:
Water: 24 ( -2 )
Food: 193 ( -3 )

End of Day 4:
Water: 22 ( -2 )
Food: 191 ( -2 )

End of Day 5:
Water: 20 ( -2 )
Food: 188 ( -3 )

TEST 2 RESULTS:

It looks like beavers will consume about 2 water and 2.4 food per day.

These results did not seem to vary from Test 1 by much. There are no confounds that immediately come to mind, but if there is something that can be tested or controlled for, please comment.


Overall Results

The math shows that a standard beaver will be consuming 2 water and 2.4 food per day. Plan for this accordingly!
Rivers, Dams, and Waterways
One of Timberborn's major selling points is the water mechanics. Droughts, rerouting water, damming rivers, and other terraforming is a key selling point of the game. There are plenty of methods of securing water for the dry seasons.

Let's look at some water mechanic basics, some general tips, then we will look at our structure pieces, and finish off with some buildings.

A great place to start is to watch some YouTube videos about flood control or water structures:


Water Flow Basics

Water in this game can be easily managed, and follows basic rules of pressure, more or less.

If you have a 5 x 1 river mouth and you put it a 5 x 1 dam on it, you will fill up the dam and then water will flow out.

If you have the same 5 x 1 river mouth and you stick a 4 x 1 dam and block the rest, you will get faster moving water (helpful later for waterwheels).

If you have the 5 x 1 river with the 4 x 1 dam, and then you add a 6 x 1 dam after that, you are going to slow your water down.

If you block the 5 x 1 river, you will get a reservoir, until it eventually breaks out over the walls.

if you block the 5 x 1 river and it's not making a lake, check for leaks around the lake. If water touches the edge of the map, it will flow out.

In summary:

Water flows from high to low.

Forcing the water into tighter spaces makes the water go faster (and may cause flooding).

Giving the water lots of space to spread out will slow the water down.

Check the area before building a dam.


Some Other Notes:

Swimming!

Yes! Your beavers will swim! They will follow paths that may be underwater, and complete constructions that are in water without much thought. They also do not seem to mind being in an area that is flooded. At a certain level of water, though, they seem to seek higher ground and will not do things like harvest trees or crops.

Building From Above

Beavers can build from above or below an object, meaning that they do not need direct access to build something. They can place levee pieces in the water multiple levels below them, or build a power component on a platform above them.

Evaporation
Water evaporates at a rate of 1 block every 22 days.


Building Pieces

Dam

The basic building block used in hydroengineering. The dam piece allows water to flow over it, once the water has reached a certain height. Dams come unlocked and are considered a solid object, meaning you can put buildings on top of it.

Levee

The levee should be one of the first pieces of dam technology unlocked, as levee's are what allow us to make a solid wall. Levee's can be stacked, and will stop water flowing -- until the water flows over them. Dams and other objects can be placed on top of levees, but levees can not be stacked ontop of anything else.

Before we dive in, I want to point out that I am by no means an engineer, so please correct me if I use the wrong terms.

What About Floodgates?

Great question! I have not used them, as they require close monitoring and manual activation. I can not write a guide or an opinion on a piece I have not used!

That being said, they probably have great and very useful applications, but I can not attest to that.


Structures

It's a Weir

The first water-stopping structure we will be producing is probably going to be a weir.


A weir is low dam that stops or slows water. In the early game, building a weir or two along the starting river will trap water for the summer. Weirs are made from dam pieces that cross the river. This will slow down water movement, and can cause your water wheels to stop flowing correctly.


In this picture, you can see that I replaced some of the dam pieces with levee pieces to block some of the water flow. This means that the water has fewer escape points, and will flow a little bit faster in that area.

Dam It All!

A dam is going to involve multiple levee pieces with a spout that allows water to escape somewhere.


This dam is 2 levels deep (with some 3 deep in the middle), and so during the dry season, the dam will retain a lot of water. Dams should be built on river mouths and are used to create lakes behind it. When damming a river, it is important to remember to let the water flow out somewhere, otherwise there will be flooding.

To reduce issues with flooding, retaining walls near the spout can be made (as are being constructed in the photo). Having the water go into a wide area can also slow down the water exiting your dam.

Lastly, you can also make a sluice:


Aqueducts

Aqueducts are a great way to move water from one point to another.


As talked about above, aqueducts create a lot of arable land, which is a massive boon for agriculture. Aboveground, they are costly to make, and take up quite a bit of room. Aqueducts can be carved into the ground using explosives, as well.

Water Dump


There are water dumps that will dump water out into an area to create an artificial lake. They require a water source, but allow you to move water anywhere.

Using this to make small lakes to increase arable land without having to build or blow up an aqueduct. Water dumps will refill the lake if it gets below their set level.

It is not recommended to use pumping stations to make a lake that will be pumped from.

Mechanical Water Pump


The mechanical water pump requires power and will pump water from a low point and release it at a higher one, forming artificial lakes wherever needed. The mechanical pump will automatically stop drawing water when the drop off side becomes full, similar to how a water dump will.

Mechanical pumps run without beaver workers, so they can be very useful for moving water from low points to much higher ones quickly and will run without stop if they have enough power.

So You've Got a Lake...


Remember that lakes and rivers can be built upon! You can produce a lake, and then move your housing and industry on top of platforms.

Lakes will stay during the drought season, and will offer a lot of water to our beavers. Make sure that they are actively pumping from it, though, as just because we have water in the lake does not mean we have stored water!
Districts
Districts in Timberborn are kind of a complicated beast at first, but are a powerful tool when used as intended. Together, we are going to look at how to create a district and how to use them to expand without accidentally starving your population.


Districts 101

Welcome to the first day of class, beaver building bureaucrats! It is time to talk about a controversial and yet fundamental piece of Timberborn: districts.

Simply put, a district is a section of the city that is marked by a central building (the district center) and the edges are marked with gates.

Districts are an interesting concept because they represent wholly independent units and can be perfectly fine while neighboring districts are dying.

Unlike most city builders, where resources can be shared and all pops can access storage evenly, each district acts like a new city. Food, logs, and all other resources are shared only within the bounds of the district, and do not cross the lines. This means when a new district is placed down, it is functionally an entirely new colony and should handled as such.

With this in mind, it can be easy to feel overwhelmed or think it is a bad mechanic. After all, how are we supposed to expand if our districts are limited?

There are some methods to moving goods from district to district, and some ways to properly (and improperly) create a new district. One large feature of the district system is that if a district is stable, and a new district is created, there is an opportunity to expand with reduced risk of destabilizing the existing districts. Overexpansion does not necessarily mean the death of the whole city.

With this frame of mind in place, we will discuss how to move forward with districts.


District Functions

Districts are basically a singular hub of action. Think of them like a city center. Before making a new district, think about some things:

1) Why do I need to put a district there?
- Building a dam? Expanding farmland? Need to cross a mountain? Colonize a new island?

2) Does it have access to food and water?
- Importantly: if the drought season comes, is there enough supply to last? Is this district going to suffer from drought?

3) Does it have access to other districts?

4) Is it cutting off supply to another district?

Before we begin making a new district, let us look at the edges of an existing district:


This is the edge of a district. The blue bounding box represents the farthest from the district that a beaver will interact with, while the red line represents the farthest distance that a building can be considered within a district.

If a building is placed beyond the red line, the beavers will construct it, but it will be considered "outside" the district and will not be used. If the building is a house, beavers will not live there and job sites will not receive employment.

However, if a building is within the blue boundary, it will be built by the district. This is incredibly useful when designing dams or other long structures. Likewise, placing a lumberjack flag at the edge of a district allows for beavers to work technically "beyond" the edge of the district.


To migrate beavers to a new district, click on the existing district center click "Migrate". This screen will display all of the information necessary to make decisions on how and where to migrate beavers.

This little bit of information is very important and can really change district placement.


Moving Goods

Each district has it's own storages of goods, which the beavers of the district will pull from. This means that the beavers of District A can only get goods from District A, even if adjacent districts have resources -- even if it causes the death of all the beavers in District A.

New districts are reliant upon well established districts to provide them with either a stable basis of growth or resources.

To move resources from one district to another, a Distribution Post and a Drop-off Point are needed.

A Distribution point is where the good leave the district, while a Drop-off Point is where goods enter a district.

Despite these easy explanations, it should be noted that for best movement of goods, each Distribution Point should be paired with a single other Drop-off point. Each beaver from the Distribution Point must make the trek to the Drop-off Point, deliver the goods, and return.

Tying a single post to point allows for the maximum movement of goods without having beavers cross a large distance to drop them off. The shorter the distance, the faster goods can travel.


One way to move a lot of goods quickly is to find the boundary of the districts, create a large stockpile from the richer district, and set the stockpiles to be focused by haulers. When the storages are full, move the District Gates to shift the boundaries. Now the other district has access to the goods. While this method requires more micromanagement, it allows for a large quantity of goods to be moved in a relatively short period of time.


Making New Districts
Making a District: Mitosis Style

The "mitosis" style of district creation is pretty much exactly like a cell dividing. The mitosis method is very stable, but it takes a time to create.

To start, find the edge of the district. Then place in necessary buildings for survival:
  • Storage
  • Water storage
  • Water pump
  • Farmhouse + plot out agriculture land
  • Forester + plot out timber land
  • Housing

Once the buildings are completed, wait for the storage and water storage to fill. Then pause the game, cut the path that connects the old district to the new, place a gate and a new district center. Beavers will need to be migrated to the new district, but they will have the resources required to survive.

This style of districting is slow, as it requires new districts to be close to the previous district.

PROS:
- Stable for the population
- Unlikely to die
- Long-term focused

CONS:
- Takes a lot of starting resources
- Takes time
- Relative distance to last district is vital
- Slow to expand, as this must be built next to existing districts


Making a District: Migration Style

This style is useful for when a project needs to be completed but the district is not designed to be permanent. Similar to the mitosis style, the migration style starts with a storage and then that is pretty much it.

Once the storage is full, lay out the desired construction, then cut off the new district and send a bunch of beavers over to it to work as builders. When the food and water are low, remove the district center and return the area to the old district.

Alternatively, when the food/water run low, return all the beavers to the main district.

The migration style is useful for drought-cycled areas, where a central storage district has access to year-round food and water, while outlying districts are prepping for engineering projects or clearcutting a forest. When the drought hits, return the beavers to the central colony to give them the summer off.

PROS:
- High return of resources (specifically beavers)
- Reasonably stable on the population
- Easy to do
- Can be built anywhere

CONS:
- Micromanagement
- Potential for getting distracted and losing the whole colony


Making a District: New Colony Style (Brute Force Method)

This method is basically "throw everything at the wall and see what sticks". The idea is to basically force the population into creating a new district from scratch without any preplanning.

Forcing all unemployed beavers into a new district like this can cause explosive growth in production, or a massive death wave.

Unlike the migration method, there is no preplanning at all. This method is most useful for quick colonization of far away new lands, as the relative distance of the last district does not matter.

PROS:
- No more unemployed beavers
- Quick and dirty
- Gets the job done
- Can be built anywhere

CONS:
- High risk of losing all invested beavers (!!!)
- Entirely unstable
- Must be monitored


Power and Transference
WIP


Example building using windmills, water wheels, and power transference.
So You Want to Make Resources
Takeaways

This section is going to be heavy on numbers and flowcharts, so if you wish to skip it -- feel free to read this blurb and do so.


Timberborn's materials are completely renewable, with the only exception being metals. Maximizing yields can help maximize usage per tile, and allow us to take our beaver production to the next level.


Without reading the math breakdown:
maple gives the best wood yield,
and
wheat -> flour -> bread produces the most food.

If you wish to traverse the flowcharts and math, read on!


========================================================================
NOTE: The math here is done from the perspective of an empty tile to food. I did not calculate the income per cycle, so this may explain why our math do not line up. This will cause my numbers to look "worse" than if they were calculated cyclically, and that is intentional.
========================================================================


Wood Production Line:


The wood production line really depends on the wood planted, and the math breaks down as such:

Birch: 1 / 9 = .11repeating
1 log yield
/ 9 days growing
= yield .11 wood per day per plot

Pine: 2 / 12 = .16repeating
2 log yield
/ 12 days growing
= yield .17 wood per day per plot

Maple: 8 / 30 = .26repeating
8 log yield
/ 30 days growing
= yield .26 wood per day per plot

Chestnut: 4 / 24 .16repeating
4 log yield
24 days growing
= yield .16 wood per day per plot


Food Production Line:


Food is a bit more complicated, as there are multiple food sources that give a different nutrition bonus each. This means that planting multiple of each crop is recommended. However, for maximizing food production, the math breaks down as such:

Berries: 3 / 12 = .25
3 berries yield
/ 12 days growing
= yield .25 food per day per plot

Carrots: 3 / 4 = .75
3 carrot yield
/ 4 days growing
= yield .75 food per day per plot

Sunflower: 2 / 5 = .4
2 sunflower seed yield
/ 5 days growing
= yield .4 food per day per plot

========================================================================
~) This math assumes it takes .5 day to move good from one process to another or storage

~*) This math assumes it takes 1 day to move good from one process to another or storage
========================================================================

Potato:
~ : (1 * 4) / (6 + .5) = .62
1 potato yield
* 4 grilled potato per potato
/ 6 days growing
+ .5 days processing potato to grilled potato
= yield .62 food per day per plot

~* : (1 * 4) / (6 + 1) = .57
1 potato yield
* 4 grilled potato per potato
/ 6 days growing
+ 1 days processing potato to grilled potato
= yield .57 food per day per plot

Spadderdock:
~ : (3 * 3) / (12 + .5) = .72
3 spadderdock yield
* 3 grilled spadderdock per spadderdock
/ 12 days growing
+ .5 days processing spadderdock to grilled spadderdock
= yield .72 food per day per plot

~* : (3 * 3) / (12 + 1) = .69
3 spadderdock yield
* 3 grilled spadderdock per spadderdock
/ 12 days growing
+ 1 days processing spadderdock to grilled spadderdock
= yield .69 food per day per plot

Wheat:
~ : (3 * 1 * 5) / (10 + .5 + .5) = 1.36repeating
3 wheat yield
* 1 flour per wheat
* 5 bread per flour
/ 10 days growing
+ .5 days processing wheat to flour
+ .5 days processing flour to bread
= yield 1.36 food per day per plot

~* : (3 * 1 * 5) / (10 + 1 + 1) = 1.25
3 wheat yield
* 1 flour per wheat
* 5 bread per flour
/ 10 days growing
+ 1 days processing wheat to flour
+ 1 days processing flour to bread
= yield 1.25 food per day per plot

Cattail:
~ : (3 * 1 * 4) / (8 + .5 + .5) = 1.33repeating
3 cattail yield
* 1 flour per cattail
* 4 cattail cracker per flour
/ 8 days growing
+ .5 days processing cattail to flour
+ .5 days processing flour to cattail cracker
= yield 1.33 food per day per plot

~* : (3 * 1 * 4) / (8 + 1 + 1) = 1.2
3 cattail yield
* 1 flour per cattail
* 4 cattail cracker per flour
/ 8 days growing
+ 1 days processing cattail to flour
+ 1 days processing flour to cattail cracker
= yield 1.2 food per day per plot

This math does not cover the use of beehives (Folktails only), as they change the growth rate of the plants around them.
F.A.Q. and Quick Info
0 How do I get more beavers?
- Give them some downtime (reduce working hours by 1 or 2), make sure you have empty lodge space, satisfy your beavers comfort (by building homes). You can also increase fertility by meeting beaver social well-being (campfires or leisure terrace)

0 Will you write about X?
- Well, if you are interested in it, sure! I will try my best to get to it when I can. While my intention was not for this guide to be a "be all, end all", it seems like the ingame tutorials aren't enough and I feel like I can help out. I will do my best to cover as much ground as I can.

0 Can you take X screenshot?
- Definitely. Post a comment and I will try to get a better screenshot of my building designs for you! I would like to showcase some of my structures in hopes that you guys can be inspired by them.

0 Why are your updates weirdly timed?
- Getting good screenshots and making sure my information is correct is also really important to me, and since my schedule is really busy, it can be hard to get it all to line up well. Your guys' comments really fuel my desire to return to this community and see this guide through, so I will keep working on it when I can!

0 Your math is wrong.
- Yeah, that is very likely. I am not a mathematician, statistician, engineer, or logistics manager. I do simple algebraic math to best support any concepts that come up. The idea is that Timberborn favors those that plan ahead: maple and wheat take the longest to grow but produce the most goods.
Updates Log
ANNOUNCEMENT: Badwater Update: 1, 20, 20, 24:
Hello everyone!! I have seen the Badwater update and I want to address it before the beavers start asking questions: yes, I have seen the update, but no, I have no plans at the moment for an update to the guide.

The Badwater update may require an entire overhaul of this guide, as it puts into question a lot of the doctrine around irrigation that has been set up here. I will endeavor to get an update out as soon as I can, but I do not know when that is.

If you are interested in helping me, please feel free to reach out to me on Steam.

Draft 10: 2023, 4 days after 4/20:
- Updated water evaporation rate, math given from a comment by LexFuturorum. Thank you!

Draft 9: Day 96 of 2023:
- Updated wood production image to be a bigger size
- Updated wood production to add chestnut and correct for the growth time change of maple
- Updated food production to add cattails and spadderdocks

Draft 8: April 2023, Wednesday the 5th
- Updated images and text in the Beaver Basics to align with the new systems.
- Added mechanical pumps to the the water systems
- Updated screenshots for migration
- Updated information in the Beaver Basics
=== The food flowchart needs to be updated...

Draft 7: October 2021, the 4th
- Split the districts section into two pieces.
- Wrote up how to move goods from district to district.
=== Should add a section about how to use the distribution limits.

6th Draft: 2021, September the 30
- Updated section on water dumps. There really wasn't much to say about them. Mostly just a recommendation.
- Added a note about how my math is not done from a cyclical point of view, but a standing point of view. Yes, I know this means my math makes the production look worse.
- Fixed a mistake where "water dumps" were called "pumping stations".
- Did a second test to see how much food/water a beaver consumes per day.

5th Draft: 9/27/21
- Added information from a test about how much a beaver consumes in a day

Draft 4: 21/9/21
- Added in flowcharts and math breaking down wood and food production cycles
- Fixed some grammar mistakes (specifically "dam" vs "damn" mistakes)
- Added a vague picture to the power section to help readers see what can be done with power
- Added a new subsection to Districts about District types. Will expand upon it soon

Draft 3: 2021, 20, 09
- Added a link to the Russian translation of this guide
- Added some more FAQs
- Began drafting the "Districts" section

Draft 2: September 17th, 2021
- Fixed a few small grammar/semantic mistakes.
- Left some internal notes for myself about what to add
- Started district discussions

Draft 1 : 16th of September, 2021
- Wrote out beginnings of the guide
94 Comments
Tomahawk Jan 24 @ 9:17am 
Really like the guide, nice to read through.

Evaporation was a little short section perhaps. I believe that only water that is exposed to air will evaporate. If not the rest of what I write is nonsense :)

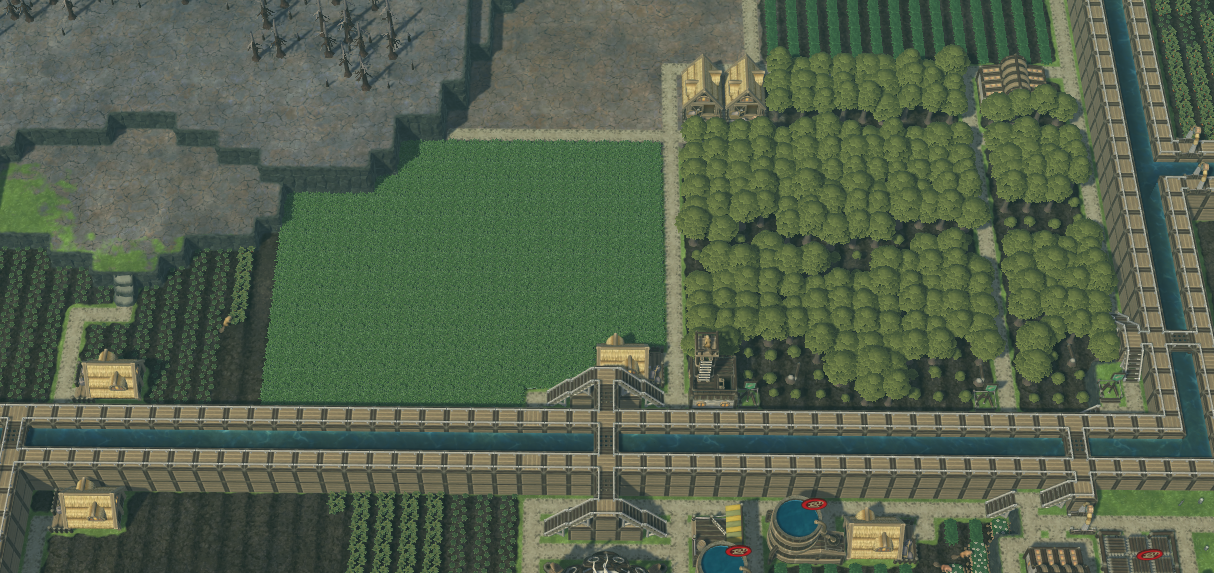
a lake of 10cubes that is 1 deep will evaporate as quickly as a single hole of water. Make it 10 cubes deep and it takes 10x longer.

Probably most efficient to survive a very long drought is putting it all in storage as it won't evaporate. 30days of drought = 30days of evaporation!

As that may be a bit much, say we can't use storage, then probably it means continously minimising the area of water. For this you will need a lot of floodgates.

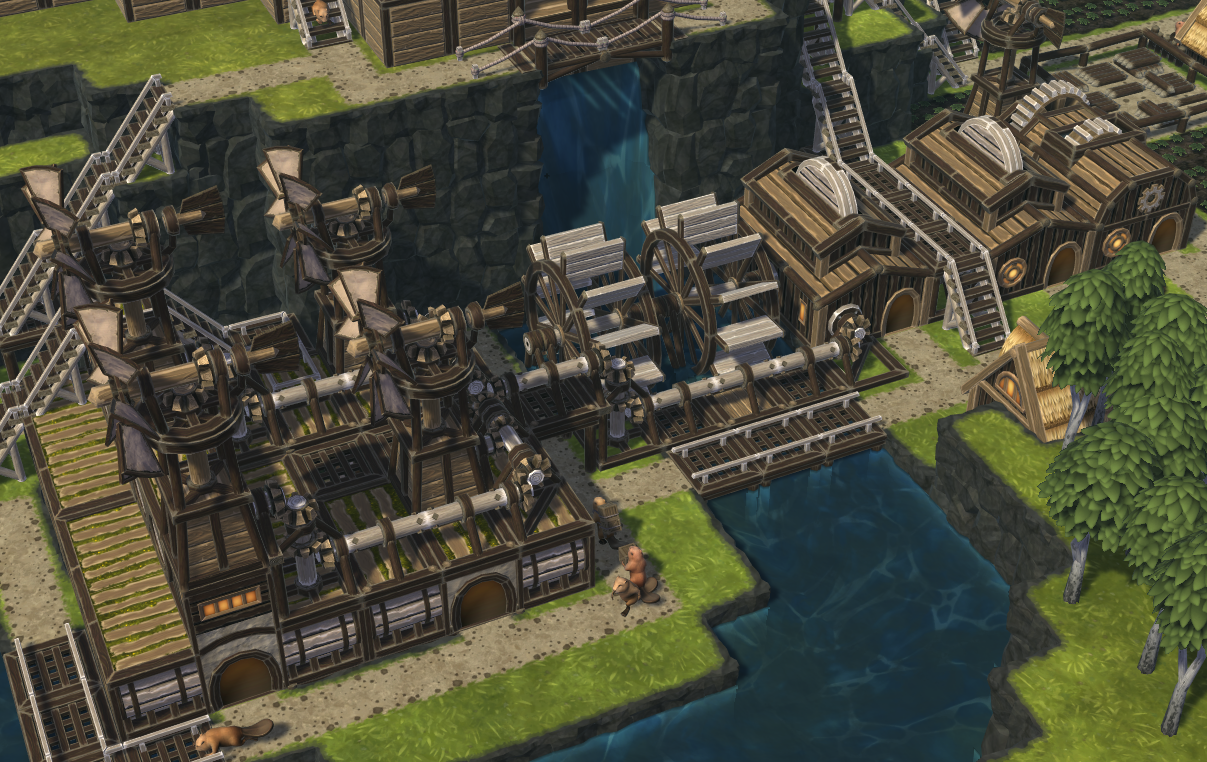
I can't imagine playing hard mode with high population without floodgates. Even more so with the badtides!
V3madmax Jan 21 @ 1:37pm 
thanks
Althis  [author] Aug 17, 2023 @ 7:24pm 
I appreciate it! I try to keep the guide semi-annually up to date, depending on the game development. It is really a lot of fun to make, and you all have been super awesome :happy_creep:
Margaret River Aug 16, 2023 @ 2:25am 
Althis - as you know, that's the nature of early access games; but know that your work is also very appreciated and a million times better than nothing...
Althis  [author] Jul 25, 2023 @ 9:55am 
3 months later, my guide is wildly out of date. Oh boy.
flex.williams Jun 4, 2023 @ 5:17am 
I use floodgates extensively in conjunction with dams. The reason is so that if I want to make a change (or I make a mistake) in my water flow paths, I can immediately shut off the water to make the correction. Once everything is working properly I usually leave them at 0 or .5m height as the dams start to flow at .65m. But if, for a new colony for example, I want to change the water flow without causing floods (or spending the time building a lot of levies which I will then tear down), I can still shut off the water to an entire section of the map.

What I would love to have would be finer control over floodgates and dams. I.e. be able to set them at 0.1m increments (dams permanently). Flood control would be a lot easier if I had 0.6m high dams, with 0.7m high dams as flood run-offs. Or possibly have a aquatic farm floodplain with a 0.1m dam outlet, fed by a 0.6m dam. That would be enough to keep the plants watered, but could also be used for flood control.
Althis  [author] Apr 27, 2023 @ 12:48pm 
As is probably obvious from the guide, I like to use artificial lakes and other water storage systems. Anecdotally, I think it is better to store water for drought seasons in "raw" water rather than in water tanks.
LexFuturorum Apr 27, 2023 @ 3:11am 
and according to the reddit i cube of water is equal to 5 units of water making a adequate storage for the droughts more space efficient than a lake, but i cant confirm this information
LexFuturorum Apr 27, 2023 @ 3:05am 
glad i could help, i just double checked the rate and its at 0.045 per day so ill call it close enough with 0.99 for 22 days
Althis  [author] Apr 24, 2023 @ 10:21am 
Water evaporation is a thing I wanted to do math for, so this helps me a ton. Thank you so much. I will add this!