Team Fortress 2

Team Fortress 2

Ikke nok vurderinger
MvM: The Guide to Pipe Grenade Demoman
Af Thenimas
Are you looking for an alternative to the MvM Demo meta? This guide explains the basics of Pipe Demo and the differences in gameplay between it and the traditional Sticky-based demo.
   
Pris
Føj til foretrukne
Gjort til foretrukken
Fjern som foretrukken
Introduction


I dislike the MvM Demo meta. It's all just "SCOTTISH RESISTANCE.... KRITZ.... AND MORE SCOTTISH RESISTANCE". Sure, it's effective, but it's boring to play. Plus, an experienced enough scottish res demo can often just suck the experience out of the game for everyone else. Maybe you just want your loot, but I think that's no fun.

Fortunately enough, there's another camp of Demo players (ignoring the demoknights). Yes indeed, a demo who upgrades their grenade launcher instead of stickies is an equally viable way to play as our drunk scottish cyclops friend. Unforunately, this playstyle isn’t seen that way by many players because he's not a "carry".

In actuality, Pipe Demo can do a lot of the same things a Sticky Demo can. They may often still carry a sticky launcher for killing uber meds with and to protect the bomb, but it's relegated to being a secondary rather than being the main damage output.

The main advantage Pipe demo has over the traditional style is a far more consistent DPS. The grenade launchers have no falloff, always deal the same damage and they don't take nearly as much time to reload. Even still, Pipe demo carries the same insane splash damage that sticky demo does. The difference is burst damage vs. raw DPS.

So are you looking for a more fun way to play as the drunken pipe bomber we all know and love? You've come to the right place.
Weapon Choice: Primary
Your main weapon that you'll be using.
In order from best to worst:


The Grenade Launcher
The ever-reliable classic pill shooter. This is, by and large, the best and most reliable primary for a grenades-based demoman. Good direct damage, good splash damage, no downsides and no gimmicks. It just works.


The Iron Bomber
So I was actually wrong about this weapon originally. After the hitbox thing was fixed, the pipes on the Iron Bomber behave identically in the air to the stock Grenade Launcher - So this thing doesn't really have an advantage in MvM anymore, it just kinda exists. All it's good for over stock is slightly more mobility - pipe jumping is a bit more reliable. Otherwise, it's a slight downgrade from stock. But not automatically unusable.


The Loch-n-Load
The Loch-n-Load is.... Actually not that terrible in MvM. Sure, it's definitely a downgrade from stock, but your clip size only really has a minor impact on your overall DPS, and no rollers barely matters either.

Other classes are probably better equipped to deal with engies than you are in MvM (even then, stickies arguably do a better job than this thing), but I won't say don't use it. It's more manageable firing arc and much longer distance may be a boon on some maps. Plus, sometimes this might be your only practical option for engies assuming none of your other teammates can handle it.


The Loose Cannon
The Loose Cannon is a huge beginner's trap for this playstyle. Can it deal more damage than the others? Potentially, but even if you somehow get it working optimally (Which is very difficult mind you, you have to constantly judge the right spacing so you're not wasting time by charging), you are going to juggle everything you hit which makes it excessively harder for your TEAMMATES to do their jobs. Besides, you already have a bunch of ways of getting minicrits in MvM.

Don't bother with this thing, it sucks for this purpose.
Weapon Choice: Secondary
When it comes to secondaries, remember that pipes or not, if no one else is looking after the uber meds, your teammates will be counting on you to take them out.

And unless your grenade launcher is upgraded enough to oneshot them to begin with, you'll be relying on stickies to do that for you. But thats fine, because stickies don't need any upgrades to do their job anyway.

But before we go over that...


The Chargin' Targe
Hey, you! Do you hate taking damage?
In all seriousness, if uber meds are not an issue (either because the wave doesn't have them or someone else is on top of it), then this is the secondary of choice. That free +30% blast resistance is solid, especially early on. Extra mobility and the ability to just eat flames without a care in the world is nice, too.

Note that resistances stack multiplicatively, not additively. Using this with +75% blast resistance upgrades is not 105% blast resistance, it's 83%.
(100 dmg x 25% left after res upgrades x 70% left after shield == 17.5 , 100-17.5 = 82.5%, rounded to 83%.)


The Stickybomb Launcher / The Scottish Resistance
These fulfull the role of the med-killing secondaries. Stock sticky works better for those heavy-medic combos (the ones that come two at a time) because of the fast arm time (which allows you to take them out one after the other), but Scottish Resistance is better for the massive clusters of medics that gather behind giants because of the larger trap size and faster firing speed.

Scottish is also just a good secondary in general (you know, how the weapon is SUPPOSED to be), since you can use it to trap multiple areas at once and keep an eye on your stickies through walls while you're doing something else.


For the other secondaries:
- The Tide Turner and Splendid Screen are better as demoknight-oriented playstyles, and offer weaker resistances as a result. Use them if you don't have targe, but targe is better mostly (Unless you're adept at trimping and think the extra mobility from that will help, in which case be my guest.)
- Quickie in my experience is mainly useful as an anti-engiebot weapon since you can snipe them from afar. But in a med-picking task, it tends to perform poorly when compared to the other launchers.
- Sticky jumper is... fine. If you have a decent amount of blast resistance then you would be better off with stock stickies, but it's not like crazy mobility is all that needed unless you don't have an Engie. In most cases, for a mobility secondary, targe or tide is better because free resistances.
Weapon Choice: Melee
Melee doesn't matter that much. When in doubt, use stock. The Eyelander can be good for a bit of health boost (assuming you remember it's there and don't die with heads), but otherwise just use whatever works.
Upgrades
Ah yes, the juicy section, the section that REALLY separates the good demos from the not good demos.

Basically just upgrade your primary and nothing else, until all that's left is the less important primary upgrades. Get resistances then.

That "nothing else" part is important. Do not upgrade your secondary or melee weapon (unless you have nothing else to upgrade).

With that in mind, here is my personal upgrade path:


There are two upgrades worth special consideration:

Crit Resistance
This one's simple.
- If there are crit robots in the next wave (the ones with the flashy blue border on their icons), max out crit resistance immediately.
- If there are no crit robots, don't buy crit resistance.

Ammo Capacity
How much you upgrade this depends on your preference, the map, how good your engie is, etc. I usually buy at least one after I start upgrading reload speed just because 16 pipes isn't a lot, but for you, it's your choice.


Now, the upgrade progression:

1: Health-on-kill (one or two ticks)
You may or may not need 2 depending on if you have a medic and/or if they're any good, but I always get at least one. Health-on-kill is just a basic upgrade that every damage class can make use of (except scout), and in 90% of cases, it's essential for survivability. Do not max this upgrade out. (atleast not now).

2: Reload speed (max out)
Reload speed is the most important upgrade for DPS. When you're reloading, you're not dealing damage, and when you're not dealing damage, you're open to being rushed down. Max this upgrade out as soon as you can so you can fire off as many pipes as possible.

3: Damage, Firing Speed (upgrade at the same time, max out both)
I tend to prioritize Damage over Firing Speed in most cases just because higher damage means you need to use less pipes to take out more enemies (whereas firing increases your pipe consumption), but both are good.

Demo's damage upgrades are actually nerfed compared to other class primaries since it only goes up to +80% instead of +100%, and the upgrade costs $500 per tick instead of $400. Not important but worth mentioning, since Demo's primary is so powerful to begin with; but you need two ticks to oneshot light classes instead of the usual one for rocket launchers or scatterguns.

4: Body Resistances (as many as you want/need)
Prioritize the upgrades that correspond to the damage types in the upcoming waves. You don't even necessarily need to max them out, just get some when you need them. I tend to prefer bullet resistance if I have the targe equipped (since that's your only weakness), but otherwise both blast and bullet are good. Fire isn't high priority since you're usually out of flamethrower range, but it's not useless.

Don't waste money on resistances for enemies the upcoming wave doesn't have.

5: Clip Size, more Health-on-Kill, Health Regen, Movement Speed
After everything else, these are what I consider the "low priority" upgrades. Nice to have, not essential.

One tick of Health Regen might be worth considering during the mid-game, especially on giant or tank waves where the effect of Health-on-kill is much more minimal - this will at least counter any bits of chip damage you take while you're off doing your thing. But don't upgrade it more than one tick until after you've gotten any gun upgrades and body resistances you want.

Don't buy Projectile Speed. It's a bad upgrade.
Ok, maybe not "bad", but I've seen many new players buy it way too early in the match (presumably because they don't know what else to spend their last few credits on). Don't do it. It often makes it harder to aim if you're not used to it, and does nothing to increase your DPS. Even if you make the argument for range, it totals out to $600 to double it, which is money better spent on damage. Range needn't matter anyway since you can just stand further away and you won't suffer falloff.

Very low priority. I personally never buy it, even when I have everything else maxed out.
Gameplay
On a basic level, Pipe Demo is all about shooting the enemies full of pipes until they explode. However, there are some things to remember.

- Much like the Soldier, Pipe Demo is somewhat weak during the earlygame when compared to Heavy, or even Sticky demo for that matter, but he becomes obscenely powerful by endgame. He requires a lot of money to get there however, and he ain't got any equivalent to the Beggar's either. So make sure you're on top of your medic picking duties while you're still leveling up your launcher, lest you be labelled as useless to the team. And make sure you get decent upgrades, too. Don't waste your money on bad upgrades, or canteen/buyback spam.

- The key to taking out Uber Medics is that they pop uber instantly if they drop below 55 HP (from 150). Two stickies is usually enough for one, but for the clusters of them, you might as well use a full clip to maximise your chances of taking all of them out at once.

- Be wary of Pyros, as they occasionally have the ability to airblast pipes. Although reflected pipes aren't as deadly as reflected crockets, they're still hazardous to your team. Use stickies to take care of them, or let a hitscan class take care of them while you're off doing something else.

- If you're using Scottish Resistance, it's a good idea to always keep a few stickies on the bomb if it's way far behind the front lines. Because of the way Scottish Resistance works, you can use it to kill meds and also keep a separate trap at the same time. So if a common manages to sneak past, you can watch the indicator on the bottom to know when to detonate and take care of them.

- Remember that Pipes have no ramp-up or falloff. They always deal the same amount of damage (on a direct hit) regardless of how close or far away you are; 100 with no upgrades, 180 when fully maxed. So you can put plenty of distance between you and the bots, provided you compensate your aim. Just don't be too close, as you take self-damage (obviously)

- Pipe Demo is a fairly decent tank buster on his own. Not on the level as Phlog Pyro, Beggar's Soldier, or Cola Scout, but he can do a lot thanks to his consistent damage output. Whether or not you should prioritize the tank depends on if your team already has it covered or not, and if you need to stay up at the front to keep the DPS up and the medics dead or not. Shoot the tank when it comes, but only follow it if the team needs the help.

- In addition, when it comes to crits, Pipes crit a lot harder than scatterguns or miniguns do because they have no ramp-up. So if you have a medic, when the tank comes don't be afraid to ask for a Kritzkrieg charge, since Demo can do quite a lot with it.
(What I mean by "pipes crit harder" is that Scattergun goes from 105 damage to 180 damage when kritz'd. Pipes go from 100 to 300.)

- Make sure that your team can effectively deal with Giant Scouts, since you can't reliably spam traps for them. Scottish res helps a bit, but they may be an issue for you otherwise.

EDIT 2021/07/03
Full credit goes to Gold Titanium Sulfur Carbon for bringing this to my attention
https://www.youtube.com/watch?v=iQe3fr4z9QA
Turns out, stock grenades with 3 or 4 ticks of damage can somewhat reliably kill medics using splash damage. Since, to kill an uber medic, all you have to do is kill it without it's health dropping between 55 hp and 1 hp, the roughly ~80 dmg that a +60% splash hit on a giant will bring a 150 hp medic down to 70, meaning you can actually kill the clusters without stickies.

It's more reliable with 3 ticks (~80 dmg) than 4 ticks (~90 dmg, which can sometimes vary enough to trigger uber if the medics are too close), so be cautious. Stickies work better in general, but this is helpful to remember if you aren't using stickies and your med picker is currently dead/bad.
Thanks, and have fun!
I made this guide because no one else has made a pipes-specific MvM demo guide apparently, which is a shame because it's my second favourite playstyle in MvM (behind Damage Scout, but there's plenty of guides on him)

So hopefully somebody out there finds this info useful.

Credits:
Guide written & edited by me (Thenimas)
Thumbnail was created by Chaofanatic
All weapon images were created by me using Blender
Upgrade icons were taken directly from ingame
All image editing was done using https://www.getpaint.net/ (including the final meme picture)

Special thanks goes out to Quenquent and Underscore Gaming for inspiration
16 kommentarer
VicJokerHead 13. dec. 2024 kl. 1:10 
This is an awesome tutorial, I had a lot of fun playing this way and I hope more people find it fun as well. Thank you for posting!:sticky:
BirbSMB 21. okt. 2024 kl. 11:20 
Was never sure of how to upgrade when playing Demopan in MvM - I'll try this out on Bavarian Botbash later today.
Gape Newell 24. aug. 2024 kl. 0:19 
Also forgot the crit upgrade for the eyelander, that paired with a sticky jumper can give you insane burst damage if you get eyelander crits and just shit pills all over a giant/P.O.I
Thenimas  [ophavsmand] 22. aug. 2024 kl. 10:43 
Fair points. I haven't played MvM seriously in over a year so I haven't really refined my experiences and views here much. Honestly all of the grenade launchers except the LC have at least some merit.
Gape Newell 22. aug. 2024 kl. 0:10 
I think the Iron Bomber is leagues better than stock due to the fact that if your aiming close to your target, you're gonna hit them with rollers. It is also significantly better in hitting groups that are in open areas because of the rollers.

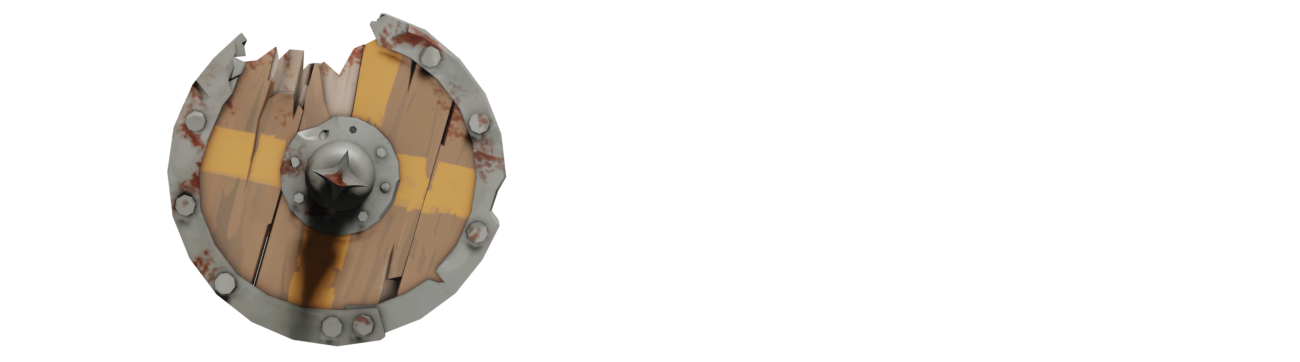
The sticky jumper is also super useful for saving your ass & getting heads with an eyelander
How3en 31. maj 2024 kl. 7:33 
Pyro used it for refelcting demo projctile
Thenimas  [ophavsmand] 22. juni 2023 kl. 21:09 
Fixed iron bomber section.

I should really have a changelog section in the guide itself xd
Thenimas  [ophavsmand] 12. juni 2023 kl. 14:26 
I've given this guide a few minor edits (mostly switched Loch and Loose Cannon's places) after some small feedback from the forums.

I've been trying to decide on making more non-meta guides like this, but the only thing I'd actually be interested to cover is DPS scout - except Underscore already did a good guide on that. I do have a few small tips/tricks and misc stuff I could say that he didn't cover, but I don't think anyone would read a small, obscure guide like that.

I probably shouldn't let that stop me but what can I say, I'm also lazy.
solar 11. juni 2023 kl. 18:34 
Use grenade launcher
Thenimas  [ophavsmand] 15. juni 2021 kl. 11:27 
100 visitors 👌