Blender

Blender

81 hodnocení
Vermintide asset ripping 2.0 - Bitsquid Blender Tools 0.6.3, Wwise Unpacker, NinjaRipper, Blender
Vytvořil: Janfon1
2.0 - NEW TOOLS! The old NinjaRipper/RavioliScanner methods are now outdated and preserved only for Vermintide: End Times.

In this guide you'll learn the specific workflow for asset ripping meshes, textures and audio files from Vermintide 2 using BitsquidBlenderTools and Wwise Unpacker - and from Vermintide: End Times using NinjaRipper, Noesis and Ravioli Scanner.
5
5
6
2
3
   
Ocenit
Přidat do oblíbených
Oblíbeno
Odebrat z oblíbených
Introduction

As part of honing my skills in Blender, I've been making fan animations of a video game series "Vermintide". I've been spending my free time ripping the characters from the games, assembling them together, rigging and finally animating in Blender. It's been a great excercise and a phenomenal outlet for creativity, though obviously time consuming.


After noticing the growing interest of people wanting to know how I got my hands on these models, I decided to write this guide so I can just link it to people instead of writing down an essay on asset ripping to each individual person. That and unless someone finds out a better way, this is the most time efficient way (in finding exactly what you're looking for) of asset ripping meshes and textures from the game.


WARNING: The guide was made with the reader being equipped with basic Blender knowledge in mind and is not designed to teach someone how to use the software from scratch.

WARNING: Bitsquid Blender Tools only pertains to Vermintide 2. Vermintide: End Times still requires the use of the old method.
BITSQUID BLENDER TOOLS (BBT)
THIS METHOD REPLACES NINJARIPPER ENTIRELY FOR VERMINTIDE 2

Developed by qasikfwn, Bitsquid Blender Tools (BBT) is a fork (copy) of an addon of the same name by Lucas Schwiderski. Using this tool, we can extract the entire game's bundle files in their original formats, with the original textures and import them directly to Blender.


As of the writing of this chapter, the tool's dictionary (list of asset names it knows and can decode) roughly consists of 60% of the entire game. Some specific props are still unknown like parts of Taal's Horn Keep, Chaos Wastes etc. but otherwise a vast majority of characters, enemies, weapons, assets, architecture etc. are all named and ready to import into Blender.

The gitlab website of the tool explains things incredibly well and doesn't really need repeating on my end. But to make things short, here's the things it can do:
  • GUI for unpacking game files with VT2 Bundle Unpacker
  • Map importing via .level files
Model importing (pretty much entire characters with their textures):
  • Armatures
  • Normals
  • Vertex groups
  • Vertex weights
  • Material slots
  • Automatic texture importing
  • Animation importing

Give it a shot, it's a direct upgrade to the previous method!
Installing Bitsquid Blender Tools
Current version 0.6.3 (03 February 2025 - more discovered filenames!)

You can follow the tool's wiki to get a step-by-step explanation[gitlab.com] on how to install, prepare and use the tool.

WARNING: READ THE "SEPARATE BUNDLE PACKAGES" SECTION IN THE "Know-how of using BBT" CHAPTER BEFORE EXTRACTING

Ubershader guide
Upon importing a model (a .unit files) into Blender, these models usually come with the textures already found, but not connected to the Principled BSDF shader. Thanks to the aid of nihalrahman, a new ultimate shader exists called V2 Ubershader that you can utilize for just about any asset from the game.

Since version 0.5.8 the shader comes packaged with the mod, no need to download it separately.

READ THE TUTORIAL HERE[docs.google.com]

Know-how of using BBT
This section can be updated over time with new info.

Using "Everything" for browsing the bundles
I've been using a tool called Everything [www.voidtools.com]for quick and efficient browsing of the bundles catalogue. It's infinitely faster than the default Windows search tools, has some neat advanced search options, allows for instant playback/renaming and is generally just a straight up upgrade when you need to find something in a jiffy. I highly recommend using it.


Quick access to shaders
If you want to bypass appending the shader over and over again between new projects you can put one in your default .blend file. Open up a fresh Blender project, append the shader to it, then go to File->Defaults->Save Startup File. Remember to update this when new versions of the shader get made.


"Try to unhash file names"
Keeping this option enabled means the extractor will use a "dictionary" (list of encoded names and the game files they match to) to export things with their correct names. Always keep it on, don't turn it off by accident.

Should I unpack only .unit and .materials?
No, just unpack everything, all of it. I tried unpacking only a few choice files types and I constantly got errors as parts and pieces of meshes were missing. You're better off keeping everything just in case.

"Separate bundle folders"

This option is only useful if you're hunting for undecoded files or trying to pair up models with their textures in the same folders. Otherwise you are entirely better off w/o this option, as it bloats the file size severely and duplicates a plethora of assets.

When preparing to extract the bundles from the game, you have a choice between extracting everything into a single folder or to "Separate bundle folders". This option exists to resolve an issue with finding textures by preserving their bundle structure. In other words, a weapon and its textures will almost always be in the same folders now.


For example, Engines of War Versus Mode assets are all kept inside a single bundle. It contains the decrypted files, with their full names and folder structure, but also a ton of those that aren't. With "Separating(...)" enabled, these won't get lost in the sea of other encoded assets and you'll have a much easier time finding them.
SOUND EXTRACTION W/ BBT AND WWISE UNPACKER
Besides meshes and textures BBT can extract a plethora of other asset files, including repositories of sound files. They are usually located in directories called "wwise" and have file formats such as .wwise, .wwise_stream, .wwise_bank or .wwise_dep. The audio is very easy to sort through now that we have more hints as to its origin (e.g. "hud_versus.wwise_bank").


Downloading Wwise Unpacker Revamped

The software I used for extracting these files to MP3 is Wwise Unpacker Revamped[codeberg.org] by VIPLighting. The Codeberg website is convoluted as ♥♥♥♥, but the download link to the latest release can be found under the Relases tab[codeberg.org].


Once you've download the .zip file, extract its contents to a new folder called "Wwise Unpacker Revamped [current version]" and you're good to go.

Converting wwise to mp3

Copy-paste the entirety of the "wwise" folder of your choice to "Game Files". I suggest copying in this case to make sure the original bundle's structure is preserved.


After that, all you do is launch "Unpack to MP3.bat" and you're good to go. It'll open up a command console and show progress on it detecting, then converting the files.


Once the software is done, it'll show up a tornado with a message "Unpack finished! Files should be in the 'MP3' folder". You can ignore "Should I delete BNKs and PCKs" because it does nothing in our case.


Post-converting cleanup

Cut-paste all of your converted mp3 files into a new folder, preferably something called "[name] output" so you can track it down easily later.

Wwise Unpacker needs some help with cleanup once you're done with it. Delete all files from Game Files and Tools/Decoding (the .wem files it decoded and converted to mp3). The tool doesn't delete these files manually and you have to get rid of them consistently after each conversion.

And you're done!
Ripping the environment - what can be done?
I noticed that at least one person was also interested in ripping the maps from the game. Might as well share my thoughts on that, too.

As of the version 0.6.1 importing maps to Blender can be done via the .level files. It's nuts, it's been deemed impossible by me for years and yet here we are lol


I'll need to attain some experience with these .level files myself before I can document them better, but the fact this is possible now is astounding and incredibly exciting.

Everything below this point is for supplementary material like props.


The extracted V2 bundles house a vast library of props, foliage, geometry and whatnot that we can use to craft scenes easily. Give these a shot first, the only trouble's that you'll need to connect the Ubershader to materials manually (at least as of now). Choose this option first over looking for alternatives.


Thankfully, since the game has a fairly realistic dark fantasy artstyle it's easy to piece together an environment that fits the look of the characters. All we need from the game then is its textures and some smaller assets while the rest can be replaced.

Asset libraries that match V2

For the purpose of making environment design easier on myself, I found a few different asset libraries I've been using in my animations.

1. Witcher 3 Asset Library[open3dlab.com]
Contains thousands of different gritty, grounded, medieval assets like houses, indoor props, bushes, trees, architecture, corpses etc. Comes to about 3-4 gigs in size, but definitely worth it. I've only used Decorations.7z for my own scenes, you don't necessarily need to download everything.

FIX FOR BLACK EEVEE TEXTURES
Enabling Ambient Occlusion turns all textures pitch black in Eevee. To solve this (and an issue with overblown texture brightness:
  • open witcher3_materials.blend
  • go inside the Witcher3_Main node group
  • for Specular/Roughness, detach the Eevee socket and connect the Cycles on to it. This fixes the AO issue
  • go to the left end of the node group and set Color Dodge to 0. This fixes the texture brigthness.


After applying these changes they can be used in Eevee without an issue, which has been my go-to render engine for Vermintide stuff. Upon doing these changes to the core node group, it will automatically apply to every asset from the library.

2. Plant Library[blendermarket.com]

Free collection of high-detail patches of grass, leaves, bushes, a few trees but not many, photogrammetry rocks etc. They're very rich in detail and some I'd say are unoptimized, so use them sparingly. Even then it's such a rare treat to find something of this grade.

3. PolyHaven (formerly HDRI Haven)

A library of free HDRI images that help immensely in achieving interesting skies or lighting in general, not a single scene in my stuff goes without using one. From my experience using 2K is enough, I have been hesitant to download higher resolution ones as they become larger in size exponentially.

To learn how to use HDRI in Blender, read about the Environment Texture from the manual[docs.blender.org].
=== SEPARATOR ===
The following chapters are about an older method that is now only necessary for Vermintide: End Times. Bitsquid Blender Tools was only made with V2 in mind and its functionality with V1 is not documented at the time.

OLD METHOD - Necessary tools
Programs required for asset ripping this specific game are as follows:

MESH/TEXTURE RIPPING


Paste the RIP files plugin (.py) into the noesisv4421\plugins\python folder. It allows the model viewer to read and export the meshes that NinjaRipper creates.

SOUND FILE RIPPING

Setting up NinjaRipper
NinjaRipper is a fairly flexible tool that works for some games, for others not quite. It basically takes a snapshot of the game screen and rips everything that's on it including the textures. It doesn't work on every game, it's often blocked by anti-cheat software. Luckily for us it works like a charm in Vermintide, it's only a matter of jumping through a couple hoops.


For Vermintide 2

  • use the x64 version
  • for "Exe:" choose the game executable located in this directory:
  • Steam\steamapps\common\Warhammer Vermintide 2\binaries\vermintide2.exe
  • for "Output Directory" create a folder preferably on a hard drive with plenty of space to spare, the ripped assets can (and will) take up gigabytes of space
  • The line of "Arg:" code necessary for the software to run in-game:
  • -eac-untrusted -bundle-dir bundle -ini settings -silent-mode
    It meddles with the EAC anti-cheat system, allowing you to use the NinjaRipper in-game. Thanks to the Vermintide 2 modding community for helping out with this one!

  • Everything should work fine with the "Intruder Inject" setting


For Vermintide: The End Times:
  • you must use the 32bit version (x86) due to the nature of the game's older engine
  • "Exe." file:
  • Steam\steamapps\common\Warhammer End Times Vermintide\binaries\vermintide.exe
  • The same tip for "Output Directory" applies here, though keep it separate from V2's folder for obvious reasons

  • "Arg:" code:
  • -bundle-dir ../bundle
    It tells the tool where the game's data is located (inside the "bundle" folder), without it the game will be stuck at a loading screen/crash

  • Once again "Intruder Inject" setting seems to work fine with this version of Vermintide

steam_appid.txt

Inside the binaries folder, create a steam_appid.txt file (DON'T WRITE .TXT IN THE FILE'S NAME) that contains the game's ID number:
552500
Without this file the following error will occur:

"Fatal Error!

The game will close!

Vermintide 2. You need to have the Steam Client running to play the game."


Vermintide: The End Times

All I could find for the first game was the Enemy Spawner [www.nexusmods.com] mod. Besides that our options are pretty limited.

Inside the binaries folder, create a steam_appid.txt file that contains the game's ID number:
235540
Otherwise the same error as the one above will appear.
Setting up the game in and of itself
Vermintide 2

The easiest way to asset rip in Vermintide 2 is with a combination of a couple debug mods made by the community:

THESE MODS ARE NOT CRUCIAL TO THE ASSET RIPPING PROCESS - they're suggestions to make your work easier and more efficient.

PHOTOMODE by SkacikPL

  • this mod allows us to pause the game and use freecam to force the game to load high quality textures/reach distant places to attain highest LOD (level of detail, best looking meshes).

FLIGHT MOD by Uganda


  • used in case Photomode doesn't work, this mod allows us to fly around the map and pass through impassable terrain and invisible walls. Use it to get up close to models so their full quality meshes and textures load in.


SPAWN TWEAKS by prop joe
  • this mod allows us to roam maps without enemies (or spawn 10x as many if you're bored)


CREATURE SPAWNER by Aussiemom
  • this mod spawns enemy units ranging from cannon fodder to specials to bosses, with or without active AI

Since we'll launch the game via NinjaRipper, make sure it is set to launch in Modded Realm. Simply open the Launcher and select the appropiate realm, then close it.

1. Launch the game via NR
With the settings set and NinjaRipper ready to go, use the "Run" command to launch the game. You don't have to worry about having Steam turned off or being in offline mode.

You'll know that NinjaRipper is active if:
  • the game launches without the launcher
  • you are not receiving any messages from EAC in the top right corner (doesn't concern End Times)
  • you are experiencing a big performance drop in the Keep/Inn caused by NR

If the game refuses to launch despite having done every step correctly, try these solutions:

  • disable Nvidia Geforce Experience game overlay
  • start up the game with all mods loaded, then close it and start it again via ninja ripper
  • if that doesn't work, try to open the game twice, once normally via the launcher, then again via ninjaripper
  • open the game via ninja ripper with the launcher open
  • disable all mods except the ones you chose from my recommended list in case they cause any issues
  • turning off your antivirus and/or firewall

I've had multiple people ask me for help as the software did not work on their computers and I couldn't find a unified solution.

In chapters below I address how to set up each character type for asset ripping, since each one has its own gimmicks that have to be met for the procedure to go as smoothly as possible. I came to these conclusions after hours upon hours of experimenting and doing things mostly by myself.
Übersreik Five
There are four effective workflows for asset ripping the Übersreik Five:

1. LOHNER'S EMPORIUM OF WONDERS (BEST SOLUTION FOR COSMETICS, ILLUSIONS AND CHARACTERS)


This options allows you to isolate specific weapon illusions, character models, cosmetics etc. This method always rips largest possible textures for the character, be it 2k for the body and 1k for the face.

2. CHARACTER SELECT SCREEN
Specifically for characters you don't own. Had some issues with this option, specifically helm/weapon textures were awfully small compared to the regular size ones

3. INVENTORY

Since the March 15th update you can preview every illusion for your selected weapon, including those you don't own! When in your inventory menu, click on your weapon's gear icon to the left to access this menu.


4. PHOTOMODE

Honest to Sigmar this mod used to be my crutch in the early days, but since then way more effective methods have been discovered for isolating and extracting models, meaning this mod goes to the bottom of the list. You can still use it if you wish to get up and close to distant meshes and force the game to load highest LOD, but for characters - just open the shop or use creature spawner.
NPCs
I noticed a weird gimmick with NPC characters - NinjaRipper would only recognize their heads but not rip their bodies. To hopefully solve this issue you can go back to Vermintide: End Times and try there.

For example, I had to go to the Red Moon Tavern to rip Franz Lohner's body. For whatever reason I couldn't in V2. Can't confirm if the same happens to Olesya. Olesya actually ripped fine, so Lohner is just the exception thus far.

Enemies
Asset ripping the enemy units depends on some gimmicks as well, however, afaik, they don't demand switching games (unlike Lohner).

Using the Creature Spawner, place them in the same position that you would the heroes of Übersreik.


If NinjaRipper doesn't work and the meshes aren't ripped, then try your luck with the ragdoll of the enemy instead. Be careful not to dismember or drop the enemy off the edge.

2. Ripping the assets
Having prepared your desired character, you are presented by NinjaRipper with three ways of ripping the assets.


Obviously we would want to use F10 or F12 to rip the meshes. There is practically no difference between the two except for one thing:

F9, F10 AND F12 may crash the game. That is okay, it's normal. Because you're straining the game by demanding and extracting so much data in a span of a second, it will crash when you rip the files. Don't worry, that can happen and assets are successfuly ripped either way. Seems to be less prone to crashing when ripping stuff from Lohner's shop.
3. Exporting to Blender
Inside the chosen Output Directory folder, a _NinjaRipper folder one is created and all rips are stashed inside, sorted by hour and date. They should contain RIP files (meshes) and DDS textures.


Without messing around with the program's filters, the meshes and textures are generally close to one another.

Vermintide characters in particular come in separate parts:
  • mouth (teeth with gums)
  • tongue
  • left eye
  • right eye
  • face
  • ears
  • body
  • sometimes the arms are separate from the main body mesh
  • accessories (scrolls, books)
  • hair
  • hair extras (flat planes surrounding the hair mesh, adds hair detail)
  • weapons
  • weapon parts (the trigger, the arrows, the string etc.)

You can recognize them by their size, the body is always around 1 000/4 000 something large, the rest is usually 300KB, 120KB, but in any case make sure to look through everything.


Ignore white textureless models, they generally are lower resolution and have broken UVs. Look for ones that have a texture applied to them (color, green, bright purple, sometimes they're semi-transparent). However, note that if no textured meshes appear, then you may have to rely on the former. Had this happen to me when I was extracting a staff and it turned out one of the white models was actually fine.


Export each invidivual file to .obj WITH UV FLIPPED (so the textures apply correctly).


The textures come in three parts:
  • diffuse map (the regular colored texture)
  • combined map (the all-in-one, inside its three color channels (Red, Green, Blue) are metallic maps, AO maps, Subsurface Scattering masks etc. depending on the texture)
  • normal map (applies detail to the object at no cost of performance) (also contains the roughness map or blood/fire masks in its Blue channel, causing the map to look yellow)

If the normal map looks like this:
It's perfectly fine, export it anyway. More on that in the next chapter.


Having prepared the files it's just a matter of porting them over to Blender.

In your project, use the Import Waverfront (.obj). Experiment with the Transform settings in the sidebar so that the meshes are in the upright position from the get-go.


Note that objects like hats, helmets, scrolls, books, accessories overall are spawned in the center of the viewport whereas beards, ears, faces, arms usually are properly located.

Fixing dark textures - Blender method

All Ninja Ripper textures export at a darker shade than their in-game counterpart, however it doesn't pose as many issues as it does for paintings. More often than not it's a matter of changing the Color Space in Blender to linear/non-color to fix this. Well, what if you want to use the texture outside of Blender?

I attempted to find a fix for this in paint . net, GIMP and Krita but to no avail. Thankfully we do have some options in Blender!

1. SCREENSHOT THE TEXTURE IN THE IMAGE EDITOR
DON'T USE THIS FOR CHARACTER TEXTURES UNLESS YOU KNOW WHAT YOU'RE DOING
Assuming the texture is smaller than your monitor's resolution (e.g. 1024x1024), you can simply screenshot the non-color version of it and not lose quality pe se.


  • Open the Image Editor.
  • Ctrl+Space with the cursor inside the Image Editor to make its window full-screen (press ctrl+space again to undo this or look for a "Back To Previous" button)
  • Open the texture via the Image Editor.
  • Zoom in on the texture so it fits the whole screen as much as possible
  • Open the right sidebar of the Image Editor (hotkey is "n"), in Image tab look for Color Space and change it to Non-Color/Linear (same result)
  • Screenshot

2. BAKE THE TEXTURE TO A NEW ONE
This one's a bit more complex but it retains the original resolution of the texture. The goal of this procedure is to take the non-color texture and then bake it to a new one. Basically converting it from Non-Color to sRGB in a roundabout way.

Estimated procedure time: two minutes

Here's a video that shows the whole process from beginning to end.

OUTDATED Applying materials
This is an older method of creating shaders for the V2 assets. Since then, thanks to the aid of nihalrahman, a new ultimate shader exists called V2 Ubershader that you can utilize for just about any asset from the game. Read the corresponding chapter about it higher up in the guide.

In order to access it, you must Append it to your project from the V2 Blender Kit.blend file.


OLD METHOD

I'll start off with the general rundown and then a more detailed description.


DEFAULT MATERIAL SETUP (NO YELLOW NORMAL MAP)


DEFAULT MATERIAL SETUP (YELLOW NORMAL MAP)
Value of the B channel must be set to 1.000.


The Combined map
The Combined map has three channels and depending on the mesh, they have different maps hidden inside. It took me an embarassing amount of time to recognize how to use each.


  • R - Metallic Map
  • G - Ambient Occlusion (Blender has its own built in AO, so this map is semi-useless; you can mix it with the diffuse texture for extra detail w/ Mix Color set to Multiply)
  • B - Specular map (how shiny the material is under a light). Most textures have zero specularity (black texture)


The Roughness map (how glossy/wet the material looks) is actually hidden in the Alpha Channel of the Normal Map


If the model doesn't need one of these maps, their respective channels are pitch black/white for Roughness. Connecting them doesn't change anything as they have no influence over the material's settings.

How to fix/use the yellow normal map

It's not actually broken, it just contains a mask texture inside the B channel. Nevertheless we do need a way to edit it so it's still usable as a normal map


In order to do it, you could use Photoshop and meddle with the settings there, but there is a way to do the same operation inside Blender!


1. Separate RGB + Combine RGB
2. Connect R to R, G to G
3. Leave B unconnected, set its slider value to 1.000 (basically the same effect as an Invert node)

We've successfuly excluded the mask from the normal map.


UNIQUE CASES


Textures with transparency
Always double check if your diffuse map has a transparency map in its alpha channel. It's black and white, with black translating to fully transparent. Examples of it are Grail Knight's chainmail/necklace, Kerillian's hair, Skaven fur and whiskers etc.


Solution for Eevee renderer. Just connect Alpha to the Principled BSDF's Alpha. Then go to Material Properties of your fur material (the icon is red checkered sphere, under a green triangel) and scroll down to Settings tab. Open it and you'll see Blend Mode and Shadow Mode.


Blend Mode decides how the transparency is handled:
  • Alpha Clip leaves pixelated edges and can look bad up close. You control how strong it is via the Clip Threshold slider (most games engines use Alpha Clip),
  • Alpha Hashed is almost always the best solution, but you need minimum 16-32 samples for it not to look like a blurry mess in renders,
  • Alpha Blend is hard to figure out, so ignore it for now. From my experience it's only good for stuff like glasses, windows, not hair.

Shadow Mode decides if that texture should cast a shadow and how it should do that:
  • None means it won't cast shadows at all,
  • Opaque means you'll see blocky textures, it literally uses the entire mesh to create a shadow,
  • Alpha Clip makes fur cast a correct shadow, but it can look sharp and pixelated,
  • Alpha Hashed makes a nice slightly blurred shadow, but again the render needs enough samples so it looks correct.

From my experience, best choice is Alpha Hashes for both.

Solution for Cycles is thus:


Yeah that's it lol

Rare cases of broken diffuse maps

Sometimes NinjaRipper exports diffuse maps in a weird way, confusing how to combine textures together, causing the final result to look pitch black. Minotaur's diffuse map still got exported, but for some reason it got merged with a blood mask for its back. To fix it, I had to change the texture's color space to Non-color and adjust its brightness with a Gamma node.


Blood mask node setup

Sometimes the Specular map is replaced with a blood mask (mostly for weapons).
We're using the ColorRamp node to have more control over the strength of the mask. Flip the Color Ramp as shown in the picture to fix the texture (blood is not on the correct side by default).


Sienna's eye glow

The eye glow mask is hidden inside Sienna's specular texture for the eyes. Connect it to Emission Strength and control its strength with a Math node. I found the Multiply setting works best, but someone more educated on Blender will most likely find other ways to use it. You can also animate the value of the Math node and controls its keyframes in the Dope Sheet.


Tattoos

The tattoos texture has to be set to Non-color so it is displayed properly.


Extra tips
  • Rename the textures to keep things clean and tidy (Tex_0015_0.dds to kruber_head_d etc.)
  • Non-Color is the default setting for a Normal Map


And just like that, the model is done!
OUTDATED - Ripping sound files - Ravioli Scanner + download
I have been putting up the extracted bundles online and have been mostly keeping it up to date as each new update rolled out. If you want to find a specific bundle, it was probably most likely already found and posted by me.


The process of ripping sound files is a lot messier than meshes. At this point we're just datamining the game files and scrouging up any Wwise Encoded Media we can find, then convert it to a playable format.


1. RAVIOLI SCANNER

To access the game's files we'll use the Ravioli Scanner from Ravioli Game Tools[github.com] (WARNING THE DOWNLOAD IS DOWN USE MY COPY OF THE SOFTWARE INSTEAD (VERSION 2.10.[drive.google.com]). It allows us to scan the game's bundle files, find the audio files inside them and then extract them in .wem format.


TO SAVE THE MOST TIME - GO INTO THE BUNDLES FOLDER, RIGHT CLICK ON THE E.G. A STREAM FILE AND USE THE "OPEN USING..." OPTION. TELL YOUR OPERATING SYSTEM TO ALWAYS OPEN THE SAID FILE TYPE USING RAVIOLI SCANNER. THIS WILL SAVE YOU A TON OF TIME, I'M A DUMBASS FOR NOT DISCOVERING THIS METHOD A YEAR AGO

Game's files are all stored inside Warhammer Vermintide2/bundle folder. They're partially categorized by the patch number and some of them being "STREAM". This is where we'll begin our mining.

METHOD A - Ravioli Extractor

If you have hours to spare and don't want to bother browsing the files manually, you can grab the .stream files en masse and batch convert them using the Ravioli Extractor.

For example, filter the files from the bundle folder to a day of a specific patch and filetype (.stream, 7th March 2024) and copy-paste them to a new folder. After that's done, open Ravioli Extractor, select the files as Input (it doesn't know what .stream files are, so pick "All Files" from the dropdown menu), then a new folder for Output.


Tell the software to make a new folder per bundle file it scans, tell it to allow scanning of unknown archives (so it actually browses said .stream files lol) and start. I don't recommend converting the files to an audio format since it can be lossy/glitchy. Follow the foobar2000 method later in the guide instead.


I then recommend using WizTree to sort and filter the folders based on their total file amount.


METHOD B - DIY

Open the .stream files one by one using Ravioli Scanner and find things yourself.

Once you find a file with Wwise, you'll know it because the bar on the right will instantly start going yellow.

A couple time-saving tips:

  • If it doesn't find any sound files the moment you start scanning, stop the scan and keep looking. It either does find something or it doesn't at all
  • If the scanner found the files but is still going, it's safe to stop the scan and extract what it has already found
  • In a sea of repeating patterns, look for unusual amounts. Sound files with 1300, 1537 etc. sound files are usually character voice lines that Archer (previous sound file ripper) already took out and sorted


TIPS AND TRICKS

Some of the files have voice lines for just one character, others have a couple sound effects, some have ambient tracks, music, stingers, etc.. The really big ones, 500+mb have everything at once.

Here's what I gathered:

  • Be ready to spend a lot of time finding only broken .tga files or anything else that's unusable to us. I recommend using a sorting tool like WizTree to search a folder, filter it by filetype and delete things you don't want, reducing results to only the folders with good content
  • The amount of Wwise encoded media can range from a couple dozen to thousands of files with music being in separate bundles from the dialogue
  • The audio files can and will repeat themselves, for example the character bundles or DLC bundles, though this should be less of an issue since devs updated their way of handling file storage

The hard part is that none of the files have their original names, no indication which character, anything, so you will have to listen to them one by one and sort them by hand.


2. FOOBAR2000 & VGMSTREAM

My guide initially had you convert the files to .ogg format. However, since then I discovered a new method to listen to and convert .wem files, bypassing the need for those tools. To top it all off, the old converter would corrupt some of the .wem files, whereas the new method doesn't.

The converter can be entirely dropped. I now use the audio player Foobar2000[www.foobar2000.org] with the vgmstream addon[vgmstream.org] installed to listen to the .wem files directly. Foobar2000 also has a built in converter, allowing you to batch convert thousands of .wem files to mp3, ogg, wav etc.

How to:

  • Download Foobar2000 from the website.
  • From the link provided above, click on the "Foobar2000 Component" under Windows to download the addon for Foobar2000. The downloaded file should be called foo_input_vgmstream.fb2k-component
  • Follow this guide to install the addon.[wiki.hydrogenaud.io]
  • In order to convert the files, follow this guide[www.simplehelp.net]
You can now listen to .wem files using Foobar2000.

UNAVAILABLE - Ripping sound files - Dialogue Player
WARNING - The mod is broken and the developer abandoned V2 modding as a whole. Attempts were made at fixing his work but it's not in a usable state at the time. This method is sadly unusable anymore.
Unique bundle file names

I wil note down any unique bundle files that contain things of importance. Feel free to comment your own discoveries in the comments section so I can add them to the list, too!

My searching workflow is sorting by file format .STREAM, largest file size and moving down. If a new update rolled out, I limit the sorting results to the date of the patch.

Tower of Treachery
  • 040b298ae7442488.stream tower of treachery voice lines
  • 881708e83a5f7018.patch_002.stream tower of treachery kruber and kerillian
  • ab6453ed0d177bce.patch_002.stream tower of treachery lohner n cinematics
  • 28bede64146725c3.patch_002.stream kerillian briefings treachery
  • f59ff5cd7b398972.patch_002.stream 2023 kerillian briefings
  • a47d58bac41dd178.stream tower of treachery lohner briefings
  • 174b5cbb5c6a21c6.patch_002.stream tower of treachery music

Be'lakor update - ca0a3be7e6ccd071, 4ed8509e0f030866.patch_005,

The behemoth - 18 000 random voice lines, sounds, ambience- 881708e83a5f7018.stream

A quiet drink 2023 voice lines
  • 053acd0b68aca9b1.patch_006 in-game (IT'S A MIX OF OLD AND NEW VOICE LINES)
  • 4fb571a6239d85b2.patch_006 saltz
  • 42be893dfdf1877b.patch_006 briefing
  • 7137ce899d835ed9.patch_006 bardin
  • 881708e83a5f7018.patch_006 kruber
  • ab6453ed0d177bce.patch_006 lohner

Warrior Priest update keep dialogue, Warrior Priest praying and ultimate voice lines - 4fb571a6239d85b2.stream

Warrior Priest update Lohner voice lines - ab6453ed0d177bce.patch_003.stream

Saltzpyre yelling about Sigmar for 48 sound files - f5b9c97431b34ca6.patch_002.stream

Lohner, Grudge Marks Update - ab6453ed0d177bce.patch_002.stream

Chaos Wastes Lohner, Grudge Marks Update - 4ed8509e0f030866.patch_002.stream

Kerillian briefings - f59ff5cd7b398972.patch_002.stream

Keep dialogue - Sister of The Thorn update - f59ff5cd7b398972.stream

Keep dialogue - Outcast Engineer update - 7137ce899d835ed9.stream

Chaos Wastes dialogue - f5b9c97431b34ca6.stream

Chaos Wastes hub banter - 4ed8509e0f030866.stream

A Quiet Drink dialogue - d4bb4ce0ca60dd4d.stream

Drachenfels DLC voice lines (all three maps) a56c4e085aac68e7.stream

ditto - 9994dea23d31b080.stream

Lohner and Olesya voice lines/briefings - ab6453ed0d177bce.stream

Olesya's Chaos Wastes voice lines - e73d8e994b813670.stream

Bogenhafen blade voice lines - e6bcebeeba195217.stream

Cut-off Over The Mountain singing - f5b9c97431b34ca6.patch_001.stream

Back to Ubersreik ambience and Olesya - 9931458d72d32140.stream

War Camp ambience and music - 451f401a58df4a9f.patch_002.stream

Seeking the open air? - 9669843dd479648f.stream

Music (Vanilla game, all DLCs, Weaves, Chaos Wastes) - 174b5cbb5c6a21c6.stream

Small portion of Rat Ogre and Stormfiend music tracks - 174b5cbb5c6a21c6.patch_002.stream

Hub music (Taal's Horn Keep soundtrack, Weave queue music, OVER THE MOUNTAIN INSTRUMENTAL) - 5ab1500d8b5b04cb.stream

Clan rats, skaven slaves etc. - c1e207d0acae594a.stream

Warpfire Thrower - a2ad391fc6b7ea2b.stream

Stormvermin - 46f4455f4676790b.stream

Beastmen - eef69bdcaa744aba.stream


Repeating bundle files
The same content appears in multiple different bundles

If you see 1500+ sound files, it's most likely voice lines of a singular character. Those appear a lot for some reason.

1525 Bardin voice lines - f84ecfd5ded62eca.stream
1656 Kerillian voice lines - 25438e9671278a08.stream
=== SEPARATOR ===
Conclusion + link to the rigging guide
That would be it for the asset ripping part of the whole ordeal that is bringing the Vermintide cast to life.


If you're interested in rigging the characters and creating animations with them, I can save you some time and nerves by directing you to my Rigging with Rigify guide, based mostly on my experience with rigging the Übersreik Lads.

I hope you find this guide helpful. Have fun!
Počet komentářů: 105
Shotgun Chef 25. úno. v 16.08 
Hello, I am trying to install Bitsquid and I am hitting in issue where Blender show the error:

*No module named 'uvicorn'*

Dose anyone know where I can find this module?
Ash 14. úno. v 7.41 
i cant seem to find the file number for huntsman's Kossar's Crown hat mesh is? i have the textures for it, just need the mesh
везнан 19. led. v 9.15 
Could you show an example of how to apply glow effects with Ubershader? I'm trying to do Sienna's and I've applied the base color, maskmap, and normal, but I can't seem to figure out how to do the glow effects
везнан 20. pro. 2024 v 14.29 
Thanks
Janfon1  [autor] 20. pro. 2024 v 14.18 
@Veznan
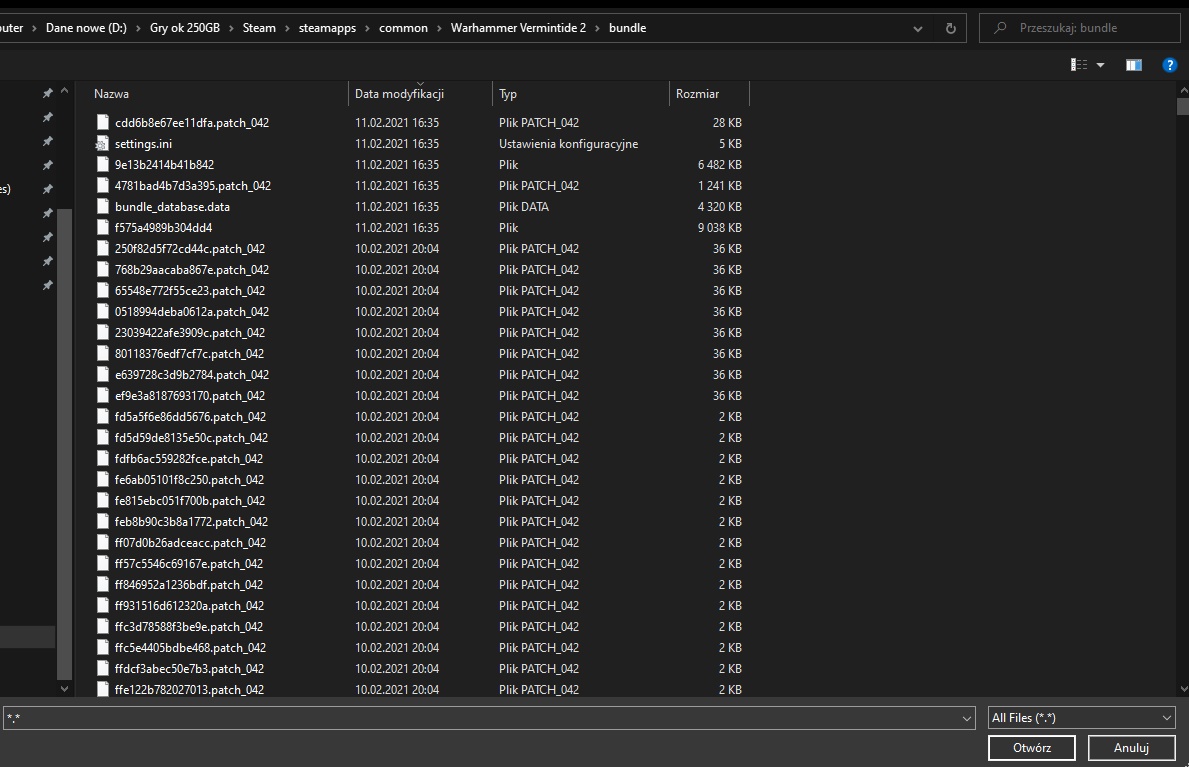
Saltz is 173740C485C85CB6.unit
Kerillian is 33fcde185cd72e1b.unit
Bardin is 36a5fdbafe8ced25.unit
Sienna is c7389375f0fca414.unit
Kruber is 03acddf146ee49df.unit
везнан 20. pro. 2024 v 13.08 
Does anyone know where the files for the new skins are?
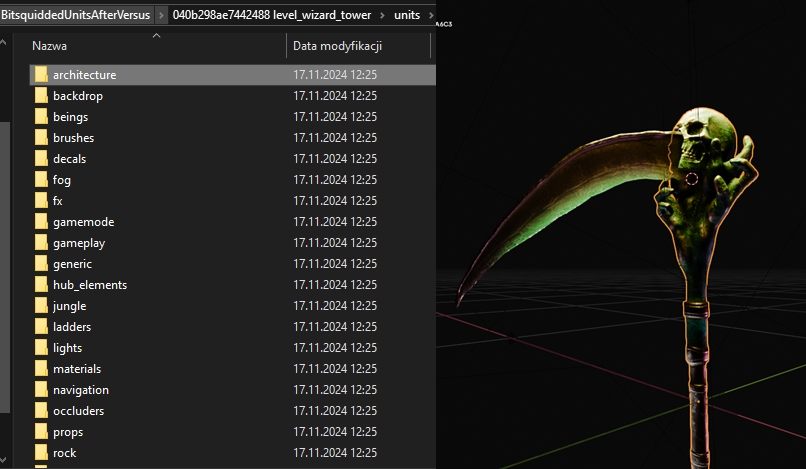
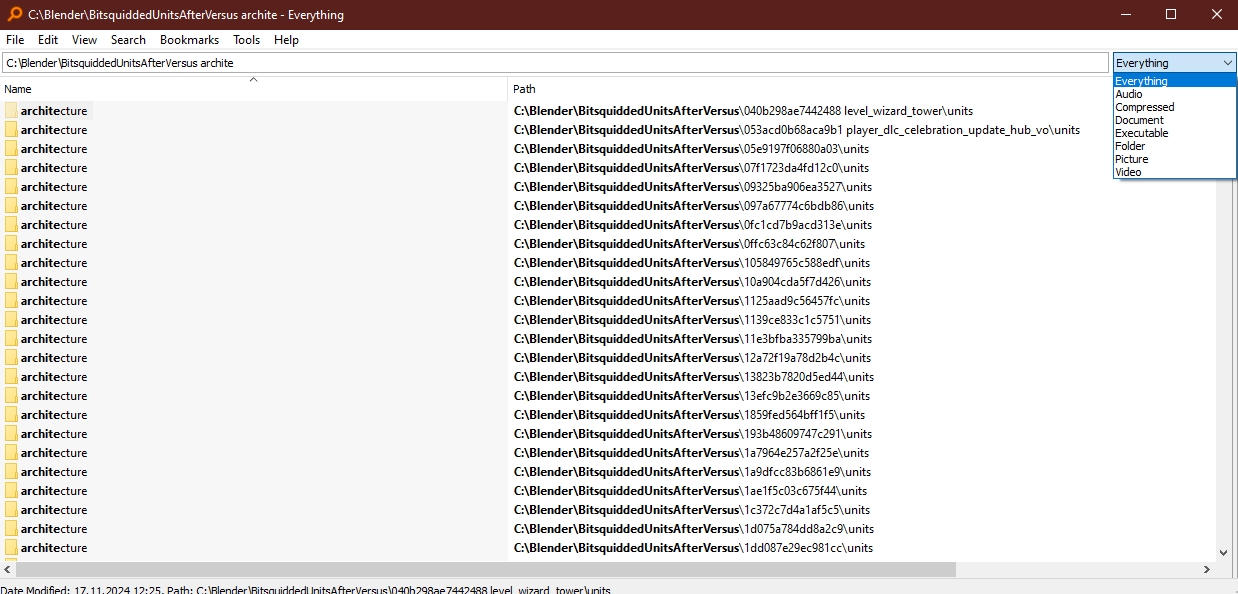
They don't seem to be in the same place as all the other skins(\units\beings\player\)
Janfon1  [autor] 5. pro. 2024 v 10.04 
@MIKE some characters have their animation files in different folders at seemingly random. Keep digging, it's gonna be there somewhere, it's either this or the names for them are encoded and not in the list of named assets yet
MIKE 5. pro. 2024 v 5.30 
Cheers for the guide, Bitsquid is an awesome tool!

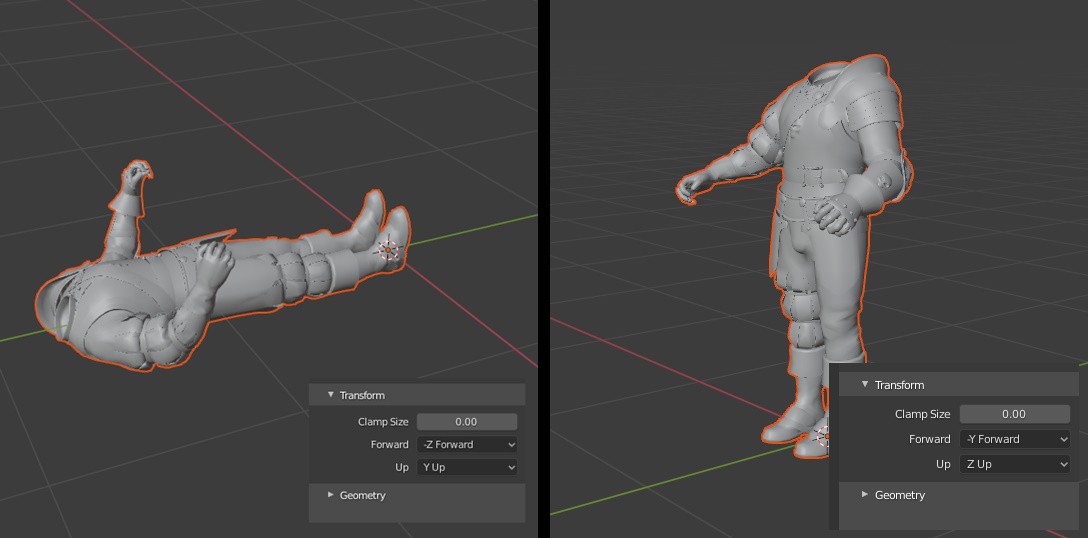
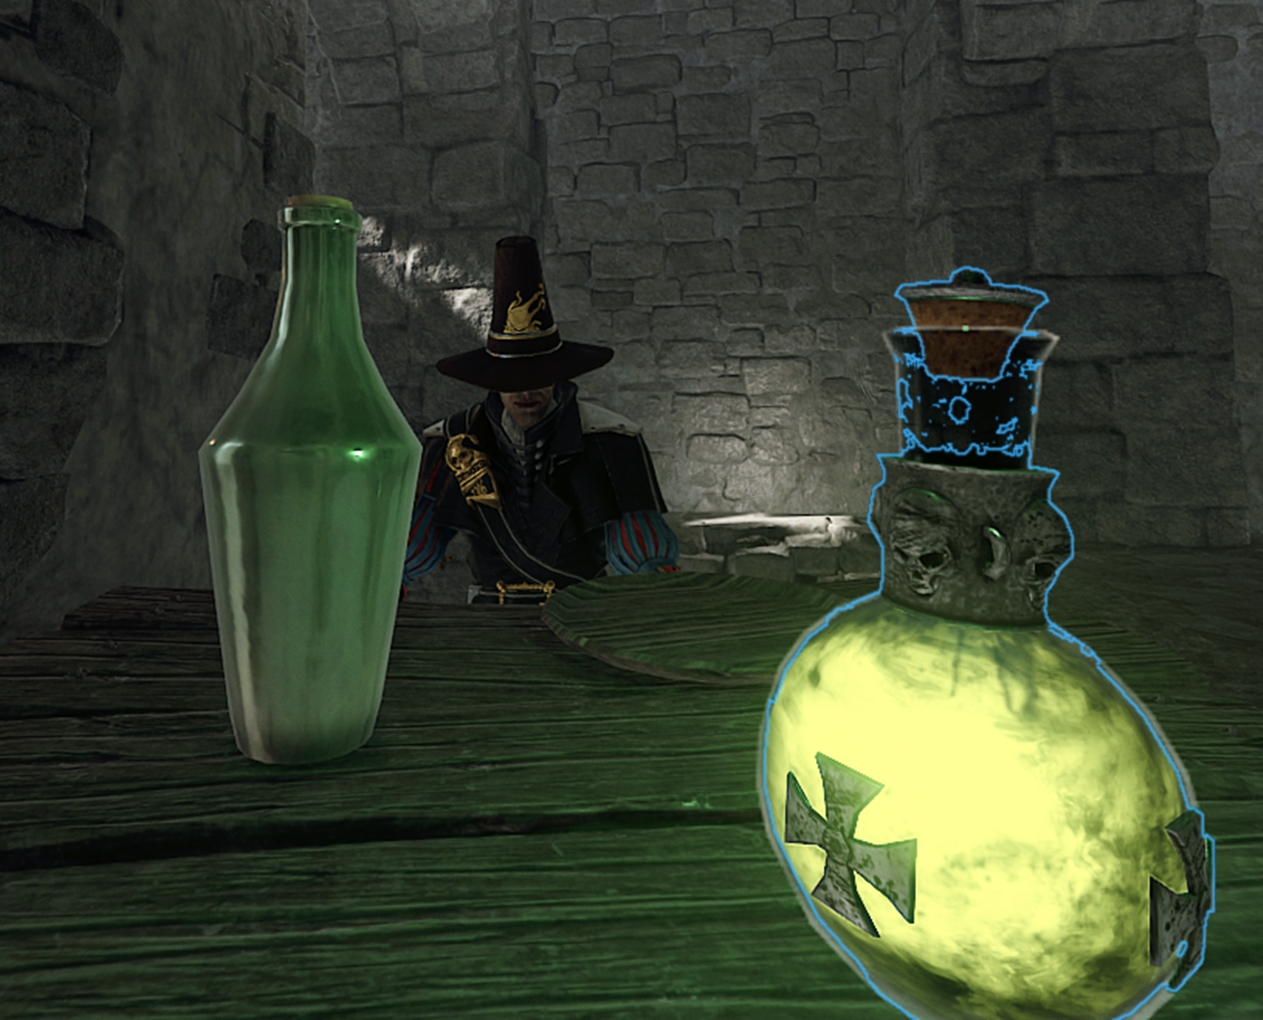
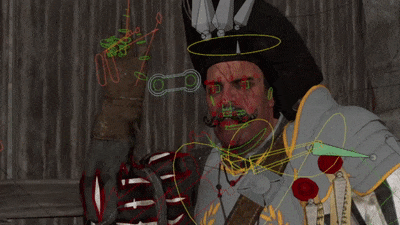
The only problem i'm having is finding the animation for the third person Ubersreik 5 models. For the enemies all of their animations come in nicely when you bring in a unit from /units/beings/enemies, but when i bring in Saltzpyre for example from /units/beings/player/witch_hunter/third_person_base/ the Bitsquid animations tab in blender just has the one animation.

Is there a better place to grab the rigged main characters from or a separate folder for their animations?
numgy 1. pro. 2024 v 7.55 
okay, ill try that see if it works, ty
Janfon1  [autor] 1. pro. 2024 v 6.50 
@numgy, I updated the guide a little. Try the new Bitsquid Blender Tools method instead :sans: