Heroes of Hammerwatch

Heroes of Hammerwatch

179 valoraciones
Mercenary Mode - Road to General Rank
Por Adelion
In this guide I describe how I reached General Rank for Mecenary Mode. There are more efficient builds and strategies. But the road presented by me contains several helfpul tips and has different safe guards installed.
9
3
21
2
5
4
2
   
Premio
Favoritos
Favorito
Quitar
Introduction and Basic Information
With the latest DLC "Heroes of Hammerwatch: Moon Temple" the Mercenary Mode has been introduced. Mercenary Mode is a perma-death mode where once you die your character is gone for good.

The good part? You are free to chose from a wide set of skills and build your level 20 dream character.
The bad part? You need to upgrade your character once more, different conveniences like Chapel Upgrades have to be unlocked specifically for Mercenary Mode again, huge bonus factors like Statues or Guild Boni have been completely removed. Also each subsequent run enforces the next New Game+ difficulty together with penalties.
The annoying part? The perma-death. Also, Mercenary Mode is tied to achievements, so if you are a hunter you have to play it. Lots, until you reach General Rank.

In the following section, I will start with some minor details concerning the progression for Mercenary Mode and where we want to get. Most of the information can be found in the Heroes of Hammerwatch Wiki under this link: http://wiki.heroesofhammerwatch.com/Mercenary_mode

Question A: How many ranks are there and when do I reach them?

Mercenary Rank
Private
Corporal
Seargent
Lieutenant
Captain
Major
Colonel
General
Needed Prestige
0
50
200
500
1000
2500
5000
10000

Question B: How are Prestige Points calculated?

Your Prestige Points are a combination of the numbers of floors you have visited, the number of bosses you've beaten (arena boss fights don't count though), your arena rank, as well as the reached NG+ in all dungeons (Forsaken Tower, Pyramid of Prophecy and Moon Temple). It follows the following formula:

INT(Floors Visited)+INT(Bosses Killed*10)+INT(POW(Tower NGP,2)*75)+INT(POW(Pyramid of Propecy NGP,2)*175)+INT(POW(Moon Temple NGP,2)*200)+INT(POW(Arena Level/4,2)*25)

While the number of floors visited and your arena rank will be important at the beginning of Mercenary Mode (more on this later) their contribution towards your Prestige Points is mostly negligible. So, simplified your Prestige Points are mainly determined by your completion of the three different dungeons. You get the following Prestige Points for each dungeon:

Run number
1
2
3
4
5
6
7
8
9
10
11
Forsaken Tower
75
300
675
1200
1875
2700
3675
4800
6075
7500
9075
Pyramid of Prophecy
175
700
1575
2800
4375
6300
8575
11200
14175
17500
21175
Moon Temple
200
800
1800
3200
5000
7200
9800
12800
16200
20000
24200

Your total Prestige Points are hereby the sum of your Prestige Points per dungeon. Points per dungeon are absolute. So if you play the Pyramid of Prophecy in run #2 and run #4, the total contribution of both runs will only be 2800 Prestige Points (plus numbers of floors and bosses) and not 3500 which would be the sum of both runs (700 + 2800). So upon completion of run #4, you would only receive the difference between 2800 and 700 Prestige Points (which equals 2100 points).
This means that if you want to reach General Rank just by completing the Forsaken Tower over and over again, you would have to run it at least 11 times. For the Pyramid of Prophecy, it would only be 8 runs. For the Moon Temple it would still be 7 runs. This also means that you get to General Rank the fastest if you play all three dungeons at least once over the course of Mercenary Mode.

This gives you two options:
  • Playing the Forsaken Tower over and over again because it is by far the easiest of the three dungeons but having to ramp up to New Game +10 with the according penalties. You also have a slower start in gaining new ranks and accompanying shop unlocks.
  • Playing each of the three dungeons at least once, having a faster unlocking progress and reaching General Rank with the lowest amount of runs. Therefore, also having less chance to screw up. But you have to complete the harder dungeons.

For this guide (and the way I did it) we will follow the second option, specifically following an optimized order for unlocking progress and keeping the harder dungeons on lower run numbers:

  • Arena to Rank 2
  • Forsaken Tower
  • Forsaken Tower
  • Arena to Rank 4
  • Pyramid of Prophecy
  • Moon Temple
  • Pyramid of Prophecy
  • Forsaken Tower

Like this, we have only to do a total of six runs (+ two arena visits) which is the absolute minimum number of necessary runs to get to General rank.
What starting build did I use
The build I used originated from this thread: https://steamcommunity.com/app/677120/discussions/0/1754654019205838624/

Credit herefore goes to Sparks. I did however not study his build in depth. I am pretty sure the way he did it was more powerful and more efficient. However, I adjusted the build so I feel more comfortable with it and integrated some safe-options to reduce the chance of having tough luck. With this said, this was my starting build:

Class: Ranger
Active Skill 1: First Aid
Passive Skill 1: Twinned Arrows
Passive Skill 2: Sidestep
Passive Skill 3: Slice and Dice

Important changes, unlocks and additions as well as used drinks will be mentioned for each run in the sections below. As for the initial choices made:
  • Sidestep is more or less mandatory for Mercenary Mode as it allows a slip-up every 5 seconds plus an increase in dodge chance. It is your base safety net.
  • Twinned Arrows helps with crowd control and damage. Also, as arrows are pin-point damage you have to aim very carefully. Twinned arrows makes the need for perfect aim less as long as you have some enemies present.
  • Slice and Dice increases your dps. Also shooting lots gives you more chances to trigger Primary Attack boni.
For the first active skill, I have chosen First Aid. It will be your main source of healing. And for a long time, also nearly the only source of healing. Getting used to it is recommanded. In addition, First Aid heals every status effect in the game. You are burning, poisoned or frozen? First Aid can negate it. This is especially important since many of these effects slow you down, making you an easier target for enemies.
Though, the biggest boon of the build is the focus on the Primary Attack. This will remain like this for later runs as well. On the plus side, this means that you don't have to waste gold on upgrades for Skill Power and Skill Crit Chance and Skill Crit Power. This will be helfpul in ressource management as gold will be an issue for most of Mercenary Mode. The overreliance on Primary Attack makes skill enhancing items useless for you though.

While this is the build I used, you can chose anything you feel comfortable with. Generally, the guide should work for most range orientated builds. Take note however that you have to adjust certain parts like on what upgrades you want to spend your gold for.
Prologue - The Arena Part 1
First adress in our endeavour is the Arena for a simple reason: to acquire funds.

So, after choosing your active and passive skills, it is time to visit the outpost and to buy your first upgrades. Buy every upgrade from the blacksmith, then go for the following drinks:

  • Miner's Delight: + 100 % Ore Gain, - 75 % Gold Gain
  • A Fool's Errand: + 100% Gold Gain, HP regen set to 0.
  • On the Run: + 0.4 Movement Speed, - 25 % Gold Gain.
  • Enchanted Slammer: + 10 Physical damage on Primary Attack, Primary attack costs 2.5% of your current mana (optional).

As mentioned before, ressources are an issue for Mercenary Mode. To increase our income - specifically ores - we take Miner's Delight as first drink. The focus on ores is simply because they are not taxed like gold. What you find will stay yours. As we still need gold - at least for in-dungeon shops - we take A Fool's Errand as second drink. The penalty of no HP regeneration can be compensated with First Aid. The third drink, On The Run, is to increase your survival odds. The faster you are, the easier you can outrun problematic situations. These three drinks will be your "foundation" for every single run for aforementioned reasons.
Since your HP regeneration is set to 0 anyway, this means you can save yourself some money by not buying the respective Mercenary upgrades. If you are confident in your skills and mana management you can optionally take Enchanted Slammer as fourth drink, simply to speed up the arena process by increasing your fighting power.
For the next step, roll in the item shop until you get Markham's Stone (the remaining items are less important) and use 9 of your remaining skill points to attune it. If you didn't get unlucky in the item shop you should still have enough gold to buy every potion and consumable upgrade. With this set-up of drinks and Markham's Stone you will get at least 35 ores per completed arena rank if you pick up all items in the arena.

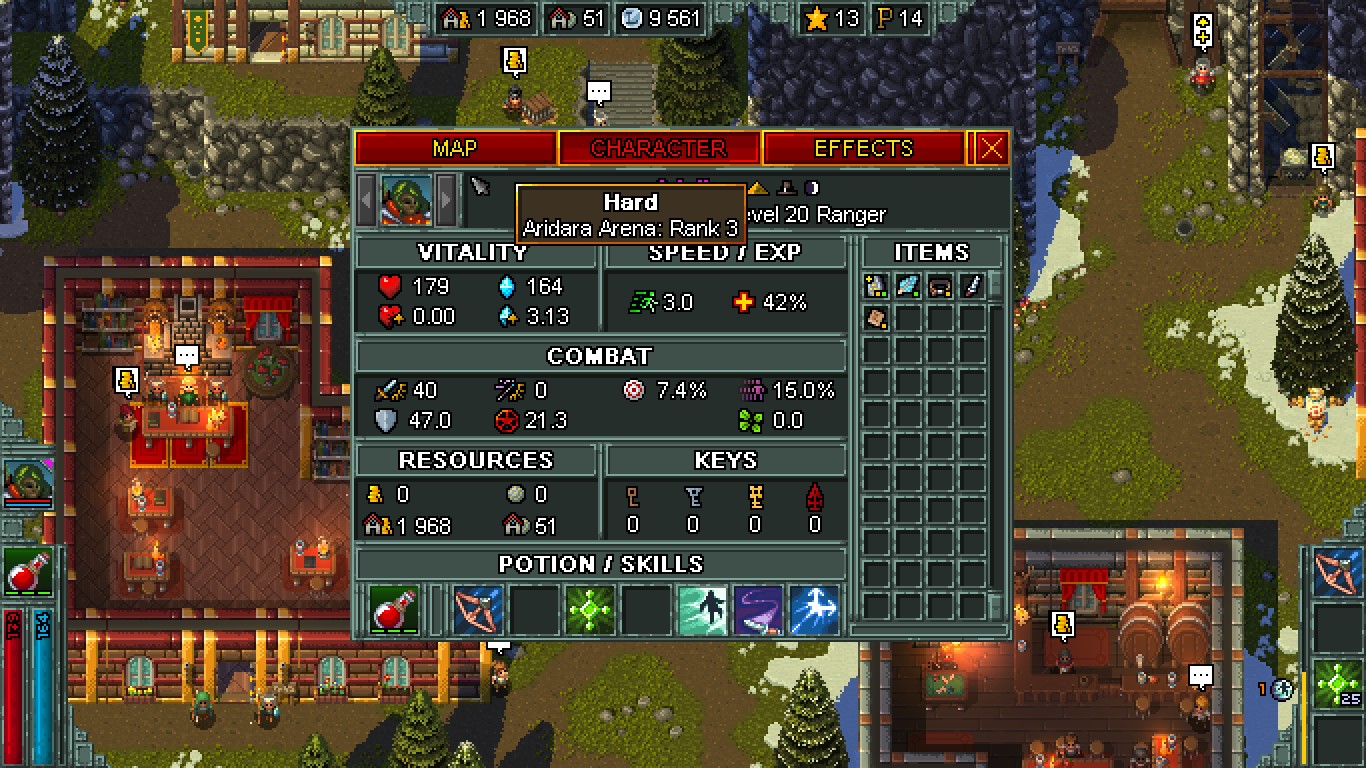
During your first arena visit, you will complete Rank 0, Rank 1 and Rank 2 resulting in slightly more than 100 ores, 14 Prestige Points and enough gold to buy at least 4 arena upgrades for each: Attack, Armor and Resistance.

Act I - The Forsaken Tower
After the arena, our next destination - and the first dungeon we conquer - will be the Forsaken Tower. But before we enter the tower, we use our newly acquired funds to upgrade further. At the Mercenary Upgrade shop we can purchase upgrades for Attack Power, Armor, Resistance, Skill points, Mana Regeneration and Crit Damage. Each stat can be upgraded thrice with a total cost of 6000 gold each. You should have enough funds to buy them all (remember to not waste money on unneeded upgrades like Skill Power).

Next preparation step is items and drinks. For later runs it is actually recommand always to start with the acquisition of the next run items just to avoid blowing off all ressources on upgrades and then having to go "naked" into the dungeon.
As your first time in Forsaken Tower Run is rather easy you don't have to care for a specific item other than the attuned Markham's Stone for increased ores. As for keys, buy them at your own leisure. Something along 10 keys of each grade should be enough for most runs. Drink-wise you go the same route as before, similarly for more ores:

  • Miner's Delight: + 100 % Ore Gain, - 75 % Gold Gain
  • A Fool's Errand: + 100% Gold Gain, HP regen set to 0.
  • On the Run: + 0.4 Movement Speed, - 25 % Gold Gain.

As you still have some skill points left, you can use them to attune some more items. As mentioned before, speed is a great helper in getting away from danger and strafe circling larger groups of enemies while you range them to death. Therefore, the first items - after Markham's Stone - I attune most of the time are the Right and Left Boot of Speed.
Speaking about speed, there is one final preparation step: the Fountain. In contrast to the main game mode, you can't equalize the fountain balance with gold. So you always have to chose more or equal amounts of negativ effects. For your first visit in the tower I would recommand this list:

  • Lousy Consumables: - 1; all health and mana pickups are 50% less effective
  • Enemy Overseers: - 5; Mini bosses spawn on every floor, excluding Act 4
  • Expanded Floors: + 1; 15% Bigger Floors
  • Expeditious Expedition: + 2; + 0.4 Movement Speed

In my opinion, Mini-bosses are the most manageable negative effect and they can even drop items if you get lucky. Consumables have never been a great help for me, so there is that. On the other side, bigger floors also mean more gold and ores to be found, further increasing your funds. Movement speed is as explained. As you can see, with the combination of the fountain and the drinks you have an additional + 0.8 in movement speed.

For the dungeon run itself, not much can be said. By now, you should have run the tower dozen of times and you know what awaits you. It is a NG+0 run, so you have no penalties and quite a powered-up character. Unless you get arrogant, you have nothing to fear. Make sure to always explore the whole floor for getting the maximum in ores and gold.

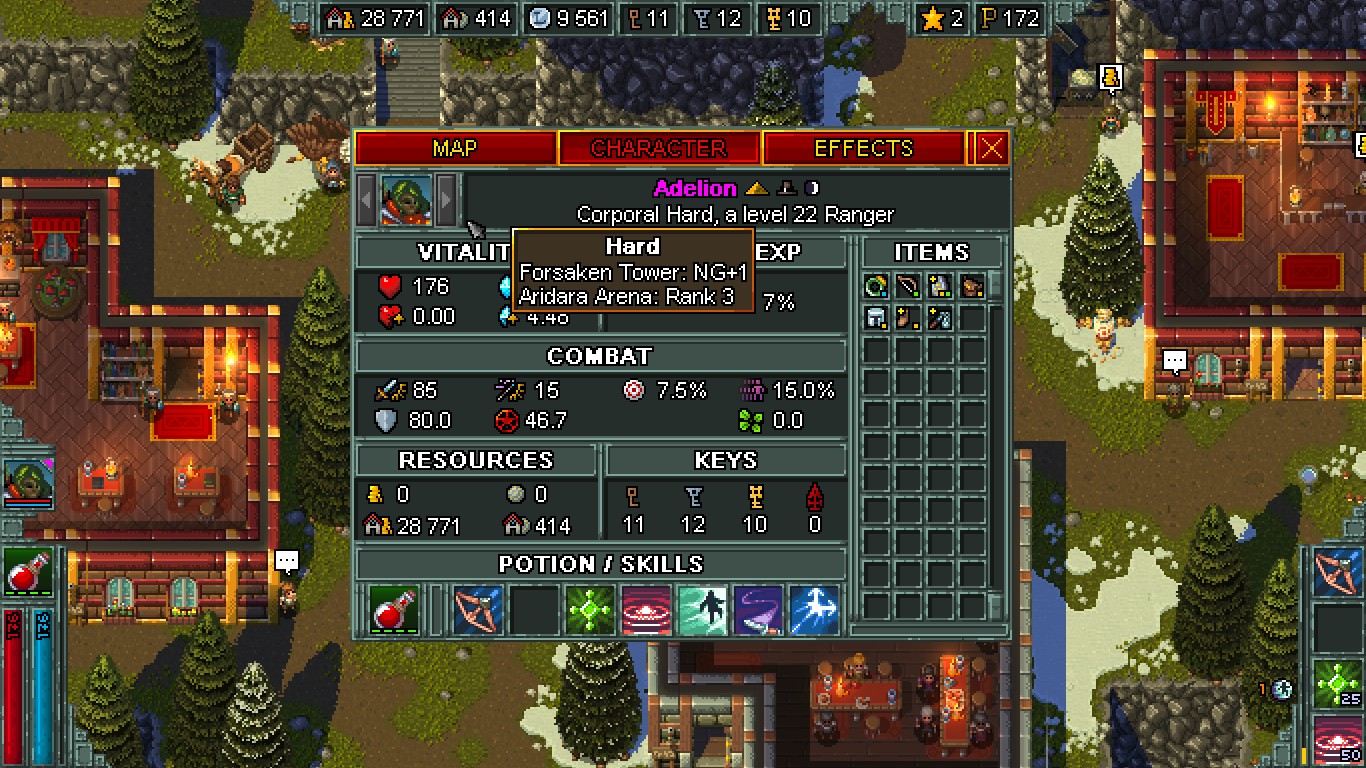
Finishing the run will net you a total of 158 Prestige Points. Combined with the 14 you already had, will result in 172 Prestige Points and your first Mercenary Rank up to Corporal.

Act II - The Forsaken Tower (again)
After the Tower is before the Tower. As mentioned previously, first thing you always should do is acquisition of the items for your next run. Starting with NG+1, you will receive heavy penalties on Armor and Resistance. However, the Forsaken Tower is still rather easy and your primary objective is obtaining funds. As such, the preparation looks almost identical to before.

As small preamble: You should never exchange all your ore to gold in one go but do it stepwise. Reasons for this is that you have far more funds in ores than necessary for the available upgrades. To avoid taxes you would have to rebuy ores at the end which leaves you with some losses. So better run twice. Obviously, this behaviour is recommanded for all subsequent runs.

First stop is the item shop where you once again roll for Markham's Stone. Other items are of lower importance, although you should check that you get at least one item increasing your primary attack or attack power. Don't forget to buy some keys. If you want you can use the Magic Anvil to give yourself another white rarity item like one of the two Boots of Speed or the attuned Spiked Flail.

Next stop is the tavern, going for the usual mix:

  • Miner's Delight: + 100 % Ore Gain, - 75 % Gold Gain
  • A Fool's Errand: + 100% Gold Gain, HP regen set to 0.
  • On the Run: + 0.4 Movement Speed, - 25 % Gold Gain.

Similarly, the fountain effects stay the same too:

  • Lousy Consumables: - 1; all health and mana pickups are 50% less effective
  • Enemy Overseers: - 5; Mini bosses spawn on every floor, excluding Act 4
  • Expanded Floors: + 1; 15% Bigger Floors
  • Expeditious Expedition: + 2; + 0.4 Movement Speed

Now we get to the new stuff. As Corporal you have unlocked the first Chapel upgrade. As enemies grow significantly in health for NG+, you should take care for increased damage. As such, I would recommand Path of Warrior (Increases damage of your primary attack by 25 %) for 10,000 gold.

Since you should still be strong in ores and gold, you can now go and buy all important upgrades at the Blacksmith and the Mercenary shop up to level 6. Take note that the sorcery shop has been unlocked, so go there to buy Resistance (ignore the rest).

With the levels you gained during your first run and the bought skill points at the Mercenary Upgrade shop, you should have enough skill points to buy your second active skill. There are two options to consider:

  • First option - and the one I've chosen - is Blast Wave. In a small radius Blast Wave will confuse enemies which in most situations gives you enough room to run away. Since we don't have any upgrades in Skill Power its damage output will be pitiful though. However, Blast Wave has another huge advantage. It does nullify most physic based projectiles like arrows. While this is of lower importance for the tower, it will be very helfpul in the Pyramid of Prophecy in the Inner Sanctum when you fight against the red Spam-A-Lots.
  • Second option is Smoke Bomb. It has a larger radius than Blast Wave and stuns enemies instead of confusing them. So all in all, it gives you better crowd control. Also, it temporarily increases your dodge chance which can make the difference for survival. However, it does nothing with already launched attacks.

Either option is fine, I think, coming down mainly to preference. Like mentioned, I've chosen Blast Wave since the projectile-spam really gets on my nerves sometimes. But if projectiles are not an issue for you, Smoke Bomb is the better choice.

With your preparation complete, you can now venture into the Tower for the second time. Stay concentrated and loot everything which is not nailed down and you should finish this run easily as well.

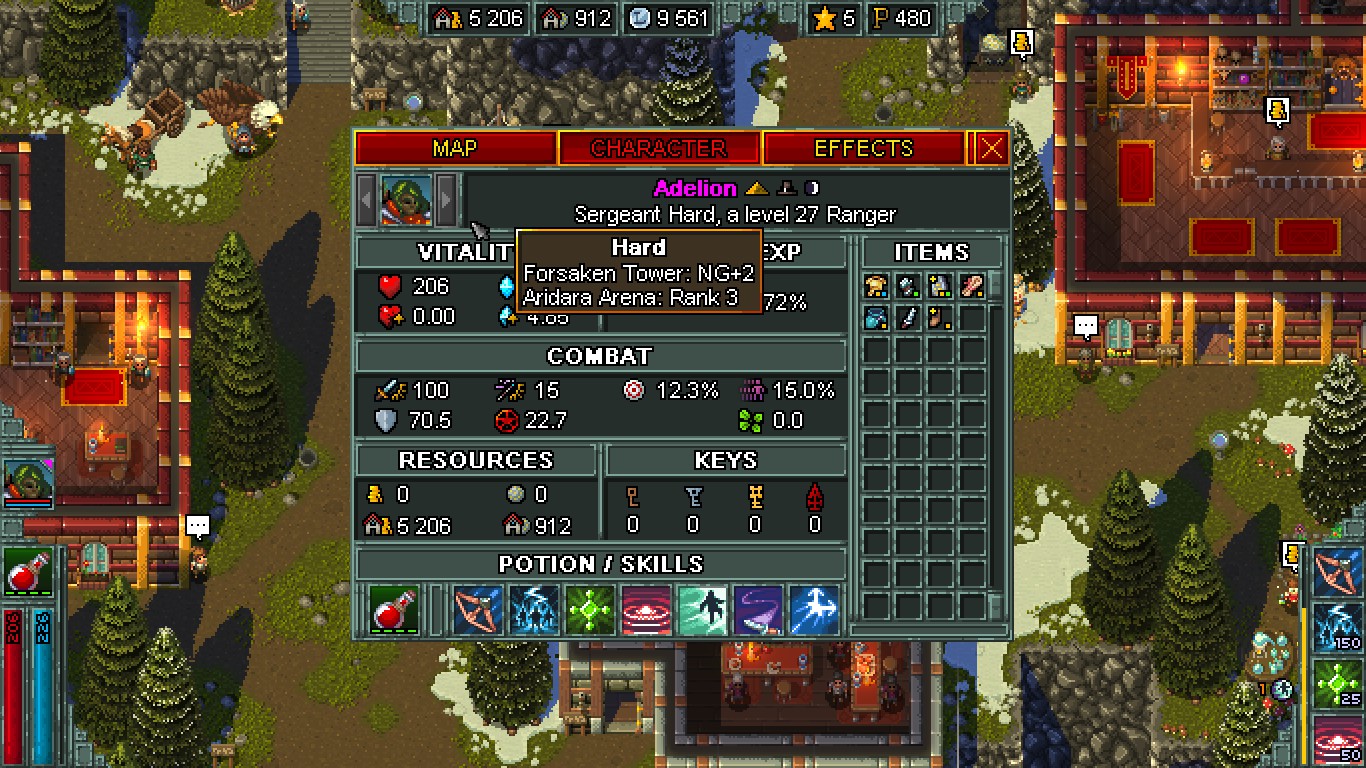
Completing the Forsaken Tower a second time will leave you with a total of 480 Prestige Points and result in your second Mercenary Rank up to Seargent.

Intermezzo - The Arena Part 2
You may have noticed that your current Prestige Points are close to another rank up. So before you head out for the next dungeon, we will visit the arena once again. Since we are quite stable from the upgrades, we still don't have to pay to much attention to the items. Therefore - yet again - roll for an attuned Markham's Stone with the remaining items being negligible. Further preparations are very similar to before.

Buy the usual drinks:

  • Miner's Delight: + 100 % Ore Gain, - 75 % Gold Gain
  • A Fool's Errand: + 100% Gold Gain, HP regen set to 0.
  • On the Run: + 0.4 Movement Speed, - 25 % Gold Gain.

And then use your ressources to buy upgrades at the Blacksmith, Sorcery Shop and the Mercenary Shop. If you skip the usual unneeded upgrades like Skill Power and Mana Regeneration, you should still have ores left afterwards.

For now, you should restrain yourself from using the skill points you gained from your last tower run. We will talk about them after the arena run.

As I am not sure if the Fountain effects the arena, we will skip on these.

With this, we are already done with the arena preparations. Time to smash some enemies. While we are pretty well upgraded, you should still pay attention. Enemies can appear below you, are high in numbers and strong enemies can spawn from wave 1. And if you got a bad arena and have tough luck with arena hazards (like the sandstorm) you can die in a matter of seconds.
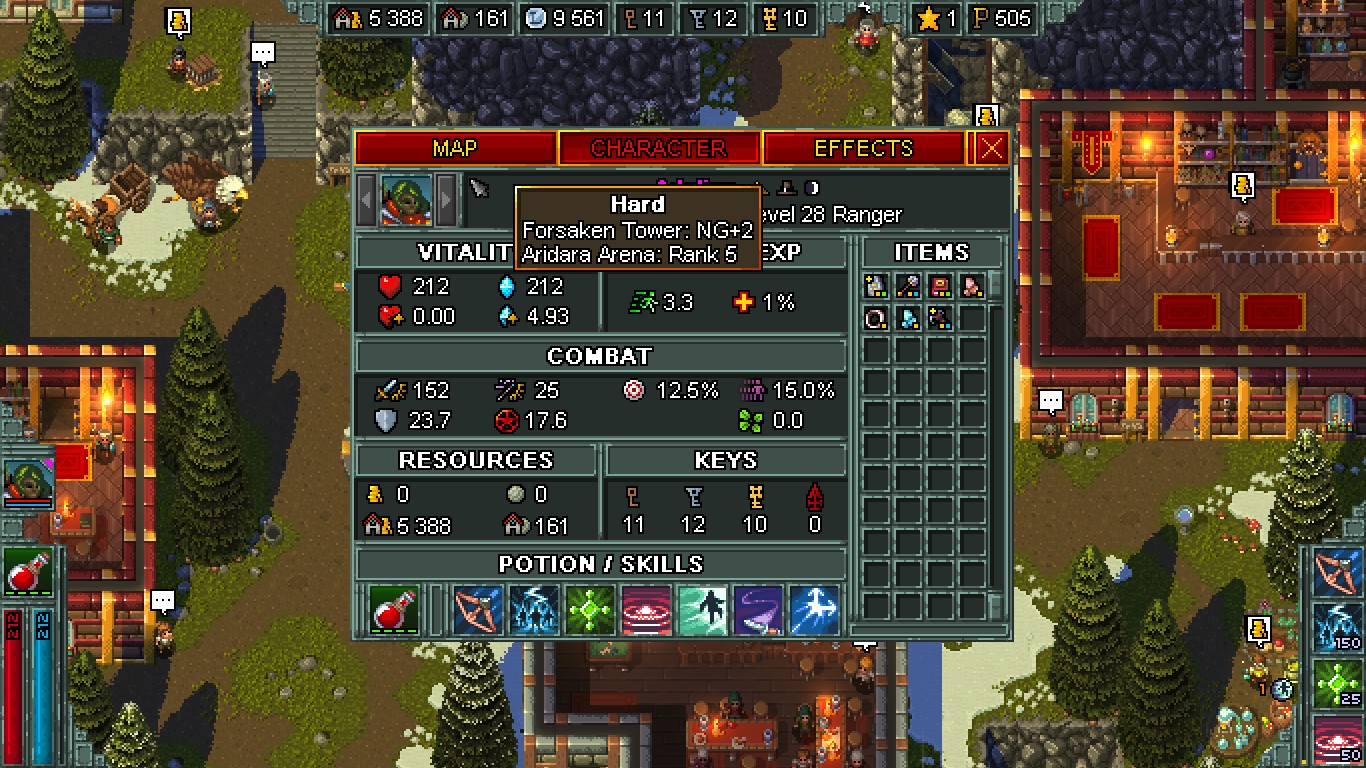
Goal is to play for exactly two ranks in the arena, after which we will have 505 Prestige Points. While you can not see the PP in the arena, you will see the notification for your rank up to Lieutenant. While it makes sense to play more arena for ressources, I heavily suggest to refrain from it. The arena is unfair by design and really can kill you in seconds. Don't ruin your day.

Act III - Pyramid of Prophecy
The easy part of Mercenary mode is now over. The next 2-3 runs are the most difficult for different reasons. Next station is the Pyramid of Prophecy. While we could do the Tower again for more ressources, the gain in Prestige Points is nowhere near enough to reach the next rank. Therefore, we have to go the Pyramid now.

Starting enemies in the Pyramid are stronger as in the Tower and we are currently in NG+2. So for the first time, we have to pay more attention for the items we get at the item shop. One neat bonus of Lieutenant rank is that you can smith blue rarity items as well, so we have different options. Personally, I would recommand two items for the next run. First one is still Markham's Stone because you will need every town upgrade you can get and the Pyramid is not exactly rich on ressources (mainly due to be being shorter). The second one is an attuned Judgement (blue rarity) which gives you +24 physical damage on primary attack, effectively doubling your damage. Personally, I would say that you should be ready to dish out about 5000-10000 gold just for item rerolling in order to get a good item combination. Getting Markham's Stone in the item shop together with another strong blue item and taking Judgement at the Magic Anvil may be your best option. Remember to buy some keys. Less though than for the Tower.

After the item shop, you can spend the rest at the usual upgrade shops. Also, make sure to pay the chapel a visit since your new rank unlocks a new tier. My recommendation is Blessing of Might (Physical damage ignores 20% of the enemies armor). As ressources start to dwindle now and you may be short on gold you should priorize Armor, Resistance and Speed. But you should still have more than you need.

If you held on your skill points as mentioned in the previous section, you should now have enough to get yourself a third active skill. Once again, you have two options:

  • First option is Company Banner. It increases your attack speed by 25 % and functions as decoy for enemies. However, the radius is rather small and the banner has no defense, so it will be destroyed quite fast. But if you want an offense tool, this is your option as it works based on your primary attack.
  • Second option is Pit Fighters which is also the one I have chosen. Don't give in to illusions. The fighters won't make much damage due to our poor Skill Power. However, they work quite well as diversion. One of the main reasons I prefer the fighters for example is the second boss fight in the Pyramid against Iris. One of her attacks is shooting two curses which both increase your curse counter by 5 and if you don't won't to get hit, you have to evade them for about half a minute. Pit Fighters can absorb those curses and makes your life easier navigating in the room.

If you still have some skill points, spend them to attune items. And don't just go for the blue items. Better spend your first skill points on white rarity items which are more likely to be obtained.

So, now to the final tweaks for our next run. First we go the Tavern where our usual list of drinks gets a new addition:

  • Miner's Delight: + 100 % Ore Gain, - 75 % Gold Gain
  • A Fool's Errand: + 100% Gold Gain, HP regen set to 0.
  • On the Run: + 0.4 Movement Speed, - 25 % Gold Gain.
  • Markham's Moonshine: + 5 % damage per item in your inventory. Spheres count twice,
    Combo is disabled.

While the disabled combo might seem really painful you have to consider what the combo gives you. First effect is more speed which is something we have taken care of already. The Tavern and Fountain upgrade give us a permanent + 0.8 bonus in movement. So we are already quite fast. Even without combo we are close to an overall speed of 4. While more speed is helpful it is not absolutely necessary. Second effect is more damage which .... well .... the drink brings you too but better. In addition, without the Amulet of Vengeance there is no way to trigger combos in boss fights anyway and now every item will have a bonus for you, even the Skill Power items which have been useless so far.

Next stop is the Fountain where for now our selection stays the same:

  • Lousy Consumables: - 1; all health and mana pickups are 50% less effective
  • Enemy Overseers: - 5; Mini bosses spawn on every floor, excluding Act 4
  • Expanded Floors: + 1; 15% Bigger Floors
  • Expeditious Expedition: + 2; + 0.4 Movement Speed

Aaaand we are ready for the Pyramid. Honestly, I don't like the Pyramid for several reasons. First off, the desert is unfair because enemies can spawn directly under you, spamming you with mini-bosses (partly our fault for our Fountain setting) and sand pits. Curses while mostly manageable, can cause your death really fast if you get greedy as it not only ruins your hit numbers but also the potentially received damage. 25 curses for example make you a one-hit wonder.
The worst offender are however the traps, specifically the rolling stones. While every trap does hurt you intensively the rolling stones are special. No matter how much health, defense, shields or even an active Side Step you have, the stones will outright kill you. This special function is very irritating and I would recommand skipping certain traps because of it. In addition to all of this, you also have the Inner Sanctum where you encounter red enemies which throw literally a billion boomerangs (remember you can chose Blast Wave to help a bit here).
Last station is the boss fight against Nerys. While he is not that hard in the first half, he will spam fire slashes near his end. Always keep distance or they can shred you. The boss fight against Nerys is reason alone to priorize Resistance items at the in-dungeons shop and the sarcophags. Pay attention and don't get to greedy with the curses but be ready to use them to get some cheap white rarity items to boost Markham's Moonshine.

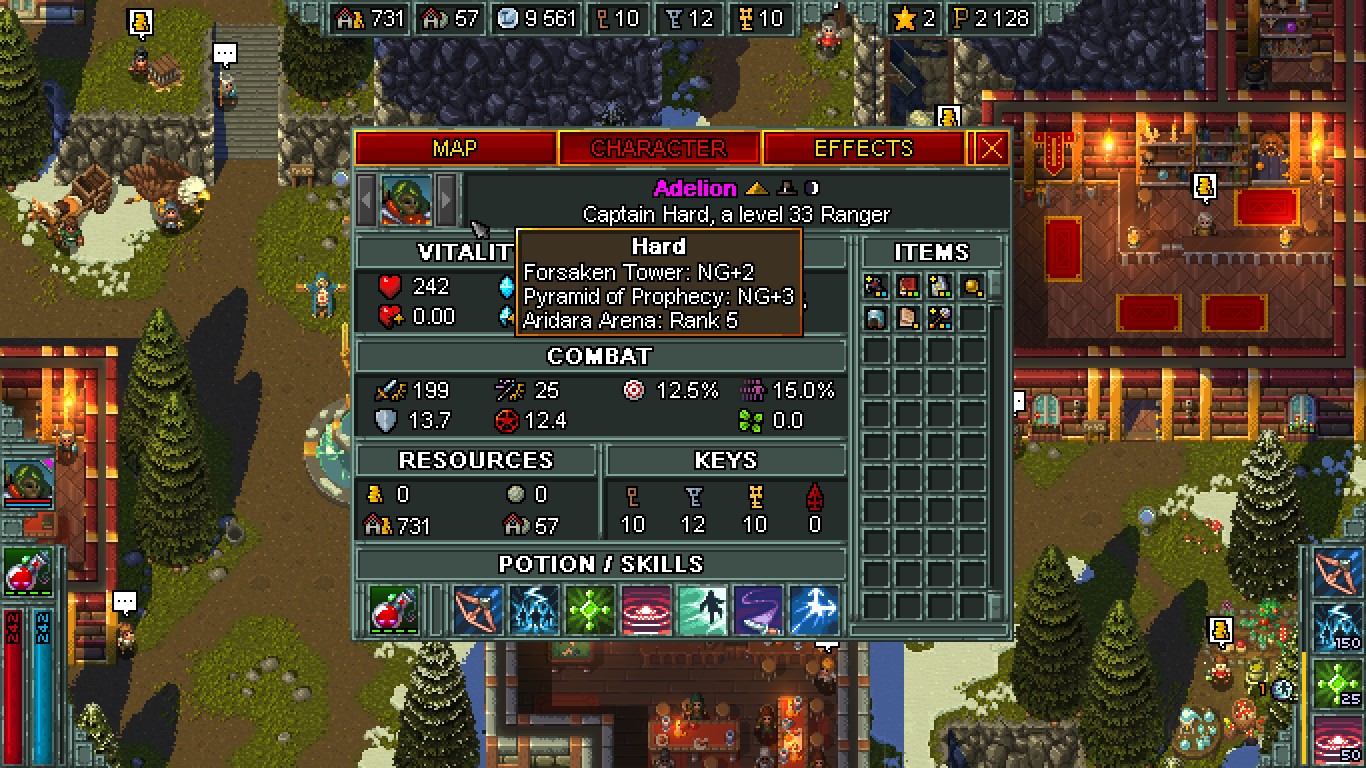
After you complete the Pyramid you will have lots of skill points, a summonable Djini and 2128 Prestige Points and your next rank up to Captain.

Act IV - Moon Temple
After your first run through the Pyramid comes now a potentially even more vicious threat: the Moon Temple. For the largest part your preparations stay the same. First stop is the item shop, you should (if possible) roll for Markham's Stone and either the Judgement or Markham's Mace as blue rarity item. The one you don't get in the item shop you should smith at the Magic Anvil. Also, don't forget to buy some keys.
Additionally, you have a large amount of skill points which can be spend on attuning items. Make sure to use them rather broadly over white and green rarity items which increase Resistance, Armor or Primary Attack.

During my games, I still had enough ressource to buy most if not all purchasable upgrades at the Blacksmith, Sorcery Shop and Mercenary Upgrades. If low on cash just skip on Mana Regeneration (you have enough by now since you don't use active skills that often) and Skill Points.

For the Tavern we stay with the selection from the last run:

  • Miner's Delight: + 100 % Ore Gain, - 75 % Gold Gain
  • A Fool's Errand: + 100% Gold Gain, HP regen set to 0.
  • On the Run: + 0.4 Movement Speed, - 25 % Gold Gain.
  • Markham's Moonshine: +5 % damage per item in your inventory. Spheres count twice,
    Combo is disabled.

While for the Fountain we change the selection slightly to:

  • Lousy Consumables: - 1; all health and mana pickups are 50% less effective
  • Enemy Overseers: - 5; Mini bosses spawn on every floor, excluding Act 4
  • Gentle Traps: + 2; Traps do 50% less damage
  • Toppled Towers: + 2; All towers are destroyed
  • Expeditious Expedition: + 2; + 0.4 Movement Speed

This will also be the set-up for all remaining runs. Speed is always a good thing. Gentle Traps and Toppled Towers are just there to make your life more comfortable because they are frequent in the Moon Temple and they will hit you. So the set-up gives you a bit more leisure to navigate. You will need it. Also, believe me, there is no chance that you want to have expanded floors activated for the Moon Temple. The third stage is ridiculous large even without it.

With this, the preparation once again are complete. Now comes the Moon Temple. The peculiar thing about this dungeon is the room structure. In result, you will always have very minor space to backtrack and avoid enemies. Nonetheless, you should search through all rooms which basically means that you will kill every enemy in the temple. The traps are more forgiving than in the pyramid and do only half damage but still pay attention.
The worst thing about the Moon Temple are the large stages as well as the bullet sponges of enemies. There are several constructs per level which are quite hard to take down. But if you search for items (and don't be mad that the Moon Temple constantly reminds you how cool Glass Floors would have been) and buy three items at the shop all the time, you should get through the temple quite well. Also, if I am not mistaken you are guaranteed a Magic Furnace once per stage (either level 1 or 2). Make use of it, if you deem it necessary. Your ores have no use if you die.
The room structure also make the Great Threat more dangerous (for once actually threatening). Together with the mini-bosses, the room can be crowded quite fast. In this situation you should either summon your Banner or the Pit Fighters. Pit Fighters are preferable due to the better defense stats and diversion effect. Another reason I've chosen them.
Final act is the boss fight which consists of four necromancers and plays out quite differently. Actually, you have a lot of space to avoid them but in the middle of the room is an orb which will activate shortly after the fight begins. While the orb generates waves which hurt you, running through them to the next safe spot is still the better choice than fighting four necromancer on one square meter. Also, there are phases between the waves where it only reduces your mana. Use potions if necessary, you will need several. Best is to familiarize yourself with the fight in the main mode before you try this in Mercenary Mode.

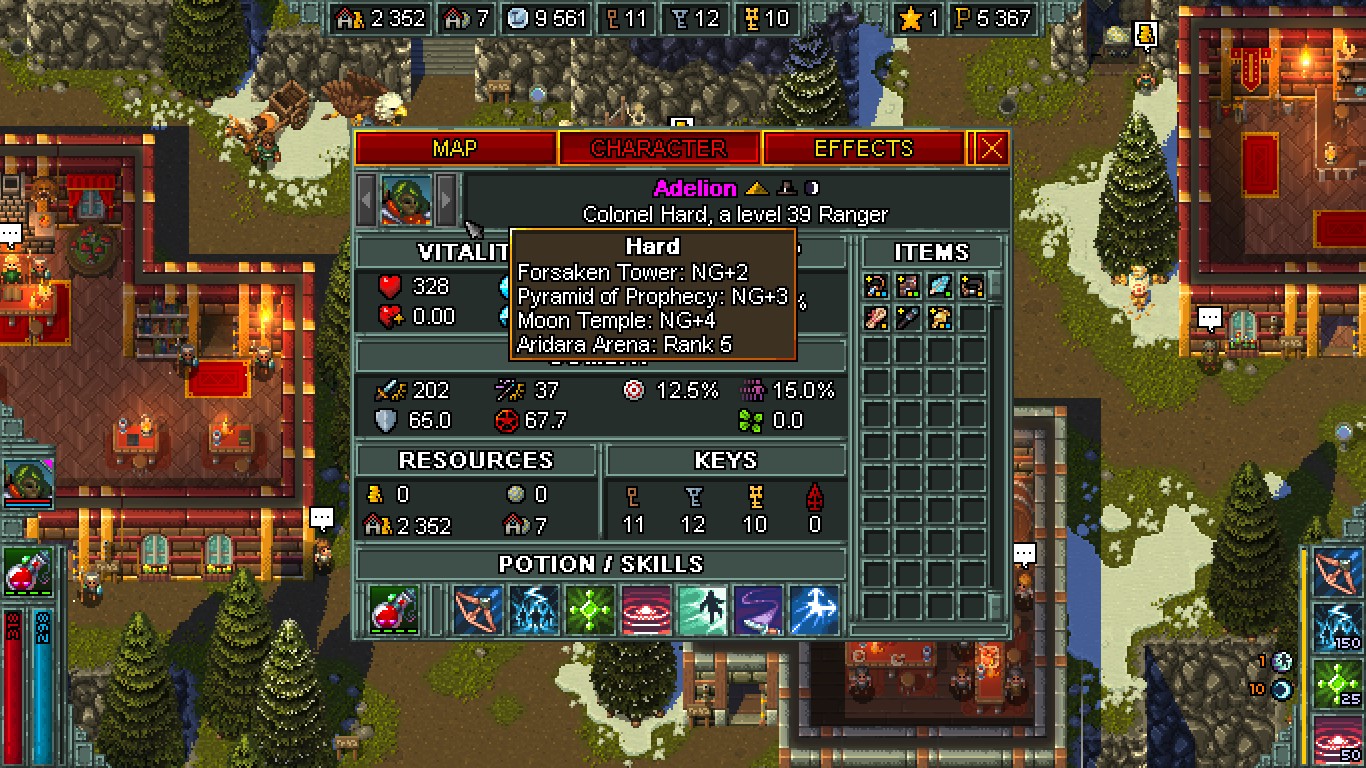
After you complete the Moon Temple you will have insane amounts of Skill Points, 10 Moon Shields absorbing half the damage for the first ten hits every floor and 5367 Prestige Points. Due to this you will be ranked up not once but twice! First you will reach Major Rank and a second later you will be promoted to Colonel (you will also get both achievements, so don't worry).


Act V - The Pyramid of Prophecy (again)
Due to our double rank up, we will have now a ton of upgrades to purchase at the Mercenary shop (Blacksmith and Sorcery Shop should be completed already) and if it hasn't happened so far, we will finally run out of ores and gold. So your first action should be a visit at the Chapel since we have unlocked Tier 3. I heavily recommand the Symbol of Essence (Gain 2.5% lifesteal on primary attack) as it solves your health management problem which so far has been accomplished manually by the First Aid skill.

Next step in your preparation is the item shop where we will start to change tactics. While Markham's Stone is still recommanded it is not any longer an absolute must. Your priority should be on one of these two items: Amor of Kings or Amulet of Kings. The one you do not get in the item shop, you should get at the Magic Anvil where you will also attune both of them. Your fifth run will therefore start with a high Resistance and Amor value making this run for the most part easier as the two runs before. Remaining skill points should again be distributed over the remaining items. By now, you should also have enough attuned items to feel the "secondary upgrades" which makes your run even easier. As always, remember to buy some keys.

Before you start shopping for upgrades, go visit the Tavern first (as you run low on gold and you won't risk spending everything before you get drinks). For the next run, the list will once again be updated:

  • Miner's Delight: + 100 % Ore Gain, - 75 % Gold Gain
  • A Fool's Errand: + 100% Gold Gain, HP regen set to 0.
  • On the Run: + 0.4 Movement Speed, - 25 % Gold Gain.
  • Markham's Moonshine: + 5 % damage per item in your inventory. Spheres count twice,
    Combo is disabled.
  • Incendiary Demise: + 40 magical damage on primary attack, set on fire when hitting enemies with primary attacks.

As you have purchased only defense items in the shop your damage has to come from somewhere else. This will be covered by Incendary Demise which gives you a whopping 40 magical attack bonus. Vice versa, the reason for getting the Amulet of Kings is to keep the self-inflicted fire-damage by the drink low (it should be at 2). And this is where the Symbol of Essence kicks in as it recovers far more than the two damage you receive per shot. Overall you have for this run a strong defense and offense.
The remaining gold and ores you can spend on the Mercenary Upgrades although you will not be able to purchase much. Priorize Resistance and then Armor.

Last stop before you go into the Pyramid once more is the Fountain where we chose the same set as before:

  • Lousy Consumables: - 1; all health and mana pickups are 50% less effective
  • Enemy Overseers: - 5; Mini bosses spawn on every floor, excluding Act 4
  • Gentle Traps: + 2; Traps do 50% less damage
  • Toppled Towers: + 2; All towers are destroyed
  • Expeditious Expedition: + 2; + 0.4 Movement Speed

As said before, you are quite well prepared for this run. Far better then for run three and four. As long as you don't get overconfident or arrogant there is not much that can happen. Play it safe and avoid tricky trap rooms (especially those with the rolling stones). You don't need the additional items absolutely.
As Nerys is still quite strong, it is still a safe choice to get even more Resistance. Otherwise this run really shouldn't be the moment to stop you.

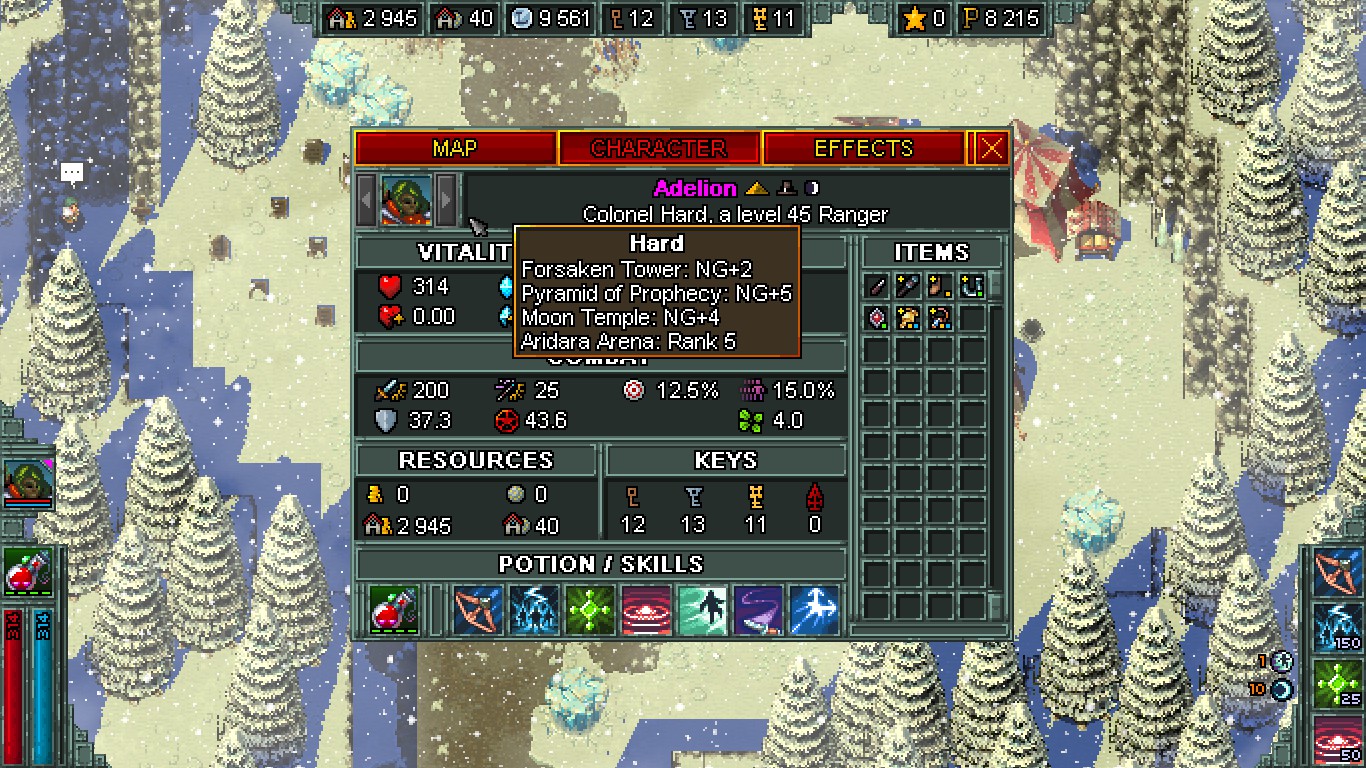
After completing the Pyramid of Prophecy the second time you will have some skill points, some minor amount of ressources as well as 8215 Prestige Points. This is not enough for General Rank yet, so for the first time you will not reach a new rank after a dungeon run. Well, you still have upgrade to purchase from before.

Act VI - The Forsaken Tower (the Return)
Finally, after three runs you will return to the Forsaken Tower. And you will enjoy it. Actually, there is not much to say for preparations as it is actually identical to your last run.

In the item shop you get either the Amulet or the Armor of Kings. The other item you get at the Magic Anvil and remaining skill points should be invested into item atunement.

The drink list from the Tavern stays the same:

  • Miner's Delight: + 100 % Ore Gain, - 75 % Gold Gain
  • A Fool's Errand: + 100% Gold Gain, HP regen set to 0.
  • On the Run:+0.4 Movement Speed, - 25 % Gold Gain.
  • Markham's Moonshine: + 5 % damage per item in your inventory. Spheres count twice,
    Combo is disabled.
  • Incendiary Demise: + 40 magical damage on primary attack, set on fire when hitting enemies with primary attacks.

as well as the Fountain setting:

  • Lousy Consumables: - 1; all health and mana pickups are 50% less effective
  • Enemy Overseers: - 5; Mini bosses spawn on every floor, excluding Act 4
  • Gentle Traps: + 2; Traps do 50% less damage
  • Toppled Towers: + 2; All towers are destroyed
  • Expeditious Expedition: + 2; + 0.4 Movement Speed

Spend remaining gold into Mercenary Upgrades and you are fine to go.

While you will have less Armor and Resistance than in your previous run and you also are in a higher New Game+, you will still have an easier time. The first floors of the Tower are faaaaar easier than the desert. And by the time the enemies get actually dangerous, you will have about 15-20 items already. Additional bonus, most traps in the first three acts are super easy. Overall you will find a lot more items before it gets dangerous. And with all the attunement done, you will have received significant buffs.
While this makes your life easier, it is not an excuse to get impatient or doing dumb things like running into traps at higher floors (around Act V specifically). Once again, play it safe and there isn't that much which can endanger you unless you insist on standing in the Vampire's Blood Storm or the Dragon's Ice Breath. And remember if a status effects make problems (most notably slowing you down or confusion) you can still use your First Aid Kit.

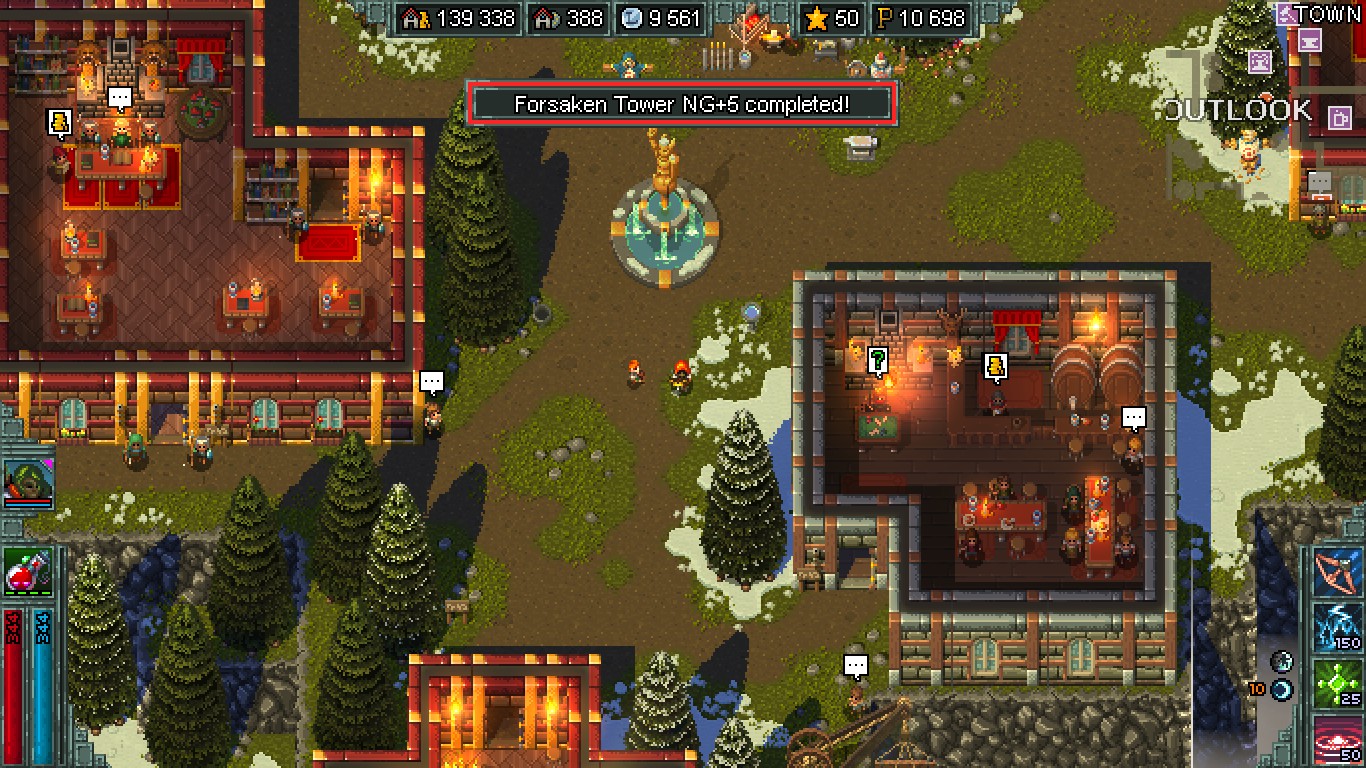
After you have completed the Forsaken Tower for the third time, you will end up with 10698 Prestige Points. You finally have reached General Rank. Congratulations! From here on out you are free to chose your own route. For example never touching Mercenary Mode again :P
I think the set-up is strong enough to have at least another safe run in whatever dungeon you chose. Afterwards you might have to adjust to a more dangerous but also more effective set-up.

Final words
I might add another section where I will list the total sum of purchasable upgrades and defense penalties per New Game+/Mercenary Rank. If you can gather enough funds you actually drop just once below a total sum of 0. And you get minor amounts of defense for leveling up. So overall, one could say that Mercenary mode is quite balanced.
It is still a pain if not alone for the fact that we can't use all those super-useful and overpowered guild boni we got accustomed too (Statues too, but them missing is less painful in the low New Game+ games).

If you have any further questions feel free to post them in the comment section and I will look if I can give you an answer. Other than that:

Thank you for reading and have fun playing the game
43 comentarios
aholadawin 24 ABR a las 10:59 a. m. 
A slight twist that I find to be working well. Not sure for later gameplay. But I am very much having fun in this mode with your setup/guide for each floor.

Warlock instead of Ranger. Throwing knives, pit fighters, first aid. On the prowl, sidestep, slice and dice.

You can run in and keep yourself alive with the added speed(on the prowl) and health/mana regen(soul dagger).
Pit fighters to distract/eat projectiles.
Still no money into health regen due to a fools errand.
Shaftlock and Markhams stone are a must to bring and attune ASAP. After the first tower run, I had 400 ore remaining with everything upgraded and I got a bird to collect coins.
I'm genuinely enjoying this mode with that setup and this guide. Playing on the switch lol
weslleyend 23 ABR a las 1:34 p. m. 
Thank you. I hate this mode, such a cool idea with many weird decisions. I played a different build, but your dungeon order was essential. :MHRISE_happy:
Adelion  [autor] 6 ABR a las 2:24 p. m. 
Yea, it has been suggested before as it is quite an obvious choice. And I always was annoyed that the game didn't give me the Dwarven Pickaxe while i was in the Moon Temple.

I simply didn't roll for it (and also did not suggest it) since I mostly priorize safety and the other items have a slight advantage there. But it is a great choice nonetheless if you are willing to take the additional risk.

Also, if you haven't done so far. There are some good alternatives and suggestion in the comments which i didn't integrate in the guide itself. As I wanted the people going the extra mile reading comments to find something of value.
veaac.fdirct 6 ABR a las 11:46 a. m. 
You should consider taking an attuned Dwarven Pickaxe into the temple: All the golem enemies in the last third of the dungeon are considered constructs, and with Markam's Stone, Miner's Delight, and/or Shaftlock Pickaxe you can usually take home about 2500-3000 ore (equivalent to ~2 million gold).... if you turn all all the extra enemies at the fountain.
Kerbo 16 ABR 2024 a las 8:02 p. m. 
great guide. Finally finished the achievements for this game. A few modifications I used:
1. My 3rd active was the gladiator's net: Slows, disarms, and +50% damage to enemies. Really helped in the early level part of each dungeon.
2. Until you can get life-steal church buff, getting a life-steal item makes things 100x's easier-especially in arena and first time through Pyramid of Prophecy.
3. I gambled on an early Blood Ritual (first tower run) because if it was junk I could restart. Got +resistance. Made things so much easier.

Anyways, thanks for great/detailed guide.
Ragnaman 19 FEB 2024 a las 8:17 p. m. 
Yeah, there are items that boost the main attack anyway and then this effect drops off as in those crazy NG levels % +/- stuff becomes king.

Still, fun in the beginning and merc skills can be swapped at any time.
Adelion  [autor] 19 FEB 2024 a las 4:12 p. m. 
At least in the beginning. Hm, if I was more motivated I would do some math. At the start the passive is good. But with the attuned Judgement or the Incendiary Demise, the effect would diminish and the other passives might take lead again.
Adelion  [autor] 19 FEB 2024 a las 4:04 p. m. 
It seems the description is wrong then. If it really ups the primary attack by 50 %, it is quite a powerful passive and a good choice.
Ragnaman 19 FEB 2024 a las 3:47 p. m. 
My tests show that flames of devotion are applied to just about everything. Primary attack, the verious DOTs and even the passive lightning shots which sometimes shoot off even from the DOTs.
Adelion  [autor] 19 FEB 2024 a las 10:46 a. m. 
Personally, I don't think any passive skill is worth replacing sidestep in a game where things can often oneshot you.

Concerning Flames of Devotion: As far as I understand the 12 points additional magical damage are NOT applied to your primary but to your skill damage. So, if you don't have any offense skills the passive is pretty much useless. Considering that the I used is heavily focused on the Primary Attack, it is not a good choice here. Though, you can modifiy the build and use one which implements more active skills and skill power.

However, take this analysis with a heap of salt. It has been very long since I played and have deducted this from the skill description.