Kingdom Come: Deliverance

Kingdom Come: Deliverance

287 valoraciones
Johanka's A Woman's Lot Quests Achievement Guide and Walkthrough
Por X-ztnZ
Finally the long wait is over! I know you've been just dying to get your hands on a good guide for the Johanka achievements—I know I did... over and over to be precise. Hence, I decided to take matters into my own hands and write a walkthrough and achievement guide for Johanka's Sasau quests.

So, in lieu of the more commonplace soubriquet, I present thee the Ultimate Johanka's A Woman's Lot Quests Achievement Guide and Walkthrough! In here you will find a full explanation (that is to say the best explanation) on how to progress through the story, get the good ending and grab all the different achievements in one playthrough! Everything neatly packed with pictures, of course.
6
27
2
5
4
4
4
2
   
Premiar
Favoritos
Favorito
Quitar
Introduction
The last DLC for Kingdom Come: Deliverance, A Woman's Lot, features two elongated questlines. One features around Theresa, the Skalitz miller's daughter. The other storyline is centered around fellow Skalitz refugee Johanka, who has fled to Sasau and now tends to the victims of war in the Sasau Monastery's infirmary. This walkthrough and achievement guide is only concerned with Johanka's quests in the DLC.

The reason for that is twofold. Firstly, even though the DLC is now almost one year old there is no decent walkthrough available for Johanka's quest—and even information on the wiki's seems sparse at best. Secondly, her achievements are among the most rare of KCD, indicating that a lot of players (like me) feel rather intimidated by her questline.

I actually found her questline very intriguing, especially if you take your time to savour the intricacies of the story and the environment. The developers really tried to show what a woman's lot could be when forced to flee the sanctity of home in medieval times. Overall, there is some quality story telling here and the achievements—although they generally require a bit more planning than say Theresa's achievements—are quite doable.

A word of caution for the wary. This guide is heavy on spoilers, if you don't want the story spoiled for you then stop reading now.

So without further ado, let's get to the guide, shall we.

The Madonna of Sasau
To start the DLC storyline some prerequisite work is required. First of all you need to have completed the 'In God's Hands' quest, secondly you need to have completed the 'Pestilence' quest. You can start the former straight after completing 'Awakening'. Just travel to the travel to Sasau Monastery and speak with Johanka in the infirmary (located along the west wall of the monastery's courtyard). Offering a helping hand will start the prerequisite quest 'In God's Hands'.

After completing it you won't be able to talk with her again until you've completed 'Pestilence'. This is a side quest that ties in with the 'Questions and Answers' main quest. For this quest Johanka will travel from the Monastery to Merhojed and back again. Once she's back at the monastery you can talk with her to help her with a recent fit of nightmares she seems to be having. This will start the overarching 'The Madonna of Sasau' DLC questline, wherein you are tasked with helping Johanka uncover the truth behind her dreams.

The questline for 'The Madonna of Sasau' is further divided into several side quests. Although some events technically take place within the overarching Madonna questline, these events have usually been described in the respective side quest sections that follow directly after said Madonna parts. Generally, all side quests are interposed with an activity from the Madonna questline wherein you get to flesh out your relation with Johanka. The DLC finale, however, takes completely place in the overarching Madonna quest, and thus has it's own section.

Quest progression
The DLC has a total of seven (7) achievements, evenly spaced out, which you can almost unlock in one playthrough. The You had one job! and Angel of Mercy achievements might be incompatible, but this would require more testing. To be sure, however, just make a save before drinking with Ambrose in 'Casting Lots', get the achievement, and reload.

Both Full House Sinner and Cleric's Pet require some prior work and you need to have progressed further through the story than just having passed 'Awakening'. The former requires you to have played through 'Baptism of Fire' (main quest) and 'At Your Service, My Lady' (side quest). The latter achievement requires several side quests and at least the completion of 'A Needle in a Haystack' (main quest).

Below you can see where in the questline/during which quests you can unlock a specific achievement.

#
'Quest name'
Objectives
Achievements
'The Madonna of Sasau'
Overarching questline
1.
'Infernal Dream'
Find the cave Johanka has been dreaming about
Infernal Justice
2.
'Casting Lots'
Try and help the tailor with his problem
You had one job!
3.
'Go, and Sin No More'
Try to rehabilitate the prostitute in Ledetchko
Voyeur
4.
'Bonum Commune'
Try and help Pavel of Kolin with his mission
Like a Ghost
(The Madonna of Sasau)
Escort Johanka to preach out of town
Full House Sinner
5.
'The Wicket Gate'
Undertake the pilgrimage
(The Madonna of Sasau)
Talk to the inquisitor
Cleric's Pet
(The Madonna of Sasau)
Try to defend Johanka before the Court
Angel of Mercy
Achievements overview
Angel of Mercy
Help save Johanka from the most grievous charge of heresy!
◘ Exclusive: Yes (with You Had One Job!)
◘ Hints: Unlocked in the events at Sasau after completing 'The Wicket Gate'. To get the achievement you need to have played through 'The Madonna of Sasau' quests in a good—selfless—way, so: don't bribe people, don't keep Ambrose's money or dice, don't have intercourse with Adela, donate Pavel's money in his name, do the pilgrimage and read the manuscript from Father Godwin. When preparing for the trial, talk with all witnesses. Also talk with the blacksmith's wife and get her to admit she sent the ruffians. Make absolutely sure to talk with Nicodemus and afterwards tell Johanka not to provoke the Inquisitor. You need to speak to Nicodemus again and talk with Matthias afterwards to get his dice. Return to Johanka with the dice and convince her a second time. During trial call all witnesses and use every speech option to intervene.

Cleric's Pet
Report to the Inquisitor all the wrongdoing going on in the province
◘ Hints: Unlocked in the events at Sasau after completing 'The Wicket Gate'. You need some prior work to complete the achievement. To get it you need to have: gotten drunk with father Godwin in 'Mysterious Ways'; found father Simon in 'A Man of the Cloth', found out the heretics in 'Waldensians', cavorted with the witches in 'Playing with the Devil', found the devil's skull in 'The House of God', and caught monks drinking in 'A Needle in a Haystack'. Report them all to the Inquisitor to get the achievement, make sure to give him a real monk's name (Lucas).

Full House Sinner
Have on your conscience every sin Johanka can think of
◘ Hints: Lots of people report problems with this one. You can get this after you get into a row with some villagers after the 'Bonum Commune' quest. You need to have committed, and confess to, every sin Johanka can think off: sleep with Lady Stephanie, fornicate with a bathmaid, steal something, serve time in jail, kill Runt, murder someone else, and get drunk. You have to commit all sins some time (i.e. days) before triggering the event, so that the in-game reputation system can spread the rumor of your foul deeds. However, according to some, having jail/sex/alcohol (de)buffs active helps unlock the achievement.

Infernal Justice
The punishment fits the crime
◘ Hints: During the mission 'Infernal Dream' you'll eventually end up in a fight with a brigand dressed as a Skalitz guard. Kill the fiend and dispose of him in the same way as he did with his victims (throw him in the nearby well/mineshaft). Once he tumbles down you get the achievement.

Like a Ghost
Recover Pavel's treasure without being discovered
◘ Hints: During the mission 'Bonum Commune' find and return a treasure for Pavel. The catch to unlocking the achievement is that you cannot be spotted by the Cumans camping next to the treasure. You can, however, stealth kill them. Wait till it's dark and you should be able to sneak into the derelict house behind the Cumans, grab the treasure from the chimney and report back to Pavel to unlock the achievement.

Voyeur
See what Henslin has in his braies without being observed
◘ Hints: Unlocked during 'Go, and Sin No More'. You need to have the Pickpocket skill (you can learn it from Peshek at the Rattay mill). Convince the bathhouse madam to let you into Adela's quarter when she's fighting Henslin. Sneak and pickpocket the powdered unicorn horn from Henslin and the achievement is yours.

You had one job!
Drink yourself into oblivion with Ambrose!
◘ Exclusive: Yes (with Angel of Mercy)
◘ Hints: Extremely missable and unobtainable with a Drinking skill above 10. You need to fail the quest 'Casting Lots' by passing out during a drinking binge with Ambrose (the Sasau tailor). Being intolerable to beer (Wine Drinker perk) and alcohol (True Slav perk) seems to help. During dialogue choose the high alcohol options (three kegs). You get the achievement when you get a loading screen saying "You're unconscious!"
Map: Sasau and Monastery
For easy navigating, this section contains two maps of Sasau with area's that are commonly references in this guide.

Sasau Monastery

– Various locations around the Monastery: Infirmary (red), Johanka's monastery cell (orange), Custodian's home (yellow), Overseer's office (purple).

Sasau Town

– Various locations around Sasau: Sasau Wagonner's Inn (light green), Dungeon (red), Bailiff's home (orange), Market (yellow), Swordsmith (white), Tailor (dark blue).
Prerequisite: In God's Hands [1]
Before you can start Johanka's DLC quests, you will need to complete the 'In God's Hands' side quest. You can start it any time after completing 'Awakening'. Head over to the Sasau Monastery and find Johanka. During the day, she can usually be seen tending to the wounded in the Monastery Infirmary, which is located halfway down the western wall of the monastery's courtyard. Talk to her and she'll tell you that the infirmary is lacking in everything, staff, medicine and foodstuffs, and thus can't give proper help to the wounded. Offer your help to start the 'In God's Hands' quest.

In God's Hands
1. Help with healing the sick in the monastery
– Find out what happened to Philip
– Help the man with the broken leg
– Find something to help the insomniac fall asleep
– Get healing herbs for Semek
– Find bandages for Hannes
2. (Optional) Get sufficient game meat and bring it to Johanka
3. (Optional) Find out how to get better conditions for the sick
4. Tell Johanka you can't do any more

Help with healing the sick in the monastery
Head into the sick ward. There are five wounded here that need additional help. If you're First Aid perk is high enough (mine was level 3) you can head out into the infirmary and inspect the wounded yourself. Else you will have to ask Brother Nicodemus for help. Walk around the ward and interact [E] with the different patients. For the quest to proceed you need to inspect: Philip from Skalitz; Thomas; Hannes from Skalitz; Quarryman Semek; and the Insomniac.

Find out what happened to Philip
1. Find out what happened to Philip
2. Go and see Father Simon
3. Get Philip Artemisia potion
4. Wait a while to see if the cure takes effect

Enter the infirmary and turn right. In the first bed lies Philip, a bloke with a white tunic and dark hose. He seems to be in a catatonic state. Inspect him (press [E]). He doesn't seem to be wounded, but he's shaking terribly. Head over to Johanka and ask her about Philip. She'll tell you that he arrived just fine with the other refugees, but he took sick after a couple of days. He probably has gotten a form of poisoning, because he hid himself from the Cumans between a pile of corpses. There's nothing she can do for him, but she knows someone who can, namely Father Simon.

Depending upon your progression through the main game, you might or might not have already met Father Simon. If you haven't found him yet, you will first need to complete the A Man of the Cloth[kingdom-come-deliverance.fandom.com] side quest. If you already completed that one, then Father Simon can be found in the hovel right next to the church in Rovna. In any case, once you found him, head over to the good father and tell him about poor Philip. He'll tell you to give him an Artemisia potion against the effects of the poison, and that after that it's all in God's hands.

(Father Simon sitting in front of his hovel at Rovna)

For an Artemisia potion you will need two parts of wormwood and one part sage. Both can be bought from Brother Nicodemus for a minor fee, or you can pick them up yourself. Neither wormwood nor sage seems to be cultivated in the many gardens around Sasau, but around the alchemy shack near Samopesh there are several forest gardens. The one in the glade to the south of the shack (next to the sheep cottage) has sage. An unmarked garden to the east of the shack, just outside the forest, has wormwood. Go to an alchemy station and brew the concoction and apply it to Philip. Wait a couple (6 or more) hours and you should get a prompt that the cure worked.

Help the man with the broken leg (Thomas)
1. Help the man with the broken leg
2. Ask the executioner about the man with the broken leg
3. Set the broken bone in the man's leg

Head back into the infirmary and inspect Thomas, he lies right next to Philip and wears a green tunic, dark hose, linen hood and a grey felt hat. There doesn't seem to be much wrong with him except for an injury to his leg. Find Johanka and ask her about him. She'll tell you he had a pretty bad injury to his leg with the bones protruding from the flesh. His bones got set, but she's unsure if they set right. However, the monks—who have knowledge of such matters—refuse to help and say it's in God's hands.

(The Executioner sitting at the table inside his home in Rattay)

Depending on your First Aid skill (mine was level 3), you either get the option to straighten out the bones yourself, or not. If you don't, you will have to find the Executioner. So ride out to his hovel near Rattay and pay the friendly man a visit. They won't let him on the monastery grounds, so he'll tell you how to set the bones yourself. Return to the sick ward and apply your newly acquired knowledge of the human skeleton. After a short cutscene with brother Nicodemus you're set and done.

Find something to help the insomniac fall asleep
1. Find something to help the insomniac fall asleep

Off into the infirmary again. This time, find the Insomniac. He's lying in the corner just opposite the entrance, sporting a linen shirt, short braies and a coif. He had broken his leg and now he can't sleep because of the pain and because of all the people who are screaming in agony around him. Ahhh first world medieval world problems. Head over to brother Nicodemus and ask him about "a potion to induce heavy sleep". He'll tell you about the true and tried classic Lullaby potion. If you haven't got the recipe already he'll give it to you.

For a Lullaby potion you will need poppy, thistle and herb paris. You can buy all for a modest fee from brother Nicodemus, or you can forage them yourself. Both poppy and thistle shouldn't prove to difficult to find. Poppy grows abundant in the fields around the monastery and thistle is quite common too, you can find some in the church garden to the north of the infirmary. Herb paris can be quite hard to find, but you can find quite a lot at the forest garden to the south of Sasau Town. In any case, get the potion and give it to the Insomniac so he can have a long well-deserved rest.

(Location of the illusterious herb paris south of Sasau)
Prerequisite: In God's Hands [2]
Because of Steam's strict rules on the maximum amount of characters allowed per section, the 'In God's Hands' prerequisite quest walkthrough has been divided in two parts. This is the second part.

Get healing herbs for Semek
1. Get healing herbs for Semek

Halfway down the infirmary you can spot Quarryman Semek, he wears a brown tunic with a red and white hood. He's not from Skalitz, but he hurt himself pretty badly when falling from some scaffolding. His wounds should heal in a couple of weeks, but that'll be too late because the foreman will boot him from his job. Semek begs you to help him get back to work again in a few days so that he can provide for his family again. He'll tell you a tale about a purple herb that was used by an old hag from his village.

Go to Johanka and ask her if she knows about such a herb and she'll scold you for taking care of someone who's not a refugee and thus obviously doesn't need your help as much, right? Right?! Oh, how sharper than a serpent's tooth 'tis to have a thankless nurse, who spreads her Christian neightbour's love around selectively. Surely, thou can't let this man to his own devices. So ever onwards towards Nicodemus. Well, turns out he hasn't heard of such an herb either, but he recommends you to look into the herbarium. Herbwhatium? Right, go to the alchemy bench and open your recipe book. Now click [Q] to switch to the herbarium.

Turns out there is one such herb, purple it is, with said proposed qualities: Symphitum Comfrey called also Black Salsify, it is the best remedy for broken bones, swelling and bruising and aids as well against internal pains from the bones. It is used for health and resilience, but it also drives away horses and big animals.

Grows most of all on banks by the water and in ditches around fields. Greatly helps the health and stamina, but induces fatigue.


Head out into the wilderness and find yourself some of this illusive purple herb—or alternatively buy some from Brother Nicodemus. If you're a cheapskate, however, you can also find some quality specimens in a garden just to the north of the infirmary. Regardless, get the herb and return to Semek. Give him the (right) herb and he'll thank you and tell you to come back to him in a day or two. Do so and, supposedly, he'll give you a free perk—how workers like him keep up with back-breaking labour day after day...

(Location of the purple herb within the monastery)

Find bandages for Hannes
1. Find bandages for Hannes
2. Tell Nicodemus to tie up the wounded

Hannes (dressed in a white tunic and dark hose, lying in the far corner of the sick ward) seems to have hurt is leg pretty badly. Of course, he'll tell the ladies it was because of a valiant fight against the Cumans—in truth, however, he hurt his leg while fleeing from them. No matter, you're not here to judge, so let's see how you can help the poor fellow. Turns out his blood-soaked and stinking bandages need to be replaced. So go find yourself 10 shiny new bandages. You can find a total of 5 around the infirmary (3 in the sick ward, 2 around Nicodemus in the alchemy lab). You can also buy a couple of bandages from Nicodemus himself.

(Location of the three bandages in the sick ward)

After you got yourself the required bandages return to Hannes. After a bit of a chat, depending on your First Aid level (mine was 3), you get a chance to replace the bandages yourself or you can ask Brother Nicodemus for help. No matter what route you choose (Nicodemus will comment he doesn't have any bandages ... even though he sells them), you will get a nice little reputation boost.

(Optional) Get sufficient game meat and bring it to Johanka
1. Get sufficient game meat and bring it to Johanka

This one is pretty straight-forward, you need to bring 100 pieces of game meat (supposedly, that is deer, hare or swine) to Johanka. Yes, that's considered a capital crime in medieval Bohemia—and no, neither Johanka nor Heinrich seem to have any problem with that. You can either kill or buy the meat. Hunting grounds are rather sparse in the direct neighbourhood of the monastery. If you're having trouble finding game, you can head a bit out towards Samopesh, there is a sward to the west of town that features some roe deer. Also the woods around Sampesh feature plenty of game. If you really don't feel like hunting, you can also clandestinely slaughtered the local livestock. After you got the meat, return to Johanka for a compliment.

(The locations of various game animals around Sasau)

(Optional) Find out how to get better conditions for the sick
1. Find out how to get better conditions for the sick
2. Try to get supplies from the Custodian

The infirmary is bursting at its seams, so you put it on yourself to go on an epic quest to improve the living conditions around the sick ward. Unfortunately, you haven't got a clue how to exactly do that, so head out to Brother Nicodemus and talk with him about the living conditions. He'll tell you that the monks are quite unbothered with the worldly affairs of the infirmary, and are not much of a help. He's also on a tight budget, and because the Abbott is on a temporary leave there is no way for him to increase his expenditure. The Custodian (Baron vom Berg), however, might be of use. Because of some twist with Johanka, he does seem to refuse his assistance.

(The Custodian with his loyal scribe graces the infirmary with his presence)

You can go to the Custodian right away, he is located along the northern wall of the monastery, and either bribe (150 gold) or persuade (12 speech) him into giving more goods to the infirmary. You can also wait until you healed 3 (out of 5) sick, because the Custodian will come barging into the infirmary. You'll have a chance to persuade him (speech 13) for a small reputation gain and an easier speech check (10) later on.

Tell Joanka you can't do any more
1. Tell Joanka you can't do any more

After you've helped all of the five sick and wounded, return to Johanka for her compliments on a job well done. Congratulations, you're set and ready to start Johanka's DLC part of A Woman's Lot!
Quest: Infernal Dream
After completing the 'In God's Hands' quest, return to Johanka. If you can't find her, don't worry, she also changed her routine. Now during morning (until approximately 11 a.m.) she stays in her new quarters—right next to the infirmary on the monastery's ground—praying. Afterwards she moves to the infirmary to treat the sick and wounded. Talk to her, and she'll mention how tough it is to be a nurse, as she seems to be the only one that cares about the miserable. She'll also mention she really worries about Matthias. Heinrich goes on to tell her she looks terrible, which prompts her to reveal she's having a recent bout of peculiar dreams.

(Johanka in solemn piety in her quarters)

Obviously, this sounds like the start of an epic quest, so press her about the "peculiar dreams". This starts 'The Madonna of Sasau' DLC quest. Johanka relates how she's dreaming about the Virgin Mary, who guides her to a cave near Skalitz. Once in the cave, however, the Virgin dissappears and the Devil approaches her. She eventually dies in the dream and then finally wakes up. The rest of the morning she spends in solemn prayer. Johanka is convinced there is a meaning behind these dreams. Reply "I think you're right" and she asks you to investigate the cave, which starts 'Infernal Dream'. In it you'll have a chance to unlock the Infernal Justice achievement.

Infernal Dream
1. Find the cave Johanka has been dreaming about
2. Explore the mineshaft
3. Explore the opening of the mineshaft
4. Explore the miner's huts
5. Put an end to the murderer's reign of terror
6. Tell Johanka what you found out

Grab your horse and go to Skalitz. Remember the dream she told you? No? Well here it is again:
    1. I'm standing at the foot of the hill with the castle behind me. By the walkway leading to the ore-washing tanks, near the woods. Uncle used to work there... 2. I'm bringing him some food, going towards the pond. Then everything suddenly goes dark. 3. I carry on uphill, along the stone channel, 4. up to the mouth of a huge cave.

(1. The walkway, 2. the pond, 3. the stone channel, 4. the cave)

Enter the tunnel entrance (not really "the mouth of a huge cave" but hey, who am I to interpret divine dreams) and walk all the way to the back until you can't go any further. Investigate the area and you'll be prompted to go outside again to investigate the mineshaft entrance. Go outside and travel a bit uphill. Just before the crest you should see a wooden chimney. Next to it are the remnants of the well/mineshaft. Investigate the area once again, and you'll be prompted to investigate the miner's huts on top of the hill.

(Location of the well (red) and the miner's huts (orange) on top of the hill)

Approach the miner's huts and you should see a lonely soldier dressed in Skalitz colours wearing a shield that depicts the devil himself. Looks suspicious, right? Talk to him to find out he's all that's left of the Skalitz garrisson—yeah and I'm the pope in Avignon. Eventually, the gigs up and you can either go the long way ("I don't know any Johlin") to learn more about this brigands prior handiwork, or take the short way ("I'm taking you to Sir Radzig!" or "Flee") to make minced meat out of this sack of potatoes.

(Who knew Skalitz guard's got retrofitted with a shield depicting the devil and sporting the motto 'Hellboy de Hellhole')

Finish him off, and grab him to throw his body into the mineshaft (next to the wooden chimney you encountered earlier) where the fiend used to dispose of all his victims. Congrats, you just unlocked the Infernal Justice achievement! Return to Johanka and tell her "I found the place you dreamt of" to finish the quest. Reply how you wish after that, generally the more flattering you are the better your reputation with Johanka will be (i.e. "It was just like you said").
Quest: Casting Lots
After reporting back on the 'Infernal Dream' quest, Johanka will tell you that she thinks the nightmare was just a test of the Holy Virgin to see if she (Johanka) could understand her. Now the virgin Mary appeared in another dream of hers and Johanka is determined that she should warn the people of Sasau of impending doom. Tell her "that makes sense" for a small reputation boost and onward it is towards the market! Getting there should start the 'Casting Lots' quest in which you'll have a chance to unlock the illusive You Had One Job achievement.

(Johanka explains her holy mission to Heinrich in her monastery cell)

Casting Lots
1. Talk to the tailor's wife
2. (Optional) Get Ambrose to drink himself to oblivion
– Take Ambrose's money
– Wait until Ambrose sobers up and tell him what he did yesterday
2. (Optional) Win all Ambrose's coin from him
3. Teach Ambrose the error of his ways
4. (Optional) Throw Ambrose's dice down the well

Once you get at the market the would-be prophetess seems to be having some start up problems. You can reassure her by telling her "You can do it. I'll advise you" or "The Virgin Mary will guide you", or you can be an inconsiderate douche and tell her "Pull yourself together, girl!" No matter your preferred way of persuading the prophetess into submission, Johanka will make a staggering speech before an increasingly interested crowd. You know the deal, fire and furbies, end of the world, that sort of talk.

(The world's a stage and, and all the men and women merely players …)

After her speech, Johanka is approached by a mysterious woman in blue. Turns out it's the tailor's wife. She's mad in desperation and begs Johanka to take care of her husband—who as it turns out is a degenerate gambler. Of course, our prophetess can't be bothered with such petty nuisances. Can't they see she has a world to save? Luckily, there is spineless Heinrich, always ready to play a round of di… help a damsel in distress. So of you go to the Sasau tailor!

Go to the Tailor, which is conveniently located at the market square, and talk to the tailor's wife—her name is Guta, mind you. Turns out Guta loves her husband (Ambrose), he has just one little flaw and that is that he tends to waste all their hard earned money on a drinking binge and gambling spree. Of course you're willing to help Guta, by taking all the money from Ambrose. Not surprisingly, she doesn't really like that idea. Tell her "I swear I'll give it all back" and ask her where you can find Ambrose. Turns out he's just about to go out of town, and probably is at the tavern where he likes to play a bit of dice, especially when he's been hitting the sauce.

(Heinrich approaches the tailor's wife)

Seems like this is getting better and better for Heinrich! Not only is he going to gamble in the name of righteousness, he'll also have an excuse to get wasted. Off to the Sasau Wagoners Inn, where we'll find Ambrose. From there you have two options to proceed: either get Ambrose to drink himself into oblivion, or play dice against him and win all his coin. What road you have to take largely depends on personal preference.

Get Ambrose to drink himself to oblivion
Depending upon your Drinking level this one is pretty simple. If it's too low (the general consensus is level 10 or lower) you can pass out (you'll be prompted "You're unconscious!"), you will fail the quest and unlock the You Had One Job achievement! If you keep passing out then (obviously) you're a worse drinker than Ambrose and have no choice but to play dice against him—which is interesting if you're so soaked that you can't read your dice anymore.

(If you managed to get this loading screen then you've unlocked the You Had One Job achievement)

If your Alcohol Skill level is high enough, you will be able to make Ambrose pass out. For that to happen you'll have to imbibe at least eleven tankards—the amount of drinking rounds and tankards seem to depend upon your level of progression in-game. So generally, choose two or more tankards per round. Once the option "About the meaning of life…" arrives you're set to go. This is also the last stage where you can opt to wager Ambrose over a game of dice, because Ambrose will pass out after that round (the loading screen will say "You're drinking").

(If you managed to make Ambrose pass out, your world view should look something like this)

Once Ambrose is passed out, stand up from the table and steal his money from him (I guess skullduggery isn't a sin in this case—the end justifying the means). Have a well deserved nap and next morning talk to him when he finally sobers up (should be around 9 a.m.) You can meet him outside sitting next to his wain and teach him the error of his ways.

Win all Ambrose's coin from him
Your other option is to place dice with Ambrose. He, however, does seem rather reluctant to play with you. But as Guta told you, that's nothing a couple of tankards won't solve. To be precise, that's nothing 8 tankards won't solve. So choose your options and prompt him "How about a game of dice?", he should accept. If you're too drunk to read your dice then winning from Ambrose can make for an… interesting match. In any case, he seems to be the worst dice player in KCD history and you should be able to mop up the table with him, even without using weighted dice.

(Heinrich plays dice against Ambrose over a nice pint of Bohemian lager)

Seeing how bad Ambrose plays, the hardest part here is to actually get Ambrose to wager all his money. For that to happen you need to lose two matches and you'll actually have to put an effort into losing—if you don't his conscience'll get the better of him and he'll leave. After losing your two matches you'll get an opportunity to play him for all he's got (provided you have aprox. 700 Grosschen + whatever you bet before). Do so and mash him up. After that take your time to explain to him the error of his ways.

Teach Ambrose the error of his ways
No matter what road you took (unless you failed the quest), you'll get the chance to "Teach Ambrose the error of his ways". After that your choices don't really matter. However, for a good DLC ending get his dice—and throw them away—and don't keep the money. You can also return to Guta and report back to her for a reputation boost (provided you didn't keep the money). You can also return half to Ambrose and half to Guta for the largest reputation boost.

(Heinrich is explaining to Ambrose the error of his ways)

Return to Johanka and brief her on your success.
Quest: Go, and Sin No More
Once you report back to Johanka you'll have some time to chat up with her. You can ask her how it's going with Matthias for some extra reputation. Also a shrine of veneration appeared in front of her lodgings. You can chat about it with her if you like. You can also compliment her on her speech at the square. She'll eventually ask you if you understood the meaning of the speech, tell her "You were telling us to be virtuous" if you want to improve your relation. You can also ask her how she got her current lodgings, press her and pass a speech check (level 2 for me) for some additional info that you can use in 'Go, and Sin No More'.

(Johanka explains her latest revelation to Heinrich in her monastery cell)

After your report, Johanka'll tell you how a girl from the baths came to see her and told her that she'd stop wenching and seek another vocation. Great news, and positive proof that the Holy Virgin is lending a helping hand. If only more people would join the life of the virtuous. Of course Heinrich happens to know... a wench... in Ledetchko... Long story short, her name is Adela and you're sent out to rehabilitate her. This starts the 'Go, and Sin No More'. There is one achievement in this quest (Voyeur) that you can get relatively easy as long as you got the Pickpocket skill.

Go, and Sin No More
1. Go to Ledetchko and find Adela
2. Talk to the bathhouse madam
3. Rescue Adela
4. (Optional) Wait until tomorrow
5. Talk to Adela
6. Convince Adela
7. Escort Adela to Sasau
8. (Optional) Protect Adela

Head over to Ledetchko and pay a visit to the Bathhouse. Walk past the baths towards the last door on your right and you should hear a row going on inside. Seems like Adela is struggling with an aggressive customer. Talk to the Bathhouse Madam, and she'll tell you it's nothing to worry about. It's a well-paying customer and the wounds will heal eventually. You have two options, either you can wait it out or you can convince the madam to let you in. To get the Voyeur achievement you will need to choose the latter.


Rescue Adela
If you can't stand the thought of standing idly by when a woman is getting assaulted, then you get the option the charge in and confront Henslin. You can either persuade (speech 12), bluff (charisma 9) or intimidate (strength 10) the madam. However, the latter will act detrimental to your reputation. Get the key (or pick the very easy lock) and open the room.

For the Voyeur achievement you will need to pickpocket the unicorn horn powder from Henslin. Don't get caught or the gigs up. After pickpocketing the powder from him, and unlocking the achievement, you can still choose to wait it out, silently knock him out or to confront him. You can also kill him then and there but... don't.

(Sir, is that a powdered unicorn horn I'm seeing in your pocket?)

If you confront Henslin, he'll tell you to get out. You can comply ("I'll be going") and suffer no reputation damage. Or you can tell him "I'm not going anywhere!" and suffer a reputation penalty. You can escalate further and get into a fistcuff with him, or try tact ("We can come to an agreement"). Either way, the scene ends the same way with you saving Adela from Henslin and earning her eternal... disrespect. That's right, Adela will scowl you for saving her from getting violated and you'll suffer additional reputation damage. You'll get a chance to remedy the situation, however, and tell her to "Leave this place!".

(The patron doth protest too much—time to shut him up)

Wait until tomorrow
If you don't feel much like a white knight in shiny armour, you can opt to return to the bathhouse the next day. Three hoorahs for you good Sir, for being such a noble and chivalrous gentleman! Turns out Adela got quite the thrashing, but that doesn't spoil her mood to much. And, in addition, she's not even mad at you for leaving her to her own lot. Instead, she asks if you're here to enjoy a bath with her. I suggest you don't and instead get right on to business—the soul-saving business that is. Tell her "I just want to talk to you."

(Adela the morning after being roughly beaten by her patron)

Convince Adela
Convincing Adela will turn out exactly the same no matter which path you have chosen. However, the dialogue is pretty easy to muck up, gaining you either reputation loss or failing the quest altogether. Start with "Leave this place" after that choose "I'll take you away from this hole" and tell her "Johanka" sent you (if you talked with Johanka about her new lodgings before going on this quest—this will make convincing Adela easier). The next couple of options are timed, say: "A girl from Skalitz"; "I believe"; "Why not?"; and "No".

If you've done everything as described above, you already should have gained quite a bit of reputation. This makes convincing her so much easier, because you will only need to choose 2 correct dialogue paths (instead of 3, for which you would need the First Aid perk). Say "Get yourself a different job" and you'll get four options, three of them are able to convince her:

1. You won't be able to do this forever → You could catch some disease (requires: First Aid level II?)
2. You're an outcast → You can't manage everything alone → Not even Johanka can manage on her own/(Look at the Skalitz people) → (And without Johanka?)**
3. You could do something else → Help the sick
    ** The options in parenthesis are alternatives, so you can either choose to tell Adela straight away about Johanka, or you can tell first about the Skalitz refugees. Both should lead to the same result though. If you haven't talked about Johanka's sacrifice before, then you will get a small reputation loss, but you get the chance to salvage the situation.
Escort Adela to Sasau
If you followed the guide, you should just have convinced Adela to come with you to Sasau, without incurring additional reputation loss! Now, depending on how you chose to deal with Henslin, the road to Sasau can go smoothly or... Henslin and two of his cronies are throwing a surprise party for you halfway through the journey (the game also prompts you that you lost additional reputation—gosh a woman's lot in medieval times sure was brutal). If you want to go this route but do a pacifist run, you have no choice but to head into the forest and lose them (you'll get the option "I've lost them in the forest" with Adela). Else, you will have to kill them.

(Henslin and his cronies try to teach Heinrich a lesson or two in medieval customs... yeah good luck with that)

Once you arrive at Sasau, don't be the guy that takes advantage of a vulnerable girl in a new town. Instead, remind her that she's here to start a new virtuous life. This'll end 'Go, and Sin No More'. You can now report your success to Johanka.
Quest: Bonum Commune
Report your success to Johanka and she'll complement you on a job well done. Matthias seems to be doing better, but during your absence a group of troublemakers also took hold of Sasau. They kick around the gifts left for Johanka at her monastery cell, and seem to loiter around the main gate, spreading libelous rumours about her and keeping people from visiting her. The guards seem unable to do anything about it. Surely, by now you know what to do, valiant Sir Heinrich.

(Oh Lord, what dark times are we living in when ruffians are pretending to be pious pilgrims!)

You can either report to the Custodian, who seems happy to help if you mention the thugs are harassing Johanka. If you don't mention her he seems rather unwilling—unless you convince him (speech check 9) in which case he'll reluctantly help you. You can also directly take care of the problem yourself. Remember, Johanka doesn't like the use of violence, so either bluff (charisma 3), intimidate (strength 17), or bribe them. You can also bribe them to tell you who sent them, this'll reveal that 'some wealthy villagers' in town sent them.

Bonum Commune
1. Find the place where Pavel hid his treasure
2. Find the treasure
3. Decide what to do with the donation
4. Make a donation for the common good
– (Optional) Give the money to the Sasau parish priest
– (Optional) Give the money to the Sasau Bailiff
– (Optional) Give the money to Sasau Monastery

After you dealt with those pesky loudmouths and troublemakers, return to Johanka for your next assignment. She wants you to accompany her to a meeting with a fine gentleman at the Sasau Wagonner's Inn, which will start the 'Bonum Commune' quest. You'll automatically go there and are immediatly greated by Pavel of Kolin, a fine burgher hailing from the royal city. It seems Johanka is making quite the name for herself, and Pavel tells how she rekindled his newfound piety in him.

(Bohemian standoff between Johanka, Pavel and Heinrich at the Sasau Wagonners Inn)

Johanka's speech at the market square reminded him of past misdeeds for which he now wants to make amends. He recounts how he, in his younger years, passed through Sasau for a business deal and decided to bury a treasure in the nearby woods. He wanted to reclaim the treasure himself but lost his footing and plummeted down a creek, so in lieu of the circumstances he decided to ask for help. Agree to help him (preferably without asking for a finder's fee—you scoundrel). After agreeing you can ask him some additional questions about himself and the treasure.

Find the place where Pavel hid his treasure
To complete 'Bonum Commune' you'll need to find the location of the treasure, grab it and donate it for the common good. You will also have a chance to unlock the Like a Ghost achievement if you grab the treasure without being spotted by any Cumans. The way to the treasure is fairly easy, just follow Pavel's instructions to the letter.

(Road to the abandoned hamlet with landmarks marked, dead body with the Custodian's letter orange.)
    Start between the Sasau quarry (1) and the marshland at the point where a woodland stream flows into the river (2). If you follow the stream uphill (3), you should find a woodland path that joins it. Pavel lost his hat there (4). If you follow the path closely (5)(6)(7), it will lead you to an abandoned settlement deep in the woods (8). The hiding place is in one of the ruins there.

Easy peasy lemon squeezy, just head over to the quarry and follow Heinrich's commentary and you should be alright. If you run into a fellow named Doubek, don't be alarmed. You can have a chat with him and still get the achievement. He also has some interesting things to mention about the Qumoes. Once you get at the abandoned settlement, be sure to examine the dead guy lying on a boulder there. Hmmm, looks like trouble ahead.

(The abandoned settlement; location of the treasure in red square, Cumans in orange square.)

If you're here for the achievement, make sure not to be spotted by the Cumans (there's a total of three). To do this, wait till it's dark and sneak past the sleeping Cumans into the far building. Pavel's treasure is in the chimney. You can also stealth kill the Cumans and still get the achievement. Congrats, that's it for Like a Ghost. Don't worry if it doesn't pop up right away (it doesn't), you'll get it after you report back to Pavel at the Wagonner's Inn.

There's some more minor treasures hidden in the area. One stash with garlic, water and a cross under some rubble behind the low wall next to the cooking spot, and some candles in the other derelict building that is accessible by a tunnel next to the dead-guy-on-a-boulder.

Decide what to do with the donation
Once you done, head back to Sasau. Say hi to Doubek if you like and find Pavel at the Wagonner's Inn. Ask Pavel what he wants to do with the treasure. He wants to donate it for the common good, either to the Sasau Bailiff or the St. Martin's Church parish priest (Father Fabian). You can convince him to donate it to the monastery—in which case you'll need to give the money to the Overseer. Each of these options is valid and it mainly depends upon your personal preference.

(Pavel can usually be found enjoying the company of other patrons outside the Wagonners Inn)

When donating, make sure to donate all the money and tell them to spend it however they like—in Pavel's name of course. Also make sure to drop by the Custodian and tell him about the dead men he sent out into the woods. If you also managed to (stealth) kill the Cumans he'll give you a reward. After that, return to Pavel to conclude the quest.
Quest: The Wicket Gate
After completing 'Bonum Commune' head back to Johanka, and she'll tell you she's had another vision of the Virgin Mary that she needs to share with the world. This time, however, she needs to speak at a meadow near the forest instead of at the market square. Accompany her, and eventually a band of roughnecks will approach the sermon, and you know what that means. I hope you like the taste of broken teeth in the morning.


Give the lads a good ass whooping with your fists and return to your mistress. Now, the next talk with her might be the most important in your life, because you can unlock the Full House Sinner achievement in it. It's also extremely bugged, so don't despair (or do) if you don't unlock it.

To get the achievement you need to have committed, and confess, to all sins Johanka can think of. These are: committing adultery with Lady Stephanie, fornicating with a bathmaid, killing Runt, murdering someone else, committing theft/larceny (stealing something), getting incarcerated, and imbibing too much alcohol.
    Some people who have trouble unlocking the achievement report that having active alcohol/sex/jail buffs seems to do the trick, for me it didn't. Even though I just seen a bathmaid before talking to Johanka she did not comment on my transgression. Returning to 'Go, and Sin No More' and having intercourse with Adela made Johanka comment on my liberal morals though. Hence, my hypothesis is that some time has to pass between committing the sin and talking to Johanka, thus giving the inhabitants of fictional medieval Bohemia the time to gossip about your misdeed. So on my second try I ventured to verify my hypothesis. I committed every sin right before starting the quest and lo and behold! No achievement. Ever nimble as I am quick I continued with my next trick. Now, instead of committing every conceivable sin just before starting this quest, I committed them earlier and did a couple of side quests afterwards (thereby letting the in-game reputation system do it's work). Hence it came to pass that a couple of days after committing all the heinous deeds I continued my virtuous venture with Johanka and verily I got the achievement swiftly. In any case, good luck and congrats to you if you get the achievement!
Regardless, after your chat she will tell you to do penance for your sins, which will start 'The Wicket Gate' quest.

The Wicket Gate
1. Go on the pilgrimage
2. (Optional) Visit the sacred sites and do penance for your sins
3. Pray to Our Lady in the Uzhitz church
4. Make a donation to Uzhitz church
5. Go to Godwin to pick up the manuscript he promised you

Johanka tell's you to wear a penitent's robe and go barefoot to Uzhitz. On the way you will need to pray at several shrines and conciliatory crosses to absolve your sins—at least one per sin. Once in Uzhitz you have to pray to the Virgin Mary at the Church of the Assumption of the Virgin Mary and make a donation. The amount of shrines you have to pray at, and the amount of pecunia you have to pay, are dependent upon how many sins you confessed to Johanka. It's a nice role-playing touch, but not very spectacular to write about, so enjoy the picture gallery filler.
    Oh, and lest forget. If you don't feel like doing penance for your virtual sins, you can just cheat on your pilgrimage by going straight to Uzhitz on your horse and with your boots on. It's not like there's some invisible digital omnipotent being watching over you to see if you do your chores.

Visit the sacred sites and do penance for your sins
Shrine 1. Holy Mary
    Hail Mary, full of grace, the Lord is with Thee. Blessed art Thou amongst women, and blessed is the fruit of Thy womb, Jesus. Holy Mary, Mother of God, pray for us sinners, now and at the hour of our death. Amen.

Shrine 2. Stealing
    Lord Jesus, forgive me for stealing and behaving like a sinful thief. I am ashamed of myself and I won't do it again. From now on I'll be honest and honourable. Amen.

Shrine 3. Taking a life
    God almighty, have mercy on me and forgive me for committing the terrible sin of taking a life. Grant me mercy and let me find peace, I beg you. Amen.

Shrine 4. Prostitutes
    Dear God, forgive me for going with prostitutes and sinning with them. Mary, Mother of God, help me be more virtuous. Amen.

Shrine 5.
Not sure if this is an actual shrine you can pray at, but next to the mill at Merhojed there's one that should be on your path.

Shrine 6. Peace
    My this one has seen better days! I ought to tell someone about it… But now… Almighty God, please grant us peace, that we may rebuild this little shrine… and maybe Skalitz too… Amen.

Shrine 7. Wrongs and dishonest deeds
    Forgive me, Lord, for all the wrongs I have done and the dishonest deeds I have comitted. I promise I'll amend my ways. Amen. [Sic!]

Shrine 8. Lady Stephanie
    Forgive me God, for sinning with Lady Stephanie. Amen.

Shrine 9. Ma and Pa
    I should pray for Ma and Pa… Mary, holy Mother of God, please intercede for my parents. They never did anything wicked. Pray that their souls may find peace in God's Kingdom. Amen.

Shrine 10. Intemperance
    Lord Jesus, I often drank and indulged more than I should have. Please help me overcome my intemperance. Amen.

Pray to Our Lady in the Uzhitz church
Whether you cheated upon your penance or not, eventually you'll have to enter the Marian church in Uzhitz and pray to the holy virgin. Enter the church, walk past the pulpit and pray to the mural of Mary and Jesus.

    Ave Maria, gratia plena… Hmm… I don't know the rest in Latin. But she'll understand my native tongue too, won't she? Holy Mary, Queen of Heaven, merciful Mother… just Virgin, loving… Yes… loving and... and forgiving. Please look down on me and hear me, a great sinner. I want to say sorry and repent… to do penance - for being such a villain, and for all the terrible things I did.

After this intro you'll get a chance to truly repent, or not. Choose whatever fits your mood. If you did so, you'll get a chance to repent for all your sins—again. After that, find Father Godwin and make pecuniary amends to him. Tell him how Johanka rekindled your newly found faith and afterwards he'll tell you to come by him for copy he made of the Matthew of Janow Manuscript—a Bohemian theologian who studied and taught at Paris. He tells you to bring it to Johanka, but you might want to read it first.

And that's that for 'The Wicket Gate'. You can return to Sasau—by horse, armed and dressed to kill if you so prefer.

(Heinrich talks about Johanka to father Godwin)
Quest: The Madonna of Sasau [1]
After your pilgrimage in 'The Wicket Gate' you'll be prompted to go back to Sasau. Being the good lad you are, you immediately do so, only to find out that the cult of personality around Johanka has ended. Her monastery cell is empty, the gifts and makeshift shrine are gone and outside her cell a guard has been posted. Talk to him to find out that Johanka has been arrested by order of the Bishop—goody I didn't even know Sasau had a bishop!

This'll start the last part of 'The Madonna of Sasau' questline. There's no new subquests here. The ending of the quest'll be largely depended upon the choices you make next, however, your past choices in Johanka's questline also matter—and if you decided to be a complete unscrupulous rogue in the previous quests, there is no chance for a good ending here. If you, however, did follow this guide then you should be good for any ending of your choosing.

You'll also have a chance to unlock the last two achievements of the DLC here: Cleric's Pet and Angel of Mercy. The latter requires you to go with the good ending, which will be described here. The former requires you to complete some main and side quests, so do that before talking with the Bishop—once you talk to him you have three (3) days to complete the quest.

The Madonna of Sasau
1. Go Back to Johanka
2. Find out what happened to Johanka
3. Talk to the Inquisitor
4. Once you're prepared for the trial, tell the Inquisitor
5. Try to defend Johanka before the court.

Your first stop will be Brother Nicodemus. He can be found in the alchemy laboratory next to the infirmary. He'll bring you up to speed how an inquisitorial Bishop came to Sasau, interrogated Johanka and had her locked up on charges of heresy. The Bishop has his chambers on the second floor of the monastery complex (next to the Overseer's office).

(Heinrich engaging in conversation with Bishop Jaroslav)

Tell him you want to speak with him about Johanka and he'll be surprisingly candid with you. He'll ask you about your opinion about the whole affair, and you'll have to tell him whatever you know about Johanka and her goings-on at the monastery—no use lying here. Tell him about her honesty and her concern, but also her affair with the Custodian (provided you know about it) and her preferential treatment of the Skalitz' refugees. Next convince him that you want to defend her in court. Do not make stupid quips about the church (i.e. "How does the Church know what's right?") nor try to be a macho (i.e. "I'll defend her in a duel!"), because the Inquisitor will not like that.

At the end of your talk the Inquisitor will 'remind' you of your duty as a good Christian to report anything suspicious to the Church. Of course, if you do so, he will certainly take that into account when pronouncing his sentence over poor Johanka. This is your queue for the Cleric's Pet achievement. It requires you to have already completed several main and side quests in the game. If you did complete all these quests (in the intended way), you get a chance to report six misgiving to him. Do so for the Cleric's Pet achievement (you can also still get the Angel of Mercy achievement while ratting out on everybody).
    For this you need to: get drunk with Father Godwin in Mysterious Ways, find Father Simon in A Man of the Cloth, complete Waldensians, follow the women into the forest in Playing with the Devil, find the skull in The House of God, and catch the monks drinking in the cellar during A Needle in a Haystack—give him a real monk's name (Lucas). If you need to complete any of these do so before talking to the Bishop for the first time. After you talk to him the quest is on a timer and you have three (3) days to complete the quest!

You'll also have a chance to gain some additional reputation and Codex entries by talking with the Inquisitor's assistant. You need neither to complete the quest or the achievements. After you're set and done Heinrich should get ready to find his witnesses and prepare his defense. Make sure to save your game here if you either want a certain ending or if you need to get the Angel of Mercy achievement.

Testimony
1. (Optional) Sir Sebastian's testimony
2. (Optional) Bailiff Hashek's testimony
– Talk to Katra, the swordsmith's wife, about Johanka
3. (Optional) Father Fabian's testimony
4. (Optional) Brother Nicodemus' testimony
5. (Optional) Guta's testimony
6. (Optional) Bath wench Adela's testimony
7. (Optional) Pavel of Kolin's testimony

First go for Sir Sebastian (the Custodian) who's quite near. He seems more than willing to come forward in Johanka's defense. Don't worry, no need to out him on his adulterous relation (yet). Next up Brother Nicodemus. He tells you that he worries and that you should try and convince Johanka—we'll get back to that later. Bath wench Adela can be found wandering around the sick ward, so this is a good moment to get her statement. Continue to Sasau Town and halfway through meet with Pavel of Kolin, conveniently still residing at the Sasau Wagonner's Inn. If you made the donation (any donation) in his name he should be willing to help you out. Now cross the river into town.


(Brother Nicodemus (left), Bailiff Hashek (right), bathmaid Adela (above)

In Sasau town we get Guta (the tailor's wife) statement, and if you did not screw Ambrose over, she should be more than willing to help you out here. Father Fabian (either at St. Martin's Church or walking around the marketplace) seems less enthusiastic about Johanka. Just tell him you'll handle the defense and that's it, we can't expect much from him it seems. The last person at this side of the river will be Bailiff Hashek. He already got called to testify by the Inquisitor, however, he'll also mention to you he saw the Bishop have dinner with Katra, the swordsmith's wife. Aha! The plot thicken's my dear reader. Time for some snooping around.


(Guta, the tailor's wife (left), and Father Fabian at the market (right)

Remember those loudmouth ruffians who were passing libel on Johanka after you got back from a well deserved bath in Ledetchko? And those knaves who blew up what should've been a nice afternoon picnic at the Sasau forest? Well, I got an itch that we're about to find out exactly which woman's cardinal sin is envy. Go to the swordsmith—don't know where he is? Can't blame you with so many smith's in town—his hovel can be found at the edge of town when you're going out to Ledetchko. His wife likes to dress in Bohemia's national colours, i.e. she's the gal with a white headscarf and a red-with-blue dress. You can either intimidate (strength 6) or bluff (charisma 9) her into admitting her guilt.

(Meet Katra, the swordsmith's wife. Someone should tell her envy is a capital vice)

Once everything is set and done, make sure to go to the Bailiff's house (it's the half-timbered house next to St. Martin's Church). Head into the yard, and walk to the back. That's where the town's jail is where they keep Johanka.
Quest: The Madonna of Sasau [2]
Because of Steam's strict rules on the maximum amount of characters allowed per section, The Madonna of Sasau quest walkthrough has been divided in two parts. This is the second part.

Persuade Johanka
1. Try to persuade Johanka to speak with humility
2. Tell Brother Nicodemus how it went
3. Give Johanka the dice from Matthias

If you want to get the Angel of Mercy achievement—which means getting the 'good' ending—you will need to find a way to speak with Johanka (which the Bishop expressly forbade) and convince her to speak with humility before the Inquisitor (and not go on another rant this time). Considering that this is quite a matter of life and death for her, you would suppose that she'd saw the obvious benefits in such an approach. This, however, being medieval Bohemia (and a woman's lot in medieval times obviously being not for the faint of heart), she seems to be rather reluctant to doubt her divine conviction that she is the chosen prophetess of the Holy Virgin.

(Johanka in the dungeon; torchlight added for additional dramatic effect by yours truly)

Go to the Bailiff's house, head into the yard, and walk to the back. There's a shed there with some guards inside that houses the town's jail. To speak with Johanka you first need to weasel yourself past the guard however. You can either bribe yourself through (300 gold),*** go back to the Bishop and pickpocket the Inquisitor's retinue papers from him, or go to Sir Sebastian for help. The Custodian tells you to wait till nightfall and then steal the Inquisitor's document from his chest (you need to pass a very hard lock).

In any case, talk with her about her trial and tell her "You mustn't provoke the Bishop". Johanka, however, tells you how she must be steadfast in her hour of need and spread the word of Holy Mary. Press her some more for a classic 'Et tu, Brutes?' reaction. No matter what you say, you shan't convince her so return to Brother Nicodemus.
    *** Even though the Bishop will rebuke you for bribing the guards and then speaking with Johanka (against his explicit orders), you are still able to get a good ending—provided you did not make too many other transgressions and mistakes.
Tell Brother Nicodemus how you spoke to Johanka and were unable to convince her. Nicodemus already feared as much, if only there was a way to convince her. Perhaps she has some relatives who can talk some sense into her? Hmmm, to bad they did not survive the siege at Skalitz... if only there was some friend she cared about. Who knew her well and could get through to her...

But of course there is! Fellow Skalitz survivor and best friend Theresa at the Rattay mill! The game does not give you any prompts, so you can either go to Theresa, and she'll tell you to talk to Matthias... or skip that and head directly into the sick ward to talk with him (he's awake now, finally and just in the nick of time). If you do (fast)travel to Rattay you get to convey Theresa's best wishes. Narly.

(Matthias would be this fella, lying uselessly in bed for the whole game)

Go to Matthias in the infirmary and show him your totally awesome bedside manners by immediately telling him the bad news about his fiancée. He'll agree that it's better for her to show humility and will hand you Matthias' lucky dice. He'll tell you Johanka will understand if you give them to her. You can once again go to Theresa for the story about the dice (which you'll hear another time—i.e. in Theresa's story of the DLC), or you can bring your message to Johanka straight away. She already seems a bit more complacent when you do, although obviously still in dubio.

Well, and with that, as the old bard said, the game's afoot! (No, not Sir Arthur Conan Doyle, ye othere ol' bard! The one who wrote the play King Henry V—you Sherlock). Once more unto the breach, dear friends, once more!

Der Prozess
    Jemand musste Johan K. verleumdet haben, denn ohne dass sie etwas Böses getan hätte, wurde sie eines Morgens verhaftet...
1. Once you're prepared for the trial, tell the Inquisitor
2. Try to defend Johanka before the court.

This is the moment where all our faiths intersect. If you followed this guide you sure as hell (pardon my French) should unlock the Angel of Mercy achievement at the end—if only you keep your wits now and don't muck up. If you, however, decided to be a naughty boy then you're in for a treat.
    If you don't want the whole scene to be spoiled for you—and it is a dish best served cold—then don't read on. When playing through the DLC for the first time, the trial is best experienced on your own. Try to savour the moment and save our heroine from certain impending doom, if you can! In all other cases, tread valiantly on.
Return to the Bishop. If you didn't do it, now is a splendid time to read Matthew of Janow Manuscript. Also if your speech is abysmal low (if only you had taken that speech boost at the start of the game when mother told you...) this is also the moment to take a Bard's Potion. When you're done tell the Inquisitor you're ready.

(The trial is held within the confines of St. Martin's Church—proceedings are held in secret so there is no scrutiny by the public)

Some basic tips: call all witnesses, use the speech checks to intervene, don't be afraid to do some buttkickin' in the name of righteousness. The following choices are not set in stone though, and you might get the same result with another approach:

1. Johanka's apparitions are real (speech 12)
2. Call Pavel of Kolin
3. Cite Matthew of Janow
4. Call Brother Nicodemus
5. Johanka doesn't bless anyone
6. Call Guta, the tailor's wife
7. Call Adela
8. She's not telling you everything!
9. The Custodian took advantage of her!
10. The Virgin Mary speaks to her
11. Present a clever argument (speech 12)

If you followed this guide, you get to watch a cutscene and the Angel of Mercy achievement should unlock. Congrats! That's also it for the DLC. Johanka's story is over. Afterwards, you can talk to her and the other dramatis personae if you like—and move on to other adventures. To boldly go where no blacksmith's son has gone before.
Epilogue: Endings
The game features three endings: a good ending, a bad ending, and a neutral ending. While the differences, for Johanka at least, are fundamentally different. They are not so different to achieve. Elementary, my dear reader, you can get each ending by how you conduct the trial. If you're really immoral there is also a secret ending (more like an easter egg).

The Good
To get the good ending, you basically have to follow this guide. I.e. don't be an inconsiderate neo-liberal feeble-minded person who cares nothing about a woman's lot in medieval times and thinks Johanka is just a religiously brainwashed zealot. Instead be like Gary Cooper—the strong, silent type. To get this ending you will need to:

1. Be supportive of Johanka, tell her you trust her
2. Return Ambrose's money either to himself or his wife
3. Have no sexual intercourse with Adela
4. Donate all of Pavel's money in his name and tell the benificiaries to spend it however they seem fit
5. Read Matthew of Janow's Manifest
6. Call all witnesses, intercede whenever possible during trial, and challenge the swordsmith's wife
7. Make damn sure to convince Johanka to show humility before the Inquisitor or you shan't ever get this


The Bad
A sure way to get the bad ending is simply not to convince Johanka and let the trial run it's course. You can also get a bad ending by behaving like a narcissistic egoistic violent and inconsiderate lunatic during the whole questline. Cheat people out of their money, don't keep your word, get on the Inquisitor's bad side, lie to him and get locked up, et cetera.


The Neutral
You get a neutral ending either by failing some quests, or by not being able to convince Johanka. In fact, I reckon most people don't get the achievement because they fail to get Johanka to recant her beliefs, even though they solved the rest of the quest formidable. You can be the most saintly of players, even the Cleric's pet, but if Johanka pisses of the Inquisitor it's game over.


The Secret
There is one more way to end this quest—and your game—for good. Simply sneak into the Bishop's quarters at night and assassinate him.

FAQ: Frequently Asked Questions
Q: I don't get Matthew of Janow's Manifest in Uzhitz. Can't even pickpocket or kill him.
A: if u want to get the BOOK from Godwin u must walk all the way there and pray at the shrines. Honourable mention to @MIR-12 for clarifying this.

Q: Who the hell is Heinrich?
A: Heinrich, in simple terms, is German Henry. I decided to play through the game with the German dub because, well you know, people didn't talk like a British sodden dweep in medieval Bohemia and Bohemia being part of the Holy Roman Empire... Oh blimey sakra, go read the in-game Codex. Let's just say the name stuck.

Q: German dub?
A: Yeah, it's amazing how it changes the whole game experience, I strongly recommend you to turn it on under the game settings. You can even download the official HD Voice Pack German for the German dub, available from Steam here.

Q: So, how do you get all the quest names and dialogue options right, must be a lot of work translating all that stuff!
A: You'd be surprised how much effort I put into these guides... They should pay me for my effort and build me a statue!

Q: Incredible! I appreciate the effort can I tip you? Paypal? Credit card? Money wire? Bank transfer?
A: Whoa, take it easy! I was just joking. For writing this guide I simply switched the subtitle language to English. It changes all written text in the game (both in dialogue and in your journal) to English. Narly, isn't it?

Q: Isn't that really confusing though?
A: Nope, not really.

Q: Are you also going to write a guide on the other A Woman's Lot achievements?
A: No, unfortunately not. I've already played through Theresa's story and have no interest of revisiting it now or in the near future.

Q: Why not? I have yet to unlock Theresa's achievements!
A: While her story is immersive and well-designed, her achievements are also infinitely easier to get. In addition, there are already easily accessible guides and snippets available on how to unlock them.

Q: What is your outfit? Looks neat.
A: Heinrich is wearing: a black chaperon (turns out burgundy in-game!), red-and-green padded coif, red dyed Milanese brigandine, black pourpoint, dark combat jacket, hunter's gloves, red-white miparti hose, and nobleman's boots. Sometimes, when Heinrich goes out for a stroll, he also wears his mail collar, chausses and hauberk.

Q: Help! Some pictures aren't showing up!
A: Yeah, I know. Sometimes Steam Guides seems to randomly wipe uploaded images out from existence. The only thing that seems to work is reuploading the pictures, so just give a holler if the problem persists.

Q: Did you write any other KCD-related guides?
A: Yes, actually I did. I tried to fill in the gaps with the Friend's without Benefits Steam guide, the (Not-so-)Christian Burial and Ledetchko Revenant walkthrough, the Wingman + True Friend achievement guide, and the complete Band of Bastards DLC walkthrough and achievement guide. In addition, I tried to compile all available knowledge on the KCD achievements in the Kingdom Come: Deliverance 100% Achievement Reference Guide.

Q: Did you use any guides while writing this walkthrough?
A: Yeah I did, although I found most of them to be rather esoteric. However, a big shout out to PainOfDemise for this very clear and concise A Woman's Lot Roadmap[www.playstationtrophies.org]. I also used the hints provided by various users on Trueachievements[www.trueachievements.com] and the snippets in Ary's KCD Steam Guide.
61 comentarios
N*rd 18 MAR a las 9:44 
@LowFatMilk Same to me.

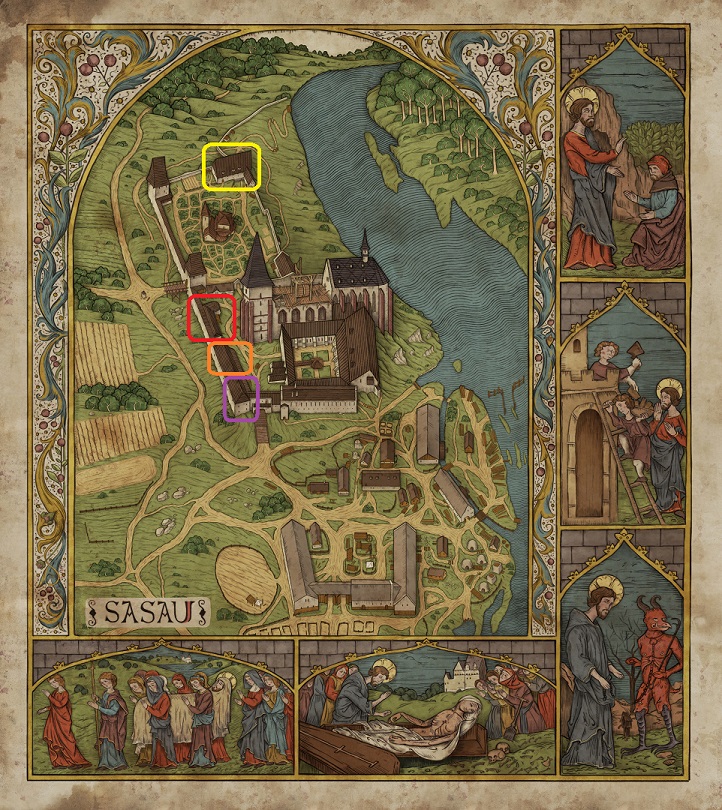
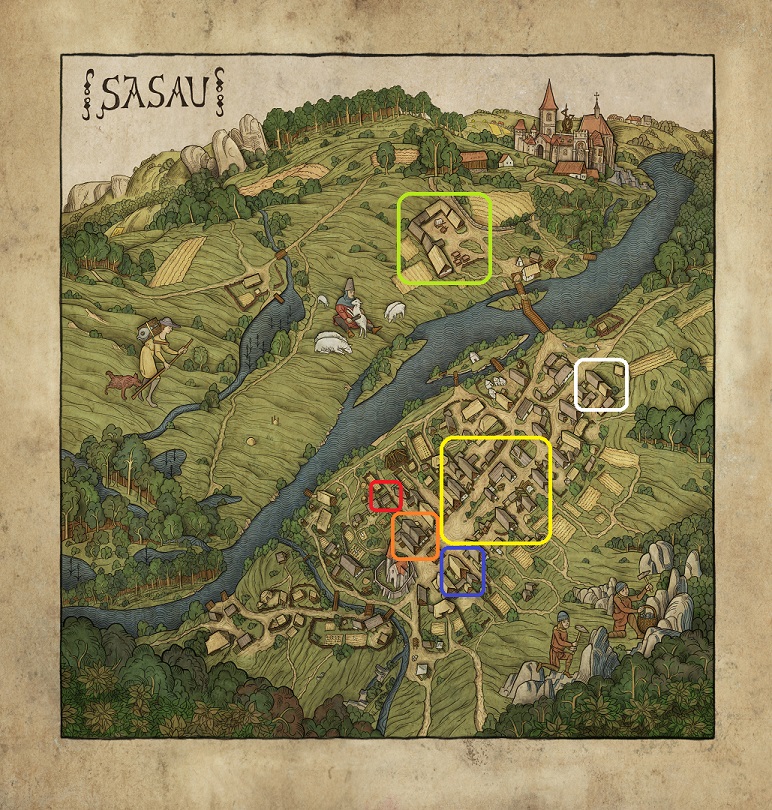
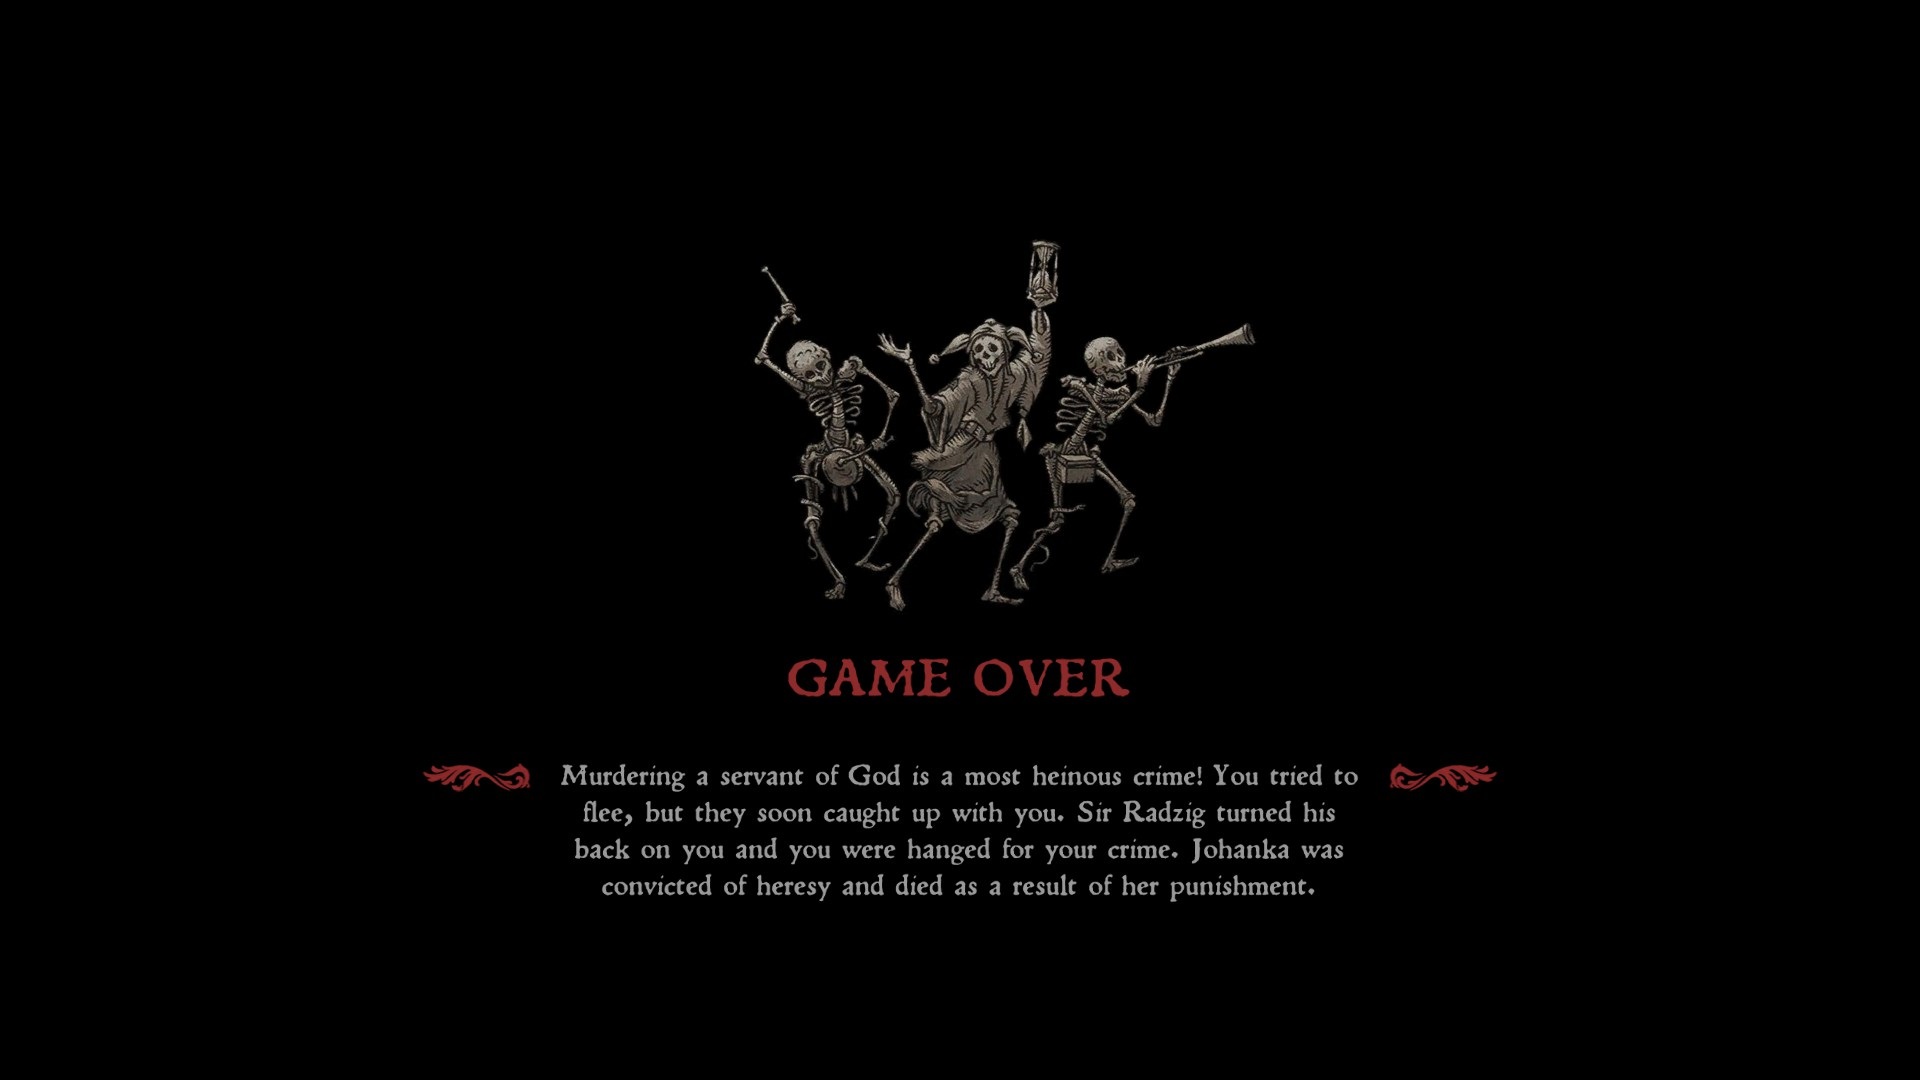
I had a jailtime when i was in the monestary.
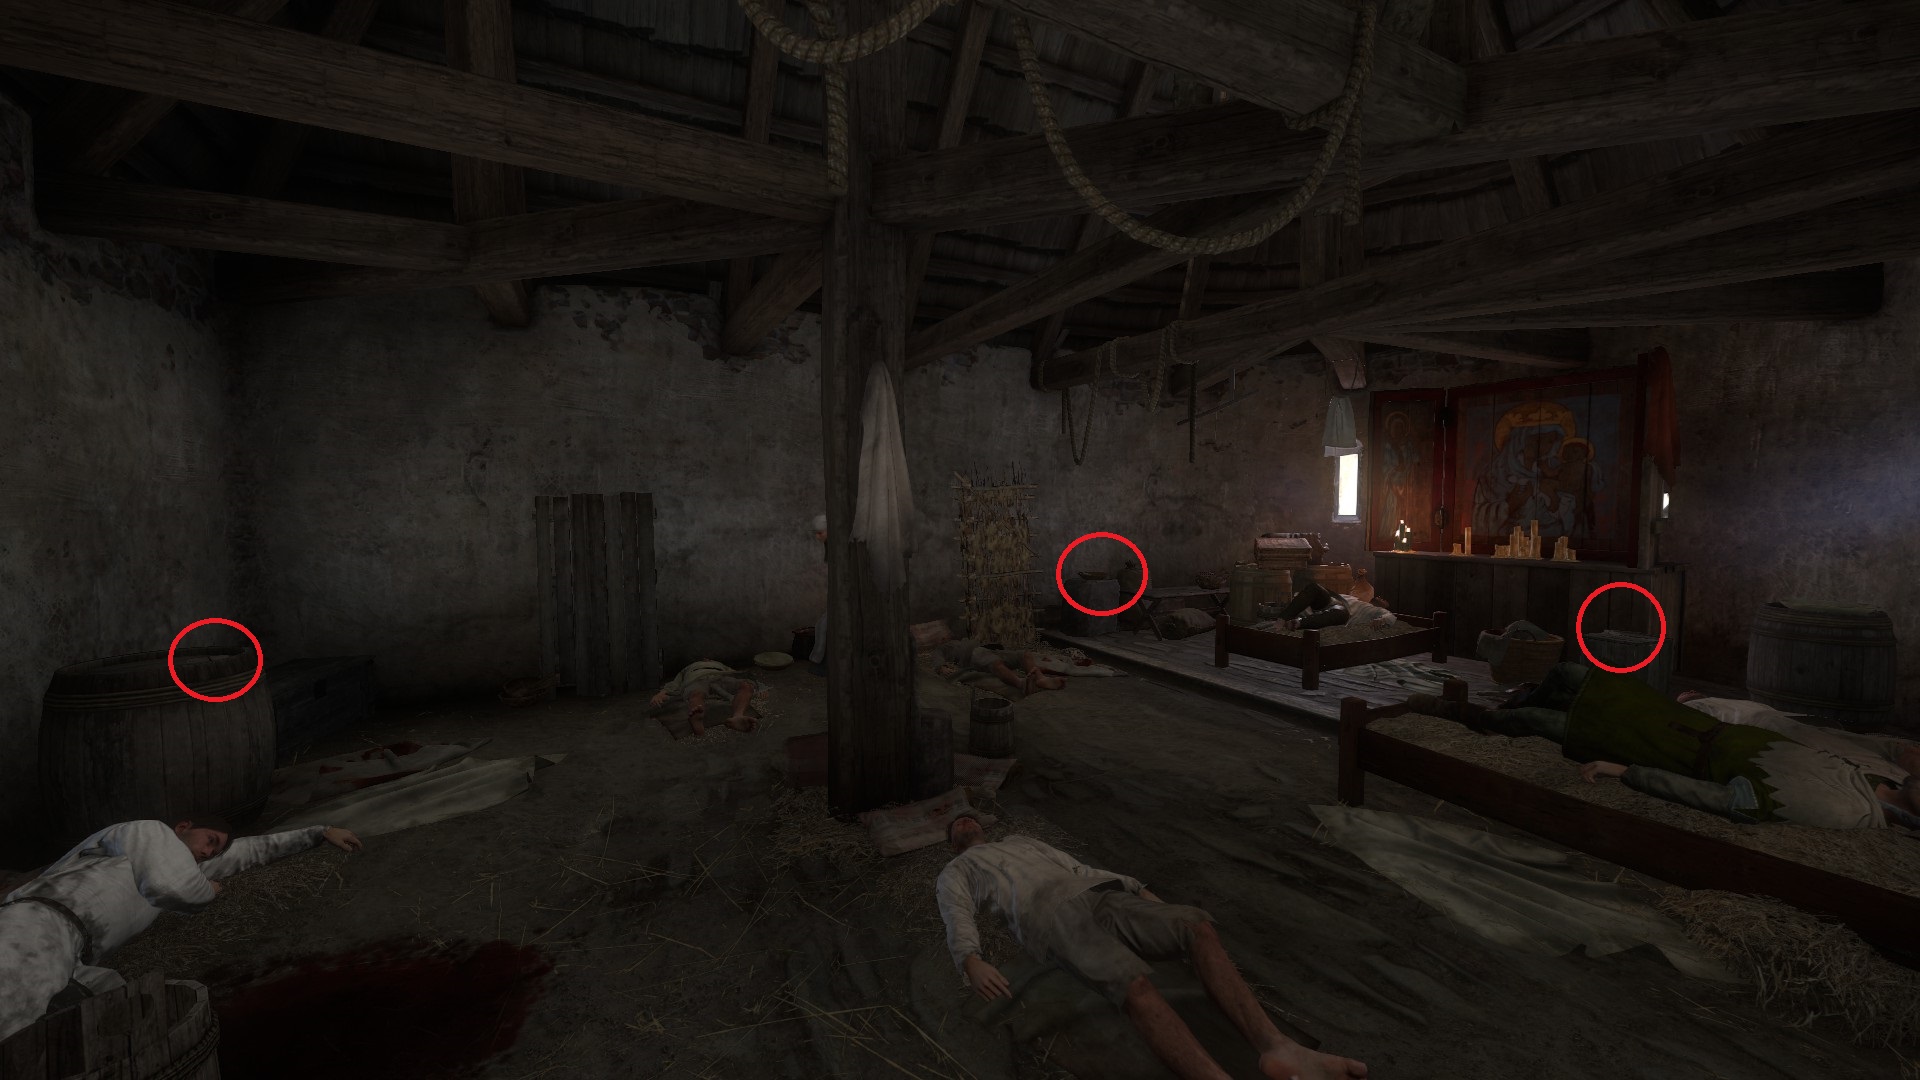
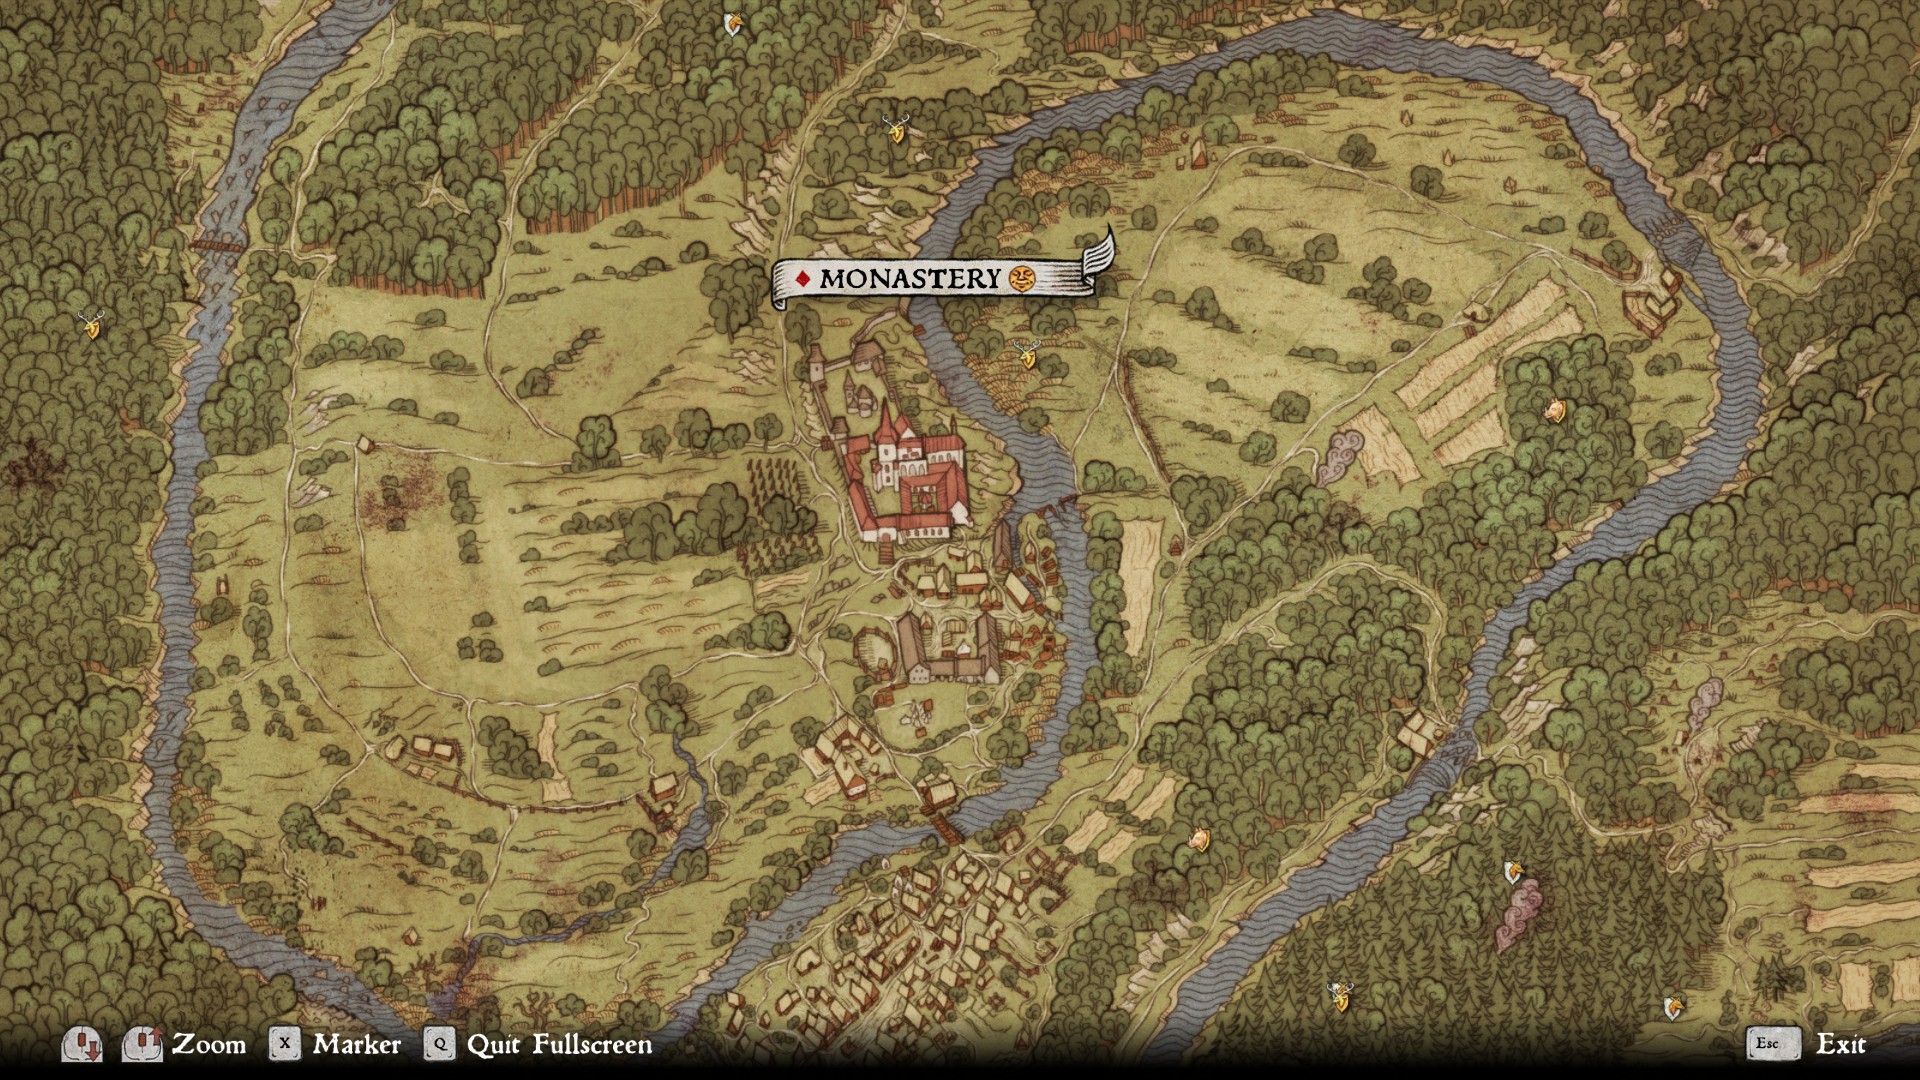
also i went full exterminatus in the monestary - its now basically empty.
LowFatMilk 5 MAR a las 0:09 
Amazing guide

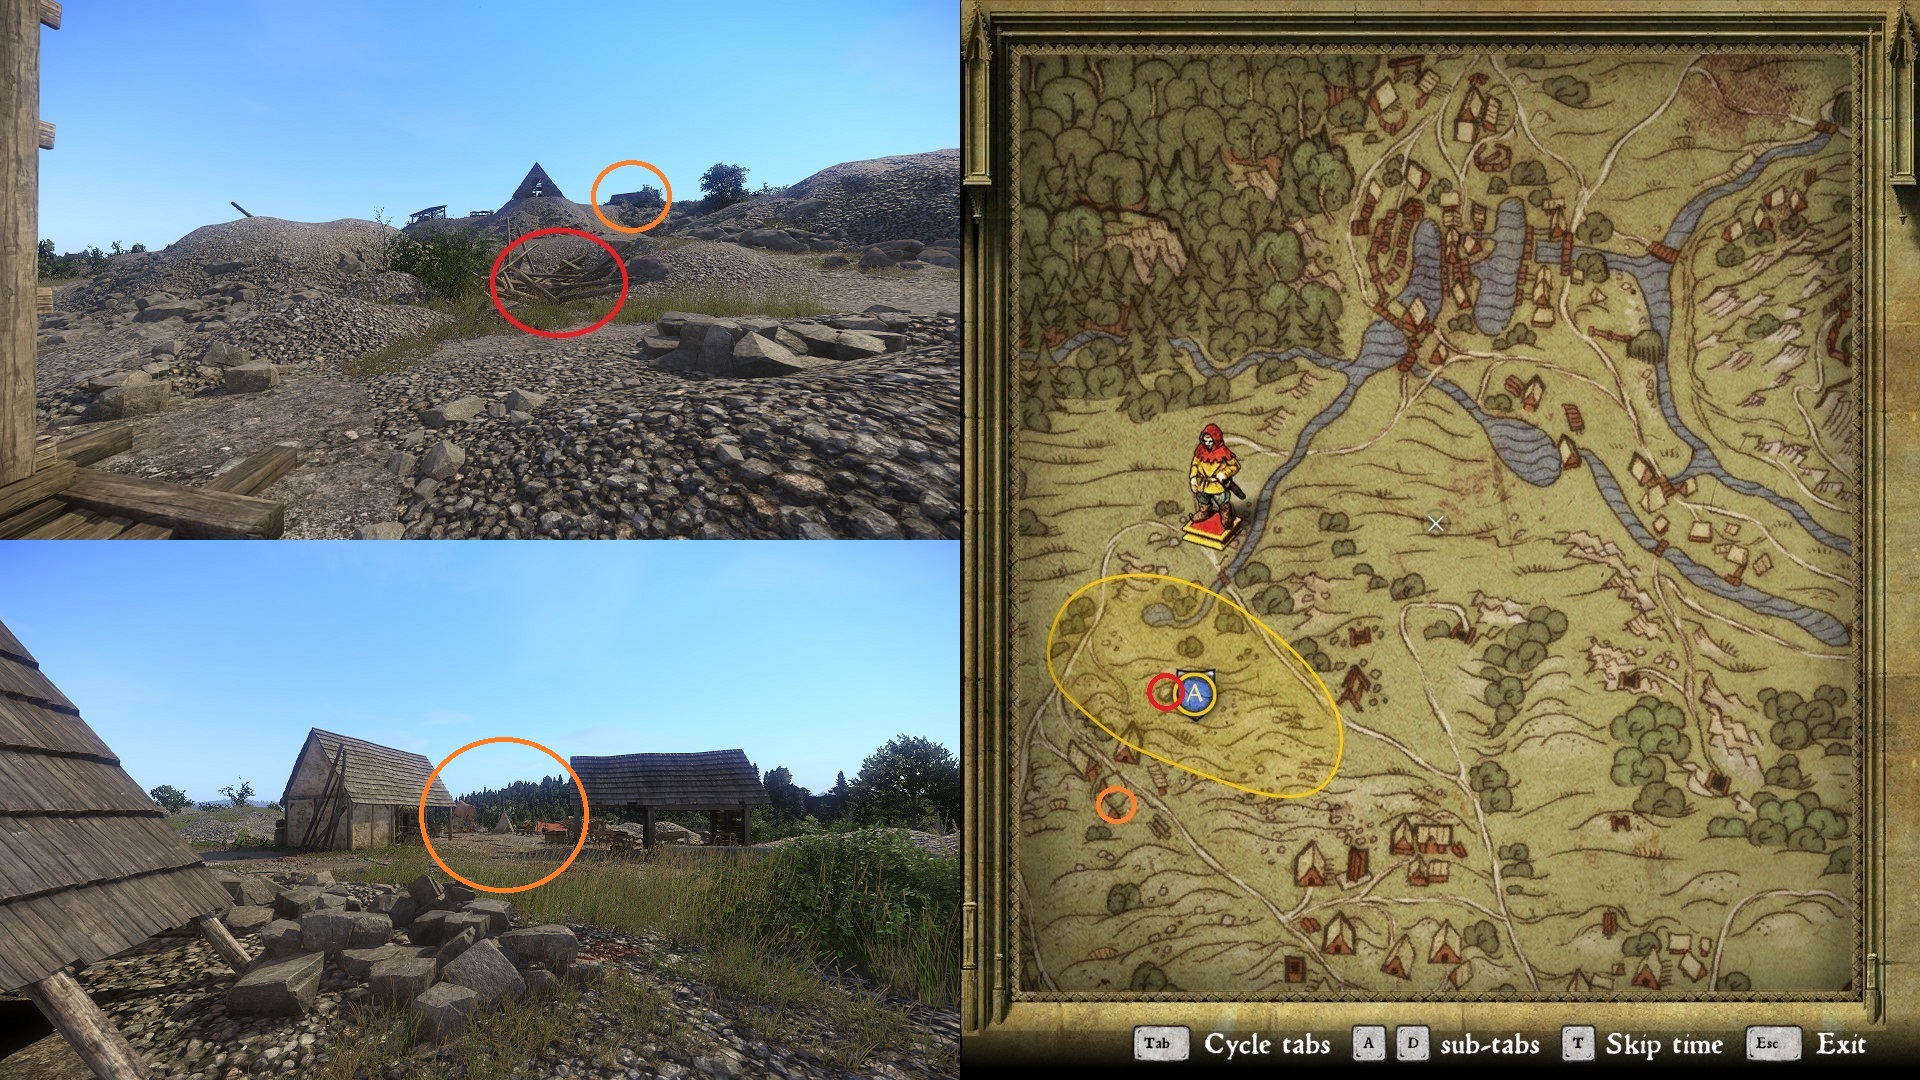
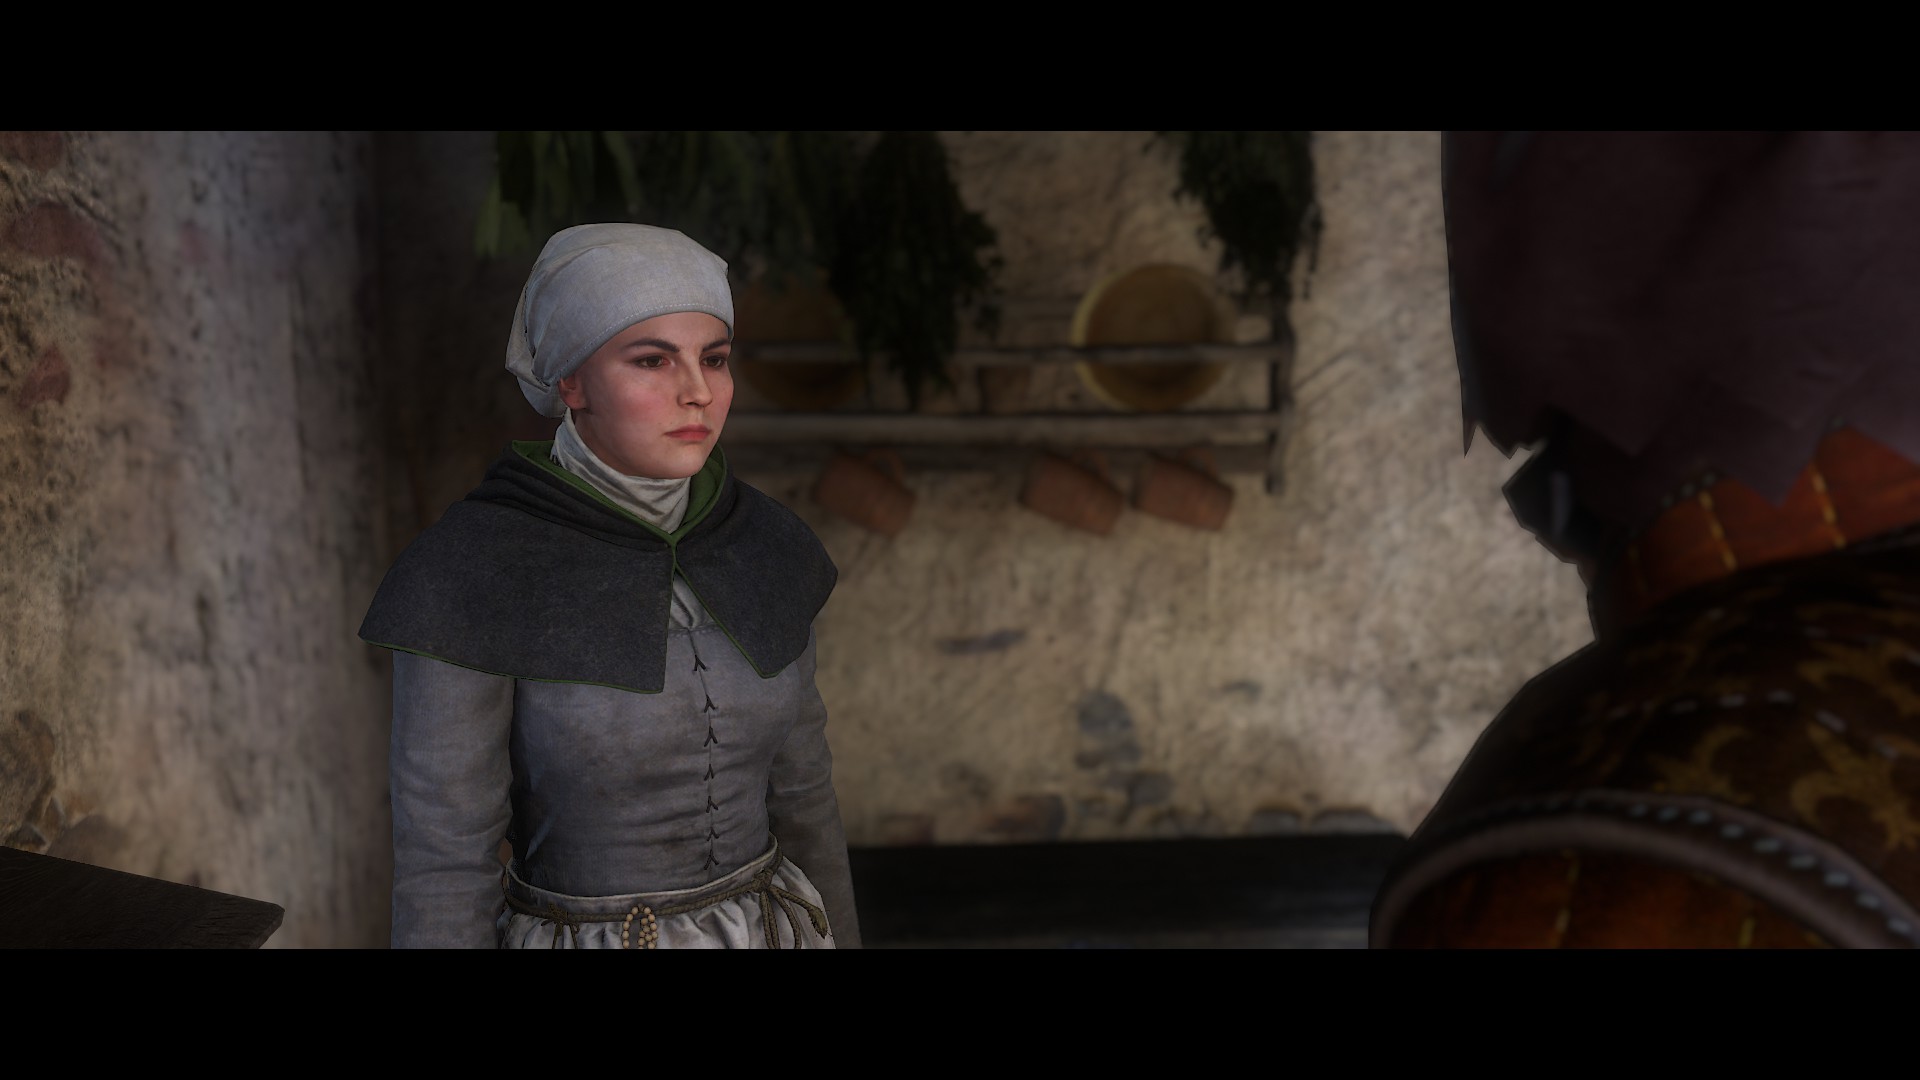
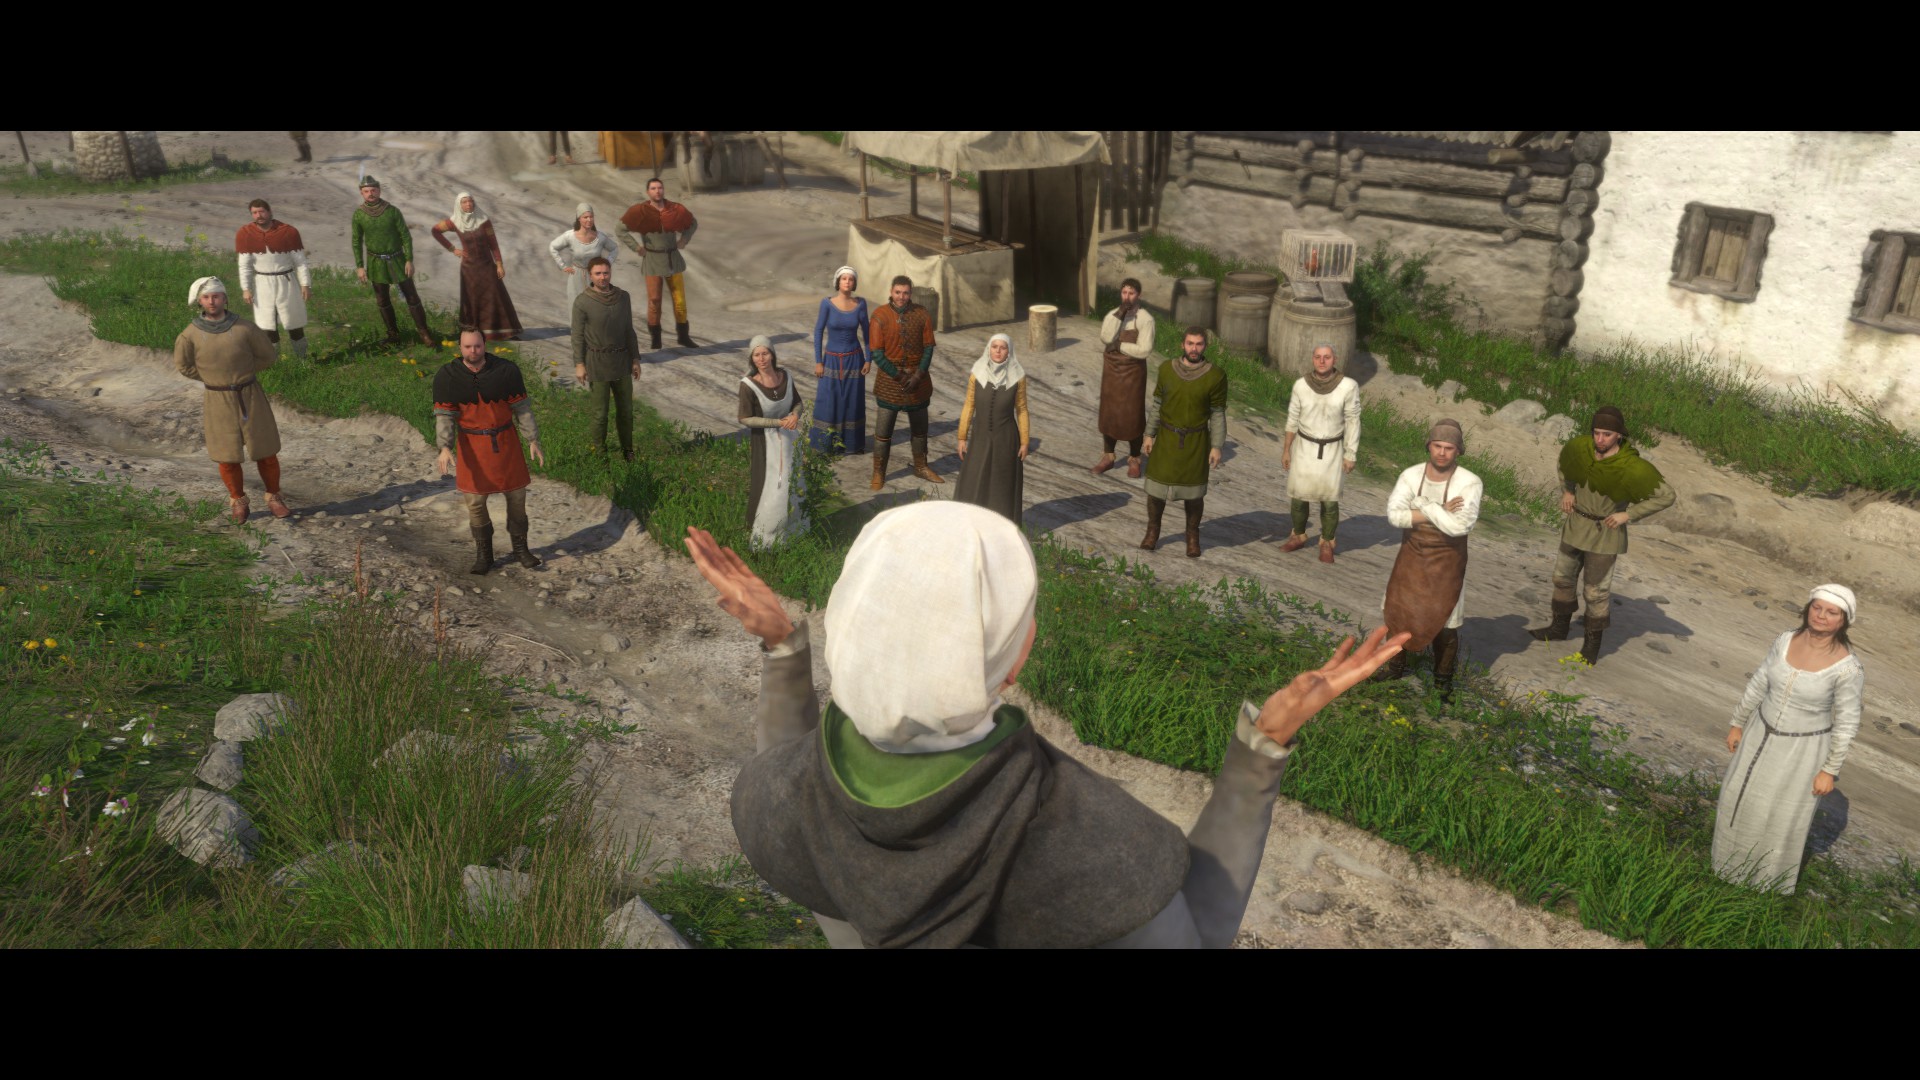
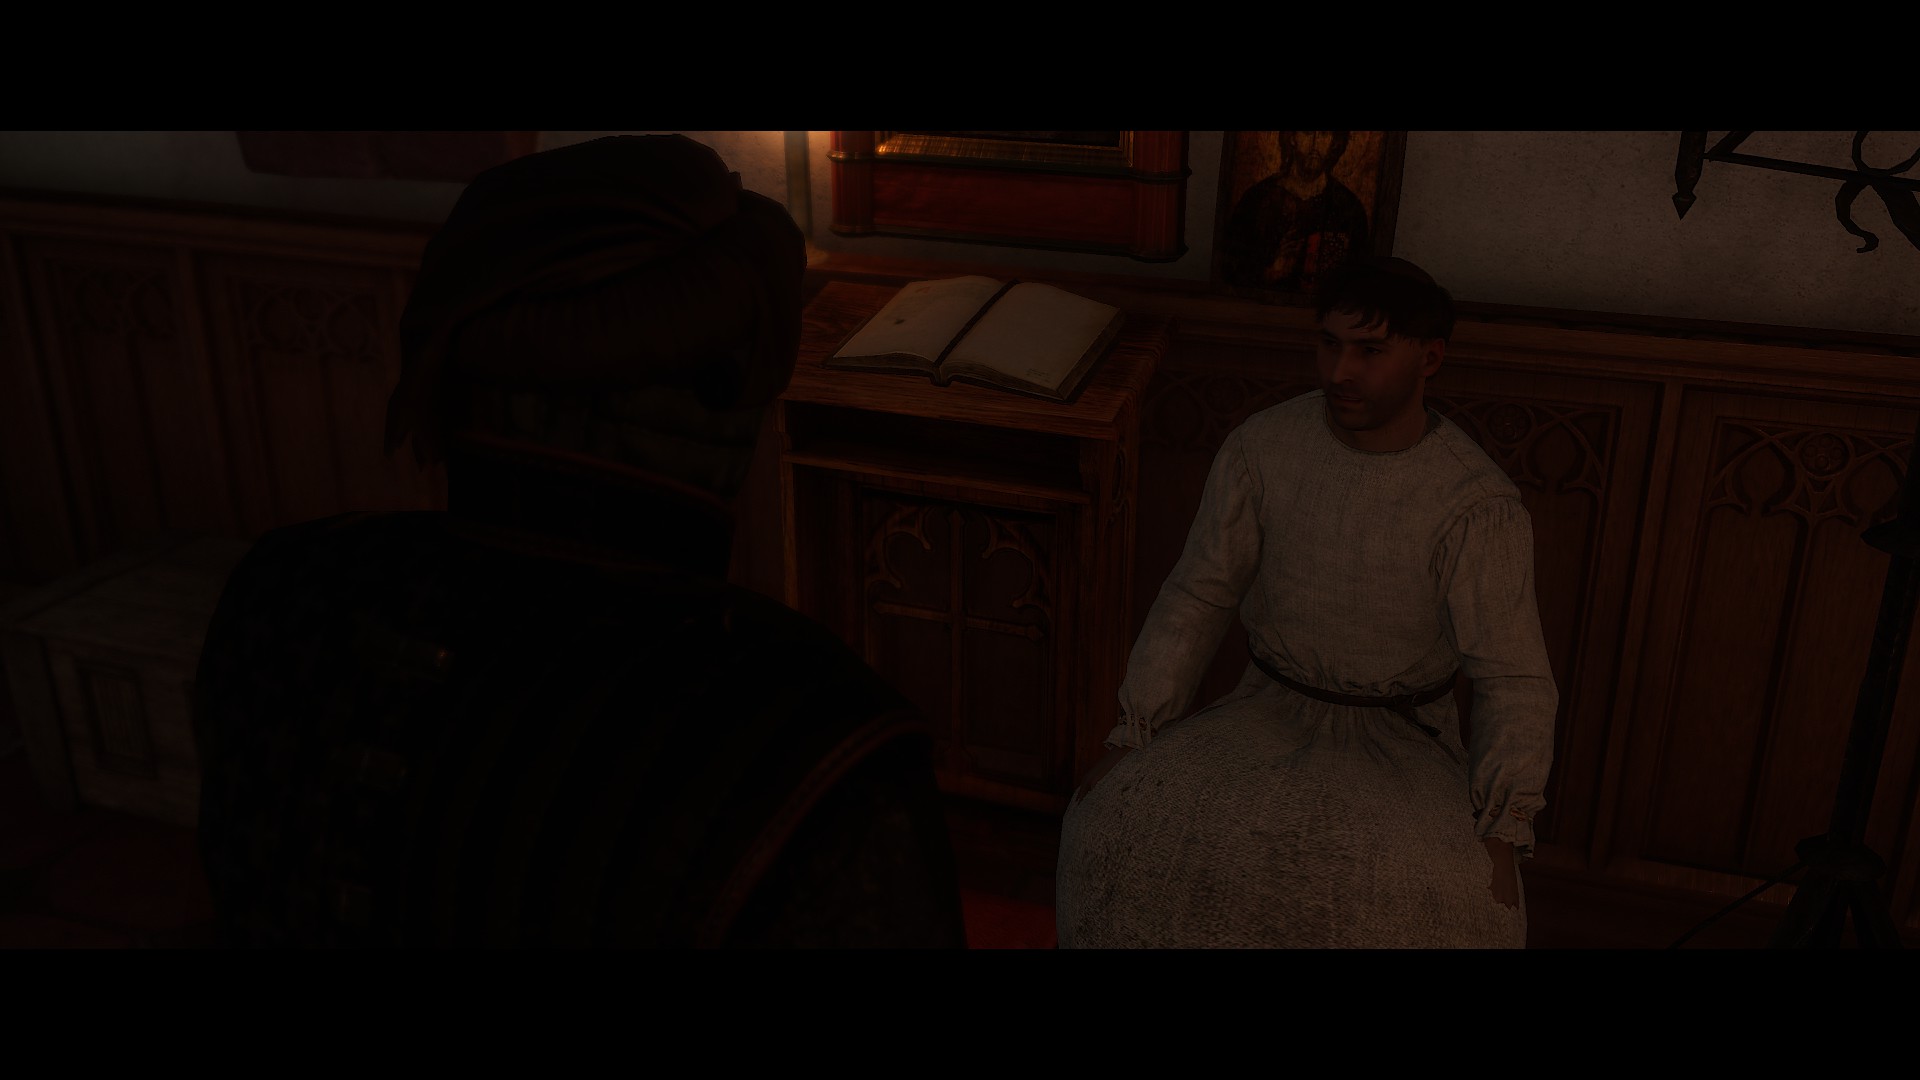
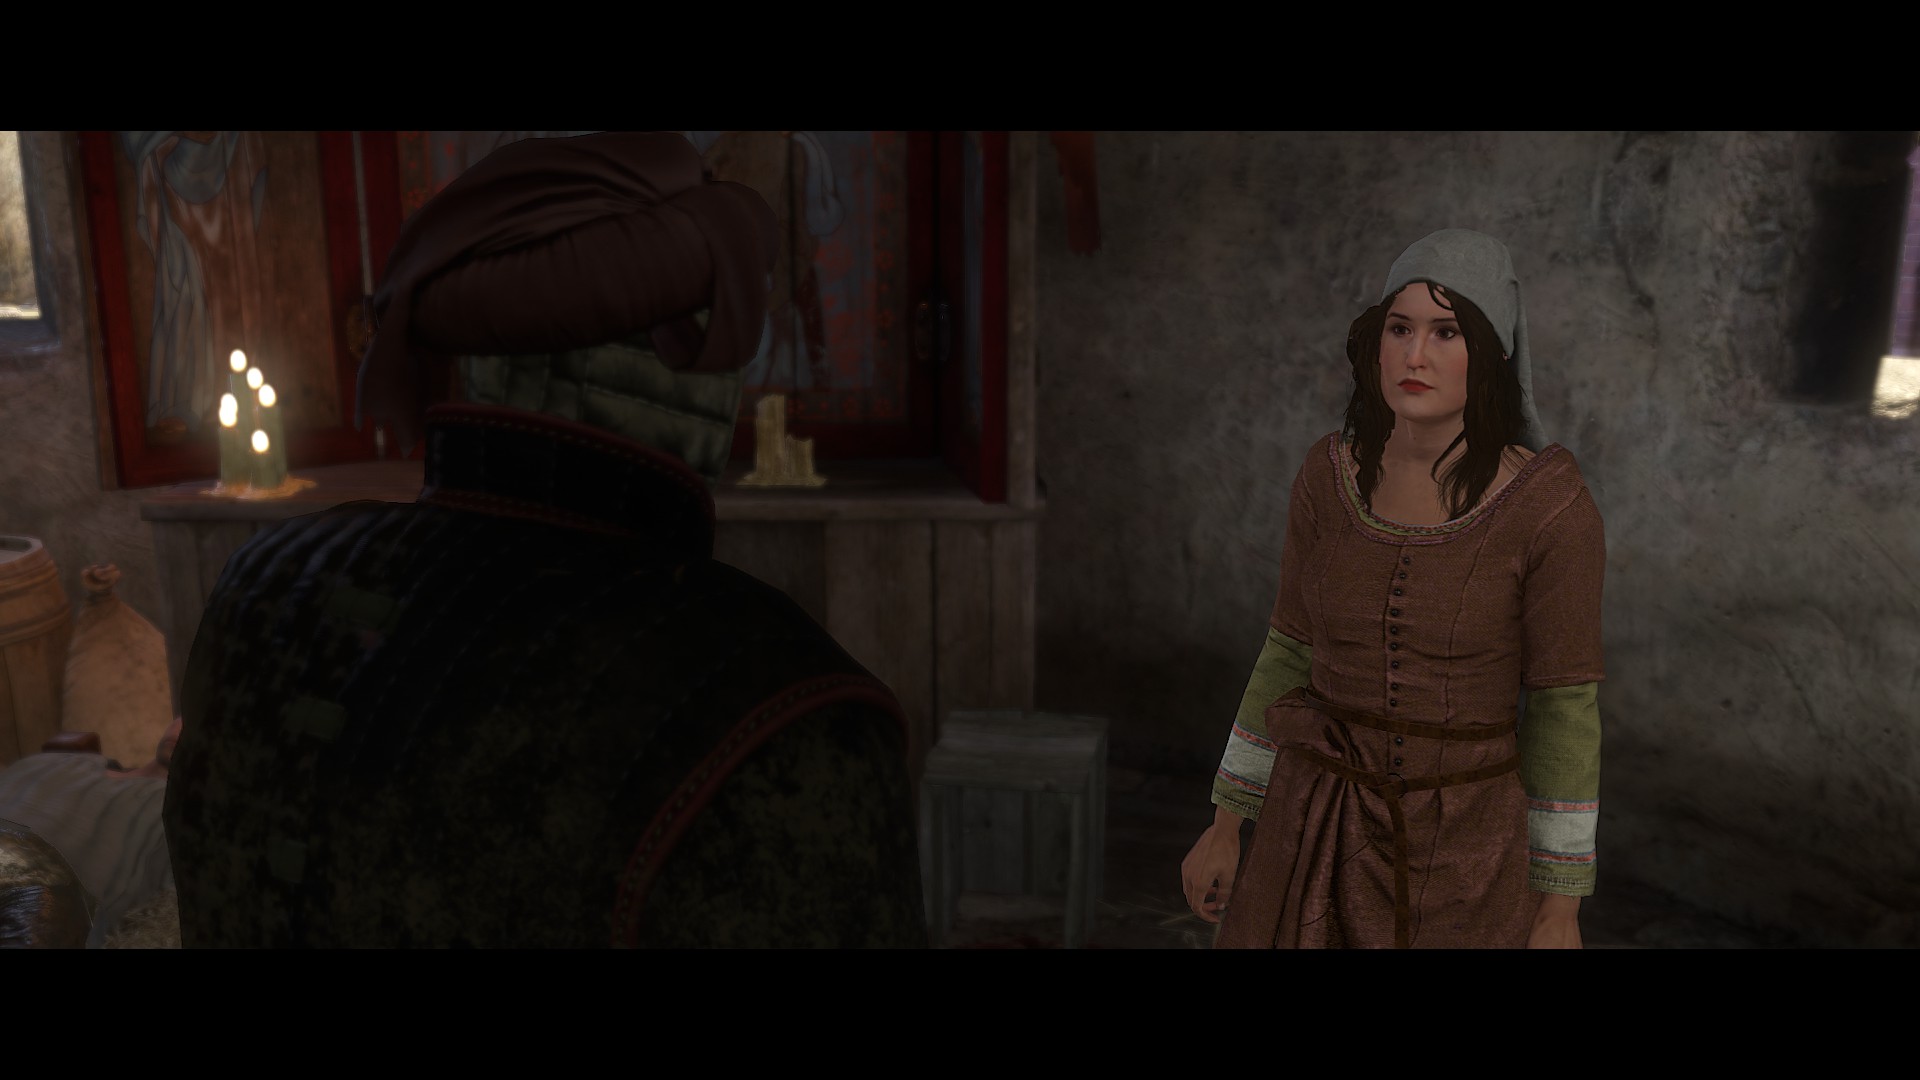
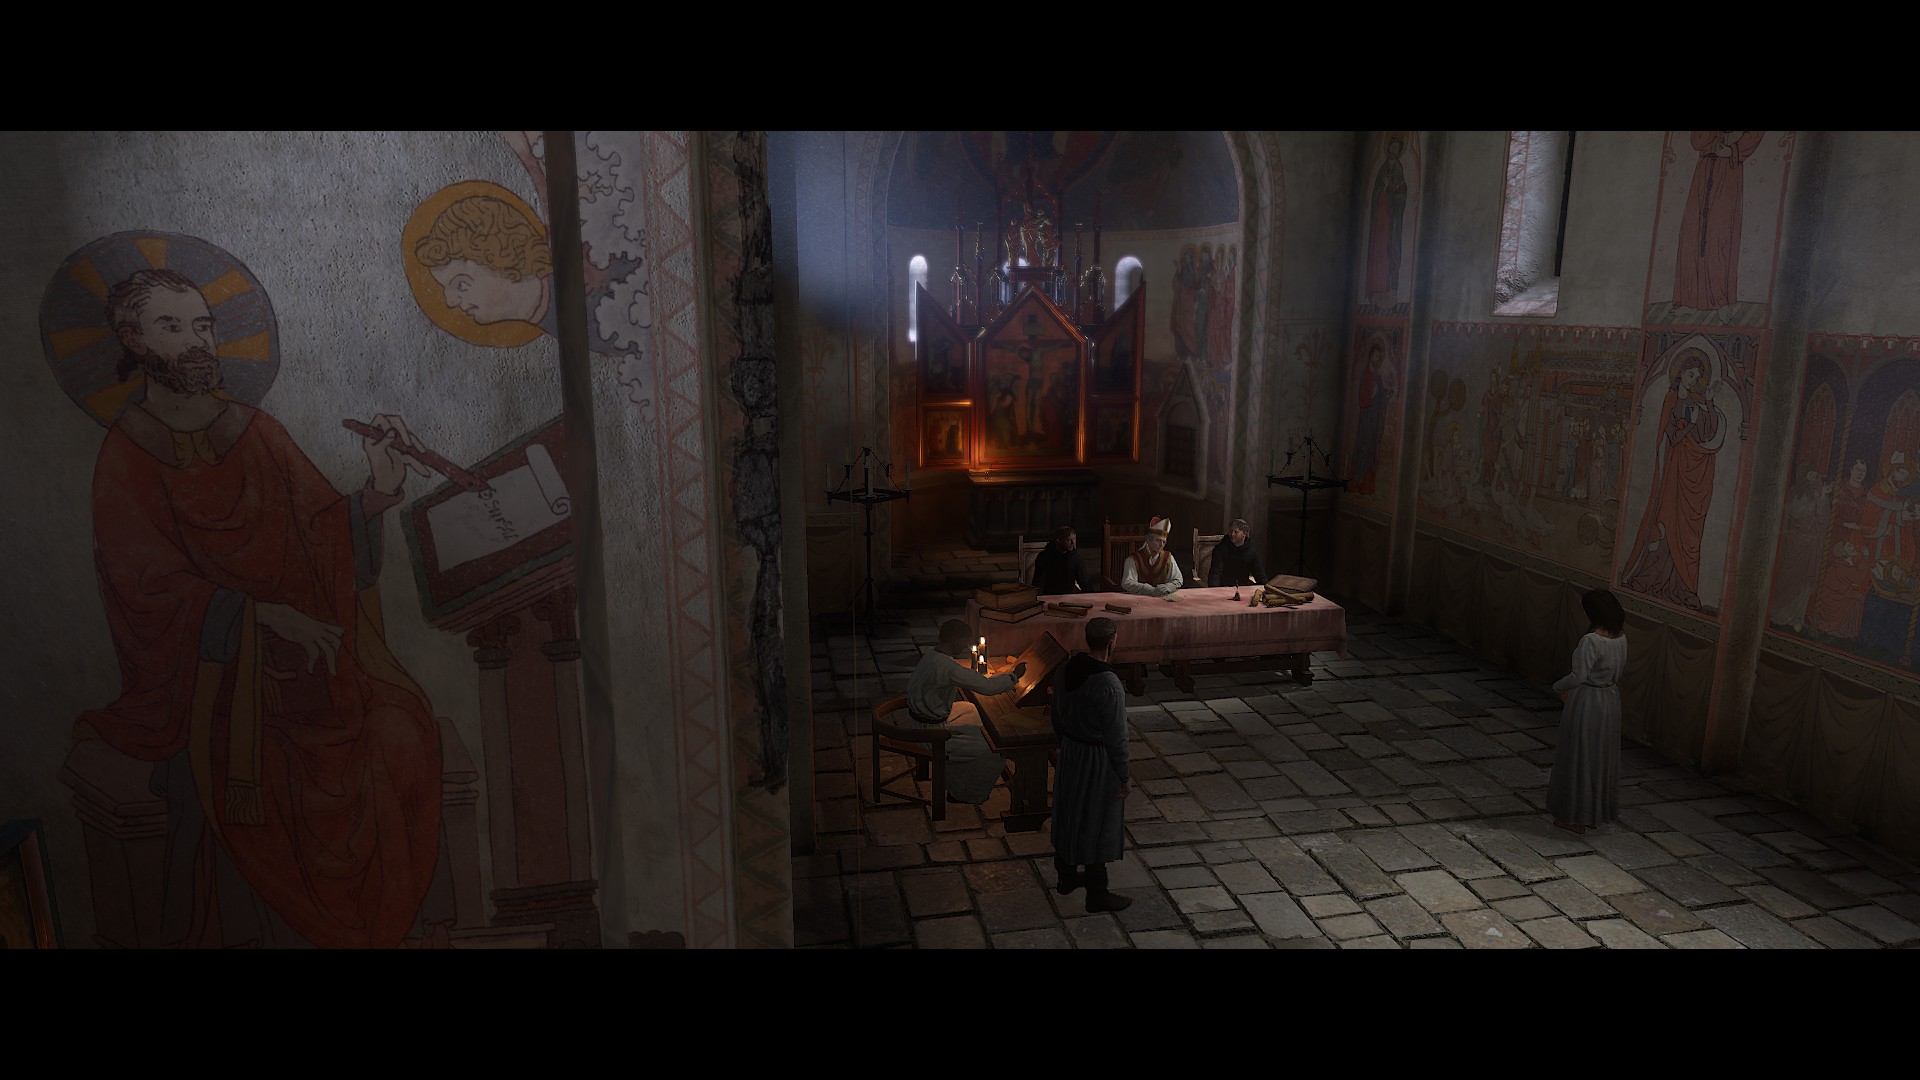
A note from me with the Full House Sinner achievement - This achievement popped up for me as soon as I beat up the group of men at the meadow sermon, then spoke to Johanka. She said "I have another sinner I need to deal with" and it popped up.

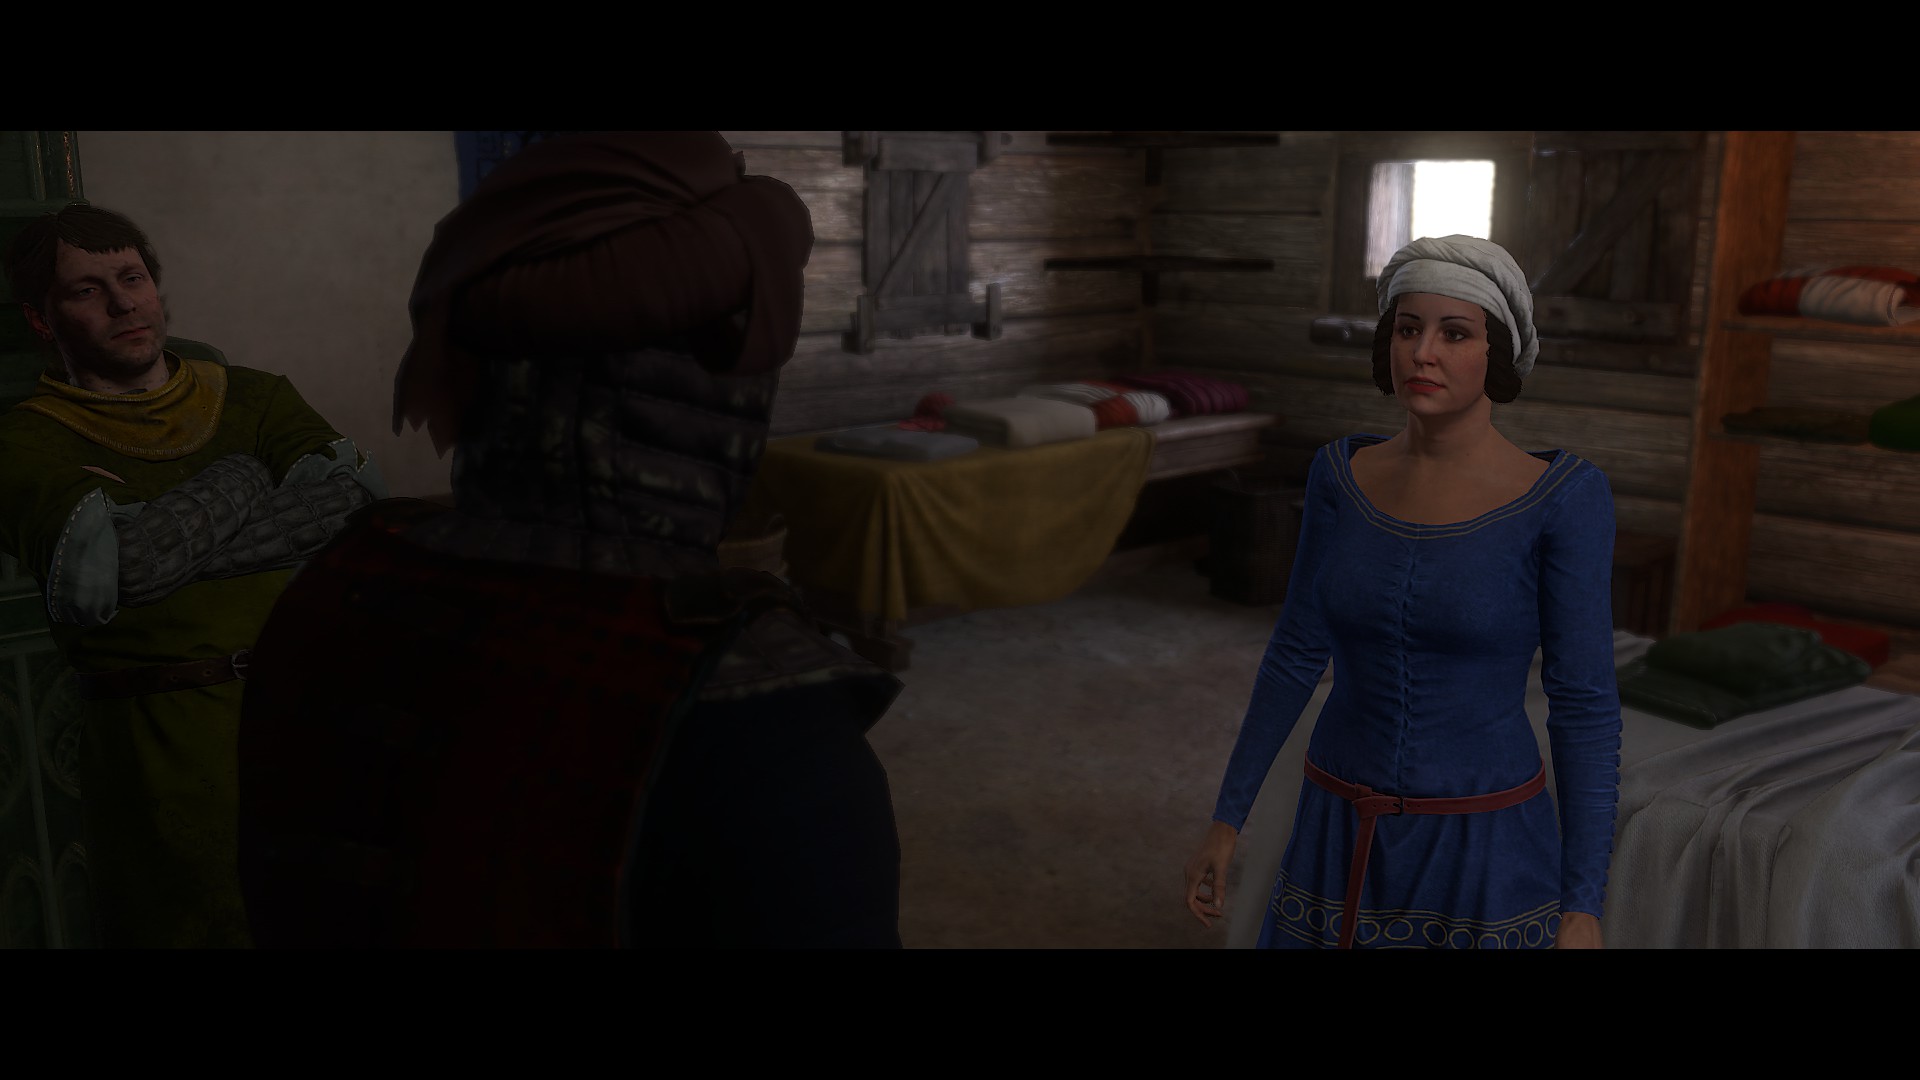
I accepted Lady Stephanie's offer
Used the bathhouses several times, just to be sure
Danced with the devil women
Drank with Father Godwin
Murdered a few villagers and other randoms (never once got caught)
The ONLY time I spent any period in jail was from Sebastian Von Berg putting me there in the earlier quest aiding the sick and injured
Stole a LOT of shit over the course of my playthrough

All of this was done over 100 in-game days, so plenty of time to spread the word around towns.
N7 Kobold 28 FEB a las 15:29 
Great guide, helped a ton.
big Hat arxm 18 FEB a las 17:20 
I received the book from Godwin and rode the entire journey although I did pray at every shrine.
TreeTrunk 12 ENE a las 4:38 
Angel of Mercy was so difficult as I didn't know about Matthias getting better and the Janos book but I finally got it thanks to this guide. I need another play through for Cleric's Pet though :csdmeh:
Linio 25 DIC 2024 a las 4:26 
Same than @Lumi here : the donation of the money is INDEED important since otherwise Pavel will deny the participation on the trial, locking you out of the final achievement. It's a pity because the guide is really good, but this should be corrected, otherwise it derails completely the end of the quests... :/
Cade 22 NOV 2024 a las 20:27 
I have another warning related to `Cleric's Pet` achievement. For the quest `A Man of the Cloth`, you have to proceed with the Father Simon path, if you pay the Sasau priest instead and finish the quest that way, you'd be locked from getting the Cleric's Pet achievement since you won't be able to report about Simon's to the Inquisitor.
Cade 16 NOV 2024 a las 23:16 
I think I know what's happening. Before talking to the wife, but already starting 'Casting Lots', I accidentally pickpocketed Ambrose in the inn, hence he doesn't have any money left in his pocket when I'm about to proceed the quest. Fuck now I have to reload and redo the whole monastery quest that I did in paralel.
Cade 16 NOV 2024 a las 22:54 
In Casting Lots when talking to Ambrose for the first time (speaking how he's about to leave to Kuttenberg and he lacks money in the inn), my quest failed instantly. Can't find anything on google either, is my game bugged or is this a consequence of something?
l'homme rouge 11 OCT 2024 a las 23:17 
@Razmir 's comment must be added to this guide, it's dealbreaker which you can not take back.