Sid Meier's Civilization VI

Sid Meier's Civilization VI

35 个评价
Zigzagzigal's Guides - Mongolia (R&F)
由 Zigzagzigal 制作
Come the medieval era, the world shall tremble beneath the hooves of the Mongolian cavalry. Here, I detail Mongolian strategies and counter-strategies.
   
奖励
收藏
已收藏
取消收藏
Legacy Guide
If you have the Gathering Storm expansion, click here for the updated guide.

This guide is no longer updated, but will remain for the sake of those without the Gathering Storm expansion.
Introduction
Note: This guide requires the Rise and Fall expansion.

Content from DLC packs (Poland, Vikings, Australia, Persia/Macedon, Nubia, Khmer/Indonesia) is marked as such.

The sins of the Earth shall be met with divine punishment, and it falls upon us to deliver it. Let us set aside our petty internal squabbles for a greater cause. Together we shall ride forth beyond the plains, the mountains, the rivers, the seas and the ends of the earth to create our masterpiece. An empire without bounds.

How to use this guide

This guide is divided into multiple sections explaining how best to use and play against this specific civ.
  • The Outline details the mechanics of how the civilization's unique features work and what their start bias is (assuming they have one at all).
  • The Victory Skew section describes to what extent the civ (and its individual leaders where applicable) are inclined towards particular victory routes. This is not a rating of its power, but rather a general indicator of the most appropriate route to victory.
  • Multiple sections for Uniques explain in detail how to use each special bonus of the civilization.
  • Administration describes some of the most synergistic governments, government buildings, policy cards, age bonuses, pantheons, religious beliefs, wonders, city-states and Great People for the civ. Only the ones with the most synergy with the civ's uniques are mentioned - these should be given more consideration than they would be for other civs but are not necessarily the "best" choices when playing as the civ for a given victory route.
  • Finally, the Counter-Strategies discusses how best to play against the civ, including a consideration of leader agendas if the civ is controlled by a computer.

Note that all costs (production, science, culture, gold, etc.) mentioned within the guide assume a game played on the normal speed settings. To modify these values for other game speeds:
  • Online: Divide by 2
  • Quick: Divide by 1.5
  • Epic: Multiply by 1.5
  • Marathon: Multiply by 3

Glossary

Terminology used in this guide and not in-game is explained here.

AoE (Area of Effect) - Describes bonuses or penalties that affect multiple tiles in a set radius. Positive examples include Factories and Stadiums (which by default offer production and happiness respectively to cities within a 6 tile radius unless they're within range of another building of the same type) and a negative example is nuclear weapons, which cause devastation over a wide radius.

Beelining - The strategy of obtaining a technology or civic quickly by only researching it and its prerequisites. Some deviation is allowed in the event that taking a technology or civic off the main track provides some kind of advantage that makes up for that deviation (either a source of extra science/culture or access to something necessary for a eureka or inspiration boost.

CA (Civ Ability) - The unique ability of a civilization, shared by all its leaders. Unlike unique units, buildings, districts and improvements, civ abilites do not have to be built.

Compact empires - Civs with cities close together. This is useful if you want to make use of districts that gain adjacency bonuses from other districts, maximise the number of copies of the same district in the same area, or to maximise the potential of area-of-effect bonuses later in the game.

Dispersed empires - Civs with cities that are spread out. This is useful if you want to ensure cities have plenty of room for both districts and tile improvements. Civs with unique tile improvements generally favour a more dispersed empire in order to make use of them, as do civs focused on wonder construction.

GWAM - Collective name for Great Writers, Artists and Musicians. All of them can produce Great Works that offer tourism and culture, making them important to anyone seeking a cultural victory.

LA (Leader Ability) - The unique ability of a specific leader, which like civ abilities do not have to be built. Usually but not always, they tend to be more specific in scope than civ abilities. Some leader abilities come with an associated unique unit on top of the standard one every civ has.

Prebuilding - Training a unit with the intention of upgrading it to a desired unit later. An example is building Slingers and upgrading them once Archery is unlocked.

Start bias - The kind of terrain, terrain feature or resource a civilization is more likely to start near. This is typically used for civilizations that have early bonuses dependent on a particular terrain type. There are five tiers of start bias; civs with a tier 1 start bias are placed before civs of tier 2 and so on, increasing their odds of receiving a favourable starting location.

Complete information on start biases within the game can be found in the Civilizations.xml file (find the Civ 6 folder in Steam's program files, then go through the Base, Assets, Gameplay and Data folders to find the file). DLC and Expansion civs have a similarly-named file in their corresponding folders. If a civilization is not listed as having a start bias there, it does not have one, even if you feel like you keep spawning in the same terrain when playing as that civ.

Super-uniques - Unique units that do not replace any others, and are hence particularly unique. Examples include India's Varu and Mongolia's Keshigs.

Tall empires - Empires that emphasise city development over expansion, usually resulting in fewer, but bigger, cities.

Uniques - Collective name for civ abilities, leader abilities, unique units, unique buildings, unique districts and unique improvements.

UA (Unique Ability) - A collective name for leader abilities and civ abilities.

UB (Unique Building) - A special building which may only be constructed in the cities of a single civilization, which replaces a normal building and offers a special advantage on top.

UD (Unique District) - A special district which may only be constructed in the cities of a single civilization, which replaces a normal district and offers some unique advantages on top. In some cases, there may be minor disadvantages as well, but these are always outweighed by the positive features. All unique districts cost half as much to construct relative to the regular districts they replace.

UI (Unique Improvement) - A special improvement that can only be built by the Builders of a single civilization. Unlike unique buildings or districts, these do not replace a regular improvement. Some require a technology to unlock, and many have their yields improved with later technologies. "UI" always refers to unique improvements in my guides and not to "user interface" or "unique infrastructure".

UU (Unique Unit) - A special unit that may only be built by a single civilization, and in some cases only when that civilization is led by a specific leader. These usually replace an existing unit and offer extra advantages (and occasionally minor disadvantages as well in exchange for bigger advantages).

Wide empires - Empires that emphasise expansion over city development, usually resulting in more, but smaller, cities.
Outline
Start Bias


Mongolia has a tier 2 bias towards horse resources. Both Genghis Khan's leader ability and the UB benefit from access to horses making this a useful bias to have.

Civilization Ability: Örtöö
  • Sending a trade route automatically creates a trading post in the destination city, including cities owned by you.
  • With at least one trading post present in a civ, gain 1 level of diplomatic visibility. This persists even through war.
  • For every level of diplomatic visibility you have with a civ higher than they have with you, gain +6 strength and religious strength instead of +3.

Genghis Khan's Leader Ability: Mongol Horde


  • All light and heavy cavalry units, as well as Keshigs, gain +3 strength.
  • All light and heavy cavalry units, as well as Keshigs, have a chance to capture other light and heavy cavalry units when they are killed.
    • The weaker the defeated unit is, the more likely they are to be captured.
    • Keshigs do not need to be adjacent to a unit to capture them.
    • Captured units start with 25 health and their moves depleted for the turn.
    • Eligible units to be captured include unique light and heavy cavalry units and Scythia's Saka Horse Archers, but not Egypt's Maryannu Chariot Archers.
  • Captured Scythian Saka Horse Archers do not gain these bonuses.

Unique Unit: Keshig


A medieval-era ranged land unit which does not replace anything

Research
Obsoletion
Upgrades from
Upgrades to
Cost
Maintenance
Resource needed

Stirrups
Technology
Medieval era

Ballistics
Technology
Industrial era
None

Field Cannon
(??? Gold)
180 Production
or
720 Gold
or
360 Faith*
3 Gold
None
*Purchasing units with faith requires the Grand Master's Chapel government building, which requires either the medieval-era Divine Right or renaissance-era Exploration civics.

Strength
Ranged Strength
Moves
Range
Sight
Negative Attributes
Positive Attributes
30 Melee Strength
40 Ranged Strength
4 Movement Points
2 Range
2
  • Unable to capture cities
  • -17 strength vs. city defences
  • Does not exert zone of control
  • Ignores Zone of Control
  • Allow formation units to inherit its movement speed

Notable features
  • Compared to Crossbowmen, Keshigs:
    • Cannot be upgraded into
    • Have a vulnerability to anti-cavalry units and bonuses
    • Have 2 additional movement points for a total of 4.
    • Ignore zone of control
    • Allow formation units to inherit its movement speed
      • Units affected include attached civilian units (such as Great Generals) and support units (such as Siege Towers) but not religious units.
      • To use this ability, move the Keshig, not the unit it's in formation with.
      • This works even if the formation unit has no remaining movement points.
      • This works even if the units are embarked.

Unique Building: Ordu


An classical-era Encampment building which replaces the Stable

Research
Prerequisites
Required to build
Cost
Maintenance
Pillage yield

Horseback Riding
Technology
Classical era

Encampment

Must not already
have a Barracks in
the city.

Armoury

Military Academy
105 Production
or
420 Gold
or
210 Faith*
1 Gold
None
*Purchasing Encampment buildings with faith requires you to be suzerain over the Valletta city-state.

Fixed yields
Other yields
Citizen slots
Great Person points
Miscellaneous effects
1 Production
1 Housing
None
1 Commander
(1 Production and 1 Culture)
1 Great General Point
  • Light cavalry, heavy cavalry and siege units trained in this city gain 25% more experience from combat.
  • Light cavalry, heavy cavalry and Keshig units trained in this city gain +1 Movement Point.

Positive changes
  • Light cavalry, heavy cavalry and Keshig units trained in this city gain +1 movement point.
    • This is kept when the unit is upgraded.
Victory Skew
In this section, the civ is subjectively graded based on how much it leans towards a specific victory type - not how powerful it is. Scores of 3 or more mean the civ has at least a minor advantage towards the victory route.

Leader

Culture

Domination

Religion

Science
Genghis Khan
4/10
(Acceptable)
10/10
(Ideal)
6/10
(Decent)
3/10
(Acceptable)

Though Mongolia isn't really intended for cultural victories, they offer some small bonuses that may help (in addition to simply capturing high-tourism spots from other civs). A boost to diplomatic visibility helps you get to level 2 (Open) status, which tells you when civs are starting construction of wonders - letting you know which wonders you can risk building and which you can't. Instant trading posts help you trade with more distant civs sooner for the 25% tourism boost. Finally, Keshigs can escort units like Naturalists and Archaeologists over vast distances rapidly.

Domination is the obvious route. Mongolia requires a bit of set-up for maximum effectiveness, but they can take down other civs at alarmingly fast speeds once they get going. Mongolia does have the disadvantages of being heavily reliant on cavalry units and needing to track down iron to create Knights to complement Keshigs, but those are manageable problems.

Religious victory is surprisingly effective - so long as you can found a religion in the first place. Mongolia's civ ability boosts the strength of religious units in theological combat, and getting to a high level of diplomatic visibility is much easier in peace than war.

Finally, Mongolia isn't really suited to scientific victories either, unless you've captured a lot of high-science or high-production cities.
Civilization Ability: Örtöö (Part 1/2)

I send a trade route...


...I immediately get a trading post...


...and a level of diplomatic visibility!

Much like France, Mongolia has an advantage to learning more about their opponents. Unlike France, Mongolia emphasises the direct strength benefits of diplomatic visibility, rather than its espionage role.

Making use of this ability is easy. All you need to do is send a trade route to a city owned by another civ, preferably one that you don't intend to capture early in a potential war. Early on, if there's more than one possible civ to send the route to, it's a good idea to send the trade route to whichever civ is more likely to declare war on you so you have the strength bonus ready just in case.

Diplomatic Visibility Mechanics

Diplomatic visibility lets you find out more about what's going on in a civ, and helps you fight them more effectively.

Firstly, here's what's revealed at each level of diplomatic visibility:

Level
Name
Revealed
Notes
0 Diplomatic Visibility
None
  • Declaration of war
  • Conquered city
  • Founded religion
  • Used nuclear weapon
Everyone who has met this civ will know about this.
1 Diplomatic Visibility
Limited
  • Founded city
  • Made trade deal
  • Revoked trade deal
  • Denouncement
  • Changed government
  • Made alliance
This gives you a clue to the civ's relationship with other civs. Learning about founded cities gives you an insight into how powerful the civ is even if you can't see all their territory.
2 Diplomatic Visibility
Open
  • Reveals secret agenda*
  • Constructed district
  • Started wonder
  • Recruited Great Person
In singleplayer, revealing secret agendas makes it easier to play the diplomacy game and work out what other civs want. Otherwise, this level is great for knowing who's building lots of wonders - in other words, who a good target is.
3 Diplomatic Visibility
Secret
  • Finished technology or civic
  • Trained Settler
  • Sent envoy to city-state
  • Formented unrest
  • Neutralised governor
This gives you much clearer information on where a civ is on the technology or civics tree. Knowing when a civ has just researched certain technologies gives you a good clue to their real power. This level also gives you a bit of information about a couple of specific Spy operations - formenting unrest will cause Barbarian units to appear in a civ's lands, while neutralising a governor could create a temporary hit to loyalty in addition to some more specific effects.
4 Diplomatic Visibility
Top Secret
  • Changed victory goal*
  • Preparing for war*
  • Launching attack*
  • Started project
  • Obtained nuclear weapon
Weaker in multiplayer than singleplayer, but it still lets you know exactly when a civ is constructing spaceship parts or nuclear weapons. If they're building spaceship parts, be prepared to send some Spies over to disrupt it.
*Does not work against human players; only AI civs.

If you have a higher level of diplomatic visibility with a civ than vice versa, you'll gain a +3 strength bonus per level. For Mongolia, this is doubled to +6. The following table shows what that can mean:

Mongolia's Diplomatic
Visibility Advantage
Mongolia's Strength
Advantage
-4 Diplomatic Visibility
-12 Strength
-3 Diplomatic Visibility
-9 Strength
-2 Diplomatic Visibility
-6 Strength
-1 Diplomatic Visibility
-3 Strength
0 Diplomatic Visibility
0 Strength
1 Diplomatic Visibility
6 Strength
2 Diplomatic Visibility
12 Strength
3 Diplomatic Visibility
18 Strength
4 Diplomatic Visibility
24 Strength
Civilization Ability: Örtöö (Part 2/2)
Using the Strength Bonus

Because Mongolia's strength bonus gets stronger the higher diplomatic visibility you can get, you'll want to find a range of bonuses to it that work in war-time. These include:
  • Mongolia's bonus for having a trading post present in the target civ.
  • Researching the renaissance-era Printing technology.
  • Sending a Spy on a Listening Post mission to the target civ (requires the renaissance-era Diplomatic Service civic). Unlike other Spy missions, this provides you the benefit immediately. Consider sending the Spy to a low-priority city you don't intend to capture early in the war, but not the same one you have a trading post in in case a third civ captures it.
  • Using the modern-era Great Merchant Mary Katherine Goddard.

If your target civ has any of those advantages against you, then your strength bonus will be weakened.

The trick to making the most of this bonus is to push for the Printing technology once you're done with Stirrups, and getting to Diplomatic Service fairly soon so you can set up your first Spy. Don't delay your Knight/Keshig wars in order to get these bonuses first - you can work towards them while your wars are still ongoing.


Germany has only level 0 diplomatic visibility on me, and I have level 3 diplomatic visibility on them - granting me a +18 strength boost!

Both Printing and Diplomatic Service aren't commonly high-priority research targets for civs, so you should be able to get a considerable bonus through the early parts of the renaissance era. Nonetheless, into the late parts of the renaissance era, prepare to see wars become considerably harder as your civ ability's strength bonus is slashed and Pike and Shot units arrive to cause trouble for your Knights and Keshigs.

Advanced Trading Post Usage

Mongolia's instant trading posts are largely used to quickly establish a diplomatic visibility bonus against civs, but they don't have to be used that way. Your own established trading posts in cities also grant you +1 gold when your trade routes pass through them, and reset the range of the routes, allowing them to travel much further.

To make the most of this bonus, you'll want to have at least a couple of Traders available. Send the first to a distant city, and then you can immediately use the second to trade to a more distant city via the first one. Other civs would have to wait quite some time to be able to trade that far! Aside from the slight bit of extra gold, this also helps you establish diplomatic visibility in civs that are further away. Considering the world will probably turn on you after your first war, getting trading posts up in as many civs as possible as soon as possible is a good idea. Still, even if other civs pillage your routes, you'll still enjoy having those trading posts immediately active.


Setting up a trading post in every other full civ grants you 3 era score, or 5 if you're the first civ in the world to do so. Mongolia should usually be able to achieve this.

Summary
  • Send traders to cities of full civs that you're unlikely to capture early in a potential war
  • Once you have the Stirrups technology, research the Printing technology and Diplomatic Service civic as soon as you can for extra diplomatic visibility.
Unique Building: Ordu


Though the Ordu's effect seems minor at first glance, it grants Mongolia a near-unrivalled speed advantage on land allowing you to take down other civs at an alarmingly fast rate.

Preparation

The Ordu UB requires Horseback Riding, though the Encampment district requires Bronze Working. It's not a bad idea to work towards Bronze Working as early as possible in preparation. If you're having difficulty getting the eureka boost for it, switch to researching towards Archery, the Wheel or Writing for a bit so you have time to kill some Barbarians.

Getting early Encampments will help you on your way to your first Great General, but don't neglect expansion as well - at a minimum you should have three cities reasonably early so they can share the load of unit production. Researching Bronze Working also reveals iron, which is needed to train Knights or upgrade heavy Chariots to them - be sure to settle one of your cities near an iron spot, or else you'll have to fight your wars using inferior Horsemen.

You'll also want some Monuments so you can get to key civics like Political Philosophy, Feudalism and Mercenaries sooner, and a good Campus or two to cut down the time needed to reach the key Stirrups technology, which unlocks both Knights and Keshigs. Eventually you'll want Commercial Hubs and Markets as well to cover maintenance costs, but that can wait until you've launched your first war.

Once Ordu are established...

Once you have Horseback Riding and have established your UB in some cities, research the Wheel and train up some Heavy Chariots in those cities, along with either a Battering Ram or Siege Tower. The Manoeuvre and Conscription military policy cards together will help you produce them at a rapid rate while also avoiding maintenance costs, meaning you'll have a decent-sized force ready for upgrading to Knights and a decent treasury prepared to let you do that.

While you train some Heavy Chariots and research the Stirrups technology, work towards the Feudalism civic. Feudalism unlocks the eureka boost for Stirrups and the Feudal Contract military policy card, required to train Keshigs faster. With the Stirrups technology, you can then train Keshigs while working your way to the Mercenaries civic. Mercenaries unlocks the Professional Army military policy card, which halves the cost of upgrading units.

With your Heavy Chariots upgraded to Knights and your Keshigs trained, you'll be ready to go to war.

Making Use of Extra Movement

With the speed bonus Ordu offer to Knights and Keshigs, in addition to a classical or medieval-era Great General, your army will move at a speed of six tiles per turn. This typically means you can move from one city to the next in a single turn during a war, meaning you can cut the time needed to take the next city. You'll usually be able to conquer fast enough that loyalty won't be an issue.

Bumping units up to six movement points can also help you manage maintenance costs, research and injured units, as they'll have more movement points free to pillage. Pillaging usually costs 3 movement points, but for fully-boosted Keshigs and Knights they'll still have three points left over to move and fight. Pillage farms for unit health, trade routes or pastures for gold, mines or lumber mills for science, quarries for culture and so forth - you'll be able to easily fix those improvements later with captured Builders.

Finally, boosted movement makes the ability of Keshigs to escort formation units even more effective - more about that will be covered in the unit's section.

Summary
  • Research Bronze Working early to find iron spots and build Encampments
  • Writing and Horseback Riding are the next key technologies for Campuses and Ordu respectively.
  • Make a detour to the Wheel technology once you have Ordu built so you can train Heavy Chariots to upgrade later.
  • A good culture output will help you save time getting your Keshig/Knight armies established by getting you to civics like Feudalism and Mercenaries sooner.
  • Extra movement helps save time in warfare and makes pillaging more viable.
Unique Unit: Keshig


With your Knights, Keshigs, a classical or medieval-era Great General and either a Battering Ram or Siege Tower, it's time to get your wars started! You'll be able to rapidly sweep across the map, taking cities so fast loyalty won't have time to register as a problem.

Standard Usage

Keshigs deal damage akin to a Crossbowman (boosted further by both Mongolia's civ and leader abilities), but have considerably better mobility. Having a ranged attack and high mobility makes them great at avoiding danger, and even if they get injured, you can simply pillage farms for health and still have movement points left over.

Keshigs also ignore zone of control, like Knights do. This allows you to slip around enemy defences and surround them more easily, or escape from enemy units.

On the other hand, Keshigs also have a vulnerability to anti-cavalry units. Pikeman are a particular danger, with 51 strength when fighting them. Taking into account Genghis Khan's leader ability and one +6 strength bonus from having one higher level of diplomatic visibility than vice versa, that still puts Keshigs at a disadvantage. You'll either need to use your Knights in those situations, rely on enough ranged attacks to kill them before they can react, or try to get a higher level of diplomatic visibility.

Though Keshigs are much weaker against cities relative to Knights, they still have an important role in taking them down - escorting Great Generals as well as either Siege Towers or Battering Rams. Normally, those units would slow down a Knight-led army due to their low movement speed, but Keshigs stop that being a problem, letting you bring your full force against a city and move onto the next sooner.

If your Battering Ram/Siege Tower-escorting Keshig is next to an enemy city, be sure to delay attacking with them at the start of each turn. That means if you capture that city, you can then move the units on to the next city without needing to spend another turn doing so.

Keshigs will stay relevant through the early renaissance era thanks to the Printing technology and the opportunity for Mongolia's first spy at Diplomatic Service, helping to bump up your diplomatic visibility and therefore your units' strength. Still, even with these bonuses, Pike and Shot units may be a bit tough for Keshigs to handle. Promoted Knights have a much better shot, but generally you'll want to wrap up your Knight/Keshig wars before Pike and Shot units become too commonplace.

Advanced Usage

The ability of Keshigs to escort civilian and support units at great speeds isn't just limited to getting Great Generals and Battering Rams or Siege Towers moving at the same speed as the rest of your army...


Starting with a Keshig and a unit in formation, you can move it a few tiles, detach once the Keshig has one movement point remaining, move out the Keshig, move in a new one, reattach and continue. This even works when the units are embarked! This allows you to move civilian or support units across entire continents in a single turn if you have enough Keshigs.

This trick gives Keshigs a useful peace-time role: escorting civilian units to quickly reach new destinations. A chain of Keshigs can get a new Settler to a good city spot quickly, an Archaeologist to an antiquity site, or a Builder to a remote weak city that lacks the production to train their own.

Furthermore, this function can be used late in the game to get new support units closer to the front lines of a war. Don't get too close to the front lines, however - even with Mongolia's civ ability and Genghis Khan's leader ability Keshigs won't last long against industrial era and later units.

Summary
  • Keshigs are great at dealing with enemy units while Knights take on the city defences.
  • Keep at least one Keshig in formation with a Battering Ram or Siege Tower so they can easily support Knights taking down city defences.
  • Watch out for Pikemen or Pike and Shot units.
  • A chain of Keshigs allows civilian or support units to cross vast distances in one turn, even over water.
Genghis Khan's Leader Ability: Mongol Horde

Yes, you can even capture unique units, including Scythia's Saka Horse Archers!

Genghis Khan brings two bonuses to the table:
  • A +3 strength bonus to all your cavalry units (including Keshigs) in all situations - a bonus so straightforward it doesn't really need elaboration, and...
  • The opportunity to convert defeated enemy cavalry units.
Converting defeated enemy cavalry is the more interesting bonus, even if it doesn't come into play as often.


When hovering over an eligible target, it'll tell you the odds of capturing the cavalry unit. The lower the unit's melee strength relative to your own unit, the more likely you are to capture it.

Captured cavalry units start at only 25 health, so they're prone to being killed immediately if you can't clear the area of enemy units. Losing a unit in enemy territory, even if it's one that originally belonged to another civ, will cause you to suffer a war weariness penalty, so you should probably aim to kill as many other nearby units as possible before you convert cavalry to your side.

Another subtle downside of this ability is that it'll eventually steer other civs into not using cavalry against you, probably leading to you facing more anti-cavalry units. On the other hand, if they're not using as many fast units against you, it'll be easy for your own cavalry to withdraw if they get injured without being intercepted.

Stealing Unique Units

Perhaps the best thing about Genghis Khan's leader ability is the way it lets you capture unique units from other civs. Be aware that they'll typically be slower than your own cavalry as they can't benefit from the Ordu movement bonus.

Here's all the unique units you can capture in rough chronological order. For full details on each unit, go to the "Other Guides" section at the end of the guide and click a link to the corresponding civ.

Sumeria - War-Cart

War-Carts are slightly stronger than Heavy Chariots, but the +3 strength bonus Genghis Khan's leader ability offers will help you capture them. War-Carts have the notable advantage of being immune to anti-cavalry bonuses, making them excellent at clearing out Barbarian encampments, which are often guarded by Spearmen. There is one downside, however - upgrading them to Knights is slightly more expensive.

Macedon - Hetairoi
Requires the Persia and Macedon Civilization and Scenario Pack.

This Horseman replacement counts as a heavy cavalry unit, and therefore can be upgraded to a Knight. It can be upgraded to a Knight for a lower cost than Heavy Chariots, so it's worth keeping any you capture around.

Capturing one, however, can prove difficult. It gains Great General Points when it captures a unit and gets +5 strength when occupying the same tile as a Great General, meaning they can quite easily get up to 46 strength. You might want to train a couple of Horsemen of your own and bring along a Great General if you want to capture them prior to getting the Chivalry technology.

Scythia - Saka Horse Archer

Scythia's ability to spam light cavalry and Saka Horse Archers makes them a lovely opponent for Mongolia. This UU in particular has low defence, so can usually be converted. Just beware of it being killed immediately after you capture it!

Saka Horse Archers aren't particularly strong in Mongolia's hands, meaning you'll probably want to use them for pillaging or risky moves where you don't mind losing them.

India - Varu

This special classical-era heavy cavalry unit is slow but strong. It won't be able to keep up with your Knights or Keshigs, but it's not bad as a defensive unit to guard your core cities while the rest of your army is away.

Because Varu make adjacent units weaker, you'll want to use ranged attacks from Keshigs to capture them.

Arabia - Mamluk

Now we're talking. Knights are already great for Mongolia, but now you can grab yourself a Knight that heals up every turn! So long as you can hit them hard with a lot of attacks in a single turn, they're no harder to capture than Knights, and their heal-per-turn ability in your hands complements the fast pace of Mongolian warfare nicely.

The medieval-era Great Scientist Abu Al-Qasim Al-Zahrawi makes adjacent units heal 20 HP per turn faster, which goes nicely with the ability of Mamluks to heal every turn. Furthermore, you can get them in formation with a Keshig to ensure they can keep up with your Mamluks and constantly offer the extra health boost.

Poland - Winged Hussars
Requires the Poland Civilization and Scenario Pack.

Though Winged Hussars don't replace anything, you can think of them as super-Knights. The main distinctions are a +7 strength advantage and the ability to knockback enemy units. With at least one point of diplomatic visibility higher on Poland than vice versa, that strength bonus disappears, making the units much easier to capture.

With the unit under your control, you'll end up with something just four points weaker than Cavalry even before taking the Mongolian civ ability into account. With two levels higher diplomatic visibility in a civ than vice versa - which isn't too hard to achieve - the Winged Hussar can get to levels of strength on a par with Infantry. As the knockback ability is more likely to trigger the stronger the Winged Hussar is, you'll have a lot of control over the positioning of enemy units. Pushing units off forested hills and into open terrain can help you maximise your damage output, for example.

Mapuche - Malón Raider

A word of warning: try to avoid fighting Mapuche while you're in a Golden Age, particularly once they've hit the renaissance era. Even with your unique strength bonuses, Malón Raiders will be a tough foe for your Knights and Keshigs to kill. If you can't avoid a Golden Age, consider looking for a different target until the age is over. When attempting to capture Malón Raiders, try to lure them away from their homelands so they lose their +4 combat boost.

Malón Raiders are excellent pillagers and aren't bad at combat either. Close to your home lands, they'll be as strong as Cavalry would be for other civs even before considering Mongolia's civ ability. Away from your home lands they won't be quite as strong, but they can still rapidly pillage farms for food.

Russia - Cossack

Cossacks are Cavalry replacements which are particularly effective defensively. Their strong home-lands strength and ability to move after attacking means they'll make mincemeat of your Keshigs, so use Cavalry of your own or Tanks instead to fight Russia in this stage of the game.

A captured Cossack is greatly helpful to Mongolia thanks to their ability to move after attacking. Against enemy cities, you can get one more hit in a turn by attacking it with a Cossack and moving out, leaving the tile free for another of your units to attack it.

America - Rough Rider

The late-industrial Rough Rider unit can vary greatly in strength depending on its location. Away from Teddy Roosevelt's home continent and not on a hill, they have 67 strength - a manageable target for your cavalry. But in his home continent and on a hill, they're up to 82 strength - something you'll most likely need Tanks to take on.

In your control, Rough Riders are rather good at taking on units that are relying on terrain bonuses. Against units in hills, Mongolian Rough Riders are as strong as Tanks of other civs. If you're still fighting on your own continent, you can also get culture from kills. Finally, the low maintenance cost of Rough Riders means you should have no problem supporting their upkeep.
Administration - Government, Policy Cards and Ages
Note that the Administration sections strictly cover the options that have particularly good synergy with the civ's uniques. These are not necessarily the best choices, but rather options you should consider more than usual if playing this civ relative to others.

Government

Tier One

Autocracy isn't a bad choice. Mongolia benefits from a lot of military policy cards early on, and getting stronger yields in your capital and your Government Plaza city is a more relevant bonus than Oligarchy's strength increase (which doesn't work for cavalry units).

The Warlord's Throne is a good complementary government building. The production boost it offers when capturing cities helps you develop at home as you conquer away from it - Commercial Hubs and Markets will be particularly useful things to build.

Tier Two

Monarchy is probably your best choice. Mongolia finds uses for a wide range of military policy cards, so the high number of slots won't be a problem, while the government comes at the same civic as Chivalry, a policy card that helps you train Knights faster.

The Intelligence Agency is a great choice of tier two government building. An extra Spy means you'll have one more spare for the listening post mission, which temporarily raises your diplomatic visibility with a civ.

Tier Three

Fascism's military bonuses fits well with Mongolia's heavy military emphasis.

The War Department complements this by allowing your units to heal after every kill. This means less time spent healing up, hence faster warfare!

Policy Cards

Ancient Era

Caravansaries (Economic, requires Foreign Trade) - Mongolia's civ ability encourages early trade with other civs - a good source of gold. Boosting the gold you get from it means you can accumulate more ready for upgrading your Heavy Chariots to Knights later on.

Conscription (Military, requires State Workforce) - Eliminates the maintenance cost of Heavy Chariots, so you can train lots of them ready for upgrading later.

Manoeuvre (Military, requires Military Tradition) - Helps you train Heavy Chariots and Horsemen faster.

Classical Era

Raid (Military, requires Military Training) - A Great General and your UB will make your armies particularly mobile, making pillaging easy - especially for your light cavalry units. Boost the yields you get from pillaging with this policy card.

Veterancy (Military, requires Military Training) - Needing to build an Encampment and Ordu in a city before you can start training fast cavalry units there is quite an investment, but thankfully this policy card helps with that.

Medieval Era

Chivalry (Military, requires Divine Right) - Helps you train Knights faster, though not Keshigs. Don't rely on this policy card to build your first Knights - train Heavy Chariots and upgrade them instead, and use this policy card to help train backup Knights later.

Feudal Contract (Military, requires Feudalism) - You'll need to train Keshigs from scratch, so having this policy card available will really help.

Professional Army (Military, requires Mercenaries) - With a lot of Heavy Chariots trained, the upgrade path to Knights can be pretty expensive! Thankfully, this policy card halves that cost.

Trade Confederation (Economic, requires Mercenaries) - Your civ ability isn't just good for combat - it lets you trade far and wide for extra gold. This policy card means you can also get science and culture from international trade.

Renaissance Era

Logistics (Military, requires Mercantilism) - Move at lightning-fast speeds through your own lands, or from lands you've just captured into enemy terrain. That'll make it particularly hard for those pesky anti-cavalry units to catch you up.

Machiavellianism (Diplomatic, requires Diplomatic Service) - Faster Spy training will help you get more prepared for the Listening Post mission, which provides you with additional diplomatic visibility and therefore combat strength.

Triangular Trade (Economic, requires Mercantilism) - Get more gold out of your trade routes.

Industrial Era

National Identity (Military, requires Nationalism) - Cavalry units you capture will start on 25 health, and therefore a -7 strength penalty. This policy card halves that penalty, increasing the odds of the units you capture surviving.

Total War (Military, requires Scorched Earth) - Functions the same way as the earlier Raid policy card.

Modern Era

Levee en Masse (Military, requires Mobilisation) - Converting a lot of cavalry units to your side will be expensive, so this policy card will be useful to lessen the maintenance burden.

Lightning Warfare (Military, requires Totalitarianism) - Helps you train Tanks, Helicopters and Modern Armour faster.

Market Economy (Economic, requires Capitalism) - Boosts international trade yields further, complementing your gold from trading posts nicely.

Martial Law (Military, requires Totalitarianism) - The trouble with Genghis Khan's ability to capture units is that they'll start on 25 health, making them easily destroyed. Losing a unit causes significantly more war weariness than normal combat does. As such, picking up this policy card may be a good idea to account for that problem.

Patriotic War (Military, requires Class Struggle) - Even though Keshigs will be too weak by this stage of the game for direct combat, they're still useful for rapidly transporting support units around the map. This policy card will help you train those support units faster.

Propaganda (Military, requires Mass Media) - Also helps you handle war weariness.

Information Era

Ecommerce (Economic, requires Globalisation) - A final boost to trade route production and gold.

Age Bonuses

Only bonuses with notable synergy with the civ's uniques are covered here.

Twilight Valour (Dark Age, Classical to Renaissance eras) - While a dark age will make it harder to hang onto cities you capture normally, Mongolia conquers so fast you can usually manage the loyalty penalty. You can also pick up this dark age policy card to make your Knights hit even harder. If they get injured, use their high movement to retreat to your own lands.

Reform the Coinage (Golden Age, Renaissance to Modern eras) - A lovely way to get more money out of your international trade routes, particularly in war-time. It also makes it much more likely your traders will get home safely after setting up a trading post.

To Arms! (Dedication, Industrial to Information eras) - Mongolia's huge military bonuses makes taking on corps and armies easier than normal. That helps make this dedication a good source of era score.

To Arms! (Golden Age, Industrial to Information eras) - In the industrial era, Knights won't be strong enough to handle other civs' armies, while it's still too early to upgrade them into Tanks. As such, you'll probably need to train up some Cavalry units. This era bonus makes that easier.

Bodyguard of Lies (Golden Age, Atomic to Information eras) - Need a strength boost, fast? With this Golden Age bonus, you can instantly get Spies to enemy cities ready for a Listening Post mission to begin.
Administration - Religion and City-States
Pantheons

City Patron Goddess - If you want your UB up sooner, you can use this pantheon to speed up Encampment production.

God of the Forge - Speeds up training Heavy Chariots and Horsemen.

God of the Open Sky - Mongolia's horse start bias means you'll usually start near at least one pasture resource. The culture boost from this pantheon will really help with getting to key civics like Feudalism sooner.

Religious Beliefs

You can have one founder, one follower, one enhancer and one worship belief.

Zen Meditation (Follower) - The nature of Mongolia's UB encourages you to have plenty of Encampments, but you'll also want a decent number of Campuses, Commercial Hubs, Industrial Zones and Entertainment Complexes. As such, you'll probably be getting cities to two speciality districts pretty quickly anyway. This gives you an extra amenity in all those cities, helping you to manage war weariness.

City-States

Antioch (Trade) - Helps you get a little more gold from your international trade routes.

Bandar Brunei (Trade) - Increases the effectiveness of your trading posts at granting additional gold from trade routes.

Carthage (Militaristic) - Mongolia's incentive to have at least one Encampment building in as many cities as possible makes it much easier to make use of this bonus, which reduces the cost of purchasing military units.

Hattusa (Scientific) - Not found any iron for your Knights? If this city-state is in the game, you'll have a backup method of obtaining it.

Lisbon (Trade) - When you're sending trade routes overseas to set up new trading posts, the last thing you want to see is a little message two turns later saying Barbarians have pillaged it. Being suzerain over Lisbon prevents this happening.

Muscat (Trade) - Capturing cavalry will bump up maintenance costs while warfare will cause war weariness. Muscat allows you to solve two problems at once rather than just one by constructing Commercial Hubs. Requires the Vikings scenario pack.

Valletta (Militaristic) - Got a lot of faith from capturing enemy cities? You can use it to improve your Encampments further.
Administration - Wonders and Great People
Wonders

Colossus (Classical era, Shipbuilding technology) - A good wonder to capture due to the extra trade route capacity, though it's a bit too out of the way to be worth building yourself.

Terracotta Army (Classical era, Construction technology) - Mongolia's fast combat strategy leaves little time for resting up and healing. By granting your entire army free promotions, you can save a few precious turns. Of course, making your entire army stronger is good too.

Alhambra (Medieval era, Castles technology) - It's a competitive wonder, but a good one. Mongolia will find there's a lot of relevant military policy cards they can use, so having one more slot available will certainly help.

Great Zimbabwe (Renaissance era, Banking technology) - More trade route capacity, helping you to set up yet more trading posts.

Great People

Any classical or medieval-era Great General is highly useful, but it would be redundant to list them all.

Classical Era

Zhang Qian (Great Merchant) - Gain extra trade route capacity, helping you to set up more trading posts sooner.

Medieval Era

Abu Al-Qasim Al-Zahrawi (Great Scientist) - While a useful Great Person to have for any domination-inclined civ, Mongolia has the advantage that Keshigs can boost their movement speed, helping him keep up with your army. If you're playing against Arabia and manage to capture Mamluks off them, then he becomes especially powerful.

El Cid (Great General) - Already got a classical or medieval-era Great General? Then you can safely retire El Cid to create a Keshig corps. Aside from being able to kill enemy units faster, the extra strength will increase the odds of capturing enemy cavalry units.

Marco Polo (Great Merchant) - Gain more trade route capacity.

Modern Era

Joaquim Marques Lisboa (Great Admiral) - Reducing war weariness helps you manage occasions where you convert enemy cavalry units only to have them be immediately killed.

John Rockefeller (Great Merchant) - Helps you get more gold out of your trade routes.

Mary Katherine Goddard (Great Merchant) - Very much a priority for Mongolia and quite possibly the most useful Great Person in the game for you. Boosting diplomatic visibility by +1 level usually means another +6 strength boost against all other civs. Combine that with your trading posts and Spies carrying out the Listening Post operation, and you could be looking at a fairly reliable +18 strength boost.

Atomic Era

Georgy Zhukov (Great General) - Mongolia relies on cavalry units which are both fast and ignore zone of control, making it easy to surround opponents and get good flanking bonuses. Retiring this Great General permanently makes flanking bonuses 50% better.

Melitta Bentz (Great Merchant) - More trade route capacity.
Counter-Strategies
Taking on Mongolia needs a bit of espionage, and a lot of anti-cavalry units. Mongolia's by far at their strongest in the medieval and renaissance eras, so either aim to take them out early or have a plan to resist their onslaught.

Civilization Ability: Örtöö

Mongolia has to send you a trade route in order to get their diplomatic visibility bonus, giving you an obvious indicator of when you need to prepare for war. Start building up anti-cavalry units and look towards strengthening your own diplomatic visibility with Mongolia. If they haven't sent you a trade route yet and your army's strong enough, you can pre-emptively declare war on them to prevent them setting up a trading post in one of your cities.

The stronger diplomatic visibility you have with Mongolia, the weaker their strength bonus will be. Getting the Printing technology, using a Spy on a Listening Post mission in their cities or acquiring the modern-era Great Merchant Mary Katherine Goddard will help considerably.

Genghis Khan's Leader Ability: Mongol Horde

Genghis Khan's cavalry units are stronger than they'd otherwise be. In singleplayer, this can become quite a problem when combined with difficulty strength bonuses and the Mongolian civ ability. Thankfully, the nature of this ability means that Genghis Khan will be highly dependent on units vulnerable to anti-cavalry, particularly if you can use the Echelon promotion as well.

Anti-cavalry units can eventually also unlock the Hold the Line promotion, which gives adjacent non-anti-cavalry units a +10 strength boost against cavalry. This is particularly useful in conjunction with melee infantry units, which tend to have a higher base strength.

To avoid Mongolia converting your units, minimise your use of cavalry against them and be sure to retreat cavalry units that are even a little bit injured. Of course, this does mean it's harder to catch up injured Mongolian units, but the Commando promotion (for melee infantry units) and the Redeploy promotion (for anti-cavalry units) will help.

Genghis Khan's Agenda: Horse Lord

Genghis Khan if controlled by a computer opponent likes civs that avoid training too many cavalry units, and dislikes civs with a lot of them.

Obviously this is going to cause some tension if you're playing as Scythia, or any other civ with a cavalry UU (note that Egypt's Maryannu Chariot Archers don't count, but Cleopatra's leader ability will make you a more likely target for Mongolia's trade routes so don't assume you're safe). Still, cavalry UUs do tend to be more powerful, helping you see off the threat.

For peaceful civs, gaining Genghis Khan's approval won't be too difficult as you're likely to have a lot fewer cavalry units than him, making him a decent candidate for a military alliance.

Unique Unit: Keshig

Keshigs are like Crossbowmen, with one notable advantage and one notable disadvantage in combat: they're faster, but they're vulnerable to anti-cavalry units. Even if Mongolia's got a decent amount of diplomatic visibility on you, Pikemen will still win against Keshigs, and Pike and Shot units will quickly handle them.

Keshigs can also help civilian and support units to move at high speeds, but this comes with a downside - Keshigs are worse at defending than many other military units of their era. Keshigs can often be killed by Pikemen in just two hits, letting you easily take down the formation unit with it.

Unique Building: Ordu

The main effect of Mongolia's UB is that it makes their cavalry units faster, and hence harder to kill as they're able to escape faster. A lesser effect is that it pushes Mongolia to develop lots of Encampment districts, which can lead to them neglecting other district types early on.

How do you handle lots of fast units? Know the terrain, have plenty of anti-cavalry units at the ready and you can ambush them as they try and move to a new city or retreat. Keep your units together so they can provide each other support bonuses and can't be flanked.
Other Guides
If you like these guides and want to send a tip, you can click here![ko-fi.com]

Rise and Fall

These guides are for those with the Rise and Fall expansion, but not Gathering Storm.

Compilation Guides

Individual Civilization Guides

Vanilla

The Vanilla guides are for those without the Rise and Fall or Gathering Storm expansions. These guides are no longer updated. You can find these by scrolling to the top of this page, clicking "Zigzagzigal's Guides" and looking near the end of the list of guides. The "Other Guides" section of every Vanilla guide has links to every other Vanilla guide.
5 条留言
Zigzagzigal  [作者] 2021 年 4 月 23 日 下午 2:43 
I intend my next Gathering Storm guide to be an updated guide to Mongolia including Kublai Khan.
Ryley03d 2021 年 4 月 23 日 下午 2:27 
Can you update for Kublai Khan?
paulski66 2018 年 7 月 26 日 下午 12:29 
Mongolia strike me as a late-blooming Nubia: overpowered, fast as hell ranged unit that comes an era later than Nubia's but that allows you to steamroll the opposition...assuming you put the work in to set yourself up for the arrival of Keshigs. Unlike the Pitati archers, Keshigs are a bit pricey, so getting tto the point where you can just crank out a conquering army requires a good bit of foundation-laying. Personally, I find that Shaka is more powerful than Mongolia, just given the universal nature of the early arrival of corps and armies; Mongolia has a better unique, but with Shaka all of your units essentially become uniques, significantly more powerful than any of the units they'll face in battle. Plus you can prepare your conquering army ahead of time, and don't have to pay to upgrade to a new unique unit; just combine two swordsmen, two archers, etc...
Zigzagzigal  [作者] 2018 年 7 月 3 日 上午 3:47 
Both civs have balance problems as a result of their extreme strength bonuses. It probably comes down to movement speed in singleplayer - Mongolia with Great Generals moves at double the speed relative to the Zulus with Great Generals, so they can conquer much faster.

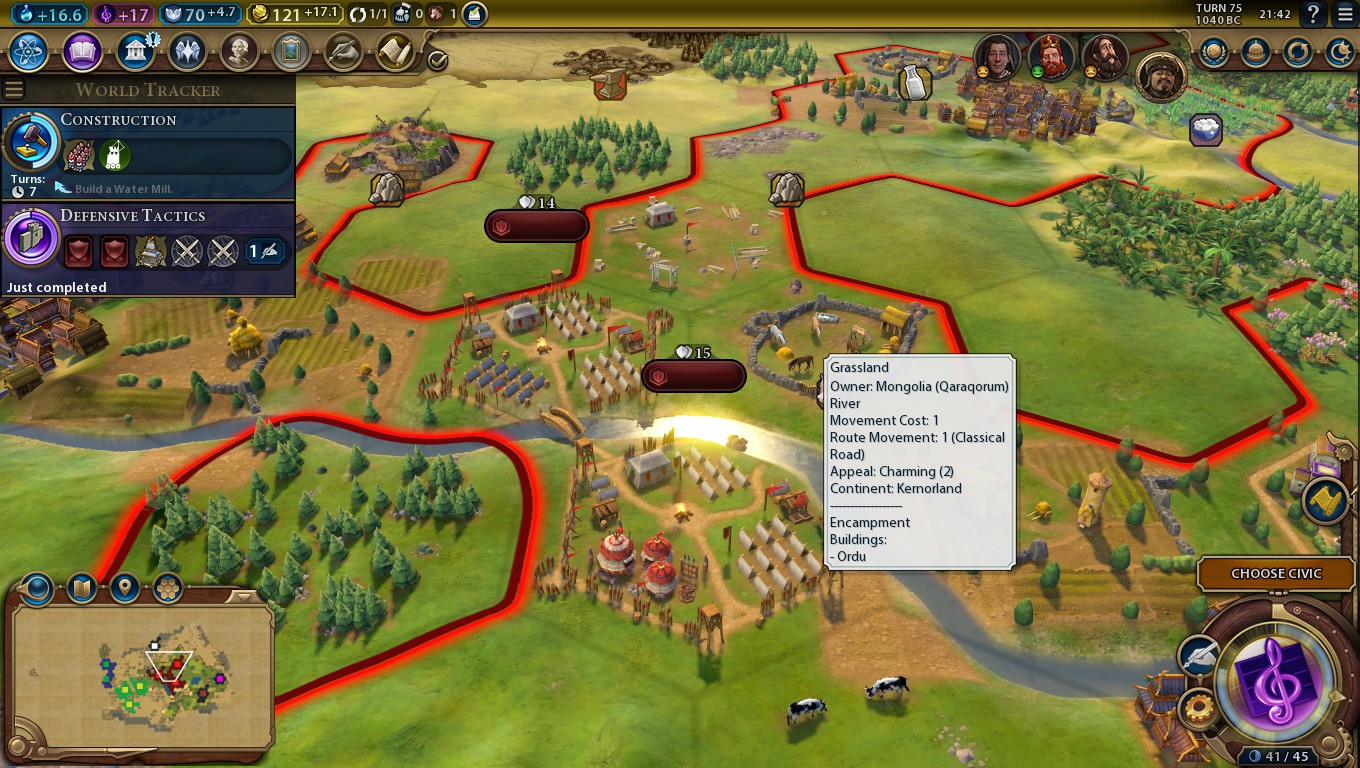
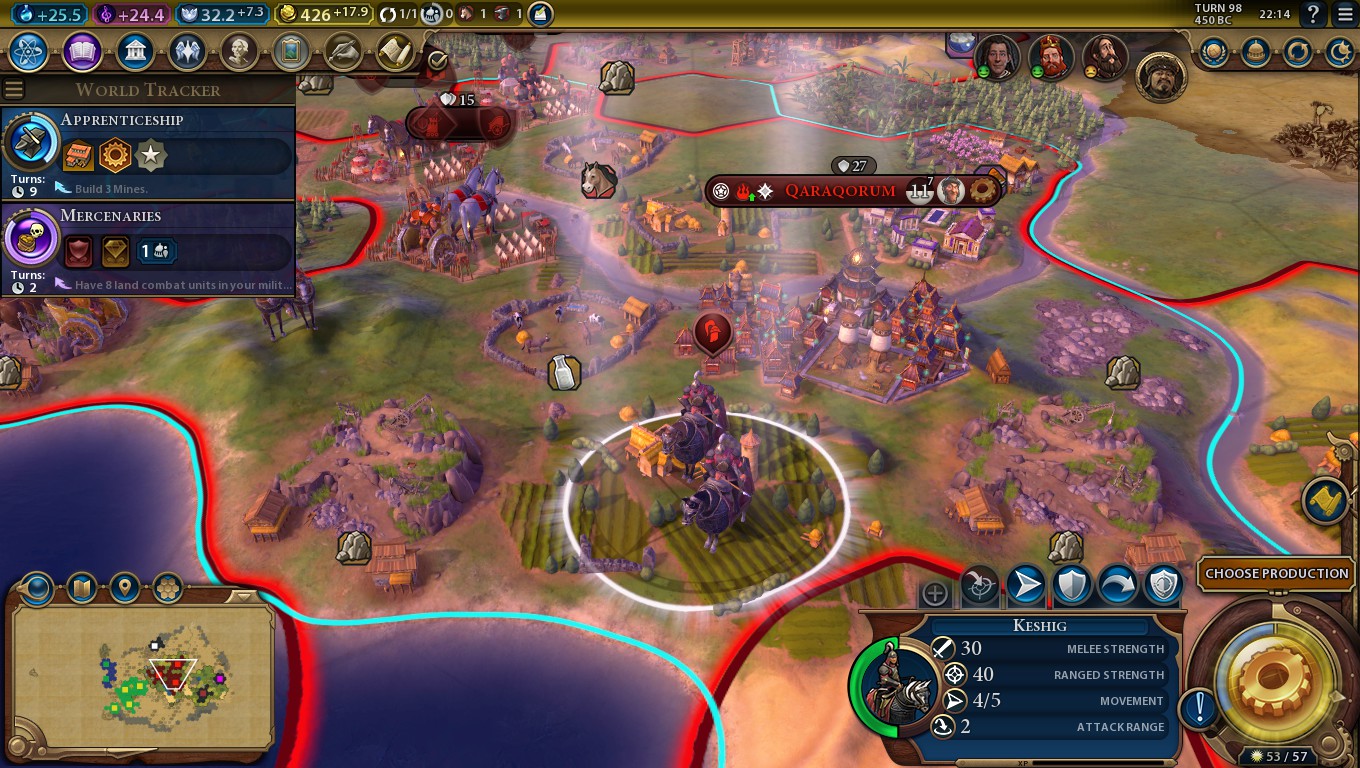
On the other hand, Mongolia is much less effective at dealing with their counters (the Zulus can form Knight corps to deal with enemy Swordsmen or Musketmen, while Mongolia using melee infantry units to handle enemy anti-cavalry would slow their conquering down considerably).

Smarter opponents will know to keep a high level of diplomatic visibility in Mongolia, which weakens their civ ability. There's no equivalent counterplay for the Zulus.

Ultimately, this makes me think that Mongolia probably performs better in singleplayer and the Zulus probably perform better in multiplayer.
weraptor 2018 年 7 月 3 日 上午 2:22 
Good guide, I see you've awarded both Mongolia and the Zulus same victory scores. Which civ is stronger in your opinion (apart from Impis countering cavalry)?