Oxygen Not Included

Oxygen Not Included

1,316 평점
ONI - Surviving the Mid-Game
Jahws 님이 작성
This is a mid-game guide for Oxygen Not Included current to the official release. It's designed to teach you the ideas and strategies needed to make it from cycle 50 to cycle 250 and beyond. Some of the later content is still based on the long-outdated Rocketry Upgrade, though.

In other words, this focuses on how to go from supplying basic needs with your initially-provided resources to managing long-term issues, near-fully stabilizing a colony, and growing your base's capabilities.
8
5
32
4
5
4
4
2
   
어워드
즐겨찾기
즐겨찾기됨
즐겨찾기 해제
Intro
This guide assumes that you're already familiar with handling the following issues that plague what I term an "early-game" base:

  • Carbon Dioxide
  • Food
  • Hygiene/Plumbing
  • Oxygen (from Algae)
  • Power Generation (basic, from Coal)
  • Morale management
If any of those are still a major issue for you, consider reading my early-game guide first before proceeding:

https://steamcommunity.com/sharedfiles/filedetails/?id=1359110726
If you'd rather use the same world-gen seed as I'm basing everything on but wish to otherwise ignore the early-game guide, I'm using the world-gen seed 2500 on Terra. These strategies are not specific to a particular seed, but I recognize its usefulness when following a guide for learning purposes.

That said, some of these strategies are specific to certain types of maps - please note that this guide will focus on Terra map types. I will try to leave notes for guidance for other types of seeds, but I focus on Terra since this guide is focused on helping newcomers learn the game, and Terra is best suited for this task.

I will be avoiding strategies that rely upon the randomly-generated "hidden geysers", as not all seeds will contain specific geyser types. I will also be ignoring "bonus items" from the Printing Pod, since those are also quite random.
Mid-Game's Start
Before proceeding further, here's the base I'm starting from:


It's the exact same colony from the end of my early-game guide, meaning that the following goals have been met:
  • A basic Mealwood farm has been established, and we're producing enough to move from Liceloaf to Pickled Meal.
  • Dupes have started gaining specialized skill-sets and have enough Morale to do so without gaining Stress.
  • Plumbing and a basic Water reclamation system are in place.
  • Coal-based Power generation has been established.
  • An initial Carbon Scrubber system has been established.
By meeting these goals, the colony has become relatively stable and meets all basic Duplicant needs. As such, we're now able to spend time on larger projects and exploration. Basically, we've mostly shifted from "survival" to "expansion." That said, we are still prone to some ongoing issues:
  • While our Water supply is plentiful, it is also quite finite. Too much research will cut significantly into our reserves, so be careful!
  • We're still producing Oxygen from Algae. Our initial area only has so much of it to go around, so we'll either need to continually mine more of it or find some way to transition to Water-based Oxygen production.
In a nutshell, our largest concern at present is Water, though Heat will start to become a concern as we proceed.

Other Notes
If you haven't already done this, you might want to check the "Enable Proximity" box on the Priorities tab. It's designed to help streamline task selection a bit for large bases, and since we'll start exploring and having Dupes with high travel times soon, now's a good time to do this.

Long-Term Goals
This was mentioned in passing a few times in the early-game guide, but this playthrough has already discovered a few special sites that renewably generate resources - geysers and vents.


Let's start by talking about the orange circle to the top-left. That marks a Natural Gas Geyser.
  • Every colony (on map types with Slime biomes, like Terra) are guaranteed at least one of these somewhere on the map, already revealed and active.
    • Caustic biomes have a 50/50 chance of an extra one of these or of a Chlorine Geyser.
  • These usually put out almost enough Natural Gas on average to fully power one Natural Gas Generator for your colony. That's basically 800 W for free before any buffs are applied.
    • Burning Natural Gas this way also produces small amounts of Carbon Dioxide and Polluted Water.
  • They output at 150 C - far too hot for anything we can construct right now to properly handle.
In the lower-left's blue circle we can see a Cool Steam Vent.
  • Every colony on Terra is guaranteed two of these somewhere on the map, already revealted and active.
    • For other map types, that's one free for having a Slime biome and one free for having a Caustic biome.
  • These usually put out somewhere around 1.6 kg/s Steam when averaged across a full active/dormant cycle - enough to sustain a modest base.
  • They output at 110 C - too hot for standard use within a base.
Using Geysers
As mentioned before, our largest long-term concern right now is Water - something that Cool Steam Vents are practically made to answer. The issue is the tradeoff - our colony simply cannot handle that kind of heat right now. We'll need to advance our base to a point that we become able to use these features despite the drawbacks before we can really utilize these.

That said, our long-term goal is to utilize these as core features of our base, becoming near-sustainable in the process.

Hidden Geysers
You may have noticed me mentioning that the previously-mentioned geyser types were "already revealed and active." This is because every map spawns (on average) with about 12 dormant and buried geysers of various types!

Note the pink/purple circle to the right in the previous image. Here's a close-up:


Note that line of four special blocks in a line - those are Neutronium, a material that cannot be mined without cheats. That four-block base, combined with the pattern of minerals above it, denotes a hidden geyser or vent - and they're all randomly generated per world. Some will be easy to utilize, but others will only become approachable in the late-game. Right now, we have no clue what it is, but we can find out before allowing it to become active - and doing so is well worth the effort.
Hatch Ranching
First things first, it's time to start playing with critters! While I didn't talk too much about them in the early-game guide, you've certainly run into a number of Hatches by this point, probably along with a Shine Bug or two. Every critter in this game has a purpose and use within a base, but we haven't been able to do much with them until now.

In case you don't know what Hatches are yet, here's a few currently roaming free in my colony:


While ranching does little to address the long-term problem of Water, it is the long-term answer to a number of other problems we'll be discovering over time as we proceed in the game.
  • Generally speaking, an early-game base utilizes mostly Coal-based Power. At present, we're only getting that Coal from mining, which is non-renewable. However, Hatch ranching provides near-renewable Coal!
  • Ranching of any type allows limited production of "standard" quality food: Omelettes. Producing these will allow us to sustain morale for some extra skills without issue.
  • Critter eggs are our first available source of Lime, a vital component of Steel that we'll need to build up for late-game.
    • Steel has the special feature of adding +200 C to the overheat threshold of any building made with it, making them able to process high temperature resources from the geysers we talked about earlier!
  • By raising critters under specific conditions, we can breed them to solve other issues within the base - but the breeding process takes significant time. We should start now.
As an example of that last point, feeding Hatches a constant supply of Sedimentary Rock (found in the Swamp biome) tends to produce eggs for Stone Hatchlings:


A different type of Hatch - the Smooth Hatch - can refine Metals for us directly, without consuming any Power - quite a useful feature to have around!

Researches Required
  • Ranching (Tier 3)
While Animal Control (Tier 4) would also be handy because of the Incubator, that building requires a significant amount of constant Power, which your base may or may not be prepared for. As all this building does is expedite the egg-hatching process, it may be safely delayed. That said, speeding up the Smooth Hatch ranching process can be useful - use your own judgment.

Other Requirements
  • A Dupe with the Critter Ranching skill
Getting Started
My first recommendation for ranching is to establish a pair of Hatch ranches, such as the pair seen right of the Washrooms in the images below:


You'll want to establish a few Storage Bins elsewhere, set them to "Sweep Only", and have your Dupes "move [the] debris to storage" - the top-left of the smaller icons in the image above. We want to control what the Hatches eat, and leaving debris on the floor will interfere with that. If the Bins fill, you can simply dump their contents and fill them again - "Sweep Only" is good for that.

While your Dupes work on that, have your Digger mine out a couple of blocks like the one selected in the left image if you can, avoiding any Slime blocks as you do so. Feeding that material to Hatches raises their chance of laying Stone Hatchling eggs.

Breeding Stone Hatchlings

Once you have the left-hand room of the pair cleaned out, set its structures to the following settings:
  • Critter Feeder
    • Hatch
      • Sedimentary Rock
  • Critter Dropoff
    • Max: 2 Critters
    • Hatch
    • Stone Hatchling (if available)
Note - filling the Critter Feeder is a Store task, not Supply, so make sure to have a Dupe attentive for this!

Once that's done, have your Rancher wrangle up any Stone Hatches / Stone Hatchlings you have, followed by the youngest Hatches you can find. Aim to fill the room.


Breeding Smooth Hatchlings
While you probably can't do this yet, I'd like to talk about the next step now. Note the highlighted detail in the image above - Stone Hatchlings only have a 2% chance to lay Smooth Hatchling Eggs. To increase this chance, we'll need to feed them some sort of Metal Ore.

Once you have your first young Stone Hatch (or its Egg), wrangle it (or place it via Storage Bin) into the right-hand room. For this Critter Dropoff, I advise storing Iron Ore - that's because it's the same food you'll be giving your Smooth Hatches once you have them. Iron is somewhat more costly to efficiently refine than most of the other metals, so I advise getting all your refined Iron for now via Smooth Hatches when possible. The right-hand room is designed to hold 3 Hatches max; I advise not going beyond this number.

Details
Note that in order to be comfortable, Hatches require 12 tiles of open space each within a room.

Why this setup? Our long-term goal with this pair of rooms is to facilitate Smooth Hatch breeding, which will require quite the investment, though also with quite the payoff. If you've used a Rock Granulator at any point, you'll note the 240 W per second requirement, paired with a 50% loss in material. Smooth Hatches, on the other hand, generate no Heat, require no Power, and also produce eggs useful for food - that's a triple win! The only downsides are that they are a commitment, as they only eat Raw Metal, and that they have a 25% mass loss on what they eat. They're great for early, low-impact refinement of Metal.

As part of the process, we'll also have bred Stone Hatches. These allow us to convert most rock types into Coal, which standard Hatches can't do. As you explore throughout the game, you'll end up with abundant piles of mined Igneous Rock and Granite, let alone other rock types. We might as well use some of it for (Coal) Power while we address other concerns.

Note that when young, each Hatch type has a very high probability to lay its own egg type. The breeding process usually takes 20 cycles or so before you have a decent chance to obtain a different type of egg, and that's when you're actively breeding for the new type.

On Eggs
If you want your Dupes to pick a specific Egg for use with the Egg Cracker, you can use the Sweep ("move debris into storage") command on that Egg and set its errand priority over 5 - values like 7 and 8 seem to work well. They may on rare occasions get the wrong egg, but this seems to work around 95% of the time for me, making that Egg a higher-priority target for errands.

Other Notes
Once you have successfully bred your third Smooth Hatch egg, kick the Stone Hatch that laid it out of its pen and into the one with Sedimentary Rock. There's no longer any reason to have it eating metal. Use the Critter Drop-Off settings to do this - wrangled critters will automatically be delivered to the highest-priority ranch (or open-air Critter Dropoff) that will accept them.

At the same time, I highly advise setting up a standard-Hatch ranch - you'll have plenty of Sandstone for a long time, so you may as well get extra Coal and Eggs from them, too. It'll also provide a place to kick out the regular Hatches when you need space for the metal-eating Stone Hatch to be relocated.

Also, there's a reason for the gap I've left on top of the Washroom but beneath the new Hatch stable. There's a facility (a Hospital room) we'll want to build there somewhat soon that can attach itself to the Washroom loop for its plumbing.

Exploration
Now that we've got a big long-term project started - the Hatch ranch - it's time to see what else is available in our Duplicants' world. There are many different types of resources out there, so we should prepare our base to allow us safe exploration to find them. We could also use something to do while waiting for our Hatches to become tame and lay new Eggs.

We already talked about geysers; if you're using this map seed you should have already found at least three. If not, now's a good time to get proactive about finding the locations of a few. As it turns out, I found another geyser site after mining some Iron Ore to the right of my base:


We also have a few other goals:
  • We'll eventually want to extend our central corridor toward the top and the bottom of the map. Are there any obstacles in the way?
  • Can we secure additional stockpiles of Algae or Metal Ore safely?
    • Make sure to find lots of Iron Ore that we can feed our eventual Smooth Hatches!
  • Can we find a Frozen biome or two? (These are filled with ice and granite, usually < -20 C.)
    • Frozen biomes also contain a few unique resources and not found anywhere else, so gaining entry to them can pay off well!
    • Note that not all map types contain this biome. That said, most map types will have at least one biome that cannot be accessed directly from your starting area, and each has unique resources that will give you more tools to work with.
  • What direction(s) can we easily expand our base toward?
    • Over time, we'll eventuallly want to clear out a large open space and establish an industrial area outside of our colony's core.
    • We'll also want space to place additional Stables for more critter types.
  • If on Terra (or other map with the Swamp biome, which has pools of Polluted Water and caches of Gold Ore)
    • Can we find some accessible Fungal Spores (seed) / Dusk Caps (plant)?
      • We'll want to start using more efficient food sources soon.
      • If Swamp biomes aren't available for your map type, consider prioritizing open spaces for increased ranching instead.
    • Can we find some accessible sources of Bleach Stone?
That's a lot of questions, but the driving motivation is this: we need to scout our world so that we can do effective base planning. Also, now that we're starting to proactively explore the outside world, it's not a bad time to consider taking a second Digger-interest Dupe, expecially if you can get it comboed with a Building interest. Getting an extra Supply Dupe or a Tidy Dupe (pick one) would be pretty useful as well, should you not have one - we'll want a Dupe to focus on Storage tasks soon. (Of course, take your time to find a good one.)

Exploration Approaches
When exploring, you may sometimes wish to do some... interesting... digging patterns, like this:


While it's not exactly straightforward, it allows us to avoid opening up major pockets of gas that could mess with our base's atmosphere while still allowing us to uncover more of the map. For now, try to avoid opening pockets of strange atmospheres or mining any tiles of Slime. We'll talk about handling those in a bit.

When digging vertically, an approach like the following is often best:


Dupes have a strange pathing behavior sometimes when it comes to digging. When a tile is first cleared out, they don't immediately consider any newly-available tiles. If nothing else is available nearby, they'll run away to other job sites. Allowing them to dig out a neighboring tile instead keeps them in the work area. If the resources align well, this can also give them a closer supply of material to work with - great when digging in remote locations later!

Areas of Interest
For starters, here's the new version of my revealed map:


This was enough to find a few interesting areas. To give you some ideas of what to look for, here are some of those interesting sites I've found and why they look interesting for colony planning:


Both areas circled here in green (left side of base) have almost literally no unique features worth long-term preservation. The top one in particular does have a few large pockets of weird atmospheres, but that's it. There's no geysers or ruins of any kind in our way - a perfect area to clear out and use to extend our colony.

There's also the fact that each of the two circles is a single biome. It's generally easier to strip mine a single biome than deal with the challenges from multiple biomes simultaneously.

The lower circled area also has two Dusk Cap plants growing in it, which makes four total that we can see so far - there are two others near the Natural Gas Geyser that were already visible.


Here we see the area above our base. I've added a dark red box that lines up with the central corridor. While there are a few bits of "ruins" in the area, we're fortunate in how the parts in the way can be deconstructed without issue.

In other news, say hello to two more geysers - we found a second Cool Steam Vent and another hidden geyser! My miner hasn't quite unlocked the final Digging Skill yet, so I'll note what we found later. We've also found the bottom of a Frozen biome - note the blue color theme.

Speaking of Frozen biomes...


We've managed to get a good peek into this one from far to the right of our base. There's another hidden geyser at the edge of our vision - note the selected tile and hovering "Neutronium" text. We can already see four Wheezeworts in there - those light-blue cacti things. Those are great for passively cooling areas down - something to keep in mind once we start producing significant amounts of heat.

Other Notes
Each of the three screenshots above includes at least one significant deposit of Bleach Stone - we'll have our pick of sites to mine out when we want that resource.
-- Base Planning (Round 1) --
Taking a look at the needs of our base and what's available around us, we can start planning some general strategies for our base. I do have some general advice I usually give at this point, but how it applies to your game will depend on where sites like those above can be found within your own game.

If you want to play it safe, my usual starting advice is to start utilizing resources we can find within a Caustic biome.
  • This is where Balm Lilies grow, which can be used to make anti-Slimelung medicine just in case things go wrong in the Swamp biome.
  • Chlorine is pretty useful for sanitizing the Swamp biome's debris - especially the Algae, which sometimes will carry Slimelung germs.
  • Iron Ore is usually found here, which is great with our Smooth Hatch plan.
  • There are stores of Coal and Algae for free here. No germs, just a bit hot. This extends our longevity.
  • This is where we can first find Dreckos, and we want to ranch these critters too.
  • Very large quantities of Igneous Rock can be found here - it's the best readily-available material for building Insulated constructions.
    • While better materials do exist, they all require significant amounts of processing and have their own drawbacks.
    • Igneous is "good enough" for anything Insulated we'll want to make in the mid-game.
Combine that with this picture from earlier:


That huge upper-left circle is a Caustic biome, and its resources are ripe for the taking. They're a little small in the image, but there are three wild Dreckos in the big pocket of mostly-Chlorine. Below that big pocket is quite a chunk of Bleach Stone, and inside the pocket are some Balm Lilies that have dropped a few Flowers - the part we need for medicine making.

That area is also on the same side as the two Cool Steam Vents and the Natural Gas Geyser we've been talking about. Clearing out the area will better prepare us to utilize those features when the time comes. So, our next goal: breaching this Caustic biome.

From Caustic to Swamp
After that, we'll want to look toward some Swamp biomes. While they can be dangerous due to germs, we'll have the tools to handle it after mastering the Caustic biome.
  • This is where Dusk Cap plants and their seeds, Fungal Spores, can be found. They're a much more efficient plant to farm than Mealwood!
  • There's a ton of Slime here. This is the real danger... but it can be used to grow Dusk Caps. It has some other nice uses too, and we'll need to clear out large amounts of it eventually.
  • There are often large pockets of Polluted Oxygen here - run it through a Deodorizer for clean air!
  • Those huge pockets of Polluted Water can be extremely useful.
    • They make great early coolant for industrial processes - Polluted Water has a higher boiling point and a lower boiling point than Water!
    • If we run low on Water supplies, we can easily get more by running Polluted Water through a Water Sieve - and these pockets are at a very appropriate temperature by default.
  • Last but certainly not least are the huge deposits of Gold Ore that can be found here. This is generally the easiest metal to refine and is super-useful for all kinds of tasks.


An additional note, in the case of this seed - I never explored much below the colony - largely because there was no easy access into and through the Swamp biome below if I followed my own advice earlier. We'll want to be able to scout that area out too, and we already have plenty to do at the moment.

Beginning Industry
As noted earlier, the Swamp biome will give us a number of tools quite useful for starting some industrial processes. In particular, we'll want to utilize that "great coolant" property of a Polluted Water pocket or two for some high-efficiency refinement. After that, we'll do another round of scouting - in particular, we should be able to make a strong push toward the bottom of the map for some very useful resources we haven't yet seen.
The Caustic Biome
The first thing to decide upon whenever entering a new biome... is where to enter it. There can be a few factors to this:
  • Just passing through, like we did earlier for exploration? Avoid any atmosphere pockets.
  • Wanting to clear the place out? Get rid of the troublesome spots.
  • Is there something particular you want to harvest? What will help you get there?

New Researches Required
  • HVAC (Tier 4) - unlocks the Gas Reservoir
Here's where I decided to properly enter the Caustic biome to the left of my base:


My reasoning for this spot:
  • That big pocket of Chlorine must be cleared out if we want to mine out the whole area while controlling the atmosphere.
  • That pocket is also where the Dreckos are.
  • I have enough space for a small work area to support exploration there.
  • This will also get me direct access to the Bleach Stone and the Balm Lily Flowers within.
  • When the big atmosphere pocket has been handled, it'll be safe to scout what's on the other side.
  • I'm coming at the pocket from the middle, rather than the top (problem with Hydrogen) or the bottom (problem with Chlorine).
Now, note the dig commands approaching the big gas pocket. This is a good spot to start establishing a station to pump out the pockets' atmospheres in the area. You'll want to build something like this:


The top Gas Filter is set for Hydrogen while the bottom one is set for Chlorine - Chlorine's obviously the higher-density gas in that pocket, after all.

Once you've built everything out like this, mine the final tiles in front of the Gas Pump and then connect the final wire. You won't even need a Builder to make the connection; everything's prebuilt, so the game will automatically link them for you when you tell it to. I build like this pretty often so I can control when the pump actually starts, since this build will draw a lot of Power for a while, keeping our Dupes busy.

Also, once you start the Pump actively working, consider setting the door's access to only permit exits from the gas pocket. This will allow any Dupes still inside to escape, but they won't be able to come back until you change the permissions. This prevents gas from having opportunities to escape. That said, once the front gets low pressured, you may want to open the area out a bit so things can flow better. This is also a good time to add a temporary Oxygen Diffuser by the local Generators.

After a while, you'll start having much lower pressure near the pump than elsewhere in the room. At that point, consider adding an extra pump at the front and disabling the old one:


Nearly two cycles later, I've already captured a lot of the Chlorine in the pocket - the pressure's down from 1kg/tile to an average of maybe half that. Note how the Hydrogen portions have expanded accordingly. (This was taken just after disabling the old Gas Pump.)

Of course, pumping that area near-completely will take a while; feel free to start work on the next section of the guide while you wait if your Dupes start idling a lot.

Ready for Entry
Eventually, that big gas pocket should start having a very thin atmosphere.


At this point, we'll have little issue if we open the door for full access. While we didn't capture all the gas, that's okay - the goal was to prevent a LOT of it from spreading to places we didn't want it. With the low pressure in the chamber, Oxygen from our base will spread inside, instead of the other way around.


And now, it's time for our plunder! Our goal here is to harvest at least 130 kg of Bleach Stone - this will be enough to start working on a Swamp biome. The same spot (in my case) also gives access to a few Balm Lily Flowers, allowing a second-tier skilled Doctor to make anti-Slimelung medicine to prepare a Hospital (coming soon) for possible issues with a Swamp biome entry.

You'll quickly notice that Bleach Stone "off-gasses" - it will emit small amounts of Chlorine. To prevent this, I advise setting up the following somewhere:


This will make it a high-priority item to store, preserving as much of our harvest as possible. Solids that "off gas" cannot do so when the tile they are in (the bottom tile of the Bin) is submerged or otherwise overpressured.

Other Notes
Now that we have our second "Consumable Ore" resource, go over to your Coal plant and check its Storage Bin.


By default, if a Storage Bin previously accepted all items of a category into Storage, any new resources of the same category are automatically accepted to the same Bin when discovered. In this case, we don't want that - uncheck Bleach Stone here.

It's generally quite helpful with food items and seeds, but not so much with a few specific resources.
Swamp Preparations
Since gas pumping operations tend to take a while, it might be a good idea to start a few simple building projects back in the base while we wait. Both of these areas are good to have around when entering a Swamp biome, so we'll want to tackle them soon anyway.

Slime Containment + Processing
In the last section, we talked about storing Bleach Stone underwater so that it can't convert into gas. Slime from the Swamp biome works the same way, producing germy Polluted Oxygen that can get your Dupes sick. As a result, it's not a good idea to leave it lying around everywhere.

Fortunately, there are two great early-game uses for Slime that we can start preparing for right away - Sage Hatches and Dusk Cap farming, the latter of which produces Mushrooms for food. I like to build specialized spots for both of these close to each other within my colonies, starting with a room like this:


(Apologies in advance; I forgot to set a hotkey for this location to keep all the pictures at the same point.)

The top area is for Sage Hatch ranching, while the bottom is for two separate things - farming on the left and long-term food storage on the right.

Once you have the room shaped like the image above, find any lingering pockets of Carbon Dioxide (CO2) that you can and build a Gas Pump with piping that leads to this room. Dusk Caps require a CO2 atmosphere to grow. Note the design of the room - since CO2 is the heaviest gas, it won't escape this room unless we let the area become drastically underpressured.

That said, I made the room one tile too wide by mistake - move the right wall one block to the left so that we can preserve the central corridor. I'll show a completed and fixed version of this toward the end.


Since CO2 provides a "sterile atmosphere" according to the game, any food stored within it will not spoil - and for absolutely no Power draw! That's a big bonus we can definitely use right away, so let's start pumping when we can.


At this point, there are a few of things I'd like to note:
  • Note the top room - I've used the "Auto-Bottle" feature of a Bottle Emptier to place one full delivery of Water (200 kg) in a single tile. That will be more than enough to submerge any Slime in the tile. (Less is generally fine; I'm not sure what the minimum effective volume is if there is one.)
    • That tile is a bit too low, though - so I'm going to build Tiles in such a way that I can push the Water up to where I want it.
  • About those new Refrigerators - we're never going to plug them in. The new Carbon Dioxide atmosphere will do the work for us. We build them because they are very compact food storage structures.
    • I like to use these for my "unprocessed ingredients" - one for Pincha Peppernuts, one for Raw Egg, etc.
    • The Refrigerator in the Mess Hall / Great Hall gets the prepared, higher-Morale food.
After a bit more work...


Please disregard the wild Drecko - it wandered in by mistake.

The main Slime storage will be in the Storage Bin below the Sage ranching area. Note that it also gets its own Water pool. From here, there's just a little more to take care of - we'll want to put a door on the place to prevent wandering wild Shine Bugs and we'll want to add a couple of Sinks.


Since we'll be handling Slime pretty often in this area, it's wise to ensure that Dupes clean their hands before leaving. We don't want any Slimelung germs to pass onto Algae that's about to be used for Oxygen - something that can easily happen otherwise.

Again, I made a bit of a mistake with the room's dimensions before - you'll want to aim for something like this for the final version. I had to move the right wall a bit to the left to preserve the central corridor. Of course, this is also a good opportunity to show off what the room will become.


The Hospital
You may remember that I reserved a zone just above the Washrooms previously, stating that I wanted to make use of the area's plumbing. Now's that time:


Researches Required
  • Medical Equipment (Tier 2)
Other Requirements
  • A Dupe with the Duplicant Treatment Skill.
    • For me, that's my Cook/Artist/now Doctor. She's multi-talented. I do this because all three tend to be somewhat low-demand jobs, so there's no reason to have a dedicated specialist for just one of these roles.
Once you've gotten the Hospital in place, build an Apothecary and manufacture a few Medical Packs. They take a while to make, so having them ready for treatment early is useful. That said, I've gone a game without ever needing any, but it's better to have them and not need them - especially when you're still learning the game.

Please ignore the wild Pufts - they're a random gift from the Printing Pod and serve no purpose here.

Other Notes
Once all of the preparation work above is complete and we've also completed the previous section, congrats - we're basically ready to enter the Swamp biome.

Note that the next two sections may also be taken in parallel, with the third starting shortly into the first. A patient approach works best in that biome, leaving plenty of time for work within the core base, so I usually work on the Drecko farm and proper Mushroom farming after starting to enter the Swamp.
The Swamp Biome
Planning the Entry

Now that it's time to enter a Swamp biome, the question is "which one?"

-

The top-left option isn't particularly useful right now outside of a few Dusk Caps. Two of them can be reached without mining any Slime, and the Algae I've set for mining is germ-free. We can grab those quite easily.

The top-right option also has a few easily-accessed Dusk Cap seeds. There's also a wonderful amount of space for future construction, but we don't particularly need that now - we've hardly used the space we just got from the Caustic biome! Neither of these areas has large but hard-to-reach Gold Amalgam deposits, either.

As a result, my current plan is to break in, get what I want, and leave quickly. We can do a little scouting from the easily-entered pocket in the top-right version, so we'll at least stick around for that first.


All of that being said, I want to start processing the area below the base. Remember, we haven't gotten to do any scouting down there yet. In the long-term, we'll also want to find a pathway straight down for our central corridor - we'll eventually want to mine through here. There are some decent deposits of Gold Amalgam here, which is nice, as well as some nice pools of Polluted Water - it's always great to have this near to the Coal Generators.

Finally, there's the fact that it's a large section of Swamp biome - if we're going to invest early in a specialized setup for entry to this biome, investing somewhere that we can work for a long time is a good idea at this point.

New Required Researches
  • Liquid-Based Refinement Processes (Tier 3) - yes, despite using Chlorine Gas and not liquids.
Swamp Biome Entry
Once you've decided where you want to establish a serious mining operation at a Swamp biome, build something like this at its entry point:


That's two Hand Sanitizers and two Ore Scrubbers, the latter of which is unlocked by the new tech. I've added Gas Pipes from the Chlorine-filled Gas Reservoirs to them, providing their needed supply. They're also on the only path out of our future mining operation, ensuring that Dupes must pass this station and sanitize before leaving. We also have a couple of Deodorizers planted at the Ladder to stymie any Polluted Oxygen that may try to pass through.

Also notice that I've enacted door permissions settings here. I'm only permitting my two mining/building Dupes (to explore) and my two Dupes with high Storage priority - with one Ore Scrubber for each of the two. This way, while infected Slime may pass through the Scrubbers, Algae is nearly sure to be sanitized before it makes its way into the base. Why does this matter?


Tiles of Slime over around 225 kg can exceed a count of 1 million Slimelung germs. When this happens, Slimelung spreads to the neighboring tiles - this can infect nearby Algae. If that Algae makes it into an Oxygen Diffuser before the germ count goes down significantly, a lot of your Dupes could get sick - that's not good. We'd also prefer not to have it in any Sand, since that goes into Deodorizers and could also pass into Oxygen that way.

Each Ore Scrubber use will reduce the germ count by 480000 germs. That's not quite enough to make this Algae block germ free if it were to be instantly used, but it would significantly reduce the danger.

Now back to our entry:


Once the Deodorizers are done and have Sand, extend the ladder a few tiles, looking for non-Slime spots to set new Deodorizers - especially if you see a nearby pocket of Polluted Oxygen. In my case, there's one under the right Ore Scrubber - I want to find a relatively Slime-free access point there and prepare to release its gas.

Also, once you've harvested your first Slime, quickly set the prepared Storage Bin to store Slime at priority 7. While you're at it, disable disinfection of it; it'll be a lost cause, which is why we have Sinks at the exit of the prepared area.


This is why I didn't bother with an Oxygen Diffuser down here - there's a TON of locked Polluted Oxygen here. Now that I have an array of Deodorizers here, it's time to open up that pocket and let them do their work. While they do so, it's a good time to work on a side project. (At this point, I've already started up the Mushroom farm.)

After a few cycles of that - since that wasn't the only high-pressure Polluted Oxygen pocket - I arrive at this state:

Continued Exploration


As you can see, I've made it to a nice chunk of Gold Amalgam and to the same position as my central corridor. We're not exactly ready to connect things yet, though - there's a lot of stuff yet to be mined before we fully link them. The part that most catches my eye, though - we have a lot of small Polluted Water pools up high and a nice big pool toward the bottom-right. My plan: I'm going to use gravity again to make one big pool of Polluted Water down there. That will prove quite useful for efficient Metal Refinement, too.

If I can do that and clear out all the Swamp biome to the right of the central corridor, I'll be in a good spot to properly extend the ladder through the biome and access the Frozen biome below. Speaking of the Frozen biome, we can already see a beautiful amount of Wheezeworts just waiting to be utilized there.

One possible issue though - this biome is also the home of fish critters called Pacu:


These critters eat Algae in large quantities if you give them the chance! Since we're still Algae reliant, that might not be the best idea. If you have the chance to snipe an Egg out of ponds you want to dig out, consider doing so. Our core area's Water pool will make a great home for them; use the Storage Bin trick to make it work. Then, just wait for the parent Pacu to die out - they have short life spans - and there should be no issue. Or you can just kill it once the Egg is laid - if you're not feeding it Algae, there's no effective difference.

If you're wondering why I spam Deodorizers, check this out:


Despite my spam, the Dupes are getting exposed to strong enough levels of Slimelung that they risk becoming sick - and this is with the germs dying off in regular Oxygen. They'll go nuts in Polluted Oxygen, so take care. This is what we made the medicine for, but our supply is limited - take care. (It used to be a much deadlier disease, too - veterans are often extra-skittish around Slimelung as a result.)

Final Notes
From here, everything will proceed about the same way. I'm basically waiting a few more cycles for the bottom pool's Pacu to die off, and then I'll go nuts with its pool. There's another Pacu in one of the higher pools that I have to wait on anyway; I'll just wait for its Egg to spawn before releasing its Polluted Water to finish the job.

During some of this wait, I built a ladder down into the lower Frozen biome and saw the other side. More on that later.

Drecko Ranching
Now that we've opened up a Caustic biome, we have access to a new critter - the Drecko. They have an interesting diet - they eat growing plants, rather than raw resources or harvested food, but what they produce in return isn't that interesting.


When in a Hydrogen environment, Dreckos grow Reed Fiber wool - this provides a nice, low-cost source of clothing (and exo-suit) material. The real reason to consider this, however - by feeding them Mealwood, we can breed Glossy Dreckos, which provide very low-cost Plastic. Plastic is otherwise a high-cost advanced resource quite useful for some high-tech buildings. While it'll take quite the time investment due to the slow breeding and growth process for Dreckos, it's a very worthwhile endeavor that will pay dividends - so why not start it now?

A standard Drecko needs to have two accessible, growing Mealwood plants to survive. (Pincha Pepper and Balm Lily also work, but are not useful for breeding.) A Glossy Drecko needs three Mealwood plants or Bristle Blossoms to survive, so this room can only really sustain 3 Glossy Dreckos - which is our target.

Part of the trick, of course, is getting the mixed atmosphere in the room required to maintain this ranch. Mealwood requires Oxygen, Carbon Dioxide, or Polluted Oxygen to grow, but the Dreckos require Hydrogen for their fibers / scales to grow. Fortunately, we probably already have Hydrogen left over from our trip to the Caustic biome.

Basic setup
In case it's not clear exactly where I put this, here's an image from the start of construction:


The planned site will require downgrading the Nature Reserve to a Park, but that's a sacrifice I'm willing to make. While I'm not showing the overlay here, I have set the area to an errand priority of 3 - that way, Swamp biome work is prioritized. Those who cannot access the Swamp will instead work here.

Eventually, all the digging is done and the room's structure is ready:


Similar to the Slime containment area, I'm going to pump in Hydrogen. Since the room is closed at the top, any Hydrogen on the roof is likely to stick in place undisturbed, allowing the Dreckos to slowly grow their special products over time.

Also, at this point you should seek out the youngest Drecko you can and wrangle it into this room. If you're extremely lucky, there may be an accessible Glossy Drecklet Egg - if so, grab that instead. Plant Mealwood in the Farming Tiles - this causes both strains of Drecko to be more likely to lay Glossy Drecklet Eggs. We'll only bother with one Drecko because right now, that's the only kind we really want to ranch. Again - 3 Mealwood per Glossy Drecko, while 2 can cover a regular.

Other notes
Don't be surprised if you only receive your first Stone Hatch eggs around now. As mentioned before, ranching is a significant time investment. Start early if possible! That's why we're also getting started on the Glossy process now.

As you might imagine, this construction is definitely not optimized for the best Reed Fiber / Plastic production possible. That's okay - we aren't going to need much of either for a long, long time. This is instead designed to be a simple, straightforward setup that is easy to understand and use. Feel free to make fancier versions if you want! That said, this is generally enough to cover any Plastic needs I'll have for the first few hundred cycles. There's no rush here.
Mushroom Farming
As we talked about previously, Slime is quite useful for growing food - Mushrooms. If you run the numbers, it turns out that Mushroom farming has the most efficient resource conversion rate of any food - merely 4 kg per cycle of Slime is needed, as opposed to the 20 kg/cycle of Water (or worse) of most of the other food types. The closest competitor is Lettuce (yet to be discovered) at 5 kg/cycle Salt Water - which happens to pair really well with Mushrooms.

Mushroom Farming also has a few other interesting properties. Its plant, the Dusk Cap, requires darkness and a Carbon Dioxide atmosphere. That latter requirement can be very useful for something else - food preservation! Fortunately, back in the "Swamp Preparations" section, we already built a farm for this - we just needed to wait for the seeds.


Now that we've gained access to Slime and Fungal Spores, we can actually start running the farm. Make sure to set the Storage Bin to accept Slime - it's under "Organics." Use a high priority so that loose Slime isn't left sitting around.

Once you've collected at least 3000 kg of it and have a Sage Hatch, also swap the stable's food supply to Slime. Mining out a Swamp biome breaks loose a lot of Slime, and Sage Hatches will be the quickest way to eliminate it! Sages also have the most efficient rate of conversion to Coal, so this will further increase our Coal stockpile for generating Power.

Alternatively, the Distillation technology gives you access to the Algae Distiller. If you're not on the Terra map (and thus are low on Water), consider using this instead - it will convert 3 parts Slime to 1 part Algae and 2 parts Polluted Water. Just be careful with the germs...

After some time, your farmer should be able to produce a few extra Fungal Spores for you, eventually giving you a fully-planted Mushroom farm. At this point, you should be able to completely remove the old Mealwood farms!

Benefits:
  • Fried Mushrooms gain +400 kcal as part of the cooking process.
  • Slime is incredibly efficient for food production.
  • Fried Mushrooms give +1 Morale instead of Pickled Meal's -1 - easily enough to cover another Skill for your Dupes.
  • Fried Mushrooms are more space-efficient - 2800 kcal per kg instead of 1800 kcal per kg of Pickled Meal.
  • They require a mere quarter of the work time that Mealwood does, freeing up Dupe time for other tasks.
After a while of mining in the Swamp biome, my Mushroom farm is almost full! You can also see that I got a Sage Hatchling Egg recently.


With 12 plants currently growing at 4 kg/cycle of Slime, I already have enough Slime for 30 cycles of Dusk Cap growth - and this is with a few breaks to let Polluted Oxygen pockets clear out. After clearing out the bottom-right of the Swamp biome as planned, I'll have far more in storage, allowing me to farm these for the foreseeable future.

Of course, we will need to keep an eye on our Slime levels from time to time, especially once we have active Sage Hatches. That said, we now have the know-how and the tools to get more whenever we need it.
-- Base Planning (Round 2) --
That was a lot of work, but we now have a lot more options available to our burgeoning base. We've found our way through a Caustic biome and a Swamp biome and come out on top. Take a look how far we've come since the start of the guide!


-
You might notice that I've done a few things in the background to further enhance the base, like the new Fire Pole in the central corridor - this makes descents quicker for Dupes.

Now that we've acquired large amounts of Metal Ore and a big pool of Polluted Water, we can start taking steps to extend our reach even further into our world. If you've scouted far enough to the south, hopefully you've seen one very important feature:


We call this area the Oil biome. This area gives us a ton of valuable tools to work with:
  • Lead - a naturally-occuring Refined Metal! Mining lots of this will help us overhaul our Power network!
  • Crude Oil - useful for Power and high-temperature liquid designs, this versatile resource has all sorts of applications.
  • Diamond - incredibly potent for heat conductivity applications
  • Fossil - can be crushed to yield Lime, which is used to make Steel. And there's tons down there!
With the tools we just acquired and the resources we'll gain when we reach the Oil biome, we'll be able to start properly industrializing our base. As a result, making the preparations for a visit, following through, and the upgrades this will afford us will be the focus of this guide's next arc.

Geyser Capture
You're likely at least 60 to 70 cycles into your game now. If so, keep an eye on any Cool Steam Vents and/or Natural Gas Geysers you may have found - there's a good chance that one may go dormant soon. Whenever this occurs, pause whatever else you're doing and start capturing the Geyser or Vent instead if possible.

Other notes
Since the last "base planning" section, I've gotten two new Dupes. Apologies for forgetting to screenshot the Printer Pod screen for the first! She has the Tidying and Suit Wearing interests.


Also, don't forget to check on your Washroom / reclamation loop every once in a while. It's probably been over 50 cycles since we first built the thing, and we don't want it to get backed up. That being stated...


Looks like I've got plenty more time before I need to worry about this. Just in case the same isn't true for you, a few suggestions:
  • If you're on a Terra seed and/or your Water supply's not an issue:
    • Thimble Reeds consume amazing amounts of Polluted Water, giving you Reed Fiber in return. This would be my standard go-to option, as that can be used to make in-game artworks, in addition to suits and clothing.
    • You could instead forward the germy Water to a Bristle Berry farm. The germs actually don't transfer to the crops - and even if they did, the Electric Grill automatically disinfects anything cooked on it.
    • Some other plants also consume one or the other. Consider an Arbor Tree if you lucked into an Acorn from the Printer Pod!
  • If we put a Liquid Reservoir in a room of Chlorine, it'll actually disinfect the Water... as long as we aren't constantly adding more germs to it.
    • We should still have quite a lot of Chlorine from our excursion to the Caustic biome for something like this.
    • The Pathogen Diagnostics tech (tier 3) gives some useful Automation sensors for this sort of thing.
Metal Refinement
Before we head into the Oil biome, we could really use a Metal Refinery. Our Smooth Hatches probably aren't up and running yet, but we'll soon be able to use Steel, a metal that they cannot help create. Furthermore, it's useful to have an easily-accessible, no-loss early source of Refined Metal. The main downside is that it requires an incredible Power draw of 1.2 kW to operate! This pushes the limits of our Coal plant.

In particular, the next things after this we'll want to build - Atmo Suits - require significant amounts of Refined Metal to make and utilize. While our production will be limited for now, this will lead to a big payoff down the road.

Researches Required
  • Smelting (Tier 4)
Other Requirements
  • Use a Kiln to make at least 800 kg Ceramic - we want to use this for our Metal Refinery, as it has a strong overheat bonus.
    • Ceramics require Clay, which we should have tons of from our recent Swamp biome work.
Before continuing, let's revisit a picture from the end of the Swamp Biome section:


That giant pool of Polluted Water will make a perfect coolant for our first Metal Refinery. You see, Polluted Water has a boiling point of 119.4 C instead of 100 C, and that provides us with a nice safety margin for some high-temperature work. We'll need it, too - certain Refinery tasks dump a lot of heat into their coolant.


Steel can only be made at the Metal Refinery, and each batch will heat 400 kg Water or Polluted Water by a whopping 56 C! Note that 119 - 56 C = 63 C, so that's the maximum temperature we can consider using for coolant here.

Now, for the actual construction. The structures, wiring, and piping are all relatively simple - note the pictures below. I've placed the Metal Refinery closer to the base while still being directly above the coolant pool. It's still a bit distant from the base, but it'll have to do - we will need a strong power supply connection for this. Polluted Water is directly pumped into the Refinery, then directly out and dumped back into its source pool. If possible, try to use a Gold Amalgam-based Liquid Pump here - we may need that +50 C Overheat bonus in the future.


The real trick is giving it a good Power source, which we had space for relatively close by. I've added two extra Coal Generators to the top of the old Coal Generation plant on their own Heavi-Watt Wire and Automation Wire; this line will be dedicated to the Metal Refinery and its Liquid Pump for now. I had to clear up some of the old wiring in the area and use the Rock Granulator for a little more Refined Metal to make the Smart Battery, but that's okay.

With this building constructed, we can start producing mass amounts of various Refined Metals for use in industrializing our base. Start with around 600 kg of Copper, then swap to around 3000 kg Gold. Iron is more expensive to refine, as it generates more heat, while Copper and Gold are much more maintainable to industrially refine - Gold in particular. At the same time, we don't want to make our source pool too hot yet; we'll have trouble making Steel otherwise. For now, absolutely avoid heating the source over 50 C - we'll want that room to work with later.

Early Refined Metal Uses
There are a couple of early uses for Refined Metal worth mentioning now that don't fit in very well in the upcoming sections:
  • Use your first 200 kg of Refined Gold to place an Auto-Sweeper inside the Coal Generator power plant if you have a Dupe with the Mechatronics Engineering Skill. This will automatically resupply your Generators when they get low!
  • It may be worth spending another 200 kg to place one near the Mushroom farm; we can have one automatically supply Slime to most of the plants there.
  • Alternatively, building one Incubator with Gold now might be a good investment. Put it on its own circuit if it would overload your current Power lines. We should be able to afford this now, and it will help finish up our ranching efforts from earlier in the guide.
Steam Vent Enclosure
A big event has recently happened in my playthrough:


It's time to "capture" the Cool Steam Vent and lock away its heat. But how can we do this?

Fortunately, we literally just acquired the tools we need to properly handle this task - all that Refined Metal is perfect for making Atmo Suits, which can protect our Dupes from uncomfortable and hostile environments!

We were already about to start on this, just in a different location. So, we'll take this in three sections:
  • Preparing for entry (this one)
  • Atmo Suit Station
  • Capturing the Cool Steam Vent
The best way to enter a Cool Steam Vent's area is usually from the top-left or top-right, like so:


I usually prefer to build a 3x3 notch on the top-left or top-right for entry; you can see that I've alloted the space here already. We'll talk about that in the next section. In the meantime, also notice that I've placed a Ceramic Pitcher Pump in the chamber - we need that +200 C overheat bonus to have one there safely! why would we want to do this?

As it turns out, the Super Computer doesn't care what temperature of Water you give it for Research. The question: would you rather eliminate renewable hot Water for your research, or our valuable, currently non-renewable cool in-base Water? The answer should be pretty clear - so disable the old Pitcher Pump and use our new Water supplies instead for loads of research!

A little bit more about this 'capture' station - note the design of the entry. Vents and Geysers stop emitting their resources when overpressured. For liquid outputs, what matters are the bottom two rows squares. While the Pitcher Pump lines up with the "two rows" rule, we add an extra row for the door so that none of the contents accidentally leak out.

If possible, make the Manual Airlock from Gold Ore, as it has the lowest thermal conductivity. If that is not available to you, go with Iron instead, as it's the next lowest.
Atmo Suit Stations
Now that we've readied a site for our first Atmo Suits, it's time to set them up!

Researches Required
  • Hazard Protection (Tier 4)
Other Requirements
  • 300kg of the following Refined Metals per suit:
    • Copper (sometimes not found on non-Terra worlds)
    • Aluminum (not found on Terra)
    • Iron
  • 2 Reed Fiber per suit
    • Fortunately, we have access to Dreckos and to Thimble Reeds from the Swamp Biome, both of which supply this.
To start off, let's refer to our future Atmo Suit station site:


We've got that nice 3x3 spot to stick the necessary buildings for Atmo Suit use now - it's just a matter of getting the resources ready. While we do so, there's something else we'll need to get ready - we'll need a decent supply of pumped Oxygen for them. Build something like this:


This establishes a dedicated station for supplying Oxygen to any Dupes working here. It's pretty simple and localized, so we can remove it at a future point pretty easily whenever we want. Now it's a matter of building the actual station and the Atmo Suits themselves. You'll want two suits - that's what the initial 600 kg of Copper from the Metal Refinery is for. Use Gold for the Exosuit Forge and other needed constructions.

Also, since I haven't talked about this yet, notice how the only way into and out of the Cool Steam Vent's area will be through this station. This ensures that the Atmo Suits are always handled correctly here and that Dupes passing through will always be protected. Another detail - if there is no Atmo Suit available with enough Oxygen, Dupes won't go inside!

Once you get the Atmo Suit Docks built, connect them like this:


This will evenly split the Oxygen between the two Atmo Suits when docked; otherwise, one tends to hog all of the Oxygen for quite a while. Then, once the Atmo Suits are ready and delivered, we're ready for the next section.

Other Notes
We'll be repeating this setup a few times throughout this guide, though for different entrypoints and places. The next one currently planned is for the Oil biome due to its heat and other dangers. The same core idea applies - only one way in or out keeps the Dupes safe. The Atmo Suit docks will still need their Oxygen as well; the only difference is where we place the different pieces.
Cool Steam Vent Capture
Now that our Atmo Suit setup is done, we can now safely enter the Cool Steam Vent's domain. That Water is pretty hot, but it's nothing the Atmo Suit can't resist.


Depending on your world and base's timings, your Cool Steam Vent may or may not have come out of dormancy at this point. If it's active, it's really not safe to send Dupes into that chamber without protection! You may want to selectively control when the Dupes enter, as Steam might escape when the Vent is actively emitting.

In my case, the Vent's still dormant, so it's time to get working. My first priority - it's now safe for my Researcher to enter and start analyzing the Cool Steam Vent's properties. Doing this will allow us to know all aspects of the feature's operation.

That data will help us know how large we should make the Vent's enclosure - since we know it will go dormant occasionally, we'd like to know how much Water we can expect on average and how much extra we'll need to save during the active phase as a buffer to maintain that average, but from reserves while dormant.


In the meantime, I'll add some more Insulated Tile walls and a Ladder matching the furthest point down that the Pitcher Pump can reach. We'll at least want those, no matter what the data turns out to be. After a few cycles...


Success - we now know all of this Cool Steam Vent's properties. Of course, making use of them involves a fair bit of math. If that doesn't sound riveting to you, consider making use of a resource like this one: ONI Assistant: ONI Geyser Calculator[oni-assistant.com]. It'll crunch most of the numbers for you.

Entering my data there tells me the following:
  • Average output while active: 2.437 kg/s Water.
  • Average output per active/dormant cycle: 1.228 kg/s Water. (That's actually kind of low for one of these...)
  • One full "activity cycle" (active/dormant) will fill 100 tiles completely.
  • There's also some data about cooling, but I'll worry about that later.
Basically, we're dormant half the time, so we need to store half of everything that comes in per "activity cycle" - we'll need 50 tiles of Water storage in our chamber if we want to smooth out the input over time while using the full average in the future. The chamber is ten tiles wide at its widest, but we have two 'half rows' because of the Neutronium and the Atmo Suit Dock flooring - we'll need three rows of tiles beneath the Neutronium eventually for proper utilization of this Cool Steam Vent.

At this stage, we're not actively using much of the Water and can let the heat bleed out into the neighboring Caustic biome, so we can just let it sit for now and fully enclose things later. This is possible in part because we're on a Terra map - we're given a colossal amount of clean, cool Water at the start, so we're not in a rush yet. (That may not hold true for other map types, though.)

For now, spending hot Water instead of cool for Research will already make a huge difference... and may even be enough on some other map types to keep our base afloat for now.

Other Notes
While we may not yet be fully utilizing this Cool Steam Vent, we've rendered the area safe for work and for future development. There are a few things to do before we fully integrate the Cool Steam Vent, so while we may not have fully "tamed" it, we have "captured" it in preparation of future work. We won't have any spills or other issues here and can revisit it at our leisure.

If you're on other map types and are running low on Algae or Rust, it may be wise to start pumping Water from here for use in an Electrolyzer. That said, you'll usually have some form of Oxygen supply that will last you for now; one of your first two biomes around the start will always have one-time consumable supplies useful for Oxygen. In my playthrough for this guide, I'm sitting at 35300 kg of Algae - easily enough to last me for a long time.
The Oil Biome
So, previously I managed to catch a glimpse of the Oil biome:


I don't have any other dormant geysers or vents of interest at the moment. While some of the buried ones might be dormant, but they're not the type we're prepared to handle yet, so they're best left sealed. So, the plan is now to prepare for entry to the Oil Biome.

This is best done via Atmo Suit, much like we did already with the Cool Steam Vent. This time, I'm placing the Oxygen-producing setup relatively close to base (near the coolant pool and refinery) while placing the Atmo Suits at the entrance, like so:


Because of the way I approached this area, I'd prefer to set up my Atmo Suit Docks just outside of the central corridor. (I've denoted the future corridor space with a maroon rectangle again.) In this playthrough, I'm super-fortunate with the placement - I can come at it from the side and top without issue! We won't always be that lucky; here's an alternate example from a previous playthrough:


It's usually a good idea to end the central corridor outside of the Oil biome so that random debris can't drop inside of it, then build an access point nearby like this.

Oil Biome Dangers
Where there are lots of goodies to be found here, there are a few major things to look out for:


Sporechids may have a nice Decor score, but they're also the source for ONI's most dangerous disease. When possible, avoid pockets with these or their germs, as they'll give your Dupes an incredibly nasty debuff. The medicine to cure the disease costs (refined) Tungsten and critter eggs of a type we haven't begun to ranch yet - the best "approach" is to simply not risk getting the disease. The germs will not die out within Carbon Dioxide, and they'll spread around within it - and that gas is quite plentiful down here for now.


For convenience, I've selected a normal-pressure tile of Crude Oil for comparison with the Crude Oil pocket near the cursor. By default, Crude Oil likes a pressure of 800 kg - but sometimes you'll find pockets down there at pressures at or over 3000 kg per tile. Whenever you open that area up, the Oil will rapidly expand until it reaches its desired pressure - make sure you've provided enough space for the Oil to fill before opening that up!

The Plunder
At the moment, we're after two particular resources that can be found down here, though two more will follow soon after:
  • Fossil will be extremely useful for making Steel - make sure to mine up what we can, as we'll want to start Steel refining soon!
  • Lead is in plentiful supply down here and is quite useful for placing Conductive Wire, which has double the overload threshold. It'll help us overhaul our current infrastructure significantly.
  • Resource #3 is Diamond, which is an utterly fantastic heat conductor. We'll want it for those purposes in the relatively near future.
  • #4 is the Crude Oil itself, which can take on relatively high temperatures and remain liquid. It can also be converted into Petroleum, but we'll worry about that feature much later.
Make sure to find stashes of plenty of each. You'll probably want to set up some Storage Bins for a few of these somewhere you don't mind getting hot but that will also be easy to reach - I'm placing these near the coolant pool as well. That way, your Storage Dupes will slowly bring the materials closer and shorten the Supply runs that would otherwise occur in the near future.

One last thing we'll likely find here, but want to leave down here, is the new critter - the Slickster. These are great for handling any Carbon Dioxide buildup, but we need to leave them in the Oil Biome for now so that their child critters will be of the same type. We don't want the Oxygen-eating version, which is what we'd get for bringing them into the base. There's also the fact that since they eat Carbon Dioxide, if they eat enough of it they'll make it safe for us to clear out the Sporechids in the future.

Other Features

While we won't be doing anything with these for quite a while, you should also keep an eye out for Oil Reservoirs. These sites can host Oil Wells to produce renewable Crude Oil at the cost of Water for us in the future. Every world has at least 3.
Natural Gas Geyser Capture
During work on the previous section - actually, fairly early on - my Natural Gas Geyser went dormant. Looks like it's time for another round of Geyser capture!

As usual, the first problem to consider is how to properly approach the feature. As it turns out, Natural Gas is the second-heaviest gas in the game, losing only to Carbon Dioxide. Oxygen and other gasses will stay on top. Our Dupes like Oxygen... so coming in from above is the way to go.

For my Natural Gas Geyser and playthrough, I chose to approach like this:


The feature's already so close to my base that there's little need to process the whole biome for this; we can accept a little leakage of Slimelung for a bit. (I've got lots of medicine left.) I'm placing two doors to help limit the amount of Natural Gas that might escape. There's one other thing I can do to help with this task - keep the Oxygen pressure up top high. The easiest way to do that is to add an Oxygen Diffuser between the two doors. Feel free to use Mechanized Airlocks instead of Manual Airlocks if you can keep them powered; this will reduce the amount of time that the doors are open.

That said, even then, expect a lot of gas to weasel its way out by the time we're done here. We can only try to minimize the loss.

Researches Required
  • Low-Resistance Conductors - for Conductive Wire. We want to future-proof the chamber before we seal it.


As you can see, after that I built a ladder down next to the Geyser. The atmosphere isn't uncomfortable temperature-wise, so the only issue for a researcher is the Oxygen supply. I'm fine with my researcher running in and out a bit if it means I don't need to do the full Atmo Suit setup here.

Now that we're in, it's time to start building infrastructure to tidy up the room and make its contents usable. I've already started with wall insulation - once we start steadily using the Natural Gas from this chamber, it will be replaced with much hotter Natural Gas than is currently here. Since the Natural Gas comes out at 150 C, there's a chance it will eventually be that hot inside - too hot for Gold Amalgam to be of use. Steel has an even stronger overheat bonus though - so we'll use that for the Gas Pump here.


I've added just enough Conductive Wire and Gas Pipes to connect the chamber to the outside world in the future. The Atmo Sensor should be set to > 500g pressure for general operation - that should ensure full efficiency on our Power consumption here. Of course, feel free to sweep out any critical resources here as well - large amounts of Algae and Gold Amalgam are definitely worth keeping.

Materials List:
  • Conductive Wire, Automation Wire - Lead
  • Atmo Sensor - Lead (doesn't overheat)
  • Gas Pump - Steel
  • Gas Pipes (inside) - any material
  • Insulated Tiles - Igneous

Geyser Statistics
Just to highlight a different community resource, you can also use sites like the Oxygen Not Included Database[oni-db.com], which provides lots of references and shows the links between all sorts of resources. The site also has a geyser calculator, though it's a bit less detailed on the math specific to your personal geysers.

It turns out this one emits a net average of 88 g/s of Natural Gas over a full Active/Dormant cycle - just shy of the amount needed to run one Natural Gas Generator full-time. Not bad!

With a little care and preparation, we can now go ahead and fully enclose the Natural Gas Geyser, permanently sealing away its heat. The few resources locked away inside are well worth that price.

Coal Generation Plant - Stage 3
Following from the first two stages of a Coal plant laid out in the early-game guide, we're finally at a point to further extend the plant's capacities. First, note that the main base is only being supplied with a maximum of 1 kW due to the single existing Small Power Transformer and limited plain Wire line we have running north. It's not been a real issue until this point, given that until recently, only two Coal generators were being regularly run, but things are starting to change. How can be practically increase our available Power capacity?

Fortunately for us, not only have we started producing some Refined Metals, we've hit a motherlode of already-refined Lead. We can start merging our Power systems now with a bit of effort - but first, it might be wise to merge the Coal Generation Plant. Right now, we're running it in two halves, remember?

First things first, if you've not already done so, it's time to fix that pesky issue that occurs when our generators run out of Coal. Rather than wait for a Dupe to fix the issue, why not automatically supply it? By this point, you should have a Dupe able to - or nearly able to - take on the Mechatronics Engineer role. This role allows the Dupe to build Auto-Sweepers, which can perform Coal resupplies automatically. Install one as seen in the image below.


Note the carefully-sculpted shape of the room. It's designed to allow the Auto-Sweeper to supply all four generators with Coal automatically. So long as the nearby Storage Compactor is supplied with Coal, that Auto-Sweeper can handle the rest! Gone are the days of occasional brown-outs! As for the wires in the main chamber, they're all a simple extension of the same lines from the original, first layer of generators.

That's hardly the only thing we're going to do here, though - so let's be sure to get a few things ready before continuing.

Researches Required
  • Smart Storage (Tier 4)
Additional Suggestions
  • Low-Resistance Conductors (Tier 4) - for the larger Power Transformer
Other Requirements
  • A Dupe with the Mechatronics Engineer job / perk
Our goal here is to maximize the abilities of our Power generators and link them together. Toward this end:


I've moved the Smart Battery to the lower floor now in the same place as the old Power Transformer. We now use a new Large Power Transformer at the right-hand side that's directly connected to Heavi-Watt Wire - we'll do more with that in the next section.

Of course, your eyes might be drawn to that big new structure where the Smart Battery used to be - that's a Power Control Station. Its benefit?


Our Coal generator plant is now formally recognized as a Power Room. The Power Control Station allows us to spend Refined Metal (I suggest Lead for now) to apply a special "Tune-Up" buff that raises a Generator's power output by 50%! (It does take your Operator-skilled Dupes quite a while to apply it, though.) So, for the cost of some Refined Metal, we can conserve our Coal supplies if need be. That stated, I'm not hurting for Coal, so I've disabled it for now.


Additionally, the two floors of the room have now been merged onto a single circuit - both for Automation and for Power, as seen above. Now that they're all on the same circuit, the maximum Power output is 2400 kW unbuffed - or 3600 kW if all the Coal Generators have the Tune-Up buff applied!

Other Notes
If desired, we can move the Carbon Skimmer one tile to the right in order to fit a second, doubling our maximum Carbon Dioxide processing power. I don't particularly need this ability right now, so I'm not going to bother doing so at this time.
Power System - the Rework
Remember all that time ago when I said there was a reason behind the six-tile wide central corridor? It's finally time to really talk about that. We're about to seriously upgrade our colony's maximum Power throughput, and we'll want a way to transmit all that Power wherever it's needed.

As our base's Power needs grow, wiring tends to become a tricky thing to handle. Conductive Wire can handle up to 2 kW of Power, double that of standard Wire, but even that won't be sufficient to supply the needs of a fully industrialized base. Rather than merely delay the problem, it is possible to solve directly at this time - with Heavi-Watt Wire.

Now, Heavi-Watt Wire's use comes at a "heavi" price - it's absolutely horrible for Decor, and it can't be hidden within Tiles. That said, we can hide it behind walls with careful planning. Enter the grand Power system rework - we're going to run a Heavi-Watt Wire near the base, if not yet into it.

First, let's revisit a picture from the end of last section:


See that little stub of Heavi-Watt Wire that we are linking the Coal Generator room to? We're going to extend that. We'll also link the Metal Refinery to the same line, but from below - that way we can keep using it.

By maintaining a Heavi-Watt Wire line outside of the room, it becomes possible to add smaller Power Transformers where needed to create smaller circuits supplied by our central generators:


Note the top part of the main line. Exposed parts near the main base should use Gold-based Heavi-Conductive Wire. While it offers zero increase in capacity, Gold-based Heavi-Conductive Wire mitigates a lot of the Decor issues of plain Heavi-Watt Wire. (While we haven't talked much about Decor yet, this is a good thing to do.) The rest of it can be made from plain Heavi-Watt Wire hidden between wall Tiles.

By leaving a corridor of width two on the left-hand side, it becomes possible to hide Heavi-Watt wire and any connected Small Power Transformers from the base at large. This allows us to have a main line of Power run through the middle of the base with minimal impact. Adding a wall beside this sub-corridor shrinks the Ladder and Fire Pole section to a width of three tiles, which is perfectly reasonable for general access purposes. Of course, Liquid Pipes and Gas Pipes may be laid out within the overall area as well, providing a main industrial line that runs through the base yet minimally impacts its decor.

This is also where having secondary corridors can come in handy - by closing off some some of the old access points to the right, we can fully hide Heavi-Watt Wire from view. This will restrict left-to-right access, but the lessened impact to Decor may well be worth it.


This rework will allow us to start using Power more liberally; we could even replace the old Manual Generators near the research workshop with a link to the main grid. While this does give increased freedom, try not to go too crazy with Power usage - Coal is likely still a semi-limited resource within your base. Take care not to outright burn through your reserves!

To better highlight a few of the points above, here's a little bit more rework of the power system near the Metal Refinery:


Note how I've used Gold-based Heavi Conductive Wire in the primary walk path out of the Swamp biome and in the future extension to the central corridor. With that, I've been able to place a Large Power Transformer right by the Metal Refinery and replace all of that old Heavi-Watt Wire with simple Lead Conductive Wire, which can be much simpler to work with.

Other Notes
Be aware that both types of Transformers generate small but constant Heat - keep an eye on your base to make sure the temperatures stay reasonable. Act as needed to counteract any excess heat.

If you haven't made any sort of "Hatchery" room in your base yet, the increased Power supply to your colony's core from this rework should allow you to safely implement one at this time if desired without worry of overloading Wires.
-- Base Planning (Round 3) --
Yet again, we've come a long way from where we were before:


Now that we've reached the Oil biome and have been able to produce some Refined Metal, we've been able to start implementing some nice upgrades within our colony. However... we're just getting started.

Also of note: there's a strong chance our efforts in Ranching are paying off now, or soon will be.


I've already gotten my first Smooth Hatch, thanks in part to the Incubator. I thought I'd already have my first Glossy Drecko by now, too... but my ranched Drecko is stubborn and doesn't want to give me the right Eggs. I figure it'll cough up a Glossy Drecklet Egg pretty soon, though, which will begin to yield valuable Plastic.

So, we're starting to produce Iron passively through ranching (or soon will), and Plastic is starting to become available too. We've also 'captured' a couple of renewable-resource features, but we aren't really doing much with them yet. Finally, we've only begun to start using the new resources from the Oil biome, too.

Given all of these resources now at our disposal, the next primary goal is a little different than those before - it's time to properly industrialize the colony.

Of course, before continuing, make sure to check your Oxygen levels, Algae levels, Water supply, Liquid Reservoir status, etc. Always keep an eye out for any issues on the horizon. Also check any special features for status changes; I have another Cool Steam Vent (a hidden one!) that's recently entered dormancy. A very rare feature of this one:


This is not normal - I've got two very close Cool Steam Vents - close enough that I plan to use a single enclosure to capture both together... at some point. But at the moment, I do have other priorities. The previously-hidden one also only just entered dormancy, so I should have some spare time at present. (Also, as I've covered the basics of Cool Steam Vent capture, I won't be expanding on this in the guide; I'll just say when I've done it.)

Industrialization
It's no accident that this section is coming on the heels of a Power grid upgrade - industrializing is going to require a lot of Power. In fact, we're going to start off by continuing to address the Power situation. One aspect of this - did you notice the start of a central horizontal corridor forming?


ONI is a 2D game, not 1D - we'll need a good pathway for power lines, etc in both the horizontal and vertical directions. This will be an offshoot of the original corridor that can branch out to other places. It's also noteworthy that Large Power Transformers fit far better in the horizontal version than the vertical version.

Of course, we'll have another issue to deal with - all the things we'll want to build are going to take a lot of space. Remember way back when, how we picked that Caustic biome because it'd give us wide open space to work with? Now's when that comes into play. Of course, we've got a fair bit of space to work with in the old Swamp biome, too - we should be covered between the two sites for a while. That said, mining them out more thoroughly would be a pretty good idea and idling task for the near future.

The Big Picture
You may remember at the start of this guide, in the section called "Mid-Game's Start", I mentioned a few overarching issues that we'll be facing in the midgame. In particular, as the game proceeds we'll need to move from Algae to Water for Oxygen production, and we'll start having to concern ourselves with Heat.

If you've been watching your Algae levels, you've probably noticed some significant shifts in your stockpile over time. Terra's pretty generous, so we still have time, but we can't get too lazy with the Algae mining at present. This will get harder the more Dupes we have in the colony, so don't be overeager about taking a lot of them - try to stay within 10 or so until we reach an alternate solution.

Have you been checking your daily reports on occasion?


When I run the math on this, that 367.5 kg/cycle of Oxygen from the Diffusers requires 404.25 kg/cycle Algae. (There's a ratio of 11 Algae: 10 oxygen.) At 28.8t ,or 28800 kg Algae in the bank, I have less than 80 cycles until I run out - and that's if I don't take on any extra Dupes. This is something I'll want to do, though. Now, there's some Algae I haven't mined out close to base, but this still simply delays the deadline - there's only so much Algae in the world, and it requires deliberate upkeep on my, the player's, part. Wouldn't it be nice to not even have to manage it?

Also, this arc of the guide will be lasting a while - do keep an eye on your Algae levels from here out. Make sure to keep mining extra if you get below 10 tons so that you can maintain a buffer - there should be enough around to last for a while yet, at least if you're on Terra like this guide assumes.


Our workshop is starting to get a little bit on the warm side. Now, part of that is the hot Water we've started using for research, to be sure. This will only accelerate as we continue adding Power Transformers and using more machines within the base - something we'll actually want, as a few machines (like the Jukebot) can dramatically boost Dupe Morale levels and allow us to take more Skills. Eventually, we'll need a way to deal with heat.


The biggest offender, though, is definitely our Metal Refinery. Depending on how much Metal you've been refining, things are probably starting to get hot down there - and it will only continue to get hotter unless we take careful action.

During this arc of the guide, we're going to learn how to address both problems - heat and our current Algae reliance. The first big goal for this? We're going to construct our first Steam Turbine setup. It'll take a while to prepare for this, but it's coming.
Idle Power
If you play like I do, sometimes your Dupes keep bothering you with Idle notifications. It can be rather hard to constantly find new things for them to do. What if we could make some of that downtime useful for the colony?

We've recently established a central Power grid of Heavi-Watt Wire, and it was mentioned that other types of Generators could be linked into it eventually. Why not start now and incorporate Manual Generators into the grid? While they may not add that much extra Power on a constant basis, this would allow the base to get an extra boost of Power when needed.


Required Researches
  • Computing (Tier 5)
The core idea of this site is to "bank" Power from Manual Generator use while also keeping each Power-generation task within a reasonable time frame, so that Dupes don't get permanently stuck on the treadmills. To ensure our goals are kept, we'll be using slightly more complicated Automation than before.


Settings:
  • Left Smart Battery: High - 1%, Low - 0%
  • Right Smart Battery: High - 90%, Low - 0%
  • Manual Generators: 100%, Priority 1.
  • Filter Gate - minimum of 10 seconds. Tune to your tastes.
Here's the "life cycle" of this Manual Generator plant:
  • Starting when the Smart Batteries are drained, the Manual Generators are set active by the Memory Toggle.
    • It's Active because of the Left Smart Battery.
    • The installation will not output Power to the grid at this time.
  • Once the Smart Batteries reach 90% Power, the system starts outputting to the grid.
    • At this point, the Dupes' Power-generation errands are on a timer corresponding to the Filter Gate setting.
    • Whenever the Batteries completely fill or the Filter Gate timer runs out, whichever comes first, the Manual Generators are shut down until all Power is drained.
This allows Dupes to contribute directly to the Power grid while allowing us to set a definite end-time on their errand there. For a single Dupe, the Smart Battery set will take 100 seconds to fill. At 90 seconds, the system connects to the Power grid, and the remaining 10 seconds of Power are covered by the Filter Gate. Of course, you can extend their run time on the Generators by adding to that Gate's timer - that way, in times of high demand, you can squeeze out an extra 20 secs per Power cycle while still limiting the time that Dupes commit to the errand. A "discharge cycle," where the Dupes are forced out, should be 40% of the length of the "active" Power-generating cycle. (You can cut it to 10% if you splurge with a Large Power Transformer instead of the smaller version seen next to the Smart Batteries.)

This allows the Dupes to still maintain a semblance of "idleness," allowing them to catch up on any errands that accrued in the meantime while occupying them significantly when errands are scarce. If you'd rather they check for new errands more frequently, just lower the "high" setting on the right Smart Battery and/or the timer on the Filter Gate accordingly to ensure quicker checks.

Before we leave the section, let's at least look at the connection to the Power grid:


Now both Power-generation builds can provide electricity to our base. Also, while I haven't built an extra yet at this time, I've cleared out space to link a second copy with the first - the build's simple and small enough to do this without much issue.
Power Prioritization
Now that we're starting to deal with multiple Power sources, we may want to prioritize the use of one over another. We can do that by smartly using Automation. By placing Smart Batteries on the main grid, we can determine how high the Power demand is compared to what our base can generate and adjust accordingly.


Note the new Smart Batteries on the main Power grid - they're now connected to the Large Power Transformers that connect the grid to our Power-generating rooms!

Coal plant - external Smart Battery
  • Standby: 100%
  • Active: 60%
Manual Generator (idling) plant - external Smart Battery
  • Standby: 25%
  • Active: 10%
These settings will ensure that Coal is used for Power before our "idle power" battery. Should the Power demand be too great for Coal to sustain the grid, then the Smart Batteries will eventually dip below 10% and we'll get a boost from our backup Smart Battery supply. (We want it to kick in before the Power's fully drained - otherwise machines might stop.) This will only become more stable as additional Smart Batteries are added to the external power grid's buffer for other connection points.

By staggering the "standby" and "active" settings on your Smart Batteries, you can determine the order in which different sources of Power will "activate" or "come online," allowing you to pick the most efficient or most plentiful sources first once you have the settings in place.

Of course, those aren't the only kind of settings we could implement - for those who prefer conservation and Dupe-based Power:

Coal plant - external Smart Battery
  • Standby: 80%
  • Active: 50%
Manual Generator (idling) plant - external Smart Battery
  • Standby: 100%
  • Active: 75%
With this setup, any Power from the idling plant will be used before Coal.

Generator Priority Hierarchy
As more sources of Power are added to the grid, here's my usual set of priorities when possible:

Always Run
  • Solar gets directly connected to the grid - it's 100% free energy, so we should automatically use that.
  • Steam comes next - it's a renewable Power source that will generally come from eliminating nasty heat; we'd like our heat elmiination uptime to be maximized.
  • Hydrogen (if storage is maxed) - these Generators are extremely efficient, and we don't want to waste any excess if there's no other use for it.
  • Natural Gas (if storage is maxed) - Petroleum processing generates Natural Gas automatically and can lock up if we don't use up the Natural Gas generated by refinement. (Max pressure matches that of the Natural Gas Geyser.)
Run when needed
  • Petroleum - these generators produce a lot of wonderful excess resources worth utilizing and generate less Heat per Watt than those lower in the list.
    • An argument can be made for "always run" depending on a base's needs and capabilities - Slickster ranches need Carbon Dioxide for sustenance.
  • Natural Gas (if storage isn't critically low) - it's more heat-efficient than Coal and also generates useful resources, though much less per Watt than Petroleum.
  • Coal - it's much less efficient than the rest.
Manual Generators generally slide between maxed Natural Gas and the end of the list, based on what I want at a given moment. If there's a lot of Idle time, I'll often move them higher in the list to conserve resources.

To set these "priorities", simply ensure that the Smart Battery settings will trigger the Generators in this order.

Conditional Power
As the base expands and becomes capable of more, you may wish to consider disabling non-critical Power lines when reserves are low - we can use Smart Batteries and Automation logic to do this too. Perhaps if reserves drop below 10%, we might disable Morale-boosting buildings like the Jukebot and Arcade Cabinet (once built) - perhaps even our Research Stations. By disabling non-critical structures, we can make sure the "lights stay on" where it counts.

Alternatively, you may wish to eventually consider activating certain Power lines only when Power is extremely plentiful. For example, Fertilizer Synthesizers are considered Power-negative - the Natural Gas they generate isn't enough to keep themselves Powered. However, not only is Fertilizer itself quite useful, that Natural Gas supply can bolster the colony during times when its other Natural Gas sources (the Geysers) are dormant. Spending excess Power now to stabilize Power later is hardly a loss.

In the late-game, cooling operations for rocket fuel might be a good "halfway" conditional expenditure. It's not critical, but there's a natural desire to see Rockets fly and bring back new resources and so we might not want to set its use too low, either. Perhaps we might set it to run so long as we're not at risk of using Coal.

Keeping our Power centralized on a main Power line allows us to make decisions via Automation on what can be used based on the colony's supply and demand at any time. It's quite a useful principle, so keep that in mind as we add more capabilities to our growing base.

Other Notes
If you recall, I previously mentioned that my playthrough's had another Cool Steam Vent go Dormant recently. I'll be taking some time to do this before the next section, resulting in this:


Yep. That's two Cool Steam Vents in the same chamber - why make separate ones when they're so close? The second one happened to enter dormancy by the time I'd analyzed the first, not that it'd have mattered greatly once I got the Atmo Suit Docks in place.

Stats:
  • On the left: overall average of 1.578 kg/s Water.
  • On the right: overall average of 1.246 kg/s Water. (This one had been hidden.)
Once we're able to cool the Steam effectively, this map will be providing the base at least 4.052 kg/s Water! (The already-analyzed one gave 1.228 kg/s.) While we are using one non-guaranteed output so far, there's another guaranteed one we've yet to utilize - a Salt Water Geyser. On Terra, renewable Water will usually be plentiful once you find all the features - and even most of the time on other maps, as lots of the possible random Geysers and Vents give some kind of Water too.

As you might imagine, eventually we may need some kind of "Water" network and/or prioritization. That's in the far future, though.
Infrastructure Expansion
Now that we've got our Power systems prepared, we're almost ready to get building - but first, there's a little bit of prep work we'll need to do. In particular, we're about to need a lot of empty room to work with. Naturally, this will take some time, but there's a fair chance some of our ranching efforts still need a little time to kick in, so that's okay.

Remember our expansion plans from way earlier - now that we've started utilizing central corridors, extending those if possible can be quite useful for us. Feel free to make just enough room to run Heavi-Watt wire and a pipe or two for now.


  • The maroon-colored rectangle symbolizes our planned expansion of the main horizontal corridor to our desired industrial site.
  • The light-green circles designate areas that we'll want to excavate for building space.
There's also a lot of space above the top circle there that was also already planned for mass excavation at some point. We'll get to that in time, as we'll first need a way to connect the Power lines and piping.

I've chosen to start by focusing on extending the corridor. I've extended some Gas Pipes to connect to the old Gas Reservoirs and Gas Filters, but there's a good chance I'll need to add more as we proceed. This is partly so that I can funnel all the Slime we'll want to dig out through that tunnel and the already-built Ore Scrubbers. (You may want to review "The Caustic Biome" when handling the gas pockets here.)


Once the pressure became reasonably low, I opened it up to let air come in. It's not close to base, and there are safe places for any excess Chlorine and Hydrogen to settle. Once I got close to the Ladders in the left Swamp biome, I installed a door at the top of the old Ladder and set it to prevent exit by that route. This allows us to ensure that Slime from the bottom circled area is handled properly by reusing our infrastructure for exploring the one originally below our main base. This could be handled by a second station like the first one, with Hand Sanitizers and Ore Scrubbers - the key is to make sure that all exits from the Slimelung-infected area are covered by these structures.

When you're ready to start mining in the new Swamp area, make sure you have enough room for Slime storage. If not, build an extra Storage Bin or two in a submerged area, like the giant Water tank from earlier, and raise its priority to 6 or 7. Basically, make sure any Slime near the Mushroom farm stays there (priority 7) rather than being relocated to the new Bins, which Dupes would do automatically if the new bins were set to priority 8 or 9.

Here's a look at where I am at the end of this section:


I've left in rows of tiles to make strip mining easier down there and I've just pumped out much of the Hydrogen gas that rose to the top of the area. The latter's not that necessary, but I like saving resources like that when I can. From here, I can continue to expand the open area as needed.

Oil Piping
Another noteworthy task to handle at the same time - we're going to want significant amounts of Crude Oil soon in our industrial area. Of course, that Oil is all the way at the bottom of the map. It may take a whlie to get the Liquid Pipes and Conductive Wire constructed, but the effort will be well worth it.


Other Notes
As a side note, if at any point you start noticing trouble from heat build-up, look for a Frozen biome and those light-blue cacti - the Wheezeworts:


I haven't talked much about them yet since heat's not been a big problem; that's because we've kept the hottest things away from the sensitive parts of the base. Some areas are starting to increase in temperature, though.

Also, something extra from one of the earlier pictures:


You may have noticed that I've shifted things for the entry to the original Swamp Biome.
While I've altered the main corridor, note that I've carefully managed the terrain so that any Slime is still only accessible through the Ore Scrubbers - all Slime on the right-hand side has been mined out. That Tile wall at the entry to the Frozen Biome is three tiles high, making it impassible. This allowed me to safely extend the central corridor's Ladder to connect with the Frozen Biome entry.

Remember:
  • Dupes can only jump across one-tile gaps. A one-tile height difference at the same time is fine.
  • Dupes can only jump up two-tile high walls, not three-tile.
Using these facts to your advantage can allow you to slowly integrate areas like this into your main base infrastructure.
[Principles] On Cooling Loops
In this section, we're going to pause for a moment to examine some very important details on how plumbing works in this game and how we can use that to our advantage. By being selective with what we construct and how we lay out our Pipes, we can control how liquids flow through a system or structure. These behaviors can allow us to create 'loops' that are useful for cooling - we'll visit a few of these in the next few sections.

Don't worry about building what you see at the moment; I'm going to use a bit of sandbox for demonstration purposes only before we proceed with a real build.

A basic loop
Let's start off with this structure below:


We have a Liquid Pump in a pool along with some Piping. The only other machine in there is a Liquid Valve.


That Liquid Valve takes input from the right and forwards all of it to the left. This prevents liquids from trying to go in the opposite direction. (Liquids automatically seek any available inputs that will take them, if possible.)

You'll note that there's one other structure here - a Liquid Bridge. That Bridge takes fluid from the Liquid Pump and sends it to the loop - but there's an interesting catch. Bridges will never send liquid across if there is no room for it - any directly-connected Pipes have total priority over the Bridge.

With these two structures in place, here's what it will look like when set in motion. First, filling the loop:


After a while, the loop will fill with fluid; at that point, we'll see this:


Note how the liquid "bubbles" are between Pipes at the top. On the other hand, the pipes at the bottom - from the Pump to the Bridge - have no liquid motion; the Liquid Bridge is entirely blocked by the circulating liquid in the loop and has nowhere to go.

Cooling Loops
To make a useful loop for cooling, we often want to check the temperature of liquids with the Liquid Pipe Thermo Sensor and pass anything too hot through a Thermo Aquatuner. This can be done in a few different ways; if the loop runs close to the Aquatuner, enabling and disabling via automation can work nicely. (I won't do this now, but you'll see this approach in the SPOM section.)

At other times, this may not work conveniently for the loop - we may instead want to send a secondary pipe path elsewhere for cooling to happen. We'll look at this now, especially since we'll be doing this in our next build for the colony.


In this image, I've added a few new structures but kept everything from the old loop. We're simply adding onto it. At the very top-right, we have a Liquid Pipe Thermo Sensor, and beneath that is a connected (via Automation) Liquid Shutoff.


The output of that Liquid Shutoff creates a new loop - one that runs to the new, isolated Thermo Aquatuner. That Aquatuner then sends the liquid back to the main tank, dumping it out from the new Liquid Vent at the top. (Note that due to ONI's pressure mechanics, the Vent must be at the tank's top - it'll overpressure otherwise and not release liquid.

So basically, we've added a second loop to the first one, if that makes sense. This new "loop" will only get liquid if the original loop's liquid gets too hot, sending it off to be cooled.


Because the Liquid Shutoff has an input on the inner loop, if possible it will immediately function like the Liquid Bridge or the Liquid Valve. When enabled, it will automatically send liquids straight to the second loop, bypassing the original Liquid Bridge entirely.

Note that the act of sending liquid to the second loop will create new gaps in the first loop - at this point, our Liquid Pump will resupply the first loop with new Liquid to replace the part that got too hot. It may be hard to tell from this image, but the Liquid Pump is operating again for exactly this reason. (You can see that liquid "bubbles" are between Pipes at the bottom.)

This will allow the original loop to maintain a steady stream of liquid while making sure to keep that liquid cool, sending any heated liquid to the Thermo Aquatuner to cool it.

Conclusion
By using Liquid Bridges carefully along with Liquid Valves when necessary, we can create pipe setups that can be used to automatically manage the state of liquids within that setup. This is quite key for managing heat in ONI, and we'll start making use of these principles in real builds within the next section.

That said, I'll be focused far more on "what" to build than "why" to build it there, so review this section as needed if you run into issues. The tools are powerful, but they do sometimes lead to images that can be dense at first glance.

Also, you can replace the pipework on the left-hand side in the next section with this instead, if you so desire - it'll probably be a fair bit clearer to work with. Apologies for not having done it this way the first time!
Steam Turbine Cooling (Step 1)
Now that we've done a lot of preparation to get here, it's finally time to start our industrial site. Hope you didn't get your existing coolant too hot, 'cause we're about to use it! We'll want to invest the following resources in the near future; once the next few sections are done, we won't have to worry about coolant for our Metal Refinery again!
  • Steel - 1200 kg (required for +200 C overheat ability)
  • Copper - 900 kg (for Atmo Suits)
  • Any refined metal but Lead - 800 kg
  • Gold - 2000 kg (due to low heat cost; can be replaced)
  • Wolframite - 400 kg (due to high conductivity; can be replaced)
Manufacture the materials in that order - this should maximize the use of your current coolant. Other materials you should have on hand:
  • Plastic - 200 kg
You should have a little more time remaining if necessary, but hopefully your ranching investments have begun to pay off. Ideally, Smooth Hatches should be refining all the Iron for your Steel and Glossy Dreckos should be providing you with Plastic around now.

So you can see the size of what you'll want to prepare, I've gone ahead and issued a few build orders to start:


Note that I'm leaving space for a two-tile high walkway under both buildings - we'll want to route a few things through here without interfering with the main corridor.

At any rate, clearing out those areas will allot us the space for our next two build patterns - the Coolant Tank and the Steam Turbine Cooler. This pair, when used together, will blow the game wide open in terms of what we can safely do.

In case you're worried about that Cool Steam Vent to the side, don't worry if your industrial site is nowhere near this kind of feature. It did impact my choice of location, but you can always create another setup like this near your Cool Steam Vents after this round of builds is complete.

You'll also want to prepare some Pipes to supply the area with Crude Oil and Polluted Water. The newly-expanded main corridor is useful for this; we can always remove the lines later if need be.

Required Researches
  • Liquid Tuning (Tier 4)
  • Smelting (Tier 4) - though you should already have this.

On Heat Management
As we proceed, you'll note the use of different types of Pipes. A bit of info about them:
  • Standard Pipes can readily transfer heat between themselves, their environment, and their contents. The rate of transfer between two 'standard' materials is determined by the geometric mean of their thermal conductivity, as seen on the "Properties" tab of the material. (They may not have updated the tooltip yet.)
  • Insulated Pipes (and other such buildables) cut their material's heat transfer dramatically, multiplying it by 0.01. Furthermore, the rate of transfer is then determined by the lower conductivity involved.
  • Radiant Pipes instead double their material's conductivity, are made of highly conductive metals, and also boost the conductivity beyond that. They are extremely effective for use in heat exchanging setups.

What to Build
You'll want to start off by building the shell for both buildings:


The left-side horizontal door is made of Wolframite, while the others are made of Gold Amalgam.

With these shells in place, we can now proceed to plan out some of the internal structure for the two buildings' bottom floors. We should also prep an Atmo Suit supply station nearby if we don't already have one - both buildings are designed for Atmo Suit access due to the extreme temperatures they will have when active.

Once your Atmo Suit Docks are ready and the pipes have been constructed, you may want to go ahead and start piping Crude Oil into the bottom of the right construction and Polluted Water into the left one, like so:


That Thermo Aquatuner is constructed from Steel, allowing it to reach temperatures of up to 275 C before overheating. Crude Oil can take that level of heat and even more, hence its use in the right building's chambers. Go ahead and get started early - the pumping operation will take quite a while.

Once you've started pumping the liquids into each chamber, aim to set up piping and automation structures like this:


Yeah... that's a bit complex. I tend to prioritize the ability to make everything compact.

Materials:
  • Metal Tiles, Radiant Pipes, Liquid Shutoff - Gold
  • Thermo Aquatuner - Steel
  • Wires, Automation - Lead
  • Atmo Suit Docks/Checkpoints - Gold
  • Liquid Pump, Liquid Vents - Iron Ore
  • Insulated Liquid Pipes - Igneous Rock

So what's going on up there?
  • The Liquid Pipe Thermo Sensor sends any coolant over -4.5 C to the Thermo Aquatuner. (Minimum temperature: -20.6 C. I like to give a small safety margin.)
    • Since we won't know how much hotter than -4.5 C the coolant started at, we dump all coolant from the Aquatuner into the coolant tank. (This will matter for our first cooling task.)
    • The Crude Oil surrounding the Aquatuner will "bank" the heat for use in the next section.
  • Any coolant below -4.5 C is considered to still be "cool enough" and will automatically re-enter the outer cooling loop, cutting off the Liquid Pump.
    • Note the paired Liquid Bridges on the left - whenever coolant comes out of the first one, the second bridge will be blocked. It's a neat trick to make use of.
    • Should the right bridge of the pair ever be blocked, it will automatically dump held coolant from the loop so that the upcoming contents may always continue flowing.
      • In its present form, this can never happen - but once we start linking structures to it, stoppages can occur.
Of course, it's hard to fully express this with just words. As an aid, here's a one-minute clip of this loop in action:


Note that I manually swap the Liquid Pipe Thermo Sensor's setting to emulate the behavior of a fully primed system here. The key detail - note how the loop with the Radiant Liquid Pipes never once runs out of coolant. This is designed so that we can add new paths into the coolant loop and maintain a perfect, constant flow.

Important Tweak

After an extra 12 cycles, it turns out that the loop as seen above can become blocked. There's a simple way to fix it in place with a Liquid Valve:


Other Notes
Note how I've deliberately left space between the two chambers, despite marking off about five extra tiles for the one on the right. We're going to start with the chamber in its present form, but that space can be used to extend the right at a future point. You may wish to leave an extra four or five tiles to the left of the coolant tank for a similar purpose - plan ahead, as it's very useful to be able to upgrade our cooling system without tearing the whole thing down.

This is also part of why we have the Atmo Suit Docks for both rooms - this allows Dupes to enter the machines while they operate safely. Since the chamber on the right can get extremely hot, the triple Mechanized Door setup is designed to be vacuum-sealable. The Clock Sensor below the doors can be used to close and reopen the center door at your convenience - doing so when the other two doors are closed will leave a vacuum for perfect insulation in its place.
Steam Turbine Cooling (Step 2)
Now that we have an operational Coolant Loop in place, we've placed ourselves on a bit of a clock - while all that Crude Oil can bank a lot of heat, it'll eventually superheat. That being said, we've got quite a number of cycles before that truly becomes a problem.

Our right chamber from the previous section is actually half of a Steam Turbine setup. The currently-empty chamber above the Crude Oil is designed as a Steam heater. Since the tiles between the Crude Oil and that chamber are highly conductive, the Crude Oil can efficiently heat any Steam in the chamber, and that can drive a Steam Turbine that will eliminate that heat, giving Power in return!

Unfortunately, it doesn't exactly give us more Power than it costs to run the Thermo Aquatuner. Using Water or Polluted Water to drive that device will give us back some of the Power when the Steam Turbine eliminates the heat if we use the right setup. That said, it's not a bad cost, all things considered - the Thermo Aquatuner is effectively around a 630 W cost when running, and we've run far more expensive things.

Required Researches
  • Renewable Energy (Tier 5)
Probably the first order of business on our list is to vacuum out the future Steam chamber. To do that, we'll need to stick a Gas Pump down there. Fortunately, it can be temporary - we can access it by Atmo Suit.


Once that's done, it's time to complete the build. Deconstruct the Gas Pump and remove any low-melting-point debris from the Crude Oil chamber. Phosphorite's melting point is dangerously close to the temperature we'll be using for our Steam!

After that, some overlays:


Note that the Steam Turbine has its own dedicated Power line that links into the main grid. We can add a second Steam Turbine to the same line in the future - that's what the extra space to its left is for, should we ever decide to extend this structure.


Note the highlighted circuit's current usage. I've left just enough capacity to place a second Thermo Aquatuner there. It'll be dedicated to the neighboring Cool Steam Vent.


You might note that I've added a Liquid Shutoff to the side of the Steam Turbine. Should we ever want to fully decommission this site, that Shutoff can be used to reroute all output away from the Steam chamber and to force the Turbine to process all of the contained Steam, clearing out the hot gasses. Past that:
  • Thermo Sensor - above 227 C
  • Filter Gate - 15 seconds (to ensure a bit of stability)
And finally...


I'm now ready to add a controlled amount of Water (from the Cool Steam Vent) to the chamber. By using a Liquid Shutoff and a Clock Sensor, I can directly control how long the Liquid Pump that will supply the Steam chamber runs. I'd advise getting maybe 20 kg Steam per tile - enough to conduct nicely with the Metal Tiles below, but not high enough to require a ton of heating time.

After that, you'll need to wait a lot of cycles for enough Heat to be generated to see your Steam Turbine start operating, but it'll be worth it. In the meantime, your Power generation rooms are probably in overdrive, so do pay attention to heat elsewhere in your base and plant a few Wheezeworts if needed. Also, check your Algae levels - we'll want to have at least 20 tons (one full Storage Bin) either stored or easily accessible at this point.

This may also be a good time to upgrade your "idling" generator setup and boost its priority above the Coal plant's or consider enabling the Power Control Station in the Coal room so that the Generators run more efficiently, as they'll see a lot more up-time than usual for around 10 cycles or so.

Other Notes
You may want to place a couple of Diamond-based Tempshift Plates on either side of the Metal Tiles to help boost conductivity between the Crude Oil chamber and the Steam chamber, like this:


Note the new, small white plates in the Steam chamber and Crude Oil chamber.

Also, remember when I said I've got about 80 cycles until I'm out of Algae in the "Base Planning (Round 3)" section? Well, I've been taking a few extra Dupes - I'm now at 11 - it's 36 cycles later, and I've drained half that Algae. I do still have quite a bit around that I can mine, but since the Algae drain is accelerating with the new recruits, I really should avoid taking anyone extra for now.

If you want the math on this Turbine setup:
  • For every second a Thermo Aquatuner runs on Water or Polluted Water, it transfers 2/3 of the heat necessary to drive a Steam Turbine at full efficiency.
    • Cost: 1200 W
    • Return: 850 W * 2/3 (uptime) = 566.7 W
While there is a cost to running this setup, the facts are that it eliminates heat and can be built wherever we want it. It's a powerful tool for our arsenal, and we'll be using variants of this often throughout the rest of the guide and the late game.

Note that at this point, you shouldn't expect to see it run very often - we're not producing that much heat on a constant basis. Once we start adding a lot of heat producers in the area, that will begin to change. This setup costs our colony Power to run - the Steam Turbine returns less Power than the Thermotuner driving it costs - so don't feel a need to keep it running unnecessarily.
A Sustainable Refinery
When preparing for the Steam Turbine Cooling setup we've recently completed, we generated a lot of Heat when refining all the required Refined Metal. Steel is expensive in more ways than one, and our original pool of coolant is either too hot to make more or close to it. Since Steel is so critical for long-term cooling operations like this, our next goal is to ensure we can produce more of it safely. Fortunately, our coolant loop was designed to be extended a bit, and for this exact purpose - we're going to move our Metal Refinery site.

Compare this picture to those from the previous section:


I've placed the new Metal Refinery directly over the coolant tank. We may need to move it in the future, but this is simple enough for now and very quick to complete.


As it turns out, we even have enough capacity on the coolant tank's Conductive Wire line to handle the Metal Refinery's Power draw.


I advise constructing the additional Pipes before eliminating the original Liquid Bridge of the cooling loop. Note that I've used Radiant Liquid Pipes for coolant going into the Metal Refinery and around it - the building itself also generates significant heat, so we should cool it too. This also allows us to expose a bridge on the left-hand side for future extension of the coolant loop.

The keys:
  • Input to the Metal Refinery is prioritized over the cooling loop.
  • Output to the cooling loop from the Metal Refinery is prioritized over input from the cooling loop, ensuring that we can rapidly dump heated coolant to the Aquatuner.
  • Leaving an exposed Liquid Bridge as part of the loop allows extending the loop later - the extension can be built first without issue, as it will only receive coolant once the Bridge is deconstructed.
That's what the fancy bridge work you see is designed to accomplish.


Finally, a very small bit of Automation. That Weight Plate is where Dupes stand when they operate the Metal Refinery. Triggering the Ceiling Light will give working dupes a +15% speed buff when operating the Refinery. Sure, that Light will cost us 10W... but that's 1/120th of the cost of the Metal Refinery itself. I'm pretty sure an additive +15% speed buff will easily save us a little Power. (And it might even be multiplicative - testing required.)

An Alternative
If you implemented the cooling loop seen in the "On Cooling Loops" section instead of the 'original' way I did it in Steam Turbine Cooling (Stage 1), you can make a simpler and cleaner connection instead. Don't draw any coolant from the loop that cools the Steam Turbine; instead, consider the Liquid Bridge at the bottom near the Liquid Pump:


We've got an easy source of coolant if we connect to the lower-left Liquid Bridge's input Pipe. This will prioritize the cooling loop over the Metal Refinery, but that's okay - cooling is extremely important for a base, and we'd rather not disturb that.

From there, just dump the output into the original Liquid Vent - or better yet, set a Liquid Bridge to output onto the return loop from the Aquatuner. This may "waste a little Power" by not instantly forwarding the hot liquid to the Thermo Aquatuner like the version I used, but it makes things a lot less complex and isn't that big of a loss. I probably overoptimized originally.

If you do this alternative, you should also replace the pipes on the main loop (that cools the Steam Turbine) that are inside the tank with Radiant versions - we'll need passive cooling inside the tank, as the Refinery can put out hot Water far more quickly than we're likely to warm from cooling off the Steam Turbine, and we need the Refinery's coolant to be reasonably cold for safe operation.

After retrofitting my old build to this new pattern, here's the pipe layout I ended up with:


We still extend the cooling loop around the Metal Refinery, as it produces a lot of heat, but the coolant for actual refining comes in by a separate line from the coolant loop, allowing it to constantly run. When the primary line doesn't need a resupply, the Refinery is then supplied more coolant. The coolant is also output to a separate line from the main loop, with priority going to the Thermo Aquatuner's output via Liquid Valve - that's why there's the output line curves to the right. (This was needed to be able to place the Valve.)

With this retrofit, the coolant line can run permanently without interruption, and the piping is a bit cleaner than before. In particular, each line has a single purpose, rather than trying to do two or three things with the same section. Always feel free to consider the merits and demerits of different designs; that's part of ONI!

If you decide to retrofit from the 'old' design to the new design, be careful to clear the pipes of all coolant first; it's easy to accidentally break pipes near the AETN by sending coolant the wrong way by mistake. Take care! I messed up a few times before getting it right; thank goodness for saves.

Other Notes
Now that we have a sustainable Metal Refinery, we no longer need to worry much about heat from refinement. Unless you're wanting to pursue the achievement (Down the Hatch), you can start letting your Smooth Hatches die off at this point; the 100% return from refinement beats 75% returns. That said, their 75% was far better than the 50% of the Rock Crusher and saved our base on Power and heat until now, so they filled a vital role in getting us to this point. Saving Metal will help in the late and end game.

Once your Steam Turbine setup is properly heated, you may find that it can't reduce the temperature of your coolant as fast as the Metal Refinery heats it. That's okay; our giant coolant tank is built to absorb lots of heat, allowing reasonable-sized bursts of production. When you reach that point, you'll find your Steam Turbine running far more often than it does now - we've built it to last for a long time.
Long-Term Oxygen (SPOM - Step 1)
One big issue for converting our Oxygen production from Algae to Water is that the Electrolyzer always runs hot. Put in Water anywhere from 1 C to 70 C and you'll get 70 C outputs - way too hot for use in the core base. Water hotter than that means even hotter outputs!

Fortunately, we've just learned a way to permanently handle heat - the Steam Turbine. It's possible to create a setup like our "coolant loop" to cool the Oxygen output of Electrolyzers for use in the colony - something generally called a "SPOM" in the ONI community - the "Self-Powered Oxygen Module."

The build we'll be using is inspired heavily from a post by psirrow on Reddit. I've made a few tweaks for stability, but the credit largely belongs to him.


The setup we'll be using can get rather large, so it's a good idea to start mining space for this when you can. If you remember that Caustic Biome we originally planned for industrial use... well, I'm choosing to devote much of it to this.

Here's the finished product - that should help give an idea of the scale involved:


Aim to leave space for an extra 10 tiles to the left - it's great for future extensions.

Build Overlays
This build will be fairly intricate - there are a few parts we are going to permanently close off once they've been properly readied. You'll want to get everything in the following images ready before we proceed.


If you want to match the position, that right-side Ladder you see is a new ladder extending the to-be-constructed one in the image earlier in the chapter. This lines up perfectly with the Ladder near the new Refinery.

Aside from the Steel Aquatuner, the vast majority of the overheatable machines are made with Gold Amalgam - they'll need the +50 C overheat bonus, since they'll only be passively cooled. If Gold isn't available to you due to your world type... yeah, Steel. It's a good thing we just upgraded the Refinery!


The most interesting thing overlays for now are probably the ones for piping:


Materials listing:
  • Radiant Gas Pipes - Wolframite (for high conductivity)
  • Radiant Liquid Pipes - anything but Lead
  • Insulated Pipes (both) - Igneous Rock
  • Standard Pipes - doesn't matter.
  • Liquid Bridges (for Crude Oil) - Ceramic.

This part should be of particular interest:


This will be a small "countercurrent" radiator, rapidly cooling all Oxygen that passes through. The heat exchange will be mediated by Tungsten Metal Tiles (high conductivity) once we enclose this area permanently. All Radiant Pipes need to be covered with Tungsten, while we should place Insulated Tiles over the normal Pipes in this area, working from left to right to ensure all Pipes are properly covered.

Above this we have the "heat bank," which we'll want to fill with Crude Oil (seen below). This will be connected remotely to the future Steam chamber above via a "heating" loop. We'll be adding Metal Tiles in here as well to facilitate heat transfer - the Crude Oil tank is far smaller, so it's more sensitive to temperature fluctuations than our Steam Cooling loop.


We need to properly complete the bottom room and seal it off before proceeding to the next steps.

Ready to Prime
To continue, your build should look something like this:


A couple of notes - I've added a gas outlet line from the old Hydrogen tank into this thing - note the Gas Vent squeezed in among the pumps. I've also removed the two center Metal Tiles from underneath the Hydrogen Generators and closed all the doors to the Gas Pump chamber.

Having done those parts, I've established a Power supply from the corridor far below and linked the two Gas Pipe lines on this side to nearby Vents - we want to make a near-vacuum inside, then fill the top 2/3 or so with lots of Hydrogen. At this point, it's a good idea to start readying your Water supply pipeline and your final Oxygen output pipelines. Go ahead and deconstruct the Large Power Transformer supplying the room as well - we'll have enough Power in the Smart Battery to jump-start the thing.
  • We can use the lower Atmo Sensor to activate the Pumps - when ready for the Power load, set it to "below 20 kg." The lower three pumps should activate.
  • Make sure that the top Gas Pump is disabled for now.
Once the top is under 200 g Oxygen per Tile, deactivate the Pumps and add the Hydrogen. 45 kg should be enough. After that, wait a little while for the gasses inside to settle. We want to see the following image when we view the Oxygen Overlay:


At this point, the Pump chamber is now "primed." When we open the right door to finish the build, Oxygen will come in, but we have enough Hydrogen to ensure that the atmosphere immediately below the Metal Tiles remains Hydrogen - that's the important part. This enables "passive filtering" - the one-tile gaps near the top Gas Pump will only allow Hydrogen through as long as we maintain a reasonable pressure within.

Now it's time to get in the Pump chamber and finish the build:


Once we have a Water supply ready and our Gas Pipes laid out, we're practically ready for business! Note the new Hydrogen Generator and Smart Battery above the Thermo Aquatuner - they're connected. The Gas Pipe outlet at the top of the Pump chamber is connected to the new Generator - our excess Hydrogen can fully power the cooling when equilibrium is reached!

I advise running your Oxygen lines on top of your Heavi-Watt wires in the main corridors. The SPOM spits out quite cold Oxygen, which can help to passively cool any Power Transformers overlapping the output Pipes.

Don't forget to add new Polluted Water to the coolant line with the Aquatuner - we'll need that to actually cool things. We haven't yet completed the coolant, so make sure we can extend it easily in the next step.

Once your coolant is properly cool, disconnect the new (small) Power Transformer and activate the Pump chamber of your new SPOM:
  • Hydrogen-immersed Atmo Sensor - above 600g
  • Left Atmo Sensor of pair (controls Electrolyzers) - below 800g
    • Connected Buffer Gate - 10 seconds. This will prevent the Electrolyzers from stopping unless a significant backup of Oxygen is detected; we should stop producing more until the backup is cleared.
    • This helps ensure the passive Hydrogen Filter doesn't fail.
  • Right Atmo Sensor (controls Oxygen Pumps) - above 400g

General Notes
This SPOM, in its present form, can spit out enough Oxygen for 16 Dupes - and cold at that. As long as we have the Water, our Oxygen problem is solved! We should now turn off any old Oxygen Diffusers in the places where we've started delivering Oxygen.

We are on a timer again - we need to finish the Steam Turbine section for our work to truly be done here.

If you have trouble with Oil not moving, use a Plumber to remove a bit.
Long-Term Oxygen (SPOM - Step 2)
Now that we have the Oxygen-producing part of the SPOM finished, the hard part is finally over. Our Oxygen production won't be generating that much heat, so we have plenty of time to finish the Steam Turbine section we've planned above the existing Hydrogen Generator.

That said... we probably have an exposed heating loop in the future Steam chamber - let's go ahead and remedy this now, especially if we'd like to skip prepping Atmo Suits. It won't take us long.

To start, we should build reach this state before sealing the chamber:


In case that's a bit rough to see with everything else going on:


The wiring is nothing special:


(Forgive the one pending order.) Don't connect them to the Hydrogen Generator and its Smart Battery yet - reuse the old Conductive Wire line from when we jump-started the cooling operations, then swap the connections around when we've vacuumed the chamber.

As for the needed Pipe-work:


Note that I've removed the 'extension bridge' from before and extended the coolant line behind the new Steam Turbine. You can also see where I've prepared a small section to supply the initial Water for Steam in the chamber off to the side. We won't bother putting any Tempshift Plates inside this time - we're using Radiant Liquid Pipes to do the same job... and Tempshift Plates would try to tempshift the insulated cooling line running through the chamber. (Gotta love insulation.)

The automation should look remarkably familiar:


The one distinction - I haven't yet connected the Liquid Shutoff to the Clock Sensor, which will instead be used to drive the Gas Pump. We can swap the connections later.

Priming the Steam Chamber
This should feel at least a bit familiar - the one difference is that we won't be able to retrieve the Gas Pump when we're done. As a result, I recommend using Steel for this Pump - that way it won't break in there and may be of use in the future.

Once everything above is ready, seal the chamber and vacuum it. You should know the rest by now - if not, just review the "Steam Turbine Cooling" section. The main difference is that we can't go inside to fix it later.

Other Notes
Don't worry too much if the Thermo Aquatuner below starts running out of Power periodically for now - it's having to do additional work because of the exposed cooling loop behind the Turbine. If you want, feel free to enclose the Turbine in a room walled by Insulated Tiles so that it won't have to work so hard.

Some day in the far future - okay, maybe 20 or so cycles from now - your Steam Turbine may start to periodically activate. When that time comes, I recommend the following Smart Battery settings for its circuit:
  • High Threshold - 50%
  • Low Threshold - 20%

This will ensure we can capture and use 10 kJ of Power from the Turbine. Since the Steam Turbine usually doesn't run for that long - say, 10 seconds (thus, 8.5 KJ), this allows us to store all the energy output by the Turbine and save on Hydrogen.
Cool Steam Vent Taming
Now that we're producing Oxygen from Water, we've finally bought ourselves a lot of, uh, breathing room. Chances are high that your Water supplies are currently far greater than your Algae reserves, so this will help stabilize the base quite well. That being stated... there is the simple fact currently, our Water supplies are limited. To be sure, Terra typically gives an amazing abundance of initial Water - my huge 23 C Water tank is a testament to that. However, a time will come when we will be required to utilize hot Water.

Secondly, remember that Cool Steam Vent we "captured" a while back? While we may have captured it, we never exactly "tamed" it...


While I could have dealt with this section during the Vent's dormancy, the Algae problem had become a bit pressing. As generated worlds vary and I cannot know your world's available amount of Algae, I felt it best to "rush" the SPOM and get rid of our most pressing issue urgently. Sure, it'll be annoying to work within an active Vent's domain, but that's far less annoying than having critically low Oxygen and/or Algae.

About this Cool Steam Vent:


So, rather than wait around for about 50 cycles, let's just tackle the issue now. Your first order of business should be to establish a couple of nearby Storage Bins - set one to Diamond (2400 kg) and one to Gold (around 1200 kg). We'll want to act when the Vent is "idle", and that's a rather small window of time. It's best to keep the supply close and let the Storage dupes help the workers out.

If you're in a situation where the whole room is filled with Steam that's not going away, you may want to insert a single DIamond Tempshift Plate one tile above Water and as near to the Vent as possible. This won't make Steam condense instantly, but it will greatly speed it up, providing a better window for work during future Idle periods.

Taming Cool Steam
Unfortunately for us, a Steam Turbine requires Steam to be at least 125 C before it can begin to use and cool down Steam. Since Cool Steam Vents generate a lot of Water, heating up literal tons of new Water is very impractical - we'd be better off using a dedicated Steam Turbine cooling loop like before.

If you're following the same seed as this guide, there's a fair shot you might have placed your original setup directly beside this Cool Steam Vent. If so, this will be extremely easy for you. Otherwise, two options:
  • Build another cooler like the first near to your Cool Steam Vent, or
  • Run a long pipe loop out to your Geyser, keeping it insulated
If you feel like your game will go long, I'd advise the first, even if it's a bit tedious - lots of long pipes running everywhere can become quite a tangled mess later.

Now, to tame Cool Steam, all that's necessary is that we are able to rapidly cool Steam below about 95 C as the Cool Steam Vent spits it out. This will cause the Steam to instantly condense, making entry to the chamber safer and maximizing the Vent's output. Sure, we "could" use extremely cold coolant like with the Metal Refinery, but that would rapidly become inefficient.

You see, there are lots of ways a base can use near-boiling Water very effectively without issues. We've already done this at times for Research, remember? Likewise, if you've examined the temperatures coming out of the SPOM, it shouldn't surprise you to learn that SPOMs work fantastically with hot Water. There are other late-game uses as well, and these greatly outweigh the small-volume uses of Water for farming that a base might have. Don't waste time and energy cooling all the Water down further than necessary. If we need limited amounts of cold Water later, we can cool just that amount when we need it.

The Cool Steam Vent cooling loop
We'll want to make something that's like a cooling loop, but at considerably higher temperatures. It can also be self-contained, much like the SPOM's cooling loop, since this will be dedicated to just this one room.


I made all the Radiant Liquid Pipes out of Gold (low heat generation) and the bridges from Ceramic (+200 C overheat). There's also a new Thermo Aquatuner in the Crude Oil chamber just to the right of its ladder, made (once again) from Steel. Finally, note the two (Diamond) Tempshift Plates around the Cool Steam Vent - they're at the direct center of the two Radiant Liquid Pipe "coils." Both should be visible in the image above, though the one on the right will be much easier to recognize.

You'll note that here, I'm using plain Water for the coolant. It's just as good for cooling as Polluted Water; the only limiting detail is its acceptable temperature range. This won't be an issue for us - Water will only re-enter the Thermo Aquatuner after passing through all of our pre-cooled Water supplies. (Well, at least as long as we don't drain the tank too low.) Since that Water will already be liquid, our coolant won't be in danger of turning to Steam on entering the machine, which would break the Pipe loop. Broken Pipes generally occur when a liquid would state-change upon input into a new machine, bridge, or the like.

Of course, we definitely shouldn't constantly run the Thermo Aquatuner - we'd like to keep the Power impact minimal. Enter Automation:


Now, what sort of temperature settings would be most efficient? I haven't done extensive labbing for exact numbers - and these may vary per Cool Steam Vent, anyway. That said, the following settings seem to work quite effectively:
  • Top: Above 95 C.
    • As this (+ surrounding tiles) is where Steam is generated by the Cool Steam Vent, we want to ensure efficient temperature exchange at this point.
    • This is also why the Tempshift Plates are here - they'll ensure maximum thermal conductivity at our strongest point of cooling.
    • There's a chance we may want to drop this by a couple of degrees when the tank is somewhat low, but when high we should avoid overcooling the Water. Feel free to experiment and find what "works right" for you.
  • Bottom: Above 95 C.
    • A large, mostly full tank of pre-heated Water will cause issues for condensing Steam. Keeping it at or below 95 C will keep it at a temperature that helps Steam condensation, even if only slightly at that point.
These settings should keep things running properly while making very conservative use of the dedicated Thermo Aquatuner.

Expected Power Cost
Putting this Cool Steam Vent's numbers through the ONI Assistant Geyser Calculator[oni-assistant.com] resource, the Cool Steam Vent will be outputting about 264 more kDTU/s while actively emitting than necessary to maintain a 95 C tank. A Thermo Aquatuner can transfer up to 585 kDTU/s when given 10 kg/s of Water - we actually won't be needing to run it often at all. While the Power requirements may cause occasional "spikes" of Power draw for our grid, the net impact will otherwise be fairly minimal.

Given this, it's probably wise to find secondary uses for any Steam Turbine Cooling setups you create - the setup will have tons of capacity left for handling other, much heavier cooling tasks.

Other Notes
Now that we have finally "tamed" a Cool Steam Vent, we have over 1 kg/s of hot Water we can use for whatever task we need. One good candidate would be our recently-constructed SPOM, though be aware that it can use up to 2 kg/s if your colony has enough Dupes - make sure to leave enough Water in the tank as a buffer if you swap to this now.
-- Base Planning (Round 4) --
If you've made it this far, give yourself a pat on the back - linking in Steam and converting to Oxygen production from Electrolyzers are two major thresholds and together mark a huge turning point in the game. It's not quite far enough for me to say that it outright ends the mid-game, but it's pretty close - and these accomplishments provide us with greatly increased stability moving forward. Unless you start ramping up your Dupe count, you may not have to manage your Algae supplies again!

So, about the SPOM. Each active Electrolyzer can typically provide enough Oxygen for a set of eight Dupes, so... don't go too crazy with your population. That said, once our Water supply is strong, we can finally loosen up and take on some more colony members. If you're on Terra, you probably have a crazy amount of Water still lying about in pools - feel free to start that now if you like, using pools as backup Water if needed. That said, don't forget that relationship - for every 8 normal Dupes, you'll need 1 kg/s Water. You'll want to have at least 1 kg/s Water excess by the end of this guide, so keep that in mind.

By this point, you should also have a full and active ranch for both Smooth Hatches and Glossy Dreckos - this will greatly facilitate our continued industrialization. While we could stop with the Smooth Hatches, their passive, no-Power refinement for Iron is still quite useful - and there's an achievement in it for us if we let them continue.

Also, let's take a look at the base at the start of Round 3 and compare it to the current base:


Sure, we may not have done much exploration... but our colony's expansion is impressive!

Now that the colony's getting big, I'd like to share some overlays:


Yes, I haven't bothered connecting the old Research workshop up to the actual main grid. There are also a few isolated Atmo Suit station grids.

Past those notes, the majority of the orange-colored Wires are all connected in one fashion or another to the main grid. The only exception would be the SPOM's two isolated grids.


Note how most of the longest Pipes are empty? Those were used temporarily to deliver coolant and Crude Oil; they're not in constant use. There may be a few odd branches on those pipes or near them - that's because I tend to repurpose long Pipes across multiple builds when possible.

The one truly long pipeline in actual use is new - it's delivering Water from the old megatank to the SPOM. I haven't swapped to using the Cool Steam Vent's Liquid Pump yet. There are a few isolated patches of Liquid Pipe, but since they're self-contained, they'll be easy to work around for any future Pipe-pathing.


In case you're interested in how I'm handling the SPOM's output for now, this should be enlightening. I haven't yet replaced the source of most of the Atmo Suit Docks yet. That said, almost all of them will be rarely used, so that's probably fine. The most important one to transfer would be at the bottom-right, the station servicing the Oil Biome, since that will likely see continued use. Just make sure to use a Gas Pipe Element Sensor + Gas Shutoff combo to ensure only Oxygen can enter the Atmo Suit Docks.

New Dupes

Since the last "Base Planning" round, I've taken on three new recruits:


Role: "Sweeper", focusing on Storage.


Role: "Foreman" / Engineer, focusing on Operation and Supply. She really helped with the Tune-Up buffs when I needed 'em.


Role: Farmer / backup Rancher. I kinda didn't want to take him due to already having 10, but the traits were quite strong and I've been wanting a backup Rancher for when the main one is sleeping.

As a small detail, 6 of my current 11 Dupes have Diver's Lungs, so my Oxygen consumption corresponds to 9.5 standard Dupes. That also means if I want to, I could take on 7 extra Dupes (two with Diver's Lungs) if I wanted, Oxygen-wise... but there is the small matter of food. I advise maintaining continued restraint for now - you've got plenty of time now, so you can now afford to have very high standards.

Aside from the Researcher, every Dupes has an alternate-schedule backup now, helping to ensure that someone's always available for any sort of task.

Odds and Ends
As of cycle 159, my base has finally almost filled all three Liquid Reservoirs. You know, only 140 or so cycles after they were built. Since I've recently tamed a Cool Steam Vent, I'm not hurting for Water... so I'll just 'burn' it on a few plants that consume tons of Polluted Water. I got lucky enough to gain a couple of Arbor Acorn seeds from the Printing Pod, so I'm using them. Thimble Reed plants are actually better consumers though, and I only have 20 Reed Fiber at the moment; those might be a better investment at the moment, since I'm not ranching normal Dreckos.

It's been quite a while since we focused on clearing out large amounts of a Swamp biome - make sure to check your Slime levels. Mine have nearly halved from before, largely due to having two Sage Hatches. (Coal's doing great, though!) Of course, there's a lot more Swamp to mine out eventually, so it's worth the "trouble" of ranching the Sages for now. Do keep in mind that it's not very easy to make more down the road, and we do need Slime for the Mushroom farm; don't let it run out!

Next Goals

At this point, we've definitely finished the hardest part of the mid-game. All that's left is to wrap things up and discuss a few more easily-addressable topics. There's a fair bit of organizational prep work we can do now that will help us in the late-game that doesn't fit into a nice, clean late-game arc.
  • We can significantly improve how we're handling large amounts of gasses.
  • We've yet to even start using Natural Gas!
  • There's also the small matter of the Tide Pool biome and the Salt Water Geyser to discuss.

Past those topics, our main goal should be to ensure that we get enough Water from renewable features to permanently sustain our Oxygen production. Right now, we're probably at a net loss for Water, though the drain will be quite slow. Once we can go from (net) consuming Water to producing it, we'll have almost fully stabilized and will be ready for the late-game - there are some very significant (heated) Water expenses that we'll want to explore then.

If you're following this playthrough's seed, you've got it somewhat easy - those two extra Cool Steam Vents above the base will supply all the Water you need. Otherwise, get looking for new features to exploit so you can have an excess, too!

As we are right now, we could just stop improving the base; with what we're already doing, we can easily get the "Home Sweet Home" achievement. It'll take quite a few cycles to collect the necessary resources, to be sure, but the only thing needed that we haven't made yet is Glass - and that can be handled with another cooling loop implementation.
Harnessing Natural Gas
Now that we've caught a break from more pressing matters, it's a great time to build a Natural Gas Generator plant if you've already found a good source. These generate less heat per Watt and small quantities of Polluted Water and Carbon Dioxide (also less per Watt) at the cost of Natural Gas.
There's also the simple fact that Natural Gas is a renewable resource in the ONI world, which is pretty neat.

It's also a very significant upgrade to our Power infrastructure - each Natural Gas Generator gives 33% more Power than its Coal-based equivalent, making Tune-Up buffs better here than in our Coal plant. Of course, the Petroleum Generator is even better in this regard, but that will require significantly more work - and the refinement process for Petroleum actually generates extra Natural Gas. As a result, Natural Gas is a, well, natural stepping stone for an improving colony.

The actual construction needed for this plant are fortunately pretty simple:


Since Natural Gas Generators emit liquid Polluted Water, we can use Mesh Tiles to allow the runoff to collect in a common pool. (It drops exactly where you'd expect it to drop based on the Generator's graphics.) The runoff room is two tiles high, easily allowing space for a Liquid Pump when it fills.

While there's only one Natural Gas Generator in the room for now, there's room for up to 4 in this build. Note that 4 x 1200 W = 4800 W, which is past what a single Large Power Transformer can output to the grid - but not by much. This gives us room to expand this new Power Plant as we gain new sources of Natural Gas.


The two Pneumatic Doors here are actually necessary - without either, the would-be Power Plant room is too big for the bonus to apply. While the Power Control Station is tightly packed in there, this gives us enough room for a Smart Battery and Large Power Transformer combo on the wall's other side. (Note that two Power connections may not overlap; to move the Smart Battery left would require moving the Heavi-Watt Joint Plate right.)


As you can see above the room, I've already linked the room into the Power Grid with automation that controls when it actually connects. I've temporarily given this Power Plant priority over Coal, since there's a build-up of Natural Gas near the originating Geyser, but we'll be setting up something a little more complex for this in the next section.


The Gas Pipe layout is pretty simple. Note that the Natural Gas Pipes are all insulated - eventually our source will become quite hot, and we'd rather not let that leak out everywhere in the base. The Carbon Dioxide byproduct is being forwarded to the Coal plant's Carbon Skimmers for now, though we'll eventually want to redirect that to the Oil Biome for our Slickster friends down there.

Other Notes
We haven't really talked yet about Power Plant cooling. You see, Generators produce a lot of heat, though we haven't really had significant issues with that yet. We will eventually want to implement cooling solutions, though we should be fine for now in that regard. That's why I didn't bother with Insulated walls for this build; we won't mind too much if cooling leaks out once the time comes.
Speaking of which, I've left a fair bit of space nearby - easily enough to implement a Steam Turbine build if desired. I won't be doing that yet, though.
Advanced Gas Containment
Now that we've started utilizing Natural Gas, we should probably prepare a proper tank to store it. Natural Gas Geysers don't exactly provide a steady resource stream:


When the Geyser is emitting Natural Gas, it's producing far, far more than a single Natural Gas Generator can utilize. That being said, when the numbers are crunched, this Geyser actually produces slightly less Natural Gas than a single Natural Gas Generator uses per second on average! As a result, we can't make the most of the Geyser unless we store its output.

Of course, there is that small issue of the output reaching 150 C eventually. Just in the last 5 of so cycles, the temperature in the Geyser's chamber has almost reached 100 C already. We'll want somewhere to build useful, compact storage for this valuable resource. Of course, we already have the tools to handle this - so it's time to get started. At the same time, we'd like to think ahead a bit to future problems and give ourselves some nice options for future use.

This will be another build where we want a complete vacuum. As such, we need to make sure everything is ready before we seal the construction and vacuum pump. I'll give the breakdown below.


Construction: Pre-Vacuum
To start off, you'll want to build the approximate structure seen below next to the Natural Gas Power Plant:


We'll be using two Gas Reservoirs for basic storage along with a new construction item - the High Pressure Gas Vent, which maxes out at a pressure of 20 kg/tile. The standard Gas Reservoir only gets 10 kg/tile, which is respectable in its own right - and these two pressures can stack!


There's obviously a bit of 'fun' going on with the Gas Pipe layout here. Here's how input gasses will be handled:
  • If possible, forward incoming gas to the output pipe. (This happens after passing through everything inside.
  • If not, fill the two Gas Reservoirs first. Their output costs no Power at all, so this helps conserve energy.
  • If the Reservoirs are full, dump the Gas into the chamber.
If the Gas Reservoirs start to become empty, the Gas Pump will then kick in and begin to refill them so long as the pressure is above 250g, to ensure Power efficiency.


The automation here is pretty simple. Outside at the top, we've built a failsafe 'filter' from a Gas Pipe Element Sensor and a Gas Shutoff - only Natural Gas will be permitted entry into the chamber.

Past that, we have three Atmo Sensor lines, only one of which actively does anything. This is to facilitate potential automation logic we may have down the road - I'll demonstrate one such use later this section. I like controlling the rate of Natural Gas use based on how much I have saved.

Once all of this is built, seal off the left-side wall and pump the room completely dry - pure vacuum. Temporarily set the center Atmo Sensor to "below 20kg" to accomplish this.

Construction: Finishing Touches
Once your vacuuming process is finished, don't forget to deconstruct the temporary Gas Vent! Once that's done, you can then swap the Natural Gas pipeline over to your brand-new "Natural Gas chamber" for permanent storage. We'll now be able to collect all of our Natural Gas Geyser's output until this chamber is full - which will take quite a while.

You should now aim for something like the following:


This storage chamber now supplies the Natural Gas Power Plant, and the old line has been swapped to direct incoming Natural Gas here by deconstructing the old Gas Bridge. The old line will naturally clear out over time.


As promised, here's a bit of that fun automation I was hinting at. I've changed the Power Plant's "priority." First, the settings:
  • Left-most Atmo Sensor - "above 5000 g" (or whatever you want)
  • Middle Atmo Sensor (drives Pump) - "above 250g"
  • Right-most Atmo Sensor (drives Power Plant's automation) - "above 19000 g"
  • Natural Gas Power Plant's Smart Battery: High - 60%, Low - 40%.
The logic that results:
  • If our Natural Gas chamber has over 19kg/tile of Natural Gas stored, we will automatically use it for Power. We're almost out of storage room, so we might as well burn our supply to make room for more from the Geyser (or wherever else).
  • Otherwise, wait until the main grid drops to 60% of maximum stored Power and generate until we're back at 80%. This means we'll use less Natural Gas and rely on other Power sources for the time being - hopefully maintaining a decent supply during periods of Geyser dormancy.
If we wanted, we could add an extra tier - if we invert the "above 250g" Sensor with a Not Gate, we could establish logic that drops the priority even further, making it "last resort" power instead since our reserves would be quite low then. The third Sensor gives even more options if wanted - as an alternate example, perhaps it could be used to establish logic settings on when to use the Gas Range.

Other Notes
At this time, I highly recommend building an extra copy of this room, but for Hydrogen. I typically use space right next to the SPOM for this:


It fits quite nicely in that space after a little internal reorganization. This Hydrogen chamber works on the exact same principles; it's just a slightly different shape. As you can see, I've already dumped my old Hydrogen storage into the chamber. Note that Gold Amalgam should be perfectly fine for this version, as we don't expect to deal with Hydrogen over 125 C.

Similarly to the Natural Gas setup, when the chamber becomes nearly full, it's a good idea to start automatically burning Hydrogen for Power (in a Generator) so that you never actually fill your storage.
More Exploration
With our newly increased stability, it's time to turn our eyes back toward exploration. We were somewhat lucky that a Cool Steam Vent was relatively close to base, which took a lot of work to integrate. Just look at how long ago that round of exploration was! At this point, you've probably explored the area immediately surrounding your base quite well and have found a couple of geysers. That said, the world is larger than just that surrounding area, and some very useful things are likely still available to find.

Among other things, each world is guaranteed two Cool Steam Vents, one Natural Gas Geyser, and either one Chlorine Vent or an extra Natural Gas Geyser. (The guaranteed geysers and vents are never buried.) So far, we're using exactly two of these four... assuming you've already found the appropriate types on your seed. Additionally, there are usually around twelve hidden geysers/vents of various types - many of which will be new, though some will be duplicates of the types we already know. There's a lot more for us to explore and find. The main idea - build some tunnels, explore, and find new features until you find something worth using.

If you're on the same seed as me, you've probably already found the following ones near your base:
  • Leaky Oil Fissure (outputs at 326.9 C)
  • Steam Vent (outputs at 500 C)
There's also one more guaranteed Geyser type we've caught vision of but have ignored so far:


The Salt Water Geyser is yet another Water source we can utilize, and it's already cool enough to utilize. Of course, it needs refinement in a Desalinator for 480 W, but it's still pretty useful. We'll talk about that more when we properly enter the Tide Pool Biome, its home. We've kind of ignored that one too, since it wasn't on our "critical path" for survivability. Now that we've earned some flexibility, we can explore here.

Of course, one problem is that without Sandbox mode (this is a "survival" guide) we don't know the placement of all these wonderful hidden and not-so-hidden features. In case it's not clear already, you may need to start making some pretty long exploration runs to start finding new interesting features to play with! Don't be afraid to send Dupes out long distances - they'll let you know if they find things they don't like out there. Play around some and learn from the experience.

Also, while we have visited the Oil Biome, we've hardly begun to really utilize it; that will be saved for the late-game, though.

Ruins
As you explore, you'll probably find sites like this from time to time:


Examine these and other mystery structures in the game world to learn more about the game's lore. You might get a few bonus items for your troubles, too. This ruin requires Duplicants to interact with the outside door as seen above. After that interaction, the mystery area is revealed:


One particularly interesting item is at the right-hand side - the Neural Vacillator. This special machine will add a bonus positive Trait to any Dupe of your choice - but the trait is randomly chosen. I find that most of the traits work well on my "pioneering" Dupes, the ones who often work far from the base - but feel free to choose whoever.


After a few moments of operation, you'll need to activate the building again before the Trait is assigned and the Dupe set free:

The Frozen Biome
Before I move too quickly, it's probably wise to discuss the other Biome we've seen but never directly addressed - the Frozen Biome. I passed through one on the way to the Oil Biome but didn't really talk much about the place itself.


There's typically not much challenge to be found passing through here - just make sure your Dupes avoid any melted puddles of Water, as they'll quickly catch Hypothermia from that.

Wheezeworts
That said, we did talk a bit about the most important resource here for a young colony - the Wheezewort. Those light-blue cacti you see provide passive cooling to their environment. They're not as strong as our Steam Turbine cooling setup, but they're still very useful.


When domesticated, these plants can cool 1 kg of gas from their local atmosphere by -5 C. This is maximized by placement in Hydrogen, in which they can cool 12 kDTU/s as opposed to around 5 kDTU/s in Oxygen, which is still respectable. Two of these in Oxygen can completely negate the heat emitted by one constantly-running Natural Gas Generator, for example.

Given their strength, it's quite possible to use these as part of an Oxygen cooling system. I've got a write-up on one such solution under "The 'Classic' SPOM" in the following guide:

https://steamcommunity.com/sharedfiles/filedetails/?id=1359728437
It's simpler and could have been built earlier, but because of the importance of Steam Turbine builds for things we'll do later in the game, I didn't go with this option for this guide. There's also the fact that not all world types even have the Frozen Biome and Wheezeworts - the solution we implemented can be built without them, which is kind of important for those worlds. That said, we're here on Terra, so they're available - feel free to use them within your base if an area starts getting a bit hot!

Wolframite
On maps without Aluminum like Terra, the most conductive basic Metal Ore is Wolframite, found here in the Frozen Biome.


This is incredibly useful for Radiant Gas Pipes where needed, along with other situations that need high thermal conductivity. The extremely high melting point is also nothing to sneeze at. While we could find places to use it now, this Metal truly shines in late-game and end-game structures. It's also a critical component of the most advanced Refined Metal types, so try to conserve it.

Sleet Wheat
We also have a new type of farmable plant here - Sleet Wheat.


This plant's produce is also its seed, and it's an ingredient for some of the highest-quality foods. It's rather tricky to farm at this point, so a wiser strategy is to conserve as much as possible of Frozen Biomes you come across so that it can grow wild. Frozen Biomes automatically refrigerate their crops, so you can build massive reserves of Sleet Wheat - just keep Polluted Oxygen and Polluted Water away from it.

Anti Entropy Thermo-Nullifiers
Another Frozen-Biome specific structure is the Anti-Entropy Thermo-Nullifier, often abbreviated in the community as the AETN. You'll typically need to dig these out, but some part of them is usually pre-exposed to the environment. The bottom-right corner was visible in this section's first image, which is how I knew where to dig for this image:


This device provides 80 kDTU/s of cooling for the low, low price of 10g Hydrogen/s. (Worth noting - most SPOM setups will produce at least this much as excess per second.) While they still aren't as strong as Steam Turbine cooling setups, they have the powerful benefit of not being restricted by their coolant type or being broken by phase transitions.

AETNs only stop cooling once the temperature reaches -173.15 C. As a result, these places are fantastic for 'reclaiming' any Sour Gas that may exist in your game's world, converting it into Methane; Methane becomes Natural Gas when heated. There exist late-game builds that exploit this fact, as Petroleum boils into Sour Gas - but we're nowhere near the tech level required to perform such a feat in a controlled manner.

Frozen Biome Uses
There are a couple of different approaches that players take to this place:
  • Some players like to use this for passive cooling early in the game - you can pump hot Oxygen through here to 'eliminate' its heat. Doing so warms the place, but this strategy can last you quite a while if needed - this is probably wise to do if you know you'll want to clear the place eventually.
    • Worth noting - melting the biome's Ice this way gives you twice as much Water as mining it and then melting it. You may not have noticed, but anything you dig loses half its mass.
    • This also means that Ice here provides twice the cooling it would otherwise give elsewhere, making the 'passive cooling' use a pretty strong option.
  • Call me a conservationist, but I prefer trying to preserve these places as well as possible, at least for now. Doing so preserves all that passive Sleet Wheat growth, providing a huge emergency buffer for food if I lose track of my food supply levels.
The Tide Pool Biome
The last Biome to talk about for now is called the Tide Pool Biome:


The atmosphere here is typically a mix of Hydrogen and Carbon Dioxide; nothing particularly dangerous. The thing that is dangerous here?


Meet the Pokeshell. While normally not aggressive, if a Roe Egg is in range, they'll fight off anything that invades to protect their young - be it Dupe or other critter. They'll be a darker shade of red in these cases, so keep an eye out for angry Pokeshells when exploring here. Here's a different site with one of those dark red Pokeshells:


It'll protect that Egg to the death, so be careful! They do have their uses, though. If you can safely grab some of their discarded Moltings, those are a great source of Lime when processed in the Rock Crusher.

You'll note that there are also substantial Bleach Stone supplies here; if we couldn't find any earlier in the Caustic Biome, this would have made a good alternative place to mine for it. One distinct detriment, though - there are no Metal Ores found in Tide Pool biomes. Nothing.


As a result, this place is mostly useful for its agricultural and ranching resources. For example, here we see a new harvestable plant - the Waterweed, which produces Lettuce. To grow it, the bottom tile of the plant must be submerged - but only the bottom tile. Too much, and you'll get that "Too Wet!" warning.

Lettuce is an interesting crop - it's fairly easy to grow and is actually remarkably efficient with resources - just .5 kg/cycle Bleach Stone and only 5 kg/cycle Salt Water. This mirrors Mushrooms and also pairs well with them for a certain advanced food type. The one real issue is that they're not calorie-dense; they take up space in your storage like uncooked Meal Lice.

Past that, the other main benefit is that this place has lots of other resources that can be somewhat useful - Salt Water can be converted to Water and Salt, Salt can be crushed into Table Salt for Morale, and there's plenty of Rock for Stone Hatch fodder. You may also find bits of Fossil in here, which is useful for additional Lime.

All in all, the only thing you need to watch out for here are the Pokeshells. Nothing too crazy or concerning here. Aside from that, it's a decent place for finding Lime, and maybe even farming it if you're up to the challenge with Pokeshells. (Using automation to nab their Eggs quickly would be wise.)
Salt Water Geyser Capture
After a lot of searching, you should eventually be able to find your world's guaranteed Salt Water Geyser. In my case, I found it long ago, which is nice... but it's led to a possible issue:


That's a lot of Salt Water, and it's quite hot near the top. Of course, an active Salt Water Geyser would be emitting hot Salt Water anyway, so either way, we'd run into this issue eventually. So, how do we approach this thing?

This is a different type of Geyser than we saw previously - this one emits liquid Water directly, rather than a Gas. That said, the rules we talked about for Cool Steam Vents actually apply here - Water will cover the bottom two tiles of the Geyser and start on the third row before overpressuring. As a result, we want to approach this thing from above and the side. It also emits hot liquid, so we'll need Atmo Suits for a safe work and research environment.


Since we don't have to worry about scalding Steam or the like, there's less immediate need to wall everything off. That said, 95 C is still quite hot, so we should construct a room of Insulated Tiles around this feature. The key question is "how large?" - and analysis of the Geyser will help give us an answer.

Some time later...


That's an average of 3.15 kg/s Salt Water! We'll get 93% of that back as normal Water when run through Desalinators, so that's 2.93 kg/s Water - easily more than what we actually need for our base presently! Salt Water Geysers seem to produce high volumes, so definitely seek them out!

Looking at the math, saving enough Salt Water to last through inactivity and dormancy would probably take about 40.4% of the total output of a full cycle for this Geyser - or about 97 tiles. Looks like I'll need to make lots of room! As you might can tell from my previous screenshot, a similar style and shape to the Cool Steam Vent's enclosure should work well here, given the need for Atmo Suit Docks - we just won't need to worry about actually cooling the place.


I opted for a 16 x 7 chamber before the notch. 16 x 6 = 96, which is just shy of the amount I'd need to reserve - and then there's the 4 Neutronium tiles to worry about. The entire right-side wall is Abyssalite, which is an amazing insulator I'll leave in place, so it's the other sides I'll need to worry about. The picture above should give you the basic idea, though I haven't started making a proper roof yet.

This one's actually easier than the other two we've done so far, wouldn't you think? The one issue is that we'll have to refine its output to get any real use of these resources, but we'll be able to afford the Power cost once we need to use it.
Review of the Mid-Game
The Review
If you've made it to this point, congrats! You've beaten what many consider to be ONI's mid-game and are ready to go the distance! You've got multiple sources of incoming heated Water for your base, allowing you to easily sustain Oxygen levels for at least 8 or 9 Duplicants without issue. Extra sources of Water will allow you start investing in some fun late-game projects we'll be talking about in the next guide. If you can reach over 3 kg/s Water in some fashion, you should be set - that's 2 kg/s for your Dupes and 1 kg/s for other projects - but even then, the more the merrier.

For now, continue on refining Steel and consider delving into Glass as well. While all that Steel work does create tons of Heat, we've already been handling it with our Steam Turbine setups. Meanwhile, the old SPOM's built-in cooling has helped to keep the base and farm cool, preventing the classic ONI heat death scenario from killing the base.

Finally, you've hopefully found your Natural Gas Geyser(s) and tamed them to incorporate more sources of Power into your colony's grid.

For those interested, here's the state of my colony at the end of this guide. I took some extra time (about 20 cycles) to properly tame the pair of Cool Steam Vents above my base with another Steam Turbine setup, giving the base plenty of renewable Water to work with in the late-game.


Here's the chamber for the paired Cool Steam Vents. Nothing too special.


I used a closed-off design, so I went ahead and pre-built an extra Aquatuner inside. I'm not 100% sure about my future plans, but I feel like placing farms near this structure in the future may be near-ideal. Farms will need a Thermo Aquatuner for temperature regulation, so if I do this, I plan to dump any related heat into this Steam Turbine.

Worth noting - when both Cool Steam Vents are actively producing resources at the same time, they'll have their Thermo Aquatuner running nearly full-time because of the combined heat they generate. Of course, there are also idle and dormant periods, but having the Crude Oil heat buffer below will help ensure we can handle any excess.

Also note that I've removed the 'notch' from this one - this one doesn't yet have its own cooling like the others, so run it around 135 C. We won't get as much Power returned from its operation, but below 140 C they can self-cool from the Water they output. That is, once I replace the output pipe with Radiant Pipes once the area gets hot - it isn't yet, so I've held off on that replacement temporarily.

Summary
  • Oxygen handled? Check.
  • Food still increasing? Hopefully that's a "check."
  • Water supplies are safe? Check.
  • Sustainable Power? Maybe not infinite, but we're almost certainly covered for hundreds of cycles with our ranching setups. The Natural Gas Geyser is infinite; just probably not quite enough.
  • Heat death averted? Check.
While the base may need some small tweaks as certain non-renewable resources run low over time, you now have all the skills needed to adjust and adapt so that your base can go infinite - so long as you don't overdo it on your Dupe count. There's a strong chance you've even been sustaining more Dupes than I have - it helps when you allow yourself to use those extra geysers to supplement your Water and run extra SPOMs or the like.

So, congrats! From here you should be free to go and explore the rest of your in-game world - and even beyond into space! If you're interested in a continuation of this guide for things like Oil processing and handling the Space biome, check out my late-game guide here:

https://steamcommunity.com/sharedfiles/filedetails/?id=1836883700
댓글 228
B0RIS 2024년 10월 30일 오후 4시 28분 
@Demky Because they're feeding them metal ore which you should only do sparingly early on

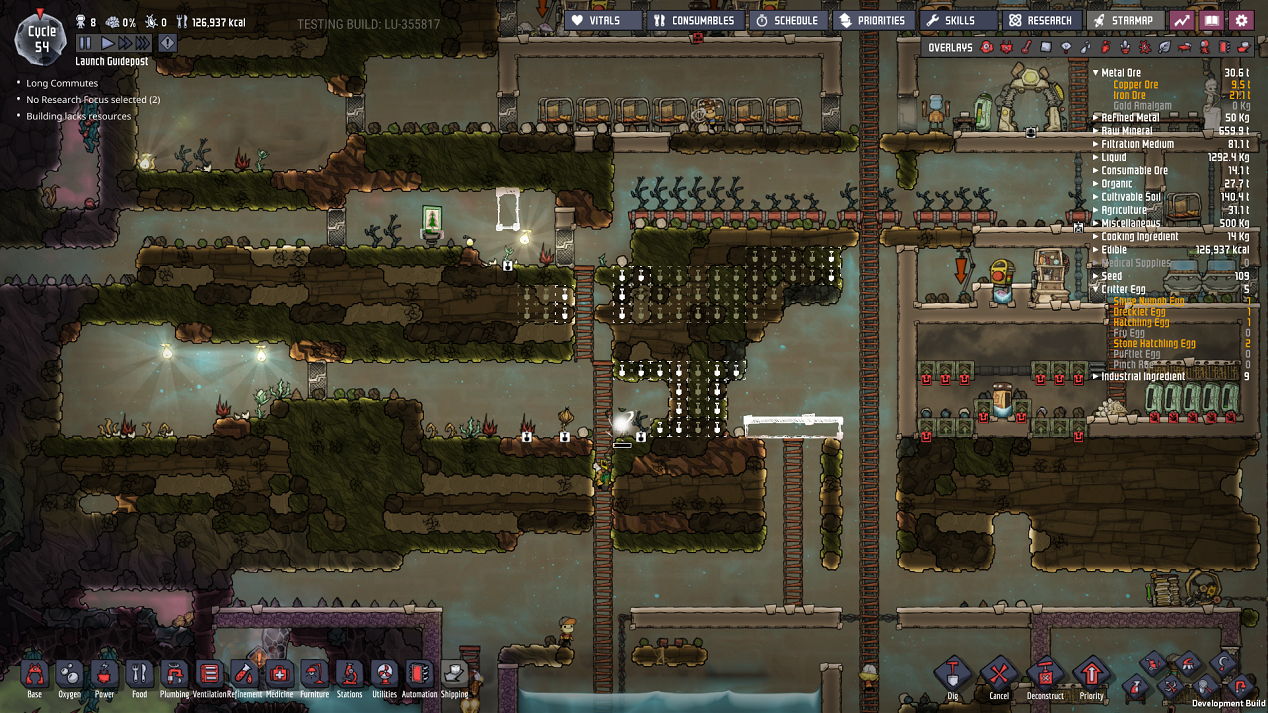
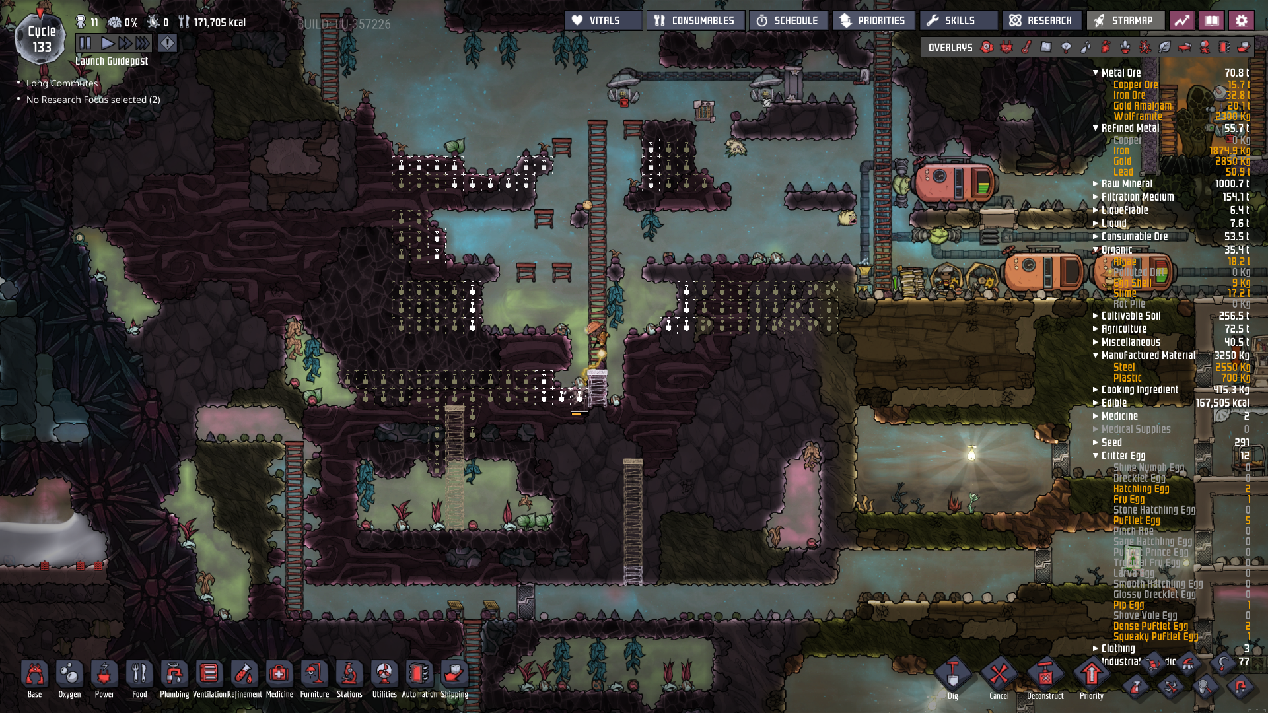
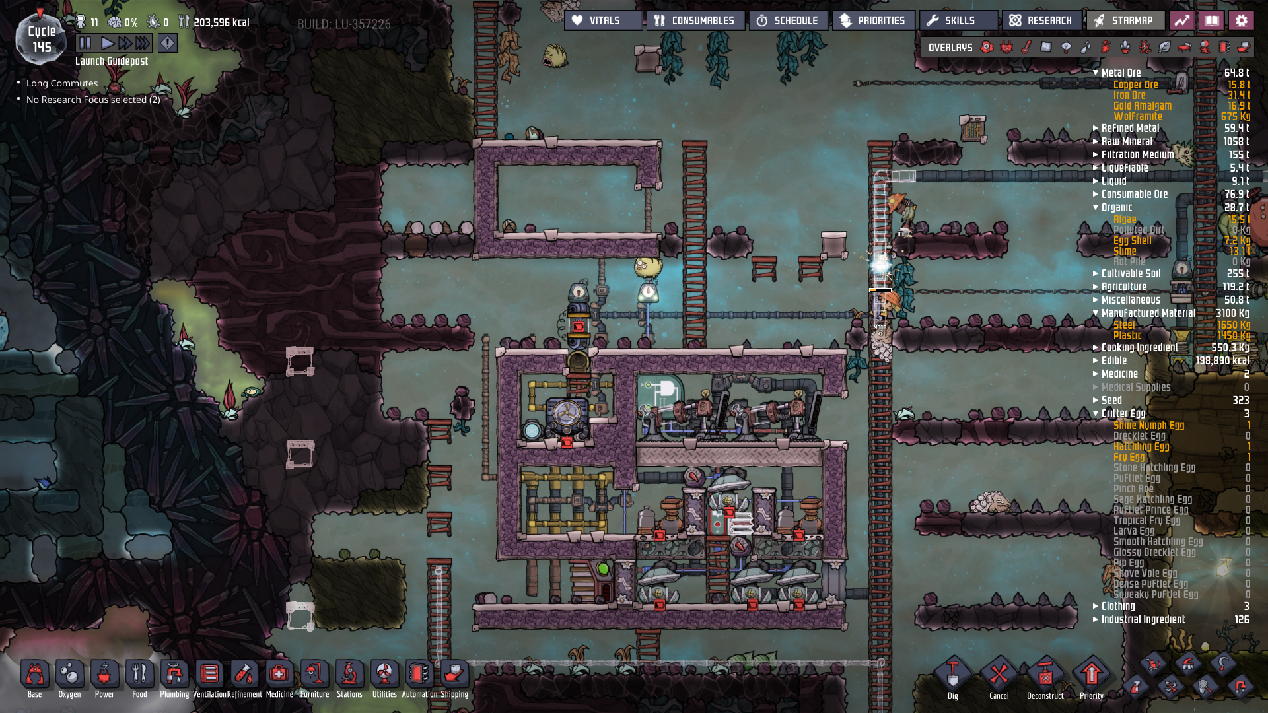
This is an excellent guide but it being 5 years old there's a lot of things changed since it was made.

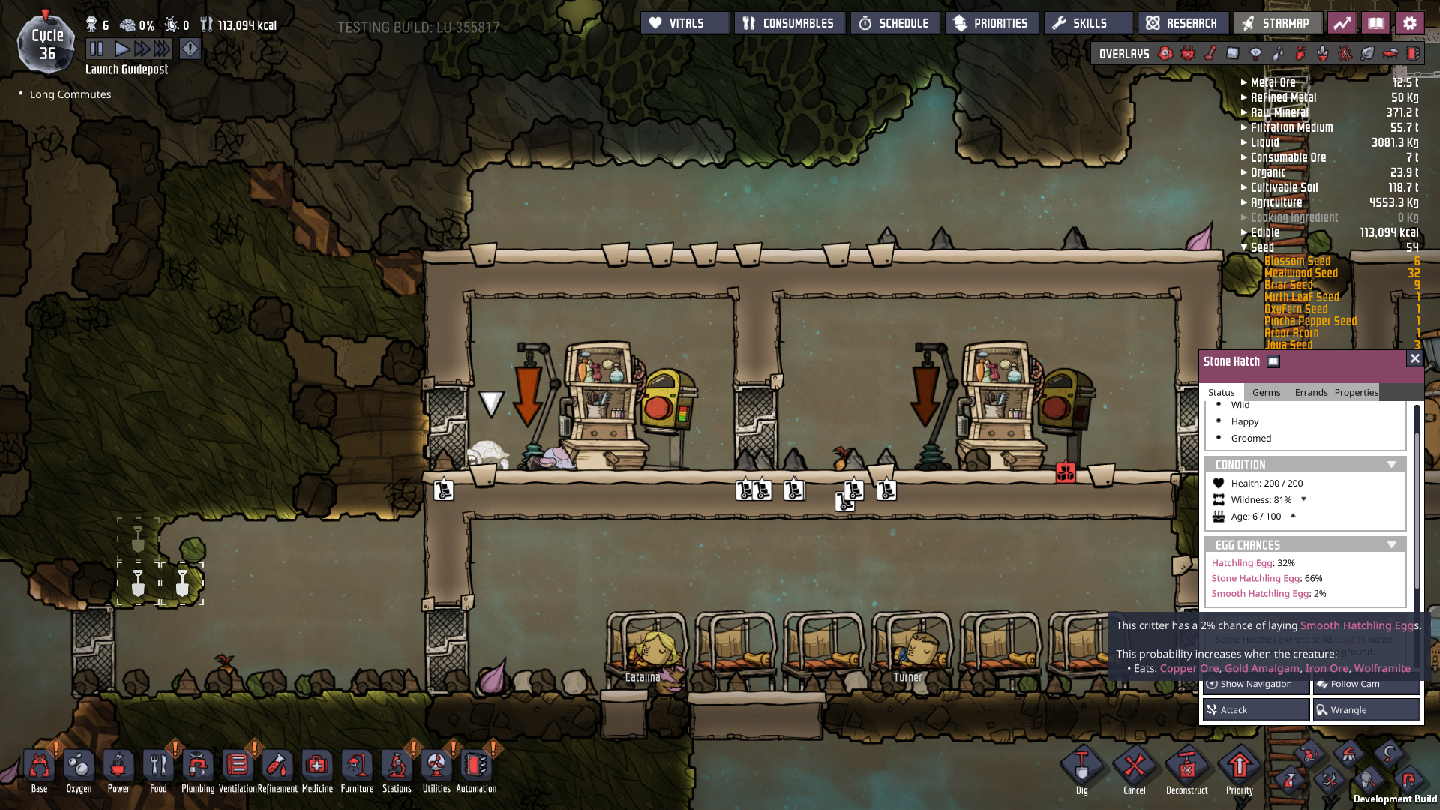
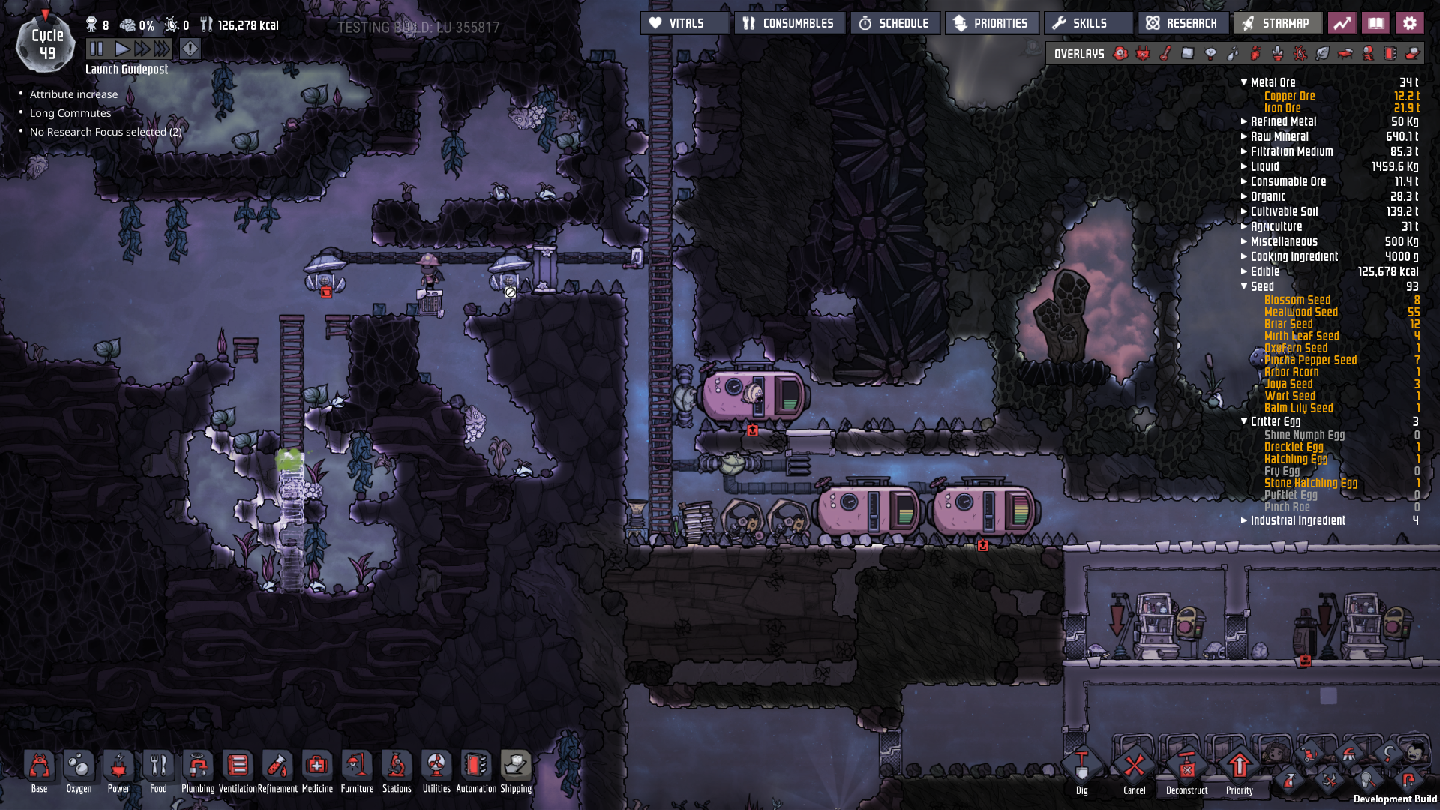
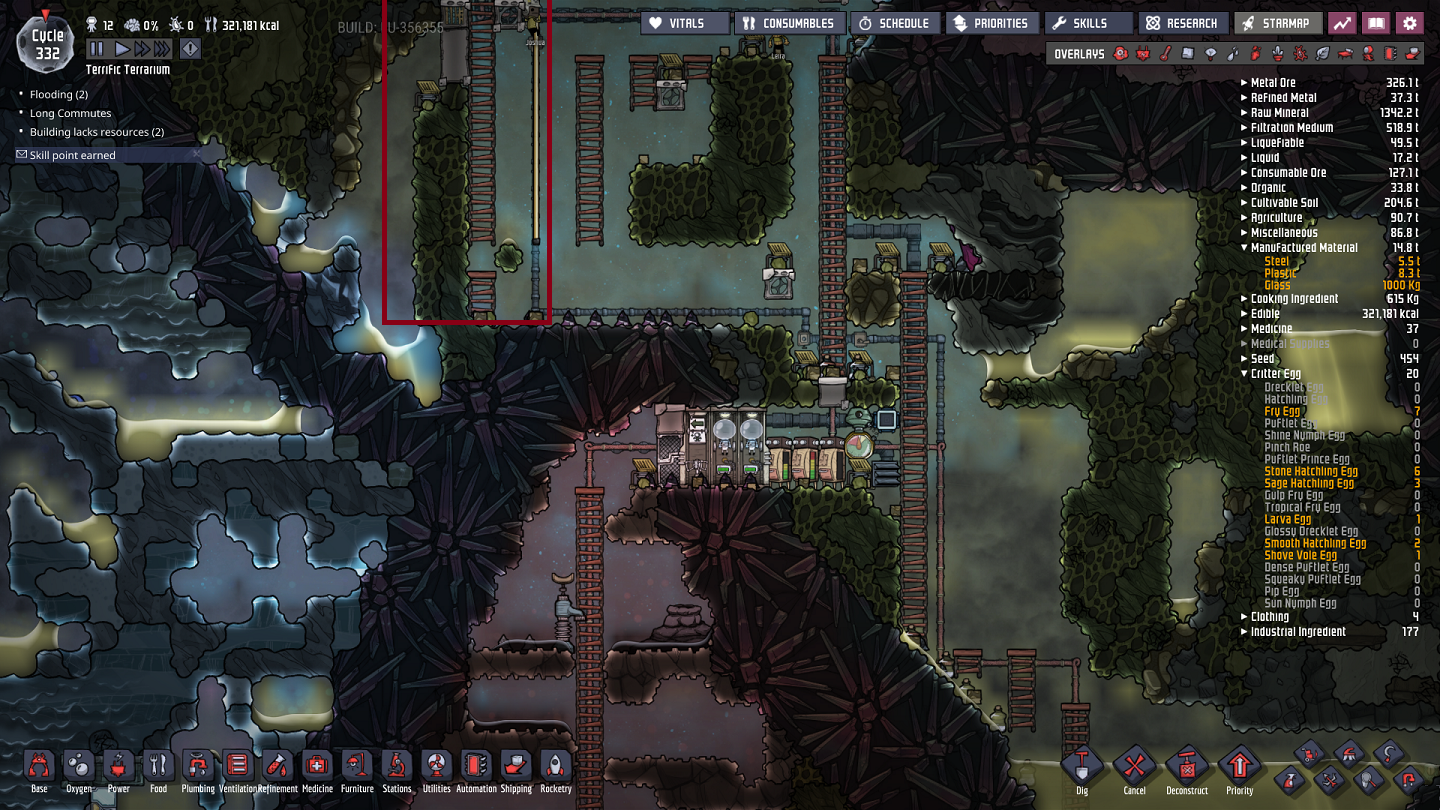
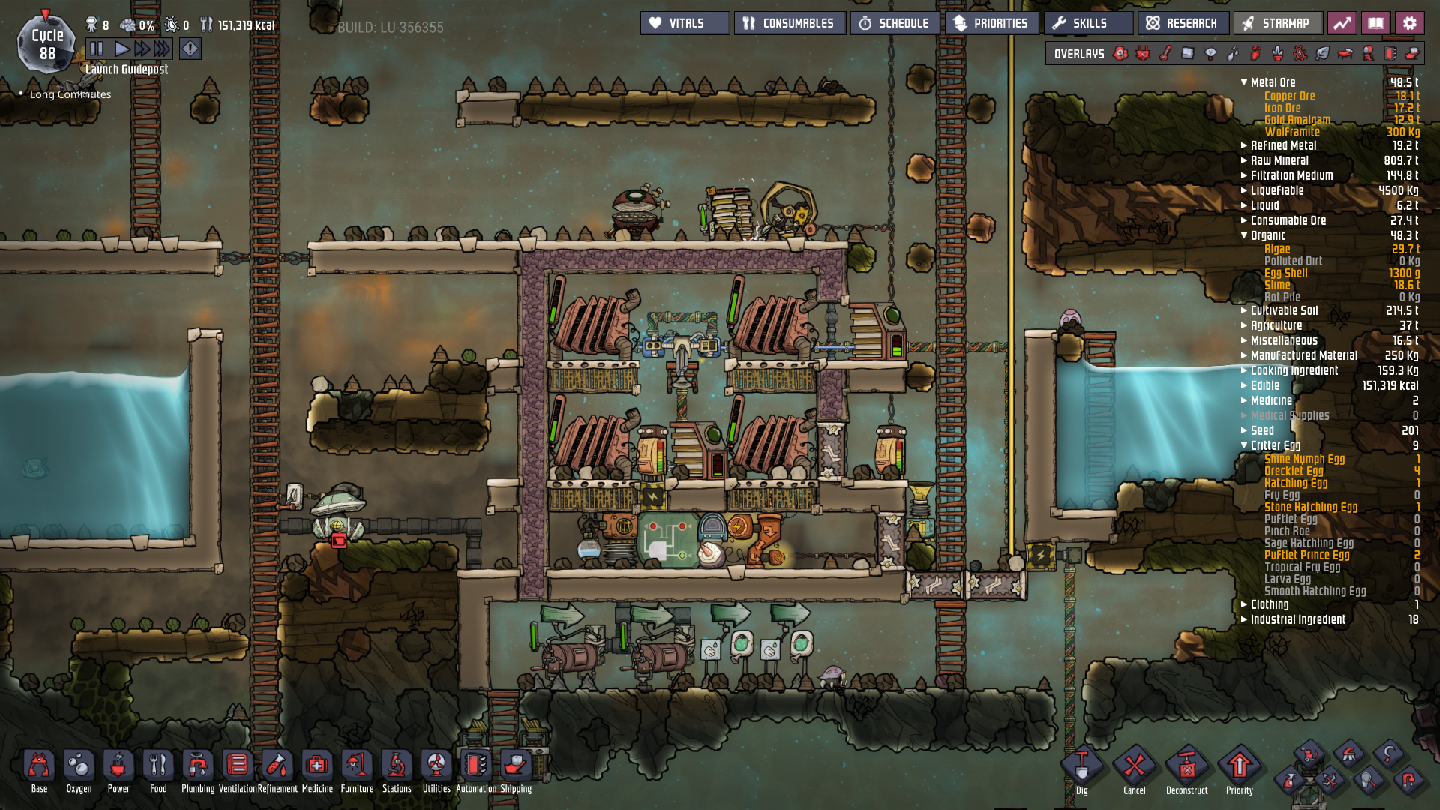
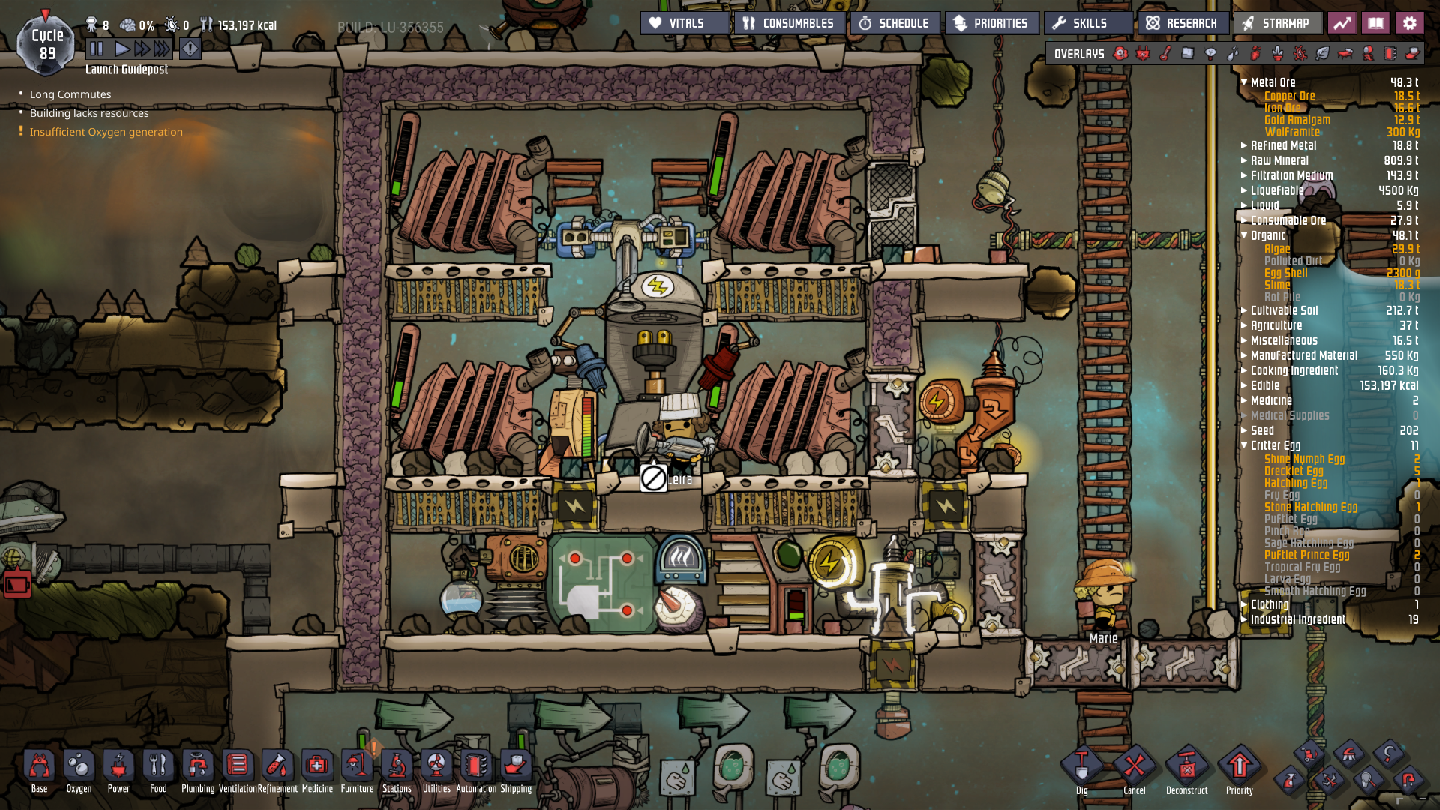
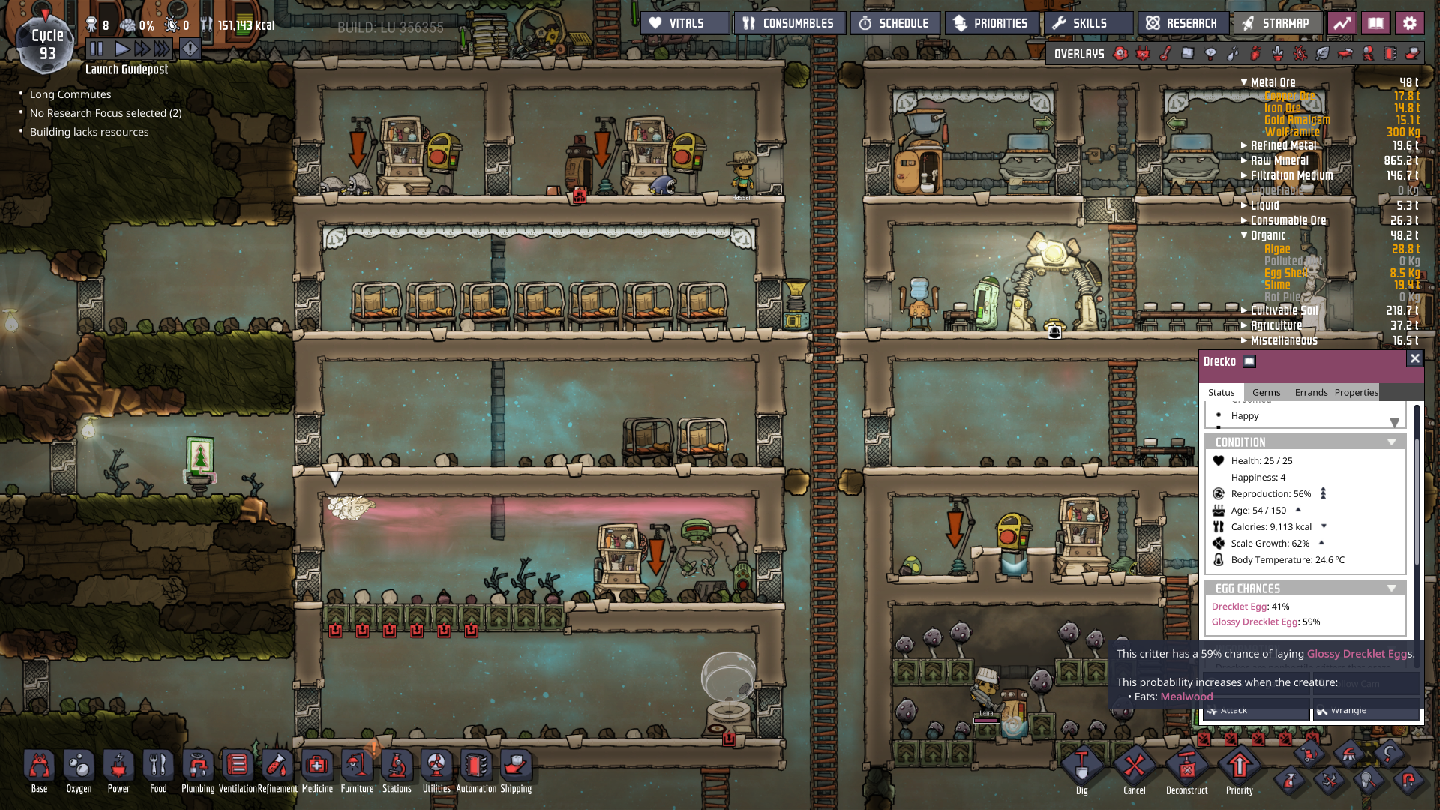
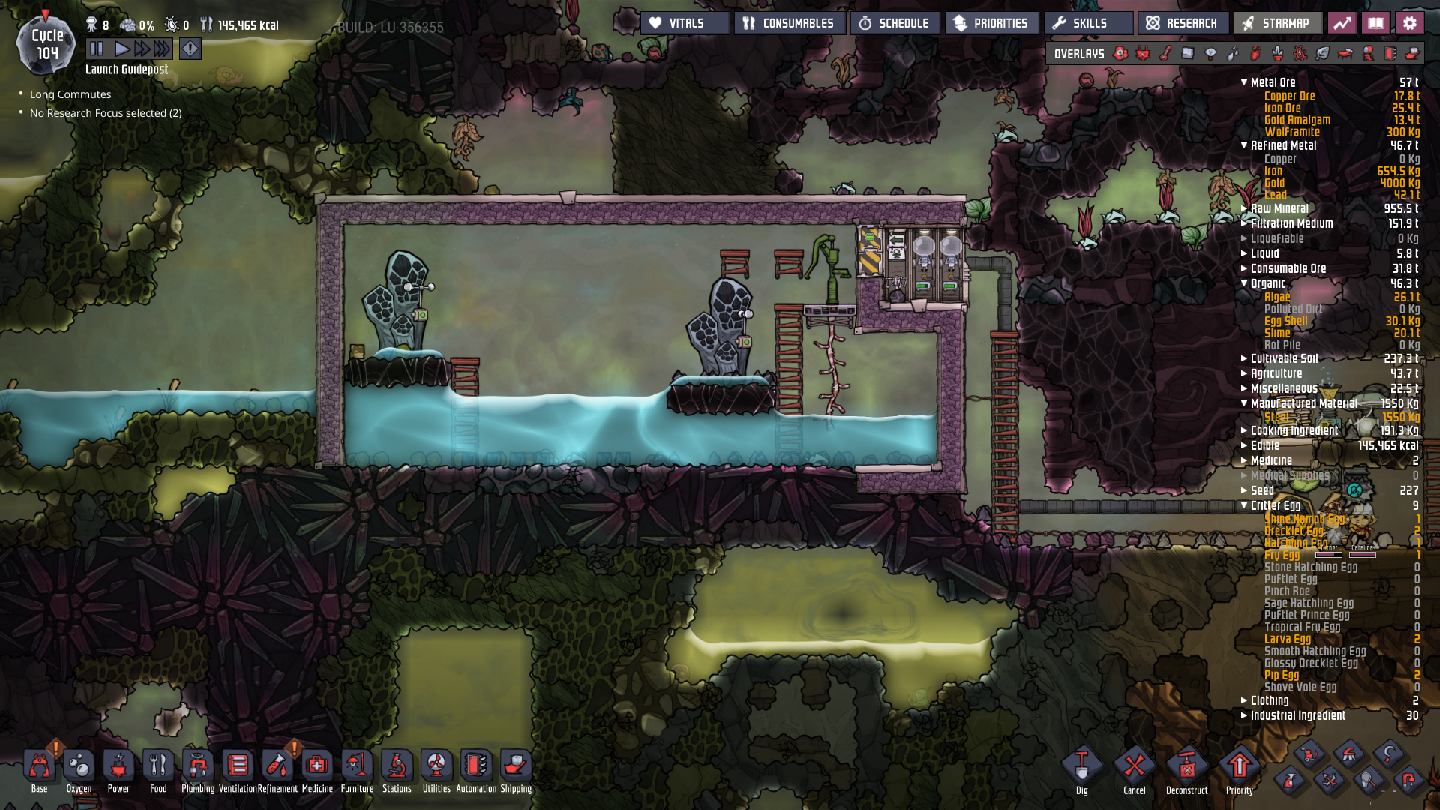
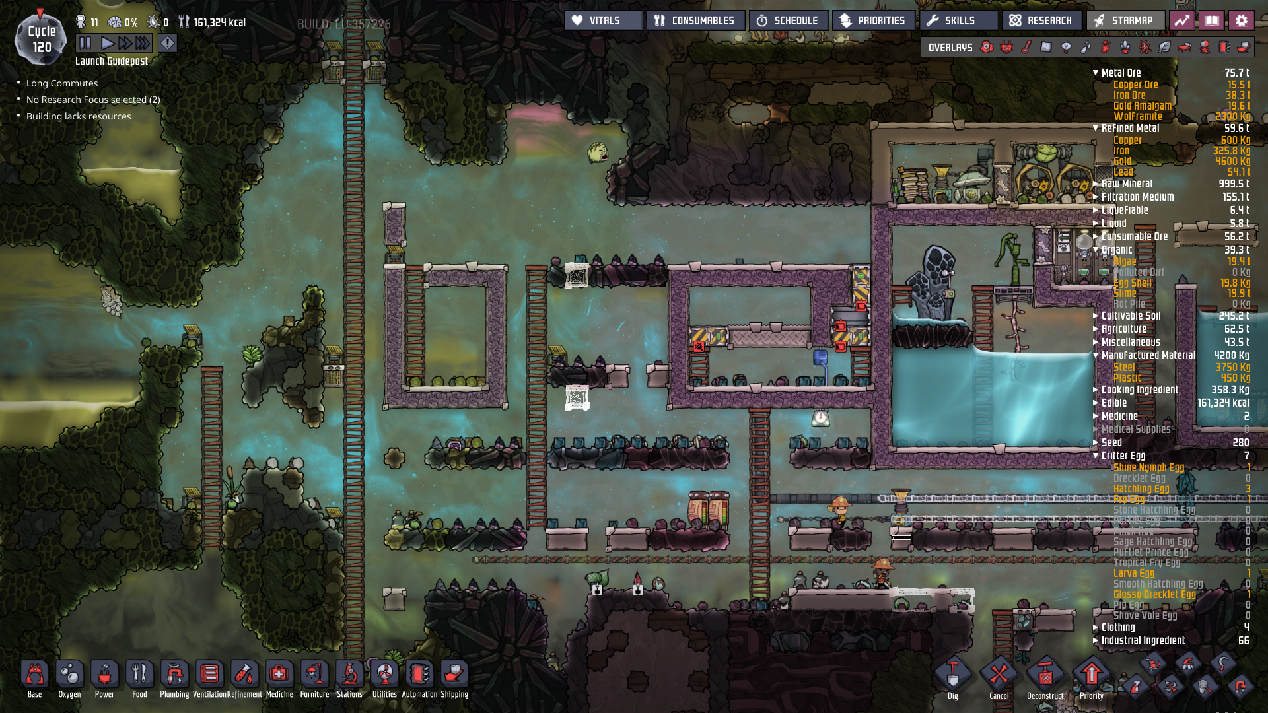
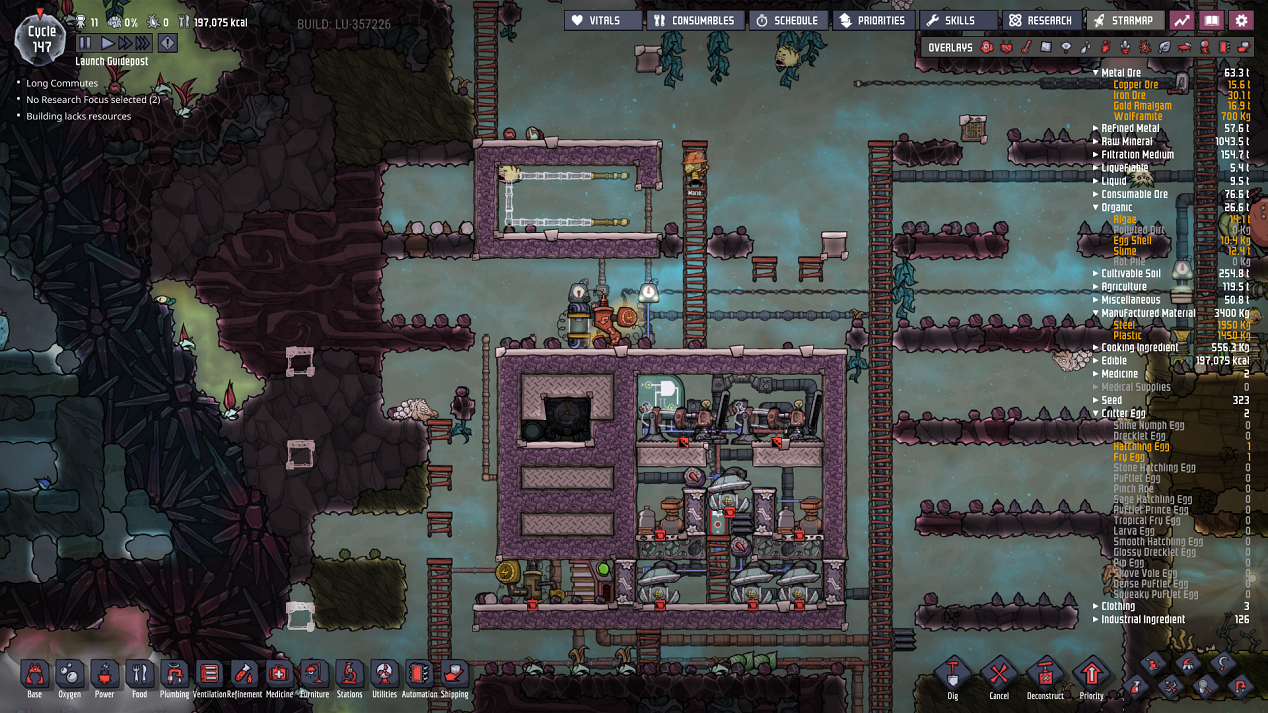
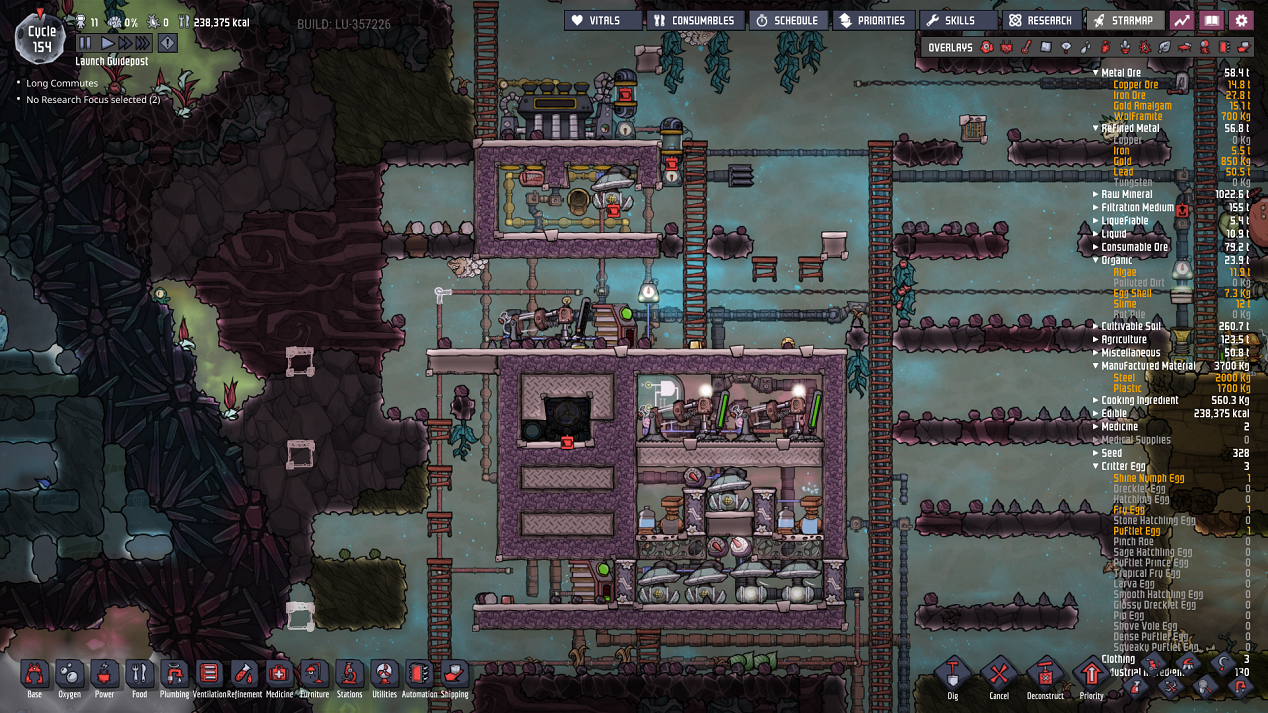
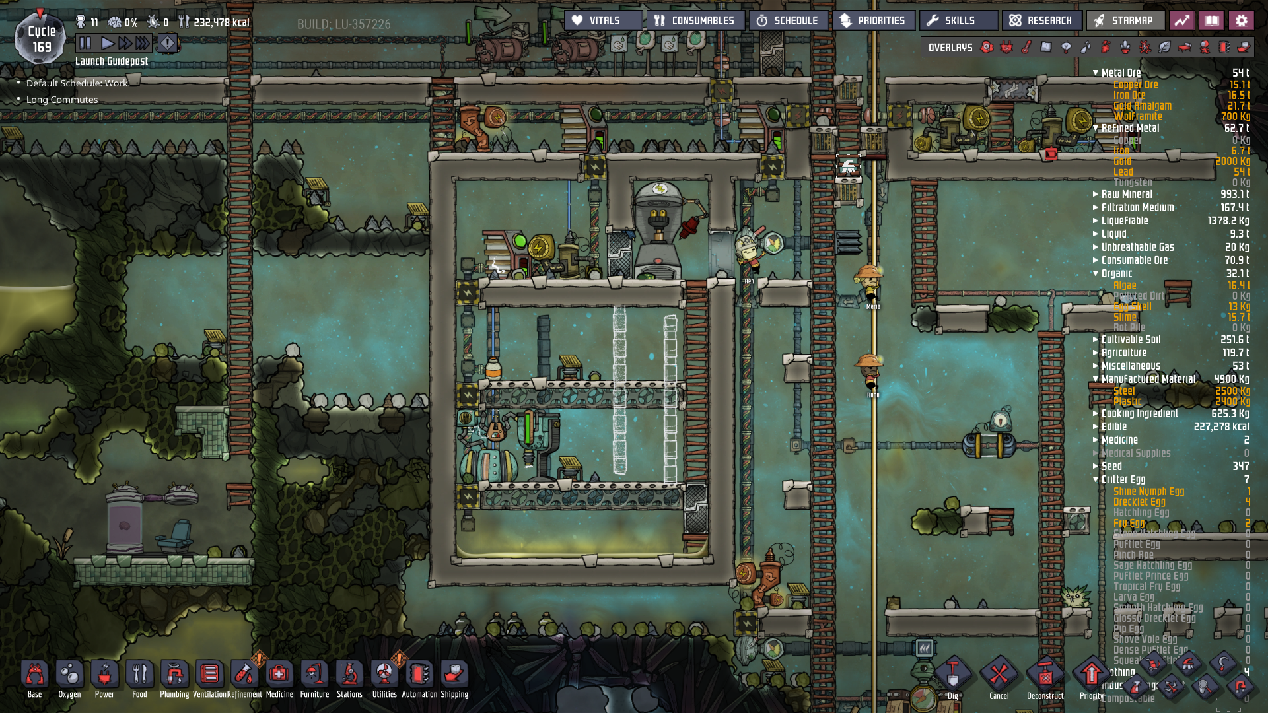
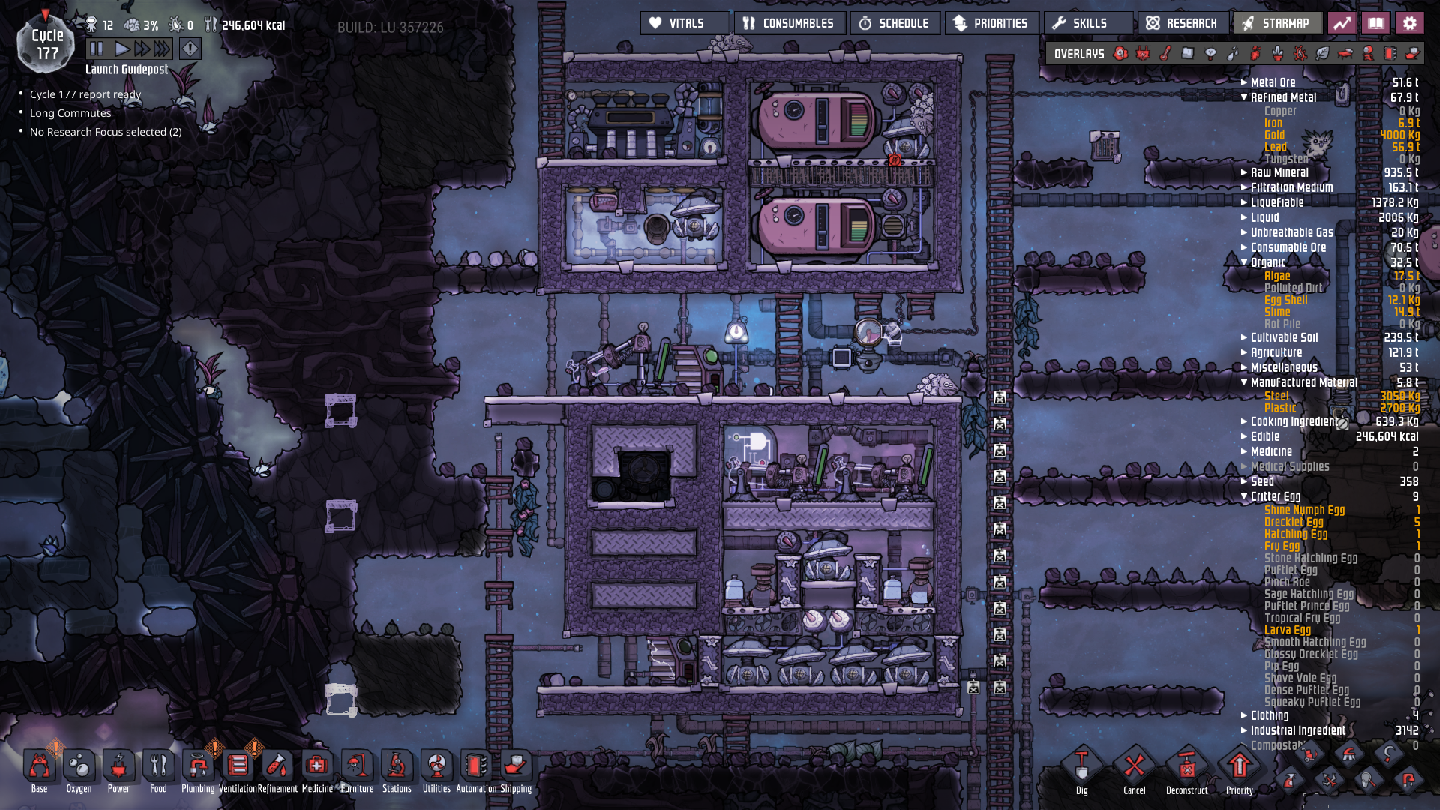
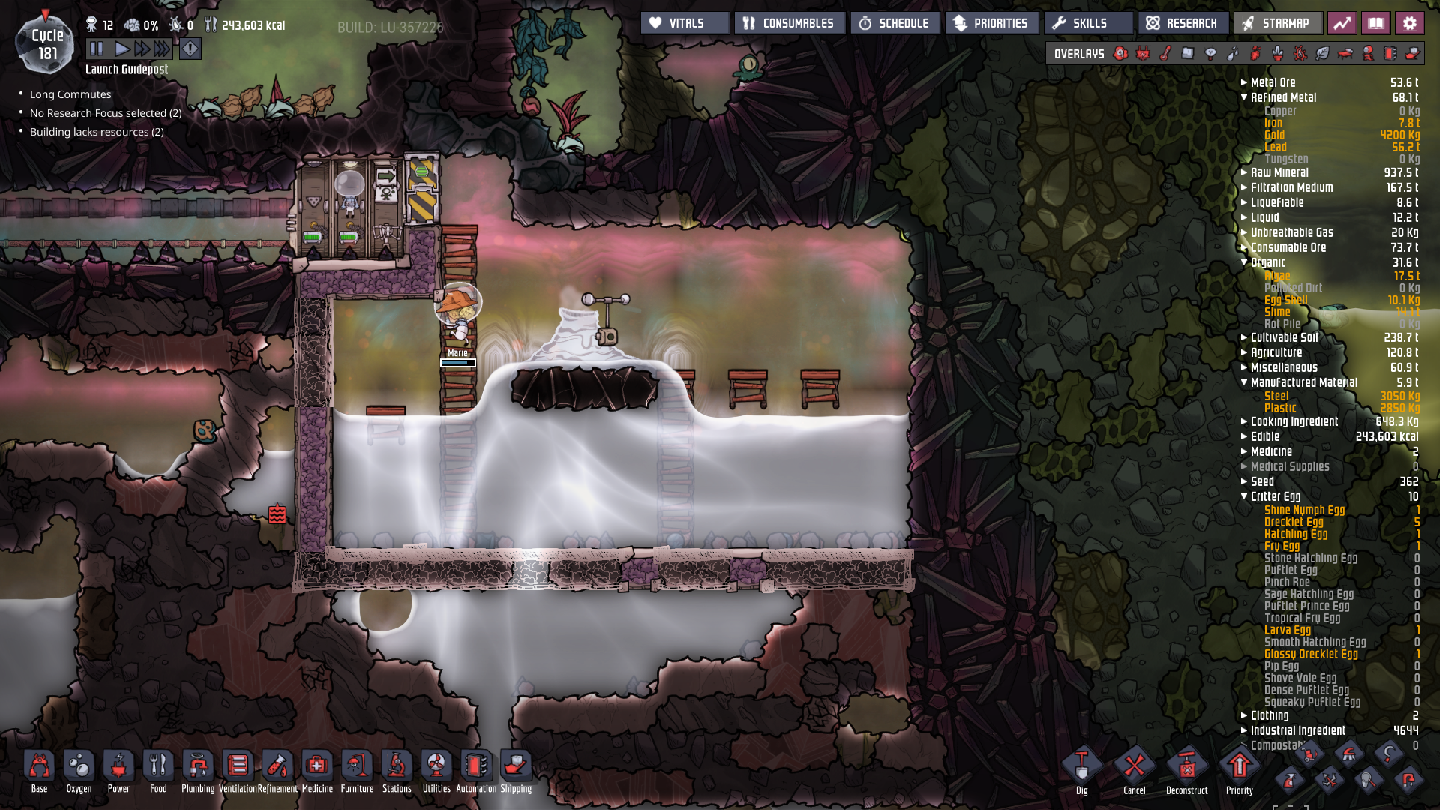
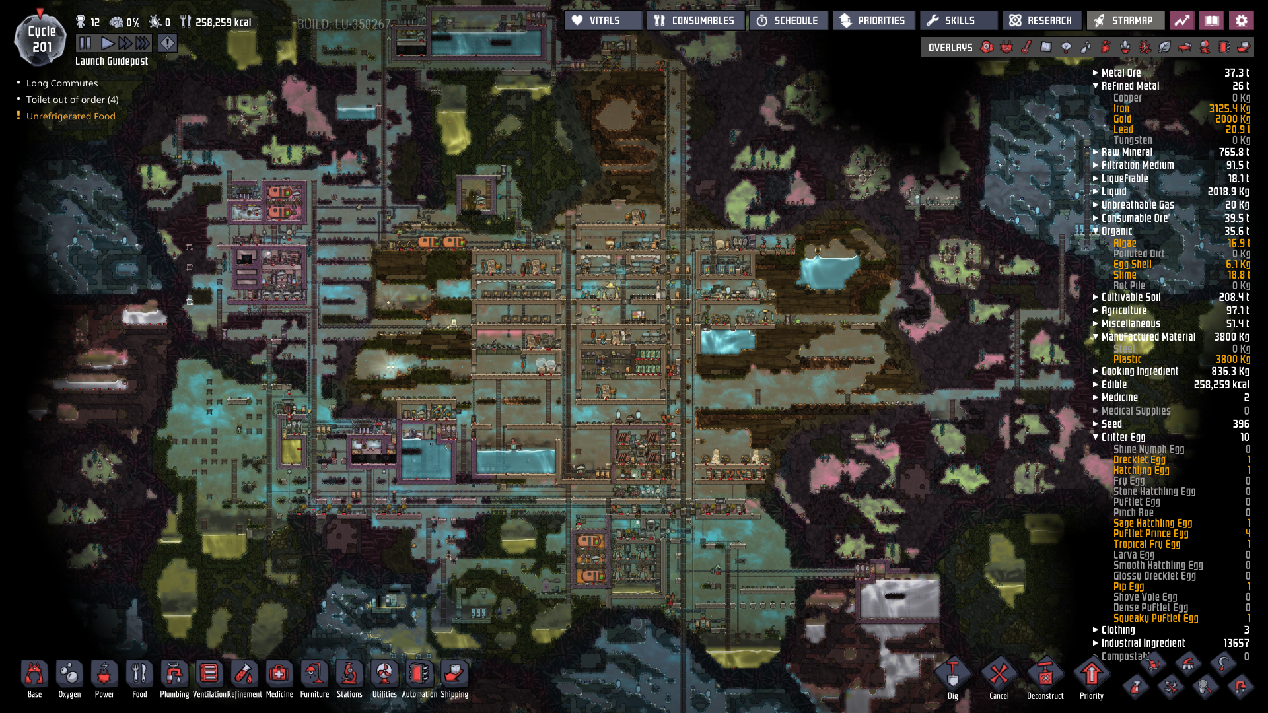
For example a lot of players believe smooth hatches aren't worth because they cost more in labor and resource than the refinery you will eventually build anyway.

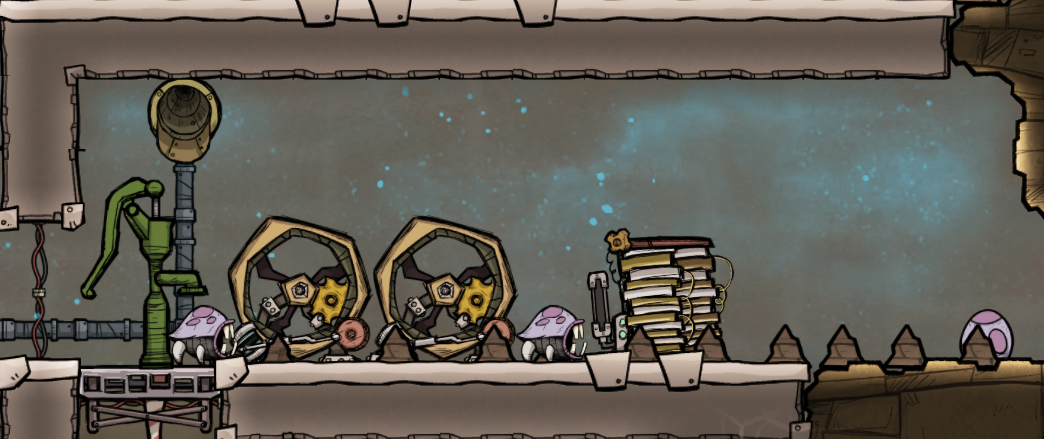
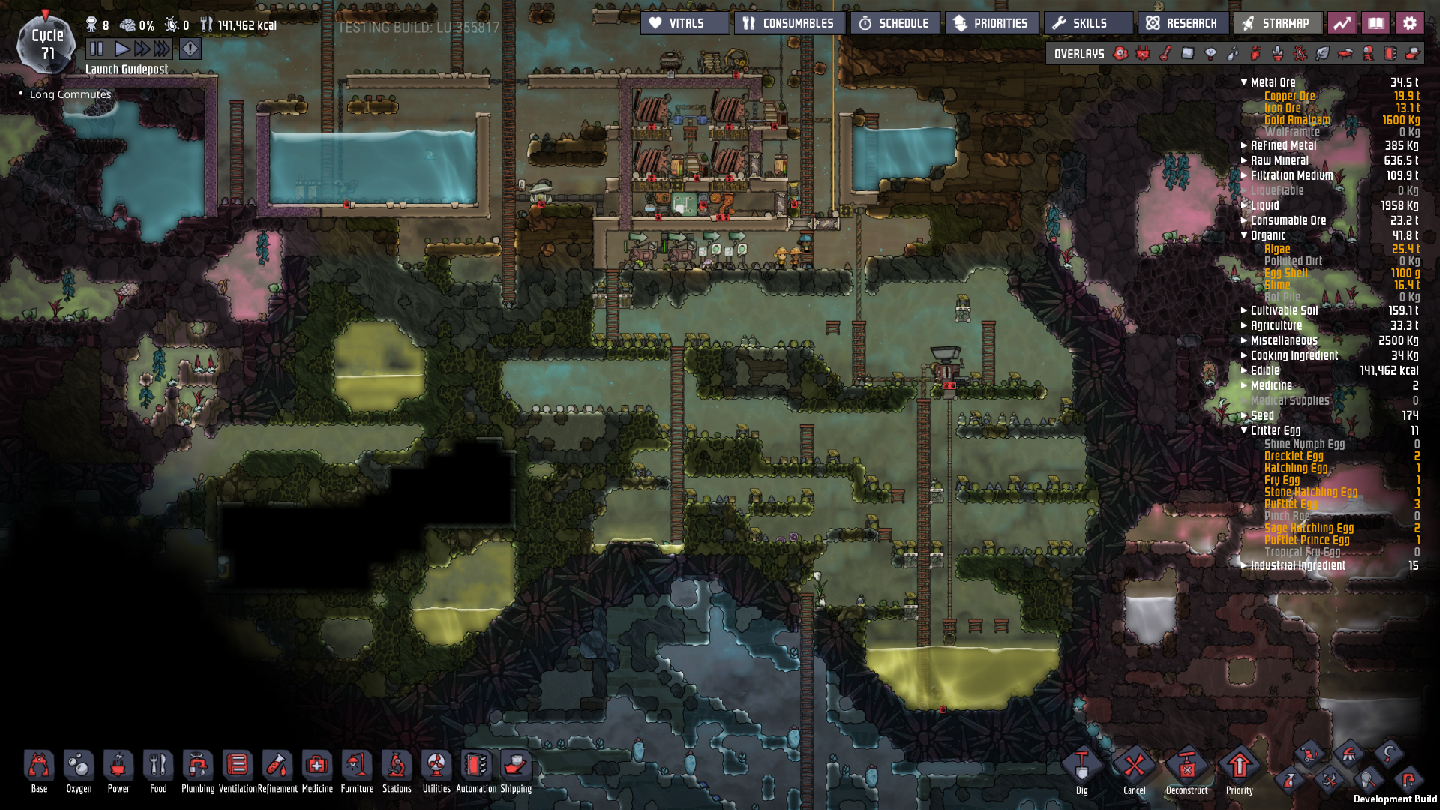
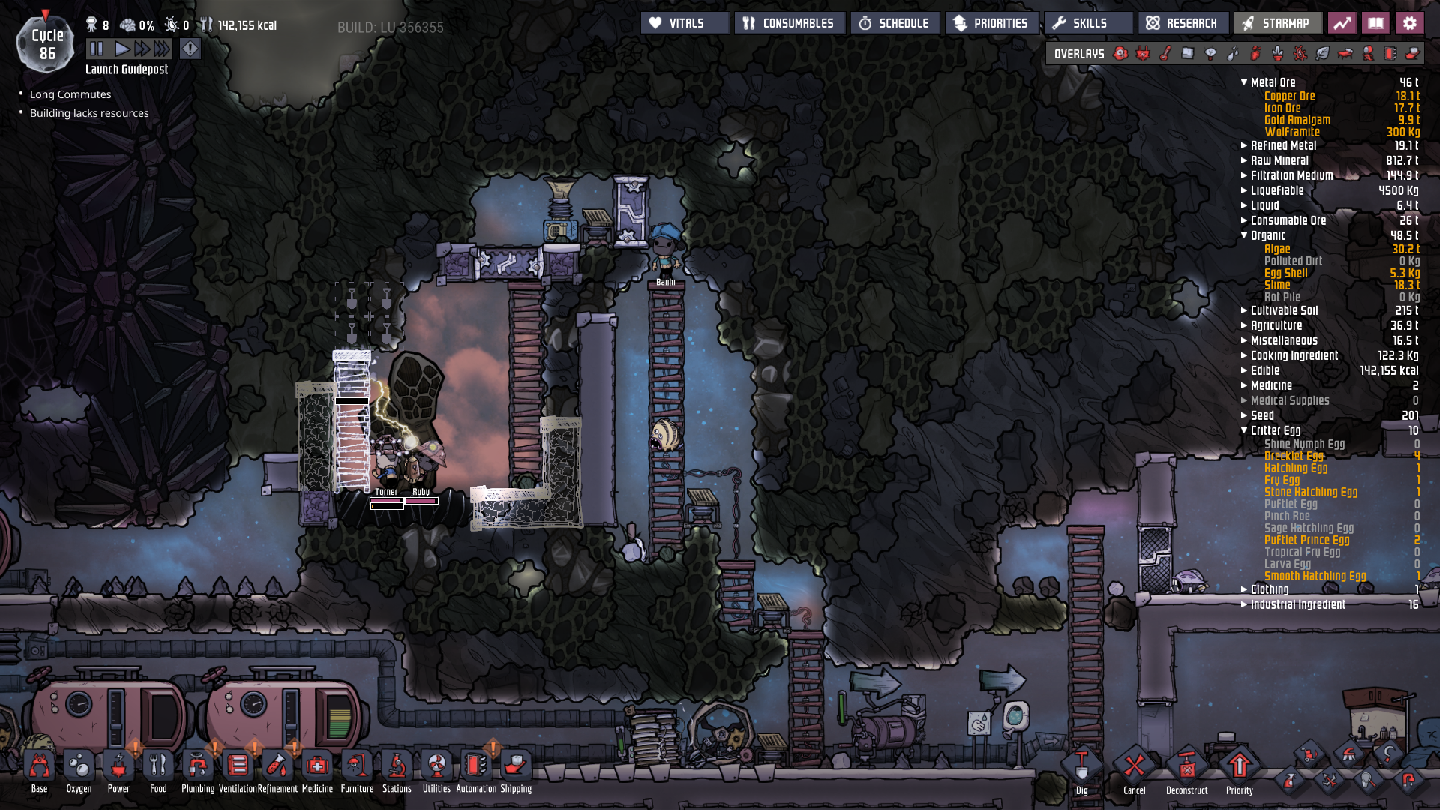
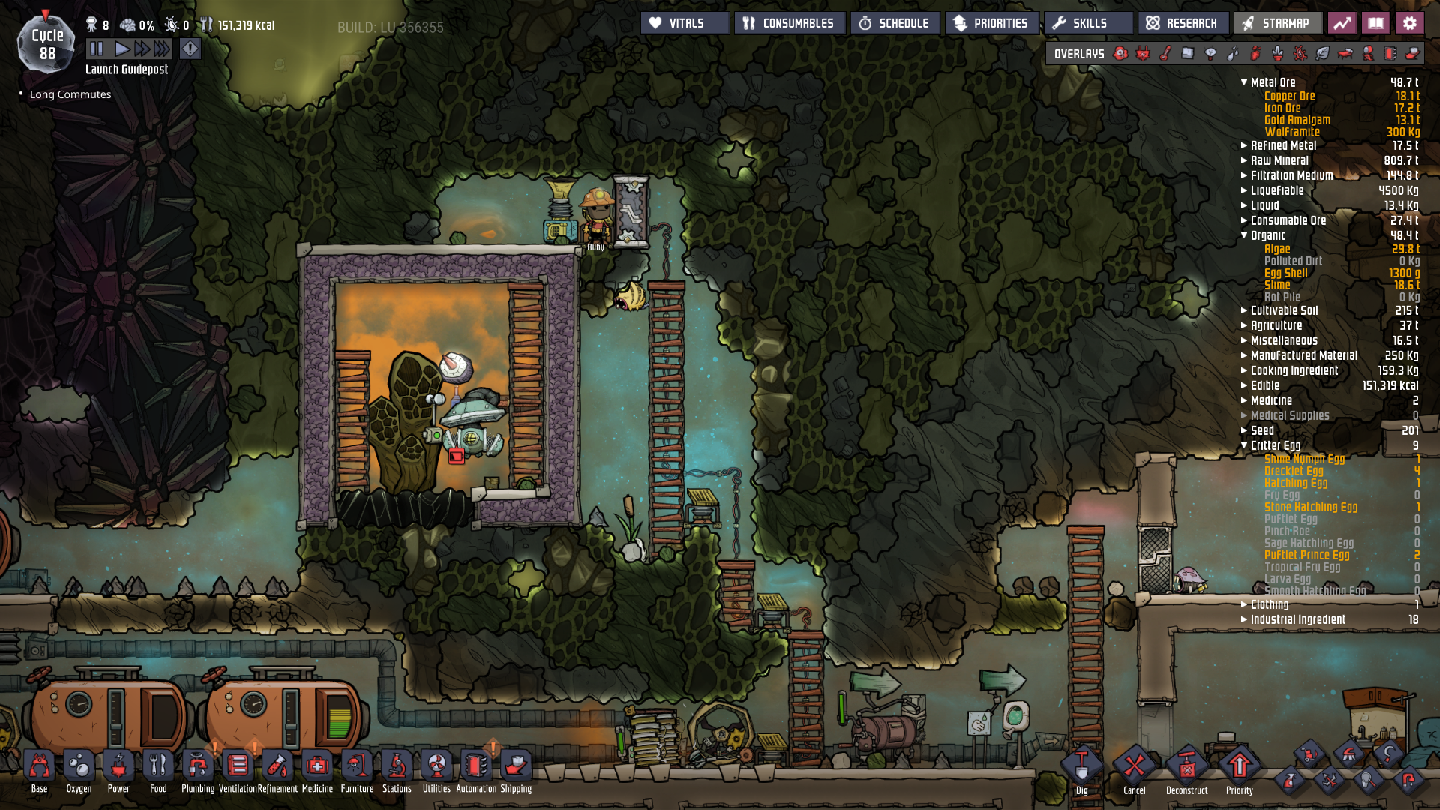
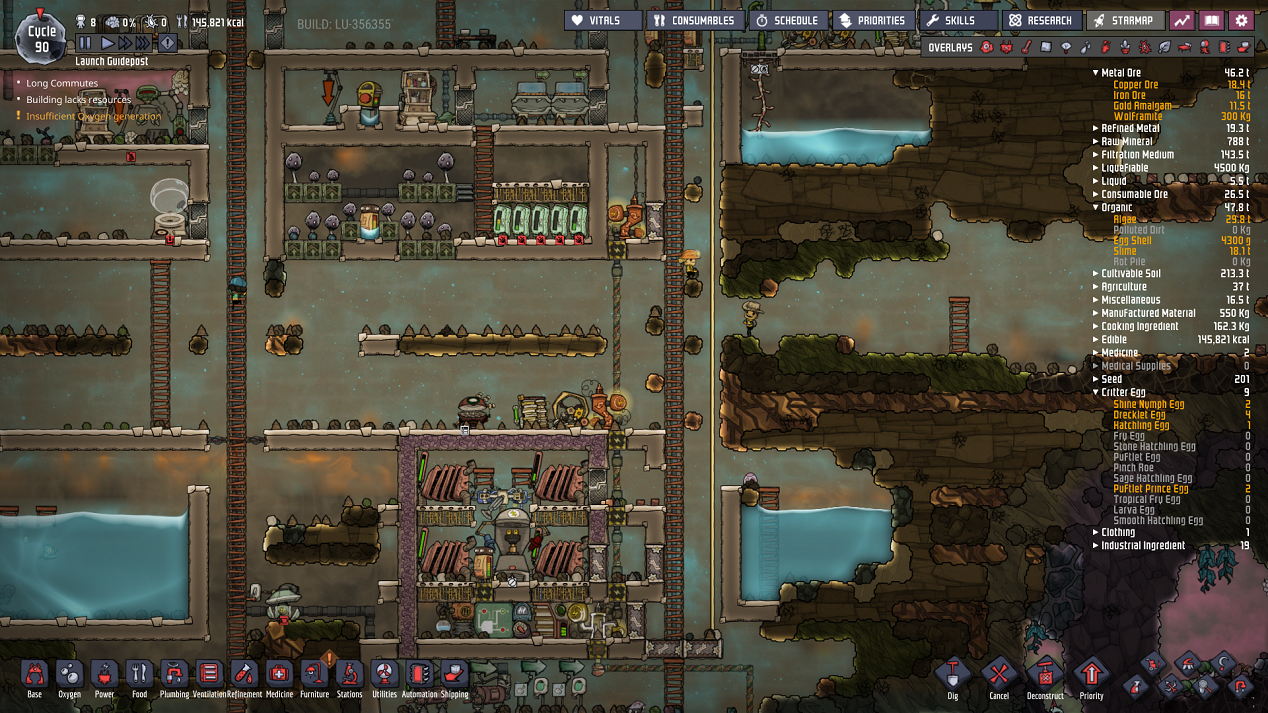
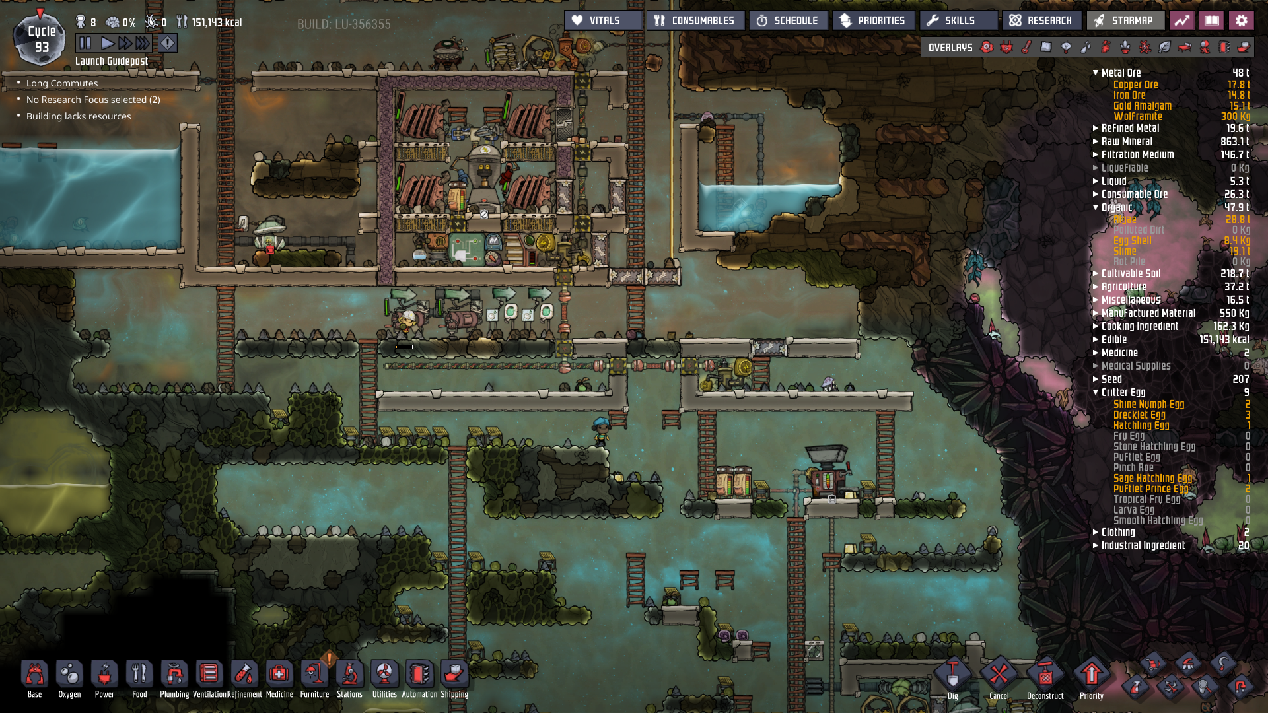
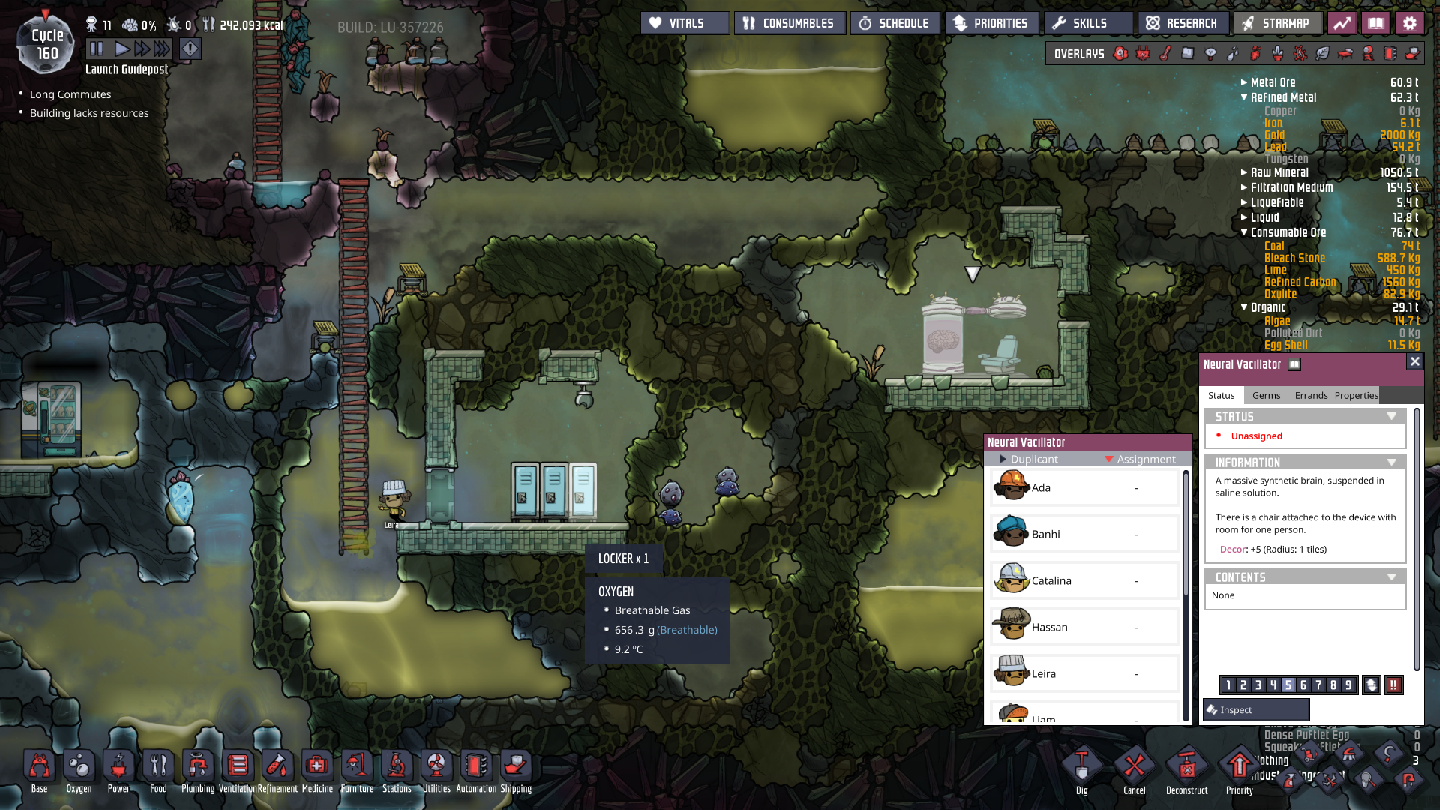
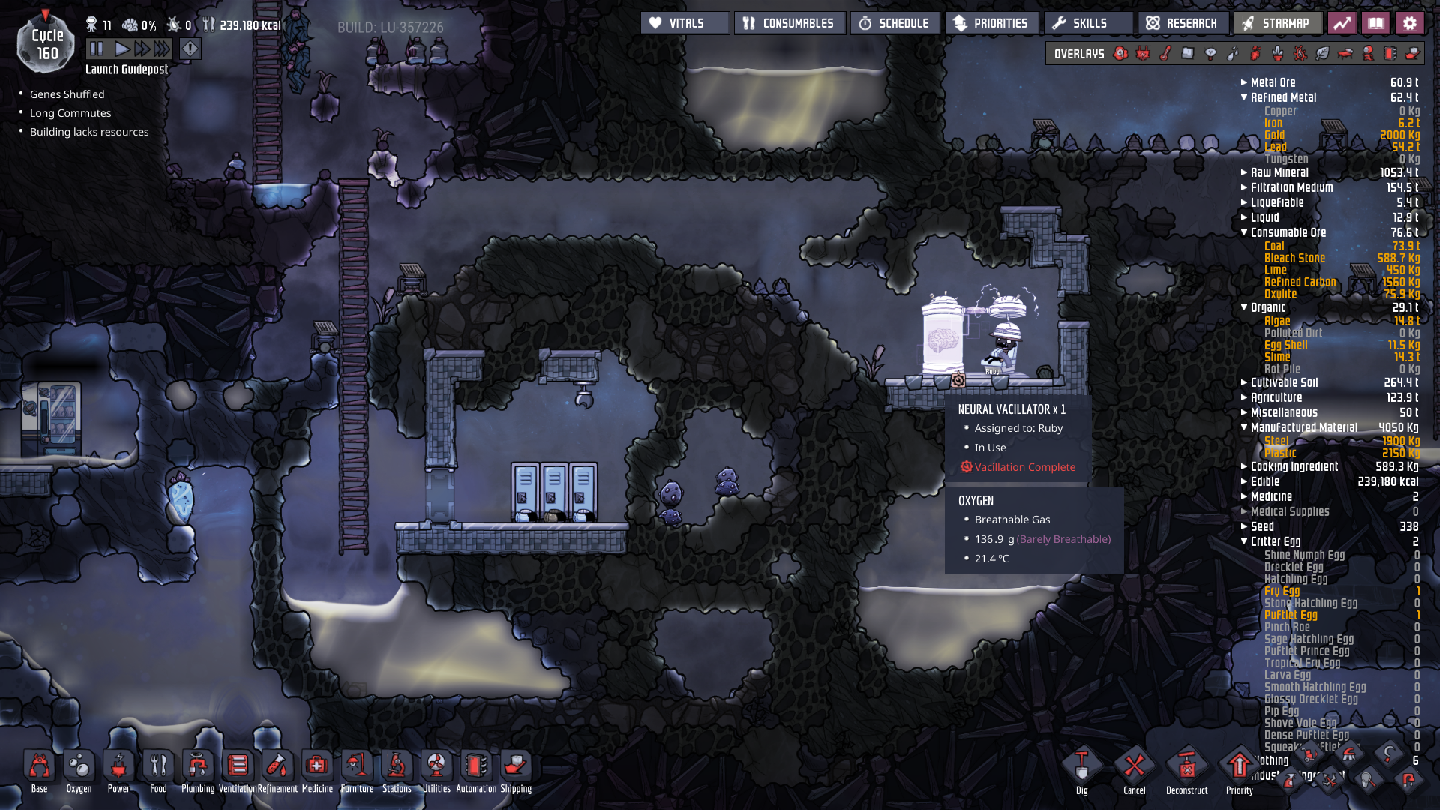
The best reason for hatches is food, everything else is just extra imo. I usually keep just regular hatches cause you can feed them almost anything.
✔️ DemKy Nigerian Prince 2024년 10월 30일 오전 5시 30분 
Why do we make a Breeding Stone Hatchlings with only 2 hatch ? isn't it better to make a bigger one to get stone hatch faster ?
Pédro 2023년 7월 15일 오후 7시 29분 
just a few things ive noticed thats changed since this guide was made:
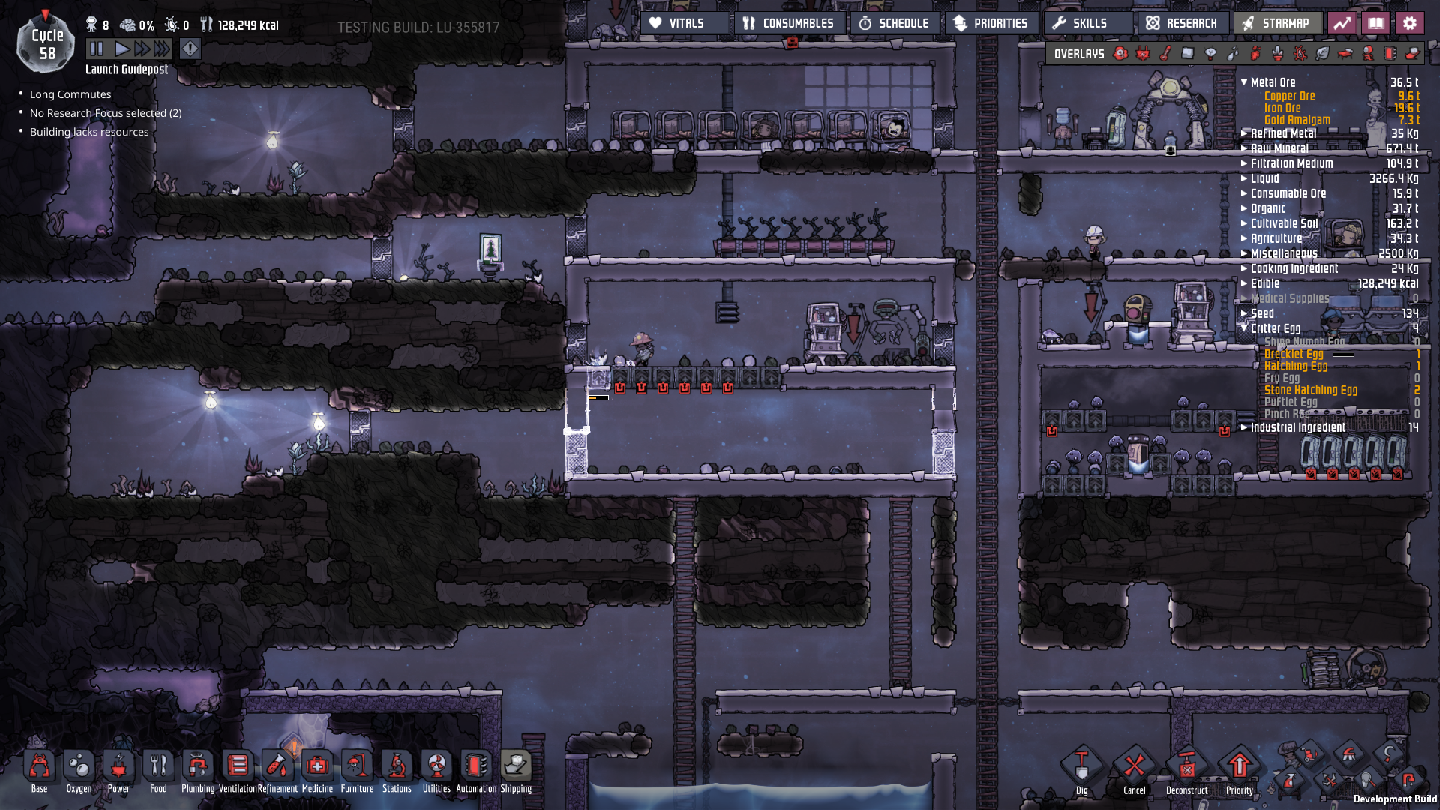
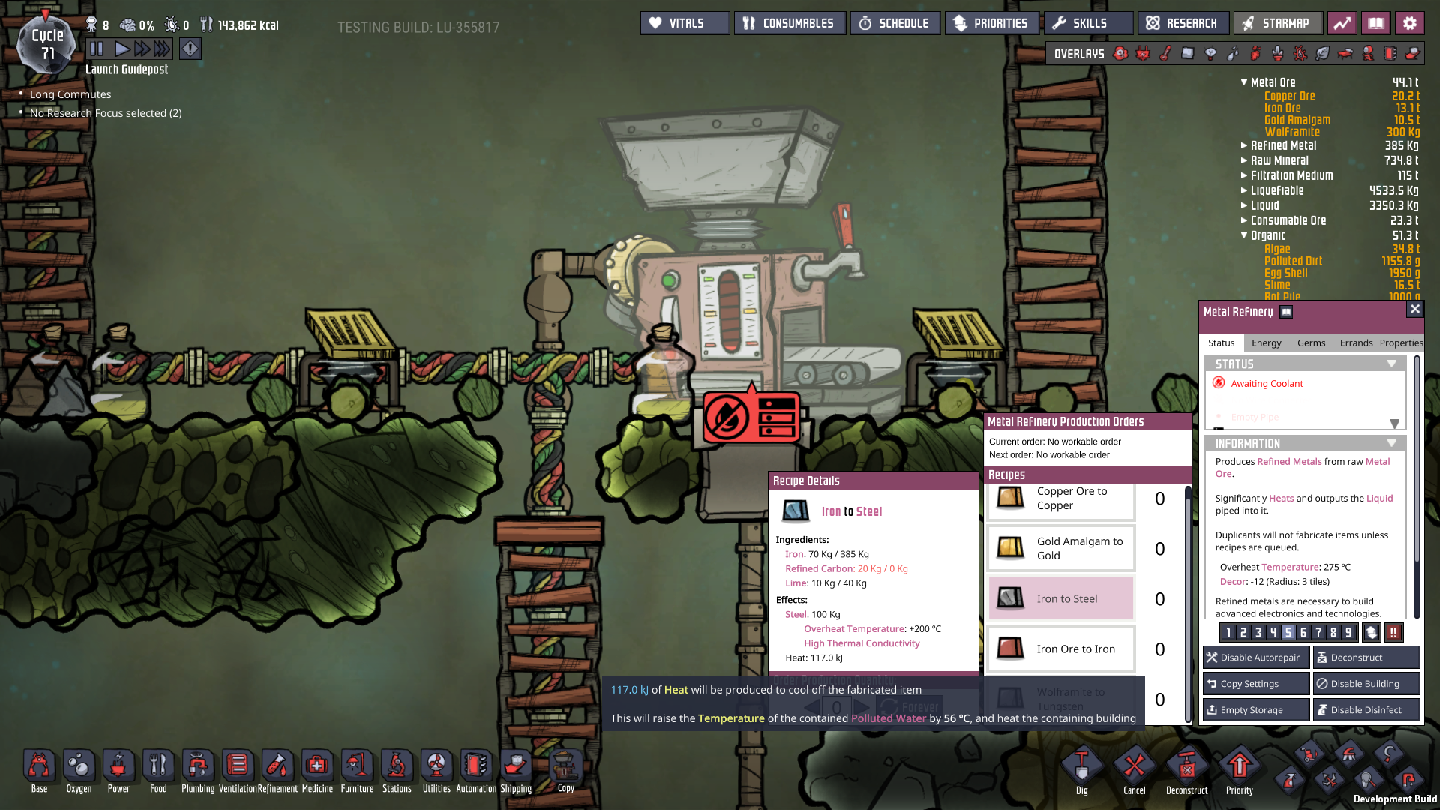
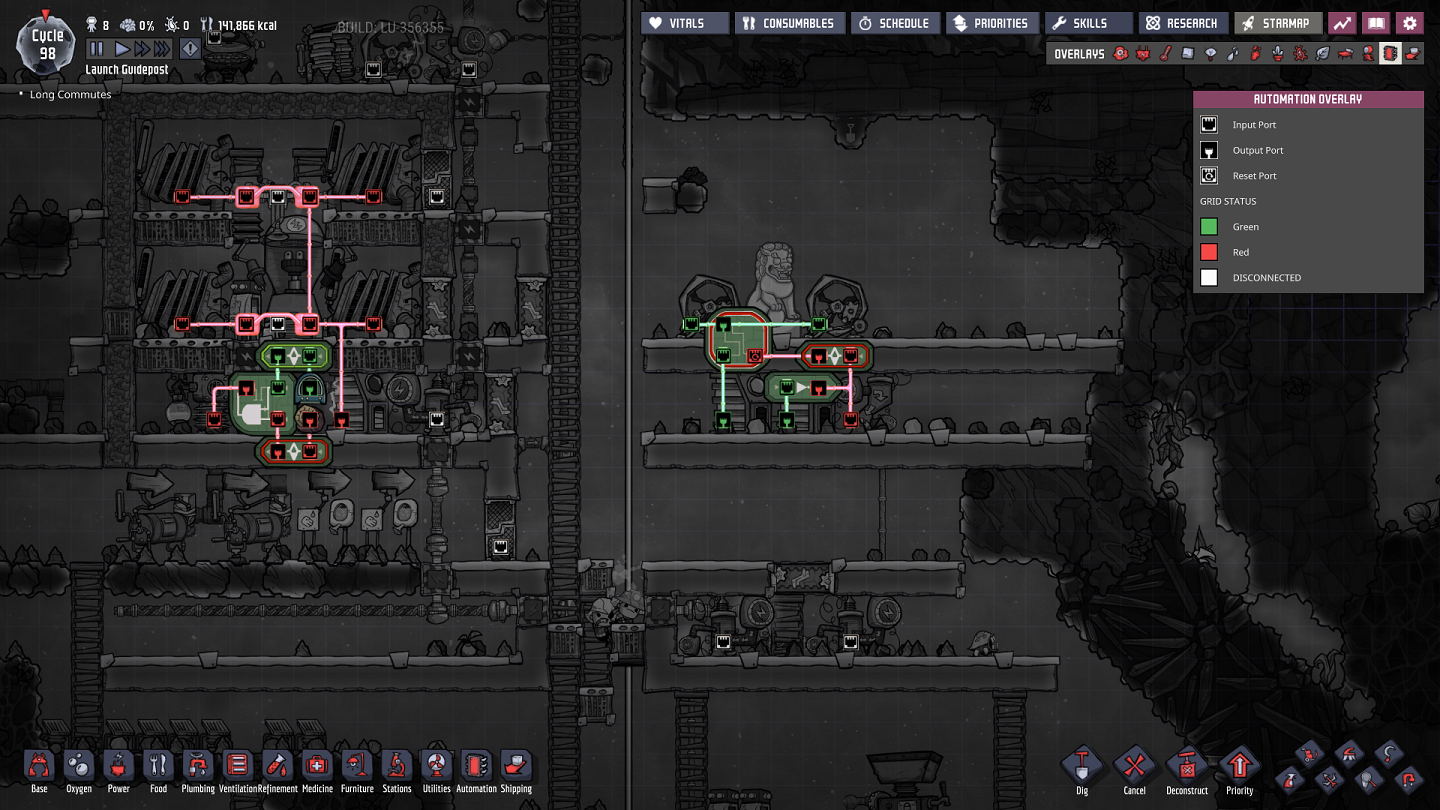
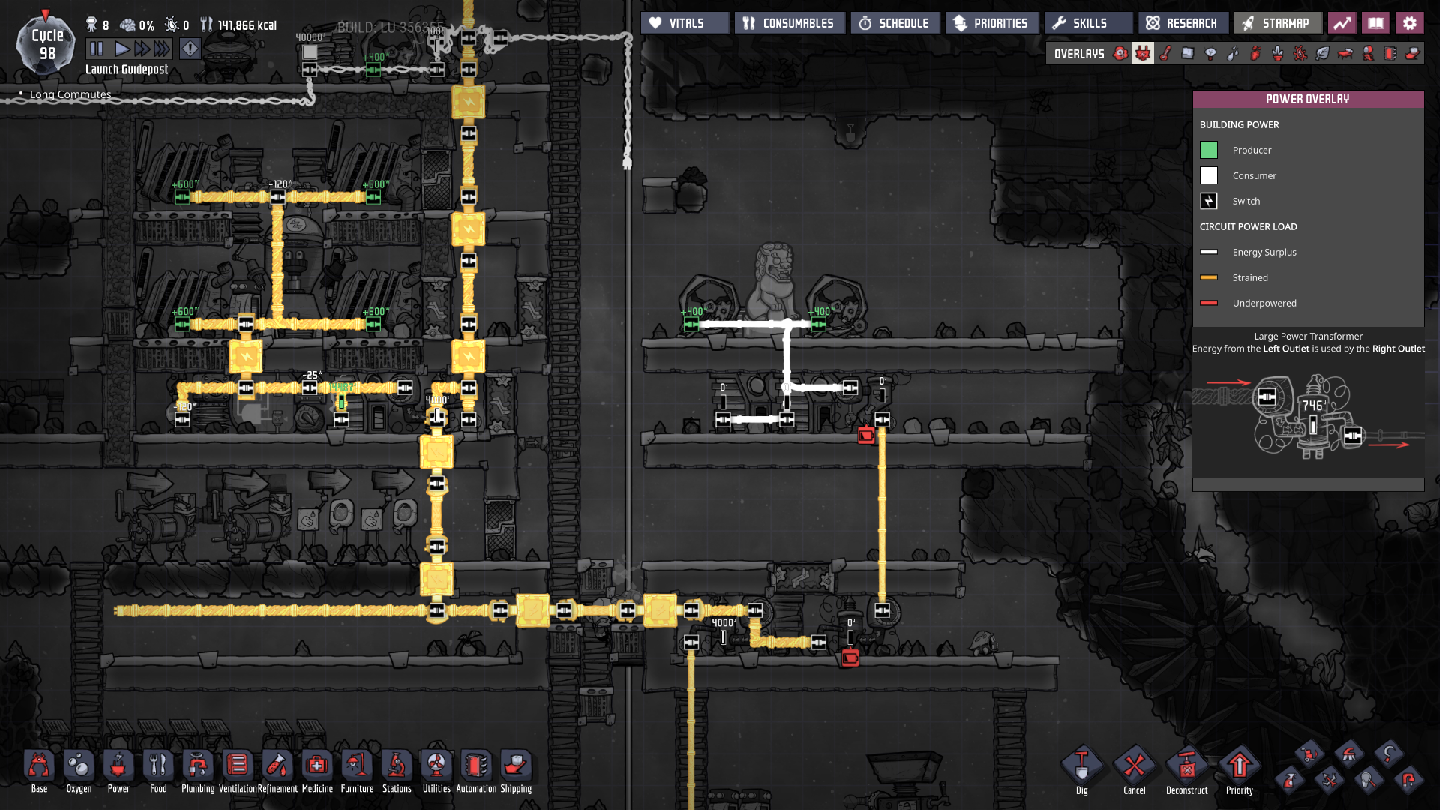
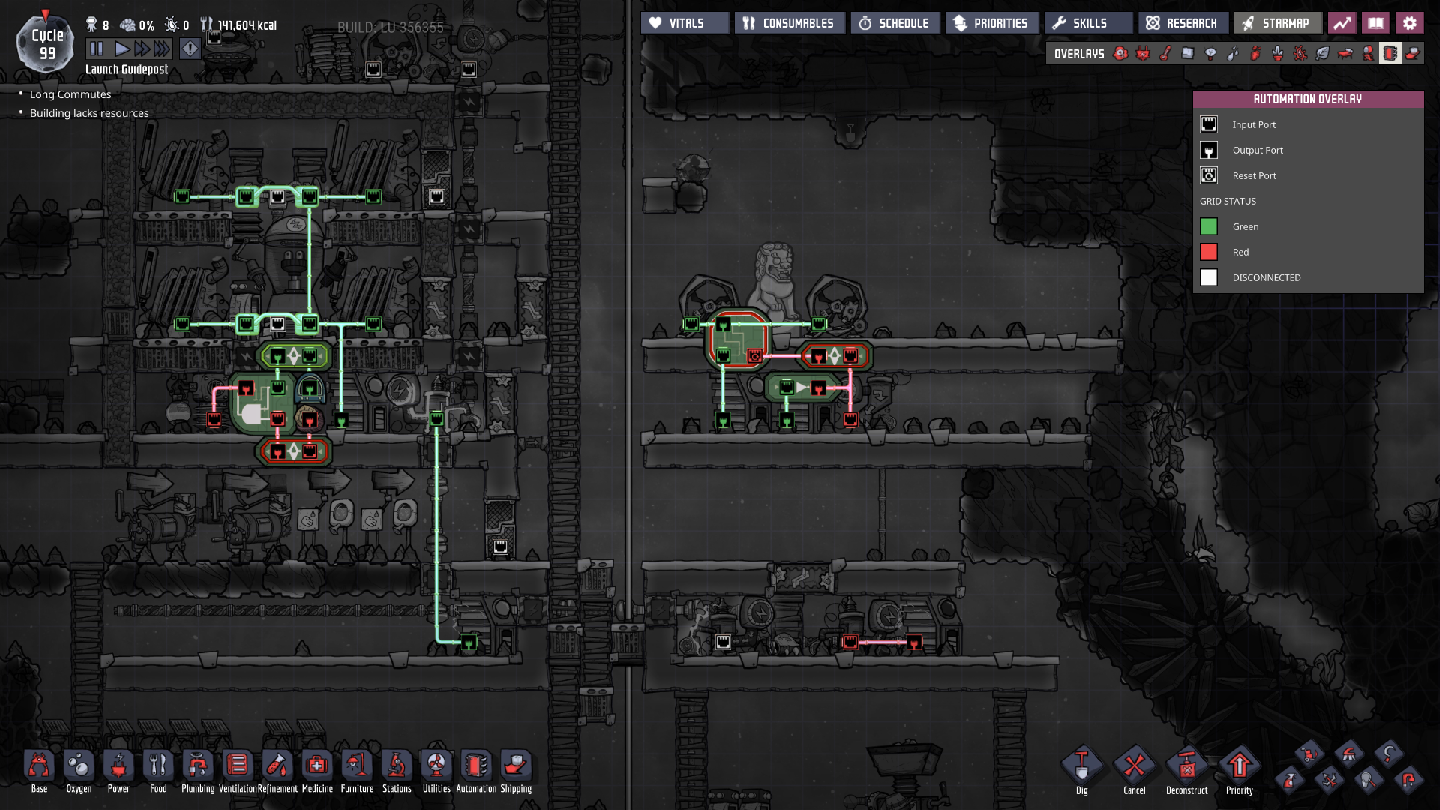
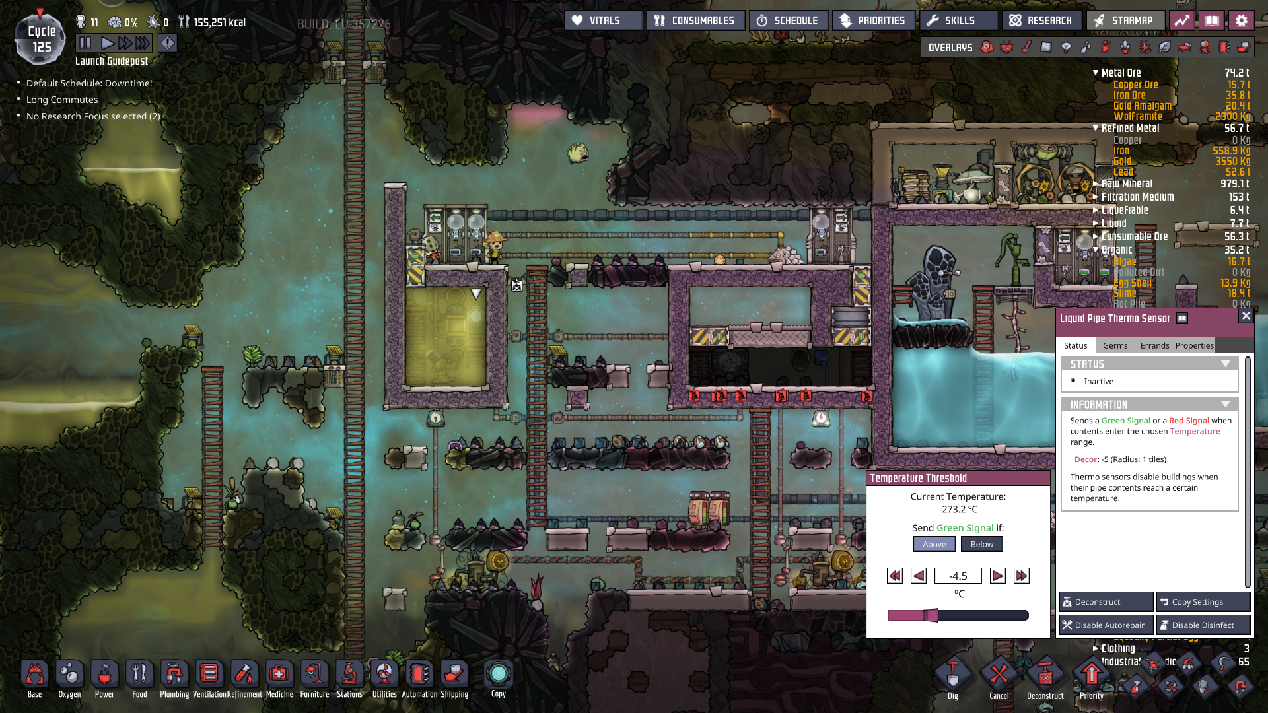
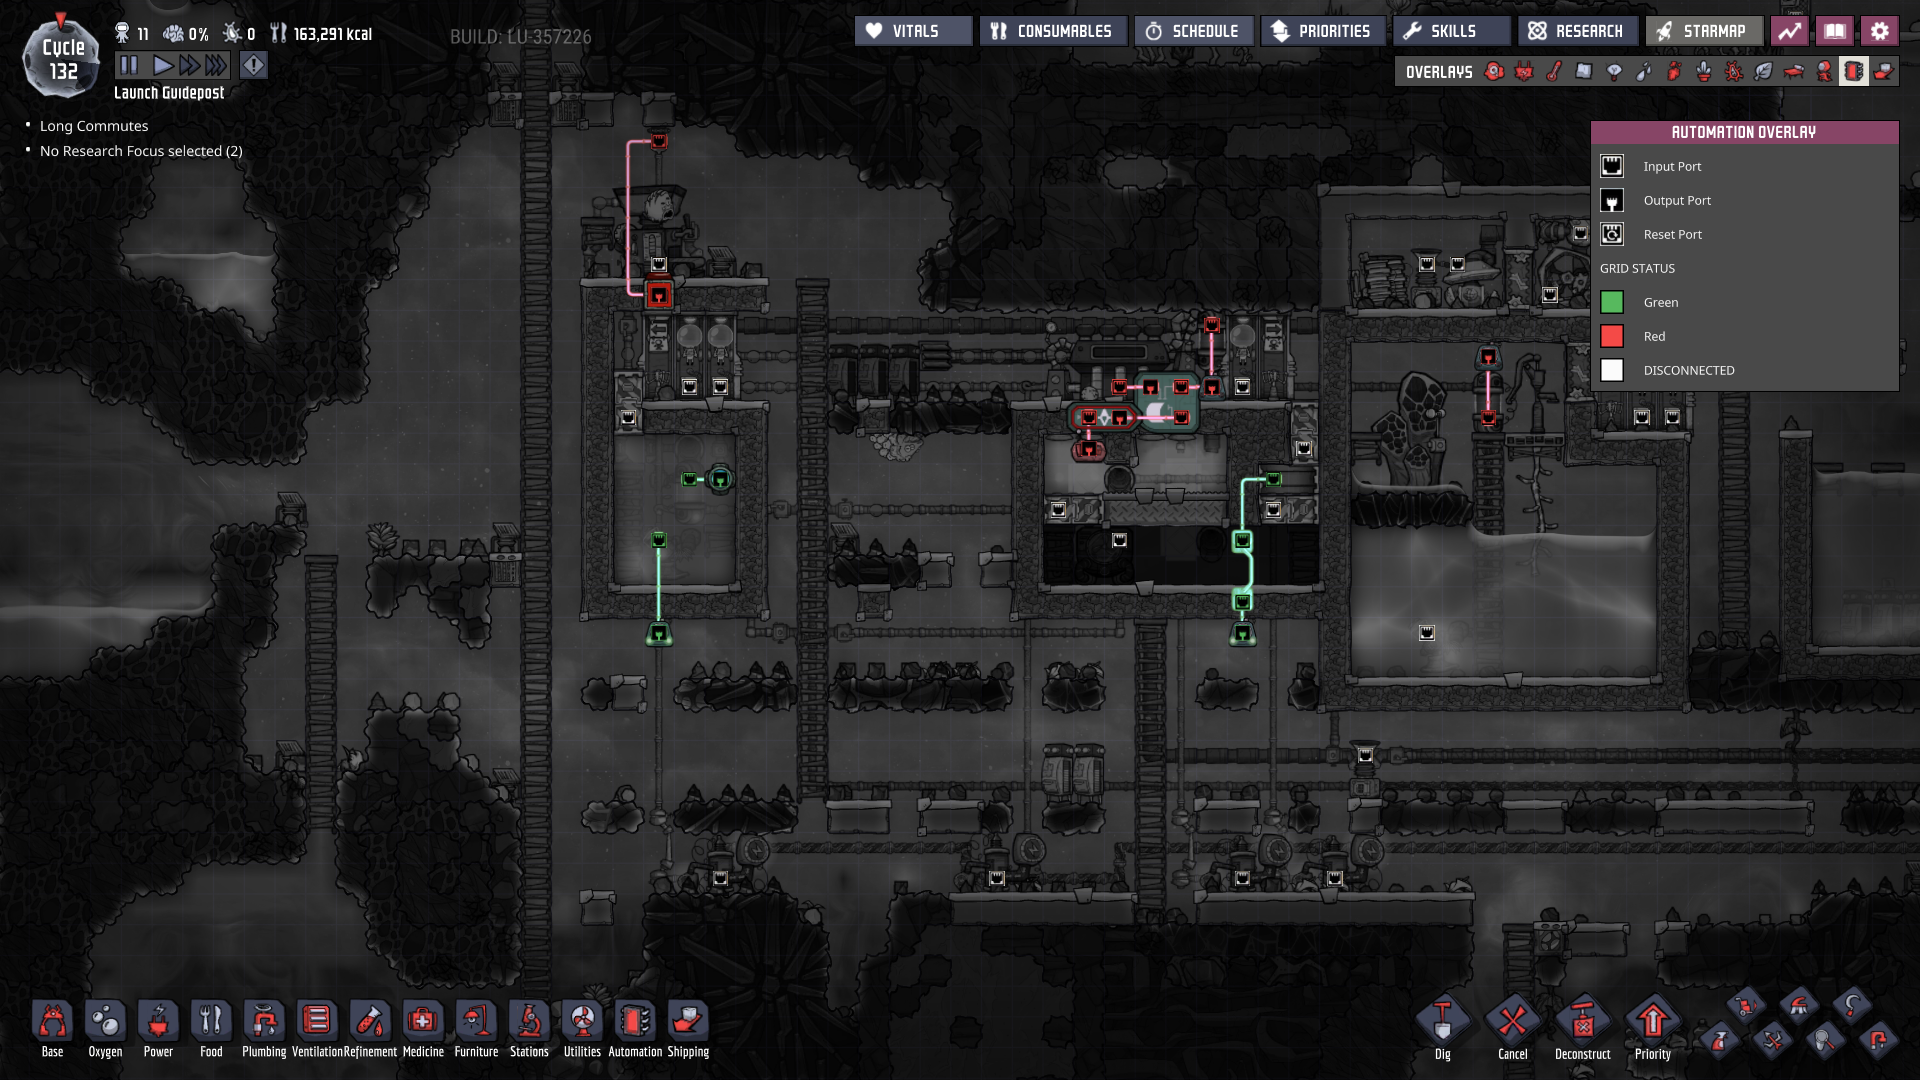
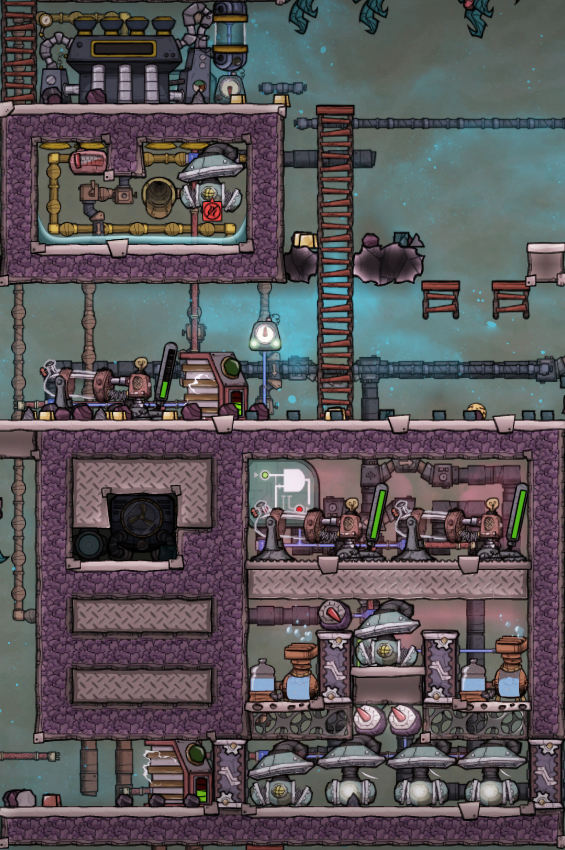
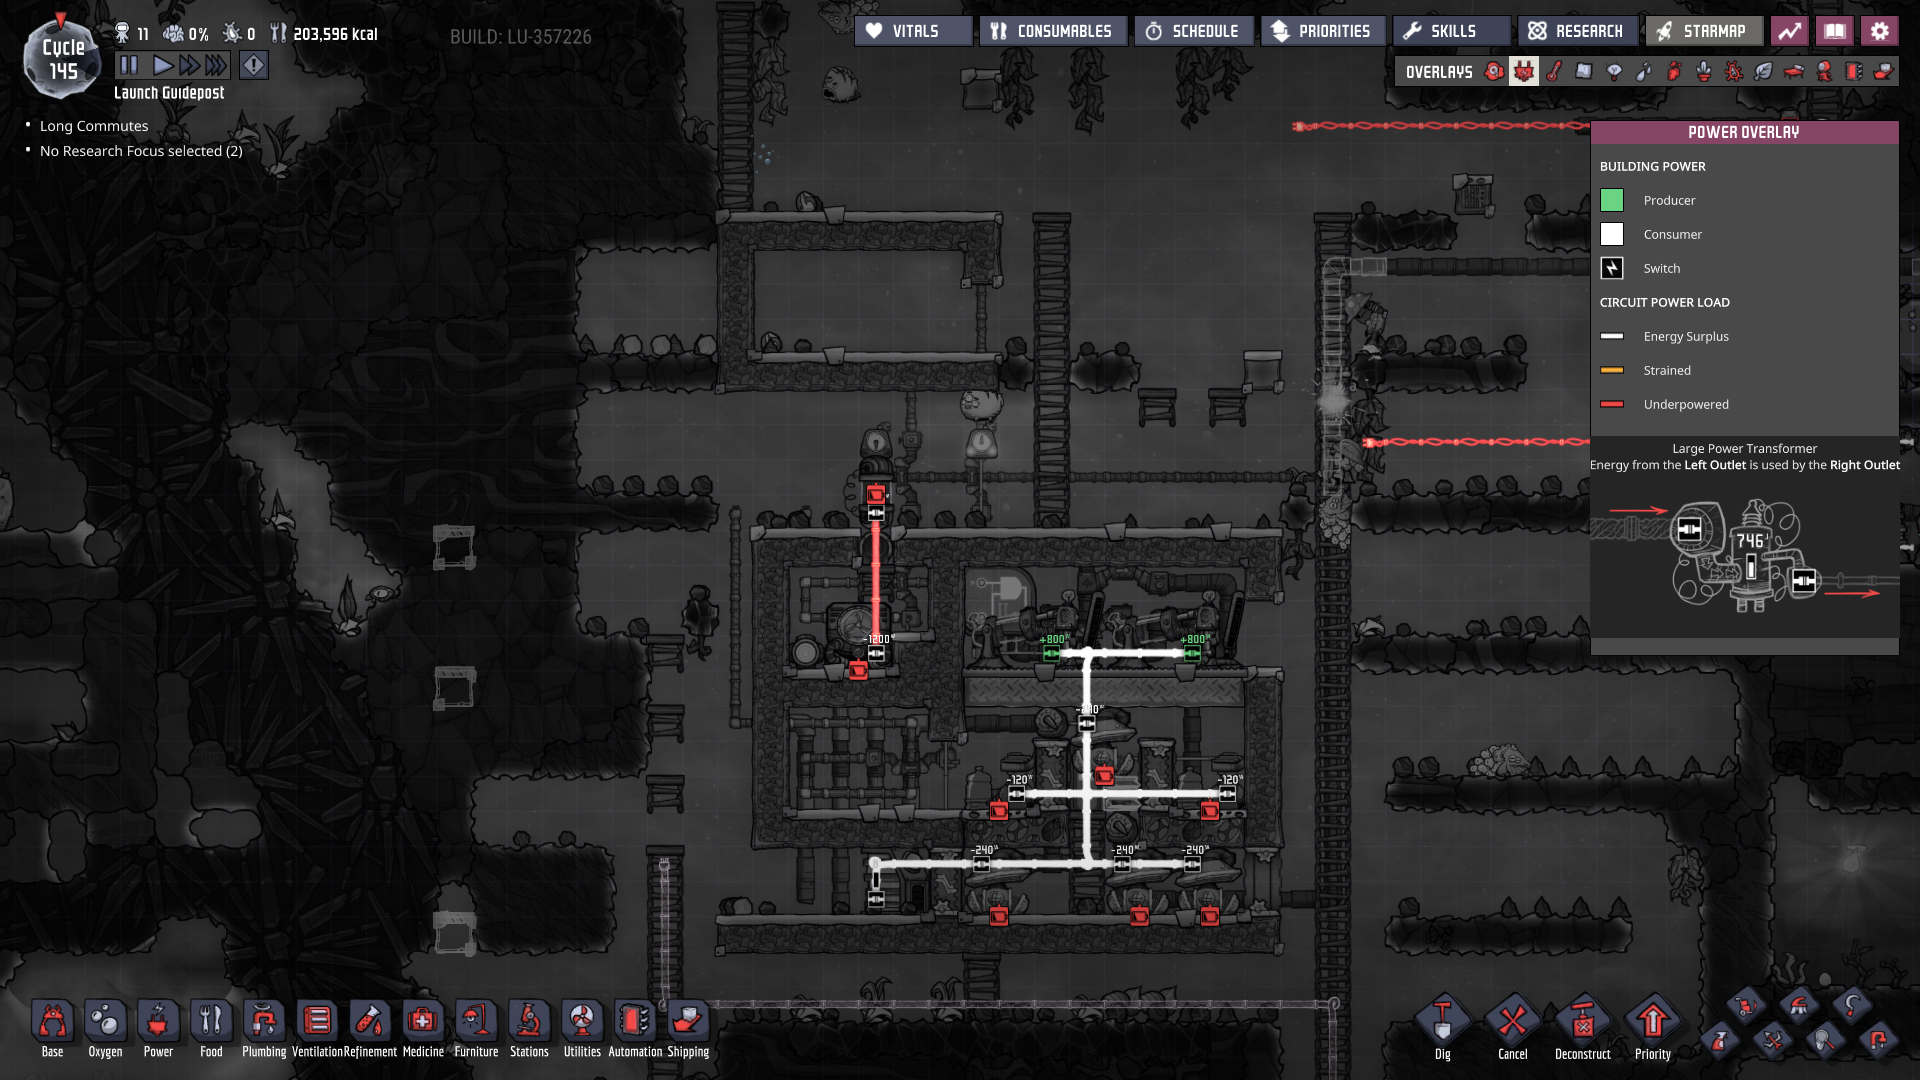
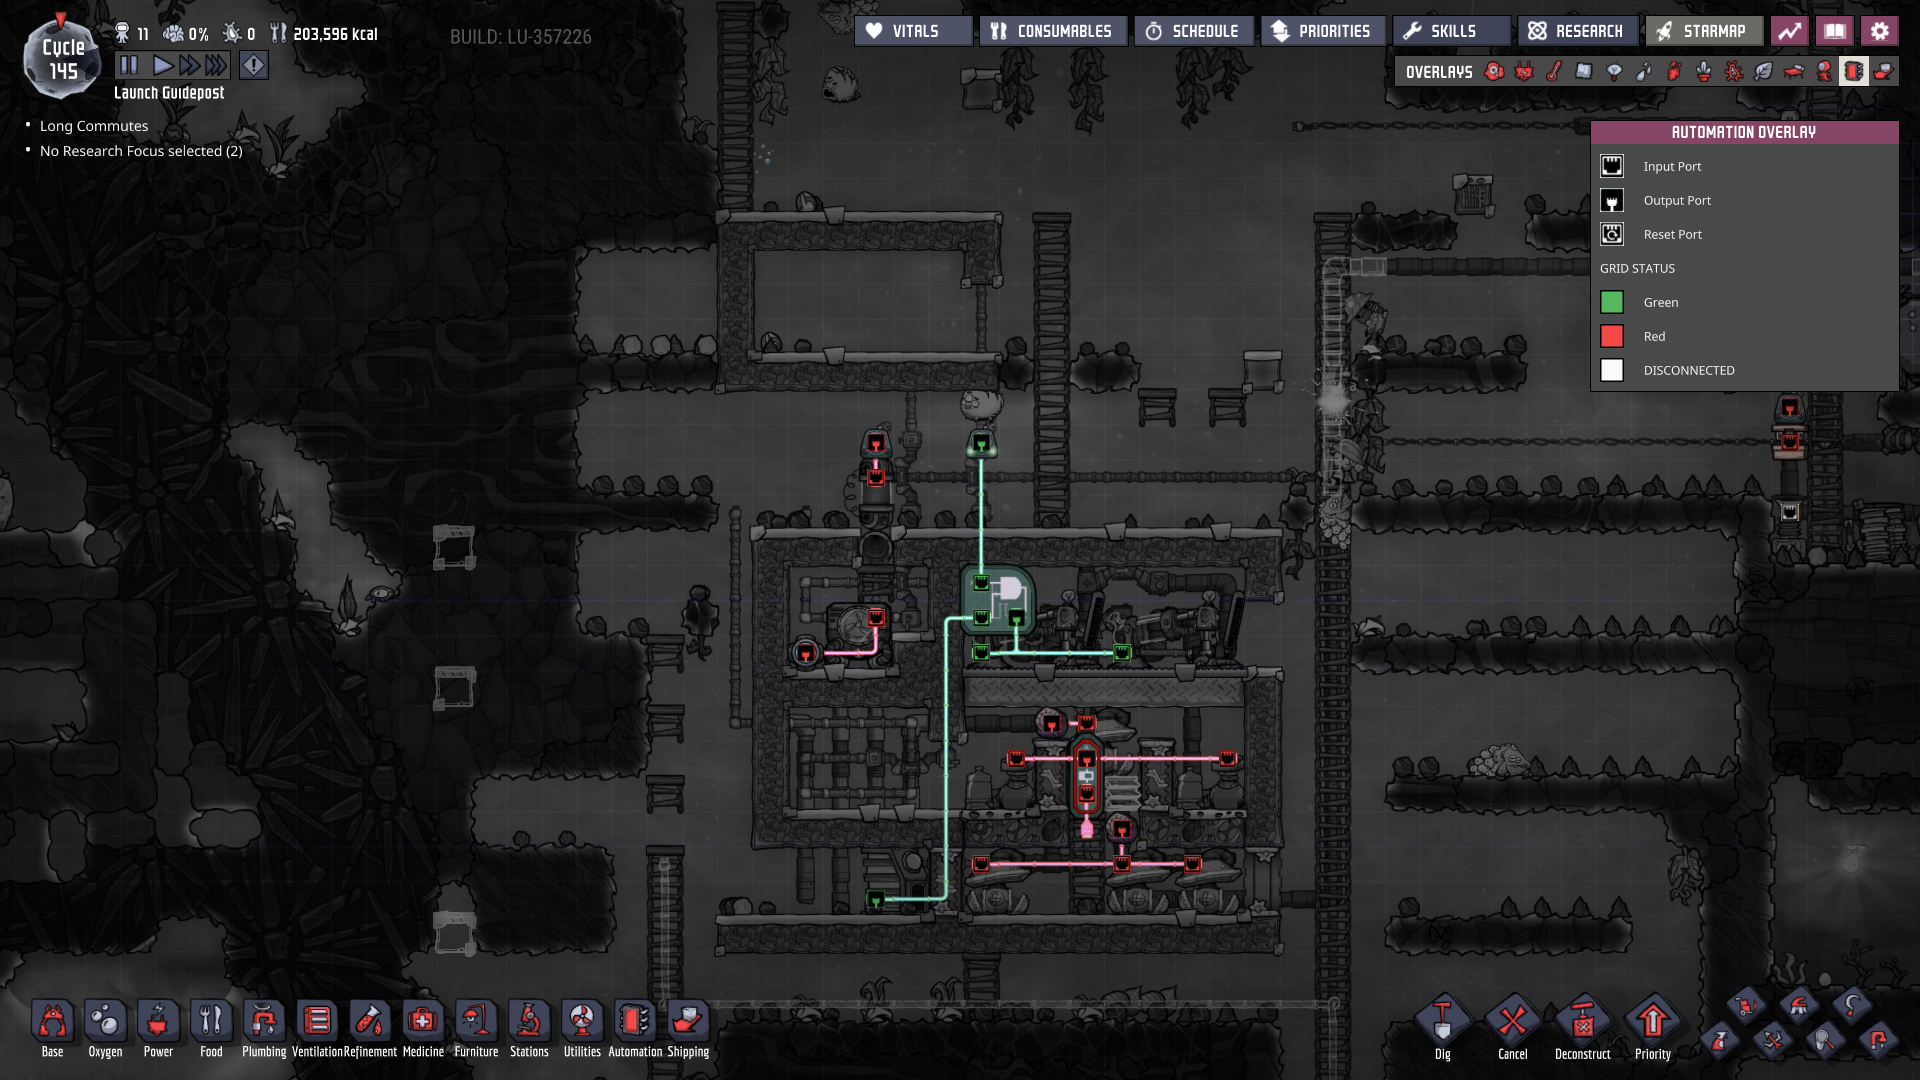
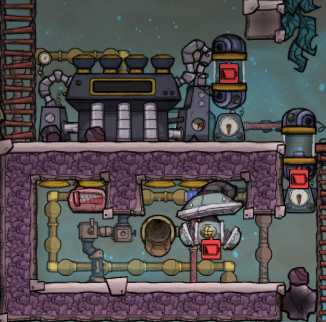
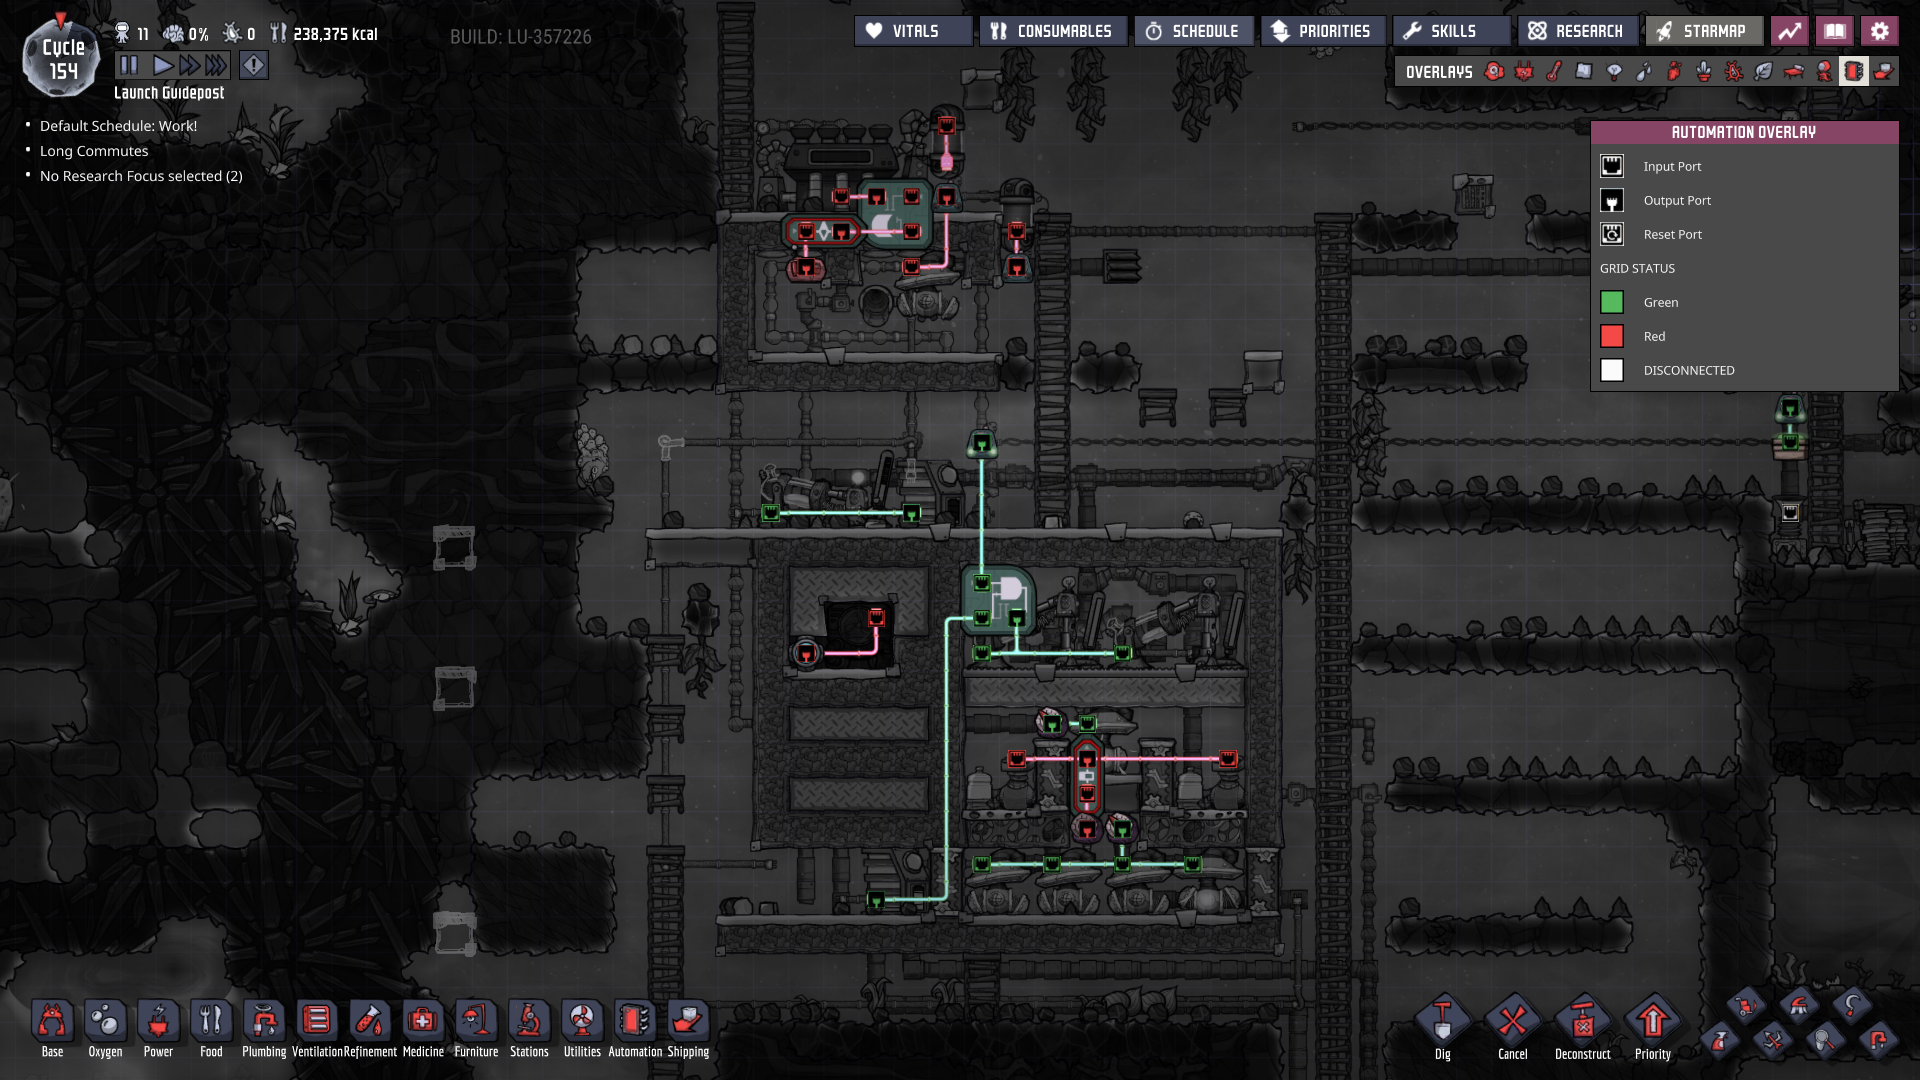
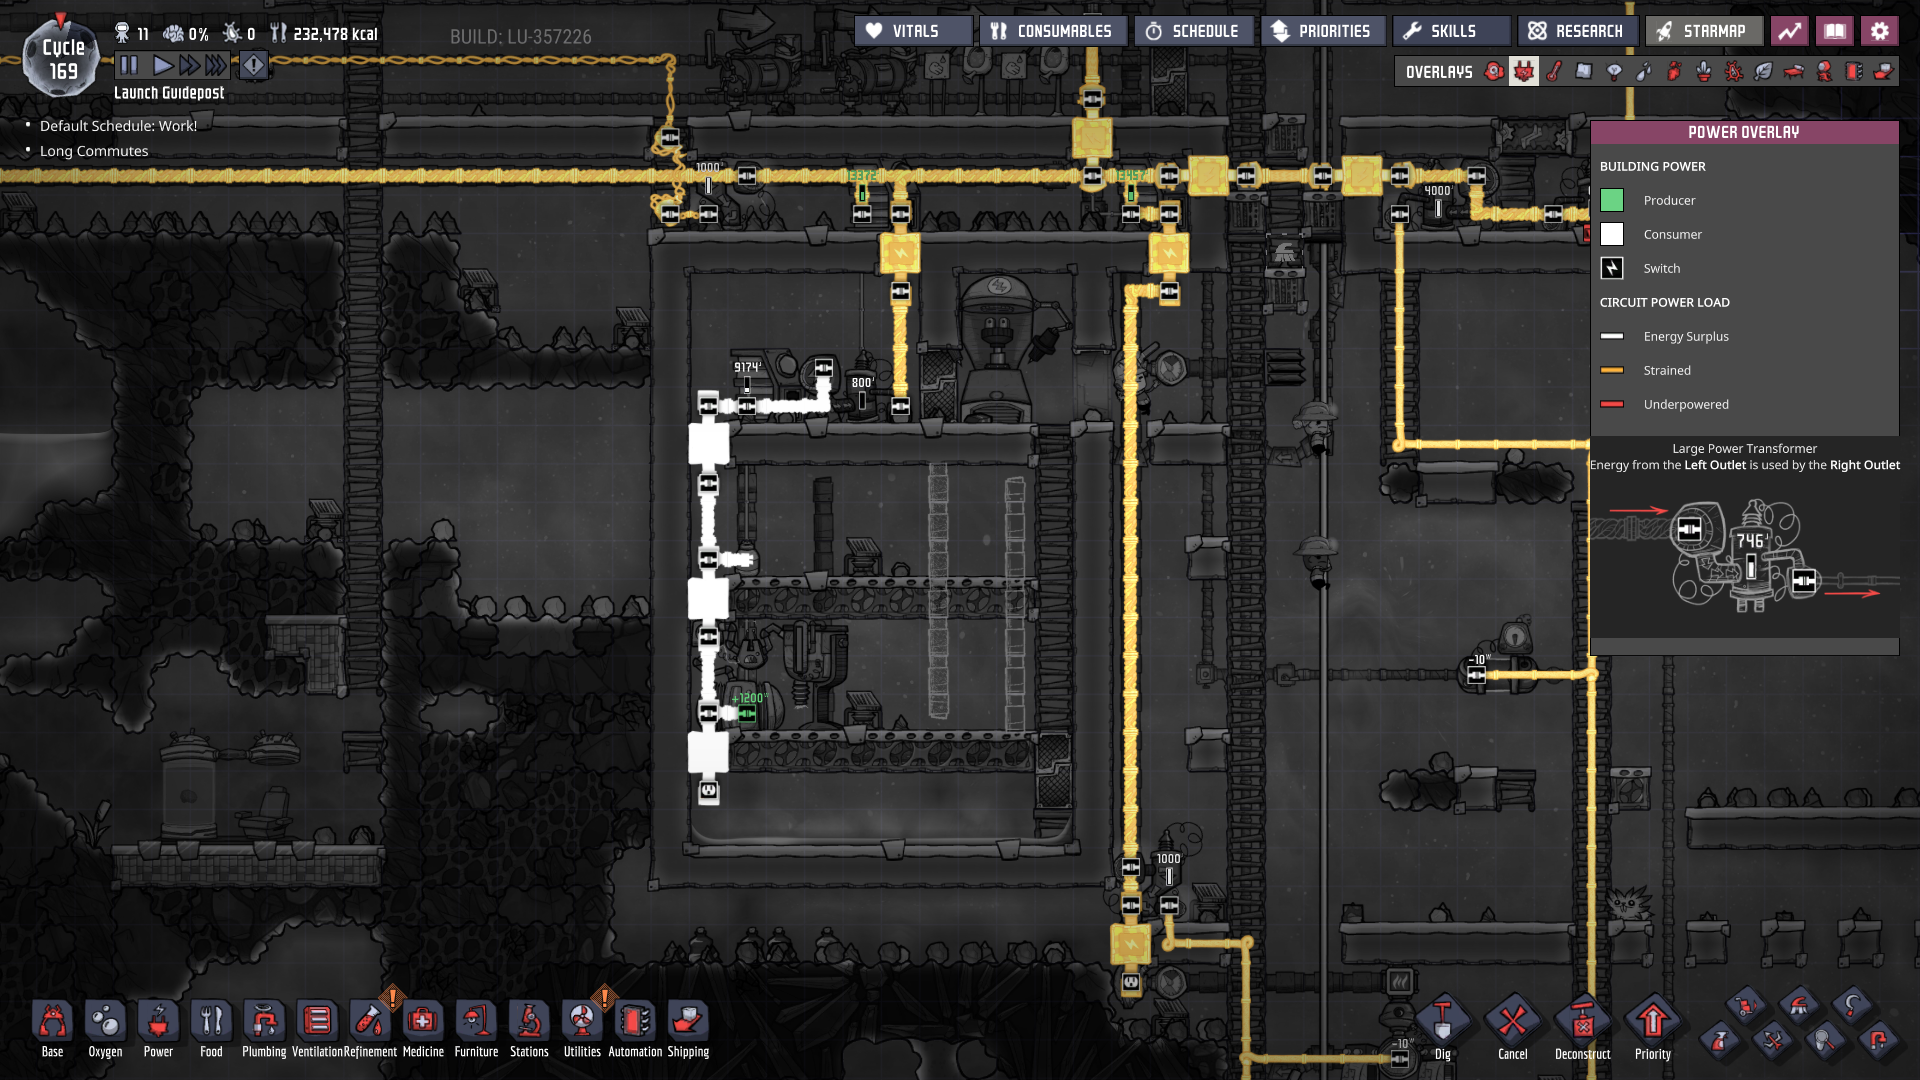
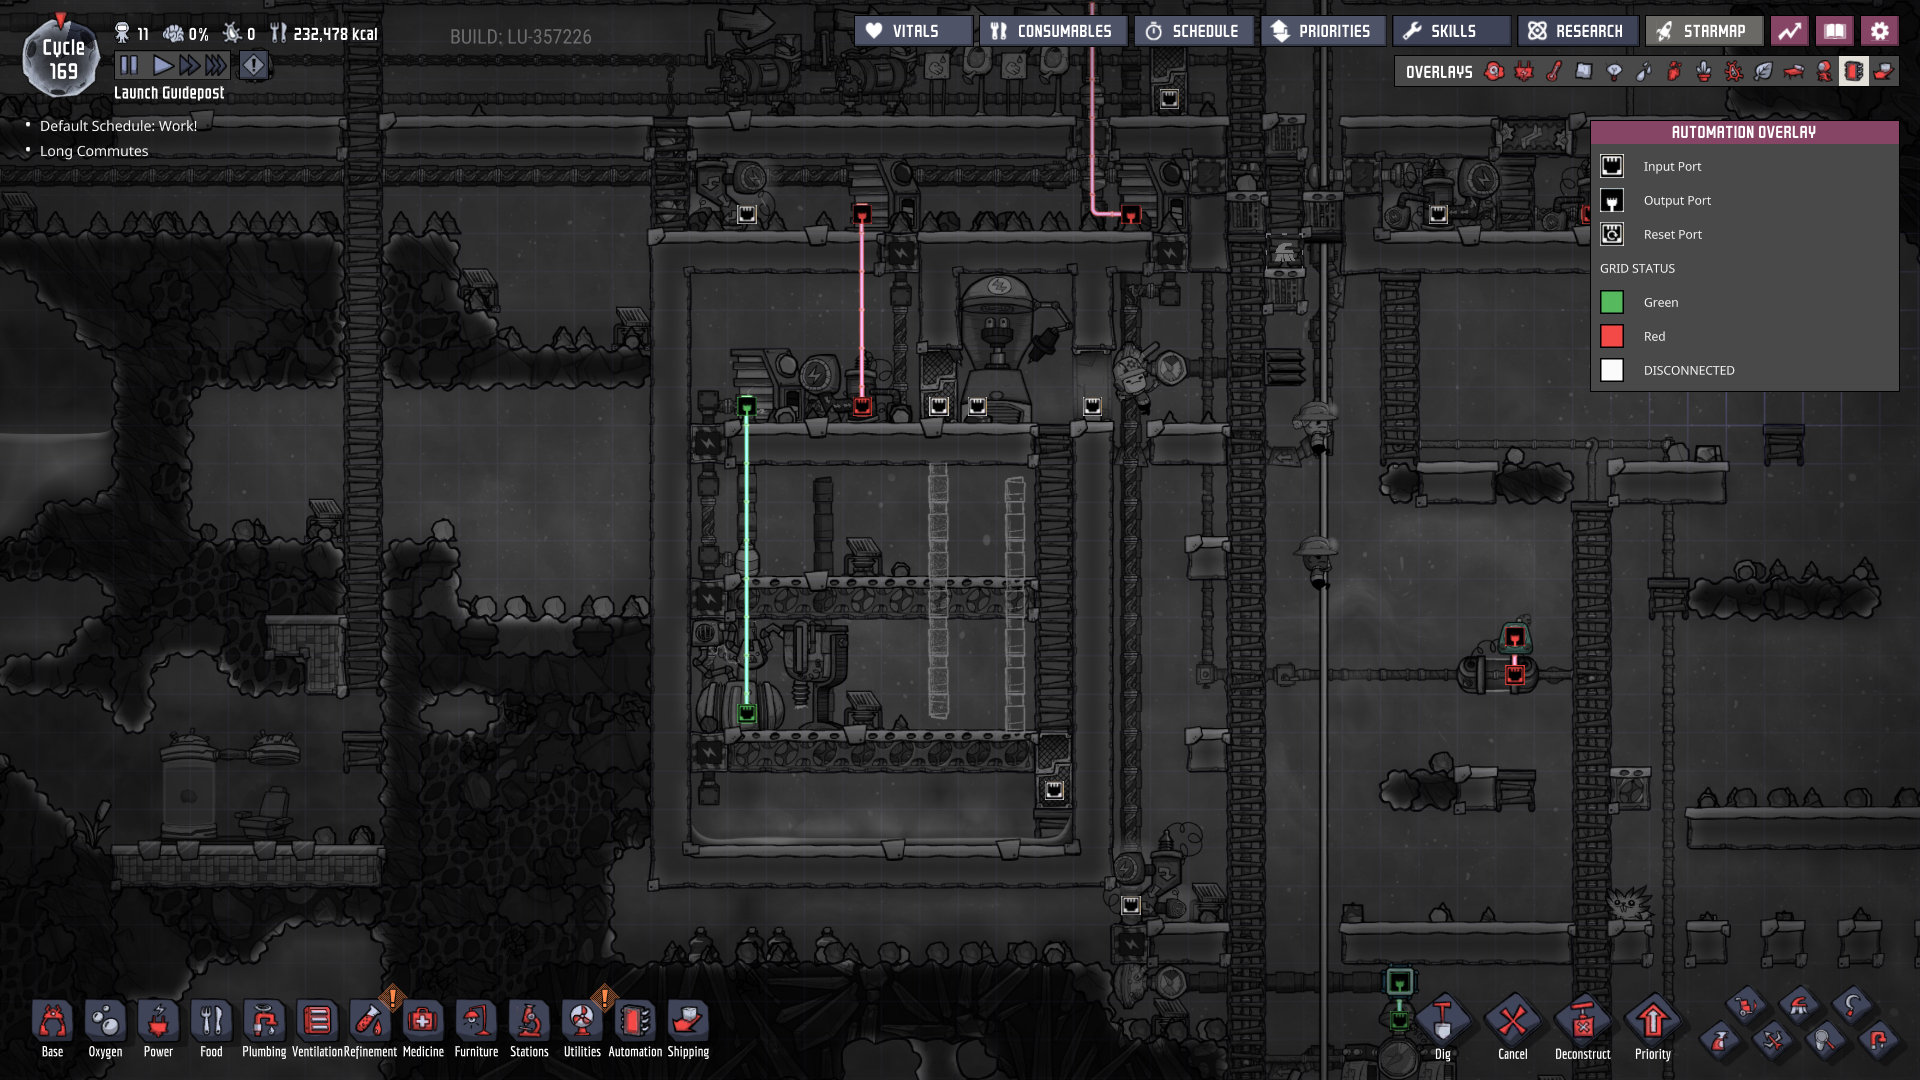
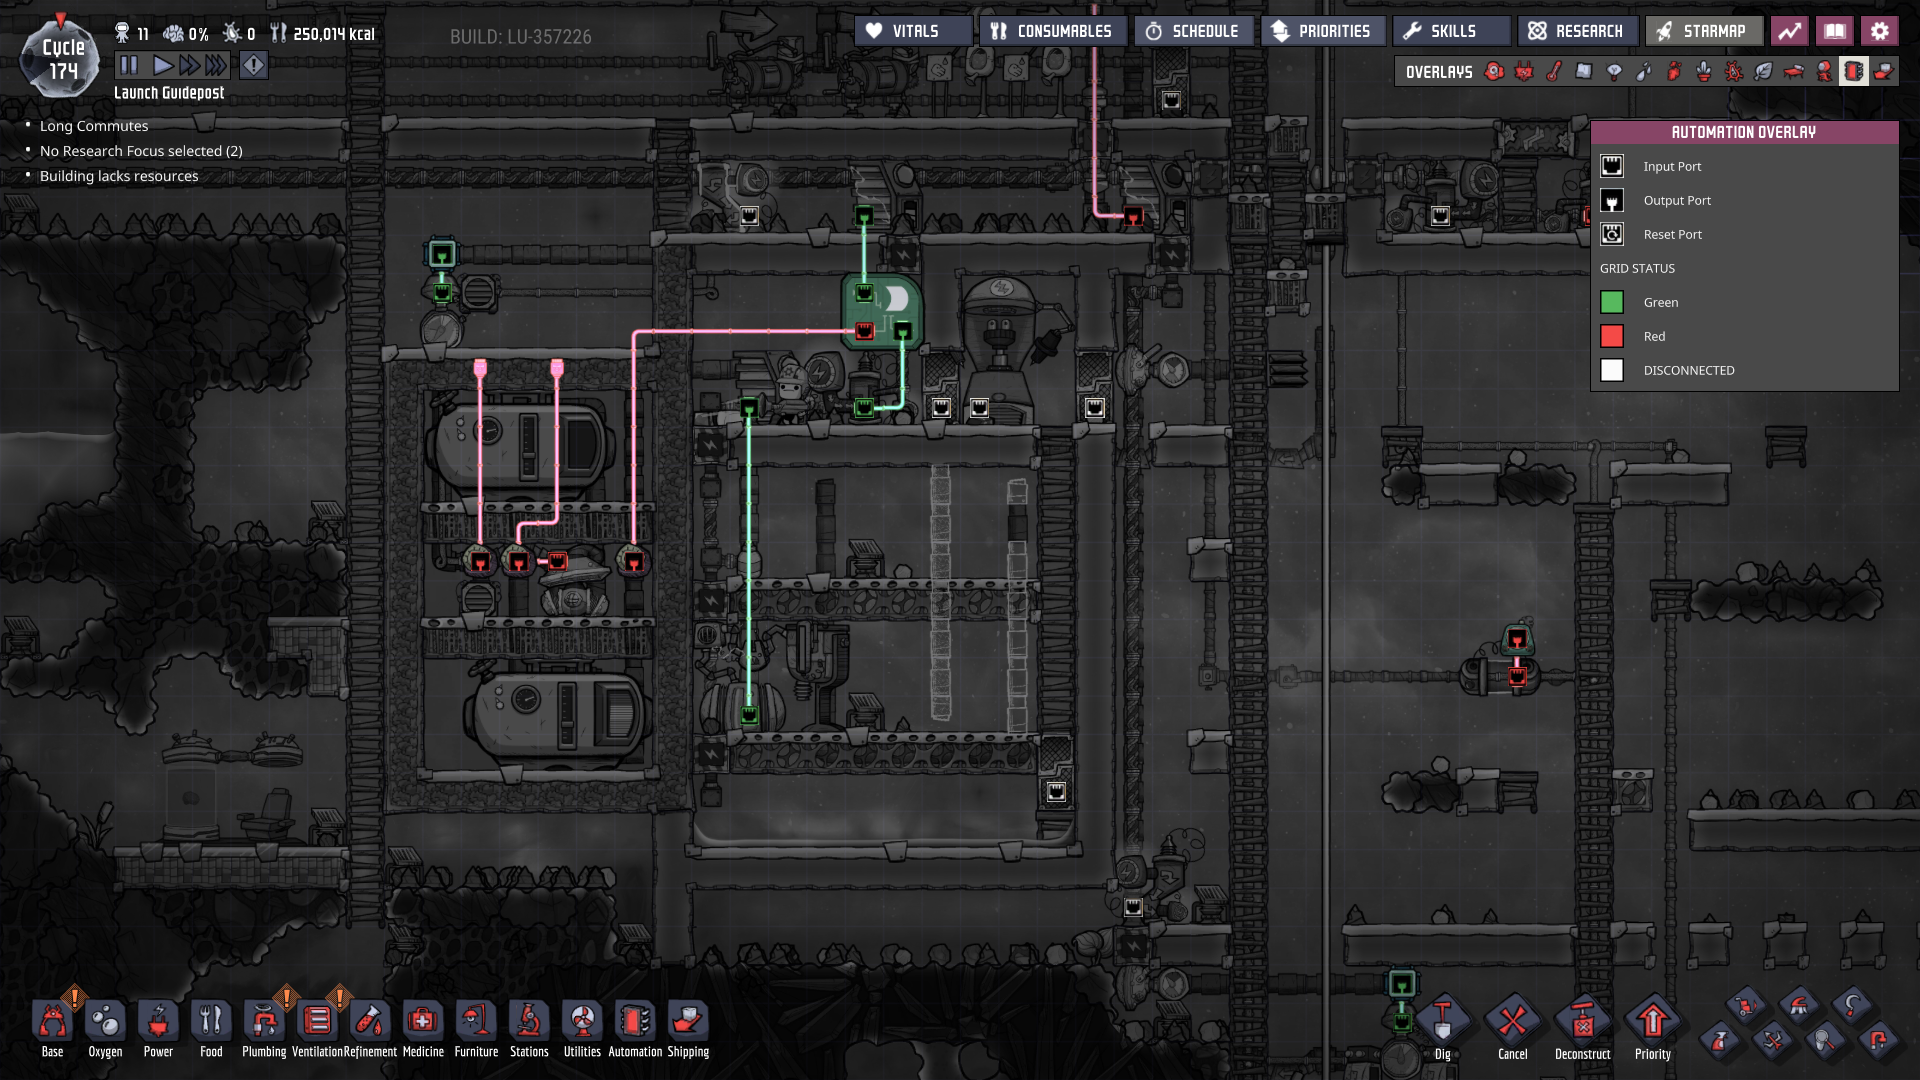
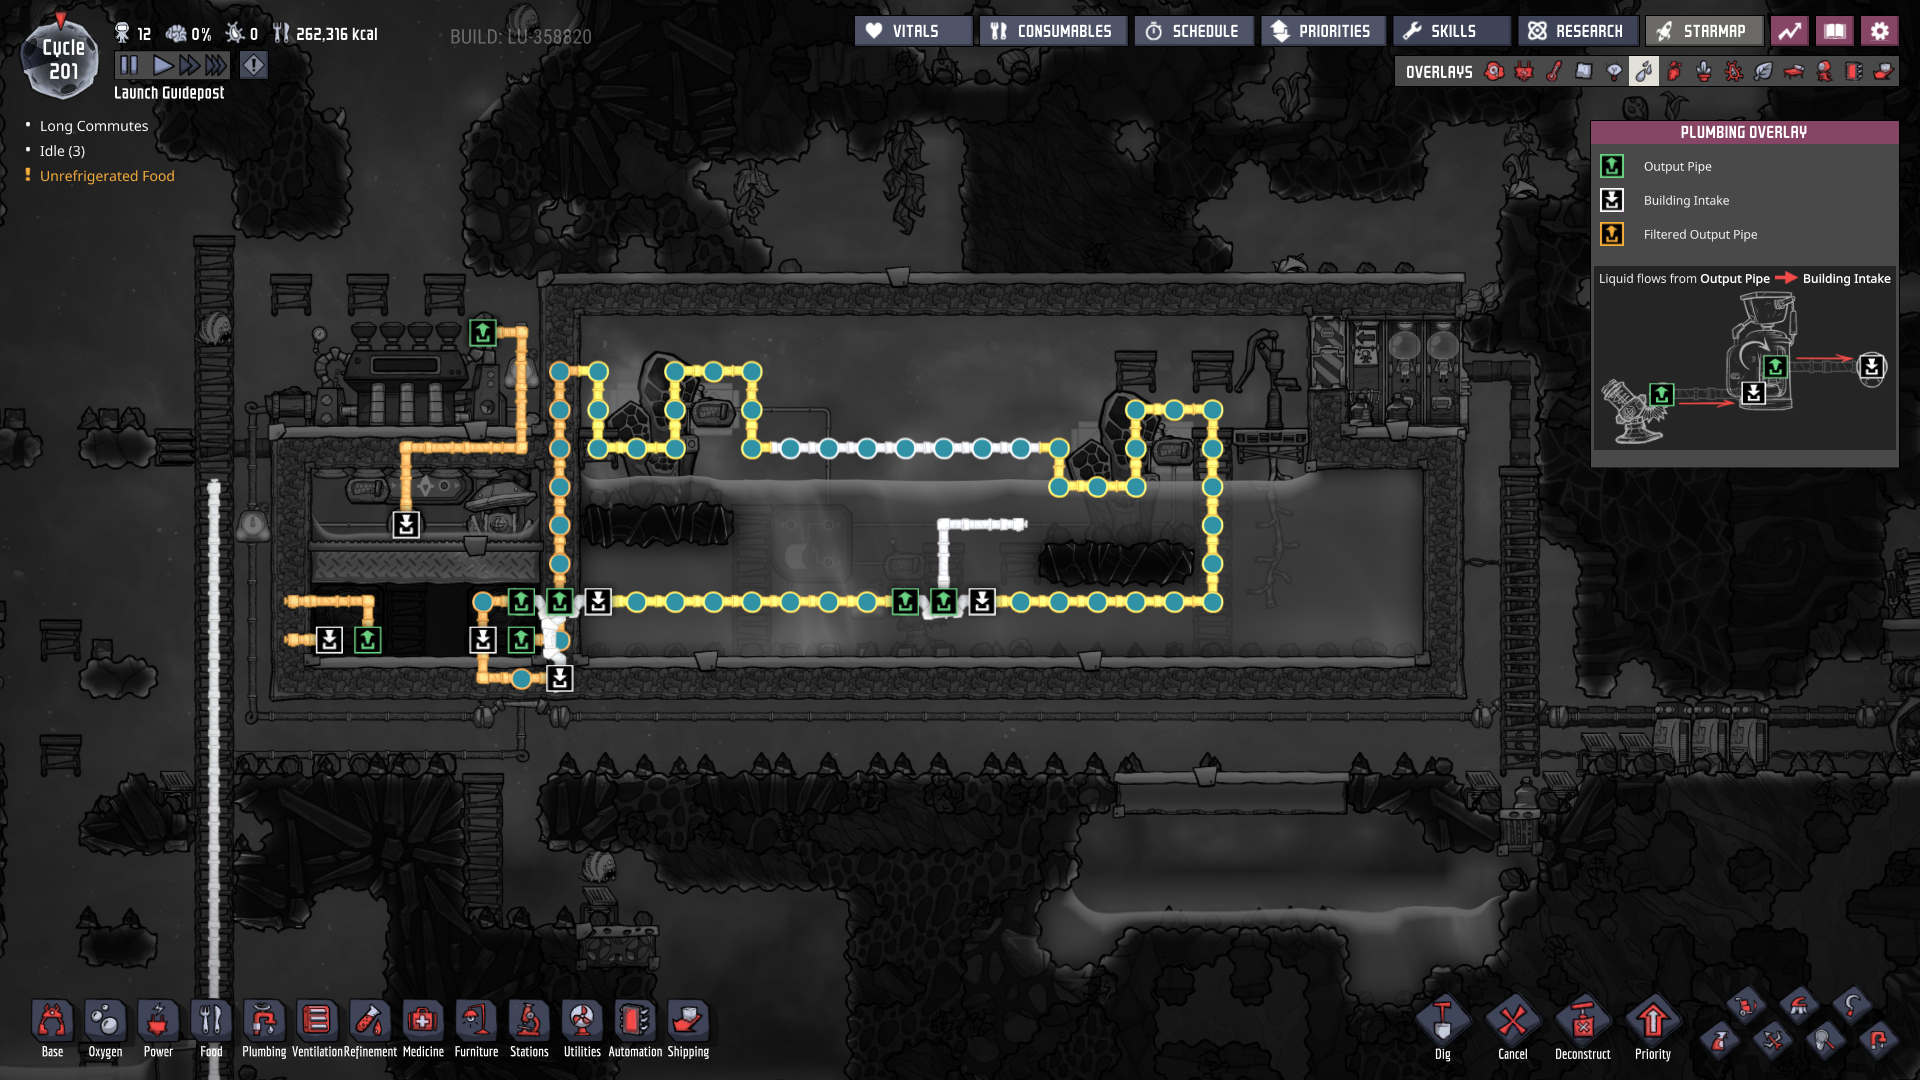
* signal switches let you manually toggle a green or red signal in place of the cycle sensor trick
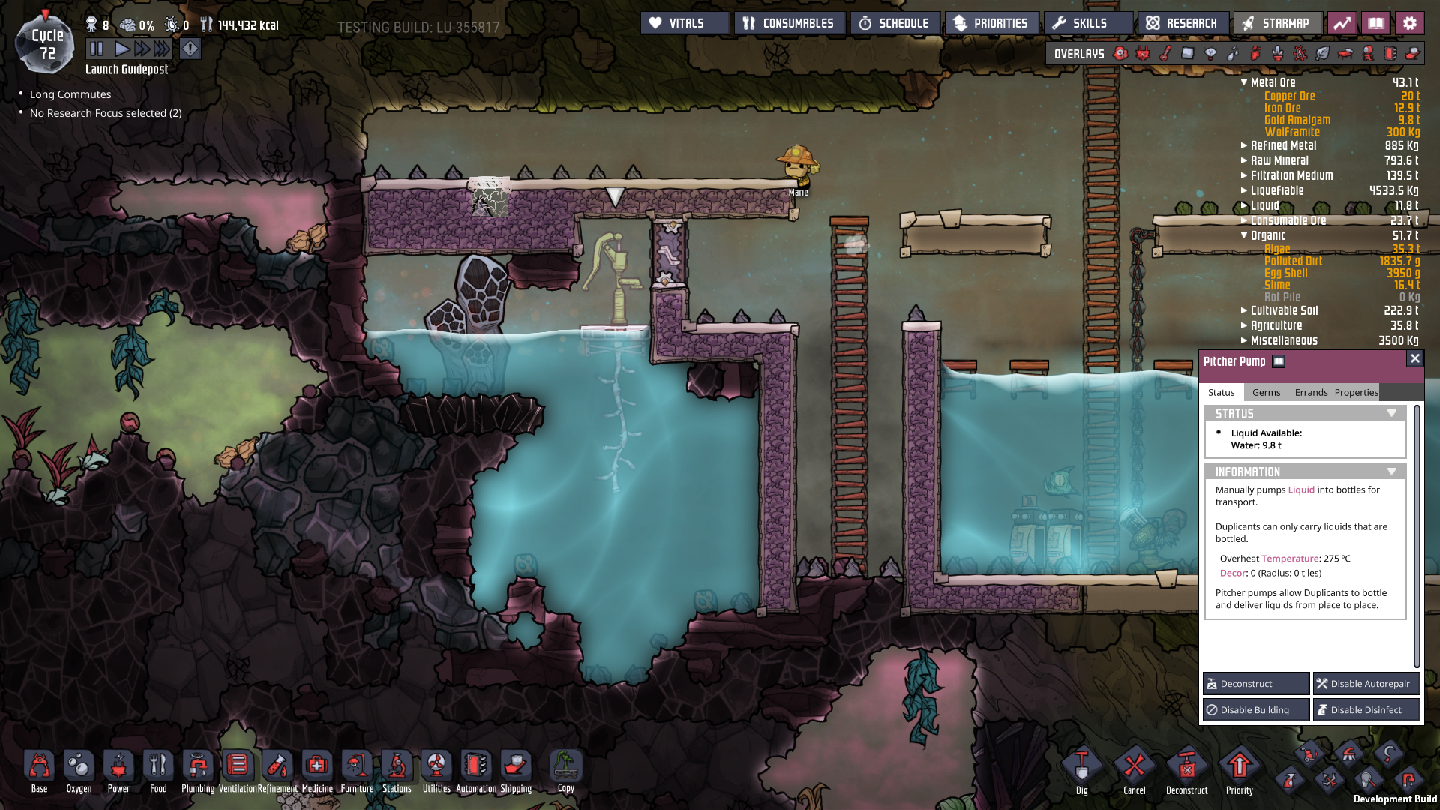
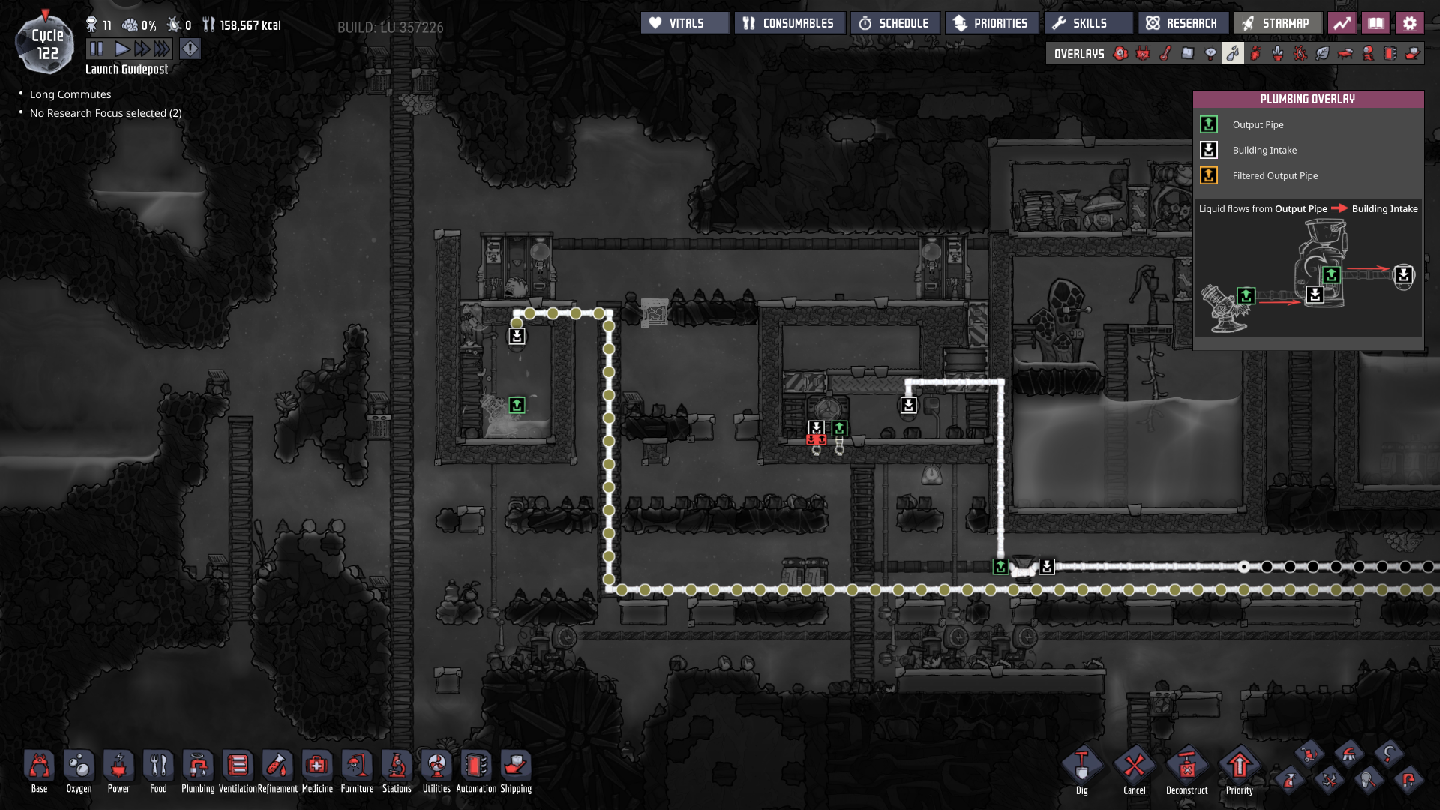
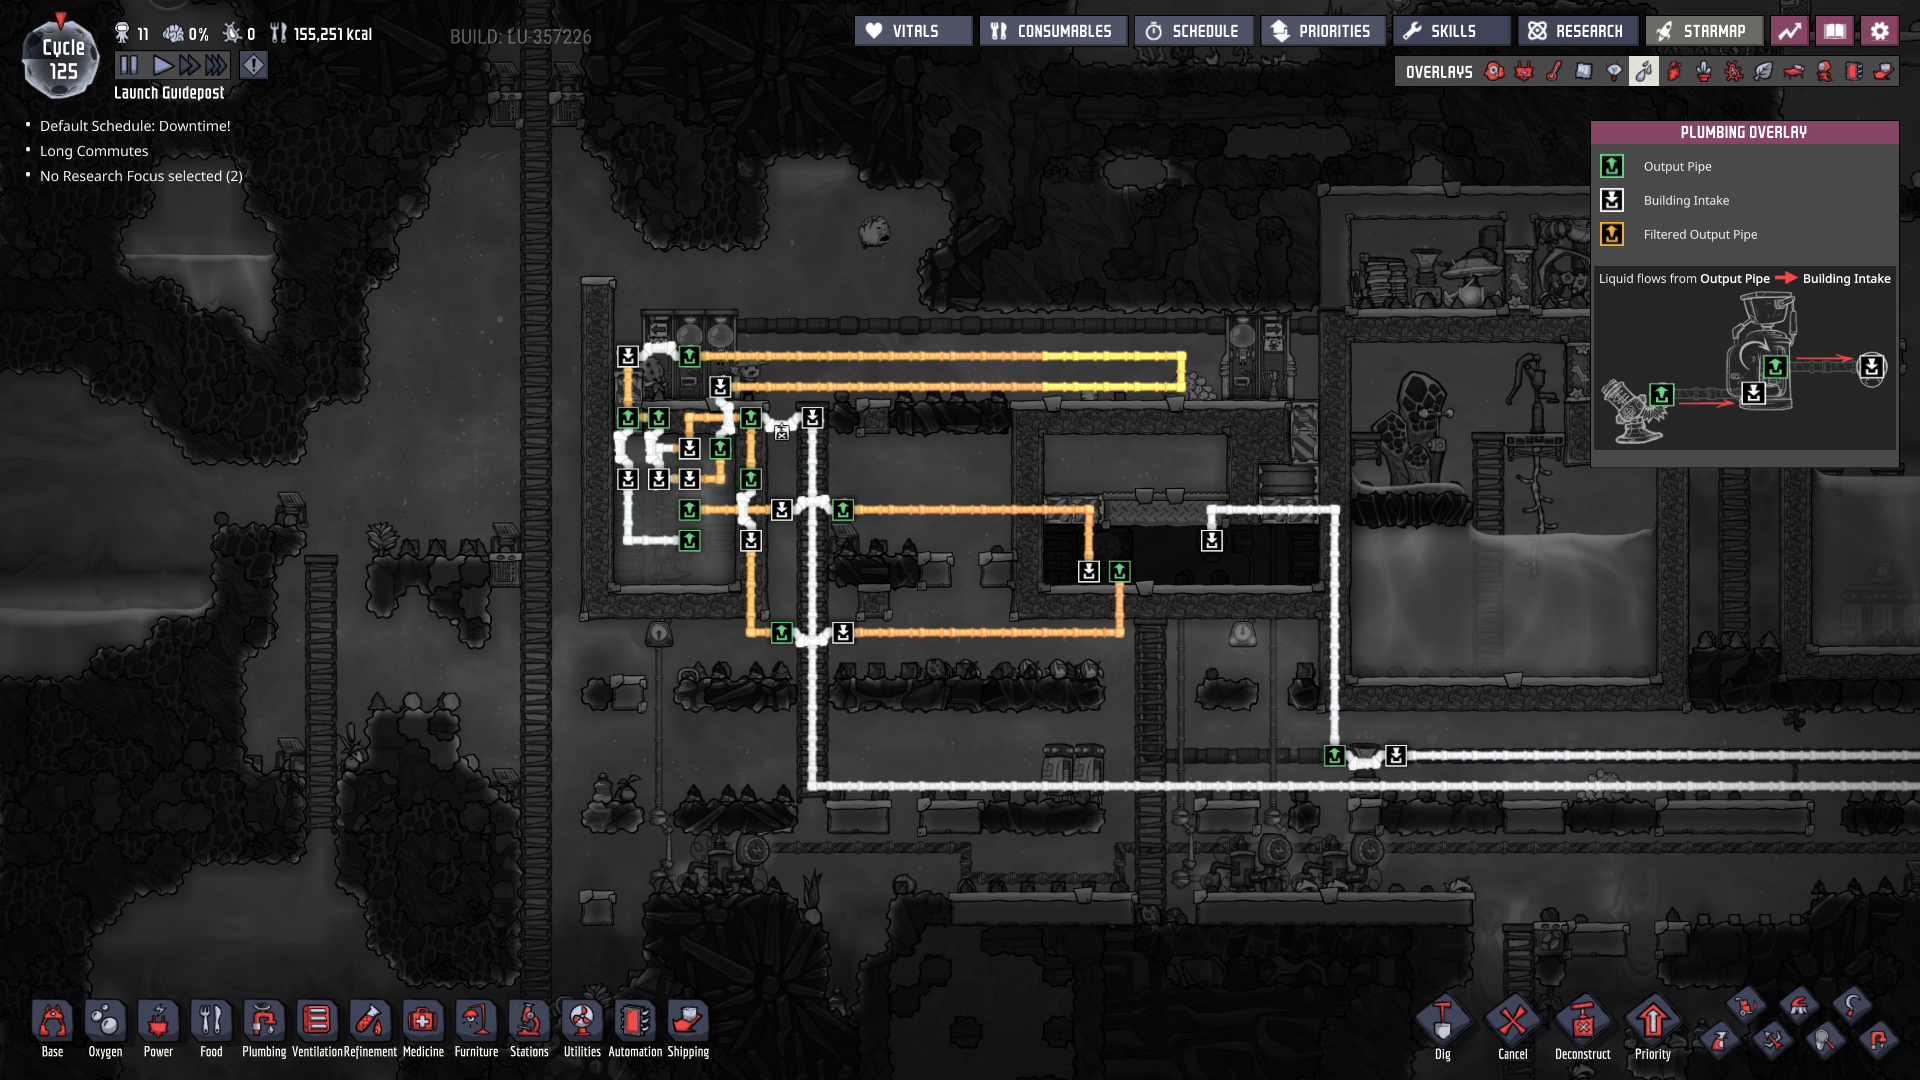
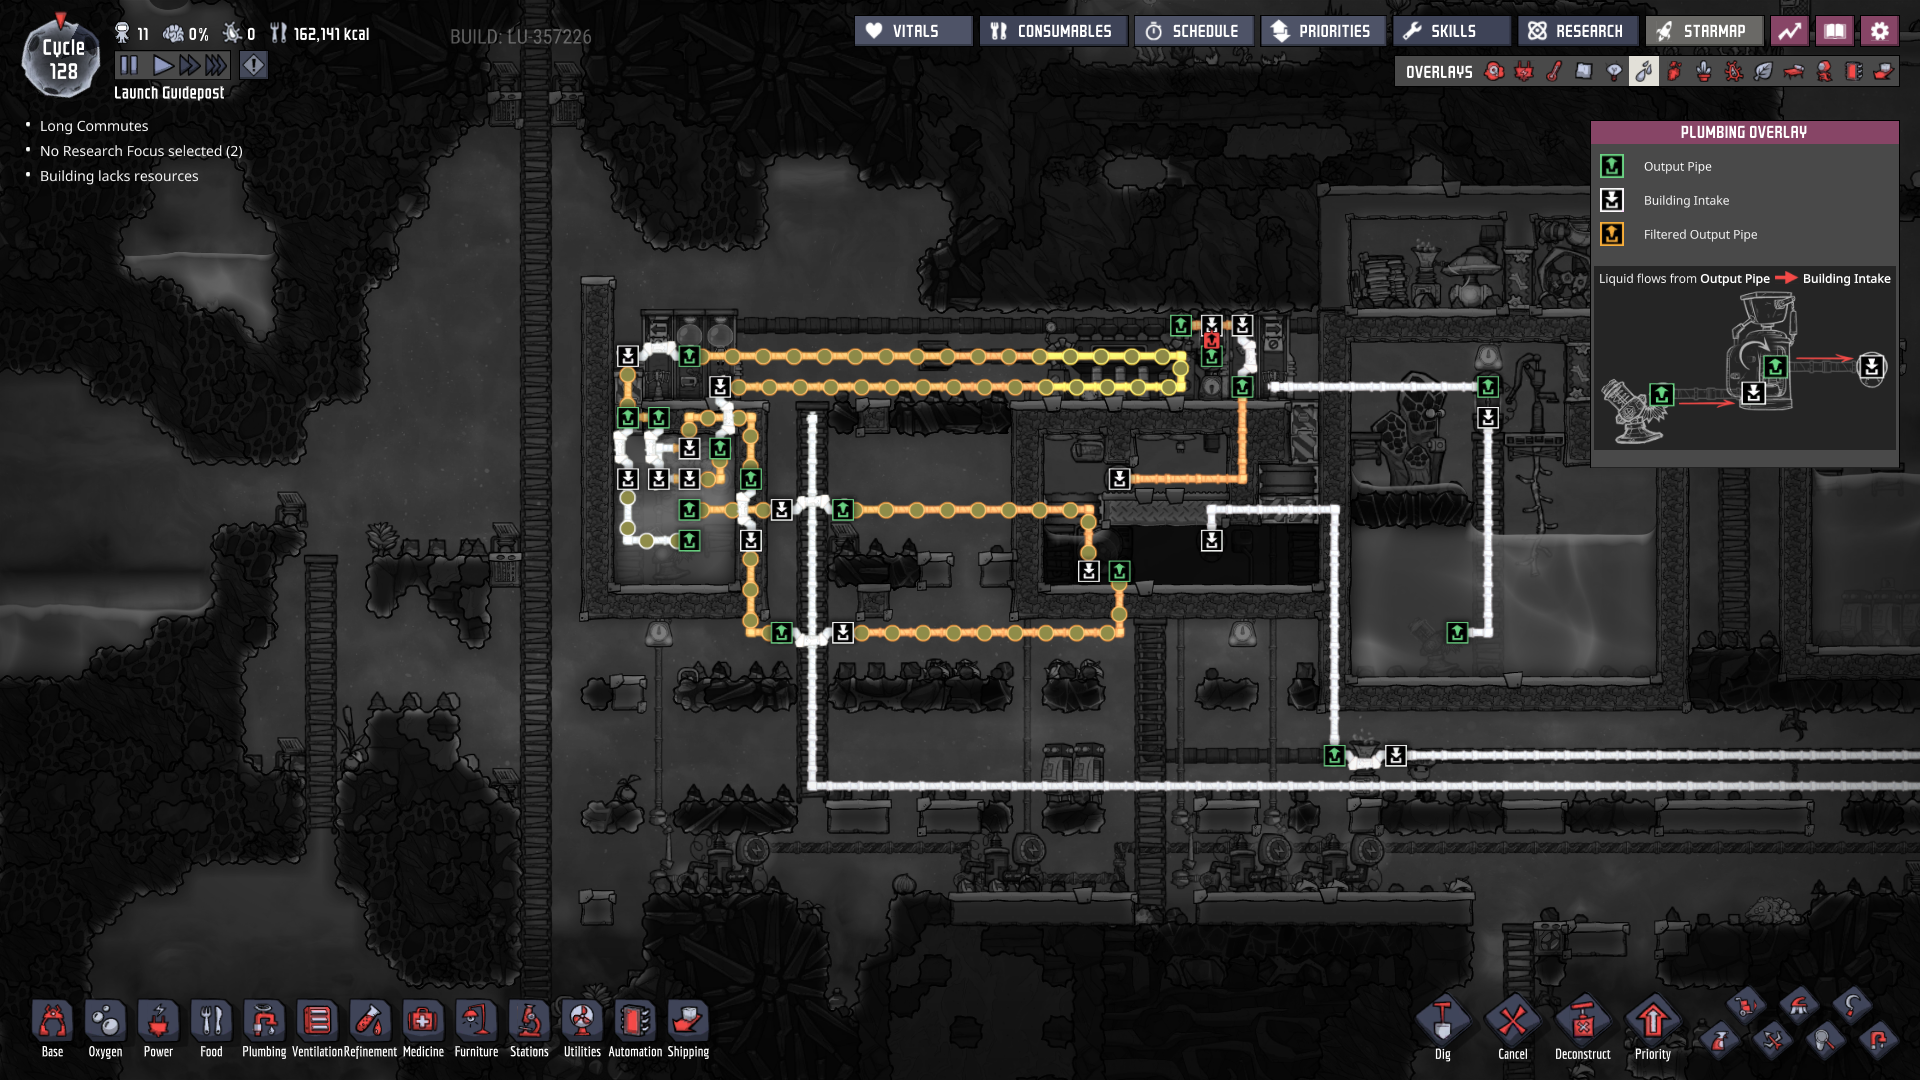
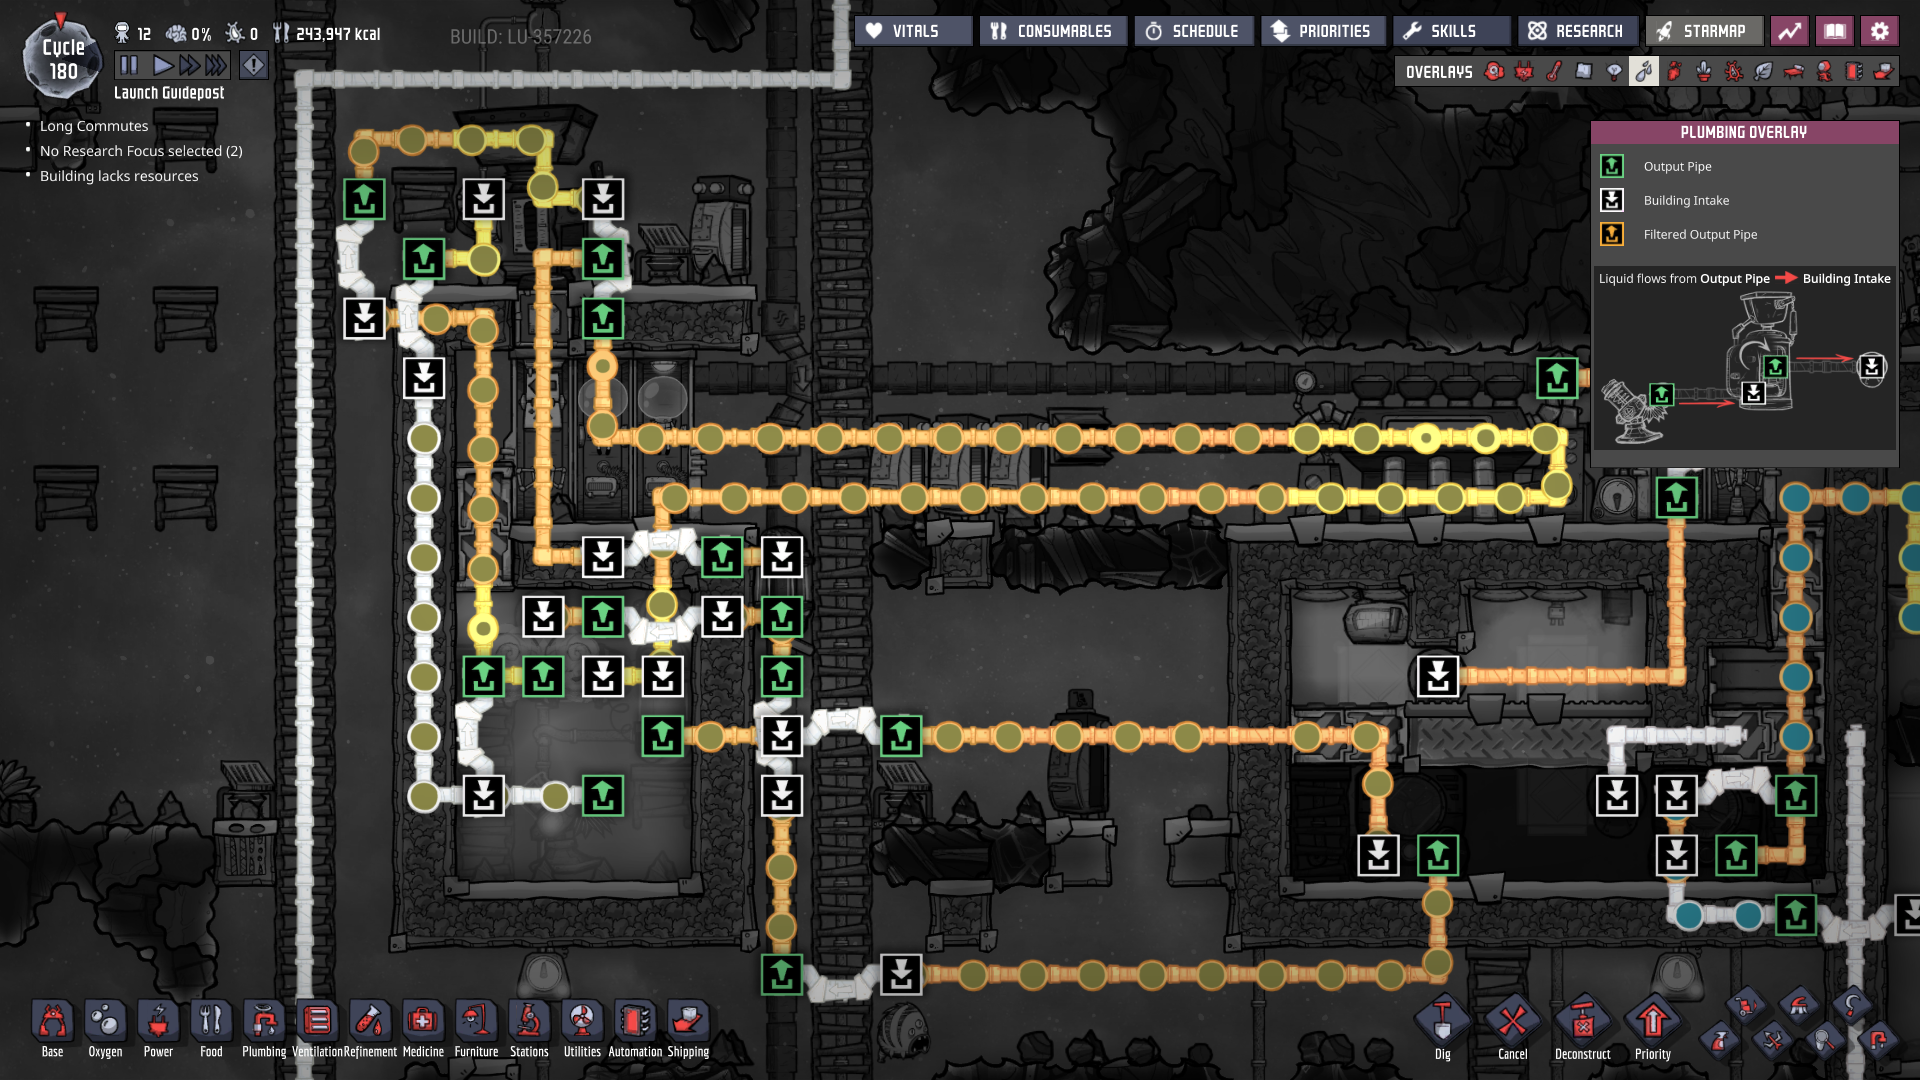
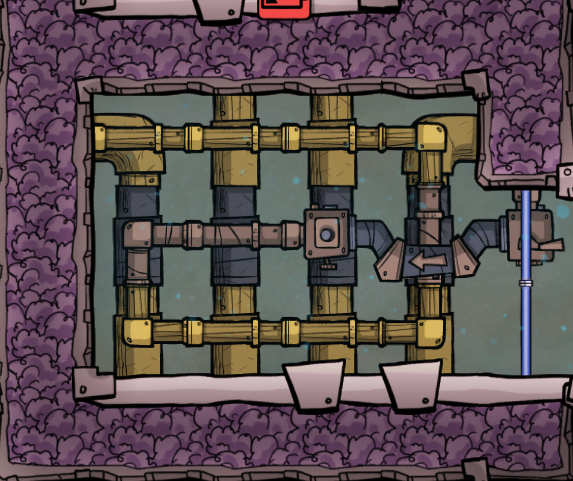
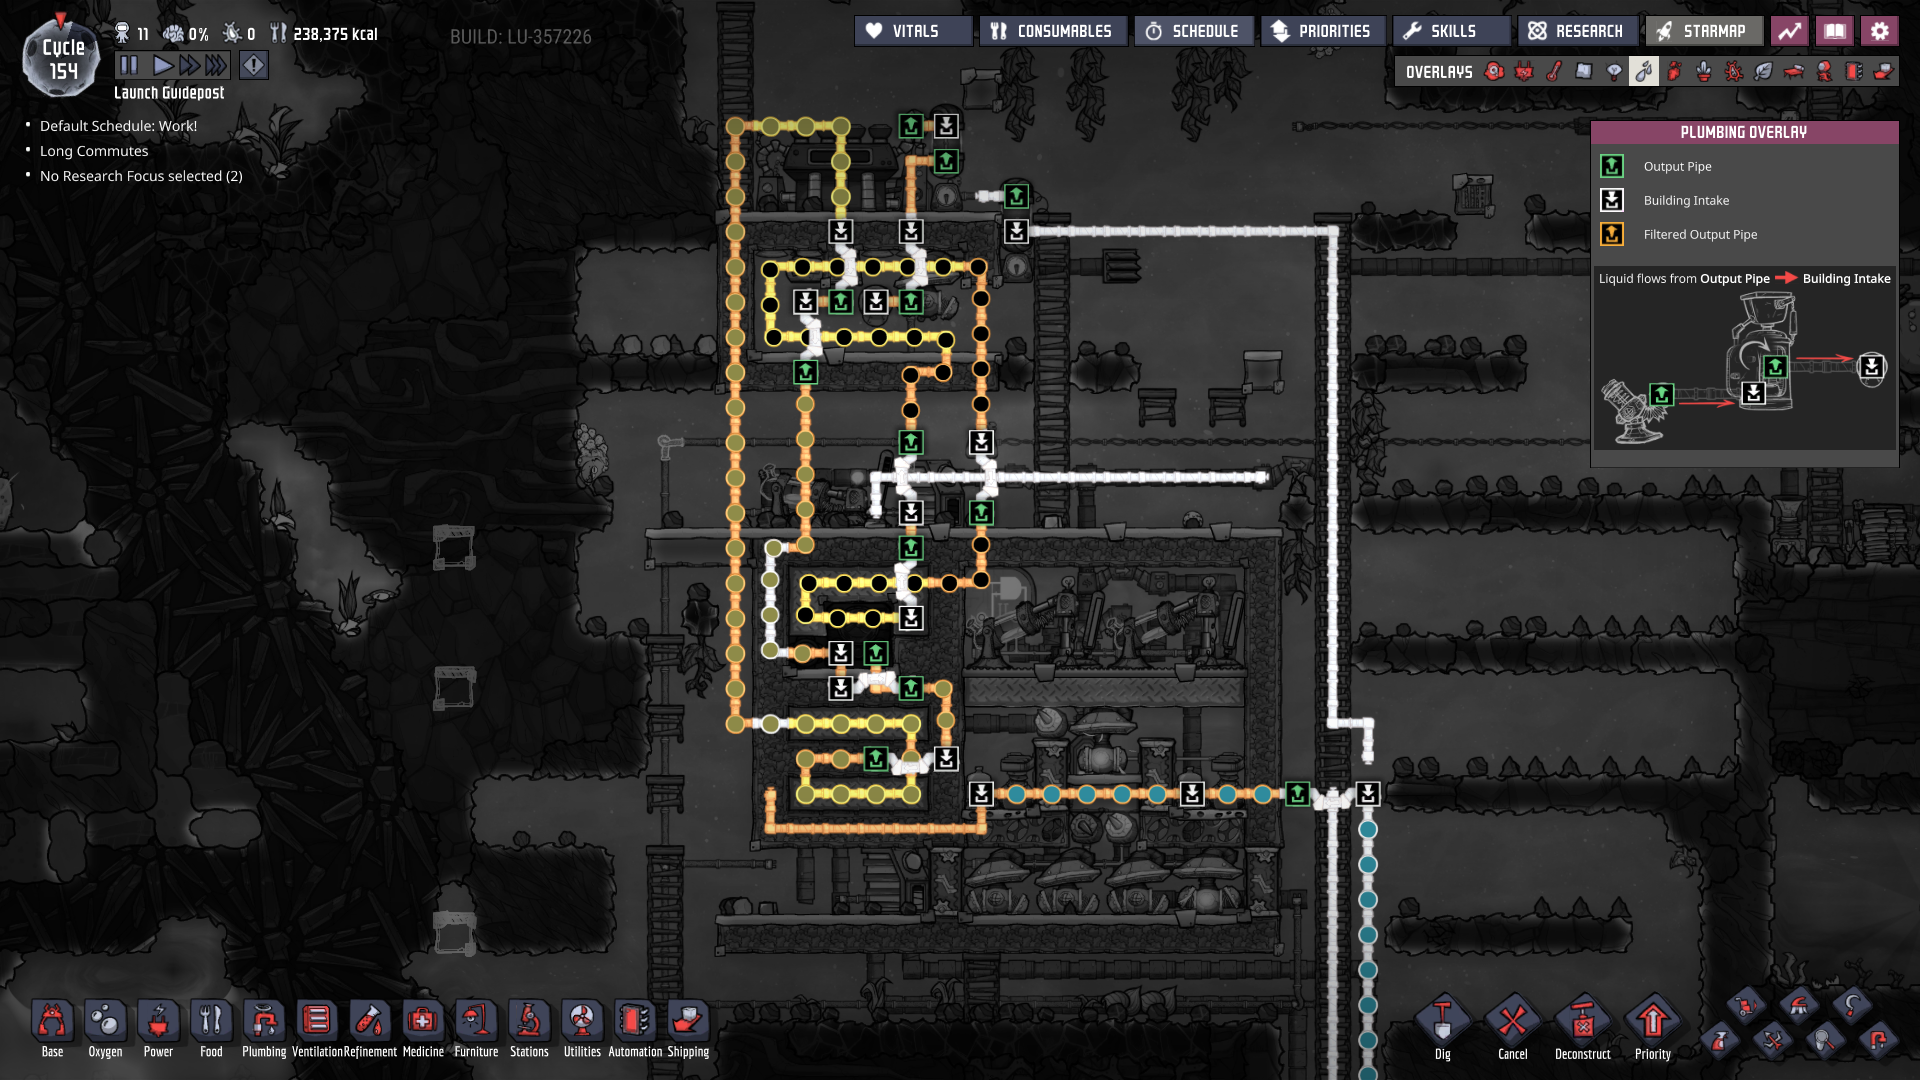
* gas/liquid meter valves let you send a precise amount of gas/liquid through instead of the shutoff + cycle sensor trick
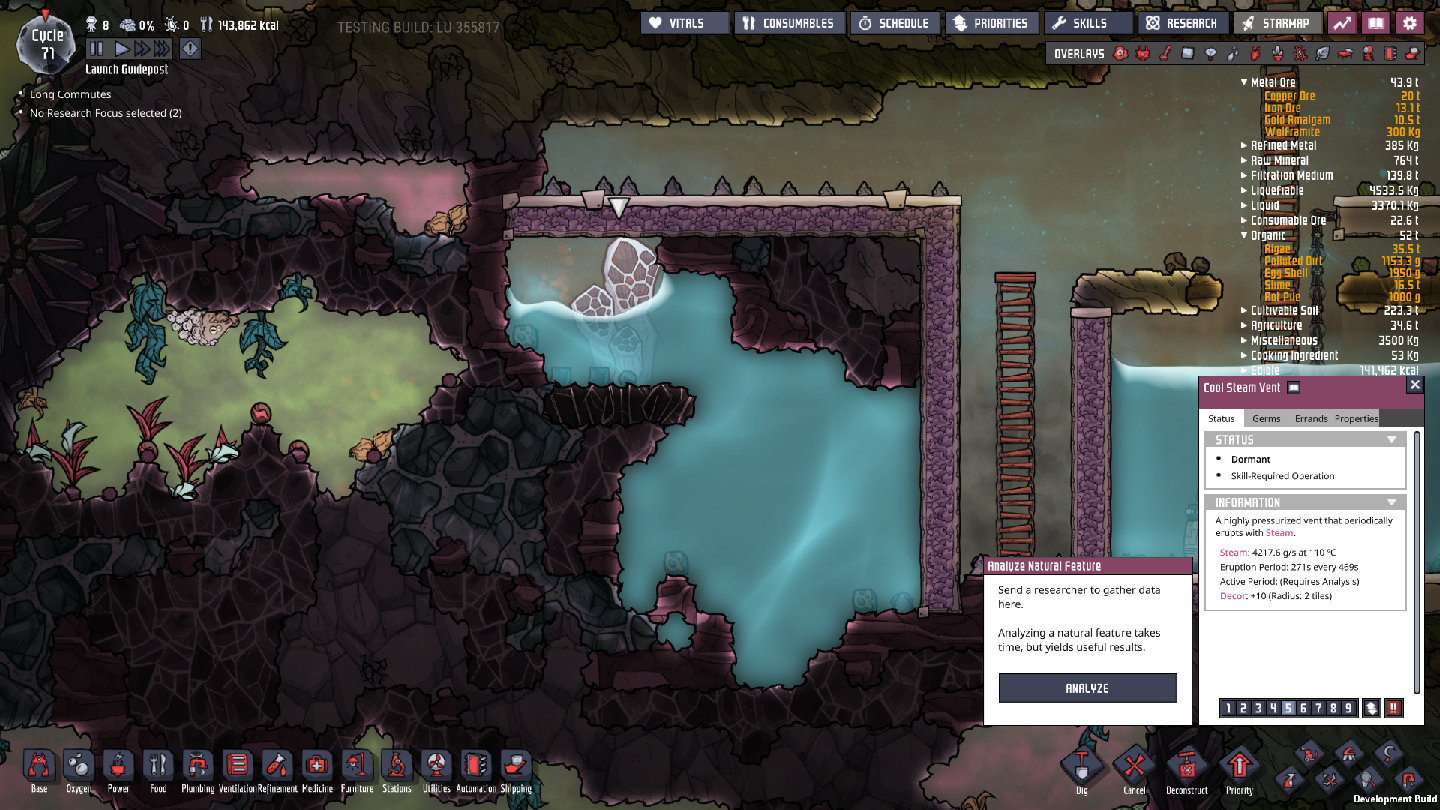
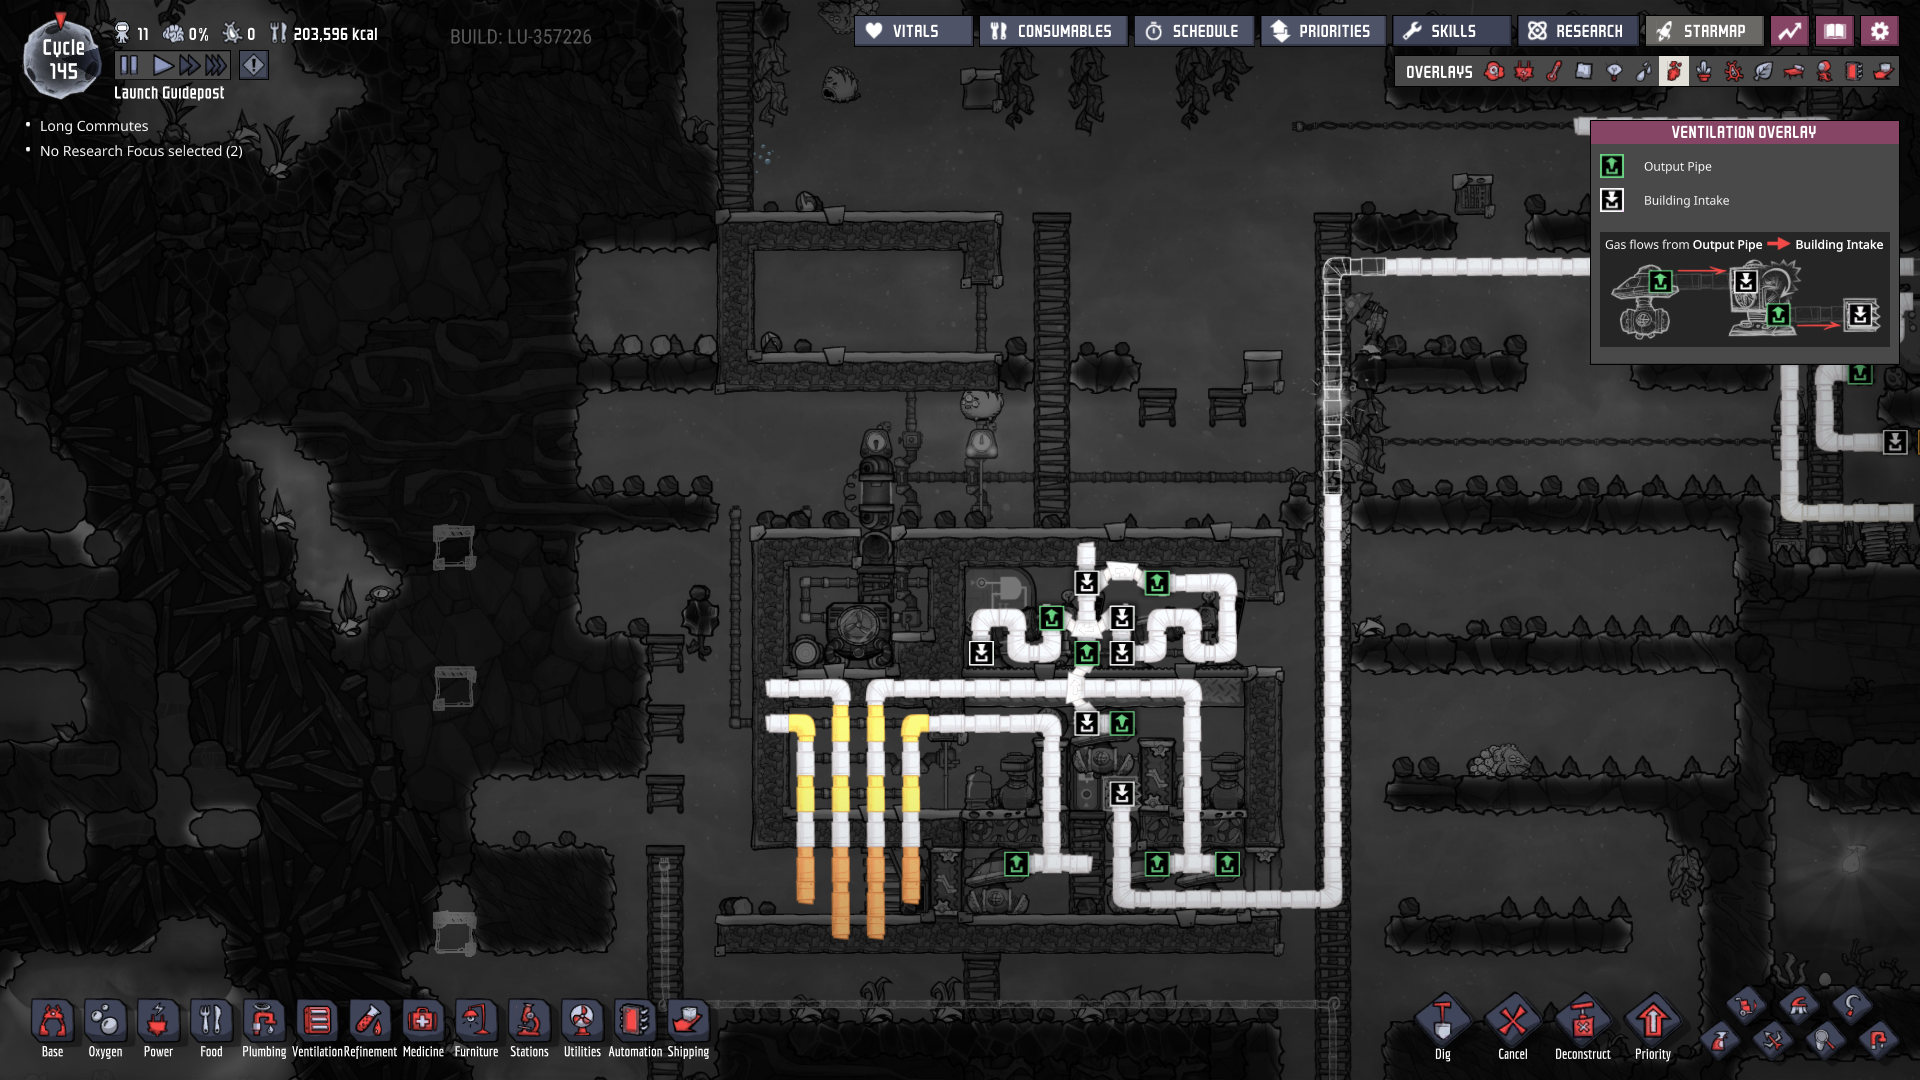
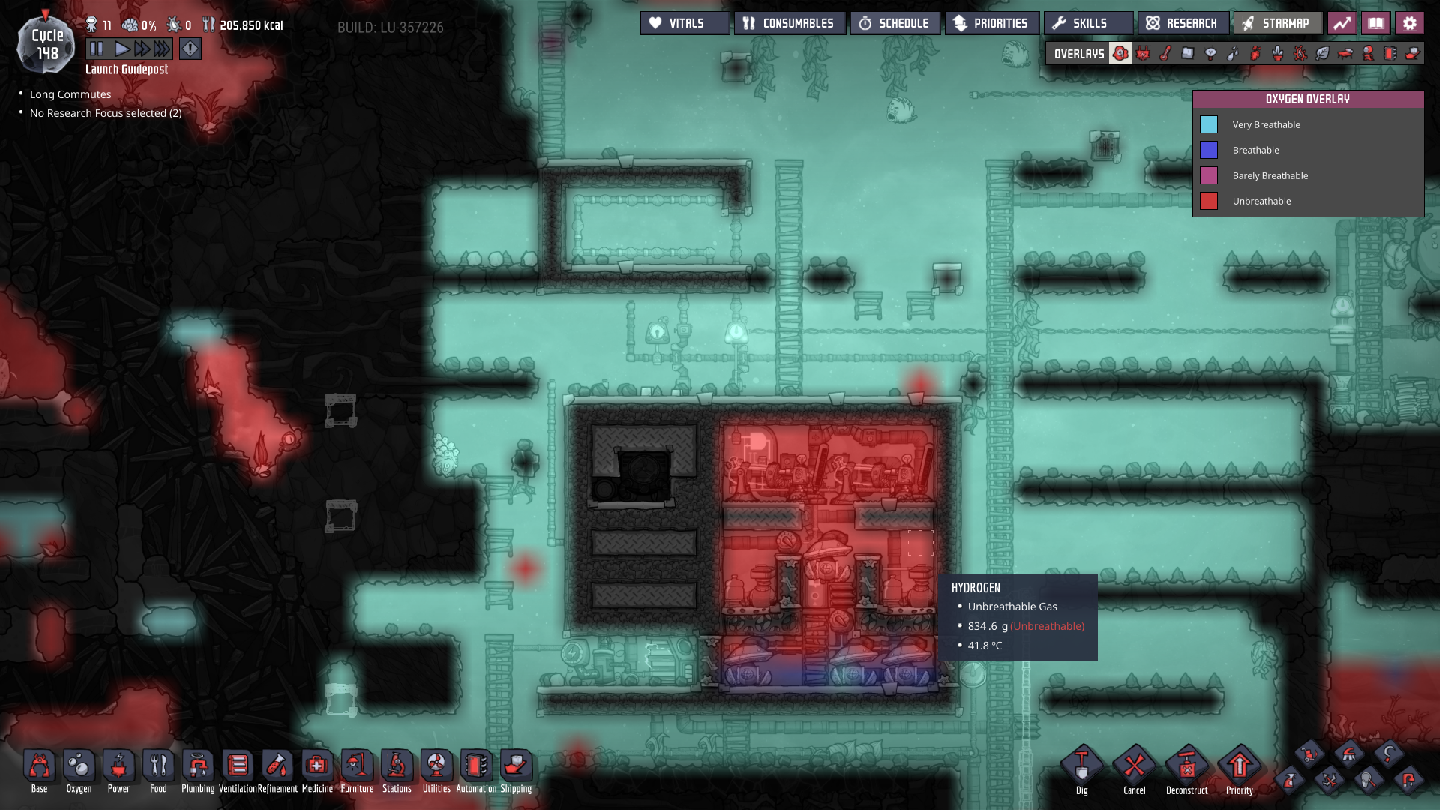
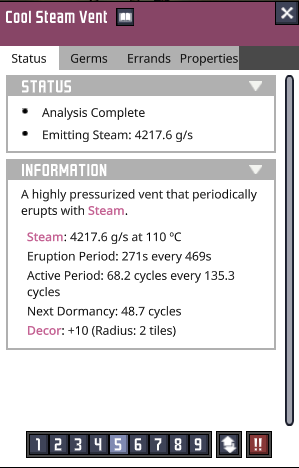
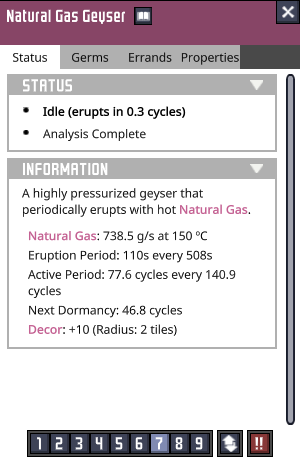
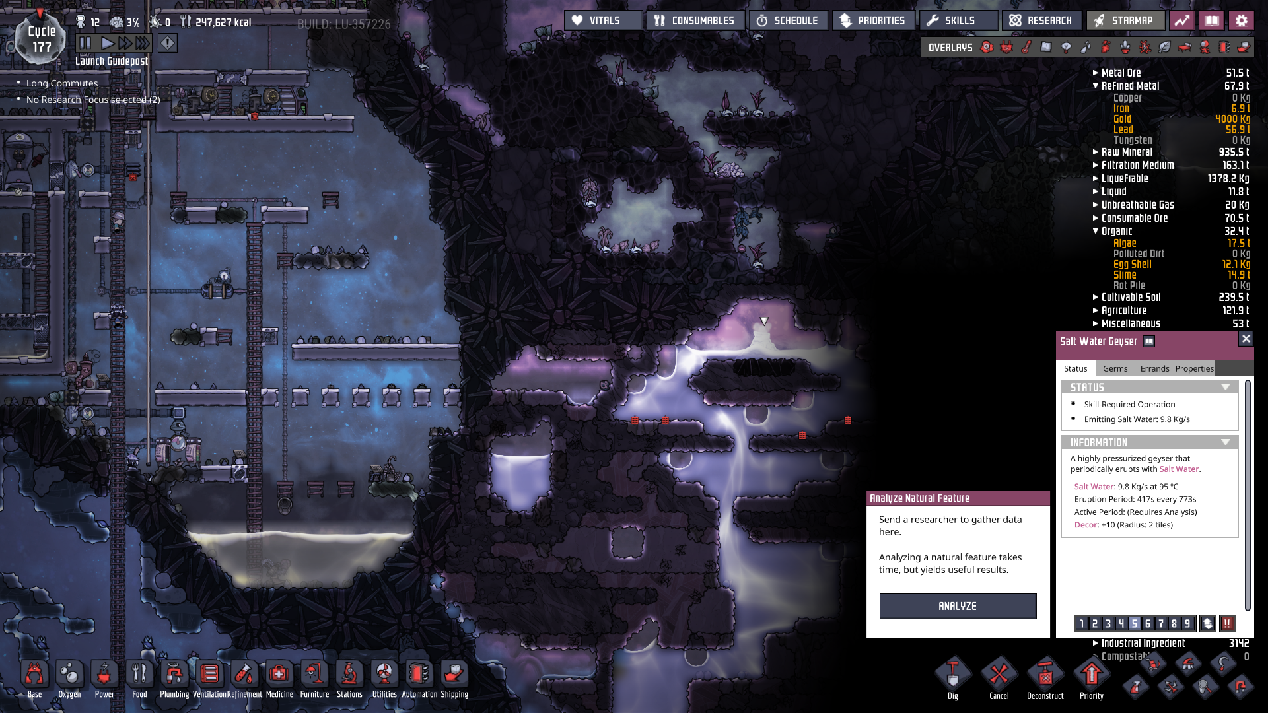
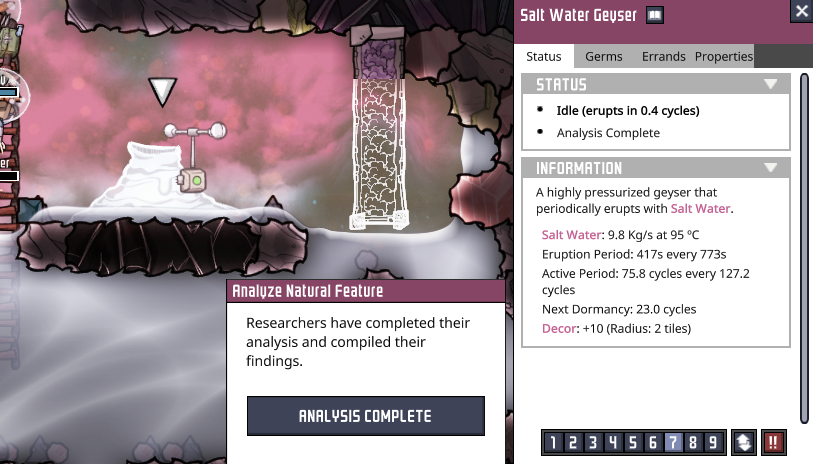
* vents and geysers will tell you the average output after being analysed
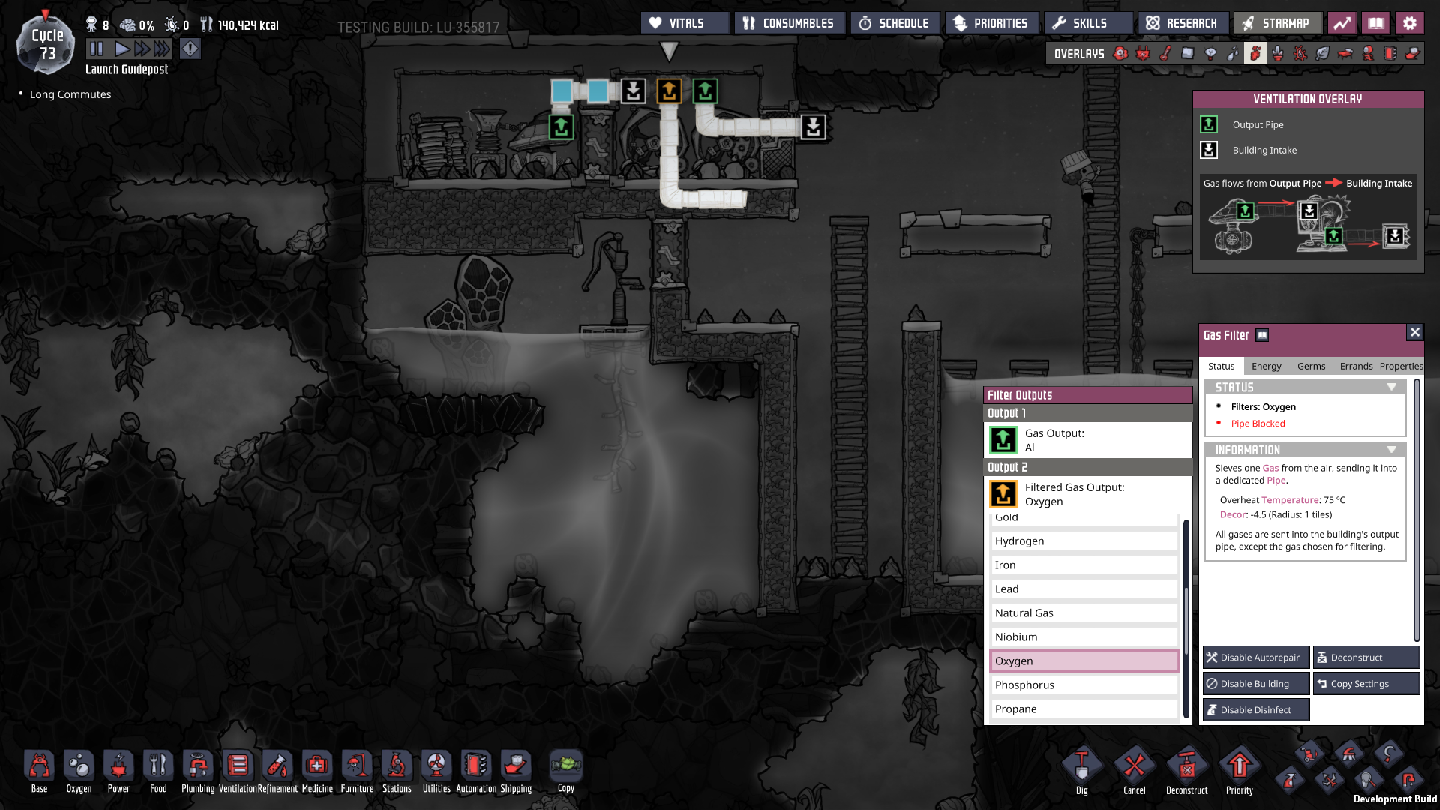
* if your having trouble telling the difference between the old looking gates and the new ones, they made the gate shape itself the shape it used to show, so rounded edge for AND gate, pointed end for OR gate and pointed end with a line in the tail for the XOR gate
B0RIS 2022년 12월 4일 오전 9시 36분 
Images are loading for me, most likely a Steam issue

Try middle clicking the image for a new window. In the past that's worked for me.. it loads the image directly in a new window (opening a direct URL vs http request)
lammaer 2022년 12월 4일 오전 8시 42분 
I loved this guide when I first played ONI, now came back and sadly mot of the images gone. Any way to fix it please?
Halifax789 2022년 11월 6일 오전 10시 34분 
it seems a iot of the pictures of the guide dissappeared?
this is a name yes 2022년 10월 1일 오전 3시 57분 
A tip for finding what a geyser is is by making it yellow alert priority and the notification tells you what it is.
Ragum 2021년 7월 16일 오후 1시 46분 
@Ekimmak the electrolyzer room is passively cooled by the gas in it. Since the hydrogen and oxygen created by the electrolyzers comes out at 70ºC (at least), you need the extra overheat temperature as a buffer for the generated heat of the machines. The temperature of the gas will be the equilibrium point of temperature in the room (between 70ºC or 100ºC, depending on how hot the water you're using is)
Oxygen Not Included 2021년 7월 11일 오후 6시 19분 
This is an older SPOM method, if I am not mistaken. Much simpler methods to use. Aquaturner, steam turbine and Insulated tiles.
biasy 2021년 7월 11일 오전 3시 08분 
Aquatuner and steam turbine?