ARK: Survival Evolved

ARK: Survival Evolved

203 ratings
Single Player Survival Notes (WIP)
By Zetnus
Dossiers from my time playing single player ARK on the Island. They will contain helpful information about playing ARK in singleplayer.

This guide is a work in progress and I will hopefully get around to adding the remaining chapters.
2
3
6
2
   
Award
Favorite
Favorited
Unfavorite
1) Introduction
In this guide I have used my experiences playing ARK in single player and locally hosted servers, to gather some advice that might help you survive.

This assumes you are relatively new to ARK, and are playing on a single player or locally hosted server.

For detailed information about ARK, it is always good to refer to the wiki:
https://ark.gamepedia.com/ARK_Survival_Evolved_Wiki
https://ark.wiki.gg/wiki/ARK_Survival_Evolved_Wiki
There you will find information about how to tame specific dinosaurs and everything else that is not sufficiently explained in game.
.
2) Server Settings
Before you actually hop right into it, you should have a look over the sever settings. Since YOU are the host of your own game, you can (and should) tweak the settings to your liking. I will go over some of the settings which I suggest changing from their defaults.
In general my goal is maintain the classic ARK experience, while changing things to improve quality-of-life and to adapt settings to a single player environment.
My suggestion is to first click to reset the settings to the default – since ARK changes what they consider default from time to time. Then go through and consider the settings highlighted plus any others that catch your eye.
.
GENERAL RULES

DIFFICULTY LEVEL
Default: 0.2
My recommendation: 0.2 if new to ARK, otherwise see below
Explanation:
The default single player difficulty is 0.2 while the default on official servers is 1.0.
Concretely, 0.2 means that you will see wild dinos ranging from level 1 to 34-ish. With a difficulty on 1.0 wild dinos will be anything up to 150. My personal recommendation would be to keep it at 0.2, especially if you are new to ARK. If you want the challenge or really want to tame level 150 dinos, then go ahead and increase the difficulty. However, remember that high level dinos take longer to tame.
In my experience, 0.2 is just fine because both the wild dinos and the dinos you tame have lower levels, so basically you are just operating at a different scaling factor. Remember, you can change this setting later if you want.
One final point is that this setting affects the quality of loot. This would mean that you get only white and green quality loot if your difficulty is at 0.2. However, by default for single player the SUPPLY CRATE LOOT QUALITY (in advanced settings) is set to 5.0. What this means is that you end up with the normal loot scale of 1.0 overall (0.2*5.0 = 1.0). If you up the difficulty, you might consider lowering the loot quality accordingly.

TAMING SPEED
Default: 1.0
My recommendation: 3.0
Explanation:
This is the single most important setting to change! Taming stuff can take a loooong time (especially if you set the difficulty to 1.0 and are taming high level dinos). We're talking multiple hours here. Multiple hours sitting and waiting and occasionally feeding the unconscious dino narcotics.
I strongly recommend grabbing that slider and pulling it all the way to the right to 3.0. At this level taming even the largest dinos will take more on the order of 30 min or so, rather than many hours (assumes max level of 30-ish). There is simply no reason for you to have to sit around for a really long time in single player, especially because you don't have tribemates who can relieve you of taming duty or bring you supplies while you wait.

STRUCTURE DMG REPAIR COOLDOWN
Default: 180
My recommendation: something lower, like 30
Explanation:
This is a minor one. It is the cooldown (in seconds) until you can repair something that has just been damaged. In PvP it makes sense that you shouldn't be able to repair things too soon after them being damaged, so that you can't fend off a raid by repairing from the inside. But in singleplayer it's just a nuisance to wait around to repair your things.

NON-DEDICATED HOST TETHER DISTANCE
Default: 1.0
My recommendation: 3.0
Explanation:
If you plan on hosting a local session for your friend(s) to join you, definitely max out this setting. Otherwise your friends will find themselves constantly being teleported to you at the most inconvenient times.

PVE MODE
Default: off
My recommendation: off
Explanation:
Keep it off. Otherwise there will be a bunch of settings in the advanced section which you will want to change to not impede your experience (ie. allowing flyers to carry stuff, building in caves, etc.)

DISABLE FRIENDLY FIRE
Default: off
My recommendation: on
Explanation:
Another important one. This will keep you from accidentally injuring your own dinos. More importantly, it will keep your own dinos from injuring you (especially those with a big tail sweep attack).

SHOW MAP PLAYER LOCATION
Default: off
My recommendation: up to you
Explanation:
You decide on this one. It can be helpful, but if you want to feel truly lost, keep it off.

DISABLE STRUCTURE PLACEMENT COLLISION
Default: off
My recommendation: on
Explanation:
Turning this on will give let you place things even if they collide with terrain or existing structures. If you want to focus on the building aspects of the game, this will definitely make you have a much better time, since collisions can be a real pain.


2.1) Advanced Server Settings
ADVANCED RULES

FORCE ALLOW CAVE FLYERS
Default: off
My recommendation: on
Explanation:
There are reasons why caves have many restrictions in multiplayer since they are important story locations, but in single player I don't see why you should have any limitations in caves.

PVP ZONE STRUCTURE DAMAGE
Default: 6.0
My recommendation: 1.0
Explanation:
This setting causes structures in caves to take extra damage in PvP (in PvE structures are not allowed in caves at all by default). The intention is clear: to prevent players from blocking up important caves with buildings. However, in single player there are no other players who would be impeded by your cave buildings, so I suggest lowering the damage multiplayer to 1.0, so that it is the same as everywhere else.

BREEDING/IMPRINTING/BABY STUFF
I have not gotten around to breeding in ARK, so I cannot offer any recommendations about these settings. It might make sense to speed up some of the things.

NIGHT TIME SPEED
Default: 1.0
My recommendation: situational
Explanation:
Night time is very dark. If you are a streamer or YouTuber, I suggest increasing this setting (perhaps even to the max). This will make the night pass much faster and ensure that your viewers can actually see what is going on.
Otherwise keep it at the default or adjust as you see fit (if night time is starting to annoy you).

SPOILING TIME/ ITEM DECOMPOSITION TIME / CORPSE DECOMPOSITION TIME
Default: 0.0 (ie. the normal level , which is 1.0)
My recommendation: consider raising it
Explanation:
Spoiling time affects items such as berries, meat, fish, flowers, mushrooms, eggs, and any organic materials. Item decomposition time affects items dropped from your inventory or dropped from your corpse if you are killed. Corpse decomposition time affects how long dead dinos or players lie around in the world.
There is an argument made for increasing these values. Spoiling time in particular is one of interest. Certain types of food, especially prime meat, spoil extremely quickly (ie. 2 min in your inventory), such that there is barely time to cook it after a big kill. It makes things easier to tame carnivores if your prime meat lasts a bit longer. In multiplayer, your tribe mates would bring you prime meat during a tame, but if you are alone, you need to go on the hunt yourself and then get back in time, all the while hoping that your tame wasn't eaten while you were away.
The main downside of increasing the spoil time is that spoiled meat is an important ingredient in making narcotics so your rate of generating spoiled meat goes down. But the reality is that narcotic production in my experience is usually limited by the availability of narcoberries and not of spoiled meat. In any case, you can always split your meat into many stacks to get it to spoil more quickly if you ever should find yourself short on spoiled meat.
As to item and corpse decomposition time, the only reason I increased those was because I wanted to give myself more time after dying to retrieve things from my corpse before they decomposed (this was in the days before the bright glowing corpse locator beacon was a thing)

SUPPLY CRATE LOOT QUALITY
Default: 5.0
My recommendation: 5.0
Explanation: adjust if you have changed the difficulty
I suggest changing this if you change the difficulty. My recommendation is to keep it such that this setting multiplied by the difficulty gives 1.0.

INCREASE PLATFORM STRUCTURE LIMIT
Default: 1.0
My recommendation: consider increasing it
Explanation:
This setting will allow you to build more stuff on rafts and platform saddles. Consider raising it if you find yourself unable to place more things to complete your houseboat, for example.


3) Character Creation
The time has come, go ahead and click on PLAY SINGLE PLAYER!
Alternatively you can click on HOST NON-DEDICATED SESSION – both will use the same savefile and world. The only difference is that your friends can join you, and that pulling up the menu will not pause the game if you are hosting locally rather than doing true singleplayer.
.
.
The first thing you will see is the character creation screen.
Take your time here, because you cannot change your character easily later on without starting over or using admin commands and cheats.

Does any of it matter?
Yes!
…but it matters a lot less in single player than in multiplayer PvP.


Here are the things to consider:

Skin color affects your visibility to other players (not relevant for singleplayer).

Height affects your visibility, hitboxes, and the ease of mounting dinos.
Short players can hide more easily. Very tall players can have the top of their head clip through low roofs. Once again a non-issue for single player.
Smaller players have smaller hitboxes (good), but their head is lower down and thus easier for other players to hit (bad, since there is a headshot multiplier). The reverse is true for tall people who have a larger hitbox but a head that is less likely to be hit by melee strikes. Not much of a consideration in single player.
Taller players will have an easier time interacting with or mounting tall dinosaurs or flying dinosaurs hovering overhead.

Hand size supposedly affects weapon size, with larger hands leading to the weapon being larger (and having a longer reach).

In conclusion, you might find that being a black female midget with massive hands is good a good hardcore PvP build. However, since this is single player, I suggest you build the character you visually like, and don't worry about all this.

Have fun and produce something of entirely unrealistic proportions if you want.
One more thing, you can't choose hair length because it grows naturally during the game. Once you craft scissors you can cut your own hair into shape. Certain achievements will unlock hairstyles.


4) Choosing a Spawn Location
remember - spawns are wide-ranging zones and not pinpoints!
.
So, where to spawn?
Back when I started, the spawn areas were listed in alphabetical order, so I picked East 1, which was alright, but I probably would have picked a different one if I had informed myself ahead of time.

But now the game helpfully tells you that the South spawns are easy, the East and West spawns are medium and the North spawns are hard, so it's easier to make a suitable decision. It also lists them in order from easy to hard.

But first you need to make a fundamental choice: are you just going to pick a spawn mostly at random, or do you want to hear information about the different parts of the island, and make a more informed long-term decision?

If it's the former, let me just give you a few pointers:
>Spawns are not specific points but rather wide-ranging zones, meaning that you won't spawn in an exact given location
>All spawns offer beach areas of relative safety; however they are variable in what you will find once you leave those beaches
>You should always spawn on or close to a beach
>The South spawn zones offer areas many wide beaches and many river mouths
>Similarly, the southern East (E1) and West (W1, W2) spawn offer the same type of environments
>The remaining spawns (including all the north spawns) can be considered a bit more difficult because they border swamps, mountains and snowy regions – all areas that spawn many predators which may make their way into the neighboring regions and terrorize the inhabitants.

So yeah, pick a spawn – at random if you want. It doesn't matter too much, since you can choose each time you die, and you will be dying a lot, at least at the beginning.
4.1) Biomes
If you want to feel fully immersed and lost, then don't read this section. It will describe the different biomes and consider the attractions of the various spawn points.
First we consider the biomes.

Relatively safe biomes

Beaches
+Good visibility to spot threats from a distance
+Excellent access to water
+Generally only smaller predators (unless larger predators wander in from neighboring biomes)
+Numerous docile creatures to hunt
+Stones can be picked up directly from the ground
+Decent amounts of berry bushes, trees, and boulders
-Metal and other mid-game resources are scarce

Grasslands
+Excellent visibility to spot threats from a distance
+Many different animals present
-Including large predators (think T-Rex)
-Resources spread out and not always abundant

Rivers
+Good visibility to spot threats from a distance
+Good access to water
+Fish as a food source
+River rocks which provide a small amount of metal when mined
+Plenty of trees, berry bushes, and boulders
-Spinosauruses, piranhas, crocodiles

Challenging Biomes

Mountains
+Good visibility to spot threats from a distance
+Metal, crystal and obsidian present
-Numerous dangerous predators
-Few berry bushes and trees
-No drinking water

Forests/Jungles
+Many trees and berry bushes
-Very poor visibility makes it hard to spot predators, and makes it easy to get lost

Redwood Forest
+Massive trees that you can build platforms on and tap for sap
+Decent visibility
+Close to nearby mountains which have metal, crystal and obsidian
-Numerous predators

Lethal Biomes

Snow
+Unique creatures not found elsewhere
+Oil rocks minable directly on the surface
+Penguins for organic polymer
+Many mid and late game resources readily available
-Many powerful predators
-Extreme cold (without fur armor you will freeze to death in a matter of minutes)

Swamp
+Rare flowers and mushrooms
+Unique creatures not found elsewhere
-Countless predators (many of which are poisonous)
-Poor visibility to see said predators

For more information about resource distribution, check out the resource map:
https://ark.gamepedia.com/Resource_Map_(The_Island)
.
4.2) Detailed Look at Spawns
_______________________________________________________________
Armed with this knowledge, let's see what the spawns have to offer us:

West 2
-
There is a large island complex in the southwest of the map that offers a nice place to start out and is often settled by new players. The small peak provides a nice view. The little rivers offer plentiful opportunities to kill fish for food. Many loot beacons spawn on this island. One of the downsides is that you have to rely on relatively metal-poor river rocks as your only local source of metal. Like all southern areas it is far away from any source of obsidian.

South 3 and East 1 "Herbivore Island"
-
Both offer nice expanses of beach that can be built on. However, I'm going to focus on a specific attraction. In the far south-east there is an isolated island that has no predators at all, meaning that you can leave your tamed companions out in the open without fear of them being eaten. In order to reach it, you will want to build a raft, since it's a long and dangerous swim. This Island is a great place to build up if you want to be safe from predators. It offers a small bay that you can keep water creatures in and flat sandy areas to build a house nearby. One important draw is that it comes with numerous metal nodes directly on the island, so you can be self-sufficient for quite some time (just don't build too close to the metal nodes so that you don't block them from respawning). Also, there is a loot beacon that drops on the island. Finally, the surrounding seas offer oil nodes in only moderate depth. The island has many large herbivores (Brontos, Stegos, Ankylos, Trikes) and is a great place to tame one in safety. Crystal can be mined in relative safety from the entrance of a cave on the southeastern mainland. Obsidian and anything you might want from the snow biome is about as far away as it gets and will necessitate extensive voyages. Finally, keep in mind that South 3 and East 1 are far-ranging spawn areas, so you won't necessarily spawn in the southeast corner (ex. the East spawn reaches all the way up the coast to where the swamp meets the sea).

South 2
-
There is a nice lagoon and an area with many rocky spires that could be walled into a predator-proof fort. You could also build a base on the rock plateaus, but getting resources up there will be tricky. There tend to be beaver dams around the one of the river mouths, and those dams can be looted for wood, pearls and cementing paste. The beaches are in close proximity to medium-sized mountains that boast many metal nodes. Beware of piranhas and spinos in the waterways. Like all southern areas it is far away from any source of obsidian.

South 1 and West 1
-
There is a large plateau with only a few access ways. They can be walled off and cleared of predators to provide a spacious base area with a good view of the surrounding lowlands. It provides a close route to the swamp and redwood areas to the north of it. Be careful when venturing close the swamp as snakes will come streaming out to hunt you down. There is no local metal other than what can be derived from river-rocks, although it's not too far to head to the mountain further east for metal. Like all southern areas it is far away from any source of obsidian.

East 2 and East 3
-
These spawn zones reach from the swamp all the way north to the narrow stretch of beach between the mountain and the ocean there. If you pick these beaches as your home, make sure to stay clear of the swamp. Proximity to the mountain means that you will experience an influx of predators wandering down the slopes. However, the obsidian and metal found on the mountain may justify the dangers in settling nearby.

West 3
-
This is a very long spawn zone stretching from deep south all the way to the borders of the snow biome in the north. There are wide beaches to settle on. However there is no local metal at all – not even any notable amount of river rocks. This means that you may want to resettle further inland (perhaps close to the volcano) in order to have access to metal and other important resources. Alternatively, it might be beneficial to settle on the coast close to the border to the snow biome and make trips there to obtain resources. But there you will have to worry about dangerous birds and other threats. In summary, the West offers beaches but not the metal needed for advancing beyond the stone age.

North 2 and North 3 "Hidden Lake"
-
There is a small inland lake in the northeast of the map. This is a nice scenic spot to set up a base. The surrounding forests are dangerous but the valley with the lake is somewhat safer than the surroundings (although predators do wander in). The lake often has beavers that will provide a steady supply of dams to loot for wood and pearls. Three loot beacon points are next to the lake. There is no local metal so you will have to acquire it from the nearby mountains.

North 1
-
You do have a beach here, and close proximity to a resource-rich mountain to the due south. Alternatively, if you want a real challenge you can head to the island in the north east. This island houses only carnivores and is one of the most dangerous places in the ARK. That was a joke, don't settle there! However, having this island nearby does provide the opportunity to collect high level-loot and to tame a strong carnivore of your choice.

So there you have it. Pick a spawn, and let's get started!
5) First Steps
You wake up mostly naked on a beach…

Take a look around… Immerse yourself in the prehistoric paradise you have landed in…

Marvel at the abundant dinosaurs…

If you get eaten, don't worry it's normal to start out at the bottom of the food chain. Just respawn, and remember that you are always gaining experience, and that is what matters.


A few basics that you will quickly want to know:

Picking stuff up
> Use "E" to pick up things from the ground, like rocks, sticks, poop etc.
> Use "E" on bushes to harvest berries and fiber from them.
> Use "E" when in shallow water to drink.
> You can use "E" while holding utility items like a torch, however, you cannot pick up stuff if you are holding a tool or a weapon.

HUD
> The HUD will show your hotbar, plus status icons for you (and for any dino you are riding).
> "H" brings up descriptive text for what the icons mean.

Hotbar
> You can and should put stuff in your hotbar in order to access them easily.
> Usually you will want to have your basic set of tools and weapons, plus any utility items you want to use.
> It is also a good idea to have a food source in your hot bar, so that you can eat at your convenience.
>The final slot in the hotbar is used when you are passively taming certain creatures by walking up behind them and feeding them. The game will tell you which food you need to feed.

Hot and cold
> You will constantly get messages about being too hot or cold. These can be safely ignored unless the change to "freezing" or "burning"
> Cold increases your food drain and hot increases your water drain. At the extremes you also lose health, but this should only be an issue in the snow biome, on mountains, underwater, or near lava.
> Cloth clothing will protect you mainly from the heat
> Most other armor types protect you mainly from cold

Crafting
> To start with, craft yourself a hatchet.
> To do this you will need stones (pick them up with "E") and wood (punch trees with right mouse button).
> Open up your inventory, "I" and go to the crafting menu in the top left

At this point you will probably have received a level-up notification. That brings us to leveling (see next section).

6) Levelling Up (Attributes - part 1)
It's temping just to pick something for your level up points and be done with it, but it pays to think ahead here. In single player it's not hard to cheat and spawn yourself a mindwipe to reset your points, but if you know what you are doing when you pick in the first place, then there is no need for that.


Attributes

Health
Health is very straightforward. It is how many hit points you have. If your health drops below 30HP, then you become injured and are no longer able to sprint or jump. Health recovers naturally over time. This can be sped up by eating cooked meat or healing items. Being attacked, fall damage, eating things humans should not eat, extreme hot or cold, drowning, starving, dehydrating, will all cause you to lose health. Armor will reduce the amount of damage taken from attacks (ie. increasing your effective health), but does not shield your health from things other than attacks.
Leveling health adds 10HP. It's generally a solid choice to add some points into health. Not just for fighting predators, but also to give you more time to explore the snow biome before you completely freeze to death. Although armor and dinosaur mounts make health less important.

Stamina
Stamina is used by certain activities like running, jumping, swimming, and swinging your tool or weapon. It regenerates rapidly when not being drained, but drains food and water in the process. If you run out of stamina while swimming in the middle of the ocean, you will drown, because stamina does not regenerate while it is being depleted. If you run out of stamina in a fight, continuing to attack will increase your torpidity (ie. push you towards unconsciousness). Getting poisoned by certain creatures will rapidly drain your stamina. Stimberries or stimulants can be eaten to rapidly regenerate stamina in a fight, at the cost of dehydrating you.
Leveling stamina adds 10. I suggest leveling stamina somewhat in order to let you run for longer periods without resting, and to let you harvest wood or stone without having to rest while harvesting.

Oxygen
Oxygen affects how long you can be underwater before you start rapidly losing health by suffocation. Oxygen drains when you are underwater and replenishes rapidly when you resurface. Oxygen also affects your swim speed.
Leveling adds 20 Oxygen. It's not necessary in the early game, since you will not be diving for resources or exploring the oceans underwater in the early game. In the mid game it can be useful to give you more time on your underwater mount to gather resources before having to resurface. In the late game, you will have SCUBA gear, which replenishes your oxygen, so it no longer is important, unless you are trying to conserve durability on your SCUBA gear by only using it sparingly.

Food
Food is how much nourishment you have stored in your body. If it drops to zero, you enter starvation and start losing health and increasing torpidity. Don't panic though: it takes a while to actually die of starvation. Food drains continuously, but drains faster when it is cold, when you are regenerating stamina, or when you are regenerating health. Food is replenished by eating. When you eat, things take a while to digest, so your food will rise gradually and not immediately. Cooked meat provides more food than cooked fish, and both provide more food than berries. Eggs can be eaten for a large amount of food. Don't eat raw or spoiled meat. Don't eat poop. Don't eat narcoberries (they will knock you unconscious). Don't eat stimberries for their food value, (keep them around for times when you have been poisoned and need to regenerate stamina).
Leveling food adds 10 to your maximum. Leveling food is a waste though, since you can just carry around food in your hotbar and eat when necessary.

Water
Water is like food. It is the amount you have in your body and drains continuously. It drains faster when you are too hot, or when you are regenerating stamina. Going underwater instantly refills your water. Drinking with "E" while in shallow water does the same. Water can be stored in water skins, jugs, and canteens for you to drink from when there is no natural water nearby. Eating berries also restores water. If it rains, that will restore your water as well. Running out of water will cause you to be dehydrated, which drains your health and increases your torpidity. Don't panic though: it takes a while to actually die of dehydration.
Leveling water adds 10. Leveling water is a waste, since you tend to be close to natural water sources, or have means of carrying water with you.

Weight
Weight is your carrying capacity. Every item has a weight associated with it, and all the items you have in your inventory will add up towards your capacity and slow down your movement speed. Starting at about 75% of your total weight stat, your movement speed starts to slow down noticeably. At 85% you become encumbered, which prevents you from running and jumping. Movement speed falls off exponentially as you approach your maximum weight. At 98% or more, you can no longer move at all and need to drop some items from your inventory.
Leveling weight adds 10 to your limit and scales the percentages accordingly. In singleplayer, weight is a very important stat to level. Let me give you some context: a full stack of berries weighs 10, a full stack of wood or stone weighs 50, tools and weapons weigh 2 each, with metal weapons weighing 5-10 each, full fur armor weighs 48, a full stack of metal weighs 200. You see what I am getting at here. Unless you want to be very reliant on dinosaurs of absolutely every transportation task, you would well advised to invest in weight. Increasing stamina and movement speed is of no use if you are encumbered by not having the necessary weight capacity.

Melee Damage
Melee damage is a multiplier to the amount of damage you deal with melee attacks. Using your pickaxe or hatchet count as melee attacks, so in addition to allowing you to kill stuff faster, melee damage allows you to deal more damage to resources, which translates into more resources gained from the tree, rock, node, corpse, etc. Melee damage does not improve your ranged damage (slingshot, bow, crossbow, guns).
Leveling melee damage adds 5% to the multiplier. Adding some points here can be useful, but the reality is that you will often be using tamed dinos or ranged weapons in your fights, and you will be using dinos to collect resources, rather than your own tools. In which case you should level melee damage on those dinos.

Movement Speed
Movement speed is how fast you move. Remember that movement speed is affected by your carried weight. Movement speed also improves swim speed, in addition to any bonuses from Oxygen.
Leveling movement speed adds 1.5% to this stat. It's not a bad idea to add some points since this can help you outrun predators and get around your base more quickly.

Crafting Skill
Crafting Skill improves the speed at which you can craft items in your inventory, and improves the quality of items crafted from blueprints.
Leveling adds 10%. Since crafting is already quite fast, the only time you would benefit from the speed bonus would be when repairing armor or crafting arrows in the middle of a fight. That is why the quality bonus was added as well. I'm not sure it's worth investing in this. Certainly not for the speed, although it might be worth it for the quality.

6.1) Levelling Up (Attributes - part 2)
Fortitude
Fortitude increases the natural insulation of your body against heat and cold, and also reduces the amount of torpidity you gain from torpidity inducing attacks. These same things can also be achieved by wearing armor.
Leveling fortitude adds 2. You cannot completely remove the need for clothing to help with temperature issues, but a few points in fortitude might be enough to keep you cold, rather than freezing. The real benefit from fortitude is that it makes you harder to knock out. This is useful, because there are various nasty creatures that kill you by knocking you unconscious rather than going for your health.

Torpidity
Torpidity is a measure of how unconscious you are. Base is zero. At 50, you become unconscious, and remain unconscious until your torpor drops to zero. Torpor is gained by eating narcoberries, narcotics and bio toxin, by attacking when out of stamina, by starvation or dehydration. Most importantly though, torpor is gained by being attacked by various creatures. Armor and fortitude will reduce the amount of torpor you take from these attacks. Stimberries and stimulants can be used to reduce your torpor, at the cost of draining your water. It's a good idea to keep some in your hotbar. Torpor decreases naturally over time. However, if you have been knocked unconscious by a hostile creature, it will probably kill you before you can recover.
Torpor cannot be leveled. However, leveling fortitude will reduce the amount of torpor damage you take.


My recommendation

Vital attributes:
Weight – The most important thing to level, in my opinion. I personally went all the way to 500 with this, which is probably overkill. Aim for 200 or 250 and see if that suits your needs. Prioritize your first levels in to weight.
Stamina – I suggest leveling it to 200 or 250. That should be enough to let you sprint for considerable distances, and to let you mine a full metal node without needing to recover. Any more than that is probably overkill, since your stamina regenerates quite quickly when standing still.


Important attributes:
Health – A bit of extra health to keep you alive in sticky situations can never hurt. Add as much as you want.
Melee Damage – Another solid choice, especially if you spend a lot of time harvesting with tools, rather than dinos, or if you often find yourself in melee fights.


Useful attributes:
Movement Speed – Not a bad choice, although I personally did not add many points here. I suggest prioritizing weight and stamina before increasing movement speed. If you level this excessively (ie. past 130-140) you may run into issues like falling off cliffs because you were unable to stop in time.
Oxygen – Don't add points here early on. Only consider this once you are ready to explore the seas. I personally added some points here in order to conserve SCUBA gear (since they lose durability when used) during my ocean explorations.
Fortitude – I'm not sure how great the fortitude bonus really is. I added a modest amount of points to help me against torpor-inflicting attacks.
Crafting Skill – Back when it was only "crafting speed" it was firmly in the "useless" category. Now, it might actually be worth it to make your high quality items even better.


Useless attributes:
Food – Do not waste any points here. Just carry around the food in your inventory rather than in your stomach.
Water – Do not waste any points here. You can carry around water in the form of water jugs or berries.


So there we have it. Once you spend skill points you will be taken to screen where you can learn new crafting recipes, or Engrams.
6.2) Levelling Up (Engrams lvl 1-10)
Once you spend your attribute points, you will gain skill points, which can be used to unlock "engrams", which are crafting recopies. You don't have to spend these points immediately, and I recommend saving them up until you actually intend to craft the items in question.

Note: I'm not going to list saddles; just get them whenever you need them.

+++high priority (unlock ASAP)
++moderate priority (unlock when you have all the important stuff)
+low priority (only unlock if you find yourself needing this item)


Level 1 (already unlocked by default)
+Note – A piece of paper. Can be written on. Not important for survival.
+++Stone Pick – The pickaxe is one of the two main harvesting tools. It is good for gathering thatch from trees, meat from corpses, and flint from rocks.
+++Torch – Lights up the immediate area and provides warmth. Can be held in the offhand while gathering. Important for the night-time visibility.

Level 2
+++Campfire – Allows you to cook meat and provides warmth and light. A must have for any survivor.
+++Stone Hatchet – The hatchet is the other main harvesting tool. A must have. It is good for gathering wood from trees, hide from corpses, and stone from rocks. Alternate between hatchet and pickaxe, depending on which resource you need more of.
+++Spear – Can be used to jab at enemies. Can also be thrown. Randomly breaks mid combat, so it makes sense to stack up a few. Lower priority than the other level 2 Engrams, but still important going forward.

Level 3
++Cloth Clothing set – provides a small amount of armor and cold resistance and provides good heat resistance. Can be crafted in a pinch with simple resources. You'll want to unlock them all at some point, since they are required to unlock higher-tier clothes. Start by prioritizing those that require no hide to craft.
+Waterskin – Lets you carry one swig of water along to drink when not close to water, or to transport water to cooking pots or crop plots. It's leaky, making it not particularly useful. Unless you live far away from a natural water source, there is no need to rush to unlock this. You'll find them in loot beacons all the time too, and they don't stack.

Level 4
++Thatch building basics – Lets you build a small thatch shack. This should be a small short term home at best. Most lager dinos can break it down easily. So the main benefit of a shack is to ward off small dinos and to provide you with insulation against the heat and cold (indicated by the house icon on the HUD). Remember, you need a foundation to place any of the other pieces. Prioritize other engrams in this tier first, but do get these at some point, since you need them to unlock all other structures.
++Hide Sleeping Bag – A single-use respawn point. Can be rolled up and returned to your inventory if you want to relocate it. Disintegrates upon use as a spawn point. Often found in loot beacons. Place one down once you start building a shack. As an unlock, it only becomes relevant once you want to be able to spawn at a specific point. Not needed if you live right in the middle of a spawn zone.
+++Storage Box – Stash your loot so that you don't have to carry it around. Very important to unlock. Has the same durability as thatch.


Level 5
+Wooden Sign – Cosmetic. Allows messages to be written on it. Low priority.
+Slingshot – A ranged weapon that uses stones for ammo. Can be used to knock out dinos, but isn't very efficient at doing so. Stick to your spear for self defense, and consider waiting for better knockout weapons.
+Sloped Thatch – No need to unlock these until you are going for sloped wood segments.

Level 6
+++Mortar and Pestle – Crafting station for various powders and pastes. It's very important to have one at your base.
++Sparkpowder – Crafting material produced in the mortar and pestle by combining stone and flint. Is used in numerous applications going foreward.
+Blood Extraction Syringe – Can be used on yourself to produce blood packs which are essentially healthkits. Drain health while you are idle, so that you can use to recover health in a fight. You can probably delay unlocking this until a later time, since health can be healed in a fight by eating cooked meat as well.
+++Narcotic – Created by combining spoiled meat and narcoberries in the mortar and pestle. Narcotics don't spoil, and are critical for taming many dinos.

Level 7
+++Simple Bed – Multi-use respawn point. Must be placed on foundations. Has a cooldown between uses, so there is a benefit to having multiple beds in one location, even as a lone survivor.
+Single Panel Flag – For decoration. Low Priority.
+Standing torch – Provides a stationary light and heat source. Burns for quite a while if fueled by spark powder.
++Spyglass – Very useful for seeing dino names and levels from a distance. Requires that you have a crystal to craft it.

Level 8
++Wooden Club – Melee weapon for knocking dinos unconscious so that you can tame them. You don't need it until you want to try taming a low-health weak dino. Is also useful for harvesting organic polymer from penguins in the later game.
+Multi-Panel Flag – Decoration.
++Cooking pot – Used to brew recopies and dyes. For normal cooking tasks, a campfire is just fine.
+Compass – Could be useful for orienting yourself I suppose. But since you have a map, you usually generally won't need this.

Level 9
+Paint Brush – Lets you paint stuff for decoration.
+++Bola – Can be thrown at smaller dinos to immobilize them for 30 sec, so that you can kill or tame them without having them run or fly away. Single use only.
+Training Dummy – Can be used to test your DPS. Only works if friendly fire is not disabled. Generally optional unlock.

Level 10
++Small Crop Plot – Allows you to plant and grow berries when supplied with seeds, water, and fertilizer. Feaces work as fertilizer, and rainwater will be perfectly sufficient if you plant it outside.
+++Bow – Ranged weapon. Fires stone arrows. Very useful for shooting things when standing on top of a rock where you can't be attacked.
+++Stone Arrow – Easy to craft wherever you are with basic supplies. Still useful in the midgame, since they are so easy to make, and don't waste metal. Arrows can be recovered from the ground and from corpses by walking over them.

7) First Steps (cont.)
Right, now that we have the basic leveling and unlocks sorted, back to actual gameplay.

Your primary task at the beginning is to gain experience and levels, while learning about the gameplay mechanics. So if you die (and you will die, a LOT) don't feel bad about it. You keep your experience, and the stuff on your corpse is quite expendable. You are at the bottom of the food chain, and dying is usual. Don't worry too much if you fail to recover your corpse.

So let's get together the barebones basic supplies to survive the night!

>Walk through bushes and press "E". This should get you enough berries to keep from starving for now. Eat the berries when you get hungry (but don't eat the black or white ones – narcoberries and stimberries).

>Craft that pickaxe if you haven't done so already. Also get yourself the hatchet. Both of those can double as a weapon in a pinch, so if you see some Dodos running around, go kill them for the meat.

>If you find any unattended corpses lying around, butcher those too.

>Remember that the pickaxe will get you more flint, meat, and thatch, while the hatchet gets you more stone, hide, and wood.
.
.
>Get yourself a campfire to roast that raw Dodo meat. Put the cooked meat in your hotbar and eat it as needed

>Craft yourself a stack of 2-3 spears. However, just because you have a spear, doesn't mean you should pick a fight. Run away from *everything* that attempts to chase you. If you see something that looks like a predator, then stay a safe distance away. The spears are for emergency cases, when a raptor has chased you down, and it's clear you can't escape by running. In this case stand and fight. Specifically, jab at its head and pray that you kill it before it kills you.

>Instead of picking fights, browse through the bushes collecting fiber. Make yourself some cloth clothes. They don't offer much protection, but it's better than nothing, and it will get you XP.

>If you find eggs, you can eat those. Just be aware that picking up an egg may attract an angry parent.

>If it starts getting dark, craft a torch, and place down a campfire in a nice open area with good visibility. Huddle by your campfire and eat your cooked meat as necessary. Don't venture out too far. Don't worry too much about being cold, as long as the icon doesn't switch to "freezing"

>If you are starting to accumulate things that you would like to stash away, then build yourself a storage box. You can also use the coming day(s) to build yourself a little thatch hut. It offers little protection against predators, but will at least help against the cold (assuming you build a sufficiently enclosed space – you can tell by the house icon). Your hut is only temporary, but it will make you feel safer. Abandon it if predators decide to take up residence in the area.

>Start getting your bearings. Look for landmarks that will help you find this place again if you die.

>Explore the ARK, but stick to beaches and grasslands. Don't go into the jungle. If you need to cross rivers, check carefully for piranhas and other dangers. Minimize the distance you need to swim.

>The general idea is that you just want to be leveling up, practicing your survival skills, and scoping out cool places to set up a more permanent residence.
8) Dinos to Hunt for Food
Berries are nice, but cooked meat is a lot more filling, and besides, you'll need to obtain hide from somewhere. So which creatures is it safe to hunt?

(As a general suggestion, you'll always be short on hide, so always butcher corpses with the hatchet.)

Dodo
Dodos waddle around on the beaches. If attacked, they will waddle away at a pretty slow pace. So this makes them easy prey for you, and for everything else. They have low health and can be killed with any weapon, or even your fists. Probably just use your hatchet though.

Trilobite
A small aquatic crustacean that will come up onto the beaches from time to time. If attacked, they will try to flee. Chase them away from the water, because they are faster in water. Provide meat and also chitin (and sometimes pearls or oil), which can be saved up for later use.

Lystrosaurus
A cute, small and slow herbivore that will not fight back and waddles away quite slowly. Another easy source of meat and hide.

Moschops
Looks dangerous, but in fact will run away if attacked. Runs decently fast, but you can keep up by sprinting. Keep jabbing it with your spear until it is dead.

Parasaur
The Parasaur will run away rapidly when attacked. You can't outrun it, so you will need to chase it into a cliff, where it will get stuck. Don't chase it into the water.
You can thow a bola at it, to immobilize it long enough to be killed, but remember that bolas are single use.

Pihomia
Another herbivore that rapidly runs away when attacked. Provides a large quantity of meat and/or hide, but can outrun humans, so you will need to chase it into trees or terrain.

Carbonemys
A large, slow turtle. WILL fight back if attacked, and is hard-hitting. It's slow enough that you can kill it with a ranged weapon by shooting and running backwards. You can also try kiting around and hitting it with spear, although it will often get a hit on you as well. Takes many hits to bring down.

Compy
A tiny carnivore that will follow you around without attacking. If multiple compies are close to each other, they become aggressive. The best thing to do is to kill them before they become too many. They have a low health pool, so a few hits will take them down.

Dilophosaur
A common sight on the beaches. The Dilo is a small aggressive carnivore with a relatively modest aggro radius and a slower speed than a human sprinting. Initially you will want to avoid confrontation with them, but later on you can use them as a meat and hide source. Armed with a spear and some clothing, you should be able to take down individual Dilos. Just be careful to dodge the initial attempt to spit in your face. Once you have sidestepped that, aim for the head.

Corpses
Abandoned corpses are an excellent source of meat and hide. If you find one, don't pass up the opportunity. Just make sure that whatever killed it isn't nearby.
Even your own corpse will provide meat, although that might be a bridge to far for you.

Don't fight any of the larger herbivores. They WILL fight back, and you are not equipped to take them down. Also, as an aside, don't steal the egg of any creature that you can't defeat in combat.

And there you have it. Cook your meat before eating it. Stash your hide away – it's a used in all kinds of crafting recipes. Also stash your spoiled meat – you will want to use it to make narcotics.
9) Dangerous Dinos
And now we come to the common dangers. This guide will only cover some of them. There are many more threats that may wander on to the beaches from adjacent biomes.

In general, you can tell if a creature will be hostile by looking at it. Does it look like a carnivore or herbivore? Does it have large claws? Is it attacking other creatures on sight? Is it running towards you?

When in doubt, keep a safe distance and observe its behavior.

Dilophosaur
Likely one of the first predators you will meet, since they are all over the beaches. You'll also recognize them from the chapter above.
The Dilo will spit in your face and then rapidly attack you. Luckily they have a very small aggression radius, and aren't too fast. So just start sprinting when you hear their characteristic warning call. They are easy to avoid, and as a new survivor, you will want to avoid them.
Once you feel like trying your luck at fighting one, make sure there are no others nearby. Approach and sidestep the spit. Then aim for its head with your spear. Should you get blinded, keep jabbing toward where you think its head is.

Compy
Also mentioned in the previous chapter. The main danger is that they are attracted to humans, and that they become aggressive when in groups. Those two things go hand in hand.
They can be outrun and they are also low health. The main danger is being swarmed by a large pack. If this happens, run away and try to either climb on a rock or get into the water. As long as you aren't surrounded, it's usually safe to stand and fight. Jab with your spear to knock them back.

Raptor
The bane of early survivors. Raptors are very fast and will attack you mercilessly. A recent update also gave them a pinning pounce attack. Outrunning them is tricky. Your best hope is to find high ground that they can't get up on to, or to get them stuck in trees/terrain, or perhaps to get them interested in something else. Take a wide berth around any Raptor you see – unlike the Dilo, the Raptor has a high aggro radius.
If you can't run away or if your stamina gives out, then stand and fight. Aim for the head – it has a high headshot multiplier. If you are lucky, you will kill it before it kills you.
If one takes up residence in an area you want to be in, then keep spawning in and attempting to kill it with spears until you finally take it down.
Don't bother with the bow, unless you are somewhere where the Raptor can't reach you.

Troodon
A small and very dangerous carnivore. During the day time, it has a small aggro radius and can easily be avoided, but at night its eyes will glow, and it becomes highly aggressive.
The danger of the Troodon is that its attacks rapidly drain your stamina and increase your torpor. After only a few seconds, you will be unconscious and the Troodon will mercilessly circle and attack your unconscious body, leaving you no chance of regaining consciousness.
Avoid if at all possible. If you are forced into a fight, continuously eat stimberries or stimulants from your hotbar to maintain consciousness. At the same time, fight back with your spear. After the fight, go drink some water since the stimberries will have dehydrated you.
If you need to clear out a Troodon from an area, do it during the day, preferably at range from an elevated position, and with a good supply of Stimberries in case you end up in melee combat.
Supposedly they will stay away from torches and campfires, although I have not personally observed this behavior.

Insects
Numerous insects, such as the Titanomyrma (a giant ant), are aggressive and will try to swarm you. Insect bites are generally poisonous and will slowly drain your stamina. The flying variant is especially annoying since it can be hard to hit. Once you do hit them, they die quickly though. Back yourself up against a rock, so that you are only attacked from in front. Any single one is only a nuisance, but a swarm can be dangerous.

Carnotaurus
A medium-sized predator that looks like a mini-Rex. You will recognize the distinctive trampling sound. As an early survivor, you have no chance to defeat it on foot (at least not until you have metal weapons and armor).
Running away is your only hope.

Terror Bird
Luckily they are somewhat uncommon, because these flightless predatory birds are highly aggressive. They are usually found in packs and are able to run quite fast, so running away is unlikely to work. Stay far, far away if you spot a pack of these. In combat, fight them like you would fight a raptor. You may be able to deal with individual birds by aiming for the head, but if a whole pack is after you, you are in trouble.

Tyrannosaurus
The Rex and other apex carnivores need to be avoided at all costs. Run away, and hope it aggros on to something else and get distracted. You can outsprint a wild Rex, as long as you don't run out of stamina. Generally they will rove around eating everything and not linger in any one area too long.

Therizinosaurus
A large bipedal herbivorous bird, that is far more dangerous than it looks. It will wander around, generally solitary, and will only attack other creatures if carnivores get too close to it. However, it will also attack any humans that invade its personal space. The claws are deadly – this is one of the few creatures that fight a Rex or Spino and win the fight.
As long as you keep a safe distance, the Therizo will not attack you, however, be careful in case it wanders close to you.
In a fight you have little chance unless you can shoot at it from an unreachable spot like the top of a cliff.

Alpha Predators
Alpha predators are larger, more dangerous versions of the normal predators (such as Raptors, Carnos, and Rexes). You can recognize them by the fact that they have a red glow and are actually larger than their normal counterparts. Thankfully, they have a reduced aggro radius.
They are untamable and are meant to provide a midgame or lategame challenge. Do not engage them. You have no chance without a powerful mount.


Countless additional threats can be found in the Redwood, Snow, and Swamp biomes. Steer clear of these as an early survivor.
9.1) Threats in Rivers
Crossing rivers is dangerous business. Always check the water first and find places where the distance to swim is short.

Piranha
The inland rivers are full of Piranhas, which will attack any survivor that attempts to swim across. Before you start swimming, check for Prianahas. Try to cross where the river is narrow, so that you have a shorter distance to swim. Don't turn and fight, keep swimming. The shore will bring safety.

Sarcosuchus
The Sarco is a large crocodile that is found in the rivers and also in some of the bays on the coast. It will happily leave the water to chase you. You should be able to outrun it on land. If you need to fight it, attack from range.

Spinosaurus
Apex carnivore that rivals the Rex. It has a relatively small aggro radius and will quickly lose interest if you run away from water, so that is what you should do if you encounter one.
10) Engrams lvl 11-20
Let's take a look at the next things you will unlock.


Level 11
++Wood Structure Basics – The basics components to building a wooden house. Wood only takes damage from larger creatures and is much more secure than thatch. Wood structures will require a larger amount of resources, so only unlock and start building with wood when you have found a spot to set up longer term.
++Stimulant – Made in the mortar and pestle by combining stimberries and sparkpowder, and doesn't spoil. Stimulants are a more potent version of Stimberries when it comes to maintaining consciousness.

Level 12
+Wooden Shield – Can be equipped in the off-hand while using a one-handed weapon. Blocks visibility quite a bit. Is probably more of a PvP thing.
+Wooden Cage – Let's your imprison other humans or small dinos.
++Further wooden structures – Unlock as needed. Pillars can be used in building tricks to get roofs and floors at the desired level.


Level 13
++Cementing Paste – Crafted in the mortar and pestle using chitin/keratin and stone. Used in some higher-level crafting recipes. Can be looted from beaver dams.
+Wardrums – A set of large drums. Not important for survival.
++Wooden Spike Wall – Deals damage to attacking creatures. Can be useful to defend your perimeter.
++Further wooden structures – Unlock as needed.

Level 14
++Further wooden structures – Unlock as needed for your building plans.

Level 15
++Gunpowder – Crafted in the mortar and pestle using charcoal and sparkpowder. Used to make bullets and explosives. Since you aren't using those yet, you can delay this unlock for quite some time.
+Flare Gun – Temporarily illuminates an area. Single use. Not very useful.
+++Hide Clothing – Offers much better physical protection than cloth and is certainly worth equipping.
++Compost Bin – Turns thatch and faeces into fertilizer over time. Useful once you are farming with crop plots.

Level 16
+Gravestone – Cosmetic like the wooden sign.
+Rope Ladder – Retractable version of the wooden ladder.
+++Large Storage Box – Offers much more space than the small storage box. A must-have for anyone.
+++Wooden Raft – Allows you to explore the seas. You can place structures on to it, and even build a small houseboat.
++Bug Repellant – Keeps insects from becoming aggressive unless you touch or attack them. Very useful in caves.


Level 17
+Stone Irrigation stuff and Resivoir – Allows you to pipe water to a different place. Crops outdoors will do just fine with rainwater, so you only need these if you are growing crops indoors or if you want to bring drinking water to your base.

Level 18
++Dinosaur Gate and Gateway – Wooden door for medium-sized dinos.
+++Feeding Trough – Feeds all your dinos in a decent radius using food from its inventory. Extends the spoil time of food placed in it's inventory (by x4, like in dino inventories), at no cost. Very useful once you have a lot of tamed dinos to keep them fed.
+Lesser Antidote – Cures swamp fever. I have never had a use for it and the ingredients are tricky to acquire.
+Fishing Rod – Can be used to catch fish, but requires all kinds of difficult-to-acquire bait items. Not worth getting.
+++Preserving Bin – A basic refrigerator that requires sparkpowder to operate. Extends the spoil time of things placed inside by a factor of 10. Will slowly turn cooked meat into jerky (which lasts much longer) using oil and sparkpowder. Very useful.

Level 19
+Wooden Cosmetics – Not needed, but make your home look nice.
++Bookshelf – Can store a large number of blueprints and recipes, thus freeing up space in your storage closets.

Level 20
+++Refining Forage – A furnace that turns metal into metal ingots and oil+hide into gasoline. This is your first step into the iron age.
+++Smithy – Crafting station for everything containing metal, and also a whole bunch of other items.
+++Metal Pick – A more efficient version of the stone pick. This should be the first metal item you make at the smithy and you should use it for any further metal mining.
+++Metal Hatchet – A more efficient version of the stone hatchet.

Now you have just made it to the iron age and it is high time to settle down somewhere so you can build all these cool things you have been unlocking.
11) Settling Down
Alright, you've gained some experience, you've survived the night, you are starting to understand the basics.

It's time to settle down.

At first, you will just want some thatch foundations to place a bed on, as well as some storage boxes and somewhere you place your mortar and pestle.
Your first thatch hut(s) don't need to be anything special, just place to rest, and come back to.

But, you can already start dreaming big, and planning ahead for a larger and more permanent base.
Here are some important things to look for:

A sufficiently large, flat area - while it is possible to build on slopes, it is much easier to build on flatter areas. Initially, you'll just need space for a modest wooden house, but later you will want to fence in an area to keep your tamed dinosaurs safe, so stay on the lookout for a suitable area!

Easy access to water, berries, wood, and stone - These are your basics. It's very nice to live in the vicinity a body of water, so that you never have to worry about dehydrating at home. And having food and crafting resources nearby is just as important.

Proximity to other resources - Metal, obsidian and other resources will become important later, and if they are close to your base, that's a definite plus. Theoretically, a base in the center of the island might be good idea if you value this point highly.

Absence of predators - Unless you are on Herbivore Island, you will never be completely safe. Nevertheless, it's obviously beneficial (especially while your construction is in progress) to not have any predators interfering, so find a spot that looks clear, or lure predators away if necessary.

View - Having a nice scenic spot, for example on top of a cliff or hill will give you a nice view, at the cost of having to walk a bit further for water.

So what does that add up to?
Beaches or river/lake shores, or places close to these areas. They offer good visibility and a nice view. They tend to be flat, are close to water and usually spawn with rocks. Trees and berries are never far away. River sites will have metal-containing river rocks.
If you want specific suggestions for locations, take a look at the section I wrote on spawns.

Your plans for a mountaintop fortress are best saved for later.

Materials
Let's quickly take at the materials you could use for construction:

Thatch:
-Requires a moderate amount of thatch, some wood and some fiber.
-Offers only limited building possibilities with fewer pieces
-Can be damaged by all manner of dinos
Thatch is best used for temporary bases, way-points, and shelters for the night, but is not suitable for building a real house.
It's better than nothing!

Wood:
-Requires a lot of wood, some thatch and some fiber
-Cannot be damaged by very small dinos, but all others can damage it
Wood can be used to create your house, but the fact that it is susceptible to damage from many dinos means that a wooden house should (eventually) be surrounded by a fortified perimeter, unless you are on Herbivore Island, where you can build entirely with wood, and don't have to worry about fencing in your tamed dinos.

Stone
-Requires a lot of stone and a moderate amount of wood and thatch
-Can be damaged by almost no dinos (basically only alpha predators and bosses; ie. even a Rex cannot damage stone)
Stone is sufficient for almost all purposes in a singleplayer setting. Build your outermost walls/fence/buildings out of stone and you should be safe. Collecting enough stone for larger construction projects is best done with a tamed dino.

Metal
Metal bases are a thing for PvP and are overkill in almost all singleplayer situations, unless you are using the console to spawn yourself resources.

How to build
-You need to start with a foundation piece. Once you have placed one, other foundations will snap to it. Place walls/windowed walls/ door-frames along the edges of foundations.
-You can use "E" to flip things you are placing and to make sure they are facing the right way. It can be a bit tricky to get things to snap properly.
-You can crouch "C" or zoom to third-person (scroll wheel) to help with placement.
-Attach ceilings to walls to make a second floor, or a roof.
-To move between floors, you will need to get a ladder, or use the sloped pieces to build a ramp.
They have also added a staircase, which I have not used.
-Placing windows and doors in windowed walls / door-frames will allow you to close these.
-If you build an enclosed space, you should be able to get an insulation bonus against both hot and cold when you are inside (indicated by a house icon on the HUD)
-They have added the ability to pick up things at no cost, shortly after placing, so take advantage of this if you misplace something.
-If you disabled structure placement collision in the server settings (as I suggest) then you will be able to place things intersecting with other things and/or the ground.

As a general word of caution, construction (even wood structures) requires a lot of resources if you are collecting by hand. Make your first house small. Enough space for a bed, some storage closets, a campfire, a workbench, and a furnace is all you need at first. Once you have tamed dinosaurs that are good at collecting wood/stone, you can complete your grander visions.
It's okay if it just looks like a block at first :)
Clunky, but functional

sloped pieces make for great ramps

all your iron age essentials

Houseboats!
Yes, you can build on rafts.
It can be a simple as a single foundation with a bed, storage box and campfire, or as complex as a miniature house, with a full set of crafting stations. You can use it to explore the island/oceans (more on that later), and to bring home resources from faraway places. It can also serve as a mobile base while you scout out a more permanent place to settle.
If you want to build a proper houseboat, you'll want to use a foundation lowering trick, such as the one described here: https://www.youtube.com/watch?v=yQ4btBQunOs
Make sure to keep the rudder itself free. I suggest using sloped pieces at the edge of rafts to make it easier to get in and out in the water.

simple wooden raft equipped with a bed, workbench, storage closet, preserving bin, campfire, and an enclosed taming area

a sturdy stone houseboat (note the use of wooden sloped pieces to help get out of the water, and the semi-enclosed steering area, which is sufficient to grant the home insulation buff while at the rudder)
12) First Tames
It's time for the part you've all been waiting for ... taming your very own dinosaurs!

Each dinosaur has a specific way it needs to be tamed.
The are two main categories of taming knockout taming and passive taming, along with a few special cases.
It's always worth checking the wiki if you intend to tame something exotic.
Also, you can use taming calculators to work out exactly how many supplies you will need for a specific level of dinosaur. I use this one https://www.dododex.com/
How do you see a dino's level from a safe distance? With the craft-able spyglass! You'll need to get crystal from a mountaintop, or from the entrance to the cave on the south east beach (recommended).

Knockout taming
Is the most common way to tame things.

Step 1 - increase the torpidity of your target to knock it unconscious
This requires using a weapon that deals torpidity, rather than just damage.
Such weapons include:
-Fists
-Wooden Club
-Slingshot
-Bow (Tranq Arrow)
-Crossbow (Tranq Arrow)
-Longneck Rifle (Tranquilizer Dart)

-Various dino attacks

Yes, you read that correctly, your fists can knock a dino unconscious!
Try it on a dodo and you will see.
Also, you might have inadvertently knocked out a compy or dilo if your spear broke and you were forced to fight with your hands.

Step 2 - place food in the dino's inventory

The unconscious dino will eat food from it's inventory when it gets hungry, and whenever this happens, you gain taming progress. Do not force-feed, it will not give you taming progress!
Using preferred foods will give you faster taming progress and/or more efficient taming.

In general carnivores prefer (from most to least):
-Kibble (which is a topic for another day)
-Raw Mutton (very hard to obtain - ie. only by killing sheep, which are super rare)
-Cooked Lamb Chop (cooked version of Raw Mutton)
Ignore those first 3, and focus on these instead:
-Raw Prime Meat (obtained by killing large dinosaurs; has a very quick spoil time)
-Cooked Prime Meat
-Raw Prime Fish Meat (obtained from large aquatic creatures)
-Raw Meat
-Cooked Prime Fish Meat
-Cooked Meat
-Raw Fish Meat
-Cooked Fish Meat

So in summary, carnivores generally prefer raw over cooked and meat over fish. If multiple items are present, they will eat the most preferred type first, when in the taming process. Save preferred foods for long and important tames.
Raw meat should be easy to obtain, and especially once you have a meat-eating mount, you'll always have some around in their inventory. This is also a good time to mention that food in a dino's inventory gets a longer spoil time (x4 longer) than in your own inventory.

If you happen to get some prime meat, immediately cook it! By that I mean you should build a campfire on the spot (if it's safe). Prime meat only lasts 2 min in your inventory, and only stacks 1. Even if you increased the spoiling time in the sever settings (as I suggest), you are still pressed for time. Storing the raw prime meat in a tamed mount while you wait for a free spot in a campfire will give you a bit more time.


In general, herbivores prefer (from most to least):
-Kibble (which is a topic for another day)
-Advanced Crops (any of Citronal, Longrass, Rockarrot, Savoroot - these can be grown in a medium or large crop plot from their seeds)
-Mejoberry (the purple ones)
-Other colored berries (DO NOT use Narcoberries or Stimberries, ie. the black and white ones)

In summary, you'll want to save up purple berries for taming herbivores, while preferentially eating the other colors yourself for food and water. Advanced crops spoil somewhat rapidly once removed from the crop plot, so are only viable if you are taming close to home.

Step 3 - wait, and force-feed narcotics when necessary

Once you've placed food in the dino's inventory, it's time to wait around until the dino gets hungry and eats. Make sure to stay close by in case you need to defend your tame.
Also, note that in addition to the taming meter, there is a torpidity meter - if that reaches 0, the dinosaur you are attempting to tame will wake up and you will lose all taming progress.
To keep it from waking up, you may need to force feed (ie. "remote use item") narcotics after placing them in the dino's inventory.

The following items can be used, in order from most to least effective:
-Bio Toxin (obtained from jellyfish)
-Narcotic (made by combining narcoberries and spoiled meat in a mortar and pestle)
-Narcoberry

If you happen to have some bio toxin, use that. Otherwise, your go-to will be narcotics. Unlike the other two items on the list, narcotics do not spoil, so turn your narcoberries and spoiled meat into narcotics whenever possible! if you run out of narcotics, or don't have any along, you grab some narcoberries from nearby bushes and use those.
How many narcotics you will need depends on the dinosaur in question. Some have a very high torpor depletion rate, and will need to be constantly fed narcotics, while other might not need any narcotics at all, because their torpidity depletes so slowly, or because they tame so quickly. If you are taming something exotic, it makes sense to check the wiki and/or a taming calculator, to make sure you actually have enough narcotics along to complete the tame.

Let's practice

Let's start as easy as possible. Go find yourself a Dodo and punch it a few times, or make a wooden club and use that. Once it keels over, stop hitting it. Put some berries in it's inventory.
If you've increased the taming multiplier in the server settings (as I suggested), you will have yourself a tamed dodo in less than a minute. Quick, think of a name!
Now what to do with your tamed Dodo? Probably eat it, to be honest. It's not useful for anything. I guess if you get a female, it will lay eggs for you, but that's true of any reptile (Birds are reptiles, by the way!).
Which is a good thing to point out: if given the choice, tame females, because then you will get free eggs!
I guess I have a Dodo now

Now let's try something a bit harder. Look for an isolated Dilophosaur, ideally a low-level one. Although it will be hard to check the level if you don't have a spyglass yet. Whack it in the head (they have a headshot multiplier), until it drops to the ground.
Now you'll need some raw meat. If you don't have any, get some, or use cooked meat.
You probably won't even need any narcoberries, since they tame quite quickly too.
There you go, you now have a tamed Dilo! Put some raw meat in it's inventory for it to eat when it gets hungry. It will follow you around and help you in combat. It is too small to ride, but it will still make nice companion. You can practice all the tame settings and whistles and such with it (ie. pressing 'T' will make it follow you).
Don't get too attached though - it might die to a larger predator at some point, hopefully allowing you to escape in the process.


12.1) First tames (cont.)
Passive Taming
Some dinosaurs cannot be tamed by knocking them out. These will require passive taming, or they might have a unique taming method (check the wiki!)


The standard passive taming method is quite simple. Walk up behind the dino you want to tame and you will get a prompt telling you to put a taming food in your last hotbar slot. If you have an acceptable food type in that slot, you can can walk up behind it and feed it. Note that some dinos don't like being touched, and some are even more skittish, and will run if they see you, so this might require some skill and/or camo armor. Once fed, the taming progress will go up. You then need to wait until it gets hungry again, before it will accept more food. Repeat until the taming bar is full.

To practice, find a Lystrosaurus waddling around. Put some purple berries in your right most hotbar slot. Walk up and feed it. It's not skittish, so no need to worry about scaring it. Repeat until you have tamed it.
What to do with your tamed Lystrosaurus?
It's incredibly cute and you can pet it, which increases the experience gain of all other nearby tamed dinosaurs, so you could bring it to your home and keep it safe and pet it whenever you walk by.


Taming something you can ride
This is what you've been waiting for. Taming a mount will be a bit more tricky. It will be helpful to have narcotics and tranq arrows (which we haven't discussed in engrams yet - but they are easily made by combining narcotics with stone arrows), although a club or slingshot will work too, with enough hits.
Here are some early mounts to try taming (in order of saddle unlock level):

Parasaur (lvl 9)
Suggested Equipment:
-bolas
-club or a few tranq arrows
-mejoberries
-a few narcoberries or narcotics
Taming Strategy:
When attacked, the Parasaur lets out a warning cry and then proceeds to run away. If you are taming a low-level Parasaur, you can headshot it with a tranq arrow, and do so again while it does the call and that should be enough to knock it out.
The safer approach is to throw a bola at it first. That gives you 30 seconds to knock it out, which is plenty of time with arrows. If you are using a club, and the Parasaur is higher-leveled, you'll need a lot of hits (go for the head!), so it would be prudent to have a backup bola ready.
Once unconscious, place the mejoberries in it's inventory and force feed narcotics if the unconscious meter is getting too low.
Utility:
To be perfectly honest, a Parasaur is not particularly useful. Compared to other herbivores, it is poor in combat, and its ability to gather berries is pitiful. I decided to list it anyway, because of the super low level requirement to craft a saddle, and because of the relative ease of taming.
It does have decent speed and stamina, so you can use it to get around more quickly.
It can also be set warn when there are threats nearby. I have not used this ability, but you should probably try it out!

Triceratops (lvl 16)
Suggested Equipment:
-tranq arrows
-mejoberries
-narcoberries or narcotics
-a rock to stand on
Taming Strategy:
The Trike is not nearly as easy to tame as a Parasaur. If attacked, it will fight back, attempting to headbutt you (beware of the knock-back). Also note that other Trikes will come to help if one is attacked. The difficulty comes from the fact that the head takes reduced damage (only x0.15), and the head will be what is facing you. If you have a teammate, then one person can distract the Trike, while the other fires at it's body. But if you are alone, it's not so easy. My suggestion is to find a suitable boulder to shoot from, so that you can't be hit. Alternatively, try get it stuck in trees or other terrain. Try aiming for the body, if at all possible, but often the head will be all you can hit, so prepare a generous amount of arrows. If the torpor is getting sufficiently high, the Trike may try to run for it. That is your chance to sprint after it and finish the task.
Utility:
The Trike is a useful early mount in multiple ways.
Gathering berries and thatch - The Trike is excellent at gathering berries with it's large AoE attack. In a matter of seconds it can gather enough berries to keep you fed for days. It's charge attack apparently has been given the ability to gather large amounts of thatch from trees, so use that if you need thatch.
Combat - The Trike can deal with most early predators easily. No more do you need to fear Raptors or a Carnotaurus. You can pick fights with a surprising range of predators. Just don't let anything get behind you!
Transportation - It has a decent weight capacity, meaning that you can use it on early expeditions to gather resources or explore.

Raptor (lvl 18)
Suggested Equipment:
-tranq arrows
-raw meat
-narcoberries or narcotics
-a rock to stand on
-a spyglass
Taming Strategy:
Raptors highly aggressive and quite fast. They will pounce you, incapacitating you.
So keep a safe distance and scope out the raptor you want to tame with your spyglass. A higher lvl Raptor comes with higher base stats and a higher eventual level cap, so it is worth picking a higher leveled one. Once you spot one, find a nearby boulder to climb on, and test to make sure you can get on quickly. Now go grab the Raptor's attention and then sprint to your boulder. The Raptor will mercilessly try to get you. This should allow you to easily fire at it's head, which has a large headshot multiplier. At this point it's actually quite easy to knock out the raptor, because they have very low torpor (and low health - so be careful not to kill them). It's quite doable to knock out a whole pack of raptors in quick succession to tame the whole group at the same time. Bolas are also useable on raptors, but I prefer the boulder strategy, because I would probably miss my bola throw during the panic moment when being charged at.
Utility:
Travel - Raptors are fast. You can run around the island, chase down prey and run away from dangers. Might want to invest some points into improving stamina though.
Combat - Raptors are glass cannons, they can quickly and aggressively take down all sorts of prey, but their health and stamina aren't great. Note that raptors benefit from a pack boost, if in a group of 3 or more. The highest lvl one becomes the alpha, and they can vocalize to boost their entire pack for a while. The pack boost is a bit buggy in my experience, but even without it, it's worth getting yourself a pack. This also lets you benefit from the buff provided by having a male and a female close to each-other. Also you can distribute weight among the pack members.
Meat and Hide gathering - The Raptor is decently good at gathering both meat and hide, and is able to chase down creatures that might be able to outrun you if you are on foot.


12.2) Leveling Tamed Dinos
Just like yourself, your tamed dinosaurs will also gain experience and levels. When you initially tame a dinosaur, it gains some levels (up to 50% more than it currently has) depending on how "efficient" the taming process was. This can be slightly increased by using preferred foods when taming, and will be decreased if the dino takes damage while unconscious, or if the taming process takes longer for some reason (ie. needing to get food first).

Example:
>You find a lvl 15 Dilophosaur in the wild and decide to tame it.
>You have the sever settings set to give a taming speed multiplyer of x3 (as I suggest).
>You tame the Dilo with raw meat. The taming efficiency % will slowly decline from 100% and the tame should be done at 92% efficiency.
>That gives the Dilo +6 levels immediately upon taming completion for a base level of 21.
>You have a lvl 21 tamed Dilo.
>Tamed Dinos can gain 73 levels. So you Dilo could eventually reach 21+73 = lvl 94

If we repeat the same example with a lvl 34 wild Dilophosaur, it goes like this:
>You tame the Dilo with raw meat. The taming efficiency % will slowly decline from 100% and the tame should be done at 87.5% efficiency (because higher level tames take more time).
>That gives the Dilo +14 levels immediately upon taming completion for a base level of 48.
>Tamed Dinos can gain 73 levels. So you Dilo could eventually reach 48+73 = lvl 121

This is why it makes sense to tame higher level dinos when possible.
They start with higher stats and max out at a higher level too.

Note that if you've kept the difficulty at 0.2 (as is the default for singleplayer), lvl 30-something is the highest you will encounter in the wild (except for special locations like some of the caves - where the creatures are untameable)

Let's say you have the difficulty set to 1.0
>You find a lvl 100 Dilophosaur in the wild and decide to tame it.
>You tame the Dilo with raw meat. The taming efficiency % will slowly decline from 100% and the tame should be done at 79.6% efficiency (because higher level tames take more time).
>That gives the Dilo +39 levels immediately upon taming completion for a base level of 139.
>Tamed Dinos can gain 73 levels. So you Dilo could eventually reach 139+73 = lvl 212

Choosing Attributes for Tames
So how to invest those points that your tamed dinos can gain?


Before we start, it's worth noting that different species gain different amounts of a stat per point invested. Check the wiki if you want to see what it would be for a specific dino.
Gains are percentages, not absolute values. The percentage is a percent of the base stats it had after taming, which is another argument for always taming the highest level creatures you can find.

Health
Adds more hitpoints. Useful for any tame that might end up in combat. So it's always a good choice to invest points here.

Stamina
Un-ridden tamed creatures normally don't lose stamina - this means that any tame you aren't riding can sprint/swim/attack continuously. Furthermore, this means that you should ONLY invest in stamina for creatures you intend to ride. Especially important for fliers, since they must land to regenerate stamina, so more stamina means less breaks and more flying.
Regenerating stamina drains food, so your dinos will often eat while regenerating stamina.

Oxygen
Fully aquatic creatures don't have an oxygen meter.
For any other creatures this affects their swim speed and how long they can remain submerged. Only useful for amphibious creatures.

Food
Just as useless as it is for players. Don't waste any points here!

Weight
Increases the carrying capacity. Important for smaller mounts (since they have to carry you + your inventory), as well as tames used for resource gathering and transportation. A fully encumbered dino will not move at all. Note that dinos automatically pick up things (resources, loot) when attacking a resource node or a corpse. So you may need to periodically empty the junk out of their inventory.

Melee Damage
Increases attack damage and also the amount of resources gained per attack. Useful for combat mounts and for any resource-gathering tames.

Movement Speed
Fliers cannot have have their movement speed increased!
For all other dinos, you can level this to increase their base speed. weigh this against the other stats and decide what you need most.

Torpidity
Cannot have points invested into it, but you can check how easily your dino might get knocked out. You can wake up your unconscious tame by force-feeding it stimulants or stimberries.

In Summary

Mounts - level stamina, movement speed, weight
Aerial Mounts - level stamina, weight
Amphibious mounts - maybe level oxygen instead of movement speed
Combat - level health, melee damage
Combat Mounts - distribute points among weight, health, melee damage, stamina and movement speed, as needed. Maybe check the wiki to see where it has good stat growth
Gatherers - level melee damage, weight
Backpacks - level weight, maybe health
Companions/Pets - level health

When in doubt, level health. Your pet Dodo doesn't need anything else.
13) Engrams lvl 21-32
Time to explore those Iron Age Engrams!
Note that items requiring metal must be crafted at a smithy, NOT in your own inventory!


Level 21
+Painting Canvas – For making paintings as decoration
+++Tranq Arrow – Incredibly useful. I've already mentioned this in the taming section. Made by combining narcotics with stone arrows in your inventory. For use in bows and crossbows. Used for knockout taming, well into the midgame. Picking up the arrow from the ground returns a normal stone arrow.
++Scissors – Used to cut your own hair (ie. change your hairstyle). Gives you human hair, which you can use instead of pelts for crafting. Can also be used to shear sheep. Not important to unlock quickly.
+Wall Torch – Like a torch, but can be mounted on walls to provide light and heat.

Level 22
+Parachute – Single use. Can be used to save your life if you accidentally dismount a flier high in mid air.
+Tophy Wall-Mount – Can be used to mount a trophy. But trophies require beating bosses or alpha predators, so you won't have any, and don't need this item.
+Tripwire Alarm Trap – Only useful for PvP.

Level 23
++Fur Armor – Provides very good protection against the cold, but not underwater. Essential for the snow biome. Requires fur to craft. Use your own hair if don't have fur. Fur is dropped by mammals, especially those in the the snow biome. Unlock this once you want to explore the snow biome. Fur armor is heavy, so make sure you level your own weight.

Level 24
++Stone Building Basics – Can only be damaged by bosses, alpha predators, and the like. Unlock these once you want to build a stone house. Note that you need a LOT of stone for construction.
+Smoke Grenade – For PvP.


Level 25
++Further Stone Structures – Unlock as needed for construction.
+Artifact Pedastal – Used to display Artifacts, which you will eventually be able to loot from caves.
+Magnifying Glass – Shows potential loot from plants, hitpoints of structures, health and torpor of creatures. Theoretically useful for seeing how close you are to knocking out a creature and if you are in danger of killing it. Practically, if the creature is fighting back, you don't have time to be using the magnifying glass.
+++Pike – Metal version of the spear. Doesn't break randomly in combat and cannot be thrown. Pretty heavy at a weight of 10.
+++Crossbow – Metal version of the bow. Incredibly useful, so craft one as soon as possible. Always fires fully charged shots. Can be fired underwater, unlike most other ranged weapons.

Level 26
++Medium Crop Plot – Bigger version of the small crop plot. Can be used to grow Citronal, Longrass, Rockarrot, Savoroot, or just berries. If placed outside, rainwater is enough to provide irrigation. You will find them in loot beacons all the time, so don't rush to unlock this.
++Further Stone Structures – Unlock as needed for construction.
++Water Jar – Improved version of the waterskin. Carries more water and doesn't leak, so it's actually worth using.

Level 27
++Further Stone Structures – Unlock as needed for construction.

Level 28
++Further Stone Structures – Unlock as needed for construction.
+Handcuffs – Serves no purpose in singleplayer.
+Bear Trap – Immobilizes small creatures for up to 800 seconds. You can trigger your own trap, so be careful!
+Stone Fireplace – Provides light and warmth, but cannot be used for cooking. Comes with a long chimney.


Level 29
+Metal Spike Wall – Upgraded version of the wooden spike wall. Can only be damaged by creatures that can damage stone.
+Tripwire Narcotic Trap – You need two of them to set up a trip wire. Note that creatures knocked out by one are not available for taming, so it's not very useful outside of PvP.
+Balista Turret – A turret that you can mount to fire spear bolts and chain bolas. You would have to build it on a tamed creature with a platform saddle, in order to bring it somewhere useful. Surely not worth unlocking, at least until you are able to craft the chain bola too.
+Spear Bolt – Ammunition for the Balista Turret and the Harpoon Launcher. Requires a lot of metal (14 per bolt), but can be recovered if it doesn't break.

Level 30
+++Sword – Higher damage and attack rate than the pike, but lower range and no knockback. Pick either the sword the pike as your melee weapon, depending on personal preference. I use a sword. Also, it's excellent at harvesting organic polymer from penguins.
++Metal Sickle – Can be used to harvest large amounts of fiber from bushes. Also good for obtaining raw prime fish meat.
++Further Stone Structures – Unlock as needed for construction.

Level 31
+Large Bear Trap – Large version of the small bear trap. ONLY works on larger animals. Can be useful in certain taming situations.
++Further Stone Structures – Unlock as needed for construction.
+Catapult Turret – A turret that you can mount to fire boulders. Has little purpose in singleplayer.

Level 32
+Lance – Used when mounted to knock other players off their mounts. No damage. Not useful in singleplayer.
+Toilet – Can be used to defecate. Must be connected to water pipes. Converts feces into fertilizer when flushed and grants an experience buff for 2 min.
13.1) Engrams lvl 33-44

Level 33
+Wooden Tree Platform – Can be used to build a base in the trees of the redwood biome.
++Ghillie Armor – Provides excellent protection against heat. Provides camouflage, so wild dinos have 50% reduced range in detecting you. Requires organic polymer, which can be difficult to obtain, and which spoils over time.

Level 34
+Simple Pistol – Can fire 6 bullets before needing to be reloaded. I suggest sticking to the crossbow, instead of wasting metal on bullets.
+Simple Bullet – Fired by the simple pistol
+Cannon – For PvP. Limited usefulness in singleplayer and very costly to craft.
+Cannon Ball – Fired by the cannon. Requires way too much metal.

Level 35
+Scope Attachment – Provides zoom on firearms
++Longneck Rifle – Single shot rifle. High damage per shot, but long reload. Cannot be fired underwater. Can fire tranquilizer darts (once you unlock those), but cannot be equipped with a scope when firing them. I wouldn't get one until you can also make tranquilizer darts.
+Simple Rifle Ammo – Can be fired by the Longneck Rifle.

Level 36
+Tree Sap Tap – Can be attached to redwood trees to obtain sap. Sap isn't needed for many things though.
+Beer Barrel – Used to make beer from thatch and berries. Beer is only useful in PvP, or to tame the Chalicotherium.
+Large Crop Plot – Can be used to grow Plant Species X, which is mainly used as a turret for PvP. Can also grow any other seeds, but you can use smaller crop plots for those too.


Level 37
++Chitin Armor – Intermediate armor that provides good protection from attacks but only modest protection from cold. Crafted using chitin, which you can obtain from all manner of insects and crustaceans.

Level 38
+Grenade – For PvP.
+Re-Fertilizer – Used to re-grow trees and bushes. According to the wiki, Re-Fertilizer currently doesn't seem to work in Single Player. (tested 1/20//2020) so yeah...

Level 39
+Metal Shield – Stronger than the wooden shield. Very heavy (45). Probably more useful in PvP.
+Shotgun – Can hit multiple enemies at close range. Might be useful for combat in caves.
+Simple Shotgun Ammo – Fired by the shotgun

Level 40
+Poison Grenade – Only works on humans, so not useful for singleplayer.
+Metal Irrigation Structures – Since stone pipes are treated as wood in terms of durability, it does make sense to build irrigation structures out of metal, if they are in a vulnerable area.


Level 41
+Silencer Attachment – Still heard by creatures, so not useful outside of PvP.
+Metal Water Reservoir – Improved version of the water reservoir for your irrigation needs.

Level 42
+Greenhouse Structures – Greenhouses are fragile, but boost crop growth rate. Your greenhouse should be at least 3x3 to get the full 300% growth rate boost. That being said, crops grow at an acceptable rate even without a greenhouse.

Level 43
+Further Greenhouse Structures – Unlock if you build a greenhouse.
+Harpoon Launcher – Weapon designed for underwater use. Can fire spear bolts and tranq spear bolts. I use the crossbow instead.

Level 44
+Improvised Explosive Device – For PvP.
+Further Greenhouse Structures – Unlock if you build a greenhouse.


That has brought us pretty far. The next section on Engrams will advance us to the industrial and modern area with metal structures and electronics.
At this point I should say that despite being highly leveled, I live primitively in ARK. For example, I have never electrified by base, and basically don't use guns. So I will have less personal advice pertaining to the later Engrams. I will still try to provide helpful insights though.

+++++UNFINISHED BELOW HERE+++++
14) Utility Tames
You will want to tame dinosaurs to help you with various tasks. Some are able to efficiently gather large amounts of certain resources. Others make for good terrestrial/aquatic/airborne mounts. In this section I will cover a couple choices for each. Afterwards, I will offer my taming approach for each of the creatures.

The wiki includes a useful page: https://ark.wiki.gg/wiki/Domestication

Berries
  • Brontosaurus
  • Triceratops
  • Stegosaurus*
  • Most large herbivores
Most large herbivores are really good at gathering berries. I have just listed a few of the basic ones. Any will do to get you more food berries then you could possibly ever need. Personally I keep a Stegosaurus in a large berry patch and just do a few tail swipes from time to time when I need berries. The Stegosaurus now has several gather modes, one of which is for berries.

Raw Meat and Raw Prime Meat
  • Rex
  • Carnotaurus
  • Raptor
  • Most carnivores
  • Metal Pick
Almost any carnivore will do a good job of gathering raw meat. The ones I list here are a few basic ones that I have tamed and can offer taming guides for.
Raw prime meat can be gathered from the corpses of especially large creatures. It is a superior taming food, but spoils very quickly, so should be cooked as soon as possible.

Hide
  • Sabertooth
  • Direwolf
  • Metal Hatchet
  • Most carnivores
Any carnivore will gather an acceptable amount of hide from things they kill. But the mammalian predators do particularly well. You will always be short on hide, so I suggest always butchering corpses with the hatchet rather than the pickaxe.

Wood
  • Castoroides (Giant Beaver)
  • Metal Hatchet
  • Mammoth
  • Stegosaurus*
There are not many creatures that are good at gathering wood. The Beaver is very good at it and has a weight reduction for wood, but is also a very tricky tame. Mammoths also get a weight reduction for wood, but I have not tamed one, so I cannot give you a guide for that. The hatchet is pretty good too. The Stegosaurus has a mode now for gathering wood, so do check that out, since they are much easier to tame than a beaver.

Thatch
  • Brontosaurus
  • Mammoth
  • Triceratops*
  • Stegosaurus*
  • Metal Pick
Thatch is also obtained from wood sources. It is a similar story with thatch, where not many creatures are great at gathering it. The Brontosaurus does well, simply by virtue of it's huge AoE attack. The Triceratops has been given a ram attack that is supposedly good at gathering thatch and the Stegosaurus has a mode for thatch as well. I would also point you in the direction of the Mammoth, although I have yet to tame one. Finally, remember that the metal pickaxe works well too.

Stone
  • Doedicurus
  • Ankylosaurus
  • Metal Hatchet
The Doedicurus is your go-to creature for stone, boasting an impressive 75% weight reduction for stone and an incredible gather rate. The Ankylosaurus also gathers a decent amount of stone, while being able to get flint and metal as well (unlike the Doedicurus). The tool for stone is the hatchet.

Flint
  • Ankylosaurus
  • Metal Pick
Flint is the other resource that you can get from rocks. The Ankylosaurus is good at gathering flint. Otherwise, use your pickaxe.

Metal
  • Ankylosaurus
  • Metal Pick
Metal is only found in specific rocks. Often they are more shiny than normal rocks. The Ankylosaurus has an 85% weight reduction for metal, so you will definitely want to use it for mining. If you don't have one, use your metal (or stone) pickaxe.

Crystal and Obsidian
  • Ankylosaurus
  • Metal Pick
Crystal and obsidian are obtained from special rocks found in caves, on mountain tops and in the snow biome. Crystals are large white protrusions while obsidian is a very dark black rock. The Ankylosaurus is your go-to dino for collecting most minerals, metals and rocks. Otherwise, use your pickaxe.

Fiber
  • Dire Bear
  • Gigantopithecus
  • Metal Sickle
  • Hands
Fiber is obtained from bushes. The Dire Bear and Gigantopithecus are both excellent at gathering fiber, with the Gigantopithecus even being able to gather fiber autonomously. However, I have not tamed these creatures, so I cannot give specific advice. Instead I will point out that the metal sickle is also excellent at gathering fiber, and even your bare hands are quite decent at this task, so there is no immediate need to tame a creature specifically for fiber.

Chitin / Keratin and Pelt
  • Sabertooth
  • Direwolf
  • Metal Hatchet
  • Most carnivores
Chitin is obtained as the secondary product from crustaceans and insects. Keratin is obtained as the secondary product from many creatures with large horns, armor plates, or claws. Both can be used interchangeably in many crafting recipes.
Pelt is obtained as the secondary product from mammals with fur, most of which are found in the snow biome.
Any carnivore will gather an acceptable amount of these secondary resources from things they kill. But the mammalian predators tend to do particularly well.

Oil
  • Dunkleosteus
  • Ankylosaurus
  • Metal Pick
Oil is found on the beaches of the snow biome. Otherwise it is found underwater everywhere in the ocean. For surface mining, and shallow underwater oil, the Ankylosaurus does a very good job. For deep-sea mining the Dunkleosteus is the way to go.

Raw Fish Meat

Raw Prime Fish Meat

Silica Pearls

Organic Polymer

Rare Flowers and Rare Mushrooms


Task-specific-tames for each resource type
(where to find them, supplies, taming strategy, uses)

Flight
transport
mobile smithy

backpack

misc tames for fun/cutenes

multipurpose

standard minimum set of creatures to tame
metal tools
ankylo
any carnivore

12) Exploring the Island
WIP

tips on how to explore
explorer notes
ground/vs air travel
beacons
rafts as mobile base for exploring
13) Exploring the Ocean
WIP
Rafts
Amphibious land creatures
Aquatic tames
Icthy, Megaladon, Basil, plesia, Mosa
SCUBA gear
Underwater resources and resource caves
tips
14) Caves
ocean caves

flyer bypass
15) Bosses
16) Breeding
Scorched Earth (maybe?)
47 Comments
Gears Apr 21, 2022 @ 10:34pm 
This tutorial is amazing. I hope you get around to finishing it one day!
Manu Dec 23, 2020 @ 6:46pm 
Every point in speed gives you +2% and you start at 100%, it's 50 points to get to 200% but I've just read that with 170% a player outruns everything, so 150% would be a neat value, it's 25 points
Zetnus  [author] Dec 20, 2020 @ 2:43pm 
200% speed. that would require 133 skill points I think. XD
Zetnus  [author] Dec 20, 2020 @ 12:50pm 
https://ark.gamepedia.com/Melee_Damage
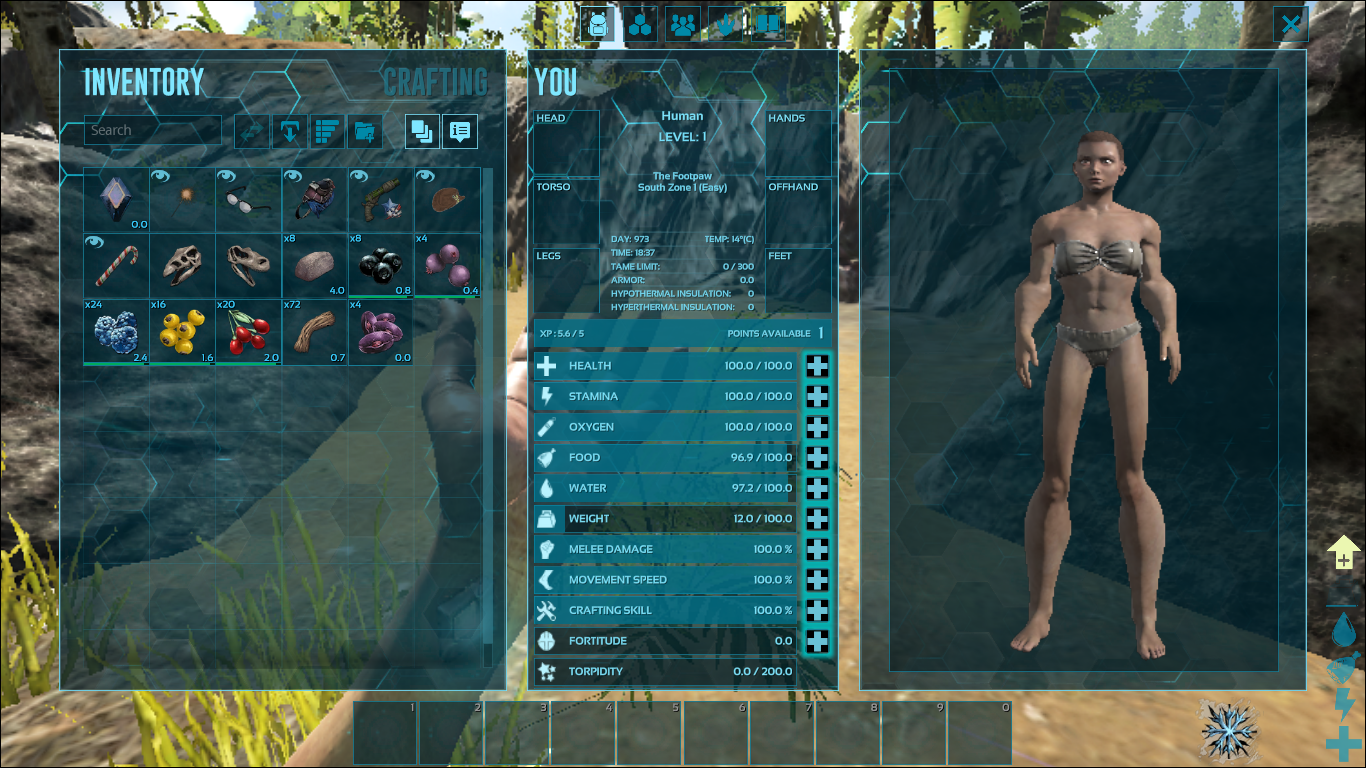
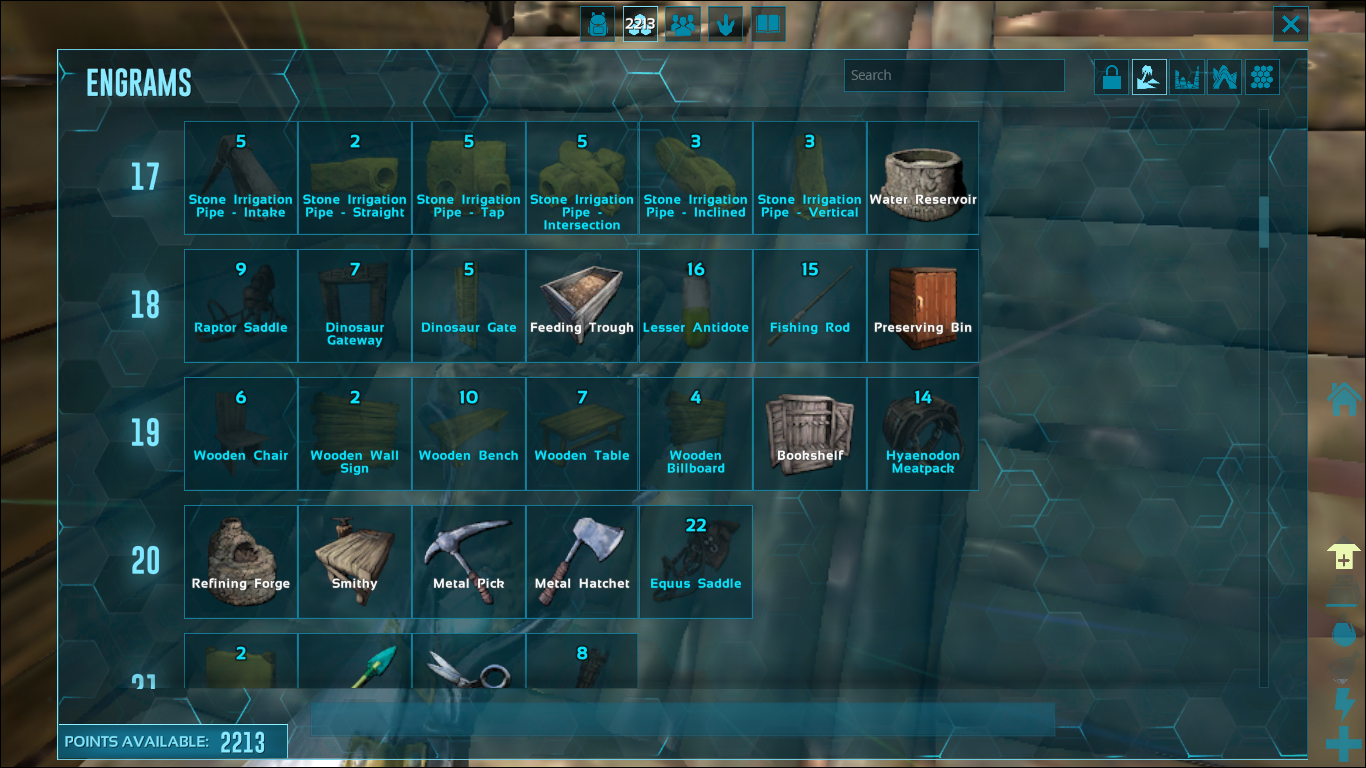
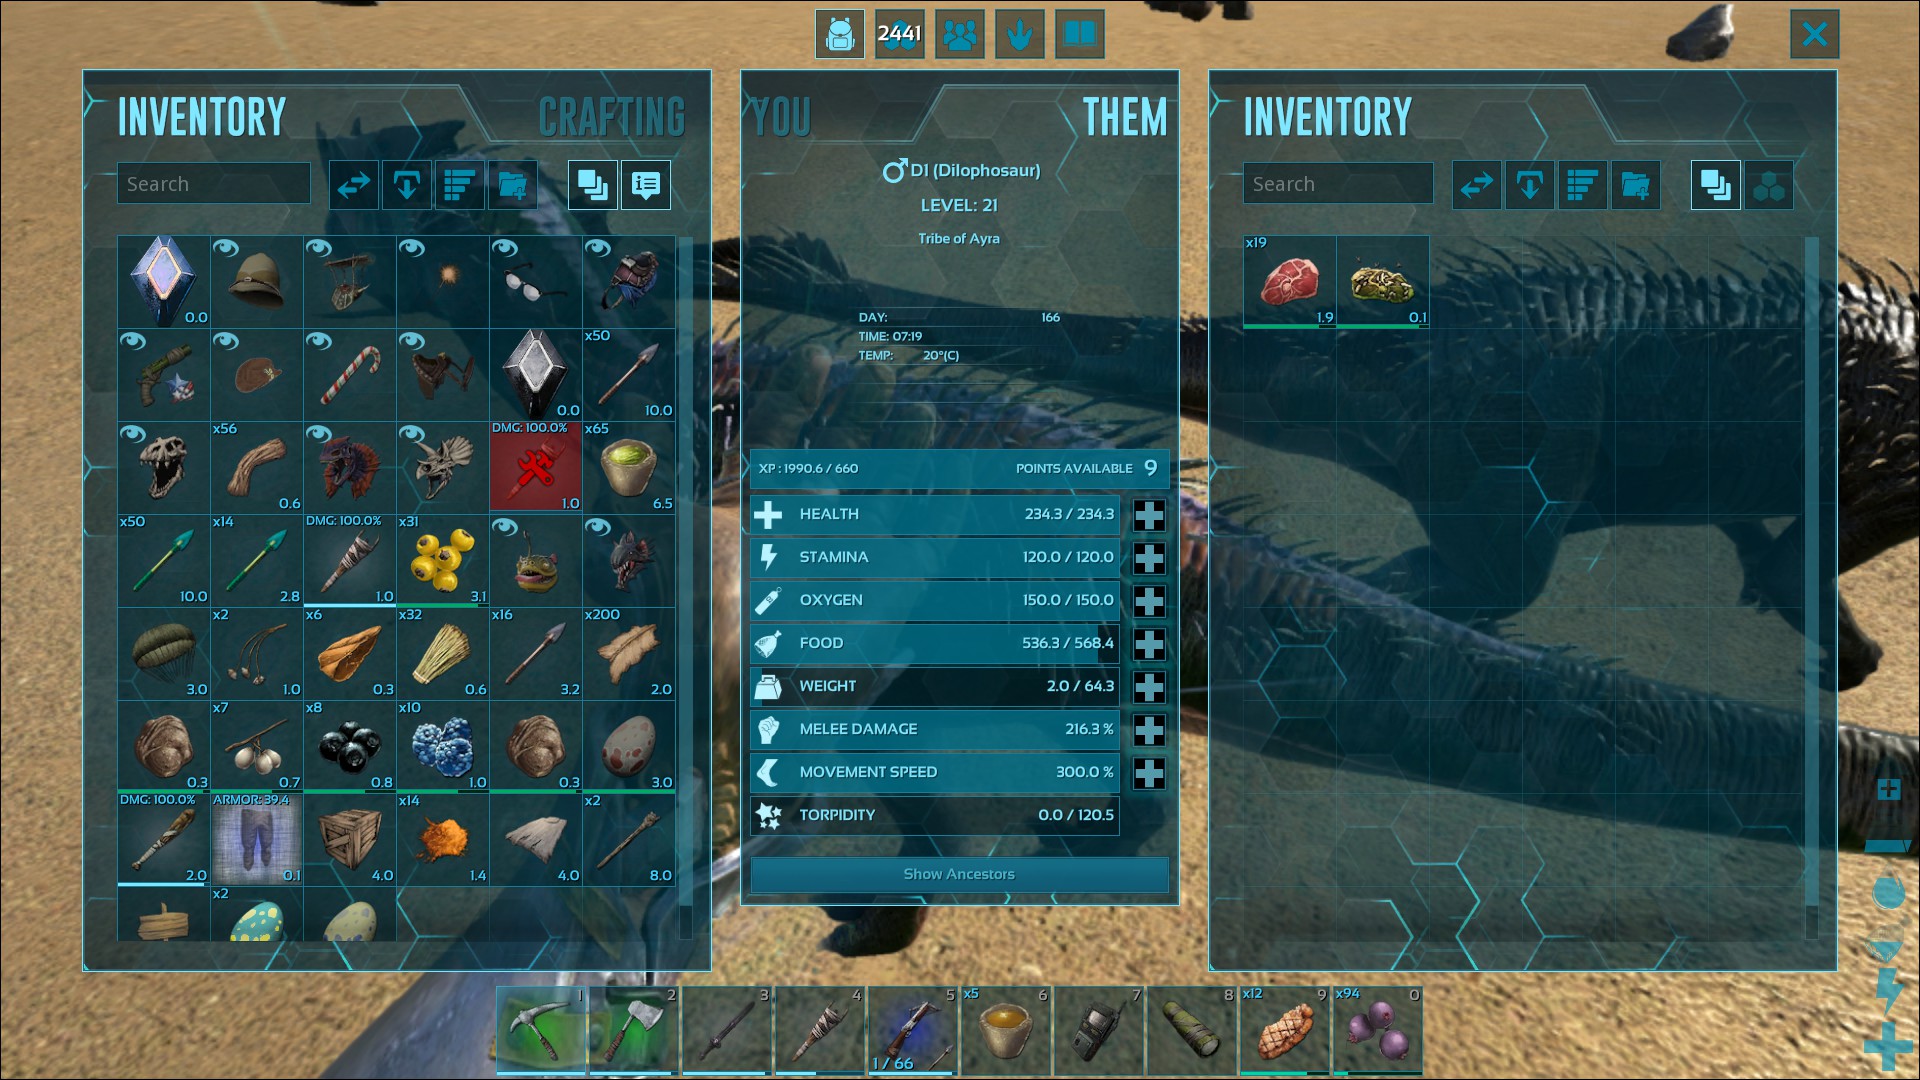
"increasing melee damage affects the damage output of player melee weapons, but not of ranged weapons. It also increases the damage of most dino attacks."
But I did see there was some discussion on this topic.
Manu Dec 20, 2020 @ 11:31am 
They say that with 200% in speed you can outrun a raptor
Manu Dec 20, 2020 @ 11:30am 
The wiki says that the base damage of a weapon is affected by your melee damage, so it should make a difference. I haven't checked, just trusted the wiki information and used it. Just googled about it and some don't recommend it because they think it's a waste but it does affect your attack damage and gather (when you do it yourself) as it also increases the harvest of dinos. It would make sense that it didn't affect ranged as it's melee damage and not damage but I never run any tests to confirm this and there is an ambiguous opinion there.
Again, it's a matter of opinions, but it's good to mention what it does so player can chose their playstyle.
Zetnus  [author] Dec 20, 2020 @ 8:56am 
Thanks, those are some excellent points. I personally only have played any significant amount of time on The Island and on Scorched Earth, and only cleared some of the caves and none of the bosses. So this is only really meant as a getting started guide, since I won't be able to help with the lategame. Personally I enjoyed running around and trying to tame all manner of creatures, and spent most of my time exploring and taming, so those are the things I can say most about.

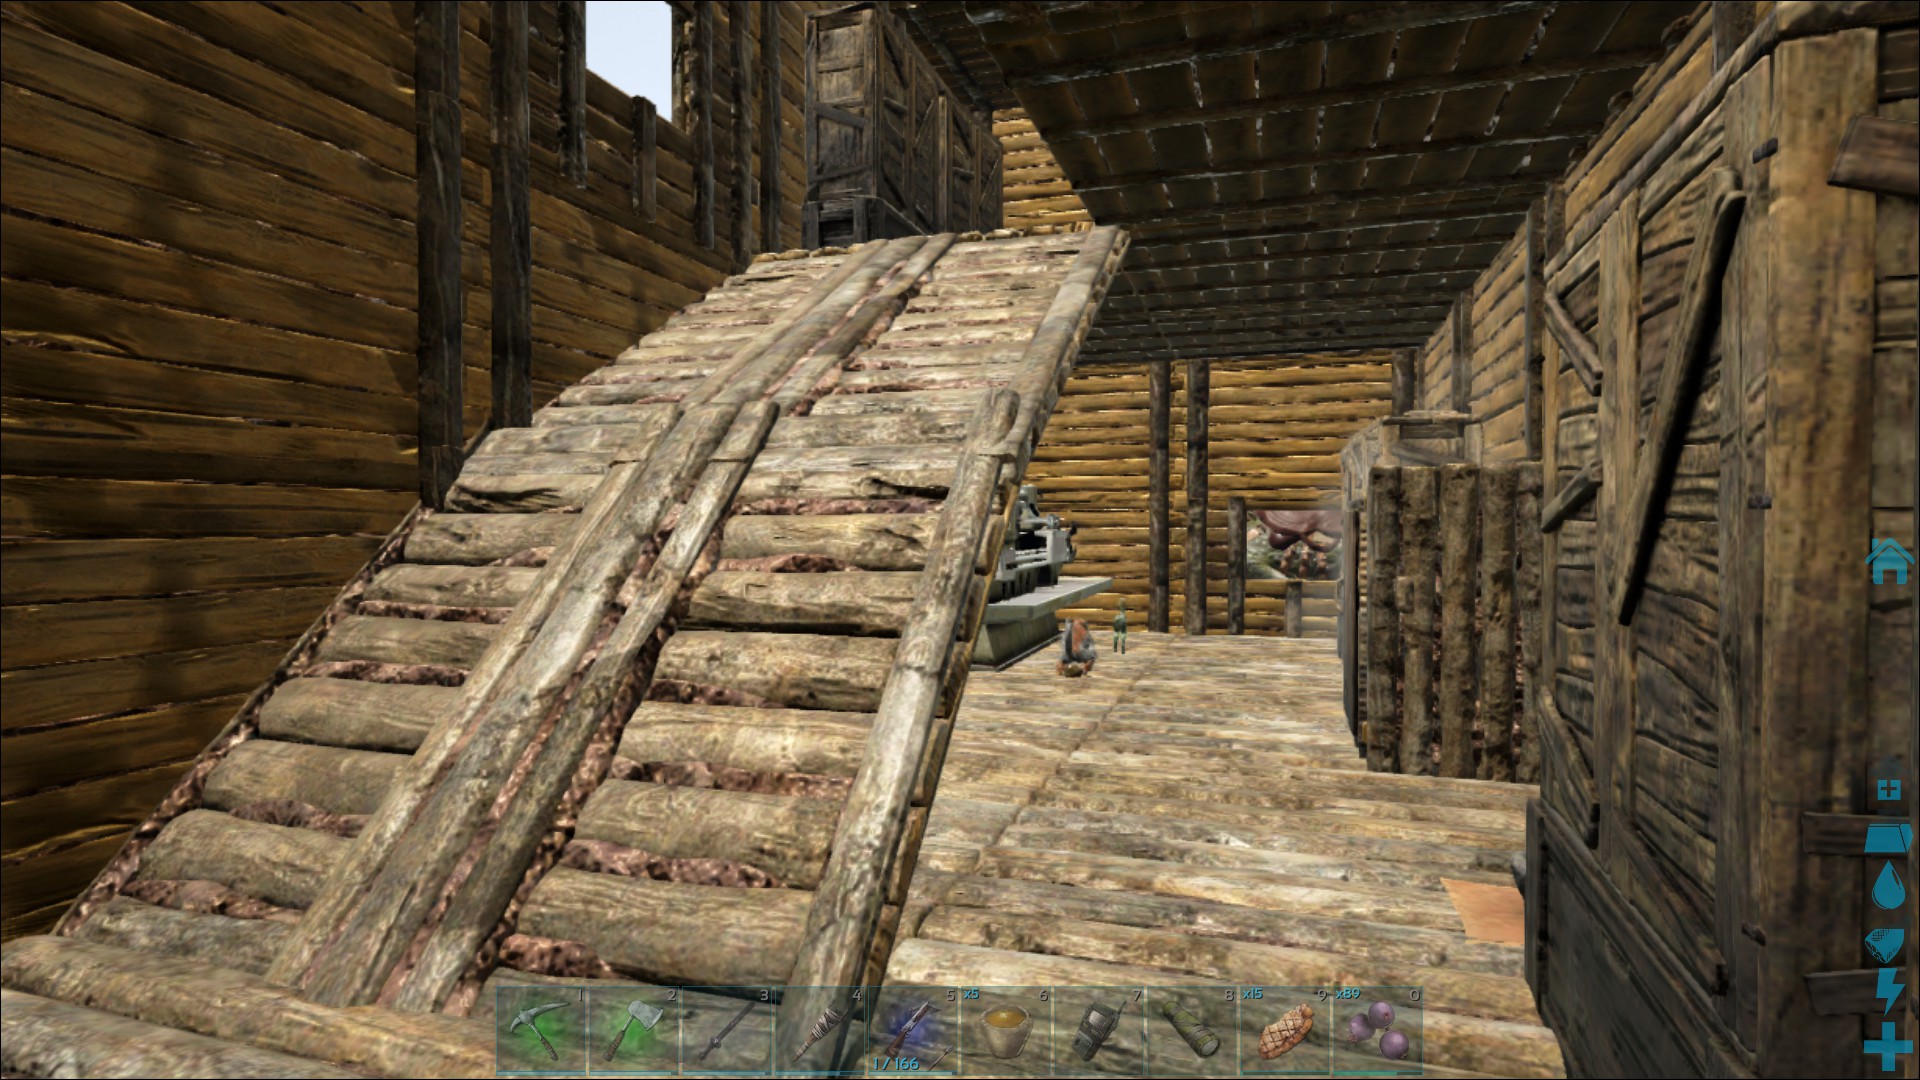
I understand the point with weight and the opportunity cost that comes with leveling weight heavily. You make good points, but personally I benefited a lot from. Probably because I spent a fair amount of timing mining/chopping myself. The trick of building while on a dino is a good tip though, as is the standing while running trick.

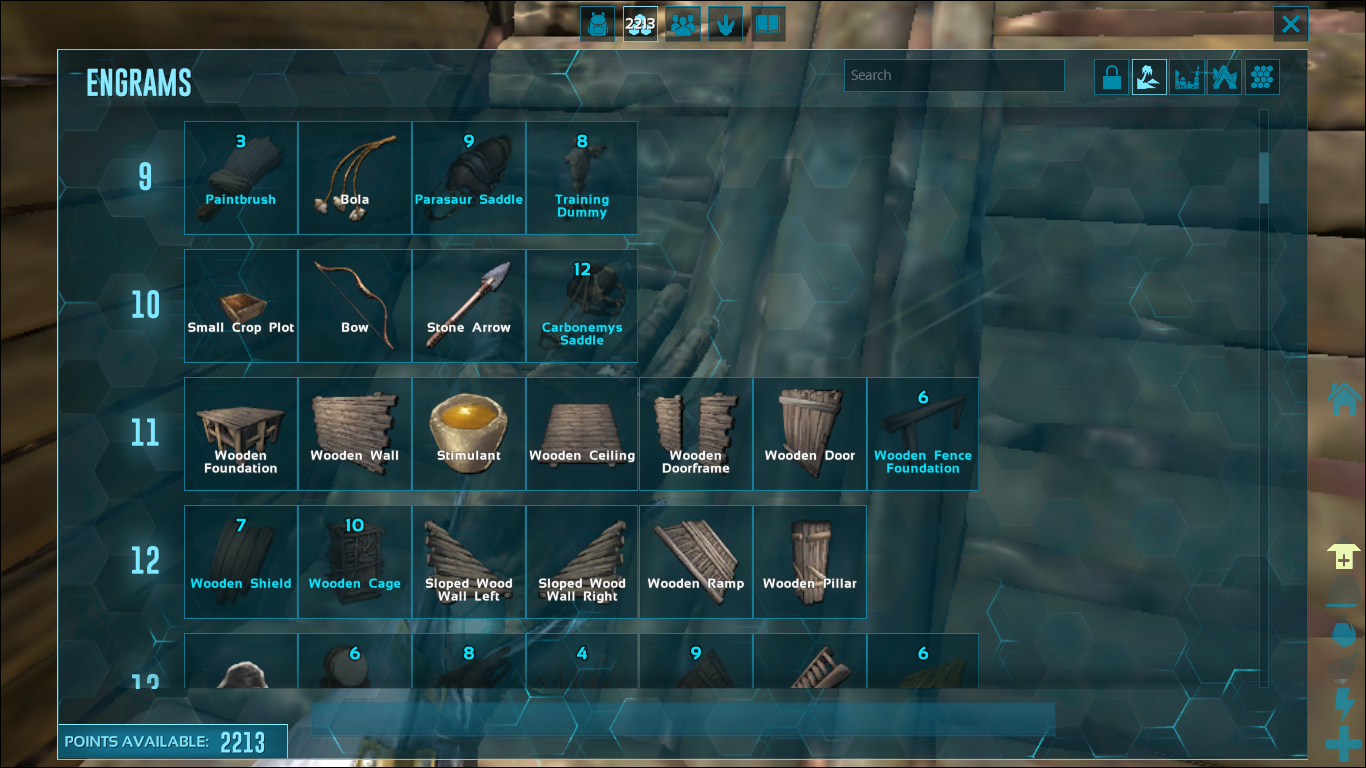
Finally, are you sure that melee damage increases the damage of arrows? Everything I have read suggests that it does not.
Manu Dec 20, 2020 @ 4:26am 
Trikes: they have a nice reach, if you time your attack you will receive no damage and can kill any creature that is being knocked back. Stamina is even more important than damage, as you need to keep attacking.
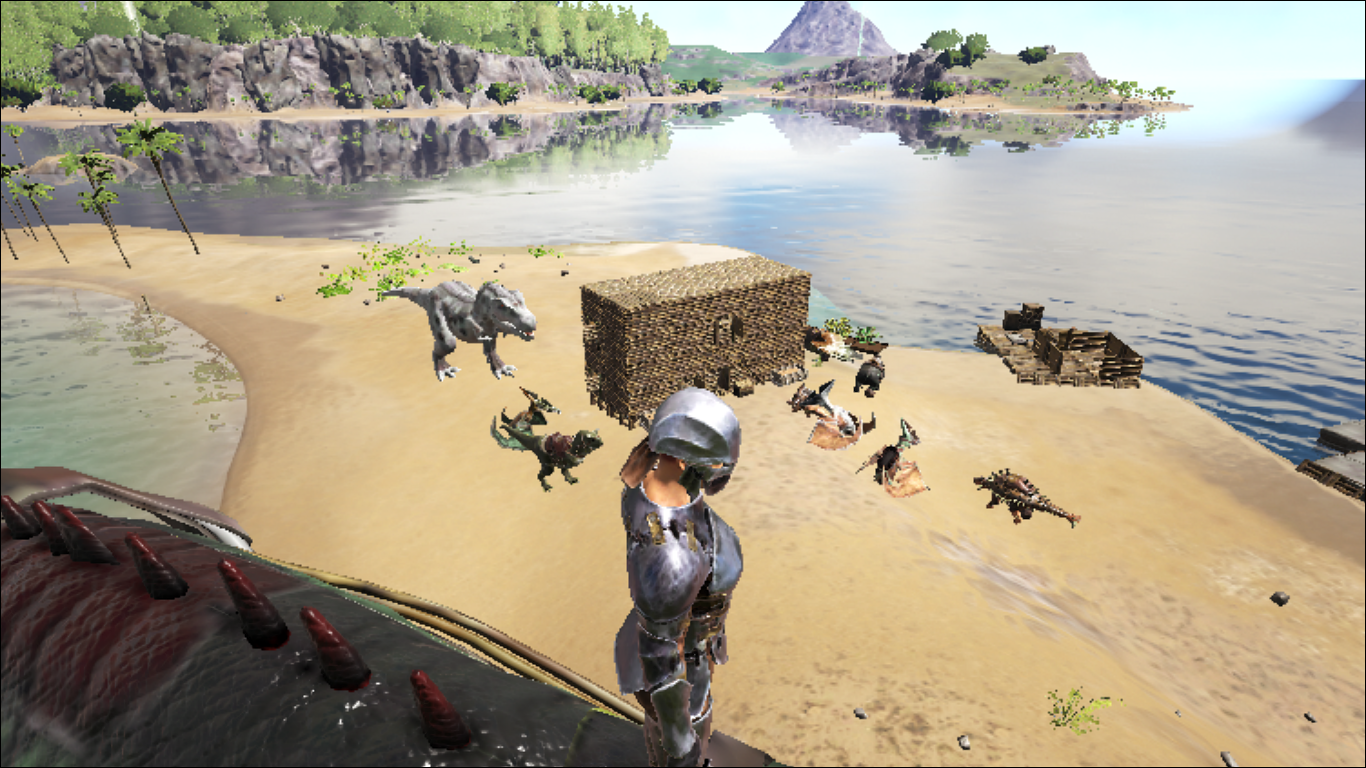
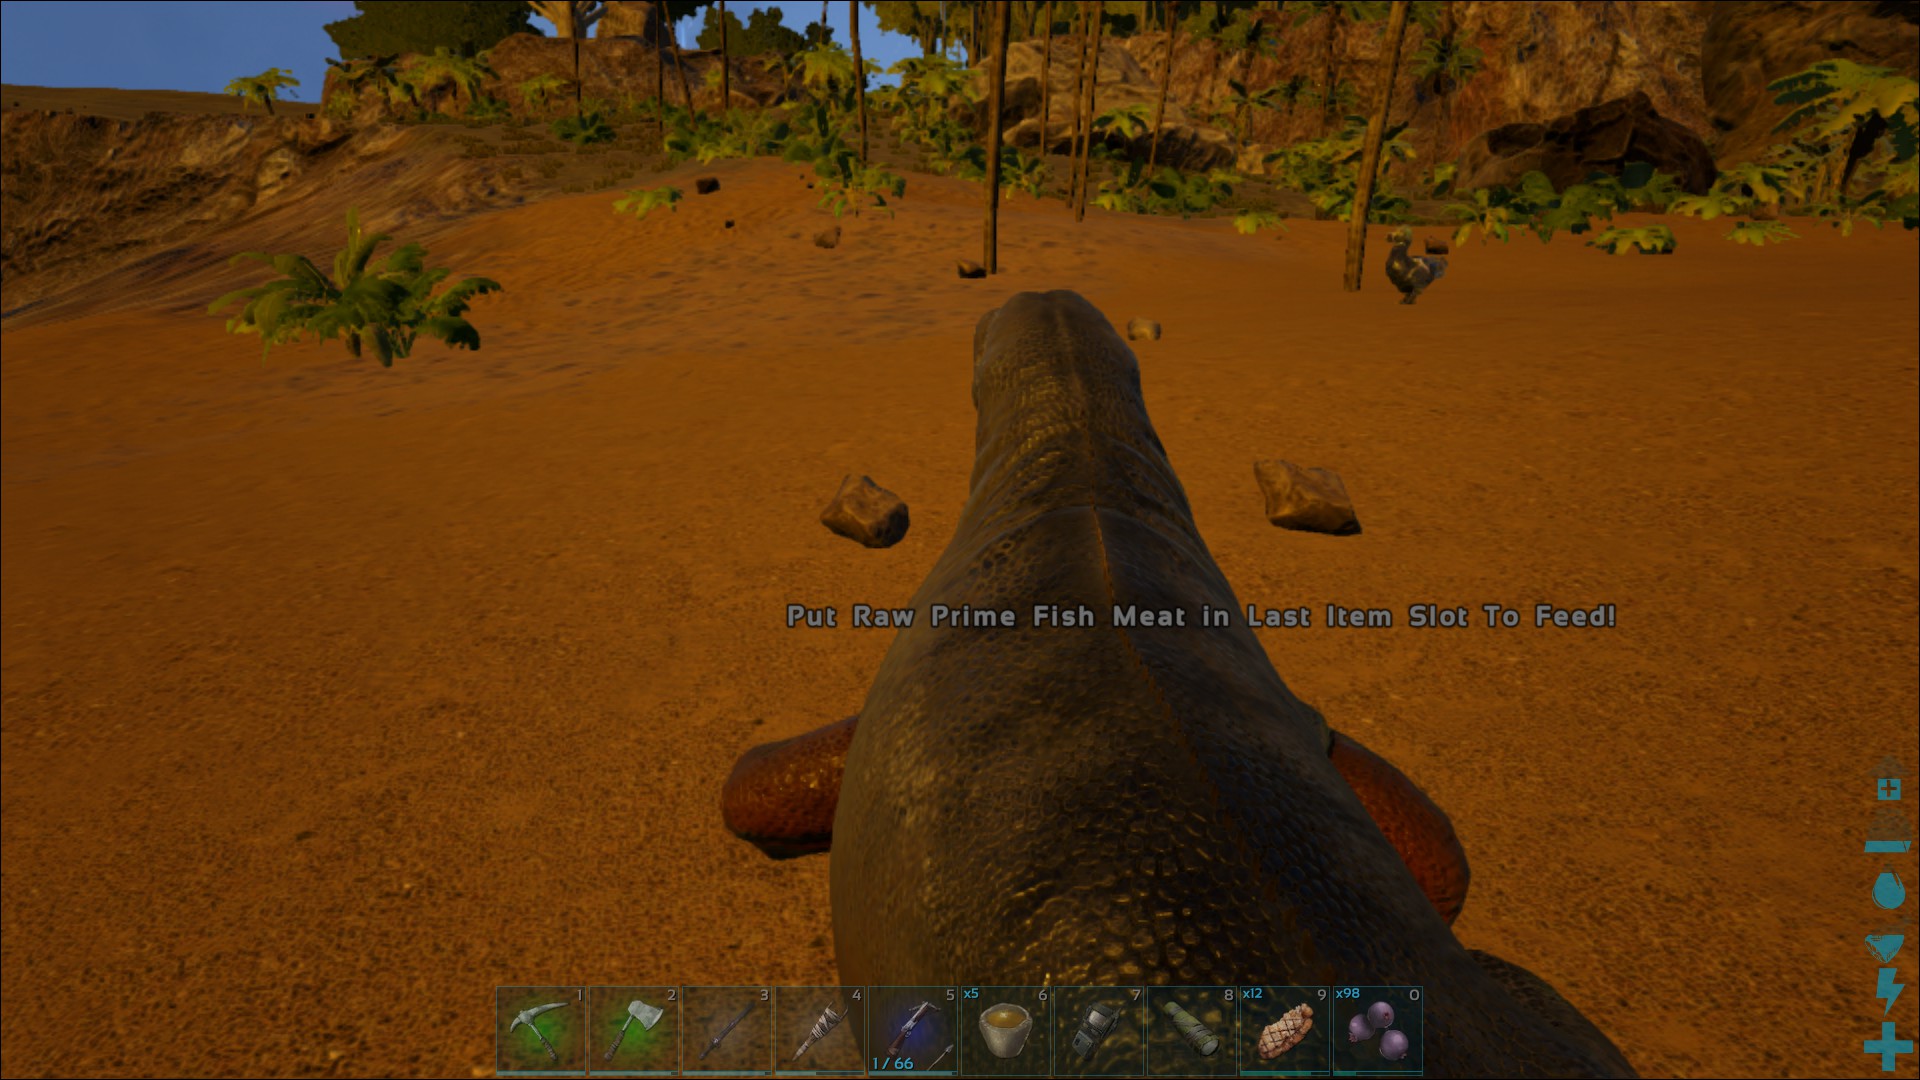
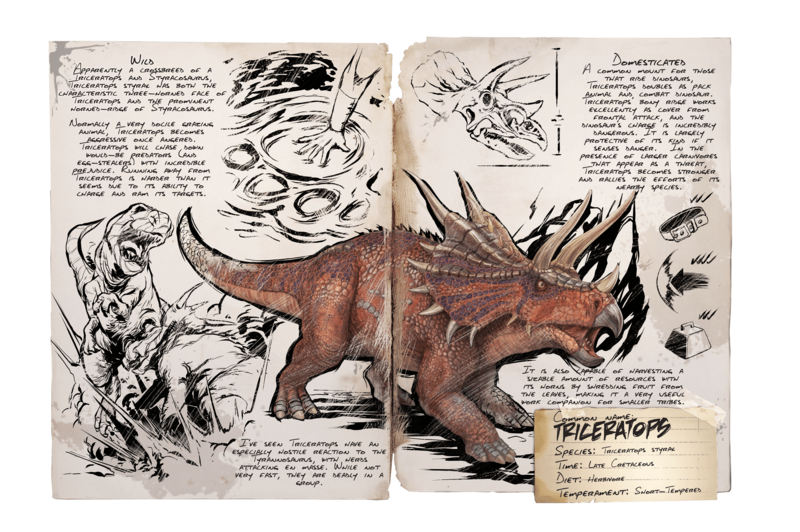
Tip, if you add the trike to a group and press E while riding it, you will end up standing on its back, then you can press the group number and order to move forward. The trike will run consuming no stamina and will let you access your inventory while moving. covering long distances running, if you do this riding it you will consume the stamina and won't be able to use your inventory at the same time. Same criteria can be used with any other creature you can stand on its back.
Manu Dec 20, 2020 @ 4:19am 
I think health, stamina and melee attack are very relevant. You don't care about weight, that's what you want dinos for, you can build from the dino. I use trikes to carry my building items and build while riding. A downside of increasing weight is that you might find yourself carrying more than your ptera or raptor can carry, even low level paras and trikes making it inconvenient in the short term and in the long termn a waste of points you could use to increase fortitude, oxigen or Melee attack, that will increase the damage (and torpor) of trank arrows and darts. Running speed will also change your luck, and health will be important when you enter a cave.
Manu Dec 20, 2020 @ 3:53am 
Wow, great work. I disagree with the level of difficulty factor, as you start taming creatures you will want higher level and at 0.2 anything you get will be like anything else you can find. It might be an interesting idea for a survival (not powergaming) style.
If the guide is for SP only in single player mode (not online server) then it shoulld be a path to defeat the bosses and "win" the island, also explain (if you didn't) the order of the maps.