7 Days to Die

7 Days to Die

54 次評價
Random Map Guide 1.0
由 Serious 發表
Info about the default random map generator to help you building your next favourite map.
3
   
獎勵
加入最愛
已加入最愛
移除最愛
Intro
In this guide i will share some info about the default map generator in 7d2d (A22 or v.1.0) and how to build your next favourite map.

The programs you need are:
• 7d2d
• paint / paintnet / GIMP or any other program like that (for an even better and personalized experience).
I use PaintNet for this

Also check out my other 7D2D guides:
https://steamcommunity.com/sharedfiles/filedetails/?id=3319077641
https://steamcommunity.com/sharedfiles/filedetails/?id=3309358974


Info about the settings
None of this is "official" afaik, but it's multiple times tested.

  • The basic settings like towns, rivers and so on affect each other just minimal.
    It's possible that one river is partially inside a lake, but that's it. Many lakes will move some of the wilderness POI but won't reduce their amount noticable.

  • The lakes slider only affects large lakes as important part of the landscape, not small lakes as part of the outer regions in some towns.

  • The preview quality should be set to default or lower for world sizes of 8192 or more.
    Heavily depending on your system of course.

  • Plains and Hills affect the towns just minimal, there is a difference between 30%/50%/20% (Plains, Hills, Mountains) and 50%/30%/20%, but there is no general rule like: plains>hills → more towns

  • Mountains strongly affect the amount of towns (mountains < 20% → many towns)

  • The bioms define (unlike A21) the landscape and the towns. Most importantly:
    • No mountains in wasteland
    • The largest cities are only in wasteland
    • No larger towns in both forest and burned forest

  • The Seed defines the boundary of the map. E.g. Water NorthEast, Mountain SouthWest
Create your perfect RG Map
For your perfect random generated map experience i recommend the following steps:

  • Set the basic settings
    Towns, Wilderness POI's, Rivers, Craters, Cracks, Lakes.
    I often use "many" for all of them

  • Set Plains/Hills/Mountains.
    I often use values around 0% Plains (the towns are plain even with 0%), 80% Hills, 20% Mountains

  • Your prefered setup:
    You like many big towns:
    → Maximum wasteland
    You like mountains:
    → Minimum wasteland
    You want as many as possible high tier quests and as few as possible small tier 1-3 tier towns:
    → Minimum forest and burned forest

    So far i use minium forest, burned forest and desert, some snow and more than 50% wasteland

  • The biom layout options helps to arrange your mountains, most importantly:
    • wasteland center block any mountains in the center
    • line and one dominant biom (>50%) will create a U shaped map, where the main biom will be the U, and all other bioms will be inside the U.
    My favourite here is line with a dominant wasteland biom

  • A random world seed, world size how you like, and preview quality default or lower
    For singleplayer i recommend 6k or 8k.

  • Start the world generation and wait to finish (~2 minutes on modern systems for a 10 k map)

  • If you like the boundary don't change the seed or size of the map anymore
    Otherwise change the seed to get a different boundary
    The same seed on different world sizes won't build an equal boundary

  • Repeat the process till you like:
    • The boundary
    • The amount and size of towns
    • The amount and size of mountains
    If you don't want to test to much you can check the seeds section in this guide.

  • After the generation make a screenshot of the map (Steam F12)
    Do NOT create a new map from the random generator page, just go back to the main menu (save the map at the pop up) and close the game.

  • Before it's time for the fine tuning it's probably time to test if the generator didn't make anything weired so far, e.g. missing one trader. Go to the folder of your map:
    C:\Users\YOURUSER\AppData\Roaming\7DaysToDie\GeneratedWorlds
    or
    %appdata%\7DaysToDie\GeneratedWorlds
    and open the prefabs.xml e.g with notepad++, then search for the trader:
    rekt
    jen
    hugh
    joel
    bob
    If you search for trader you can also count with notepad++ and see how many trader you will have in your map.
    If you can't fine one trader you can simply rename one or more of them. Important is only that you do this before you start the map the very first time.

  • Follow the steps in the "optimize biom" section. Use the information of your screenshot to personalize and optimize your map. Ideas might be:
    • all mountains covered in snow
    • no desert close to the ocean
    • no big cities in the wasteland (for better fps)
    • at least one bigger town in every biom
    • No direct connection between snow and desert

    you won't hit everything to 100% but the general setting will work very good with a few minutes of work

  • Replace the old biomes.png with your new adjusted one

  • Start a new game using the name of the new generated map
Optimize bioms
After the finished generation of a map open the folder of the map here:
C:\Users\"YOURUSER"\AppData\Roaming\7DaysToDie\GeneratedWorlds\
or:
%USERNAME%\AppData\Roaming\7DaysToDie\GeneratedWorlds

Here you find the:
biomes.png


It could look like:


• Make a backup of this biomes.png or of the complete folder

• Open it with paint net (steam blocks link so just type in paint net in google) or any other image editor program (e.g. GIMP)

• Use a brush or tool of your choice to change the bioms png.
The colors you choose set the bioms
Use the color picker tool to get the correct colors.
Alternativ you can use these values:


IMPORTANT: Only these values are allowed, some programs might start with a hardness of <100% and mix the old and new color. That's not working. Only these 5 colors are allowed.

• You can mix these 5 colors/bioms as much as you want.

The adjusted biomes.png could look like:

Seed/config examples
Now a few good examples for Seeds and configs. (4k, 6k, 10k):

6k


4k


10k


Additional seeds will be added when i found good ones

Thanks for reading and have fun creating your perfect map
xml configuration (for even more details)
For those with a bit more time and more special map wishes ;)

While the default ingame settings and the optimizing with paint-net are already enough to create awesome maps there are additional options using xml configuration files.
This might sound difficult for some, it's actually just copy paste and adjusting some values from forest to wasteland and stuff like this. You don't need any experience in coding or modding.

A example about a really huge city and very dense map you can create this way:


The file you need is in your 7d2d folder:
...:\Steam\steamapps\common\7 Days To Die\Data\Config
open the rwgmixer.xml file with your editor.
I recommend notepad++ for this.

BACKUP

First things first:
MAKE A BACKUP OF THIS FILE
Really, just copy it and rename it to rwgmixer-Backup.xml.

After that open the rwgmixer.xml file

TRADER SETUP

A second step before you do any detail adjustments should be to free the trader from their dedicated spawn biom:
That's easy done in one of the very last lines ~650 in the file

here you can see:

<prefab_spawn_adjust partial_name="trader_rekt" biomeTags="forest" bias="20" min_count="2" max_count="4"/>....

so trader rekt can only spawn in forest biom and there will be max 4 of them.
I recommend to change this so all trader can spawn in all bioms like this:

<prefab_spawn_adjust partial_name="trader_rekt" biomeTags="forest,burntforest,desert,snow,wasteland" bias="20" min_count="2" max_count="4"/>

Do this for all the 5 traders, if you want you can also adjust their max count to more or less than 20 traders in your map
The min_count is no hard limit, if the map is to small or with to few towns there could be lower as min_count trader.

WORLD

You can adjust your map details for different world sizes:
tiny, small, medium and large.
All the values are available for all 4 sizes.
In this guide i will only use large, which means 10k map in game.
So you can skip pretty much 3/4 of the rwgmixer file ;-)

The details for world_size large start in my rwgmixer file at line 388,
you can also search for large
Don't change the first 2 lines about world_size and border_step_distance

MOUNTAINS, HILLS & PLAINS

First detail adjusments are done at the general landscape like mountains and "smaller" things like lakes.

Some words about the details:

<property name="scale" value="1,1.2"/>
→ the scale of this mountain is min 1 and max 1.2

<property name="cluster_iterations" value="3"/>
→ The cells where this kind of mountains will be created will be processed 3 times
In generel higher iterations improve the details but also increase the build time of the map, though the default value is most likely ok and higher values won't improve the details noticable.

<property name="cluster_range" value="500"/>
→ How large one cell is, with higher values the mountains you create here have a bigger radius but also the gabs between mountains could be larger.

<property name="use_biome_mask" value="true"/>
→ This is used to define the form of the mountains, most noticable on the desert mountains which look a lot different to the other ones.


In general these settings are good for most maps, though if you want a very natural and mountain like map you can adjust the scale and range settings a bit. But stay reasonable ;-)
A max value for the desert mountains size of 2 will work and could look great, but max value of 20 will defintly break those areas ingame.

Important NOTE: The priority for the map creation is like
landscape (mountains) > Towns > Lakes/Rivers...
So to large mountains will leave almost no space for cities.
Also to many and large cities won't leave space for lakes.

Lakes, Rivers, Crater & Canyons

Here you can change the size and count of these.
Note that these values are NOT guaranteed at all. If you create a really huge city and some mountains there won't be much place left for lakes.

In general the values here are also ok, but you can change the max settings a bit if you want larger or smaller ones. But also here don't change a 2.2 to a 10, but to a 3 or probably 4 ;-)

You can also set the waterboarder here if you like or dislike more water and the boarders. Note that this won't change the sides where water is, but only the size of the ocean.

Towns & City

Next you can set the count and tiles of the possible towns and cities. The tiles define the size.
Note that again these values are not guaranteed at all.

As example:
<property class="oldwest">
<property name="count" value="1, 2, 3"/>
<property name="tiles" value="2, 3"/>
</property>

means you will get max 1-3 oldwest towns depending on your towns setting (non, few, default, many), while the tiles value mean the towns will be min 2 and max 3 tiles large.

As example change:
<property class="citybig">
<property name="count" value="1, 2, 3"/>
<property name="tiles" value="28, 40"/>
</property>
to
<property class="citybig">
<property name="count" value="1, 1, 1"/>
<property name="tiles" value="120, 400"/>
</property>

to make your map a one BIG CITY map, while the rest of the map won't be changed much.

Township

Next you can set the details about the towns and cities you create, like what kind of city spawns in which biom. If you want a more randomized map you can change all the townships to spawn in all the bioms.


Something interesting is in line 514 (at my file):

<township name="oldwest">
<property name="spawn_trader" value="false"/>
<property name="spawn_gateway" value="false"/>
<property name="biomes" value="desert"/>
</township>

you can change this to:

<township name="oldwest">
<property name="spawn_trader" value="true"/>
<property name="spawn_gateway" value="true"/>
<property name="biomes" value="wasteland, desert, snow, burntforest, forest"/>
</township>

now oldwest towns could be build with a trader close to them, and they will also have the possibilty to spawn outside of desert biom.

Another thing is the outskirt_district you see in bigger towns and cities like

<township name="town">
<property name="outskirt_district" value="rural"/>
<property name="biomes" value="desert,snow"/>
</township>

here you can change the outer regions of a city to something else as rural, like industrial or downtown ;-)

district


The last step is to define the actual districts of your towns and cities.

As example:
<district name="downtown">
<property name="district_spawn_weight" value="0.3"/>
<property name="district_required_township" value="citybig,wasteland_city,city"/>
<property name="district_preview_color" value="0.5,0.5,0.5"/>
<property name="avoided_neighbor_districts" value="rural"/>
</district>

the spawn weight defines how much of the town should be this district.
Note that these values are normalized, so all spawn weight values at 1 create pretty much the same town as all of them at 0.5.
But if you want one big city just downtown and industrial this is your spot ;-)

Note that these district values are map wide not city wide. So changing e.g. downtown to 1 it could be better to allow downtown only at citybig set by "district_required_township"

The preview_color is set by an red green blue value between 0 and 1, examples:
1 0 0 - red
0 1 0 - green
0 0 1 - blue
1 1 0 - yellow
1 1 1 - white
0 0 0 - black

The avoided_neightbor_districts is interesting in case you think your downtown area could be so big that it reaches the border of your city. In this case it would create some empty space between rural and downtown area.
XML Helper Tool
For those who don't want to play with their xml files i wrote a small tool where you can set multiple rwg and other game settings.
Note that this is no actual mod but a simple exe file, no installation, no setup necessary.
Just a download and double klick
For detail check the guide i made for this tool:
https://steamcommunity.com/sharedfiles/filedetails/?id=3309358974
20 則留言
Serious  [作者] 2024 年 8 月 27 日 下午 1:18 
@Wafelek, whenever something strange or buggy happens and you can't find a solution and made no backup, just delete the corresponding configuration file, here it should be the rwgmixer.xml.
After this make a steam file verification. Then you get the default mixer file back.
Wafelek;**** 2024 年 8 月 27 日 下午 12:25 
Hello, no matter what I will try traders don't spawn on all biomes(mainly forest+burnt forest) when changing their settings on biomes, however there will multiple dozens of them on desert,snow and wasteland. :steamsad:
Serious  [作者] 2024 年 7 月 28 日 上午 10:24 
@TooShort,
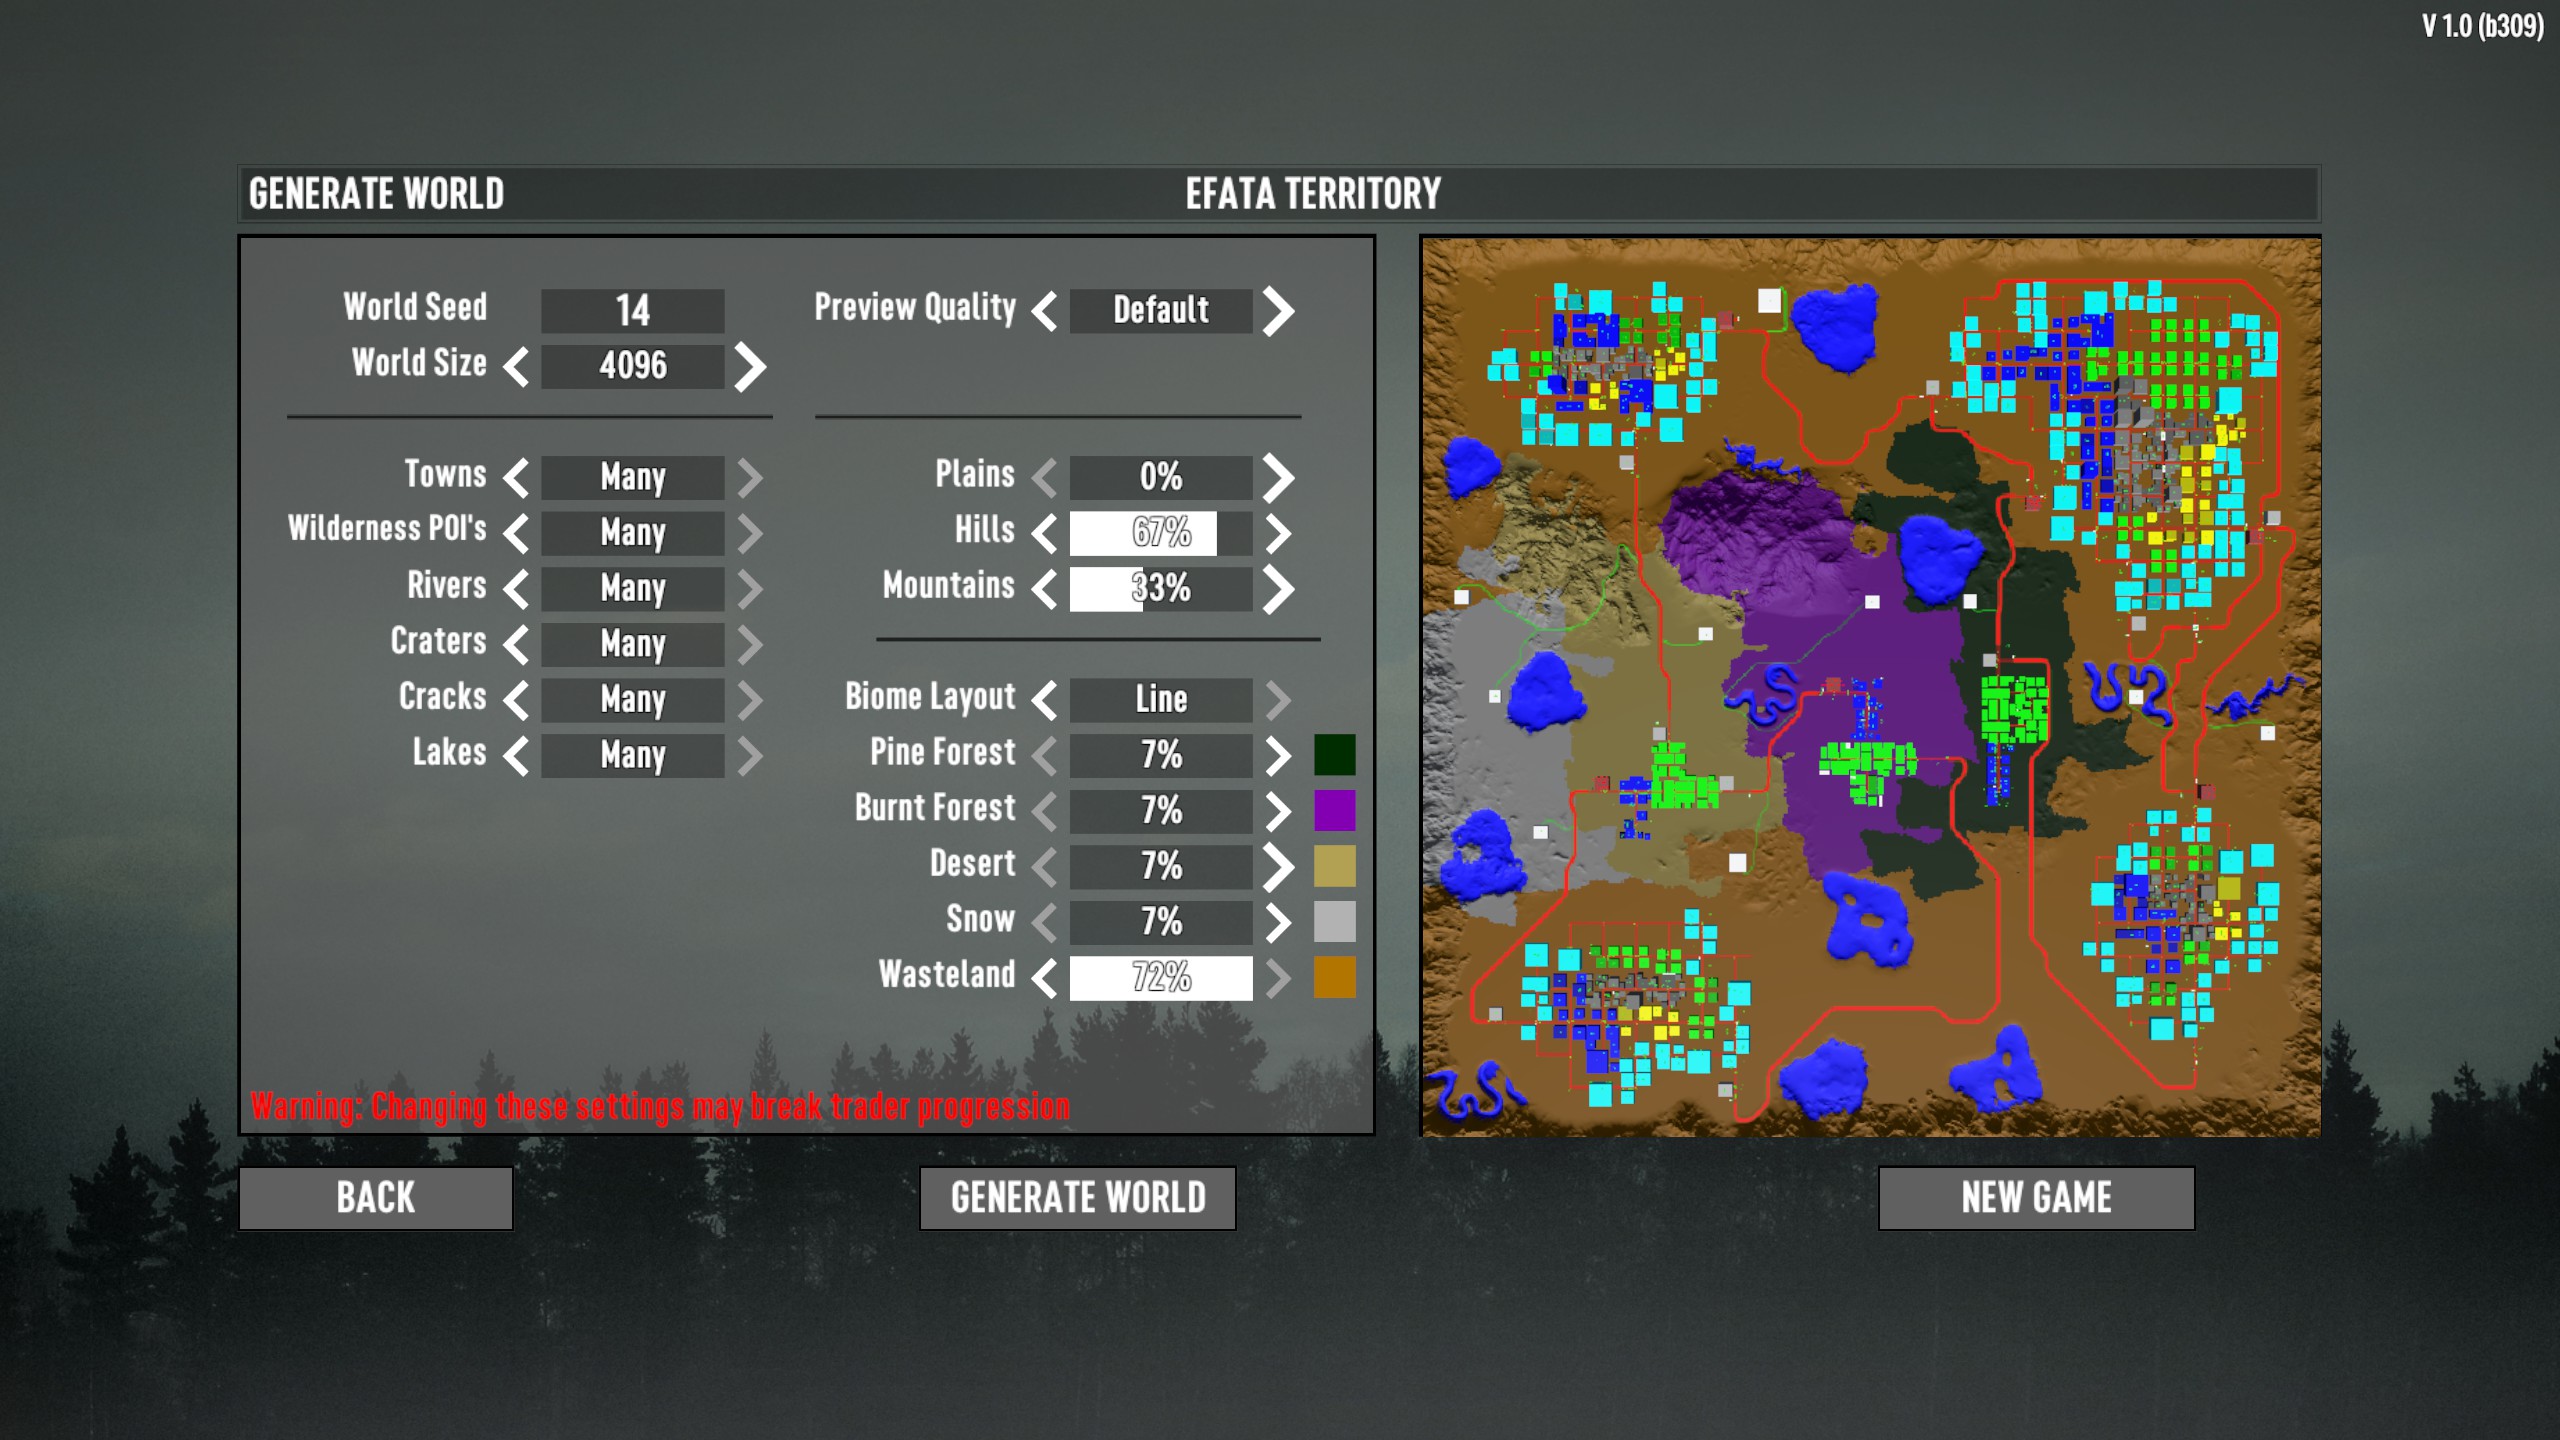
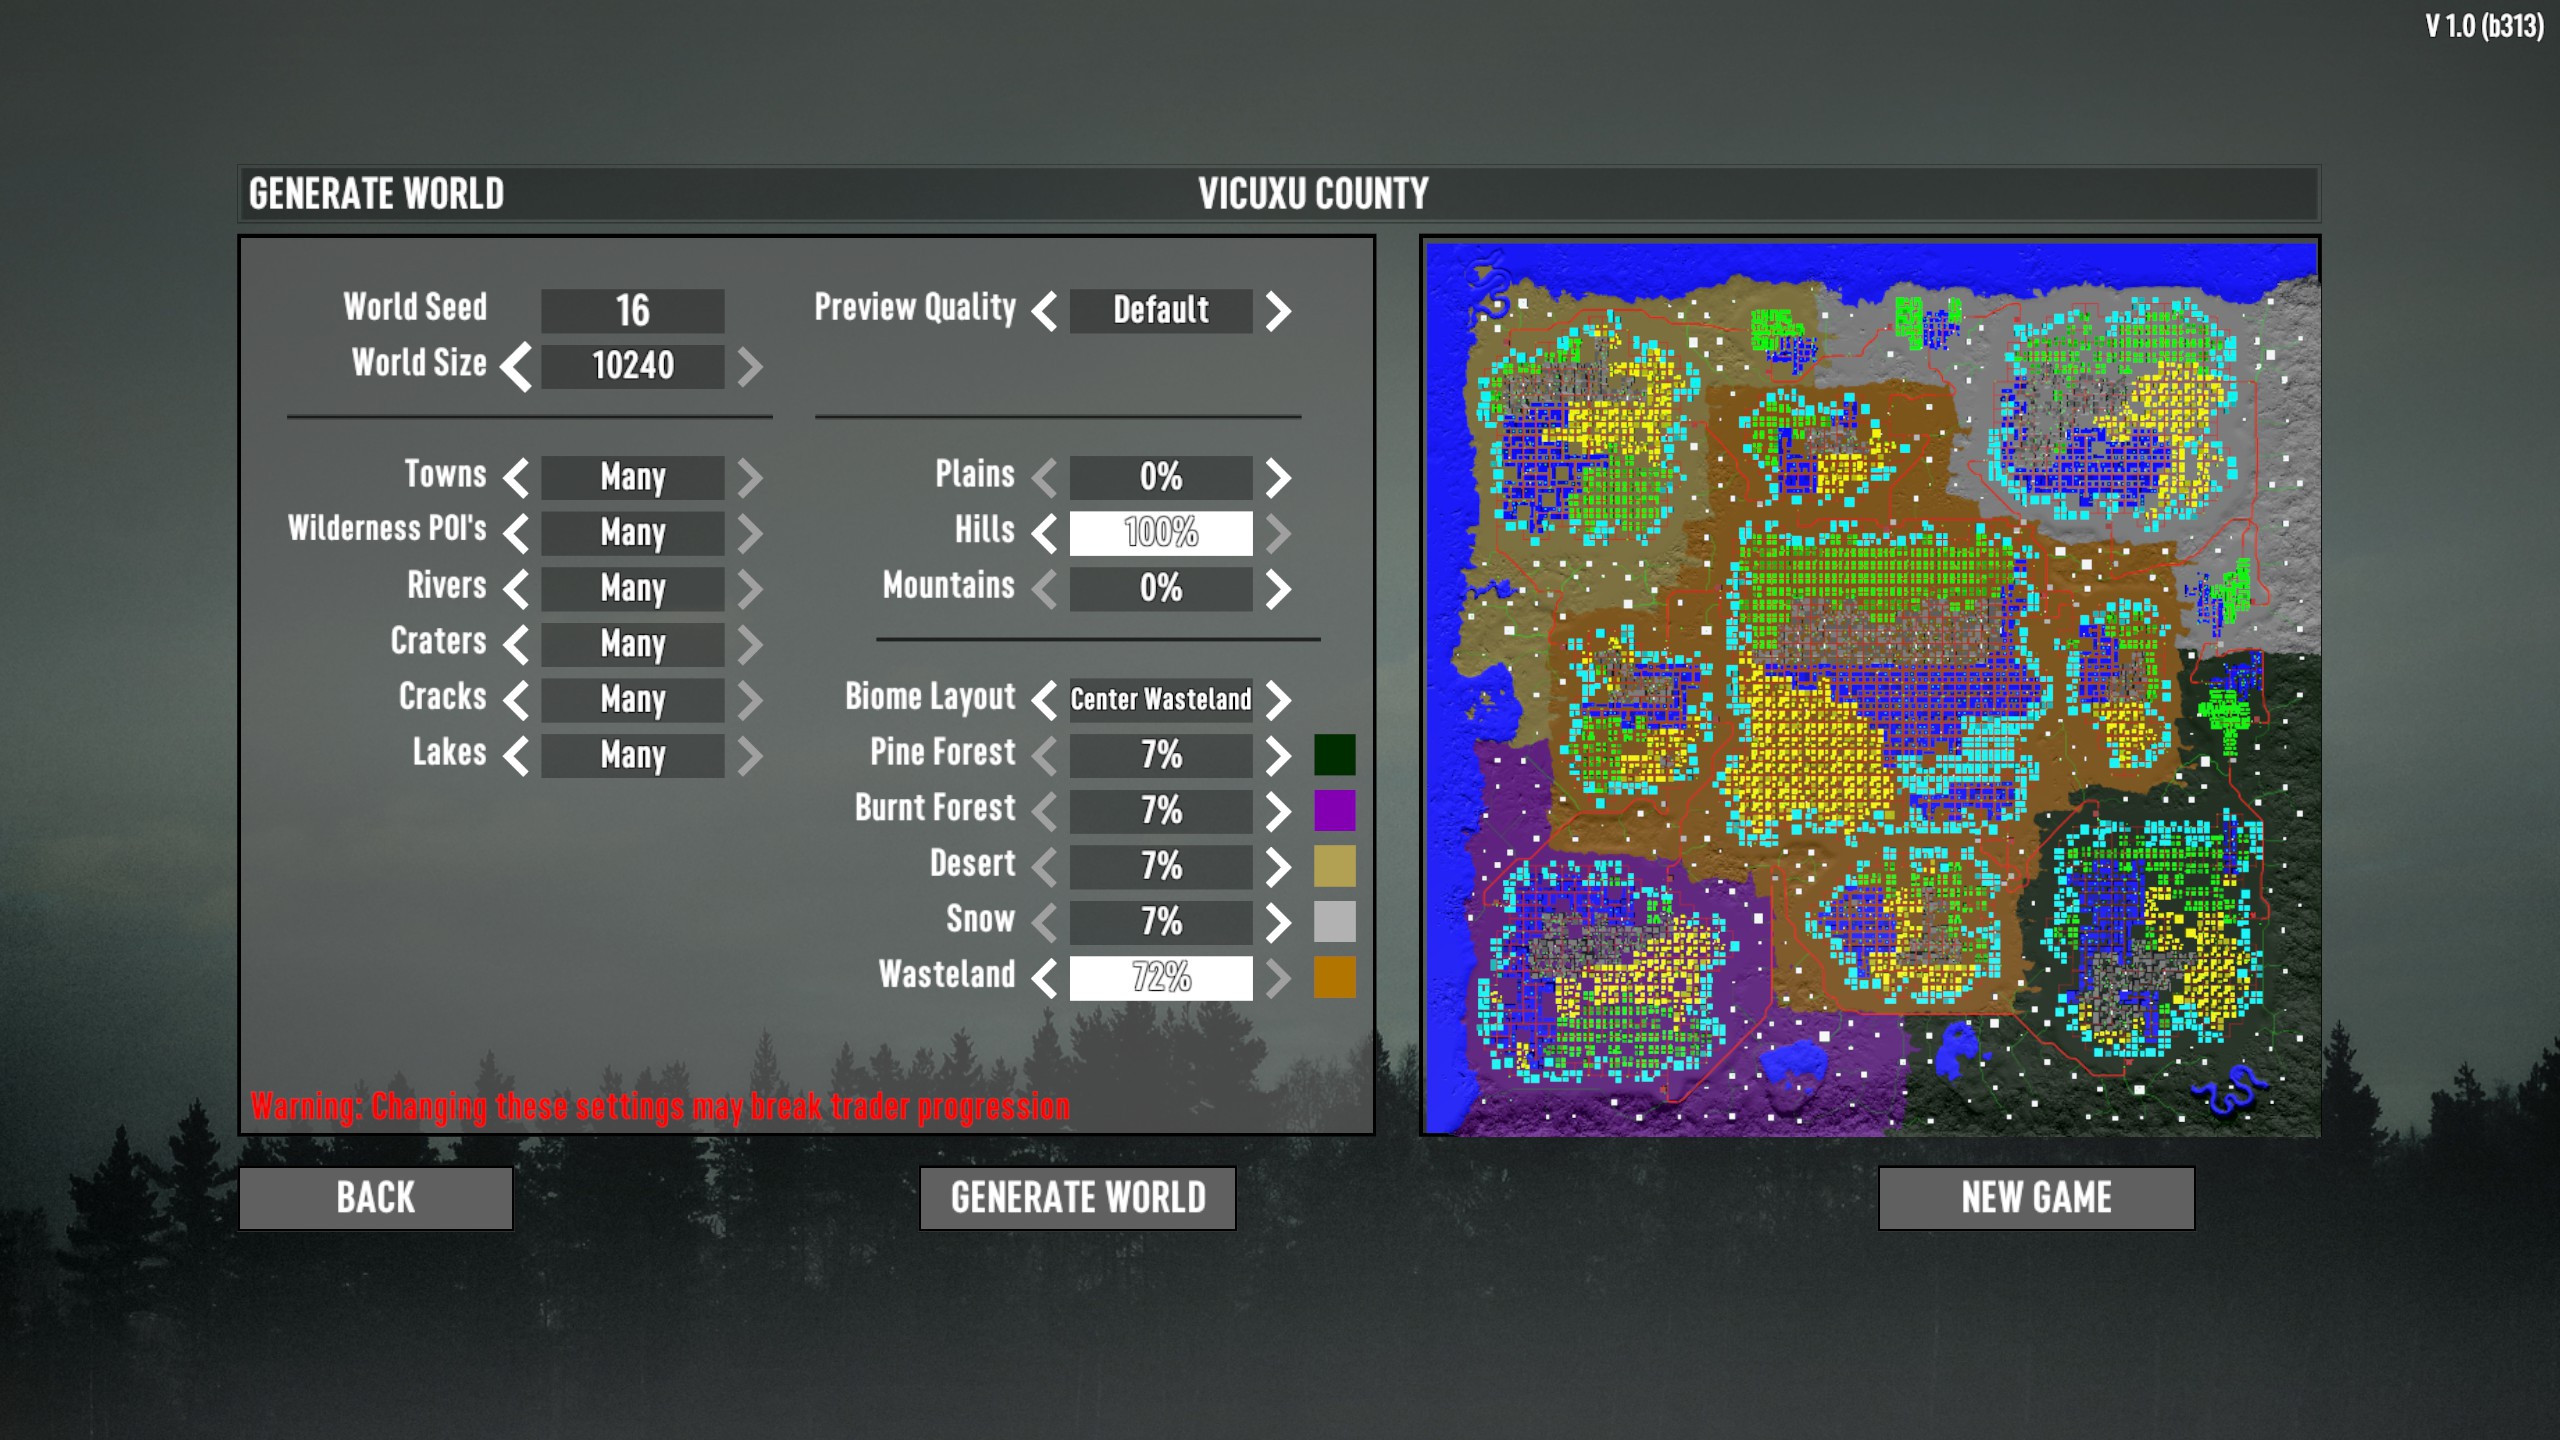
I actually work on a small program for those who don't want to play with their xml files with some tested and working presets you can choose from.
E.g. default mountain, many towns, all traders everywhere.

I will update the guide with a link to program when finished ;-)
Tech Sgt. TooShort 2024 年 7 月 28 日 上午 9:13 
I really appreciate this guide, but to those of us with less than a preferred comfort level to make these changes, any chance you could just provide a download link for your files that we can copy and paste into our own folders?
Your dad. 2024 年 7 月 27 日 下午 12:28 
Fantastic guide. Helped me make a massive city map, and get rid of Rekt all in one go. :steamhappy:
scachich 2024 年 7 月 26 日 下午 2:51 
this guide is sure something else, i might never actually apply anything from the guide as im quite clueless and might break something.
Like rightfully earned.
Serious  [作者] 2024 年 7 月 25 日 下午 4:33 
@Slenderzombie65,
You can also delete just the xml files and afterwards check for file integrity so you don't have to download everything again ;-)
Slenderzombie65 2024 年 7 月 25 日 下午 4:21 
hehe, i copplied and pasted the line discription to my rwgmixer file and it crashes my game on startup. i wish there was a app that insta converts files from mod packs or somthing without me hurting my brain and fucking with file black magicry bullshit... time to uninstall and reinstall the entire game again since i already messed up with creating a backup file and lost it too.
George_cy_ 2024 年 7 月 22 日 下午 9:35 
ah great! thank you very much for helping me out!
Serious  [作者] 2024 年 7 月 22 日 下午 2:15 
Tested it myself with good results.
The lake is not super deep but it's very large and with dynamic shoreline, sometimes even with small island with a poi on it.