Team Fortress 2

Team Fortress 2

338 ratings
Highlander Heavy guide
By remember reach
An introduction and guide to playing Heavy in Highlander (9v9) for beginner and intermediate Heavies. This can also be a good reminder for veteran Heavies.
   
Award
Favorite
Favorited
Unfavorite
Introduction
Greetings! Have you ever wanted to play Heavy in Highlander, but never really had the time to train? Maybe you're already a Highlander Heavy, but you're looking to step your game up? Or perhaps you're a veteran who hasn't touched the game in an eternity? Fear not! With the help of this guide, you will acquire the knowledge needed to become a successful HL Heavy!


WARNING: this guide contains no map positioning guidance-- Ruskeydoo already covered this very well in his videos, and I would be wasting my time repeating it all over again. Please don't tell me "your guide misses map positioning", I know about that, I've made it so it has everything BUT map positioning since it's available everywhere.
What this guide does, however:

• Educate the reader on what mindset they should have while playing HL heavy
• Inform the reader of other classes' intentions, capacities and how to counter those
• Give insight on unlocks, ways of playing, decision making and threat assessment as a heavy
• Focus on the reader's own capacities and abilities, which is a preliminary phase that comes before map positioning.

If you're still reading by now, I'm going to assume you're aware of what Highlander is. It's a competitive format in which 9 classes, 1 of each fight against another team of 9 persons. I'm not going to waste my time explaining the game modes and general rules of HL, there are guides that do it better.

This guide will be divided in three parts: the first one will be a preface of how you should be playing against every other class, and what to expect from them.
The second one will be an extended analysis of what weapon you should be using, and exactly how you should be using it. It includes many small tricks that can make a difference, and a good insight on what the best Heavy primary is.

The third one will concern game sense and you. As you've probably guessed it, gamesense is a huge part of HL, especially for combo classes and crucially for the Heavy. It will additionally possess a few other tricks you can use to your advantage.

You may add me if you need further help with anything, however I ask of you not to bother me if your question is a basic one.
Other classes and you (part 1)
Scout


"I'm going to jump all over you and you're going to have a hard time tracking me if you expect me to stay on the ground. Bad scouts will just stand still and shoot you from the back, if you're quick enough you can kill them before they land the third meatshot. Even when you're alive I can be an annoyance to your Medic, if you're not quick enough to kill me I'll destroy your combo and be gone with the wind before you know it."

The Scout is one of the biggest threats to the Medic in Highlander. Most of the time, he'll target your Medic, unless you get called on low hp and need to go down. Such a scenario will, most of the time, result in the death of your Medic, unless the scout is stopped by another class. What you should expect from the Scout as a Heavy:

• Jumps over your head, moves erratically to mess your tracking up and move his hitboxes around
• Flank your combo if your flank isn't doing much
• He'll be pushing the cart if in payload mode
• He shines as a predominant class in KoTH maps, where he gets a lot of kills

Don't under-estimate the Scout. While he has a low health pool, he can deal a high amount of damage in a short amount of time. You want to be able to protect your Medic against them, obviously. Most high-level Scouts can have intricate and good movement, so you'll be needing to practice your tracking. Tracking can be key in scout situations as a Heavy most of the time; learn to visualize player trajectories, adapt your tracking to the flow of his movement. Knowing your enemy is of prime importance, as a lot of players have repetitive patterns and predictable behaviors. Screwing up once isn't bad; it's screwing up thrice or more that is.
Get used to Scouts jumping over your head-- most of the time, they'll do it because tracking outside of your field of vision can be a hard task. As I've said, adapt your tracking to the flow of the enemy.

Overall you want to watch out for him, stay aware of his location. If the enemy scout is having too much liberty you need to tell your flank to up their game.
On king of the hill you reverse roles with the scout: he becomes a predominant force while you support your team. You can still counter the scout in koth and therefore weaken the enemy team's presence and overall damage output. It honestly depends on the way the scout plays, as I've said most players have repetitive patterns you can learn and adapt to if you pay attention to said patterns.

Soldier


"What makes me able to kill you is me being superior in terms of grounds. I can spam a choke and cause you to lose 150hp, meanwhile if you do the same you'll be causing like 30 or 40 damage. Most of the time I'll try to jump your medic/bomb him, what makes the difference is whether I'm able to land the final rocket. You need to be ready to deny me."

The Soldier's most prominent threat to you as a vanguard of your team is him bombing your Medic. It can only take a few rockets at mid to close range for him to kill your Medic, giving his team an uber and heals (and subsequently numbers, damage output, etc etc) advantage. You obviously can't always be there to counter everyone on the enemy team, which is why sometimes you need to rely on other parts of your team. The Pyro can reflect the Soldier's rockets while you shoot him. Load up tr_walkway, enable the jumping ramp, and just practice on shooting bots airborne. Make it your goal to make them dead before they hit the ground. Stop firing and unrevv each time you kill a bot, that way you're training yourself to destroy airborne targets without your full accuracy and damage outputs.
In a 1 on 1 encounter with the Soldier, health and cover are of the utmost importance. You typically want to avoid encounters where he has an environmental advantage (per instance, takes advantage of chokes to deal splash damage. A good example of this is holding process PC defensively, the Soldier can use the walls to splash you for 100, and you might be able to damage him for 20.)
Don't throw your life away. Don't kill the soldier if it means he also kills you. You ensure your team's territorial control and punish over-extenders, if you're dead not only does your team's odds of survival and victory are harmed, but it also allows other classes to suicidally rush your team, because nobody's there to punish them, or at least as hard as you can.
In a situation where your medic has full ubercharge, and this often happens on king of the hill maps, your Soldier will suicide bomb the Medic. This situation can have many outcomes:

• Medic surfs 1st rocket, assuming they're at 150 hp before the bomb, bomber is killed
• Soldier forces or drops Medic
• Heavy kills Soldier before colossal damage is done

There are honestly tons of varying factors that affect the outcome of a bomb. Most of the time, you want your holding position to be as less risky as possible. IF you're allowing for your Medic to be bombed, or if it does happen, you want to be sure you can take care of the imminent threat quickly.

(continuing the Soldier subsection)

Have your Pyro help you out too if your tracking isn't good enough to kill Soldiers airborne yet, though I believe every Heavy should work on their tracking. If you see the Soldier initiating his bomb, punish him by shooting him out of the air-- don't let a mindless, oblivious bomb be successful.

In other scenarios than bombs, use the environment to your advantage; if the Soldier is running Black Box, his damage output is severely deteriorated in an encounter with you. You basically want him to be at a clip disadvantage when you're facing him-- if you can make him waste rockets without losing too much HP, that's pretty useful. So if you can, bait him into spamming stray rockets pointlessly at long range (upward 3rd per instance, if you're on defense odds are he can and will spam rockets to prevent you from going out there), you can take advantage of this by letting your flank know the soldier's low on ammo.
Just think about it: soldier spams rockets in your face with stock rl, count his rockets -> let your scout know he's low on clip -> scout gets him, able to take him down since he can only shoot 1 rocket. Of course that's just an example and I'm sure there are tons of other applications to this, but it's definitely something to keep in mind.
Other classes and you (part 2)
Pyro


To the right, a Pyro


Above, what a Pyro wants you to think he is.

"I will be a huge detriment to your team by pushing you back and cancelling your damage output, but that's when I'm mostly vulnerable. You generally want to focus me before an uber, but that doesn't mean I'm not a free kill if I over-extend."

WARNING: Calculations date from before the July 2016 update.

A Heavy has 450 hp with overheal, while being healed by a Medic. The Degreaser deals an average of 150 damage at point blank, so it'd take 3 seconds for the Pyro to cancel Heavy's health pool. However, if the Heavy is being healed continously, he gains 24 hp every second (medi-gun heals 24hp per second (wiki)), so even after he loses 450hp he still has 72hp if the medic keeps healing him. In other words, a Pyro needs 3.5 seconds to properly kill a Heavy. The minigun takes 0.87s to revv, add to that 80ms for the human brain to process incoming information, and possibly latency of around 40ms in our example, you're ready to fire in .99s, so 1 second. You have 2.5 seconds to track and kill the Pyro. (previous calculations showed 2 seconds).

Knowing how to deal with pyros is 90% gamesense and 10% tracking. If you find yourself in a spot where you get continuously airblasted, it's your or your teams' fault for allowing the Pyro to get so close to YOU in the first place. Ask a friend of yours to hop on a MGE server that allows all classes-- he goes Pyro, you go Heavy, and make him airblast you around. Try to shoot him while you're airborne. DON'T let a Pyro get close to you for free-- rushing the fattest class of the game that theoretically outdamages you is a mistake that should get punished.
Knowing their loadout also helps. A flare Pyro will naturally take advantage of their cover more, sometimes be more agressive and try to get some quick frags, while a Shotgun pyro won't be so daring and will mostly keep to their combo. In the instance of the Pyro pulling a flare combo on your Medic, have your own Pyro obstruct their way while you or someone else of your team takes care of them. A Pyro rushing your Medic is a suicidal move you can prevent with good tracking and coordination.

If given the opportunity to kill him early on during an uber, I recommend you do so to avoid wasting it, unless there's a higher priority, as in you can take out their Medic who's on low health. If used intelligently, he can counter both Medi-Gun and Kritzkrieg ubers. He's quite weak in terms of damage output compared to other classes, but can still pose a considerable threat.

Demoman


"I can, and will win most mid-ranges if I'm being supported by my team and you're not. Try to take me on when my clip is low or my health is. I'm a critical target when my medic has a kritz charge because I can deal tremendous amounts of damage, and my traps can ruin your team's pushes."


The Demoman is often the core of a team's momentum on most maps, especially 5cp and most of the time payload, depending on how your team plays. He possesses huge area denial and tremendous damage output, more so when under the effect of a kritzkrieg charge. I find that there are a lot of demomen at low-level competitive play that tend to over-extend, so they're easy kills as long as you can remotely track well. Keep this in mind: at close to mid range, he needs to lend three pipes or 4 pipes depending on scenario, you have more than enough time to take care of him especially with the new Tomislav (that being said stock remains a very viable option)

At mid-range, you WILL get stickyspammed, avoid engaging unless necessary
At long-range, most of the time he'll obviously have superior damage output, but it's not worth bothering unless you can make him waste his attention and clip on you.
Interestingly enough you're the only class that can survive a crit sticky, and if the enemy doesn't have a perfect kritz as in enemy demo doesn't land all his stickies you can get away (I'm thinking about a first blind crit sticky on viaduct mid then they push, by that time while you do take some damage you can retreat to say the house where you may not get called out or where you may not be chased down). If you're 100% sure you can't get away don't even bother to try to initiate combat unless you know the medic's critically low, odds are you'll get 1 crit sticky + 1 crit pipe to the face and that's the end of it. If all hope is lost just play with FoS around, captivate their attention, give your team some time to pull back since you'll die anyway/deal as much damage to demo as you can before going down (you can run away at lower levels given his aim isn't perfect)

Natascha does NOT negate crit damage (which is why quickscopes deal 140 dmg, it only negates the base damage), don't attempt to use it if you know a kritz is coming for its defensive/counter-damage purpose. Looking at your spin-up, latency and reaction time is NOT worth it unless the med's really low (if their kritz is a success odds are they'll cap the point = longer respawn time for enemy med and shorter for you, just a thought), but yeah you're dead anyway unless you're playing far back. Generally I find that a kritz charge will yield one of 3 outcomes:

• You get destroyed
• You get partially destroyed and pull back
• You're safe thanks to positioning and rotating (per instance, holding on hill on viaduct can prove itself to be rewarding since you can easily pull back unless you're being focused, but I find that you can still get away)

Don't forget the demo is a part of the combo, you should in my opinion prioritize him on defense instead of the enemy heavy, and allow me to explain why: on defense territorial control is more important since you can't gain it back, and the offensive team won't be as affected as the defensive one if both heavies go down. BUT if the offensive demo goes down and the defensive heavy goes down, offense can't push really well and if they do they can't dish out as much damage as they'd do without their demo.
No, being a heavy on offense does not mean you're a pick kamikaze class-- it just means you're not as utterly valuable as a Heavy on defense.

You should also be able to know the demo's actions in the near future. Holding 3rd upward in house and you see him? You should know he's going to stickyspam and act accordingly to the situation. Long -> mid range = stickies, mid -> close range = stickies/pipes, close range = pipes. Spamming pipes from a distance = sticky trap somewhere, playing passively = going to pop/kritz soon, etc etc

Other classes and you (part 3)
Heavy


"If I kill you, I will mow your teammates down. Don't be selfish and prideful by trying to kill me, only try to do so if you know you have an advantage."
The Love and War nerf last year made it that you need to be revving up for 1 second for full accuracy and firing for 1 second for full damage, so you can use this at your advantage.

"If I'm revved up and you jumprevv into me, the decisive factor will be whether I was aware you would be doing that or not. The key to getting me is how long I expose myself and who has the superior damage/accuracy. Your job isn't to take me out, and you shouldn't sacrifice your life to take me out unless I'm getting massive heals and dominating your team. Bear in mind that no matter how good I am, I can still be beaten by good positioning and damage superiority/awareness."

Stock and Tomislav are considered the best Heavy primaries. Some claim the Tomislav is once again the king of miniguns, others claim they're worth each other. Tomislav implies less spread, and sometimes you need that spread to deal damage to multiple targets. It also favors mid-range encounters, so it's a straight upgrade from stock on maps like ashville per instance.
I personally think you should use what you're most comfortable with. I've seen Tomislav heavies beat Stock heavies and vice versa, if it feels off and your results aren't massively affected by the change you can just use whichever you prefer. I know some people who prefer Stock's spread to the Tomislav's capacity of mid-range spam, and again the opposite is valid. To be on equal grounds with the enemy Heavy, you can always just imitate their choice of primary weapon.
Natascha is viable for defensive playstyles and tanking damage. Its damage resistance is very interesting and you can survive fully-charged headshots, so it's definitely something to think about in some scenarios (knd's heavy ran it on gullywash vs mts season 16 NA hl plat finals and it yielded good results, definitely a viable choice imo). Brass Beast isn't as good because it promotes an aggressive playstyle on a slow weapon. Don't use it unless you're fooling around.

Choice of weapons -> Tomislav/Stock >/ Stock/Tomislav > Natascha > Brass Beast > Huo-Long Heater.

Not much to be said, just don't trade your life for their heavy's unless you're on offense (more on this later). Be wiser than the enemy Heavy, and I guarantee you will come out victorious of most situations, granted your team cooperates.

Engineer


"With the recent heavy buff, you can now be more active when it comes to destroying my buildings. If you're ubered, most of the time it'll be to take my sentry out, though you should try not to die to it. In the King of the Hill mode, I'll build minisentries that you should only focus if you can afford it and you have little risk of dying by doing so. If you're at a health disadvantage, you should probably flee from the sentry as it's kind of ridiculous to die to a minisentry, that being said don't hesitate to help your teammates out. My shotgun can hurt at point blank/close range and I'll move erratically, so be ready to track me well."

Prem Engies with shotgun can be pretty scary, but they're nothing you should actively fear or look out for. Due to your higher damage output, you'll come out victorious of most of your encounters with the Engineer, though he can fend for himself well with his minisentry and other weapons. With the recent gunslinger nerf, it's easier to destroy minis while they're building, that being said try to shoot minis from an angle they can't reach you.
DON'T be oblivious to what's going on because you want to destroy the mini. It's so easy for a Heavy to get backstabbed because they had threat priority all wrong; you're not the only class that can destroy minisentries, and while you're shooting at it, you can get stabbed/headshot/spammed/ambushed/all kinds of things. If you can't use the environment to your advantage to create a spot while relatively close to the mini it can't see you, and you can't destroy it quickly, just don't do it. If the minisentry is being wrangled, you can possibly attack it from where the Engineer can't see you. (upward 3rd, traditional heavy hold per instance)
Be smart. Your life isn't worth a minisentry. If you can be a nuisance to the engineer's constructions, go ahead, but ONLY if you can afford it.

Other classes and you (part 4)
Medic


Ah, the Holy Grail of TF2. Your true enemy. Sadly, it is not your job to take care of him unless doing so incurs no negative consequences.

"Not much to say here. Head of the team, priority target, don't over-extend to kill me and leave that to your teammates, else my heavy will punish you doing so. I can use arrows to keep my teammates alive at mid to long range, so don't take every fight for granted else you'll regret it. While I'm a great threat to your team as a concept, I have very little defense, so if you can kill me do it."

A notable behavior in most rookie Heavies is that they focus the Medic whenever they can. You deal a lot of damage, and you're supposed to be protecting your combo, not being the main damage dealer, though this can change depending on how your team plays. If you can get a free medic pick due to bad positioning on their part, go for it; it's just not worth sacrificing your life for the Medic's and then get killed because you didn't stop incoming damage, especially when the Medic is at like 20% uber.

Sniper & Spy


This section is relatively small because as a Heavy, there isn't much you can do against a Sniper. I believe I've developed the Spy section a lot, but it's up to you.


Sniper: Hello, I'm here to make you have a bad day. I can deal instant 150 damage to you before you know it, and if you stay in the open you'll be dead before you know it. Don't clown in front of me with your fists of steel, I'll just focus down any teammate of yours if you do so. Use the fists of steel to cross areas/tank damage when needed, and don't try to target me as your damage output at long range is very weak. Rely on your team for this one.

Spy

l
"Hello, I'm here to make you have an even worse day. I will sacrifice my life for either yours or your medic's, because that's what HL spy is about. Watch out for me before and after an uber, track my respawn time and try to visualize my location after I feign death. Be aware of when I'm alive and when I'm dead, and do spycheck me as your pyro can't always do that. Don't ignore the huge threat I pose to your medic; one hit, and it's all over, so watch out. I can trickstab you in more ways you can imagine, you can counter this by NOT jumprevving into me and keeping your distances."

A good Spy strikes in the heat of the moment. Watch out for the Spy before and after an uber, as these tend to be huge distractions to everyone. Some Spies may even try to trickstab you; they make you think they're going to the left, per instance, and then snap to the right and you get stabbed because you were shooting at the left. To prevent this from happening, you can just crouch and track the Spy to the best of your ability if taking your distance isn't an option. Crouching tends to confuse a lot of players as well as alters hitboxes in some situations, albeit the latter doesn't affect spy's knife. You can use that as an advantage to throw the Spy off. You don't want him to be at point blank because you're a very easy prey-- mid to close range is good. Create that distance if you can.
If you're being spammed by his Ambassador at long range, adapt irregular movement to throw his aim off and retreat with fists of steel. GRU while being spammed with the ambassador will just make you take more damage due to the Spy adapting the mentality of "oh I can deal consistent mini-crits".

• Sometimes, a lot of times actually, the Spy will go after you instead of the Medic. Spychecking is also your job, I suggest getting used to a sensitivity that allows you to flick very well so you can turn around quickly even in the heat of battles. As I've said earlier, great spies strike when you least expect them-- you can bait them to attempting to backstab you by pretending you're not aware of their presence, and turn around when they're in a position they can't evade from.
• Remember your importance as a combo class; when you die, your team's territorial control is inferior to the enemy team's push potential.
• Ask yourself what's better: keeping the spy at bay while someone else on your team handles him, or mindlessly suiciding into him and getting trickstabbed? Taking care of the Spy, due to your awful mobility, is NOT your job.
• If you can, prematurely activating a Spy's death feign with the dead ringet can prove to be useful, so keep that in mind.
• Learn the Spy decloak spots to maximize your efficiency against them. Watching Spy POVs can prove itself to be VERY useful.
• Think not of what you see, but what you expect to happen. The spy can and will shift your visual attention to an area and take advantage of your exposed back and large hitboxes to kill you. Don't give spies a free kill, maintain distance and know your opponent.
• Adding to all of the above, persistent spychecking by a Heavy and having your Pyro on the aggressive can be a good idea. Look at kids next door, they use that strategy and they're one of the best teams in the world.

Thus ends our analysis of other classes. You should, of course, be able to make decisions depending on the situation at hand. A scout won't always charge your Medic and might choose to pick your Demo instead. A pyro could be running phlogistinator/detonator/scorch shot and thus act naturally suicidally... and so forth. You need to be able to adapt to the situation, such is the difference between a good and a great Heavy.
Weapon analysis, hitboxes and positioning relatively to damage output
Tomislav; the mid-range messiah


Tomislav is a really interesting unlock. It has 20% faster spin-up, -20% less spread (20% more accuracy), with its sole downside being its slower firing speed. The slower firing speed isn't much of a big deal, since the improved accuracy can easily compensate for it when it comes to damage output.
I recommend it to every new Heavy to train their accuracy and tracking with. It's an amazing weapon on small, tight maps though stock can do the job too. In heavy vs heavy it's mostly situational, highly relying on positioning unless you both see each other and start revving up at the same second. In which case, multiple factors come in mind:

- latency
- hitboxes (there are a few tricks at mid to close range that can save your life in a stock v stock encounter, though I'm not too sure about whether hitboxes matter when it comes to tomislav vs stock)
- your team vs his: being helped by your team in a heavy encounter is crucial, as a simple damage difference may be the game changer.
Then again, you shouldn't be trying to kill their heavy unless you have a clear advantage, were it in terms of positioning or numbers. Up to your judgement whether you want to go head-on with a tomislav heavy as stock or go against a stock heavy as a tomislav heavy.

Stock vs Tomislav

Here's something interesting I had in mind: stock can be situationally better than tomislav since its spread might allow for better damage in case your tracking's not on point in some scenarios. Tomislav can provide with serious middle-rage harassment, I'd be comfortable with using it any time of the day, but it can be your personal preference really.

Tomislav beats stock at mid range due to reduced spread.
Stock beats tomislav at close and mid-long range due to firing rate.

What makes Tomislav such a great weapon is that it rewards tracking, but it doesn't have a notable downside that (aside from spread) makes it a definite sidegrade, which is why some perceive it as an upgrade, others as a sidegrade. Slower firing speed but greater accuracy means that regardless of your firing rate, you will still be dealing consistent damage. I don't think it needs a rework or a nerf, but it probably should've had something that made it a sidegrade to stock which would still be viable.

Let's talk about other upsides of the Tomislav: you get silent spin-up, so you can go for interesting though somewhat risky plays where your tracking will be the key. Your position will get called out most of the time but the upside is still worth considering in some scenarios. It takes 0.87s for the stock Minigun to revv up, and 80 ms for the human brain to process all incoming information. That makes it 0.95s for you to be starting to be dishing out damage, this without taking in consideration your latency.

But with Tomislav, that has quicker revving speed, you will be taking 0.87*0.8= 0.696s to revv up. It's a small, very small difference, but I doubt you can neglect it. So let's say you play @ a 100 ms latency.

Stock minigun: 0.87+0.08+0.1= 1.05s
Tomislav: 0.696+0.08+0.1 = 0.876s

So with a bad latency, you can perform better with the Tomislav on paper. Theoretically speaking, a Tomislav Heavy with 100 ms latency equals a Stock Minigun Heavy with 0 ms latency, though it's undeniable that there are still many network factors and settings that influence some outcomes, albeit rarely.
It actually grants you an edge when you play on, say, NA server if you live in EU, or the opposite, compared to the results you'd get with Stock Minigun. Definitely a considerable weapon if you have overall bad latency, overall a great Heavy wep.

If you play better with stock and not using the Tomislav does not penalize your team, use stock.
If you want to be on equal terms with the enemy Heavy in terms of primary, use the same primary he's using. If he switches to Tomislav, equally switch to Tomislav. If he switches to Natascha, make use of good positioning w/ Stock or Tomislav.
If you're playing on a high-latency server/enemy heavy has way better latency, use the Tomislav. Really, latency can be the dealbreaker in some situations.
If you're going to be playing a supportive role, like on king of the hill maps, Natascha is a very viable option. Small koth maps like viaduct can be abused by the Tomislav.
You can basically hard counter Tomislav with Natascha, natty destroys tommy at all ranges but midrange
See what works the best, the best primary isn't set in stone.


Hitbox manipulation


You can alter your hitboxes by moving and crouching. There are many tiny spots on multiple maps that allow you to alter your hitboxes (per instance, the wooden planks on koth_viaduct's point-- strafing left and right on them changes your head's position at all times, making it harder for Snipers to headshot you)
You can always win a Heavy v Heavy fight if you alter your hitboxes to the point that you survive the encounter with the enemy Heavy and he doesn't. If you find yourself in that situation, you're probably going to die unless you have numbers/aren't being focused down/enemy combo is lacking, but ask yourself this: in an inevitable encounter with your enemy counterpart, which is better? Dying because you couldn't be bothered to mash A, D and CTRL, and let him mow your teammates down? Or creating a weakness in the enemy team's combo? Little things can make the difference.
A funny thing with Heavy is that regardless of your minigun's position, you will shoot wherever you're looking at. This might be a bit weird to understand, but think of it this way: there are some spots/covers in some maps, these allow you to cover most of your hitboxes, but you can still see the enemy and thus still inflict damage, even if your minigun SEEMS behind the cover. A good example of this is the point on koth_viaduct. Load it up locally, and just press forward unto the intersection between the rock and the wooden plank. It's showcased in Ruskeydoo's viaduct strategy guide @ 07:07. https://www.youtube.com/watch?v=bcueI4cMkUY

Keep the following in mind: if you have partial cover and the enemy Heavy doesn't, and you're at equal damage accuracy outputs and health, you can just deny the combo's push really well because you're dishing out more damage than you're receiving. A good example of this is badwater 1st on defense, you can just jump on the rock right next to the hill, crouch and it'll grant you some cover. This hides some of your hitboxes, thus making you take less damage, but you have the same view you would if you used the traditional hold.

And here arises the question: "which is more important? Being able to see more enemies at the risk of more damage received, or taking less damage at the risk of less damage output?"
It really depends. You're not supposed as a class to be the main damage dealer, it mainly depends on your demoman's positioning on many maps. Keep in mind that as a relatively slow and bulky class, playing defensively can and is most of the time more rewarding than playing aggressively. That being said, the damage output vs damage received question relies on what your team needs the most. Sometimes your demoman can spam his projectiles and cause heaps of damage but you need to be watching out for the enemy flank, sometimes you really need the damage and you need to focus targets with your demo. Don't be afraid to go through old bad demos, as Ruskeydoo would say it's painful but it'll help you see your mistakes.

Going back to the topic of hitbox manipulation, it's not something you should rely on all the time. It can save you from a positioning mistake, or from being caught out, yes, but there are more important things than mashing your A, D and CTRL keys, but if you can afford to do it go ahead. A LOT of low-level Heavies don't know of hitbox manipulation, so if you're one you can use this little trick to up your game.
Gamesense and you
Offense vs Defense: your role


On defense (RED), you're obviously more important than your offensive counterpart. Due to Heavy's slow nature and huge hitboxes, he's very good at defending, holding positions, supporting his team, etc etc. Being on defense means you're going to have to maintain your team's territorial control for as long as you can to ensure victory-- a team without a Heavy is one that won't be able to hold their position very well. If you watch ANY type of POV you'll most certainly hear at some point "heavy down, let's push", this only ascertains the Heavy's defensive nature and importance as a vanguard further.
What you should understand from this is that you cannot afford to die on defense as much as you can on offense. On offense your position holds aren't as important as on defense, you'll typically have to do the following:

• Support your demo
• Protect your medic from flank classes
• Deny bombers
• Hold positions that provide a strategic advantage for you and your team

On offense, obviously holding positions isn't as important as on defense, and in a lot of occasions the enemy flank will be guarding areas against your own team's flank (swiftwater 2nd is a good example), so you won't have to be as tight on protecting your medic, denying jumpers, etc etc. I am NOT saying that offense Heavy is easier or lighter of a task than defense Heavy-- all I am saying is that you have somewhat different priorities, and by the class's nature a heavy on offense can afford to die more than a heavy on defense. By that, we're implying that both heavies going down is better for BLU than it is for RED, since BLU heavy is not as important to his team as RED heavy is.

RED's casualty report and consequence: heavy's dead -> major part of defense unavailable
BLU's casualty report and consequence: heavy's dead -> minor part of offense unavailable
The difference is pretty obvious.

Another reason as to why dying to BLU heavy on defense is a bad thing is because of spawn timers. BLU generally spawns faster than RED, so the offense heavy will be back up before you, which can make the enemy team's push stronger.
So yeah, try not to die too often while defending. Another good idea to prevent doing that is not going for impossible holds. Holding second on badwater is for instance an impossible hold if you're being overwhelmed by the enemy team and will only get you and your engie killed. It can work, but you'll see most plat teams give up 2nd and settle for a strong 3rd defense for a good reason.
An impossible hold is characterized by the following traits:

• Seems like a good idea at first glance, but ends up being detrimental to your team
• Not taking into account the enemy's progress/going by textbook cases/not taking into account who's up and who's down on each team
• In the middle of sniper sightlines, possesses many flank routes, props to abuse, corners and dark spots nobody looks at for spies to abuse, etc etc

Note that the presence of one of these factors doesn't mean it's an impossible hold, it's just a bad idea to hold there

Cart pushing and you


You generally don't want to be the one pushing the cart, this for many reasons

• Your large hitboxes make you more prone to long-range spam and chokes
• A lot of cart positioning allows for dropstabs, or most of the time it's just a good distraction for the spy to pick whoever's pushing it
• You're only adding x1 to the cart, and in exchange your combo's less secure
• Sniper will be watching cart at a lot of occasions, pushing cart as heavy is suicide in that case
• Cart's generally at the center of both team's sightlines, so again you'll go down very quickly

When should you be pushing the cart, and when should you not do it?
You basically want to ALLOW your team to push the cart instead of pushing it yourself. By allowing your team to push, I mean limit casualties caused by the enemy so that more teammates are there to push, clearing stickies and minis off the cart's way, etc etc. Basically giving your team's some breathing space. There are only 2 scenarios where you should be pushing the cart:

• Your team really needs a good time, or timer's about to run out
• There isn't much you can do to counter the enemy, so all you can do is support the cart pushing and adding some speed to it

The main threat to cart-pushing is obviously the Spy. Imagine this: you're pushing into upward 4th, and as the fat hunk of Russian love you are you choose to dry hump the cart. Oh no! There are over 4 routes the spy can use to kill you and get away with it. Not only that, but you're also distracted by pushing ahead and firing at people, so the Spy will have an easier time taking care of you.
As such, you should only push the cart as a sacrifice for your team's ultimate victory. Using fists of steel and sandvich when pushing on last can be a good idea, if you're eating sandvich on upward last and sentry's down you can handle the spam and get a win. Or overheal + fists of steel will allow you to handle the spam.

Sandvich and you: a love story

You probably know the Sandvich doesn't instantly heal you, it progressively does so = you can get damaged and still heal a considerable amount of hp. What you also probably know is that in highlander, other people need it more than you, including:

• Your med. He's on fire and about to die? Just survived a bomb? Heal him.
• Your combo. Sometimes, depending on the situation, healing priority leaves some of your core members lit, weak and on the verge of dying. Help them out.
• Your flank! Sometimes, your solly needs to be back in action quickly. It's better to give him a sandvich and get him an overheal by your med than to keep it to yourself and waste more of your medic's time.
Of course you need to know for when you need to save it depending on the circumstances; if a bomb's incoming, you want to have a sandvich on you. If you've repelled enemy forces, don't hesitate to heal teammates. It also depends on who's up and who's down on both sides.

You can pick up medkits to refill your sandvich, this includes small medkits. You can thus turn small medkits into medium medkits, eat your sandvich close to the medkit and instantly get a refill, or simply provide your team with consistent healthpacks advantage if the enemy heavy's not doing that. Of course, you shouldn't be dedicating yourself to that, but it never hurts to have an edge.

Sandvich masking is also somewhat important depending on the scenario. The sound of a heavy eating his sandvich means he's lit and vulnerable, you don't want anyone knowing that. Simply use a voice command as you are eating your treat; some like to use the "Medic!" command, a favorite of mine however is the negative voice commands, which are for the most part more quiet than their positive counterpart.

Last but not least, don't hesitate to eat your sandvich when the situation calls for it. Don't waste it.

ADDITIONAL TIPS (EXTRA)


• Taking advantage of damage and accuracy ramps is mostly favorable on defense. Reason for this is that when a heavy enters an area that's being held by the enemy heavy, his hitboxes are exposed before he can even see the enemy and thus inflict damage. The defending heavy will likely see the offending heavy first, and his odds of survival are thus higher.

• Crouching will confuse players at low levels. Don't rely on it though, it's inconsistent, cheap and apathetic towards the strategy you should use. Players who rely on one simple trick to do well never improve.

• Use TAB to see who's up and who's down, great for pushes.

• Never forget that if you have high latency, you will lose a direct encounter with the enemy heavy most of the time unless you have a high advantage.

• Projecting enemy trajectory can be very useful, especially against jumping soldiers and scouts and DR spies.
Gamesense and you (cont.)
When playing Heavy in a competitive environment, the most important thing to know is as follows:

YOU CANNOT DO WELL ON YOUR OWN UNLESS YOU'RE IN LIKE STEEL OR SOMETHING, PLAY WITH YOUR TEAM

Think about it. Take two Heavies of equal tracking skill; one is doing his own thing, holding a point away from his combo. The other is playing with his Demoman or, when not needed in the former scenario, saving his teammates lives and pressuring the enemy. Which one do you think is bound to do better?
Your biggest weakness is your primary weapon; not only does it have dmg and accuracy ramp-up, but it takes ~1 second to revv up and you NEED to be looking at your target at all times to inflict damage. This allows burst damage classes to take advantage of certain positions/chokes to get free damage on you.

So how are you supposed to get a lot of kills and roflstomp everyone on the server?
You don't.
It's a thankless main because often, especially in low levels, people won't appreciate the heavy saving their lives. But I digress; you should be playing demoman or soldier if you're playing for the frags. You basically want to secure the position you're holding, contain the enemy flank and incoming threats/overextenders, protect your medic and combo against classes that can really break them. (SCP)
Plus, when you do play with your demoman, you're able to complement his huge damage output. You're able to protect him from the enemy scout. You're able to keep him from getting backstabbed. You're able to soak up the incoming damage and serve as his damage sponge.
Same thing if you're playing really passively, you can allow your Sniper to do really well without him getting dominated by the enemy Spy.

A very common mistake new Heavies make is think they can push without their Demoman/other combo members. While this can work sometimes, you will end up in an unfavorable position which will result in your medic's possible death and assuredly yours. I'm not saying you should never be pushing ahead of your team (you can push on viaduct mid with uber if they have a few players down and give your team some breathing space depending on the enemy's positioning).

It's just really so much more useful to be playing around your combo than to be trying to make something happen by your own. Again, a Heavy who's doing the latter can MAYBE get a cheeky play that isn't that great in the first place, but one who plays around his combo secures their odds of winning.

Don't forget you can support your team without actually killing anyone. You basically want to focus on vantage points where you can deal a lot of damage without getting killed-- distracting the enemy sniper might prrove useful if you know he's not really good (applies to koth way more than payload if you ask me, don't try to do that in pl)

Another important point is threat assessment. You'll be faced with life-or-death scenarios that will affect the outcome of a match at least once every game you play. Depending on the circumstances, you will need to make the correct decision to preserve your team's odds of success. There are, though, a few generally acceptable decisions to take that apply to the majority of scenarios:

• Always take care of the biggest threat to your team first. Depending on the enemy's positioning, numbers and health advantage, you'll generally want to make the most out of what you have.
• Only make choices in which you know you'll die when you know your team will majorly benefit from it. I cannot press how important this is, especially on defense. If it doesn't stop the push/grant your team an advantage, it's generally not worth it.
• The guy with the largest damage output and mobility needs to go first. Say your combo is facing theirs and you took care of their demo and got half of the heavy' health before going down-- I say it's much better than getting the heavy and half of the demo, and it applies to all gamemodes.

"By that reasoning, should we not be targetting Scouts more?"
Theoretically, yes. However, there's a large difference between a demo's health pool and a scout's health pool, even their positioning is different. (demo can hide behind his heavy, scout loses his efficiency unless he's abusing some spot). He's also easier to take care of due to his small health pool.

Most of the time you wanna take the heavy out as a first priority in a life-or-death situation UNLESS you can get a vital pick. Per instance, enemy med's close to getting uber, but you pick him and go down to the heavy; if you had picked the heavy the med would have gotten away.
The reason as to why you wanna take care of the heavy is because due to your slow, sluggish mobility, you won't be able to run away, and a heavy's damage output can be tremendously high.

Threat assessment is really situational, but it highly depends on your game sense too. You need to be able to take decisions quickly when it comes to know who to take out first. It's not only about that; say you're low on health but you're in a really good spot (thinking of process pc as an example). Their heavy + med are trying to move up and you deal like 100 damage to the med with your tomislav, they'll be forced to retreat else the med's going to die. Tons of other scenarios where you can force people to retreat; it's not as good as killing them, but you can't get everything you want in life.

Gamesense: how to improve & reading your enemy
First and foremost, here is a piece of advice that will save you a lot of time you could be spending on real practice:

Do not play lobbies to try to improve; they are, most of the time, stacked by people who are just looking to relax. The lack of communication and attenuated cooperation will cause multiple misconceptions for someone getting into HL/6s if their first experience is lobbies.
I've played a few hundred lobbies as the fat man, and while it helped me to start acquiring knowledge, mixes and organized, communicative teams will help you get better.

Playing lobbies can contribute towards making you new friends/acquaintances that can later on get you in a team/play with you during mixes/ask you to ring for them, given you live up to their expectations.

Nobody, at a higher level of competitive, expects you to carry your team; this is a given considering the huge influence of a sniper in a Highlander match. You're expected to play with your demo and protect your combo. You don't need to be perfect in order to play at higher levels of competitive TF2, but being better than other Heavies - definitely the hardest part of it all - will make you shine.

Improving by looking at your logs.tf

Logs.tf allows you to see your stats in every competitive-format based match you've ever played, be it a tf2c lobby, a scrim or an official, given the server has the logs.tf plugin. Below is an example of what logs look like:


.png]
K stands for kills, A for assists, D for deaths, DA for damage inflicted, DA/M for DPM (damage per minute), KA/D for kill/death ratio, DT for damage taken and DT/M for damage taken per minute.

What kind of stats indicate a Heavy's skill level?

First off, you have to understand that while logs are a good way to review one's overall performance, they're not always accurate.
As a Heavy, allow me to start off by telling you that not having many kills is not the end of the world. You don't need to be the top fragger on your team, that's not your job. However, a good way to know how well a Heavy did his job is to look at his Medic's number of deaths.
The less the Heavy dies, the less the Medic is exposed to danger and subsequently dies less. It can identically be an indicator of a Heavy's very passive playstyle, which might hurt his teammates in the long run if they can't adapt. (not helping demo w/ cleaning kills for example)

Let's talk about damage inflicted and damage taken. I feel like the latter is very important, especially when you compare it to the other Heavy's. See, if you're taking a lot of damage, you're either underperforming because you're not getting many heals, or you're privating your combo/flank of heals and buffs they should be getting only because you didn't position yourself well. By taking a lot of damage, you're bringing your team down, unless your team plays around you as a main element. However, such a meta is obsolete in NA HL where Snipers are predominant.

Does that mean I should never be taking damage?

No-- it means you should try not to take extra damage. What good is it for you to spam a demo at mid to long range for 30 damage and lose 100 health? Think about the situations you put yourself in and don't be oblivious to the enemy.

Low damage taken and high damage inflicted is a very good indicator of good positioning-- it implies you've positioned yourself to take as little damage as possible while dealing a lot of damage. Damage inflicted alone isn't really a huge indicator, because a lot of times you'll have to play passively if their sniper has a brain stem.

I feel like your number of deaths is also pretty important. Allow me to explain; you're responsible for your team's territorial control. The more you die, the weaker your team's territorial control is. The weaker it is, the more the enemy can get picks and move freely.
You're bound to be brought down by other players who aren't good if you're playing with them. They will ignore your positioning, your damage and accuracy ramp-up/advantage, and will furiously blame you when they over-extend far beyond your reach.

The enemy Spy's number of kills and deaths is also a pretty good indicator if he's not really hard focusing your Sniper. As a Heavy, it is your responsibility to spycheck efficiently and keep the Spy from creating an opportunity for his team to push. Your Pyro already has spam to deflect, projecting your responsibility onto him is just clogging his work.
The more you spycheck and are aware of the spy, the less picks he'll be getting, so your team will have a better shot at ultimately winning.

Tl;dr for the logs section: die less, position yourself better, protect your med and spycheck

Reading/analyzing your enemy

At lower levels of competitive, every player has a pattern you can read and use to your advantage. Soldier bombing you from a specific route 40 seconds after the round starts? No problem, you're expecting him and ready to deny him. Spy always getting behind your combo holding rock and picking your med? Never again, because you're aware of where he's going and what his intent is. Of course better players will alternate between playstyles and routes they take often, however you'll still be able to analyze the situation.
Remember when we spoke of the enemy demo spamming pills implying he has a trap set up? Now apply this logic to a whole enemy team. Your medic died recently, they're getting more and more aggressive = they have/will have uber very soon, put yourself in a spot it's easy to pull back from. Demo spamming pills but they don't seem to have a trap? They're going to have kritz very soon, be prepared.
Be sure, however, not to jump to conclusions out of petty reasonings. An agressive team does not always imply an uber advantage, but it is likely the case.
Ubers and you
I've previously mentioned in this guide you should be holding back during ubers, however I feel like this is a matter that should be handled with more attention than I previously have. As such, we'll be discussing what you need to do during ubers, starting with your uber.
Due to your lack of mobility, you're not the best target to single uber, as such your medic will often choose to focus most of his uber on your demo/scout and flash you a bit (uber lasts 6 seconds if you flash everyone with it, 8 seconds if you focus it on one player). However, you can still be useful during an uber by doing the following:

Watching out for the Spy/flank overall. The former is VERY important, because a lot of good spies know to empathize on when your team ubers because that's when comms are clogged the most and it's hard to hear the decloaking sound/everyone's really distracted. Always expect the Spy to be waiting for the right moment to strike-- as mentioned earlier, knowing your enemy is also very important. See, Spies aren't all the same; some of them are quite agressive and will take risky decloaks to get important picks, some of them are on the opposite quite passive and pick you when you expect it the least. Think about it for a second; you just ubered and you're pushing up, your team gets a med pick but you suddenly die to a backstab. Now the enemy flank has more liberty to suicide into your med, and there's nobody to deny the soldier bombing him. Now you've lost your med and they have uber advantage/maybe even numbers, just because you didn't think about turning around and watching your team's back.

• If you're on the offensive team, DON'T OVER-EXTEND!. You're making yoursef way easier to kill by stepping too far in the enemy's territory, it's harder to retreat and you take more damage.

Think of a way out ahead-- an uber is worthless if you have to sacrifice your combo to get anything out of it. If you're committing with your team while still watching your back, it's a very good idea to start retreating if you didn't get a major pick. Your life is VERY valuable as a Heavy, by mindlessly jumping into the enemy you're relying on coincidences and the opposing team's weakness for your survival, and this is nowhere near improving.

Obviously it's very circumstancial and depends on what situation you're in, but that's what you generally want to do.

As for if the enemy ubers:

Take a step back. No really, they're out to get you and if you position yourself poorly you're going to die in a matter of seconds. Don't be a hero and don't over-extend to get a pick you think is valuable, because it won't matter if they're able to juice you out of their uber when compared to your odds of success. (which are pretty low if you're playing against actual gamers)

Be ready to punish over-extenders. Odds are you won't be playing against a team of b4nnys at their respective mains, and as they say "l'erreur est humaine". Think about it this way; you're the bouncer getting people out of the night club if they stay past closing hour-- the club would just get swarmed and vandalized without you.
Tracking: how to train, how to improve and tips
It's pretty hard to teach someone how to track because it's the heavy's only mechanical skill and one you need to work a lot on to get better at. Tracking as heavy is not exceptionally hard, but in some scenarios good tracking can save your life where bad tracking would have failed you.

Allow me to give you an example; if you get flanked by the enemy scout in a one on one, there are odds of you surviving the encounter if you track him correctly enough. Nobody is perfect and nobody can get pixel perfect tracking on any and every target, but you can get better at it the more you play.

You might be wondering "how do I get better at tracking?"-- one might find the answers to be controversial, but I find pubbing around to be good practice for that as long as you don't get negative pub habits incorporated into your hl playstyle. Nobody's penalized if you do bad since it's just a pub, there are some players with intricate movement and continually playing against them can make you improve, it's good practice to warm up, etc etc.
You could ask a friend to hop into an all-class MGE server too. Playing mixes and scrims can be a good idea since most people there will have good+ movement, but you end up penalizing your team if you don't track well. As I mentioned earlier in this guide, a lot of tracking is about projection; you need to be able to visualize the enemy's trajectory. Thus, a scout jumping is giving you an advantage by creating predictable points where his viewmodel will be.

Alternatively, load up tr_walkway, activate the ramp and try to get some mid-air kills. Be sure to reset your damage and accuracy ramps by stopping to fire each time you get a kill, because you want to be prepared for the worst, and having full dmg and accuracy ramps will prove to make tracking easier for you if you're training like I'm advising you to.
In the end, tracking is understanding your enemy.

As a Heavy you generally want to be able to track both high velocity (jumpers and scout) and low velocity targets. The secret to great tracking is not only mastery of both types, but also transitioning between them.

Do you need a gaming mouse? While it's preferable, I was able to track intricate movement with a cheap five dollars mouse. It's all about the muscle memory you develop through hours of practice.

One thing you can do to make tracking jumpy scouts is anticipate their jump, then quickly flick to the endpoint of the predictable trajectory they've created. What goes up must eventually go down.

You'll find below a small list of scout patterns I have found in my time of playing mixes/lobbies/watching povs/just pubbing around. What's really interesting about scout is that his hitboxes move around really quickly the more he moves, so understanding complex scout movement could prove to be beneficial to you

Pattern 1: medium strafes from the right to the left and from the left to the right, made mostly to buy time to inflict more damage to the heavy, done at mid-close to close range

Pattern 2: quick strafes from the right to the left and from the left to the right, unpredictably, made mostly to take less damage and onfuse the heavy's tracking

Pattern 3.I: start from the right, jump to the left, then jump directly above with a weak deviation angle. Made mostly to buy time, as jumping over a heavy's head forces him to move his mouse more

Pattern 3.II: left, jump to the right, jump directly above. A jump directly above a Heavy's head will often throw off his aim.

Pattern 4: move in a short circular fashion, like making circles. The goal here is to confuse the Heavy.

Pattern 5: simple double jump above your head, easily predictable since not really complex

I won't be including the deviations of these patterns. It'd be gullible and arrogant to claim that all scouts have the same exact pattern, but most players have patterns you can detect, and scout patterns variate over the spectrum of the patterns I've described above.

Last but not least, you have the mouse sensibility question. Some people perform well with really low sensitivity, others do well with really high sensitivity, it's entirely up to preference. It's commonly known that low sensitivity is better for hitscan since it allows you to be more precise, but if you have a high sens and you can adapt your wrist's movement to the flow of the enemy's, good on you. You generally want a sensibility that allows you to quickly flick to do a 180 degrees spin
I. Tracking by velocity: introduction & low-velocity targets
First and foremost, I'd like to start this section off by affirming the following:

Tracking most targets, as Heavy, is fairly easy.

Unlike the totality of classes in the game, with the half-exception of Pyro, the Heavy's main way of dealing damage is to keep looking at his target until said target dies. The pyro's flame particles are more encompassing, but deal less damage. The Heavy's minigun having the highest damage output per second at close range in the game after exceeding the 1 second mark of firing (starting from 50% damage), it is fair to call the Minigun/Tomislav (as those are his best primaries as of writing this guide, may change depending on the Pyro update's additions) a death ray that has some ramp-up. The following image shows the "ray"'s use depending on the distance from your target.


Looking at a target is very easy. Keeping your crosshair on that target is less easy, but still manageable. I find that playing Scout and Sniper help improve your tracking as Heavy, since they both consist of tracking a target, except they do it at multiple, non-consecutive points of time (hence Scout's burst damage), while Heavy has to do it continuously.

After having defined what Heavy tracking consists of, we have to move onto what types of targets you will be tracking. These are classified by their velocity, the speed at which they move being the defining factor in how difficult they will be to track. You will face three types of targets:

Low-velocity targets: Mostly enemy Heavies and, to an extent, Soldiers and Demomen in tight, closed areas. These targets have very little mobility and will have no other choice than to run away or inflict a high amount of damage their teammates will follow up on, should you trap them. The former is obviously easier for the Soldier who can rocketjump at a low angle to avoid getting killed.
Disclaimer: I'm aware Demo and Solly have huge mobility. We're strictly discussing their lack of mobility in tight environments. Their high velocity and mobility generally speaking will later on be discussed.

The low-velocity targets make up for their lack of escapability with damage output. As such, facing them is no lighter stand-off than the next ones.

Fighting Demomen at mid-range will often leave you at a loss if they're prepared, them having a higher damage output. If you have 100% damage output when the confrontation starts, you may win the fight, depending on how much HP they have and what their choice of weapon is. (high-level demomen will have no problem piping you thrice, that I can assure you)
Use the element of surprise and teammates to get the upper hand.

A mid to close-range encounter with a Soldier can go their way, depending on the cover they have at their disposition. If they're smart and don't over-extend, they can easily deal upwards of 200 damage and take, say, 40 in exchange. That is 2/3 of your base HP (~1/2 with overheal) for 1/5 of theirs (or, better yet, 2/15 if overhealed).
Don't let a Soldier abuse his cover. Not only are you taking in tons of damage, you're just wasting your time and attention span. Let one of your teammates deal with it if he has really good cover.

As for Heavies, it generally depends on who has the larger damage output first. The enemy Heavy will abuse his crouch key should he find himself cornered by you: do not take this fight for granted, even if you have a Medic. I assume that at this point of the guide, you've become fairly familiar with the Love and War Heavy nerf, hence the lack of explanation. If you don't, I suggest you read the aforementioned.
An overheal will save you only if both of you start firing at almost the same time, as in your damage output is only slightly inferior to his in the first second of firing.

These targets are relatively easy to track, having both large hitboxes and low mobility. They're not free kills, however, and should still be dealt with with the utmost care. Getting cocky will land you a nice backstab-- be careful you don't get baited into seemingly favorable situations.
II. Tracking by velocity: medium velocity targets
The second type of targets you will have to track are medium velocity targets. You may easily have guessed this category encompasses most of this game's classes. The key to tracking these targets is evidently to adapt your tracking to their movement. This should not be too complicated as long as your mouse sensitivity/DPI isn't over the roof.

That's not quite it, though. We've spoken of "most of this game's classes". You may be asking yourself if this includes Soldiers and Demomen. The answer is as follows:

Contextually speaking, maybe.
It highly depends on the situation. Soldiers and Demomen are slower than other classes, but they're very fast and mobile once they're in the air, the former more than the latter because of the Gunboats that allow their wearer to receive less self-damage from rockets.
On average, however, one could easily say they're medium velocity targets: slow on the ground, fast in the sky. The problem doesn't lie in tracking them on the ground-- it's when they're jumping your medic your tracking can mean the difference between a successful hold on Badwater 1st, or having to build on 3rd two minutes after round start.

The following figure shows the different stages of a bomb. The created trajectory is entirely reliant on the angle from which the rocket is fired, the jumper's position right before it hit the surface, etc etc.


If possible, you should already be firing between t0 and t1. This highers your odds of taking the jumper out. You can predict a jumper's about to jump based on their behavior; much like a Demoman spams pipes when he has an elaborate trap, a jumper will hold off from firing as to preserve ammo for the bomb, and pull back as to receive overheal. Alternatively, if you don't see a Soldier for a while on a king of the hill map, odds are he's about to jump you and bomb your med.

More importantly, you want to predict the jumper's trajectory and be able to visualize it. This comes with training and experience, mostly, but playing some Soldier can give you a great insight as to where the jumper will land, how long he'll be in the air for, the very trajectory he'll take, etc etc.
The good thing with jumpers is that they can't manipulate their trajectory. Sure, they can airstrafe, but this doesn't affect hitscan tracking much, and the trajectory remains unchanged for the most part. So once you visualize it and predict it, it's a free kill if you can track it.
Denying jumpers as Heavy is very important, because you're the only one who can do it relatively easily. Hypothetically speaking, your Pyro would have to guess when the projectile will be fired and deflect it. Your demoman would have to airshot the jumper. All you have to do is look and press m1. That's an exaggeration, but it means you're the best at denying jumpers.


Spy: reaction time and how not to get chainstabbed
In this section, we'll be discussing the risk the enemy Spy poses not only to you, but to your entire team as well.
It should come to no one's surprise that spies often get chainstabs, as in they stab a first player, then a second and possibly a third/fourth/so on.
These chainstabs are inevitable at even the highest levels of Highlander (more so in 6s where Spy is completely unexpected to be run even as an offclass) and it's hard to avoid them in very noisy environments, such as a heated last push/last hold.
Chainstabs are often game-defining and change the outcome of the entire match; as such, it's a Heavy's responsibility to ensure he doesn't fall prey to them.

As a Heavy, you are the most prone to backstabs, having massive hitboxes and being the slowest class in the game. Should a Spy sneak up on your team, however, he'll likely go for the Medic if available, then you. This means that you are more often than not one of his victims.

This section discusses the eventuality where you have not been able to stop the enemy Spy before he got a kill. The math we'll be using as shown below uses reflexes, as a chainstab is always unexpected by any of the parties involved.

THESE ARE ALL APPROXIMATE VALUES

According to the TF2 wiki, the Spy has a constant velocity of 6.07 m/s while walking.
If the average distance between a Medic and his Heavy is of 4 meters, the Spy takes 0.65 seconds to cross it, after backstabbing the Medic.
The attack interval of any knife is 0.8 seconds, so the Spy would need to wait 0.15 seconds more to backstab you.

On your side of things however, the human brain takes an average of 80 ms to process information, and another 250 ms to react to visual stimuli (the visual stimuli being the disappearance of the Medic's healing bar, or the Medic's name showing up in the killfeed).

Many tries have shown that it takes an average of 300 ms to perform a 180 considering you use the entirety of your mousepad. For the sake of realism, we'll go with 0.08 + 0.25 + 0.3 = 0.63 seconds required for you to turn around.

0.63 < 0.65 and you still have a bit of time before the Spy is able to attack again.
0.63 + x = 0.8 --> max latency one can have would be around 170 ms for them to be able to react in time physically speaking.

With the big earner, this is much harder because the Spy has a velocity of now 7.71 m/s. This gives him the upper hand against most Heavies.

However, that's not how it works. Not entirely, at least; a lot of beginners and intermediate Heavies who are reading this guide have yet to hone their reflexes to adapt to the stimuli of the Medic getting backstabbed.

These calculations were made in hopes of finding the reaction time to be smaller than the time it would take for a Spy to backstab you. All things said and done, you get 170 ms to make sure your hitboxes aren't exposted enough after your body has reacted.

Our calculations ignore latency entirely, assuming the Spy and Heavy have the same latency it's irrelevant. Should the Heavy find himself at a latency disadvantage, his odds of surviving a chainstab are much, much slimer.

But! A lot of Heavies see the feed, tell themselves "oh crap, my Medic's dead"... and die soon after. They haven't gotten used to treating the backstab/healing popup disappearing as a reflex, which means they're inevitably slower.

I suggest training yourself to reacting to these things not by thinking, but rather by simply flicking. It needs to become a reflex-- some Heavies, like Arthur and Polk, have demonstrated such an ability by near-instant flicks to the human eye, so it's definitely possible.

You simply need more playing experience. This section serves as advice/warning, not a tutorial. TF2 servers are your oyster.
Additional tips and video resources
I hope you've learned something from this guide.
Before I link you to the "videos" section of the epilogue, here are a few tips I think are worth keeping in mind and can make a difference:
• Low-level spies will walk in a straight line after you trigger their dead ringer. Take into account the speed boost they get, and in a lot of cases you can just land a call if they're low on HP. Don't try to track a DR-feign Spy unless it's the ONLY thing you could be doing, it's rarely worth your time, but a cool trick nonetheless

• Don't forget to take two things into factor in Heavy v Heavy duels: damage output, and mashing that CTRL button of yours. I can't tell you how many times I've gotten out of tight encounters with ~3 hp because I took those into consideration, sometimes it can cost the entire match.

• In a safe spot and their uber has overextended? Keep shooting the ground until the uber fades instead of shooting them, that way you attract less attention while retaining your damage output, thus maximizing efficiency.

• If it's not a point blank, you can always try to surf the damage away if you jump into an encounter you feel like you can't win. This often works when you have an overheal and you run into an enemy Heavy, because he keeps firing at you and propels you. Jump and equip your Fists of Steel. Not something you want to keep trying to pull off on a regular basis, but can prove to be useful every now and then.

• Make sure you're fighting on your own terms. Fighting in an environment that favors the enemy Scout will land you nowhere. If you need to commit to a fight, try to alter the environment to your advantage. Positioning is key.

Below are some great Heavy video channels you can watch to learn even more of heavy gamesense, map positioning, etc etc.

Rondego's "Much More than your Minigun" sandvich clip showing you what you should be doing instead when you can't do much:


Ruskeydoo's channel: https://www.youtube.com/channel/UC8v9VPIRlAIxXtnnpjnsYyA -- gives great insight and thoughts on positioning. I highly recommend any heavy watches his povs, there's no strict way to play heavy but you can always learn more

Kresnik's channel: https://www.youtube.com/watch?v=E_j0yPmQ47E -- same as above

Karl's channel: https://www.youtube.com/channel/UCVgZmBuoX-zf1S0zMN0ad3w -- same, it's also recently updated as of releasing this guide.

Extrasolar's circumvention to the Tough Break update heavy melee nerfs


Special mentions

Divi for being my personal inspiration to become better.

Extrasolar for teaching me some things about Heavy I never gave thought to.


Thank you for reading... now go.

96 Comments
Ubivat' Aug 15, 2021 @ 7:33am 
so you're telling me that only sandvich(and maybe banana) are viable i hl? damn that's kinda boring. I wish heavy had a shotgun to battle the lunchbox.
sponky Jan 7, 2021 @ 3:17pm 
I can't find Ruskeydoo's guide on positioning, could anyone link me to it? Thanks
Foil Love Sep 25, 2020 @ 6:43pm 
:balloonicorn::luv:
frog.fan Apr 30, 2020 @ 9:32pm 
massive guide, thanks for all the advice :) helped me out a lot
remember reach  [author] Mar 22, 2018 @ 2:04pm 
Thank you for your kind words, I'm glad to hear people are still finding this guide useful. All the best to you!
remember reach  [author] Aug 4, 2017 @ 1:34pm 
The second is that it's very unreliable. You can "mask" your head with your arm, by either looking up or spamming the "Go go go!"/"Move up!" commands (as that makes the Heavy point to where he's looking and mask his head), but it honestly depends on the angle the enemy Sniper sees you from, and it's not always guaranteed to work because of the way hitboxes work in TF2.

That being said, I may consider adding a small section including this in the hitbox manipulation category. Thank you for the input and for the kind words.
remember reach  [author] Aug 4, 2017 @ 1:34pm 
I don't mind the comments at all, so no worries.
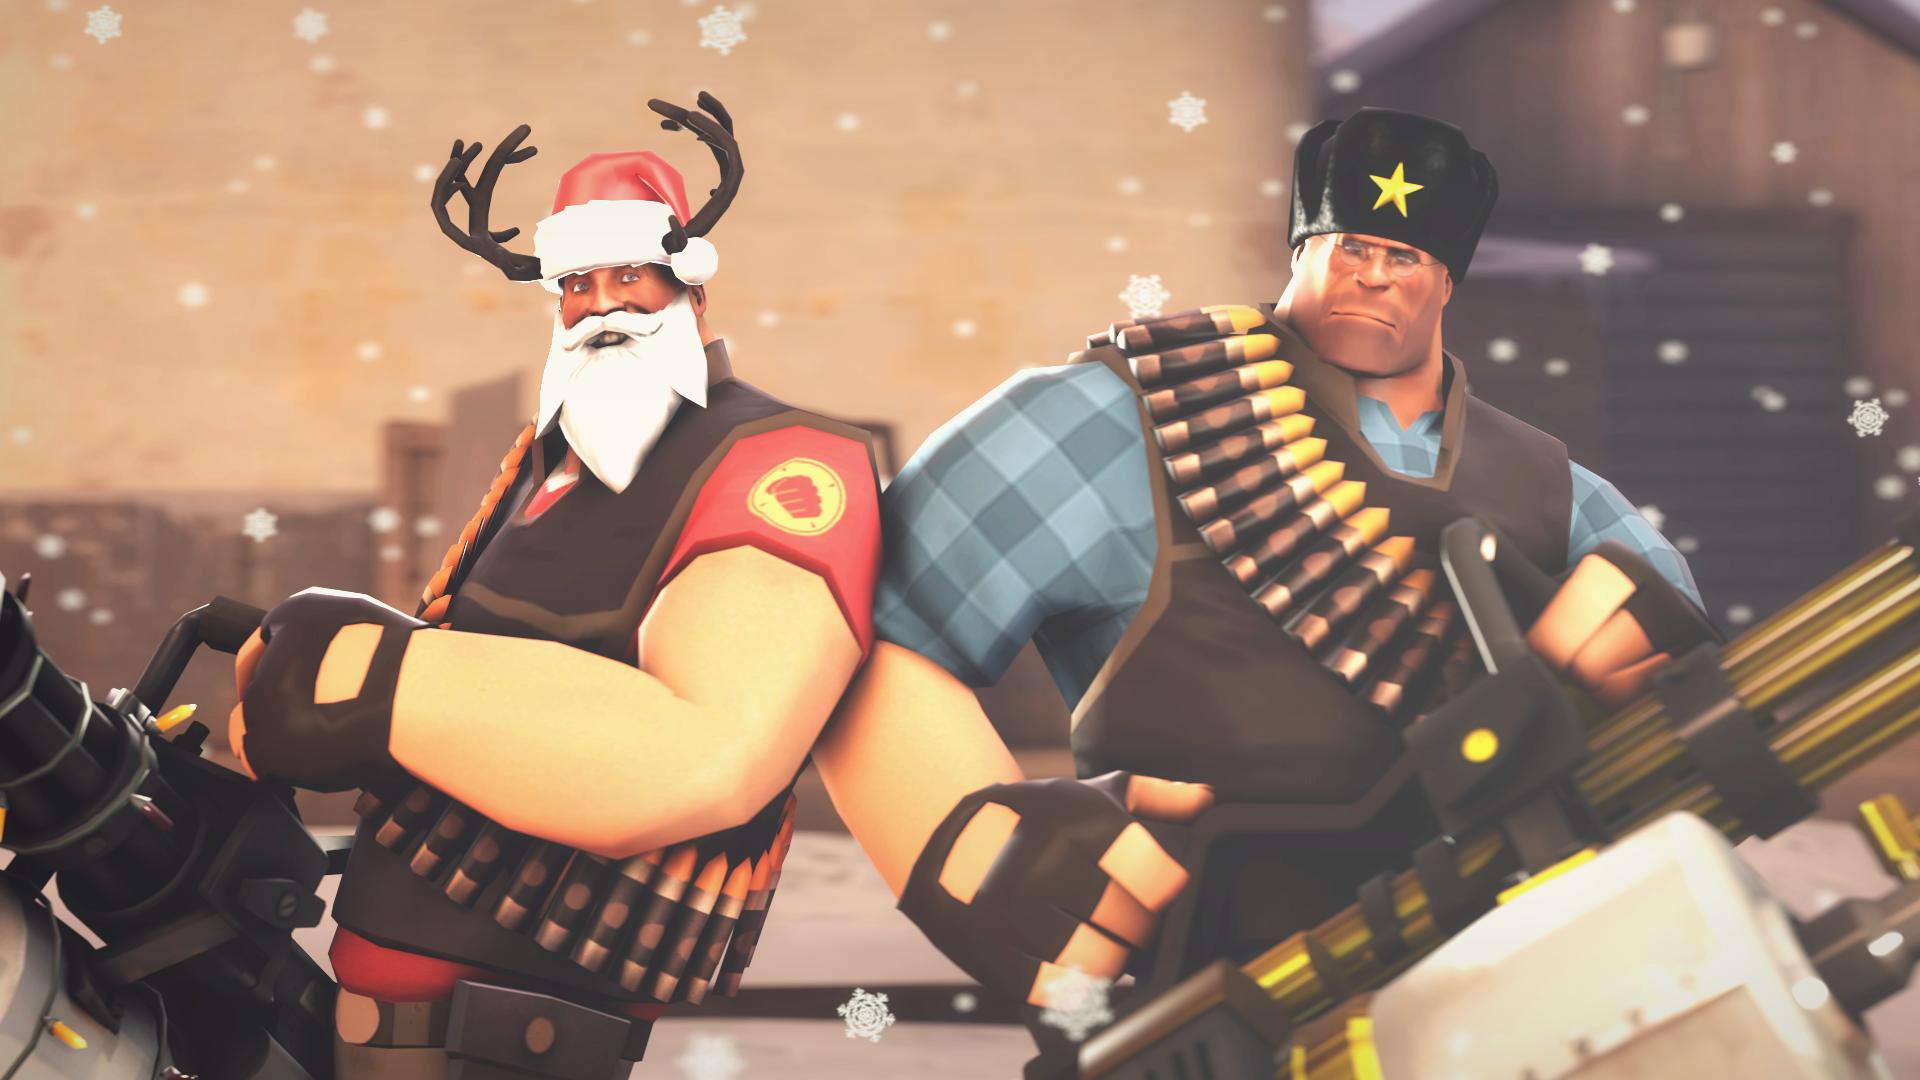
I'm aware of that trick, and I've even voiced it in my commens when rebutting to another Heavy main's advances. You're right when you say his arm blocks his head and virtually prevents headshots, but I don't think this should be in the guide for two main reasons.

The first of which is that it encourages bad habits like over-extending into sniper sightlines. Of course, one could say the same about spamming ctrl, but it's a last ditch measure. I think it'd only promote bad habits, and good positioning is crucial for Heavies, on some maps (such as viaduct) more than others.
UwU Aug 1, 2017 @ 4:51am 
Dammmmmmmmmm Moo actually investing time in improving, not being a lazy fatty :steammocking: if you want you could mge me for 1v1 against a spyy:steamhappy:
remember reach  [author] Jun 6, 2017 @ 4:43pm 
Last but not least, note how Maccy prefires before actually seeing the enemy Heavy. I've made mention of this technique in my guide, though I'm unsure as to whether it was clear enough or not, so I'll be sure to review it later today. Thanks a lot for the feedback!
remember reach  [author] Jun 6, 2017 @ 4:42pm 
Natascha can shut great Scouts down pretty well. That being said, I've seen it run on gullywash as well. I've tested it out and you can kill a Heavy using Stock with Natty as long as you have a slightly larger damage output, but I don't see much reason to run it permanently. The damage resistance sure is nice, but I don't think it's worth trading for the lower damage output, already hindered by the L&W update. It is pretty handy against headshots in koth which makes it even better as you can be a real annoyance to the enemy flank, but you should never rely on it and instead use positioning and terrain to your advantage.

As for pubs, it feels a bit sluggish. I'd only really bother if there was someone I couldn't track, and if there was I'd probably be better off training my tracking as aiming as Heavy isn't that hard. Still viable.