
Salt and Sanctuary

Salt and Sanctuary

44 ratings
Tower Shields and You
By Old Iron Johnson
How to stop worrying about bosses, hold down the block button, and stay Salty.
   
Award
Favorite
Favorited
Unfavorite
Why Tower Shields?
One boss in the game has an attack that bypasses your shield directly. Only three bosses in the game deal damage that one of your shields can't block more than 95%. Your shields will trivialize the Tree of Men and Witch of the Lake, two bosses that give other builds hives, and make armor nearly useless for boss fights. You can get one of the best tower shields in the game by area 4 with a little farming, and the single best one in area 5.

Beyond that, tower shields have some advantages that make them a great investment:
  • High stability: once you get properly set up, bosses will only do minimal damage to your stamina bar. Even multi-man boss fights won't be able to guard-break you, and dropping your guard for just a second or two will give you back all the stamina you need to take more hits.
  • Less need for timing; you can keep your block up in anticipation of an attack instead of rolling.
  • Excellent combined resistances: Early on, you'll get shields that negate physical and fire damage almost perfectly, and later you'll do the same with physical/magic and eventually all types of damage.
  • No bosses except one can bypass your guard.
  • Early accessibility: you get good tower shields by the Sunken Keep or Castle or Storms.
  • Loadout freedom: with great resistances, you get more choice in ring/armor slots.
  • Only need to get shield skill to level 4 for full advantage.

However, you face some downsides:
  • Weight: the good tower shields weigh between 28-36, a big hit to your equip load.
  • Rolling: For most of the game, you'll be stuck with a midroll at best.
  • Slower parry: makes the biggest difference in the early game, where tough enemies like Bronze Knights are hardto kill without it.
  • Vulnerable to grabs: these go through your guard, and with your limited roll, it's harder to dodge things like Retchfeeders or Bola Eyes.
The Options
THE BEST

Iron Rampart
Weight: 36
Shield Level: 4
Upgrade Path: Drowned
Blocks: Everything
Drops: Armor Golem, Castle of Storms
Bosses: Any, if you can lift it


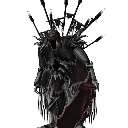
This is why you go tower shield. For most of the game, using this baby means running naked, unless you've pumped endurance and nothing else. It only needs level 4 to have 100 block in everything, meaning it won't suck up your precious drowned tomes for full efficiency. It's the only tower shield that has a perfect resistance to lightning, meaning you can free up a ring slot while you beat in Third Lamb and Skourzh's faces.

At the same time, until you go NG+, you'll probably be stuck using one-handed weapons. It also requires farming, meaning that unlucky drops can keep you from getting it for a while.

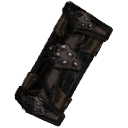
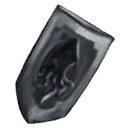
Type 46 Tower Shield
Weight: 28
Shield Level: 3
Upgrade Path: Ordinary
Blocks: Phyiscal, Fire
Location: The Three (level 4), Iron Ones (level 4), Red Hall of Cages
Bosses: Kraeken Wyrm, Tree of Men, Disembowelled Husk, Dried King


Not quite as good as Iron Rampart, but you can get it by the Sunken Keep with creed upgrades and it'll still ruin the ♥♥♥♥ of the next few bosses. While its resistances against everything but physical/fire are medicore, it's got great stability, frees up a few pounds, and only needs ordinary materials to upgrade. Basically your workhorse until you hit the Lamb or the Witch. At level 7, it hits 100% stagger reduction, meaning no stamina loss from attacks; overkill, but a nice bragging point.


Ashen Effigy
Weight: 32
Shield Level: 4
Upgrade Path: Ordinary
Blocks: Physical, Holy, Arcane
Location: Ziggurat of Dust
Bosses: Lake Witch, Architect, Murdiella Mal, The Three, Nameless God

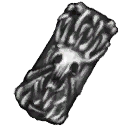
Salt and Sanctuary has a lot of endgame bosses who use some mix of slash/blunt with holy/arcane. This shield soaks both of these damage types like a champ, and still gives you 4 free pounds over the Iron Rampart. It also has a neat little effect where physical hits damage the opponent back, like Lamprey armor. The damage reflect probably won't make or break fights with bosses, but it can help against tougher nuts like Bronze and Alkymancery Knights. It's a little obsoleted by the Pruina Scutum, but for bosses who attack constantly, its stability is helpful.

THE GOOD

Pruina Scutum
Weight: 20
Shield Level: 4
Upgrade Path: Frozen
Blocks: Physical, Holy, Arcane
Location: Salt Alkymancery
Bosses to use on: Arcitect, Murdiella Mal, Nameless God

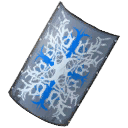
Basically the Ashen Effigy with a little less stability and a lot less weight. It does the same job against the same bosses and is light enough that you'll probably be able to swing a greatsword alongside it. At the same time, it's a weaker all-rounder since its other resistances are in the 40s-50s, and that low stability means you'll be hititng less often and might actually get your guard broken. You get it late enough that it's basically an NG+ shield, too.

It also shows up right before the Architect boss fight so you can point and laugh at those magical explosives.

THE SOLIDLY MEDIOCRE

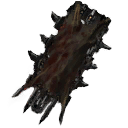
Flayer's Rack
Weight: 26
Shield Level: 2
Upgrade Path: Ordinary
Blocks: Physical, Fire
Location: Red Hall of Cages, Red Lord drop
Bosses to use on: Tree of Men

It's a drop that's made for fighting the area boss, thanks to a 100 fire and 90-ish blunt resist. If you haven't pumped shields up to 3, use the wrong creed, or haven't farmed up your devotion levels, it's a nice throwaway to get past one of the game's more annoying bosses and then never use again. Ties with the Ashen Effigy for "most metal-looking shield" award.

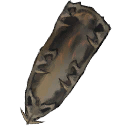
Kraekan Greatshield
Weight: 18
Shield Level: 2
Upgrade Path: Drowned
Blocks: Physical
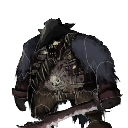
Location: Bronze Knight drop
Bosses to use on: Queen of Smiles

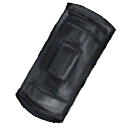
If you get lucky, it's a good shield that can carry you through a couple of areas before it inevitably gets replaced by gear with more varied resistances. Drowned materials are better saved for boss weapons or the Iron Rampart. Don't sink them into this one.

THE TRAPS

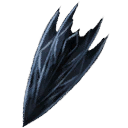
Tainted Greatshield
Weight: 30
Shield Level: 5
Upgrade Path: Ordinary
Blocks: Physical, Holy
Location: Salt Alkymancery
Bosses to use on: Architect, The Three, Nameless God

This shield weighs in at only 2 pounds lighter than the Ashen Effigy, but requires level 5 of the shield skill, which only opens up this thing. It doesn't even have the arcane resistance, and has the secondary effect of damaging you while corrupted, but healing when you block. The investments you have to make for it just aren't worth it, especially when other shields do everything it does better.

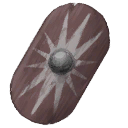
Askarian Scutum
Weight: 12
Shield Level: 2
Upgrade Path: Ordinary
Blocks: Blunt
Location: Sunken Keep
Bosses to use on: None

Baby's first tower shield, found when you finish the Sunken Keep. Only worth using if you're too strapped for weight to use anything better, and even then, its mediocre resistance to everything but blunt makes it pretty useless for any bosses or many future areas. Use the Teuthis shield instead.

HONORABLE MENTIONS
Teuthis Shield
Weight: 10
Shield Level: 1
Upgrade Path: Ordinary
Blocks: Physical
Location: Three Creed blacksmith
Bosses to use on: Lamb, Skourzh

Your shield before you get the resources to branch out. Actually great for an early-game blocker, with 100s in both physical damage types. Sure, every other resist is paltry, but it'll carry you through those first few areas. A great reason to grab the Three creed instead of its competitors.

The actual drop is in the Dome of the Forgotten, which is so late that it's actually laughable.

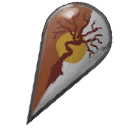
Sunset Kite Shield
Weight: 10
Shield Level: 1
Upgrade Path: Ordinary
Blocks: Lightning
Location: Village of Smiles, after Far Beach
Bosses to use on: Lamb, Skourzh

A decent option if you need something to keep the lightning off you, something light shield actually do better than big ones. You get this by grabbing the bag of earth from the base of the Ziggurat, then going back to Fern, who's after the Queen of Smiles. Answer yes/yes to get the shield.

There are also two other light shields that give 95% lightning resist, transmutable from the Dome of the Forgotten. Both of them have weak physical resists, which is a problem when Lamb and Skourzh both love to hit you with their spiky bits.

EVERYTHING ELSE
  • Gangplank Mantlet: gotten midway through the game, Askarian Scutum 2.0. Not enough resistances to be worth using over the shields you can lift at that point.
  • Boeotian Greatshield: perfect resistance to bladed, trash against everything else. Gotten in the same area as the Gangplank Mantlet, and equally useless.
  • Oppressor's Greatshield: A slightly lighter Type 46 with no fire resistance, requires a diamond cluster and 30k salt to get. Decent and good-looking, but pales comapred to everything you have by that point.
  • Carapace Pavise: Mediocre resistances all around and a decent weight. Gotten in the 3rd to last area. Nice for cosplay or if you haven't been pumping endurance.
Tools and Creeds
Your shield build goes quite naturally with the following skills:

Heavy Armor (END): same direction on the skill tree, gives you the endurance you need to use your shield. Excellent if you use your shield on bosses more than regular enemies, since you'll be able to take hits from meaner stuff without dying. By the end of NG, you'll have enough to use some of the lighter towers with stuff like the Umbral set.

Level up to: 4. The Tainted Armor is like its companion shield, in that it's inferior to its level 4 versions.


Berserker (STR): gives you one-handed axes and maces. Compared to swordfighter, it won't give you the equivalent two-handers, but will give you a choice between mixed slash/strike or pure strike. A lot of bosses and endgame enemies have insane slash resistance, which is a major weakness of swords.

Level up to: 4, for the Tetruncheon mace, an amazing all-rounder.


Heavy Macefighter (STR): Opposite of berserker; gives you the big two-handers. While they do amazing damage and can stunlock like a charm, the slow attack speeds and weight make them a better choice for a pure two-handed build. Once again, a great alternate if you're using your shield to tank the boss, and definitely worth dipping into. These also have the problem that the best greataxe/warhammer are both class 5, which means no shield with them.

Level up to:
  • 1: just for grabbing the warhammer you get in Sunken Keep for its blunt burst damage.
  • 3: Obsidian Pillar is the second-best warhammer and will stunlock nearly anything if you have the stamina. Iron Butterfly is a good slash weapon.
  • 5: One of the few strength weapon skills that's worth 5 points, Trinity Scepter is hands down the best warhammer, and the Castaway's Greatadze is great too.


Swordfighter (STR/DEX): Gives one and two-handed swords. While you get a big variety of weapons, all of them do slash damage, which makes them very situational. At the same time, its two-handers are light enough to use with shields and capable of amazing DPS, and it has DEX options that maces don't. A good focus if you have some way of dealing strike damage.

Level up to: 4, purely for the Scharfrichter.


Pikeman (STR/DEX): Gives poleaxes, repaers, and spears. It's the closest to shields, meaning fewer nodes invested, has good reach, and has options for STR and DEX builds. At the same time, almost all of its options do slash damage, leaving it with the problems of swordfighter while lacking its high burst damage.

Level up to: 4 if using with shields, 5 if two-handing.


Other weapons: Bows, whips, and guns all require you to drop your shield. Daggers have the weaknesses of swordfighter at 10 without a lot of advantages. Magic weapons don't really take advantage of shields, since you fight from far away.

Overall, the decision comes down to using a shield for everything vs. bosses. For fighting whole levels, Berserker/swordfighter is the better choice. If you do a two-handed hybrid, prioritize Heavy Macefighter or Swordfighter and dip into Berserker.

Specific Gear
  • Scharfrichter: Not only does it have the amazing "fast hitter" flag, the Schar does more damage than the level 5 greatsword, has S scaling with strength, and has a unique feature: its strong attack does more damage one-handed than two-handed. It's a natural candidate for use with a shield. One of the few weapons worth spending your drowned tomes on.
  • Tetruncheon: A light mace with extra slash damage and decent scaling. Great for bashing just about anything, does good posie damage, and is probably the best one-handed STR option.
  • Kureimoa: It does decent damage even one-handed, has OK reach, and is light enough that you can still get some armor with it. A workhorse.
  • Jaws of Death: Amazing as a two-hander, and still great one-handed. The premier slash weapon until the Schar comes up.
  • Mossy ring: faster stamina regen means less time with your shield down, more hits soaked, and more attacks. It should always be in your ring slot if you're doing serious fighting.
  • Umbral set: If you use heavy armor, this is what you're aiming for. No poise at all, but amazing resists and aesthetics.

CREEDS

You're best off starting with the Three as your creed. It gives you both the Teuthis and Type 46 shields, spare Kureimoas for transmutation later, and replentishable fire/lightning buffs for weapons. Compared to the Iron Ones, it gives you better shields and more variety for attack options. You can also pump up your devotion levels early, with skullbats, drowned soldiers, and heartseekers all appearing by the Sunken Keep. This'll get you to level 4, where you can buy the Type 46 tower shield and coast the next few areas.


Once you get to Cran's pass, the House of Splendor is the endgame creed of choice. It offers an incredibly powerful buffing item, dirt-cheap transmutation and upgrade materials, and uses the same materials to level devotion as the Three, making it easy to jump back up the ranks quickly. Compared to its next closest competitor, the Order of the Betrayer, it has much better items for sale, and its buff item is arguably more useful due to boosting your defense, lasting longer, and not requiring you to hit the enemy with a thrown projectile. It's also considerably easier to level without ruining the chances of joining another creed if you change your mind.
Boss-Bashing: Trees, Men, and a Weird Swamp Thing
Boss descriptions assume that you're using a good shield for that point, but that you didn't farm the Iron Rampart.
  • Up to Sunken Keep/Castle of Storms: Teuthis Shield
  • Castle of Storms to Ziggurat of Dust: Type 46 Tower Shield
  • Ziggurat of Dust to End of Game: Ashen Effigy/Type 46 Tower Shield

The Sodden Knight:
If you have your Teuthis shield, use it to block everything except the lightning shots, which you should jump over. Keep an eye on stamina; at this point in the game, your shield and bar are still too low to turtle.

Difficulty: 3/5, don't stick it in the outlet

The Queen of Smiles
She does completely negligible damage to your stamina and has long cooldowns after most attacks. If you keep using your Teuthis shield, she can't even do chip damage through it.

Difficulty: 1/5

The Mad Alchemist
The first real muilti-elemental boss, mixing up poison, lightning, fire, and arcane, and will always chip through your block. Since he has no melee, two-hand that kureimoa and chop him down quick. Still, remember that half damage is better than eating it.

Difficulty: 4/5, this is your boss on drugs

Kraekan Cyclops
Pings your stamina bar a bit if you still use the Teuthis. Likes to swap sides on his swings after half health, problematic if you're rolling around. Don't attack so often that you get guard broken, and you shouldn't have any trouble. If you still struggle, farm up a delicious Type 46.

Difficulty: 2/5

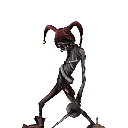
The False Jester
Queen of Smiles 2.0 with more mobility. Still does one damage type and can't dent your stamina. The biggest difficulty in this fight is waiting for an opening to stab him back.

Difficulty: 1/5

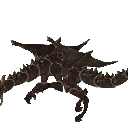
Kraekan Wyrm
Fire resistance is the most important in this fight, followed by blunt. Your Type 46 does this job admirably, but if you don't have it, bite the bullet and grab the Phoenix Rondache to keep the fire off your back, since wounding is the devil.

Difficulty: 2/5, BYOBBQ

The Tree of Men
Another blunt/fire boss. Use the Type 46 or Flayer Rack. Stay off the bottom floor, where you'll get kicked into a hole, and block whenver there's fire on you. The left side has fewer platforms collapse. Make sure you have two weapon sets: slash for the men and blunt for the tree.

Difficulty: 3/5, for insane soccer skills

Disembowelled Husk
Mixing things up, he does slash/fire. His sword is much less dangerous than his pistol for the same reason as the last two bosses. Fire resistance is your friend, and the Type 46 will make all of his attacks bounce off you. Hit him after his jumping combo or air shot.

Difficulty: 2/5

That Stench Most Foul
You don't really need a shield for this one. Just cover your weapon in fire and kill it in 30 seconds. He doesn't do enough damage to keep you from healing right through it. The axe knight in front of the lever might be the real area boss.

Difficulty: 0/5, the Pinwheel of SaS
Boss Bashing 2: I Accidentally the Lord Souls
The Untouched Inquisitor
Hurts pretty bad if he gets past your block, and flies in the air, making it a pain to catch and hit him. Still does monotype physical damage and has long attack cooldowns. Your warmup for the next boss.

Difficulty: 2/5, for frequent flier miles

The Third Lamb
Same as the Mad Alchemist: lightning, slash, and poison, so the Type 46 won't save you. It has elemental weaknesses, but you can't just turtle without the Rampart. Grab a shield/ring with decent lightning resist and hit it when it charges up the big lightning shot. After half health, it'll start comboing into lightning moves after attacks, so be more cautious. The poison damage is negligible.

Difficulty: 4/5

Ronin Cran
Jumpy acrobatic version of Artorias, a problem for wizards and dex builds. He can't hurt your shield and those flashy moves give you time to recover stamina. Beat him while he's powering up. Note: despite looking like it's magic, his dark aura just makes him deal more slash damage.

Difficulty: 2/5

The Dried King
Uses fire attacks exclusively. Has some quick followups in his second stage, so keep guarding until you have an opening to put your mace through his head. Getting hit hurts, but still can't threaten you.

Difficulty: 2/5

The Bloodless Prince
Yet another monotype physical boss. His foot stomp attack can take off a chunk of stamina, but it doesn't happen often enough to wear down your bar much. Chop him in the ankles.

Difficulty: 2/5

The Coveted
Strike/slash, and like to chain its attacks together to leave little space for hitting it back. You can still soak all of its damage easily, but make sure not to get chained by its blasts while hitting the axe. Really likes shockwaves, so stay away from thrown axes.

Difficulty: 3/5

Carsejaw the Cruel
Not only is he the fifth boss in a row with a single damage type, he has the best heavy armor set and greatsword in the game. With low poise and two negative resists, he folds like wet paper and lets you cosplay him.

Difficulty: 2/5, not as neato as they said

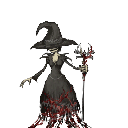
Witch of the Lake
The one boss that makes a shield build all worth it. She pretends it's a bullet hell game, and can actually knock off enough stamina to guardbreak and oneshot you with low stamina. Her tendency to shoot offscreen also doesn't help you kill her any faster.

Fortunately, she's almost all arcane damage, and your Ashen Effigy laughs off anything she's got. It's a matter of patience keeping your stamina high. Don't get greedy, since one opening will kill you; hit her after her melee attacks or the non-homing spam attack.

Difficulty: 5/5 if you can't manage stamina or forgot your shield, 2/5 otherwise

Murdiella Mal
Witch of the Lake that won't one-shot you for a failed block. The real annoyance is chasing her back and forth. If you're low on stamina you can run away from most of her ranged attacks until your bar fills back up.

Difficulty: 2/5

Unskinned/Architect
A two-man fight. Unskinned does strike damage, the Architect flies around laying holy traps. Use Ashen Effigy or Pruina Scutum. Since the Unskinned uses melee and isn't very mobile, it's easier to wear him down first, especially after he charges and falls over. If you need space, disarm traps by walking into them with your shield up.

Difficulty: 2/5, teamwork makes it happen

Kraekan Dragon Skourzh
Lightning is always a pain unless you have the Iron Rampart or one of the 100% resist non-tower shields. If you don't, pop on your resistance ring and learn the timing so you can dart jump away from his walls and breath. He still won't do enough damage through blocks to kill you before you kill him.

Difficulty: 3/5

The Three
Three bosses for the price of one: King, Knight, and Judge. The first two are melee attackers with moderate slash resistance; Judge shoots magic and has huge resistance to strike and elements. King has a kick that comes out very quickly, a jump attack, and a normal swing. Knight shares the jump and swing, but trades the kick for a block. Judge is like a toned- down Witch of the Lake or Murdiella Mal, shooting a stationary projectile that'll rapidly home in on you. This shot reaches across the entire arena and hits hard, though not fatally. Low stability will keep you on the edge from chained hits, so use the Ashen Effigy or Iron Rampart.

This fight poses the same problems as the Architect. It's hard to find a time to attack, and even harder to heal. Unlike builds that rely on rolling, the Judge isn't a definite priority; in fact, the King is probably your best target, since he's in your face, more mobile and aggressive than the knight, and opens the others up when killed. Despite their size, the bosses won't do that much damage to your stamina, and each individual attack isn't too damaging if it gets through your shield. Use the melee fighters' jump attacks to split them up and kill them piecemeal.

Difficulty: 4/5, where are your gods now

Nameless God
Stop the presses. This is the first boss who has a grab. That's right, a mechanic that actually punishes you for sitting behind a shield. Granted, it only does about a quarter health and is relegated to the point where you almost finished the entire game, but it's the thought that counts.

Outside of his super-unique secret move, Nameless has another Mal/Witch-esque magic barrage and several sword combos. His poise is low for a boss, letting you knock him out of attacks, but he does have quick followups and likes to make distance. Watch out for ihm chaining grabs or grabbing you as you start to stand up, since it has almost no startup. There's no real gimmick to the fight outside of just fighting better than he does, although your shield does make things easier.

Difficulty: 4/5
6 Comments
Oct 11, 2020 @ 9:21am 
Admittedly I like the look of using a tower shield with a whip. Best used with something like poison so you're still dealing damage even when you're between attacks.
Apr 7, 2018 @ 1:44am 
nice
May 20, 2017 @ 5:35am 
Well, I just rolled every boss into a ball with a two-handed sword, so yeah. Turtling is the worst thing you can do in boss battles, tbh. Playing super-aggro always works better.
Oct 21, 2016 @ 4:58pm 
I had full Umbral (partially upgraded) + fully upgraded Iron Rampart. I decided to use the Opal Tusk as my weapon of choice, with the Mossy Charm. I would get puhished by getting greedy, but only by her melee attack. I died on the first run, because of an error window popping up (yeah, I blame something else :steamsalty:). On the second try, it did not take me that long to kill her, but I still got her killed on second try. Tower shields to help you a lot
Old Iron Johnson  [author]
Oct 21, 2016 @ 4:35pm 
Witch of the Lake is absolutely the worst one to get bored on. You get greedy, try to go for another hit, and eat 20 shots to the face. Although running on NG+3 with Umbral armor actually means most bosses won't 1-shot you for a failed block.
Oct 20, 2016 @ 7:44pm 
I have tested the Best Shield (Iron Rampart) on NG+4 and NG+5, so far, having a high level, makes it pretty simple to kill bosses, only takes a long time: block, hit 1-3, repeat 100+ times boss dead, or you die, because you let your guard down, to allow the boss to one shot you, hahaha