The Long Dark

The Long Dark

Not enough ratings
Survival guide - Lessons from the wilderness
By Cryinghawke
This is a comprehensive yet spoiler free guide to surviving the wilderness. It will not tell you everything but it will help your survival chances. The guide is written with exploring in mind and not hand holding.

The guide is split into lessons for ease of access. It is advised to read the guide as you play.

DISCLAIMER : if you have played the game for more than a month move along, this is probably not for you. Reading this might spoil some of the fun for many players. I've written it to be as spoiler free as I could.

Each lesson assumes you've read the previous lessons. It is advised to read this as you play and NOT in 1 sitting.

If you've played adventure/exploration games before scroll down to lesson 4. Lessons 1-3 are very basic, you can skip those.
   
Award
Favorite
Favorited
Unfavorite
Lesson 01 : Menus and UI and controls.
This is true for most games but before you jump in take a minute and look through the menus.

Stop by the settings menu and familiarize yourself with the controls. The controls section can tell you a few things like :

There is no jumping in the long dark. (see mods below)

There is more than 1 weapon in the game.

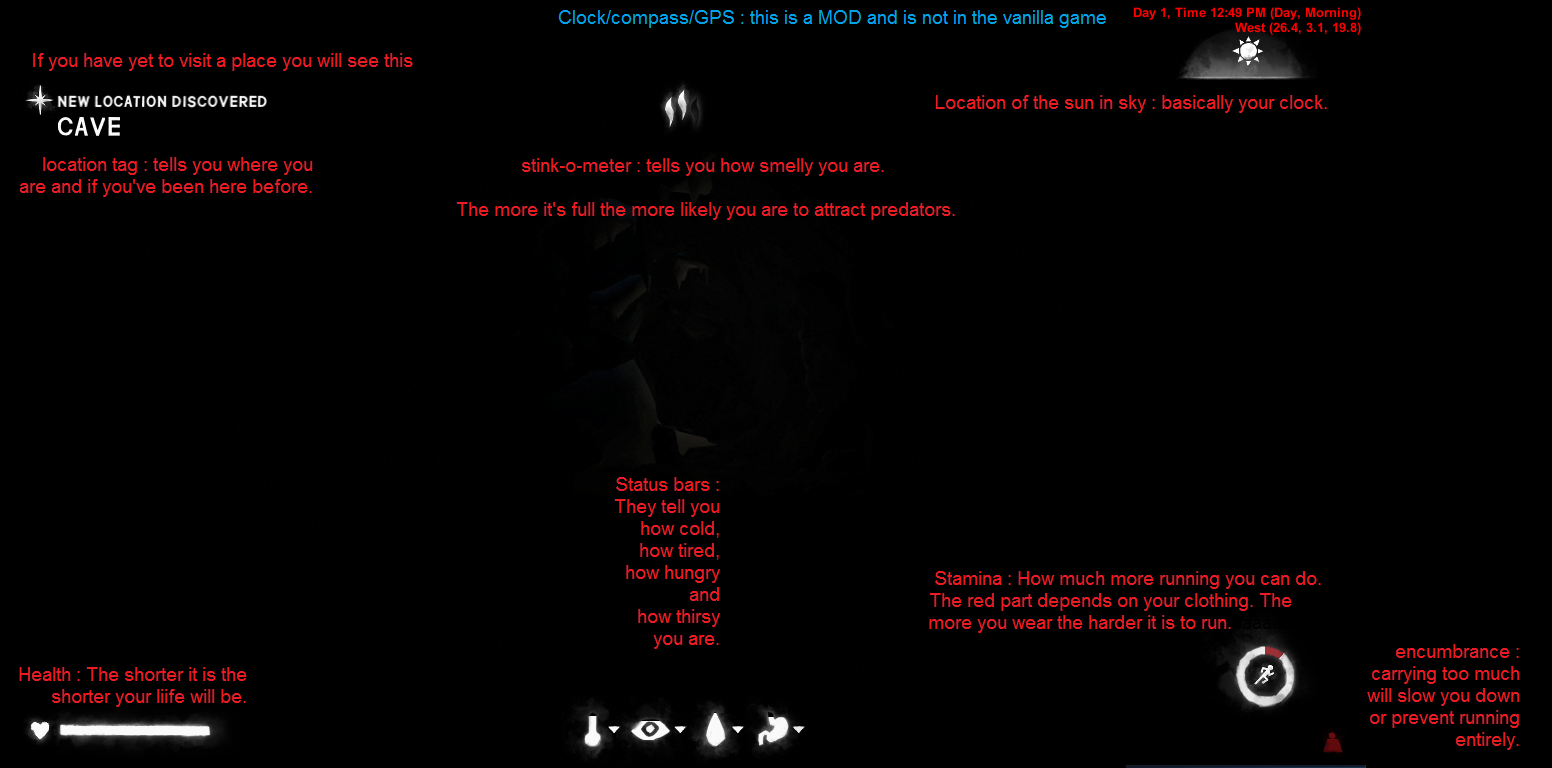
Once you're in the game play around with those controls, check out the menus and UI(see provided image) to learn all you can. It's not too complicated and will save you some trouble later on.

Change the keybinds as you see fit and proceed to lesson 2.

UI explained

Lesson 02 : No shame in starting in easy mode.
If you've explored the menus like suggested in lesson 01 you know that the game has several modes(Survival, Story/"Wintermute" and Challenge).

Survival mode has 4 difficulties plus a custom settings mode(later on that) ranging from easy to extreme.

There is no shame in playing Pilgrim your first time around. Before story mode Pilgrimg was the best way to learn. Starting story mode is also an option if you want a basic tutorial with a bit of hand holding that is not present in the Survival mode.

Have you chosen your prefered mode? Good. Move on to lesson 3.
Lesson 03 : Stop, breath, relax.


TLD is not a fast paced game. You won't die immediately if you are new to the game. Take a few minutes to compose yourself.

Check your inventory, what do you need the most?

Check your immediate surroundings, what do you see?

You have no hat? Don't panic. You don't have a gun? Don't panic.

For the moment don't focus too much on your status bars.

Are you calm? Good. Move to lesson 4.
Lesson 04 : Starting out, shelter and foraging
So, you checked out the settings and picked a mode to play in. You know how to access your inventory and what is in it. You've taken a quick look around and you are ready to go.

Okay then. Pick a direction and walk, don't run. As you walk look for items on the ground, bushes and trees. Initially you want to pick up pretty much everything you can find. Everything in the game is useful at one point or another.

Your first real goal should be shelter. You don't want to be outside when the winds pick up or when the sun goes down. Shelters can be as simple as caves or as comfortable as houses. They will serve as a place to rest when turn in for the night. Not all shelters are equal.

Look for man made structures and paths as those usually lead to shelter.
The bigger the shelter the more you will usually find in it. Take your time and look everywhere thoroughly. Items tend to "hide" under objects. Some of the best loot is not in plain sight. Check every container and even corpses.

Are you staying in a warm and comfortable place? If so, proceed to Lesson 5.
Lesson 05 : Weight management, inventory and sorting and the journal.
First off, I highly recommend using containers and NOT dropping items on the floor. This will both save you from clicking to pick up many items and help you organize. Some items do stack(e.g ammo boxes and pill boxes) but dropping arrows or sticks is ill advised.

Each section of your inventory(see below) will show the total weight of the items in it to help you find what you are carrying the most of. As mentioned in lesson 04 many of the items ARE useful but not all of them have to be on you at all times. Do not carry more than you have to.
  • Fire starting : anything that burns or can start a fire will be here. Keeping a pile of firewood in your shelters is always a good idea so whenever you have a lot of it store it for later. Don't take a lot of firewood with you when leaving the base. Sticks and branches are not hard to find and a hatchet is lighter than the wood it can cut. It is usually best to pick up sticks as you walk and not bring firewood with you from home. Keep that in mind and you will always have enough wood to keep you warm or boil water.

  • First aid : bandages, pills, antiseptic and such will be found here. You will not need most of the medicines you find on you at all times. You can for the most part pack 2-3 bandages, some antiseptic and painkillers just in case.

  • Clothing : This section is split in to two parts - worn and in pack. Worn clothes weight slightly less than if kept in your inventory. This section should ONLY have the clothes you are wearing when heading out to explore.

    That being said - dress for the occasion. The weather and what your plan for the day is dictates the dress code. If you are going on a long trek you might want to have heavier clothing. If you are going to be going in and out of buildings you can afford to wear less.

    Keeping cloth and sowing kit is preferable to spare clothing. You don't need to pack an extra pair of pants just in case.

  • Food and drink : Anything you can cook or consume will be placed here. As with clothing - take what you need. You don't have to carry tons of food or water unless you know you won't be able to get more. An empty bottle and a tin can weight less than 1L of water and you can boil water with ease(see fire starting above) and a fishing tackle at 0.02kg is far lighter than a fish. Carrying raw meat is also not advised as it will fill the "smelliness" meter(see link provided in lesson 01 "UI).

  • Tools : Tools are obviously found here. Your weapons and light sources will also be in this section. The tools category is arguably the most important category. Tools can either be light with many of them being only a few grams or heavy like the rifle and hammer(4kg and 2kg respectively).
As with clothing only take the tools you need. A sewing kit or fishing tackle, a whetstone and recycled can are all light and useful. A knife is not too heavy and should be taken almost always.

If you have no plans of hunting feel free to leave the rifle behind, the revolver is lighter and better for protection from wildlife.

A tool box is usually only useful next to a crafting table.

Each tool has it's intended use but some can be used for more than one thing.

Material : Anything used to craft with will be placed here. Some items from other categories can also be found here(e.g bandages). For the most part you can leave pretty much everything in this category at home with the only exceptions being bandages and cloth(see first aid and clothing). Animal hides, guts and saplings should NOT be stored in containers but rather places on the floor/other surface inside buildings or the deep end caves to cure(see crafting and curing below)
Lastly, it can be difficult to keep track of what you left, when you left it and in which location. The journal can help you there.

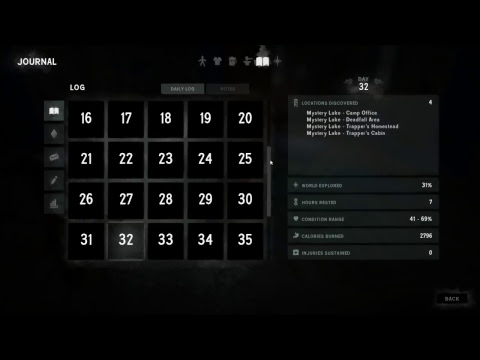
The journal can be accessed via the hotkey(default "J" key). You can find useful information(see tips and tricks). Each day in the journal will have a record of the places you've been and any injuries sustained during that day. You may also write in the journal yourself. You may write in each one of the days or in the general section. You should write down the location of important items. This is especially important if you move between different areas a lot.

Ready to go? Good. Haul ass to lesson 6.
Lesson 06 : Fire, cooking and water boiling.
The long dark have several skills and the longer you play the better you will become in those skills(see skills below) and fire starting is probably the most important skill of them all.

Fire and you will lead a symbiotic relationship. You will feed it wood and paper and it will provide you with light, warmth, the ability to cook and boil water as well as ward off wolves.

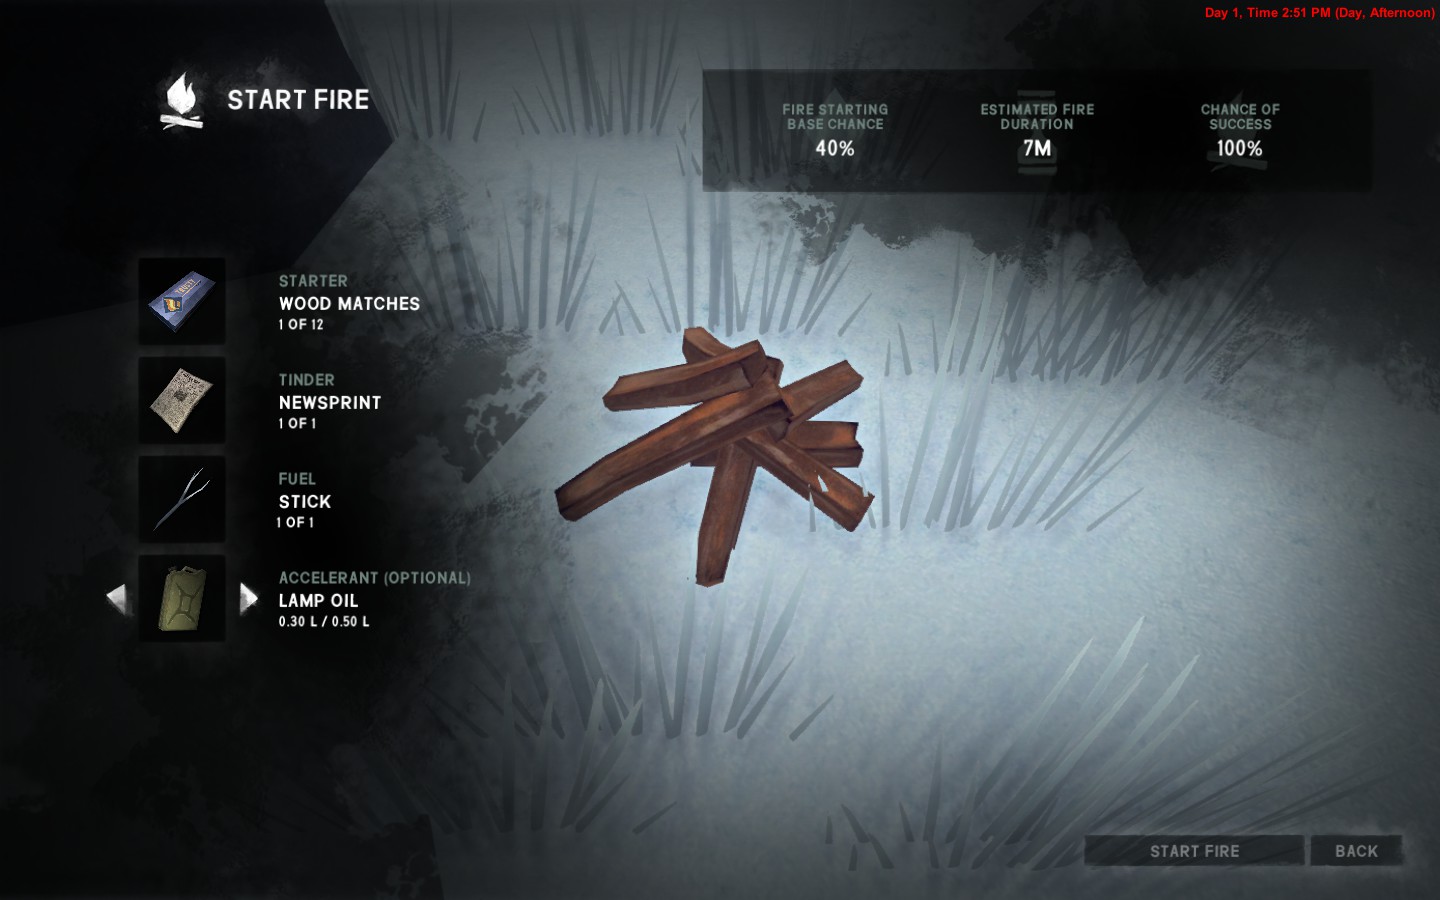
To start a fire you will need an starter, fuel, tinder and accelerant(optional).
You may think that you should save the best starters with the highest chances of success for later and use those with less chances first but that would be wrong(see more on this in tips and tricks).

At first you're going to suck a starting fires, no doubt about it. Different fire starting methods have different chances of success as do different types of fuels. The more fires you light the more skilled you will become and the easier it will be to start a fire.

Fire can be lit pretty much everywhere outside. Fires can not be lit if the weather is too bad. Placing your fire in a place that is going to be protected from wind is a good idea when possible.
The wind shield shows that your current location is sheltered from wind at the moment. You can use this to indicate that the place you are in is good to place a fire in.


Fires lit inside buildings and caves are limited to the mouths of caves with *loading screens*(caves with no transitional areas count as "outside" areas) and in some rare cases entire cave systems. Fires can not be lit inside buildings outside of "fireboxes" (e.g fire barrel or pot belly stove). In addition, fire can also NOT be lit on wooden surfaces such as docks or inside train carts.

Fires that burn long enough can be later harvest for charcoal(see mapping below). Fire wood is lost for good once you put in into a fire(see tips and tricks) if a wind blows the fire out that's it. It is best to fuel a fire with a couple of hours worth of fuel and not more to avoid wasting all of your fuel.

Cooking and boiling water are an inseparable part of day to day life.

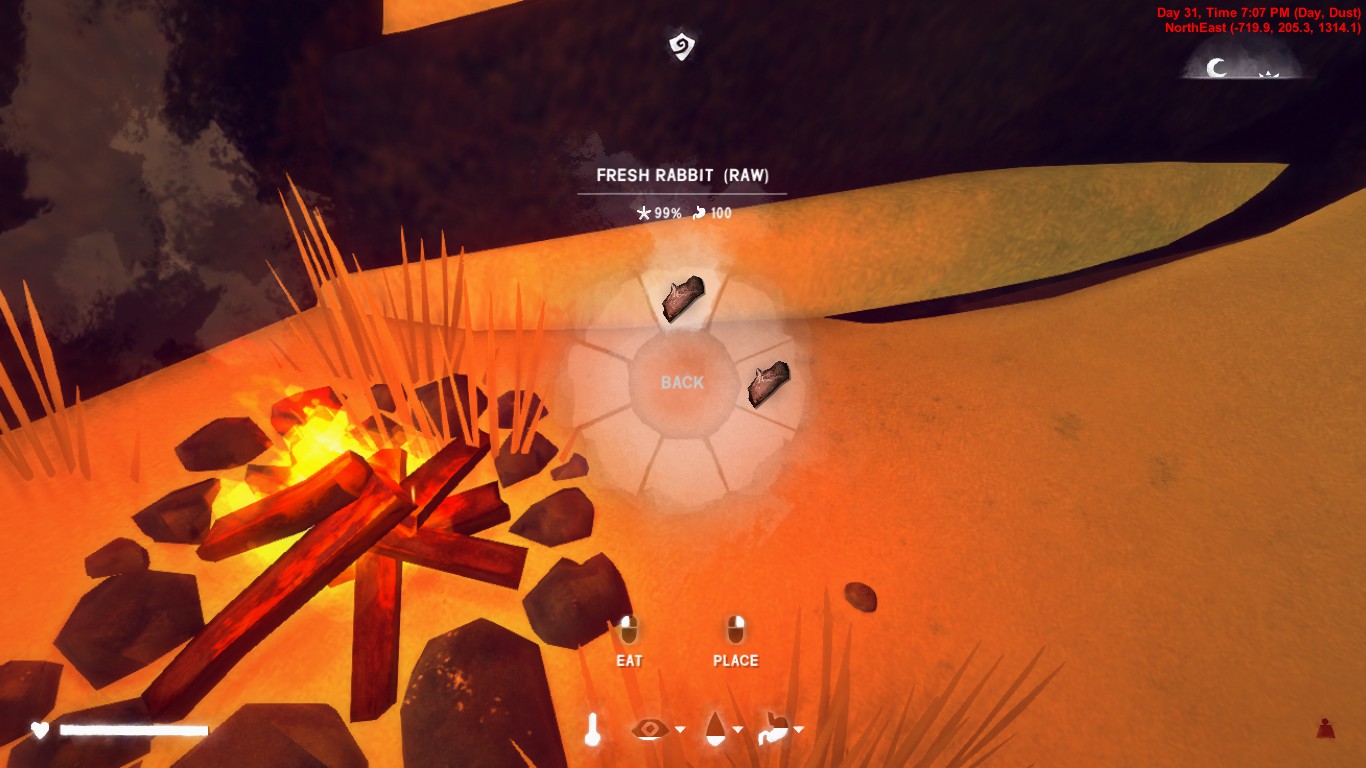
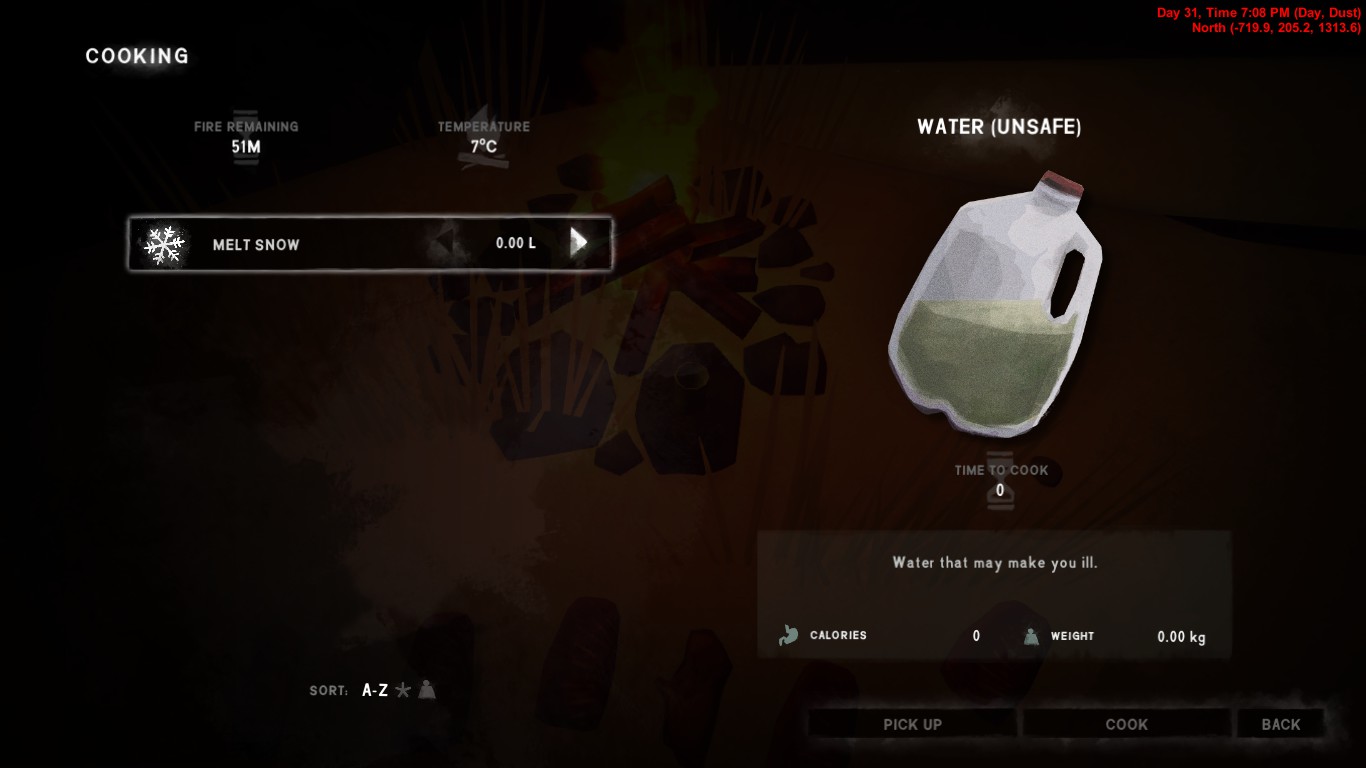
Lit fires will allow you to cook or boil water. To cook and item bring up the radial menu and pick the item.


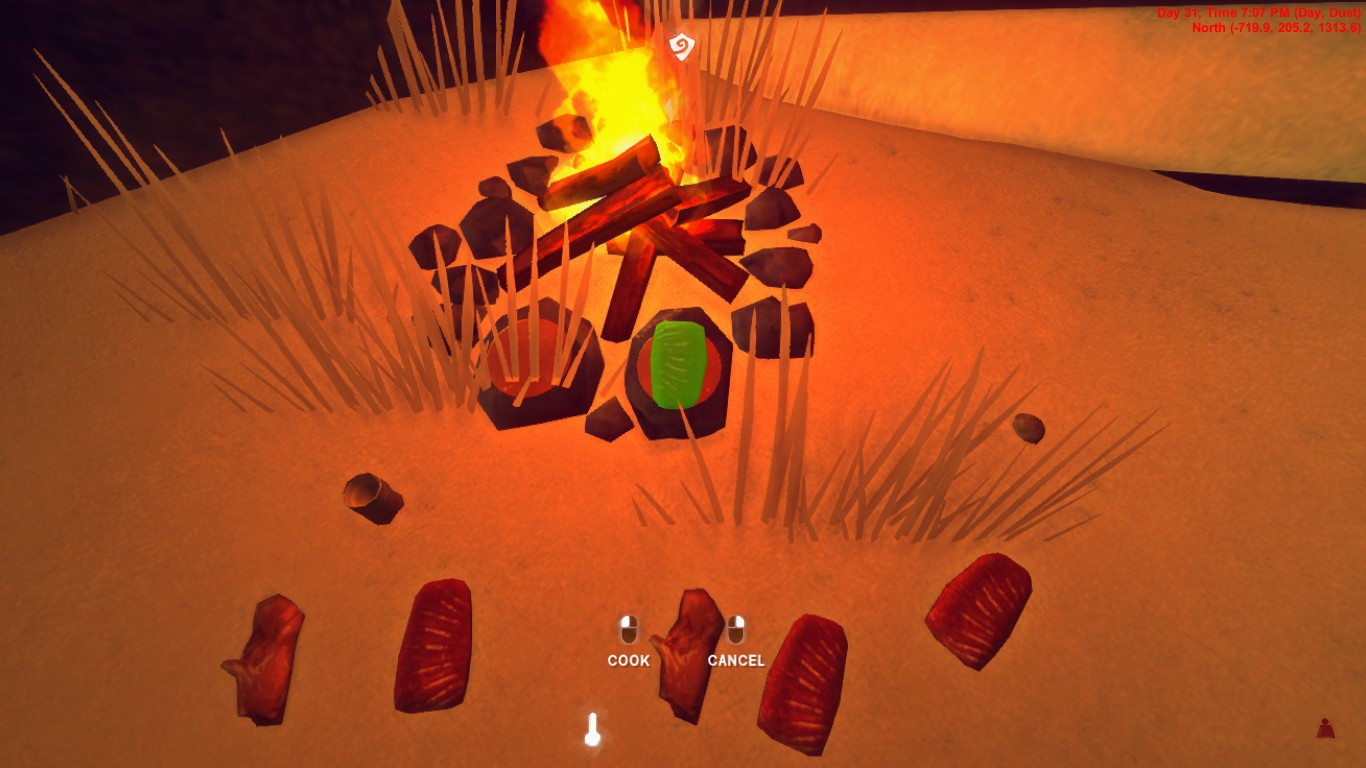
You will now have the item "floating", place it on the red spots next to or above the fire.


You can place open cans and cups next to a fire to cook/heat them. Meat can only be cooked on the "cooking spots" as seen in the image above.

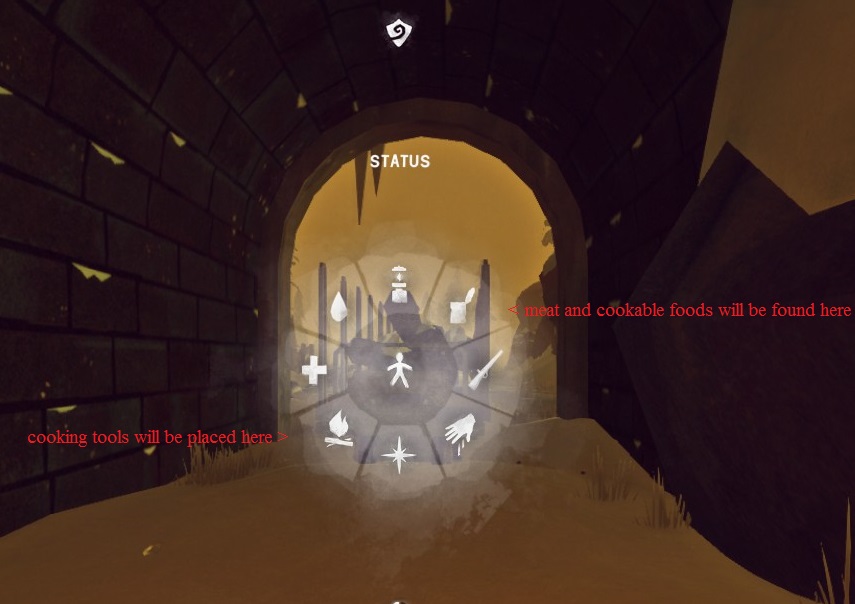
Boiling water works just like cooking but unlike cooking it requires tools. A recycled can or a pot is required to melt and boil water. Cooking tools can be found in your inventory in the "tools" section of via the radial menu as shown above.

Water that has been melted is not safe to drink(see lesson 09) and has to be boiled.


Got a fire going? Good. Hydrate and proceed to lesson 7.
Lesson 07 : Exploring, mapping and the value of sound.
We've tackled the basics, explored for a bit, learned how to manage our inventory and light a fire. Your chances of survival have improved from slim to promising.

Time to explore for real and explorers need maps. You have probably encountered more than 1 location already and maybe even more than 1 area.

The map tool can help you navigate and find your way around. To use the map you need to first fill it out. To fill the map you need 2 things - charcoal and a clear weather.

Charcoal(not to be confused with "coal") can be found in the remains of fires you've made and in places where fire used to burn(e.g fire barrels). Click the fire "spot" and then collect charcoal. As with many items in lesson 05, charcoal is not a must to have on you at all times in large amounts. While charcoal is light it's weight can build up quickly.

After you have some charcoal find your way to a high ground(not a must but recommended) in a safe location. It takes 15 minutes to chart in the map and the weather can turn on you in that time. Some hills and most mountains will obscure parts of the map as you chart unless you are on a higher ground.

To fill in or look at the map bring up the radial menu(default key "space bar"), select the map section indicated by the compass symbol at the bottom and then select charcoal. Left clicking will now pass time and chart the area.

The map will now show a small area that you have mapped and will also show containers, bodies, carcasses, tree limbs and other harvestables within the radius of mapping. The map can be updated with new limbs and new carcasses but as far as I know older icons do not get removed.

If you have sound turned on you have probably already heard sounds made by buildings and animals but the sound system is a valuable survival tool.

Buildings make metal and wood sounds. Wolves will howl, growl and bark. Deer will trample snow and thin ice cracks when you walk on it. Listen to the world around you, your ears are valuable tools. Listening to crows is also very useful because they know things you don't. A murder of crows circling above means there is a body near by. Crows will also warn you about near by bears if you listen closely to the change in the tone of the sounds they make. You will often hear the crows warning you long before you or the bear spot each other.

Map out? Ears open? Good. Proceed to lesson 8.
Lesson 08 : Skills, books and planning ahead.
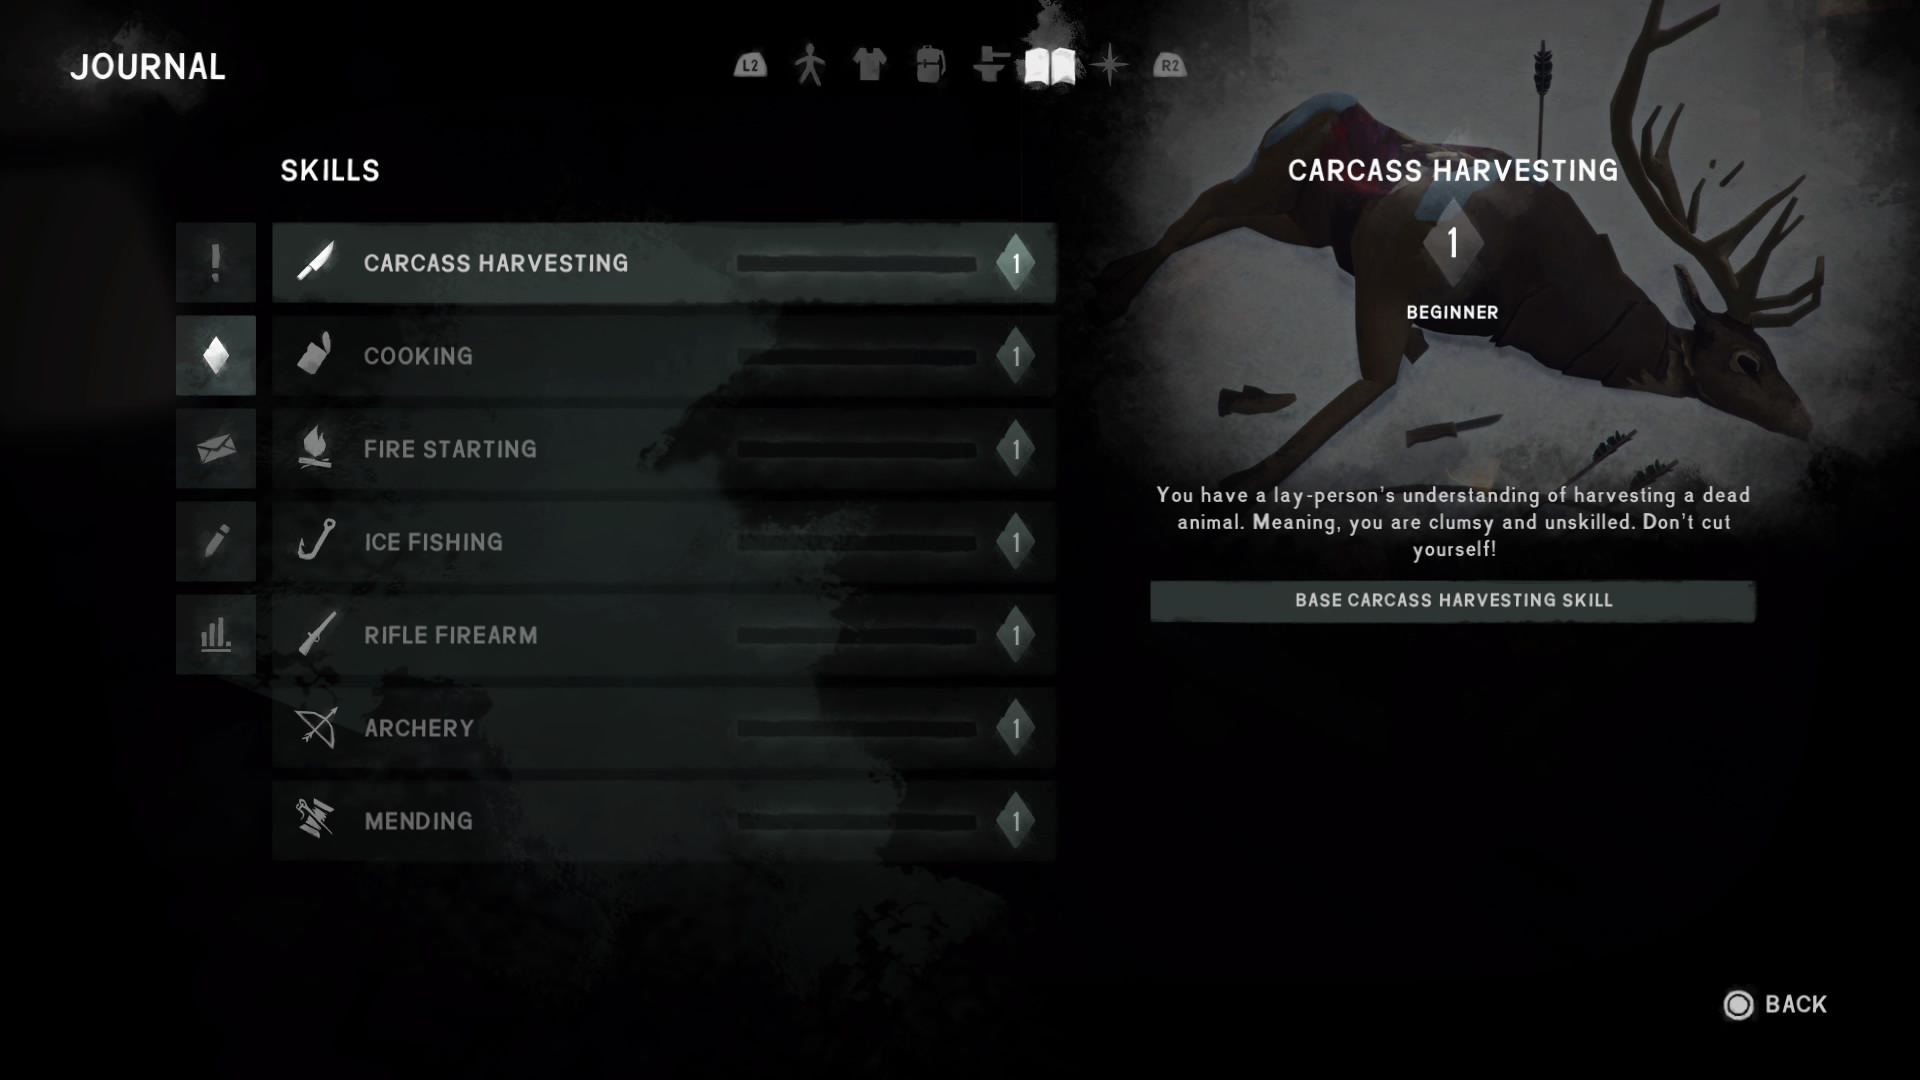
As I've mentioned in lesson 06 - TLD has skills. The different skills, their description and your progress in those skills can be found in your journal.


Mastering each skill will reward you with a perk of ability. There are 5 levels to each skill. Many skills have books found through out the world which will reward you with points when read. It is best to use the books as early as possible in most skills.

Fire starting(see lesson 06) - how good you are at starting a fire.

  • Carcass harvesting - Determines how fast you can harvest meat, guts and hide. This skill rewards points based on time spend harvesting(see tips and tricks). This skill pretty much requires tools(knife, hatchet, hacksaw). Training this skill is usually risky because the carcass and any raw meat or guts in your inventory will attract predators and most of the time you will be outside which means you can be caught in a blizzard if you are not careful. However, you can also choose to quarter the animal(does not work for rabbits since you can just pick those up) and carry the meat "sacks" to a safe location. Quartering takes 1 hour and will yield the hide, the guts and a bunch of meat "sacks".

    ***WARNING*** - quartering an animal will also make any arrows stuck in the body vanish. Do not quarter the animal if you wish to reclaim the arrows.

    Animals that have been fully harvested will vanish from the map after some time.

  • Cooking - cooking requires a fire and each item cooked except water will reward a skill point(see tips and tricks). Cooking goes hand in hand with Carcass harvesting and Fire starting. Each item has it's own cooking time after which it will begin to burn. Burnt food will not reward any points and will be destroyed when picked up. Cooking raw meat will reduce the "smelliness"(see image provided in lesson 1 "UI")

  • Ice fishing - The most limited skill and probably the simplest. You can fish in holes in the ice found in fishing huts. Some maps do not have fishing spots hence why the skills is limited. Fishing is a safe way to get food and also the only way to get lantern fuel outside of finding it in the world. To obtain lantern fuel you need to cook the fish(as with raw meat this will also reduce the "smelliness") You need a tool(hammer, crowbar, hatchet or knife) to break the ice and fishing tackle to fish. Using any tools other than the crowbar is not advised because breaking the ice damages the tool. The hammer, knife and hatchet have other uses while the crowbar will lose any functionality once all containers are open in any given area.

  • Mending - Fixing clothes. Simple enough right? You will need a sowing kit or a fishing tackle. A fishing tackle is a good item to have on you at all time due to it's usefulness and light weight. It is best to read the books on mending before doing a lot of clothing repair since the resources are limited and are lost when attempts fail.

  • Archery : Like mending it is recommended to read books about archery before using a bow if possible. Skill points rewarded for successful hits and for crafting arrows. Arrows can be picked up and reused until they break. They can then be broken down for feathers and an arrow head. Unlike the rifle the bow can not be fired from the crouching position until level 5 is reached.

  • Rifle Firearm - Points in this skill are rewarded for successful hits and with bullets being precious it is highly recommended to read all the books available about rifles before firing a single shot. The rifle is heavy but it comes in handy when hunting larger animals.

Think you're ready? We'll see. Proceed to lesson 9.
lesson 09 : Hunting, trapping and injuries.
Besides fishing which we discussed in lesson 08 hunting and trapping will most likely be your main source of food.

You can hunt rabbits, wolves, deer, bears and moose(Keep in mind that some of these are hostile and dangerous)

The only animal that you can trap is currently the rabbit using snares(see crafting below). Snares can be found in your radial menu and are places like any other item.

Rabbits can also be stunned with rocks for a short while. After you've mastered rock throwing rabbit hunting becomes quick and easy. Once you hit a rabbit you need to hurry though because it will not stay down for long. Run to it and grab it

*** WARNING *** sometimes a bug can occur when quickly clicking a rabbit with a rock in your hands that leaves you stuck and unable to do anything. To avoid this HOLSTER your rocks as soon as you hit the rabbit.

Archery and Rifle firearm are the skills you will need for hunting anything bigger than a rabbit.

The bow and rifle are not equal. They each have their pros and cons.

The bow on it's own is much lighter than the rifle but an arrow weighs more than a bullet. Arrows can be reclaimed and reused, bullets can not. The rifle does more damage and from a greater distance and can be fired from the crouching position(unlocked at level 5 archery for the bow).

All in all it is my educated opinion that weapons should be used as follows :

Rocks - rabbits only

Bow - Deer and wolves(should avoid wolves at all times if possible)

Rifle - Bear and moose.

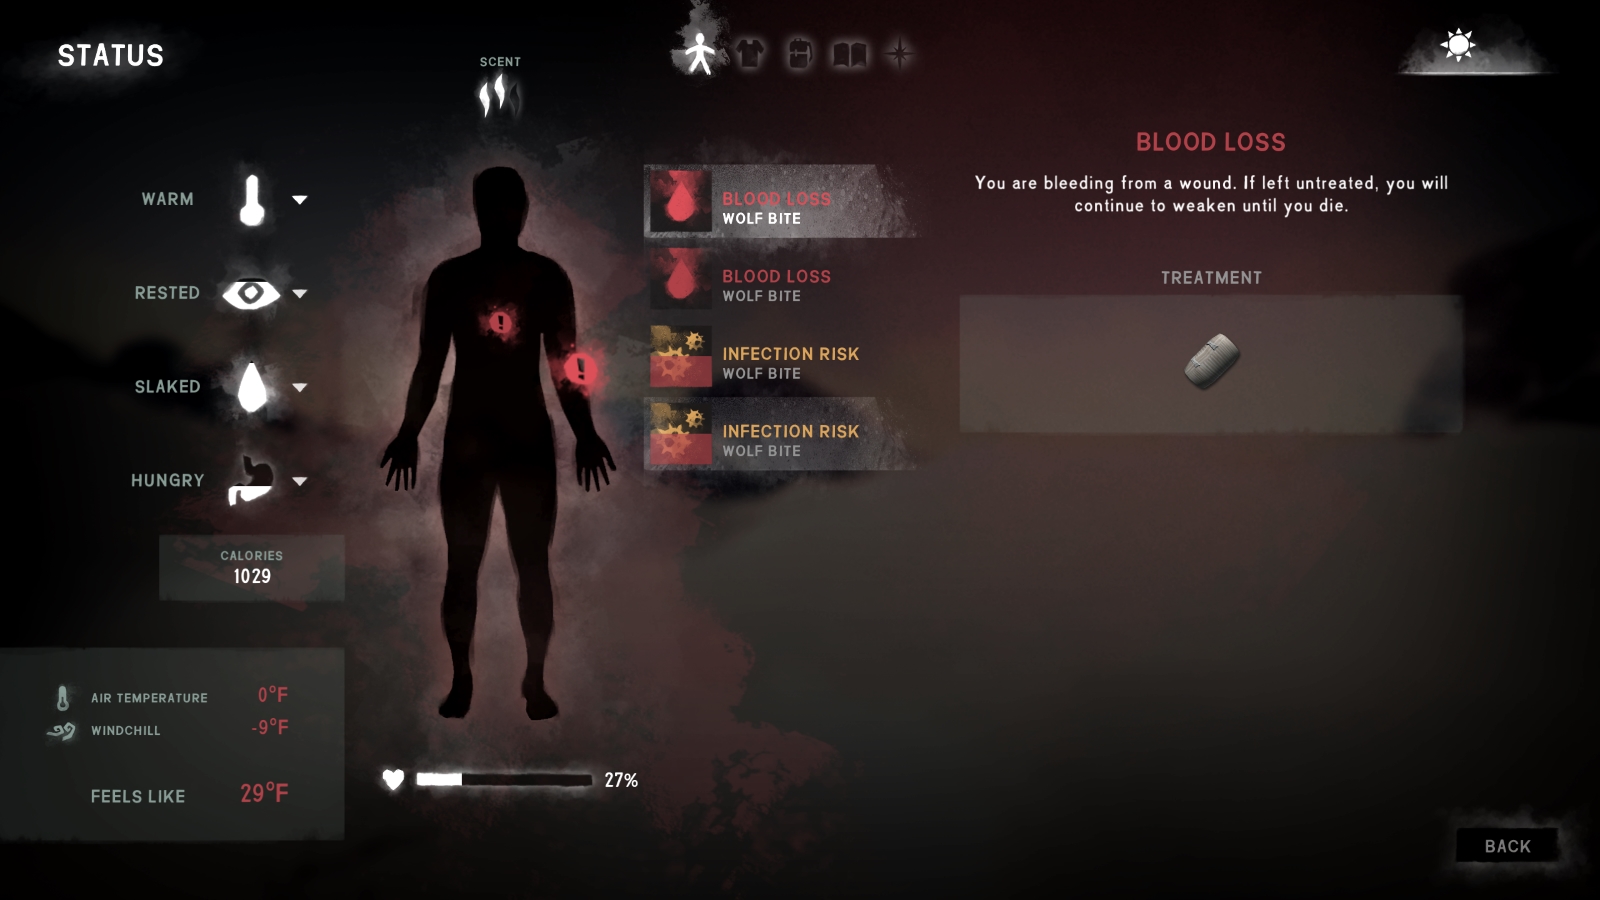
Animal attacks, drinking unboiled(unsafe) water, eating raw/predator meat or spoiled food can lead to injuries and ailments.

Injuries and ailments are what medicines and first aid are for. The character screen will tell you what is required for each ailment or injury. Treatment is administered via the redial menu. Information about each injury/ailment/risk can be found in your status page(default key "F")

Some injuries are deadly, others are not. Make sure you read the discriptions if you're confused about which does what.

It is important to know the difference between risk of(marked yellow) and sustained(marked red)


Risks will continue to appear in your journal until treated or until they because a sustained injury/ailment and be marked red.

Sustaining injuries will also automatically save the game.

Animal attacks can result in injuries ranging from minor cuts and bruises that require no treatment to broken ribs and major blood loss.

Eating raw or spoiled meat(low % food in general can do this too) will result in food poisoning. Eating predator food will give you a chance to contract parasites. The more you eat the higher the chances will be.

Drinking unsafe water will give you dysentry.

Are you healthy and sated? Good. Proceed to lesson 10.
Lesson 10 : Curing, Crafting and medicinal plants.
By now you should have some animals hides and have most likely harvested plants.

If you have followed the instructions on weight management from lesson 5 you've probably already have cured or partially cured animal hides, guts and tree saplings.

Curing is important for crafting as raw hides, guts and saplings can not be crafted with.

Animal skin can be used to make clothing. Cured saplings can either be crafted into arrow shafts (birch sapling) or into a bow (maple sapling). Cured guts can be crafted either into clothing along with hides or into fishing line that is half of the fishing tackle. Crafting a bow and clothing also requires cured guts.

Crafting does not have a hotkey. It can be access via a workbench or from inside the other tabs(inventory/status/etc)

Crafting clothing and tools means a lot of time spent inside buildings which can lead to cabin fever. Since crafting for the most part requires light it is recommended to craft at night while cooking at short intervals or in the early morning when it is very cold outside.

Some crafting can only be done at a furnace(arrow heads, improvised knives and hatchets) and almost all crafting requires one tool or another(knife, sewing kit, fishing tackle, hammer).

You can craft fishing hooks(scrap metal) and snares(cured guts and reclaimed wood) at a crafting table with no tools.

Some crafting can be done from the inventory with no tools(making tinder from sticks or making bandages from cloth)

Another subsection of crafting from the inventory is the preparing of medicinal plants before cooking. Mushrooms and rose hips need to be sliced before they can be used as medicine. Old man's beard can be crafted into special bandages.

Medicinal plants can be used instead of regular medicines. Rose hip tea replaces painkillers, Reishi mushroom tea can be used as an antibiotic and Old man's beard bandages serve as both bandage and antiseptic. Natural remedies do not spoil so it is generally best to leave them for last if you are aiming for a long run.

My that's a nice fur coat you got there. Proceed to lesson 11.
Lesson 11 : Tips and Tricks and other.
  • Torches - You can pull lit torches from a fire at a cost of 10 minutes of the fire's duration. Torches can be used to light other fires and other torches. You can also break down torches into sticks. This is the only way to get fuel back from a fire once you already put it in. Holding a lit torch will provide a minor temperature boost and it will help fend off wolves.

  • Chaining torches - A torch pulled from a fire will not burn forever. You can draw multiple torches from a fire and and chain their duration.

  • Grab as many torches as you want, putting them out and in your inventory. Take the lit torch and go where you need to go. When the light of the torch is about to go out drop it or throw it(dropping can be done with the default light source key "1") and then use the unlit torch on the lit one on the ground just like you would with a fire. Be sure to stand close enough to the torch or you will waste a match.

  • Saving matches 1 - if you have a torch in your hand and only 1 starter (matches/firestriker) the slightest click will waste 1 match or 2% of the firestriker. To avoid this keep both matches and a fire striker in your inventory if you can. When you have both the game will ask you how to light a the torch. The game considers both wood and cardboard matches as "matches" though.

  • Saving matches 2 - 1 match 1 attempt at lighting a fire right? Wrong! You can light a torch with a match and then try to light a fire until the torch is out. That along with chaining torches means you will rarely need to use more than 1 match on any given day. Even less if you find a magnifying glass.

  • Magnifying glass - as I mentioned in lesson 06 there is more than one way to light a fire. A magnifying glass can be used indefinitely but only on days when the weather allows it (clear weather) and only outside. Use this with torch chaining to bring "free" fire inside buildings.

  • "free" Arrow heads - You don't HAVE to go to a furnace to get arrow heads. You can recycle old arrows that are either broken or almost broken.

  • Use rocks to control animals - If a wolf or a bear has not spotted you yet but are in your way you can lure them away by throwing a rock in the direction you want them to go. This won't make a wolf or bear go very far but just a bit can help.

    Rocks will also scare prey animals such as deer and rabbit and can be used to make them run towards a wolf.

  • "free" Meat - deer and rabbits flee from you and can be herded towards wolves. Wolves will kill the animal for you. Next you need to scare the wolf away either by lighting a fire or throwing a lit torch at it(a lit torch can fail or cause the wolf to charge you).

  • "faster" leveling up of carcass harvesting - this skill is (as mentioned in lesson 9) time based. The longer you spend doing it the more points you will get. More often than not you will want to use the fastest weapon to be done with the carcass as fast as possible. HOWEVER if you quarter the carcass which will usually take far less than the harvesting time you can take the "sacks" with you inside and then harvest them by hand. This will give you many more points. You can also do this with rabbits. This can not be done with frozen meat but you can always leave it to thaw inside.

    be sure to take the meat outside when you are done harvesting so it does not spoil as fast.

    Also. please note that the "sacks" weight about double the weight of the meat you can harvest.

  • Cutting small bits of meat AKA bait - when harvesting you will sometimes have an X.1 kg amount of meat. Simply dial up the harvest meter all the way to the end and then dial it back down leaving the 0.1kg. This can also be done by canceling the harvest by pressing the esc key.

  • FASTER leveling up of cooking. - You can harvest an animal into tiny bits of meat and cook those. You will get a point for each of them and they will only take a few minutes to cook. A single dear can provide many many points and not just 8-10. A bear can level you up to level 5.

    Be advised this will take a fair amount of time and plenty of firewood but not more than it would otherwise take to cook the meat in 1kg sizes.

    Congratulations. If you have made it this far you are warm, fed and healthy. You just might make it out of this alive. Proceed to lesson 12 for bonus credit.
Lesson 12 : Mods
For Mods post V1.56 check http://xpazeman.com/tld-mod-list/


3 Comments
Cryinghawke  [author] Nov 16, 2018 @ 4:48pm 
@PowerOn - editted the section to be clearer and added a line about fires on wood flooring.
PowerOn Nov 16, 2018 @ 8:02am 
>>>Fires lit inside are limited to the mouths of caves

First, are two kinds of cave plus mine - ignoring bear cave.
Caves without and with transition screen.

In caves without transition screen - have a warm area in their real part, allow lit fire in any flat surface of cave interior, protected from wind. E.g. cave in the hill in front ML Camp Office.

Caves with transition screen allow lit fire in their mouth (outside) protected by wind and in any flat surface of their inside area, e.g. caves in going across mountain in TMW.

Mine - the one from CH-PV allow lit fire in their inside area near entrances, but not in central area - where are a bench, which conditions the use of this bench in having a lantern or stock of torch.

An 'inside' exception - probable due bug or inverted surfaces in code, but Maintenance Shed in BR allow lit fire in any flat surface of their inside area. But after VF update is not possible lit fire anymore in shed outside area, with bed. A complete nonsense.
Stake From JateFarm Oct 11, 2018 @ 12:14pm 
Even though I've been playing for over a month, I definitely learned a few things.