Serious Sam Fusion 2017 (beta)

Serious Sam Fusion 2017 (beta)

425 ratings
Secrets Guide for SSF 2017
By Crowbaria and 2 collaborators
WARNING: MAJOR SPOILER ALERT!

This is the complete guide of Serious Sam Fusion 2017. This guide will help explain of what hidden objects there are through out all 45 Campaign levels. The new screenshots will help give an easier explaination of what the secrets look like and you can probably find the rendered location by yourself. Though each secret is not 100% legit, because others can find other routes and skilled tactics on how to get there faster. I only listed the secrets of what I found in order, so please, enjoy this drastically long compliation of every one of the 389 secrets (89 in TFE, 162 in TSE, and 138 in BFE) and their screenshots! You can help by posting comments at the bottom of this page, suggest that on how you might've gotten the secret, or what you think I should fix/add on to this. Thank you, and enjoy!

Please wait while all of the images render themselves, thank you.

If any if the images are too small for you to see, click one one and it will enlarge itself to fullscreen.

Credit to: Retro Raider for condensing the guides, Mauritsio for the TFE and TSE guides, and Atlascian Sarnosian for the BFE guide.

Remember to Like/Favorite if you found any of this guide helpful to you!

UPDATE: April 24, 2017
Updated the main guide description to look like Atlas's guides and begun implimenting the BFE section.
5
2
11
2
2
   
Award
Favorite
Favorited
Unfavorite
DISCLAIMER
The First Encounter and Second Encounter guides were created by Mauritsio.
The BFE guide was created by Atlascian Sarnosian with the help of GameFAQs[[www.gamefaqs.com], Serious Sam Wiki[www.serioussam.wikia.com] and
GalleyUK.
Many thanks to Crowbaria for taking the time to port the guides over to Fusion 2017!
The guides on their own can be found here:
http://steamcommunity.com/sharedfiles/filedetails/?id=121157621
http://steamcommunity.com/sharedfiles/filedetails/?id=121921406
http://steamcommunity.com/sharedfiles/filedetails/?id=231547960

Russian version here:
http://steamcommunity.com/sharedfiles/filedetails/?id=891724666
1. Temple of Hatshepsut (7 Secrets)
The first level of The First Encounter has 7 secrets.

#1: From your starting position, go right to find a Secret Colt behind some pillars.


#2: Head up the ramp and go left. Jump onto the roof of the building off to the left of the ramp. You will find some Secret Rockets.


#3: Do the same as Secret #2, but then on the opposite side. You will find a Secret Rocket Launcher.


#4: When you have the Secret Rocket Launcher, head off the main ramp and go left where you will notice a door. Blow it open to reveal a Mega-Secret, which releases Croteam, the developers of this game (appearing as bigheads).


This is the wall you are supposed to blow up.

#5: Opposite of Secret #4, touch the door to reveal a Mega-Secret, releasing fans (again, appearing as bigheads).

This is the wall you are supposed to touch.

#6: If you look into the dunes, you can notice a palm tree far away. Head towards this palm tree to collect some Health, Shells and Rockets (picking up the health triggers the secret).


The secret viewed from the temple.


#7: Back at the main temple, head to the right of the upper temple where you will notice a differently colored wall. Touch this wall to reveal a Double Barrelled Shotgun.

2. Sand Canyon (6 Secrets)
The second level of The First Encounter has 6 secrets.

#1: Before entering the tomb, head towards the top right of the entrance to find a wall. Touch it to reveal some Armor, Rockets, Bullets and Shells (aswell as some Harpies!)


The room itself, Harpies exclusive

#2: From Secret #1, look for a dead tree behind a hill. Head towards this dead tree to find a Secret Valley. The valley contains Rockets, Bullets and Shells (and some enemies, mainly Kamikazes).

The dead tree you should be looking for.

#3 In the room where you fight Marsh Hoppers for the first time, look towards the right side of the room and look for a differently textured wall. Touch this wall to find a Tommy Gun and some Bullets.

#4: In the next room, look left of the entrance behind the pillar to find a bounce pad. Using this bounce pad will take you on top of the pillars, where you can find some Secret Armor.

Note the slightly higher ground next to the right pillar: this is the bounce pad.

#5: In that same room, there is a side room. Look under the small ramp of the side room to discover a Secret Hole with some Health in it.

#6: In the final valley, look for a small hill left to the exit tomb and climb up to it. Head ontop of the exit monument to discover a Secret Place with some Shells, and a lone Health Pill (picking up the pill will spawn five Gnaars!)

The hill you should be looking for.

3. Tomb of Ramses III (8 Secrets)
The third level of The First Encounter has 8 secrets.

#1: In the first main room, head to the small room on the right and take the stairs. Once you reach a dead end, jump over to the other side to find a Secret Place with some Armor and Shells.

The secret viewed from the 'dead end'.

#2: In the second main room, head to the far right corner and jump on the lantern. Head right and you will come across some Secret Health.

The lantern required to reach the secret.

The Secret Heatlh itself.

#3: Same as Secret #2, instead head left to find a Secret Passage, allowing you to skip a small portion of the map.

#4 + #5: In the small area just before the third main room, head left, go on the stairs, go left again and take the stairs. You will notice a Rocket Launcher. Look carefully between the platform you are currently standing on and the wall to notice some sparks. Jump into these sparks to activate a Secret Teleporter, which you can then use to obtain the Secret Rocket Launcher.

Both the sparks and the Rocket Launcher can be seen.

#6: In the third main room, just before you exit, go left instead and a narrow platform will stretch towards the wall. Follow this platform to find some Secret Heatlh hidden in an alcove.

The alcove can be seen on the left.

#7: In the small area just before the final area, just before you exit, turn around and bear left to find a Secret Passage, which will take you to a small room with some Health, Rockets and Bullets.

The passage.

#8: From Secret #7, go through the door to find yourself in a passage behind some pillars. Head down this passage to get access to a ledge: There is a Secret Shield on this ledge.
4. Valley of the Kings (4 Secrets)
The fourth level of The First Encounter has 4 secrets.

#1: This is a different secret than the other ones we have seen before. Instead of being in one particular spot, this one is scatterred throughout the whole level. You must blow up ALL the statues in the level, there are a total of five:

Near the temple's entrance.
Directly after the small room where you can look down to a +100 HP.
In the room after the one mentioned above, to the left side of the room.
In the room where you can find the Moon Mountains papyrus.
In the room that disables the spike trap required to get the Stone Ankh.
NOTE; you additionally have to blow up the statues in the final room where you pick up the key thingy.
Once all of these statues are destroyed, you will recieve the message "Boom! All statues destroyed!", followed by "Secret teleport has been found!", which is Secret #3.


#2: After you finish the Marsh Hopper fight in the "illuminating pyramid" room, exit as normally, but before heading up the ramp to the Element, go right to get on a ledge overlooking the room. Go to the very right of this ledge to find a bounce pad. This pad will take you onto the rafters to find some Secret Armor.

The bounce pad.

[There was armor here but i picked it up]
#3 + #4: After you destroy all the statues as told in Secret #1 and collected the Element, head down the passage and go right, where you will find the teleporter. Go in and you will find yourself past the bridge, which would normally snap and take you to Oasis. Head down the passage here to get access to the first secret level: Moon Mountains.

NOTE: Even if you didn't destory all statues, it is still possible to get this secret. Just go down the passage and to the right when you finish, and you will find some rocks. Simply shoot a rocket at it to unlock the teleporter. You will not get credit for Secret #1 this way, however.


5. Moon Mountains (Secret) (7 Secrets)
The first secret level of The First Encounter has 7 secrets.

#1: In the first area, when you reach the fourth platform, there should be a lone Bullet pick-up near the middle-right edge of the platform. Pick it up to catapult a Secret Shield.


The bullets.


The Secret Shield, shortly after being catapulted.

#2: When you reach the fifth platform of the same area, look right until you find a part of the platform that is very close to the waterfall. From this point, you must jump towards the waterfall. If you succeed, you will have discovered a Secret Passage, allowing you to skip a small portion of the map.


#3: From where you land in Secret #2, head left until you find some Secret Health in a bush.


#4: Before you exit the second main area by jumping down the square hole, go past the hole and touch the wall, revealing a Secret Cave. There will be lots of goodies here, but once you pick up a Health Pill, some enemies will spawn in, and the "WAR!" music will start.

Outside the Cave; notice the circular dark wall.

The battle inside the Cave; on Normal difficulty.

#5: After dropping down the square hole, look left of where you fall and you can find some Serious Health behind a rock.


#6 + #7: Once you enter the area where you fight the Highlander, look behind you immediately and you will notice a rectangular rock. Shoot it to reveal a Secret Backstage where some Bullets and Rockets will spawn in. If you continue to proceed down the passage, you will find a Secret Teleport, allowing you to skip the Highlander mini-boss.


The rectangular rock.
6. Oasis (6 Secrets)
The fifth level of The First Encounter has 6 secrets.

#1: From your starting position, go past the small waterfall to find a Secret Cave with an Ammo Backpack and Armor.

#2: In the first room of the shrine, look left of the statue and pick up the Health Pill. If you pick this up, you will hear the sound of enemies spawning. But don't be alarmed! You only triggered the Sound-Attack Secret.

The pill that triggers the secret.
NOTE; the following secrets are only available after picking up the +1 armor shard in the room on the left
Thanks to
rubregg
for pointing this out
#3 + #4: Blow up the statue in the same room to reveal a Secret Bouncer underneath it, which will then open up the Secret Door. Use the bouncer to reach a Minigun (you do not need to collect the Minigun to get all the secrets in the level)
NOTE; To enable these secrets, you have to blow up the statue and pick up *ANY 2* out of these 3 items: +1 health pill left of statue (sound attack secret) / +1 health pill right of statue (spawns biomech) / +1 armor shard in the room on the left (spawns frogs, gnaars and kleers).


The bouncer is shown as a green circle.

NOTE: It is recommended you collect the following 2 secrets after the Marsh Hopper Boss.

#5 + #6: Look to the left of the room where you fought the Marsh Hopper Boss, where you should notice a darker wall. Blow up this wall to reveal a Secret Cave. Next, head into the cave but DO NOT pick up anything. Wait a few seconds to activate a Secret 'Suprise' Trap (juvenile arachnoid).

7. Dunes (7 Secrets)
The sixth level of The First Encounter has 7 secrets.

#1: After traversing over the first dune, head left along the top of the dunes to find some Heatlh on it's own. Approach it to spawn some Secret Items in the form of Rockets. Beware, you will also spawn some Kleers!

The spawned items.

#2: Do the opposite of Secret #1 to find some Secret Health. You willl also spawn some Rockets, Bullets and Kleers.

The spawned items.

#3: From Secret #2, head straight into the desert and you may notice an oasis. Head towards this oasis quickly before you take damage from the sun to collect some Heatlh and Armor. Beware, you will also spawn alot of Harpies!


Approach the oasis from this very angle or it will NOT register!

#4: From Secret #1, head towards the left hand wall surrounding the city. Blow up the lone palm tree there to spawn some Secret Items, including Rockets, Bullets, Health, but also Kleers and Kamikazes.

The palm tree can be seen on the left.

#5; Opposite of Secret #4, pick up the lone health pill in the corner of the right hand wall to activate some Secret Health.

The health pill can be seen on the right, click the picture if you can't see it.

NOTE: Many think that the following 2 secrets are only available on Normal difficulties and higher, since they require rocket jumping, which can only be done on those difficulties. This is false. On Tourist and Easy, you can jump onto your enemies to reach the secrets.

#6: While in the outer sanctum, use either way mentioned above to reach the left platform to find a Secret Depot tucked away in the corner.

#7: Opposite of Secret #7. Stay on the platform for a second, leave it, and watch as the platform crumbles. You can find some Secret Health in the remains.

Platform before...

..plaftorm after, with the Health in the corner.
8. Memphis - Suburbs (7 Secrets)
The seventh level of The First Encounter has 7 secrets.

#1: In the first suburban area, keep left until you find an alleyway tucked away behind a building. This is a Secret Place where you will find Rockets, Bullets and Health.

#2: In the first suburban area, head to the far-left corner where you will see a palm tree blocking some Health. Destroy the palm tree and enter the Secret Place with the Health.

#3: In the second suburban area, keep left to find another Secret Place with some Armor.

#4: In the second suburban area, head left of the locked exit door to find some Secret Heatlh behind a house.

#5: Opposite of Secret #4, there is an Armor Piece tucked away behind a pillar. When you pick this up, a house will move towards you, a yodelling sound is cued and 3 enemies spawn. You have found a Secret Yodeller.

The armor piece can be seen on the right, click the picture if you can't see it.

#6: In the far-right corner of the second suburban area, there is a Health pill and some Rockets. Picking up the pill triggers a Secret Trap with 3 Minor Biomechs and 1 Major.

This picture is a little vague: click it so it becomes clearer.

#7: Before you jump down into the sewers, locate a ledge in the pipe and position yourself so that you may land on it when you fall down. When you land on the ledge, you will have discovered a Secret Hole with some Armor and Health.

The ledge can be clearly seen before you jump into it.

9. Memphis - Sewers (5 Secrets)
The eighth level of The First Encounter has 5 secrets.

#1: From your starting position, dive down until you find a Secret Passage with some Shells and Health in it.

The Passage can be seen from your starting position.

#2: Near the giant dead fish in the first room, swim down and keep right to find a Secret Shield.

The giant dead fish is an useful landmark for finding the shield.

#3: There is a way to get on the walkway over the water: Once you go up the stairs, perform a well timed jump from the position shown in the picture below. Head down the walkway to find a Secret Shield at the end of it.

Perform a well-timed jump from here to reach the Secret.

#4: After defeating the Marsh Hoppers in the second area, go to the bottom of the stairs and turn left. You should see a hole in the corner. Head in here to find a Secret Passage. There are/is Rockets, Bullets and Health at the end of the Passage (and some Kleers!)


#5: When you reach the point where a Reptiloid spawns as a wall comes down, kill it, where some Red Armor will spawn on the Reptiloid's death location. Pick it up quickly before the wall rises up again, or you will have missed your chance. If you get trapped in the small area, use the button to escape.

Kill it with fire!

10. City of Memphis - Metropolis (1 Secret)
The ninth level of The First Encounter has only 1 secret.

#1: Once you enter the third area, head right to find a darker piece of the wall. Blow it up to discover a Secret Ammo Depot with a Cannon in it.

11. Alley of the Sphinxes - Approaching Thebes (1 Secret)
The tenth level of The First Encounter has only 1 secret.

#1: Note that low performance PC's cannot regulary see this secret. See this picture:

If you see these particular items, keep heading left. Eventually, the oasis will become visible. There is some Secret Ammo there.

if your PC performs well, you can already see the oasis just by looking to your left after spawning.
12. Thebes - Karnak (8 Secrets)
The eleventh level of The First Encounter has 8 secrets.

#1: Once the level starts, run backwards immediately before the doors behind you close. If successfull, you will have discovered a Generous Yard (as seen in the ending cutscene of Alley of the Sphinxes).

#2: In the first room with the pillars, there are two switches behind pillars on either side of the door you came from. Once both have been activated, a Secret Platform will be activated next to the door you came from. The platform will take you to a Secret Area with some Cannonballs and Heatlh (the platform and area count as one secret together).


#3: As you approach the Ankh Pool, swim towards the monument and you may notice some Cannonballs on the pool's surface. Touch the wall underneath to reveal a Secret Area with Bullets, Rockets, Armor, Cannonballs and Health.


#4: There is a differently colored wall on the right hand side of the pool. Touch it to reveal a Secret Place with some Armor and the 'Croteam Scroll'. Invoke NETRISCA to read what it has to say. The introduction music from the SD version of the game is also played.


#5: After going through the pipe to enter the locked temple, turn around and press the switches on either side of the closed door. Back at the Ankh Pool, a Secret Entrance will open by the monument. Go through the entrance to find an Ammo Backpack, Health, and a giant blob without a purpose (you do not need to go in the secret room to register the secret).


#6: In the room with two bodies of water, jump into the left pool and you should notice a differently colored wall. Touch it to reveal a Secret Area with some Armor and a giant red blob without a purpose.


#7: In the final area, look to the left and you should notice a differently colored wall. Go straight through it to discover a Secret Ammo Pack.

#8: Throughout the battle in the final area, the message "Secret health has been enabled!" will appear. When you see this, look to the right to find a small alcove with the Secret Health in it.

The message is displayed.
13. Thebes - Luxor (8 Secrets)
The twelfth level of The First Encounter has 8 secrets.

#1: In the pre-Gold Heart area, there is a small building at the end of the pathway with a Health Bottle in it. You must COLLECT this bottle, not just walk over it. Once you do, 2 Werebulls will spawn. Once you kill them, the ceiling of the small building will lower, revealing a Secret Ammo Depot.


The ammo depot.
#2 + #3: Before exiting the Gold Heart area, head right of the exit to find a bounce pad tucked away in a corner. You can use it to reach some Secret Health. There is another bounce pad behind that Secret Health, jump on it but strafe right so the other bounce pad doesn't bounce you back. You will then notice some Bullets. There is a slightly lighter piece of wall near those Bullets, blow it up to reveal a Secret Ammo Depot with some Bullets, Cannonballs and Electricity.

The secret health.

The ammo depot.

#4: In the pre-Feather of Truth area, there will be 4 giant columns. Once you enter, destroy the first on your left and the furthest away on the right. You will spawn Secret Cannon Ammo scattered around the yard.

Blow up this one...

...and this one.


#5: As you enter the Feather of Truth area, head left until you come across a bounce pad. This bounce pad will take you to a Secret Place with some Health.

#6: Before exiting the Feather of Truth area, turn around and jump onto the roof of the small building. Shoot the grey square in the middle to make an entrance into the building. This is a Secret Room with some Health and lots of Gnaars. Shoot the square to get back out.


Inside the room, with dead Gnaars.

#7: In the area before the Giant Obelisk, there is a spike pit. If you jump into this spike pit, you will be teleported into a Secret Area with Armor, Shells and Cannonballs.
NOTE: The teleporter works only once.

The pit you are supposed to jump into.

#8: As the exit doors of the level open, instead of going straight forward, go left immediately to find a smaller set of doors. These doors will take you to the second secret level: Sacred Yards.

Take the left set of doors.
14. Sacred Yards (Secret) (12 Secrets)
The second secret level of The First Encounter has 11 secrets.

#1: In the first room with water, blow up the spire in the middle to reveal some Secret Health (and some Reptiloids!).
{ In order to get this secret, you need to not pick up any health pill before the room containing the secret.}

The spire to blow up.

#2: In the first area with the Gold Sphinx, a platform will rise up once you enter. Blow it up before it finishes rising to discover a Secret Trick, so you don't need to press all the buttons scattered around the area.


Quickly, unleash a rocket!

#3: In the same area, press the switch towards the far left hand corner to raise a wooden platform. Press the newly revealed switch to activate a Secret Platform, allowing you to get some Health and Armor.


The revealed button.


#4 - #7: Once you enter the second area with the Gold Sphinx, head left to find a Serious Backpack. It will run away from you, pick it up to discover a Secret Area. In that area, go to the far left corner to discover a Serious Backpack, and the far right corner to discover some Health. After you killed all the enemies in that area, head to the front of the area to discover a door has opened with a button inside. Two Croteam Bigheads will convince you NOT to press the button, but do so anyway, blowing up the pyramid and revealing Secret Crates.


Crates! What an odd secret...

#8 - #10: Back in the Gold Sphinx area, after the 2 Adult Arachnoids spawn in, some Health and Armor will spawn at their death locations. To reach them, jump on the small buttons to reach the ledges. Use the same method with the middle button, but this time, jump through the small gaps to discover a Secret Entrance straight to the Gold Sphinx, useful for speedruns.


#11: After you collect the second Gold Sphinx, the message "Mechanism has been activated for unlocking!" will appear. Shoot the platform in the left corner in the water to activate a Secret Platform. You can use the platform to skip from the right button to the Gold Sphinx. Useless?


The message is displayed.


Blow up this platform to trigger the secret.


#12 To learn about the super secret, the Geek Secret, check out the guide here:
http://steamcommunity.com/sharedfiles/filedetails/?id=893607641
15. The Great Pyramid (3 Secrets)
The final level of The First Encounter has 3 secrets.
#1: Head to the end of the left-hand middle tunnel where the Biomechs broke through to find some Secret Health.

#2: Head to the end of the right-hand middle tunnel where the Biomechs broke through to find an Armor Shard. Pick it up to activate a Surprise Trap, spawning 8 Minor Biomechs.


#3: When you run from Ugh-Zan to the pyramid, look right into the desert where you should see some sort of big head. Approach it discover a Secret Area with some health. If you leave the area, a bunch of Kamikazes will spawn around you!

The head, viewed from a distance.

This part is from a "dlc" for fusion buy it here
http://store.steampowered.com/app/41014/?snr=1_7_15__13
16. Palenque - Sierra de Chiapas (15 Secrets)
The first level of The Second Encounter. has 15 secrets.

#1: Dive down the bottom of the starting lake to find a Secret Rocket Launcher on a lit up spot.

#2 + #3: Once you start, look behind you to find a grassy area across the lake with some Secret Armor and a Non-Secret Colt. Further behind the rocks is a phone booth. Approach it to register a Secret Phone Booth. You can also make a call with the phone booth.


The phone booth.

#4 - #6: Equip your Chainsaw and cut down some trees! Once you cut down 3 trees, a Secret Weapon (Tommy Gun) will be spawned infront of the temple, 6 trees for Secret Ammo (Bullets), and 9 trees for more Secret Ammo (again, Bullets).


#7 + #8: On the left hand wall of the temple courtyard is a differently colored wall. Blow it up with the Secret Rocket Launcher to reveal a Secret Entrance, also releasing the Croteam Bigheads. Go inside the entrance to discover a Secret Hall of fame with Rockets and a presentation from Admir the Bighead.

The wall to blow up.

"Thank you, thank you. You are too much."

#9 + #10: From Secret #8, head down into the valley straight ahead to discover the remains of the Secret Crate Bus. Behind the Crate Bus is some Secret Ammo (Rockets).

I made a circle around the ammo, just for you guys! 8D

#11: In the temple, before you go into the corridor with crushing pillars, turn around instead down the dark corridor to find Mental's Secret Room. Jump on the letters in this order:

M - E - N - T - A - L

When you do this, the wall on the opposite side will slide away and reveal some Health. Don't jump on the wrong letters too much, or you may impale yourself by the spikes that slide down!


The lights and the secret's name make it Very obvious what to do!

The health, unsealed.

#12: In the final valley, there is a large pit to your left. Position yourself to drop down onto the ledge on the right to find a Secret Rocket Launcher hidden under a bush. You can get back up by jumping into the portal on the ledge near the Rocket Launcher's.


The ledge that appears when you pick up the rocket launcher.

#13 + #14: After crossing the pit, there is a clearing on your left. Look for a giant boulder and blow it up to reveal a Secret Cave. Prepare for a long dive! Once you surface, go past the rope bridge to find Non-Secret Sniper Bullets and Secret Health.

The boulder to blow up.

The secrets, after resurfacing from the lake.

#15: Dive to the right-bottom of the ending lake to find some Secret Health.
17. Palenque - Valley of the Jaguar (10 Secrets)
The second level of The Second Encounter. has 10 secrets.

#1: Before you leave the second jump pad area, look left to spot a ledge sticking out of the wall. Jump on it to be bounced up to the higher ledge where you will find some Secret Ammo (Sniper Bullets).

The bouncer ledge.

#2: As you enter the main valley, turn around and blow up the ledge above you to release a Secret Powerup (Invulnerability).

ALTERNATIVE METHOD: There is a very small rock sticking out on the top-right corner wall in the room where you get the Grenade Launcher. Blow it up to release the Secret Powerup. The thing is, this is the only way to trigger the same secret in Palenque Demo.

The ALT method.

#3: In the valley passage left of the Female Jaguar's temple, you will see the "CROLLYWOOD" letters at the end of the valley. Approach it to discover a Secret Crollywood movie studio. There are no items of interest near the studio itself.

The letters CROLLYWOOD can be seen.

#4: This secret can be annoying: under the bridge that leads you to the Female Jaguar temple, there is Armor at the end of the wooden planks supporting the bridge. Jump onto the plank closest to the ground and time your jumps wisely.

#5: In the Female Jaguar temple, before you enter the "Follow-the-light" room, there is a bounce pad behind the far-left pillar. Use it to reach Non-Secret Sniper Bullets and Secret Armor.

The bounce pad.

#6; In the corridor in front of the room with spines on top are jaguars. blow up all the jaguars, and then jump to the secret teleport that has appeared.


Thanks to AleX_WeDeR for the jpgs

#7: In the valley passage left of the Male Jaguar's temple, you will see a giant boulder sitting on top. Approach the boulder until you come across some Secret Armor. Picking up the Armor will trigger the boulder, so don't move once you pick up the Armor!

The gigantic boulder.

#8: Walk up the stairs leading to the Male Jaguar temple. At a certain point, Sam will sniff two times and say "I smell some serious firepower around here.", and guess what, he's right! Slide down the right ledge once where you'll notice a differently colored piece of wall. Blow it up to reveal a Secret Minigun.

"I smell some serious firepower around here."

The wall to blow up.

There are two huts near the Crystal Skull temple.

#9: Go into the hut on the left to find a Secret Ammo Depot with a plethorea of Bullets.

#10: Go behind the hut on the right to find some Secret Health.
18. Teotihuacan - The City of the Gods (16 Secrets)
The third level of The Second Encounter. has 16 secrets.

#1: In the first yard, head to the bottom-left corner to find some Secret Ammo (Cannonballs) in a dark corner.

#2: Opposite of Secret #1, you can find some Secret Health behind a house. A tree gives the impression that you can't go behind the house, so blow it up or walk past it.

#3 + #4: In the temple with the Seriously Scary mask, look to your right once you enter to spot some collapsed pillars. If you shoot the left pillar, you will unseal a Secret Corridor. At the end of the corridor are Cannonballs and a Serious Bomb. Blow up the pillar in the middle to reveal a Secret Cannon.

Keep in mind you can only blow up the left pillar.

The end of the corridor, with the Secret Cannon.

#5: In the top-left corner of the first yard, there is a lone health pill behind a building. Picking it up will activate a Secret Bloodbath, spawning 3 Biomech Majors around you. Beware!

Lone +1 HP and +1 Armor pickups are always traps. Always.

#6: Opposite of Secret #5: After you exit the Hilariously Happy mask temple, go right immediately until you notice a darker patch of wall. Blow it up to reveal some Secret Armor.

The wall to blow up.

#11, 1/5: Before you exit the first yard, blow up the two-headed snake above the exit. Trust me, it will be worth it.

#7: In the second yard, head left until you find some sparkles behind a tree. If you go in these sparkles, you will be teleported to a "Secret yard of strange looking heads", featuring resized enemies and lots of supplies, including a Cannon.

The sparkles.

#8: Back in the second yard, head behind the main building of the yard to find some Secret Ammo (Cannonballs).

#11, 2/5: Before you exit the second yard, blow up the two-headed snake above the exit. Seriously, it will be worth it.

#9: Once you enter the village area, head to the wall opposite of where you entered and look behind a house to find some Secret Health.

#10: Look around the village area until you spot a house with no door, but a black wall. You may hear some giggling from inside, if you enter, you will activate the Secret Spanish lost cannon, so step away immediately! You will find some Cannonballs inside the house.

The house.

Inside the house.

#11, 3/5: Blow up the two-headed snake above the house mentioned in Secret #10...

#11, 4/5: Blow up the two-headed snake above the entrance to the underground complex...

#11, 5/5: And now it's finally clear. If you blew up ALL the two-headed snakes, a Secret teleport will appear in the village area. Head inside to find an area with a giant two-headed snake and some Rockets. I told you it would be seriously worth it.


The teleport.

#12: Before entering the underground complex, in the room where you get ambushed by Cucurbitos, there will be spikes hanging on the ceiling. When you pass the second row of these spikes, look behind you to spot some Health on the middle spike. Blow it up to reveal some Secret Health.

#13 + #14: After you slide down to the Kleer ambush room, either wall to the left and right has a differently textured part. If you blow up the left one, you will discover a Secret poker game with 3 Zumb'ul's. If you blow up the right one, you will discover some Secret Items.

Gambling can cost you your life!

The secret items.

#15: Once you enter the windy corridor, go into the first hole on your right to find a Secret Passage with some Armor, Health and a tiny Cucurbito. It will be very hard to get in, as the wind will try to push you back as much as possible. Try to avoid strafing while going in, it seems to work.

The hole.

#16: Once you enter the lava area, head right and look near the sunken house to find some Secret Ammo (Rockets) on a small ledge.
19. Teotihuacan - Serpent Yards (12 Secrets)
The fourth level of The Second Encounter. has 12 secrets.

#1: When you exit the starting building, head to the lower-left corner to find a lone armor piece. Pick it up to spawn a Secret suicidal plant, which is a Kamikaze in disguise...
NOTE: Do not take out the plant before the secret registers.

The armor piece.

#2: Opposite of #1, head to the lower-right corner to find some Secret Ammo (Sniper Bullets).

#3: During the major Kleer battle, two Biomech Majors will break through a wall from where you entered the area. Walk up to the remains of the wall and turn left to find some Secret Health.

The wall where the Biomechs broke through.

#4: After the force field, look behind the house on your right to find some Secret Ammo (Cannonballs).

#5: There is a bigger building after the force field. There is a switch on the side of it, hidden behind a bush. Activating the switch will spawn a bouncing Kamikaze above you. Kill him to spawn some Secret Items (health pills, sniper bullets).

The switch.

Click the picture so that you can easily see the Kamikaze.

#6: Near the evil stone head building, there is a broken wall. There is a mask above one of the holes: destroy it and pass through the hole to discover a secret place with some Health, Armor and a Biomech.

The mask.

Notice the 'blurry' effect, this is the teleport.

#7: In the Moon Pyramid yard, there is a single Marsh Hopper disguised as a stone head on the right side. Blow it up to spawn some Secret Health.

That stone head is a spy!

#8: In the same yard, head behind the Moon Pyramid until you discover a detonator. If you use it, you will activate a Secret mega ultra explosion, and also spawn 2 Highlanders. There is a Serious Pack amongst the rubble, keep an eye out!

#9: After you defeat the evil stone head using the Ix Chel mask, head inside the building below it to find some Secret Armor inside.

#10 + #11: In the last courtyard, there is a lone health pill in the middle right-hand corner. If you pick it up, you will activate a Secret Watcher. Look above you where you will find two eyes floatin in mid-air. Shoot them to activate a Secret Mighty Kamikaze, Once activated, the Kamikaze will explode itself in mere seconds, and it has a really big explosion radius, so stand back!

The health pill.

I always feel like, somebody's watching me...

Oh.

#12: In the last room, there are two jaguars above the level exit. If you blow up both of them, you will spawn some Secret Health.

20. Teotihuacan - The Pit (11 Secrets)
The fifth level of The Second Encounter. has 11 secrets.

#1: After you leave the starting room, look behind the right pillars until you find a dark passage. Head inside to find some Secret Health.

The passage.

#2: After the 'Dangerous Forces' room, you'll be in a corridor where you are ambushed by Zorgs and a Zumb'ul. Before you leave, look behind you to spot a lantern with some sparkles above it. If you go into the sparkles, you'll be teleported above. Jump on the narrow platforms to reach some Secret Armor.

The sparkles.

#3: Once you're on the first bridge of the dark abyss area, jump onto the right ledge and look beneath you until you spot some sparkles. Jump into the sparkles to find some Secret Ammo (Cannonballs).

Both the sparkles and your teleport destination can be seen.

#4: In the same area, once you enter the tower, instead of taking the stairs, go right to find some Secret Health under the staircase. Mind the Kleer!

Yeah, that way. -> -> ->

#5: As you ascend the staircase, you will notice windows to your left. When you pass the seventh window, look into the window to find a minature reptiloid demon. Kill it to spawn some Secret Health.
NOTE: If you aren't bothered counting the windows, listen closely for someone whispering "Psst, hey.".

The game calls him Blondie...

#6: In the second tower, go onto the ledge opposite of the tower entrance. Notice some sparkles on the right lantern. Jump into them to find a Secret broken teleport. You can see some armor infront of you; a simple jump will be enough to reach it.

Click the picture so you can see the sparkles.

#7: At the same tower, blow up both lanterns on the other ledge to summon Secret annoying Pinky's lost brothers, appearing as two mini reptiloids.

NOTE: For those of you who don't get it, Pinky was a mini reptiloid in the secret Sacred Yards level of the First Encounter. You could encounter him even without secrets.

#8: Once you're in the area with the giant fan in the middle, use it and strafe right to reach the ledge on the right. Activate the switch near that ledge and a platform will move above the fan. Go on it and let it take you to a Secret Area with some Health and Marsh Hoppers.

The ledge with the switch.

The platform.

Inside the area.

#9: After the room where you get two Serious Bombs from their pedestals, you will come down a hallway where zome Zorgs and a Zumb'ul ambush you. Destroy all the lanterns (there are a total of 8) in that hallway to spawn some Secret Ammo (Cannonballs) at the exit.

This hallway.

The spawned ammo.

#10 + #11: After you survive the giant battle outside and head up the exit stairs, instead of going into the pit, go right until you come across a lantern. This lantern has sparkles in it, so you know what to do. You will find yourself above some Secret rocket festival gear (Rockets and Serious Damage). Once you pick it up, drop down from the ledge and go right until you see a heart. Pick it up to begin the Secret rocket festival, spawning 5 Biomech majors!
RANDOM COMBAT TIP: A Major Biomech requires 2 Serious Damage rockets to die.

The sparkles.

Overlooking the gear.

The heart.
21. Ziggurat (11 Secrets)
The sixth level of The Second Encounter. has 11 secrets.

#1: Once you start, walk behind the building to find a Secret Weapon (Sniper Rifle).


#2: When you enter the building, you'll come across a spike pit. At the bottom of it is a Heart. Position yourself accordingly so that you can collect the Secret Health.

ALTERNATIVE METHOD: When you enter the room with the giant pillars, the first pillar you see will have a hole in it, clearly visible. You could jump through here and collect the Heart, but you will have to navigate the building again.

The hole.

#3: Once outside, go left of the building to find some lone Sniper Bullets. Picking them up will activate a Secret suicidal avenger plant, which is a Marsh Hopper with Biomech Minor lasers in disguise.
NOTE: Do not kill the plant with the sunglasses before you pick up the ammo or the secret will NOT register.


The plant with sunglasses can be seen on the left.

#4: Go behind the building where you collect "Hawk Wings - Part 1". Shoot the darker piece of wall to reveal an Armor Shard. Pick it up to enable Secret Armor, but also a Biomech Major.

The armor shard.

#5: Opposite of Secret #3, go right of the building to find a lighter piece of wall. Shoot it reveal some Secret Health.


The health unsealed.

#6: Once inside the building after the first outside courtyard, you will notice some Secret Items behind a grating on your right.


These items.

Then, after you use a button to unlock a door, go into the next room and look inbetween the pillars on the wall on the back of that room. You will find a darkened passage: go in it to reach the Secret Items.

The darkened passage.

#7: After you exit the room where you get the Double Barrelled Shotgun, you'll come across a spike pit. In the spike pit, you will notice some sparkles.

The spike pit.

Simply jump down into the spike pit to be teleported to a Secret Place, where 4 teleporters spin around a Serious Bomb/Cannon (depends if you're playing single- or multiplayer). You can use the teleporter in the spike pit as much as you like.


#8 + #9: Once you are in the main village area, look right into the distance (scan around with your Sniper Rifle). You'll notice a bush in the distance.


The bush.

Approach it to find two powerups: Serious Speed and Serious Damage, both hidden under a bush. Picking up each of them will register a Secret.


The powerups, hidden under the bushes.

#10: After you exit the main village area, go through the door on the right to the courtyard. One of the wide buildings in there has a window different from the rest: blow it up to spawn a Alduran Reptiloid. Don't shoot it though, as Secret Boxing Barry will punch him dead for you!

The window to blow up.

#11: In the same courtyard, go to the far-left corner to find a brighter piece of wall. Blow it up to reveal a small area, which at first sight may have nothing in it, but if you look up, you'll notice a wooden platform above. Blow it up to reveal a Secret Powerup (Invulnerability).


The wall. Notice the Sniper Bullets infront of it.


The platform, in the right corner.
22. Persepolis - The Elephant Atrium (13 Secrets)
The seventh level of The Second Encounter. has 13 secrets.

#1: After you head up the first small set of stairs, instead of going straight forward, go left. At the end of that passage is a small ledge with a small bounce pad left of it. Use the bounce pad to land onto the pillars: navigate your way to the other side of the room to find some Secret Health.

The bounce pad.

#2 + #3: In the first outside courtyard, go left immediately until you find a Health Pill hugging a wall. Approaching it will spawn 2 Biomech Minors. Afterwards, blow up the wall that the pill was hugging to discover a Secret Area, with a Biomech and a Cannon.

The pill.

First sight of the yard.

Proceed inside the area to encounter an even bigger battle, including Kleers, Werebulls and more Biomechs. At the back of the yard is a detonator: use it to destroy a Secret Pyramid, revealing some Cannonballs and Serious Speed underneath it.

The detonator.

The ruined pyramid.

#4: Back in the previous yard, look at the left wall of the "Holy Bathhouse" where you'll notice an armor shard infront of a differently colored wall. Blow up the wall to reveal some Secret Armor. Picking up the armor shard will spawn a Biomech Major.

#5: This is a pretty frustating one. After you clean yourself in the bathhouse and enter the next small yard, kill the Zorgs and Zumb'ul. Afterwards, 6 Kleers will be catapulted into the yard one by one. Your objective is to kill ALL 6 Kleers before they can touch the ground (your Sniper Rifle will prove very useful then). If you do so, you will recieve the message "Bravo! You killed all 6 Kleers in the air!", which counts as a secret.

"Bravo! You killed all 6 Kleers in the air!"

#6: In the next yard, go left around the corner to notice a darker piece of wall. Blow it up to reveal some Secret Armor.

The armor unsealed.

#7: Opposite of Secret #6, you'll find some lone Rockets. Pick them up to mutate a Secret Plant, creating the devastating Biomech Major - tree variant!

The rockets.

#8: In the same yard, beyond the elephant statue, there is a hole in the left corner with some Secret Health in it.

#9 + #10: In the next yard, head opposite of the entrance to find a switch. Use it to unseal a Secret Yard.

The switch.

Next, when you reach the Minigun Yard, head into the building opposite from the entrance. This is the Secret Yard you unsealed. Head left to have a conversation with past Sam. Head right to find some Secret Items, guarded by a ton of Kleers.

The items.

#11: When you enter the room with the rotating platform in the middle, if you look into the pit, you'll notice a fan is moving around it. When the fan is positioned on the right, jump on it so you can reach some Secret Armor in a small hole above you.

The fan.
The room viewed from the small hole where the armor resides.

#12: In the final outside yard, head to the far-left side and you'll find a switch near a staircase. Use the switch to unlock a Secret Door. Head to the opposite side of the yard and enter the small building where you'll discover an ammo depot. This is the door you unlocked.

The switch.

The building/ammo depot

[b]#13[/b]: In the same yard, head behind the horse statue in the middle and Use it's... well... yeah. You'll encounter some Secret horse power, spawning some Health. [previewicon=8363706;sizeOriginal,inline;Persepolis - The Elephant Atrium #13.jpg][/previewicon
The building/ammo depot

#13: In the same yard, head behind the horse statue in the middle and Use it's... well... yeah. You'll encounter some Secret horse power, spawning some Health.

The horse statue.
23. Persepolis - Courtyards of Gilgamesh (12 Secrets)
The eighth level of The Second Encounter. has 12 secrets.

#1: As you enter the first main area, go right immediately to find two ledges sticking out of the wall. Use them to reach a platform with some Secret Health.

#2: In the small area with the two pools, go behind the pool on the right to find a Secret Ammo Pack.

#3: Head into the pool on the right and take the main path. As you traverse down the path, look down into a hole to find a Secret Ammo Pack.

#4: Still taking the main path, you'll come into a T-junction room. Head straight forward and go upwards to find a Secret Room with some Sniper Bullets, Rockets and Health.

The room, viewed through a window.

Straight forward!

#5: Once you surface from the long dive, look right until you spot a bullseye target on a tower. Shoot it to reveal a Secret Room on the right side of the area.

The bullseye is marked with a red circle.
Also note the wierdly textured wall on the left. This is the secret room.


#6: In the same courtyard, shoot the patch of wall directly opposite of Secret #5 to reveal a Secret 'Don't push' detonator. If you are so foolish enough to use it, prepare for a fight with a Highlander!

Shoot here.

#7: In the same courtyard, go behind the building where you get the Laser to find some lone Rockets. Pick them up to summon Secret Mutated Plant and Friends (one biomech majors and two minors).

The rockets to pick up.

#8: As you enter the building after collecting the Winged Lion, instead of heading left, take the right door. Fight your way through a narrow corridor until you find some Secret Health at the end. Once you pick it up, you'll be trapped in a giant battle!


#9: In the hallway with the giant Kleer battle, keep looking left until you find some small platforms sticking out of the wall (they are very hard to spot!). Use the platforms to reach the top of the arch. Parkour across the lanterns until you reach some Secret Health.

Each platform is marked.

The health (seen from far away).

#10: After that corridor, go left to find a small alcove with some Secret Armor inside.

#11: During the sliding platform part, you'll notice a Heart sitting on a ramp to the left. Once Sam says "Now I am seriously serious!", destory this platform with a rocket to reveal the Secret Health.

The ramp.

#12: During the large, final battle, keep looking left until you see a building that has a bullseye target on it. Shoot it to, at first, catapult 2 Hearts, but the game decides to troll you and gives you only one.
24. Tower of Babel (12 Secrets)
The ninth level of The Second Encounter. has 12 secrets.

#1: In the area where you collect the King Tilmun statue, look left of the exit to find a hole with some Secret Ammo (Cannonballs) in it.

#2: In the Chamber of Cosmos (large room with spiral staircases and foggy pit), once you ascend the first small spiral staircase, jump off the stairs left where you'll find a small area with some Health in it. Approach the Heart from the sides, or else the game will teleport you back up!

The secret viewed from a distance.

Red is bad. Green is good.

#3: As you ascend the second, larger spiral staircase, jump off left immediately to find an area with some Secret Sniper Bullets and some Non-Secret Health. Use the stairs to get back up.

#4: In the lower area, there will be small holes in the wall that look like the mouse holes you see in movies and what not. If you land a rocket into one of them, you'll spawn Secret Deadly Midgets, which are very tiny Werebulls! They are very annoying to take out and have no damage penalty even with their seriously small size, so beware!

Example hole


#5: Back in the main area, slide down the big slope and turn left around the corner. You'll see a lantern: behind this lantern is a bounce pad. Use it to be catapulted to an area with lots of Secret Ammo (Cannonballs). Once you pick them up, you'll spawn a Biomech Major, so beware!

The bounce-pad (click the picture if you can't see it).

#6: In the first large outside area, head to the left side of the area. You may notice one of the giant columns has glowing eyes: if you blow up that column, you'll unseal a Secret Passage to Egypt Level. Head inside where you'll stumble across a tiny Great Pyramid, with Ugh-Zan, Sam himself and more. Blow up some stuff to reveal a Non-Secret Heart.

The column is marked.

#7: In the courtyard where the third Tablet of Wisdom resides, head to the wall opposite from the exit and look right where you'll spot a differently colored wall. Blow it up to reveal a Secret Powerup (Invulnerability).

#8: In the courtyard after that one, there is a lone health pill in a corner right to the exit. Pick it up to spawn the Secret MIGHTY GIZMO, a giant Marsh Hopper, the forgotten 4th boss of The Second Encounter! Although, you can kill it in 1 hit. But when you do, it'll spawn dozens of tiny Marsh Hoppers, so watch out!

The health pill.

"Secret MIGHTY GIZMO has been encountered!"

#9: In the main area again, after collecting all the Tablets of Wisdom, go up to the main door and drop down left where you'll find a Secret Powerup (Invulnerability) in the corner.

#10: After you obtain all the Tablets of Wisdom, instead of entering the Tower of Babel, go to the entrance of the courtyard where you found the first Tablet of Wisdom. Strangely enough, the door is unlocked. Go into the yard itself to begin the Secret Round Two! This includes doing the circle around the Tower all over again, but with more supplies, enemies and tools of destruction!

"Secret round two has been discovered!"

#11 + #12: After you went down the big slope in the Tower, instead of entering the boss room, turn around and go to the back of the room. One of the pillars will have a small platform with Cannonballs on it above you: shoot the platform to reveal Secret Cannon Ammo. But, once you attempt to approach the ammo, you'll be teleported back. No travelling by the sides: shoot the area behind the Secret Ammo to collect it.

The ammo.

The ammo after Secret #11.
25. The Citadel (17 Secrets)
The tenth level of The Second Encounter. has 17 secrets.

NOTICE: Secret #12 requires you to reach a certain section of the map in 15 minutes. So if you wish to get all 17 secrets in this level, you will need to do your business fast.

#1: From your starting position, check the doors of the houses to your left until you find that one is creaking. Shoot this door in any way you wish to reveal a Secret Weapon (Double Shotgun).

Notice the creaking effect.

#2: After you exit the first Kill-O-Matic room, you'll see a hole with a boxing glove and a switch directly infront of you. Approach the glove, make sure to stand clear and use the switch to activate a Secret KO Glove.

#3: On the stone bridge, a tower left of the bridge will be struck by lightning. If you drop down where that tower got destroyed, you'll find some Secret Health and a bounce pad which you can use to get back up.

The health is in the bottom-right corner.

#4: When you enter the first castle courtyard, go behind the house in the bottom-right corner to find some Secret Ammo (Sniper Bullets).

#5: In the same courtyard, go behind the house in the far-right corner to find some Secret Ammo (Rockets).

#6: When you enter the courtyard where you collect the Gold Cross, look right where you'll see some graves. Simply approach these graves to find Secret Graves. If you use the graves, you'll unleash the most feared enemy in Serious Sam.

The graves. Notice the surfboard replacing a regular cross.

#7: In the same courtyard, look left of the building where you collect the Gold Cross. You'll find a lone health pill behind a rock. COLLECT (not just walk over it!) the pill to be teleported to a small area with an Ammo Pack and Health. Mind the Cucurbito that spawns when you collect the Ammo Pack!

The health pill.

The area you are teleported to.

#8: In the courtyard with the Rocket Launcher, collect the Napalm scattered across the yard to activate a Secret Jumping Plant (Marsh Hopper in disguise).

"Secret jumping plant has been activated!"

#9: In the courtyard after the next one, look behind the houses on the left where you'll find a phone booth and some Secret Ammo (Rockets). If you decide to make a call, you'll have one with Future Sam who is 'pretty close to kicking Mental's ♥♥♥'. In other words, you are calling Sam in the Siriusopolis Downtown level in Serious Sam II.

#10: In that same courtyard, head to the house in the opposite corner where you'll find a barrel sitting in a corner. Blow it up to reveal Secret Invulnerability.

The barrel to blow up is marked.

#11: In the clockwork room, dive into the pool underneath the wooden gears until you find a passage. Head down the passage where you'll find Secret Health.

Head down the marked passage.

#12: This level starts at 11:45 PM virtual time. And as this secret's name suggests, "Midnight Mega Secret", you'll have to do something in 15 minutes.

After you get out of the clockwork room, there will be a house to your left. One minute after the clock strikes midnight, you'll see the message "Midnight mega secret enabled!". From that point, you have only one minute to reach the house. Inside, you will find the Secret Midnight Items: Serious Damage, Invulnerability, Minigun, Heart, Serious Pack and Super Armor. The door of the house will close with the message "Midnight mega secret disabled!".
incase you failed to make it in time, or you are too early The door is destructible, and can be destroyed by about 8 rockets [Credit to Nevermore2790 for finding this] Or by using the knife. It saves ammo and it's also faster [Credit to FiB. Muleke_Trairao for finding this]

The house containing the game's most frustrating secret.

#13: In the same area, look behind the row of houses on your right until you find some Secret Armor. Mind the Kleer!

#14: When you enter the drawbridge courtyard, head behind the house on your left to find some Secret Ammo (Sniper Bullets).

#15: Diagonally from Secret #14, you can find some Secret Armor behind the house.

#16: In the underground lake area, look in the far-left area where you'll find some Secret Health.

The health appears as a Cube.

#17: In the final area, look behind your entry point where you'll see a barrel. Blow it up to reveal some Secret Armor.

The barrel.
26. Land of the Damned (14 Secrets)
The eleventh level of The Second Encounter. has 14 secrets.

#1: In the first village area, a house close to your spawning position will have a creaky door. Blow it up to reveal a Secret Powerup (Serious Damage).

Notice how the door moves slightly.

#2: In the same village, head up the wooden platform surrounding the windmill. When you find a switch, using it will summon a Secret Santa. Santa will start to move around the village. Damaging him will spawn 'presents' such as Health, Ammo and Powerups. Small bursts from the Flamethrower seem to get the most 'presents' out of him.

The switch.

Santa.

#3: In the far-left corner of the same village, you'll hear some couching. If you look above you, you might see two feet sticking out of a chimney. If you blow them up, you'll unplug Secret Jammed Santa and reveal a Heart.

The feet sticking out of the chimney.

#4: At the far-end of the village from where you start, blow up the snowman to reveal some Secret Armor.

The snowman.

#5: In the second village, there will be some armor in front of a snowman with sunglasses on. When you pick up the armor, move away immediately as the snowman will shoot rockets at you! Afterwards, blow up the snowman to terminate a Secret Snowman Avenger and reveal some Sniper Bullets.

The snowman and the armor.

#6: The house directly next to the snowman with sunglasses has a creaky door. Blow it up to reveal a Secret Powerup.

Once again, notice how the door moves slightly.

#7: Near Secrets #5 and #6, there will be a much smaller snowman with a switch on his body. Use it to summon another Secret Santa. Once again, short, controlled bursts of the Flamethrower.

The switch.

#8: In the small area just before the lava caves, there will be another snowman to your left. If you blow him up, he shrinks. If you blow him up again, he shrinks again! Keep on attacking him until the Secret Incredible Shrinking Snowman is completely dead. He will spawn a Heart and 2 Major Biomechs afterwards, so beware!

The snowman.

#9: In the first lava cave, a small part of the narrow archway will be destroyed due to the collapsing ceiling. If you look into the gap that is created, you'll see some sparkles. Head into the sparkles to be teleported up where you'll find some Secret Health.

The sparkles.

#10: In the second lava cave, you'll be able to spot some Cannonballs at the far wall opposite from where you entered. Destroy the ledge underneath to drop the Cannonballs. Proceed as normally where you'll automatically come across the Secret Ammo.

The cannonballs.

#11: Before you leave the second lava cave, head left where you'll see a giant rock. Behind the rock is a Secret Weapon (Cannon).

The rock (click the picture if you cannot see it).

#12: In the final lava cave, you'll come across a load of platforms. Head to the one marked in this picture:

You'll notice the platform starts moving once you get on it. It'll take you to another, far away platform with some Secret Armor. The trip back is long and also interrupted by a Large Lava Golem, so prepare for a boring trip. :|

The platform with the Secret Armor.

#13: After you cross the final archway in the final lava cave, turn around and go behind the archway's base where you'll find some Secret Health.

The health viewed from the opposite side. It's also marked.

#14: Just before you enter the teleporter that leads you to the Ice Castle, jump off right until you spot a Secret Teleporter. Head inside to be teleported to a small area with 4 platforms with Armor and Health on them (also some Lava Golems!). You can use the small rock in the middle of the platforms to get back out.

The teleporter.

The area you are teleported to.
27. The Grand Cathedral (7 Secrets)
The final level of the second encounter has 7 secrets.


#1: From your starting position, go right where you'll see a lighter piece of wall. Destory it to reveal some Secret Items (Heart and Serious Damage).

The wall.

#2: As you enter the third 'leg' of the Corridor of Death, one of the corner towers has a dude with an afro sticking out of the window. If you shoot him, you'll launch a Secret Powerup (Serious Damage).

"Yo, dude, there's a circle around me! Ayo!"

#3: Around halfway through the Corridor of Death's third 'leg', there is a VERY slightly lighter colored wall on your left. If you blow it up, you'll reveal a Secret Teleport to Pumpkin Field. Inside the Pumpkin Field, there is a Serious Backpack, Heart, Full Armor and Serious Bomb to collect. All of these items are on a stone road and you should stay on the road, otherwise, you'll spawn loads of midget Cucurbitos! There is a teleporter back at the end of the road.

This piece of wall is VERY hard to spot normally, so keep your eyes peeled!

The pumpkin field.

#4: There is a certain piece of wall that can be destroyed to reveal some Secret Items on the right side of the Corridor's fifth 'leg'. It is very hard to seperate if from the normal wall, so I marked it for you guys:

Should you still have trouble finding it, it is worthwhile to note the Full Armor on the same picture. It should make things easier to find.

#5: In the 'leg' of the Corridor right before the Cannonball shooters, there is a clearly differently colored wall on the right side. Blow it up to reveal a Secret Teleport to Embyro Museum. Inside the Embyro Museum, you'll find a Heart that spawn 2 Highlanders, Serious Damage, a Serious Pack and Full Armor.

The wall may not seem very clear here, but in-game, it's alot better.

#6: Right before the Cannonball shooting faces in the Corridor of Death, look to your left where you'll see a part of a Witch-Harpy's body in a window. Blow it up to launch a Secret Powerup (Invulnerability).

#7: At a certain point during the final boss, the message "Pink secret has been enabled!" will appear on your screen. When this happens, go right facing the cathedral and next to the bouncer will be a pink hole with Secret Health in it.

The pink doesn't always appear. I'm not sure if this is a graphical glitch or what.

Thus ends his Guide for The Second Encounter.
...unless you have the "Legend of the Beast" DLC. Then it's not over. >:3

This part will be part of a dlc that can be got here
28. New Kingdom - Children of Amon Ra (5 Secrets)
The first level of Legend Of The Beast has 5 (4) secrets.

#1: As you enter the first courtyard, there will be three rectangular archways in front of you. In the very right archway, there is a differently colored wall. If you touch it, you'll reveal some Secret Items.

The suspicious wall can be seen on the right.

#2 + #3: The left courtyard will have a small lake with a bridge crossing it. If you look under the bridge, you'll see a Secret Teleport. If you enter it, you'll be teleported into a room where some Non-Secret Armor is guided by a spike trap. For some reason, going through the teleporter counts as 2 secrets in 1.

The teleporter.

The armor guarded by the spike trap.

#4: As you enter the right courtyard, head to the bottom-left corner where you'll spot a Health Cube. If you approach, it will attempt to avoid you, but you can still easily collect this Secret Health.

The health.

#5: In the same courtyard, there will be a differently colored wall behind the switch you have to use. Touch it to reveal a Secret Weapon (Shotgun).

The wall.
29. New Kingdom - Holy Spirits (5 Secrets)
The second level of Legend Of The Beast has 5 secrets.

#1: In the first area, look at the top backside of the second obelisk on your right where you'll see a target. Shoot it to spawn some Secret Ammo (Shells).

The target.

#2: In the area where you get the Chainsaw, there is a small switch on the far left pillar. If you use it, you'll spawn a ring of Secret Health around the Chainsaw.

The switch can be seen on the left.

#3: In the small temple where you can get the DB shotgun early, the entrance room has a differently colored part of the ceiling. Shoot it to open the part of the ceiling. Jump in to find a Secret Weapon (Rocket Launcher).

This part of the wall.

#4: In the area with the rectangular pool and two pillars, dive into the pool and turn to where you entered from to find a passage. Head down to find some Secret Health.

The passage

#5: Many believe this secret is glitched. This is not true.

In the same room as #4, you'll see Super Armor placed on a small ledge above. Dive into the pool until you find a tiny switch on the wall facing the Armor. Pressing it will activate a Secret Platform which you can use to reach the secret from the balcony above.

(Thanks to Eyesdown for pointing this one out for the op of this guide!)

The switch can be seen, it is however very tiny, so click the picture for a clearer view.

The armor with the platform activated.
30. New Kingdom - The Grand Obelisk (4 Secrets)
The final level of The Legend Of The Beast has 4 secrets.

#1: As you enter the third main yard, look right and upwards where you'll see Secret Health sitting on a platform. You can:

A: If you have the Secret Rocket Launcher from the previous level, you can use it to blow up the platform right now.
B: After you get the Rocket Launcher normally, go back to the beginning of the yard and blow up the platform.

The health.

#2: There is a giant sphinx infront of the building that holds the Rocket Launcher in the third main yard. Use the lanterns to jump onto it's base. Now look at the front of the Sphinx where you may spot a small switch: Use it to reveal a Secret Room beneath the Sphinx with some Armor and Bullets.

The switch.

The room beneath the Sphinx.

#3: In the big room that holds the Rocket Launcher, head to the far right corner and enter the small room there. Look behind the lantern on the left where you'll spot a small switch. Use it to bring down a platform. Go on the platform to be brought into a Secret Room with Armor, Rockets and Bullets.

The switch can be seen on the right.

The room you are brought into.

#4: When you're back in the yard you began in, instead of heading into the Obelisk, go back to the door that leads to the second main yard. You'll notice the door is unlocked and when you go in the yard, you'll find Secret Deja Vu, spawning a Heart and Super Armor. Unless you wanna do the full circle around the Obelisk again, you can go back into the first yard before the door closes (if you are fast enough).

"Secret Deja Vu found!"
This part is from a "dlc" for fusion buy it here
http://store.steampowered.com/app/41070/?snr=1_7_15__13
31. Summer in Cairo (17 Secrets)
Reading (continued) before advancing beyond the Third secret is recommended

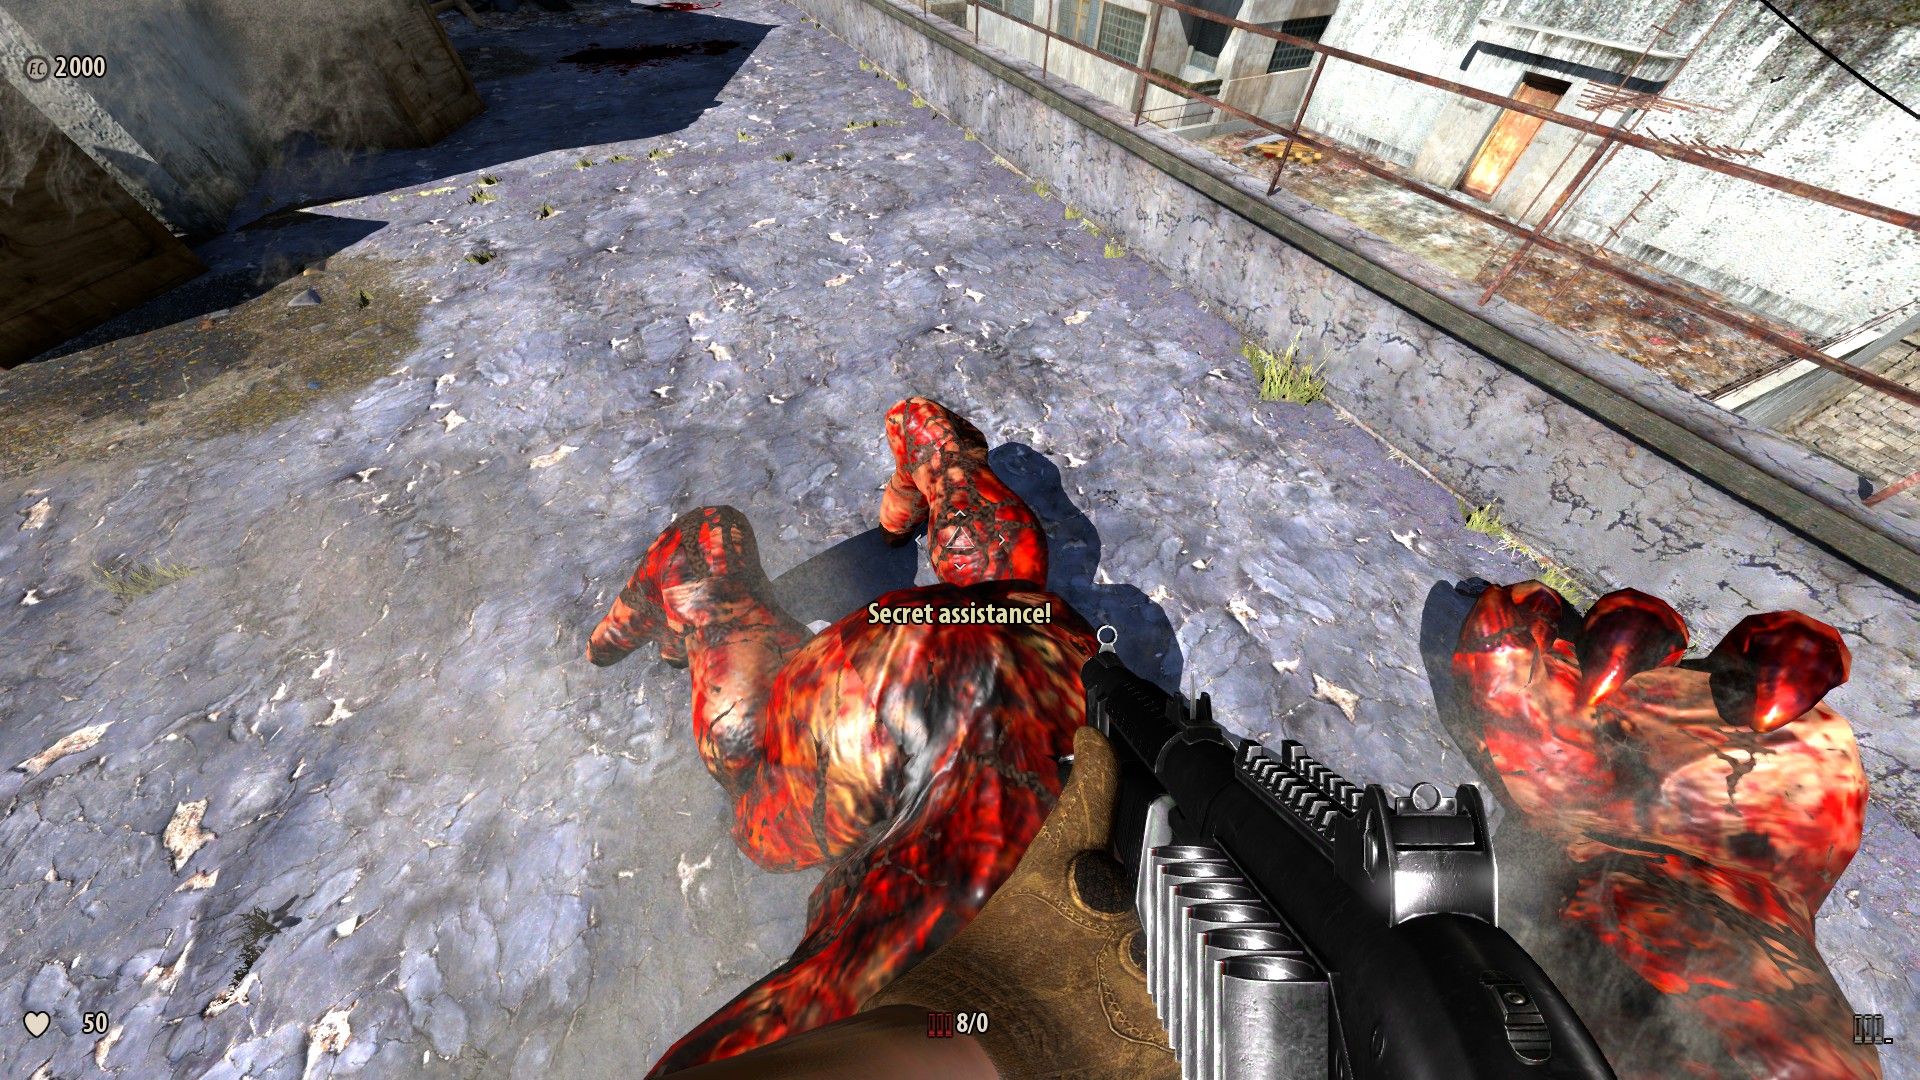
1) Use the Gnaar's eye — As soon as you melee the first Gnaar, look across the roof from where she came from. There's a green speck two buildings over. Throw the eye at a high enough arc (standing at the edge, at the same level as the top of the tall building to the left) that it hits the speck and tosses it onto your roof. If you miss with the eyeball, you can try again with one from another Gnaar (don't run or change weapons while holding an eye, as it will cause it to vanish/drop). Pick up the shotgun and kill the next Gnaar, showing a "Secret assistance!" message. Reward: Pump Action Shotgun.


-
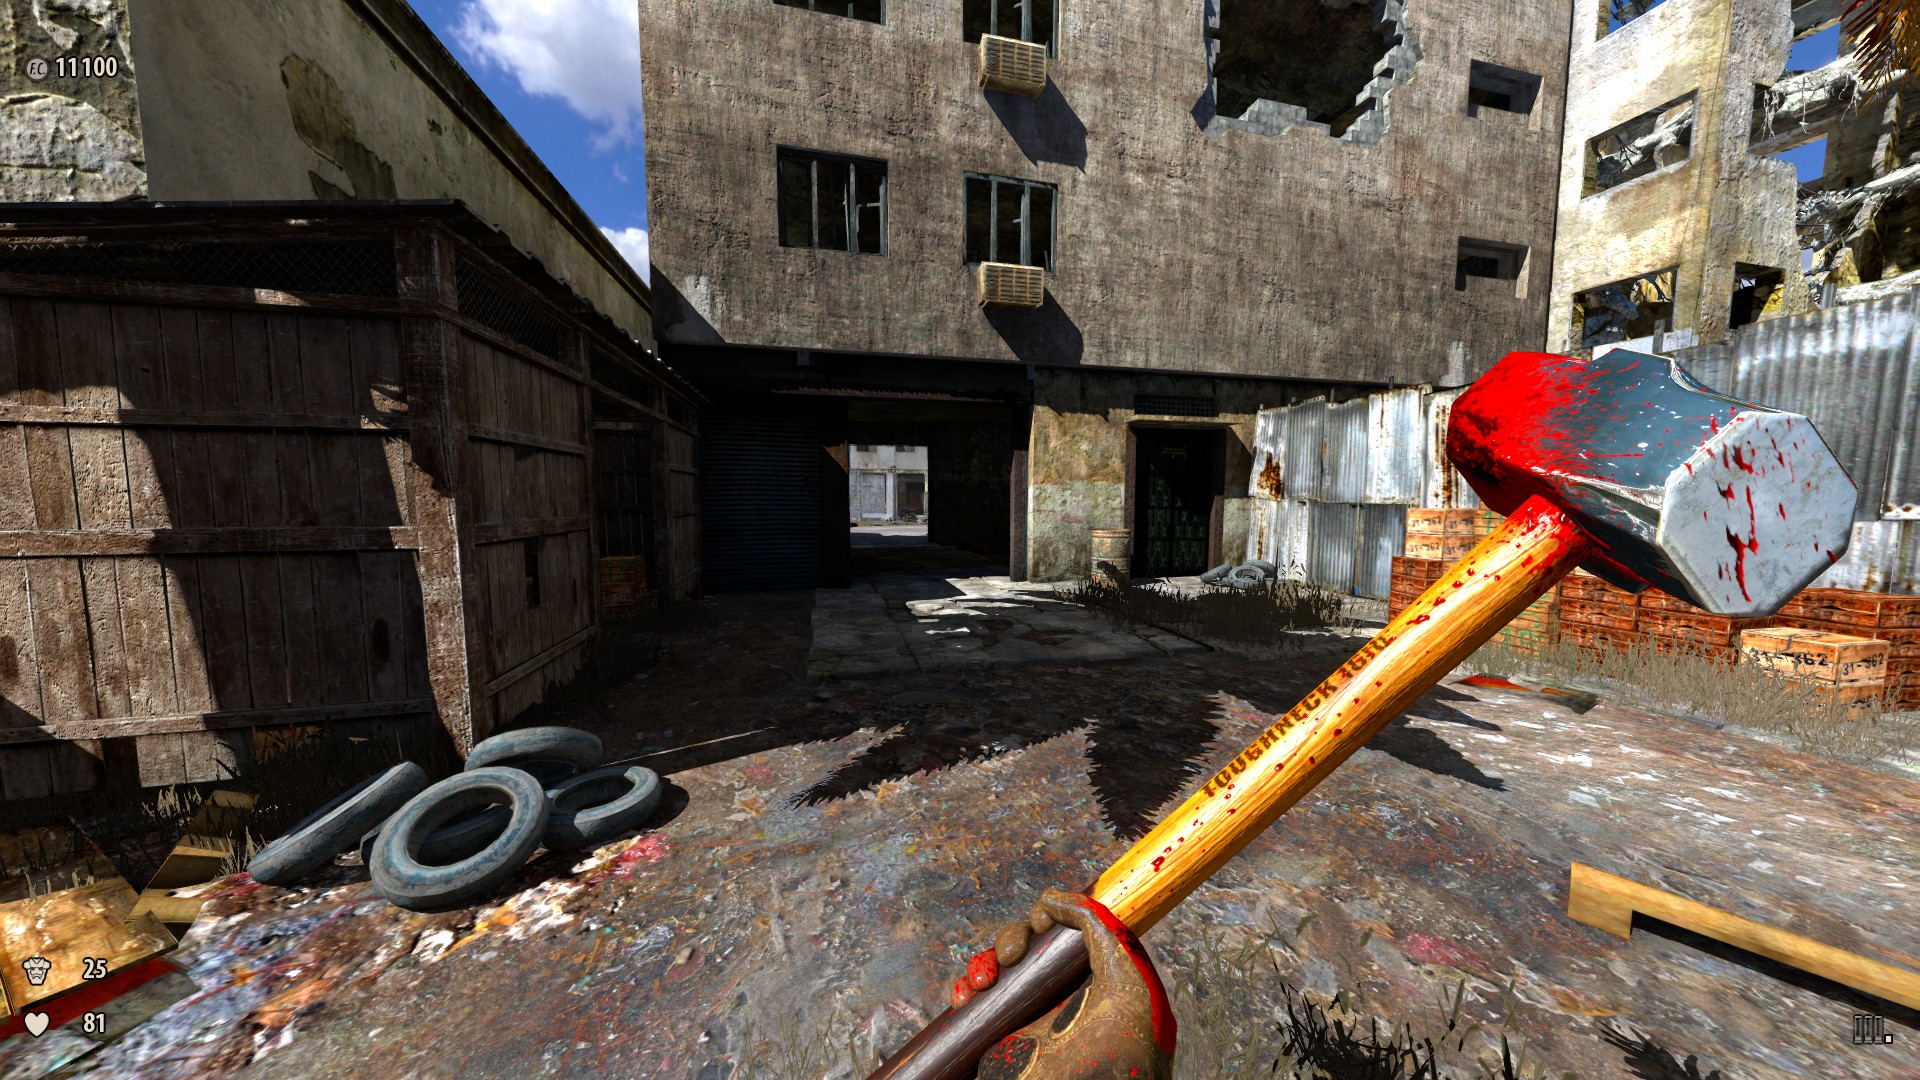
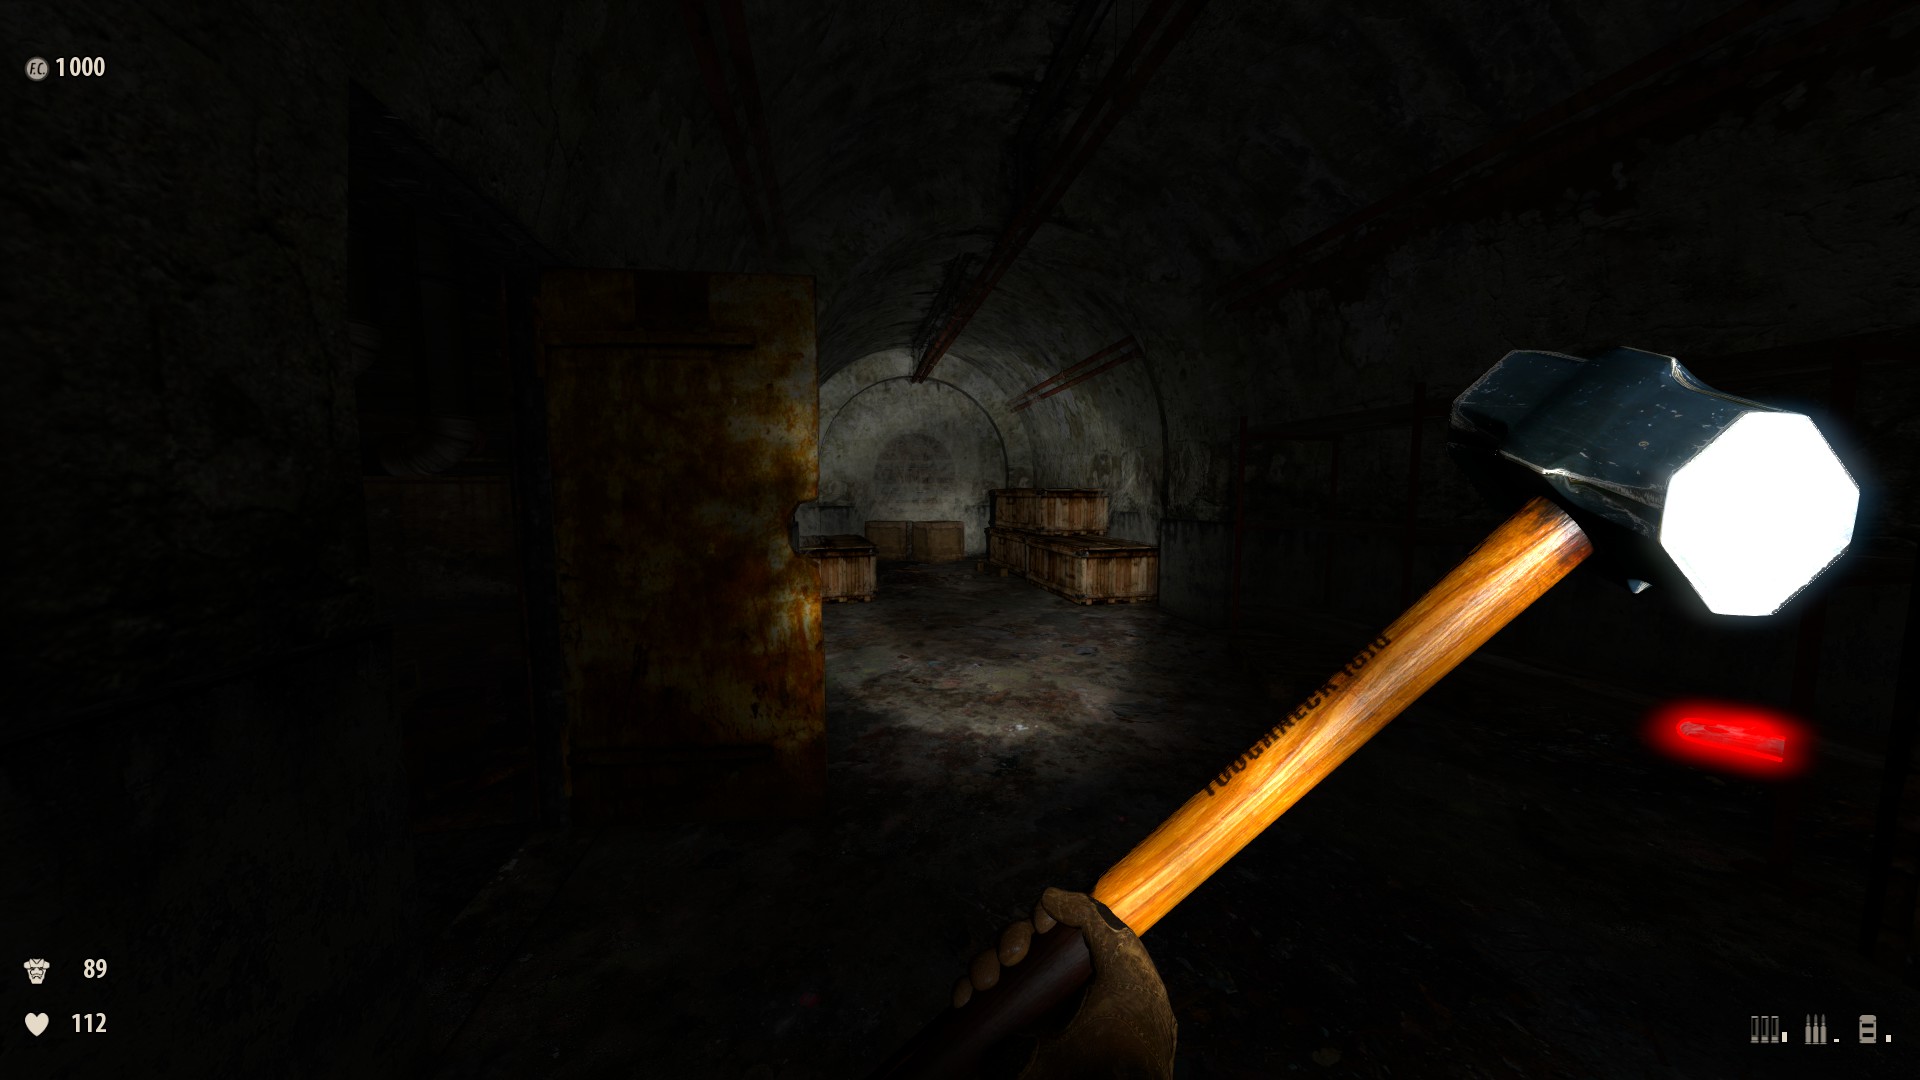
2) On top of the starting building — Jump across to the roof with an antenna that is beside the door down; the sledgehammer is a "Parkour secret." There is no reliable way down, but try jumping for a window ledge to break your fall. Reward: Sledgehammer.


-
3) From the roof where you've picked up the sledgehammer in the previous secret, jump down to the lower roof and face the building you originally started the game on. You will see some caged balconies that have a small ledge you're able to jump to. Jump across to land on the second from the top, then face the building you've just jumped from — you will see balconies as well. Jump towards the left side of the middle (second from the top) balcony to grab a pickup (it might not be visible from the balcony you're standing on). Reward: Shells +10.


-
4) On street level beside the starting building — A pack of shells is in an alley; pick it up to get the secret. A Beheaded Rocketeer is right beside it. Reward: Shells +5.


-
5) Just after you kill the first Female Gnaar on ground level — To the left you can see a glowing blue armour on the third floor of a ruined building. Jump on the boxes, then the garbage bin, then the kiosk. Press up against the building directly under the armor and jump straight up to pick it up; this is a "Parkour secret." Reward: Armor +25.

-
6) After the road where you fight a bunch of Female Gnaar — You walk through a ruined wall. Look to the right beside a garage. Behind a corrugated wall is a health pickup with a "Mini secret found!" message. Reward: Health +1.

-
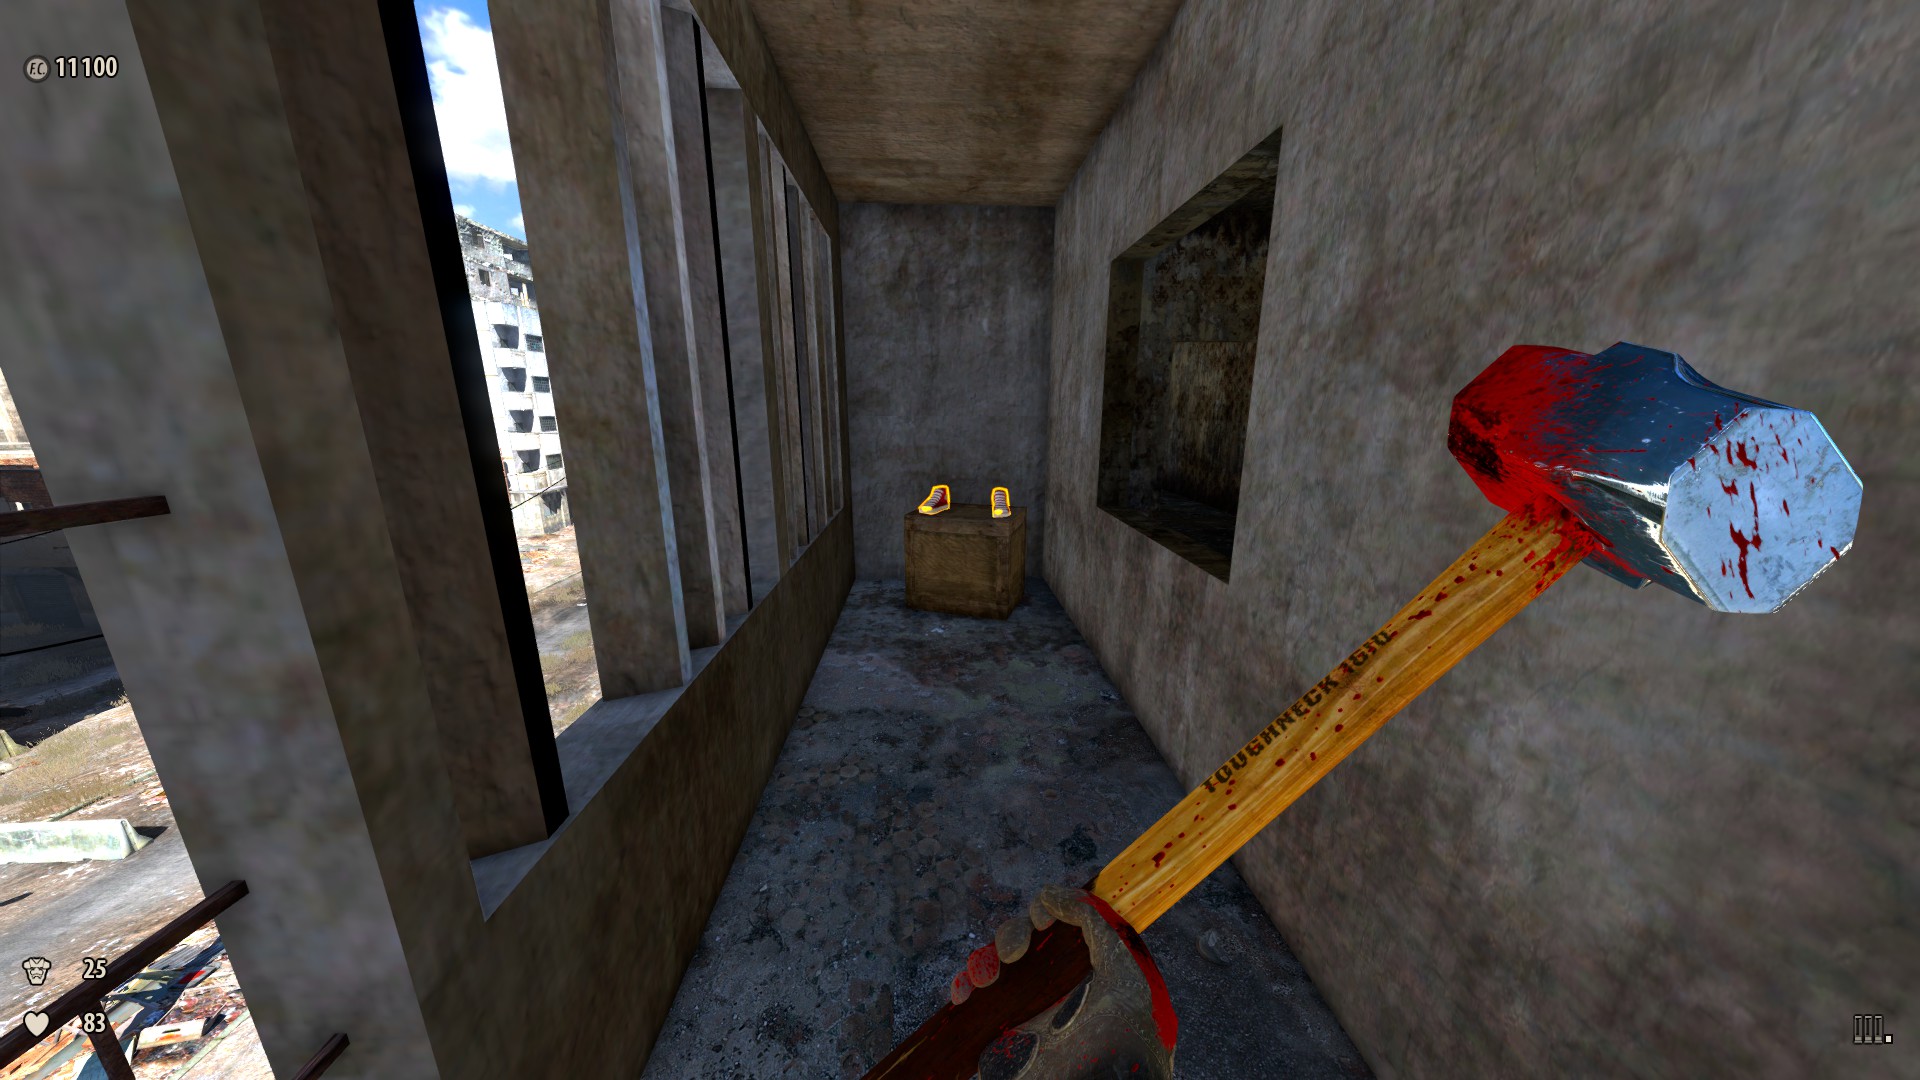
7) When you get the call from Jones — You head through a building that has stairs to the right. Go up two floors (jumping over the ruined stairs) and walk out to the balcony. Pick up the shoes. Reward: Serious Sam Classic outfit.

-
8) On the first main road containing a Beheaded Rocketeer — Behind the bus stop is a stone wall coming out from a building. Walk around it to the left and you will see a gap in the wall concealed by a bush. Go through the gap to pick up an electricity pack. Reward: Electricity +50.

-
9) When a warship blows up a building — After the fight, head through a broken section of wall and into an area with garages. Look to the left behind a bin to see a wall with uneven bricks. Break the wall with the sledgehammer and head on through to find many posters with special text and the message "Secret Yard of Fame Found!" Reward: Easter egg.

-
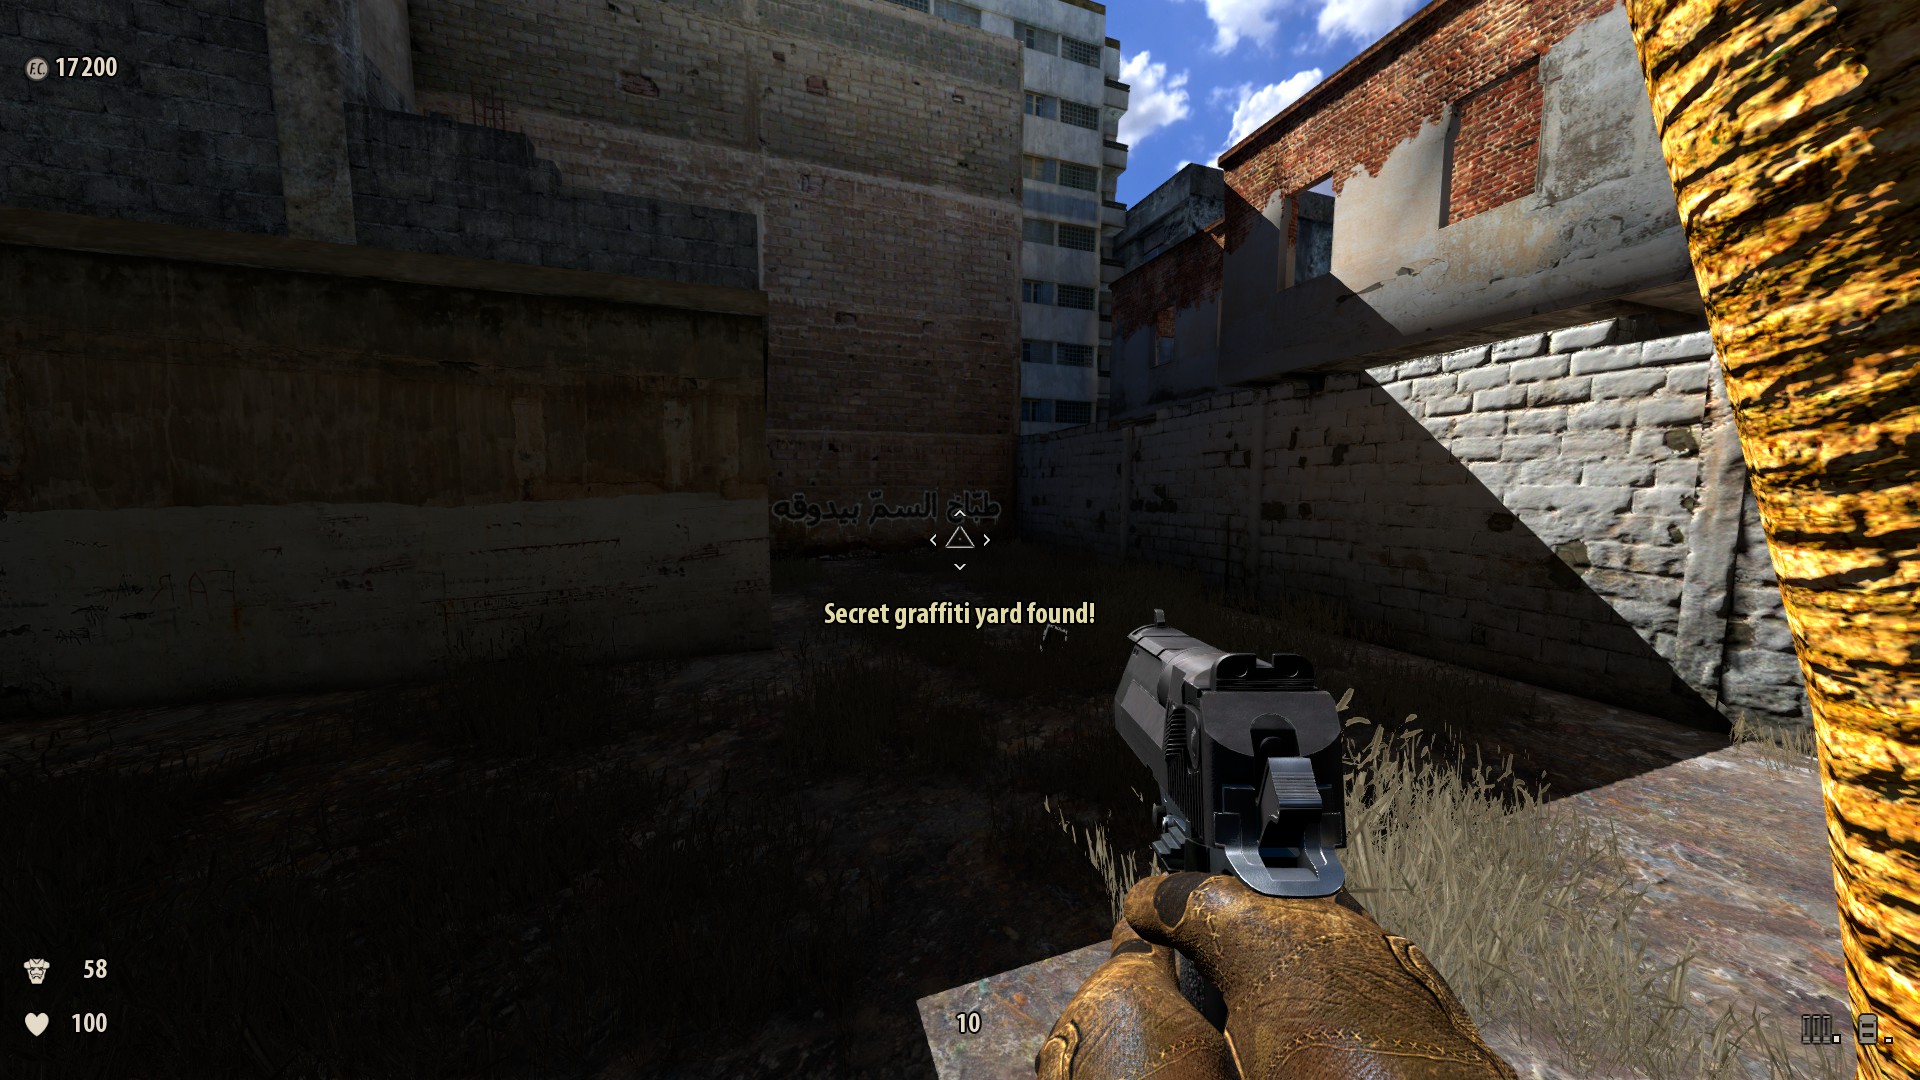
10) Just after you pick up the pistol — Look left and jump on some boxes and over the wall, get the message "Secret graffiti yard found!" Read the graffiti. Rewards: Easter egg, Assault rifle bullets +30.

-
11) It is possible to get secrets 11, 12, 13, and 14 (in that order) if you don't accidentally fall off the wall or roof (if you do fall, you'll have to circle back around and enter the secret yard here in Secret 11). In the street before the parking lot — On the left hand side you can see a decrepit truck through a gate. Jump on the barrel behind the garbage bin, the bin, then over; "Secret yard found!" message pops up. Pick up the helmet, which will spawn some Kleer Skeletons. Reward: Armor +10.
(continued)

-
THE REAL 3TH Facing the entrance door to that building from the outside, to your left there are secret keys on a container (they glow purple). Go back into the building, up the stairs, to the 2nd level and you get to a closed door. Smash that door with the hammer and go in, to your right will be a locked gate (the keys open this) behind which you will find a rocket launcher.


THE REAL 4TH Go up one floor and enter the flat. Inside there is another closed door you can open with the hammer. Inside is some ammo. Careful, when you come back out a kleer will jump at you from the right.


12) In the alley beside the parking lot (in area 8), head back toward the gate you jumped over to enter the secret yard and jump on some boxes on the left, then up on top the garage, heading left towards the parking lot. Note that you will pass Secret 14 before reaching Secret 12, but save that until later if you want to save a little bit of time. From here you will be able to see Secrets 12 (Shells on the portable) and 13 (one health on a building ledge). Run over the shipping container and jump over to the portable in the parking lot, and pick up the shells. Reward: Shells +10.

-
13) When you're standing on the portable from Secret 12, look toward the building — you will see a health pickup on a ledge. You can jump on to the wall from here or backtrack and run along the wall from the building. Either way, follow the wall until it meets the building and then jump up to pick up the health (stay on the wall if possible to get faster access to Secret 14). Reward: Health +1.

-
14) Backtrack on the edge of the wall towards the where you came from, then head left, back towards the gate you jumped over to enter the Secret Yard. On the left will be a dark alley with some cells. Hop down and get the cells. Reward: Electricity +50.

-
15) In the parking lot — Jump on a car sticking out of the garages on the left, then hop down to between the garages. There is a clip down there. Climb out using the barrel. Reward: Assault rifle bullets +30.

-
16) In the plaza before the museum — where the helicopter crashed — there are several garages on the far left. One of them contains a helmet. Reward: Armor +10.

-
17) After the final battle against the Kleer Skeletons — A message saying "Secret Arc de Triomphe enabled!" Head back to the ruined archway and walk through it. "Secret Arc de Triomphe enabled. Welcoming committee is arriving." shows up, and Beheaded Kamikaze spawn in.
32. Into the Spider's Nest (9 Secrets)
1) In the boiler room at the start — between the second and third big machines is a clip. Reward: Shells +5.


-
2) Just outside the boiler room — look to the left. Behind two boxes are some cobwebs hiding a passage blocked off with planks. Break the boxes and planks with the sledgehammer and collect the clip. Reward: Assault Rifle Bullets +30.


-
3) In the hallway that leads to the stairwell, heading towards the stairs — There is a room with half-closed shutter just before the stairwell to the left, it has a translatable plaque on the ground. Behind the column on the back right is a clip. Reward: Shells +5.

-
4) On the second floor just after the stairs — there is a door with a "No entry" sign beside it. You can walk straight through the door by going around the sign on the right, which will show a "Secret room found!" message. In the next room is a weapon. Reward: Double Shotgun.

-
5) On the balcony in a side room on the second floor — The third room on the rear wall has a shelf. Break the shelf with the sledgehammer. Behind it is a switch; push it and a "Secret door unlocked!" message shows up. Now head out the door to the balcony in the main hall and jump over the railing to run along the lip on the wall, then around to the other balcony. The third shutter will be slightly open. Crawl under it and the message "Speedrun secret found!" is shown, and a huge chunk of the level is skipped. Reward: Shortcut.

-
6) On the balcony in the main hall across from the left side — on the way to the partially open shutter (in Secret 5), there is a health pickup. Reward: Health +50.

-
7) After Sam picks up a cell phone — Just after you kill a Gnaar there is a short hall heading left with a small Sphinx statue. Look behind it to see a switch. Press the switch to move the statue and collect the pickup. Reward: Electricity +50.

-
8) Just after you see a Shotgunner — Head right into the passage he came from. There is a shelf with a box on top. Break the shelf with the sledgehammer and head into the hall, which will show the message "Secret spooky hall found!" A scene with a ghost Rodriguez plays, and then you can collect the weapon at the end. Reward: XL2 Lasergun.

-
9) Back in the museum before you drop down — At the point you drop down there are bricks on the left you can scale, then jump over to the left to get to the second floor. Run around to the other room on the right and pickup the armor vest. (You could have already picked this up under 5.) Reward: Armor +50.
33. Broken Wings (16 Secrets)
1) The sniper's perch (Identified with many sandbags and Cloned Soldiers on it) nearby the starting area — Jump onto the nearby dumpster closest to the with sandbags, and then jump on the nearby utility box propped against the wall, and make another hop onto the top of the wall from the utility box. From there, jump over, or go around the sandbags to pick up the hidden ammunition. Reward: Shells +10.


-
2) In the yard after the sniper perch — there's a dumpster on the right. Jump on it and over the wall and pick up an armor helmet. Reward: Armor +10.

-
3) Before the overpass — The ruined building on the right can be climbed into. On the right hand side is some health. Reward: Health +11.

-
4) Just after the overpass — on the left are a bunch of shells. If you turn around — concealed by a column supporting the overpass — you will note a pill bottle that counts as a secret and spawns a Kleer Skeleton. Reward: Health +1.

-
5) Just after the overpass — On the road to the right there is a building on the right that is blocked off with planks. Break them with your sledgehammer and collect the pickup. Reward: Electricity +50.

-
6) Before the popup Cloned Soldiers — After the first overpass and before passing under it a second time, in the building on the right is some armor. Reward: Armor +10.

-
7) Under the overpass — Continuing on past secret 4 and beyond a ruined car is an armor shard that counts as a mini secret and spawns a Kleer Skeleton. Reward: Armor +1.

-
8) Beside the overpass — Just after passing under the overpass a second time, turn right and in a little alley is a weapon. Reward: 12 Gauge Pump Action Shotgun.

-
9) Beside the overpass — Just after passing under the overpass a second time, jump on the garbage bin and over the wall. Once you reach the barrels on the other side the message "Secret flanking performed!" shows up. This takes you around a small fight. Reward: Alternate route.

-
10) Beside the overpass — A building beside the overpass is blocked off with planks. Break them with the sledgehammer and collect the pickups. Reward: Armor +25, Shells +10.

-
11) Don't have a party without me — When Sam makes this comment, climb up the stairs until there's a break in the wall back towards the overpass. A health pack is hanging off it; jump across. Reward: Health +50.

-
12) Near the archway — Before the archway behind a barricade is ammo that counts as a mini secret. Reward: Rockets +5.

-
13 If you go around the barricade in the second screen shot, you can jump on the dumpster and get on top of the barricade. From there, jump behind the other barricade and you should get Electricity and it will spawn an adult Arachnoid Credit to Deliri0us;Dave for finding this
-
13) In the courtyard with three broken columns — There is a stack of boxes. Jump on them then over the wall to collect the weapon. Reward: M29 Infantry Assault Rifle.

-
14) Before the mosque — Along an alley just a bit before the mosque is a white wall with turned-over gray couch under a dark metal sign embedded in the wall. On the leftmost portion of the same wall past a two chair, and mattress will be a drum (the cylindrical container), jump on it, and look directly through the small hole in the wall. There will be a small electrical box directly in sight; shoot it and it will say "Secret door unlocked" meaning a speedrun secret was unlocked. Head to the nearby mosque entrance. Along the left side of the mosque wall prior to the stairs will be a large group of boxes. Break them to expose a ladder ("Secret speedrun found") which leads to the end of the outer mosque area. Reward: Shortcut.
(continued)

-
15) The outer mosque — Around the second corner of the outer halls of the mosque is a stack of crates. Hidden among them is an armor shard. Reward: Armor +1.

-
16) The inner mosque — There's scaffolding on the building in the center. Crawl under it and then to the top, then jump up to grab the helmet. Reward: Armor +10.
34. No Place to Hide (9 Secrets)
1) At the start — Get on the boxes on the left and jump on the wall. Look to the right to the archway and you'll see an armor shard on an awning. Jump on the air conditioner then over to get it. Reward: Armor +1. Message: "Parkour secret found!"

-
2) At the start — Just before the first archway is a wall with some boxes on it. Get up on the wall and look left; you'll see a pill bottle on an overhang. You need to jump on the wall on the right, then jump on the overhangs around to the left to get it. Reward: Health +1. Message: "Parkour secret found!"

-
3) In the first courtyard — There are boxes against a wall to the left. Jump up and over to collect the ammo. Reward: Electricity +50.

-
4) Just past the courtyard turret — There's a turret over an archway protecting a courtyard. Once past it, follow the wall left and you will find a pile of garbage bags. Clear them away with the sledgehammer and behind it is a place to put C4. Once you have C4 (from secret 6), return and blow the wall. Behind it is a weapon. There's an alternative way to get the secret: In front of the wall are some boxes near the building next to the wall, jump on them, and then on the ledge on the building next to the boxes, then sprint jump behind the wall, pick up the weapon and blow the wall up. Reward: Rocket launcher.

-
5) Just before the crashed helicopter — Left of the mosque entrance, there's a wall with loose bricks that can be broken with the sledgehammer; behind it is a weapon. Reward: XL2 Lasergun, Health +2.

-
6) Up the white building — In the same area as Secret 5 with the XL2 Lasergun, you will see a tall group of boxes against a wall with three air conditioner units. Climb on top of the boxes and then jump onto the first air conditioner. The second jump is slightly tricky, while still standing on the first air conditioner, put a slight distance between you and second air conditioner and jump for it (if you fall off just keep trying). Finally, jump onto the final air conditioner unit and you'll notice a black wire which extends from the air conditioner to the building opposite of the air conditioner. Carefully walk on the black wire to the building, once across turn right. There will be a blue couch with the explosive required for secret 4. Reward: C4 Explosive +1

-
7) After the mosque — To the left of the mosque is a wall with graffiti on it. Jump on the barrel, then the air conditioner, then over the wall to collect the pickup and spawn some Kleer Skeletons. Reward: Electricity +50.

-
8) Beside the gate — There's a gate with a minaret atop it guarded by Cloned Soldiers. Take a left at the gate, then look for a narrow gap between the walls behind some crates, and collect the helmet/vest armor. Reward: Armor +50.

-
9) Near the end — Beside the rocket launcher on the right is a cracked wall. Blow it up with a rocket and collect the pickup. Reward: Health +50.
35. Under the Iron Cloud (13 Secrets)
1) At the pedestrian bridge — On the right side of the bridge is a building with a pickup on a third floor balcony. To get there jump onto the ledge of the ruined building just beyond the bridge, hop over to the target building, crawl under, then jump at the pickup. Reward: Sniper Bullets +3.

-
2) Near the pedestrian bridge — Just after the bridge, take a right into an alleyway. Hop on a box and over the wall to collect some ammo. Reward: C4 Explosive +3.

-
3) Before the overpass — In a corner after the mosque is a garbage bag. Destroy it and take the pickup. Reward: Electricity +50.

-
4) After the overpass — Once off the overpass, head back along it. There's a garage with a car in it; look behind it for a pickup. Reward: Minigun Bullets +100

-
5) After the overpass, on top of a building — At the garage with a car in it, climb the boxes and then onto the building. Walk back in the direction of the overpass and around the corner. Hop on the air conditioner on your side, then take a sprinting leap to the air conditioner on the white building and climb onto the roof. Take the weapon. Reward: Cannon.

-
6) After the overpass — Further back along the overpass there's a stack of barrels in front of a barb-wire topped wall. Jump over and pickup the weapon, spawning a Kleer Skeleton. The boxes are indestructible so you can always get out. This also allows you to return to before the overpass. (Alternate path: When still on the overpass, keep left, and sprint jump just past the grated fence up here, into the area of the Lasergun below.) Reward: XL2 Lasergun, Health +1.

-
7) Perpendicular to the overpass — Along the road you get off onto after stepping off the overpass you can see a shipping container, and then left of that a portable with ammo on top. Climb the wall with graffiti on it, using the crates. Jump along the walls back to the shipping container and then over to the portable, and pickup the ammo. Reward: Cannonballs +4.

-
8) At the shipping container — Once on top of the portable (from secret 7), jump back onto the wall further away from the road after the vents. Drop down behind the wall to get a "Useless secret area found!" message. Reward: The satisfaction of having done a good job.

-
9) After the underpass — There's a big fight along this road which has a mosque at the end of it on the left. On the right is a ruined building. Jump up into the window using the ruined wall to climb up, and then drop down and pickup the pill bottle. This spawns the message "Secret nuthouse found!" and at least 3 Major Bio-Mechanoids. (Alternate path: Go all around the mosque to find two concrete barriers, these can be blown up with several rockets.) Reward: Health +1.

-
10) After the underpass — At the end of the road after the underpass on the left at the corner of the mosque and the blockade is an armor helmet hidden in bushes. Reward: Armor +10.

-
11) Before the drop down — Back along that road is a ruined car before a wall. Jump on the car and over the wall, then take the ammo. Reward: Cannonballs +4.

-
12) On a building before the drop down — If you look up on the third floor of a building before secret 11 you can see a pill bottle. Get back up on the wall, walk around the building, jump up onto your ledge, then jump across to grab the bottle. Reward: Health +1.

-
13) The ruins, far-right section — Along the right-hand wall near the far wall is some debris sticking out (not those ammo "refill" zones). Behind one of the chunks is a health pickup. Reward: Health +100. Message: "Secret found!"
36. The Silent Riddler (8 Secrets)
1) On a building in the first village — Climb up the wall on the left on its first break. Jump across the buildings towards the one with the satellite dish, then keep climbing up to find a weapon and get a "King of the Hill secret found!" message. Reward: Sniper rifle.

-
2) Just outside the first village — A dirt road runs perpendicular to the village. Looking to the right you can see a truck, and if you're at the truck you should see a black spike in the desert, which is a utility pole. If the worm hasn't surfaced recently, run out until you hear rumbling and then run back, let it come up and go back down, then race out to get the weapon at the pole. The worm seems to take a bit longer than usual to start burrowing towards you if you make a beeline directly towards the Minigun from the truck. Reward: Minigun.

-
3) On the left side of the second village, behind a building, is an explosive barrel partially buried in the sand. Shooting it will reveal a pickup. Reward: +25 Armor.

-
4) Further into the second village there is a walled off yard with a couple of different ways in (3 holes in the wall and an open gate; in the sixth row of houses, relatively central). In this area is a light blue dumpster against a building. Between dumpster and the building is a almost stuck pickup. Reward: +25 Health.

-
5)in The Silent Riddler is at the right end of the street before the monument entrance
Credit to BAGR for finding this secret
-
6) At the entrance to the monument — The kiosk at the entrance to the monument has a caged door on it, but can be opened by using it. Entering it shows the message "Secret ticket booth found!" and spawns a Rocketeer, who gives you a bag of money when you approach the counter, but gets angry when you take it. Killing him gets a quip from Sam and spawns more monsters. Reward: Easter egg.

-
7) At the entrance to the monument — There's a locked yard to the left of the entrance that's also opened with the keycard. Inside the base of the crane is a pickup. Reward: Health +10.

-
8) In the tunnels after the stairs — There's a long hall with dozens of blind alcoves. In one on the left near the end is another hallway with a spooky hall and a weapon. Reward: Devastator.

-
9) In the final area — If you go down the stairs to the door to the Sphinx, there's a health pack tucked in the corner on the right. Reward: Health +50.
37. Unearthing the Sun (8 Secrets)
1) Turn around — Immediately at the start you can see a pill bottle behind you. If you run up to it a woman giggles and it dashes off further into the desert. When you pick it up the message "Secret jester pills found!" shows up and Beheaded Kamikaze spawn in. Reward: Health +1.

-
2) Near the starting point to the left is a broken wall with some pillars in front of them. There is a small nook at the top of the wall where ammo is hidden. Seen from above, the wall is "T" shaped — the ammo is located at the intersection. While the walls extending from the T are destructible to explosives, the area that the ammo is located on is not. This means that if the walls around it are completely destroyed, the ammo will stay up there and you'll have no way to jump up to reach it. For this reason it's recommended that you either go for the pickup quickly after starting (before heavy fighting takes place), or fight away from the area where it won't get hit by rockets. Reward: 3 Sniper Rifle Rounds.

-
3) Around the wall — Once you get to the wall, head around it to the left, keeping close to the wall to avoid the worm. Grab the weapon. You must head back from here or the worm will get you. Reward: Lasergun.

-
4) You can find a big ammo cache in the big room with pillars and space monkeys. It's accessed by going up the room, like you normally do, but when you reach two holes on the left and right sides to jump into, jump into the right one and you'll go down the slope for this cache
Credit to Blake Langermann for finding this

5) In the first building — As soon as you enter the building set in the wall, the first statue on the left has ammo behind it. Blow it up with the Mutilator or a rocket and take the ammo. Reward: Minigun Bullets +100.

-
6) In the crypt — As soon as you drop down, turn around. A health pack is behind you. Reward: Health +25. Message: "Secret found!"

-
7) Collecting keys, up high — When you're getting the four keys for the Sirian door, straight across from the entrance are columns. The rear columns on the left are supporting some ammo; break the columns and collect it. Reward: Cannonballs +4.

-
8) Collecting keys — Left of the column area at the corner of the region are some fallen block columns and palm trees. Behind the column is a health pickup. Reward: Health +50. Message: "Mini secret found!"

-
9) At the temple in the rocks — Behind the temple set inside the rocky walls is armor and ammo. Reward: Armor +10, Electricity +50.
38. The Dark Bride (10 Secrets)
1) In the courtyard outside — As soon as you get outside, climb up the stairs and run behind the temple you came out of. Collect the armor. Reward: Armor +50.

-
2) At the pond — There's a place you can't get to at the pond area with some columns in front of it. Go to the right hand side. Jump around onto the window, and duck to get through. (Alternate path: Go to the left hand side onto some stairs. Sprint them up and jump for the window there. The secret on the right side still needs to be triggered though.) There's the developers as bigheads here and a health pack. Reward: Easter egg, Health +100. Message: "Secret Hall of Developers found!"

-
3) The Dark Bride — There are two portables behind a lockup. The portable on the right has a destructable door. Reward: Electricity +50. Message: "Secret found!"

-
4) The Dark Bride — To the right of the exit gate for this area, there's a shed with a health pickup in it. If you climb onto the boxes beside it, you can pick up the secret keys. They're used after the second locked door, where you're facing another door — "No Entry" — walk through it and collect the armor. Reward: Armor +100. Messages: "Secret keys found!"; "Secret found!"

-
5) At the minigun fight — You need the key from secret 4. At the end of the path is a door you can now walk through and collect ammo. Reward: Minigun Bullets +500. Message: "Secret found!"

-
6) Before the courtyard with the Aurigan Cave Demons — When you get to the portable where you pick up the keys there's a Scrapjack on the far wall. To his left (your right)(indoors) is a wall with a slightly darker texture. This wall can be destroyed. Reward: Rockets +15. Message: "Secret Found!"

-
7) At the Cloned Soldier fight — There's a portable in this area with a health pickup on it. Jump on some rubble then jump towards it. Reward: Health +50. Message: "Secret found!"

-
8) The final battle — On the right side of the entrance is some ammo. Reward: Cannonballs +4. Message: "Secret found!"

-
9) The final battle — On the left side of the entrance, behind a tumbled stone, is some armor. Reward: Armor +10. Message: "Secret found!"

-
10) The final battle — On the left side of the exit is some ammo. Reward: Devastator Shells +20. Message: "Secret found!"
39. The Power of the Underworld (9 Secrets)
1) Near the entrance — Around the right of the entrance is a little blocked-off area covered in sand. In the far corner on the right is a health pickup. Reward: Health +50. Message: "Mini secret found!"

-
2) On top of a crypt — One of the little pyramid-topped crypts has a health pickup on top (near the second of the locked gates on the left). If you face the entrance to the pyramid shaped crypt, there will be a broken wall directly behind you (note, the wall pictured here is actually from the wall to the left of the crypt, but they are identical and you can scale both walls with the positioning pictured here). If you walk straight up to the wall as shown in this screenshot, you can jump 4 times to make it to the top of the wall — 1, 2, 3, and 4. From there, you can do a running jump to jump to reach the the lower middle ledge of the crypt. Then jump up to grab the powerup. Reward is 100 health, up to a maximum of 200.

-
3) In the area with many columns under the level (you can go there by tunnel, or just jumping down) there is a temple with one of the Sirian keys, jump onto the ledge behind the statue to find an armor. Reward: Armor+10. Message: "Secret found!"

-
4) Right before the room with the C4 box and the hole in the ground where you drop down to the throne room. To the left of the entrance to that room is a pit. Drop down, turn around and crouch through the rubble. Reward: Electricity + 50. Message: "Secret found!".

-
5) The throne room — On the arms of the big throne there is some ammo. Go behind the throne and up two levels, jump onto the headrest, then down to gather the ammo (from only one level up with a sprint jump this is also possible). Reward: Rockets +10. Message: "Secret found!"

-
6) Outside the crypt — Once you get outside in the area with a bunch of columns and ammo you can see armor on top of a pillar. Blow the pillar up to get it. Reward: Armor +50. Message: "Secret found!"

-
7) Before the final fight — Before you drop down to the final open area, you climb up some wooden stairs. If you walk along the ledge around the left there are some keys. Pick them up and the message "Secret key found!" is displayed. Straight ahead you should see a flashing green pickup on top of a big building. Head back to that point, go through the door, up the ladder, and get the weapon. Reward: Sniper rifle. (Alternate path: Without the key for the gate, jump onto the small sphinx statue, to then sprint jump over the fence.) Message: "Secret vista found!"

-
8) At the final fight — Just left around the corner of the entrance is some ammo. Reward: Devastator Shells +20. Message: "Secret found!"

-
9) At the final fight — At the far left corner of the area just before the desert is a health pickup under four spread out palm trees. Reward: Health +25. Message: "Secret found!"
40. The Lost Temples of Nubia (5 Secrets)
1) At the start of the level — the area where you find a sledgehammer (let us say the sun is in the south), immediately to the left (north) is a small ruined temple with a some armor. From there go — as in sprint — directly west to a fallen column (easier to see when sandstorm clears) behind that column is a Double Shotgun. Reward: Double Shotgun. Message: "Secret Found"

-
2) Sniper rounds are hidden in the first temple ruin with the armor and sledgehammer resting to the right of the entrance with many Hatchling Arachnoids and with weapons in the center. To find it, first go to the center of the ruin and then walk back out the way you came while looking to the upper left of the of the giant temple wall. The pickup is sitting on a destructible box. Reward: 3 Sniper Bullets.

-
3) After the oasis — There's a big buried building you walk around with two jutting obelisks just before the sunken temple with all the holes in the desert sand. Tucked under the other side of the central area of the building is some ammo between said obelisks. Reward: Minigun Bullets +100. Message: "Mini secret found!"

-
4) Before the temple — There are two ruined walls lined with columns. On the wall to the right is a helmet. Walk to the end of the wall, jump up, and walk back to collect it. Reward: Armor +10. Message: "Secret found!"

-
5) If you're walking into the temple through the big main entrance from the previous area, you'll see a box of infinite C4 explosives on your left just before another big passage. On the inside of this passage to your right is a round button. When you press it, the message, "Secret cannon deployed" will appear. Then backtrack a bit so that you can again see the C4 box on your left and you're able to see the top area of the passage that had the button — you will see a square box at the top of the temple. When you shoot it with a rocket, the cannon will fall to the ground. Message: "Secret cannon". Reward: Cannon.
41. The Last Man on Earth (11 Secrets)
1) At the boulder — When the boulder crashes down the tunnel ramp, on the left in a cubby hole behind where it used to be there is some ammo. Reward: Minigun Bullets +100. Message: "Secret found!"

-
2) Outside the crypt — Once you get outside where you find the dead soldier, after the cutscene, go to left, in the corner there is an armor behind the portable. Reward: Armor +10. Message: "Mini secret found!"

-
3) Before you walk through one of the two open gate doors — In front of the second open gated door is a hollow small stone tower. You can jump into it from the broken wall that's right next to it if it wasn't destroyed during the fight. Reward: XL2 Lasergun. Message: "Secret Found!".

-
4) Right next to the portable where you pick up the Ramesseum Exit Key is a small building. Inside that building, walk up to the wall and look up through the hole. Shoot the box. Reward: Sniper Rifle. Message: "Secret Found!".

-
5) When you walk through the gates into the final area of the map, the city, you'll see a road just a few meters ahead of you. Follow that road to the right and through the opening in wall. Continue a few meters outside and on the first elevation in the sand, turn left. Reward: C4 + 7. Message: "Secret Found!".

-
6) In the near-left city — Outside the wall on the left is some armor. Reward: Armor +50. Message: "Secret found!"

-
7) In the near-right city — There's a two-story red building in this area. On a balcony is a clip. Climb up the wall, then jump up to grab it. Reward: Sniper Bullets +3. Message: "Secret found!"

-
8) In the near-right city — There's a two-story red building in this area. Tucked against the wall surrounding it is some health (i.e. right under 7.). Reward: Health +25. Message: "Mini secret found!"

-
9) Mid-right part of the city is a walled off area (made of wavy zinc sheets) with some boxes stacked against it. Climb over for 150 electricity.

-
10) In the far-left city — A building on the last row has ammo on top of it. Jump on one of the two crates (unless destroyed) and then up. Reward: Electricity +150. Message: "Secret found!"

-
11) In the far-left city — There's a ruined wall with some palm trees around it in the desert, with some ammo tucked behind the wall. Reward: Minigun Bullets +100. Message: "Secret found!"
42. The Guardian of Time (4 Secrets)
1) Near the kamikaze fight — Instead of going left following the path, go straight — right, You will arrive in a dead end, look up You will see a box in the rock, destroy the box with a rocket and collect the ammo. Reward: Devastator Shells +20.

-
2) In the large area with some ruins — On the left close to the sand border next to an arch, on the side closest to the sand. Rewards: Electricity +150. Message: "Secret found".

-
3) In the large area with some ruins — Enter the central temple in this area, look up at the hole in the ceiling and shoot down the box. Rewards: Sniper Bullets +3. Message: "Secret found".

-
4) Near the Werebull fight — At the double-rock archway after the first clearing there are a bunch of boxes and ammo and a rocket crate. Beneath one of the destructible crates is some more ammo. Reward: Devastator Shells +20. Message: "Secret found!"
This part is from a "dlc" for fusion buy it here
http://store.steampowered.com/app/41074/?snr=1_7_15__13
43. Gathering of the Gods (8 Secrets)
1) At the starting area, near the staircase, you’ll spot a bunch of crates with planks behind them. Destroy them with the Axe and proceed through the cavern to discover a Spider Cave, but watch out for a swarm of miniature Hatchling Spiders.

-
2) When you climb up the staircase from #1, you’ll see a building on your left and a building to your right with a shelter next to it. Go behind the building on the right, jump up on the crates and onto its roof. From its roof, jump on the shelter’s roof, and from there, sprint-jump to the roof of the building on the left to collect a secret +50 health.

-
3) On the left side of the island, you’ll see a floating red object near the shore. Dive into the water below it to collect a rocket launcher.

-
4) Near the start, when you encounter the first Cave Demon, jump and climb on the wall, and then travel over it to collect a secret health.

-
5) Still on the right side of the island, near the opposite side from the start and behind a temple, walk along the shoreline until you find some rocks. Approach the rocks to discover the “Wilson Secret”.

-
6) A bit before #5, there is a suspicious pile of rocks near one of the temples. Blast the ones close to a bush with a rocket to reveal a secret cavern with cells and Kleer skulls.

-
7) On the right side of the island, you’ll see a smaller island to your east. Swim to and walk over it to find a secret cannon, go behind it and press the Use button to trigger a humorous cutscene.

-
8) At the temple on the opposite side of the starting area in the island, look up to the fouth column (the one next to a broken section of the wall). You’ll spot some rocket supplies there. Use the Mutilator or the Rocket Launcher to bring down the column and collect the ammo.
44. Together Forever (4 Secrets)
1) As you start, go to the second building near the shoreline. Fall down from the cliff next to it, and look at it to spot a cave. Walk within the cave to find a ladder, which you must use to climb up and into the house to find a secret cannon. From there, you can open the house's door by pressing the Use button.

-
2) Just after the ruins in the first area, go to the leftmost part of the mountain and follow the mountainside. When you reach the first house, go behind it, and you’ll spot a door. Destroy it with an Axe to discover a secret Frustrated Kamikaze.

3) In the military base, near the tower on the right, is a large garbage container with crates near it. Jump on the crates, and from there to the container. Look up from there until you see a ladder, press E to use it and climb up inside the tower to pick up a secret Minigun.

-
4) From the first tomb, follow the Cliffside to the corner to find an entrance to another tomb. Go inside to find a “Secret Legend of the Beast”, with a miniature Khnum in it. (the secret is between the two tombs)
45. Born Again (7 Secrets)
1) At the starting area, dive into the small pool all the way down to find a Minigun.

-
2) As you exit the starting cave, look to your right, you will notice an enormous rock pillar. After acquiring the jetpack, fly over behind it and walk/fly up to the top to discover a cannon with some cannonballs.

-
3) In the area with the jetpack, behind some rocks over the small ruined temple lie some items.

-
4) At the first highway you see with the Scrapjack, Arachnoid and/or Reptiloid on it, the leftmost/farthest end has a locked gate, and a panel to the left. After acquiring the keycard, use the panel to open the gate and collect some supplies.

-
5) At the end of the level, before entering the temple with the control room (and starting the Scrapjack Boss fight), go all the way to the end of the valley behind the temple. Inside some bushes is some armor. (You can do this after you’ve started the final boss fight as well, but it’s easier to do so before.)

-
6) After sliding down the pipe and losing the jetpack, when you hit the ground, shoot the Kamikaze running right to left on the top of the first bridge before he teleports out. Then continue towards the second bridge, where you will trigger the Revenge of the Kamikaze secret and get attacked by several more Kamikazes.

-
7) At the final area, in the center, you’ll be between two pylons with rubble in front of them. Jump on the rumble of either of the pylons, if you can’t jump to the left, jump to the right. If you can’t jump on the right, jump to the left. Repeat the process until you have reached the top and press a switch. Repeat this sequence for the opposite pylon and a teleporter will appear between them on the ground, which will teleport you back to the starting area, where an enormous Kamikaze will be standing in front of you, then rapidly charge at you. Kill him to register the secret.
---CHAPTER 4: SERIOUS SAM 4---
To be announced...
98 Comments
DiaBomb Jul 9, 2024 @ 7:13am 
In Dunes you don't need to rocket jump or use enemies to jump on. There are wooden posts on the walls next to the platforms to jump on.
Nikola2 Jun 16, 2024 @ 7:05am 
thank you
Zhnigo Jan 24, 2023 @ 1:27pm 
In BFE 39 Power of the Underworld, secret #2 has been moved from the roof of the pyramid crypt to the roof of the Horus altar right beside it. It's also easier to get, requiring climbing the crypt from the back side.
Zhnigo Jan 22, 2023 @ 11:15pm 
In BFE 37 Unearthing the Sun, secrets #4 should be moved to #6. it's made worse by the fact there's a point of no return between them.

In BFE 36 The Silent Riddler, secret #5 should really be rewritten to be legible

Cheers
Snoucher Jun 16, 2022 @ 12:16am 
Hey man, you missed one secret that's pretty boring to get. If you cut down a lot more trees before you get the Tommy gun and it's ammo (and I really mean a lot), and after doing so, you will trigger Reptiloid highlander spawns in the first area.

I'm nicknaming this the "Deforestation Secret".
Nomad May 18, 2022 @ 11:29am 
The Silent Riddler has 9 secrets in Fusion version of SS3. It should be be secret number 5:

(Serious Sam Fusion only) at the far right of the village ,just before the entrance to the ancient ruins, head right and you will see a building, take another right through a small gap in the building to find an Extra Large Armor. Keep in mind that picking the armor up will spawn a Major Bio-mechanoid so be sure to get out of there as soon as you pick the armor up.
Neon Henchman May 16, 2022 @ 10:33am 
It's new Secrets for Regular Fusion, it's not just Mods
Анпон Jan 9, 2022 @ 3:43am 
Author, there is 19 secrets in Summer in Cairo. Am I not understanding something? Was fusion updated or is it me just playing with some stupid mods I somehow forgot to turn off?
Slenderminion Dec 10, 2021 @ 4:19pm 
Small correction regarding the 4th secret in the third Jewel of the Nile level. You don't use the keycard for the pipe on the secret door, you use a second keycard found behind small building next to the warehouse you get the pipe keycard in.
Cataco Oct 30, 2021 @ 2:52pm 
Love this guide! Super helpful and informative enough to be easily followed. :cozybethesda: