GOD EATER 2 Rage Burst

GOD EATER 2 Rage Burst

68 ratings
Comprehensive Sword Guide (With Damage Multipliers)
By Chibiki
There's a bit of math involved in this Guide. If MinMaxing doesn't interest you, read the first section for elemental damage, it might get you more damage. OP recovery for each weapon is included. Now with melee attack speed.
   
Award
Favorite
Favorited
Unfavorite
Overview
Note everything is taken from the JP wiki[www62.atwiki.jp]. I have physically calculated all these myself using the formulas provided. So the formulas provided are more or less in the ball park.
There's a bit of math involved in this post. If that doesn't interest you just read the first section for elemental damage to help you get a little more damage for casually playing.
I might add Blood Arts some time later if there are people actually playing the game still.
If I get the time to it I'll create another guide with aragami defense ratings.
Elemental Damage (The One Thing You Should Read At Least)
Elemental Multipliers for Swords
Attack attribute (Elements listed on your weapon)
Defense attribute (Strong)
Defense attribute (Moderate)
Defense attribute (None)
Defense attribute (Weak)
Defense attribute (Very Weak)
◎◎
-
x
xx
◎◎
0.2
0.8
1
1.5
1.75
0.2
0.8
1
1.25
1.5
-
1
1
1
1
1

Elemental Multipliers for Guns
Attack attribute (Elements listed on your weapon)
Defense attribute (Strong)
Defense attribute (Moderate)
Defense attribute (None)
Defense attribute (Weak)
Defense attribute (Very Weak)
◎◎
-
x
xx
◎◎
0.2
0.8
1
1.75
2.5
0.2
0.8
1
1.5
2
-
0.2
0.8
1
1.25
1.5
x
0.2
0.8
1
1.13
1.25
xx
0.2
0.8
1
1
1

In summary, if you want to get a bit more damage out of your sword, craft one for each element and bring the right one for each mission. On the other hand. For guns it's highly recommened to NOT get one with an elemental multiplier because the uses are limited and the Crush/Piercing values are dramatically lowered. The elements attached to the bullets themselves in the bullet creator is more then enough.
And in the case of Reinforced weapons, the game will only use one element for it's attack, and it's not RNG based so it's forgiving. So if you hit a spot that's weak to Blaze, Spark, and Divine, the game will make your attack a Blaze or Spark element but not Frost.
Sword Damage Formula
Formula of Theoretical Damage
(Base Weapon Power + Adding Correction) × Multiplication Correction × Elemental Multiplier × [(100 - Aragami Defense) ÷ 100]

Adding Correction
Adding Correction
Numerical Value
Melee ATK
20%
B Melee ATK
30%
B Blood Arts Upgrade
19%
Survival Instincts
15%
Wild Instincts
30%
Adrenaline Rush
20%
All Out Attack
25%
Melee ATK Specialist
20%
Close Quarter ATK
20%
Burst State
Lv1: + 10%, Lv2: + 15%, Lv3: + 20%
Attack Power Up
Small: + 5%, large: + 10%
Attack Power Down
-5%
Blood Rage Evoke Pledge
[Evoke Rate - 100]%
Blood Arts Correction
+1%
Charged Spear
+20%
Note, weapon pluses (upgrades) are included in the Weapon base. HOWEVER, the game will automatically apply the 20% from the skill "Melee ATK" into the status screen. Upgrades for swords grant a +.01% in base damage capping out at 1.3.

Multiplication Correction
Numerical Value
Sword Master
Critical: x1.5, Good: x1, Bad: x0.5
Exterminator
1 + (Skill Lv ÷ 10)
Hidden Attack
x3 (Enemy Must be Out of Combat)
Note, you will almost never get a "Hidden Attack" unless you're using the sniper's steath field, but this is the wrong guide. Or you have the skills "Muted" and "B Super Muted" and the aragami doesn't have you in their line of sight. Also blame your teammates cause if they disrupt the aragami before you attack, then you won't get the Hidden Attack Buff.
Short Blade
Special Actions
Rising Edge: R + □ buttons to use.
Advanced step / jump: ○ or × button to use (Can only be performed at in the middle of a combo).
Aerial step: ○ button to use (Must be in the air) Consumes stamina like normal.

Damage Multipliers
Action
Attack Multiplier (1)
Attack Multiplier (2)
Attack Multiplier (3)
Attack Multiplier (4)
Attack Multiplier (5)
Ground □
90%
90%
100%
110%
120%
Ground △
90%
100%
110%
120%
130%
Air □
90%
100%
110%
-
-
Air △
110%
-
-
-
-
Step □
90%
-
-
-
-
Step △
100%
-
-
-
-
Devour
120%
-
-
-
-
Rising Edge
110%
-
-
-
-

OP Recovery
Action
OP Regen (1)
OP Regen (2)
OP Regen (3)
OP Regen (4)
OP Regen (5)
Ground □
3
3
3
10
10
Ground △
3
3
3
10
10
Air □
3
3
6
-
-
Air △
3x Number of hits
-
-
-
-
Step □
10
-
-
-
-
Step △
10
-
-
-
-
Devour
10
-
-
-
-
Rising Edge
3
-
-
-
-

Because of the way the skill "Combo Master" works, Short Blade is the best weapon to use with it.
Increases the damage of the 2nd stage of the blade attack and onwards. 2nd hit: +4%; 3rd hit: +8%; 4th hit: +12%; 5th hit: +20%.
Long Blade
Special Actions
Zero Stance: R + □ buttons to use. Regain 10 ST. Also an animation cancel.
Impulse Edge: R + □ buttons to use (Must be in Zero Stance). OP consumption varies, (40, Bursts Lv1 32, Lv2 24, Lv3 12) affected by the skill "Trigger Happy". The action is extremely loud and will cancel the skill "Muted".

Impulse Edge Damage Multipliers
Attack attribute (Elements listed on your SWORD)
Defense attribute (Strong)
Defense attribute (Moderate)
Defense attribute (None)
Defense attribute (Weak)
Defense attribute (Very Weak)
◎◎
-
x
xx
◎◎
0.2
0.8
1
1.13
1.25
0.2
0.8
1
1
1
-
1
1
1
1
1

Damage Multipliers
Action
Attack Multiplier (1)
Attack Multiplier (2)
Attack Multiplier (3)
Attack Multiplier (4)
Ground □
100%
110%
120%
130%
Ground △
100%
110%
120%
120%
Air □
100%
110%
-
-
Air △
110%
-
-
-
Step □
100%
-
-
-
Step △
110%
-
-
-
Devour
120%
-
-
-
Impulse Edge
220%
-
-
-

OP Recovery
Action
OP Regen (1)
OP Regen (2)
OP Regen (3)
OP Regen (4)
Ground □
3
4
5
10
Ground △
3
4
5
10
Air □
4
4
-
-
Air △
4
-
-
-
Step □
10
-
-
-
Step △
10
-
-
-
Devour
10
-
-
-
Buster Blade
Special Actions
Charge Crush: hold □ button to use. Movement and action is restricted, you can still aim. ST decreases for as long as you hold it. The action is extremely loud and will cancel the skill "Muted".
Advanced Guard: After any ground action, you can guard at a set rate. Unaffected by the skill "Guard Speed" or shield types.
Parrying Upper: R + □ buttons to use. Guard for a moment, followed by a counter attack. Consumes 20 ST. Negates all damage if successful. Not recommened for multistage attacks.

Damage Mutlipliers
Action
Attack Multiplier (1)
Attack Multiplier (2)
Attack Multiplier (3)
Ground □
110%
120%
130%
Ground △
110%
140%
150%
Air □
100%
-
-
Air △
110%
-
-
Step □
100%
-
-
Step △
110%
-
-
Devour
120%
-
-
Parrying Upper
100%
-
-
Charge Crush
400%
-
-

OP Recovery
Action
OP Regen (1)
OP Regen (2)
OP Regen (3)
Ground □
5
7
10
Ground △
5
7
10
Air □
5
-
-
Air △
5
-
-
Step □
10
-
-
Step △
10
-
-
Devour
10
-
-
Parrying Upper
5
-
-
Charge Crush
10
-
-
Boost Hammer
No one actually uses this. But I'll include it anyways.

Special Actions
Boost Ignition: R + □ buttons to use. The action is extremely loud and will cancel the skill "Muted".
Boost Rush: □ button to use (Must use Boost Ignition before). Consumes 10 ST.
Boost Drive: △ button to use (Must use Boost Ignition before). Consumes 10 ST.
Boost Impact: R + □ buttons to use (Must use Boost Ignition before). Consumes 25 ST. The action is extremely loud and will cancel the skill "Muted".

Damage Multiplier
Action
Attack Multiplier (1)
Attack Multiplier (2)
Attack Multiplier (3)
Ground □
130%
140%
150%
Ground △
130%
150%
160%
Air □
110%
-
-
Air △
120%
-
-
Step □
120%
-
-
Step △
130%
-
-
Devour
120%
-
-
Boost Rush
130%
130%
-
Boost Drive
140%
-
-
Boost Impact
330%
-
-

OP Recover
Action
OP Regen (1)
OP Regen (2)
OP Regen (3)
Ground □
5
7
10
Ground △
5
7
10
Air □
5
-
-
Air △
5
-
-
Step □
10
-
-
Step △
10
-
-
Devour
10
-
-
Boost Rush
3
3
-
Boost Drive
5
-
-
Boost Impact
10
Charge Spear
Special Actions
Charge Glide: Hold □ button. Dash foward on release. Consumes 10 ST. Movement is not restricted. "Auto Guard" skill will still block. Damage increases by 20% during deployment state. It will return to normal after the final Auto Attack Chain, Getting hit, or Blocking.
Backflip: R + □ buttons to use. Will put you in the sky, and can dodge some attacks. Consumes 5 ST. It's possible to hold Charge Glide "Charge" by using backflip.

Damage Multipliers
Action
Attack Multiplier (1)
Attack Multiplier (2)
Attack Multiplier (3)
Attack Multiplier (4)
Ground □
100%
110%
120%
130%
Ground △
100%
110%
120%
120%
Air □
100%
110%
-
-
Air △
110%
-
-
-
Step □
100%
-
-
-
Step △
110%
-
-
-
Devour
120%
-
-
-
Charge Glide
200%
-
-
-

OP Recovery
Action
OP Regen (1)
OP Regen (2)
OP Regen (3)
OP Regen (4)
Ground □
3
4
5
10
Ground △
3
4
5
10
Air □
4
4
-
-
Air △
4
-
-
-
Step □
10
-
-
-
Step △
10
-
-
-
Devour
10
-
-
-
Charge Glide
10
-
-
-
Variant Scythe
My personal favorite weapon choice.

Features
□ Attacks are short ranged.
△ Attacks are 2 medium ranged attacks.

Special Actions
Round Fang: R + □ buttons to trigger. Scythe enters deployed state. Consumes 20 ST. Two cleaves strating from the left followed by a one starting on the right. Enables Multihits. Hits about 180 degrees. After stepping, you can maintain deployed state for a while. The most damage comes from the tip or edge of the blade.
Vertical Fang: △ button to trigger (Scythe must be deployed). Scythe drops down exteneded. Consumes 10 ST. Likewise the most damage comes from the tip or edge of the blade.
Cleave Fang: R + □ buttons to trigger (Can only be used after Vertical Fang). Scythe retracts, slicing everything in between. Consumes 15 ST. The most damage comes from the MIDDLE of the blade

Damage Multiplier
Action
Attack Multiplier (1)
Attack Multiplier (2)
Attack Multiplier (3)
Attack Multiplier (4)
Attack Multiplier (5)
Ground □
90%
100%
90% + 90%
130%
-
Ground △
70% + 40%
80% + 40%
80% + 40%
90% + 50%
-
Air □
90%
100%
110%
-
-
Air △
90% + 40%
-
-
-
-
Step □
100%
-
-
-
-
Step △
80% + 40%
-
-
-
-
Devour
120%
-
-
-
-
(First hit)
(Second hit)
(Third hit)
(Fourth hit)
(Fifth hit)
Round Fang
120%
55%
40%
40%
35%
Vertical Fang
130%
60%
50%
50%
35%
Cleave Fang
140%
70%
65%
65%
35%

OP Recovery
Action
OP Regen (1)
OP Regen (2)
OP Regen (3)
OP Regen (4)
Ground □
3
4
3 + 3
10
Ground △
2 + 2
3 + 3
3 + 3
5 + 5
Air □
3
5
6
-
Air △
3 + 3
-
-
-
Step □
5
-
-
-
Step △
3 + 3
-
-
-
Devour
10
-
-
-
Round Fang
2 per hit
-
-
-
Vertical Fang
2 per hit
-
-
-
Cleave Fang
5 + (3 per hit)
-
-
-
Is Melee Attack Speed worth it?
So some people I talk to have noticed that there's a skill called [Sunburst]. It grants an amazing -10 to the attack speed stat. While I only played with Scythes enough to have a melee attack skill up, it should be more or less in the same ball park. Hammers and Busters maybe have a greater effect, but I can't test that out.

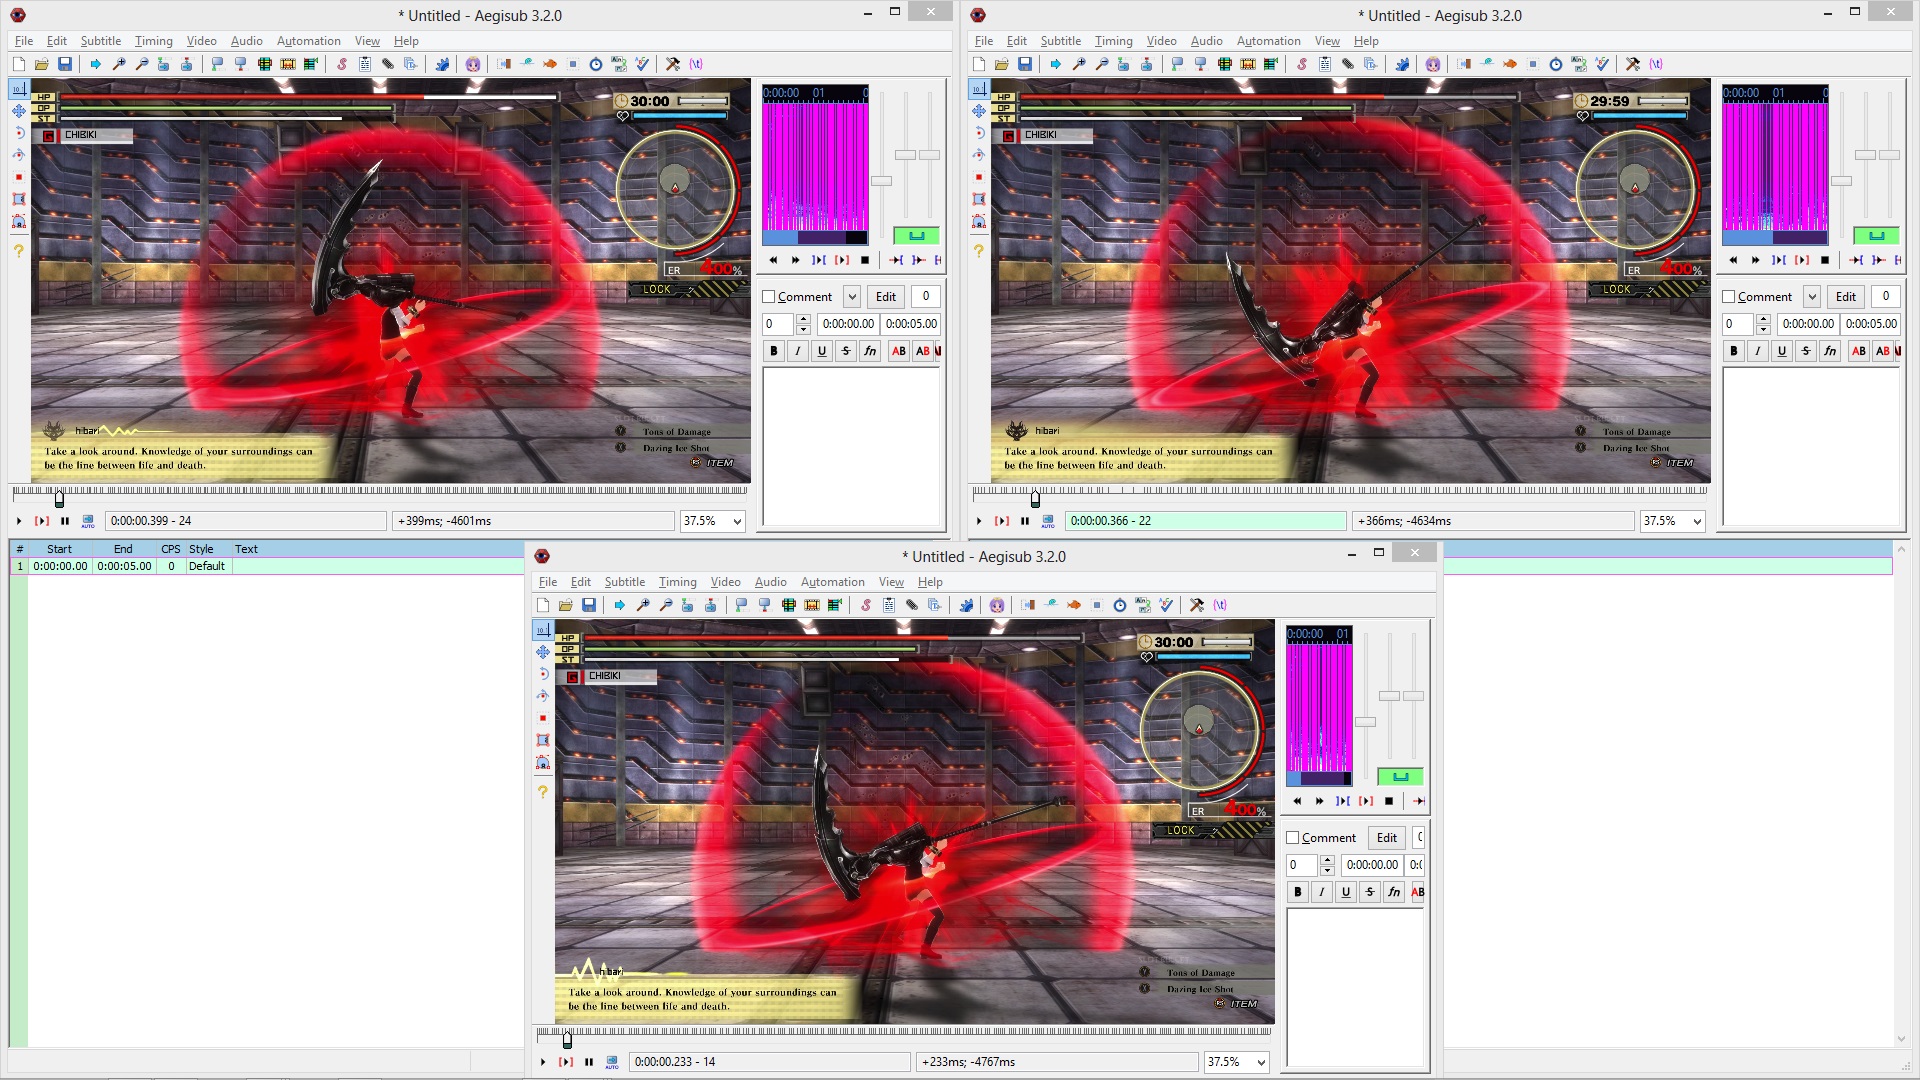
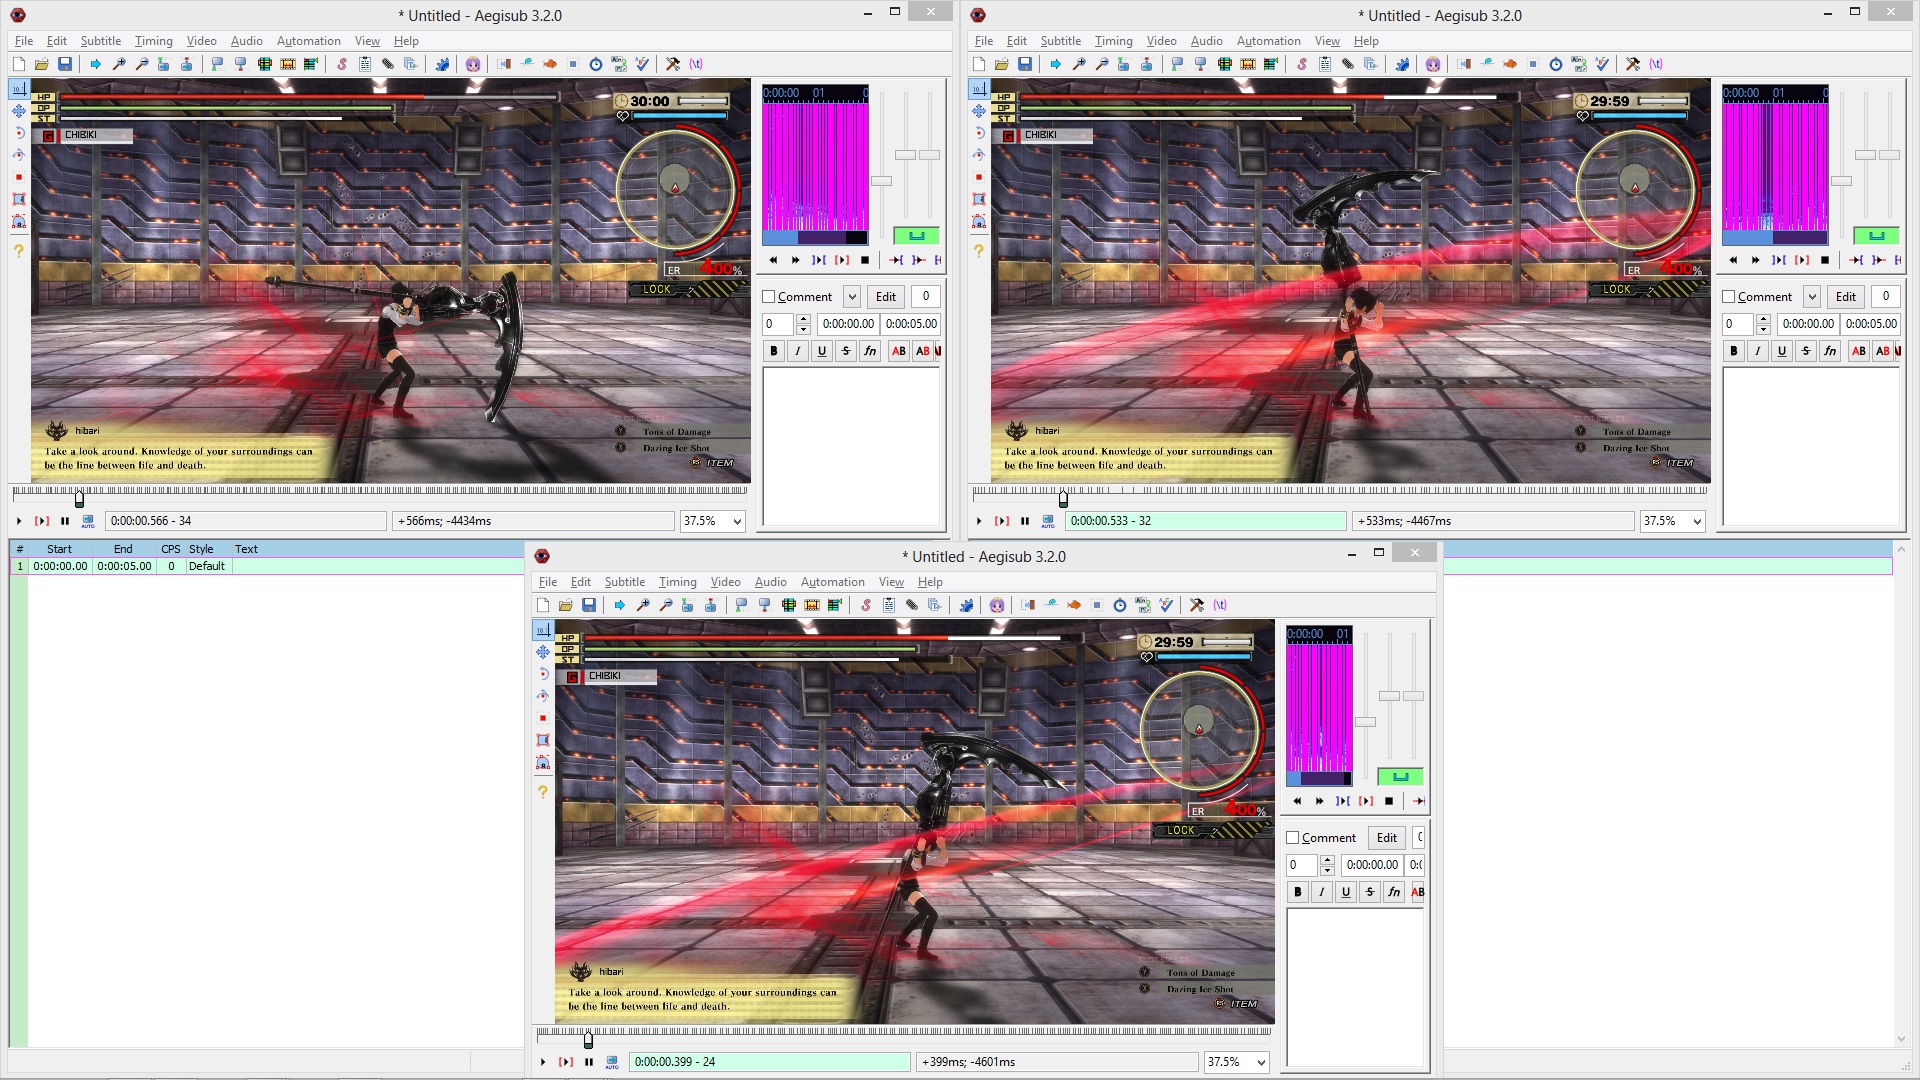
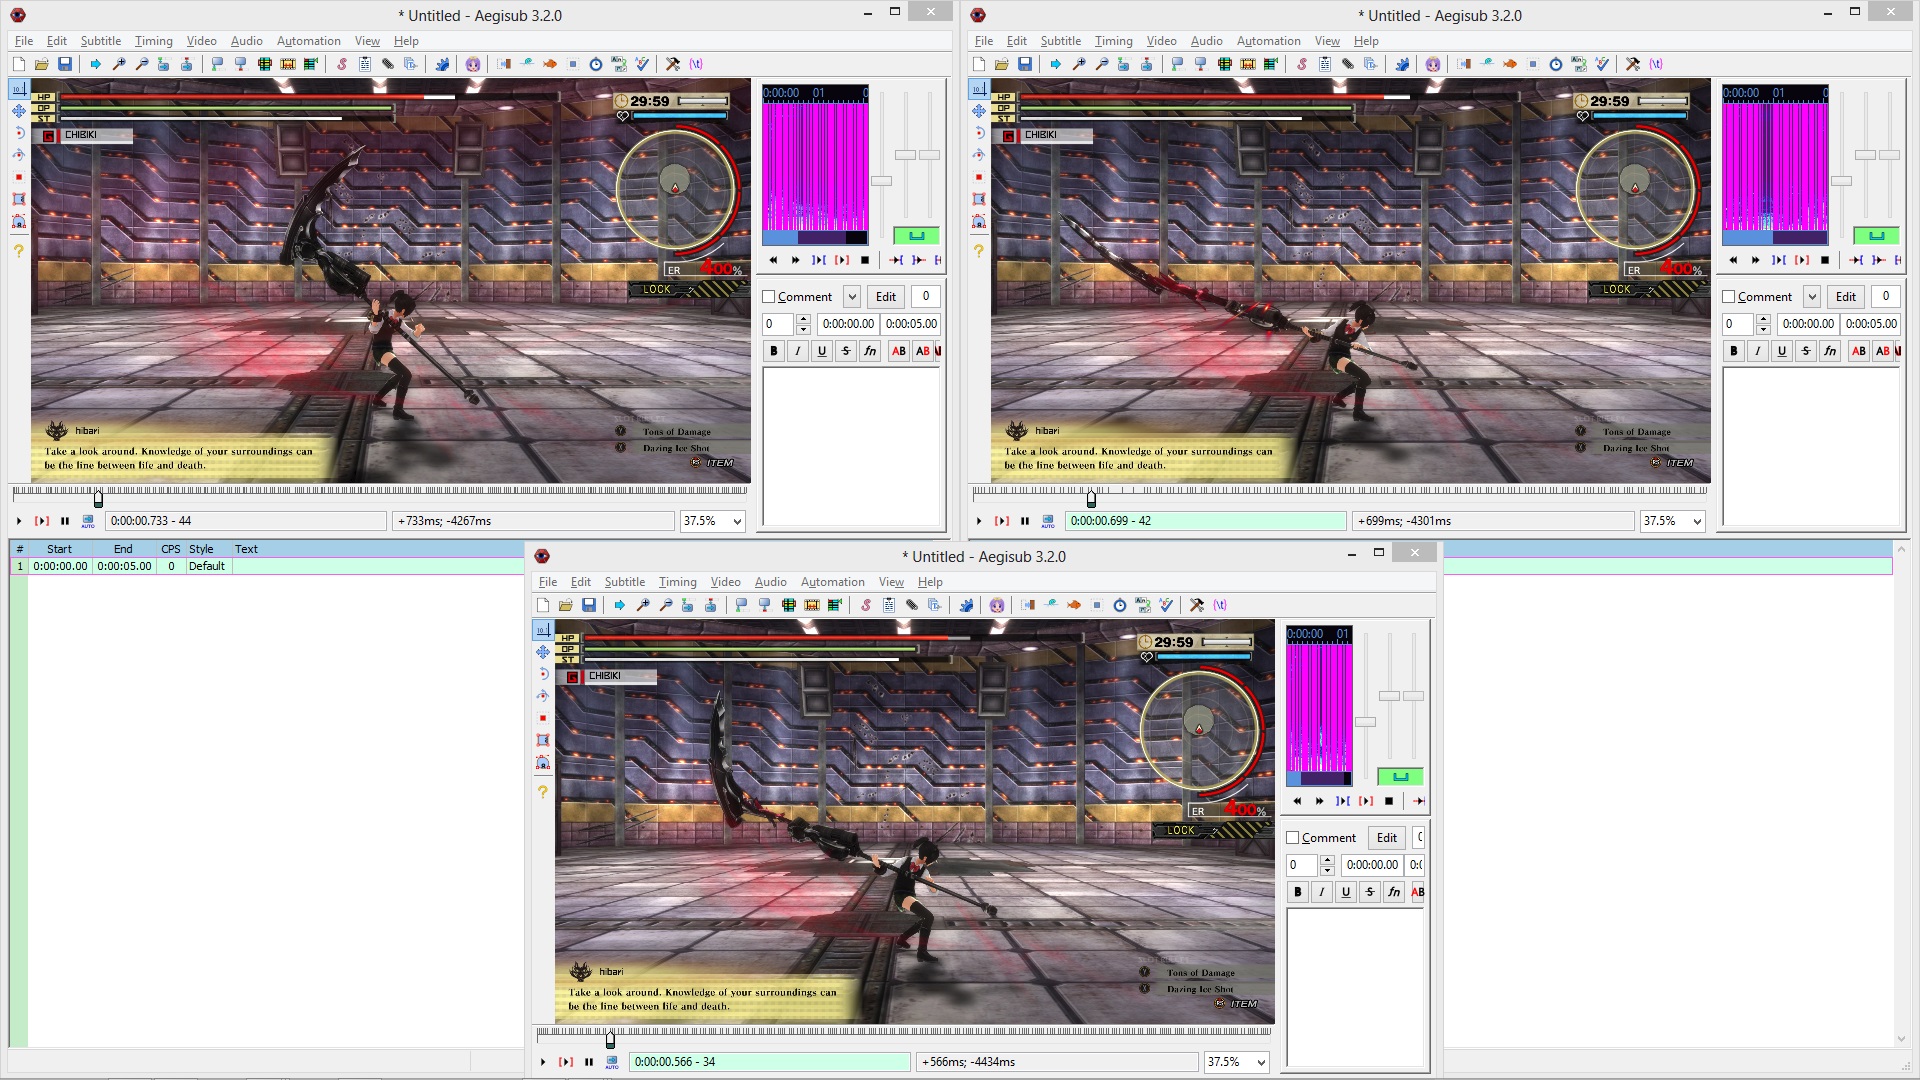
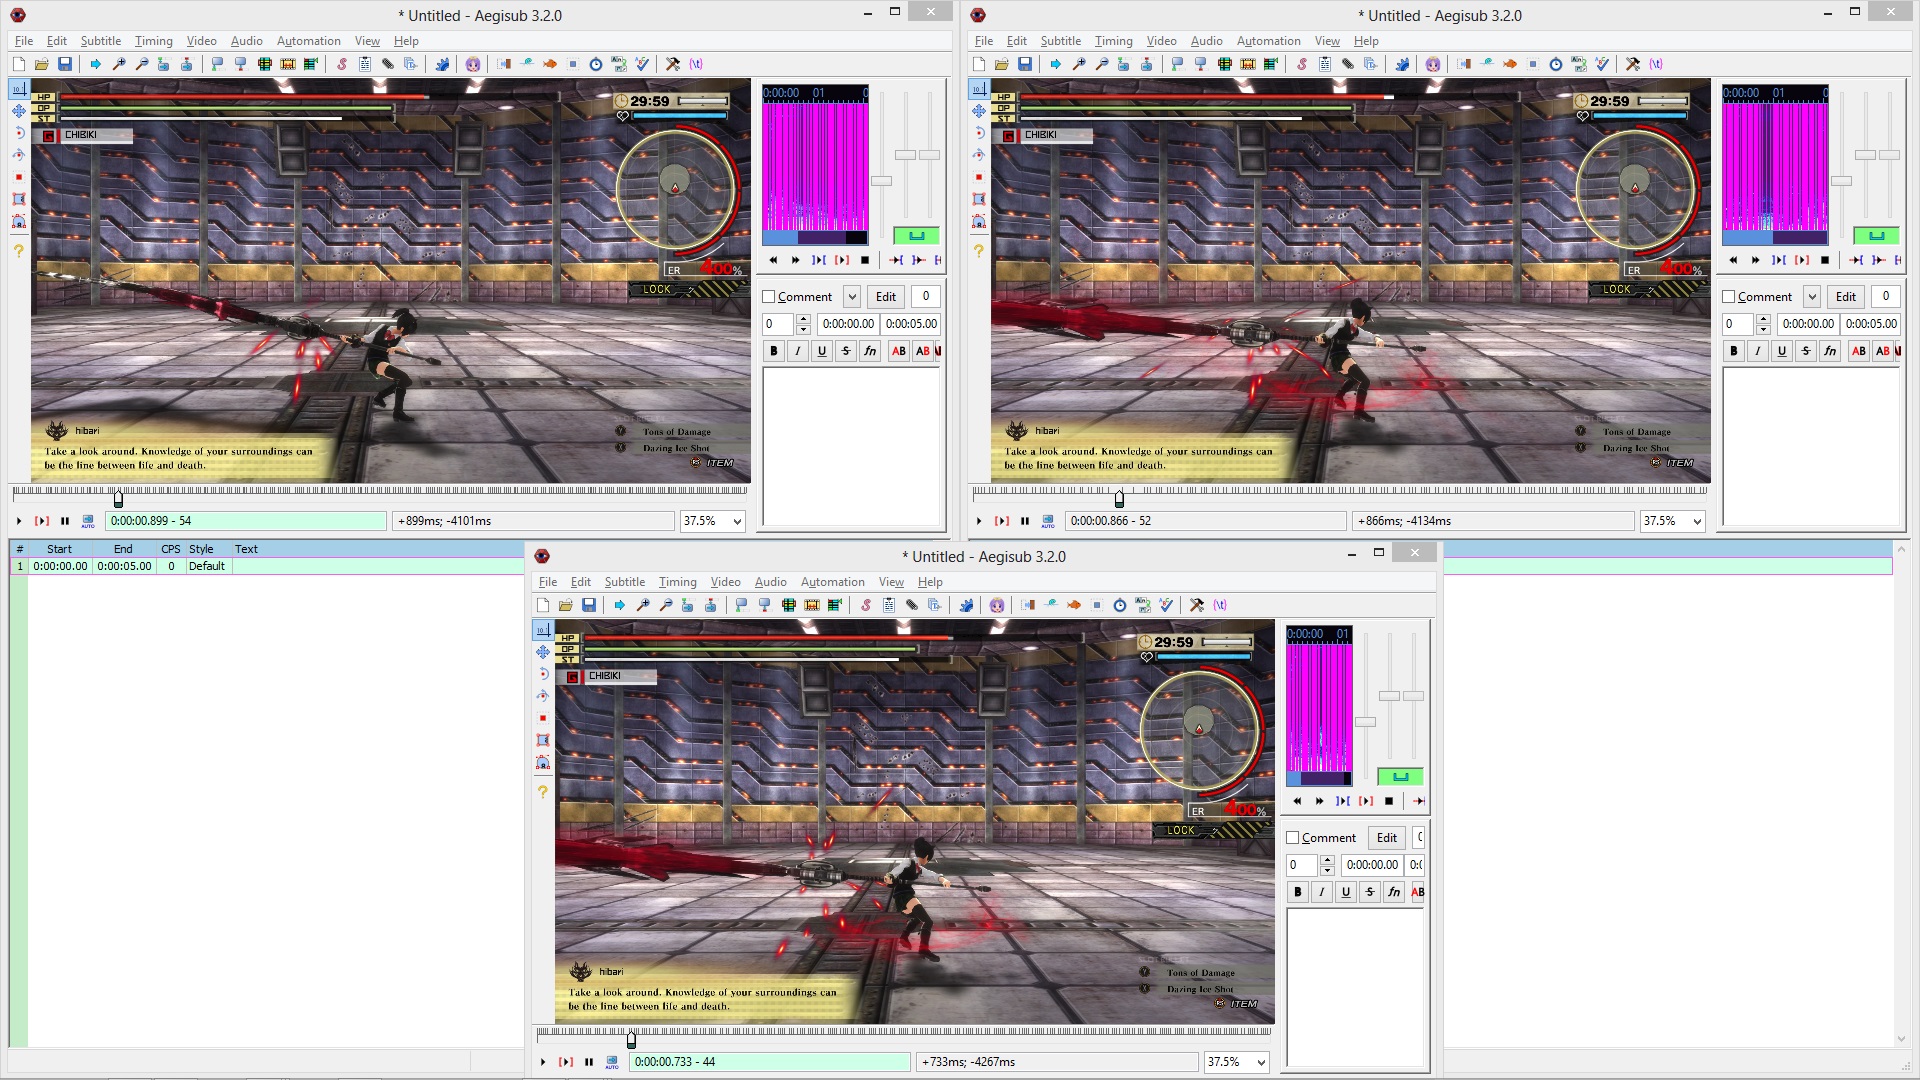
I would make a video running each attack speed side by side, but I don't believe I have the technology to do so. So for now screenshots are the next best thing.

The one on the Left has sunbusrt
The one on the Right has Melee Attack Speed (positive)
The bottom one is normal speed.
This is 10 frames after I aligned each video capture.
As you can see there's a kind of a difference already from the start. They seem to just be each 1 frame apart from each other.

This is 10 frames after the first picture, or 20 frames after I aligned each video capture.
The difference between the sunburst and normal is pretty notable, yet the melee attack speed up isn't changing by much.

This is 10 frames after the second picture, or 30 frames after I aligned each video capture.
Nothing new here, it just reinforces the previous images.

This is 40 frames after I aligned each video capture.
Now here's the interesting part, I checked it again but notice how the normal speed and melee attack speed are around the same time now? Melee attack speed is still faster but it's only by a tiny nudge, probably not noticable with normal gameplay.

Summary
I'm not telling you that [Sunburst] is a bad skill. I'm only showing the negative qualities. But the reason why I used the fang deployment and not a regular auto attack is because I wanted to show that melee attack speed not only affects auto attacks but also special actions. But why does that matter you wonder?
I have an insane friend on steam who uses nothing but the Blood Art Final Vengence. Now one night he wanted to test out the skill [Sunburst] and needless to say it ended poorly. This is because melee attack speed also affect the parry window on Buster or Execution Blood Art on Scythes (but I didn't test it since I'm not a fan of that BA). So in some cases this skill might be helpful if you want to slow your attacks, but I can't think of any Blood Arts I currently use that would benefit from it.
Now the skill itself. While it has other amazing components, you need to ask yourself is it worth the -10% attack speed. Don't let this little section discourage you from using it. Play the game how you like. I'm just here to let you know if you feel like your timing is off and you have the skill, it's probably why.

Now for Melee attack speed up. There's not much to say about this skill. The only question you need to ask is, "Is the small frame differences worth a single skill slot?" As there is no skill in game that has melee attack speed up. If you want my personal opinion, notice why I'm using the basic kurogane colors? Yeah, I don't recommend this skill 'specially when Evoke Rate or Blood Rage Duration is much better. But that's just my opinion.
8 Comments
goingpostalreal Mar 23 @ 8:52am 
where can i get melee attack speed up?
UncleDrake Jun 21, 2020 @ 4:38am 
Melee attack speed up is a must have skill. The reason you see no real impact is because you don't test it correctly. Melee attack speed up does NOT change the animation time in itself (the reason you do see a difference is input lag and not 100% alignment of your videos combined)

It shortens the wind-up (meaning your strikes hit sooner) as well as the cool-down between attacks (meaning you can input another attack sooner). That makes the skill damn good with most weapons but especially with buster blades. You can literally fire off charge crush and hit your target even before you see the blade strike your target. Of course using that skill changes the timing you might be used to, so it's not a beginner friendly skill at all. But once you learn how to use a speed boosted weapon, your dps WILL skyrocket.

Tempus May 2, 2018 @ 7:49pm 
Thxs for guide man
H3roMax Aug 10, 2017 @ 8:56pm 
A Great Peace of Guide :3
I like it and its useful for everyone who doesnt understand well the DMG / Critical Multiplier nwn
10/10 Well Done!
SSS+ :3
KOS-MOS Nov 13, 2016 @ 1:14am 
This is a very good guide ^^ i like to use swords for fun and to challenge myself when i get bored using those broken bullet builds xD
Louis Cypher Nov 7, 2016 @ 5:05pm 
Thanks again for pointing that out. I'll try it with a few elemental weapons
Chibiki  [author] Nov 6, 2016 @ 5:38am 
There's a list on the JP wiki telling you specifically what parts of an aragami are weak to which specific element (For example the head may be weak to Frost, but the arms may be weak to Divine), I was planning on making another guide for it, but I'm having trouble formatting the tables. And I'm not sure how many people will actually look at the guide. So I don't really want to invest time into something like that. The reason elemental weapons have lower based damage is because they're made up with their elemental multipliers.

For example:
Using the Kurogane Scythe and the Olybrius Scythe (a scythe with ◎◎ in F) the differences are 867 vs 694 at +30. However when fighting an aragami with weakness to F, Olybrius' damage becomes 1041 or 1215.
But in return, if you're fighting one that resists F, the damage output for Shiranui becomes 555 or 139.

And it's because of that I prefer raw weapons. But, if you have a weapon for each element, you will out damage a raw weapon user.
Louis Cypher Nov 6, 2016 @ 2:31am 
cool, good to know.

But one think I have to aks:
How do I know if the aragami is weak or very weak against the chosen element?

As you certainly know the multi elemental or oo elemental weapons a weaker than no elemental or one-elemental weapons.

So maybe it's better to abstain from oo ones.