Team Fortress 2

Team Fortress 2

67 ratings
Demoman Grenade Launcher Comparisons
By Jargo
This guide is going to be looking at how good the Demoman's Grenade Launchers are.

EDIT: OKAY EVERYONE. It's pretty obvious that I favour the Loose Cannon and Loch-n-Load and (to an extent) the Iron Bomber (basically all Uniques GLs) over the Stock Grenade Launcher. Mainly the Loose Cannon.

I've been doing research, practice, and having discussions about this weapon for a while.

I've made a discovery about why some people think it's bad: APPARENTLY it's really hard to use (lol). And it has less DPS.
Well, guess what? At mid-ranges, it's raw DPS is about the same as Stock, and at close range, it instead has higher burst damage and has airburst. The only real downside is range and it's a little hard to use against buildings (but not completely bad).

So, I still hold the opinion that the Loose Cannon is actually the best Demoman Grenade Launcher.

Also, looking at this weapon, even though technically Weapon-To-Weapon, it can be compared around equally to Stock, it is better IMO BECAUSE it fills all the roles that a Demoman Primary (Secondary) should fill. The Stock Grenade Launcher is used primarily for self-defence and spammability, but lacks reliability in that it's hard to aim. Well, mister, why would you use anything else when the Loose Cannon pushes intruders back and has grenades that explode midair?

Right, I'm done for now.
   
Award
Favorite
Favorited
Unfavorite
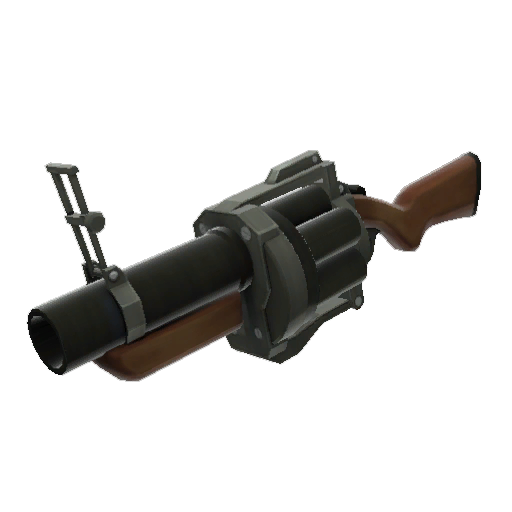
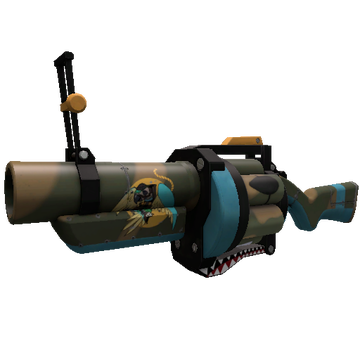
Default Grenade Launcher
The Default Grenade Launcher is the default primary weapon of the Demoman. It is a modified M79 Grenade Launcher that has a revolving chamber similar to an M32 Multiple Grenade Launcher. Both weapons are popular in shooter games and the TF2 Default Grenade Launcher makes for a rather pleasant looking combination of both.


The Default Grenade Launcher shoots arcing grenades that have travel time. Grenades with the Default Grenade Launcher must be aimed higher than the target if fired from a distance, and they must also be aimed at where the enemy is going to be, not where they are, to compensate for travel time.


The Default Grenade Launcher holds 4 of these grenades in the chamber at maximum. The interval of fire between each grenade is 0.6 seconds. The Default Grenade Launcher is fully automatic, however, it is recommended that you use it with caution and manually fire each shot, in order to better guarantee successful hits.

To reload the Default Grenade Launcher, the Demoman places one grenade into the revolving chamber at once. This means that he has to individually load 4 grenades back into the Default Grenade Launcher after he has expelled his whole clip. This also means that spammage of these grenades is usually short-lived. The Default Grenade Launcher takes 1.24 seconds to fully load its first grenade, and all other grenades are reloaded in 0.6 seconds each. This totals at a 3.04 reload time.

The Default Grenade Launcher's grenades deal 100 damage from any range, as long as you can hit your target directly. 100 damage isn't enough to kill any full-health classes, however, so usually at least 2 grenades have to hit a target successfully for him to die. If a grenade doesn't hit the target directly, the Grenade Launcher's grenade will bounce off whatever surface it just hit, be it a wall or the floor, then it will start to roll along the ground after landing, and it will explode after 2.3 seconds. This explosion deals a maximum of 60 damage.

Grenades from the Default Grenade Launcher, be they "Direct Hits (Pills)" or "Rollers", have a splash diameter of 9.1 feet (2.77 metres/146 HU). If a Grenade doesn't directly hit an enemy, its damage will be lessened. The splash diameter from these grenades means that a Demoman can damage himself, making close combat with this weapon extremely hazardous. This also means that a Demoman can "Grenade Jump" with his rollers; he has to roll a grenade into a prop to keep it still, then he has to jump over it as it explodes, to increase his jump height.

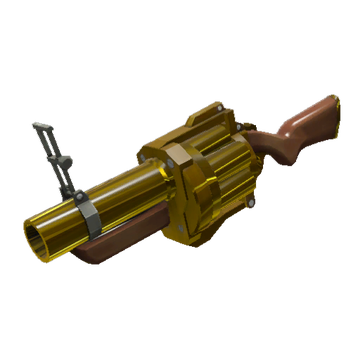
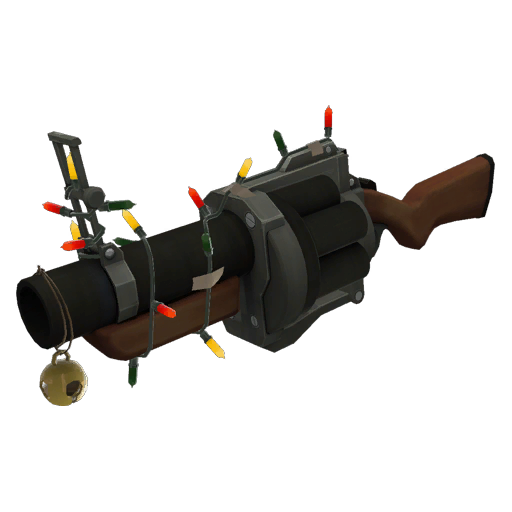
The Default Grenade Launcher has several skins. It can be golden (Australium Grenade Launcher), adorned with ornaments (Festive Grenade Launcher), or can have various patterns/stickers applied to it (Decorated Grenade Launcher).


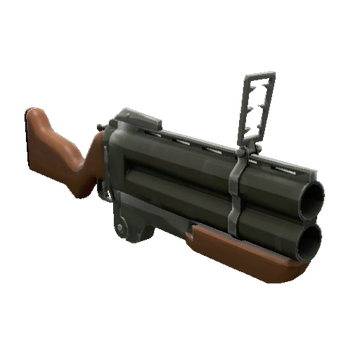
Loch-n-Load
The Loch-n-Load is a variant primary for the Demoman. It seems to be a combination of an M79 Grenade Launcher and a China Lake Grenade Launcher. It can be unlocked through weapon drops, uncrating and purchase, and by various other means.


The Loch-n-Load is exactly the same as the Grenade Launcher in its functions, except for a few tweaks.

The Loch-n-Load lacks Rollers. If you hit something other than a player or building, the grenade will simply shatter and won't deal any damage. This means that accuracy is highly important when using the Loch-n-Load and that Grenade Jumps are nearly impossible. Self-damage isn't gone, however, because at close-range, the bombs can still explode in your face if they hit an enemy.

The Loch-n-Load fires grenades that travel at a speed that is 25% faster than the Default Grenade Launcher. This lessens the arc and increases the range of the grenades as well.

The Loch-n-Load lacks the fourth grenade and also has a 25% smaller splash diameter.

The Loch-n-Load deals 20% more damage to buildings, killing most in two hits instead of three.
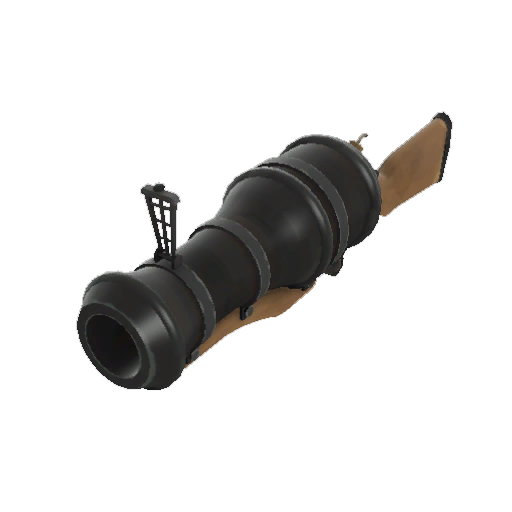
The Loose Cannon
The Loose Cannon is a variant primary for the Demoman. It is a grenade launcher fashioned into the shape of a pirate ship cannon. It can be unlocked through weapon drops, uncrating and purchase, and by various other means.


The Loose Cannon is similar to the Grenade Launcher, however, it has many tweaks.

The Loose Cannon's grenades look like cannonballs. This does not affect their function.


The Loose Cannon's cannonballs deal 50% less damage than the Default Grenade Launcher on a direct hit. This means they only deal 50 damage. However, the cannonballs do not explode on a direct hit, instead, they explode within a second of being fired, which causes them to explode just after a direct hit. The damage dealt by the subsequent explosion is usually 60 or lower. However, if an enemy is hit directly and the cannonball explodes within 0.5 seconds of the impact, the explosion will deal exactly 81 damage at all ranges. The combination of a 50 damage direct hit and an 81 damage explosion (known as a "Double Donk") will result in the instantaneous death of any class with 125 maximum health, ie Engineers, Scouts, Snipers, and Spies.

The Loose Cannon's cannonballs don't always explode within 0.5 seconds of impact. That is why the Loose Cannon features a charge meter. By holding down the fire button, you can make the cannonball explode earlier. This allows you to time Double Donks and allows you to get them in almost any situation, as long as you are skilled enough.

The Loose Cannon's charge meter allows you to do what's known as a "Cannon Jump", where you can actually jump with it as if it were a Rocket Launcher, simply by holding down the charge meter for 1 second and turning towards a surface (you can look forward and downward at the same time for maximum jump height at the cost of almost 50% health) then jumping, as the cannonball explodes. Similarly, you can actually charge then release the cannonball onto the ground and jump off that. The charge meter also allows you to do kamikaze style attacks on enemies who are too hard to hit. This causes them and yourself to take around 60 damage; this technique of exploding a cannonball while it is still in the weapon can also be used to perform intentional self-damage, which can be useful for building up Medic Ubercharges faster.

The Loose Cannon also features a 20% faster projectiles speed, which, like the Loch-n-Load, lessens the arc and increases the range of its cannonballs. However, the short fuse time of the Cannonballs makes the range shorter than the Default Grenade Launcher overall.

The Loose Cannon also causes immense knockback on direct hits, which allows you to push enemies into hazards, or to push enemies away from you in self-defence.

The Loose Cannon's direct hits are counted as explosive damage but don't actually have any splash diameter. This means that both other enemies and yourself will not be hurt by the initial hit, only by the explosion that occurs afterwards.
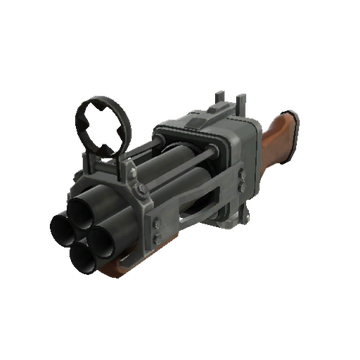
Iron Bomber
The Iron Bomber is a variant primary for the Demoman. It is a fictional grenade launcher armed with four extended barrels. It can be unlocked through weapon drops, uncrating and purchase, and by various other means.


The Iron Bomber is the most highly similar to the Default Grenade Launcher of all the grenade launchers. It does have a few tweaks, though.

The Iron Bomber's grenades look like little round balls instead of like pipes. This does not affect their function.


The Iron Bomber features Rollers that do not bounce or roll much on contact with a surface other than a Player or Building. This means that area denial is much more effective, as they won't move much from where they are planted unless they are planted in midair or into a wall (gravity still affects them).

The Iron Bomber also features a 30% faster fuse time. This causes traps to detonate faster.

The faster fuse time combined with the slow-moving Rollers allows for easier to perform Grenade Jumps in comparison to the Default Grenade Launcher.

The Iron Bomber performs almost identically to the Default Grenade Launcher while used in direct combat, however, it has a 15% smaller splash diameter for its grenades, both when they hit targets directly and when they explode as Rollers.

The Iron Bomber's shorter fuse time and slow-moving Rollers causes it to have a severely shorter range than the other grenade launchers.
Grenade Launcher Comparisons
Now, we move onto the Grenade Launcher Comparisons.

This is the order which I rank them in terms of how powerful they are (Damage, Projectile Speed, Clip Size):
1. Loose Cannon
2. Default Grenade Launcher
3. Loch-n-Load
4. Iron Bomber


This is the order which I rank them in terms of how useful they are (Utility, eg Grenade Jumps):
1. Loose Cannon
2. Iron Bomber
3. Default Grenade Launcher
4. Loch-n-Load


This is the order which I rank them in terms of how versatile they are (Amount of abilities, strength in different situations/loadouts):
1. Loose Cannon
2. Iron Bomber
3. Default Grenade Launcher
4. Loch-n-Load


This is the order which I rank them in terms of how easy they are to use:
1. Loch-n-Load
2. Default Grenade Launcher
3. Iron Bomber
4. Loose Cannon


I will explain my reasoning in a moment. As you can see, the Loose Cannon tops the list in every category except ease of use. Meanwhile, the other grenade launchers fight each other for the second-place spot in three of the categories but are all easier to use than the Loose Cannon. The conclusion I have drawn is that the Loose Cannon is simply the best grenade launcher for a Demoman, but only if you can actually use it. If you aren't very good at using it, you have two options: Practice using the Loose Cannon or use something else.

So, why have I come to this conclusion? Let's take a closer look at the stats.

Default Grenade Launcher: Excels at??? It deals the same damage as two of the other grenade launchers, and deals less damage than the Loose Cannon (if your Loose Cannon cannonball is a successful Double Donk). It is worse than the Loose Cannon at almost everything, however, it does have some small advantages; it deals higher damage to buildings, it has longer range, and it is easier to use.

Loch-n-Load: Excels at destroying buildings, with increased damage to buildings, longer range, and easier usage. From this, we can conclude that the Default Grenade Launcher is almost obsolete; when compared to the Loose Cannon, it is worse at almost everything, but the only things it is better than the Loose Cannon at happen to be things which the Loch-n-Load is better than it at. At the moment, pretty much the only advantage to the Default Grenade Launcher is its relatively "less-situational" position in comparison to other Grenade Launchers and its unique ability to be able to mindlessly spam rollers at a distance.

Loose Cannon: Excels at??? Almost everything. It deals the most damage in skilled hands. It pushes people away from you, which allows you to self-defend easier, to push people into hazards, and to push people into your own stickybombs. It has several unique functions that all involve its charge meter. Additionally, it has a shorter fuse and faster projectile speed, for some reason, almost completely making the Iron Bomber's abilities and the Loch-n-Load's abilities obsolete.

Iron Bomber: Excels at??? It is supposed to be the ideal Demoknight grenade launcher. It has bombs that don't move much and explode quickly, assisting you in fleeing enemies by making short temporary traps even without a stickybomb launcher, and assisting you in doing Grenade Jumps. Only problem? The only problem is that the Loose Cannon is pretty much 100% better than the Iron Bomber. The Loose Cannon has an EVEN SHORTER fuse speed, its bombs DON'T MOVE AROUND MUCH, they even PUSH PEOPLE AWAY FROM YOU, can DEAL MORE DAMAGE, have a FASTER PROJECTILE SPEED, and, worst of all, they can be used to perform FASTER AND MORE EFFECTIVE GRENADE JUMPS.
R.I.P. Iron Bomber. Your only advantage is that you're easier to use. You even have less range than the Loose Cannon, somehow.

Now, we move onto grenade launcher choice:
Equip the Default Grenade Launcher when... You want something that's mediocre at everything but excels at rolling 60 damage grenades along the ground.
Equip the Loch-n-Load when... You want something that's really good at destroying buildings, is pretty good at long-range combat, and is easy to use.
Equip the Loose Cannon when... You want something that's a straight upgrade in every field that matters, is very complicated and versatile, is great for self-defence, is great for a Demoknight hybrid, and whose only drawback is the difficultness and complicatedness that results from its complex design.
Equip the Iron Bomber when... You want something that's similar to the Loose Cannon but worse but is also easier to use.
Loadouts with Grenade Launchers
Default Grenade Launcher:
  • Default Grenade Launcher, Default Stickybomb Launcher, Default Bottle.
    For unoriginal Demomen.
  • Default Grenade Launcher, Sticky Jumper, Ullapool Caber.
    For being a troll with rollers.

Loch-n-Load:
  • Loch-n-Load, Quickiebomb Launcher, Claidheamh Mor.
    This is the Demo-Sniper set. You can launch bombs a ridiculously far distance but are pitiful at combat in close-quarters. You have the Claidheamh Mor as a decent melee for self-defence.
  • Loch-n-Load, Chargin' Targe, Half-Zatoichi.
    This is the Building-Destroyer set. You can destroy Engineer nests with ease, while also taking less damage from fire and explosives, You also have a handy charge ability, which can be combined with your Half-Zatoichi to perform deadly melee attacks.
  • Loch-n-Load, Splendid Screen, Half-Zatoichi.
    This is similar to the Building-Destroyer set, however, you have the Splendid Screen instead. This gives you less resistance, but a lot more mobility.

Loose Cannon:
  • Loose Cannon, Scottish Resistance, Scotsman's Skullcutter.
    This is the Ultimate Defender set. Along with an Engineer and a Heavy, you will be almost unstoppable. Your cannonballs will actually be knocking people into your sticky traps. Your Scottish Resistance stickybombs can actually defend buildings and Heavies from Spies and enemy Demomen as well.
  • Loose Cannon, Quickiebomb Launcher, Half-Zatoichi.
    This set is the Mobile Unit set. You become extremely aggressive, taking out nests, Heavies, etc. You also have some unique abilities such as being able to destroy stickybombs and push enemies back when you are in trouble. Your weapons all deal amazing damage, but the damage must be obtained through skilful usage.
  • Loose Cannon, Tide Turner, Eyelander.
    This set is for the Demoknight Hybrid who wants to be able to jump and charge, and deal relatively good damage. Your mobility will be insane, and after gaining a few heads, you will be unstoppable.

Iron Bomber:
  • Iron Bomber, Default Stickybomb Launcher, Claidheamh Mor.
    This is for the Average Tavish. You can do everything a normal Demoman is expected to do, but you have the Iron Bomber for self-defence, compensating for bad aim as well, and the Claidheamh Mor for when you're in trouble.
  • Iron Bomber, Scottish Resistance, Ullapool Caber.
    This set is an alternative to the Ultimate Defender set. You have the Iron Bomber and Ullapool caber mainly for easy self-defence.
  • Iron Bomber, Tide Turner, Eyelander.
    This set is similar to the Demoknight Hybrid set, but it uses the Iron Bomber instead.
Other Primaries
Okay, so obviously the Demoman doesn't only have Grenade Launchers in his primary slot. He also has the B.A.S.E. Jumper and the Ali Baba's Wee Booties/Bootlegger.

This section is just going to be a quick analysis of both.

B.A.S.E. Jumper
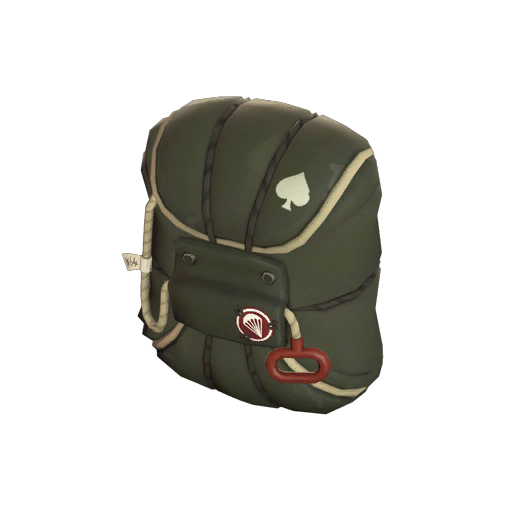
The B.A.S.E. Jumper is a green paratrooper's parachute that can be equipped on both the Soldier and the Demoman. While airborne, it allows you to press the "jump" button to greatly slow both your vertical and horizontal momentum. On the Demoman, it replaces his Grenade Launchers, so this whole guide kind of becomes useless if you simply LOVE using the B.A.S.E. Jumper.


Admittedly, I do like the B.A.S.E. Jumper a lot. I frequently use it on Soldier with the Air Strike, Liberty Launcher, and Stock Rocket Launcher. On Demoman, I don't use it as often, however. When you're looking at the B.A.S.E. Jumper on the Soldier, you've got a wide array of powerful direct-combat weapons. On the other hand, the Demoman can't actually use his Grenade Launchers with the B.A.S.E. Jumper, so direct damage is somewhat out the window. He can use 7 secondaries with the B.A.S.E. Jumper; 4 Stickybomb Launchers and 3 Shields.

Okay, now we're onto synergy.

  • Stickybomb Launcher:
    This is the best option for use with the B.A.S.E. Jumper. You have a long-ranged, versatile weapon, highly capable of holding an assault without the assistance of a Grenade Launcher. However, ditching your Grenade Launcher still hurts.
  • Quickiebomb Launcher:
    This is the second best option for use with the B.A.S.E. Jumper. You have half the clip-size of the Stickybomb Launcher, but you still deal good damage if you charge your shots.
  • Scottish Resistance:
    This is not an ideal weapon to use with the B.A.S.E. Jumper because you have almost no self-defence or direct combat ability.
  • Sticky Jumper:
    This weapon can be used to "troll", wherein you can jump and fly around the map and take no damage, but you also cannot deal any damage to enemies (except with your melee).
  • Chargin' Targe:
    The Chargin' Targe is not recommended for use with the B.A.S.E. Jumper because you can't launch yourself into the air easily, making the B.A.S.E. Jumper mostly useless.
  • Tide Turner:
    This one is also pretty useless with the B.A.S.E. Jumper. However, you can more easily launch yourself off platforms with this Shield, and you can turn more easily. It's still not recommended.
  • Splendid Screen:
    Like the others, this Shield is not recommended for use with the B.A.S.E. Jumper.

So, my conclusion is that more than half of the secondaries are useless with the B.A.S.E. Jumper. This automatically makes it the worst Demoman primary since it doesn't synergise with anything apart from Stock and its Quickiebomb Launcher variant.

Ali Baba's Wee Booties
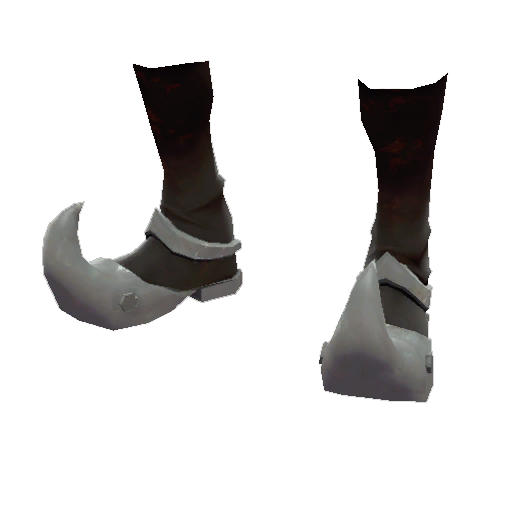
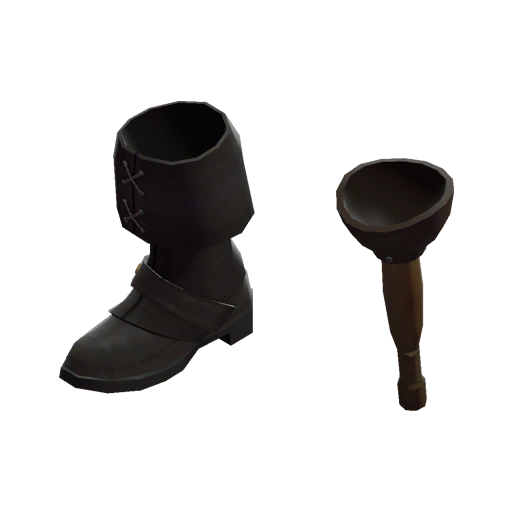
Now we're onto the Ali Baba's Wee Booties. This primary weapon is a steel-plated pair of boots with a little curl at the tip of each boot. It has a (non-valuable) reskin called the "Bootlegger", which looks like a pirate's boot and a bootleg. The Ali Baba's Wee Booties give you 25 health if you're using a Stickybomb Launcher, and they give you 10% faster speed, 200% more turning control and 25% charge restored on melee kill if you're using a Shield (on top of the 25 health).


Obviously, this weapon loses a LOT of potential when used with a Stickybomb Launcher. However, 25 health can be mildly useful. It's still best not to be too reliant on this health, however, because you will end up being really bad at using Grenade Launchers and you will also be too reckless (less concern for survival). When used with Shields, this weapon is a little wasted with the Tide Turner, because the Tide Turner already has full turn control and gives you 75% charge on a kill. The other Shields do get a lot out of using this weapon.

More synergy.

  • Stickybomb Launcher:
    This weapon is an okay choice with the Ali Baba's Wee Booties. It wastes most of the benefits, but it gives you some ranged combat ability.
  • Quickiebomb Launcher:
    This weapon is also an okay choice. It is not recommended, however.
  • Scottish Resistance:
    This weapon is a horrible choice with the Ali Baba's Wee Booties. There is no good reason for you to be boosting your health at the cost of your Grenade Launcher when using the Scottish Resistance since you'll be on defence (and safely hidden in some fortress with Medics, Engineers, Health packs and Spawn Rooms). Getting rid of your Grenade Launcher takes away your self-defence ability.
  • Sticky Jumper:
    This weapon should not be used with the Ali Baba's Wee Booties ever. (unless you're using the Caber and want to have more health after kamikazeing. But then again, you'll also be taking more fall damage from not equipping the B.A.S.E. Jumper.
  • Chargin' Targe:
    This weapon benefits greatly from use with the Booties. More health and more resistances are a good combo.
  • Tide Turner:
    This weapon can benefit from use with the Booties, however, it wastes some of the abilities of the Booties.
  • Splendid Screen:
    This weapon benefits greatly from use with the Booties. You don't have as much resistance as the Chargin' Targe, but you have more shield-damage and mobility.

In conclusion, the Ali Baba's Wee Booties are not that good, but they're definitely better than the B.A.S.E. Jumper (when on Demoman, not when on Soldier).
You read my guide?
Thanks for reading this guide!

You can comment below on what loadouts you like and why. I will add any new ones to my loadouts list.

UPDATE: I have 4/5 star rating??? This guide was made in a total of 2 hours (editing). :P
I made a new guide: http://steamcommunity.com/sharedfiles/filedetails/?id=789026373
111 Comments
mmmmmmmmmmmmmmmmmmmmmmmmmm Oct 29, 2016 @ 5:00pm 
Jargo

"I am pretty sure that I listed that in my loadout ideas. It is one of the only times I'd ever consider equipping the Loch-n-Load, to be honest. (I actually use it over the Loose Cannon in this loadout)."

you're right, you did, my bad. nice guide, definitely going into my favorites, keep up the good work :D
maddy Oct 29, 2016 @ 12:37am 
Ha ha. You're a funny man.
Jargo  [author] Oct 29, 2016 @ 12:13am 
I did lol.

Just to clarify, that is ten metres? Right?
maddy Oct 29, 2016 @ 12:11am 
The ScoRes actually works as a great offensive weapon because of how many traps you can set up and how many areas you can hold. The real downside is just that it takes so long for the stickies to arm, making it awful for any sort of airbursting unless it's long range.

You can also get rid of the section for me now, lol
Jargo  [author] Oct 29, 2016 @ 12:09am 
When there is a ScoRes Demoman working together with an Engineer, I assume it's turtling.
maddy Oct 29, 2016 @ 12:03am 
Why did you automatically assume turtling? Feels bad man ;-;
Jargo  [author] Oct 29, 2016 @ 12:02am 
It is still a good strategy in Payload and Attack/Defence. Not so much in CP, because turtling is dumb in CP because you'll never win.
maddy Oct 28, 2016 @ 11:59pm 
CTF is for losers!
Jargo  [author] Oct 28, 2016 @ 11:55pm 
mads

Try going Engineer with a Demoman using the Scottish Resistance and Loose Cannon, teamed up with you on defence. In a Pub, you will be unstoppable. Especially on CTF maps.
Jargo  [author] Oct 28, 2016 @ 11:53pm 
mads

Oops. He was talking about Gullywash Mid.