Undertale
190 avaliações
Undertale: 100% Completion Guide
Por Natty
This guide is only for people who have achieved the True Pacifist ending at least once and want to have a "perfected" Undertale file. Do NOT proceed otherwise.
10
2
   
Premiar
Adic. a Favoritos
Nos Favoritos
Desfavoritar
Step 0: READ THIS BEFORE CONTINUING
If you didn't read the description, do NOT keep on reading if you have not yet finished at least one True Pacifist ending. Otherwise, you'll be spoiled a WHOLE lot. Don't come flaming towards me if you haven't done this yet. It's your own fault.

Also, if you want me to add anything to make your Undertale file stronger, you need to consider this before messaging, commenting, etc.: Does it affect your file in any way at all until the very end of the True Pacifist route?

With all that said, stay determined. I'm gonna take you for a ride.
Step 1: Complete a Genocide route
After you've completed your first True Pacifist route, restart your file and begin a Genocide route. Here's what you'll need to do:

- Kill 20 enemies in The Ruins before killing Toriel
- Kill 16 enemies in Snowdin before killing Papyrus
- Kill 16 enemies in Waterfall before killing Undyne
- Kill 40 enemies in Hotland and/or in the CORE before killing Mettaton
- Continue as usual as if you were playing through a Neutral Pacifist route

If you want to make your journey a little easier, you'll want to stock up on some healing items and equipment:

- Equip the Faded Ribbon and the Toy Knife, Drop the Bandage and the Stick, buy as many Spider Ciders as you can from the Spider Bake Sale, and get the Butterscotch Pie after killing the 20 enemies but before killing Toriel in The Ruins
- Equip the Tough Glove and the Manly Bandanna, Drop the Toy Knife and the Faded Ribbon, get the 3 Snowman Pieces from the Snowman, steal (9 minus [number of Spider Ciders]) Cinnamon Bunnies, and put the Spider Ciders, the Butterscotch Pie the 3 Snowman Pieces and the Cinnamon Bunnies into the Box before killing Papyrus in Snowdin
- Equip the Old Tutu and the Ballet Shoes, Drop the Tough Glove and the Manly Bandanna, get the Abandoned Quiche before fighting Undyne in Waterfall
- Restock on your Spider Ciders and Cinnamon Bunnies that you kept in the Box along with the Abandoned Quiche for the fight with Undyne. Heal up whenever necessary
- Use any Spider Ciders, Cinnamon Bunnies or the Abandoned Quiche if you have any of those with you after the fight with Undyne; you won't need them anymore
- Get the Instant Noodles from the fridge in Alphys' lab, equip the Empty Gun and the Cowboy Hat, drop the Old Tutu and the Ballet Shoes, and buy the Face Steak and 2 Legendary Heroes and put them into the Box before killing Metatton
- Pick up the 2 Legendary Heroes, the 3 Snowman Pieces, the Face Steak, the Instant Noodles then the Butterscotch Pie (do it in that order) from the next Box you come across

Completing the Genocide route will permanently corrupt your Undertale file, causing you to never be able to get the regular True Pacifist or Genocide endings again. This is essential to do for 100% completion.

Step 2: Begin another True Pacifist route
For the sake of full completion, you're wanting to have a post-Genocide True Pacifist ending. HOWEVER, DO NOT PROCEED BEYOND STARTING A NEW FILE AT THIS POINT. There are a lot of things you need to do in a specific order that you won't be able to go back to if you go too far. Go on to Step 3 IMMEDIATELY after starting a new file.

Step 3: Spare enemies and mini-bosses in a specific way
The sake of this step is to get all yellow text for all of the enemies and mini-bosses in the True Pacifist end credits. It's pretty much just a way of saying: "You improved the lives of these monsters more than what was necessary. Congratulations!"

Here's what you'll need to do for each enemy before sparing them (you'll only need to do it once):


Froggit: Compliment

Whimsun: Console

Moldsmal: Flirt

Loox: Don't Pick On

Vegetoid: Dinner, then touch the green

Migosp: Talk to it when it is by itself

Napstablook: Cheer x3, Flirt or Cheer

Snowdrake: Wait a turn, Laugh

Ice Cap: Ignore x2, Steal, Compliment

Doggo: Wait a turn without moving, Pet

Lesser Dog: Pet until the text "Lesser Dog has gone where no Dog has gone before." appears

Dogamy and Dogaressa: Roll Around, Re-Sniff, Pet Dogamy, Pet Dogaressa

Gyftrot: Undecorate x3

Greater Dog: Beckon, Pet, Play, Pet, Pet

Aaron: Enter Napstablook's house in Waterfall, play a song, leave with the song still playing, then head south and walk around the area with the Save Point until you enter a battle with Aaron and Woshua

Woshua: Clean, touch the green

Moldbygg: Unhug

Mad Dummy: Talk, Spare until the end of the battle

Temmie: Talk

Shyren: Hum x5

Vulkin: Hug or Encourage

Tsunderplane: Approach, then hit the green x4

Pyrope: Heat Up x2

Royal Guards: Clean Armor for RG 02, Whisper to RG 01

Muffet: Spare until she gives up, eat a spider item during the battle, or buy one of the 9999G items

Final Froggit: Mystify

Whimsalot: Pray

Astigmatism: Wait a turn, then either Pick On or Don't Pick On depending on its request

Madjick: Talk or Stare at both Orbs

Knight Knight: Sing x2 (assuming you learned Shyren's song)

Memoryhead: Cell, Refuse

Endogeny: Beckon, Pet, Play, Pet, Pet (DO NOT THROW THE STICK OR USE THE HUSH PUPPY)

Lemon Bread: Hum, Flex, Unhug

Snowdrake's Mother: Joke x3

Reaper Bird: Mystify, Pray, Pick On


The video in this section will show you what the True Pacifist credits will look like when you have achieved this task.

Step 4: Turn all yellow text into pink text
In the room where you fight Napstablook, head north and you'll come to a room full of frogs. Talk to the last one at the end of the hallway and tell them to get rid of all the yellow text (the text that allows you to know when an enemy can be spared). Then, talk to them again and tell them to bring the yellow text back. They'll be frustrated towards you and instead of bringing the yellow text back, they'll give you pink text instead, so every time you can spare an enemy, instead of the enemy's name and the "Spare" action being yellow, it'll be pink! How fabulous~


AUTHOR'S NOTE: Just because the sparing text turns pink, it DOES NOT mean that the pink text will be in the True Pacifist end credits. It's just a little touch to your file.

FUN FACT: If you check the first garbage pile in the garbage dump (after Undyne causes you to plummet to your doom), it'll say something... interesting about what you did with the frog in The Ruins.
Step 5: Stock up on items
You'll want to stock up on quite a few items along the way to sell later. You'll need the cash to buy something very important later. These are all also one-of-a-kind items, meaning they'll be gone once you get rid of them. Here is what you'll want to do:

*Store as many items as you can in your boxes*

*Do NOT buy any other unnecessary items. It'll make the game a whole lot harder, but it'll cause less boredom later on*

*Every time you can negotiate with Temmie, DO IT. Refuse her offer once. If you refuse it twice, you won't be able to get the extra cash*

- Get 4 Monster Candies, the Faded Ribbon, the Toy Knife, and the Butterscotch Pie in The Ruins
- Equip the Tough Glove and get the Snowman Piece in Snowdin
- Get the Old Tutu, the Abandoned Quiche, the Ballet Slippers, the Dog Residue, and 2 Astronaut Foods in Waterfall
- Equip the Old Tutu
- Sell everything you have to Temmie in Temmie Village
- Get the Instant Noodles in Hotland
- Get the Stained Apron and the Burnt Pan and buy a Hot Dog...? from Sans in Hotland
- Slide the Hot Dog...? under the rightmost door in MTT Resort to get the Hush Puppy
- Buy the Face Steak from Burgerpants and the Empty Gun, the Cowboy Hat, and the Mystery Key from Bratty and Catty
- Pick up the Glamburger and the 100G in the trash cans in the CORE
- Go back to Temmie and sell everything you have EXCEPT for the Mystery Key
- STOP, DO NOT FIGHT METTATON

Step 6: Little Details
This section is for really small things that you can do in the game that could be considered to be counted as part of 100%.

1. This first one is really simple. Back in Snowdin where you fought the Greater Dog, there are a bunch of snow poffs. If you check all of them, you are awarded 30G. You can only do this once, however.

2. Next, there's Heats Flamesman. In front of the Right Floor 3 elevator, there's this little flame dude just hanging out. Speak to him BEFORE going on your dinner date with Sans, telling you to remember his name, then come back and speak to him again some time later in the game (I'd say after you've gotten the Neutral Pacifist ending). He'll be shocked that you remembered his name and will continue to have that shocked expression until the very end of the game.

Step 7: Mysterious House
With the key you got from Bratty and Catty, head back to Waterfall. Go outside of Napstablook's house and use the key on the house to the right of it. I'll end this section here as I don't want to go into detail about who's house this is. I want you to figure it out on your own ;)

Step 8: temy armor
You may have noticed when you were selling things to Temmie that you can send her off to college for 1000G. If you've been following me up to this point, you should have WAY more than enough to do so. When Temmie returns, she'll sell a new item, Temmie Armor! This is the best defensive gear in the game, so you'll want it by this time.

However, when you see how expensive it is... oh geez... 9999G. That's a bit excessive, huh? Well, actually, it's not as bad as it seems. Go on to the next section to see how this can be gotten with a much less tedious method.

Step 9: Grind for Gold
There are several methods to get enough money to buy Temmie Armor. Though, all of them are very tedious to do and you'll get bored fairly quickly doing them. Here are a few ways to do it:

- Die a total of 25 times. This will bring the cost of the Temmie Armor down to the minimum price of 750G. To do this, go back to the CORE and die that many times.

- Buy as many Cloudy Glasses as you can from Gerson and sell them all to Temmie. You buy them for 30G and sell them for 50G or more, making a 20G+ profit.

- Make a bunch of Dog Residue and sell all but one of them to Temmie so you can do it again.

- Go to the CORE and keep sparing enemies over and over again.

- Keep sinking the snowball into the hole at the Snowdin Ball Game. Added by Grazer.

- In Waterfall, after the first chase with Undyne near the dock, some time later in the game (I'm not entirely sure when), there's this... thing that wants you to ride its face for 3G. No, you don't pay 3G, you gain 3G. It's kinda weird, but hey! Free money for fast travel! Added by Netto Takashi.

There may be other methods, but these are the ones I know of for now. Message me or comment somewhere if you know of another method!

Step 10: Sans' Room and The Workshop
Now that you have your Temmie Armor, fight Mettaton EX and get to Sans. After he tells you his speech, close out your game and open it back up. Go back to him and skip through his speech once again, but this time, he'll notice that something about you is a bit off, as if he's told you this before. To compensate, he'll tell you a secret password. After this, close out your game again. Open it back up, get to Sans, and tell him that password. With this, he tells you another password. Close out the game for the last time, open it back up, and tell him the other secret password. With this, he gives you the key to his room.

Head ALL THE WAY BACK to Snowdin and go to Papyrus and Sans' house. Go to Sans' room and unlock the door. Once inside, wait for the lights to turn on and search the drawer for another key. Head out of the house and go behind it on the left side. You'll find a secret door there! Unlock the door with the key and explore the room. There's nothing in here to take note of for 100%, but it's still cool to see what's in there.

Step 11: Your greatest challenge
After unlocking Sans' room, proceed with the True Pacifist route as usual. Get to the very end of the game and sit through the credits, seeing all of the monsters with yellow text pass by!

Now... for your greatest challenge in the game...

After the credits roll, you'll be brought to a screen where the Special Credits will roll.

Well, not necessarily roll. They moreso COME RIGHT AFTER YOU AT FULL FORCE.

Your last challenge of your 100% completed file of Undertale is to dodge all of the names in the Special Credits. And I mean ALL of them.

I need to be completely honest with all of you. This, in my opinion, is the hardest thing to do in the game. Even harder than the Sans fight. It took me 9 tries to beat Sans. It took me 11 to do this.

Oh, and do you know what makes this excruciatingly frustrating? If you touch ONE name, you have to start the whole thing over again. That means closing out your game, reopening it, and sit through the ENTIRE ENDING CUTSCENE AND THE CREDITS.


I cannot express how hard and frustrating this is. HOWEVER, if you DO end up doing it, you'll get a message that says: "Incredible work. Somewhere, felt a door opening...!" What door could they be speaking of, you may ask? Well...

When the "The End" screen appears, close out the game and reload it. Head back to Snowdin and head to the area where you fought the Gyftrot, but this time, keep heading west. You'll come up to an opening in the side of a mountain. Head inside, and you'll see another opening at the end of the hall. Head on inside and...

Heh...
Step 12: You did it!
CONGRATURATION! You've (possibly) gotten a 100% completed file of Undertale! At least, MY definition of a 100%-ed file.

If there's anything else that needs to be added, feel free to mesage me about it! With a game like this, it's quite difficult to know what qualifies as 100%, since the game never tells you. This is as much as I know of for now.

Once again, if you ARE planning to message me or comment on what needs to be added, ask yourself: Does it have any affect on your Undertale file at all until the very end of the True Pacifist route?

With that said, thank you for reading!

40 comentários
Kaifireskate 16 de mar. às 15:33 
damn i just came to check some undertale post after finishing the game...welp anyways i'm not going to reset the world it would be stupid.
Jkmckay21 16 de mar. às 14:00 
...:btd6stunned:
Jkmckay21 16 de mar. às 13:59 
What about hard mode?
Jkmckay21 16 de mar. às 13:59 
Hard mode.
Luke_SkyWagon 13 dez. 2024 às 9:43 
Oh, and in Toriel's House, the "water sausages" dialogue changes if you read the encyclopedia, does that count? Sorry, I forgot about it until now and I can't edit my previous comment. :celeste_strawberry:
Luke_SkyWagon 13 dez. 2024 às 8:56 
I'm thinking about Burgerpants, and how his dialogue permanently changes if you try to talk to him
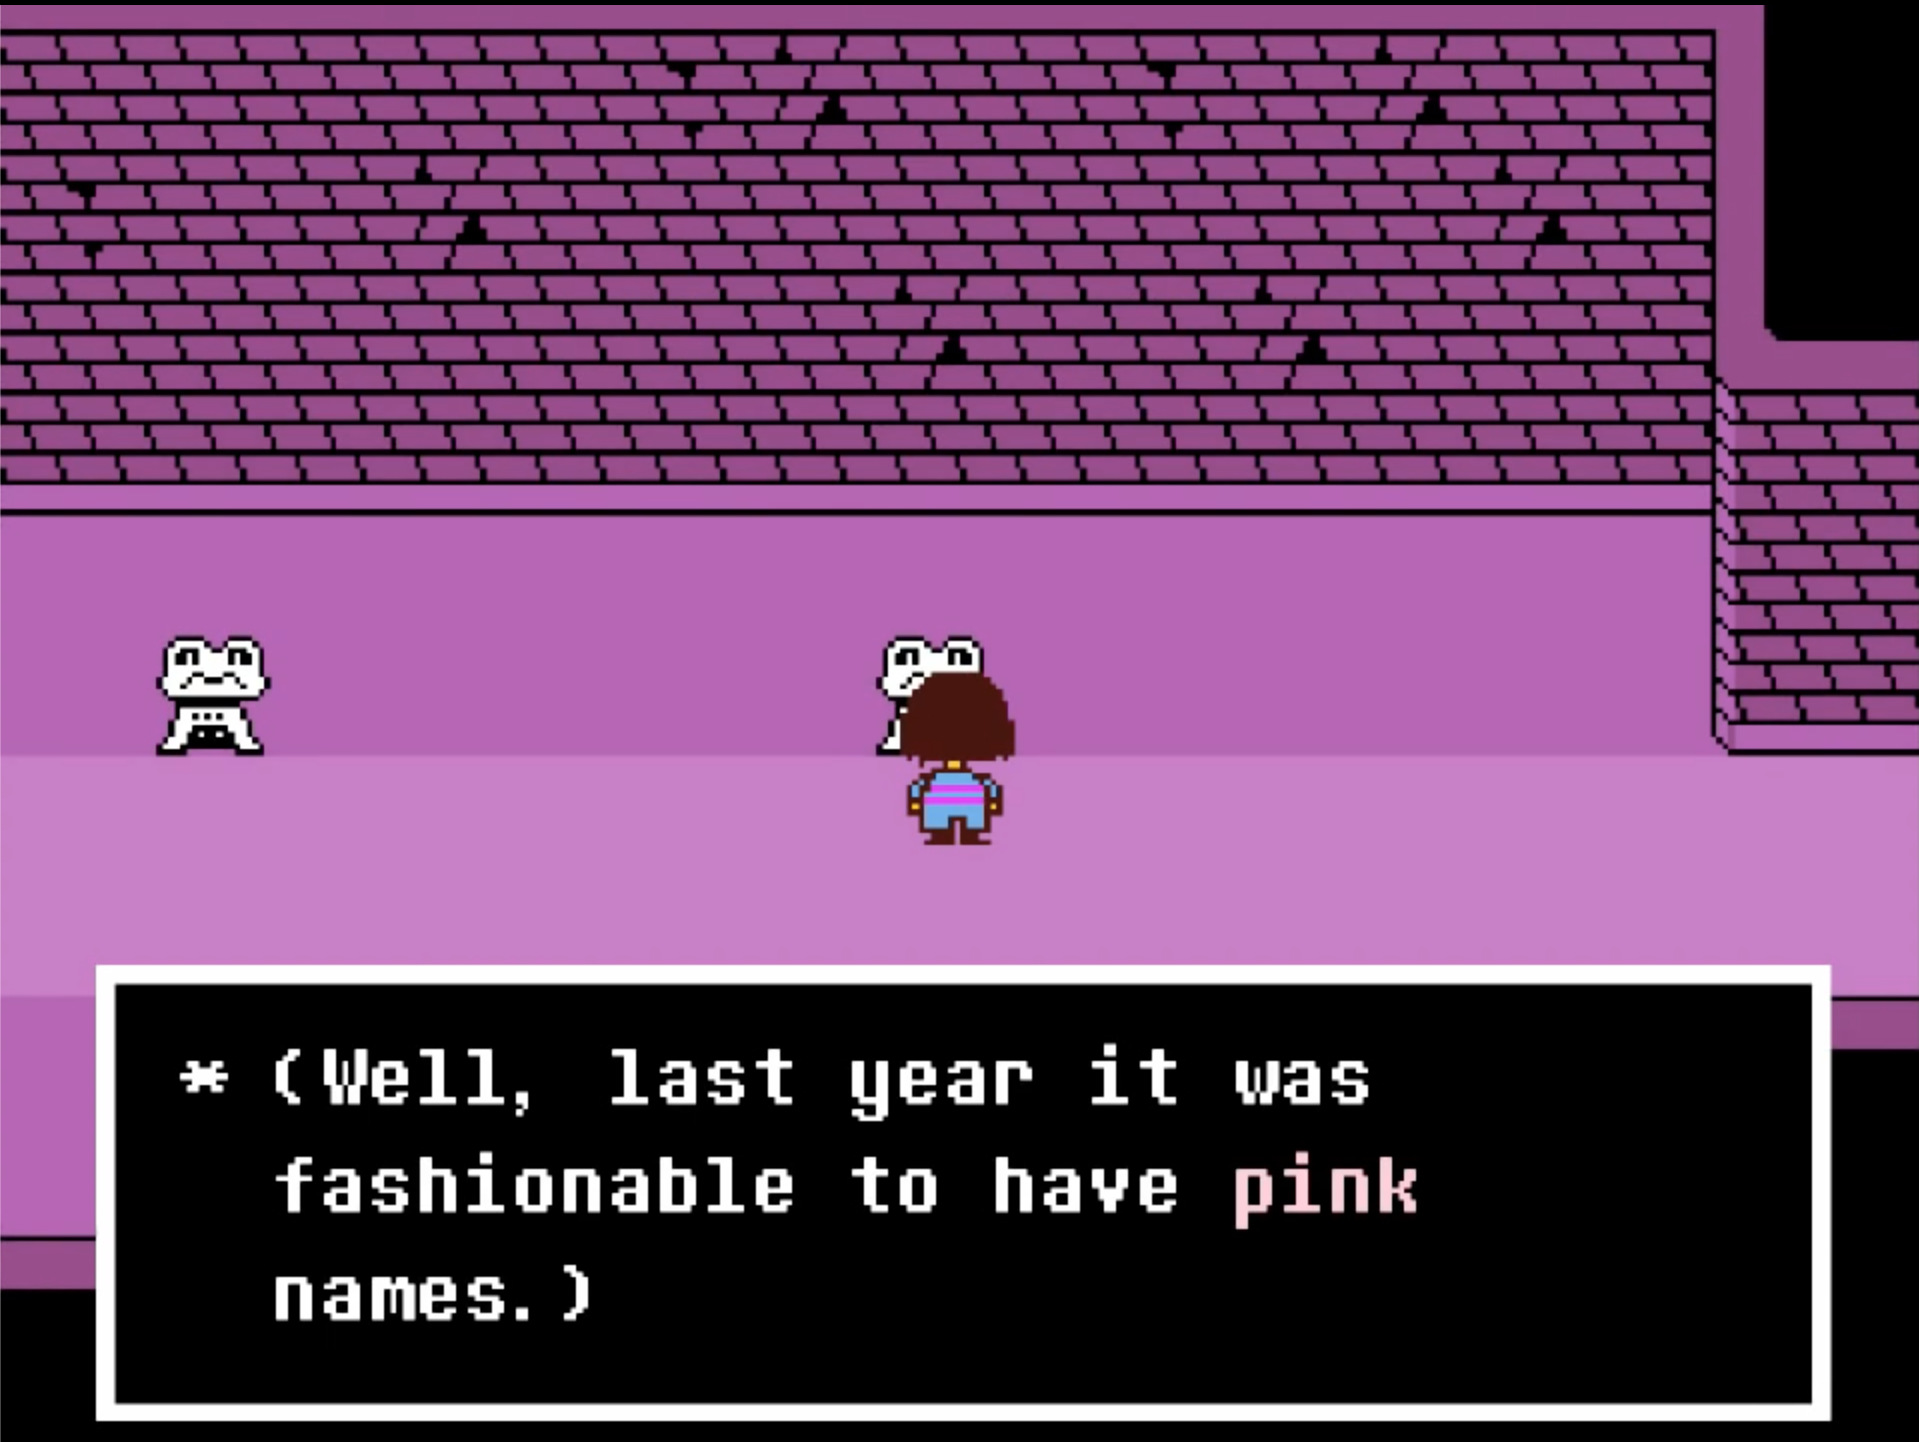
Are there any other NPC dialogue changes like that? And Gerson giving you the King Fluffybuns story during the epilogue, that's changed dialogue too. Do these count for 100%? :celeste_strawberry:
Nezuko-Chan 24 nov. 2024 às 10:47 
"the sans fight took me 9 tries" IM SORRY, 9? I HAVE BEEN TRYING FOR 5 MONTHS
EeveeMaster8540 2 set. 2024 às 8:28 
Discount Temmie Flakes can be sold for the same amount as normal Flakes
MugMug 27 jan. 2024 às 16:18 
just remove system_information_963 if you want regular endings back
Natty  [autor] 29 dez. 2023 às 19:53 
@Bonnie214owa

Yes, we want that with this run.