FINAL FANTASY X/X-2 HD Remaster

FINAL FANTASY X/X-2 HD Remaster

87 avaliações
Starting out with the Sphere Grid
Por GaidinBDJ
This guide covers the very basics of the Final Fantasy X's Sphere Grid system. It's not an in-depth guide or intended for long-term strategies. Just a little bit to get you started.
4
   
Premiar
Adic. a Favoritos
Nos Favoritos
Desfavoritar
In 50 Words
Use the Standard Grid. Do each character’s “main” sphere first. Don’t skip nodes; wait until you have the correct sphere. For early grinding, save an Ability Sphere for Wakka’s “Extract Ability.” Use your first two L.1 Key Spheres to get Kimahri into Rikku’s sphere and get Steal and Use.
Introduction
This guide isn't supposed to an in-depth guide to the Grid Sphere system. It's meant for you to read in a few minutes when you're first starting out so you can hit the ground running. I'll also try to hit a few points so you can avoid early mistakes and get a jump-start on the awesome Grid Sphere system.

At first glance, the sphere grid in Final Fantasy X can be a bit intimidating to look at for a first-time player. Once you take a look at how it works, it gets much easier to understand and you may even come to see it (like I do) as one of the coolest leveling systems in the Final Fantasy series. While the standard grid starts characters in particular areas focused on the traditional classes/jobs of the Final Fantasy series you can eventually take any character anywhere (or any character everywhere or even every character everywhere). It is completely possible (although time-consuming) to have every character learn every skill and spell on the Grid Sphere.

For your first playthrough, I’d highly recommend playing the “Standard” sphere grid as opposed to the “Expert” grid. Standard starts each character in their own area of the grid and makes their initial progression somewhat linear so they get a set of skills and stats geared toward specific roles. Expert starts all the characters in more neutral positions so you can take any character in any direction you choose for each one right off the bat.

The Grid Sphere is massive. The HD Remastered edition (which you're likely playing if you're reading this) has 860 nodes.
Moving Around the Grid
Instead of experience points and levels, in FFX you get AP and Sphere Levels which allow you to travel around the grid. Each sphere level you gain lets you move one step into an untraversed area or up to four steps “backwards” through areas you’ve already traversed. Later, you’ll get spheres which let a character jump around the grid to reach more distant areas. Each character moves around the grid independantly.

When you're looking at the grid, paths that the character has already traveled will show a colored highlight correspond to the color assigned to that character.

Every character who performs a combat action during a fight (swapping in/out doesn’t count as an action so just use one of their buffs or the Defend action) and isn’t KOed or petrified at the end will get AP.
Nodes
Nodes are the name for each little circle on the Sphere Grid.

There are several different kinds of nodes:
  • Empty Nodes - These start out as just stepping stones you need to pass over. They still use a S.Lv to move to them. Later, you’ll be able to place your own nodes at these locations and activate them just like the pre-existing ones.
  • Stat Nodes - When these are activated by a character, they give that character increases in their stats (HP, MP, strength, agility, magic power, etc.). They’re activated by using red spheres which will start to drop after combat early on.
  • Ability Nodes - These nodes activate powers and spells for the character. These nodes are activated by ability spheres.
  • Lock Nodes - These nodes (black and marked with Lv.1, Lv.2, Lv.3, or Lv.4) require specific spheres which unlock that path. Once a lock is removed, any character can pass through that node.

You can activate any node the character is standing at or any node immediately connected to it. When you’re starting out, you should activate every node you can reach before moving on so you don’t have to waste sphere levels moving backwards to pick them up.


In this picture, you can see the node Tidus is currenly at, the activated nodes and paths "behind" him highlighted in blue, and the grey path "ahead" of him. Despite the fact Tidus hasn't traveled the "northwest" path, he can still reach the next node to activate it.

You may also notice small colored diamonds around the nodes. Each character has a color assigned to them and the diamond shows which character has activated the node. There are special spheres you get later that let another character activate the same node.
Spheres
While you’re starting out, you’ll likely only run into two types of spheres: Red and Key. Red Spheres will start to drop fairly early but you don't come across Key Spheres until Mi'ihen Highroad (which comes right after Yuna)

Red spheres are used to unlock nodes for abilities and stats. During the beginning part of the game, you’ll have Ability Spheres (used for all abilities) as well as three types of stat spheres: Power Spheres, Speed Spheres, and Mana Spheres. Later, you’ll start to find red Fortune Spheres which unlock Luck Nodes.

Power Spheres are used for HP, Defense, and Strength nodes. Mana Spheres are used for Magic Power, Magic Resistance, and MP nodes. Speed Spheres are used for Agility, Accuracy, and Evasion nodes.

Key spheres are used to open Lock Nodes and come in four levels corresponding to the four levels of Lock Nodes on the Sphere Grid. Once a Lock Node is opened, it’s replaced with an empty node and can be passed by any character.

Later on, you’ll start to get Purple, Yellow, Light Blue, and Clear Spheres. Purple Spheres are used to fill empty nodes with new stat nodes, Light Blue Sphere are used to jump your characters to distant parts of the grid, and Clear Spheres will remove a stat node that you placed. Yellow Spheres allow you to unlock a specific type of node that has been unlocked by a different character.
Roles
On the Standard Grid, characters start out in locations that lend themselves to specific roles.

The general roles for the starting bunch of characters are:
  • Tidus - Melee attacker and temporal mage (haste, slow, etc.)
  • Wakka - Ranged attacker and status debuffer (blind, mute, etc.)
  • Yuna - White mage (healing and protection)
  • Lulu - Black mage (offensive spells)
  • Auron - Anti-armor melee and stat debuffer (strength down, evasion down, etc.)
  • Kimahri - Starts in the center and doesn’t have a dedicated sphere or role.
You’ll get additional characters later on but these are the 6 you’ll have for the first couple hours of gameplay (Auron will come a bit later than the first 5) and while you’re getting your feet wet. While the Standard Grid does enfore their roles through the paths available, you can eventually move them to any role.
Kamahri
Kimahri starts in the middle of the sphere grid and you can take him in any direction. A good recommendation for him is to head into Rikku’s (a thief-type character you’ll get later on) area to pick the Steal and Use powers early. Steal is handy to save gil at the beginning and to pick up items. Use is a very versatile power that lets you use items like grenades and elemental items to inflict damage. It can come in very handy if Lulu or Yuna goes down and/or you need extra elemental damage.

If you want to take Kimahri into a different sphere, Yuna’s will need a Level 2 Key Sphere, Tidus’ will need one L.1, Wakka’s will need two L.1s. Auron’s isn’t easily reachable at the start as you have to pass through Tidus’ or Wakka’s spheres to get to his (you'll need one L.1 and one L.2 in the process unless you have one of the Light Blue Spheres to jump there)
Level 1 Key Spheres
In order to get Kimahri into others' grids, you'll need at least one L.1 Key Sphere. You’ll be able to get these once you reach Mi’ihen Highroad. You’ll get one from talking to a man along the road and the second from Rin at the Travel Agency before the Chocobo Eater fight. You can get two more by sucessfully pushing the Chocobo Eater off the cliff. Alternately, you can start playing blitzball once you reach Mi’ihen Highroad and win Level 1 Key Spheres from that.
Tips
Screwing Up
It's virtually impossible to permanantly screw up a character's progress on the Standard Grid. They'll encounter stat nodes which work with the ability nodes you encounter. Skipping nodes (i.e. passing over nodes without activating them) can really set your character back, though. Don't skip nodes. If you're grinding, there's no harm in storing up S.Lvs to spend later.

Early Grinding
The first place you can really grind is the jungle before Kilika’s temple. You'll have 5 of 7 characters, there’s a save sphere at the entrance that can be used to heal, and plenty of encounters. If you plan to grind here, make sure you hang onto an Ability Sphere long enough to activate Wakka’s Extract Ability skill. Ability spheres don’t drop from these enemies and you can end up stalled if you’re trying to grind up some early abilities. The skill is reachable 11 steps into Wakka’s Standard path. If you already spent your last Ability Sphere, you can still store Sphere Levels for later.


Keep in mind that any grinding you do will mean characters not currently in the party will end up behind all the rest. The characters left behind will earn a bonus when they get AP to help them catch up. For example, if you grind before you get Rikku then, when Rikku joins, she'll get extra AP after any fight she earns AP in to catch her up.

Purple Spheres
You may pick up a Purple Luck Sphere early on. Don’t place this as you’re likely not going to have a Fortune Sphere to activate it meaning you’ll have to backtrack later.

Empty Nodes
On a similar note, don't sweat the empty nodes you'll be filling in later. By the time you start to get Purple Spheres to fill in those nodes, you'll have more options for gaining AP quickly or jumping around the grid.

Yellow Spheres
Eventually, you'll start to find Yellow Spheres. Yellow Spheres come in six types: Attribute, Special, Skill, White Magic, Black Magic, and Special. Each corresponds to a specific type of node (except Master which can be used on any node). Yellow Spheres can be used by a character to activate any node of the appropriate type anywhere on the grid provided another character has previously activated it.

During certain points in the story, you won't have some characters in the party at and their activated nodes will be unavailable for activation using Yellow Spheres. For example, at one point you'll obtain a White Magic Sphere when Yuna and Kamahri are the only party members. You couldn't use it to teach Yuna any of Tidus' temporal spells until your party includes him again.
FAQs
Ok, most of these are once-asked questions but "OAQ" doesn't have the same ring to it.

1. Can you start out with the Expert Grid?
Yep. Each character will start out in the center of the grid and "facing" their rough default path. You can easily rearrange them by moving them around that center grid and head them down the path you want them on. There's not much of a benefit to it unless you have specific goals in mind which you'd likely have from a previous playthrough and probably wouldn't be reading this guide.

1a. How hard is it? (to start on Expert)
If you've played Final Fantasy games before (or fantasy RPGs in general), you'll likely be familar with how you should proceed. Magic power for mages and healers, strength and accuracy for melee-type, and so on. Frankly, if you're reading this, you're probably not the Expert Grid-type player.

2. How far should I go when grinding?
Having Lulu into her -ara sphere is helpful during the Chocobo Eater fight (so grind it on the Mi'ihen Highroad). Getting Yuna as far as having "Life" is really helpful but, at minium, she should have Esuna before you leave Kilika.

3. Do I have to send Kimahri to get Steal/Use? There's a lot of empty nodes on the way!
Nope. You can send Kimahri into any path you want. Auron's isn't really feasible since it'll take time to get through Tidus' and Wakka's spheres but the rest are viable. Steal and Use are really handy to have though. Yep, you'll "waste" 6 S.Lvs getting there but Steal and Use are really nice until Rikku shows up.

4. Which party member should I focus on when leveling up?
Lulu is a big one. I'd make sure she gets AP in every single possible fight. FFX favors technical fights more than previous Final Fantasy games and elemental weaknesses are one of the most commonly-encountered technical aspects.

Wakka is another one to work on for the same reason (technical fights) since he can apply Silence and Dark which mitigate magic and melee attacks, respectively. Wakka also gets nice accuracy boosts which help since high evasion is another technical aspect you run into fairly often. Wakka also does incredible melee damage and can hit ground and Aerial (yet another technical mechanic) equally well. His Overdrive does elemental damage (although it's a slot-style mechanic which means you need fast-twitch skills to get a specific desired element) so he's got pretty much everything covered.

Yuna gets elemental protection spells (the Nul-X spells) which will come in very handy in certain fights. Yuna is also good to level up because her Aeons inherit her magic power stat and, level for level, her Aeons will hit harder with magic than Lulu will. Yuna having a lot of MP is also good because she can be used between fights to heal the rest of the party when you don't want to use items and don't have a close Save Sphere.

If you only pick three, go with these three (Lulu, Wakka, and Yuna)

If you're playing the HD Remaster version and use the "Max Gil" boost, get Kamahri or Rikku the "Spare Change" ability. If there's a boss fight you have problems with or a tough enemy, Spare Change is an ace in the hole that can hit for 9,999 damage if you spend 100k gil.

5. How can I earn AP faster?
Early on, there's no way to maximize AP. It's just a grind. If you want your whole party up, cycle through all of them each fight as the AP you get isn't divided up; there's just AP for the fight and all party members who participated get the full amount. Later, you'll be able to customize weapons to add skills that will help. There's better guides out there for mid/late-game AP farming but if you don't want to read them, just customize weapons with the following (in order): Double/Triple AP, Overdrive -> AP, and Double/Triple Overdrive

How much AP do I need per level? Does it always get higher?
For those that care, the formula is 5*(Total Sphere Levels + 1) + ((Total Sphere Level^3) / 50) until you reach 101 Sphere Levels. Then it's a flat 22,000 per sphere level. Without any special considerations (searching out high AP enemies or weapon customization) by mid-to-late-game you'll be able to grind at a rate of a Sphere Level every 3-5 fights or so. If you add all the AP weapon customization and search out the right enemies, you can get multiple Sphere Levels per fight. There's other guides that have in-depth instructions for maximizing AP gain.

Who do I focus on if I don't want to get into all the gritty details?
Lulu for the elemental damage, Yuna for healing (and use White/Black Magic Spheres to pick up -aga temporal and elemental spells), and Wakka for melee damage and status infliction. Keep in mind, during certain story segments you won't have your full party compliment so if you focus only on these characters, you may run into issues with the members you have being underpowered. At those points, there are always random battles you can use to level-up your off characters.

Having piercing attacks for armored enemies is only a concern early in the game. It becomes irrelevant relatively quickly.
Contact
Feedback is appreciated; especially typo corrections. I keep reading this over and over and find typo every single time. Send me a message through Steam or e-mail me at gaidinbdj@gmail.com. If you e-mail me, include Sphere Grid in the subject line for easy sorting.

I will also shamelessly accept friend requests so you can give me games. :) (Not that I don't have *way* to much of a backlog already). If you're in or visiting Vegas, beer is also acceptable.
7 comentários
LtdCloud 15 de abr. às 18:49 
Great guide covering the basics! Thanks
Operative 15 mar. 2024 às 1:23 
Hey there! About the Expert Sphere Grid, the number of spheres differ from the PS2 versions.

You will hear a lot of speculation about not being able to obtain max stats in FFX with the Expert sphere grid (707 nodes). However, there are 720 in the HD version and I wrote a guide explaining how to do that with clear spheres if you want perfect stats with both HP and Damage limit breaks.

Great guide for the normal mode! I will probably update my guide to include more information about sphere costs and locations, key nodes and locations, etc. At some point in the future.
Ace 31 dez. 2020 às 9:31 
Another reason to get Steal for Kimahri is that you can Steal A LOT of Lv 3 Key Spheres from Biran and Yenke. Very usefull.
kats89 28 jun. 2016 às 19:11 
I know that in the original you were better off playing Standard mode (even as an expert) because the standard mode had more nodes to use. Do you know if that is still the case in the HD remake? I saw that you mentioned the 800+ nodes but was unsure if that's once again different from Expert mode. (To me I think they should be equal- otherwise it feels like you're rewarded for playing standard mode- and the difference in the Beginner/Expert grid in the original FFX was noticable when trying to fight the dark aeons) .
Snoopuru 14 jun. 2016 às 15:57 
"(although it's a slot-style mechanic which means you need fast-twitch skills to get a specific desired element)"

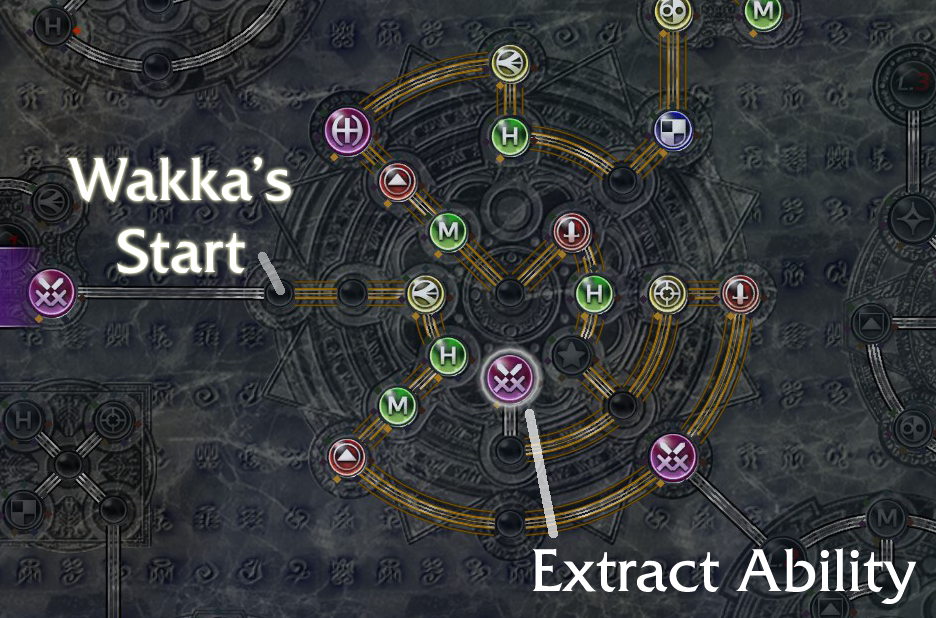
I just want to clarify that all slot-overdrives for Wakka are set in stone, and are predictable. As soon as the slot under the desired slot passes below the line for the middle, you can press confirm and get it. On a side note, you should also probably add in that for the post-game, when you're maxxing stats, the Expert Sphere Grid has less nodes than the Standard Sphere Grid.
BananaPancake 25 mai. 2016 às 14:26 
Good write up, I started with the Expert Grid because I played the game whe it was released. Good to know I can't really screw up.
Hala 23 mai. 2016 às 9:36 
This is a great guide, thanks! Not in Vegas, sadly. I'm in Yorkshire, UK. I can have a nice Yorkshire beer on your behalf :) (not the best idea, I know).