Steam Controller
592 оценки
The Steam Controller 101 guide
От Gormash
So you've gotten your steam controller and confusion sets in. How do you use it? Can I use it outside of steam? What does all the settings mean?
This guide is an attempt to put your mind at rest and help you make the most of your controller.

Newest update: Touch Menu Config - Added info on custom icons (Dec 2, 2015)
5
2
   
Награда
Добавяне към любими
В любими
Премахване от любими
Welcome
WELCOME

So, you've gotten yourself a steam controller? Congrats! It's a masterfully crafted piece of hardware that really can change the way you play games.
But it can be a really intimidating thing to configure correctly, mainly because Valve has forgotten to include any useful form of instructions with it. That's what I'm here to help with. Hopefully I can shed some light on what all those menus and sliders do, and how you can make this into something that can come close to rivaling a mouse/keyboard combo.

But first a disclaimer:
All of what I write here is figured out through trial and error, simply by playing around with every setting and dial. This might mean that I unintentionally write something that's not correct. If so I apologize and beg that you inform me of it so I can update this guide.
I also want it known that while I've tried the controller with a wide variety of games and genres, I have probably not played [insert obscure game title] and don't know offhand what the best setting for that game is.
And finally, a lot of what I say about optimal settings and such is personal preferences. You will likely have differing tastes and will need to tweak your settings accordingly.

By the way, I'd appreciate comments about this guide. Let me know if there's something I should change or if I've written something wrong. Oh, and don't forget to rate!
Abrevations
As with regular game pads there's a lot of buttons to keep track of, so I'm going to present you with a list of all the controls on the controller as well as a few common abbreviation I like to use, just to keep things more organized as we dive into the nitty gritty details further on. Mind you, some of these might not be official call signs, but they work for me.

BPM – Big Picture Mode.
SO – Steam Overlay. The screen/menu that pops up when you press the Steam Button. From here you can access the configuration menu that we'll spend the majority of this guide on.

SB – Steam Button. The big round one in the middle of the controller.
START – The right pointing button to the right of the SB.
BACK – The left pointing button to the left of the SB.

STICK – The analog stick. Note that you can press it down so it can act as a button as well.
FACE BUTTONS – The four buttons marked A, B, X and Y.

LPT – Left TrackPad. The big round shape on the left with an indentated cross on it.
RTP – Right TrackPad. The big round shape on the right with a smooth surface.

LB – Left Bumper. Also known as Left Shoulder Button.
RB – Right Bumper. Also known as Right Shoulder Button.

LT – Left Trigger. The button below the LB.
RT – Right Trigger. The button below the RB.

LG – Left Grip. The button on the left underside of the controller.
RG – Right Grip. The button on the right underside of the controller.

GYRO – The gyroscopic motion detector thingies inside the controller.
Hardwired Binds
As far as I've managed to find out there's two button combinations that's hardwired into the controller that you can NOT change in any way. They are:

SB + RT
This will take a screenshot of the screen.

SB + BACK
This will call up and remove the virtual keyboard as long as there's a text-entry area for you to type something. If you don't have such an area active this combo will freeze the controller without calling up the keyboard until you press the same combo again to get rid of the keyboard that isn't there. Yup, a bug. ;)
Also note that there is no way to press any other keys to call up the keyboard, so if you want to emulate i.e. pressing ENTER while playing Guild Wars 2 to start typing you must THEN open the keyboard manually, and then ENTER again to send the text. Hopefully something that can be fixed in a future firmware update.

While on the subject of virtual keyboard, keep in mind that this ONLY work within BPM. If you minimize BPM and try to use it nothing will happen.
What Are Mode Shifts?
It might seem a bit premature to start with this as it is a slightly advanced option, but it is useful to know what it is as it opens up a lot of potential for the controller.
In short, mode shifting is changing the behavior of a button by holding down another button. An example would be having the X button fire off a gun, but if you hold down LG and press X it would reload the gun instead. Once you let go of the LG the button would return to its original function.

We'll go further into how to do this as well as a few examples of why you might want to later in the guide, but for now I just want you to know it is possible, and that there are a few buttons that you can NOT modeshift like this.
These buttons are LB, RB, LG, RG, BACK and START.
Setting Up Your Steam Controller
The first thing you aught to do is setting up your steam controller. Start by plugging the dongle that came with the controller into an available USB socket, then fire up steam and launch into Big Picture Mode. You can do this by clicking the little controller symbol in the top right of the steam window.


Once BPM is up and ready you should start up your steam controller by pressing the steam button (I assume you've already inserted the batteries... Duh!) and shortly after you should see a prompt about the controller being detected and you'll face a window asking you to update the firmware for the controller. Do so, as it allows you to maximize the usefulness of it.

But what the hell? I don't get any prompts of updates?
Don't worry, this has happened to a few people, me included. A reboot of your computer should fix that problem. I had to do so, and the second time everything worked like intended.

Now that the controller is connected and active it is time to check out some settings that might be of use. These are not vital in any way, but I recommend going through it anyway.
The settings screen can be accessed by selecting the gear icon in the upper right of your BPM window.


I'm not sure what this part of the interface is officially called, but I've dubbed it the BPM taskbar. Here you can access info on downloads and notifications, as well as check out settings and exit BPM.
Once you select the gear icon you'll see the settings screen.
BPM Settings


The first thing you should do here is check out the SYSTEM settings on the far right.
This window will allow you to opt into the BPM beta program, giving your controller more options to experiment with.
You can also use this window to manually check for updates.


Your next stop should be the INTERFACE window under the DISPLAY heading.
The magic trick here is to check off the option to use BPM in windowed mode. I personally loathed BPM until I found out it was possible to run windowed. Also, running it windowed seems to have removed the massive lag that I used to experience with BPM.
Do note that this option is only available if you've opted into the beta feature shown above.


Everything else in here is up to personal preference.

After setting BPM to windowed mode check out the RESOLUTION window. I have a 1080p monitor and have set the resolution in BPM to 720p. This allows it to be useful to me while also easy to minimize and do other thing. What you chose is a matter of taste. Try it out and figure out what works best for you.
Non-Steam Games
Most people have games outside of their steam library. It IS possible to play games not found on steam with the controller, but they must be added to your steam library first.

You can do so either in desktop mode (regular old steam) or BPM.

To do it in desktop mode you simply click Games --> Add a Non-Steam Game to My Library...
A window labeled «Add a game» will pop up and scan your drives for programs. Locate the games you want to import and click the checkmarks next to them. You can import several games at the same time. Then press the ADD SELECTED PROGRAMS.
If your game isn't located in the list you can click the Browse button and manually select it.

To add games through BPM you must enter the settings screen and select the ADD LIBRARY SHORTCUT located to the far right. This will let you browse all programs just as on desktop mode, but as icons instead of a list. Select a game to add it.

I prefer adding shortcuts in desktop mode for two reasons.
First; You can add multiple games at once. In BPM you can only add one and one game at a time.
Second; You don't have a BROWSE option in BPM.

Your game(s) should now be located in your steam library and ready to go.

Most GoG games work just fine, as do Origin games. Some people have mentioned problems with Uplay games (big shock there) that have been solved by adding the Uplay launcher to your steam library and launch them from there. Emulators such at ePSXe and Dolphin have also been reported to work fine.
Despite this, keep in mind that there MAY be some few games that don't play well with steam. I don't have a list, unfortunately, so it's all trial and error. But a very large majority of games aught to run fine through steam.
DosBox Settings
DosBox games need some tweaks to work correctly.

First add the game to your library as mentioned above.
Use your file management program to locate the directory the game is installed to.
Find the file that start the game (usually called LAUNCH [name of game] if it's from GOG).
Right click and select PROPERTIES.


Select everything in the TARGET box and copy it (CTRL+C).
Go back to steam and BPM and select the game in your library.
Select MANAGE GAME and then LAUNCH OPTIONS.
Paste the string from the DosBox properties in here (CTRL+V).


The game should now start up just fine. You might have to press ALT+ENTER to go full screen, though.

Beware that DosBox does not play nice with the steam overlay, and many games does not allow you to add custom bindings for the controller. This can be partially mitigated by changing the bindings for desktop use (found in the settings window on the CONTROLLER CONFIGURATIONS page). Some few games work fine, but far from all. Just a heads up...
Saving Your Settings
For each game you use with the steam controller the computer creates a configuration file, and if you save them manually you'll have multiple configuration files.
Steam saves your settings as a VDF file on your computer, with the same filename as you give the setting. If you don't save it, steam will save the settings in a file named $$$autosave.vdf with one such file for each game. So make it a habit to save the settings manually and give it a name that you'll easily remember. That will make it easier for you to find the file in question if you ever should need it.

Why would you need it? Two reasons.

The first is related to non-steam games. For some reason you can't save these configs publicly, so you can't share them with other people through steam. If you want to share it you will need to find the file, share it with other players through other means (more on this below), and then they can copy it onto their computer.

The second reason is that if you create a kick-ass config that you want to be the basis of other configs you could find the file and copy it into another folder so that it will show up as a template for future use. Very useful if you have several similar games with just minor differences in button layout.

Your config setting is stored at this path:
steam\userdata\<account number>\241100\remote\controller_config\<app-id>


The account number is different for each account, as are the app-id's. You'll have to dig through them to find the file in question, thus the importance of proper naming when saving. Most steam games will have an app-id of 4 to 6 numbers.
Non-steam games don't look so neat, though. They tend to have gibberish id's about 40 characters long, looking like hexadecimal code. My Guild Wars 2 folder is named «78e82022d4dbb62edd7a1fda0aa633f5317d8880», which doesn't really roll off the tongue.

My best tip for figuring out which game is in which folder is to go to your library, select the game you want and select MANAGE GAME, then CONFIGURE CONTROLLER. Save your settings (doesn't matter what the bindings are) and set the savename to the name of the game. That way, when you open a folder you'll see the name of the game inside.


If you want to set a config as a template, locate it as shown above. Copy the file,then paste it into:
steam\controller_base\template


From now on that setting will be available as a template, along with the four default templates.
Sharing Non-Steam Bindings
Once you've located a binding you want to share head over to www . steamcontrollerdb . com (remove the spaces) and create an account (it's free). Select ADD CONFIG and write a description (it has a dumbed down version of HTML going, so add <br> at the end of sentences to do a line break) and select the file for the game you want to share.
And for the love of [insert deity], please write a description explaining how your bindingswork. Figuring it out by looking at the code inside your file is a major drag, andmost people won' bother downloading it.

If you want to see what bindings other people have made you don't need an account. Just search through the games and pick a setup you'd like to try, and download it.
Locate the setting folder for your game (see above) and copy the file in here. Note that you MUST have started the game at least once or created a controller config first, or there won't be a folder to drop the file into.
The Config Menu
Below you can see a picture of the config menu. The various button configuration will differ from this based on the game and settings your are working with, but the basic layout should be identical.


Along the bottom you see block of info on the two trackpads, the analog stick and the face buttons. Just above them is the info on the gyroscope. Along the left (from top to bottom) is the left trigger, bumper, grip and the back button, and on the right you have the right trigger, bumper, grip and start button.

Use the stick to move between the various blocks of info, and press the A button to configure them.
Press the X button to open a menu to download templates of community bindings.
Press the Y button to save your settings, either privately or publicly.
And finally, press the B button to get out of the config menu.
Button Config
So, let us get started.
And as with most things it is best to start with baby steps, so we begin with the things easiest to play around with, the buttons that can't be mode shifted. These would be the LB, RB, LG, RG, BACK and START buttons. All of these function in exactly the same way, so I bunch them all together and describe them as one. For this part of the guide I'll use the left bumper (LB) as an example, but the process is the same for the other buttons as well.

Once you've selected the button you want to configure you'll see a screen like this:


Above the keyboard representation you'll see a text entry field where you can add a description to your keybinding. What you write here is what will be displayed on the main config window. If you leave it blank the selected hotkey will be displayed instead.

Once you've written a description use the stick to select the key, button or whatever you want the LB associated with, and press the A button.
If you want a multi-combo button press like SHIFT + V or something similar just press Y first and then select all the keys you want. Be aware that if you select wrong you must press Y again to disable multi-button selection and start over again.

If you want to delete any keybinding from the LB button press the X button and confirm.
If you plan on using a button as a modeshifter and nothing else it may be for the best to wipe away any bindings.
Trigger Config
Both triggers function in the same way, so I'll just go over the right trigger for this part.

The steam controller triggers come with several functions that make customizing them a dream. They both have two stages of presses, called a Full Pull Action and a Soft Pull Action. The Soft Pull is when you just lightly squeeze the trigger a little. Push it a little more and you'll feel a “click”, which is the Full Pull. And if you pull the trigger fast and hard you'll go straight to the Full Pull without activating the Soft Pull.
Taking advantage of this you can bind several actions to a single trigger instead of spreading it across multiple controls. In the panel below you can see my configuration for Borderlands 2 where I bound the Soft Pull to enable my iron sights/aiming, while the Full Pull shoots. This frees up my left trigger to do other tasks.


The triggers can also be configured to detect analog activation, useful for driving games where you control acceleration by how hard you pull on the trigger.
So, enough chit chat... Let's look at the settings themselves.

Full Pull Action
The keybind that will be activated when you fully pull the trigger.

Soft Pull Action
The keybind that will be activated when you partially pull the trigger.

Soft Pull Trigger Style
This changes how responsive the trigger is when changing between the Soft and Full pulls. There are 5 choices here, ranged from the least to the most responsive: Simple Threshold, Relaxed Hip Fire, Normal Hip Fire, Aggressive Hip Fire and Hair Trigger.
For me the two first settings were best, with the latter three being too sensitive, but this is just a matter of perspective. Try them out and decide on the one that feel best for you.

Soft Pull Point
How far in you need to pull the trigger before the Full Pull action activates. The further to the left you have the slider, the further you must pull before you Full Pull. Set it to the far right and you hardly need to pull the trigger at all to go from Soft to Full Pull.

Trigger Analog Output
Enable or disable analog output on the triggers. If you want a trigger that is either off or on turn this setting Off.

Trigger Range Start
Allow you to fine tune how far you must pull the trigger before analog output start to register.

Trigger Range End
Let you change how far in the trigger allows to move to input analog output. Slider all to the right give you the full range.

Trigger Response Curve
Determine how the value from an analog trigger output is interpreted.
Linear, which will most likely suit all but the most special needs, output a smooth and regular value. That means that each increment of pressing the trigger have the same value as the last one. Changing to one other the other settings will change it so the trigger will start outputting slowly when you softly press and higher the harder it is triggered, or visa verse.
This is an advanced option that I've yet to find a use for, and that I suggest you leave alone until you're more familiar with the controller.

Mode Shifting
Will be explained in a later section of the guide.

Haptic Intensity
How much of a rumble-like feedback you get from pulling the trigger.

Hold To Repeat (Turbo)
An On or Off toggle to determine if an action is repeated while holding the trigger down.

Repeat Interval
Determine the time between each action when the trigger is set to repeat. To the left is slower, while sliding to the right means faster repeats.
About Trackpads, Stick and Face Button Config
While these controls might seem very different, they share many of the same controls. For instance, both trackpads, the stick and the buttons can be used as a Dpad or buttons. Heck, you could even make the face buttons emulate a (really crappy) mouse.
Not only that, but the interface for changing around these settings are identical.

To avoid repeating myself too much I'll make a different section for each of the different modes, noting under each if that mode is incompatible with any of the various inputs. Also, despite having the indented cross on the face the left trackpad work just like the right one does. Many people assume it can only work as a Dpad, but technically speaking they are identical.

On each of the config panels the first option, in the upper left, will be Style of Input. This is the option that changes the way that control behaves. Changing this option will change all other options on the config panel, sometimes drastically so.

Each of the following sections will look at one of these Styles of Input and go more in detail on what it does and how it works.
The only mode that won't get it's own section is None. Selecting this option simply disables that part of the controller. No need to elaborate on that.
Touch Menu Config
As control methods go the Touch Menu is a real oddball, but it is as brilliant and useful as it is original. This input style can only be used with the two trackpads.

Placing your finger on the trackpad will display a grid of buttons on the screen, with your finger highlighted by a blue dot. As you move your finger around the trackpad the dot moves along. Place it on one of the squares in the grid and press down to select that input.


Here you can see a 12 button grid I made for displaying emotes in Diablo III. Sorry for the low quality, but the Touch Menu is part of the steam overlay and doesn't show up in screenshots, so I had to make do with a low quality camera shot of my screen.

By default the buttons in the grid will be blank squares with the keybind assigned to it displayed, but with a little effort you can insert icons of various colors and shapes. You can also change the size, opacity and position of the menu. Each Touch Menu can display either 2, 4, 7, 9, 12 or 16 buttons. Using a mode shift this can effectively give you 32 inputs on a single trackpads, or 64 across both of them!

So, how does this work?
Let's take a look at the config window...


Touch Menu Button Count
Here you select how many buttons you want to display. As mentioned you can have either 2, 4, 7, 9, 12 or 16 buttons. They will show in a grid pattern, with the exception of 7. Here you'll have three rows with 2 buttons on the upper and lower row, and three buttons in the middle row (look at the image a little further down).
The buttons are numbered from left to right, top to bottom, which can be useful to know when you set up what each button does. Example: If you only want 6 buttons you select the 7 button option and leave the 4th button (middle one) blank.

On-Screen Horizontal Position
How far from the left edge of the screen the menu will display. The further to the right the bar is, the further right on the screen the menu will appear.

On-Screen Vertical Position
How far from the top edge of the screen the menu will display. The further to the right the bar is, the further down on the screen the menu will appear.

Touch Menu Button 1 -4
Click this to set which keybinding the corresponding button will use. Click Advanced Settings to set keybinds for buttons 5 through 16.
It is highly recommended that you write descriptions for these bindings as they'll appear on the screen when you hove above the buttons.

Mode Shifting
Will be explained in a later section of the guide.

Display Binding Label On Button
If you have this option enabled you'll get a description of the button above the grid of buttons. The description is the label you wrote when selecting a keybind. Turning this option off will naturally remove this label.

Touch Menu Opacity
Having this slider all to the right will make the Touch Menu 100% opaque, and all to the left it will be virtually invisible. Adjust to suit your need.

Touch Menu Size
This slider control the size of the grid, with buttons being smaller the further to the left you are, and larger the more you go to the right on the slider.

Advanced Settings
Here you can set keybinds and description for buttons 5 through 16.

So, what was this about icons?
Here's another example from Diablo III, showing off the 7 button grid.


To set up icons we have to dig into button keybinds.
When you you see the keyboard and description label you can see a small icon to the left of the text entry field. By default it has a ring symbolizing no icon selected. Click on it to select icons.


This will bring up a grid of 4 by 4 icons. To see more just scroll your mouse wheel or browse downward with the analog stick.


Click or press the A button to select the icon you want. This will switch to a preview of the icon with options of changing the color of both the icon itself as well as the background.


Once you've finished you're taken back to the keybind select screen.

When you have a lot of buttons to customize it'll take a while, so it pays itself to set up an effective workflow. What I found worked best for me was to first enter the description (since that's the default position when entering the keybind screen), then change the icon, and finally select the keybind itself, as this last step will take you back out of the keybind screen.

But what if you want to have custom icons in your game instead of the default icons? No problemo...
All the icons are stored at \steam\tenfoot\resource\images\library\controller\binding_icons as separate PNG files. If you want to add more icons find the folder mentioned and copy the icons you want to use in here. There are some few restrictions:

- The filename must be unique.
- Must be saved as a PNG with transparency enabled.
- Must be exactly 256 x 256 pixels.

The icons are shown in the steam config menus are shown in an alphabetical order. As all the default icons start with the name "ghost", an icon named "alucard_03.png" would be shown first in the list while "testing_this_junk.png" would be at the bottom.

I've not experienced any restrictons with regard to color. You can easily add colored icons, though they will look really bad if you colorshift them as indicated above.
If you want to use one of the default icons as a template you aught to be aware that they are saved as grayscale/8bit images and you'll have to increase the color depth before you can add some color. Much easier to create some from scratch, in my opinion.

If you find the original icons too horrible for words you can easily delete them, but I highly recommend making backups first. You know, just in case.
To Be Continued...
--------------------------------------------------------------------------------------


This guide is not 100% complete yet. Please be patient, and I'll update it as quickly as I can. :)


--------------------------------------------------------------------------------------
139 коментара
Death On Holiday 30 авг. 2024 в 14:24 
I'll always continue to use my steam controller. I've gotten so used to how it's customization allowed for so many different things I couldn't do with a normal joypad. So long as it turns on and connects to my console I'll continue to use it. I also ended up buying two extra steam controllers off ebay and marrying the setup of my prime controller to those.
Gormash  [автор] 18 авг. 2024 в 10:53 
Yes, I am afraid that I'll never finish this guide. My Steam controller was lost in a fire and I never got a new one.
I've since gotten a Steam Deck leaving me no reason to get one either.

If someone want to expand and finish this guide using what I already have here they are welcome as long as they give me credit for the pieces I have made.
ahrimen 18 авг. 2024 в 7:14 
Is this just a dead project now?
There is Add Steam Controller option in BigPicture anymore.

This is a real shame because the controller is truly unique but without any support it is a paper weight now.
Aiden Araneo 6 септ. 2023 в 12:06 
Yes update. It's borderline useless now.
Jixn3l 15 апр. 2023 в 21:00 
plz update for new big picture mode:steamsad::steamthumbsdown:
AwakenOne2010 8 дек. 2022 в 8:08 
"While on the subject of virtual keyboard, keep in mind that this ONLY work within BPM. If you minimize BPM and try to use it nothing will happen."

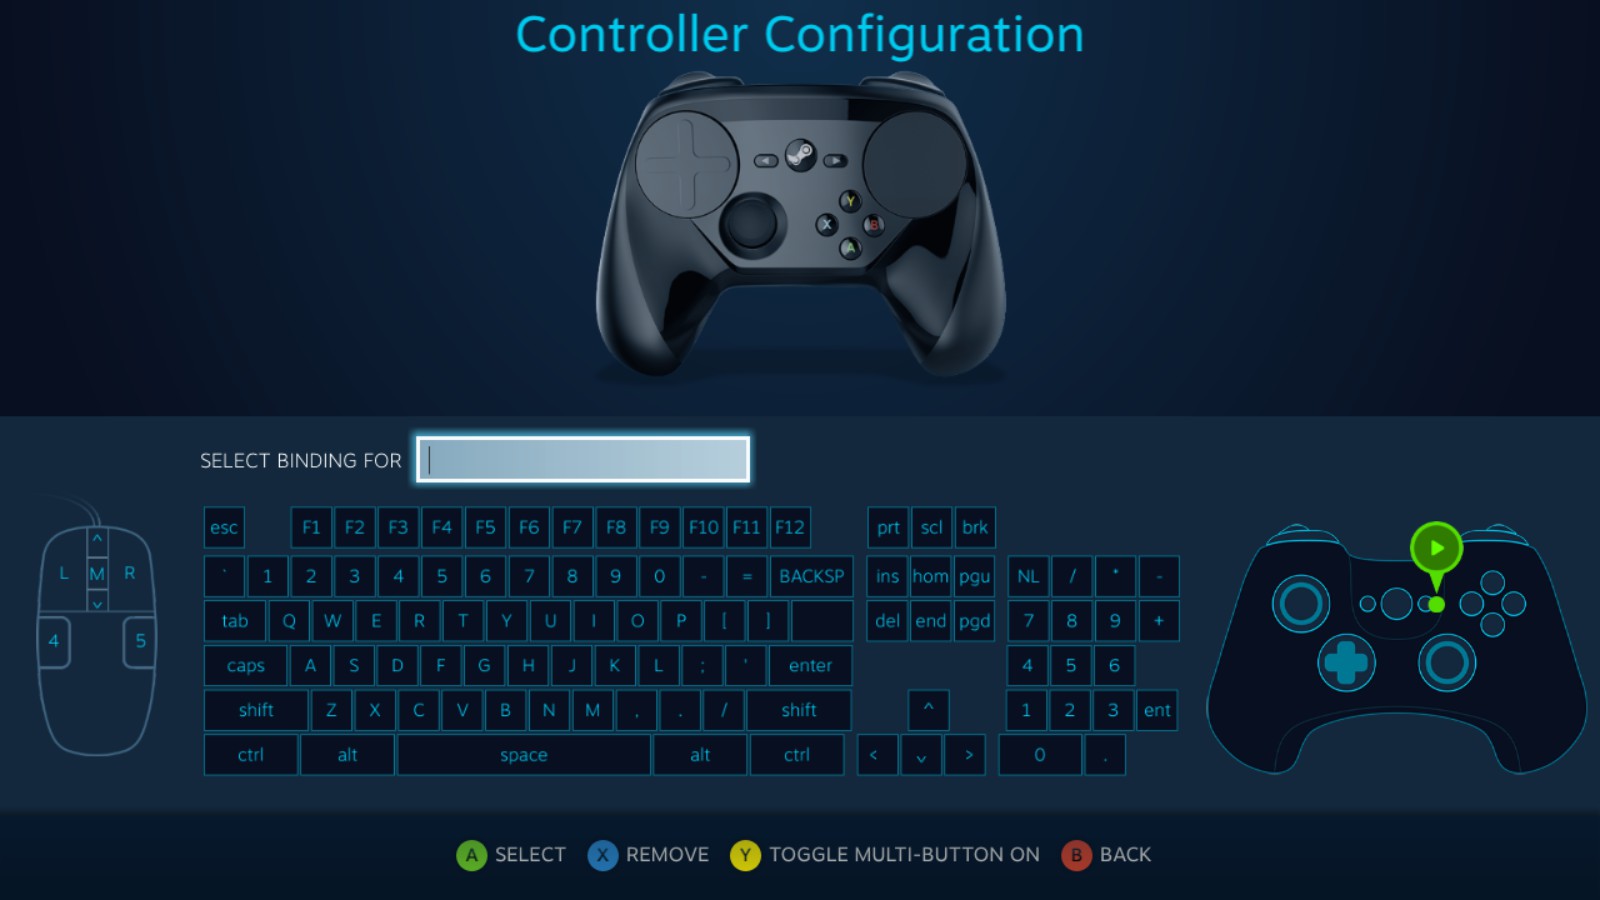
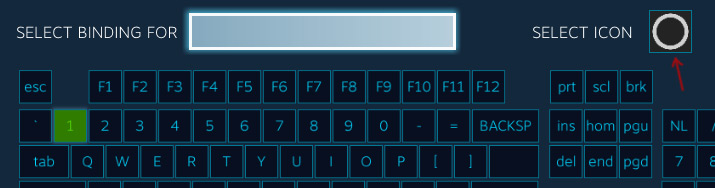
I do not have BPM open at all BUT when I open the Notepad in windows 10 where text input is allowed. I pressed SB+Back, the virtual keyboard appear and it can be used to enter text into the Notepad.
little-amsterdam 3 апр. 2022 в 20:20 
I have 3 new in Box controllers willing to let them go for $500
g1bel 15 ноем. 2021 в 8:28 
thx
timebreach 4 авг. 2021 в 23:42 
enable the Bluetooth LE Pairing Mode. Here are the four modes the Steam Controller now supports:

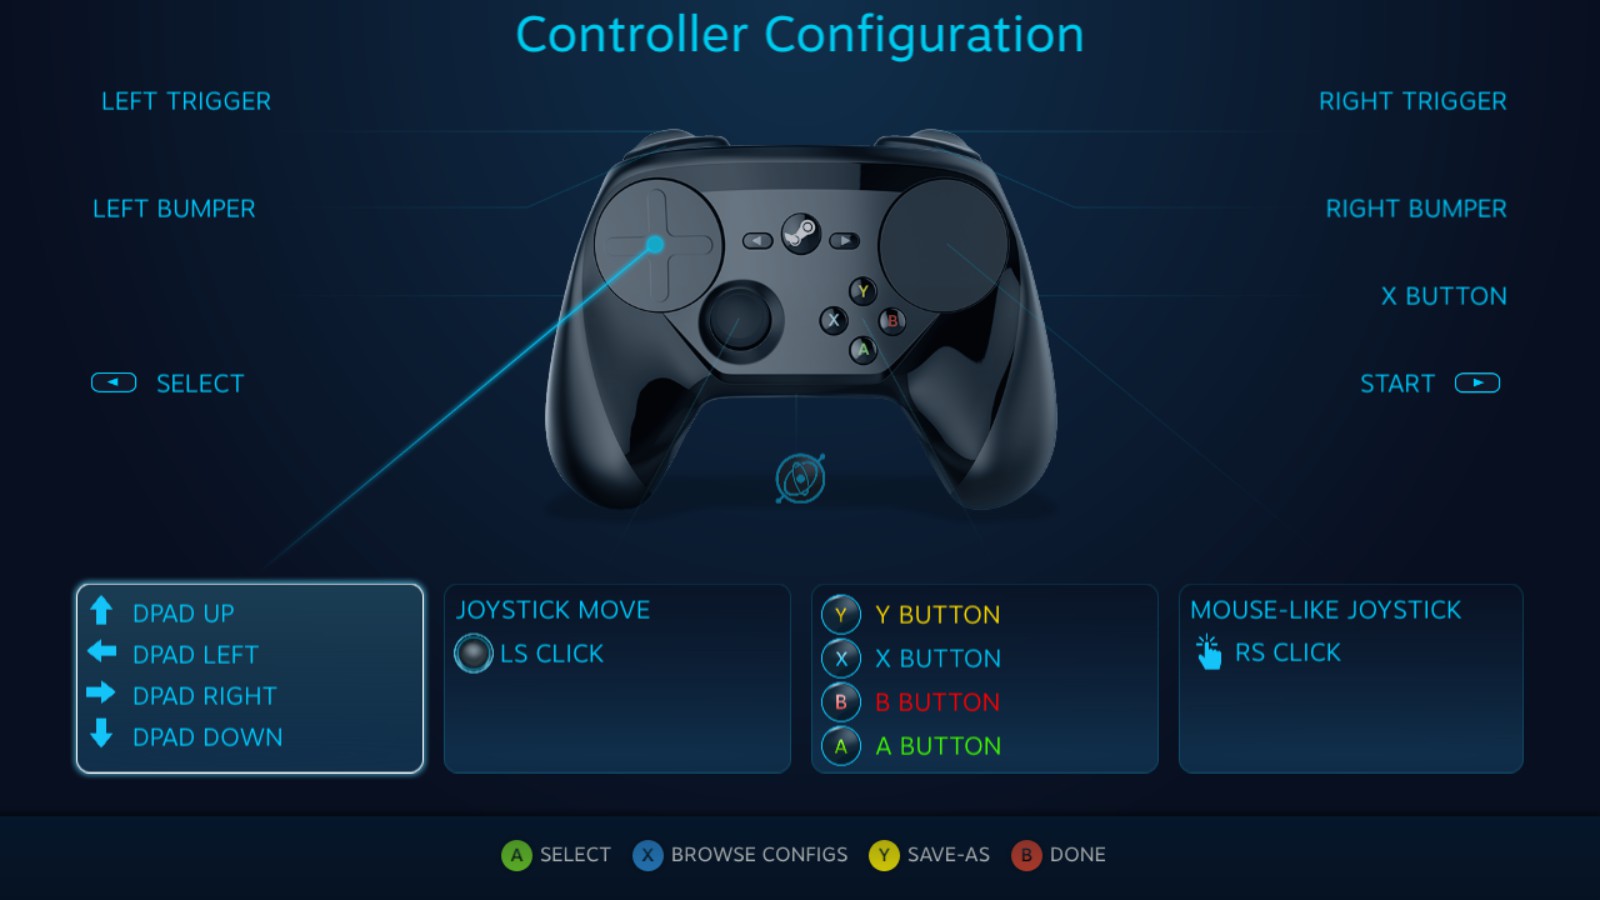
“Y” button + “Steam” button = Bluetooth LE Pairing mode: Pairs the controller to a mobile device.
“B” button + “Steam” button = Bluetooth LE mode: Launches the controller in BLE mode.
“X” button + “Steam” button = Receiver Pairing mode: Pairs the controller to the supplied, USB-based Wireless Receiver (non-Bluetooth).
“A” button + “Steam” button = Dongle mode: Launches the controller in Original Receiver mode.
Next, refer to the Bluetooth instructions in the Apple TV and iPhone/iPad sections to connect your Steam Controller with your Apple TV, iPhone, or iPad.
suegraham36 23 ян. 2021 в 19:40 
Is this controller also for a PC windows? This is how i play my games.