Act of Aggression

Act of Aggression

Not enough ratings
Chimera Campaign Finale (Mexican Stand-off) Walkthrough
By Falchion and 1 collaborators
This will be a written walkthrough for the extremely difficult chimera campaign final mission, which took me more than 7 tries before finally being able to accomplish it in around 2 hours after learning how the map will play out with every try. Through this guide I will explain what to expect throughout the map, and the best units to deal with what the enemy throws at you.

Bonus stuff at the conclusion!

Also at the end is an alternative technique that requires a sneaky retreat tactic combined with cheap squad attacks and stealthy base expansion. It was written by Sykoste after an extremely long learning curve over a single frustrating 11 hour game! Have fun...
   
Award
Favorite
Favorited
Unfavorite
The map layout
Your combined base of US and Chimera will be in the bottom middle of the map, with a scarce oil and aluminium field, only enough for you to get started. There will be a bank to your right, with a cartel base further right guarded by many artillery turrets and some units, and two aluminium fields to your left (also rather scarce), and another cartel base further left, guarded by shershens and a couple of koalikista artillery. Directly above are many railgun turrets scattered around a field, with enemy units here and there, and somewhere around that field is a rare earth field (also scarce but still rare earth). On the top right of the map, there will be two thor orbital superweapon platforms, unguarded (excluding all the enemy units you have to kill along the way to get there). The main enemy base is all the way on top of the map on top of a mountain with the only entrance being in the middle, and all along the cliff there will be railgun turrets, and grinches (infantry aa) here and there. The middle and the left side of the enemy base would have all of the cartel infastructure, with 3 skyguard turrets guarding the middle ones shielding the middle part of the base from many nukes.
What to expect
Since it is the finale expect everything in the cartel arsenal to be thrown at you. Watch out for scorpios and shershens as they have very long range, and amos cluster mortars will also attack from time to time. Most of this are just annoying, but not deadly. The one major threat that you have to watch out for is the koalitsiya,
Cartel's uber unit - A slow but heavily armoured and armed howitzer, capable of bombarding in a salvo of 3 very powerful shots. 2-3 of them are more than capable of easily taking out a Tusk 2 Abrams, and destroying your base is even easier. They can even shoot at point blank range, have a mounted machine gun to shoot at helicopters and have 50 hit points so they are more than capable of self-defence. You should also expect all 3 enemy jets, a cluster bomber, a close range air superiority fighter and a supersonic napalm bomber. The latter bomber is quite uncommon, but the other 2 are very common so be prepared to intercept them.
How to deal with what they throw at you
Everyone has their own way of completing this mission, so if you think that your method is more effective than mine, leave a comment so that others can learn from it, or simply ignore this guide.

Essential units to use throughout the game (all fully upgraded of course)
USA Javelin - Put them in districts to the left and right of your base (especially the right), and they will be able to pick off the small attack groups the enemy sends your way every few minutes. They can even fire over obstacles such as districts and other structures so keep this in mind when using them. Accompany them with a couple of stingers and snipers to deal with non-vehicle threats.

Chimera Rhino (sword protocol required) - They have ridiculous range, only cost credits and have a high rate of fire albeit rather average damage per shot. What makes them so good and useful in this mission is their range, allowing you to slowly whittle down at the koalitsija's health as they approach your base. Another extremely important use of the rhino is an upgrade in the Spear vehicle bay that allows the rhino to detect enemy artillery from a long distance. This distance is so great that you can detect the koalas coming out of the prototype bay in the enemy base. They are also handy in taking out the bases to your right and left (if not taken out yet by your initial force) at a very safe distance. Use them in combination with

Chimera Ninja - A stealth recon helicopter able to fire anti-air missiles. It is able to detect stealth units too, which is handy as cartel would have a lot of their vehicles and tanks upgraded with optical camouflage. Use them to spot for your Rhinos, or as escort for

USA Guardians - Upgraded with NLOS-guidance, their dual hellfire missiles have excellent range allowing you to fire on enemy targets from a very safe distance. Their rate of fire, good damage and ability to fire on the move with 100% accuracy ensures that you can pick off the koalas and any other hostile targets long before they come close to your base. It is also armed with an autocannon and rocket pods (when upgraded) for self defence. This is a key unit to destroying the koalas effectively with zero casualties.

Chimera Antey-2500 - There will be about 4 thor orbital platforms, two relatively unguarded on the top right and two in the middle of the enemy base (heavily guarded), so you will need anti-nukes for days. At least two of them, with 4 anti-nuke missiles loaded each would prevent your steady progress from suddenly turning sour at a crater in your base with buildings on fire, and have a peace of mind allowing you to focus on taking out the koalas. They are also able to shoot at enemy jets and helicopters from a ridiculous range.
Use them over the US patriot - the main reason for this is because refilling the patriot's anti-nukes cost rare earth, while refilling antey's anti-nukes only cost dollars. The antey also seems to have a greater range than the patriot, but a lower rate of fire. (not confirmed, just perspective)

US Raptors or Chimera Pak Fa - The enemy will deploy a lot of jets, especially the cluster bomber and air superiority fighter, so using these will help prevent them from disturbing your units. Comparing these two, the raptor is slightly better in it's air superiority role, with a better turn radius and possibly higher rate of fire with it's missiles, however the Pak Fa has the ability to fire it's missiles at ground targets, with two nice features - these agms can be fired at ground targets at the range in which it shoots jets with, and it also does not consume it's normal loadout of anti-air missiles in the process. 3 missiles fired from pak fas are enough to destroy one koala.
Raptors for a pure anti-air role, Pak Fa for anti-tank and anti-air.

Optional
Chimera Tigre - Weaker than the the guardian in terms of anti-tank firepower, but has some magical flares that allows them to guarantee dodging the first few missiles fired at them. They are equipped with incendiary rocket pods, autocannons, anti-tank and anti-air missiles, making them a very well-rounded jack-of-all-trades gunship able to take on any target by themselves, but not excelling in specialized roles such as the anti-tank guardian. They can be used as a substitute for the ninja as they do have anti-air and stealth detection capabilities and are alot more durable.

Chimera Valor - Equipped with long range anti-tank missiles similar to the guardian, even longer but rather inaccurate ranged rockets and anti-air missiles, they can fill the role of guardians as a more well-rounded unit however the rate of fire of their anti-tank missiles is also lower thus I prefer guardians.

US NLOS-C - Rhinos with more firepower but less range. You can use it in sync with the Rhinos for a very powerful artillery force but not alone, as it does not have the artillery detection capabilities of the Rhinos.

US B-2 bomber - After spending your rare earth on the necessary upgrades for your essential units, the remaining rare earth can be put into nukes, or this bomber which will help stop the koalas right in their tracks as they approach your base. Their level of firepower is also a tad overpowered in destroying both buildings and units. Just don't send them into areas with a huge concentration of anti-air.
The start of the mission
I'll just name the koalitsiya as koalas for easier referencing.

You start off at the bottom middle of the map, initially with a force of 6 Abrams Tusk 2, 4 fully upgraded Terminators, 1 Hercules Repair vehicle, 4 Pumas, 8 Deltas and 8 Exosoldiers. Just ahead of your force there will be a group of Cartel units who will proceed to attack you, in a wave of vextras, scorpios, vextras, scorpios, shershens, otomatics and shershens.Try to ensure that none of your units die at this point, they're the best units of their factions and are not easy to replace so early in the game. Have the abrams in front soaking the hits from the scorpios and shershens while your terminators shoot down as many missiles as possible. Pull back wounded units to avoid them being focused down. If you lose any at this point, it might be a good idea to just restart since you haven't progressed much anyway.

Once you clear out those enemy units, you will be given control of both a US and Chimera HQ, along with about 6 fully upgraded MG nests around your base for minor defence while you build up your forces.

The Bank
The resources at your base are very very little, so you will need to quickly secure the bank to your right for extra income and also to ensure that the enemy dosen't drain too much from it. The bank will have 6 punishers inside, combat medics with grenade launchers capable of pinning down your infantry. Therefore, to safely capture the bank without losing any of your elite units is by training some SAS from the chimera barracks, about 2-4 of them will pick off the punishers one by one, after which you can then garrison the bank with deltas and exosoldiers who are capable of defending themselves from both infantry and vehicles. There will be a couple of jackals who can snipe your infantry nearby so take them out with some abrams before you send your infantry in. I don't recommend attacking the base to the right yet, focus on the one to the left first.

The Aluminium fields
There will be two aluminium fields to your left, for the much needed aluminium to start producing and upgrading better units and expand your base. Bring your entire tank/bmpt army to the field and attack the base to the left, as it is in close proximity to one of the aluminium fields. The main threat in this base will be two koalas and alot of shershens so target these units first before anything else. You can also choose to capture the buildings if you wish, remember to upgrade this ability at the respective hq prior to doing so. If you do capture the cartel hq you can produce it's stuff and most importantly the building that produces rare earth indefintely. Once you have secured the area around the two aluminium fields and built two refineries and an outpost/fob nearby, fill the nearby districts with Javelins/Stingers/SAS to easily defend against everything except the artillery.

Defending your base
Fill the nearby buildings to the right and left of your base with javelins when you have enough money, and also put some stingers to the right as cluster bombers will come from the base to the right. If not attacking, your initial force will help a lot in base defence. Build up a chimera outpost (turned into repair outpost, shield protocol required) on each side of the base to repair the MG nests and keep them alive. Also, build a field hospital and a prison, upgrade the non lethal tactics in the chimera barracks and start capturing POWs. This will earn you permanent money income apart from the initial 500 dollars. 10 prisoners from the prison can be traded for 3.5k rare earth once you unlock the rare earth upgrade from the hq, and prisoners from the hospital can be traded for 1k aluminium each. Remember that the chimera prison has the global heal ability, so you can use this to heal your infantry inside districts to keep them alive. An alternative would be to build a Chimera Namer or a US Dustoff and set them on hold position near a district to costantly heal the infantry inside.

Capturing the Cartel outpost
To get the one of the achievements you have to capture at least one of the Cartel HQs. The left outpost has lesser units guarding it, thus easier for capturing. It also has two more aluminium fields in close proximity to it, apart from the two already revealed to you. If you managed to keep your initial force of 6 abrams, 4 terminators and 1 repair vehicle and a few pumas this shouldn't be too difficult. Build a barracks and train fill at least two pumas with Marines or Felins (remember to upgrade the capture building abiility from their respective HQ) There will be two koalas at the bottom of the base so rush them with the abrams leading and soaking the hits and take them out quickly before they do too much damage. After that, have your terminators take out the shershens nearer to the base, as the terminators are able to intercept missiles fired at them. Once these units are clear there should only be otomatics remaining, so take them out while your pumas drive up to the buildings, unload the infantry and start capturing everything. Try to build an accelerator in that base to stealth it.

Essential build order once you get control of your HQs
-One refinery for each faction for the oil and aluminium field
-Chimera barracks - Two SAS to take out the punishers in the bank from a distance, preferably in a nearby building (not too near). Take out the two nearby jackals with an abrams or two first. Once the punishers are dead, move 6 exos/deltas into the bank, and put the rest in nearby buildings as reserve.
-US barracks - Pump out javelins to garrison the districts to the left and right to defend your base from minor skirmishes (Don't rely on the defensive turrets, and also remember to watch out for shershens and scorpios, who can outrange your javelins.), and some stingers to the bottom right of your base to defend against cluster bombers.
-Chimera prison - Start capturing them POWs, this will be a major boost to your income once you have a prison full. The prison also has a global heal ability, this is especially useful once you capture the bank with your exos and deltas, keeping them alive. Set the prison to a control group (ctrl + 1-0) to make your life easier.
Once you have these essential buildings out, work towards getting out a SPEAR vehicle bay (Rhino), a Support bay (Ninjas), and an Anti-ballistic center (Anteys) for Chimera, and a US helipad (Guardians). A Chimera Air Control Center for Pak Fas would also be useful but is not mandatory. You will need Sword Protocol to build Rhinos, and Defcon 2 to build Guardians. You will also need an armory to upgrade NLOS guidance for the Guardian hellfires
Getting to the middle phase
Income
The most important thing now is to ensure that you have a constant flow of resources, especially oil and aluminium. US and Chimera have the buildings for this - US Administrative center in Defcon 1 which generates 20 dollars every second, and the Chimera Syntech Lab (requires both shield and sword protocol) that generates 10 aluminium every second. Build at least 5 of each structure to guarantee a stable income. If you were able to capture the Cartel HQ at either your left or right, having the underground stock market would also help, generating 4 rare earth per second. All these are essential because of the lack of resources on the map. There may be hidden resources near the left cartel outpost, use a recon humvee or ugv to check it out if you are keen on getting it (and defending it)

Helo squadron
Meanwhile start building rhinos (spear vehicle bay), ninjas (support bay), and guardians (helipad). Have at least 1 rhino in base with the artillery detection upgrade to spot incoming koalas and amos, while a group of at least 10 guardians and 5 ninjas (everything fully upgraded, especially the NLOS guidance for the guardians and the anti-air missile for the ninjas) constantly moving around the field above you to search for enemy units and destroy them from range. Make use of your helicopters excellent range and mobility to stay at a safe distance from enemy units while still being able to shoot at them, while the rhinos at base pick off enemy units by themselves. TARGET PRIORITISE THE KOALAS, if you allow them to get close enough to shell your base you will be in a world of hurt. They often attack in groups of 3, although there was one time where two groups of 3 joined together, resulting in 6 of them wiping out my entire intial force of the 6 abrams and 4 terminators. If you're able to multitask, once the first group of units are done and fighting the enemy (make sure to take good care of your helicopters and micro them well), build a second group of guardians and ninja as an attack force. This group will then take out the two outposts on the left and right (if you have not done so already) (or capture, though more troublesome). Again, the units that you are using all have excellent range so stay out of harm's reach while attacking. The units that i state here do not require any rare earth except for certain upgrades, thus allowing you to be able to accomplish this even without capturing the cartel buildings. You can even do all this without taking the rare earth field in the middle, simply trade the pows in the prison for 3.5k rare earth once you get 10 pows (make sure you have researched the rare earth extraction upgrade in the hq, and also are not at maximum storage), this amount of rare earth is more than enough to spend on needed upgrades like the artillery detection for the rhino, and at least two anteys. Deploy these two anteys in your base (spread them out to cover more area), and load them up with 4 anti-nukes each. Not only do they make your base safe from orbital strikes they will also help to shoot down the jets the enemy sends your way.

Just for a recap for the mid phase: at least two anteys, helo group (guardians and ninjas in a ratio of 2:1) and at least one rhino. Javelins in nearby districts will also help in case anything gets past. Pak Fas would also be useful to help take out enemy jets and vehicles.
Late game
If you have followed all my steps and have the necessary units to ensure that your base is well protected from both koalas and nukes and other minor attacks, you can start focusing on attacking and winning the game without the worry of losing your base.

Enemy superweapon
Now there are two thor orbital platforms on the top right of the map, contributing in the nukes flying to your base. There are also two power generators adjacent to them. You can destroy these to ease the load on your anteys, or capture them (achievement for capturing/building cartel superweapon). It is relatively unguarded, although there are enemy railgun turret installations along the way with enemy units scattered here and there, none of which really pose too much of a threat to your helos as long as you keep a safe distance and fire from range. Take note that once you capture them the enemy may try to destroy them, so if you're not prepared to defend them don't bother building any nukes from there.

Attacking the enemy base on the hill
With that cleared, you can now plan on sieging the enemy fortress on it's hill. Now like I mentioned earlier, there are railgun turrets all along the perimeter, and skyguard turrets right in the middle of the base guarding the middle HQ and it's surrounding buildings. There is also another HQ plus other infastructure on the left, unguarded by skyguard turrets thus vulnerable to nukes. There are many ways to assault this base, and since the hardest part of the mission (the koalas) is more or less constantly dealt with by your helo squadron, you should be able to slowly form a plan for attacking without too much stress.

Air assault is out of the option due to heavy anti-air fortifications all around the base, and nuking the middle area is also out due to 3 skyguard turrets. A land assault with tanks is also unwise as railgun turrets are pretty powerful, and there will be koalas and other units guarding the front entrance. I will list out here the different methods you can use to attack this base.

Artillery - Rhinos, NLOS-C, Buratinos, Himaris with a ninja or sniper as spotter. Simply attack from the left and right of the hill with your spotter slowly inching forward just out of range of the turrets while still being able to spot them, and let your artillery fire freely and pick off everything in sight. Probrably the safest and cheapest method.

Exosoldiers - Best infantry in the game, and they can do well in this situation too. Have an overwhelming force of exos storm the hill by climbing the cliff and destroying everything in their path. Their self regen and quick movement make them very suiitable for this task, although you should stay clear of the koalas, as their aoe shells will wipe an entire group of exosoldiers.

Superweapons - The middle area is almost nukeproof (unless you simply have too many nukes), but everywhere else is vulnerable, especially the base on the left. Destroy everything out of reach of the skyguard turrets, then use whatever units you want to clear up the middle base. Skyguard turrets are also not as good as patriots and anteys in shooting down planes, so B-2s can do the job. Just watch out for berkuts if they still have air control towers in operation.
Conclusion
The main reason why this msision is so difficult is because of the koalas. Their ability to annihilate anything their gun points at is really devastating. I'm not the only one, I have seen other players stating that they have the same problem in chat. Therefore the units I use to deal with them are those that are able to destroy these koalas without them even having the chance to shoot. Guardians are really the best unit I found able to destroy koalas efficiently without a high risk of getting killed in the process, with an upgraded rhino in base to spot them.

Just for validity that I have actually completed this mission with a 100% rating
Checklist for achievements and 100% rating
All your bases belong to us - Capture a Cartel HQ
Ignition, Eat a mushroom - Build the US and Chimera nukes (Don't have to launch, but might as well launch it anyway since you've already built it to be safe).
Wrath of wotan - Capture/Build the thor control center (Cartel superweapon) (No need to launch it)
Bloodshed - Not sure, probrably the same as launching nukes or simply killing enemy units I guess.


Off topic bonus - to change the colour of your name and text in lobby chat
Add ^(number)(name)
E.g. ^0John
^0 = Black
^1 = Red
^2 = Green
^3 = Yellow
^4 = Dark blue
^5 = Light blue
^6 = Pink

The default is white

Everything below is written by Sykoste, who has an alternative unrelated to my method, and I also do not fully agree with. However some players might find his method better/easier?, then that would be good since this guide is to help players complete this mission, one way or another.
An alternative technique by Sykoste - Part 1
Part 1

The trick to this level is learning to take what you need only when you need it. Here is an alternative solution that relies on not triggering too many attacks, then triggering them when you want resources. Your most valuble resource on this level is prisoners. They can provide you with the rare earth you need later on.


The fallback >

When the level starts take everyone up and kill the initial units (set your units to hold position with the repair vehicle at the rear). Put the men in the warehouses on both sides until all the units have been cleared. You need these vehicles to defend the first few waves. Once your HQ is built, mine all the local aluminium and then build an identical new HQ for both factions before you do anything else and place them at the very bottom of the map in the pass between the two mountains on the right of the twin roads. Move your tanks that remain from the initial 'push forward' so they don't go beyond the warehouses at the head of the valley. You are essentially retreating to where the level started from. If you need more aluminium here (you built something else) you will need to just grab a few bits from the field to the left - but let it be destroyed. Mine all the resources in the start area and pull back your vehicles to the defend area (see image) Let your original HQ and turrets be destroyed. By the time the enemy reaches your defend position having destroyed the original base, you will have amassed around 50k in money.


In the image note how much money I have from having 4 HQs near the start!

Build a Barracks and fill the warehouses at the valley head with anti-tank and anti-air troops. Eventually you will lose your original base - but because you have still retained 2 HQ's you will not fail the 'defend base' objective. Now this is the interesting part, you will notice that once a few initial waves hit you, if you stay out of the clear area above the warehouses, where the original base was positioned, you will not be attacked very often. This makes it easier to defend and stops the trigger point from units entering the top road to attack you. When the original HQs are destroyed by the enemy, you will find that attacks are few and far between providing no-one enters the open field where you started, leaving you time to do more research.


Units >

You now only need a simple infiltration group made from the money resource only, which consists of 5 pumas, 3 filled with antitank guys and 1 with snipers. The front puma is the decoy - this takes the initial flak, then the others are used for surprise attack. Never underestimate the use of troops - they provide enmass a bewildering amount of targets for the enemy to hit. Some will die, and you may need to attack a few times with the same groups. You need to alternate the snipers with mortars in subsequent attacks - but they need aluminium which is the next sneaky bit. If you are new to the level, use this group with building cover to poke around the map.


Buildings >

Building wise, you need to aim for your repair buildings (logistics or outposts set to repair) and a prison/hospital as a priority. You will not have much room in the narrow valley so be wise. 2 logistics centres will keep your bases repaired from orbital attacks or airstrikes until you settle in. I stuck with logistics, they have a smaller footprint. Build outposts as repair later on when you move out from the valley to the right hand side. To do this you will need small quantities of aluminium obtainable by the next tactic.


Resources >

You can now creep your base left and right in the map along the mountain edges using only LEM storage to expand your build area. The LEM is a low priority target, if a tank attacks it, you can run in with a few anti-tank men and take it out. They will not constantly attack it providing it is not in a trigger zone. Keep to the mountain side. With units, Stay below the bottom road and drive units slowly to the left resources and slowly to the right enemy base - auto-clicking in 'the next valley along' will simply cause them to take the fast routes on the roads which will go higher up and undoubtedly trigger an attack or a stumble on a patrol. Go slow, and go 'south mountain-hug'. Build your LEM as close to the aluminium as you dare go. Then when all seems quiet, swap your original tank group + repair unit on your defensive line with 12 pumas and a repair unit. Take the tank group and wait casually to the right of the aluminium field in the houses. As soon as you are in position, build a refinery on the left most field - this will draw fire first. Then build one on the nearest field. As soon as it is built, move the original tank group plus repair vehicle to the top of the refinery and set hold position. They will protect it and not lose much for about 3 major attacks. Once you have around 6000 aluminium move the tank group to the valley below to hide them and keep them safe. Use your trucks to run north as you leave the refinery to die. With any luck - no one will spot the tank group or your LEMs. Because your LEMs are close by - it won't take long to get the materials. Use these materials to get to Sword and shield status asap. Upgrade your pumas to have the missle attack.


Stealth >

This map is about sneaking from house to house and learning where the trigger zones are and falling back when you have to. Once you get storage near to the first aluminium field, take what you can with a refinery but don't defend it - sell it when the attack wave comes. Keep that field clear of units or buildings. You will on average get 1000-1500 aluminum before it is destroyed even without a defense group. Whatever you do - don't leave a truck exposed or you will lose the content too if it is destroyed in transit. These small amounts of aluminium should be used wisely. The ONLY unit you need early on that uses this resource is mortars. Use the rest for research and buildings that make resources. If an attack comes, use an empty truck to go upwards, drawing the enemy away from your LEMs. If you lose the LEMs you lose the ability to build barracks etc. near the enemy bases for quick assults. Repeat this process when your defense groups are healed and you know what you are building. Always use the aluminium you steal this way as quickly as possible - no LEM is safe - so spend it. One or 2 times I lost collected material when a rogue tank or chopper spotted my line of LEMs.

Same with the bank to the right. Move in steal some resources now and then, move out or allow everyone to die when the attack comes. It is better to lose 6 marines over and over than to have 10 pumas be followed back to your secret base only for them to find you and take you out. If you keep your storage to the mountain edge and don't enter the resource zones with any units, the attack patrols will return to the main enemy HQ and take out only those who enter these zones. The trick is keeping storage close to the resources, so the trucks can move in and out quickly, but close to the mountain away from the fighting and the reach of the choppers. Get it right and the LEMs will never be attacked. It is the choppers 9 times out of 10 that provide sight for the long range units that do the most damage. It is prefereable to run into the park to avoid anyone finding your secret LEM expansion 'arms'. Remember LEMs are cheap - so if they do get attacked, send a small squad to remove the patrol that will stay hanging around - and simply rebuild.

When the aluminium is all gone, or when you have enough to build pumas with the missle upgrade you are ready for a proper base attack to get some revenge. See part 2.

An alternative technique - Part 2
The left base attack >

Take the group mentioned above and swap out the sniper 'bus' with mortars. Now you have a bit of aluminium this is easier to do. You need 4, no more. Use a resource finder unit as they have good radar and line of site. You can either pass close to the edges of the base, or you can drive straight in and sacrifice it. You need to locate 2 things on your map - The power plants and the turret positions, consider the unit that finds them as collateral damage. Once scoped out you may attack.

Your mortars can fire on any ground target so use the 'fire pos' button to destroy the turrets. I find the best approach is to go slow avoiding the aluminium field trigger points. Head up the far left side of the base with anti tank guys and put them in the houses overlooking the base. These chaps will provide a bit of cover in case a tank or 2 show up. Leave your mortars lower down and if you trigger a turret attack, one or two hits from the mortars will take them out. Once the mortars are gone, send in the 5 puma squad and unload all the missle troops as soon as the enemy units defend. Your priority is the powerplant. Everyone will die, but aim at the powerplant only. It will probably take out a few other buildings as it blows. Continue this same group attack until the base is gone. As soon as it is, leave the footprint of the base to stop further attacks.

Why not capture the buildings?
I prefer not too as you a) don't need any of their units/buildings and b) being in the base zone is a trigger for constant attack. Wipe them out and leave. You may now get all the aluminium if you haven't already - just defend against the choppers that will periodically attack with stingers around the field.

Once you have reached research level enough you can generate aluminium from a building and Money from buildings too. These buildings are you next priority. You wont even need Rare earth as you can sell prisoners for rare earth (250 per chap) - this is your next priority research in the field hospital. If you defend the clear area (start) and learn the attack zones (fields, bases, banks ) you can create an endless supply of prisoners and thus you have all your resources you need.

Why not capture the rare earth in the centre of the map?
Capturing the centre causes the nuclear and orbital attacks. If you don't annoy the enemy by taking this highly prized resource, you are not a threat that requires that level of commitment - see! Stealth does not always mean optical camo.

Why not take out the power first to knock out the turrets?
If you knock out power, chances are the enemy will have back up - even if it doesn't it will build it back immediately killing your attack when the turrets turn back on. Take out the turrets first.

The right base attack >

When you are ready to make a move on the enemy, move the same squad combo to the lower left corner of the right hand base and repeat what you did for base 1. This time you may use snipers and pass through the houses too for fun - but only if you have the extra vehicle damage upgrade. Also you may need stingers for the 4 choppers that poke around a lot. The puma unpack surprise combo is always the most efficient though and requires only the money (yellow) resource. To have a close supply to troops (in case the first attack does not work) build a barracks next to the furthest right LEM that you built along the mountain edge near the enemy base - but not in the trigger zone. The next valley along is a nice spot.

Expansion time >

So you have removed the two bases left and right and you did it with a small base in the centre valley and lots of cheap units. You only needed a bit of aluminium for research and all the units you need use just money. Its time to expand!

Once both the left and right bases are gone, air attacks will deminish a bit. Providing you do not enter the trigger zones and do not take the rare earth in the park, you are now rarely going to be attacked. Head to the far right area of the map which is fairly clear and open and use it to ramp up some resource buildings in a long line from just below the right bank to the south mountain range. Do NOT go too close to the bank - and do not take it. You don't need it till you take the centre.

Build another of each HQ, Outposts etc. As long as you do not attempt to take or go near the top right bank you will remain largly unnoticed. If you have the right research now is the time to build lots of logistic centres around your HQs to repair them under orbital attack later. Now you have the space to build your new arsenal - relitively untouched.

Your goal >

Amass a large attack force which consists of the following - a line of 6 choppers with 4 air-troop carriers - but put a repair vehicle in 2 of the troop carriers - this will heal the choppers on the front line.

Then you need light tanks behind those, with heavy tanks flanking left and right more repair units in the centre. At the rear you need a line of anti air (to deal with odd jets) and some long range units.

IMPORTANT > Move a smaller attack group to the top right of the map and destroy what you find there in the houses ;) You will lose that group but don't worry. Take the buildings for the achievment, but let them be destroyed. I use just 6 snipers and sneak down the very right hand side of the map. The snipers can take out the units and take the buildings too. They will die in a chopper fight but the resulting powerplant explosion will remove the enemies main patrol group. Nice.

Move your main attack group to the top right of the park and destroy all units leaving the main base by the right exit ramp. Don't go too close to the base until you take out the front turrets. Use your resource trucks enmass if you like to locate and damage the turrets, or just use drones to target the power stations at the rear. As they show up on radar your long range units will destroy the turrets. This group will survive most counter attacks. Deal with koalas on the cliff tops by zooming in with the air squad, then retreating. Locate the buildings that build these and make them a priority target.

Whilst the enemy concentrates on this exit - amass another identical group and take the left exit of the main enemy base in the same way - but don't enter the park just yet. Hold them both at a distance that stops the AI from using long range stuff from hitting you too often - I find the house line nearest the park is best. Then when you want some fun, take the centre resources. This triggers the final orbital weapon attacks - one of which you killed earlier, the other will be defended by your defenses built from the bodies of dead prisoners exchanged for red stuff. The irony.

Now the base exists are cut off you can take all the resources and let loose with an attack force and WMD ensemble to end all ensembles. Relax - and enjoy the fireworks.

Take the rest of the top base either by force or by WMDs. Do it in 45mins, or take 11 hours of sneaking if you like - that was the length of time it took me on the first go, constantly crawling on my knees after entering the resource zones - until I realised - you don't need them!
An alternative technique - underhand tactics
Tactical diversions >
Explosive rocket trucks of doom
This is a fun technique and is very efficient. Build a refinery anywhere (not on resources). Build 15 trucks (5 x 3) Use a squad of 15 refinery trucks to scope out where the turrets are by sending a group right into the centre of a base - if you time this right they are very fast and very explosive and can trigger a counter explosion that may even damage the turrets or buildings. Once found take them out with long range weapons - mortars or the puma when you have the missle option.

Cannon fodder diversions
Fast, cheap units will draw fire - so send them in to create a target for devestation units like the koala. If you find him, send the second squad directly for him with the next wave.

Koala death by rocket trucks of doom
I remove most of the stationary Koalas in the same way - with exposive refinery trucks! The trucks are fast enough to get within the minimum range, once there you can bumble around until they explode or distract the koala enough!

Air stike neutraliser
Stingers en-mass are cool for taking down airstrikes and jets - but they have a small range of sight. Send a recon vehicle to a group of stingers and place 2 groups apart in the path you keep getting attacked from. The stingers will take down the jets before they can even launch an attack. 2 groups of 8 should suffice with 1 recon vehicle in each group.

Plan of attack
Make a plan before you go in - see below!
35 Comments
zxwv1234567 Jul 8, 2024 @ 6:30am 
Far from optimal.

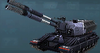
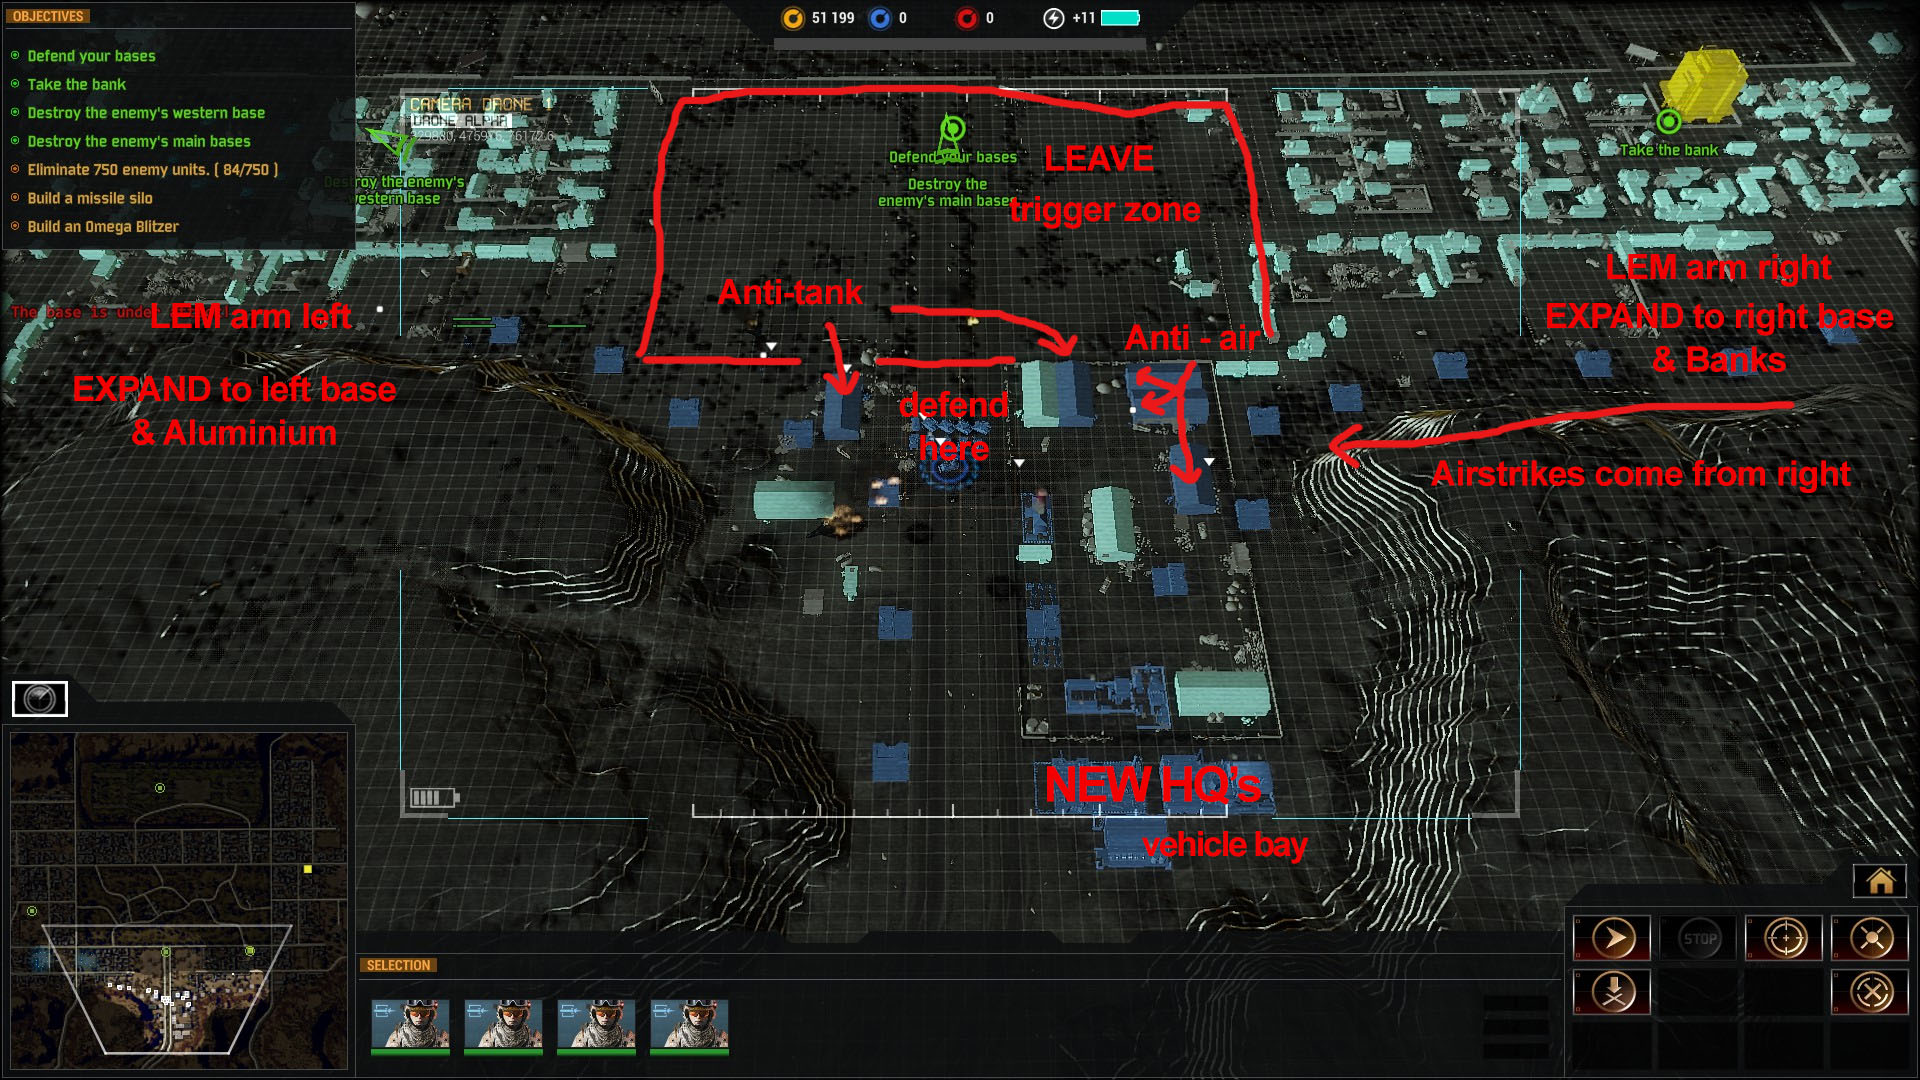
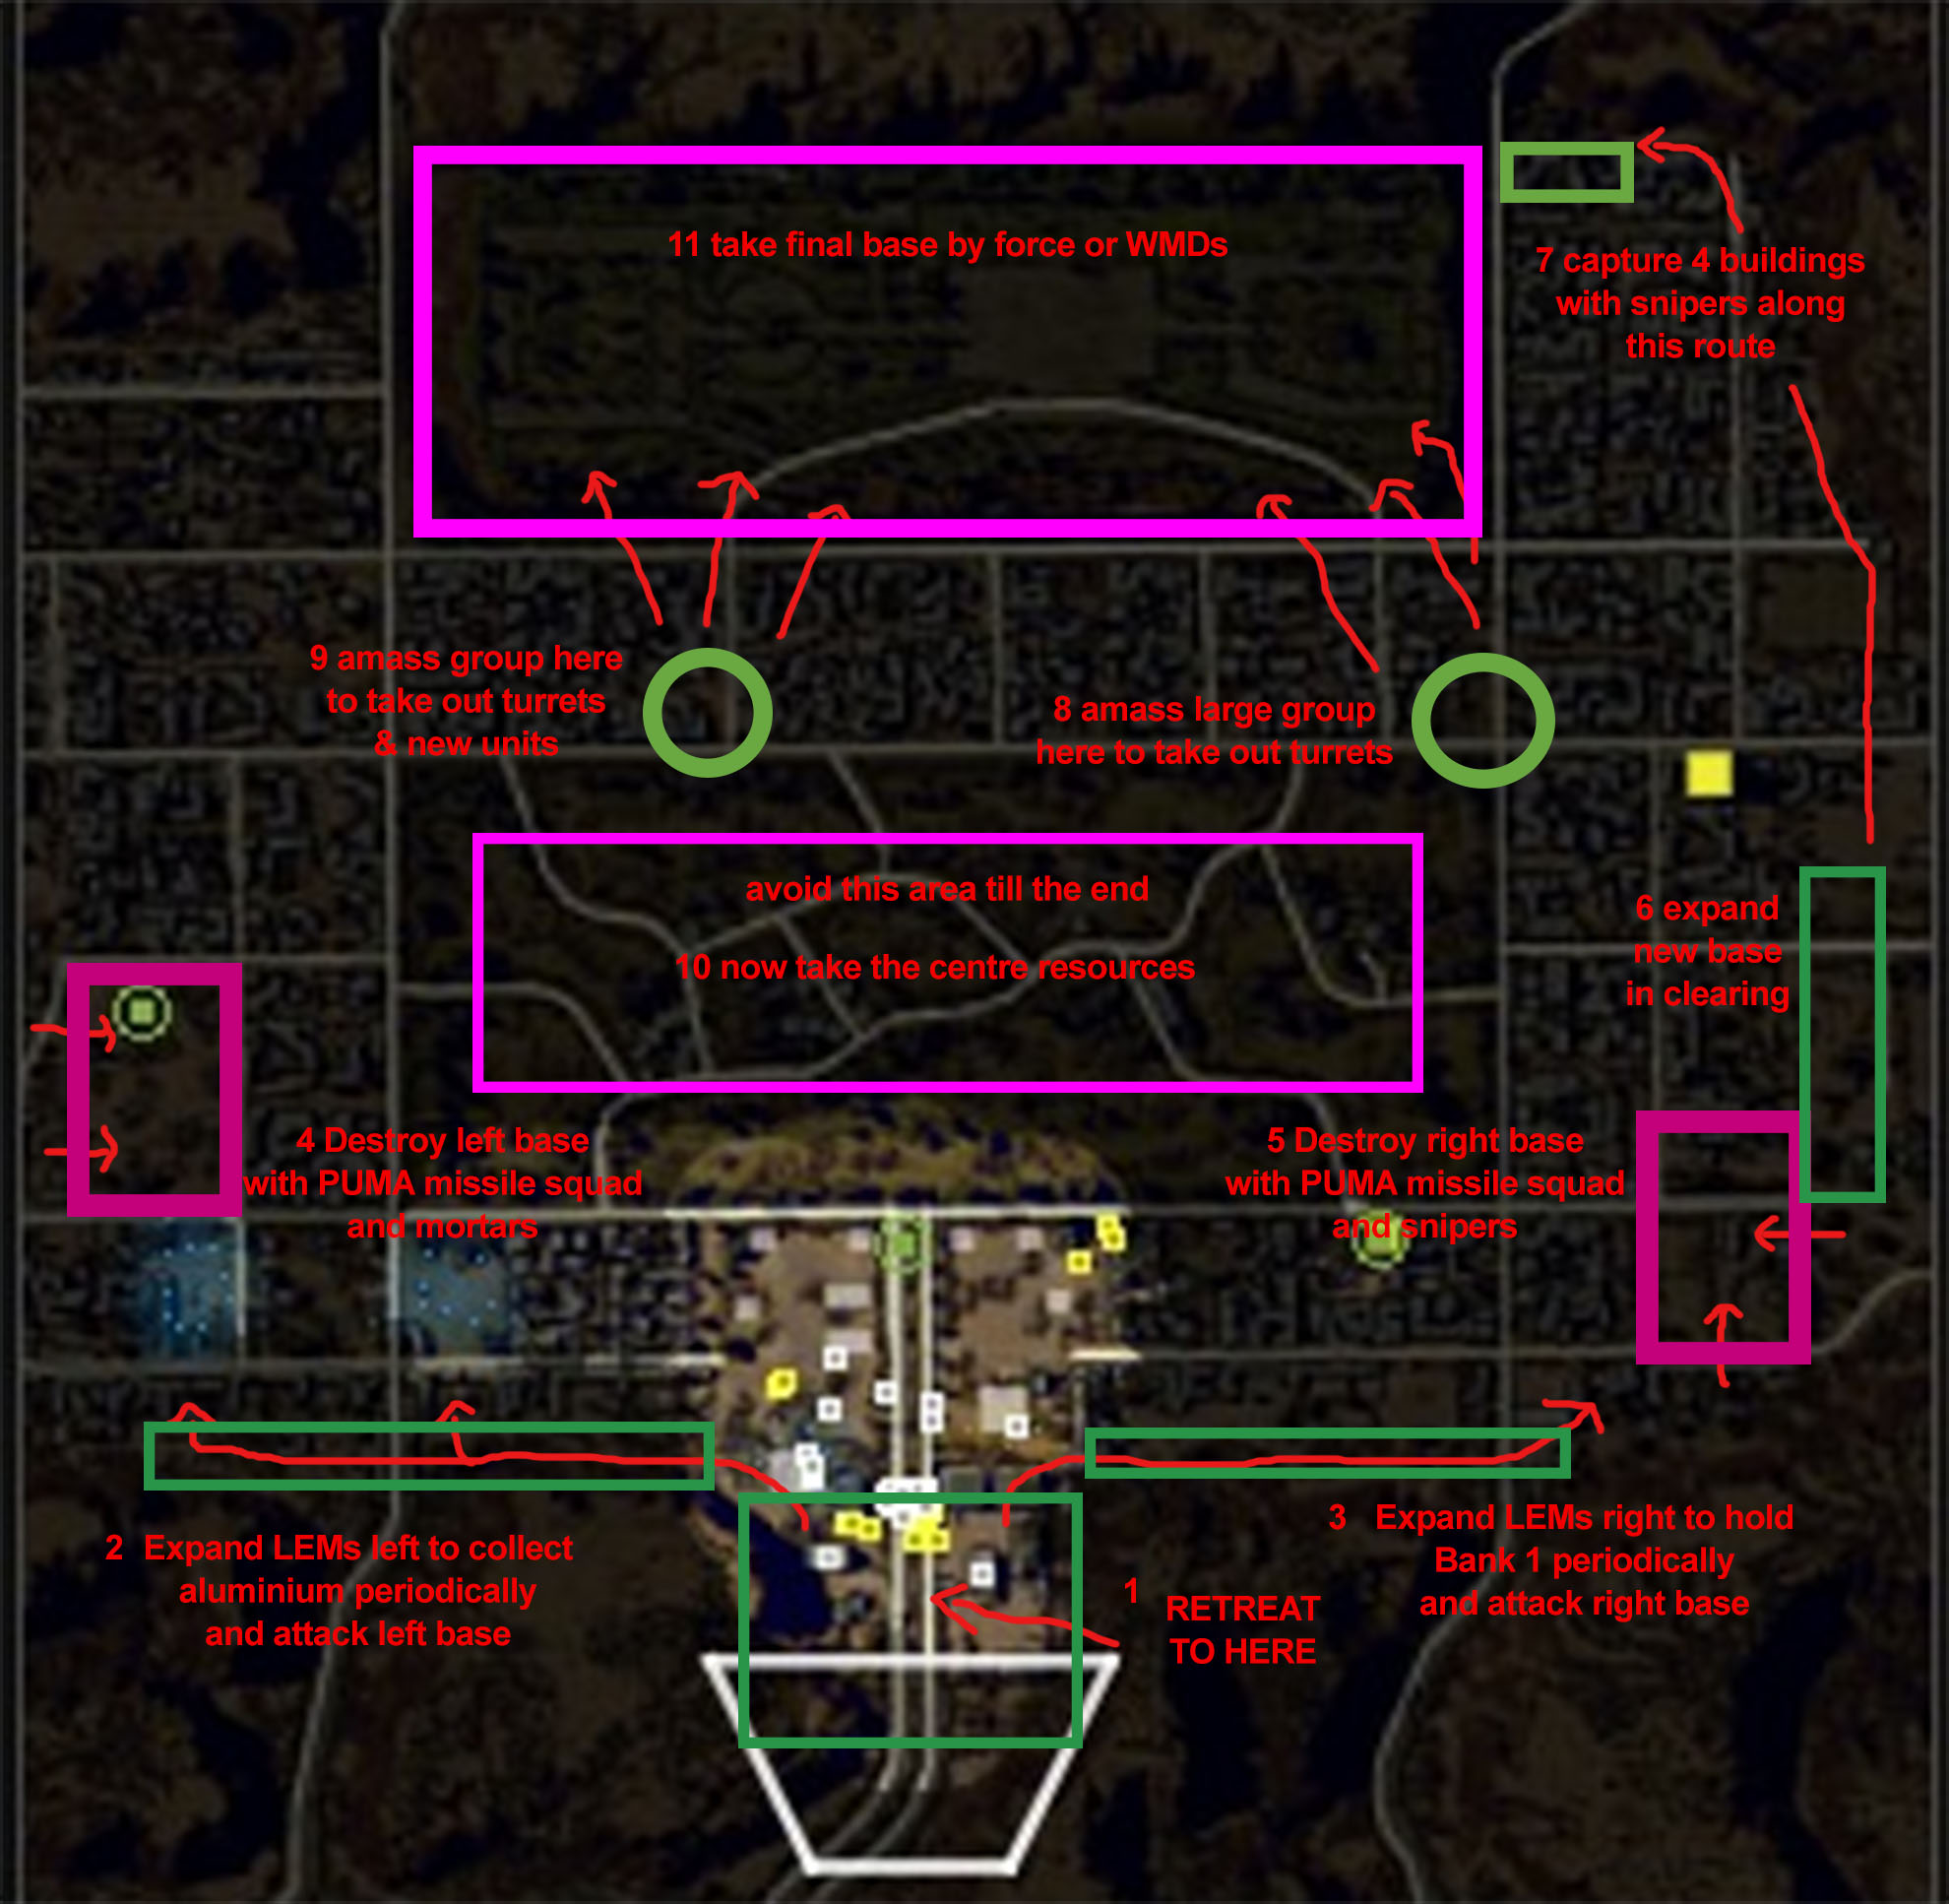
First, the Rhino has anti-artillery radar upgrade that spots enemy artillery pieces through fog of war. It has an incredibly long range, so use it to spot enemy spg early, and deal with Kolias accordingly. I recommend holding fire for the Rhino, and use gunship atgm to do the tricks.

Second, POW is the main economy in this game. Field hospital is most efficient in holding them. You will have a lot of POW in the game, and you will need a lot! Field hospital can trade POW into aluminum, and rare earth. Chimera prison can trade POW into rare earth efficiently, so you can build 10 nuke silos + 30 nukes without any trouble. You can even win the whole game without any ground force moving out from your initial camp! However, your HE weapon may kill the POW accidentall.

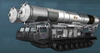
It takes around 60 min to win the game using the turtle technique. Concentrate 10 silos on enemy HQ location and you instantly win!
SUPER-TANK Apr 25, 2023 @ 12:21pm 
Also, there are 2v2v2, 2v2v2v2, 3v3 and 2v2 maps. You need to play games in such formats (I.E. for Mexican Stand-off you need 4 teams, three full of AI, one with YOU and the AI). FFA doesn't work.
SUPER-TANK Apr 25, 2023 @ 10:01am 
You still haven't updated bloodshed lol (destroy 750 enemy units)
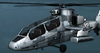
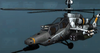
Also Guardians and Tigres both seem to have flares and NLOS via upgrades. It's just that you pay more credits for Tigres and they're much less effective against vehicles than the Guardian, even with ATGMs, which is why Tigres are obviously optional.
Falchion  [author] Jun 10, 2022 @ 11:08am 
Oh I have tried on the original as well, still couldn't get it.
«DeepCoverAka187» Jun 10, 2022 @ 12:11am 
It maybe sound stupid but, maybe you have to play the original and not the reboot to have it ?
Falchion  [author] Jun 9, 2022 @ 5:30pm 
Off-topic, does anyone know how to get the 'Triumvirate' and 'Mexican Stand-off' achievements? In the steam description it says to play against 3 and 4 teams respectively, I have tried a 4 player game FFA, and a 6 player game FFA, won both and still not gotten either of the achievements.
Falchion  [author] Jun 9, 2022 @ 5:27pm 
Alright, updated, thanks!
SUPER-TANK Jun 9, 2022 @ 5:06am 
I had to build a couple more prisons than expected so I can make the most out of Chimera's good stuff but yeah, you're right.
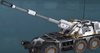
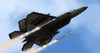
I didn't use the PAK FAs much (because my micromanagement is terrible), as I had a ton of Guardians and Tigres by abusing field hospital to trade for aluminum and the prisons themselves kept generating credits. I still used Javelins for anti-vehicle defense. For some reason, the enemy didn't send too many fighter jets at me and when they did the repair outpost just healed everything, guess it's RNG.
You might wanna update the achievement list, too.
Falchion  [author] Jun 9, 2022 @ 4:13am 
Yes, I know, but if you're investing into a unit that will become the core part of your strategy logically speaking you'll get all the upgrades for it, so the AGM upgrades are expected. The one-time rare earth cost is very achievable by exchanging POWs for rare earth. It's even easier to get rare earth if you capture the Cartel base to your left or right, so resources are not really an issue once you're all set up with the 3 income generating buildings from each faction.

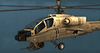
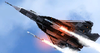
Once you have the units to deal with the main enemy threats: javelins, stingers and snipers in buildings around your base to deal with small enemy groups, your helos/pak-fas to deal with the enemy artillery, and anteys to deal with planes and nukes, you can build whatever you want to win the game.
SUPER-TANK Jun 8, 2022 @ 6:22am 
PAK FA only has anti-air missiles. Its AGMs require rare earth.