Kerbal Space Program

Kerbal Space Program

314 ratings
Lander Design
By whatdoesthisbuttondo?
This guide covers the basics of designing landers in Kerbal Space Program. There are some designs you can use out-of-the-box in here, these sections are marked with 'RTU', but it isn't meant to provide you with a ready-to-use craft for every situation, but rather give you an idea on what you need to keep in mind when designing your own craft, demonstrate various design approaches, and how using advanced modules for the same basic design can be beneficial.
6
8
2
   
Award
Favorite
Favorited
Unfavorite
Why build a lander when I can just land my whole rocket?
There are two simple reasons why you'll want to build a lander.

For one, everything that you bring down to a planet or moon you will need to bring up again. If you bring the return stage down with you, you will have a lot of extra weight. Your lander will require more fuel to take off, and especially for interplanetary missions you will need extra fuel in your lower stages to bring the extra fuel in the lander with you in the first place.

And then, landers follow a different rule of stability. While with rockets, it is generally beneficial to have the center of mass somewhere in the middle or even towards the upper third, you will want your lander to be as bottom-heavy as it can. The reason being, if your lander is top-heavy and long, as it will be when landing the whole rocket, it will tend to topple over easily. If it is built bottom-heavy and wide instead of tall, it will be very stable in landing.

Oh, and there is a third reason. Your mission will be similar to the Apollo landings, and thus at least two times more awesome.
How does this stability thing work exactly?
Have you ever wondered why so many people keep falling over when sitting on a bar stool? There are probably other factors involved, but one reason is how the legs of the bar stool are close together, and the thing itself is tall. Compare it to a lawn chair:


Look at the red line going from the ground where the legs touch to the center of mass (the person sitting on the stool or chair), and the angle we have.

The angle in the bar stool example is almost 90°, meaning if we tip this thing to the side only a little, gravity will pull the center of mass down.

The angle in the lawn chair example is less than 45°, meaning we would actually have to lift this thing up on one side quite a bit until we have an angle where gravity can make the thing fall over instead of pulling it back to its original position.

what does this mean for our lander?

When we attempt a landing on a planet or moon, our craft might not be perfectly upright when we touch down, the terrain might have a slope angle, or both.

With a lander that is built like a bar stool, we have very little margin of error, and on steeper slopes we cannot land at all, with a lander that is built like a lawn chair we do not have this problem.


This is a lawn chair lander on Minmus, the slope here is more than 30°, but as you can see, with landing legs setup like this, we can still land there.

This also means we can possibly save on fuel, since a little slope will not mean we have to maneuver to try and get over a better landing site.

In case you are wondering, the lander can in this picture is from the mod ASET ALCOR, a very good 3-man lander can that has a great RasterPropMonitor IVA you can use to do the whole landing from inside the craft. Highly recommended if you are into mods.
What about mods, do I need mods for this?
No, you will not need mods, everything in here works with just stock content. However, there is one mod that you likely will want to install anyway:

Kerbel Engineer Redux will allow you to see vital stats of your craft such as exact weight and TWR per stage while you are building it. This is not just useful for building landers, but for building rockets too, and even planes.

If you don't already have another mod that does the same thing, then get this one right away.

Ship Manifest is another mod you'll love with missions that involve docking a lander to your ship. While Kerbals can crawl through docking ports, and even transfer resources, they haven't figured out how to pass a notepad through there, or a bag of rocks for that matter, and insist on doing that by EVA instead.

This mod fixes that issue, it will even allow you to download data from external devices like thermometers directly into your lander craft or main ship, without having to EVA and read the display yourself. Given that you can radio-transfer the data directly to Kerbin, you'd probably assume you can radio it to your capsule too, but you can't.
What about tech, I'm in early career and that science isn't free you know?
Don't worry, to apply the principles shown in this guide, you will only need a couple of tech nodes unlocked.

The designs shown here will use modules that take quite a bit of science to unlock though and may not be immediately available to you. I am going this route to show you the practical use of modules like the toroidal fuel tank while covering the basics, and give you a good reason to unlock those tiny engines that might seem so utterly useless at first glance.

You might even reconsider what route you want to take while unlocking the tech tree, given that being able to recover surface samples and experiments efficiently is the fastest way to those top tier nodes.
Does it make a difference where I want to land?
Yea, it does make a huge difference! Basically, we have two different types of landings:

atmospheric landing

For atmospheric landings, we will need the bulk of our fuel supply for the ascend phase, that is after we already have landed and want to get back up again.

This is because celestial bodies with an atmosphere typically have more gravity, and the atmosphere will work against the thrust of our engines.

Our TWR (thrust to weight ratio) will need to be bigger here, and we typically will need a lot more fuel compared to landing on a moon without an atmosphere.

Depending on the thickness of the atmosphere, we might even need a heatshield so we do not burn up.

The good news is that we will use little to no fuel while in the descend phase, as we can use the atmosphere to reduce our initial speed (aerobraking), and slow our final approach by using parachutes.

non-atmospheric landing

For non-atmospheric landings, the only thing we have to worry about is the gravity of the celestial body we want to land on.

Because there is no atmosphere for aerobraking that could slow us down, we will use a considerable amount of our fuel supply for the descend phase, especially if we want to play it safe and gradually slow our descend instead of doing a well-timed burn right before impact (often called a 'suicide-burn').

The fact that we use up a lot of fuel in the descend phase also means we have to decide if we want to keep our lander design simple (single-stage lander), or if we want to optimize our fuel usage by leaving the descend stage with the landing legs and all those empty fuel tanks behind (multi-stage lander).
TWR what? Explain that for people who hate math...
You probably already heard about deltaV, the total amount of velocity change your craft is capable of with its fuel supply.

In a nutshell, TWR dictates how fast you can use your deltaV. The higher your TWR, the more of your deltaV you can put out of your thrusters per second.

Obviously important if you want to get into space, since you have to overcome gravity, but the rule of thumb "greater than 1.6 for first stage" did probably work for you so far, that is if you just didn't build your rocket by trial and error.

For landing a craft, this is also interesting, since it also helps us save fuel. A simplified example:

Suppose you are moving at 100ms towards the surface of a moon, and you decide you want to slow down to 10ms. The gravity of the moon accelerates you more, by 1ms per second.

With a lander that can put out 2ms of its deltaV per second, half of that is used fighting gravity, and you slow down by 1ms per second.

This means you take 90 seconds to reach your target velocity, and you will have used 180ms of your deltaV supply.

With a lander that can put out 6ms of its deltaV per second, you still only use 1ms per second fighting gravity, and slow down by 5ms per second.

This means you take 18 seconds to reach your target velocity, and you will have used 108ms of your deltaV supply.

As you can see, a higher TWR means you save on fuel, but it also makes landing a lot safer.
This is getting boring, let's build something already!
Alright, let us build a basic lander we can use for the Mun or Minmus. We start with a lander can, and attach some landing legs:


Notice how I immediately tried to attach the landing legs directly to the lander can. The idea here is we want to build our lander as flat as possible, and keep the center of mass low, so it does not fall over easily.

However, we need fuel and an engine, so let's attach a FLT-200 and an LV-909. This puts us at around 2.5 tons of mass, close to 1700ms deltaV, and a decent TWR of 2.41, all in all this will land on Mun or Minmus just fine, and more importantly make it back up to our main ship. Add a docking port, and it looks like this:


We had to move the lander legs down to the fuel tank, as the ground clearance was not enough for the fuel tank and the engine.

Basically, we could now just attach this thing to our rocket, and go off to Mun. Well, after sticking at least a thermometer to it, a solar panel for good measure if we have that researched and available, maybe even an antenna to transmit crew reports immediately.

But let's have a look at the center of mass that we were supposed to keep in mind first:


Well, we had to move the lander legs down unfortunately, so our lander got a little taller. Not a total deal-breaker, but certainly not ideal. Notice how I left just enough ground clearance for the engine, keeping it as flat as possible.

We always want to keep the center of mass as close to the ground as we possibly can, and at the same time the lander legs as far away from each other as possible. Unfortunately, with moving the lander legs to the fuel tank, we also moved them a bit closer together.

different approach:

So, these shiny modules I was talking about earlier... Let us see how we can improve our basic lander. We replace the fuel tanks with toroidal tanks, replace the lander legs with toothpicks, and go for the 'Spark' engine, with two additional 'Twitch' engines on the sides to generate extra thrust:


With the toroidal tanks and the smaller engines, we need a lot less ground clearance, so we can move the lander legs back to the sides of the can, we even can use the smaller landing legs now.

Our lander now comes in at just about 2 tons of mass, only a little less deltaV at 1650ms, and a TWR of 2.47, overall the stats look more appealing. Especially since it is not as tall, and the center of mass is located conveniently:


We will have a harder time toppling this over when we botch our landing, and since we saved about 20% on total mass, we will need less fuel to bring this to our destination.

Also, with the center of mass now located inside the lander can, it is easier for us to add RCS thrusters without complicating things too much.

We could also use the normal lander legs we used for the first design, compensate the extra weight (and loss in deltaV) with another toroidal tank, and make the lander even more stable (given the LT-1 legs being a bit wider) at the expense of about half a ton of extra mass, but also gaining a little deltaV in the process.

While we will not need RCS for a simple lander, as we can just as well dock our main ship to the lander, for more advanced designs we will certainly want to pack RCS, as it is always easier to perform docking operations while piloting the lighter craft, and there is really no good reason to waste the fuel of our return stage while we still have leftovers in our lander.
Easier docking sounds good, I want RCS on my lander!
Alright, we will add some RCS thrusters to our lander then. Let's first look at the lander can alone, and check out the center of mass:


Looks like the center of mass is right in the middle of the lander can. Convenient, we'll just slap on quad RCS thrusters and we're golden, right?


Well, not quite, apparently we have blocked our airlock door. Our lander isn't gonna be of much use for us if our Kerbals can't leave it, and if you're like me, you'll probably not like that thruster sitting on the windshield either.

But fortunately, we don't actually need quad RCS thrusters, two will be enough. Lets place two on opposite sides of each other, and look at what translation axis that opens up for us:


If we define our docking port as the front of our vessel, and the airlock door as the top, that gives us the following translation movements with RCS thrusters:

  • forwards
  • backwards
  • upwards
  • downwards

Rotation is not a concern for us, since we can rotate the craft as we please with the built-in reaction wheels just fine.

And since we have rotation, that also means we have translation to the left and right. We simply roll our craft 90° to the right, and upward translation becomes right translation, downward translation becomes left translation.

Looks like we're good with just two thrusters then.

Note: If you are using mods, it is worth checking out if one of your mods does provide RCS thrusters with five noozles. These will give us full translation capability without having to roll the craft, even if we only place two of them.

Let's have a look at our basic lander design again, or rather its center of mass. This time, we will remove fuel from our tanks, and only leave maybe 10% of fuel in the tanks.

Given that we will want to dock after we have landed and taken off to space again, it is reasonable to assume we'll have used most of our fuel supply.


Hmm, center of mass is actually outside the lander can. This means we can just place quad thrusters after all... Don't worry, I didn't make you read all of the above for nothing, I promise.


Ok, thrusters are placed, all we need now is some RCS fuel, as the included 15 units are likely not going to be enough. So we add two of the roundified RCS tanks to our craft, and check out if center of mass is still good.


Looks fine, guess you did read all that stuff about twin RCS thrusters for nothing then?

Not quite, let's check out our vehicle stats real quick... Well shoot, our deltaV went to hell, as did our TWR, and our craft became a whale. We did add some extra weight there, after all.

This obviously sucks, so what can we do now? We could add a fuel tank to get us some extra deltaV as well as some extra engines to restore our TWR, or we could remove monopropellant from the RCS tanks and just take what we think we'll need.

The first option would mean we add even more weight, increase our problem with the center of mass moving all over the place while we use that fuel, and possibly even make our craft taller.

The second option isn't that great either, we'll still be down by quite a bit of deltaV, still have more mass compared to the version without thrusters, and we'll likely end up 1-2 units of RCS fuel short anyway.

There is another solution, however.
Fine, then tell me that better solution.
Unfortunately, it isn't a better solution in all regards. Let's have the bad news first:

  • we will gain some mass compared to our original craft without RCS
  • we will lose some TWR compared to our original craft without RCS
  • we will only have twin RCS thrusters, so we will need to rotate for full translation ability

But there are good news too:

  • we will gain a lot of stability compared to both original craft and RCS enabled craft
  • we will only use one fuel source, so no need to worry about how much we need
  • we will not have to worry about what our center of mass does when we burn fuel
  • we will have perfect RCS precision in all phases of the flight

So, what are we going to do? Enter the 'Puff' monopropellant engine, another one of those really useful tiny engines. As the name suggests, it doesn't use liquid fuel and oxidizer, it runs on monopropellant instead, just like our RCS thrusters.

So let's add a bunch of monopropellant tanks, and then place four of these little thingies:


Great, with this setup, we can even move our lander legs back to the sides of the can, giving us more stability again. Let's check out the center of mass real quick:


Looks like it sits nicely in the middle of our lander can, this craft will not be toppling over easy when we botch the landing.

Let's have a quick look at the stats. DeltaV is back at around 1700ms where it was, TWR is still acceptable at 2.06, sadly we gained 1.5 tons of mass since the monopropellant engines are not as fuel-efficient as the liquid fuel engines.

Tough decision, so lets sweeten the pot a little. Let's look at the center of mass after we drain almost all of the fuel.

Now with monopropellant tanks, we have a difference compared to liquid fuel tanks. Even without fuel lines, they will all drain evenly at the same rate per stage. This means we drain all RCS tanks down to 10%, and check out the center of mass.

Well, what do you know, it didn't move an inch. With our RCS tank setup, apparently we can forget about the center of mass moving, and place our thrusters perfectly regardless of how much fuel we used.

All things considered, this seems to be the better solution indeed if we want RCS on our simple lander after all.
But we get so little in return for all that extra mass?
Well, if we are willing to make our design a little more complex, we can save a little mass, and at the same time improve our deltaV and our TWR.

Let's get back to theory for a second, we've assumed that we perform a non-atmospheric landing, and our mission requires a total deltaV of 1700ms for deorbit after decoupling from our main ship, landing on our celestial body, and getting back to space and in range of our main ship.

We've also covered that we'll need a little more deltaV for the descend phase, and a little less for the ascend phase.

Let's say we need 1000ms for the descend phase, and 700ms for the ascend phase, just to put a definite number on each.

We'll now go ahead and build our lander for these two phases separately, we'll start with the ascend phase. Put on two monopropellant tanks, and two monopropellant engines, as well as our RCS, and we're looking at this:


Just a bit more than 1.8 tons, 863 deltaV is already more then we need according to our plan, leaving us with enough monopropellant for the docking sequence, and a TWR of 2.24 is also pretty solid for our mission.

So far so good, now we add a decoupler, and make this a multi-stage lander. That way, we can be sure that our ascend stage can safely ignore anything we will do below, it will stay as solid like it is currently.

We've talked about how liquid fuel engines are a little more fuel-efficient compared to our monopropellant engines, so let's build the descend stage with liquid fuel. Slap on four of the toroidal tanks to the decoupler, and we're looking at this:


This adds 1.4 tons of mass, for a grand total of 3.2 tons for the lander. Our stats for the ascend stage did not change at all, as we'll just leave the descend stage behind before we fire that up.

But there is a slight problem, the only thing we can attach to the toroidal tanks is a single engine, looking at the 'Spark' engine, that will not be enough to slow us down quickly if we need to.

The solution here is the 'octagonal girder segment', it has negligible mass for our purposes, so we add two of those below our fuel tanks, and attach the 'Spark' engine, as well as four 'Twitch' engines. Our lander now looks like this:


It comes in at around 3.7 tons, so we saved 0.3 tons of mass, it sports quite a bit better deltaV at almost 2000ms total, and still has the RCS goodness.

Since we'll hopefully not burn our descend stage fully dry before we touch down, we can even use whatever is left there for the beginning of our ascend stage, so all that changed compared to our last design is we saved some weight, and even significantly increased our safety margin regarding deltaV.

I'll leave the examination of center of mass, and how it behaves while we burn fuel in the two stages, to your curiosity.

Suffice to say, the drawback we suffer with this design compared to our last one is that the RCS alignment is not as perfect in all phases of the flight as it was.

Note: As pointed out by an confuzed rock, we could also use the Oscar-B fuel tank instead of the octagonal strut to attach our engines. This will cost us a little ground clearance and increase our mass, but also gain some deltaV. Alternatively, we could replace one toroidal tank with the Oscar-B and use it for attaching the engines, which would give us back the ground clearance, in exchange for a some of our deltaV.
Looks like RCS is more trouble than it's worth?
At the moment, it looks like it. But we should probably take a closer look at this topic.

We've previously assumed that the 15 units of RCS fuel that come with our lander can are not going to enough for us. But is that really true?

Let's examine how much actual burn time that will get us with our RCS thrusters. We could go ahead and calculate it, but why not just put our thrusters on the lander can, and do some testing on the launch pad.

The desccription of the RCS thruster says that it will consume 0.25 units and then some of fuel per second maximum. Now we have two of the things that always fire at the same time, and trying it out on the launchpad confirms what we expected, together they burn 0.5 units of monopropellant per second.

This would put our burn time with those 15 units at 30 seconds. That doesn't sound all that bad for a start, but will probably not cut it.

But wait, we've tested on the launchpad. Don't these things work best in vacuum? They do, performing another test, this time launching our lander can into space, we find that they consume only 0.21 units per second in vacuum.

That gives us over 71 seconds of burn time on our RCS, just with the fuel we have in our lander can. Will that be enough?

The answer is, it depends on your docking skills. There are a few good docking guides out there, but if we only use the RCS for the final approach and translation maneuver, and if we place our RCS thrusters well enough to minimize the amount of thrust that is going to waste, 71 seconds of RCS is a lot more than we actually need.

Given that we try to keep our lander as light as possible, and that it does rotate rather quickly, we can do the bulk of the approach maneuver with our main engines.

As a reference, when doing the docking maneuver, I'll typically not start using RCS until I'm less than 200 meters from the target ship. At that point, I'll have reduced relative velocity to zero, and pointed both docking ports towards each other, so all it takes from there is simple translation movements, which can easily be done with 71 seconds burn time on a 2-3 ton craft.
[RTU] How about we build something useful for a change?
Guess I still owe you a properly working lander after all these boring technical excursions. Well, let's build something that is lightweight, can be used in practice, and is flexible enough so that the base design will last you a while in career.

Starting with a lander can, we attach four toothpicks as landing legs, place our RCS, one toroidal tank plus docking port at the top, three toroidal tanks at the bottom, four 'Twitch' engines to the sides, as well as four solar panels so we don't run out of juice.


It comes in at 2.6 tons of mass, 1760ms deltaV at a starting TWR of 2.51 and is stable when landing, but what is so great about this particular design?

It is easy to reconfigure this to meet different mission parameters, assume we might want to land on a lower gravity moon, we just remove one toroidal tank and we're good to go:


Now we're looking at 2.26 tons, 1440ms deltaV at a starting TWR of 2.88, and if we're taking a stab at a really low gravity moon, like Gilly, we drop another tank, drop the 'Twitch' engines and replace them with a single 'Spark':


Less than 1.7 tons, over 1300ms deltaV at a starting TWR of 1.1 which is good enough for very low gravity conditions, the comparatively large deltaV will even allow us to make multiple landings there.

You probably already have your own tweaks in mind by now, I'd suggest to experiment a bit, see how it handles in practice, and draw your own conclusions on what you can optimize further.


A slight variation of the design can use the sturdier LT-1 landing legs, and mount them at the very top of the can like shown above, with the solar panels repositioned.

The feet of the LT-1 legs are a little further apart, which gives added stability, but it will slightly cut into your deltaV and TWR as well as add a little mass.
How do I attach this thing to my rocket?
The first thing we probably want to do, since we'll reuse our lander, is make it a subassembly. In order for it to be attachable, we need to set the root node, and the point we want as attachment node.


Click the apropriate button in the VAB, and it will ask you to "define the root node". We want this to be the lander can, so click on the can.

Next it asks us to "select node to attach by", for the easiest version this will be our docking port. Click it, and you're set, the lander will stick to your cursor now, the docking port showing a green attachment node, and you can drop it into the subassembly drop zone.

Then you can construct your rocket, with a docking port on top of your capsule. Select the lander from the subassemblies tab, flip it around, and connect the two docking ports.

Now you'll probably want to have a fairing around your command capsule with the attached lander, and then you're good to go. The engineering report will complain about a command pod being attached the wrong way, but that isn't an issue, so you can safely ignore it.

However, this isn't nearly awesome enough. With stock fairings, I haven't found a decent way to put the lander below the command capsule, but with the mod ZeroPoint Procedural Fairings, we can do it rather nicely.

We'll need a different subassembly though, this time we'll select the bottom fuel tank as attachment node, since our lander will be sitting inside a fairing, facing the same direction as the command pod.

We'll first build our command capsule, and then attach an Interstage Fairing Adapter to it, put a decoupler on the interstage adapter to which we'll connect the lander, the whole construct will look something like this:


I've only attached one fairing wall so you can see the lander. Now the very important bit for this to work is that we set the decoupling force of both the interstage adapter and the decoupler to zero.

The reason is that we do not want our lander slamming right into our command module when it decouples, or getting any torque. Since it does not have a probe core, it will not be controllable, and if it spins or moves awkwardly, our docking procedure will be next to impossible.

Also, make sure that the interstage adapter, the decoupler, and the fairing walls are all in one stage.

Fast-forward, we're in space close to Minmus. Now we first need to stabilize our vessel, it should not spin at all. We hit the staging button, and our transfer stage is released, the fairings blown off, and our lander and command module should be drifting slowly.

Now we go into docking mode, turn on RCS, and slowly reverse our command pod a few meters. Rotate the command module around, making sure you're not hitting the lander.


We need to do this quick but careful, as the two vessels will have a slight spin we can't avoid, if the procedure takes too long it will get a lot more difficult.

If we slam into the lander now, it will most likely get a nasty spin, and our procedure is ruined, so we approach slowly, and hopefully end up with something like this:


Note: The command pod and low-profile engine in these pictures is from NearFutureSpacecraft, the solar panels from NearFutureSolar, and the low-profile fuel tank from Munar Industries Fuel Tanks.
What about Duna?
Since Duna has an atmosphere, this changes our game plan a bit, even if that atmosphere is not as thick as the atmosphere on Kerbin, it will help us a lot slowing down our craft using parachutes.

Since we want our docking procedure to be as easy as possible, we'll first build the orbital stage of our lander. We'll only need a little fuel here for maneuvering, but since there really aren't any fuel tanks small enough for our purposes, we'll just go with a toroidal tank here, and quad 'Spider' engines.


We attach our parachutes to the lander can, this will automatically adjust our attitude so we don't need to worry too much about our landing legs here.

Once we have this, we simply add a decoupler, and add our lifting stage, in this case a medium fuel tank, and a 'Terrier'. The landing legs also go here, again leaving as little ground clearance as we're comfortable with.


We want to use as much of the braking power of the atmosphere as we can, so we'll want to go for a shallow reentry with this, maximizing our flight time in the atmosphere.

The atmosphere isn't thick enough to really warrant a heat shield and the aerodynamic troubles having one big enough to cover our whole craft would bring us, so we ignore that.

We also don't want to deploy the parachutes too late, and also keep in mind their efficiency is reduced a lot in the thin atmosphere, they'll not be enough to slow us below critical speed on their own.

What we will do is perform a final landing burn once we're really close to the surface, in order to add in a better safety margin, it might be a good idea to add another small fuel tank on top of the medium one as well as quad 'Twitch' engines supporting our 'Terrier', or a twin 'Thumber' configuration instead of the 'Terrier' if you're really worried about messing it up.

More parachutes also never hurt on Duna, just make sure to place them symetrically, and always have them above your center of mass

As a rule of thumb on deltaV, if you have enough in order for your lander to make it into space from Kerbin, you have enough to establish orbit around Duna.
42 Comments
boopmastur Mar 17 @ 7:59pm 
This is very useful! Thank you!
bad name Sep 15, 2024 @ 2:20am 
yappatronic family
ironcal67 May 18, 2024 @ 7:55am 
Amazing guide!
Lerik Jan 15, 2023 @ 12:08am 
old but still very useful thanks
its_tom Dec 26, 2022 @ 10:12am 
cool :KSmiley:
Adoz Nov 24, 2022 @ 8:57am 
I Dont Think It Is Mods
Rockethead293 Jul 24, 2022 @ 10:51am 
whoa, what mods do you have for the capsule and stuff! that looks cool.
The Danger Pickle Jul 13, 2022 @ 3:11pm 
Okay okay. I just wanna add something.
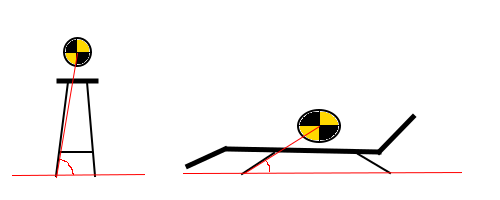
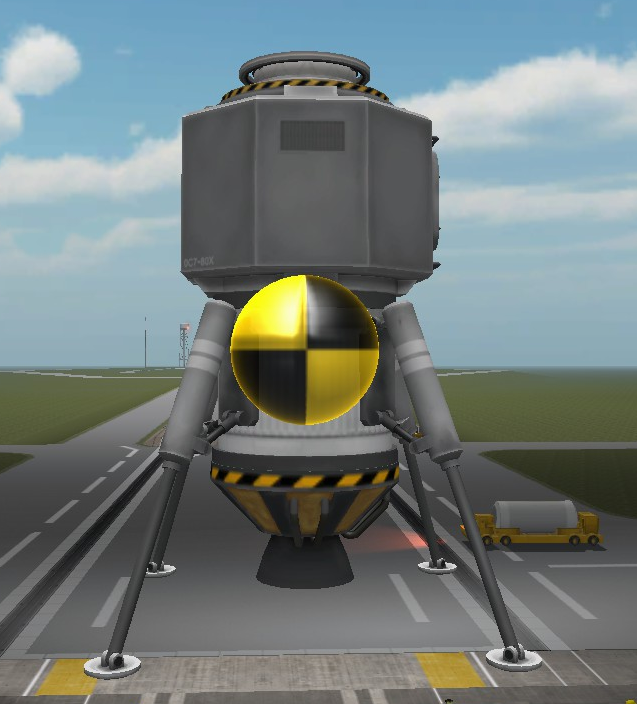
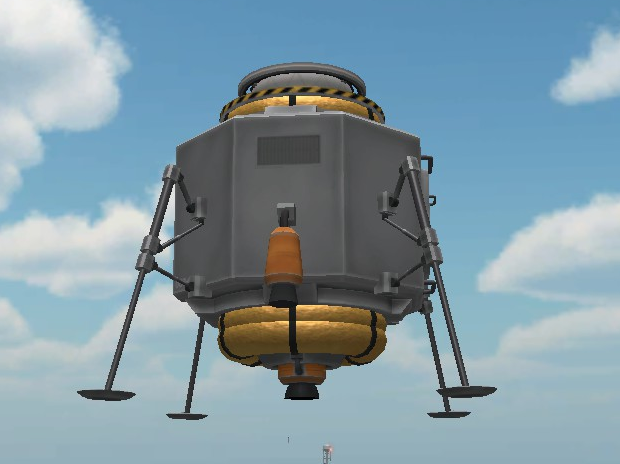
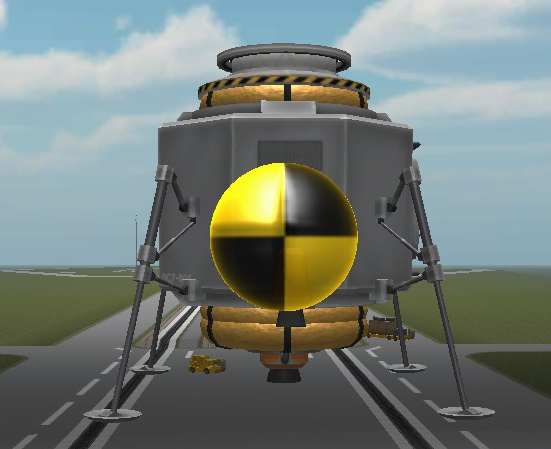
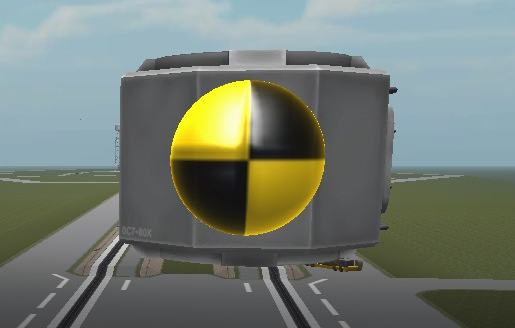
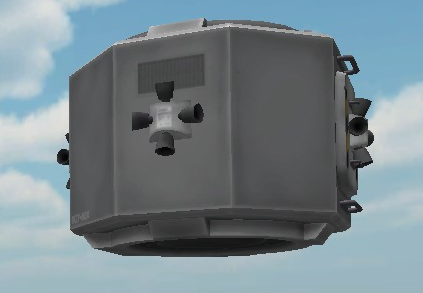
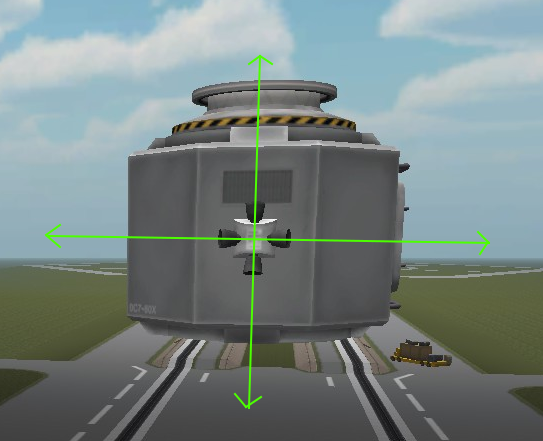
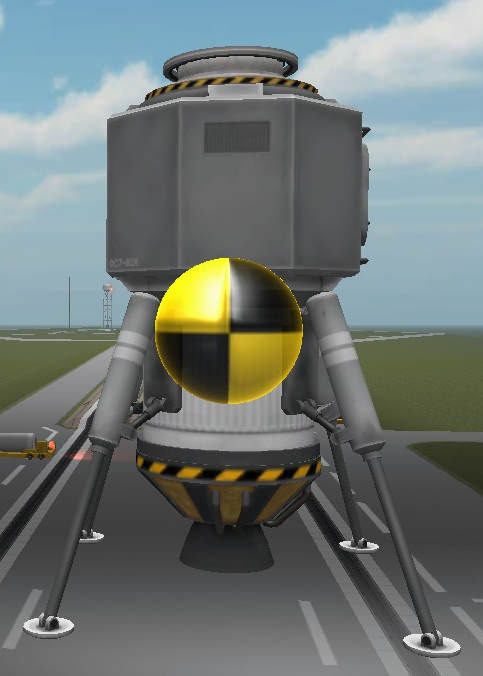
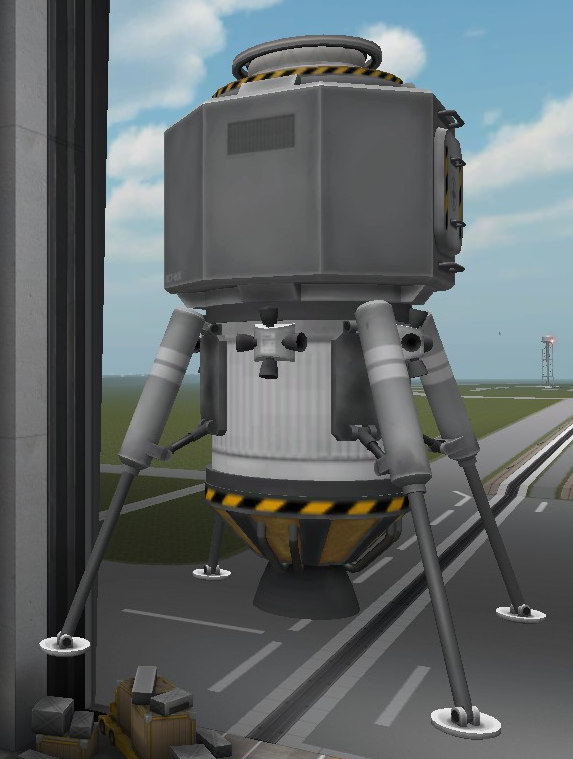
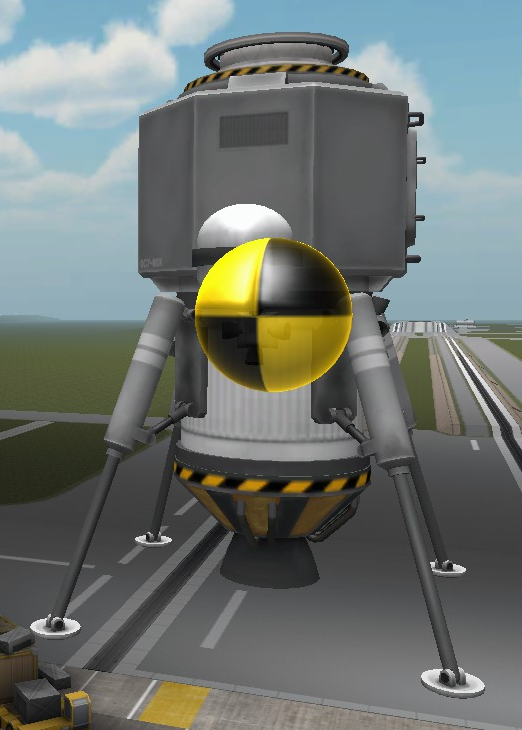
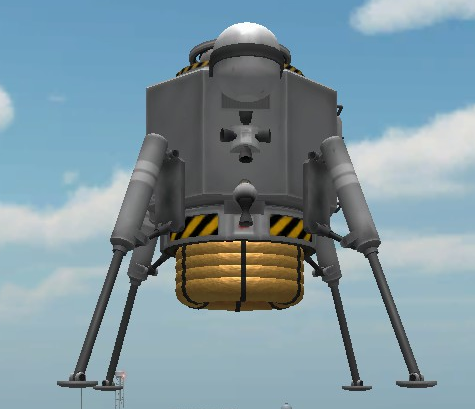
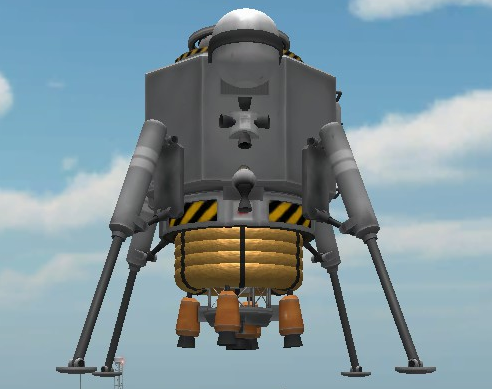
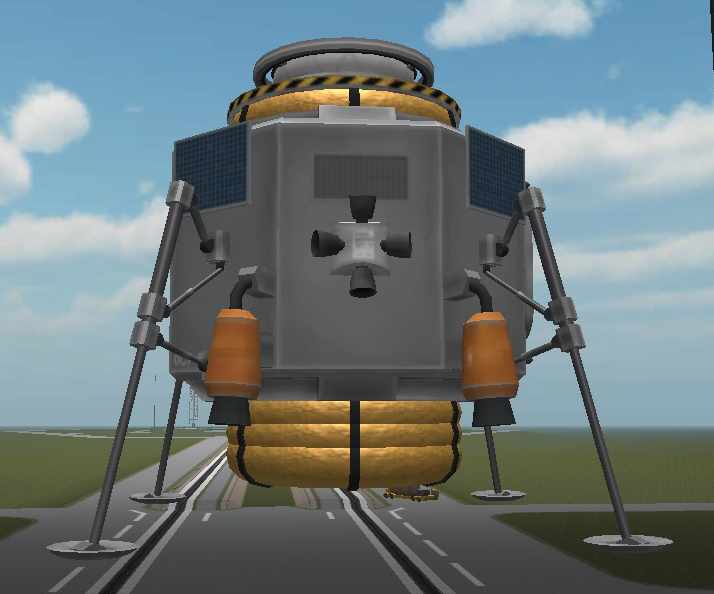
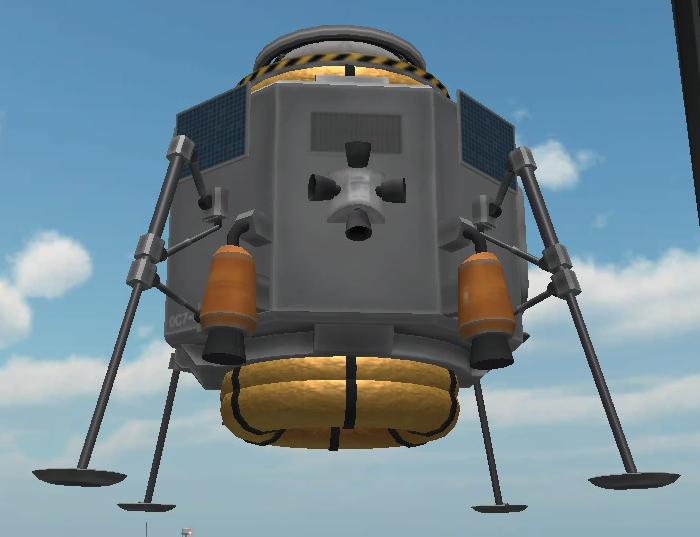
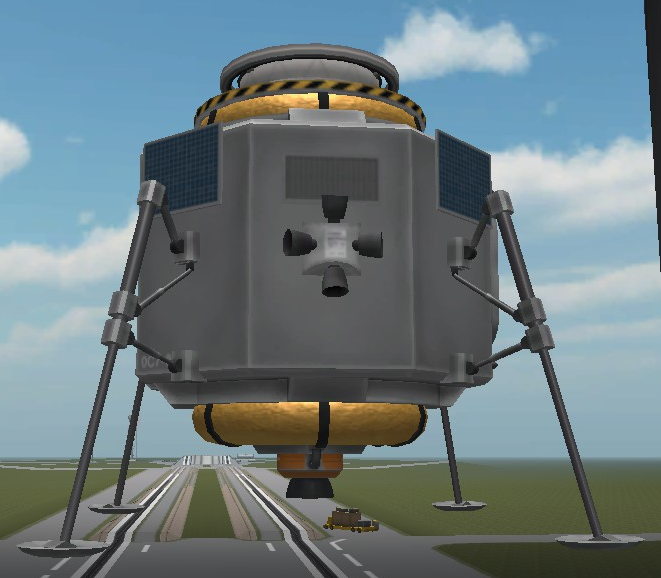
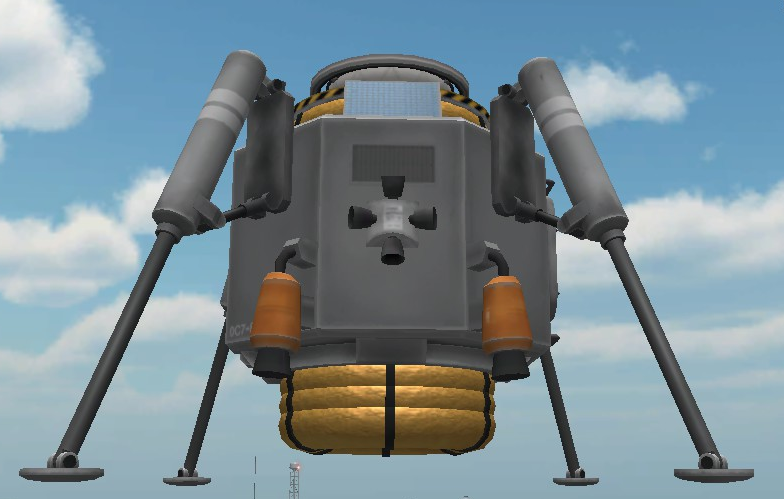
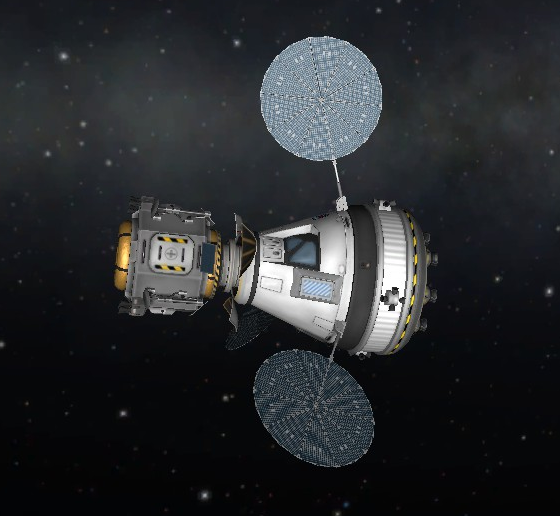
So, for atmospheric landing, Laythe, Eve, ETC, it's nice to use atmospheric engines that then detach. Not good for career, cash n' stuff, but still, works pretty well depending on the lander design.
PlantsAndTrees Mar 2, 2022 @ 10:49am 
Thanks! This Was Useful, Ima Try My First Landing Now! (On Duna)
thriver Feb 3, 2022 @ 12:16pm 
what did the full rocket look like