HELLDIVERS™ 2

HELLDIVERS™ 2

101 valoraciones
A Helldiver's CQC Guide
Por Nareen
A 'straight to the point' guide about all things CQC (melee) for divers of all skill to refer to.
2
2
2
   
Premio
Favoritos
Favorito
Quitar
Introduction
Greetings Helldiver!

You fancy using Super Earths most ancient form of weaponry against the advanced enemies of Democracy? You wanna get even sweatier and bloodier killing the enemies of Super Earth by putting in even more effort than just firing a gun? Are you a hipster?

If you answered yes to any of those questions then this guide is for you!

This is a straight-forward no nonsense guide for all things melee and CQC in Helldivers 2. It includes not only an overview of every form of melee possible in the game and their statistics, but strategies, tips, and a heavy armor mains advice to not getting swarmed whilst using a niche but surprisingly viable tool or play-style on Super Helldive difficulties.

Now lets get into it.
The Good and Bad of Melee
Melee, for better or for worse, is a niche option to pick for your dives. It is a jack of all trades specialist tool that preforms a very unique role compared to the typical guns or utility that share the secondary weapon slot.
This is NOT to say you can't fulfil the idea of a medieval warbond and run around with melee as your primary source of damage. It's just to say that a gun will have the advantage in most scenarios with far less effort required. (shocker)

But lets go through what melee is good and bad at to get a better overall idea on the reasons you may be compelled to take it on your next dive.

The Good:
  • Effective in close quarters and tight positions
  • Always available due to not requiring ammo (therefore also letting you save it for your other weapons)
  • Surprisingly good crowd-control and one-on-one capabilities
  • Able to take on nearly all enemies in the game from each faction

The Bad:
  • Limited range (shocking)
  • A sometimes janky system
  • Less than ideal dps
  • Time

That last downside may seem odd but Time is the biggest downside to using melee weapons and I feel people rarely brings this up.
In the cases of dealing with small groups of enemies there is no real issue.
However in the instances of bug breaches, bot drops, or illuminate drops: time is essential in dealing with the enemies. Not only does the increase of enemies make it more difficult to successfully utilise melee in most cases, but you run the risk of clearing the enemies so slowly that patrols will reach your position and call in more reinforcements, creating the dreaded reinforcement loop.
Its not to say this is a melee weapon phenomenon, it's just significantly harder to deal with a full wave of enemies while mainly utilising melee tools and equipment.

For that reason, unless you truly master a curated build and set of strategies, I suggest melee as more of a complimentary pick over an entire build.
Peak Physique
YOU DO NOT NEED PEAK PHYSIQUE TO RUN MELEE.

Peak Physique is an armor passive that essentially doubles the damage of your melee attacks, and while that can be very helpful it is in no way required for melee builds as many people say it is.


The damage numbers and health thresholds of enemies will be discussed in the Vs. Enemies chapter but I want to preface this now: having extra damage isn't required if you use melee well.
(Credit to u/Iron_Warrior_398 on Reddit)


Enemies have multiple health bars that are connected to each part of their body; head, limbs, torso, legs, weapons, etc. In the case of melee weapons (the Stun Lance for example): By aiming for weakpoints such as the head, you can often times one-shot most light and medium armored enemies, bypassing heavily armored areas or hard to damage spots.

Now yes, as some melee weapons feature innate armor penetration Peak Physique would help when it comes to more intense situations in where you may not always be able to hit weakpoints. It's like using a sniper rifle with a scope. You can use it fine with or without one, but the scope will let you deal with the few targets a little father away. In the case of melee: you will save a bit of time against tankier enemies. Thats it.
However as melee is so simple in its current state I would encourage those interested to take some time to learn where your stabs and strikes land and how to move your camera to make minor course adjustments. By doing so you will increase the efficiency of all melee weapons without the need to use a specific armor sets and passives to make them "viable" as many people like to say. It also offers more freedom for passives you may prefer or vibe well with your playstyle.

Are there any instances in where Peak Physique is a genuine benefit worth running?

Yes, there's some cases in where it will be a genuine help. These instances mainly revolve around the aforementioned downside of Time, specifically against the bigger tankier enemies. A more in depth explanation of this usefulness will be explained under the individual enemies in the Vs. Enemies chapter.
Melee Weapons
CQC-19 Stun Lance
  • 110 dmg (220 with Peak Physique)
  • Long-range stabs (half a Diver in length)
  • Stuns
  • Medium Armor Penetration (Level 3)
The Stun Lance is what I would call the pinnacle of Super Earth CQC engineering (for now). This weapon occupies the secondary weapon slot and is available for acquisition through the Urban Legends Warbond.
It provides the highest damage rating of the melee options with the ability to not only strike at a safer distance but with the added bonus of being able to STUN enemies, assuming you hit a weak spot.
It can be utilised in one hand: usable with all available shield stratagems and carry-able objectives.


Many people have said the Stun Lance's only issue is that it is a 'single target weapon', but I disagree.
For anyone familiar with the medieval slasher games Mordhau and Chivalry (2), you may be familar with the techniques of Accels and Drags. For those unaware this is a technique in where you move your mouse during the animation of an attack, resulting in what can simply be called swing manipulation (⚔️). Swing manipulation (⚔️) can be achieved with the Stun Lance, allowing it to attack multiple enemies in the same swing should you do it correctly.
This is achievable as the entire tip of the lance counts as a damaging point of contact.
(its why it was able to move vehicles and corpses on release)
With this in mind the Stun Lance is the most versatile and optimal melee weapon available to Divers at the time of writing. It deals solid damage with a stunning capability to manage crowds, emphasised more when manipulating your 'swings' to hit multiple enemies at once. Furthermore its range grants the weilder some saftey and room to maneuver and reposition whilst also providing the potential to take on larger enemies such as Hulks and Chargers (More details in Vs. Enemies)

-------------------------------------------------------------------------------------------------------

CQC-30 Stun Baton
  • 50 dmg (100 with Peak Physique)
  • Wide diagonal swings
  • Stuns
  • Medium Armor Penetration (Level 3)
The Stun Baton is an interesting option in the melee arsenal. This tool occupies the secondary weapon slot and is available for acquisition through the Super Credit Store.
The Stun Baton is by far the most utility focused melee option available, with its main and only benefit being its stunning capabilities.
It can be utilised in one hand: usable with all available shield stratagems and carry-able objectives.


I would say the Stun Baton is more of a preference pick over anything. If you prefer the swing animation over the stab of the Stun Lance and want something for more utility with the stun then it may be for you. However I would argue the Axe may be a better pick as it carries the same swinging animation set, higher damage, and an innate stun against most enemies along with a cleave mechanic so you hit multiple enemies at once.

-------------------------------------------------------------------------------------------------------

CQC-5 Combat Hatchet
  • 110 dmg (220 with Peak Physique)
  • Wide diagonal swings
  • Stuns (Sorta)
  • Looks cool 😎
  • Medium Armor Penetration (Level 3)
The Axe is, I would argue, the second best melee weapon in the game. It occupies the secondary weapon slot and is available for acquisition through the Super Credit Store.
The Axe is great in the sense of its an even easier crowd-controlling weapon than the Stun Lance and Baton given its wide swings and high damage allow it to cleave through many kinds of enemies.
It can be utilised in one hand: usable with all available shield stratagems and carry-able objectives.


The Axe is, in my opinion, a lesser Lance and a better Baton. If you want to utilise melee on the Bug and Illuminate fronts without dedicating your loadout to it this is the pick as your capable of simply cleaving through the majority of chaff enemies in your way. The only way in which the Axe fails to compete against the Stun Lance is in the matchups against heavier armored enemies. As the Stun Lance has a ranged stabbing attack, it is far easier and safer to target and damage weak-points on enemies such as Devastators, Hulks, and Chargers with significantly less risk. Whilst the axe is not incapable of doing this as well, it is significantly riskier as you have to be alot closer to damage them, and the enemies of Demoncracy got hands of their own-
This weapon is capable and benefits from swing manipulation (⚔️), details of such will be explained in the Vs. Enemies chapter.

-------------------------------------------------------------------------------------------------------

CQC-2 Saber
  • 110 dmg (220 with Peak Physique)
  • Precise diagonal swings
  • Medium Armor Penetration (Level 3)
The Saber, by all accounts, is a reskinned Axe. However it has two minor differences.
1). Your character model now has a scabbard on their hip
2). You still preform cutting swings, however these are now closer to the body and come from all four angles diagonally. As in tops to bottoms, and bottoms to tops.


If your a fancy diver or prefer swords over axes, this will work for you.

-------------------------------------------------------------------------------------------------------

CQC-1 One True Flag
  • 110 dmg (220 with Peak Physique)
  • Long-range stabs (half a Diver in length)
  • Stratagem
  • Medium Armor Penetration (Level 3)
The OTF is, rather sadly, a near copy of the Stun Lance, albiet without the stun or any unique properties.


All notes about the Stun Lance can be applied to the OTF, apart from the guaranteed stun. One upside the OTF has over the other melee weapons however is that is a stratagem. Whilst it is debatable if that really is much of an upside (trading a stratagem slot to use a normal secondary), it does allow melee enthusiasts a bit more loadout variety when dropping into missions.
Vs. Enemies
This chapter of the guide will focus on all the enemies you can successfully kill with melee . The basic premise will show the enemies health, how many hits each weapon takes to centre mass to kill it (with and without Peak Physique 💪) and then some tips and weakpoints on each individual enemy.

I will only be using SL (Stun Lance) and SB (Stun Baton) for the damage numbers as most melee weapons share the same damage numbers.

Enemies that did not get listed can be found below. Reasons mainly consist of the enemies weak points being incredibly tedious to reach without the use of a hellpod. Further testing is required but for now do not intend to take these enemies on with melee alone.
T = Bile Titans, (Predator Strain)
A = Gunships, Factory Strider, Dropships, (Incineration Corps)
I = Stingrays, Leviathans
Terminids


-------------------------------------------------------------------------------------------------------

Scavengers & Pouncers


Health = 60
Damage Thresholds:
SL = 1
SB = 2 (💪= 1)


A fodder enemy. Just look and swing. Be cautious when killing the Bile Variants as they will produce a mini acid AOE on death. Keep in might they are short, swinging weapons may have difficulty hitting them due to the short range.

-------------------------------------------------------------------------------------------------------

Hunters


Health = 160
Damage Thresholds:
SL = 2 (💪= 1)
SB = 4 (💪= 2)


These are very similar to scavengers in how they are fodder enemies. However in large groups their attacks have the potential to stun-lock you from even healing. These are worth targeting when possible as they are also relentless when it comes to chasing you down when you try to reposition. Keep in might they are short, swinging weapons may have difficulty hitting them due to the short range.

-------------------------------------------------------------------------------------------------------

Warriors


Health = 325 - 1,000
Damage Thresholds:
SL = 2 (💪= 1)
SB = 7 (💪= 4)


Whilst they pose more of a threat than previous enemies, their heads are incredibly easy to target, especially with the Stun Lance, and it has around 200-250hp. Remember than even when decapitated they will continue to move and attack for a short period of time and they hurt, be sure to dodge and keep your distance once they are dealt with.

-------------------------------------------------------------------------------------------------------

Hive Guards


Health = 500
Damage Thresholds:
SL = 5 (💪= 3)
SB = 10 (💪= 5)


While all melee weapons have an innate Armor Penetration value of 3, it is still more effective to target the fleshy weakpoints when possible. It is worth noting that the Axe does particularly well against them as you can cleave one of their legs (125hp) off with only a couple of swings and finish them off with a headshots.

-------------------------------------------------------------------------------------------------------

Shriekers


Health = 80
Damage Thresholds:
SL = 1
SB = 2 (💪= 1)


Its not advised to go out of your way to kill Shriekers with melee, but as it is entirely possible when they swoop down it has been listed here.

-------------------------------------------------------------------------------------------------------

Chargers, Behemoths, & Impalers


Health = 950-1100
Damage Thresholds:
SL = 10 (💪= 5)
SB = 22 (💪= 11)


The health for the Charger family seems low, but thats because the only viable place to attack is its arse. Make it charge into walls and stun itself or utilise Stun Grenades to take them down efficiently. Do not try to run circles around them in heavy armor they will pivot and stomp you eventually.

This is one of the few enemies in where Peak Physique is a benifit in the sense of by dealing more damage you can kill them faster. Again its not required per se, but it does make your life a little bit easier.

-------------------------------------------------------------------------------------------------------

Stalkers


Health = 800
Damage Thresholds:
SL = 8 (💪= 4)
SB = 16 (💪= 8)


Stalkers are incredibly nimble and annoying to fight with melee. If they manage to hit you with their tongue attack you will be sent flying in a ragdoll. It is possible to stun-lock them with options with innate stun and always assume it will take more hits than listed here due to their legs getting in the way of centre-mass.

Peak Physique is a benefit when it comes to fighting them for the same reason as the Charger family. It should be emphasised however that due to the ragdoll effect and inconsistsncy with hitting a Stalkers weakpoints that it is advised not to melee them fully, only if you have to.

-------------------------------------------------------------------------------------------------------

Spewers


Health = 300
Damage Thresholds:
SL = 3 (💪= 2)
SB = 6 (💪= 3)


Spewers are very slow and predictable so once you learn how to move around their bile attacks they are quite easy to deal with. The issue is when they come as groups as their bile will phase through one another and land on you. Aim for the head or stay behind them and prod at their sack until it bursts.
Bile variants, if they don't outright kill you, will slow you down. This can be a death sentence regardless of what armor your wearing so be sure to bait the spew before going in.
Automotons


-------------------------------------------------------------------------------------------------------

Troopers


Health = 125
Damage Thresholds:
SL = 2 (💪= 1)
SB = 3 (💪= 2)


Troopers vary only in what weapon(s) they may be carrying. What stays the same is their low health-pool. If faced with a group of these be sure to target the Commissar variant (They carry a pistol and blade) as they have the ability to call in dropships.

Devastators (& Berserkers)


Health = 350
Damage Thresholds:
SL = 4 (💪= 2)
SB = 7 (💪= 4)


Both Devastators of all variants and Bersekrs have a head health of 110hp. With the Stun Lance and Ballistic Shield these enemies only become an issue if they are the rocket variant. Otherwise you are free to push against them with little risk.

Striders


Health = 400
Damage Thresholds:
SL = 4 (💪= 2)
SB = 8 (💪= 4)


Contrary to the general consensus a strider's waist/ base is weaker than their legs with only 300hp compared to the legs joint 400. Be wary of their rockets on approach or if your tanking aggro from other bots as they can and will bypass any shield and instantly kill you. They have a stomp which you can block with the Ballistic Shield but you may risk being ragdolled.

Hulks


Health = 900
Damage Thresholds:
SL = 9 (💪= 5)
SB = 18 (💪= 9)


Similar to prior entries the health of the Hulk is determined by the only susceptible area for melee being the vent on their back. As this counts as a weakpoint weapons with stunning capabilities (such as the Stun Lance) are capable of stun-locking Hulks in place until death. Be aware due to the vent's position swinging weapons will struggle to reach.

Peak Physique is useful here as, like the other tankier enemies, it simply lets you kill them a little bit faster. When your being shot at by other bots this can be very helpful.

Tanks


Health = 750
Damage Thresholds:
SL = 7 (💪= 4)
SB = 15 (💪= 8)


As scary as Tanks can appear to be once you get ontop of them most are generally harmless, its surrounding units that make it difficult to take them down. Their vents are susceptible to damage from all melee weapons and is only a matter of closing the distance and 'riding the bull' until they die. The Ballistic Shield is very useful as you are able to tank both machine-gun fire and the Annihilator Tank cannon. Make sure you exploit any form of terrain possible both as cover and to lure the tank closer to you so there is less distance you need to travel to close the distance.
DO NOT CLIMB ON THE TREADS. Your health will get melted in seconds.
Barrage Tanks are able of shooting you even if your right against them and their rockets WILL kill you.

Turrets


Health = 750
Damage Thresholds:
SL = 7 (💪= 4)
SB = 15 (💪= 8)


Turrets are mainly found around large bases and encompass and sometimes over POI's. Depending on the timing and terrain you are able to reach their vent by use of either a mobility stratagem such as the Jetpack or Hoverpack. Alternativly, upon being reinforced, you may land ontop of the Turret Tower. THIS SHOULD KILL THEM. But in the instances it does not just know you can melee their vent as you would a Tank or Hulk. Just make sure to jump before they explode as you can be sent flying across the map.
Illuminate
ILLUMINATES


Voteless


Health = 100 / 130 / 160
Damage Thresholds:
SL = 2 (💪= 1)
SB = 4 (💪= 2)


Surprisingly the Voteless do have some variants, only affecting the physical model and health however. These are some of the more fun enemies to fight imo as they are perfect for practising swing manipulation (⚔️) on. The Stun Lance is capable of dispatching them all with a single headshot. Weapons such as the Axe work better for crowds, expecially if you take out one of their legs first with an initial swing, then follow it up with a headshot with the following strike.

Overseers


Health = 150
Damage Thresholds:
SL = 2 (💪= 1)
SB = 3 (💪= 2)


Despite being so tanky to most guns, Overseers (of all variants) are very weak to melee. With their torso and head only having 150hp they are easily dealt with even without Peak Physique (💪). However these are the most challenging non-heavy enemies to face with melee. Not only do they have access to a powerful punch that will ragdoll you, the regular Overseers's staves are incredibly consistent in bypassing the Ballistic Shield's block, which will ragdoll you and leave you on the ground for long enough to be double-tapped to death.


Fleshmobs


Health = 6,000
Damage Thresholds:
SL = 55 (💪= 28)
SB = 120 (💪= 60)


This is the ultimate challenge for any diver wanting to prove their worth as a melee specialist. Built to resist even stratagem airdrops Fleshmobs are insanely tanky and unable to be stunned by Stun Grenades or even the innate stun from the Lance or Baton. They charge faster than an out of stamina heavily armored Diver can sprint and they pivot even faster than a Charger.
The general consensus is to target the heads all over their body, due to their immense size is i recommended the Stun Lance to be used for the best results.

Harvesters


Health = 900-1000
Damage Thresholds:
SL = 10 (💪= 5)
SB = 18 (💪= 9)


The strategy to deal with Harvesters is what can be described as a mouse to an elephant. Your fully to just start hacking away at their ankles once their shield is down. They do have measures to defend themselves with this however: namely an arc blast and their 1500hp shield. It should also be said that this isnt the most practical enemy to use melee on, given its lethality and size other teammates may want it dealt with quickly so unless its a last resort, its not usually worth it. Stun-locking them is possible however.

Warp Ships


Health = 2500
Damage Thresholds:
SL = 23 (💪= 12)
SB = 50 (💪= 25)


The listed health is for the shield, not any actual damaging part. Unless Arrowhead let us walk into these ships we cannot destroy them without the use of explosives. If you have no ammo or even a hellpod to drop on it, melee can remove the shield. Eventually.

Watchers


Health = 400
Damage Thresholds:
SL = 4 (💪=2)
SB = 8 (💪= 4)


Just because you can doesn't mean you should. You should really just shoot these guys on sight as they will call in reinforcements when they fully notice you. After they do that they will follow you around and zap you with arc damage which will often break a limb (somehow). They are incredibly tedious to take down with melee as they manage to stay out of range most times, even if you back them up against a wall.
Strategies
Aiming Down Sights

Only utilise ads'ing for more precise attacks. When you ads with a melee weapon equipped your fov will zoom in over your character's shoulder and you will be reduced to a slow pace when moving. Whilst this has its practical usage at times, in the event of facing multiple enemies at once it is often times a detriment to do so (unless your using a shield, more details in the Loadout Tips chapter.)
It should also be noted that with the swinging weapons (Stun Baton, Axe, and Saber) that your attacks will often make medium armored enemies recoil and move away from you. By being ads'd it takes longer to close the distance to continue damaging them and is a gripe many players have voiced when engaging with melee.
If possible: attack the enemies in a way in where they back up against a wall or object to prevent them continuing constantly retreating from your melee range.

-------------------------------------------------------------------------------------------------------

Utilise Terrain

One of the most impact tools a melee user can utilise is the environment itself. Be it natural or created by your own hands with stratagems, explosives, or mines, forcing your enemies through tight choke-points will make cleaving through several enemies at once, and thus the horde, significantly easier.
A choke-point is not a sure-fire way to deal with an entire horde, with sufficient numbers or size they will still be able to push through and continue chasing you down. However: larger enemies can also be utilised to your advantage as in their attempt to reach you, they may trample others and clear some numbers for you.

Corners are also incredibly useful when it comes to melee. By disrupting an enemies line of sight on you you are forcing them to come to you in order to damage you. But if your only hiding around the corner, the second they turn it they are now isolated in a close quarters 1-on-1 engagement with you, and you have the advantage.

Even seemingly minor rocks or altitude differences can make a big difference on whether you are able to control and kite a horde efficiently, or be flanked and swarmed. Keep an eye out and be sure to experiment when possible.

-------------------------------------------------------------------------------------------------------

Stealth Applications

The way enemy detection works in Helldivers 2 is odd, and to be truthful: I don't fully understand it. What I do know however is melee is capable of being used to maintain stealth whilst dispatching enemies.
Similar to fighting other units with melee, there is some jankiness to this too however. You need to be able to kill the enemy quickly before it is able to turn and face you. Once the enemy faces you you are fully detected and the enemies nearby will know exactly where you are and begin closing in on your location.
The use cases for this is few and far between but for some Divers I figure it would be nice to know.

-------------------------------------------------------------------------------------------------------

Stims are a Resource

There will be times when you start getting hit by multiple enemies at once, there will be times when you get surrounded or pressured by enemies you simply cannot deal with all at once. As every attack you do with a melee weapon takes from your stamina it is crucial to remember you will almost never have enough to run away and reposition in the majority of situations.

For this reason it is good to remember that Stims are a resource, ones that not only provide a strong regenerative ability for a few seconds, but will fully recharge your stamina and keep it full for the duration of the Stim. (Even more if you utilise the Experimental Infusion Booster)
Never be afraid to pop a Stim and run away to reach a better position or to gather your bearings. You should also consider this as an option if you have any nearby teammates with stratagems that may help clear out any enemies that are casing you to struggle.
Communication is advised with this.

-------------------------------------------------------------------------------------------------------

Teammates are Helpful (Sometimes)

Assuming your not solo-diving, sticking with at least one other Diver can be an incredibly useful strategy for staying alive.
If communication is possible you and your fellow Diver can take on specialised roles in terms of dealing with enemies. Utilising Melee and a Shield makes you an incredible aggro-tank which can provide breathing room to your teammate and allow them to clear chaff or large enemies off your tail while you tank and kite them around.
Alternatively you can also make use of more conventional strategies such as standing in-front of you teammate whilst they fire or reload their weapons and keep both of you protected from ranged attacks. (This is especially effective with the HMG-Emplacement Turret as, when crouched with The Ballistic Shield, you fit perfect under the barrels of the gun and provide directional protection to your teammates otherwise exposed body.)

And if ever you find yourself in the presence of another melee-diver, shield walls prove an effective strategy against anything that isn't explosive or fire.


Loadout Tips
I'm not gonna tell you exactly what to bring and what not to. But I will give you some ideas to dwell on when it comes to curating your own builds.

If you want to improve your ability with melee overall, wear Heavy Armor for a period of time.

Heavy armor, to many players, is seen as bad as; defensively you can only survive 1-2 additional hits from some enemies. That and your stamina is heavily penalised whilst wearing it. But thats exactly why I recommend wearing Heavy Armor if you are serious about getting better with utilising melee based weapons. These limitations make it far harder to escape if you get swarmed and will, initially, result in you dying often. By undergoing this process you'll start to figure out how to better prioritise targets when your being chased down, you'll position yourself better overall as to avoid being flanked or cornered, and you'll stop depending on speed alone to deal with situations.
When you feel more confident in your ability to preform in these situations, swapping back to Medium or Light armor will then make you even more effective, as now your positioning and target priority are better and your speed will allow you to better make use of the distance you create.

As for weapon and stratagems loadout tips for your melee endeavours:
  • You want a primary weapon that compliments your choice of melee, and stratagems to compliment that pairing.
    e.g. Melee is close quarters combat, consider pairing it with a long range primary weapons with your stratagem slots being used for mass add clear or anti-tank measures with your throwable acting as utility.
  • Do not sleep on throwables for additional utility. Stun Grenades especially are incredibly effective for melee builds, especially against Hulks and Chargers.
  • Shields. Are. Powerful. To me this is what determines if someone is running melee because they want to or if it is a full build as it occupies not only a weapon slot but also a stratagem slot.

    There are three shield stratagems available:

    ---------------------------------------------------------------------------------------------------

    SH-20 Ballistic Shield Backpack


    The Ballistic Shield is the most reliable and simple shield to utilise. To put it simply is is a portable sheet of cover that blocks damage from 'small arms fire' at all times, regardless of where it is in the world.
    It is capable of fully negating damage from basic level firearms on the Automaton Front. It is able to negate a significant amount of damage from harder hitting blasts from enemies such as Devastators, Hulks, Striders, Bile Titan stomps, Illuminate Overseers (sticks), and even Harvester beam attacks. It also defends against bile attacks, but not the AOE. (Bile is coded as an explosive attack, the Fortified armor passive may be useful in these situations.)

    In a dire situation, or if caught off guard, it is capable of letting you survive a shot from Cannon Turrets, Tanks, and even Leviathan attacks that would otherwise instantly kill a diver regardless of armor, at the cost of the shields entire durability.
    The Ballistic Shield is also capable of blocking melee damage of most enemies from all factions.

    However...

    As previously mentioned throughout this guide: melee is finicky. Sometimes enemy melee damage will clip through the shield and deal full damage. Othertimes the shield lets you survive something you really shouldn't. Its in a far better place than what it used to be on release, but we are still a ways from being able to have 100% consistency with it and melee as a whole just yet.

    Just be warned: you may find your melee shenanigans ended prematurely when an Overseer or Devastator's haymaker flies through your shield and your left open for a follow up attack which will most likely kill you.

    Additional Note: Stabbing based weapons will have the Ballistic Shield remain up infront of you. Swinging based weapons will move the shield to the side, leaving you open to attacks.

    ---------------------------------------------------------------------------------------------------

    SH-32 Shield Generator Pack


    The Shield Generator Pack provides a full 360º of protection in the form of a sphere. It is a passive shield in where simply wearing it activates it, with its only limit being the shields individual health. Upon reaching 0hp, the shield will be destroyed but recharge fully in 12 seconds.
    The shield only has 200hp, and due to how bulbous the shape is it is very quick to be destroyed via crowds of enemies or focused fire. However as the healing recharge rate takes 60 seconds to begin, it may be worth letting the shield be destroyed before you make a play just to ensure you will be able to tank some damage.

    Similar to the Ballistic Shield, enemies that are on a lower elevation to you (mainly terminids) will sometimes be able to fully damage you despite the shield being active.
    A benefit to the Shield Generator is that you are immune to the stun effect from Stun Grenades. On the flip-side you cannot be healed with the Stim Pistol unless the shield bubble is down.

    Be wary of trolls whilst wearing the Shield Generator Pack as melee attacks from fellow Divers will result in you ragdolling. But to the Divers you wish to protect (such as those reloading their support weapons) standing next to them will grant them a modest amount of protection so long as they are also within the sphere.

    ---------------------------------------------------------------------------------------------------

    SH-51 Directional Shield


    The Directional Shield is a weird love-child between the Ballistic Shield and the Shield Generator Pack. It is an energy-based shield that only activates when you manually hold it up and it only covers the area in-front of you with a transparent waist-high wall that extends further horizontally to your sides, allowing for useful team-play.
    However it has to be said this shield does not block melee attacks, only projectile based attacks. This makes it significantly less effective for melee specific loadouts as you run the risk of getting pummelled in the range your attempting to be efficient in. Similar to the Ballistic Shield a one-handed weapon is required for the shield to be activated and held infront of you whilst ads'ing.

Additional Notes
I try to garner most of this information by myself and my own experience with the game as I feel not many people truly give melee weapons a proper go in most videos and posts I see in regards to it.

It's not to say I'm 100% right about everything and that I'm some stick stabbing messiah of a diver.

I just enjoy melee play-styles in most games and I want others who may share this interest to have a place to figure out potential new tips and ideas worth trying out to see what melee in Helldivers 2 can truly offer.

That is to say: we are all in this together, if you have any questions or ideas, experiences which may contrast what is in this guide or more information you wish to share, please feel free to do so in the comments and I will do my best to keep this guide updated so that the Ministry of Truth doesn't come for my ass for spreading misinformation on the internet-

I would also like to use this section to credit those whose work I reference throughout this guide; be it artwork, statistical information, and so on so forth.

- u/Iron_Warrior_398 on Reddit (for the armor locations diagram featured in the Peak Physique chapter)
- Helldivers.wiki.gg (for the image thumbnails for the weapons, enemies, stratagems, and information to cross-reference with other sources)

With all that being said: I hope the next time you think about how you can spice up your next dive that maybe you give melee and its options a try. And while your at it? Shove some lances where the sun don't shine. For Super Earth o7


Things I plan to test and add eventually:
  • Constitution & The Amendment Bayonets
  • Melee whilst Airborn
  • Melee in Vehicles (Mechs, ATVs)
  • Viability of the kicking emote
  • Demonstration GIFs
  • Combo potential with throwing daggers
  • Unarmed melee/ gunbutt dmg
  • 'Damage Stuns'
⠀⠀ ⠀⠀ ⠀⠀ ⠀⠀ ⠀⠀ ⠀⠀ ⠀⠀ ⠀⠀ ⠀⠀ ⠀⠀ ⠀⠀ ⠀⠀ ⠀⠀ ⠀⠀ ⠀⠀ ⠀⠀ ⠀⠀ ⠀⠀ ⠀⠀ ⠀⠀ ⠀⠀ ⠀⠀ ⠀⠀ ⠀⠀ ⠀⠀ ⠀⠀ ⠀⠀ ⠀⠀
21 comentarios
Tech 5 JUN a las 2:26 a. m. 
There is a way to boost the dps. Set the open weapon wheel and melee to the same key, input type press for open weapon wheel and input type tap for melee. Now enjoy your turbo melee spam. Works best with bayonet.
ah, salmonn 28 MAY a las 4:32 a. m. 
my saber attack against voteless mostly targeting their limbs, they still crawl tho.
Squishy_O 27 MAY a las 8:33 p. m. 
wait im stupid peak physique is armour not a booster
Mickey 27 MAY a las 6:45 p. m. 
Thank you so much for such a detailed guide on such a wonky and fun playstyle :mrb_boris::steamthumbsup:
travis_badnais 27 MAY a las 6:14 p. m. 
I have done a melee and got 202 kills can done you have to run spartan helmet
Squishy_O 27 MAY a las 6:11 p. m. 
one question that i have is if the peak physique stacks with the updated armour buff for the masters of ceremony warbond
Nareen  [autor] 27 MAY a las 12:07 p. m. 
I'll be sure to give it a look soon, got some edits to make in regards to the stats for the axe and saber already so I;ll update it in bulk.
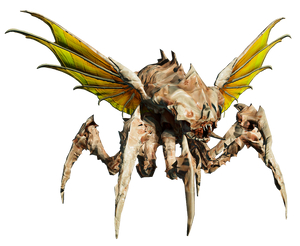
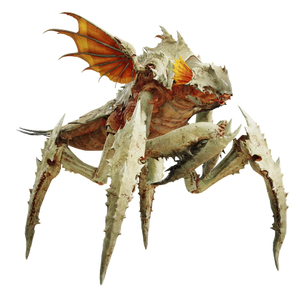
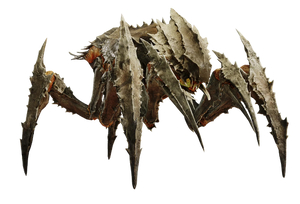
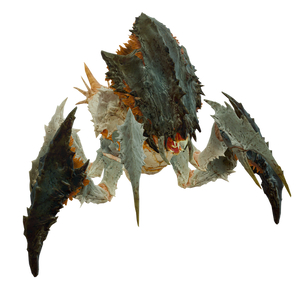
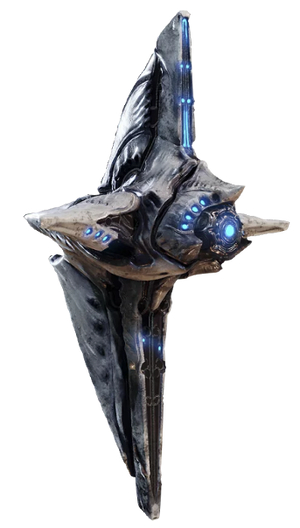
Might make a little bugs section as well because that is definitely a big issue for melee atm, probably better to have it compiled in one place than spread out in the whole guide.
Louie 27 MAY a las 11:43 a. m. 
It sucks to say, but the Saber might be a straight upgrade to Hatchet. From my testing against the illuminates, the hatchet often tends to get ''stopped'' when hacking at enemies, it wouldnt cleave through several voteless at once unless you did some finicky camera movement, which the saber has no issues doing. Also, some weird quirk when inside a shield bubble (the stratagem), the hatchet would stop aswell despite not hitting anything. Somehow, its hitting the outer wall of the bubble even when in the middle of it. Again, an absent problem when using the saber.
Grung The Goblin 26 MAY a las 12:34 p. m. 
Can't wait for the devs to stop jerking each other off and make a melee warbond
bevyrage 26 MAY a las 6:27 a. m. 
Unarmed melee/gunbutt damage sits around 50 going by voteless thresholds. Pistols can one-shot a voteless if they strike right on the head though, and going by needing two headshots with the liberator penetrator to break a head it might actually be more damage or a conditional modifier. Rising gubutts hit the torso and arms so they're pretty bad except against terminids imo. Support weapons with their downward hits have a bit more reach than expected and can hit voteless and bot heads pretty easily too with the camera manipulation.