FINAL FANTASY XIV Online
Недостатньо оцінок
Shiva (Extreme) - The Empress of Ice
Автор: Akki
A guide that covers all the basics and gives some advanced tips for the primal fight Akh Afah Amphitheatre (Extreme). It will be of use for both first timers and experienced people and it will give you a good understanding of the fight and its phases.
The guide may be very text-centered for now but it covers everything you need to know to do a good job in there. I will add illustrations, screenshots and / or videos to support this guide when I feel like it or have the materials ready.
   
Нагородити
До улюбленого
В улюблених
Прибрати
General Information about the Battle
Shiva is the face of patch 2.4 "Dreams of Ice". In order to be able to participate in the battle you will need to have cleared Ramuh on Extreme difficulty and the main story of 2.4
It's designed for 8 players with a regular setup of 2 tanks, 2 healers and 4 DPS. It can be done with 1 tank or 1 healer even. Those are advanced strategies though.

The main mechanic of Shiva is the weapon she is carrying. She will change her weapon multiple times during the fight and every weapon has its own mechanics. The whole fight evolves around this.

The fight is about coordination and dodging. Personally I'd say it's one of the easier fights in this game, however a single person can kill others easily with their own mistakes which makes this fight more difficult.

In order to keep track of her weapon, it is recommended you set her as Focus Target - she will gain a priority buff depending on her weapon that's always displayed on the left.

Shiva has both a soft and hard enrage, which means that Shiva will grow stronger if the fight takes longer. She will gain Damage Up stacks occasionally. After reaching about 11 or 12 she will enter her hard enrage point, casting another Diamond Dust which will kill the party.
Start of the Fight - Up to Adds
For the first 20% of the fight you will be fighting an easier mode of what's to come. Shortly after the pull she will change to a random weapon, either Staff or Sword. After that she will always choose the other.
Compared to the last phase, the aoes at the start are usually hard to dodge. Since there won't be much damage generally, it is recommended you take one aoe hit without risking to take multiple ones. The aoes in the later phases are always dodgeable.
Hailstorm, her Staff-initial-move which I will go into detail later, will also target all players instead of only 4-5 in the first phase.
The first phase lasts up to 80% of her HP and will always have 2 weapon changes.
Shiva's Stances - Staff Mode
One of the weapons she will use is the Staff. Right after she takes out her Staff, she will cast Hailstorm, an attack that puts multiple aoes over the players' heads, including the tank.
To avoid massive damage it is recommended you avoid stacking. They work similarly to Ramuh's Thunderstrike. Spread out and make sure your circle doesn't cross another player (it doesn't matter if it only crosses the other player's cirlce).
After that she will do about 4 map-wide aoes that hit all players for medium damage. This will need immediate aoe-healing attention in later phases.

While she has the staff up, she will be inflicting blunt damage on the tank + a slashing resistance debuff with her auto-attacks. She doesn't use any cleave-attacks so you don't have to worry about getting your party hit if you have to turn her.
The slashing resistance debuffs stack up to 8 times and last 2 minutes whenever she re-applies it. This will affect her damage during Sword mode.

It looks like this:

Once she's finished with her last aoe, she will hit a few auto-attacks on the tank before putting away the staff.
Shiva's Stances - Sword Mode
The other weapon she will be using is the Sword. After equipping her Sword she will always use Icebrand first. Icebrand will hit for 18k, however the damage is spread among all the players hit with it. To efficiently survive it, have the tank turn her into the party and get everyone hit by it. Then move right back to position.

After Icebrand she will use Glacial Bash. This attack is similar to Garuda's Slipstream. It can (and has to be) avoided by walking behind her after she starts casting it. This is the only cleave-attack that can kill your party if you turn her before she casts it. It will do up to 7k damage and stun everyone who's hit. Make sure you face her away after Icebrand!

After a short skill-break she will use Whiteout, a donut-aoe that can be avoided by standing close to her. It will not kill you but it does a lot of damage which should be avoided. Make sure you stand close.

Immediately after Whiteout she will use a knockback skill that kicks everyone away. After adds the tank has to make sure not to get knocked into the wall by this. Either avoid it by using Tempered Will or move behind her after Whiteout.

During Sword mode she will inflict slashing damage + a blunt debuff on the tank with her auto attacks. The debuff will affect the damage the tank takes from the staff and the adds! When playing with 2 tanks, the tank with the slashing debuff is supposed to tank the adds.

The blunt debuff looks like this:

Once she's done with her knockback skill, she will hit the tank a few times before putting away her weapon.
Add-Phase and Diamond Dust
Shortly after hitting her below 80% of her HP, she will move to the center of the arena and summon 4 adds. These adds need to be killed in order to survive her signature-move Diamond Dust.

Everyone should stack up in the center and give the offtank time to pick up the adds, then aoe them down. If you're not sure about your damage you can use a level 1 caster Limit Break to inflict extra damage, but it should be easy to kill them without.

The 4 circles of the adds have no meaning other than an indicator of the adds that are still alive. They don't do damage to you and they don't debuff the adds. Even if people say something else, trust me - I tried.

During add phase, Shiva will always be in Sword mode - make sure the MT hits everyone with Icebrand to avoid his death. Also make sure to face her outside again after that to avoid Glacial Bash on the party.

After Shiva disappears she will coat everything with her Diamond Dust move. This is the last chance you got to kill the adds. If they aren't dead by the time everyone gets frozen, you will die from Diamond Dust.


Having succeeded in killing the adds, the last phase will start.
What Lies Beyond the First Diamond Dust
Starting from here, her last phase will start. You're now running against time to kill her before she kills you. The arena is now surrounded by a snowstorm. If you move too close to the edge of the arena you will end up in an ice rock.

She still has all the mechanics from before and will now use 2 circle-aoes while she changes her weapon to sword or staff.
These aoes always have 4 safespots near the edge of the map. They move every time as well. As an example, if the safespots were arranged like an "x" on the first aoe, they will be arranged like a "+" right after that. Since you will have to deal with these aoes while she does her intial-weapon-move you need to be careful.
If she changes to staff, which she always does first after Diamond Dust, you will have to deal with the circle aoes, the 4 safespots and the Hailstorm aoe on 4-5 players. If everyone stacks on the same safespot, they're all dead.

To counter this, create pairs at the start of the match and assign a spot for every pair. Every pair has to make clear who is going to stand on the innermost spot of the safespot and who will standing in the outermost spot of the safespot, in case both of them have an aoe above them. Take into consideration that the circle aoe and the safespots move every second time. Make sure everyone moves clockwise or counterclockwise with their safespots to avoid stacking in panic.

This is an example how the safespots look like and how they move. Please not that the first aoe of the two in succession (the one before she changes her weapon) doesn't have an aoe in the center!

Safespot pattern + (left picture) --------------------------- Safespot pattern x (right picture)
-

She will also gain a new skill which she will use randomly, called Permafrost. It looks like a maelstrom on the whole map. If you see it, stop moving right away. Skills are fine but if you move during Permafrost you will slip and slide across the map. If you reach the edge of the arena, you will get frozen and end up in a rock. Don't move until the floor isn't frozen anymore. This lasts for like 3-4 seconds.

After her first weapon she will do a circluar aoe similar to Titan's circle-bomb-pattern. Either have everyone stack in the middle and take the hit or move to the last circle and wait for the first circle to disappear.
After the circle-pattern she will introduce a new weapon, the bow, which isn't too difficult but needs serious attention.

Please note that every circular aoe inflicts a Vulnerability Up debuff which lasts for a minute and stacks multiple times. The only time when your tank should be taking one is before she picks up the bow, if possible. A tank with 4 stacks Vulnerability Up will drop like butter. It's not worth healing.
Shiva's Stances - Bow Mode
The Bow mode, which always comes after the Titan-like circle pattern, does not inflict any debuffs on the tank and isn't affected by his debuffs. However she has an increased critical hit rate while carrying the bow, making skills like Awareness a good option.

Right when she changes to bow she will do a 270° aoe with a safespot behind her. The aoe has no indicator and is executed right after she finishes changing. Everyone not standing in the safespot will die from massive damage. The tank can't turn her as soon as she starts changing her weapon. To avoid people's deaths from not paying attention, have the tank take one of the circular aoes instead of dodging them to make sure she's facing outside.
An example of what the safe zone of the aoe looks like - inaccurate!

- Map Legend: Red marks Shiva with the tip showing her facing direction. Yellow is the approximate safe zone of this attack

After a short time she will target a player for a special knockback, this player will be indicated by a blue mark above his head. Have the player stand right behind Shiva and let everyone move away from him! She will cast a line-aoe on this player and knock everyone who's hit back in the process. If Shiva is tanked near the edge and the marked person stays close, you can avoid getting frozen by the arena walls. If the tank gets the mark he will have to be freed from the ice rock, avoid it with Tempered Will or have him buffed with Stoneskin and Adloquium so he will take 0 damage.

- Map Legend: Red marks Shiva again, Yellow dots are players without the blue mark, blue dot is the player with the blue mark. Purple indicates the line knockback aoe.

After she puts away the staff, the rotation will repeat from after Diamond Dust and the weapon will be either staff or sword. She will always follow up with a bow on both of them and then repeat again.
Shiva's Rotations in the Fight
Here's a quick run-down on the rotations she has.

The entry "Weapon moves" stand for the following:

Sword mode:
> Icebrand
> Glacial Bash
> Whiteout
> Knockback

Staff mode:
> Hailstorm
> 3-4 aoes with auto attacks inbetween

Bow mode:
> 270° aoe
> blue mark knockback


Rotations for the fight itself:

> Pull
> Weapon change (Sword or Staff)
> Weapon moves
> Weapon change (the other one)
> Weapon moves

--80%--
> Summon 4 adds
> Weapon change (Sword)
> Weapon moves
> Diamond Dust

--after adds--
> Circle aoes pattern "x"
> Weapon change (Staff)
> Circle aoes pattern "+"
> Weapon moves
> Titan-like aoe pattern
> Weapon change (Bow)
> Weapon moves

--General Rotation until hard enrage--
> Circle aoes pattern "x"
> Weapon change (Staff or Sword)
> Circle aoes pattern "+"
> Weapon moves
> Titan-like aoe pattern
> Weapon change (Bow)
> Weapon moves
--Repeat--

After repeating the last rotation 3-4 times she will enter hard enrage and kill everyone with Diamond Dust. This is only likely to happen if your DPS die all the time.
Rewards For Clearing
Just like every other extreme primal fight, there are rewards every time you clear the dungeon.
In Ahk Afah Amphitheatre (Extreme) the rewards are the following:

  • One item-level 110 weapon for a random class, drops every run.
  • One item-level 120 bracelet for a random class, drops every run as well.
  • One gladiator shield in addition to the other drops, does not drop every run but has a fair chance
  • An exclusive Shiva-themed mount, very rare - I have yet to see this one drop, even after 50+ runs
  • A Diamond or Ice Tear - fairly rare, will drop into a random person's inventory on kill
Advanced Strategies: Solo-Tanking
One of the more advanced strategies for farming is to choose only one tank and bring a fifth dps in the other tank's stead. Doing so requires a few things:

  • Two capable healers that can deal with the immense extra damage on the tank.
  • A tank who knows when to pop which cooldowns and how to avoid the most damage.
  • A party that doesn't make the fight difficult by taking extra damage (by taking unnecessary aoes, for example) or having low DPS even with a fifth damage dealer.

Since there won't be any tank-swapping, there's only one tank to focus. For the same reason, however, the tank will take in all the resistance debuffs of Shiva and therefore take immense damage depending on her weapon.
The most critical phases are when she is either in Staff or Sword mode, as those are affected by the debuffs. As tank, make sure to pop your cooldowns during these phases but save some in case ♥♥♥♥ hits the fan. Her bow mode isn't as dangerous though. Unless your healers are having trouble, you can go without defensive cooldowns there.


I will add more to this section in the future. For the time being, here's a video of a random run where I'm solo-tanking Shiva in a farm party. Pretty much all of my actions have a reason, so take a close look if you want to learn how to do it.
If you have questions, comment here or on the video. I've answered a bunch of them on youtube already, maybe you'll find your answer right away.
Conclusion
At this point you should have a full understanding of the primal fight and its mechanics. The next step is to put it into practice, as some things turn out more difficult if you have your hands full with doing job.

I want to thank you for reading my guide and ask you, if you liked it, to rate it up, favorize and share it with your companions.

If you have any questions you would like to ask, or something I should add, feel free to comment on this guide or contact me directly on Steam or ingame.

- Akio Mitsuko (Moogle EU)

Коментарів: 13
Zuly 17 жовт. 2020 о 6:14 
@Water Splash Funny you say that, because this guide is still relevant for Unreal difficulty.
Akki  [автор] 17 жовт. 2020 о 0:49 
@Water Splash that's because the guide is literally 6 years old, you would know if you read the metadata.
Heart <3 16 жовт. 2020 о 17:29 
yet this is irrrelevant since any lvl 80 combat class can easily solo extreme why not just do a unreal guide?
No 12 жовт. 2020 о 12:38 
peepeepoopoo
Royal 24 листоп. 2016 о 13:30 
Lemme put this all together in a rather, short response.

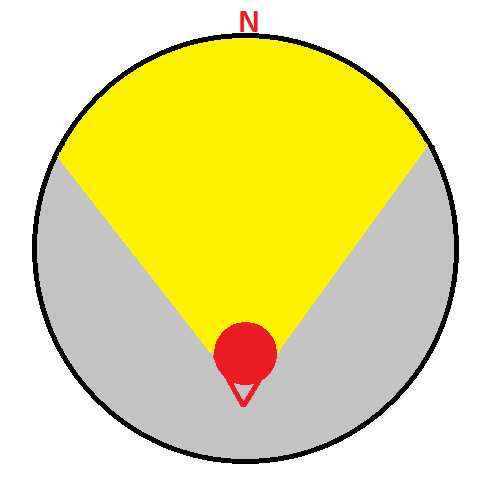
- Have the tank stand on one end of the stage and have shiva face away from the DPS and Healer(s).
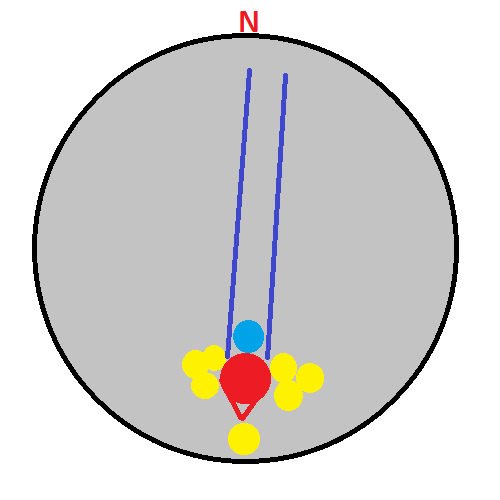
- When the ice thingy appears around the outside layer of the stage, don't touch it, if someone gets frozen from it help them out by destroying it.
- When the ice golems appear just kill them, they're quite easy to kill to be honest.
- When the floor turns to ice (if you have decent DPS this shouldn't even be able to happen) DON'T USE THE WASD keys.
- Hit her until she dies.
Dhar 16 квіт. 2016 о 8:00 
Cool =D
alyssachinese 9 листоп. 2014 о 20:24 
i wish u wereon so i could add you i added u on steam just need too add you too frirends list on ffxiv now
Akki  [автор] 9 листоп. 2014 о 0:20 
@Lcn Congratulations!
#csgojackpop.com 8 листоп. 2014 о 15:14 
@Edit : Shivas down yesterday & Loot at the same time hihihi
Akki  [автор] 8 листоп. 2014 о 14:09 
@DARCKROG You're welcome :3