S.T.A.L.K.E.R.: Call of Pripyat

S.T.A.L.K.E.R.: Call of Pripyat

Not enough ratings
A Rookie's Guide to Anomaly (v.1.5.3.)
By Dio Aloke
I have no idea what I'm doing. This is simply an easy and convenient way to write down tips and info I'll be gathering as I try the Anomaly modpack. I'm playing vanilla Anomaly 1.5.3. with just a few mods to improve companions.
   
Award
Favorite
Favorited
Unfavorite
INTRO
I always thought Anomaly was too hardcore for my taste, but being hyped by the release of Stalker 2 and wanting more after finishing the original trilogy made me look for ways to experience more Stalker until I can play the sequel.

What convinced me to try Anomaly was this Avalanche Reviews video on it:


Anomaly is highly customizable and that's what sold it to me. If I feel something was too hard I can always tinker with the configurations and tip the scales back in my favor. Same thing if I feel like I made things too easy or want a difficulty increase after gearing up.

The amount of gameplay options this mod offers is the stuff of dreams, so I highly encourage you to take your time going through the menus and fine tuning your experience.

I've decided to expand this guide considerably (still working on it) because there's no wiki for Anomaly and I'd like a convenient place to access some info.

This guide is for (almost) VANILLA Anomaly v.1.5.3.!
A GREAT BEGINNER GUIDE
It's not required, but it sure will make your life a lot easier to watch the excelent guide by Blondefire:


I know it's a long watch, but it's so worth it. You can always use the time stamps to find what you're looking for.

To be honest I'm using his initial setup and a 'rags to riches' playthrough of his as the base for this guide, plus what worked for me. I just find Steam guides to be a much better format than video for easy access to specific information, but I'll give him most credit for this guide.
NEW GAME SETUP
Like I said, I took this setup from Blondefire's excellent guide mentioned in the previous section. Here's what it should look like:


FACTION: Loner
START LOCATION: Rookie Village (Cordon)
GAMEPLAY DIFFICULTY: Easy
PROGRESSION DIFFICULTY: Tourist
STORY MODE: Enabled
STARTING GEAR:
  • TOZ-66 (sawn-off)
  • Battery pack
  • Bandage x2
  • First-aid kit x2
  • Baked beans
  • Strong energy drink
  • Lucky Strike cigarettes

Starting as a Loner allows you to start at the aptly named Rookie Village. It's located in Cordon, the friendliest map in the Zone. Plus, with Story Mode enabled, you get some tutorial missions that reward you with valuable gear to get you started.

Roughly speaking, Gameplay Difficulty influences how much damage you deal and take, how fast you get hungry/thirsty and the severity of status effect (as far as I know). Even on easy this isn't really an easy game unless you're much better at FPS games than I am.

Progression Difficulty influences how much stuff costs to buy and repair; basically, the higher it is the more you're required to craft. Anomaly's crafting system is a bit overwhelming, at least at first, so my personal recommendation is that you familiarize yourself with the game before making this a requirement.

Starting with a shotgun will be immensely helpful because it's both a powerhouse and your workhorse until you can get proper gear. You'll get ammo for it in the tutorial missions, so don't worry.

The Battery pack is useful, but not a must. Everything that is powered, well... spends battery life. That means your PDA, flashlight, detectors... It's easy enough to find batteries, but they'll usually not be fully charged. But hey, it's free here so might as well take it. Alternatively, you can swap it for an extra Bandage.

Bandages and First-aid kits are a must for survival. Even grazing wounds will make you bleed and lower your health, which regens painfully slowly, so always stay well supplied with these.

Strong energy drink has a some effects on hunger and radiation, but it's main use is stamina recovery (penalized when carrying too much stuff) and slight increase to carry weight.

Lucky Strike cigarettes (and cigarettes in general) are FAR better than alcohol in dealing with low radiation. Weight being so important, it's not even close. A cigarette pack weights 0.01kg while a bottle of vodka weights 1.45kg - both have 3 uses, so do your math. Of course, cigarettes are much more expensive (roughly double), but are not an uncommon loot. Plus saving on weight allows you to carry more loot to sell and make more money.

SETTINGS (OVERVIEW)
My favorite thing about Anomaly is that it's highly customizable. Take your time in the menus and test your changes to fine-tune your experience.

Overall I'd say options affect mostly progression and difficulty. I'll give some considerations on what I've tinkered with.

MONEY
Making less money and paying more for stuff means you'll take longer to have access to endgame gear, will have less healing items and will have to use more of the crafting system.

REPUTATION
Reputation affects buy/sell prices, what items are on offer on faction traders and disposition (hostile, neutral, friendly). At max reputation with a faction, you can recruit members of it to your party for free. (Be warned you'll take a rep penalty if they die while on your party)

So it both affects you much money you make, but also what gear you have available to you.

Gaining reputation with the different factions feels very grindy to me. It's a sandbox game meant for 'infinite play' so if you just want to do the story campaign you should consider increasing reputation gain. Cranking it up to 3 felt too much, but 2 felt too little - so I'd try starting at 2.5 and adjusting as necessary. For your 'forever game' or if you want to play the intended experience, I'd still advise you to increase it to at least 1.

DIFFICULTY
It's easy to die in Anomaly, even more than in the base game. For some this will be part of the charm while for others it's frustrating. Even when stacking bonuses in your favor and against the enemies, it's still not that easy as you start out with no proper gear and game knowledge.

Personally, I don't like bullet sponge enemies. If they can take me out in a few shots I think it's only fair I can do the same. A clean headshot will kill most enemies regardless of your weapon's caliber or their armor, so this counts mostly for body shots. Using armor-piercing ammo will still make a difference against armored enemies. Endgame mutants like chimeras will still shred you and take a lot of punishment.

MISC.
You can change how many quicksave slots you have. I'd advise increasing it to 10, enough even for a compulsive saver like myself.

Enabling death reports and discoveries and obituaries is a great way of getting more info and flavor. You can use it as kill confirm feature and to know where there are battles and what type of enemies are around.

HUD/UI
This is mostly for taste. Check the detailed section.
SETTINGS (DETAILED)
In case you want a more detailed explanation on what exactly I changed in the settings. We'll go by sections.

GAMEPLAY
GENERAL


The most important setting here is Maximum tasks per NPC. Increasing it to 3 will allow you to take all available tasks from the get-go.

Increasing despawn cap and distance helps with looting after big battles. Stealing from the dead is valuable business.

PROGRESSION DIFFICULTY


Earned goodwill factor affects how much reputation you gain by completing tasks for a faction. I felt it was very grind at base values. Cranking it up to 3 was too much, but 2 felt too little, so I set on 2.5 as a middle ground.

Money rewards factor affects how much money you get from completing tasks. Original values felt underwhelming, while maxing it (combined with the other settings) made me rich too quickly, which trivializes and shortens the progression. I left it at 2.5 so it doesn't feel I'm working for pennies.

Upgrade costs factor affects how expensive it is to pay a technician to upgrade an item for you. For my first playthrough I didn't want to bother with crafting system, so I put at the minimum. It still costs a considerable amount to fully upgrade an item.

I changed Trade prices to maximum for selling and to minimum for buying. Again I felt I was getting pennies for my loot and paying an arm and a leg for matches. Combined with the increase money reward for tasks it kinda made it easy to get rich.

Chance of recovering stashes is self-explanatory. I still feel I find less stashes than in the base games. They can be a good source of good gear and more importantly TOOLS. Consider this even if you want crafting to still be necessary, because you'll need those tools to do anything and you'll be at the mercy of RNGesus.

Traders restock cycle is at half the default period. Even you don't want to make the game too easy, it'd consider changing this for easy way to resupply ammo/water.

Limited amount of bolts is disabled. This is closer to the original games. I'm not picking out bolts from the ground. When you get the best detector you don't even need them anymore anyway,

GAMEPLAY DIFFICULTY


Bullet hit power factor only affect YOUR shots = you deal more damage. Headshots kill regardless of this setting, so it only really affects body shots. I don't like bullet sponge enemies. If a boar can 2-3 shot me I want to be able to do the same. Endgame mutants will still take a lot of bullets. You'll still feel the difference when using armor-piercing armor against armored humans.

Enemies can spot and hit you from a mile away through foliage during a rainy night so I feel this is fair enough. Listen, my eyesight is ♥♥♥♥, my monitor isn't great. I'm not a Navy SEAL sniper. (rant over)

THE ZONE
DYNAMIC NEWS


Duration of messages was increased to 15s (12s is also good) because I often missed important info while organizing inventory or, you know, getting shot at. Adjust to what feels right to you.

Death reports (including obituaries) and discoveries is a very useful way to get info on what's happening. You can use simply as kill confirm feature, but it also tells of nearby (and distant battles) or if someone is carrying something valuable (useful if you're playing as a bandit). It just feels flavorful and makes the game look a bit like a chat room.

OTHERS


Quicksave count set to 10 feels enough even for a compulsive saver as myself. If you don't save as often as you should increase it to 15 and/or enable Autosave every x minutes.

VISUAL
UI/HUD


I like having a crosshair.

Show minimap will probably trigger a few people =P I feel that if I'm checking my PDA every few seconds to check if I'm going in the right direction my immersion is broken anyway (or not, I do the same thing with Google Maps IRL). I'm sure there's a HUD compass or diagetic compass mod somewhere, but we're playing vanilla Anomaly, dammit! (yes, I do miss the corpse makers of the base games. no, there's no option for them here)

Show enemy health is even greater heresy. I'm sorry, I suffer from health bar brainrot.

Show enemy identification shows the NPC's name, faction and disposition (by color) if you aim at them for a brief period. Some purists consider it cheating beause it allows you to aim in complete darkness but I like to have this type of info easily available.

There's the option to disable the 3D PDA model. I like old-school interfaces and that includes the original PDA interface. Plus I don't want to have to press another button just to see it closely.

PLAYER

I disable everything. It's difficult enough seeing that enemy half a mile that instantly saw you and it's landing hits through rain and foliage, I don't need dirty glasses to ♥♥♥♥ up my already poor eyesight.

The breathing inside the mask was getting on my nerves.

CONTROL
KEYBINDS

I like to assign alternative keys for ammo selection and fire mode to my mouse's side buttons.

There's a freelook keybind that is unassigned by default. Middle mouse button might be a good choice. It's useful when you're travelling and want to check your surroundings without actually having to stop and change direction all the time.

There's also a Grenade quick-throw button that's also unassigned by default. You could use middle mouse button instead of the freelook, my current config is a bit awkward, but I like being able to quickly throw a grenade. (if only there was a quick melee as well, I almost never use it in combat)
GENERAL TIPS
Save often. I mean compulsively. Killed an enemy? Save. Got a valuable item? Save. Walked 100m without being shot or stepping on an anomaly? Save. There's quick save/load buttons and loading times are short.

Read the descriptions/details! They give great information, from what's required to repair an item to the possible upgrades you can apply to it. I meant it, you can miss a lot of important information by not taking the time to read descriptions details.

Don't run everywhere (you'll run into anomalies and get shot). Only do it in areas you're familiar with and have cleared of enemies previously.

Always use cover. Keep to trees, walls, anything that might serve as quick cover in case you get shot at, because it'll happen often.

When out of cover keep moving! Sprinting or just walking sideways makes you a harder target than if you crouch (even low crouch).

Weight is king. Make your carry capacity a priority as much as increasing protection. It allows you to carry more recovery items, ammo and loot for selling/crafting. Armor, backpacks and artifacts can increase your carry weight. There are consumables that do it, but they can be expensive and are temporary. Better items weight less (a stimpak vs a medkit, a glucose shot vs food). Don't carry unnecessary stuff!

Crouch often (behind cover or not). It's useful not only for stealth, but also for giving your enemies a smaller target. You can even low crouch if you're confortable (changing crouch to toggle in the menus helps with this).

Don't play at night until you get better gear. Seeing enemies or anomalies is hard enough by day, it's even more so at night.

Always extinguish campfires. Since NPCs will often light them, they can be an indicator if there's someone in the area, for example, in the Vehicle station in Cordon bandits will often spawn and might hang by the campfire.

Always check if the area is clear before looting!
SPECIFIC TIPS
All items that have a number of uses can be combined. Doing so saves valuable weight: 1 canteem with 3 uses weights less than 3 canteems with 1 use. Just drag and drop. Note you can't exceed the max number of uses, so no combining 2 canteems with 2 uses each.

You can unload all unequipped weapons in your backpack with the U key.

Make use of the inventory filters. Pressing keys 1 to 8 will filter all items in you backpack and in the trader/container/enemy by category.
FIRST STEPS (HAVE HAND, WILL HOLD)
Anomaly makes a lot of changes to the base games to the point its almost a different game. Keep this in mind: you can tinker with the configurations to approximate the base games, but it'll still be a different beast. You'll need to learn again. There are sections on repairing, upgrading and crafting which are all significantly different from the base games, so check them out.

FIRST STEPS
There might be quite a bit of loot lying around, in boxes or secret stashes around the starting village. Explore thoroughly!


Wooden boxes are a great way of finding loot. There are several here. Use right mouse button with a knife to break them in 2 attacks. There's apparently an achievement for breaking A LOT of them that increases the chances of loot, but I need to confirm that.


Metal boxes are similar, but easier to break. You can jump on them or pick (default is SHIFT+F) and drop (press F again) them to break them. Sometimes the contents will clip under them, so if it's in an elevated area check below.

There's stuff lying around in the open. Hold F to display nearby items!
Talk to FANATIC near the campfire. Choose the first option and it'll start a task for hunting boars. You'll also get ammo for your pistol and shotgun and Fanatic will join your party (details below). Before you go hunting, let's talk to WOLF. He's to the west, identified by the 'guide' icon on the map and at the door to SIDOROVICH's bunker.

WOLF will have 3 tasks for you (you should be able to take them all if you followed my settings advice):
  • Eliminate the Mutant Threat from Cordon
  • Tourist Safari
  • Rescue a Courier (MAKE SURE IT'S IN CORDON!!!)
Before you get inside the bunker, a quick note on the party system.
You can give commands to your party (or rather Companions as the game calls them) through a wheel menu. I like to bind it to C. Order them to 'wait here' so you don't stuck in the narrow bunker. Now head inside.

SIDOROVICH is the trader of Rookie Village. You'll see him a lot, the cheap bastard. Choose the 2nd option and get both Story tasks, but you won't be doing them for a looong time. What's important is his "Is there any work you want done?" option. He might give you a mission in another map, if so choose the "Have anything else?" option until you either get a task in Cordon or the one that requires Bandit patches. Now head outside.

If you're lucky you might get 3 to 4 tasks in Cordon. And a party to help you too!

The idea is to abuse companions to carry us until we can get some decent gear. Be mindful that if a companion dies you'll get a reputation penalty, so don't leave all the work to them and watch out for friendly fire. Your mantra is quicksave, quicksave, quicksave. You don't want FANATIC to die. One of the tourists dying isn't a big deal if the other one survives. Now let's hunt some boars.

Having 3 extras gun shoud help a bit, but boars are surprisingly deadly for a starter enemy. I had to try severals times to finish this task on my first playthrough. My tip in fighting them is to go for headshots with a shotgun as they approach (Fanatic says something about armored heads, but it's ♥♥♥♥♥♥♥♥). When they're near, SPRINT AND JUMP TO THE SIDE. It might take practice, but it's what works for me. The boar's charge attack gives you time to reload or shoot their butts/sides. Take care not to stand in the line of fire of your companions, you will be shot.

You can't skin boars with your ♥♥♥♥♥♥ knife so don't bother. Before talking to FANATIC again, go do the other tasks with your taskforce. The extra guns/targets will help a lot. If your party is aggroing random stuff, command them to ignore combat, just don't forget to tell them to fire at will if you're attacked!

If you get a contract to kill a bandit or the rescue mission, approach carefully. Be stealthy, so don't come running, crouch when you're near the target. Keep as close to cover as possible. Don't walk through bushes, they're noisy. Tell your companions to enter stealth, but don't forget to let them fire at will when approaching the target. All this will make those tasks a piece of cake.

AVENGERS, ASSEMBLE! THE ROOKIE TASKFORCE!

Head back to Rookie Village after you're done. Talk to FANATIC again to get the next task, but don't forget to off-load any loot you might have gotten. If you've looted any mutant parts/meats DON'T sell them! We have a plan for them later. For now, head to the anomalous area.

FANATIC will give you a crappy detector, a leaden box and a bottle of vodka. You'll need to navigate the anomaly cluster to get an artifact. Go slow, LISTEN more than look. Gravitational anomalies are almost invisible, so listen to their humming. It will alert you earlier than your anomaly detector and give a better idea of their direction. Use bolts if you wanna make sure.

I'm using a Bear detector because I got lucky in one of the stashes in the area, but you're stuck the Echo one. Follow the image and you'll be safe. Start following to the right the metal beam, between the boxes and grab the 'Bread' next to the tree. Follow through the circular opening and circle back the tree and the real artifact will be by the box.

Go a little to the right and jump over the concrete pipes. There's a stash there, so check it! You might get lucky like me. At the top of the pipes, hug the fence and go right to the warning sign and you'll be safe again. You'll be taking radiation, so put the 'anomalous bread' inside the container, not the Jellyfish, since the bread deals a lot more radiation. Drink the vodka to deal with it. Go and sell the bread to SIDOROVICH [may he choke on it] and then put the Jellyfish in the box and talk to FANATIC. After that you're free to sell the artifact for some sweet money!

Now FANATIC will give you a task to find a 'secret' stash in the village. It's on the top floor of house to the west. He hides his stashes like a dog hides behind a curtain.

You'll get another artifact which you can give to the fat fu... SIDOROVICH, that honest, generous man! Talk to FANATIC again for a couple more tasks. You're interested in the "Destroy the mutant lair" one.

I'm hitting the cap, so I see you in the next section!
SECOND STEPS (BUY GUIDE)
Ok, you've got a bit of money now. You have options, now.

I'm actually not using the settings I've recommended! So those are default prices and money gain you're seeing!

My suggestion for now is to check what SIDOROVICH has in stock. His selection changes with your reputation with the Free Stalkers, but it probably haven't changed yet so you only have basic stuff.

It's also a good time to start the habit of filtering inventory screen with the 1-8 keys!

Your priorities are:
water > healing items > ammo > detector > multitool > backpack > armor > weapons


You need water all the time, I always try to keep 2 full canteems.

Naturally, bandages and medkits are a must. 5 Bandages and 2 medkits are enough for now.

(Quick side note here: you can combine items that have charges, like canteems and medkits. Doing so saves weight, which is important now more than ever.)

Buy ammo if you feel you need to. You'll be mainly using your shotgun, so prioritize buckshot.

If you weren't as lucky as me, buy a Bear detector. It way, way better than the initial one, which you could sell to off-set the cost. Don't forget to take out the batteries first!

The Multitool is optional if you're using the settings I've recommended. I'm not, so I'm taking it! It can disassemble any item and can last forever if properly maintained. You repair it using Three-piece sharpening stone set (it's cheap and common loot) or Grooming kits (but the sharpening stone is better, I only use Grooming kits I find). (You also use the sharpening stone to repair your knife, but you might get a Hunting Knife soon, so don't bother.)

I won't go into details here, but you might consider salvaging and repairing the weapons/armor you're gonna use. Check the relevant sections for details. The multitool + sharpening stone is your repair & salvage kit, keep it in good condition and it'll take care of you.


For backpacks, you should consider the Hunter's Kit. It yields more items when skinning mutants, which will be one of your main sources of income for now. You won't make full use of it until you get a Hunting Knife though, because that allows you to skin ANY mutant. It's still worth the investment anyway.


As for armor, you've got 3 main options. Sunrise is the cheapest. Predator costs 3k more and offers +4kg of carry weight compared to the Sunrise. Autumn is the most expensive, costing 8k more than the Sunrise and the same carry weight bonus, but a massive bonus to chemical resistance. To be honest, carry weight is more important right now than chem resistance, so I'd take the Predator armor.


I wouldn't bother with masks unless you have money to spare, but you could pick the Refitted PBF gas mask kit (the lighter version). If you're swimming in money you can get the PPM-88 gas mask for much better radiation protection. Radiation is a problem early one, more than elemental damage from anomalies. That's because you can mainly avoid damage from anomalies by being careful, but radiation is everywhere.


You might be tempted to buy a rifle, but they're not that useful without a scope. A better option would be a SMG, either the Skorpion or the MP5. Skorpion uses the same ammo as your pistol, which is common loot for now, so you've got that covered. It's not hard to loot it either. The MP5 is 5k more expensive, but it's ammo is cheaper. The thing is you probably don't have a lot of it for now, so you'd have to buy. The MP5 is more useful in the long run because you can get attachments for it, so it's an investment. Your choice.


You could stick to your pistol until you can get a decent rifle with a scope. Rifle ammo is much more expensive for no meaningful difference for now. If you buy/loot a SMG/rifle, use semi-auto mode. You want to conserve ammo as much as possible. Ammo is money and you're poor now. Plus you can shoot quick enough in semi-auto.

SIDOROVICH probably won't have any pump-action shotguns at this point, you'll need to loot them from someone.

You *could* buy 1 or 2 additional artifact containers, but even with the Bear detector it's risky business though *very* profitable. Still, you can always be careful and quicksave a lot. But artifacts are heavy and you don't have that much carry weight. If you're strapped for cash leave this for later and make do with the container you've got. Personally, I always carry 3 containers, but later in the progression than this.

Binoculars are useful for scouting ahead until you get a weapon with a decent scope.

I might be hitting the cap, so in the next section I'll tell you what to loot and good ways to make money.
THIRD STEPS (LAYING THE FOUNDATIONS)
Ok, usually you need to do a bit of selling before you can buy the good stuff. You might want to check the TRADING section. Right now you probably have just a little, random loot.

WHAT YOU SHOULD KEEP
Repair items (tabs 6 and 8 in your inventory) are worth keeping. That includes any item that has a repair bonus on its description, but I usually only save the ones that give at least +4% (max is 8%).

Most weapons/armor will be too damaged for any trader to buy. Salvage only those that can be used to repair the gear you plan to use (check the REPAIR section). Grab the ammo from the rest (U key unloads all unequipped weapons) and toss them (weapons) away. Ammo you won't use is light and can add up to a lot.

Keep any food, water, cigarettes (better than alcohol for curing radiation since it weights nothing, but requires matches), alcohol (just for now, a single bottle is enough), healing items (of course!).

Keep yourself light! Those items are necessary, but you don't need a full pantry on your back.

Always pick patches! Most of them are required for some missions (Bandits, Renegades, Military, Duty and Freedom). The others you can sell or use to repair your stuff (unless you're playing an 'evil' faction). Patches are almost weightless and have an absurd value-to-weight ratio.

If you find any TOOLS, GUNSMITHING TOOLS AND DRUG-MAKING KIT treasure them! Whether you're gonna keep them for yourself or give them to a technician it's up to you, but check the crafting sections.

WHAT YOU SHOULD LOOT AND SELL

Weapon/armor you loot from enemies are falling apart, so no trader will buy them.You'll only find weapon/armor in good condition on stashes, so don't count on making money like in the base games.

You *can* salvage the broken gear and sell the parts and materials you're not gonna use to a technician, who pays a premium for those items (tabs 6 and 8 in your inventory) regardless of condition. There's one in the Farm, north of Rookie Village, past the bridge. It's a good idea to stock your crafting/repair stuff there. Salvaging damages your Multitool which you can repair with the sharpening stone. In the end it's a net profit between sellable parts/materials and upkeep cost of the Multitool, but it's a bit labor intensive and not worth it in the long run unless you're doing a crafting only run.

As a rule of thumb, grab anything that's will not overencumber you. After securing what you should keep (see above), prioritize items with high value, like the Decorated jewelry box.

Learn what traders pay a premium for what. Cooks pay more for food, medics for healing/buff items and so on. Check the TRADING section.

Hunting and arfitfacts are a good source of money early on.

Always be on the lookout for prey, but unless you can skin it, avoid combat if possible. That means boars are out of the equation. There's a trader in Garbage that specializes in mutant parts/meat, check the TRADING section for details, but I'll go back to him soon.

There aren't a lot of anomalies in Cordon, but there are a *lot* of them in Garbage, so that's where we're headed.

I'LL BE YOUR GARBAGE MAN

Garbage is to the north of Cordon and on the way there are 2 tricky spots: the bridge NE of Rookie Village and the checkpoint right on top exit of the map. For the bridge you can take the tunnel to the W of it, just take care not to touch the hanging plants. After a while you'll learn to traverse this quickly. The important thing is: always be extra careful when approaching those spots!

When you get to Garbage, go W and explore the 3 anomalies in vehicle park, saving often and going slow. Then head N towards the big hangar (there are 2 icons marking it on your map).

That's where our best friend BUTCHER lives. He pays up to 6x more for mutant parts/meat and sells buckshot at a low price, so he'll make us a LOT of money. Don't be dumb like me and check his missions BEFORE selling the meat. He always has a task to kill a mutant and another for a particular type of meat. You can always store that meat in the nearby stash until you have enough, but for now sell those not required.

He also sells our beloved Hunting Knife, which allows us to skin any mutant! Hunting is fully enabled now!

He also sells the SPAS-12, my choice of shotgun until I can get a Saiga, which will be a looong time. It almost bankrupted me (have I told I'm broke AF?), but it's a good investment.

Let me show you a map of the area:


You can hunt for artifacts in the region, there are quite a few anomalies here. I had no luck whatsover in that department. If you haven't already, upgrade to a Bear detector, it's miles better than the Echo and will be your only option for a long time. It's range is not the best, so you'll need to get closer and sometimes wander inside the anomalous zone a bit before you actually find an artifact. Eventually you'd better head to Yantar and get a Veles/Svarog detector. Not only they offer better displays, have better range, they can also detect more artifacts. You'll need a certain rank/reputation with the Ecologists to be able to buy them though.

Or you could be a vulture, something fitting for the Garbage. That means looting from the dead. Be alert for gunshots in the distance and you news feed: if there's a fight somewhere close, go there! But be careful not to be shot at, let the enemies kill themselves and finish the ones that are left. You might not even have to if they're neutral. In that last case, rush in to loot weapons and corpses.

You should also go ahead to ROSTOK in the north. I's another hub that'll provide you with valuable missions.

Here's what I've got after my first day:


Not a lot of money, but I've got Predator armor, SPAS-12 and plenty of supplies for now. A solid foundation to make more money. Not bad for the first in-game day, a few hours IRL.
FOURTH STEPS (HOW NOT TO BE BROKE AF)
Ok, so if you've followed my advice you've gone to Rostok. It's a major hub that can offer many missions.

Missions are the best way to make money! (They also often reward stash location, a good way to find important stuff, like TOOLS)

Hunting mutants is more of a complement to your income and giving you a benefit to killing them in the first place. Same can be said about loot you can sell.

Artifact hunting can be very profitable, even more so if you sell them to Ecologists in the bunker at Yantar and Jupiter, but you're not there yet. Plus, you probably don't have great protection against anomalies. While most of them can be avoided if patient, careful play, there are unavoidable environmental hazards in some anomalies that require beefier protection. You can increase your chemical resistance with pills, but they're expensive. And until you get at least a Veles detector, you probably won't find a lot of very valuable artifacts. It's definitely an option and maybe the best further in the game. If you plan to focus on that, head to Yantar and invest in a SEVA Suit.

You sometimes loot PDAs from enemies. Access their contents by right-clicking and selecting 'view'. Some PDAs are encrypted, so pay a technician to unlock them for you. You might get a stash location. You can sell PDAs to general traders like Sidorovich and Barkeep.

But for now missions are the way to go. Let's list the man mission givers in the 3 maps we've accessed:
CORDON
  • Sidorovich (Rookie Village)
  • Wolf (Rookie Village)
  • Fanatic (Rookie Village)
GARBAGE
  • Butcher (Train Hangar)
ROSTOK
  • Barkeep (100 Rads Bar)
  • Colonel Petrenko (Duty Base, at the east side of Rostok)
  • General Voronin (Duty Base)

They're not the only ones to offer missions! Make a habit of talking to every stalker you meet, they might have missions for you! By the way, check their trade screen too, sometimes they have good stuff. It's also a good way to off-load some of that stuff without having to go back to a hub.

Not all missions are worth doing. It's better to do missions that are in the same map/adjacent maps or are on the way to somewhere you want to go. Cordon-Garbage-Rostok is a good macroregion to focus early and do laps back and forth. This will also increase your reputation with the Loners and Duty, which will give you better prices and access to better gear. But what types of missions you should do then?

Missions that require you to kill mutants/humans are the best. Especially in Rostok, they can stack the same target allowing you to get 2 or even 3 for 1. What makes them the best is that sometimes they'll complete themselves: the target will be killed by an NPC or emissions. Free money!

Similar to that are defensive missions where you need to stop enemy advancement in an area. They're pretty straight-forward.

Rescue missions are a good choice too, if they're not far. You get a free companion for the duration. They have a variant where the person you need to rescue is undercover. Those require a bit more care because you can kill the guy you're supposed to rescue or he might decide to blow his cover while his surrounded by enemies and get immediately killed. Still worth doing.

Delivery and item recovery missions require a bit of attention. Delivery missions give you a package to deliver, which can be pretty heavy. If they're too heavy you can store them somewhere and go back later. Item recovery missions, unlike delivery ones, require you go to somewhere and then bring back the stuff. Some of them don't allow you to remove the item from your inventory (can confirm this for Sidorovich) and it could weight as much as 12kg!

There are item recovery missions that don't suffer from this: find documents, a lost soldier/squad, retrieve a PDA, RF missions... Those are alright.

Some missions are only available at night (after 20:00) or after you've achieved a certain rank.

Like I said, you'll be doing laps in this region, so choose what makes sense.

Additionally, try the Arena in Rostok! Once a day you can fight a mutant there. Fighting humans is possible, but a bit different. You'll get a special loadout for each fight. They can be a good way to learn how to fight more tactically. The pay isn't great at first, but they're fun, short and give lots of reputation.
The Arena is close to the entrance to the 100 Rads Bar.

After a while doing this you'll be set. With lots of money and access to better gear, the Zone will be yours. Follow the story, farm reputation with a faction or simply go explore!

THE SUGGESTED SETTINGS I'VE GIVEN IN THIS GUIDE MAKE THE GAME TOO EASY, PROGRESSION TOO FAST AND IT KINDA BECAME BORING TO ME AFTER A TIME. SO I STARTED A NEW GAME WITH DEFAULT SETTINGS. USE THIS IF YOU JUST WANT A FAST EXPERIENCE OF STORY MODE OR TO LEARN THE GAME. THEN CREATE A NEW GAME CLOSER TO THE INTENDED EXPERIENCE.
TRADING
Money is hard to come by in Anomaly, therefore it's important to make the most of it. Prices for selling and buying are influenced by two main factors: your reputation with the trader's faction and the type of trader/item. Let me explain that last part: a cook/bartender will pay more for food items than a general trader, same with techinicians and parts/repair items.

Here are the type of traders you can find (with examples):
  • General trader - Sidorovich (Rookie Village - Cordon)
  • Food trader - Barkeep (100 Rads - Rostok)
  • Technician -
  • Medical trader -
  • Scientific trader - Sakarov (Yantar)
  • Specialist trader - Butcher (Hangar - Garbage)
  • Other stalkers

Increasing your reputation with the trader's faction lowers the buying price and increases the selling price with that trader . The change can be significant: a max reputation trader will pay almost double for the same item as a neutral one, so it might be worthwhile to focus on a faction/trader

GENERAL TRADERS

Identified by the 'suitcase' icon in most cases. Sells and buys most items and as far as I know doesn't pay a premium for anything.

SIDOROVICH

FOOD TRADERS

Usually identified by the 'knife and fork' icon. Sells and buys food items (including beverages) and pay a premium for them. A good choice for selling mutant meat (on tab 7 in the inventory screen). There's a specialist that pays more for those (see below), but since he's in Garbage food trader might be more convenient since they're scattered around.

BARKEEP

TECHNICIANS

Identified by the 'cog' icon, they can also repair/upgrade your gear. They pay a premium for repair items (tabs 6 and 8 in the inventory screen) and upgrade kits. They also buy parts (like the ones you get from disassembling items) at any condition, so you might want to hold on to those.

MEDICAL TRADERS

Identified by the 'cross' icon, they can also heal you (fixed price, not influenced by how much health you're missing). They pay a premium for recovery items (tab 7 in the inventory screen), which include medkits, all pills, stimpaks and more.

SCIENTIFIC TRADERS

They're basically the scientist at the bunkers in Yantar/Jupiter, part of the Ecologist faction. They pay a premium for recovery items (tab 7 in the inventory screen), but also for specimens (mutant parts in tab 5 - if you mouse over you'll see the tag 'scientific sample' in the description) and artifacts.

Since artifacs are one of the most valuable items in the game, this is significant. Sakharov will pay DOUBLE what a maxxed trader would give for an artifact. But since artifacts are heavy, it might not be worth carrying it all the way there. One thing you could do is stock on the lighter artifacts (the junk ones that give no radiation and weight around 0.5kg) and do a trip. Or get some of the more valuable artifacts (the more radiation it gives, the more valuable it usually is) and pay a guide to lead you to Yantar/Yanov), but the fee will eat part of your profts.

SAKHAROV (Yantar)

SPECIALIST TRADERS

BUTCHER at Garbage is specialized in hunting and pays MUCH better for mutant parts/meat, like 2x to 5x more compared to a neutral trader and 2x to 3x more than a maxxed one. Early on this is huge so you might want to stash those items somewhere (the Farm in Cordon, for example, or the Flea Market in Garbage) and make a trading trip for huge profits. (In case you're wondering, mutant parts are located in tab 5 in the inventory screen and mutant meat is in tab 7)

OTHER STALKERS

Other stalkers you find in the world act more or less as general traders with limited money. Their prices are influenced by your standing with their faction. Their main advantage is that you can find them everywhere, so they're a convenient way of off-loading stuff without the need to go to a base, freeing valuable weight. I'd only recommend this if you have high standing with their faction, are close to the weight limit or don't plan on returning to base for a while. They also might have useful stuff to sell, especially if you're using the crafting system, so check often.
REPAIRING
Repairing damaged gear is tied to the crafting system, but is more 'simple' than making stuff from scratch. It's also cheaper than paying a technician to fix your stuff, so it's your only option early on. Even later in the game, using this system will help keep your gear in top shape while on the field.

Let's take a look at the repair screen:

There's a number of repair items in game and each of them repairs one type of item: weapons, armor and parts. You can't repair your armor with gun oil. Additionally, each repair item has a minimal condition requirement, see below:


That means that if the weapon had 89% condition you'd have to use another kind of repair item. You can loot them, but technicians always have them in store. To see which repair items are compatible with your gun/armor, simply mouse over over them and compatible item will be highlighted.

You might have noticed in the repair item image that they have 'base condition gain' and 'repair bonus' properties. 'Base condition gain' is how much condition will be restored if you use the repair item alone. 'Repair bonus' is how much condition will be restored if you use it as a supportive material, adding that bonus to the base condition gain of another item.

If this is confusing, you can use the inventory tabs to help you. Repair items are always in tab 6 while supportive materials are always in tab 8. The difference is that while you can use repair items as the primary item, they also work as supportive materials. They do so less effectively: in the example above you can the 'base condition gain' is 8% (if you use as the primary item) and 'repair bonus' is only 5% (if you use as the secondary item). Repair items are more expensive and rare than supportive materials, so keep this in mind.

Here, let's see a supportive material. Notice how it only has the 'repair bonus' property. That means you can't use it alone.


Ok, now we understand how to keep our gear in good shape, but what if I've found a nice weapon or amor that is absolutely banged up? Well, restoring items is possible, but much more complicated. Let's see a practical example:


This rifle has very poor condition. If you right-click it and open its details, you can see the condition of individual PARTS.


See how one of them has a yellow number? That's that part's condition. In order to restore the rifle, you'll need find parts that are in better condition and swap them. You can get parts by disassembling similar weapons. In this case, other rifles that use the same ammunition type. That's not always so: double-action shotguns (like the Sawn-off you started with) use the same ammo as pump-action shotguns (like the SPAS), but have some different parts.

You can either loot compatible parts that are in better condition or repair them (As far as I know some parts can't be repaired, so you'll need to loot them) You don't need to get all parts in perfect condition! What you need is to increase the overall condition of the weapon to the point you can use regular repair items on it!

If your inventory looks like a mess, you can highlight the parts you need mousing over the item you want to repair.

To replace parts you'll need a VICE. That's a table near every technician. You'll need to speak to the technician and ask their permission. They'll charge 1,000R and give you 5 minutes, unless you've given them all 3 tiers of tool, in which case they'll let you use it for free. But that's not all!
I don't have the required kit to repair this rifle. They're sold by technicians, looted from enemies/stashes or crafted (in the green circle tab in the image). I didn't have any luck in hours of play. I managed to find a recipe to craft them, but by that time I had already bought another weapon.

Let's see how it looks when you *do* have the necessary kit:
Notice how the kit has 3 charges. That means I can replace up to 3 parts with it. The yellow circle with faded icons are parts I *don't* have. What I have the ones in the green circles.

I've replaced one part (in green). See how the overall condition jumped from 10% to 21%. In the left corner in yellow, I have 2 copies of the other part. Notice how I've spent a charge of weapon kit by replacing the first part.

Just to reinforce: you don't need to get all parts in perfec condition, just enough to raise the overall condition so you can use regular repair items. In the example, the lowest requirement I could find was 65% condition.

Also important: you use the same KIT for replacing parts and upgrading the item!

And that's about it!
UPGRADING
When it comes to upgrading your gear you have 2 options: paying a significant amount of money to a technician to do it for you or do it yourself with a significant amount of effort.

It's important to note that regardless of the way you do it, either you or the techinician need to have TOOLS. Each tier of tools (Basic, Advanced and Expert) unlocks a tier of upgrades (from left to right in the upgrade screen).

Completing the 'find tools' tasks for a technician allows them to perform the relevant upgrades. You need to do this in order - you can't start from expert tools, first you need to give them basic ones).

IF YOU PAY THE TECHNICIAN TO UPGRADE YOUR GEAR FOR YOU the only thing needed are the relevant tools for each tier of upgrades (Basic, Advanced, Expert). It's the easier way, but also it's expensive and fully upgrading a piece of equipment this way can cost over 100k.

IF YOU WANT TO DO THE UPGRADES YOURSELF, besides the TOOLS, you'll need the relevant KIT and the UPGRADE ITEMS themselves.

Each KIT is specific to a type of item, like handguns or exoskeletons. You can't upgrade a shotgun with a pistol kit, just like you can't upgrade an exoskeleton with a regular armor kit. The same can be said of the UPGRADE ITEMS. To know what you need, see the details of the items you need to upgrade. The description of those items also tell you more or less what they're for. You can always mouse over the weapon/armor and it'll highlight compatible items.
You can see the exoskeleton KIT in green and the UPGRADE ITEMS in blue.

Both the kits and upgrades can be looted from enemies/stashes, bought from technicians or crafted.

Once you have all the necessary items, you'll need to use a technician's vice (the nearby table required to craft/upgrade items). You usually have to pay, but if you've given all 3 tools to that technician they'll allow you to use their vice for free. Regardless of whether you've paid or not, you have 5 minutes to use the vice.

Remember that when using a technician's vice you get access to their tools as well. So you might make use of any combination of their tools and yours. For example, they might only have basic tools, but if you're carrying advanced and expert ones you can perform any upgrade (provided you have the relevant kit).

Let's see the upgrade screen:
The UPGRADE ITEMS I have are displayed in the green circles. Look at the exoskeleton KIT in the yellow circle, which has 6 uses. Each upgrade you make spends 1 of those. Notice that while I have 2 expert (fine-tuning) upgrades, I can't apply them because I need to do the previous upgrades before that.

In higher progression difficulties, paying for upgrades is *extremely* expensive, so you're forced to upgrade yourself. This is a long journey. In lower difficulties you can pay for everything or mix and match depending on how much money and which items you can find, but even at the easiest setting, upgrading gear yourself is always cheaper.

CRAFTING
You can craft *a lot* of items in this game, but the first you need are MANUALS, which you can loot from enemies/stashes or sometimes find in stores.

Once you read a manual, you can access its recipes in the PDA under the Guide tab. (You can safely sell or discard the manual after reading)

Once you have the recipe for what you want and the materials required, you'll need to head to a technician's VICE. You'll have to pay 1,000R for 5 minutes at it or do it for free if you've given that technician all 3 levels of Tools.

This is what the crafting screen looks like:

There's not much too say here. You can see which manuals you've read in the lower left corner. Select the item you want to craft and if you have all the materials AND TOOLS you can craft item by pressing the highlighted button.

Notice the red circle! Most wearable gear requires BASIC TOOLS, but some need you or the technician to have ADVANCED/EXPERT TOOLS. For anything ammo-related, you need GUNSMITHING TOOLS. For drugs/healing items, you need DRUG-MAKING KIT.
COMPANIONS
Companions are a nice feature that for various reasons can be annoying. Fortunately there are ways of solving this with mods.

Before that, though... You might have tried using companions at the start of the game and thought they were crap. In part that's true. Companions combat effectiveness depends on their rank (and the stats of their weapons) and in the beginning you'll only be able to recruit Rookies like you who are just that: noobs.

Higher ranking companions are more accurate, come with better weapons/armor and have more health, thus increasing survivability. Even the crappy companions still serve as mules! Very handy when going to Yantar/Jupiter to sell a ♥♥♥♥♥♥♥♥ of artifacts or to bring back lots of armor/weapon you want to repair.

You can go over their pathetic weight limit, provided the last item is put in their inventory while they're under the 'hard' limit (like you, they can go above the nominal limit). So if they have 30kg carry weight and are at 29.9kg, you can give a 50kg exoskeleton with no problem.

You can have 2 companions. You'll be able to recruit 2 more after you've reached Legend rank. This doesn't affect temporary companions for missions. You can also go over this limit by recruiting leaders with their own squads - the whole group will join. I had 9 companions at one point.

Using the mods I've listed below (most of which I've tested) will greatly improve your experience with this system.

FIXING ANNOYING BEHAVIOR
STOP PICKING TRASH WEAPONS!
This mod stops killed NPCs from dropping their weapons on the ground. Instead they go to their inventory. This effectively stops *any NPC* from picking up weapons enemies drop.

IMPORTANT! Apparently this crashes the game if you kill important NPCs (faction leaders, technicians, traders, etc) so if you plan on attacking a faction base, remove this mod and then put it back after you're done. Personally, I had no such crashes.

There's another mod that does the same thing, but also prevents NPCs from looting dead stalkers. I haven't tested it because I actually like this system.

HAND. IT. OVER.
Do you feel your companion is carrying more than he's showing you? He won't switch weapons? That's because you can only see *part* of his inventory. This mod fully unlockes their inventories, allowing you to *really* clear it so they can be better mules.

DOUBLE FEATURE (GOES BEYOND COMPANIONS)
Now here comes a couple mods that work well in tandem. DNPCAV allows NPCs to actually loot and equip armor. So if a Bandit says he's taken armor X from a dead NPC, he'll actually wear it. (I couldn't make it work)This other mod reworks companion looting and inventory, for example, applying carry weight bonuses given by backpacks.

JAMMED? AGAIN!?
Since companions weapons degrade and it's a pain to maintain their weapons as well as yours, this mod will stop companion weapons jamming all the time, making them more effective in combat. It requires another mod called MCM, which adds an option in the main menu to configure other mods.

STOP. SHOOTING. ME.
Friendly fire isn't actually friendly, so disable it with this mod. If you have MCM installed you can further configure this. You'll get the HUD feedback still, just not the damage.

HE'S WITH ME
Saved a stupid spy only for him to be killed by his 'allies' when you go turn in the quest? Companions murdering each other? Your companion is killing everyone who looks at him wrong? This here mod will fix all that.

FIGHT MY FOES, FOOL!
Your companions disposition towards your enemies might be different than yours. For example, a Freedom companion will be neutral to Mercenaries and will ignore them. This mod makes your companions attack anyone who is hostile towards you.

LIGHTS OFF, I SAID!
This mod makes companions turn their headlights off when in stealth.

STOP BLOWING MY COVER!
Companions will prevent you from using disguises, but this little mod here fixes that.

IMPROVING COMPANION SURVIVABILITY
PLOT ARMOR
This mod make it so that companions can be downed in combat, but not killed. They'll stand up again after a time and regenerate health. Good if you don't want precious Hip to die, but it trivializes any mission involving rescuing NPCs. *It's rare, but sometimes they'll still die. Be alert!*

If this is too much for you, there's another mod that makes companions (and important NPCs like faction leaders) tougher to kill. Be warned it also reduces their damage output somewhat, making them less effective. (NOTE: I DIDN'T TEST THIS)

Another choice is this mod that greatly increases companion health regen. Works better the more heavily armored the companion is, since they're still susceptible to burst damage. (NOTE: I DIDN'T TEST THIS)

FAQ
WHAT WEAPONS SHOULD I GIVE MY COMPANIONS? Anything withe high rate of fire and/or high damage. Ease of reload is a factor to consider (Saiga > SPAS, for example). Companions will prioritize damage when switching weapons. Assault Rifles, Shotguns, LMGs, Grenades (careful with this unless you've disabled friendly fire), RPGs/Grenade Launchers (same) and *sometimes* Sniper/Gauss Rifles (how efficient they are with these guns depends on their preferences [default weapons] and ranking). They switch to Shotguns/Pistols when in close-quarters combat, but it confuses them and they keep switching. Give only one weapon to each companion. Since companions get aggroed from miles away, I wouldn't have more than 1 of them with a shotgun and instead give most of them assault rifles or maybe a rifle of the Vintorez family, which have automatic fire.
* ADDING SCOPES AND UPGRADING ACCURACY/FLATNESS/RECOIL MAKES COMPANIONS MORE ACCURATE. Condition matters too.

DO COMPANIONS CONSUME AMMO? No, they don't, but you can't give them an empty weapon. They also consider which type of ammo is loaded in the gun, so giving them AP rounds should make them better against armored enemies.

DO THEIR WEAPONS DEGRADE? Yes, they do. They'll keep using them even when at mininum condition, but they'll be subject to jamming like you would (there's a mod to stop that). Just keep this in mind in case you give them a weapon you plan to use.

CAN MY COMPANIONS LEVEL UP THEIR RANK? Yes, but it might not update immediatly.

MY COMPANION IS STUCK WHAT DO I DO? If they're not following you, simply transition to a new map and they'll be teleported.
ACHIEVEMENTS
There are many achievements in-game that impact gameplay. Some of them might be mutually exclusive and not all are available for every faction or game mode. I'll list some of the more important ones below:

GEOLOGIST
HOW TO OBTAIN:
Collect 50 artifacts.
EFFECT:
Increases the respawn rate of artifacts after emissions/psy-storms.

HEAVY POCKETS
HOW TO OBTAIN:
Have 1,000,000R in your possession.
EFFECT:
Unlocks to the full stock of every trader regardless of goodwill with their respective faction.

INFANTILE PLEASURE
HOW TO OBTAIN:
Destroy 200 wooden/metal boxes.
EFFECT:
Increases chances of finding loot in boxes by 25%.

MECHANIZED WARFARE
HOW TO OBTAIN:
Deliver all tools to a technician.
EFFECT:
Increases the effectiveness of all repair items.

WELL DRESSED
HOW TO OBTAIN:
Either kill 500 mutants or loot 250 parts/meat from them.
EFFECT:
Skinning mutants is almost instantaneous.

RAG AND BONE
HOW TO OBTAIN:
Loot (even partially) 100 stashes.
EFFECT:
Increases the possible value of items in stashes, therefore you have more chance to find better loot in them.
MODDING THE MOD
Anomaly is meant to be as customizable as possible. This is true of the built-in options it offers, but you can take a step further with mods. That's exactly what G.A.M.M.A. is, a an auto-updatable collection of mods, but we won't take it so far in this guide.

In this section I'll list some mods I've tried and liked.

IMPROVED PDA
Ever got bored during an emission with nothing to do? The mod INTERACTIVE PDA adds a host of functionalities to your PDA: from games to allowing you to buy info on artifacts and more throught it. That particular feature came in handy when I was looking for the artifacts for Hip's quest. It does work. Just beware buying information from characters with a bad rep, though in my case the info turned out to be true.

NPCS LOOT & WEAR ARMOR
I've feature this mod in the companion section. DNPCAV allows NPCs to actually loot and equip armor. So if a Bandit says he's taken armor X from a dead NPC, he'll actually wear it.

*Apparently I can't make this work
A LITTLE HELP WITH SOME QUESTS
Some STORY MODE quests can be a little difficult to finish, mainly because it isn't clear what you're supposed to do or you need to find an item *gestures vaguely*

GET DOCUMENTS FROM LAB X-19
First document in a little control room, *before* you go down any stairs.

Second document is in the same room where you disable the Rainbow Emitter.

MORTAL SIN: NEEDLE IN A HAYSTACK
True to its name, this mission features my much-hated RF Receiver. I'll show you where the thing is so you don't have to waste precious time of your life finding it.

MORTAL SIN: CONTACT LOST
If you can't find the PDA ('Investigate the situation'), it's west of the dead guy, in a patch of grass in front of the building. Hold F and it should appear.

ENCRYPTED TRANSMISSION
The marker is misleading. You should go to the tail of the fallen helicopter.

OPERATION AFTERGLOW: GUARDED SECRETS
You can find the documents in the big room with the elevator you take to reach Pripyat in Call of Chernobyl. It's past the room with the crashed helicopter.


IF AFTER THIS MISSION YOU CAN'T PROGRESS, SIMPLY GO TO THE LAUNDROMAT IN OUTSKIRTS
Strelok will then ask you to find his squad, but you'll get no marker. The 'abandoned hospital' he refers to is actually NE of the Laundromat, not the map with the same name. You can find Rogue in the Kindergarten, NW of the hideout.

If you're having trouble finding the entrance to the Kindergarten, it's in the NE corner.

As for Stitch, he's far to the north, near the statue close to the port.

Simply talk to Strelok after this and leave the Laundromat to trigger the next phase. You might need to sleep or leave the area and come back.
ACKNOWLEDGEMENTS
First of all, thanks to the whole STALKER modding community, with special thanks to the Anomaly modders, for keeping this incredible franchise alive and doing sheer black magic on a regular basis.

Thanks to Avalanche Reviews for convincing me to give Anomaly another try.

Thanks to Blondefire for his excellent beginner guide on YouTube as well as his awesome Rags to Riches playthrough. I've learned *a lot* from you and you're the main inspiration for this guide.

Thanks to the Reddit stalkers whose threads are full of useful information and are where I got the recommendations for the companion mods.
10 Comments
aerodynamically unstable Feb 27 @ 9:44am 
Thanks for getting back to me. Unfortunately I also installed the no loot in unmarked stashes mod haha. It turns out I just had to kill higher level enemies to get pdas. I had to turn down the value from 1 because I was getting too many stashes :steamsad: . Thanks for the guide!
Dio Aloke  [author] Feb 26 @ 6:47pm 
@aerodynamically unstable I now mix a lots of things that are in either Anomaly or GAMMA. I know for sure that you can find stuff in stash locations in Anomaly regardless of having the coordinates (if you know a stash location you can go there and have a chance to loot something). You get coordinates as rewards for tasks too or by interrogating surrendering enemies.

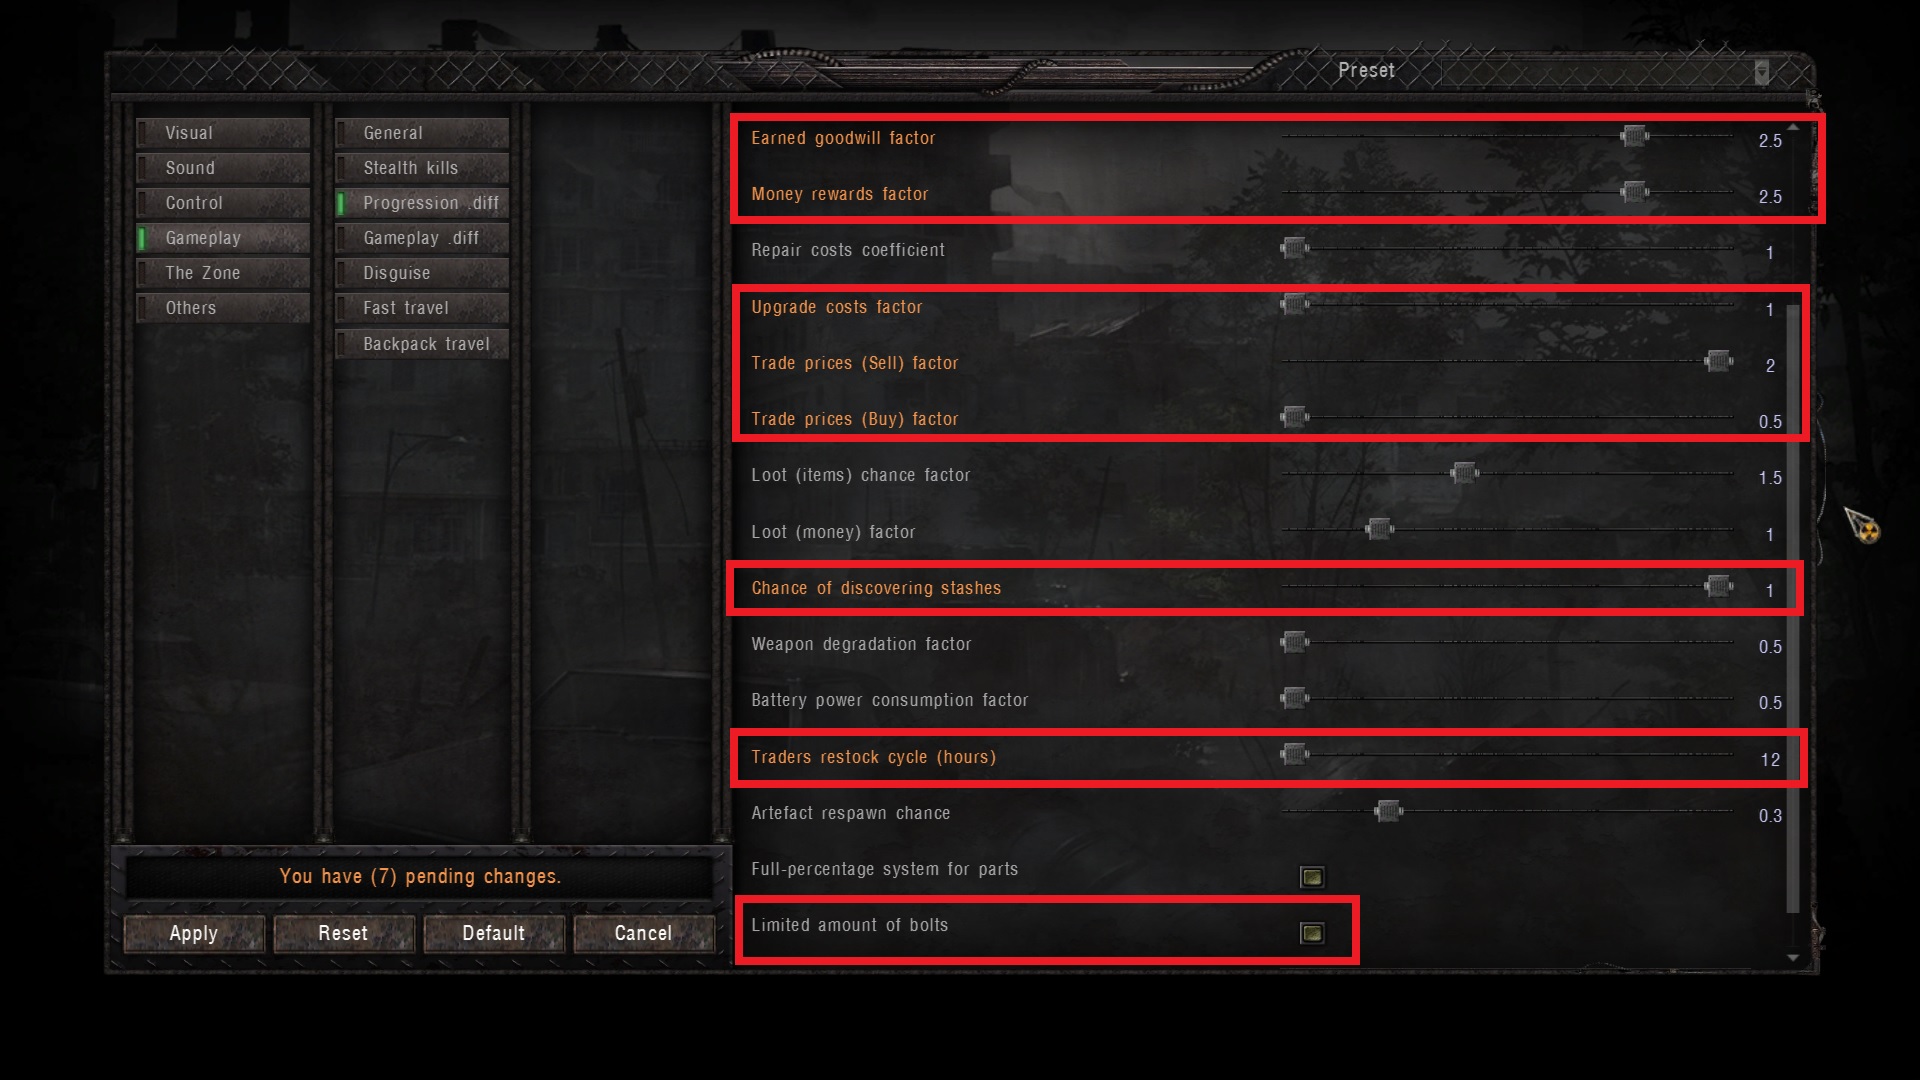
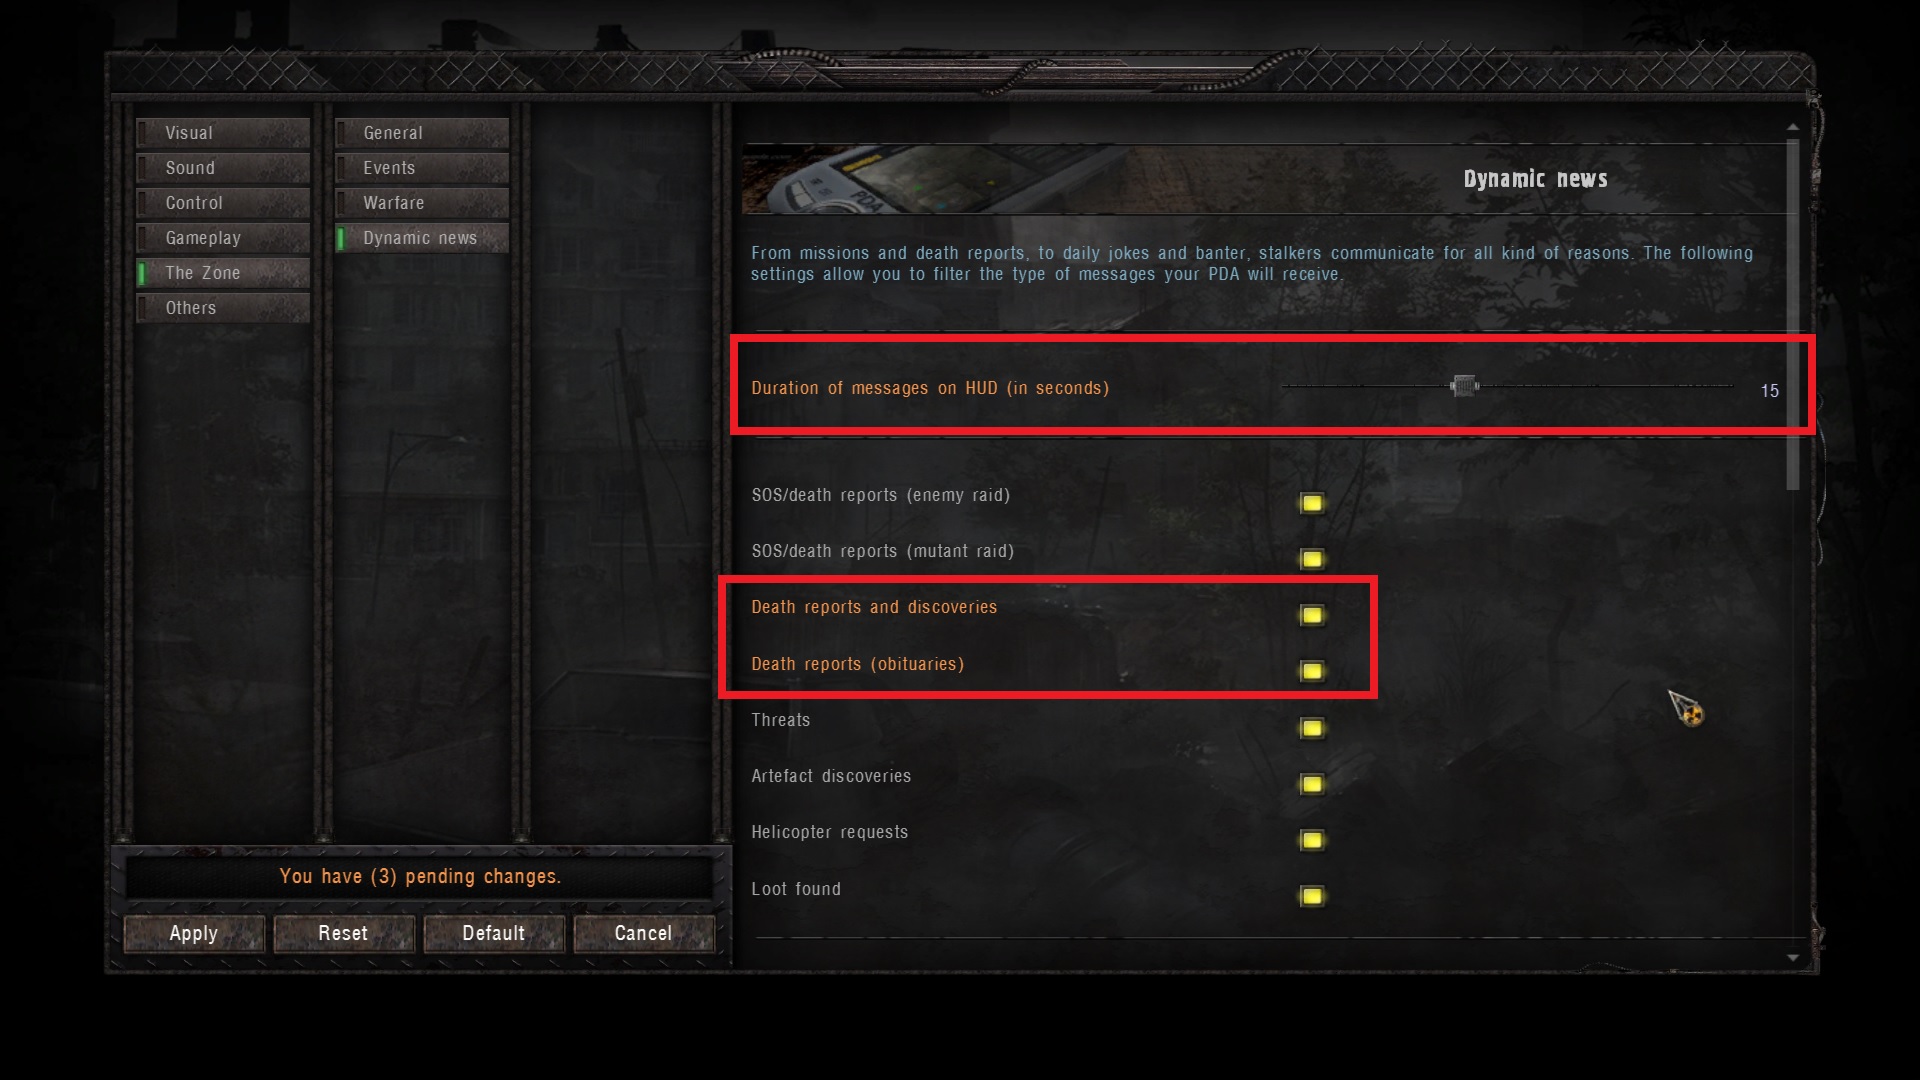
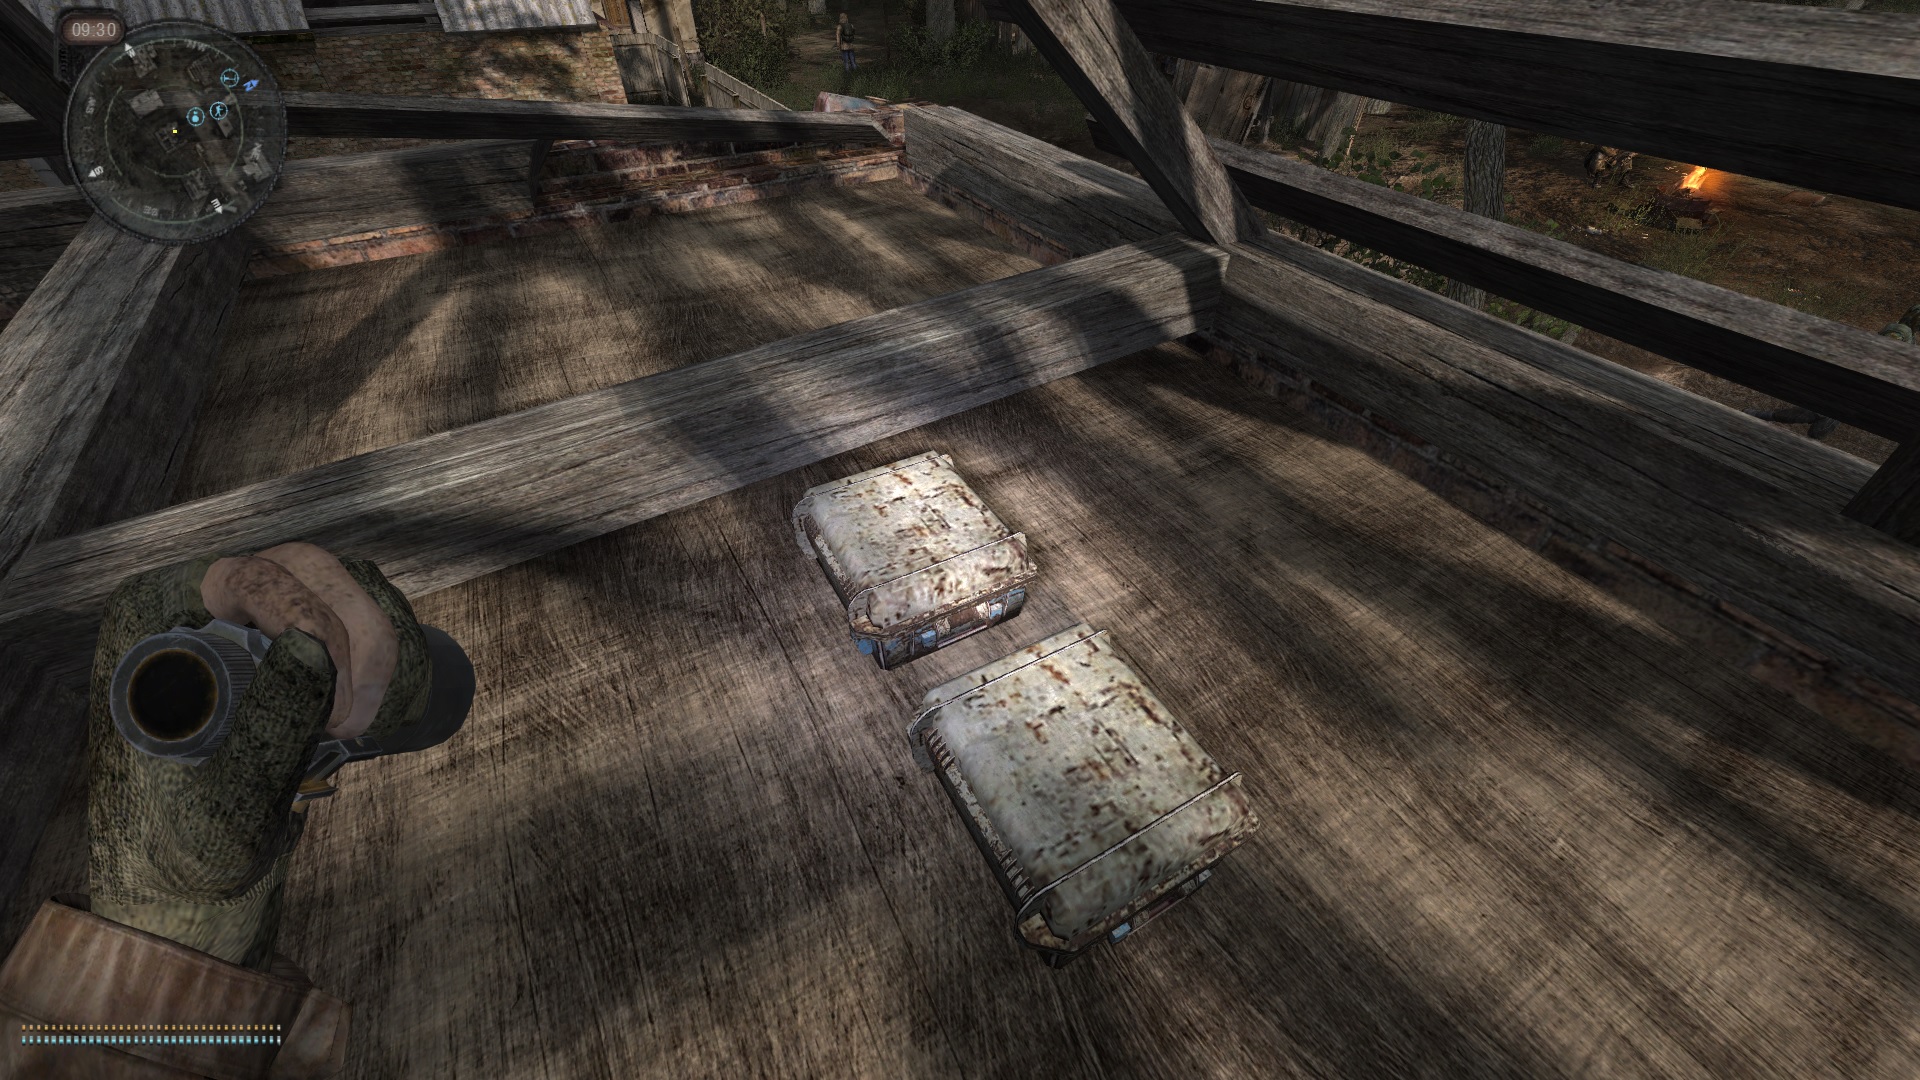
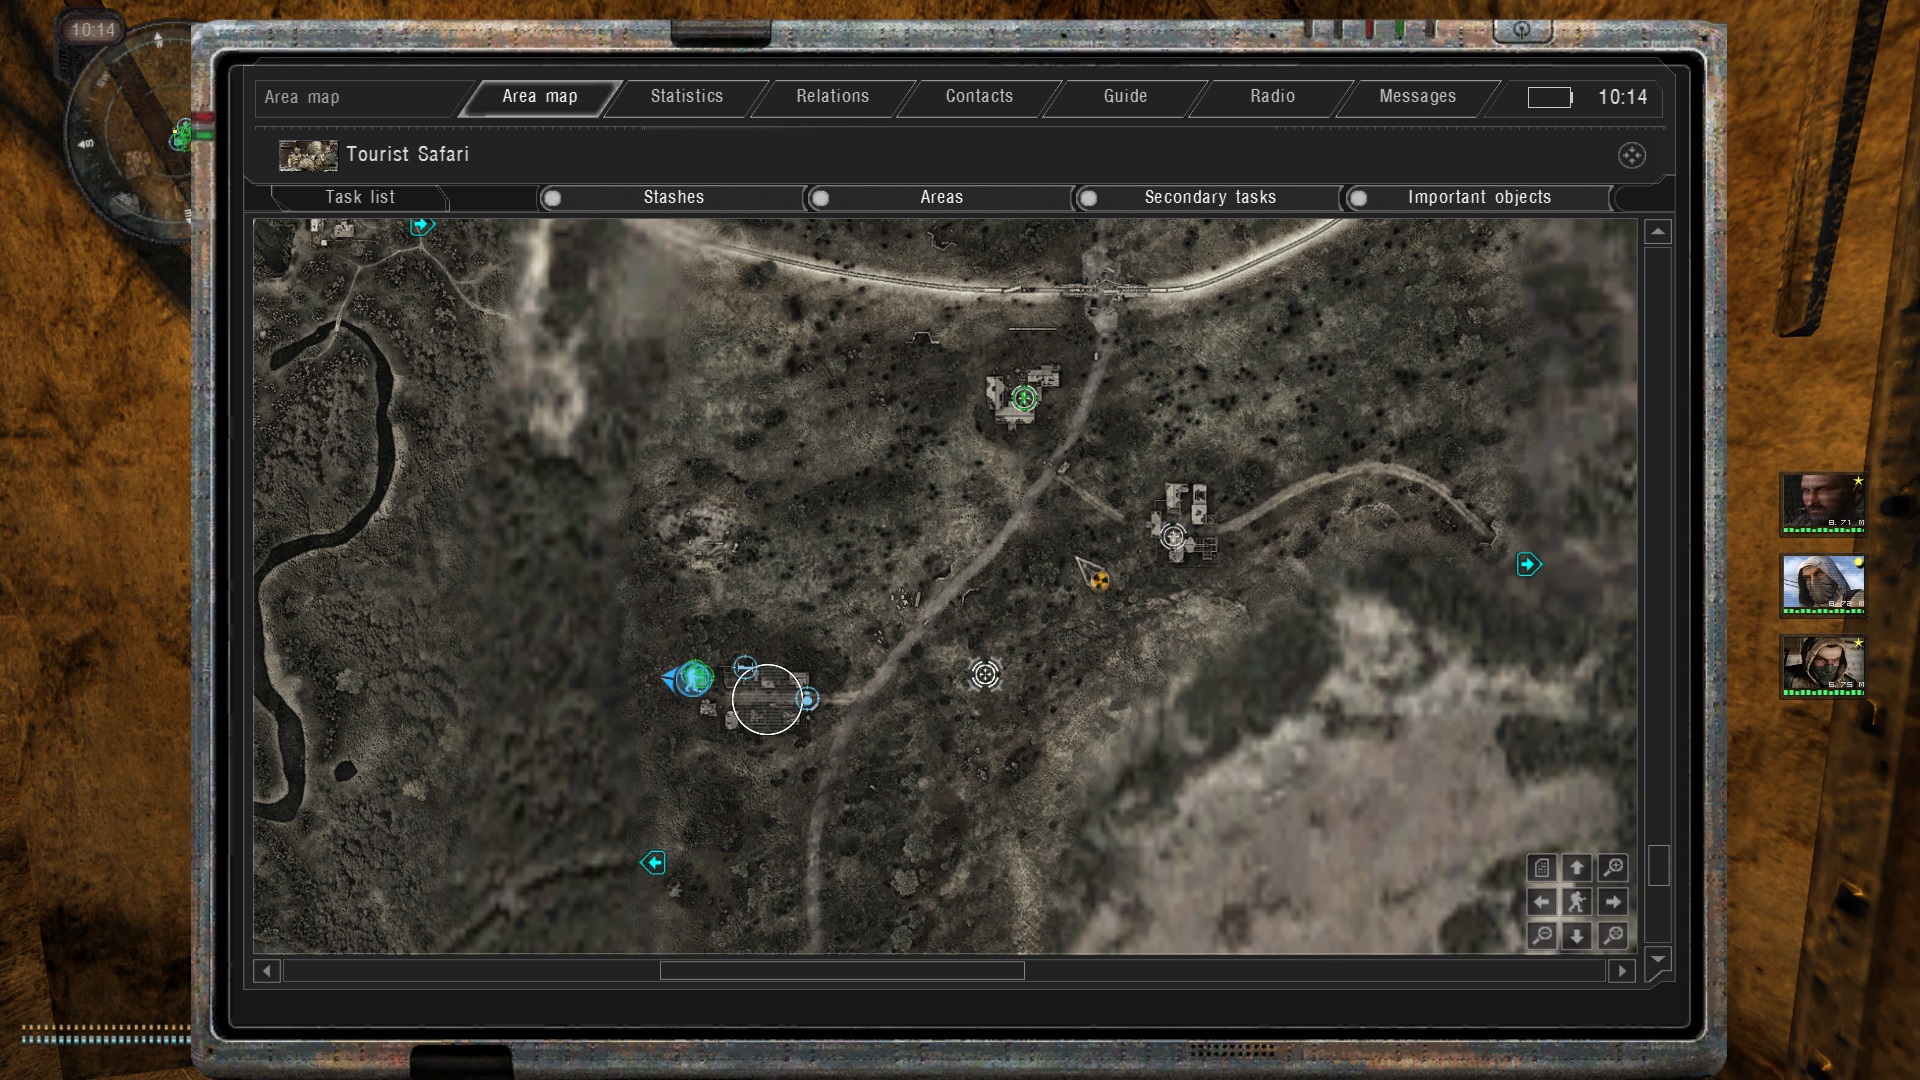
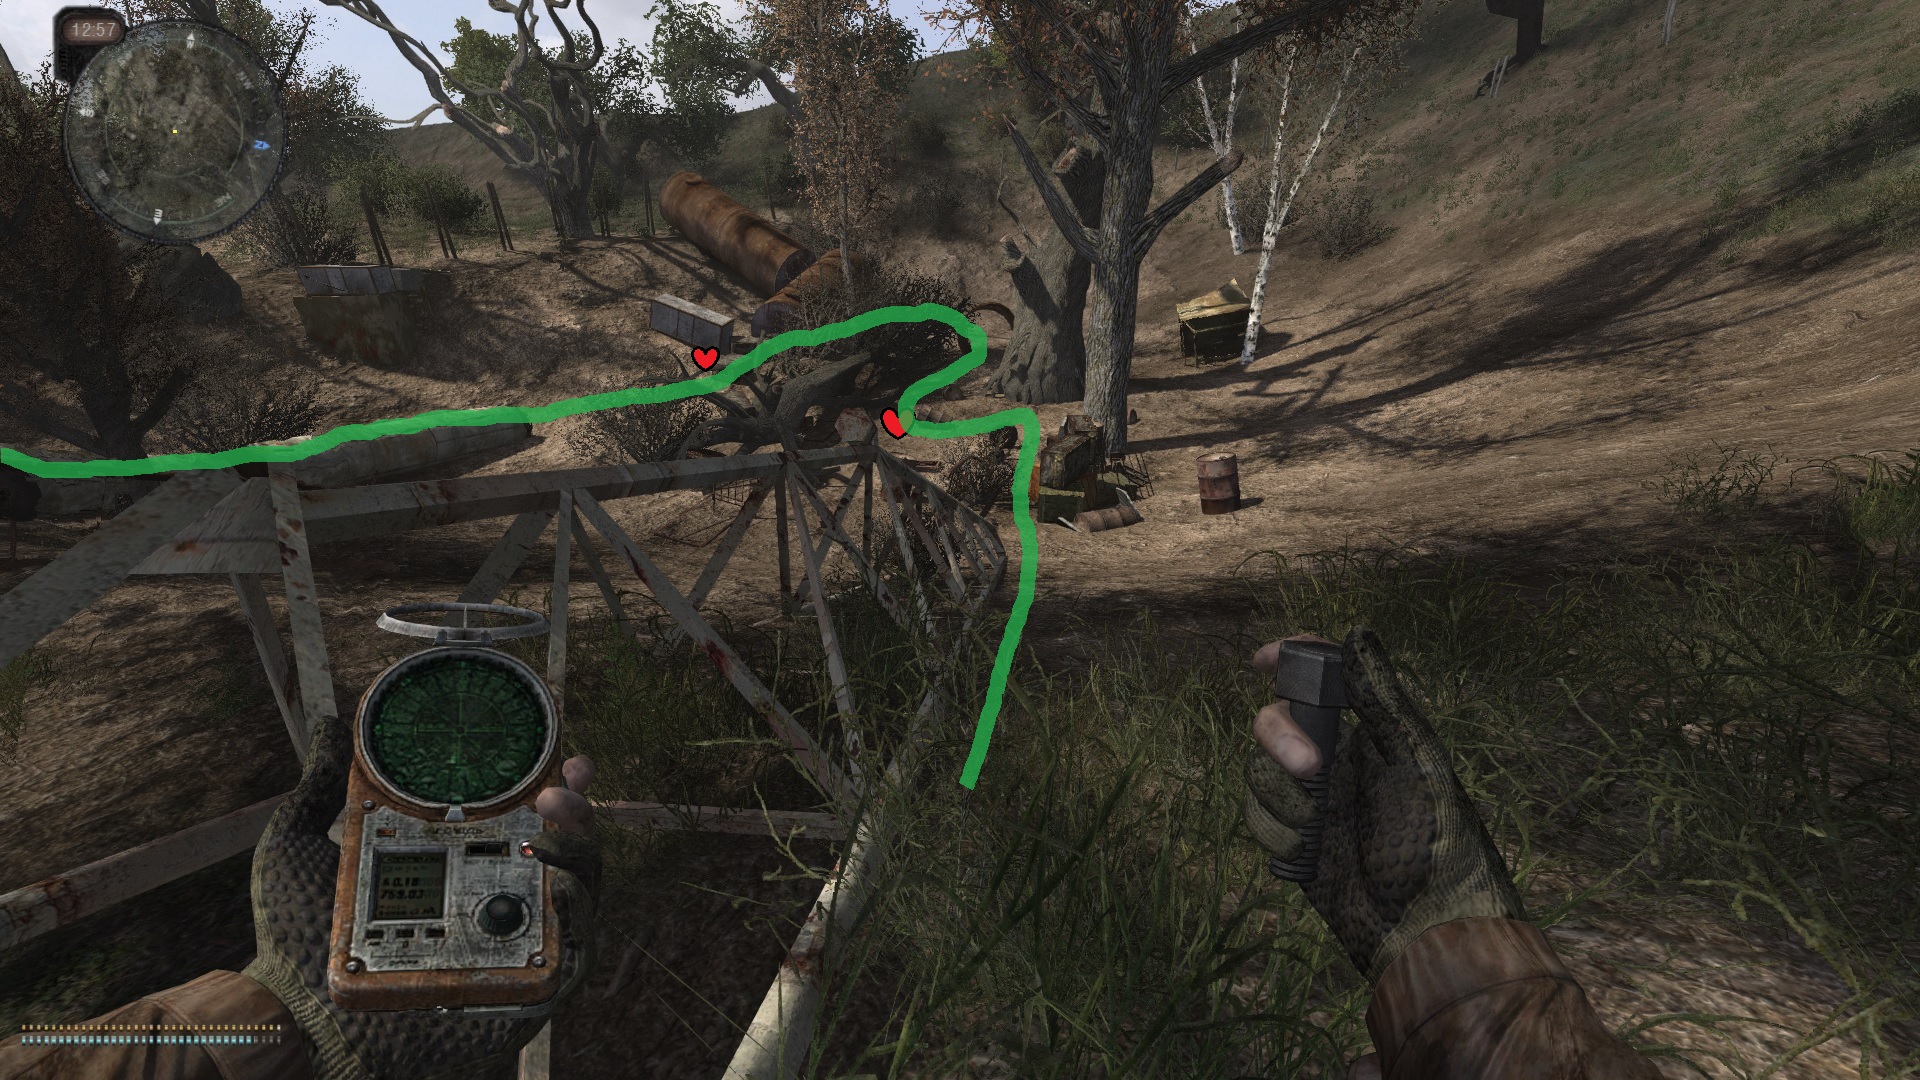
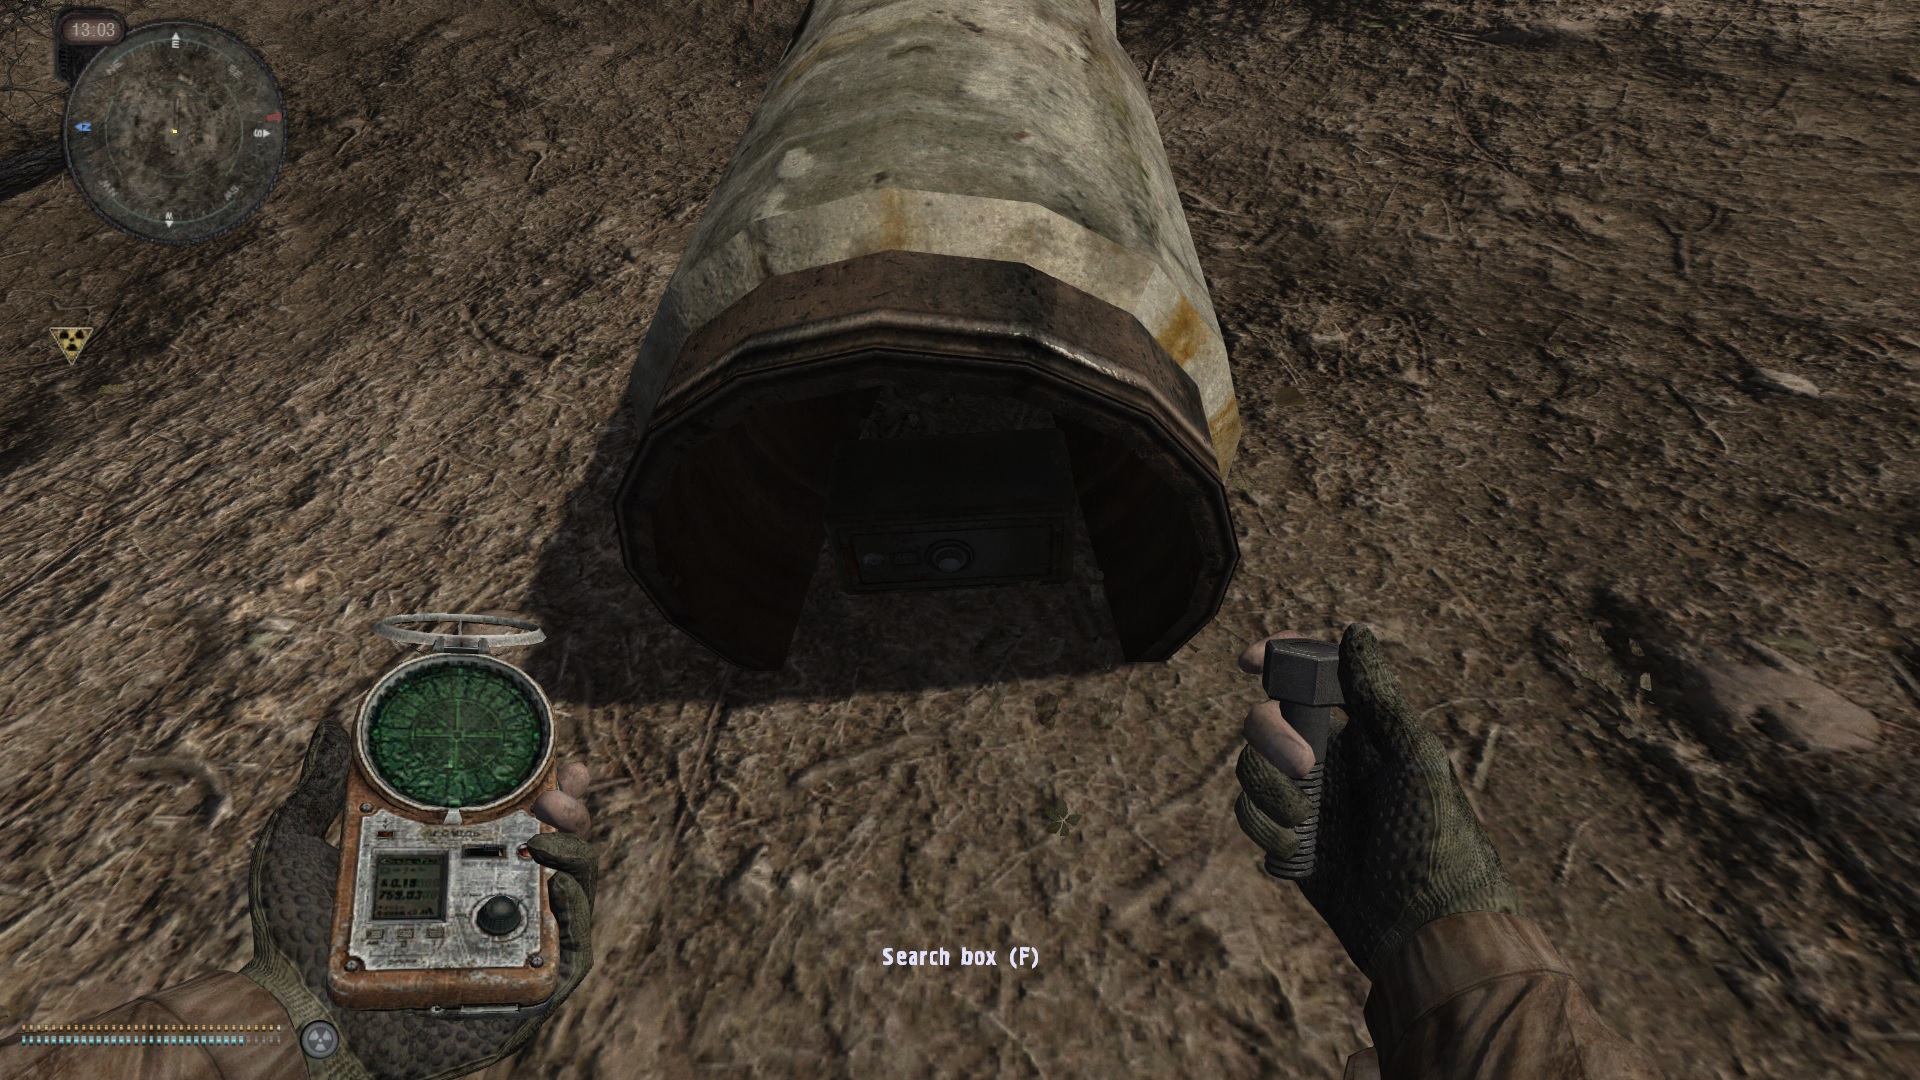
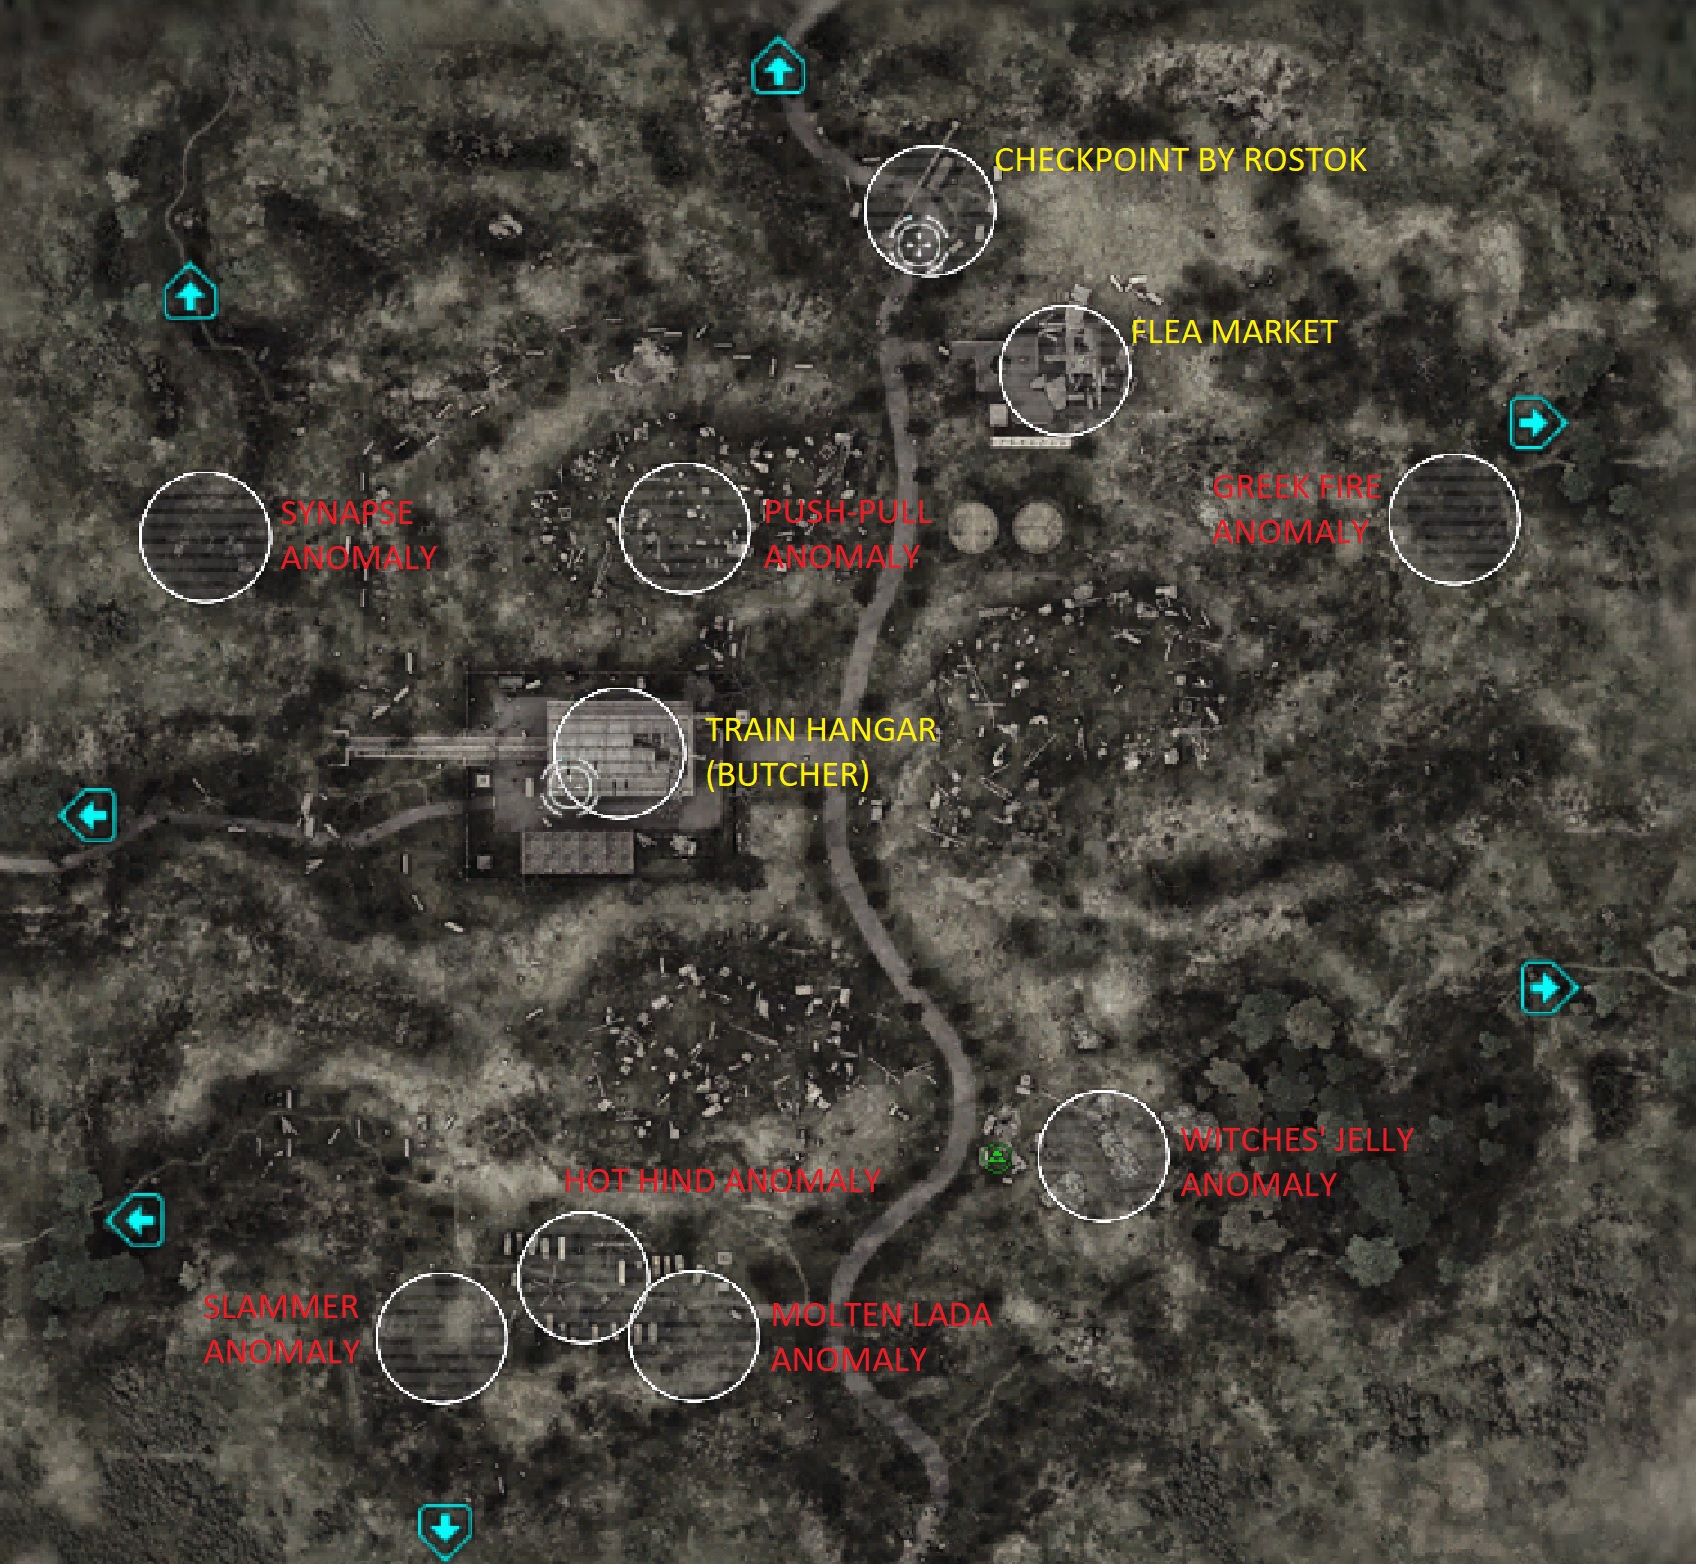
If you're not finding stashes, be on the lookout for stash containers, like tombmarkers with gas masks. If you're not familiar with what stashes look like or where they are, there are videos on YouTube with easy locations to get you started. If even then you still feel you don't get stashes, crank up the number in the menus! You can always lower it step by step if you feel it becomes too much. I hope this helps!
aerodynamically unstable Feb 20 @ 5:12pm 
Hello. Regarding chance of discovering stash, I also put it to 1 but I still haven't found any PDAs on bodies like bandits or the militry. Do they spawn in higher tier areas? I have only been to the starting areas like garbage.
Dio Aloke  [author] Dec 17, 2024 @ 10:49am 
Thanks clown_emperor, I hope it helps! Feel free to ask anything
clown_emperor Dec 17, 2024 @ 6:47am 
very detailed, thanks for the guidance my friend
Dio Aloke  [author] Dec 16, 2024 @ 3:18pm 
Reached the character limit in the COMPANIONS section :steamsad:
Dio Aloke  [author] Dec 16, 2024 @ 3:14pm 
(next)
- I've added this, thank you again
- same
- maybe Loners just die a lot or can't afford exos lol. Had a Freedom duo in exos, but had to let them go, it was too crowded wtih 5 companions (not a problem in the open, but in buildings and tunnels... (including some map transitions)
Dio Aloke  [author] Dec 16, 2024 @ 3:11pm 
Thanks, Sudo!
- I'm not sure I want to mess with hardcore AI aim, enemies can already hit me from a mile away through thick foliage. Doesn't feel worth it even with more accurate companions
- I've added the mod to the list
- I believe "He's with me" already stops companions from killing each other, but I guess you're talking about splash damage or accidental hits. I'd install both mods anyway
Sudo Modding Dec 16, 2024 @ 2:14pm 
That was a good read! Some things not mentionned:
- enabling hardcore AI aim will also impact companions
- "Companions deactivate lamps when in stealth" still works for 1.5.3, it's so much better for stealth

Also, things that you said and I just want to go further:
- "No more friendly fire" is required to disable companions that kill other companions. They don't seem to care of having an other companion in front of them, and I had to reload so many times because of that... + you can't do much about it
Sudo Modding Dec 16, 2024 @ 2:14pm 
(next)
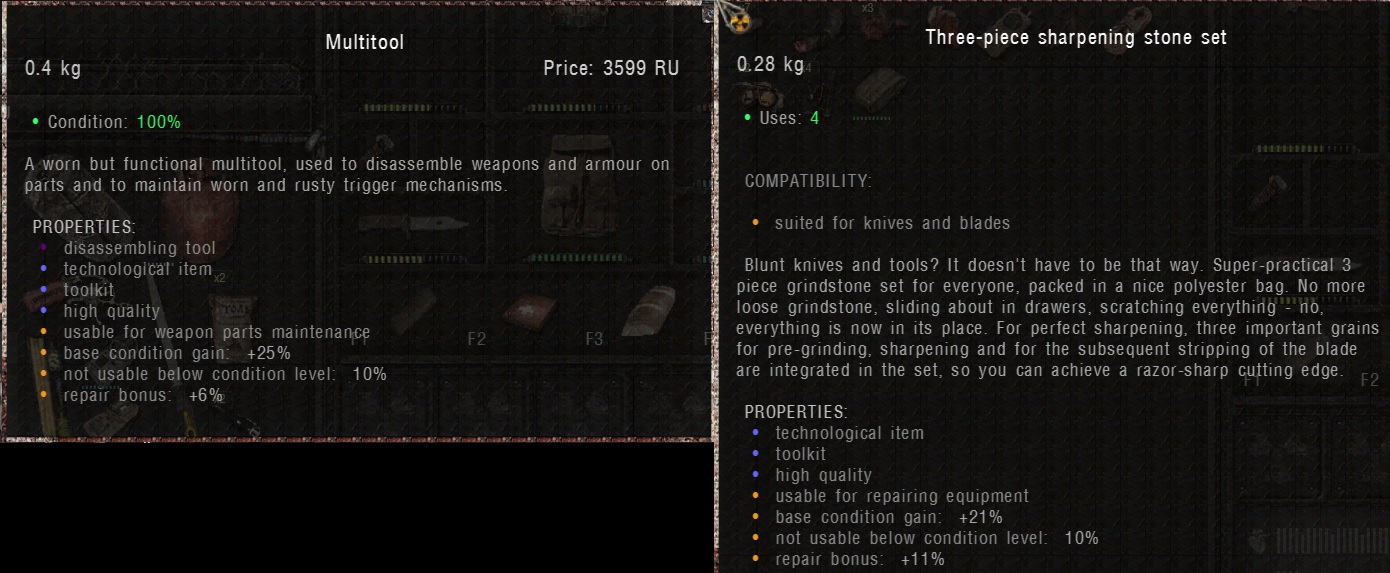
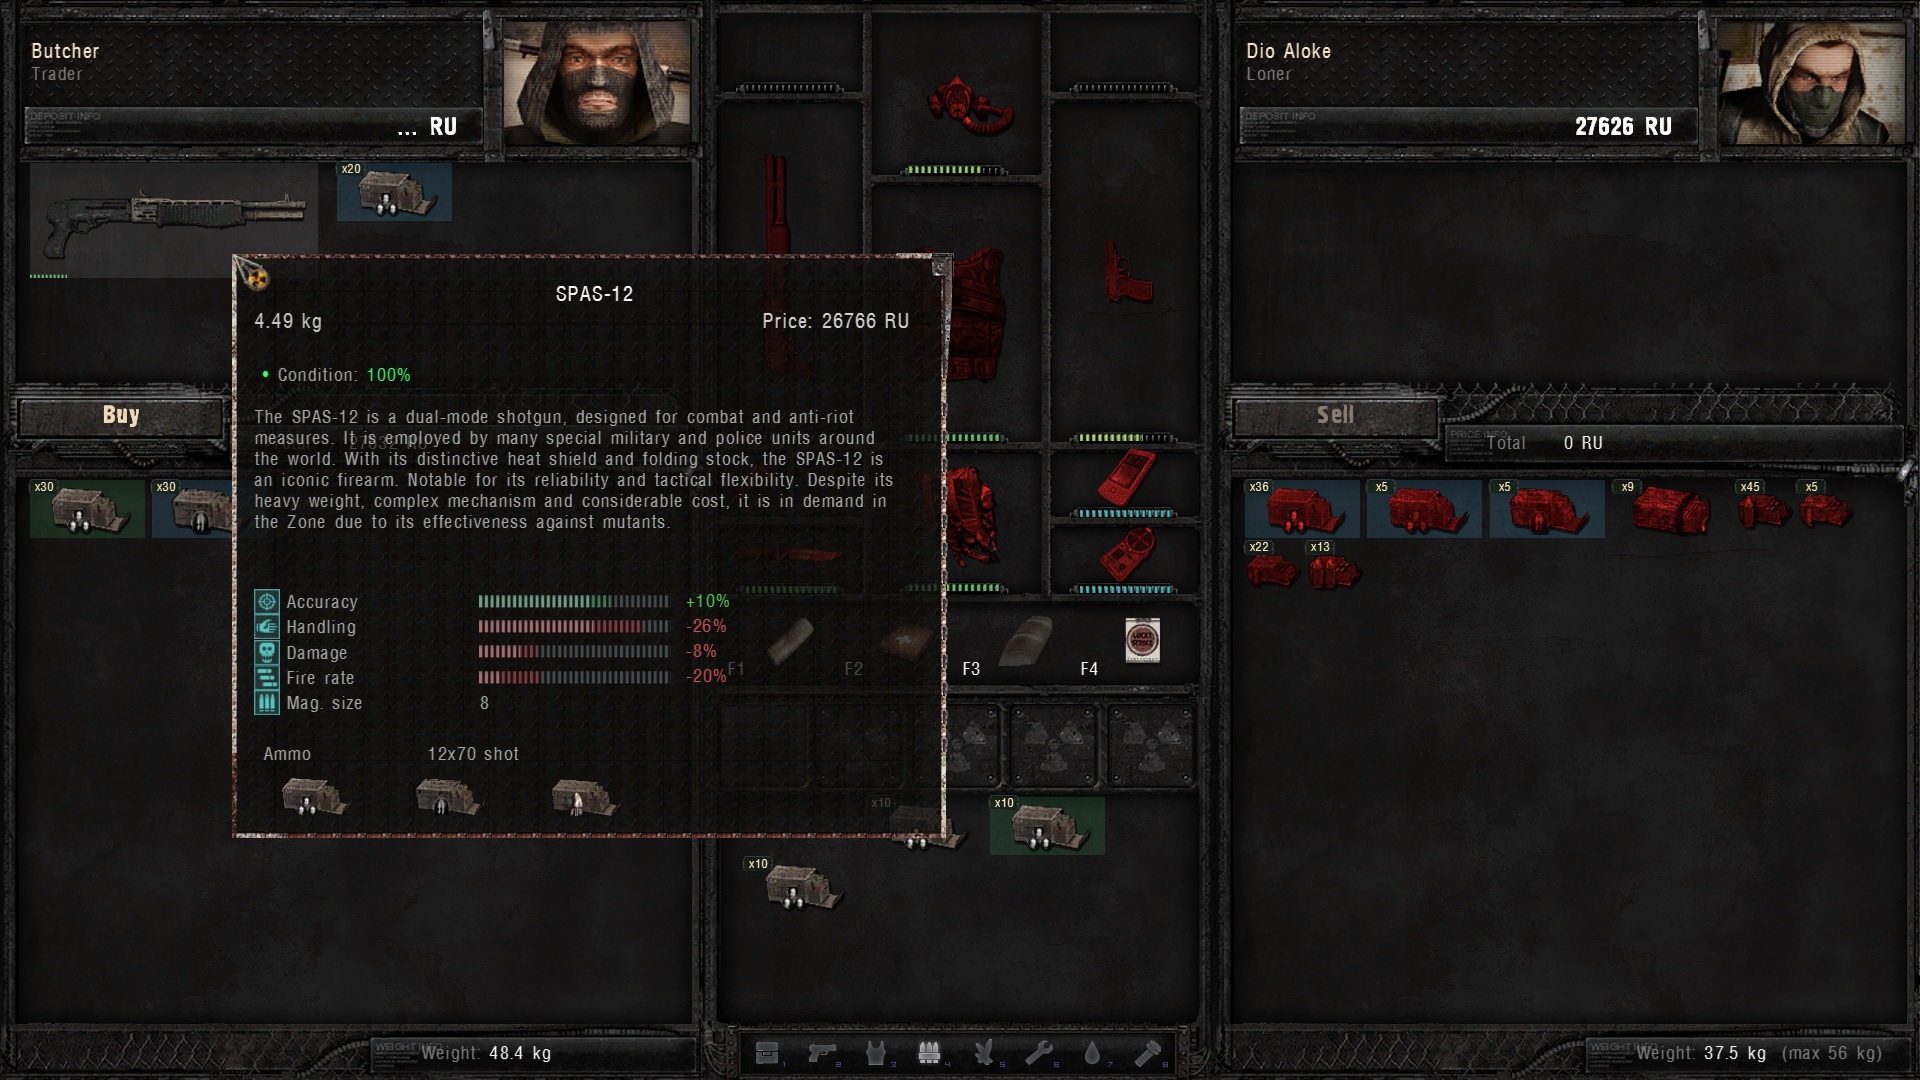
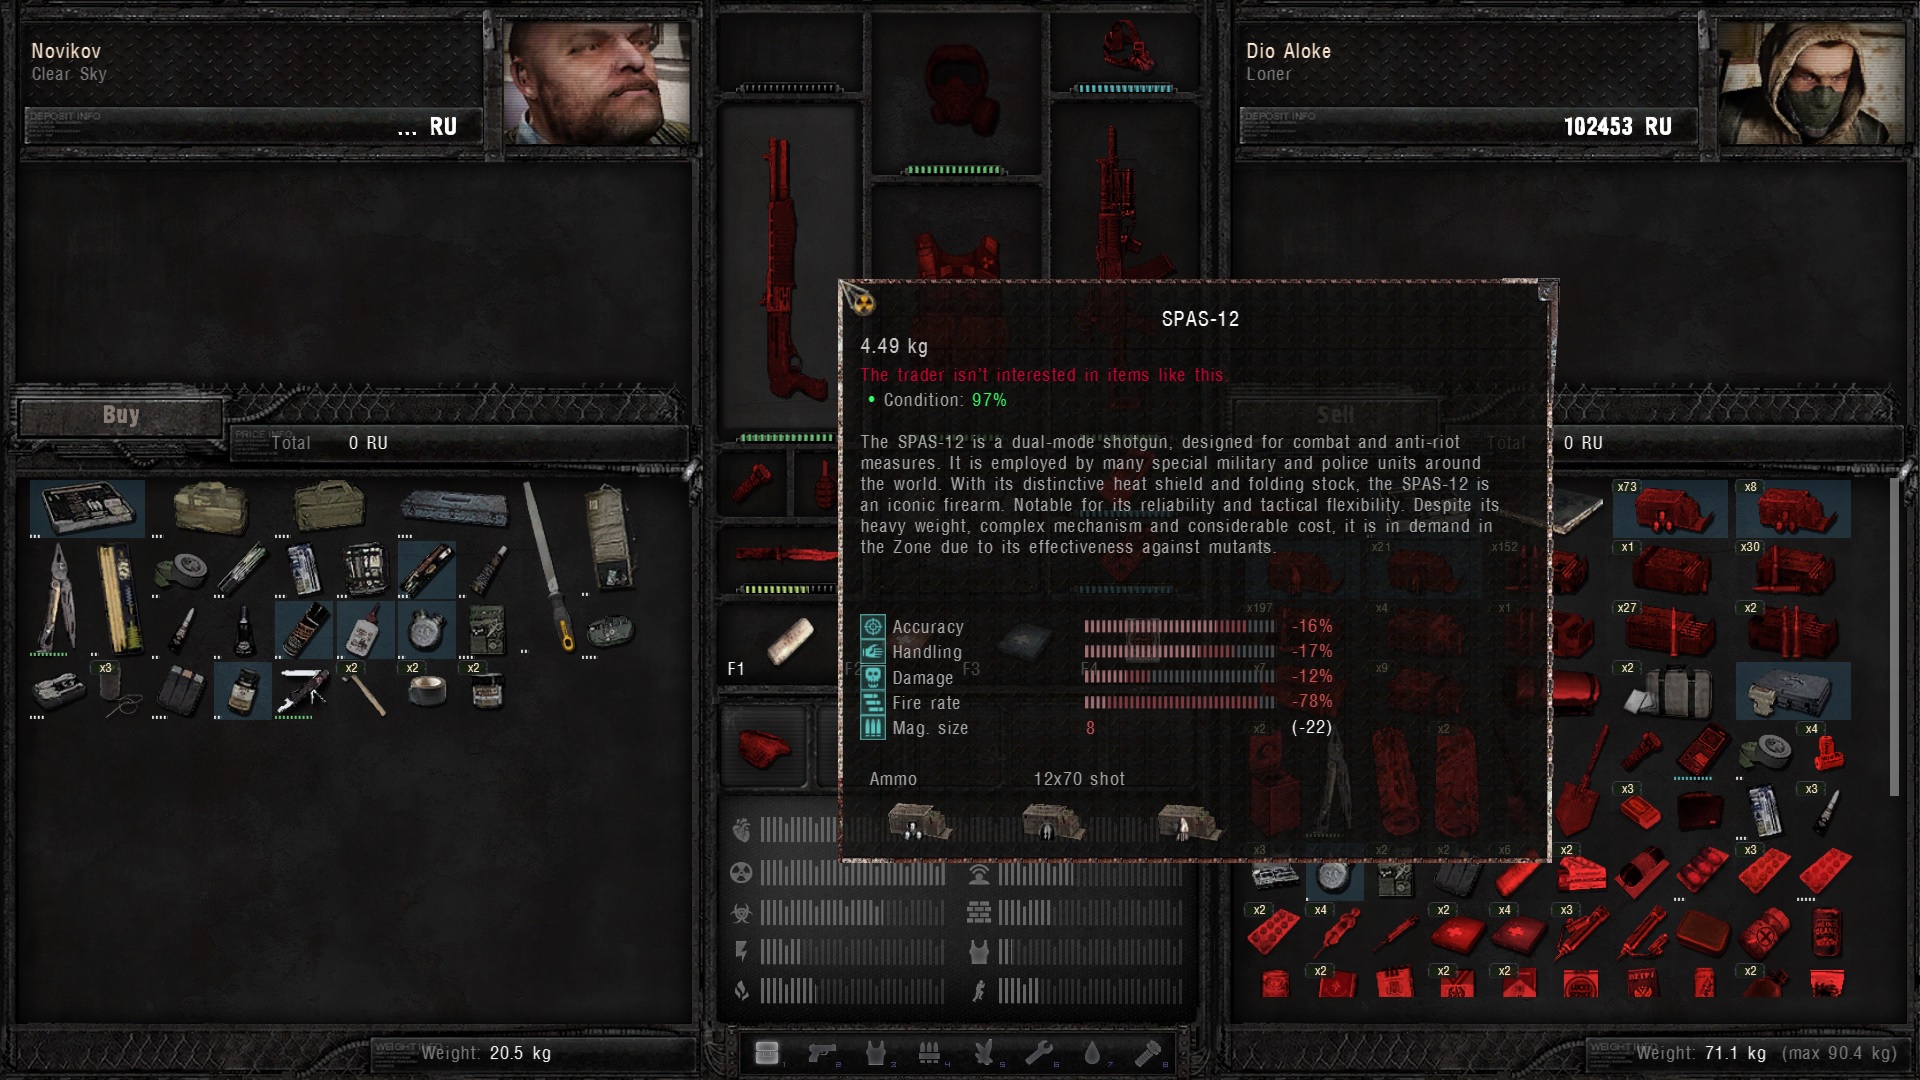
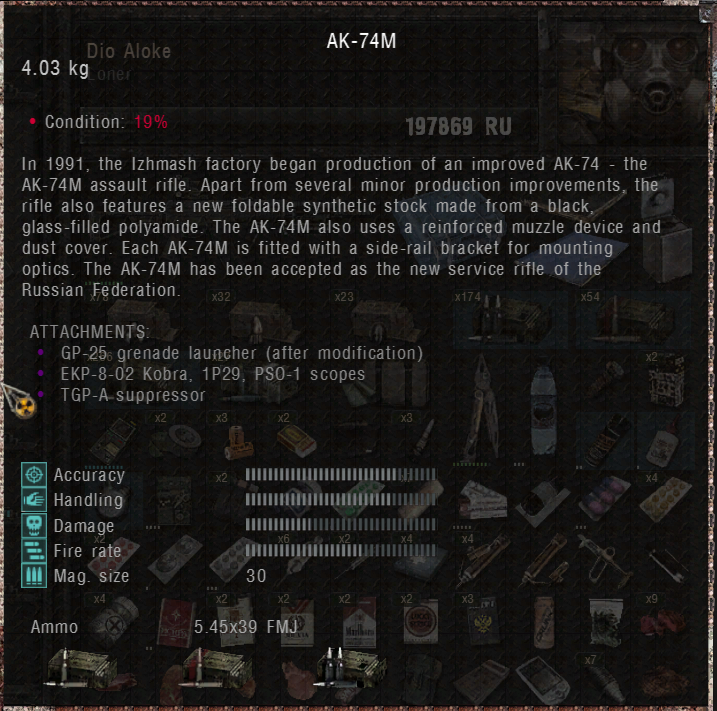
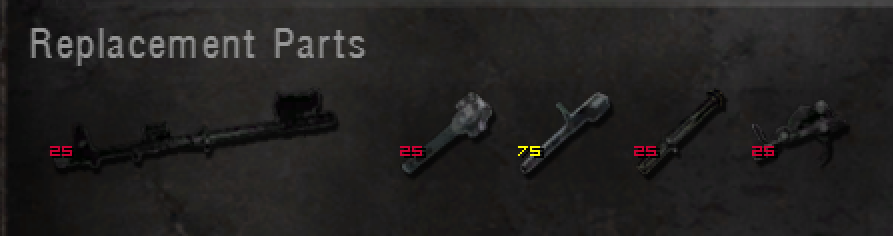
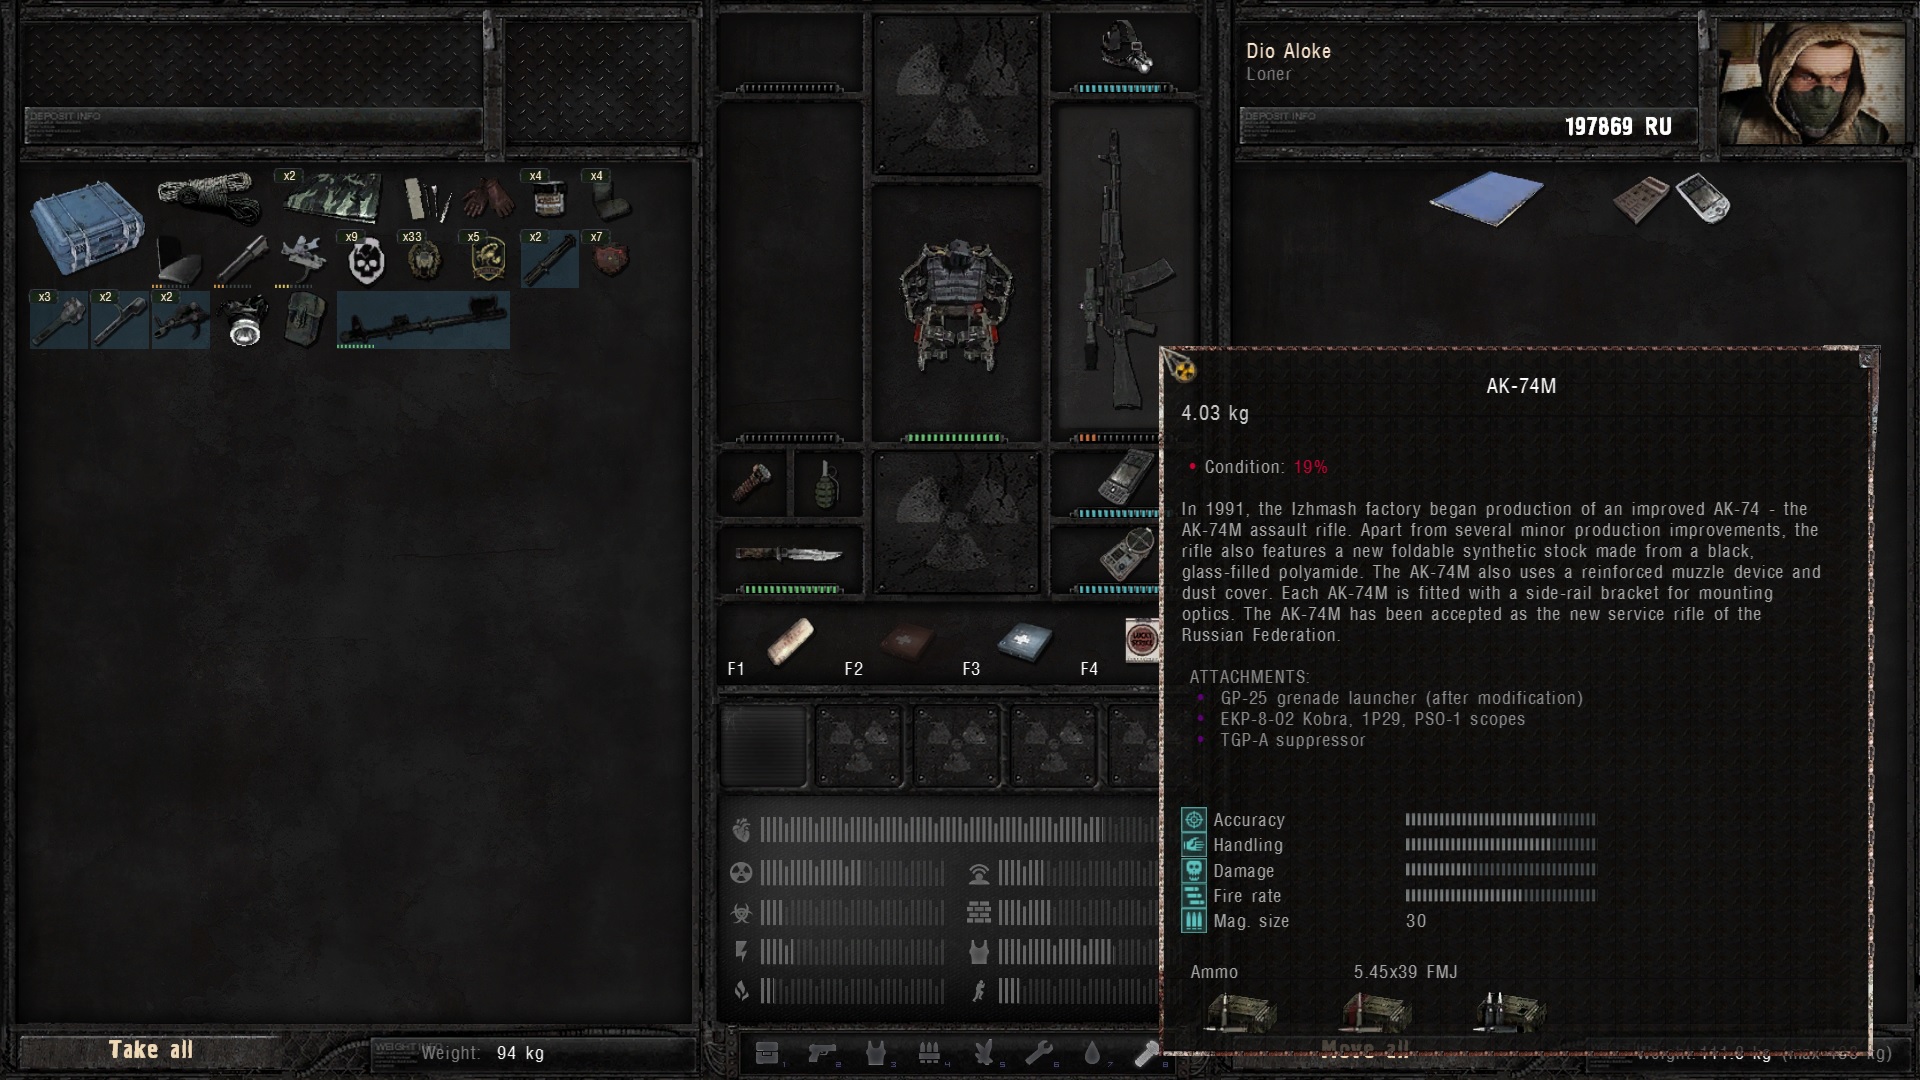
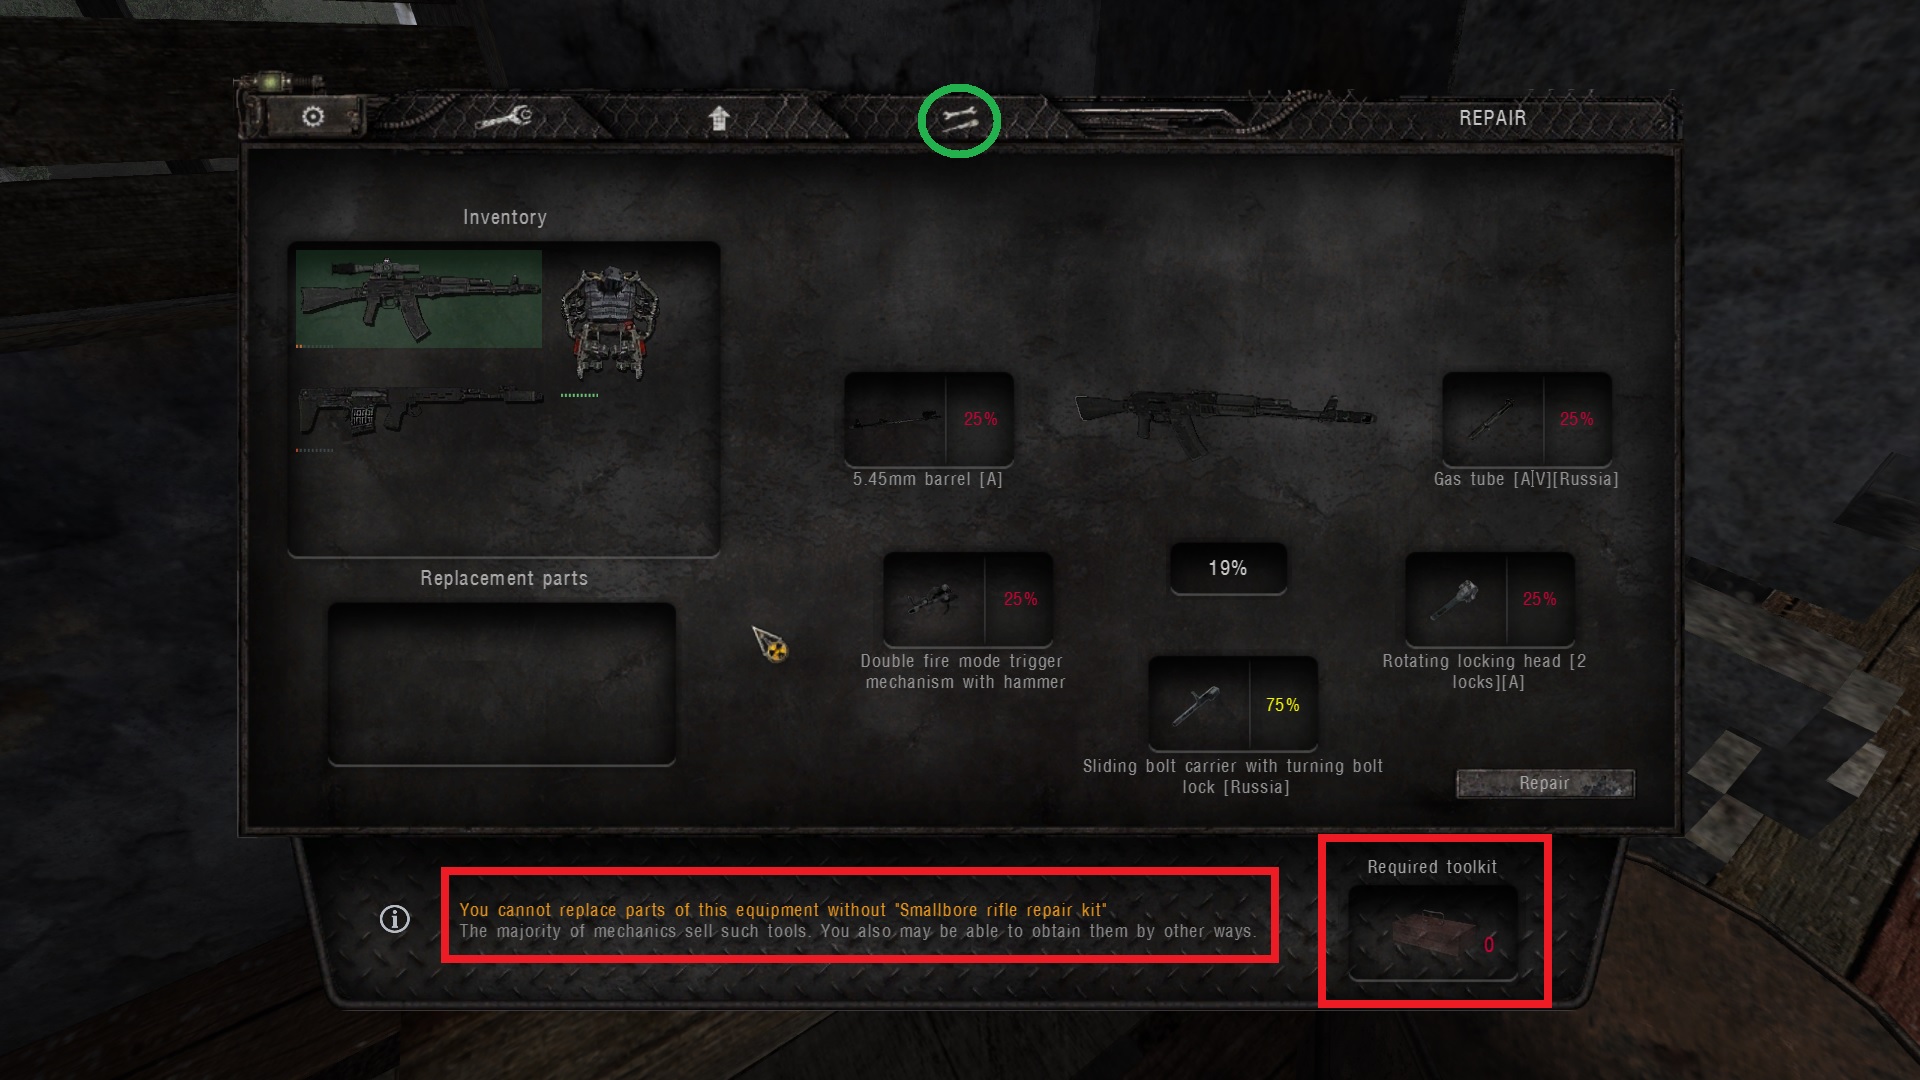
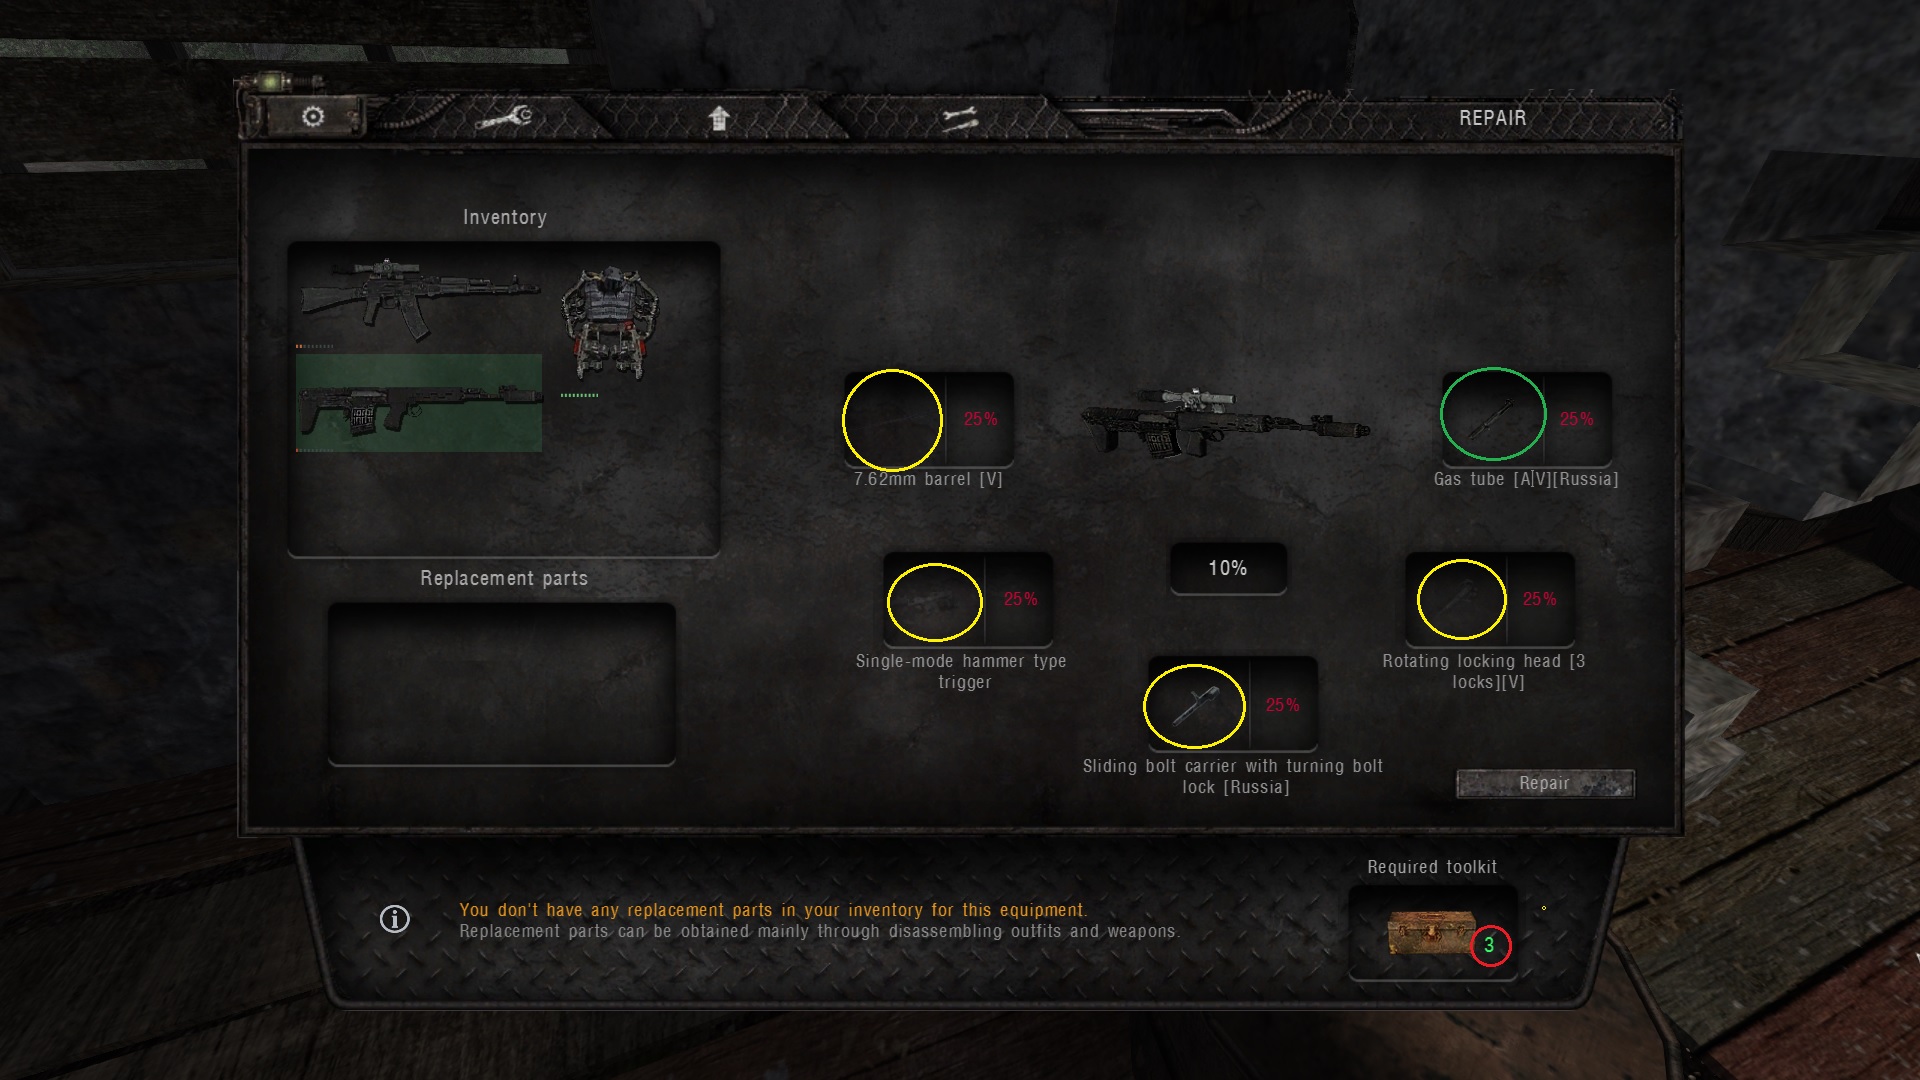
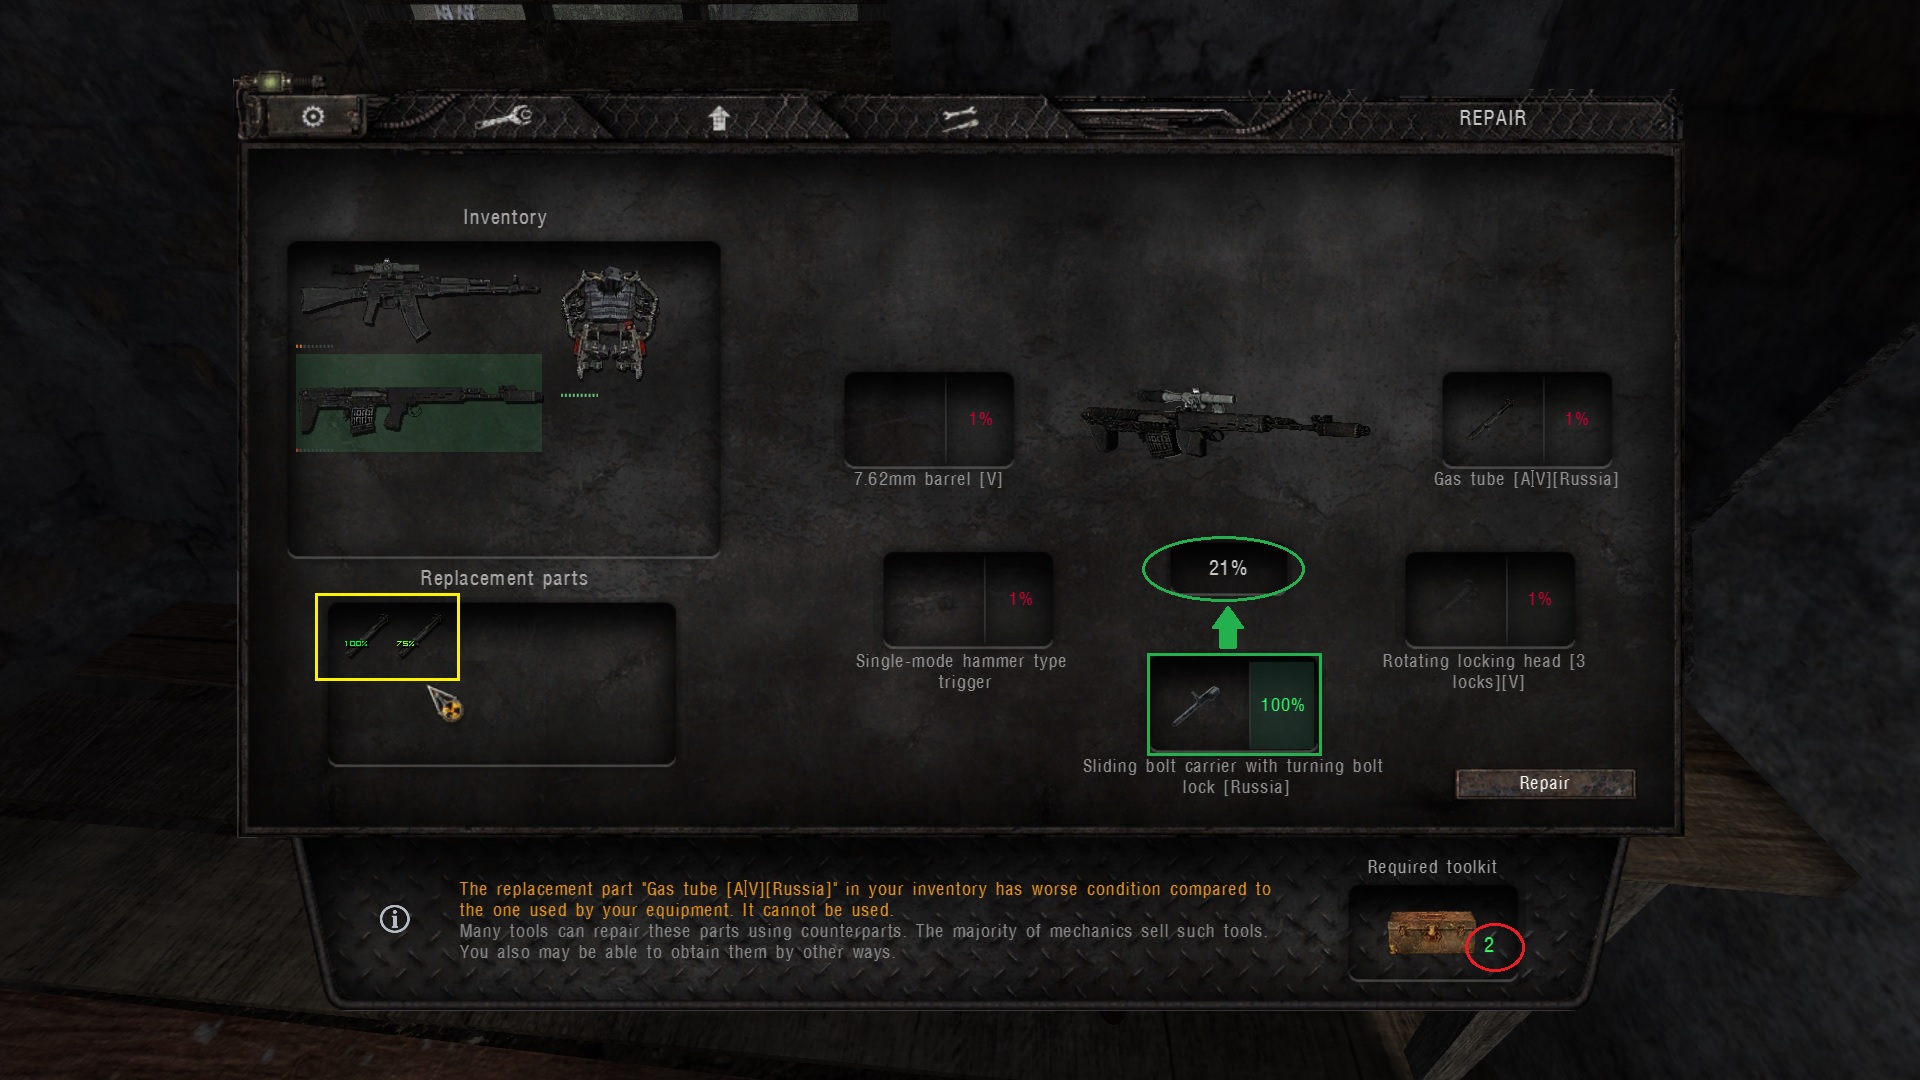
- about companion weapons: upgrades matters, scopes increase their accuracy, condition is very important (you can repair them, but yes a mod works too), an assault rifle might be the best choice (eg: FN SCAR-H (camouflaged), has probably the best stats for an AR, of course, load it with AP ammo), or if you want to level them up fast, an RPG works wonder, but... yes it reduces their life expectancy
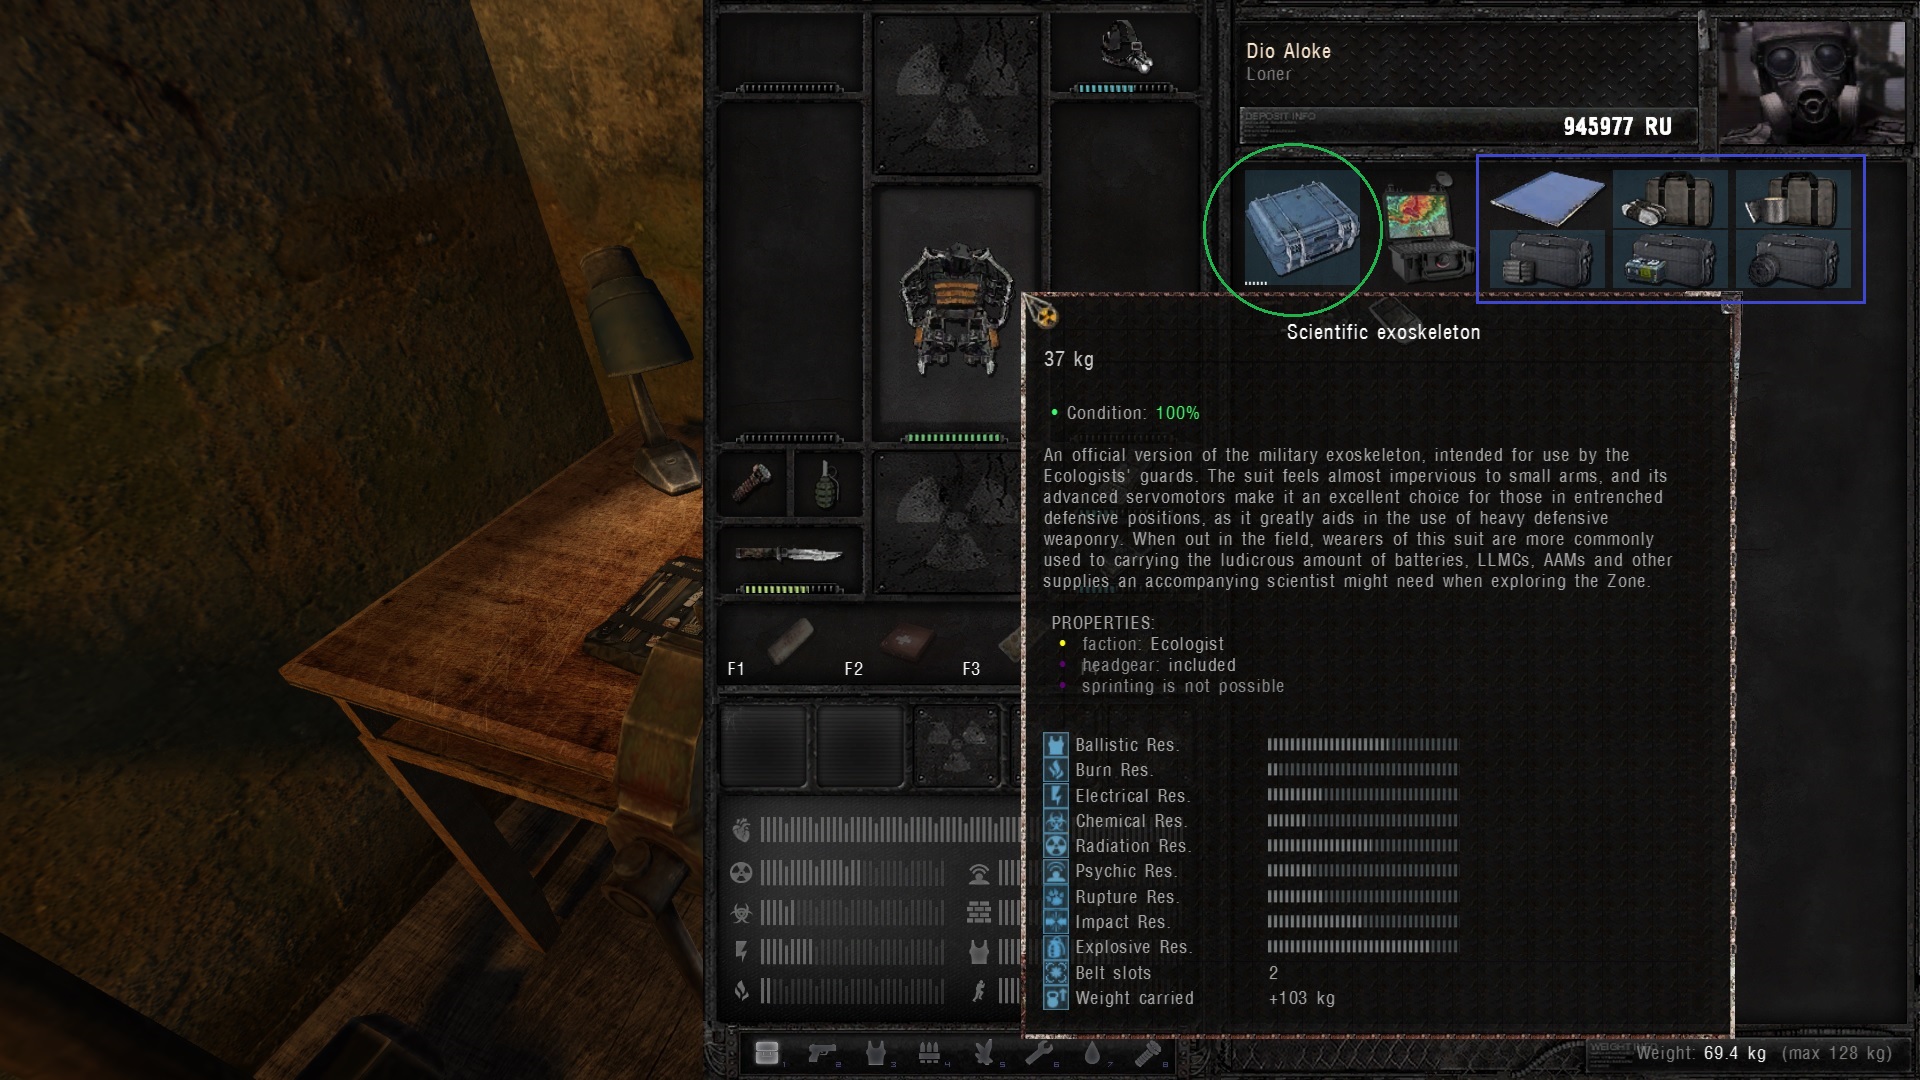
- companion rank matters for accuracy and health (they get more health from their armor model and their rank)
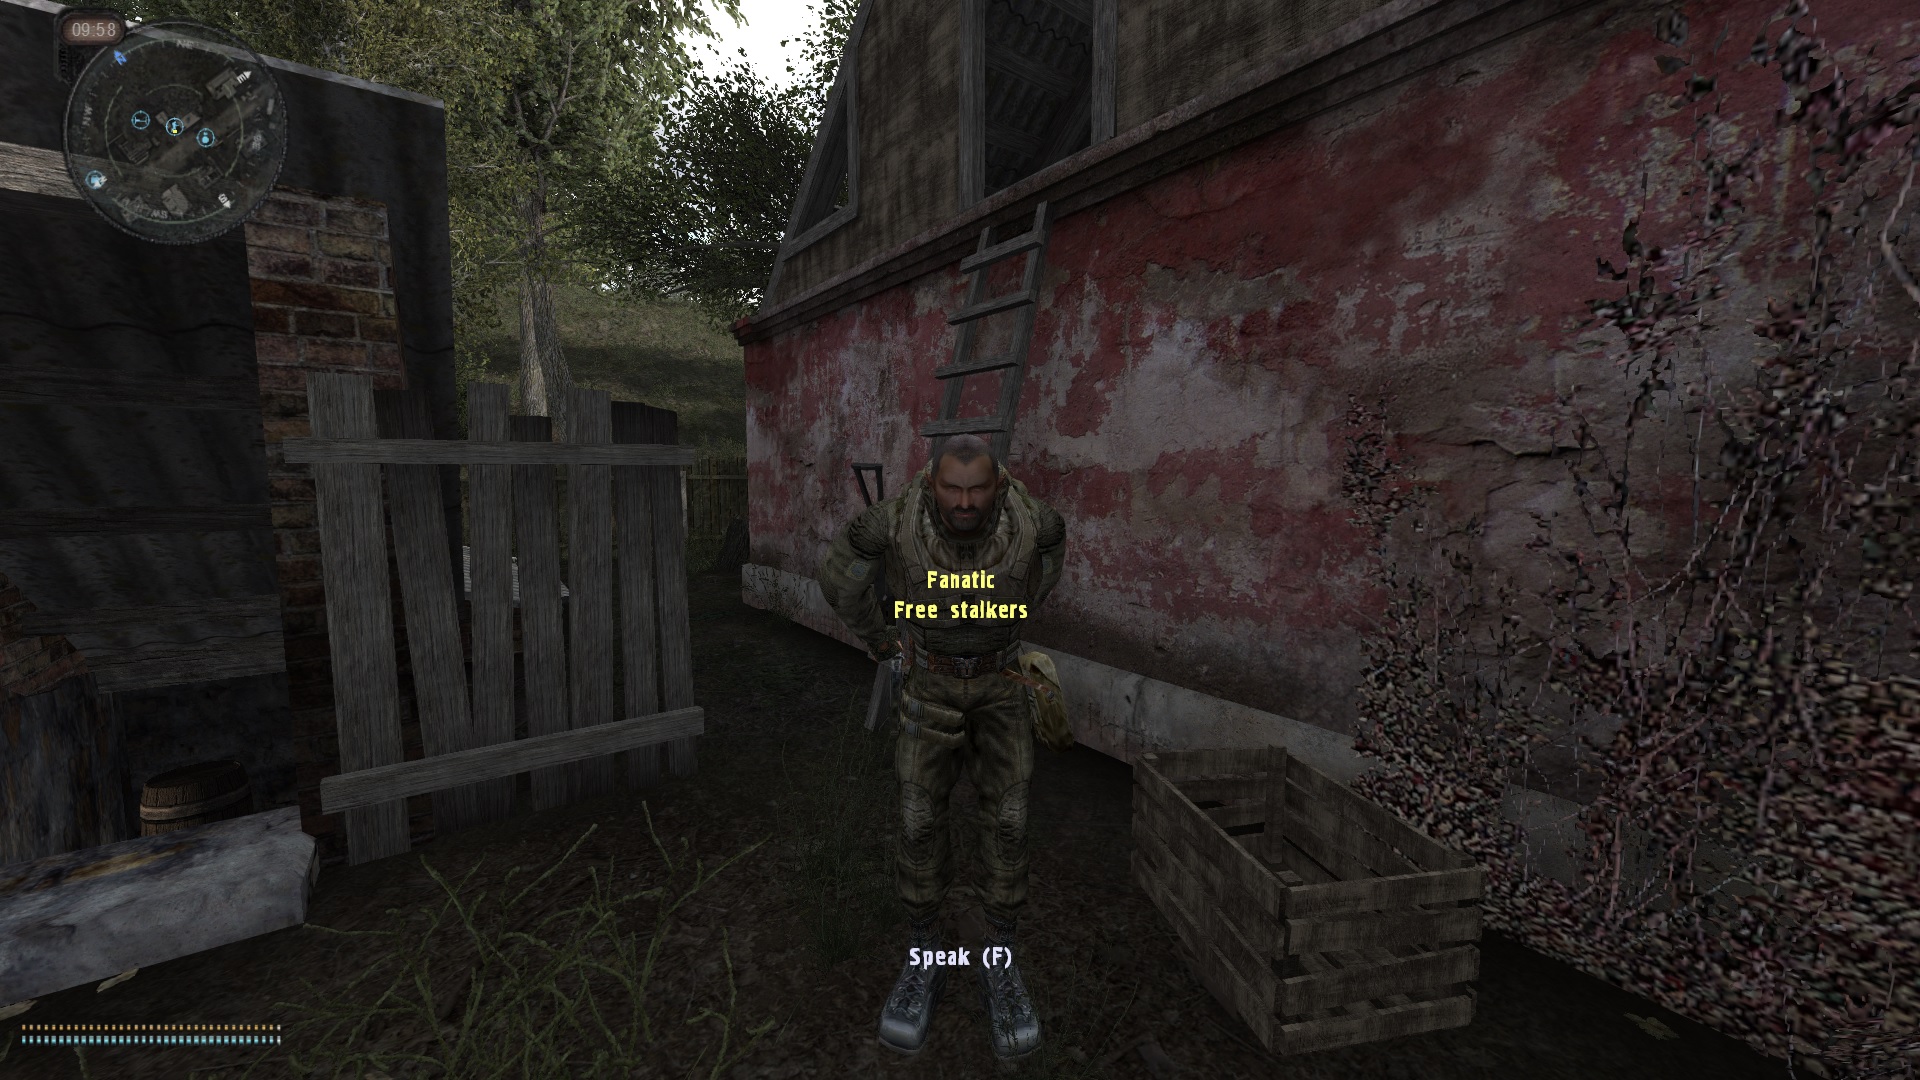
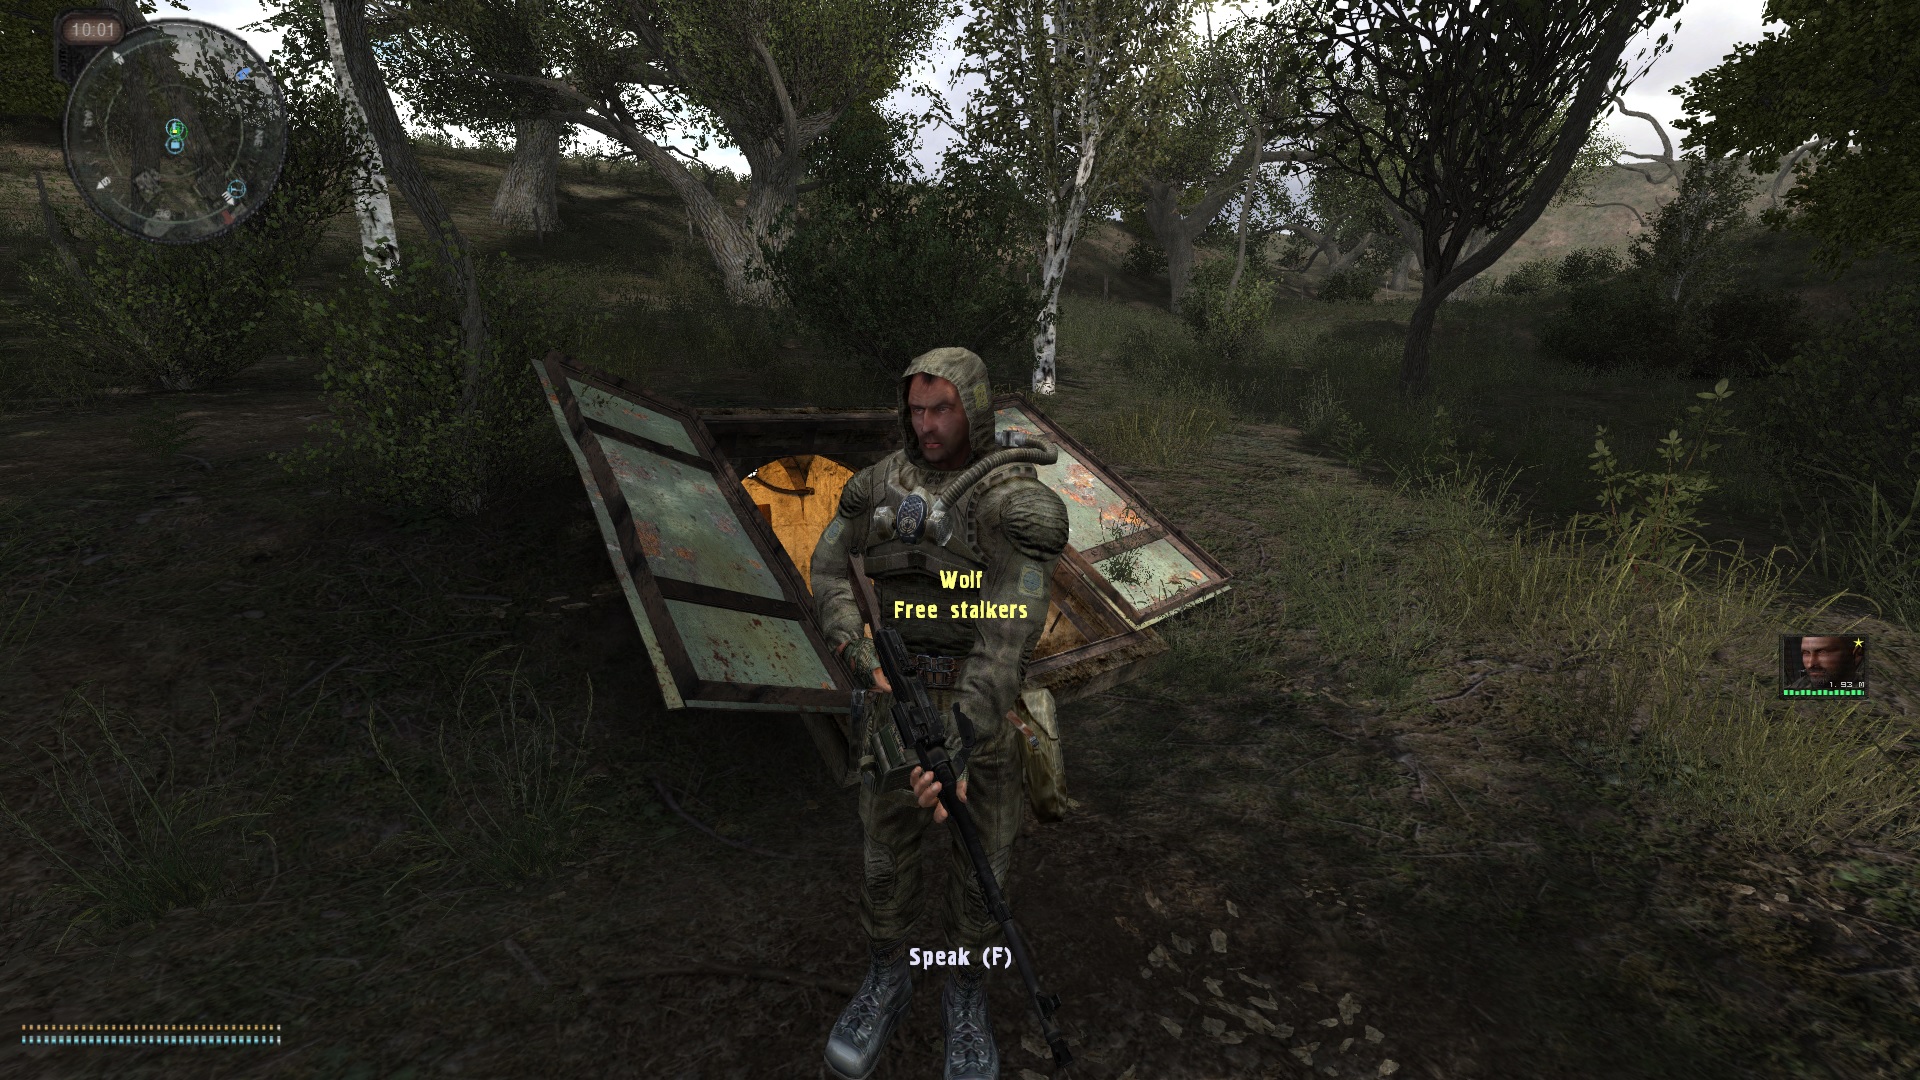
- "He's with me" helps a ton with finding companions with exo. It might be me but I have a hard time finding loners in exo