Songs of Conquest

Songs of Conquest

50 ratings
An Introductory Guide
By Arch Geneforger and 1 collaborators
A spoiler-free introductory guide for Songs of Conquest, it aims to teach new players the basics of gameplay, and faction specialities. It also includes useful tips for the official campaigns.

This is intended as a PVE guide, competitive play has other considerations, another meta, and requires a lot of game knowledge.
2
   
Award
Favorite
Favorited
Unfavorite
Gameplay Basics
General Tips
Movement, Explore!
Always explore. Search for resources to boost your economy, capture buildings for more resources, and for more visibility. If you do not loot your opponent will.
Increase your movement stat and get a secondary Wielder to make looting faster and more efficient. If your secondary Wielder picks everything up your main Wielder can manage more fights per turn.

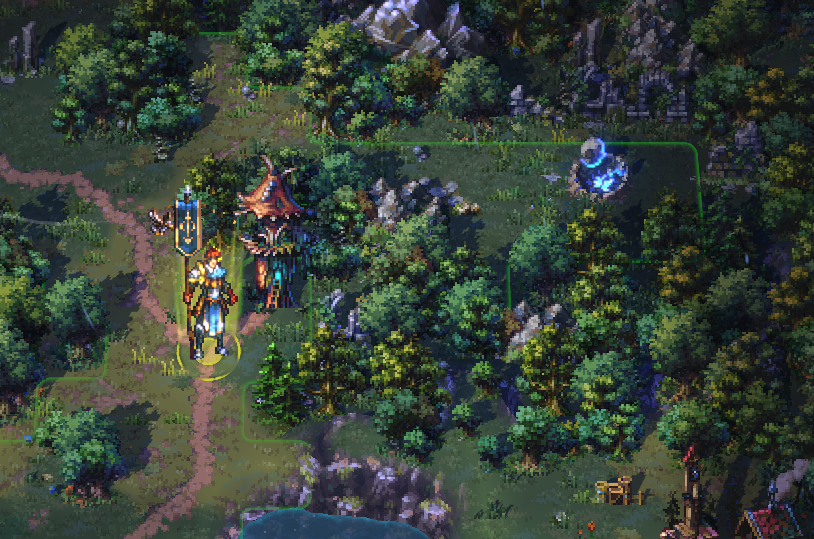
Use the ALT key, and use it often, it will show you what you can interact with.
That is the difference, it is not only useful for showing interactables but it can also expose items hidden behind enviromental objects

Make a strategy
Decide on a plan, what units are you aiming for, what research do you want. Focusing on a few units means that research is cheaper, you reinforce quicker, but that you are less flexible and can cast a smaller variety of spells.
Feel free to experiment during maps 1-3 in most campaigns because they are usually easier. This lets you figure out what tactics or units you like, and allows you to make a better plan for the final map.

Make use of your build slots
Towns get:
- 7 small building slots
- 3 medium building slots
- 2 large building slots

Large Settlements get:
- 3 small building slots
- 2 medium building slots
- 1 large building slot

Small Settlements get:
- 2 small building slot
- 1 medium building slot

If you have free building slots, consider your situation:
- If you do not have rare resources consider building multiple markets (maximum of 5) because they let you trade for better prices, this unlocks your highest-tiers of units, makes upgrades cheaper, faster and possible.
- If you are running out of units, consider focusing on one unit type, and reinforcing your armies with Rally Points.
- If an enemy is approaching build a tower, they are powerful, take one turn to build, and can be used to destroy dangerous creatures like Cheluns or Necromancers. Even if you cannot destroy their entire army, or a full stack of units, you can still damage your opponent, and soften them up for a future battle.

Artifacts
You will encounter many Artifacts in your campaign travels. Some being good and some being bad. Even if you do get a bad artifact, it does not hurt to hold on to it to sell later at an Artifact shop or hand over to another Wielder.

There are also artifact sets but they are not present in the base campaigns (Arleon, Rana, Loth & Barya). The artifact sets are powerful, especially early on, so feel free to aim for them.
Be aware that certain artifacts are stronger than sets, so mix and match when necessary.

Artifacts to be on the lookout for:
- Boots, mean movement
- Spell damage resistance (e.g. Glimmerglove)
- Special effect / Orange Quality (Gloves of Eternity, Rod of the Roots)
- Any Resource gathering artifacts
- Essence Generation (Essence Amulets)
- Any initiative Artifact

The in-game Codex is your best friend to see what artifacts do.

Other Information

More in-depth information on movement:
https://steamcommunity.com/sharedfiles/filedetails/?id=2903679819

More information on map objects and what they do
https://steamcommunity.com/sharedfiles/filedetails/?id=2904183685

More info from the wiki
https://soc.th.gl/
Skills and Powers
Important Notice: This Guide is for the PVE and Campaign sides. Do not take this info to PVP as that varies a lot.
All skills, powers, and their effects can be found within the game, in the codex.

For the main Wielder, it's important to build them for combat and to balance skills and getting Command. March is the expectation as more movement can mean more fights or more resources.

A big change happened in of the updates. That you can not level up your skill until level 5 for tier 2 skills and until level 10 for tier 3 skills.


You will also find the Mystic Hermit they give you skills and can be very helpful. In the campaigns, they usually teach you a static skill that the mapmaker thinks will be useful, but in skirmish, it is typically a random skill.
You can claim it once per Wielder, but sometimes you want to skip it and try your luck for a better skill on your next level up.

Suitable on Main Wielder
Any and all essence skills, these skills give you more essence per turn and increase the effectiveness of your spells. They are very useful on any Wielders but the ideal essence skill depends on your faction, more on that below.

Guard gives you melee resistance, and roughly 70% of all units deal damage in melee, which makes it a worthwhile pick. However, you should be careful, Ballistae and other ranged units can hit very hard.

Magic Resistance is very useful to avoid or mitigate dangerous AoE or single target attacks from enemy Wielders. While Wielders are powerful they are also uncommon, consider your situation before maxing it.

March is not the best pick combat-wise but good in campaigns when you lack map knowledge. Getting more movement means that you can explore, fight, and gather more every turn which gives you an edge over your AI opponent.

Command More units mean more fighters and more essence. Units give full essence even if their stack has a single creature in it, so high Command is useful in both small & large armies, as well as small & large economies.

Combat Training is extremely good, however, picking Combat Training will expand the pool of selectable skills, and make it less likely for essence skills to appear. So you should only pick it after locking in a few magic skills.

Raider is situational, it is good in the early game but it can fall off in the mid- to late-game. You are typically better off attacking the settlement immediately and using your skill slot for something more versatile.
It is best on shorter campaigns, or campaings that starve you of resources, as you get more and more gold for each enemy you kill.

Tutor can be considered an option but shouldn't be mandatory as you want to focus on killing the enemy. Support helps but once you know how the campaigns are structured, you could consider it. It can be skipped for some other skills. On larger Conquest maps, this skill is worth taking. It can also be used again if you upgrade it or you gain more exp.


Not Suitable for Main Wielder

Impressive This skill will almost never show up. If you do see it. Do not take it. Most of the units will not join you. The reason being is, default maps and Random Map Generated maps there is a chance they join you. It can swing you the game but it's not grantee.

Powers
Every eight levels you get a power instead of a skill, these are more powerful than skills so your choice can matter a lot.

Attuned is very useful, it gives you essence each turn which expands your options in combat. It is never a bad pick.

Brutal skip it, it's underwhelming as Combat Training does the job better.

Eager It's situational for beginners and can feel rather weak, pick it at your own discretion. It is good for factions with low movement, such as Vanir.

Essence Burst is useful in short fights, because it gives you a burst of essence, however, the essence runs out and won't be useful in long battles. It's still a good pick no matter what.

Essence Shield can be extremely useful but you need to be aware that once you attack or use an ability (any Q presses) the buff is gone. Good for getting close or stalling to get more essence.

Farsight not a lot of ranged units to make use of it, might as well skip it.

Levy extremely good for secondary Wielders, as it increases your army growth.

Rigor a good power, giving you extra survivability, great for large stack sizes.

Speed of Winds good for closing the distance, and moving first, helps you avoid losses.
Conquest
Conquest is the skirmish mode, since it all plays out on a single map it behaves differently from the Campaigns.

Your general strategy skill-wise is getting/upgrading your essence skills so that you lose fewer troops in neutral battles, this gives you the advantage when you meet a hostile Wielder.

Recommend maps to start with: New Beginnings and Ashen Allies.
In Section Challenges: Three Roads as it's the easiest. A Hot Deal, because it teaches you how to use martial Wielders and when to shoot with reload units.

Recommended Wielders for Conquest
Starters for Arleon
- Peradine: Starts with Creation Magic and has a strong starting army.
- Lady Elisa Hammond: Strong army and strong speciality
- Giandra Stormspire: Starts with Chaos Magic and also has a strong starting army.

Secondary wielder to get:
- Baron Silverlink: To get Levy. Ensure you only pick resource production skills.

Noteworthy mentions: Ravenfayre, Vilja of Thornecliffe

Starter for Rana:
- M'Sugna, Who Sees Beyond: Excellent starting army and starts with Creations Magic.
- T'Chyra, Dragons Blood: Arcane Magic user. His army isn't that powerful but still strong.

Secondary Wielders to get:
- Rasc, The First Rider: For the army and movement
- Rik-Tap, Marsh Bulwark: to hold and defend a town or settlement

Starters for Loth:
- Doctor Marjatta: Starts with Arcane Magic and also a strong army.
- Ambertina: Not as strong as Doctor Marjatta but more focused on killing enemies to gain essence.

Secondary Wielders to get:
- Magnolia Silverlink, same story with Baron Silverlink
- Coral Lightbringer, she starts with a Necromancer and March skill.

Noteworthy mentions: Merkoth, Brother Hillar, Wiesh

Starters for Barya:
- Bihgli Satherdown: Starts with Chaos Magic. The Tinkerers he starts with allows him to stall the rounds to gain enough Chaos Magic to destroy the enemy.
- Everthink: Strong starting army and off the bat starts with Destruction magic. His Magic res also helps against wielder fights.

Secondary Wielders:
- Sougthfor: The Scouting and the army he has is extremely useful.

Barony of Arleon


Arleon is filled with knights and peasants, they have tanky infantry and a few useful ranged options.
They get a lot of Order, Chaos and Creation essence so picking associated skills helps make the most of their roster.

Resources to prioritise:
- Glimmerweave (For Faey Troops + Faey Research)
- Celestial Ore (For Knights and Human Research)
- Stone (Primary resource for upgrading your town)
Do not ignore other resources and be mindful that you will need other stuff to upgrade your buildings. Such as upgrading your gold income, which costs Ancient Amber and Wood.

What to aim for unit-wise:
- Knights
- Troubadours (Your Essence battery + Musical Unit)
- Militia
- Horned Ones
- Faey Spirits

It can be nice to have Footmen, and Rangers, but they aren't always your best option.
Rangers have to compete with Militia. Ranger have better range, and can shoot each turn, but Militia produce faster, come in larger groups, and are a requirment for Knights.

However, there are no absolute strategies, you can make anything work if you are good enough, and if you know the maps well.

Arleon Campaign - the Song of Stoutheart
The easiest campaign, do this one first unless you are already comfortable with one of the other factions.

What carries over:
- Cecilia, your initial Wielder
- Cecilia will also carry over any artifacts she carries, but other Wielders will not, be careful when you give artifacts to other Wielders
- Level caps are present in the campaign

What to aim for skill-wise:
- Order Magic
- Chaos Magic
- Maxing out Guard

A New Baroness, Map 1
Level Cap: 5

Your first level. You can just familiarise yourself with the game. You may not have a town on you but you can always hire troops from Arleon neutral dwellings. Missing a few artifacts on this map is fine as they are pretty weak. However, you do want to get the stat boosters and the Mystic Hermit.

You want to try and get Order Magic and Chaos Magic if they appear as you level up. If you do not get them, upgrading Guard at least once is a good idea.

the Responsibility of Rule, Map 2
Level Cap: 8

To be honest with you dear reader. This map is very relaxed and you will be fine. The only noteworthy things to mention are to grab the artifacts and the stat boosters.

Vassals and Villains, Map 3
Level Cap: 18

This map is where some people will struggle as you do need to prepare to defend the region. When and where do you need to defend? If we said more, we would spoil it. The best thing we can say is to explore and build an army. Your best bet is to have your main Wielder kill hostiles around your resources and for the partner-in-crime to collect the items.

Be aware, that your enemies will be Wielders, they too can use spells.

Just know, that following the roads is never wrong. There are powerful artifacts up ahead.

Hint 1:There is a portal south of where you start, beyond the Faey spirits. It is inactive, but you can interact with it.

Hint 2:The first attack starts past turn 20.

Hint 3:There are 4 attackers.

Hint 4:Final attacker follows your main Wielder.

Death to Diplomacy, Map 4
Level Cap: Unknown

This is the final map of the Arleon campaign and as is the tradition in any game the finale will be tough. This includes the first fight, it is tough for a beginner but doable. Please remember that you can swap out your artifacts if you think your current set-up isn't suited for the fights ahead.

Divide and conquer is your best friend here and so is Magic Resistance.

Hint 1: Get the Research building to increase stack size. Prioritize your Militia since you get so many for free.

Hint 2:Due north of the starting location is a Town.

Hint 3:You only need to defeat Wiesh to win.
Rana (get out of our swamp)


Rana is in the Marsh, they have powerful frogmen riders, insects, and shamans.
They get a lot of Destruction, Creation, and a bit of Arcana essence so picking associated skills helps make the most of their roster. Since they get so much Destruction you can cast a lot of offensive spells and since they get so much Creation you have a lot of defensive magic.

Resources to prioritise:
-Celestial Ore (For upgrading)
-Glimmerweave (For getting Cheluns)
-Ancient Amber (If you are going for dragons and a lot of it)
Do not ignore other resources but be mindful that you will need other stuff to upgrade your buildings. Such as upgrading your gold income, which costs Stone, Wood, and Celestial Ore.

What to aim for unit-wise:
- Sages
- Cheluns
- Riders of the Swamp
- Tremours
- Clawers
- Protectors

Sages are your bread and butter. They should be the first building that you build and upgrade because their range attack and their inspiration let you manipulate the initiative of your troops.
Tremours They are your essence generating unit and with a powerful musical ability to reduce your enemy's initiative. Do not sleep on it.
Riders of the Swamp are useful since they benefit from both Rana and Beasts' research. Rasc gives them an extra buff as well.
Cheluns are your essence generating unit. They are slow but generate quite the essence for you.

However, there are no absolute strategies, you can make anything work if you are good enough, and if you know the maps well.

Rana Campaign - From the Ashes
Play this campaign second or third, unless you are already familiar with Rana. It has some tough moments but you will be fine.

What carries over:
- Rasc, your initial Wielder
- Rasc will also carry over any artifacts he carries, as will most other Wielders, but be careful when you give artifacts to others
- Level caps are present in the campaign

What to aim for skill-wise:
- Destruction Magic
- Creation Magic
- Guard

Noteworthy skills to take:
- Arcana Magic: Because you get low amount of it but it doesn't mean it's useless. It's strong but you can still build for it. Your generation of it low. You might not utilise it as much.
- Combat Training: A lot of melee troops and also Sages benefit

Life Returns to the Marsh, Map 1
Level Cap: 6

Welcome to the marsh! Your amazing lord and saviour, Captain Xavier Silkspool saved Rasc from slavery. The marsh isn't what it used to be and it's time to return to it. However, someone or something isn't happy that Rasc is returning to the marsh. Make sure to equip the spear that is in your inventory.

The first map of the Rana campaign can be considered challenging due to the situation you start in and the level cap. The best thing you can do is to increase your Command when you level up and pray you get Destruction Magic and/or Creation Magic. Try not to lose any units and keep moving.

There are noteworthy things but be careful.

Hint 1: Split your units. For example, in the first fight against the slavers. You can have one main stack of Hunters and in the other two slots just 1 Hunter each, this gives you +3 to Destruction and +3 to Creation per combat round.

Hint 2: You can actually defeat the one that is going after you. By building a Shaman Tent and two more Lookout Towers. Try and kite your pursuer.

the Marsh Adapts, Map 2
Level Cap: 14

Map 2 of Rana can be challenging. Your experience may vary as some have an easier time with it than others.

There are a lot of tough neutrals in the mission. Your safe bet is exploring your surrounding area, building an army and heading east, then north from your starting Large Settlement.

From there you are presented with a few choices. You can head further north for free recruitment but at high risk. Or you can try your luck going west.

As turns pass by, you will be given information about a Wielder that you can hire. However, this Wielder will not carry over, remember to get your artifacts back before completing the map.

Hint 1: Once you the enemy Wielder from the west. They will no longer return. Unlike the enemy from the north.

the Marsh Gives Life, Map 3
Level Cap: 18

This map can be tough at the start but once you defeat the threat. It is relaxed. We recommend not getting discouraged if you lose on this map., the main threat can be challenging.

Hint 1: There are a few ways to play this map. You can either rush the enemy or you can take their Small Settlement and build a Lookout Tower to defend against them. There is also a teleporter that leads to their base if you decide to explore more.

Hint 2: You can use P'cha for the Magic Resistance against the enemy Wielder.

Hint 3: You can use P'cha with just 1 stack of Sages in his army to defeat the Oathbound guarding the essence spires. We recommend using manual combat to learn how to defeat them with just spells.

the Marsh Expands, Map 4
Level Cap: Unknown

The final map! The fights against the enemy wielders can be unexpected as they can jump scare you from teleporters but you can do the same. It's a pretty straightforward map but make sure you are building an army and having few losses. Try not to convert if possible, unless it takes less time because you should not waste your time on Small Settlements.

Hint 1: Use the teleporter that is east of your starting Town to get to the enemy quicker.

Hint 2: One of the enemies will remain dormant until you go for the Large Settlement south of your starting Town. Attack with caution.
Barony of Loth

Loth and the Unseen Society have a mix of ranged humans, and melee oriented undead. Their basic skeletons can be surprisingly defensive but you can get a lot of utility from their humans too, not to mention their rats they can nibble your ankles.
They mostly generate Arcana, and Destruction, but they also get a bit of Order essence, you can get a lot of value from related skills.

Resources to prioritise:
- Ancient Amber (Upgrading Undead)
- Celestial Ore (Living Tech/Upgrades)
- Glimmerweave (Undead Tech)

What to aim for unit-wise:
- Legions
- Necromancers
- Banes
- Oathbound

Legions are big and they cleave your enemies. They are even more dangerous when you get their troop-specific research on them if able. Even without it, it is a solid large unit to aim for.
Necromancers, are your blood and bone of the army. They generate a lot of Essence for you and are your essence generators thanks to their Charge Essence.
Banes, if you want ranged in your army and a decent essence generation on your army. Banes fill that role for you. Posion helps to melt enemy units neutral units in combat. Once upgraded they can move away from melee to shoot.
Oathbound, they are your early-game tank and generates a good amount of essence.

Loth Campaign - Together for Her
Play this campaign second or third, unless you are already familiar with Loth. You are not given a lot of opportunities to experiment with the unit roster.

What carries over:
- Unseen Society members carry over.
- Unseen Society members will also carry over any artifacts they carry, no one else will.
- Level caps are present in the campaign

What to aim for skill-wise:
- All Essense skills
- Combat Training (If you get any essence skills first, go for it).
- Channelling

Loth wielders tend to rely on magic skills heavily so try to get them first. Guard is nice to have if it's offered to you earlier but keep in mind you will need to take Combat Training and then Melee to get it. Otherwise, try to aim for the initiative to be able to cast first, it helps to have Cunning or Prepared.
Channelling helps to increase your damage potential against neutrals or if you are lucky and the enemy doesn't have Magic Resistance. You can nuke the enemy with damaging spells.

A Baron's Faith, Map 1
Level Cap: 8

Welcome fellow cultist. The first tough part of this map is surviving with the units you are given. You want to progress the map as normal without many losses. You will unlock more stuff as you progress through the story. Once you do, the map becomes trivial.

Do the optional quests as it will give you bonuses throughout the campaign.

Hint 1: The Baron will sadly not carry over

A Scholar's Research, Map 2
Level Cap: 14

The real journey begins here. Sadly, you only have half the roaster of the Loth army. You will encounter two Wielders, and you want to build the best way you can. On this map, you are rewarded for being quick, however, behind the gates awaits a tough fight. So, prepare before opening the gates.

A Knight's Loyalty, Map 3
Level Cap: Unknown

The Wielder you start with does not carry over. So, build for Command first, grab Order Magic if it appears and then Guard. You will be given a lot of choices on this map and as much as it pains me to say. It's best to have a save file ready to load if things go awry. Aim for paths with a net gain of units.

An Empress's Hope, Map 4
Level Cap: Unknown

Welcome to the final map! We hope this guide can give some hope, not only for the Empress, but for you as well. First off, you have everything available off the bat troop-wise. Second off, if you have built your Wielders well, you will have a lot of options for who will be leading your assualt.

Be aware that the moment you start. You are at war. If you do not deal with it and start going after your opponent you might get someone after you. So, ensure that you take care of your problems before going for the objective.

Hint 1 Do NOT attack the Rana troops until you deal with Barya.

Hint 2 Remember that you teleport using the Beacons.

Hint 3 If you aren't happy with your Brother Hillar's skills. You can use the other members of the Unseen to do the fighting and claiming the Beacons.
Barya [Work-In Progress]

Barya has humans, with guns! But they also get Harima who focus on melee
They have easy access to Order, and Destruction essence, but they also get a trickle of Chaos essence.

Resources to prioritise:
- Celestial Ore (Artificers and Cannons + their research)
- Amber (For upgrading resource production)
- Glimmerweave (Harima + Research)

What to aim for unitwise:
- Artificer
- Pipers
- Harima or Cannons

It is hard to go wrong with Baryan units, because they are all strong in their own ways. They are all strong in their own right. Just ensure that you are producing enough of the main unit(s) you want to go with.

Barya Campaign - the Price of Freedom

We are still testing the Barya campaign as the maps are still new to us. We will note down the basic info for the campaign. There is more to come.

We will also update this section if the devs make any changes.

What to aim for skill-wise:
- Order Magic
- Destruction Magic
- Guard

The skills you want with Barya depend on who you start with but Magic is always a must. Other skills to be on the lookout for are Guard and Positioning (Barya can be vulnerable to ranged attacks).

the Payments of Debts, Map 1
Level Cap: 10

Welcome to the final and rather tough campaign. Off the bat, you are greeted with a difficult fight, right now the battlefield isn't static, so we cannot give advice that is sure to work. What we can suggest is to put your Tinkerers into one stack and split off one unit from your Pipers.

After that, the map opens up and you are free to explore. We advise to try and get magic skills. Keep in mind, that after level 10, you may be offered Order Magic.

Hint 1: Save enough essence to cast Justice on the Cannon

the Cost of Deeds, Map 2
Level Cap: 16

In this map, you are free to experiment on what army you want to build for. If possible, this is the map where you get Order Magic because it is nice to have. There is only one threat in this map and it can be easily handled.

the Bindings of Contracts, Map 3
Level Cap: 20

You will be starting with rags and later you'll get rich. However, you do need build for it. You will need to explore your surrounding areas before heading on.
On this map, you will need some sort of plan. If you are going for Cannons, you could consider maxing your town to be able to get a 10 stack of Cannons. If you are planning on Harima, you should try and seek out the Glimmerweave mine.

Hint 1: You will get help and the help will carry over with you.

Hint 2: Check the artifact shops to sell off junk or to get magic resistance artifacts

Hint 3: One of the portals can be reactivated if you go near it.

Hint 4: Make sure to gear out your helper and level them up as well. They will be useful.

A Life's Worth Map 4
Level Cap: Unknown

Welcome to the last and final map. It may or may not beat you. If you made it here. Then you should be able to do it. Expect to save often just in case things do go wrong.

With that being said. You have to work with what you are given. How you built your main Wielder to this point will reflect how well you do in this final mission. Follow the quest objective and ensure that you keep moving.

Hint 1: Remember that the Beacons of power can be used as teleporters. You can also use the third Small Settlement as a "Last Stand".

Hint 2: Your helper will notice something. Go there first.

Hint 3: The waves of Wielders don't stop until you fight one that has an army of Legions. You can try and fight them all off or try to speed through the map.
Closing Words
We are completely okay if people want to prove some skills are better than others. Say, if Raider is better on a campaign and show us. We will be happy to listen and change our guide to mention it.
We are planning on updating this guide as new DLCs (factions, and campaigns) are released.

We are open to suggestions, feedback and critique.

Special thanks to Hive Knight on Steam for helping us with the branding image. Check out his gallery!
https://www.pixilart.com/unusualmemes/gallery

We would also like to thank Munin, and Wielder of Rulebook from the Official Discord for helping us with proofreading, feedback, and suggestions.
Changelog
2024-06-05 - fixed an incomprehensible explanation on Combat Training
2024-06-16 - updated for version 1.1.2
2025-03-22 - Updated for Skills and Artifacts.
6 Comments
MassDemons  [author] Jan 26 @ 8:53am 
I would check https://soc.th.gl/ if anything for a guideline for what skills you want to get.
Disnag Burnazog Jan 26 @ 7:30am 
thx for the guide
Disnag Burnazog Jan 26 @ 7:30am 
far as i've seen, skills are independent of each other and you can get melee without ever seeing combat training...
MassDemons  [author] Jun 4, 2024 @ 8:37pm 
@ink More or less yes. As the thing is, if you take a skill. It will have you mostly like get other skills.
For example, Brother Hillar. If you have a chance during levels 2 to 5 get Combat Training and Destruction (plus other skills). If you take Combat training. You will have less chance of getting Destruction magic.

Taking Combat training early on unlocks other might skills such as Melee. However, this can lower your chances of getting magic skills. Sorry for the mess there.

Do note, you can see a skill being offered again but it's rather RNG.
ink Jun 4, 2024 @ 4:43am 
can you clarify with. Combat Training is extremely good. However, once you get yourself set up with the essence skills. Having two magic skills at tier 2. Or having 2 or 3 max.
do you mean only take combat training after having all the above?
Wanderclóvis May 29, 2024 @ 9:58pm 
Nice tips. I appreciate that you were worried about spoiling it. :OverTomato: