MORDHAU
Ikke nok vurderinger
Demon Horde Guide
Av Rusher_go
An overview of viable options, enemies, maps and the mode in general.
2
2
   
Utmerkelse
Favoritt
Favoritter
Fjern som favoritt
Build overview
You start with 500 gold and 5 skill points. Press B to spend them. From my experience, there are 6 paths you can take:
1) One-handed weapon and shield. With the right skills it allows you to be nearly invincible by the end. I consider it the best option since it allows you to survive the most brutal enemy of them all — high ping. In this mode you can also block with heater shield and above. That is, hold RMB to stay safe.

2) Two-handed weapon. You trade survivability for better range and damage. Works well if you keep running around. But if you get cornered by a horde or thrown around by special infected enemies, you may die quickly.

3) Bow or crossbow. Bow, especially blessed longbow, shines against special enemies. Like minotaurs or giants. The latter provide an especially big and slow target you can't miss. Given how annoying they are, killing them would be a huge help for the team. Crossbows, once you get enough skill points, can pierce through several targets, reload quickly and do plenty of damage as well. However, all ranged weapons are rather inefficient at the start. Dispatching hordes of weak enemies will also be difficult even with all skills maxed out. And as the game progresses, you'll have a surplus of skill points. Because most skills revolve around melee and are simply useless for a pure archer.

4) Toolbox and beartraps. Weak horde enemies sprint and can impale themselves on spikes. Bear traps can reactivate several times with a perk. So you can put those in strategic locations and provide some support for the team. However, from my experience, it is very inefficient. Finding a good spot for a ballista is going to be a challenge too. Overall, I simply can't recommend it right now.

5) Throwing weapons. Fire bombs, throwing axes and such replenish over time. So if you buy a fire bomb (or a black fire bomb) once, you can use them many times per match. Blessed throwing knives also give you +1 knife every time you land a hit on the enemy. So you can just hold LMB and throw those knives at the speed of a machine gun. Okay, not that fast, but still. A blessing, however, is expensive and is lost upon death.

6) Gambling. There are several mysterious graves on each map. Interacting with them costs 500 gold and can give you a random item. If you're unlucky, it will be a rock that costs 25 gold. If you're lucky, it can be a good weapon. And if you're very lucky, it can be one of the special weapons. Holy hand grenade outright destroys everything in a big radius and doesn't harm players. Exorciser is the gun from the trailer and is pretty useful too. Demonsbane is a cool two-hander and holy horseshoe can spawn a horse. I'd only recommend gambling once you buy yourself some decent gear (like medium armour with a shield and a branch) and can afford to waste money.
Starting Loadout
You start with 500 gold and 5 skill points. Press B to spend them. First of all, we need a weapon that does 50 damage to light armour body. Because most enemies appear to have 50 HP and either no armour or light armour. On prestige 1 and 2 (increased difficulty) their HP increases up to around 80, however. Regardless, some good options are:
1) Heavy branch — 100, one-handed. Effectively a mace, it does ~45 damage regardless of armour. If you put 2-3 points into the leftmost perk (which increases one-handed swing damage), you can reliably kill most enemies in one hit. Now, the branch stops on hit. But only if it doesn't kill the enemy. If it does, it can cleave through the next one like a bladed weapon. As a bonus, it does 20 damage to enemies with shields when they block. Without any perks. So you can use it for the whole game.

2) Short sword — 150, one-handed. It can also get its damage up to 50 with perks and cleave through the crowds. However, it's shorter. Still, a pretty good starting choice. It's also possible to get through the whole game with it.

3) Arming sword — 350, one-handed. 50 damage on the dot to a lightly armoured torso. With this, you don't have to invest in the damage perk to oneshot weak enemies. At least, on normal difficulty.

4) Club — 250, two-handed. 50 damage to unarmoured body allows you to oneshot weak enemies without perks. It also does 20 damage to blocking enemies with shields. It can also carry you through the whole game.

5) Rusty shovel — 350, two-handed. Longer than the club and doesn't stop on hit. Also allows you to oneshot weak enemies without perks. But does less damage to armoured enemies. Also a viable choice.

6) Dagger — 100, one-handed. At the start, it can poke enemies for 50 damage. Once blessed, it oneshots most enemies with slashes and can kill a giant in 2-3 hits. While it may not be the best starting weapon, it is something to consider for endgame.

Rusty Fork (350, two-handed) may be tempting if you want to poke and keep your distance. However, given the amount of enemies, you'll likely be overwhelmed.

If you plan to gamble right at the start, I'd still recommend getting a branch for 100 and killing a few enemies. This way, at least, you won't be defenceless if the grave screws you over.

Speaking of archers, I don't think bow/crossbow is a good way to start. Throwing weapons are a waste of money as well — they don't benefit from any perks beyond the first one in the archer tree. I'm honestly not even sure if they benefit from it at all tbh. So you'd be better off grabbing a club and selling it later (via a goblin in a box found in several spots on the map).
Special Enemies
Legally distinct Left 4 Dead campaign mode (aka Demon Horde) has several special enemies that you should be aware of:
1) Legally distinct Jockey. This little guy is probably the worst of them. When he's close, he quickly slices at your legs for a lot of damage. Hitting him is difficult due to his small size. He can also jump at any player and... start stealing their money. Which is worse than damage. You'd need your teammate to hit you to get rid of him. Another option is to fall from a big enough height and take fall damage. Getting hit by enemies or standing in fire also works. Lastly, if you have access to torches (during some objectives), you can throw the torch under yourself to kill the jockey.


2) Legally distinct Boomer. This guy vomits out black acid that does damage and drains your stamina. He can also jump up, do a flip and explode upon landing. Unlike the original Boomer, this guy has a lot of HP and does decent damage in melee. So either wait till he jumps or kill him before he can do it.


3) Legally distinct Charger. Or Minotaur. As you can imagine, this enemy charges at you and can send you flying. Though he doesn't seem to ragdoll you. In addition to charging, he can let out a shockwave upclose, doing damage and once again sending you flying. While not too dangerous most of the time, he can launch you into a demon portal (where the enemies spawn from) or off a big height. Both can instantly kill you. So consider baiting him indoors or away from dangerous places.


4) Legally distinct Tank. Or Giant. There are 2 varieties. One is dragging his weapon behind him. The other is carrying it normally. Both can ragdoll everyone in the area upon attacking. Which is not always fatal but is always annoying. The first one can blow his horn to buff nearby enemies. The other can throw big rocks at you. While dangerous in melee, they are a perfect target for archers.


5) Summoner. Guy with a glowing red or blue mace. In addition to being a tanky and damaging target, he can summon zombies and skeletons. Zombies move faster than normal enemies and can survive getting decapitated. Skeletons can be armed with pretty damaging melee and ranged weapons.


6) Flincher. Shrieker. Whatever you wish to call him. I'd call him a legally distinct Hunter, but he doesn't pounce on players. Instead, he tries to overwhelm you with a flurry of blows and teleports away in a cloud of red or blue flame upon taking any damage. This enemy can probably be fatal for unarmoured players. His fast attacks can also flinch you into oblivion. He can be dangerous if he catches you off-guard. Especially if there are other enemies around. But most of the time he is easily dispatched.


Other enemies include guys with shields and taller than usual knights with big swords or halberds. Those aren't really special since they have the standard moveset of a Mordhau character. Shield guys are notable for blocking until you attack them. For eternity, if necessary. Then, once you attack, they'll riposte and keep attacking until you either parry or damage them. At which point they'll resume blocking. There are also ranged enemies. From rock throwers to archers. Skeleton archers are probably the most damaging of them.
Blessed Weapons
You can bless weapons for 1000 at one of many altars found on each map. If you die, the blessing is lost. There's a Mordhau Wiki page that describes what blessing each weapon does. I'll leave the link below. If it gets blocked, just look for the "Demon Horde" page on the mordhau fandom site. The special weapons at the bottom come from gambling at the grave. I can recommend the blessings for heater shield and dagger. The first one gives you a ranged option. The second one makes the dagger do like 700 damage per hit and lets you kill the most powerful enemies in just 2-3 hits.

https://mordhau.fandom.com/wiki/Demon_Horde#Blessed_Weapons

Build — Man Of Shield

This build focuses on surviving. Start by buying a heavy branch and nothing else. Then save up for a heater shield. From there, you have 3 choices:
1) Blessed Heater Shield. Save up 1000 instead of buying armour and find an altar. Switch to your fists and then equip the shield. This will allow you to bless the shield. The blessing will allow it to shoot out short-range projectiles that can cleave through enemies and oneshot weaker enemies. But if you die, you lose the blessing. Still, backpedaling with enough points in the Marathon skill should let you slowly kill any enemies that come after you. Medium risk, high reward, I'd say.


2) Blessed Dagger. While regular dagger is not that good, its blessed version can kill a giant (the most powerful enemy apart from bosses) in 2-3 hits. Investing in Haymaker and Dexterity skills (more on those below) will also give it extra damage and attack speed. So you should be able to cleave through everything rather easily. However, without armour and defensive skills, you may suiddenly die and lose the blessing. High risk, high reward.

3) Invest all you have in armour. Medium armour, shield and skills should let you survive most things the game can throw at you. From there, you have the option to bless the shield or branch, buy a different weapon or invest in heavy armour.

Skills-wise, start with 3 in Marathon and 2 in Haymaker. For the first half of the match you won't have enough points to max out the damage resistance skills. So you'd have to rely on moving around and hitting enemies with your branch. You will often have no choice but to run away tactically reposition yourself too. That's why Marathon is so important. It also allows you to move faster while carrying lumber or barrels of powder. And Haymaker ensures you can kill cleave through hordes of enemies.

From there, focus on getting at least 1 point in Counter. So go Toughness - Guardian - Discipline - Padding - Recoil - Counter. This will allow your reposts to be unflinchable and ensure you can fight back if you're surrounded by a horde. Otherwise, every time you try to hit something, you'll get interrupted with a punch and die.


Once you get the precious Counter skill, max out Toughness and Guardian. It will give you 75% damage resistance. Discipline provides 12.5% more for a total of 87.5%. And the Padding skill ensures you get 5 less damage from any source. This can allow you to stand in fire or boomer's acid without taking damage.

With all that acquired, now would be a good time to pick the ultimate skill. Good options are:
1) Taunt. It is a good choice if you don't want to waste points. Make sure to invest 1 point in Lever Action and 1-2 points in Adrenaline to make yourself unflinchable while it's active. Adrenaline is worth maxing out as is, by the way.
2) Immortality. It gives you up to 15 seconds to get out of a sticky situation, revive a teammate or complete an objective. It also recharges rather quickly. Probably the best ultimate at the moment.
3) Vanish. This is poor man's Immortality that also doesn't always work. When you activate it, enemies ignore you for up to 20 seconds. That is, they'll go for the nearest player that isn't you. So if you're cornered, it might help. You can even stab enemies in the back while they ignore you and they won't react. And, more importanlty, you can revive your fellow players in the middle of a horde without interruptions. It also recharges very quickly. Those are the pros of it. On the flip side, it doesn't work on all enemies. The ability makes all active enemies ignore you. But enemies that spawn in mid-wave will still attack you. Be it summoned skeletons or just new enemies coming out of a portal (thanks to Quenquent on mordhau discord for pointing that out). So while Immortality may act as you panic button at low HP, Vanish may not be able to save you. So it's a rather risky ability but nevertheless a good one.

The rest are quite mediocre:
Shockwave does enough damage to kill weaker enemies in a small radius. But it won't help against tankier enemies and also has an abysmally long recharge time.
Volley makes arrows rain in a circle. While it is effective against a horde of enemies, so are melee weapons. On top of that, it doesn't work indoors. So you won't be able to use it in the final stretch of Mountain Peak, Totenwald and half of Castello. This will also require you to waste a few points in the engineer tree.
Divine Favor heals everyone to full HP. Sadly, it doesn't revive. By the time you get to it, melee people will be almost always at full HP thanks to health they gain on each kill. And archers will either stay far from combat, protect themselves well enough or die so fast you won't have time to heal them.
Bow and crossbow ultimates are useless for this build for obvious reasons.

Once you pick your ultimate and max it out, you have several options. If you chose the "backpedal with the shield for eternity" option, take the Regeneration skill from the left support tree. It will slowly heal you. Given that you won't be getting health from melee kills, you'll need it. Otherwise, I recommend maxing out Haymaker for extra damage, Marathon for extra speed and going Finesse(1) - Dodge(1) - Dexterity(5). That skill will ensure you can swing your weapon as fast as a carving knife. It also works for two-handers.


Berserk (left melee tree) is another interesting option. When maxed out, it gives you a 10% damage boost for each missing HP. So if you suddenly get hit for just 20 HP, you'll get a 200% damage boost. This will usually last for just one attack (since you'll heal on kill), but it will let you quickly kill whoever just hit you. It can also help you survive if you get cornered by tougher enemies.


For your final skills, Leech and Samaritan can be good choices. The first one heals you on every hit, even if you don't kill anything. It will be a big help if you decide to melee giants. The second one transforms you into a healer of sorts. By simply killing weak enemies, you can ensure everyone stays at full health. Other skills you'd have to grab on your way there are useful as well.


Your final build could look something like this. Though if you really plan to focus on the shield projectile, consider investing in the archer tree (furthest to the right). The bow draw speed skill (second to last) makes the shield shoot faster for some reason.
Build 2 — Clubbed To Death


So this build is for when you need more range and damage at the start of the match. For example, when there are just 3 players (including you) on Totenwald. Or when enemies have more than 50 hp. We'll be using two-handers here.

Start by getting 2 points in Dexterity. It's in the right Melee tree. You'd have to go through some other skills to get it. Then get a club for 250. While it may not always oneshot weak enemies to the body, it does ~80 damage to the head. So you'll need to aim carefully. We're going for Dexterity because attack speed is more important in the beginning. You'll most likely be walking backwards while swinging your club. Without even parrying anything. And at this stage punches can quickly kill you. So swinging faster than the enemy can punch is important.

Once you get more points, max out Dexterity and go for Toughness(1) - Lever Action(2). This should give you enough damage to oneshot weak enemies to the body. From there, max out Toughness and Discipline (you'd have to put 1 point in Guardian first) to gain more damage resistance. With this build you can only get up to 50% of it. Then invest in Adrenaline to become mostly unflinchable. Weak enemies will still do 6 damage with their fists to you. Even after you get heavy armour. But, at least, it will allow you to swing easier and revive teammates without getting flinched.

Money-wise, just invest in armour. Club is pretty good as is. Moreover, it stopping on hit will let you hit tougher enemies faster. Because the attack increase speed from Dexterity seems to only apply to the initial swing and not combos. Feel free to buy a different two-hander later on if you have extra money, however. I'm just yet to try them all out to determine an objectively better weapon. You can also always gamble at the grave in hopes of getting Demonsbane. Which is the ultimate two-hander.

Continuing with skills, after you get the above, you have several options. Counter (in the right tank tree) could let you survive getting flinched by more damaging enemies. Since some of them would do more than 20 damage to you even in heavy armour. I'd certainly recommend getting the Immortality ultimate. The two skills above it would also let you not worry about enemies blocking your attacks. Thorns (after Adrenaline) can help you survive if you're getting overwhelmed. Because the enemies may die on their own from hitting you. And Leech (after Thorns) can help keep you at full health when fighting tougher enemies. The left support tree is worth investing in too. Lastly, don't forget maxing out existing skills. Like Marathon and Lever Action. A more or less final build could look like this:


Overall, this build may be even less risky in the early game due to the speed and advantage range you have over most enemies. However, it requires more careful aiming and robs you of the ability to just hold RMB to stay safe. Ranged enemies will be a problem as well without a shield. But as the game progresses, you'll find yourself killing enemies much faster compared to the one-handed build. Flinching will also cease to be a problem much sooner. Though you may get flinched and heavily damaged by stronger enemies. And you won't be able to stand in fire or boomer's acid like it's nothing. Still, in the end, you may once again find yourself cleaving through the horde without a care in the world.

Build 3 - Rogue
Do you want to easily revive your teammates in the early game? Do you want to die in one hit for half of the match? Do you want to transform into a jack of all trades and master of all by the end? If you answered "yes" to two of these questions (I doubt anyone would say "yes" to the second one), then this build is for you.

Here we are going for a high risk — high reward strategy centered around the blessed dagger. Initially, dagger is capable of killing weak enemies in one stab. Landing that stab is harder than a branch's swing, but it's a reliable early game weapon. Though you likely won't be top of the leaderboard. Your objective for the first stage is to simply survive. Once it's complete, you can start being useful.

But first, a disclaimer — dagger has terrible wood and stone damage. So you can't use it for Totenwald tree and church door or Mountain Peak's totems. Thus, you'd need to either get another weapon for those or rely on your teammates.

Start by getting a dagger for 100. The rest of the things you buy depend on how much you want to risk. Your objective is to save up 1000 for the blessed dagger. However, if you die right after blessing it, it will be... like getting stabbed in the back. So I'd recommend getting at least light armour before you try saving up for the blessing. The dagger can serve you well for the first 3 stages. Tougher enemies usually start appearing after that. So consider saving up 1000 by the start of stage 4.

Skills-wise, we're going for the Vanish ultimate. It's in the right melee tree. You should be able to get it right after the first stage. Now, this skill makes all active enemies forget you exist for a period of time. But those that spawn in after you activate the ability will see you normally (thanks to Quenquent on mordhau discord for pointing that out). Also, skeletons and zombies (summoned by the summoner) will always see you. So I'd recommend putting 3 points into Vanish but not max it out. Then you should have it ready when you need it most. It also recharges incredibly quickly compared to other ultimates.

Once you get the ultimate, max out Marathon. You'll be running around a lot at first. Dexterity should be maxed out eventually, but for now it can wait. Instead, invest in the tank tree. Toughness will allow you to survive hits that would normally kill someone in light armour. So max it out. Then go for the left tank tree until you have 1-2 points in Leech. This will let you survive longer against boomers if you have to face them head-on.

If all goes well, you should have light armour and 1000 for the dagger blessing by now. So go and bless it at the nearest altar. Once you do, remember that you are still squishy. So use your Vanish, run into a horde and slaughter them all. Then book it and backpedal until Vanish recharges. Once you get medium armour, you can start getting more confident. At that point I'd also suggest buying a shield and investing in the Guardian and other defensive skills in the right tank tree. You won't have the cool reverse grip on the dagger when using the shield, but you'll keep the massive damage. So it's probably worth it.

And then, with medium armour, shield and defensive perks, you suddenly transform into a Man Of Shield. But even better. You're quite tanky, so you can run into hordes safely. Your dagger can kill giants in 2-3 hits and the rest in just one hit. If your teammates are dead and surrounded by enemies you can use Vanish to ressurect them. It even works when you're the last man standing. Consider maxing out Adrenaline to not get flinched, Haymaker for even more damage and Brute Force (left melee tree) to kill enemies that block your dagger of doom. And if you get extra money, spend them on heavy armour. The final build should look similar to Man Of Shield.
Mountain Peak
The first task of the map is to kill a boss. The best strategy for that is to rush him with all existing players. Once he starts charging his lightning attack, he is vulnerable. You can run around him in circles and whack him with your weapon. So long as you stay behind him or to the side, the lightning will do no damage. You can also run far enough or hide behind cover to avoid it. This stage can be completed in less than a minute.


The second stage requires you to shoot some ropes that corpses are hanged on. Though, perhaps, those aren't corpses. Either way, you have a ballista for that. Or, if someone has a bow, it can be used too. Enemies sometimes decide to leap off a ledge to the left of the ballista. That fall kills them. With one person on the ballista and the rest of the team guarding the ballista, this stage can also be completed in less than a minute.

The third stage requires you to carry lumber to a cart. If you put
5 points in the Marathon skill, you can outrun enemies even while carrying the stuff. Another notable option is the lift. You can load it with lumber, pull a lever and ride it to the cart with several items. When the lift stops, however, some lumber may move forward and fall into the gap. So be careful with your placement. Enemies are also unable to get inside the lift. So you can stand in it if you need a breather or to farm kills. A goblin (to who you can sell items) can be found right under the lift. Far to the right (if facing the ballista from the spawn) is a mysterious grave. And another one is near the lumber cart itself. The grave can give a random in exchange for 500 gold. It can be a weapon that costs 2000, a rock that costs 25 or a special item. Your starting budget is also 500, so you could gamble if you wish. Lastly, in the far tower, past the lift is an NPC. You can hire him to fight for you for 1000 gold.


The fourth stage consists of pushing the cart. This is where giants and minotaurs start to come in. If left unattended, giants may form a critical mass and demolish the team. There aren't any tricks here, but there's an altar inside the tunnel. You can use it to bless your weapons for 1000 gold. Beware that dying would remove the blessing.


The fifth stage requires you to kill a bunch of summoners. Which requires bashing them with melee weapons. Before you go up the ladder, you can find a trade goblin and a grave to the left. An altar can be found right next to the nearest group, to the left of the ladder after you climb it. Another goblin can be found downstairs in a building to the left of the main gates (if you face them from the outside). And another grave can be found to the right of the gates.


The sixth stage involves destorying the portal and two totems. The totems can be whacked with melee weapons. The portal needs to be hit with a catapult. So one player stays at the catapult and the rest have fun downstairs. You need to roll the mouse wheel back 1 time to hit the bottom of the big portal (and potentially damage enemies there). And 2 times to make the projectile hit the portal's top. The second option seems to do more damage to the portal.


The seventh stage requires you to open the gates by pulling on the levers. One player can stay there and press E on both levers until it is done. The rest should cover said player.


The eighth stage consists of looting the treasure inside the castle. Simply approach and press E many times. Each looting action gives you some money. There's also an altar inside the castle.

The ninth stage consists of freeing an NPC (holding E next to him) and killing the boss. The boss is quite annoying due to frequently jumping and ragdolling everyone. Just hit it till it dies. Once the boss is dead, you win.


Castello
The first stage requires you to protect 2 NPCs for 2 minutes. I timed it. Consider standing near the 2 lines of portals to catch enemies early.

The second stage requires you to open the gates with 2 levers. Same as the seventh stage on Mountain Peak. One player can stay near the levers to press E while the rest get to have fun. There's also a grave near the levers.


The third stage once again requires you to protect NPCs. This time it's several citizens who don't fight back. There's also a grave near the gates if you wish to gamble.


The fourth stage requires you to destroy 3 totems. They can be whacked with melee weapons, but a mortar is much more efficient. One player can go there and the rest get to deal with the horde. It should take about a minute, maybe two.


The fifth stage requires you to loot stuff. Same as the eighth stage of Castello. Just press E on each pile till it disappears. There's an altar on the first floor and a goblin a little further down the road.


The sixth stage consists of destroying the barricades near a cart. You get torches here and one throw of a torch can instantly destroy a barricade. So consider using those instead of melee weapons.

The seventh stage consists of pushing the cart. You'll stumble upon the trade goblin along the way. Be careful with giants and minotaurs since they can launch you through a demon portal and kill you instantly. Near the cart's final stop for this stage is a grave. And the building opposite of it houses and NPC that you can hire to fight for you.


The eighth stage requires you to carry the powder barrels. If you're not careful or unluckly, you may found yourself cornered by several giants in the room with most of the barrels. So either get some from that room first or try to coordinate with your team to ensure a safe passage. Instead of carrying the barrels all the way down you can also drop them. Pressing G will make your character drop the barrel to the right. If you stand next to railing and jump while doing so, the barrel should roll over the railing and land downstairs.


The ninth stage requires you to push the cart some more. Once it reaches the gates, it will explode after a delay. The explosion can push you away, but doesn't seem to do any damage.

The tenth stage requires you to push a cannon into position. There's also an altar to the left and a grave to the right of it (if facing the cannon from the destoyed gates).


The eleventh stage requires you to destroy the gate with the cannon and slay the boss. Once you kill the boss and destroy the gates, you win.

Totenwald


The first stage requires you to simply survive for some time. There's a grave further down the road and to the right (if facing in the direction the wagon is moving).

The second stage consists of staying near the wagon to make it move and throwing torches at a pyre. Considering the wagon will eventually roll right next to the pyre, you might as well wait till it does. Or you can sprint back and forth with the torch.

The third stage consists of hacking away at a fallen tree with melee weapons. An axe or something two-handed would do more damage to it. Refer to "wood damage" of weapons in advanced stats. Another good option seems to be to buy a fire urn for 600 gold. Which is a one-time use item. It can take down roughly a half of the tree's HP.


The fourth stage once again requires you to push the wagon and light a pyre. Along the road is an altar, in a separate building. It also has a trade goblin in front of it. A grave can be found a little before the building, to the left (if facing in the direction the wagon is moving).


On the fifth stage the wagon's wheels suddenly drop off and you have to reattach them. It's pretty quick, however a bunch of zombies spawn next to the wagon a few seconds after the stage begins. It's possible to pop off the Immortality skill and finish the stage quickly.


The sixth stage once again requires you to push the wagon. I may or may not have lost count of how many times you have to actually do it. There's a notable bottleneck you may want to use firebombs on. It also has a grave near it.


The seventh stage requires you to pick up explosive barrels and carry them to the gates. Near the barrel storage area is the trade goblin. You can also find ballistas there. They aren't exactly useful since you can't see anything on this map, but they exist.


The eighth stage consists of you carrying lumber to several houses. It's worth noting there's a second lumber spawn near the fathest house. So you don't have to carry it all from the gates. There's also a trade goblin near the top lumber spawn. An NPC you can hire stands between the top lumber spawn and the nearest house you have to carry it to. A grave can be found to the right of the gates you've just blown up (if facing them from the outside). And another grave can be found after you cross the bridge, near one of the houses.


The ninth stage requires you to break a wooden door and loot a church. It's a cultist church, so it's totally acceptable. A weapon with good wood damage is recommended. Inside, in addition to the loot, is an altar.


The tenth stage requires you to slay the boss. The game suggests you take several buckets of holy water to purify some cursed artefacts and weaken the boss. It seems to be optional, however. There is an altar on the staicase upstairs. If you go back from the buckets and turn left, you'll find it.


After you hit the boss till it dies, you win.
Conclusion
Speedrun Mountain Peak, babysit NPCs on Castello, suffer on Totenwald. If you have any tips or tricks, share them in the comments. Oh and maybe like this guide if you found it helpful. I wish you good luck in the Legally Distinct Left 4 Dead.
6 kommentarer
Mobius the Moron 18. des. 2024 kl. 4.00 
"suffer on Totenwald", seems accurate given the fact that starts of with most the team dead and keep dying for the 1st part. :D
maggartmgm 24. sep. 2024 kl. 14.06 
oh and the screamer is a dybbuk
maggartmgm 24. sep. 2024 kl. 14.02 
i thought of new nicknames for them:
the big one is a div
the boomer is a glutton
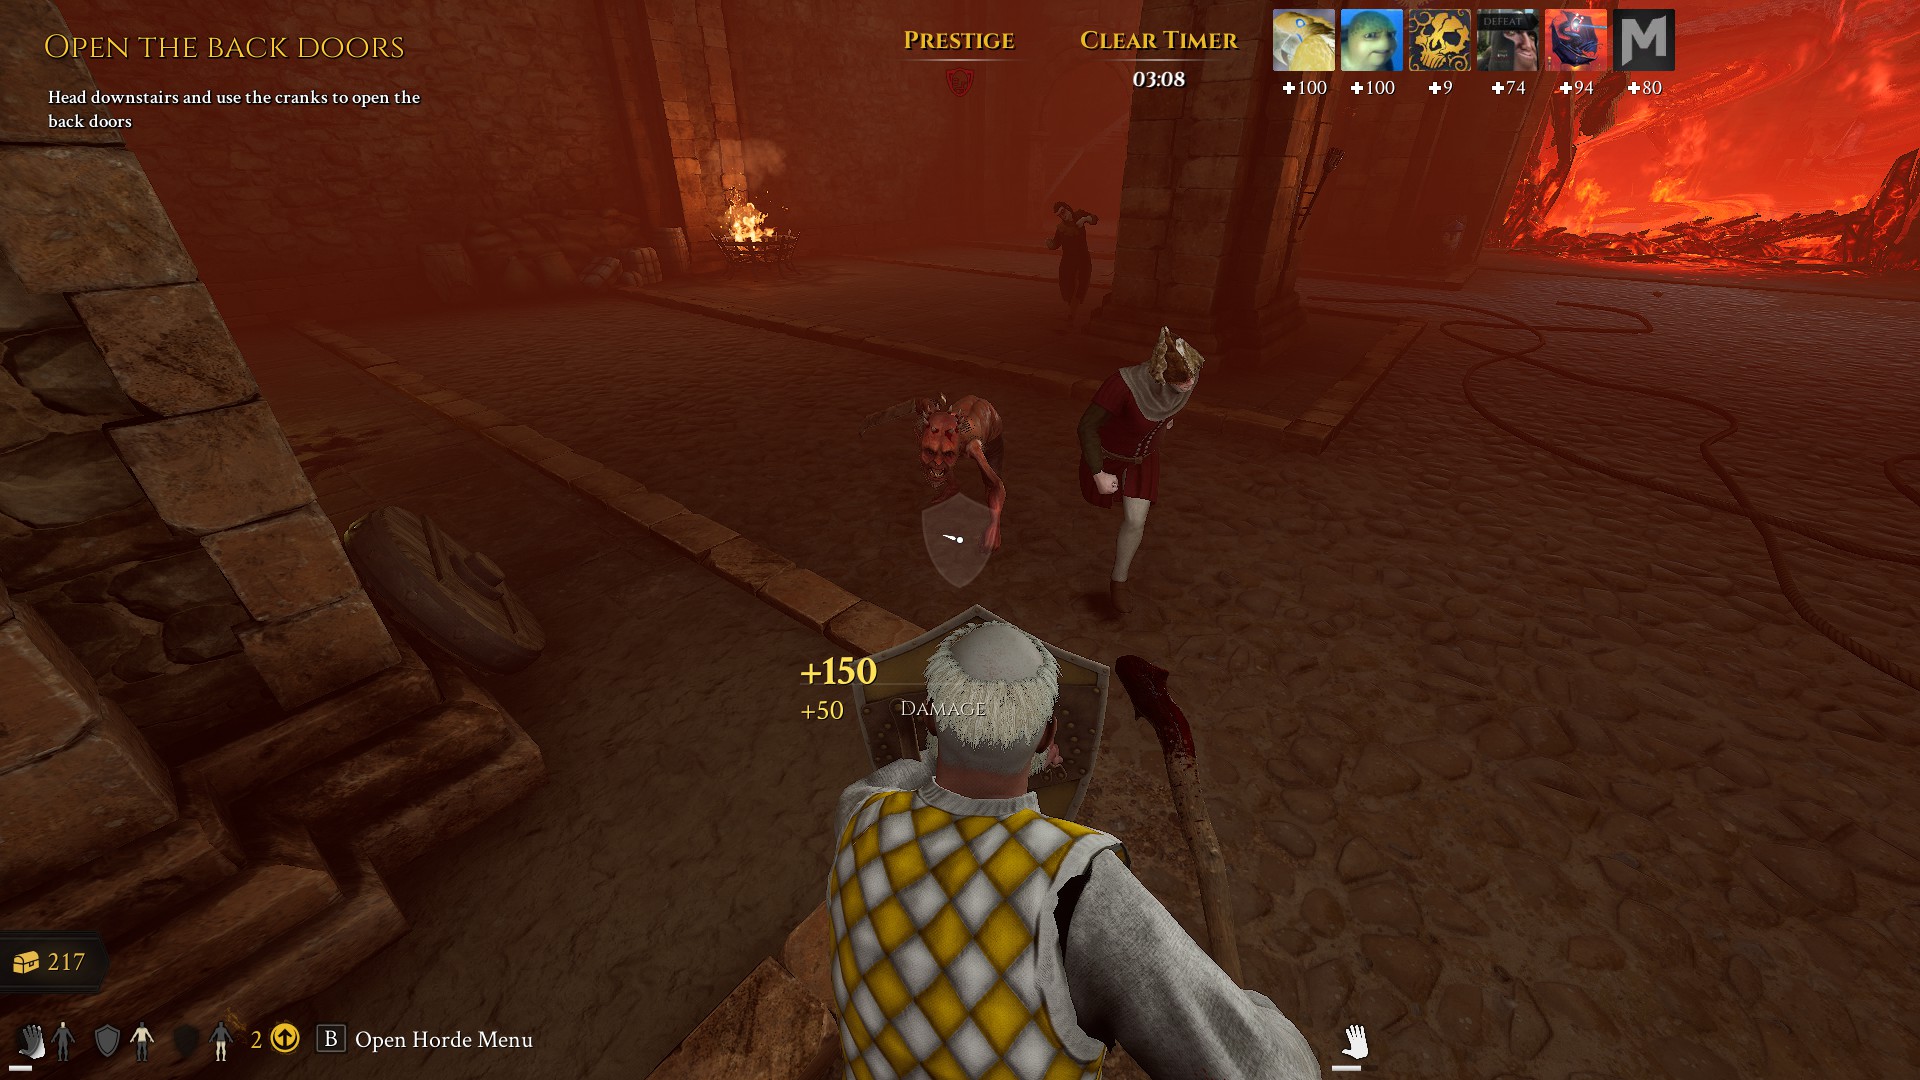
the jockey is an imp or goblin
the forest spirit is a leshy
Rusher_go  [skaper] 15. juni 2024 kl. 14.43 
Um. You need to press B. Or whatever key you have bound to open horde mode menu. It's the very first sentence in the guide. And you should also see the "B Open Horde Menu" at the bottom at the start of every match.
Screen_25 8. juni 2024 kl. 9.45 
Hi, I know I'm pretty Kate to this as I just re-downloaded the game yesterday and saw this new mode. I haven't seen anyone talk about it so I'd really really like to know where you can buy weapons and armor because I've just been using the grave marker mystery weapons and level 0 armor. I've played on all 3 maps now and have yet to see any weapons being sold or armor to upgrade.
Artemón 22. mai 2024 kl. 8.01 
the best :bluejewel: