Vampire Survivors

Vampire Survivors

902 voti
Ultimate End Game Build Guide [1.12.1 + DLC]
Da Bioness
Level up your gameplay with the best builds, characters, weapons, items, and arcana. Everything you need to dominate Vampire Survivors is here.
45
19
4
18
9
7
3
4
2
3
4
2
3
3
3
2
2
   
Premio
Aggiungi ai preferiti
Preferito
Rimuovi dai preferiti
Introduction
Welcome! This guide provides a comprehensive summary and detailed explanation of how characters and weapons perform and play in Vampire Survivors during the later stages of the game after most things have been unlocked.

This guide is primarily in the form of a tier list so players can best identify at a glance what characters, weapons, passive items, arcana, and builds are the best to use. This is updated alongside the Google Sheets version: Vampire Survivors Comprehensive Tier List[docs.google.com], but this guide should be far more in-depth. Although links will be included in some cases, please reference the Vampire Survivors Wiki[vampire.survivors.wiki] if there is a mechanic or something else you need better explained.

This is not a beginners guide. It can still be useful for beginners, but many combinations, weapons, and builds will not work properly if you are missing unlocks or are inexperienced. Furthermore, stats and certain mechanics are not going to be fully explained here. It is recommended to hold off using this guide until you have unlocked Limit Break[vampire.survivors.wiki] and Arcana[vampire.survivors.wiki]. Those two mechanics are located in Gallo Tower (4th Normal Stage) and Cappella Magna (5th Normal Stage), which can be reached and obtained within the first 5-10 hours of the game.

If you are a newer or returning player and just want to unlock everything as soon as possible, go to the "Quick Start Guide" section near the bottom of this guide.

As best as possible, this guide considers community input and takes helpful feedback seriously. If there is anything in this guide that you feel is inaccurate (e.g. placements being off a whole tier and factually incorrect information), please let me know. This guide is not a personal favorites list, but is based on the expected outcome of character, weapon, item, or Arcana when most things are unlocked.

Abbreviations:
  • LM: Legacy of the Moonspell
  • TF: Tides of the Foscari
  • EM: Emergency Meeting
  • OG: Operation Guns
  • CV: Ode to Castlevania
  • SOS: Silent Old Sanctuary
  • DB: Divine Bloodline
  • WS: Wicked Season
  • WJB: Wandering the Jet Black
  • TR: Twilight Requiem
  • HOF: Heart of Fire
  • OOB: Out of Bounds
  • SH: Sarabande of Healing
  • JOC: Jail of Crystal
  • DC: Disco of Gold
  • BS: Blood Astronomia

Use Ctrl+F or your browser's search function to find specific information in this guide.
Strategy and Methodology
The best way to play Vampire Survivors (in this guide's opinion) is to maximize your damage output and kills as much as possible. Eventually you reach a point where you can easily beat most levels, but you still want to expand your lethality through pure damage, levels, and number of kills -- that is what this guide is for.

There are detailed build examples included. This game runs on synergy. Many weapons and items do not function well in an absolute vacuum, requiring combinations of effects to improve outcomes. The characters, weapons, and Arcana will have descriptions about what they work well with and those synergies will also be visible in the build examples.

Ranking Priorities
Rankings are determined by this priority: Damage, Survivability, Versatility, Ease Of Use, Stage Specific Strengths. Each Character, Weapon, Passive Item, and Arcana has a summary of why they are ranked the way they are. Rankings are graded on a curve, with most things falling within B and C Tier, and fewer on the top of bottom of each tier list. Rankings within tiers are ordered as best as possible.

These tier lists and explanations assume you have all Power Up enabled and most, if not everything, unlocked, to include the paid downloadable content (DLC). If you are missing DLC or certain items, there are plenty of replacements for various items (with a few exceptions).

Refer to the DLC Priority section for more information

Stage Mode Options

The primary form of gameplay most of this guide is based on is with Golden Eggs disabled, Limit Break enabled, Inverse Mode enabled, and Hyper mode enabled. Consideration is given to other game modes and will as best as possible be discussed if it makes a big difference. Ultimately which stage modes you use are up to you and many times they come down to preference.

Golden Eggs Recommendation: Disabled. This game is not balanced around Golden Eggs[vampire.survivors.wiki]. The mechanics of the game fall apart at really high Golden Egg levels and 99% of builds no longer matter. Low Golden Egg Levels (under 200) can be okay if you want a bit of a handicap. Otherwise Golden Eggs are not recommended for normal gameplay unless gold farming.

The Gold Farm guide and information on how to get more Golden Eggs is located near the bottom of this guide.

Limit Break Recommendation: Enabled. Allows you to really push your character in the best way possible. Always leave this enabled unless doing a challenge run or gold farming using Trouser.

Inverse Mode Recommendation: Enabled. This game's hard mode. Make enemies' start with more health, and gain 5% Max Health and 0.5% movement speed every minute. Most importantly it allows you to buy an additional Arcana, Skips, Banishes, and Rerolls from the Merchant at the start of the game. It is recommended to play with this one as the extra Arcana is critical to making the best builds work.

Hyper Mode Recommendation: Enabled. Makes you and enemies faster, gives extra gold, and provides a Luck bonus. No reason to ever play with this off.

Hurry Mode Recommendation: Disabled. It halves the amount of time you are in the stage, making you weaker overall. You can enable it for an additional challenge and for faster runs, however this guide is not made with Hurry in mind. Definitely don't use Hurry if you are struggling to complete levels.

Endless Mode Recommendation: Optional. Can be nice for flexibility or just to see how far you can last. Turn it off if you want to make sure you adhere to the base time limit.

Random Events Recommendation: Optional. Can make the game unpredictable, but often results in better outcomes over time. Having Random Events enabled or not isn't considered in this guide.

If The Game Is Too Hard
This guide uses all Power Ups, including Curse and Charm, as well as Inverse Mode. Most of the builds also use Wicked Season. All of these used at the same time can be overwhelming for some players. So the recommended options to dial back the difficulty are:

1) Disable Hurry Mode
2) Disable Curse
3) Disable Charm
4) Disable Inverse Mode
5) Don't Select Wicked Season Arcana

Hurry Mode is already not recommended, so Curse is probably the biggest issue, followed by Charm, and so on. The large health of Inverse mode is offset by allowing you to choose another Arcana at start. For Wicked Season the Curse cycle at the 00:30 and 1:10 mark can hard for those not used to it. Still Wicked Seasons is the most universally beneficial Arcana, which is why it should be the last thing you cut if you have to.
DLC Priority
This game is cheap to buy and the paid downloadable content is also cheap. Having more Vampire Survivors content just opens up more of the game. Having said that, if you want to only purchase certain DLC packs, here is this guide's opinion:

1. Ode to Castlevania

This DLC is huge and is undeniably the best of the available DLCs for Vampire Survivors. It adds 80 characters (many of which are secret unlocks), 118 weapons, and 1 massive stage. It nearly doubled the amount of characters and weapons available in the game at the time of release.

The character from this DLC added a lot of powercreep. Many of the characters provide different and more powerful ways to play the game. There are more Megalo forms, characters that start with Arcana, trigger abilities that fire weapons, and much more. Most characters have access to multiple weapons at game start and powerful Castlevania pickups from light sources.

Like the characters, the weapons add a ton of power to the game. Powerful unions, extremely strong Librarian weapons like Troll Bomb and Soul Steal, powerful and unique spell books, fun fantasy weapons, and more.

The Ode to Castlevania stage is really well made and provides a lot of replayability. The main feature are the bosses which drop weapons and chests, while providing a fun sense of progression that isn’t simply time based.

The main downside is as of writing there are many gameplay bugs with the new content. For the average player you likely won’t notice them, but for many veterans they stick out like a sore thumb.

Overall, this DLC is practically its own game and is the best DLC by far.

2. Tides of the Foscari
This DLC has the best kind of content. It provides 8 characters, 13 weapons, 1 passive item, and 2 stages.

Of the characters Sammy is the most notable, as he will trivialize gaining gold. Je-Ne-Viv, Luminaire Foscari, Maruto Cuts, and Eleanor Uziron are all also really strong and unique characters that make playing the game enjoyable.

All 5 of the weapon evolutions are extremely powerful. Legionnaire has one of the most overpowered synergies with Divine Bloodline, while Ophion has the highest kill and damage potential of any weapon. The rest: SpellStrom, Luminaire, and Millionaire are all powerful as well.

Finally both Foscari stages are really well made, enjoyable to play on, and enhance many build options. Abyss Foscari in particular is extremely well liked due to the monster density and powerful stage items that are available.

This is one of the best DLC to get.

3. Legacy of the Moonspell
Includes 8 new characters, 13 new weapons, and 1 new stage.

The characters and weapons are generally really good and work well with many builds. Notable characters are the invincible Megalo Menya Moonspell, the powerful Menta Moonspell, and the weapon spamming Babi-Onna.

Notable weapons are Godai Shuffle and Echo Night, which are both extremely powerful full screen damage weapons. Also a special mention to Muramasa, which due to its ability to damage the player, allows for several unique build synergies.

The Mt.Moonspell stage can be pretty challenging, but has many great item pickups.

Overall a solid choice for build diversity and expanded gameplay.

4. Operation Guns
Adds in 12 characters, 22 weapons, 1 passive item, 3 pickups, and 2 stages.

Among the four it has the weakest arsenal of weapons and characters, but the sheer number of characters and weapons make this enjoyable to play. Notable characters are Colonel Bahamut, Sheena Etranzi, and Probotector. Particularly strong weapons are Time Warp, Atmo-Torpedo, and BFC2000-AD.

The two stages added, Neo Galuga and Hectic Highway, are much harder stages than other stages if you want a challenge.

This DLC has a lot of content for your money.

5. Emergency Meeting
Comes with 9 characters, 16 weapons, 8 passive items, and 1 new stage.

Notable additions are Scientist Mina, Imposter Rina, Clear Asteroids, and the absolutely overpowered Paranormal Scan. Most of the other weapons and characters don't neatly fit in with the game, both thematically and mechanically. Furthermore, many of the weapons and characters are underwhelming in terms of power. This DLC has a big focus on Multiplayer, so if you are Singleplayer only several characters aren't able to be used to their full potential.

The stage Polus Replica has all the Emergency Meeting passives on the stage, along with Lifesignscan, which makes it a great stage if looking to use a lot of weapons from this DLC. The stage itself is also challenging and with a unique stage event mechanic.

Still a good DLC to have, but it is the most passable out of the four.
Weapon Evolution Guide
Evolutions are a core function of the game. In nearly all cases a weapon evolution is an upgrade and should be pursued. The charts below show the weapon and passive item combinations required to acquire all fully evolved weapons in game.

Credit goes to Sabletooth from the Vampire Survivors Discord for creating these images.


Weapon Selection Guide
These were added in the Ode to Castlevania DLC. They are alternate weapons for many Castlevania characters and may very rarely appear in the level up screen.


Core Builds and Items
Synergies are character, weapon, and Arcana combinations that greatly enhance the effectiveness of all parts involved. Core builds can be used with any character sharing a starting weapon with the weapons listed or characters able to make adjustments towards that build. These builds utilize powerful synergies to make them work. Please see the respective Arcana, weapon, and passive item sections of this guide to get detailed information on a specific part of the build.

All builds in this guide can be used to beat almost any level, but you should also be open to customizing them or adapting if you are unable to get specific items. Use the Vampire Survivors Build Planner[danmer.github.io] to help plan out builds ahead of time.

Reading the Build Image


Images and/or links will be provided for each build, along with an explanation on how it works. These builds are usually stage agnostic, but picking stages with a lot of stage pickups can significantly expand build options and should be considered when playing.

Weapons and Passives: Generally the priority of the weapons and passive items are left to right, shown as the red and blue 1-6 in the image. The faded icons are weapons and passive items that go beyond the 6 item base limit. Stage items, Darkana, special passives, chests, and Candyboxes are some of the methods used to get more than 6 weapons and passive items.

Arcana: The Arcana are represented by the pink 1-6. Most characters will only have 4 total (3 if not playing on Inverse mode). The order for the Arcana is the most strict as many times certain characters need specific Arcana to be picked up immediately to ensure the run goes smoothly.
Core Builds - Powerful
Powerful Builds
These are the best builds using S and A Tier Arcana.

Silent Old Sanctuary Build
Build using Paranormal Scan.


Build using Troll Bomb and Sword Brothers.


Silent Old Sanctuary is the easiest type of build to get going. The power of using Silent Old Sanctuary greatly depends on the starting weapon of the character you are playing. Many characters are at their strongest when focusing on a single weapon. Characters with really weak evolutions are generally better not choosing Silent Old Sanctuary and instead pursuing full weapon builds.
  • Main Arcana: Silent Old Sanctuary, Wicked Season, Boogaloo of Illusions/Sapphire Mist/Hail from the Future - Wicked Seasons should always be taken, while Boogaloo of Illusions, Sapphire Mist, and/or Hail from the Future can be added to any build.
  • Main Weapons: Starting Weapon, Paranormal Scan - If you don't have the Emergency Meeting DLC you can drop Paranormal Scan, otherwise there is no reason not to use it in limited weapon builds.
  • Optional Weapons: Gorgeous Moon, Troll Bomb, Sword Brothers - You generally want to avoid too many weapons, but these weapons provide unique benefits. Gorgeous Moon makes it easier to collect experience and allows for AFK leveling, although it is less efficient than timing Wicked Season with experience collecting. Troll Bomb deals massive damage and can constantly trigger through Limit Breaking. Sword Brothers provides invincibility and can reach 100% uptime when using 3 or fewer weapons.
  • Main Passive Items: Empty Tome, Torrona's Box, Duplicator, Candelabrador, Spinach, Crown - Empty Tome should always be taken, all others should generally be selected in the above order when you don't need other passives for evolutions. Some weapons and characters may have specific abilities that would benefit more from other passive items, although most can still follow the recommended priority without issue.

Divine Bloodline Build
Build using many DB weapons.


DB with SOS variant. Dark Iron Shield is a equally as good as Legionnaire. Mazo Familiar can be used if you don't have the TF or CV DLC.


Divine Bloodline is one of the most powerful builds out there. It can rapidly scale your Max Health and provide flat weapon damage per missing Health. This requires Legionnaire from the Tides of the Foscari DLC, Dark Iron Shield from the Ode to Castlevania DLC, or Mazo Familiar to be really good.
  • Main Arcana: Divine Bloodline, Wicked Season, Boogaloo of Illusions/Sapphire Mist
  • Main Weapon: Legionnaire, Dark Iron Shield, or Mazo Familiar - You only need one. Legionnaire is the best, followed closely by Dark Iron Shield, but use Mazo Familiar if you are lacking the TF or CV DLC.
  • Optional Weapons: Muramasa, NO FUTURE, Crimson Shroud, Victory Sword, Dominus Agony, Dominus Hatred, Dominus Anger, Power of Sire - Muramasa, NO FUTURE, Crimson Shroud, and Victory Sword also retaliate and boost Divine Bloodline's effect, but they aren't as effective as Legionnaire, Dark Iron Shield, or Mazo Familiar. Dominus Agony, Dominus Hatred, Dominus Anger, and Power of Sire can be used to keep Health down and trigger retaliation for Dark Iron Shield and Mazo Familiar.
  • Main Passive Items: Empty Tome, Armor, Hollow Heart, Metaglio Left - These four are generally not optional, grab Hollow Heart and Metaglio Left as late as possible to get the most benefit from them.
Core Builds - Powerful...
Crystal Cries Build
CC building using many freezing weapons.


CC build use some freezing weapons and powerful neutral weapons.


CC building using Jail of Crystal.


Crystal Cries will rapidly scale your Growth, Max Health, and Recovery making you level insanely fast while at the same time becoming unkillable. To make this work you must freeze[vampire.survivors.wiki] as many enemies as possible and collect the Crystalized Souls that drop when they are killed.
  • Main Arcana: Wicked Season, Crystal Cries, Boogaloo of Illusions/Sapphire Mist/Hail from the Future/Jail of Crystal - If you are unable to freeze many enemies when starting, you will have to rely on Crystal Cries low health screen wide freeze to get started. Hail from the Future can spawn more Orologions while leveling, while Boogaloo/Sapphire Mist can increase weapon damage. Use Jail of Crystal to increase the inventory of weapons capable of freezing.
  • Main Weapon: Time Warp, Celestial Voulge, Clock Lancet/Infinite Corridor - These are the best weapons to use as they can freeze the most amount of enemies. At least one of these is required to make this build good.
  • Optional Jail of Crystal Weapons: NO FUTURE, Tri-Bracelet, Pronto Beam, Cocytus, Luminaire - Roughly ordered in how effective these weapons are. Luminaire is here for its utility rather than damage.
  • Optional Weapons: J'Odore, Icebrand, Greatest Jubilee - J'Odore and Icebrand are capable of freezing, but are not as powerful as the main weapons. Greatest Jubilee can increase the chance for the Orologion pickup to appear.
  • Main Passive Items: Empty Tome, Wings, Silver Ring, Gold Ring, Clover - Wings is needed to evolve Time Warp and Celestial Voulge. The Rings are needed to evolve Infinite Corridor. Clover increases the chance for freeze and to find Orologions.


Wandering the Jet Black Build
Jet Black build using Muramasa for self-damage and many healing weapons.


Jet Black building using Power of the Sire for self damage, some healing weapons, and two strong neutral weapons. Sarabande of Healing doubles healing done.


Wandering the Jet Black has the highest damage potential of any Arcana, able to scale infinitely by the amount of Health healed. This requires Muramasa from the Legacy of the Moonspell DLC or the Dominus weapons from Ode to Casltevania to be really good.
  • Main Arcana: Wicked Season, Wandering the Jet Black, Sapphire Mist - Sapphire Mist will allow weapons to trigger their healing multiple times. Sarabande of Healing is also a decent 4th Arcana choice.
  • Main Weapon: Muramasa, Dominus Agony or Power of the Sire, Paranormal Scan - This build cannot work without self-damaging weapons like Muramasa's or Dominus Agony/Power of the Sire. Dominus Hatred and Dominus Anger are not worth picking unless you're planning to unite them into Power of the Sire. Paranormal Scan provides great healing and additional stats.
  • Optional Weapons: Festive Winds, Fuwalafuwaloo, Sanctuary, Soul Eater, Soul Steal, Greatest Jubilee, Celestial Dusting - Weapons are in rough order of their effectiveness as healing weapons and added utility.
  • Main Passive Items: Empty Tome, Gold Mask, Attractorb - Gold Mask is needed for Muramasa. Attractorb increases the explosion area.
Core Builds - Good
Good Builds
These are good builds using A and B Tier Arcana. They can be used when you have not yet unlocked all Darkana and Arcana yet, or if you just want to try something less meta.

Slash Critical Hit Build
Slash build with many critical hit weapons and Iron Blue Will.


More generic Slash build that includes a variety of weapons and uses Boogaloo of Illusions.


This build focuses on using Slash to produce massive weapon damage. Critical hit chance is based on Luck and can eventually reach 100% with enough of it. The weapons and passives are extremely flexible for this as many weapons benefit from the Slash Arcana.

  • Main Arcana: Wicked Season, Slash, Iron Blue Will or Boogaloo of Illusions - Wicked Seasons should always be taken. Slash is the main damage multiplier. Use Iron Blue Will if you have multiple weapons that will benefit from it, otherwise choose Boogaloo of Illusions.
  • Main Weapons: Seraphic Cry - Seraphic Cry deals massive damage, Clover is a great passive for critical hit builds, and it can fit nearly all builds.
  • Optional Weapons: Legionnaire, Muramasa, Rune Sword, Death Spiral, Heaven Sword, Millionaire, Spirit Tornado Tip, Vampire Killer, Melio Confodere, Fuwalafuwaloo, Hydrostormer Tip, Crissaegrim TIp, Cross Crasher Tip, Impostongue, Aurablaster TIp, Mormegil Tip, Thousand Knives, Victory Sword, Daybreaker Tip - These all benefit from Slash are are roughly in order of their power.
  • Main Passive Items: Empty Tome, Candelabrador, Clover - Empty Tome should always be taken, all others should generally be selected in the above order when you don't need other passives for evolutions.

Heart of Fire Build
Basic HOF build.


HOF build that uses Gemini weapons.


Heart of Fire deals a lot of area damage with the explosions it produces, while also providing a defensive component through retaliation.
  • Main Arcana: Wicked Season, Heart of Fire, Sapphire Mist/Boogaloo of Illusions/Gemini - Wicked Seasons should always be taken. Heart of Fire adds retaliation and deals area damage based on weapon damage. Sapphire Mist is usually a better choose with Heart of Fire over Boogaloo, but both are still interchangeable. Gemini adds several weapons and improves a few that are affected by Heart of Fire.
  • Main Weapons: None - Weapons that benefit from Heart of Fire are notorious for being weak without it, so there is no main weapon for this build as most perform similarly.
  • Optional Weapons: Greatest Jubilee, Luminaire, Valkyrie Turner, Tri-Bracelet, The RPG, Salamender, Multistage Missile, Ashes of Muspell, Aurablaster Tip, Prototype C, Prototype A, Prototype B, Hellfire, Fire-L3G5, Svarog Statue, Aura Blast - Weapons are ordered based on the tier list. Besides the weakest, Fire-L3G5, any combination of these weapons will work.
  • Optional Gemini Weapons: Vandalier (Ebony Wings) and Phieraggi (Red Muscle) - Only get a benefit when used with Gemini
  • Main Passive Items: Empty Tome - Empty Tome should always be taken.
Core Builds - Good...
Out of Bounds Build
Example OOB using weapons that freeze by default.


OOB build using JOC to increase the amount of weapons to synergize with.


This is a build that utilizes the freeze mechanic to freeze[vampire.survivors.wiki] enemies and create explosions. Like Heart of Fire many of the weapons that benefit from Out of Bounds are not strong on their own, however the ones that are strong are identified below. The damage from Out of Bounds increases based on the amount of time survived in a run, going up by +2 damage every 1 minute.

  • Main Arcana: Wicked Season, Out of Bounds, Boogaloo of Illusions/Crystal Cries/Jail of Crystal - Wicked Seasons should always be taken. Since few weapons freeze by default, for this build taking both Jail of Crystal and Out of Bounds is recommended.
  • Main Weapon: Time Warp, Celestial Voulge, Clock Lancet/Infinite Corridor - These are the best weapons to use as they can freeze the most amount of enemies. At least one of these is required to make this build good.
  • Optional Jail of Crystal Weapons: NO FUTURE, Tri-Bracelet, Pronto Beam, Cocytus, Luminaire - Roughly ordered in how effective these weapons are. Luminaire is here for its utility rather than damage.
  • Optional Weapons: J'Odore, Icebrand, Greatest Jubilee - J'Odore and Icebrand are capable of freezing, but are not as powerful as the main weapons. Greatest Jubilee can increase the chance for the Orologion pickup to appear.
  • Main Passive Items: Empty Tome, Wings, Silver Ring, Gold Ring, Clover - Wings is needed to evolve Time Warp and Celestial Voulge. The Rings are needed to evolve Infinite Corridor. Clover increases the chance for freeze and to find Orologions.

Twilight Requiem Build


Twilight Requiem's main benefit is that it has infinite scaling with Curse. Characters that gain Curse per level or the Wicked Season Arcana synergize with Twilight Requiem to becomes late game powerhouses. Due to limited weapon choices it isn't necessary to have every weapon in this build benefit from Twilight Requiem. Twilight Requiem should be taken second or third to allow for better scaling from increases in Curse. Every +100% Curse increases the damage of the explosions by around 10-13.5.

  • Main Arcana: Wicked Season, Boogaloo of Illusions/Sapphire Mist, Twilight Requiem - Wicked Seasons should always be taken and provides Curse scaling. Boogaloo of Illusions/Sapphire Mist are damage multipliers, you only need one but can pick up the second as your last Arcana.
  • Main Weapons: Seraphic Cry, Nightmare - Seraphic Cries dealings extremely high amounts of damage. Nightmare Provides a large amount of Curse that can multiple damage
  • Optional Weapons: Sanctuary, Vampire Killer, Luminaire, Tri-Bracelet, Pronto Beam, Festive Winds, Thunder Loop, Bone, Celestial Dusting, Unholy Vespers, - These are roughly in order of power. It is not necessary to fill your build with Twilight Requiem weapons. You want to focus on ones that deal high damage and produce a lot of projectiles. Avoid picking up Duration, which is why Unholy Vespers is at the bottom of the optional weapons. Weapons that can produce a lot of projectiles will perform better.
  • Main Passive Items: Empty Tome, Duplicator, Torrona's Box, Gold Ring, Metaglio Right - Empty Tome should be selected for all builds. Duplicator increases the number of projectiles and thus explosions. Torrona's Box add a lot of stats along with Curse. Gold Ring and Metaglio Right add Curse. Skull O'Maniac could also be chosen if it works for your build or is a stage item. Avoid Spellbinder or with anything else that has high Duration, as Twilight Requiem triggers when the projectiles expires.
Core Builds - Basic and Universal
Basic Game Builds
These are not the strongest builds, but do not require DLC and can be accessed early in the game. These are also easier to understand and use.

Non-DLC Early Game Build


This build is solely for the earliest parts of the game, before Arcana are unlocked. When new to the game or starting a new file, going for these weapons will make progression easier.
  • Main Weapons: La Borra, Thunder Loop, Death Spiral, Heaven Sword - These are all strong weapons even without Arcana and can fit well in any build
  • Optional Weapons: Hellfire, Holy Wand - These are added because they work with the passive items, but they are not necessary

Non-DLC Slash Build


This a Non-DLC build that selects strong weapons that work well with the Slash Arcana.
  • Main Arcana: Boogaloo of Illusions, Slash - Boogaloo of Illusions needs levels to get really strong, while Slash needs additional sources of Luck like from Clover or Wicked Seasons to make it worth use.
  • Main Weapons: Seraphic Cry, Death Spiral, Heaven Sword - These are the strongest non-DLC Slash weapons and should always be used when doing a full Slash build
  • Optional Weapons: Photonstorm, Infinite Corridor, Gorgeous Moon - These are neutral weapons that can be added to this build due to being strong in their own right.

Non-DLC Gemini Fire Build


Heart of Fire on its own is underwhelming without DLC, however when paired with several Gemini weapons, it can create a good synergy. You want to make sure you do not evolve Gatti Amari, as its base form is extremely powerful. Try to unite Vandalier and Phieraggi early, so you can free up weapon slots later for Greatest Jubilee and an optional Photostorm. Greatest Jubilee is a rarer weapon, so if you have Seals available block out other weapons or pick it up from a Candybox.
  • Main Arcana: Gemini, Heart of Fire - The Flock Destroyer counterpart of Gatti Amari is just as powerful, while Zhar Ptytsia and Red Muscle, from Vandalier and Phieraggi respectively, are used to create more explosions for Heart of Fire.
  • Main Weapons: Seraphic Cry, Gatti Amari, Vandalier, Phieraggi, Greatest Jubilee - These all have weapon counterparts that make them worth using, while Greatest Jubilee can increase item pickup spawns to enhance the effectiveness of Gatti Amari/Flock Destroyer and Heart of Fire.
  • Optional Weapons: Photonstorm - This is a stronger filler weapon.

Non-DLC Freezing Blood Build


This uses Out of Bounds and Blood Astronomia to deal additional damage. All weapons used are also strong on their own, but are enhanced by both Arcana.
  • Main Arcana: Out of Bounds, Blood Astronomia - Both are needed to make this work, although you could make a build that only focuses on one of the Arcanas, the weapon selection choices are not strong enough to recommend it.
  • Main Weapons: Infinite Corridor, Celestial Voulge, Gorgeous Moon, Mannajja - To make the most of Out of Bound, both Infinite Corridor and Celestial Voulge can hit large amounts of enemies. Gorgeous Moon and Mananajja are strong on their own, but can be enhanced through the damaging fields created by Blood Astronomia.
  • Optional Weapons: Photonstorm, Thunder Loop - These are neutral weapons that can be added to this build due to being strong in their own right.

Universal Arcanas, Weapons, and Passive Items
These are items that can be used as filler for a build or on their own. These generally just work without additional support from other weapons or Arcana.

Universal Arcanas


These Arcana can be used with any builds as part of their core function or when needing to fill out the Arcana slots more. See the Arcana section for a detailed explanation.
  • Hail from the Future: Use when you want to have many weapons, passives, and item pickups.
  • Moonlight Bolero: Use when you want evolutions early and to get more than the standard 4 Arcana. You can keep restarting the run to guarantee the blue goblin that drops the Arcana chest at minute 0:00.
  • Wicked Seasons: Use this with nearly every build due to the scaling stats.
  • Boogaloo of Illusions: Use to fill the screen with your weapons effects.
  • Sapphire Mist: Use to multiply your weapon triggers.
  • Mad Groove: Use to quickly pick up everything on the stage.

Universal Weapons


These are extremely powerful weapons that do not need specific Arcana to make strong.
  • Paranormal Scan (EM): Can and should be added to any build you want to minmax, except Divine Bloodline.
  • Ophion (TF): Most powerful damaging weapon in game.
  • Seraphic Cry: Second most powerful non-Arcana dependent weapon, although Slash and Twilight Requiem still improve it.
  • Atmo-Torpedo (OG), Godai Shuffle (LM), Troll Bomb (CV), Photonstorm, Sanctuary (CV): Extremely powerful weapons that can fit most builds
  • BFC2000-AD (OG), Echo Night (LM), La Borra, SpellStrom (TF): Not as strong as the weapons listed above, but still good in their own way.

Universal Passives

These are the best and most universal passive items.
  • Main Passive Items: Empty Tome, Torrona's Box, Duplicator, Candelabrador, Spinach, Crown - Empty Tome should always be taken, all others should generally be selected in the above order when you don't need other passives for evolutions.
Characters Tiers
Characters are ranked based on the following factors: Damage/Kill Potential, Survivability, Build Diversity, Stat Scaling, Starting Stats, Additional Bonuses. Greater weight is given to characters that will be strong at higher levels (100, 200, 300, etc.) than just initial starting bonuses, unless those starting bonuses also scale with later levels. The more kills and levels a character can get without dying, the higher they will be ranked.

Character Builds
At least one build example is provided for each character. Character builds are in order of relative power, with stronger builds listed first. Many of the builds are optimized to be the best for that character, but many others are there for build diversity or for thematic reasons.

Nearly all characters can use many different builds. For even more build options look for other characters that share weapons or have comparable passive abilities.
S Tier Characters - 1
S Tier characters are unmatched by other characters in what they do. These characters win games and have the easiest time building the most overpowered builds imaginable.

Chaos (CV)
Starts with Infinite Corridor. Starts with +2,097,052 Max Health, -99% Growth, +200% Magnet, +65536 Rerolls, +65536 Skips, and +65536 Banish. Starts with all Arcanas except Game Killer.

Unkillable and unlike other invincible characters Chaos has no time limit. Starting with one of the most powerful weapons and every single Arcana makes Chaos the ultimate character and allows unlimited build combinations. Not that builds matter when it comes to Chaos as everything will work whether you want it to or not. Chaos notably starts with -99% Growth, however this is compensated for thanks to the sheer power of having all Arcana. Still it is recommended to pick up the Crystal Cries Darkana first to get your Growth up. Since Chaos only has Darkana left, you can target those while playing and turn Chaos into even more of a powerhouse. The main negatives for Chaos is their distracting massive model that blocks visuals of much of the game and their sheer power can make the game boring to play.

**Bug: Mad Groove will send items to the corner at the start of the game.

Builds:
  • Infinite Chaos[mozzarellathicc.github.io] - Chaos with some of the strongest weapons in games

  • Dark Moon Chaos[mozzarellathicc.github.io] - Chaos using stat scaling weapons

Queen Sigma
The Queen! She has stats for days and the definition of overpowered.

Starts with Victory Sword. She starts with 333 Max Health, 3.0 Recovery, 3 Armor, +50% Movement Speed, +50% Might, +50% Duration, -25% Cooldown, +1 Amount, +1 Revival, +100% Magnet, +50% Luck, +10% Curse, +108 Reroll, +108 Skip, and +108 Banish. She also gains +1% Might and +1% Growth every level, without cap. Additionally, she gets a Candybox from the Merchant at start, and at level 2, level 3, level 77, and level 108, the player is allowed to select an Arcana. This allows her to get up to 6 Arcana in a single run instead of the normal 3-4.

Queen Sigma boasts unmatched starting power and leveling potential, making her incredibly potent. While she can't use Golden Eggs, she doesn't need them since her base stats are equivalent to roughly 3,000 Eggs, which would otherwise just lower game difficulty. She’s perfect for exploring any build, thanks to her ability to purchase a Candybox, her high stats, and access to up to 6 Arcana. However, her sheer power can make the game feel too easy, turning her into the ultimate build fantasy character for players seeking versatility and dominance.

The builds below can all be run on other characters that share a starting weapon with one of the weapons, but will generally have less Arcana unless you use the Moonlight Bolero Darkana.

Builds:
  • Blue Crystal Queen Sigma[danmer.github.io] - An extremely powerful blue item-themed build that uses Crystal Cries to gain massive amounts of Growth and Health, while also getting a bunch of extra passives from Hail From The Future.
  • Red Black Queen Sigma[danmer.github.io] - Another powerful build, this one making use of Divine Bloodline and Wandering the Jet Black to deal massive amounts of damage and gain crazy amounts of Health.
  • Infinite Arms Queen Sigma[danmer.github.io] - This uses many of the strongest weapons and strongest Arcana to become a powerhouse. Hail From The Future is able to provide up to 7 additional weapons and passives! Use this build if your computer can handle it.
  • Invincible Sigma[danmer.github.io] - Uses some of the strongest weapons to eliminate any risk of dying...or seeing enemies
  • Overpowered Crit Sigma[danmer.github.io] - Critical hit focused builds that maximizes damage
  • Elementalist Gemini Sigma[danmer.github.io] - Uses non-DLC Gemini weapons for a colorful build
S Tier Characters - 2
Sammy (TF)
The ultimate gold farm character.

Starts with Vicious Hunger. They start with +2 Recovery and -60% Might. They gain an additional +10% Might on levels 2, 3, 5, 8, 13, and 21, negating the Might malus. They also have longer Gold Fevers, cause Vicious Hunger to have a higher gold transmutation chance, and gain experience per gold picked with a multiplier of x1.1. At level 30 Sammy will trigger Gold Fever.

Sammy excels at Limit Breaking Vicious Hunger, turning enemies into gold, healing, and experience. By prioritizing Disco of Gold, they can infinitely level up and kill enemies (or until the game potentially crashes). For Arcana, add Wicked Season and later Sarabande of Healer or Blood Astronomia. While Sammy can sometimes outperform Queen Sigma, they are more restricted in build options and playstyle. Sammy is ideal for farming Golden Eggs through massive gold generation but you should avoid selecting Disco of Gold if you want a more traditional gameplay experience.

Check out the "Gold Farm" section of this guide for more information on how to use Sammy for gold farming.

Builds:
  • Gold Farm Sammy[danmer.github.io] - Standard gold farm build
  • Crazy Cats Sammy[mozzarellathicc.github.io] - When you want to actually play Sammy...somewhat

Blackmore (CV)
Starts with Summon Spirit. He starts with +40% Move Speed, +40% Duration, and +100% Greed. Can choose a per-level bonus after defeating a set amount of enemies up to 5 times: 1% Might, Area, Speed, Duration, Recovery (0.01), Growth, Luck, Greed, Curse, or Move Speed. Bonus selection is available at the 1000, 5000, 9000, 13000, and 17000 kills. Starts with an extra Arcana V - Chaos in the Dark Night. Can get up to 5 Arcana.

One of the best characters in the game with his ability to choose 5 level up stats at kill thresholds. Can scale his stats just like Scientist Mina and has a weapon that, while not that strong, doesn't interfere with gameplay as much Science Rocks/Rocket Science does with Scientist. Has high build flexibility. Recommended stats to select are 3-4% Growth, 1% Might, with an optional 1% Area or 1% Curse. Blackmore can get up to 5 Arcana.

Builds:
  • Slash Max Stats Blackmore[mozzarellathicc.github.io] - The ultimate high stat build with scaling weapons. Choose x3 Growth, x1 Duration, and x1 Might for the level up passives.
  • Twilight Blackmore[mozzarellathicc.github.io] - Strongest Twilight Requiem build in game. Stacks Curse to gain power. Choose x3 Growth, x1 Curse, and x1 Might for the level up passives.

Scientist Mina (EM)
The ultimate stat scaler.

Starts with Science Rocks. Every 10 levels until 50, they can choose to gain 1% Might, Area, Speed, Duration, Recovery (0.01), Growth, Luck, Greed, Curse, or Move Speed per level up to a total of 5% points. Scientist Mina also gets -10% Luck every 10 levels until level 90, losing a maximum of 90% Luck.

Scientist Mina has the best infinite scaling potential in game, though their rough start with the tricky Science Rocks weapon can be a challenge, especially on stages with walls. Unlike other S-tier characters, Mina can be vulnerable early on, so surviving long enough to gain the stat buffs is crucial. While highly flexible in builds, they are slightly behind Blackmore as the ultimate stat scaler. Optimal stat choices are 3-4% Growth, 1% Might, and optionally 1% Area or Curse.

Builds:
  • Max Damage Scientist[danmer.github.io] - Focuses on maximizing damage, stats, and kills using high damage weapons. Choose x3 Growth, x1 Might, and x1 Greed for the level up passives.
  • Space Genius Scientist[danmer.github.io] - Uses many EM weapons for a nice thematic build. Choose x3 Growth, x1 Might, and x1 Curse for the level up passives.
S Tier Characters - 3
Babi-Onna (LM)
The Ultimate Weapon Spammer.

Starts with Mirage Robe. She starts with +10 Reroll. She ignores the Cooldown stat, but poses while moving, using one weapon each time she poses. The faster she moves, the faster she will trigger her weapons.

Babi-Onna has a unique playstyle centered on movement. She ignores Cooldown entirely, triggering weapons only when "voguing" as she moves. The best weapons to use with her are Ophion, Troll Bomb, and Gorgeous Moon. In addition, grabbing Paranormal Scan early allows her to boost her stats faster than any other character. Keep moving constantly and prioritize Wings as a passive item to maximize weapon spam. Avoid Empty Tome and Silent Old Sanctuary, as they are ineffective for her. While her starting weapon, Mirage Robe, offers survivability and pairs well with the Out of Bounds Arcana, opting for Laurel can make her nearly invincible, though it consumes a valuable weapon slot. Remember: the fewer weapons she carries, the stronger she becomes.

Builds:

Vlad Tepes Dracula (CV)
Can choose to start with Wine Glass or Ebony Diabologue. He starts with +566 Max Health, +100% Might, +100% Greed, +10 Reroll, +10 Skip, +10 Banish. Gains +1% Might and +0.01 Revival every level. Curse increases Might at a 1:1 ratio. Incoming damage capped at 10. Immune to health drain. Transforms into Megalo Dracula at level 80 after the Ebony and Crimson Stones have been collected. This form gains +2 Armor, +50% MoveSpeed, +150% Might, and -20% Cooldown.

An extremely powerful character. Effectively unkillable, Dracula has a built in Crimson Shroud damage taken cap, a massive amount of stats, gains Might per level, and Curse increases Might. Wine Glass/Meal Ticket and many of the weapons from Evony Diabologue are solidly strong weapons. The Revivals he gains every 100 levels makes his main weapon's evolution, Meal Ticket, stronger as the game goes on.

Builds:
A Tier Characters - 1
These are characters that start the game strong, are hard to kill, and/or can scale their stats infinitely into the hundreds or thousands of levels before minute 30.

Je-Ne-Viv (TF)
Extremely strong character with overpowered passives.

Je-Ne-Viv gains +1% Might and +0.5% Curse every level, without cap. It starts with +150 Max Health, +5 Armor, +50% Might, +50% Greed, +50% Magnet, and +7 Reroll. Je-Ne-Viv starts with an innate unique weapon, Insatiable, which acts like the Blood Astronomia Arcana but its damage is multiplied by Greed. Upon leveling up It triggers a vacuum. When taking fatal damage and everyth 6th level, Je-Ne-Viv triggers World Eater, becoming invincible for 2 seconds, killing all enemies on screen, and turning them into Little Hearts. Furthermore, World Eater destroys wall tiles, allowing the player to walk out of bounds. Finally It gains SpellString, SpellStream, and SpellStrike upon leveling up, which evolve into the powerful Spellstrom. Its starting weapon also evolves into one of the most powerful weapons in the game, Ophion.

The Might and Curse per level allows Je'Ne-Viv to scale extremely well. Having access to Ophion and Spellstrom means enemies are constantly taking damage and getting instantly killed. Its stats and passive abilities allow it to have flexible builds, but it truly thrives when it is able to constantly gain levels and take advantage of its scaling Curse. A truly oppressive character that will dominate any level, while not being as overpowered as Queen Sigma or Sammy.

Builds:
  • Final Boss Je-Ne-Viv[mozzarellathicc.github.io] - SOS build that focuses on Je-Ne-Viv's base weapons, removing Spellstrom and only focusing on Ophion works extremely well too.
  • Cursed Demon Je-Ne-Viv[mozzarellathicc.github.io] - Twilight Requiem build using many strong weapons

Cosmo Pavone
Limitless Recovery and Revivals as the run goes on.

Starts with two hidden Peachone and Ebony Wings weapons. Cosmo starts with -80 Max Health, +1 Recovery, +20% Luck, +30% Movement Speed, and +1 Revival. They also gain +1 Recovery, +1% Luck, and +0.01 Revival every level. Every time Cosmo is revived, they trigger a Rosary effect.

This character gains a massive amount of Recovery that makes them nearly impossible to kill after you get past Cosmo's early game weakness. Pairs well with Awake, Sarabande of Healing, and Wandering the Jet Black. Since Cosmos has fully open weapon slots, they are highly customizable. Finally, Cosmo becomes completely overpowered when using Sharp Tongue/Impostongue and Star Flail/Moon Rod, as the damage from those weapons is multiplied by the Recovery stat, which Cosmo is the master of.

Builds:
  • Jet Black Cosmo[mozzarellathicc.github.io] - Extremely powerful build that turns self-damage and healing into explosions. Muramasa can also be used instead of Power of Sire.
  • Super Gemini Cosmo[mozzarellathicc.github.io] - Powerful Gemini, Sarabande of Healing, and Heart of Fire build that gives Cosmo 13 weapons.

Wind (CV)
Starts with Aura Blast. He starts with +1 Recovery and +20% Move Speed. Retaliates with Aura Blast. Triggers Aura Blast and a random equipped weapon from Coat of Arms when overhealing by +8.

Building healing and recovery items is necessary if you want to maximize the benefit of his Aura Blast and Coat of Arms triggers. Limiting Wind to 3 weapons: Troll Bomb, a healing item like Lifesign Scan/Paranormal Scan or Bloody Tear/Fuwalafuwaloo, and his starting Aura Blast can make for a deadly combination as the overhealing will only trigger Troll Bomb. Another strong combination is using Disco of Gold with Wicked Seasons as the Gold Fevers will often trigger the overhealing effect, causing Troll Bomb overhealing chains as early as the first minute of the game.

Builds:
  • Troll Bomb Wind[mozzarellathicc.github.io] - A screen wiping monster build, but you won't be able to see anything.

  • DB Healing Wind[mozzarellathicc.github.io] - A CPU safer version of the above build, now with 50% more visibility

Elizabeth Bartley (CV)
Can choose to start with Hex, Belnades' Spellbook, or Ebony Diabologue. She starts with +100 Max Health, +2 Armor, +50% Move Speed, +50% Might, +100% Greed, +10 Reroll, +10 Skip, +10 Banish, and +50 Charm. Immune to health drain. Transforms into Megalo Elizabeth Bartley at certain kill thresholds for 30 seconds after the Ebony and Crimson Stones have been collected. Megalo Elizabeth Bartley gains +200% Might, -50% Cooldown, and invincibility.

Elizabeth by default can start with Hex/Nightmare, one of the strongest Spellbooks to have, or have her choice of many other powerful weapons. Charm is one of the best stats to have as it allows you to kill more enemies and improve experience gains. Her Megalo form massively increases her lethality, but even without it she is an extremely strong character thanks to her great starting stats. Notably she will immediately cap her Cooldown reduction with Empty Tome maxed out while in Megalo form.

Builds:
A Tier Characters - 2
Megalo Death (CV)
Can choose to start with Death Spiral or Ebony Diabologue. He starts with +300 Max Health, +2 Armor, +50% Move Speed, +250% Might, -20% Cooldown, +100% Greed, +10 Reroll, +10 Skip, and +10 Banish. Has Hands of Death which both deal 65 base damage and attack when the character moves. He can't die, but his run ends at the time limit.

Starts with a strong evolved weapon, a huge amount of Might, and other beneficial stats. Megalo Death will instantly overpower the enemies on any stage at the start and cannot be stopped. His only downside is he has a large model that may be distracting.

Builds:

Luminaire Foscari (TF)
A reviving and screen-wiping Goddess.

Starts with Prismatic Missile. Luminaire starts with +0.5 Recovery, +40% Move Speed, +7 Revival, and +5 Banish. Upon leveling up, Luminaire triggers a Rosary. After reviving, she gets a temporary +200% Might, -100% Cooldown, and up to 300% Move Speed that lasts 15 +2(x times Revived) seconds.

Luminaire is incredibly strong in the early and mid game. The Awaka Arcana is highly recommended to maximize her large number of starting Revivals. With proper items Luminaire can obtain over 15 Revivals, which she can use to boost her stats by intentionally killing herself until dying becomes impossible. Her starting weapon Prismatic Missile is also really good and evolves into Luminaire, which benefits her level up passive. Since she triggers Rosary on level up, you will want to focus on builds that maximize experience gains. This can allow her to chain Rosary triggers through rapid leveling up, making her one of the fastest leveling characters and a massive powerhouse early game.

Builds:

Menya Moonspell (LM)
Like Megalo Menya Moonspell, but not always.

Starts with Four Seasons. Menya starts with -20 Max Health, +10% Might, -10% Cooldown, +10% Luck, and +8 Banish. She enters a boosted state at certain kill thresholds and becomes a stronger version of Megalo Menya Moonspell gaining +200% Might, -20% Cooldown, +50% Curse, up to 300% total Move Speed, and a hidden 108 Bocce for 30 seconds.

Good starting stats and can get invincibility and a massive stat boost at certain kill thresholds for 30 seconds. She also starts with a great base weapon that turns into Godai Shuffle, one of the best weapons in the game. Four Seasons doesn't reliably kill in the middle of the screen, so a complementary weapon is generally recommended. When you get enough kill momentum going it is possible to stay within her boosted form indefinitely. Slightly better than her Megalo counterpart due to getting more stats in her boosted state.

Builds:

Megalo Menya Moonspell (LM)
A powerhouse of a character with great stats and damage immunity.

Starts with a hidden 108 Bocce. She starts with -20 Max Health, +100% Move Speed, +100% Might, -20% Cooldown, +10% Luck, and +108 Banish. She cannot be damaged at all but her run ends as soon as the time limit is reached.

Megalo Menya Moonspell feels almost like cheating due to her damage immunity and high stats, allowing her to freely experiment with weapon builds or have fun on any stage. With six full weapon slots, she's perfect for testing build setups.

Builds:
  • Crit Megalo Menya[danmer.github.io] - Strong critical hit build that focuses on pure offense

Avatar Infernas
Extremely strong character with powerful stat scaling.

Avatar gains +0.5% Curse, +0.5% Might, +2% Move Speed, and -0.25% Cooldown every level. He also starts with +60 Max Health, +50% Might, +50% Luck, +100% Magnet, +1 Revival, and +10 Reroll.

Starts with the Heart of Fire Arcana which can pair well with Hellfire, Greatest Jubilee, and Luminaire to fill the screen with explosions. This Arcana does not count against his limit, so Avatar can have 4-5 Arcana in a run. Picking items like Clock Lancet or Laurel will make it impossible for him to get damaged once his Cooldown Reduction hits -87.5%. His main downside is that he gets 2% speed per level, which makes him harder to control as the game goes on.

Builds:
  • Frostfire Avatar[danmer.github.io] - Uses speed based weapons along with fire and ice weapons/Arcana that complement each other.
  • Max Fire Avatar[danmer.github.io] - Fire theme build that stacks Curse to powerup Twilight Requiem.
A Tier Characters - 3
Megalo Dracula (CV)
Can choose to start with Wine Glass, Dominus Agony + Dominus Hatred + Dominus Anger, or Ebony Diabologue. He starts with +300 Max Health, +2 Armor, +50% Move Speed, +250% Might, -20% Cooldown, +100% Greed, +10 Reroll, +10 Skip, and +10 Banish. Gains +1% Might every level and +0.01 Revival every level**. Curse increases Might at a 1:1 ratio. Incoming damage capped at 10. Immune to health drain. Has Hands of Dracula which both deal 65 base damage and attack every 3 seconds.

An extremely powerful character. Effectively unkillable, Dracula has a built in Crimson Shroud damage taken cap, a massive amount of stats, gains Might per level**, and Curse increases Might. Wine Glass/Meal Ticket and many of the weapons from Evony Diabologue are solidly strong weapons. The Revival he gains every 100 levels makes his main weapon's evolution**, Meal Ticket, stronger as the game goes on. Choosing the Dominus weapons to start can allow you to quickly unite Power of Sire. Main downside is he has a large model that may be distracting.

**Bug: Not gaining scaling Might or Revival per level

Builds:

Young Maria Renard (CV)
Starts with a Familiar Forge. Starts with +80% Move Speed and +80 Luck. She cannot be damaged, but her run ends when reaching the time limit. Is always offered Peachone then Ebony Wings as a 4th level up option, once both birds are collected she will be offered a Familiar Forge as a 4th level up option every level up to a max of 30 Familiar Forges.

A really unique character and the true summoner in this game. You can choose to rely on your Familiar and birds for damage, or build her however you like. If using Familiars it is better to focus on a select few rather than spread to different types. Having 30 Pumpkin Familiars is recommended, as it is the strongest Familiar by far due to its Troll Bomb weapon. The rest don't really matter that much, but look at the individual Familiar entries in the Passive Items section to learn more. Young Maria is also stuck with Peachone and Ebony Wings, so making builds that work with them and their union Vandalier is recommended. The birds are terrible weapons to start with, but at least Young Maria has help and can't take damage.

Builds:

Jonathan & Charlotte (CV)
Prepare for trouble! And make it double!

Jonathan (main) can choose to start with Javelin, Morning Star, Coat of Arms, or Spectral Sword. Charlotte (second) starts with Raging Fire or Belnades' Spellbook. They start with +20 Max Health and +20% Might. Charlotte's 15 second Charge ability is affected by Growth: triggers all equipped weapons from the Belnades' Spellbook. Jonathan's 15 second Charge ability is affected by Projectile Speed: triggers all equipped weapons from the Coat of Arms.

This character has the Co-op mechanic included. The two characters alternate level up choices and are able to share passive items for the purposes of weapon evolutions. The second character will follow behind the main. In total you'll be able to obtain 12 weapons and 12 passive items before hitting the soft caps. It is basically Charlotte and Jonathan together. Two characters may seem better than one, but due to how the passive items function they may have a slower leveling progression at the start of the game than simply playing one of the component characters. If you want the second character to start with a specific weapon you need to change the weapon on the solo version of the character. To make the most out of both characters purchase Troll Bomb for Jonathan and try to get Refectio/Sanctuary on Charlotte. See their individual character entries for more details.

**Bug: Weapon evolutions favor the second character.

Builds:
  • See the character sections for Jonathan Morris and Charlotte Aulin for builds to use for each character

Charlotte & Jonathan (CV)
Charlotte (main) can choose to start with Raging Fire or Belnades' Spellbook. Jonathan (second) starts with Javelin or Coat of Arms. They start with +20% Move Speed, +40% Duration, and +40% Area. Charlotte's 15 second Charge ability is affected by Growth: triggers all equipped weapons from the Belnades' Spellbook. Jonathan's 15 second Charge ability is affected by Projectile Speed: triggers all equipped weapons from the Coat of Arms.

This character has the Co-op mechanic included. The two characters alternate level up choices and are able to share passive items for the purposes of weapon evolutions. The second character will follow behind the main. In total you'll be able to obtain 12 weapons and 12 passive items before hitting the soft caps. It is basically Charlotte and Jonathan together. Two characters may seem better than one, but due to how the passive items function they may have a slower leveling progression at the start of the game than simply playing one of the component characters. If you want the second character to start with a specific weapon you need to change the weapon on the solo version of the character. Get Refectio/Sanctuary on Charlotte to make the most of her ability. Jonathan excels with Troll Bomb, so selecting that from Coat of Arms is highly recommended. See their individual character entries for more details.

**Bug: Weapon evolutions favor the second character.

Builds:
  • See the character sections for Jonathan Morris and Charlotte Aulin for builds to use for each character
A Tier Characters - 4
Jonathan Morris (CV)
Can choose to start with Javelin or Coat of Arms. He starts with +30 Max Health, +20% Might. 15 second Charge ability affected by Projectile Speed: triggers all equipped weapons from the Coat of Arms.

Jonathan gets access to great weapon choices from Coat of Arms. Iron Ball/Wrecking Ball, Wine Glass/Meal Ticket, Santa Water/La Borra, and King Bible/Unholy Vespers are great weapons to start with. Hydrostorm and Troll Bomb should be bought from the Librarian for full weapon runs as both are extremely good weapons. Troll Bomb especially should always be bought due to how well it synergizes with Jonathan's Charge ability which creates an extremely powerful combination.

Builds:

Walter (CV)
Starts with Nitesco. He starts with +50 Max Health, +2 Armor, +20% Move Speed, +100% Greed. Triggers a random equipped weapon from the Ebony Diabologue when overhealing by +8. Immune to health drain.

Starting with Nitesco absolutely destroys the beginning of the game with ease, allowing Walter to snowball incredibly fast. The overhealing has to occur in a single heal, so grabbing a weapon like Lifesign Scan/Paranormal Scan or Bloody Tear/Fuwalafuwaloo will make it easy to trigger often. Ebony Diabologue weapons are among the game's strongest, with evolved weapons like Vol Luminatio, Vol Umbra, Soul Steal, and Sword Brothers triggering through overhealing. Soul Steal in particular is extremely powerful to use in a limited weapon build with healing. Another strong combination is using Disco of Gold with Wicked Seasons as the Gold Fevers will often trigger the overhealing effect. While similar to Wind's ability, Walter's is not as powerful due to relying on Soul Steal triggering 50% of the time instead of the far more powerful Troll Bomb triggering 100% of the time.

Builds:
  • Soul Steal Walter[mozzarellathicc.github.io] - Powerful build that chains Soul Steal and Nitesco
  • Healer Pulse Walter[mozzarellathicc.github.io] - Full weapon version of the above Soul Steal build

Smith IV
Can get some of the best stats in the game, if you work for it.

Starts with Vandalier. Smith IV starts with -93 Max Health, +20% Move Speed, -10% Might, -10% Area, -50% Projectile Speed, -10% Duration, +10% Cooldown and +100% Luck. They gain +0.01 Recovery, +0.7% Might, Area, Speed and Duration, -0.25% Cooldown, and +1% Luck every level.

Starts out with extremely low health, but if you are able to survive Smith scales extremely high and becomes a powerhouse at later levels. Vandalier can deal a lot of damage, but has poor aiming. The Divine Bloodline can be used to get them through the early game. Using Divine Bloodline with weapons like Eskizzibur/Legionnaire and Pako Battiliar/Mazo Familiar can quickly get you to over 100 Max Health within the first 30 seconds of the game. Another option is the Crystal Cries Arcana, which due to its low health screen wide freeze effect is self sustaining and can quickly give Smith decent Health and good Recovery. Additionally, weapons from the Librarian are able to give Smith a strong start. Like Avatar Infernas, Smith can eventually become invincible with weapons like Laurel, Clock Lancet, or Sword Brothers thanks to their scaling Cooldown.

Builds:
  • Crystal Cries Smith[mozzarellathicc.github.io] - Crystal Cries creates a freeze loop with Smith's low health, allowing Smith to use to to build high Health, Crowth, and Recovery.
  • DB Awake Smith[mozzarellathicc.github.io] - Uses Divine Bloodline and Awake to keep Smith alive and make them powerful
A Tier Characters - 5
Megalo Elizabeth Bartley (CV)
Can choose to start with Belnades' Spellbook or Ebony Diabologue. She starts with +300 Max Health, +2 Armor, +50% Move Speed, +250% Might, -20% Cooldown, +100% Greed, +10 Reroll, +10 Skip, +10 Banish, and +50 Charm.

Megalo Elizabeth gets her choice of spell and has a lot of stats that turn the game into easy mode. Best weapons choices are generally Refectio/Sanctuary, Hex/Nightmare, Rock Riot/Gemma Torpor, and Gale Force/Pneuma Tempestas. She is an extremely strong character with high stats that makes much of the game easy.

Builds:

Death (CV)
Starts with Death Spiral. He starts with +155 Max Health, +100% Move Speed, and +20% Might. Transforms into Megalo Death at level 80 after the Ebony and Crimson Stones have been collected. He gains +200% Might, -20% Cooldown, and +100% Curse in this form. As Megalo Death he is immune to damage, but disappears at the time limit.

His stats are identical to Red Death with the added bonus of being unable to die. Death Spiral is a powerful evolution that can be run solo or with other weapons. This character is extremely fast and starts the game killing everything in sight with his weapon.

Builds:

Count Olrox (CV)
Starts with Dark Rift. He starts with +50 Max Health, +1 Armor, +20% Move Speed, +20% Might, +20% Duration, +100% Greed, +10 Reroll, +10 Skip, and +10 Banish. Immune to health drain. Transforms into Megalo Olrox at certain kill thresholds for 30 seconds after the Ebony and Crimson Stones have been collected. Megalo Olrox gains +200% Might, -50% Cooldown, Invincibility, and a permanent Nduja Fritta Tanto.

Olrox has great starting stats and can deal a lot of damage with Dark Rift. Since he can transform as early as 1000 kills into his Megalo form that allows him to gain a massive advantage near the start of the game. Notably he will immediately cap his Cooldown reduction with Empty Tome maxed out while in Megalo form.

Builds:
  • Dark Arts Olrox[mozzarellathicc.github.io] - Strong dark weapon and glyph themed build
A Tier Characters - 6
Nathan (CV)
Can choose to start with Sonic Dash, Morning Star, or Belnades' Spellbook. He starts with +20 Max Health, +1 Armor, -5% Cooldown. Starts with an extra Arcana IV - Awake. Gain an extra choice of Arcana after surviving 7 and 14 minutes. Can get up to 6 Arcana.

Nathan has a great selection of weapons through his weapon selectors with top choices being Wind Whip/Spirit Tornado Tip, Alchemy Whip/Vampire Killer, Refectio/Sanctuary, Hex/Nightmare, Gale Force/Pneuma Tempestas, and his starting Sonic Dash/Rapidus Fio. Starting with the Awake Arcana also means he can better utilize weapons that scale with Revives, or allow himself to die to increase his base stat. Finally, getting up to 6 Arcana opens up a wide variety of build options and acts as a power multiplier for Nathan.

Builds:

Space Dude
A glass cannon that gets stronger the more weapons you have.

Starts with Phas3r. Space Dude starts with +40% Move Speed. Space Dude will occasionally activate all weapons twice. This effect occurs more often the more Cooldown reduction you have, starting at every 10-15 seconds and down to ~3 seconds with capped Cooldown reduction.

The double firing of weapons can trigger really fast with a lot of Cooldown Reduction. On average this results in an 80-180% total damage increase or around 2-3 times. Starting weapon begins a bit weak, but gets stronger fast and evolves into one of the highest damaging weapons in the game. Due to how his passive works, having more weapons can result in more damaging areas being sent out, but he still works amazingly well with one weapon builds.

Builds:

Charlotte Aulin (CV)
Can choose to start with Raging Fire or Belnades' Spellbook. She starts with +20% Move Speed, +20% Duration, +20% Area, +10 Reroll, +10 Skip, and +10 Banish. 15 second Charge ability affected by Growth: triggers all equipped weapons from the Belnades' Spellbook.

Charlotte gets access to great starting weapons from Belnades' Spellbook such as Refectio/Sanctuary, Hex/Nightmare, and Gale Force/Pneuma Tempestas. All spellbooks except for Fulgur/Tenebris Tonitrus are viable choices for a run. Some like Rock Riot and Raging Fire should not be chosen as a first weapon. Refectio/Sanctuary should always be chosen during a run due to how much Sanctuary benefits from Charlotte's Charge ability which creates an extremely powerful combination. Charlotte is also lacking in defensive stats, so picking a defensive weapon or strong starting Arcana is needed to survive early on harder levels.

Builds:
A Tier Characters - 7
Gains Boros
The ultimate leveling character.

Starts with Heaven Sword. Gains gains +2% Growth every level..

Heaven Sword is a strong starting weapon, but can be hard to target enemies without Waltz of Pearls. Gains has the second fastest leveling behind a Growth specialized Blackmoore/Scientist Mina. This allows Gains to level extremely quickly and ramp up powerful builds faster than nearly every other character. The large amount of levels also means it can fully utilize Limit Break, especially in limited weapon builds. The Game Killer Arcana can become a powerful option if selected late in the game, due to Growth scaling the damage of the Experience Gem explosions.

Builds:

Colonel Bahamut (OG)
Starts with Metal Claw. Bahamut starts with +100 Max Health, +2 Armor, +80% Move Speed, +50% Might, and +25% Magnet. He gains 1% Might per 1% Greed or 1% Curse. Can find Rapid Fires, Barriers, and Grenades from light sources. Starts with Metal Claw which evolves into Big Fuzzy Fist.

Bahamut is a really good user of Wicked Season as using the Arcana translates to 1% Might per level and provides a x2 multiplier on Greed/Curse half the time. When starting a game Bahamut has a massive +185% Might, which turns into +335 Might during Wicked Season phases. This Might Increase is effective all the way until he hits the +900% Might cap. This Might boost allows him to kill enemies and level faster at the start of the game much better than most other characters. Metal Claw/Big Fuzzy Fist are decent weapons as well as long as you get enough Area. Metal Claw leaves open blind spots on the top and bottom of your character, so you have to make sure to constantly move to prevent taking damage.

Builds:

Joachim (CV)
Starts with Rune Sword. He starts with +1 Armor, +20% Move Speeds, and +100% Greed. Immune to health drain. Can choose a per-level bonus: 1% Might, Area, Projectile Speed, Duration, Recovery (0.01), Growth, Luck, Greed, Curse, or Move Speed.

Rune Sword is a very strong weapon and he can choose a per-level bonus is incredibly powerful. In almost all cases you want to select +1% Growth as your per level bonus. Picking up the Slash Arcana as well as anything to increase Area, Projectile Speed, and Duration will increase the damage of Rune Sword.

Builds:
  • Crit Joachim[mozzarellathicc.github.io] - Crit weapons along with high stat scale. Make sure to select Growth as the level up passive
A Tier Characters - 8
Random
Starts with a random weapon. They gain or lose a small amount of stats per level. Refer to Random's wiki page[vampire.survivors.wiki] to get an understanding of how their stats work.

Has one of 8 names that determine level up stats. Cannot fully benefit from Chaos in the Dark Night, Boogaloo of Illusions, and Lost & Found Painting. The stats they gain per level are generally positive in the long term, allowing this character to grow stronger overtime in all areas. However, in the short term it is possible to lose some stats on level up. Chalanda, Mi Kujino, or Titto are generally the best names to use. You can re-enter the character selection screen to reroll the name and weapon for this character.

Builds:

Megalo Olrox (CV)
Can choose to start with Dark Rift or Ebony Diabologue. He starts with +300 Max Health, +2 Armor, +50% Move Speed, +250% Might, -20% Cooldown, +100% Greed, +10 Reroll, +10 Skip, and +10 Banish. Immune to health drain.

Megalo Olrox has a lot of stats and gets a choice of glyph weapons starting out. Ebony Diabologue is one of the best weapon selectors with few bad choices and with Olrox's massive Might and decent Cooldown reduction, he can excel with any weapon chosen.

Builds:

Blue Crescent Moon Cornell (CV)
Can choose to start with Trinum Custodem or Ebony Diabologue. He starts with +130 Max Health, +2 Armor, +40% Move Speed, +3 Amount, and +10 Reroll. Additionally, he gains 1% Might every level.

A strictly superior version of Cornell. The bonus stats from Trinum Custodem makes this character near unkillable. Thanks to his weapon, Cornell can have a total of 15 Armor, 2.5 Recovery, and -15% Cooldown. Trinum Custodem doesn't deal that much damage over the course of the game, so you will generally want to pick other weapons. Cornell's weapon and stats allows for a more close range playstyle than other characters.

Builds:

Impostor Rina (EM)
Impostor starts with +20 Max Health, +20% Movement Speed, and +20% Might. Imposter turns into Megalo Impostor Rina upon defeating a specific amount of enemies, triggering Rosary and gaining invincibility, +200% Might, -20% Cooldown, and 70% Move Speed for 30 seconds. They also gain 6 hidden Sharp Tongue weapons during the boosted state.

Starts with a decent weapon and has good base stats, but its evolution isn't that good. Gets a massive boost to Might, Movement Speed, and Cooldown Reduction during certain kill thresholds. Is invincible during the boost mode and can infinitely chain the boosted state if you kill enough. Sharp Tongue/Impostongue gets its damage multiplied by the Recovery stat, so you will want to incorporate builds that use Pummarola and Metaglio Left.

Builds:
  • Crystal Cries Imposter[mozzarellathicc.github.io] - Uses the Recovery from Crystal Cries to increase the damage of the hidden Sharp Tongues, Impostongue and Moon Rod
  • Crit Imposter[danmer.github.io] - Simple crit build
A Tier Characters - 9
Sheena Etranzi (OG)
Starts with Blade Crossbow. Sheena starts with +1 Recovery, +40% Move Speed, and +8 Rerolls. Gains -1% Cooldown per 2% Move Speed. Can find Rapid Fires, Barriers, and Grenades from light sources.

Sheena is a strong character who can easily reach the -90% Cooldown cap with just Wings and Empty Tome. This significantly boosts Blade Crossbow, which starts off weak but becomes incredibly powerful upon evolving into BFC2000-AD.

Builds:

Dario Bossi (CV)
Starts with Salamender. He adds +0.5 base damage to every equipped Fire-type weapon when leveling up. Fire-type weapons include: Raging Fire (and Gemini) / Salamender, Fire Wand / Hellfire, Valkyrie Turner, Flames of Misspell / Ashes of Muspell, Alchemy Whip /Vampire Killer, Dominus Anger, Svarog Statue, Firearm / Fire-L3GS, and Bracelet / Bi-Bracelet / Tri-Bracelet.

Doesn't have any bonus stats, but greatly increases the damage of his build by focusing on Fire-type weapons. Salamender is a great starting weapon, but underwhelming without Gemini. Heart of Fire synergizes with most of the weapon's Dario can boost. In general many "fire" weapons are on the weaker side, so Dario's damage increase for them isn't as strong as you might expect.

Builds:
  • Inferno Dario[mozzarellathicc.github.io] - Fire themed build that synergizes with Dario's passive
  • SOS Twin Salamender Dario[mozzarellathicc.github.io] - Gemini build that focuses on his starting weapon

Gyoruntin
Gyoruntin starts with +3 Armor, +80% Move Speed, and +30 Max Health. Gains 1% Curse per level and NO FUTURE gains +1 base damage per level with no cap. Can fly through walls.

Starts with a weaker version of NO FUTURE (5 base damage, instead of the normal 30), but it is still a really good weapon. The scaling Curse per level is offset by the large damage gained by NO FUTURE. This makes Gyoruntin extremely strong when using just NO FUTURE and allowing it to Limit Break. For full weapon builds using weapons that benefit from Curse like Crimson Shroud and 108 Bocce or the Arcana Twilight Requiem is recommended.

Builds:

Bats Bats Bats
Starts with Mazo Familiar. Bats Bats Bats starts with +80 Health, +80% Move Speed, and +2 Revival. Mazo Familiar gains +1 base damage per level. Each Revive also increases the character's Amount by 1. If the Revive is consumed, this bonus is lost. The player gains a Bats Bats Bats follower when they die and revive. These followers move around randomly, have Pako Battiliar, collect experience gems, gain stats when the player levels up, and revive after a time when killed.

A truly unique character that has to balance using Revival to get followers or keeping the bonus Amount. Starts with a weaker version of Mazo Familiar that gets stronger over time. Strong Arcana to use with Bats Bats Bats are Divine Bloodline and Awake. Divine Bloodline will allow them to maximize the Max Health damage bonus of Mazo Familiar while also gaining damage increase from the Arcana itself. Awake allows Bats Bats Bats to increase the number of followers and gain stats through intentionally dying. The follower bats do not deal much damage, but can be useful to distract enemies during the early game. The bonus Amount Bats Bats Bats gains from additional Revives further allows them to make other weapons in their build much more powerful.

Builds:
A Tier Characters - 10
Lisa Tepes (CV)
Can choose to start with Lumanatio or Belnades' Spellbook. She starts with +20% Move Speed, +5 Reroll, +5 Skip, and +5 Banish. Gains +1% Growth every level. Starts with an extra Arcana XX - Silent Old Sanctuary. Can get up to 5 Arcana.

Starts with one of the best Arcana in the game and a decent weapon to have it on with Luminatio and its evolution Vol Lumanatio. Limited weapon builds would benefit Lisa the most. Picking up Umbra/Vol Umbra will compensate for targeting gaps from Luminatio/Lumanatio and allow you to get the gift weapon, Universitas. The Growth per level is powerful and allows her to rapidly fill out builds and get into the 1000s of levels over the course of the game.

Builds:

Rose De Infernas
Starts with Fuwalafuwaloo. She also starts with +100 Charm, +20% Move Speed, -90% Might, and -80% Growth. Rose gains +10% Might every 12 levels until level 108, +10% Growth every 12 levels from level 36 to 84 and +15% Growth on levels 96 and 108, negating the initial negative Might and Growth.

Starts with a really powerful weapon that heals her and has a unique passive of +100 Charm that will increase enemy spawns by 100% without the malus of additional health and speed like Curse. Does start with a Might and Growth malus, but the strong weapon more than compensates for that. Because she spawns more enemies than any other characters she can gain a lot of experience and make exceptional use of weapons like Sole Solution and Ashes of Muspell.

Builds:
  • Crit Rose[mozzarellathicc.github.io] - Powerful build focused on dealing critical hits

  • Jet Black Rose[mozzarellathicc.github.io] - Using healing and self-damage to deal high damage
A Tier Characters - 11
Megalo Syuuto Moonspell (LM)
Starts with Night Sword. Megalo Syuuto gains +1% Might every level. He also starts with +150 Max Health, +2 Armor, +20% Movement Speed, +50% Might, +50% Greed, and +50% Curse.

Night Sword is an okay starting weapon that really shines when it evolves into Muramasa, a weapon that scales in damage with Greed. Has really good starting stats and stat scaling. Due to having Muramasa he can maximize the damage of Divine Bloodline or Wandering the Jet Black through the self-damage aspect. Selecting Wicked Season will also provide a source of Greed scaling, allowing Muramasa to become extremely powerful.

Builds:

Shanoa (CV)
Can choose to start with Confodere or Candybox. She starts with +20 Max Health, +50% Move Speed, +10 Reroll, +10 Skip, and +10 Banish. Gains +1% Might every level. 30 second Charge ability: Triggers all equipped weapons from the Ebony Diabologue. Can find special pickups.

Shanoa can start with any base weapon and has a decent Charge ability. She should prioritize picking up strong weapons like Optical Shot, Luminatio, Umbra from level ups and Dark Rift, Sword Brothers, and Soul Steal from the Librarian. Soul Steal is especially powerful when you can bypass its normally long cooldown. When used properly, and along with per scaling Might, she's a really strong character.

Builds:

Malphas (CV)
Starts with a hidden and weakened version of Thousand Edge (reskinned as black feathers) and Tenebris Tonitrus. Starts with +1 Armor, +80% Move Speed, and +20% Might. Can fly. Hidden weapons get stronger each level.

His starting stats aren't that great and the two weapons that scale aren't considered strong. Still like all other characters that get infinite scaling weapons, Malphas can deal extremely high damage with his starting weapons.

Builds:
  • Crit Malphas[mozzarellathicc.github.io] - Strong Slash based build
B Tier Characters - 1
Strong characters that are versatile, can scale their damage, and survive really well the longer the game goes on.

Soma Cruz (CV)
Can choose to start with Hand Grenade or Candybox. He starts with +20% Move Speed, +50% Greed, +5 Reroll, +5 Skip, and +5 Banish. Gains +1% Might every level. Immune to health drain. Once per life, triggers Soul Steal after receiving fatal damage.

Able to start with any base weapon in the game using Candybox. Gaining Might per level is always one of the best passive abilities to have. Soma also becomes hard to kill thanks to his passive Soul Steal ability, effectively doubling his lives and providing a screen wiping effect.

Builds:

Hector (CV)
Can choose to start with Mace, Spectral Sword, or Coat of Arms. He starts with +25% Magnet, +20% Growth, +20 Reroll, +20 Skip, and +20 Banish. Gains a random Familiar as a follower every 10 levels (max 4). Additionally, he is offered a Familiar Forge every 7 levels as a 4th level up option up to a max of 16 Familiar Forges, regardless of weapon slot caps. Familiar Forges will stop being offered if you have no valid weapon or passive weapon level up choices.

A strong character that has great weapon choices, decent stats, and a special passive. He can get up to 20 Familiars if you make sure to collect enough weapons and passive to allow for level up selections. His default weapon Mace/Stamazza is a heavy hitter, but lacks range. For Familiars, Pumpkin deals the highest damage and distracts enemies, while Faerie can provide some healing. The other Familiars don't stand out significantly, but you can check their individual entries in the Passive Item section to learn more. Hail from the Future can ensure you have enough level up selections to get all 16 level up Familiar Forges.

Builds:

Megalo Impostor Rina (EM)
Megalo Impostor Rina starts with +80 Max Health, +80% Move Speed, +80% Might and -10% Cooldown. Additionally, Rina gains another hidden Sharp Tongue every 6 levels, up to 6 total.

A stronger version of Imposter Rina with a permanent large buff to Movement Speed, Health, and Might. Has no active weapons, which makes them extremely customizable. The hidden Sharp Tongues get their damage multiplied by the Recovery stat, so you will want to incorporate builds that use Pummarola and Metaglio Left. The reason Megalo Impostor is ranked lower than Impostor is due to lacking the invincibility Impostor gets when boosted and offering less stats than the boosted stat.

Builds:

Alucard (CV)
Can choose to start with Alucart Sworb or Candybox. He starts with +100 Max Health, +2 Armor, +50% Move Speed. Immune to health drain. Has four abilities:
- 30 second Charge: Soul Steal
- Level Up: Dark Inferno (Dominus Anger)
- Overheal +8: Summon Spirit.
- HP-Critical: Sword Brothers.

Alucard is a fantastic character that can start with any base weapon, has great stats, and has four abilities that enhance his gameplay. Summon Spirit and Dark Inferno are the easiest to trigger. Incorporating healing items like Lifesign Scan/Paranormal Scan or Bloody Tear/Fuwalafuwaloo and prioritizing Growth will allow for rapid ability triggers. If you do stick with his starting weapon, that is a great choice too as Alucard Sword and Alucard Shield are extremely good weapons.

Builds:

Syuuto Moonspell (LM)
Syuuto starts with +50 Max Health, +2 Armor, -20% Movement Speed, +50% Might, -30% Projectile Speed, -30% Area, and +50% Curse. Transforms into Megalo Syuuto Moonspell once Summon Night Evolves into Echo Night. Megalo Syuuto gains +1% Might every level. He also starts with +150 Max Health, +2 Armor, +20% Movement Speed, +50% Might, +50% Greed, and +50% Curse.

Has great stats, but moves slowly. If you are able to evolve Echo Night early enough, he can be a slightly better version of Megalo Syuuto Moonspell due to gaining a hidden Night Sword when he transforms.

Builds:
B Tier Characters - 2
Master Librarian (CV)
Starts with Rapidus Fio. He starts with -100% Move Speed, +1 Revival, +1000% Greed, +10 Reroll, +100 Skip, and +100 Banish. He gains 2% Move Speed per level. He has a hidden Power of Lire weapon that turns everything (except light sources and terrain) into gold bags with a base cooldown of 1 minute. Starts with an extra Arcana VIII - Mad Groove.

A possible alternate gold farm character whose hidden weapon turns everything into gold. This ability scales with Cooldown and Amount. The main downside is that Power of Lire also turns chests into gold, so it might be better to rely on the Librarian or Merchant weapons than to try and evolve weapons later in the game. Rapidus Fio is a good weapon for moving really fast and mowing down enemies, but lacks the ability to kill large amounts of enemies between Power of the Lire triggers. Muramasa is an immediately powerful weapon on him due to his high Greed.

**Bug: Mad Groove will send items to the corner at the start of the game.

Builds:
  • Gold Rush Librarian[mozzarellathicc.github.io] - Evolve Muramasa as soon as possible and get all the other weapons from the Librarian Merchant

Richter Belmont (CV)
Can choose to start with Platinum Whip or Morning Star. He starts with +20% Move Speed, -10% Cooldown. Starts with an extra Arcana IX - Divine Bloodline. Can find special pickups. Can get up to 5 Arcana. Can trigger the Death boss fight.

Starts with one of the best Arcana in the game and gets to choose from a selection of Whips. Picking Morning Star to get Wind Whip/Spirit Tornado Tip will be much better than staying with Richter's starting weapon. An even better alternative is picking Morning Star, but skipping weapon selection to choose either Legionnaire or Dark Iron Shield at level 2 to make immediate and powerful use of Divine Bloodline.

Builds:
  • DB SOS Richter[mozzarellathicc.github.io] - Powerful limited weapon Divine Bloodline build. Start with Morning Star, but do not pick a weapon. Grab Iron Shield at level 2 and the components for Power of Sire from Hail from the Future.
  • DB Richter[mozzarellathicc.github.io] - Increases health through Divine Bloodline to boost damage

Maruto Cuts (TF)
Maruto gains +1 Armor after being damaged, resetting every 10 seconds, getting hit again extends the reset timer by 1 second. He also starts with +20 Max Health, +1 Armor, +20 Might, and +10% Curse. Upon reaching level 30, an Academy Badge will spawn underneath him.

Starts with an extremely good weapon that can become overpowered when using Divine Bloodline. Evolving Eskizzibur into Legionnaire as soon as possible, along with Divine Bloodline, will enable one of the highest kill and damage builds in the game. Outside of his weapon, his passive bonuses aren't that significant. Having access to Academy Badge on any level allows for a lot of flexibility and a large increase in power. Maruto can also be unlocked fairly early in the game, which can greatly help with unlocking Achievements and game progression.

Builds:

Graham Jones (CV)
Starts with Vox Umbra. He starts with +1 Armor, +20% Move Speed, +100% Magnet, and 100% Greed. Starts with an extra Arcana XIII - Wicked Season. Immune to health drain. Can get up to 5 Arcana.

Graham starts with one of the best Arcana in game and a strong evolved weapon. Magnet increases the power of Vol Umbra, so picking up Attractorb is recommended. Vol Umbra is immediately powerful when starting the game, allowing Graham to quickly gain a huge advantage and allowing him to snowball in power compared to most other characters.

Builds:

Mask of the Red Death
Starts with Death Spiral. Mask of the Red Death starts with +100% Movement Speed, +155 Max Health, and +20% Might.

Extremely high starting health and speed. Death Spiral is a powerful starting weapon and can make Red Death snowball in power. Lacks innate infinite scaling stats, so Red Death will eventually fall behind other characters with scaling stats and abilities the longer a run goes on. Due to their high Move Speed Red Death can quickly pick up stage items and maneuver around enemies. He is also unlocked early and one of the first characters newer players feel overpowered with.

Builds:
B Tier Characters - 3
Barlowe (CV)
Can choose to start with Dominus Anger, Dominus Hatred, Ebony Diabologue, or Belnades' Spellbook. He starts with +200 Max Health, +1 Armor, +20% Duration, +20% Area, +10 Banish. Overhealing increases Might and Curse by 1%. Is offered Ebony Diabologue as 4th level up option at levels 3, 5, 7, and 9.

Has access to an arsenal of great starting weapons, good starting stats, and a great overhealing ability that increases Might and Curse. Building healing and recovery items is necessary if you want to maximize the benefit of his stat passive. The weapons offered by the 4 Ebony Diabologues gained are really good, with standout choices being: Optical Shot, Luminatio, Umbra, and Dominus Agony. Sword Brothers and Soul Steal are also great, but are already offered by the Librarian vendor. These extra weapons can also allow Barlowe to have up to 10 weapons by level 9.

Builds:

Saint Germain (CV)
Can choose to start with Globus, Spectral Sword, and Ebony Diabologue. He starts with +100% Move Speed, +10 Reroll, + 10 Skip, and +10 Banish. Gains 0.2% Cooldown reduction per level. Starts with an extra Arcana XII - Out of Bounds. Can get up to 5 Arcana.

Has many great weapons to start with. His starting Arcana Out of Bounds only works with Icebrand, otherwise it will just provide him more Orologion pickups. With 0.2% Cooldown reduction per level, he can max his Cooldown at level 225, assuming Empty Tome is picked up (why wouldn't you). Besides the Cooldown reduction his other stats aren't that significant.

Builds:
  • Frozen Clock Saint Germain[mozzarellathicc.github.io] - Freezing build that focuses on collecting Orologion to boost Clock Tower's power

Shaft (CV)
Can choose to start with Umbra and Ebony Diabologue. He starts with +30% Move Speed, +50% Duration, +1 Revive, and +10 Banish. Gains +1% Curse every level. Becomes invincible and deals damage to nearby enemies for 20 seconds when health reaches a critically low level. During the invincibility Shaft gains +200% Might, -20% Cooldown, and +50% Curse.

Shaft's ability to become invincible and gain high amounts of Might and Cooldown reduction is effectively a Megalo form for the character. The Shaft Orb that is summoned when reaching critically low health deals 20 base damage and covers most of the screen around you. This critical health ability effectively makes Shaft impossible to kill as 20 seconds is usually plenty of time to heal back up to full health and allow the ability to trigger again.

Builds:

Galamoth (CV)
Starts with Tenebris Tonitrus. He starts with +156 Max Health, +2 Armor, +100% Might, +1 Revival, and +100% Greed. He gains hidden Lightning Rings every 8 levels, up to a max of 6 at level 48. Lightning Rings fire in retaliation.

Galamoth functions similar to Scorej-Oni, but comes with much better stats and a starting weapon. His weapons work well with the Tragic Princess Arcana, although Tenebris Tonitrus is a terrible evolved weapon. He has a large model that may be distracting.

Builds:

Albus (CV)
Can choose to start with Optical Shot or Ebony Diabologue. He starts with +20 Max Health, +40% Move Speed. Gains up to 40% Might and -40% Cooldown depending on how many enemies are in sight.

Optical Shot is an extremely strong weapon when paired with Albus passive. On average his passive provides around 20% Might and -20% Cooldown during the early stages of the games when enemies are spread throughout the screen. With additional Charm and Curse, you can quickly have the max value of Albus' passive up most of the time.

Builds:
B Tier Characters - 4
Scorej-Oni
Scorej-Oni starts with 108 Max Health, -20% Movement Speed, and +20% Area. It gains an additional hidden Lightning Ring every 8 levels, up to a max of 6 at level 40,

Can get up to 6 additional hidden Lightning Rings which allows for a lot of damage across the screen. Lightning Rings also trigger off of Scorej-Oni getting damaged. Decent starting stats and overall a really solid character.

Builds:

Pugnala Provola
Starts with Phiera Der Tuphello and Eight The Sparrow Pugnala gains +1% Might every level. There is no cap on this bonus. She also starts with +20% Movement Speed.

A great character that starts with two decent weapon that combine into the powerful, Phieraggi. Probably the best character you can unlock early without DLC. Choosing the Gemini Arcana early on can also allow her to start with 4 weapons and synergize with builds that use Jail of Crystal or Heart of Fire.

Builds:

Maria Renard (CV)
Can choose to start with Guardian's Targe, Spectral Sword, or Belnades' Spellbook. She starts with +40% Move Speed, +25% Might, +25% Luck. Gains one of the following Familiars at levels 2, 12, 22, and 32: Sacred Cardinal, Sacred Dragon, Sacred Tiger, and Sacred Turtle . Overhealing increases Might by 1%. Overhealing by +32 temporary boosts all current followers for 10 seconds.

Maria has many great weapons to start with through Spectral Sword and Belnades' Spellbook. Her followers will not contribute that significantly, but are nice bits of extra damage. Building healing and Recovery items will allow you to maximize her passive. Sarabande of Healing, Disco of Gold, Lifesign Scan/Paranormal Scan, Refectio/Sanctuary, and Bloody Tear/Fuwalafuwaloo are all ways to massively stack up her healing and make her extremely hard to kill.

Builds:
  • Healer Maria[mozzarellathicc.github.io] - Sarabande of Healing and Disco of Gold build that turns gold into health and health into damage.

Simondo Belmont (OG)
He starts with no weapons. Simondo gains +1 Amount every 20 levels until level 80, up to +4. Amount totalSimondo spawns Rapid Fires, Barriers, and Grenades every 30 seconds, which scale with Cooldown and Amount. In addition he will spawn 12 bonus pickups when he reaches low health. Can find Rapid Fires, Barriers, and Grenades from light sources.

The best of the +Amount characters. He has a unique playstyle where he spawns more special pickups than the other Operation Guns characters. This greatly allows him to chain the pickups by stacking Cooldown and Amount. It is even possible to do a "No Weapon" challenge with him. Since he starts with no weapons he can uniquely build anything, unlike the other +3/4 projectile characters. Furthermore the frequency of the Rapid Fire, Barrier, and Grenade picks ups means you will almost always have capped Cooldown Reduction, shields, and supplemental screenwide damage.

Builds:

Reinhardt Schneider (CV)
Can choose to start with Tyrfing, Spectral Sword, or Coat of Arms. He starts with +40 Max Health, +20% Might. Starts with an extra Arcana XVI - Slash. He further multiplies critical damage by x1.5. Can get up to 5 Arcana.

To make the most of the Slash Arcana and Reinhardt's critical damage passive it is best to start with Tyrfing/Rune Sword or Axe/Death Spiral (Spectral Sword). Alucart Sworb/Alucard Swords/Alucard Shield, Mace/Stamazza, and Iron Shield/Dark Iron Shield from Coat of Arms are also good, but do not benefit from Slash. His starting stats aren't that notable, but do help with damage and survival. Reinhardt's critical hit multiplier is strong, although Slash builds already deal extremely high damage and are likely to overkill enemies, this just makes them extra dead.

Builds:
  • Crit Reinhardt[mozzarellathicc.github.io] - Uses strong weapons and Slash to deal high damage
B Tier Characters - 5
Ghost Lino (EM)
Ghost starts with +156 Max Health, +100% Luck, and -100% Might. Ghost cannot be damaged or deal damage directly, but their run ends as soon as the Time Limit is reached. Can also pass through walls.

A fun character that like Megalo Menya Moonspell is immune to damage and ends the run at the Time Limit, unfortunately for us Ghost Lino cannot deal direct damage due to a permanent -100% Might modifier. This immediately makes most weapons completely useless on them. Sarabande of Healing, Divine Bloodline, or Blood Astronomia are immediately required for them to deal damage. After which you are limited in the weapons you are able to take, making it difficult to beat the damage output of most characters in B Tier and above. Again a fun character, but the damage immunity doesn't fully make up for the inability to deal direct damage.

Builds:

Julia Laforeze (CV)
Can choose to start with Gale Force or Belnades' Spellbook. She starts with +8 Max Health, +3 Recovery, +20% Move Speed, +50% Luck, +10 Reroll, +10 Skip, and +10 Banish. Starts with an extra Arcana VI - Sarabande of Healing. Obtains a Heart Refresh every 2 levels.Can get up to 5 Arcana.

A character that is great for a self-healing playstyle. Starts with a lot of Recovery and Sarabande of Healing, providing her a total of 7 Health recovered per second. The Heart Refreshes she gains every 2 levels increases it to a 17 Health recovered per second. Picking Refectio as the starting spellbook will provide even more healing and increase the effectiveness of Sarabande. Julia can become extremely powerful when used with Wandering the Jet Black and a self-damaging weapon like Muramasa or the Dominus weapons. Disco of Gold would also pair really well with Sarabande of healing, turning Gold Fevers into powerful damaging screen effects.

Builds:

Probotector (OG)
Starts with Prism Lass. Probotector starts with +100 Max Health, +1 Armor, and +20% Might. They gain 10% Might per 1 Armor. Can find Rapid Fires, Barriers, and Grenades from light sources.

Probotector has a really strong start with their weapon and stats. Gaining Might from Amor means you can pick up the Armor passive without sacrificing your damage. Prism Lass is a really good base weapon that benefits from Gemini, Jail of Crystal, and Crystal Cries. Finally, Time Warp is a powerful defensive and offensive weapon that can guarantee you a win.

Builds:

Miang Moonspell (LM)
Starts with Silver Wind. Miang starts with +20 Max Health, +1 Recovery, and +20% Movement Speed. Miang gains +0.2 Max Health each time she overheals. Miang also multiplies healing from all sources.

Her increased recovery, starting weapon, and passive Max Health increases allows her to focus on a self-healing play style and makes her incredibly hard to kill. She can be unlocked extremely early in the game and is one of the best characters to use for newer players. For late game progress and builds her passives not only give her great survivability, but with Arcana like Sarabande of Healing and Wandering the Jet Black can make her deal a large amount of damage.

Builds:
  • Black Crystal Miang[danmer.github.io] - A Crystal Cries and Wandering the Jet Black build that fully optimizes the healing to deal damage playstyle.
    Jet Black Healing Miang[danmer.github.io] - LM DLC only variant of the build above.

Dmitri Blinov(CV)
Starts with Ebony Diabologue. Gets a hidden clone of the latest equipped weapon or evolution.

Dmitri's ability can work best with limited weapon builds or planning out your last weapon so that it gets the most benefit of having two of itself. His starting weapon will not get duplicated, but the evolution received from a chest will. Works extremely well with Paranormal Scan or other weapons with unique effects. Due to lacking any beneficial or defensive stats, Dmitri can start off really weak. It is recommended to get at least one defensive oriented weapon or Arcana to help him survive.

Builds:
  • Speed Dmitri[mozzarellathicc.github.io] - A fast moving build with high stat boosts, unite Trinum Custodem last.
B Tier Characters - 6
Eleanor Uziron (TF)
Can choose to start with SpellString, SpellStream, or SpellStrike. Eleanor starts with -10 Max Health, +20% MoveSpeed, +25% Growth, and +2 Reroll. Upon reaching level 10 and 20, the remaining Spellstrom components will spawn underneath her. Upon reaching level 30 an Academy Badge will spawn. Use the Forbidden Scrolls of Morbane spell "starpupil" to unlock starting with any of the 3 components of Spellstrom.

Has easy access to one of the strongest weapons in the game, Spellstrom, by combining the weapons she starts with and spawns. SpellStrike is the best weapon to start out with, followed by SpellString, then SpellStream. If you start with SpellStream or SpellString, you should get another weapon or an early SpellStrike as soon as possible. Because she spawns the weapons and Academy Badge on the ground, you can strategically wait to pick them up until the right time for your build. If doing a solo-weapon Limit Break build, make sure you start with Silent Old Sanctuary to improve her starting weapon.

Builds:
  • Blue Crystal Eleanor[danmer.github.io] - An extremely powerful blue weapon build that utilizes Crystal Cries to gain a massive amount of levels.

  • Frost Mage Eleanor[danmer.github.io] - A strong freezing build,

Newt Plissken (OG)
Starts with Diver Mines. Newt starts with +40 Max Health, +50% Move Speed, and +20% Luck. He gains 1% Might per 1% Projectile Speed. He can find Average Explosive Barrels, which deal 60 base damage to all enemies near the prop when hit. Can find Rapid Fires, Barriers, and Grenades from light sources.

Diver Mines is a unique weapon that takes some time to get used to. You should try to stay near walls to get the most out of it. Once it evolves into Atmo-Torpedo you don't have to worry about any of that and can enjoy a super strong weapon. Due to Newt's passive you should prioritize getting the Chaos in the Dark Night Arcana to maximize your Projectile Speed gains. Since he focuses so much on Projectile Speed, you should use other weapons that benefit from it like any of the Operation Guns weapons, Millionaire, Death Spiral, or Heaven Sword.

Builds:

Cornell (CV)
Can choose to start with Dextro Custos, Sinestro Custos, or Ebony Diabologue. He starts with +1 Amount and +10 Reroll. Morphs into a stronger version, gaining +100 Max Health, +2 Armor, +2 Amount, and +40 Move Speed, when equipped with Trinum Custodem. Will be offered Dextros Custos, Sinestros Custos, and Centralis Custos in that order as a 4th level up option until all three weapons are selected.

The Custos trio of weapons don't have a large range, but can deal a lot of damage and provide protection from damage after getting hit. The directional nature of his starting weapons means he'll often get hit from behind, but quickly recover thanks to the stat boost Centralis Custos gives. When Cornell transforms after evolving Trinum Custodem he becomes a nearly unkillable powerhouse. Thanks to his weapon's effect he can gain an additional +10 Armor, +2.0 Recovery, and -10% Cooldown that doubles when taking damage from enemies. Cornell's playstyle is meant to be close and personal with enemies while intentionally allowing yourself to take damage to boost your power.

Builds:
  • Black Night Cornell[mozzarellathicc.github.io] - Powerful Wandering the Jet Black build, Boogaloo of Illusions can be swapped out for Sarabande of Healing if preferred.
  • Crit Cornell[mozzarellathicc.github.io] - Strong critical hit build

Hammer (CV)
Starts with The RPG. He starts with +1 Amount. Gets +1 Amount every 20 levels (max +3). Amount is doubled while invulnerable.

Hammer starts with a strong evolved weapon and gains Amount, one of the best stats in the game. Weapons that can make Hammer invulnerable to take advantage of the Amount doubling are: Sole Solution, Power of Sire, Sword Brothers, Sacred Beasts Tower Shield, and Parm Aegis. Sword Brothers can be purchased from the Librarian and is capable of providing 100% uptime on its invulnerability effect with enough Cooldown reduction. Amount has a hard cap of 10, which is very easy to hit using this character.

Builds:
  • SOS Invincible Bomb Hammer[mozzarellathicc.github.io] - A powerful builds that maintains capped Amount, invincibility, and a constant wave of damage from Troll Bomb.
B Tier Characters - 7
Santa Ladonna
Starts with Santa Javelin. Santa starts with +2 Armor, +30 Luck, and -70% Cooldown. She loses -20% Cooldown each level until she hits -10% Cooldown at level 4. She spawns an Arma Dio at level 40 and CandyBox at level 80. Santa can find Arcanas in regular treasure chests, which does not affect her maximum amount of Arcanas. She has an "HP-Critical" skill that activates as soon as her health drops below 20%, which triggers a Rosary. If you level Santa Water, Cross, and King's Bible to level 8 they will be absorbed, providing hidden versions of their evolutions and freeing up weapon slots.

This character has a lot going on. The early Arcana from evolution Chests can be good or bad depending on if you want an evolution or not. The hidden weapons mechanic can be worth pursuing, and they provide nice defenses to Santa Javelin's early game weakness. Santa's greatest strength is her weapon, Santa Javelin/Seraphic Cry, are both extremely powerful powerful. Seraphic Cry especially can fit in most builds and is easily the best non-DLC weapon in game. Her early level Cooldown can make her a great user of Game Killer, but not as much Porta Ladonnna.When playing as her, try not to collect any experience gems for as long as possible to make the most out of her early level passive bonus.

Builds:

Rinaldo Gandolfi (CV)
Can choose to start with Keremet Bubbles or Belnades' Spellbook. He starts with +20 Max Health, +1 Armor, +50% Might, +10 Reroll, +10 Skip, and +10 Banish. Starts with an extra Arcana I - Gemini. Can get up to 5 Arcana.

Gemini works extremely well with all of the Spellbook weapons. Generally it is better to pick Refectio/Sanctuary, Hex/Nightmare, or Gale Force/Pneuma Tempestas over the default Keremet Bubbles weapon. Rinaldo has average stats that otherwise don't make a significant difference in gameplay compared to other characters.

Builds:

Genevieve Gruyère (TF)
Starts with Shadow Servant. Genevieve starts with +20% Move Speed, +50% Greed, +50% Magnet, and +5 Reroll. Upon leveling up, Genevieve triggers a Vacuum. Once per life, she triggers World Eater after receiving fatal damage, becoming invincible for 3 seconds, then killing every enemy on screen and turning them into Little Hearts to heal her.

Has the powerful World Eater passive and her starting weapon evolves into the best damage dealing weapons in the game, Ophion. Grabbing the Awake Arcana and Tiragisu can give her extra lives to trigger World Eater again, but it is not necessary. With her built in vacuum Genevieve is able to be more mobile around stages and not have to worry about missed experience gems.

Builds:
  • SOS Ophion Genevieve[danmer.github.io] - Optimizes the strongest damaging weapon in the game.
  • Dark Mage Genevieve[mozzarellathicc.github.io] - Uses a variety of weapons that benefit from Twilight Requiem to turn the Curse into damage

Leon Belmont (CV)
Can choose to start with Alchemy Whip or Morning Star. He starts with +20 Max Health, +1 Armor, +1 Revival, and +5 Rerolls. Can find special pickups. Gains a hidden Svarog Statue at level 5. Leon gains additional stats upon evolving the Vampire Killer Whip, gaining +80 Max Health, +0.1 Recovery, +1 Armor, +1 Amount, +1 Revive, +10% Move Speed, +10% Might, +10% Projectile Speed, +10% Area, +10% Luck, +10% Growth, and -5% Cooldown.

Has great stats and Vampire Killer is a strong weapon especially against bosses. These stat bonuses make Leon one of the better of the Belmonts/Whip characters. The hidden Svarog Statue he gains can be used defensively against hordes of enemies.

Builds:

Succubus (CV)
Starts with Nightmare. She starts with +80% Move Speed, -10% Cooldown, and +100% Greed. Starts with an extra Arcana XVIII - Boogaloo of Illusions. Can get up to 5 Arcana.

Has high speed and starts with one of the best Arcana in the game, Boogaloo of Illusions. Nightmare on Succubus is currently bugged and missing its curse-scaling effect, making the Curse doubling zones it drops not as effective. The Curse doubling works really well with 108 Bocce and the overpowered Ophion weapon. The Twilight Requiem Arcana is highly recommended to pick as it works off of Nightmare and scales with Curse.

**Bug: Nightmare not scaling with Curse.

Builds:
B Tier Characters - 8
Carrie Fernandez(CV)
Can choose to start with Rock Riot or Belnades' Spellbook. She starts with +40% Move Speed, +1 Amount, +50% Magnet, +10 Reroll, +10 Skip, and +10 Banish. Starts with an extra Arcana XI - Waltz of Pearls. Can get up to 5 Arcana.

With Waltz of Pearls starting with either Rock Riot/Gemma Torpor or Gale Force/Pneuma Tempestas are good options. Otherwise Carrie has decent stats and is overall a good character.

Builds:
  • Waltz Gemini Carrie[mozzarellathicc.github.io] - A bouncing weapon build that fills the screen with projectiles

Crewmate Dino (EM)
Starts with Report!. Crewmate starts with +20% Movement Speed. Crewmate gains minor stat bonuses every time a weapon or passive item is upgraded to its maximum level, with no limit. This passive also includes maximum level items by teammates in multiplayer.

Gets a random stat boost when you fully level an item, this incentivizes full weapon builds and weapons that are Unions or from the Emergency Meeting DLC. The stat increases are noticeable, often better than a single level on a passive item. It is recommended to play on stages that have a lot of stage items like the DLC special stages. Hail from the Future is especially powerful on Crewmate due to providing up to 14 additional weapons/passives. Full slots in addition to Hail from the Future can result in around 10 extra passive items worth of stats for Crewmate Dino.

Builds:
  • Item Overload Crewmate[danmer.github.io] - Tries to maximize Crewmate's passive. Could be made better using Union weapons, but that requires too much coordination. Make sure to get the EM weapon passive items first before getting other passive items.

She-Moon Eeta
Starts with Glass Fandango. She-Moon starts with +2 Armor and +20% Move Speed. She triggers a screen-wide time-freeze, similar to Orologions, when she gets below 25% Max Health.

Can become nearly unkillable with high healing due to her critical health screen-wide freezing passive. Her starting weapon, Glass Fandango, is a good movement weapon and can let you create freezing builds.

Builds:

Leda
Starts with Holy Wand. Leda starts with +5 Armor, -20% Movement Speed, +100% Might, +10% Area, -10% Cooldown and -80% Greed.

Holy Wand is an okay evolved weapon, but Leda’s stats really make her shine, notably +100% Might. Can be unlocked somewhat early at the bottom of Gallo Tower and can help carry newer players through the game's progression. Leda's strong starting bonuses can make her snowball in power quickly, becoming really strong by the late game.

Builds:
  • Frost Mage Leda[mozzarellathicc.github.io] - Freeze and spell weapon build

Mina Hakuba(CV)
Can choose to start with Refectio or Belnades' Spellbook. She starts with +.5 Recovery, +20% Move Speed, -5% Cooldown, +100% Luck, +10 Reroll, +10 Skip, +10 Banish. Starts with an extra Arcana II - Twilight Requiem. Can get up to 5 Arcana.

Keeping Refectio/Sanctuary or selecting Hex/Nightmare will both benefit from Twilight Requiem and are extremely powerful weapons. Although Twilight Requiem isn't that strong without a source of infinite scaling Curse, it can still provide supplemental damage to runs. Mina's stats are average and don't make a big difference in her performance.

Builds:
  • Twilight Gemini Mina[mozzarellathicc.github.io] - Uses a variety of Gemini and Twilight Requiem weapons
B Tier Characters - 9
Keremet (CV)
Starts with Keremet Morbus. It starts with +2 Recovery, +20 Armor, and -100% Move Speed. Starts with an extra Arcana XVII - Lost & Found Painting. Triggers equipped Keremet Morbus when overhealing by +8.

The character version of the immovable object. Has the highest starting Armor of any character in game and a high Recovery stat. Unfortunately Keremet cannot move without the Move Speed Power Up and Wings. The Mad Groove Arcana is recommended to pick up items effectively if you have no large sources of Move Speed. Keremet's overhealing effect is extremely underwhelming, even when fully invested into the projectiles from Keremet Morbus will quickly hit the Pool Limit and will usually be too slow to kill enemies before other weapons do.

Builds:
  • DB Speed Keremet[mozzarellathicc.github.io] - Extremely high Armor and Move Speed build

Brauner (CV)
Starts with Ebony Diabologue. He starts with +1 Armor, +20% Move Speed, +100% Magnet, and 100% Greed. Starts with an extra Arcana XXI - Blood Astronomia. Immune to health drain. Can get up to 5 Arcana.

Ebony Diabologue weapons are strong in general, so there are plenty of choices to start with. Blood Astronomia isn't that great of an Arcana, and the only weapon to benefit from it that Brauner can start with is Sonic Dash/Rapidus Fio. Notably, Brauner's large Magnet bonus makes Blood Astronomia larger than most other characters.

Builds:
  • Blood Astronomia Brauner[mozzarellathicc.github.io] - Uses several Blood Astronomia weapons to fill the screen with damaging effects.

missingN▯
Starts with either Death Spiral or Axe. missingN▯'s base stats are randomized every time the character selection screen is opened. The final stat is determined by the base stat and the stat from PowerUps.

Make sure that Death Spiral is the starting weapon and not Axe. It has a large range of stats it randomizes, making it one of the best characters or the worst. You can view the character's stats and weapons before you start, allowing you to reroll them by exiting and reentering the character select screen. It can potentially roll negative Health and be invincible, but it can also roll stats that break your ability to play like -100% Growth or Curse. There is also a bias that some of its stats have a higher chance of being better or worse than the base stats. missingN▯ will almost always have low Move Speed or the controls reversed.

Builds:

Julius Belmont (CV)
Can choose to start with Vanitas Whip or Morning Star. He starts with +80 Max Health, +40% Might, +1 Revival, +10 Banish. Starts with an extra Arcana XIX - Heart of Fire. When Health is low, Might is increased. Can find special pickups.

Has great starting stats and Heart of Fire can be a great defensive Arcana when starting out. Selecting Morning Star to get Alchemy Whip/Vampire Killer or Wind Whip/Spirit Tornado Tip will be much better than staying with Julius's starting weapon, even with Heart of Fire.

Builds:

John Morris (CV)
Can choose to start with Iron Ball or Coat of Arms. He starts with +30 Max Health, +20% Might. Gains an extra Arcana VII - Iron Blue Will at level 10. Can find special pickups and spawns Mirrors of Truth every 5 levels. Can get up to 5 Arcana.

Since he gets Iron Blue Will, staying with Iron Ball/Wrecking Ball, or choosing Axe/Death Spiral or Shuriken/ Yagyu Shuriken is recommended. With his guaranteed Mirror of Truths every 5 levels, John works really well when using builds with a lot of weapons as they will all fire and be affected by the doubled Amount.

Builds:
  • Slash John[mozzarellathicc.github.io] - Critical hit build
B Tier Characters - 10
Zi'Assunta Belpaese
Starts with Vento Sacro. Zi'Assunta gains +0.5% Might, Projectile Speed, Duration, and Area every level. There is no cap on this bonus. She also starts with +20% Movement Speed and +10% Curse.

Has good stat scaling. Vento Sacro isn't a good starting weapon, but you can build it into Fuwalafuwaloo, a powerful healing weapon. She can be a strong character when you are new to the game. You have to keep moving to make her weapon work well.

Builds:

Sypha Belnades (CV)
Can choose to start with Ice Fang or Belnades' Spellbook. She starts with +40% Move Speed, +40% Duration, +10 Reroll, +10 Skip, and +10 Banish. Starts with an extra Arcana XIV - Jail of Crystal. Can find special pickups. Can get up to 5 Arcana.

One of the weaker of the Belnades' Spellbook characters despite being the namesake. Jail of Crystal isn't a strong Arcana and only benefits Ice Fang/Cocytus out of the Spellbooks. When playing her you should lean into the freezing build archetype and pick up weapons like Icebrand from the Librarian, Prism Lass/Time Warp, or Clock Lancet/Infinite Corridor. Pairing her with the Arcanas Crystal Cries or Out of Bounds is also highly recommended.

Builds:

Stanley Ironside (OG)
Starts with Homing Miss. Stanley starts with +100 Max Health, +1 Armor, and +20% Might. He gains 1 Armor per 10% Might. Can find Rapid Fires, Barriers, and Grenades from light sources.

Stanley is a powerful tank that can acquire an astonishing 14 Armor with Spinach and Torrona's Box, 19 Armor if you also grab the Armor passive. You can use that Armor to maximize Divine Bloodline's Armor bonus effect or just use it to not die. Homing Miss and Multistage Missiles will effectively clear the screen and beat stages with the proper stat investment.

Builds:

Vincent Dorin (CV)
Can choose to start with Iron Shield or Coat of Arms. He starts with +1 Armor, +20% Greed, +10 Banish. Every 48 Health of overhealing increases Greed by 1%. Greed is doubled while invulnerable. Starts with an extra Arcana XV - Disco of Gold. Can get up to 5 Arcana.

The scaling Greed can make Vincent a decent gold farming character, but since he requires significant investments into healing he isn't as effective at gold farming as the other Greed scaling character, Trouser. Weapons like Power of Sire, Sword Brothers, Sacred Beasts Tower Shield, and Parm Aegis can trigger invulnerability doubling Greed gains. Sarabande of Healing is highly recommended on this character as it synergizes extremely well with his passive. Greatest Jubilee can be used to spawn more light sources that will drop Coin Bags and Floor Chickens to further improve Vincent's Greed gains and Gold Fever triggers. Muramasa is a powerful weapon for Vincent due to its damage scaling with Greed.

Builds:

Lucia Zero (OG)
Starts with C-U-Laser. Lucia starts with +1 Recovery, +20% Move Speed, +1 Revivals, and +8 Rerolls. When she revives she gains +20 Max Health, +0.1 Recovery, + 0.2 Armor, +8% Move Speed, +4% Might, +4% Projectile Speed, +4% Duration, +4% Area, -3% Cooldown, +0.2 Amount, +0.2 Revival, +5% Luck, +5% Growth, and +1% Greed. Can find Rapid Fires, Barriers, and Grenades from light sources.

The revival bonus is small, but when paired with Awake you can gain a notable amount of extra stats across all areas. This can make her a powerful and hard to kill character. C-U Laser/Pronto Beam are great weapons, though require careful aiming. Although she gains bonuses from revives unlike characters like Luminaire and Cosmos, she is limited in how much she can utilize it.

Builds:
  • Cryo Blaster Lucia[mozzarellathicc.github.io] - Revive build that stacks stats through dying and freezes enemies
C Tier Characters - 1
C Tier characters generally don't do anything particularly special, but don't have notable downsides to playing them either. Characters in this tier that do have major downsides, have a benefit that is able to compensate for it. With nearly every character in C Tier, another character in a tier above can do what they do better.

Poppea Pecorina
Starts with Song of Mana. Poppea gains +1% Duration every level. There is no cap on this bonus. She also starts with +20% Movement Speed.

Poppea starts with one of the best base weapons, Song of Mana, which provides a lot of offensive and defensive power. Due to the uncapped nature of her Duration scaling, weapons like King Bible/Unholy Vespers and Santa Water/La Borra are really strong on her. She is one of the best non-DLC early game characters and can greatly assist with game progression.

Builds:

Amalaric Sniper (CV)
Starts with Arrow of Goth. He starts with +80% Move Speed and +100% Luck. Gains +1% Luck every level and can fly.

Has great mobility and Arrow of Goth is a great weapon to have at the start of the game, but may not reliably kill in the late stages. The Luck per level makes Amalaric Sniper a great character to use with critical hit builds.

Builds:
  • Crit Sniper[mozzarellathicc.github.io] - Uses Slash and high damage weapons

Juste Belmont (CV)
Can choose to start with Vibhuti Whip or Morning Star. He starts with +20% Move Speed, +20% Might, +20% Duration, +5 Reroll, +5 Skip, and +5 Banish. Can receive Belnades' Spellbook as 4th level up option until Level 7. Every 6 levels automatically levels up any equipped spell from the Belnades' Spellbook.

Juste’s passive allows him to quickly level up his weapons and reach a full build faster than most characters. Also due to his passive it is possible to have up to 11 weapons by level 7 if weapons are purchased from the Merchant/Librarian at game start. His base stats are average, without anything that might significantly benefit his build. Selecting Morning Star to get Alchemy Whip/Vampire Killer or Wind Whip/Spirit Tornado Tip will be much better than staying with Juste's starting weapon.

Builds:

Christine Davain
Starts with Pentagram. Christine starts with 1 extra level. She has -50 Max Health, -35% Might, -25% Cooldown, and +30% Move Speed bonus.

Pentagram can be hard to manage if you are not used to it. This character starts with an amazing -25% Cooldown, which is the highest flat amount of any non-scaling character. This allows her to use stronger weapons more often. When using Pentagram you want to turn it into Gorgeous Moon as soon as possible, so playing on stages with early evolution chests is important. Having access to an early Gorgeous Moon also makes this character a leveling maniac, which can quickly snowball builds through Limit Break. Her main downside is she is incredibly fragile at the start of the game and many bosses are immune to Pentagram/Gorgeous Moon's instant kill effect.

Builds:
  • Star Guardian Christine[mozzarellathicc.github.io] - Uses space themed weapons and Crystal Cries. Sarabande of Healing can be an alternate to Boogaloo of Illusions if you want to turn the healing into damage.
  • Level Breaker Christine[danmer.github.io] - Focused on spamming Gorgeous Moon to rapidly level.

Carmilla (CV)
Starts with a hidden Dominus Hatred. She starts with +100 Max Health, +1 Amor, +80% Move Speed, +20% Might, and +100% Greed. 15 second Charge ability affected by Curse: triggers all equipped Dominus weapons. Immune to health drain. Can fly.

Carmilla has great mobility and decent stats. Her Charge ability will work with Dominus Hatred, Dominus Agony, and the weapon effects within Power of Sire. Nightmare can be used to increase her Curse and easily allow her to reach the 3 second recharge cap for her Charge, however her Charge ability isn't that strong, so the impact is minimal.

Builds:
C Tier Characters - 2
Yoko Belnades (CV)
Can choose to start with Fulgur or Belnades' Spellbook. She starts with +40% Move Speed, +40% Projectile Speed, +50% Magnet, +10 Reroll, +10 Skip, +10 Banish. Starts with an extra Arcana III - Tragic Princess. Can get up to 5 Arcana.

Tragic Princess is a "tragic" Arcana to start with, however Yoko's high Move Speeds helps make it work well with the affected weapons. Fulgur/Tonitrus Tenebris and Keremet Bubbles/Keremet Morbus both benefit from Tragic Princess, allowing you to fire these otherwise underwhelming weapons more often.

Builds:

Toastie
Starts with Peachone. Toastie starts with -99 Max Health, +20% MoveSpeed, -10% Might, -10% Area, -50% Speed, -10% Duration, +10% Cooldown and +100% Luck. Additionally, Toastie gains +100% Luck by level 100, +9998 Max Health at level 100, and +65520 Armor at level 200.

One of the most difficult characters to survive early game, but if you can make it to level 100 and 200, you'll be greatly rewarded with massively increased health and armor and capable of tanking hits from the Reaper. The Divine Bloodline and Awake Arcana are essential when trying to survive. Due to their massive health and armor bonus, they are the best user of Divine Bloodline, being the only character capable of maximizing the flat Armor bonus of Divine Bloodline without Golden Eggs or Paranormal Scan. Finally, Toastie is the only character able to bypass the 50 Armor stat cap.

Builds:
  • Max Damage Toastie[danmer.github.io] - Highest damage build in the game
  • Max DB Toastie[danmer.github.io] - Build to help you survive, until you can thrive and dominate with your massive Health and Armor

Celia Fortner (CV)
Starts with Luminatio and Umbra. Obtains a Karma Coin every 2 levels.

Celia's two starting weapons are decent, but her biggest benefit is the Karma Coin every 2 levels. The positive action of Karma Coin is triggering a Soul Steal that destroys all enemies and turns them into little hearts. This chance is affected by Luck, which makes getting Wicked Seasons especially recommended for her since it will provide Growth and Luck. When you're able to level fast enough, this can cause Celia to have a constant wave of screen wipes.

Builds:

Concetta Caciotta
Starts with Shadow Pinion. Concetta gains +1% Area every level. There is no cap on this bonus. She also starts with +20% Movement Speed and +10% Curse.

She gets infinite area scaling, which can stack with Boogaloo of Illusions. Shadow Pinion is one of the most contentious weapons in the game. If you can handle the movement requirements of Shadow Pinion she can be a good character. Shadow Pinion can be a difficult weapon to use, at the start of a run you can move in a small circle without stopping to create a good defensive wall. It will sometimes be better to keep moving and not release projectiles if you are getting overwhelmed by enemies. To use offensively, run in a line and then stop in the direction the enemies have accumulated to release the projectiles.

Builds:

Maxim Kischine (CV)
Can choose to start with Discus or Coat of Arms. He starts with +40 Max Health, +80% Move Speed. Overhealing increases Projectile Speed by 1%. Might is greatly increased while Invulnerable, starting at +50% Might and scaling with baseline Might.

A really fast character with a great ability that increases Might while invulnerable, to include the invulnerability after getting hit. It is better to start with Iron Ball/Wrecking Ball, Wine Glass/Meal Ticket, Santa Water/La Borra, or King Bible/Unholy Vespers from Coat of Arms instead of Discus/Stellar Blade. Stellar Blade does gain critical hits while invulnerable, so it may still be worth picking later. Building healing and recovery items is necessary if you want to maximize the benefit of his Projectile Speed passive bonus. Greatest Jubilee can be a great weapon to pick up as it will allow for more food items for healing and Castlevania specific pickups for damage and utility.

Builds:
  • Jet Black Maxim[mozzarellathicc.github.io] - Uses weapons that heal, grant stats, and invulnerability
C Tier Characters - 3
Giovanna Grana
Starts with Gatti Ameri. Giovanna gains +1% Projectile Speed every level. There is no cap on this bonus. She also starts with +20% Movement Speed.

Gatti Amari can easily be the strongest base weapon in the game, but can be bad to start with. She gets infinite Projectile Speed that can allow her to fully utilize weapons like Runetracer/NO FUTURE to clear screens. Luck, Amount, and Duration greatly improves the effectiveness of Gatti Amari, while the Gemini Arcana can double its output. Luck is necessary to increase Gatti Amari's positive outcomes and prevent it from killing you. Avoid evolving Gatti Amari into Vicious Hunger unless you want to gold farm, the cats will deal much more damage. Also avoid pairing Gatti Amari with Divine Bloodline early in the game as that will increase its damage too much too fast and end up killing you.

Builds:

Sara Trantoul (CV)
Can choose to start with Star Flail or Belnades' Spellbook. She starts with +20% Move Speed, +40% Duration. Gains +0.02 Recovery every level. Once per life, triggers Firebreathing for every character after receiving fatal damage. Evolves the Alchemy Whip when reviving.

Has a Revival based passive, but does not start with extra lives. Her Recovery per level is too small to matter significantly, although it does increase the damage of Star Flail/Moon Rod.

Builds:

Isaac (CV)
Can choose to start with Trident, Spectral Sword, or Ebony Diabologue. He starts with +20% Projectile Speed, +20% Area, +25% Magnet, +20 Reroll, +20 Skip, +20 Banish. Gains a random Familiar as a follower every 10 levels (max 6).

Generally a worse version of Hector. Issac gets fewer Familiars and cannot choose them, so he is unable to stack Pumpkin Familiars without extreme luck. For weapons you should avoid Trident/Gungnir-Souris and instead choose a better weapon from the weapon selectors instead.

Builds:
  • Jet Black Isaac[mozzarellathicc.github.io] - Uses healing and self-damaging to deal damage

Eric Lecarde (CV)
Can choose to start with Alucard Spear, Spectral Sword, or Coat of Arms. He starts with +20% Move Speed, +20% Might, +20% Projectile Speed, +20% Area, -5% Cooldown. Becomes invincible and deals damage to nearby enemies for 20 seconds when health reaches a critically low level.

Has a great selection of weapons to choose from such as Alucard Spear/Thunderbolt Spear, Mace/Stamazza, Iron Ball/Wrecking Ball, Wine Glass/Meal Ticket, and Santa Water/La Borra. If using Eric's default Alucard Spear you will need to constantly keep moving left and right to trigger its special attack. Eric provides well rounded stats and an great defensive passive that makes him hard to kill.

Builds:

Sonia Belmont (CV)
Can choose to start with Sonic Whip or Morning Star. She starts with +40% Move Speed and +10% Luck. Gains -30% Cooldown for 10 seconds when overhealing by +8. Can find special pickups.

To take advantage of the -30% Cooldown boost you will need to pick up items like Lifesign Scan/Paranormal Scan or Bloody Tear/Fuwalafuwaloo that are able to reach that health threshold. Selecting Morning Star to get Alchemy Whip/Vampire Killer or Wind Whip/Spirit Tornado Tip will be a bit better than staying with Sonia's starting weapon.

Builds:
  • Curse Killer Sonia[mozzarellathicc.github.io] - Uses Curse to increase damage of weapons and healing to trigger Sonia's passive
C Tier Characters - 4
Minnah Mannarah
Starts with Bloody Tear. Minnah starts with +50 Max Health, 0.5 Recovery, and -70% Might. She gains +10% Might every three levels until 24, negating the Might malus. Her stats change every minute similar to some Arcanas. Might, Projectile Speed, Duration, Area, and Cooldown are on a cycle; when Duration, Area, and Cooldown are multiplied by 2, Might and Projectile Speed are divided by 2, and vice versa.

She can obtain Fuwalafuwaloo without spending a passive on Hollow Heart since she already has Bloody Tear. Passive stat changes can create two distinct "modes" that you can play around with for great results:
- Big Area, long Duration and Cooldown, slow Projectile Speed, and weaker.
- Small Area, low Duration and Cooldown, fast Projectile Speed, and stronger.

Minnah's weapon gives her incredible sustain and makes her really hard to kill early game, even with her large -70% Might malus at game start.

Builds:

Axe Armor (CV)
Starts with Axe. Axe Armor starts with +10 Max Health, +10% Might, +10% Move Speed, and +10% Curse. They gain another 5% Might, 5% Move Speed and 5% Curse every 10 levels, for a max increase of +20% or +30% in total. They gain an additional hidden Axe every 10 levels, up to a max of 6.

An objectively better version of Lama Ladonna. When playing Axe Armor you can on all in on the Axe theme by getting the Iron Blue Will and Slash Arcana. Beginning will also give all your hidden Axes +3 Amount which can be at a big boost at the start of the game, though other Arcana like Boogaloo of Illusions or Sapphire Mist would scale better long term. Death Spiral will quickly make the hidden Axes not matter as much in the middle and late stages of the game.

Builds:

Iguana Gallo Valletto
Starts with Clock Lancet. Gallo starts with 1 extra level. They have +15% Duration, -15% Cooldown, -50% Greed, +3 Reroll, and +3 Skip. Gains 10% Growth every 5 levels, up to 50%

Growth and Cooldown Reduction are some of the best stats to have, which makes Gallo a decent character to play. Starting with Clock Lancet means easy access to getting Infinite Corridor and making freeze based builds. Works well with the Out of Bounds and Crystal Cries Arcana.

Builds:

Loretta & Stella Lecarde (CV)
Loretta (main) starts with Cocytus. Stella (second) starts with Pneuma Tempestas. They start with +1 Armor, +20% Move Speed, and +100% Greed.

This character has the Co-op mechanic included. The two characters alternate level up choices and are able to share passive items for the purposes of weapon evolutions. The second character will follow behind the main. In total you'll be able to obtain 12 weapons and 12 passive items before hitting the soft caps. The stats on this character don't provide much benefit. When used with Gemini their starting weapons are able to immediately fill and damage much of the screen.

**Bug: Weapon evolutions favor the second character.

Builds:
  • See the individual builds for Loretta and Stella

Stella & Loretta Lecarde (CV)
Stella (main) starts with Pneuma Tempestas. Loretta (second) starts with Cocytus. They start with +1 Armor, +20% Move Speed, and +100% Greed.

This character has the Co-op mechanic included. The two characters alternate level up choices and are able to share passive items for the purposes of weapon evolutions. The second character will follow behind the main. In total you'll be able to obtain 12 weapons and 12 passive items before hitting the soft caps. When used with Gemini their starting weapons are able to immediately fill and damage much of the screen.

**Bug: Weapon evolutions favor the second character.

Builds:
  • See the individual builds for Loretta and Stella
C Tier Characters - 5
Trevor Belmont (CV)
Can choose to start with Dragon Water Whip or Morning Star. He starts with 20% Move Speed. He gains +1 Amount every 10 levels up to +3. Starts with an extra Arcana X - Beginning. Can find special pickups. Can get up to 5 Arcana.

The Beginning Arcana is good for the early game, but will matter less as the game progresses. Dragon Water Whip can be a decent weapon, but selecting Morning Star to get Alchemy Whip/Vampire Killer or Wind Whip/Spirit Tornado Tip will be a bit better.

Builds:

Brad Fang (OG)
Starts with Firearm. Brad starts with +100 Max Health and +20% Might. Brad gains up to -50% Cooldown, +10% Move Speed, and +10% Projectile Speed based on the missing percentage of Max Health scaling linearly. Can find Rapid Fires, Barriers, and Grenades from light sources. Starts with Firearm which evolves into Fire-L3GS.

The large amount of Cooldown he gets from missing health makes him really good with Divine Bloodline. His starting weapon isn't that great, but his stats can make up for it. Works well with Heart of Fire builds.

Builds:
  • Flame DB Brad[mozzarellathicc.github.io] - Stacks health and fills the screen with fire. Avoid healing too much to maximize Brad's passive.

Big Trouser
Starts with Candybox. Trouser gains +1% Greed every level. There is no cap on this bonus. He also has longer Gold Fevers by multiplying its duration cap and duration extension from Gold pickups by 1.5.

One of the most talked about characters. For gold farming he is S Tier, but for this Tier List that measures damage and survivability, making money doesn't help him live, especially without Golden Eggs. Since he starts with any weapon he wants, his build potential is a blank canvas. He can do any build, but he usually won't be the best character for that build. His scaling Greed works well with Muramasa and builds that use Disco of Gold.

Check out the "Gold Farm" section of this guide for more information on how to use Trouser for gold farming.

Builds:
  • Tier Chaser Trouser[mozzarellathicc.github.io] - Build that uses many overpowered weapons
  • Greed King Trouser[mozzarellathicc.github.io] - Greed scaling build that deals massive damage with Muramasa and Wandering the Jet Black
  • Princess Trouser[danmer.github.io] - No DLC

Mortaccio
Starts with Bone. Mortaccio gains +1 Amount every 20 levels until level 60 for a total of +3 Amount. Mortaccio automatically evolves Bone when they reach level 80, assuming you collected the Chaos Malachite, and gains +2 Armor, +1 Amount, and +100 Max Health.

One of a group of projectile characters that gain +1 Amount every 20 levels. Was once widely considered one of the best characters before Limit Break and other powercreep was added to the game. Mortaccio is still a solid choice for most runs, but falls behind other more powerful characters. Amount is a great stat to have and can benefit many different builds. Getting Anima of Mortaccio at level 80 turns a relatively average character into a strong one.

Builds:

O'Sole Meeo
Starts with Celestial Dusting. O'Sole gains +1 Amount every 20 levels until level 60 for a total of +3 Amount. O'Sole automatically evolves Celestial Dusting when they reach level 80, after you have obtained the Chaos Altemanna, and gains +2 Armor, +1 Amount, and +100 Max Health.

One of a group of projectile characters that gain +1 Amount every 20 levels up to +3. Amount is a great stat to have and can benefit many different builds. Getting Profusione D'Amore at level 80 turns a relatively average character into a strong one.

Builds:
C Tier Characters - 6
Yatta Cavallo
Starts with Cherry Bomb. Yatta Cavallo gains +1 Amount every 20 levels until level 60 for a total of +3 Amount. Yatta Cavallo automatically evolves Cherry Bomb when they reach level 80, after you have obtained the Chaos Rosalia, and gains +2 Armor, +1 Amount, and +100 Max Health.

One of a group of projectile characters that gain +1 Amount every 20 levels up to +3. Amount is a great stat to have and can benefit many different builds. Getting Yatta Daikarin at level 80 turns a relatively average character into a strong one.

Builds:

Gyorunton
Starts with Bracelet. Gyorunton starts with +200 Max Health, +30% Might, and +2 Revival. They gain +1% Curse every level, without cap. Additionally, they can find weapon evolutions in any chests.

They have really good starting stats, but start with Bracelet, one of the worst weapons. Bracelet’s evolution, Tri-Bracelet, can be really good when paired with Arcana like Sapphire Mist, Heart of Fire, and Twilight Requiem. The biggest benefit of Gyorunton is that they can find weapon evolutions in any chest. This can allow them to evolve weapons, like their starting weapon, really fast and on any stage. Due to the scaling Curse per level, and eventually gaining Tri-Bracelet, picking the Twilight Requiem Arcana is highly recommended.

Builds:

Unblinded Imelda Belpaese
Starts with Magic Wand. Unblinded Imelda starts with a level 5 Empty Tome, +40% Projectile Speed, +40% Move Speed, and -10% Cooldown. She also gains +10% Growth every 5 levels until level 15.

Unlocked by completing the Adventure World of Light and Dark, this alternate skin of Imelda is stronger, providing an immediate -55% Cooldown when starting a game. She also moves and shoots faster than her base form. The large Cooldown reduction she starts with can allow her to snowball faster than many other characters.

Builds:

Frozenshade (CV)
Starts with Icebrand. She starts with +2 Armor, +20% Move Speed. Collecting Wall and Floor Chicken at max Health will cause Frozenshade to activate Sorbetto, an ice breath that acts similar to Nduja Fritta Tanto.

Icebrand is a great starting weapon that can provide good damage and great protection. Sorbetto's effect doesn't scale with Might, but is affected by other stats and can be useful early in the game.

Builds:

Loretta Lecarde (CV)
Starts with Cocytus. She starts with +1 Armor, +20% Move Speed, and +100% Greed.

Has simple stats and Cocytus can be a decent weapon to start with. Picking up Gemini will double its coverage, but it is still recommend to pick up additional weapons that can attack vertically.

Builds:
C Tier Characters - 7
Quincy Morris (CV)
Can choose to start with Shuriken or Coat of Arms. He starts with +20% Move Speed, +4 Revival. Charge ability affected by Might: Attempts to safely detonate a Neutron Bomb.

His Charge ability activates a Neutron Bomb. The Charge speed scales with Might and can drop down to 37 seconds with Spinach and Torrona's Box. During the early stages of the game try to get the Charge ability off as often as possible. It is better to get Iron Ball/Wrecking Ball, Wine Glass/Meal Ticket, Santa Water/La Borra, or King Bible/Unholy Vespers from Coat of Arms than to stay with Quincy's default Shuriken/Yagyu Shuriken. His high number of starting Revivals makes him a great user of the Awake Arcana.

Builds:
  • Revival Quincy[mozzarellathicc.github.io] - Uses Awake to boost stats when killed and revived.

Lance Bean (OG)
Lance starts with +50 Max Health, +20% Projectile Speed, +4 Skips, and +4 Banishes. Lance gains 2.5% Projectile Speed and -1% Cooldown per kill threshold. Around 18K kills Projectile Speed hits the 50% cap and Cooldown will be at -20%. At 54.5K kills he will hit the -25% Cooldown cap. Can find Rapid Fires, Barriers, and Grenades from light sources. Starts with Short Gun which evolves into Prototype B,

Like Bill, he gets a lot of Projectile Speed, but also gets the valuable Cooldown stat. His starting weapon isn't that great due to the horizontal facing targeting mechanic. You should try to get other better weapons when playing as Lance, or pick up an early Heart of Fire to survive.

Builds:
  • Combat Arms Lance[mozzarellathicc.github.io] - Mixed weapon build that bounces and crits

Boon Marrabbio
Starts with Thousand Edge. Marrabbio starts with +20 Max Health, +30% Move Speed, +20% Might, -80% Greed, +10% Curse, and most notably, -110% Projectile Speed.

Has an interesting mechanic of firing projectiles backwards until you invest in Projectile Speed. The backwards firing only works when you have both the Projectile Speed and Omni Power Ups disabled, otherwise he just throws slow projectiles. Disabling Omni is not recommended, so this turns him into a character with a strong starting weapon that fires slowly.

Builds:

Keitha Muort (TF)
Starts with Flash Arrow. Keitha starts with +40% Move Speed, +20% Speed, -10% Cooldown, +10% Luck, and +10% Curse. She gains +1% Luck every level. Upon reaching level 30, an Academy Badge will spawn underneath her.

Flash Arrow is a terrible starting weapon on its own. You will want to grab Iron Blue Will immediately and focus on evolving Flash Arrow into Millionaire, an extremely powerful weapon that scales with gold collected. Defensive weapons like Santa Water/La Borra, King Bible/Unholy Vespers, Iron Shield/Dark Iron Shield, Sword Brothers, and 108 Bocce (scales with Luck) are strong second weapon choices to compensate for Flash Arrow. If you can overcome the Flash Arrow weakness she has decent starting stats and with scaling Luck can go for critical hit builds. Disco of Gold is also a great Arcana to pick up as it provides healing and a source of gold for triggering Millionaire's special.

Builds:

Henry (CV)
Can choose to start with Silver Revolver or Coat of Arms. He starts with +2 Armor, +20% Move Speed. Gains a bonus up to +100% Area and +100% Luck depending on how many enemies are in sight.

Henry on average provides ~50% Area and ~50% Luck during the first few waves of the game. Selecting Iron Ball/Wrecking Ball, Wine Glass/Meal Ticket, Santa Water/La Borra, or King Bible/Unholy Vespers from Coat of Arms will give Henry a much better start than sticking with Silver Revolver/Jewel Gun.

Builds:
C Tier Characters - 8
Simon Belmont (CV)
Can choose to start with Wind Whip or Morning Star. He starts with +20 Max Health, +1 Armor, +1 Revival, and +5 Reroll. Growth can occasionally affect Might (1% Growth = 1% Might) and Armor (23% Growth = 1 Armor). Can find special pickups.

Randomly during a game, Simon will boost his Might and/or Armor based off his Growth. Wind Whip/Spirit Tornado is one of the best whip weapons to have. Picking up Wicked Seasons and Crown is recommended to make the most out of his passive ability.

Builds:
  • Crystal Cries Simon[mozzarellathicc.github.io] - Freeze build that boosts stats using Crystal Cries

Christopher Belmont (CV)
Can choose to start with Jet Black Whip or Morning Star. He starts with +20 Max Health, +1 Armor, +1 Revival, and +5 Banish. Greed can occasionally affect Might (1% Greed = 1% Might) and Armor (23% Greed = 1 Armor). Can find special pickups.

Randomly during a game, Christopher will boost his Might and/or Armor based off his Greed. It is much better to start with Alchemy Whip/Vampire Killer or Wind Whip/Spirit Tornado Tip over Christopher's Jet Black Whip/Mormegil Tip. Picking up Wicked Seasons or even Stone Mask is recommended to make the most out of his passive ability.

Builds:

Retired Poe Ratcho
Starts with Garlic. Retired Poe starts with a level 5 Pummarola, +40 Max Health, +5 Recovery, and +25% Magnet.

Unlocked by completing the Adventure A Garlic Paradise, this alternate skin of Poe is much stronger, providing the highest base Recovery stat in game with a total Recovery of 6.5. Overall, given his starting weapon is Garlic/Soul Eater, he is still limited in how well he can perform, but now he can make great use of high healing builds that use Sarabande of Healing and Wandering the Jet Black Arcana.

Builds:

Suor Clerici
Starts with Santa Water. Clerici starts with +0.5 Recovery and +50 Max Health. Additionally, Clerici has +400% Area, however, the Area bonus depreciates by 100% each level, until the bonus is entirely gone at level 5.

Santa Water is an amazing starting weapon. Clerici also gets a massive Area boost at levels 1-4. This makes her the best user of the Game Killer Arcana, while also providing a massive boost to her damage and survivability at the start in regular games. When playing as her, try not to collect any experience gems for as long as possible to make the most out of her early level passive bonus.

Builds:
  • Twilight Princess Clerici[danmer.github.io] - Non-DLC build that increases damage by moving and gaining Curse

  • Game Killer Clerici[mozzarellathicc.github.io] - Uses Librarian weapons that benefit from Area to maximize use of Game Killer

Stella Lecarde (CV)
Starts with Pneuma Tempestas. She starts with +1 Armor, +20% Move Speed, and +100% Greed.

Has simple stats and her starting weapon Pneuma Tempestas can only attack the top part of the screen. Picking up Gemini will double its coverage, but it is still recommend to pick up additional weapons that can attack horizontally.

Builds:
  • Twilight Stella[mozzarellathicc.github.io] - Uses strong weapons that get damage boosts from the Curse-scaling Twilight Requiem.
  • Gemini Stella[mozzarellathicc.github.io] - Spellbook focused build.
C Tier Characters - 9
Guardian Pina (EM)
Starts with Clear Debris. Guardian starts with +0.1 Recovery, +1 Armor, +20% Movement Speed, and +1 Revival. Guardian provides +1 Armor and +0.1 Recovery to nearby characters. They can walk through walls. Guardian has a 50% chance to gain +1 Revival when anyone revives.

Clear Debris is a weak and unreliable starting weapon on its own. You will want to focus on evolving Clear Debris into Clear Asteroid as soon as possible. Clear Asteroid is a powerful evolution that can deal extremely high damage across the entire screen. Due to Guardian's Revival passive, the Awake Arcana benefits them significantly. When Awake is paired with other sources of Revivals, Guardian Pina's stat gains from Awake can match those of Luminaire with Awake. Guardian's Revival passive is enhanced even further in multiplayer.

Builds:
  • Revival Energy Guardian[mozzarellathicc.github.io] - Acquires a lot of revives to intentionally die with. Watch the number of revives you have left when dying to not accidentally use them all.

Soleil Belmont (CV)
Starts with Jet Black Whip, Vibhuti Whip, Vanitas Whip, and has hidden copies of all 3. He starts with +20 Max Health, +1 Armor, and +1 Revival.

Soleil starts with a whopping total of 6 whips. Even if these specific whip weapons aren't that good, there is strength in numbers. Unfortunately, what starts out great, turns bad when you realize you are now stuck with 3 weak whips, each with unimpressive evolutions.

Builds:
  • Crit Soleil[mozzarellathicc.github.io] - Slash based build

Porta Ladonna
Starts with Lightning Ring. Porta starts with +30% Area. Additionally, Porta starts with -90% Cooldown bonus, which decreases by 30% on every level up until negated upon reaching level 4.

Lightning Ring is a decent starting weapon and works great with her passive. At level 1 she starts with a capped Cooldown of -90%, making her the best user of Game Killer. The Librarian weapon Sword Brother gives her permanent invincibility at level 1 and with Game Killer. If not going for Game Killer, make sure to grab other weapons that can make up for the weak defenses of Lightning Ring. When playing as her, try not to collect any experience gems for as long as possible to make the most out of her early level passive bonus.

Builds:

Grant Dynasty (CV)
Can choose to start with Curved Knife or Coat of Arms. He starts with +60% Move Speed, +40% Luck. Triggers any equipped Curved Knife, Bwaka Knife, Knife, and Thousand Edge in retaliation or when overhealing by +8. Can find special pickups.

The knife weapons aren't that good even with his passive ability, so making a build with both of them at the start can be a bit difficult until you start stacking stats like Amount and Projectile Speed. Grant gets access to Coat of Arms so selecting Iron Ball/Wrecking Ball, Wine Glass/Meal Ticket, Santa Water/La Borra, or King Bible/Unholy Vespers are better options, while Knife/Thousand Edge and Curved Knife/Bwaka Knife can be obtained later. Having Lifesign Scan/Paranormal Scan or Bloody Tear/Fuwalafuwaloo will allow Grant to quickly trigger his overhealing ability, multiplying the output of the knife weapons.

Builds:
  • DB Crit Grant[mozzarellathicc.github.io] - Scales Max Health to increase damage while dealing critical hits with Slash.

Sir Ambrojoe
Starts with La Robba. Ambrojoe starts with +20% Luck, +20% Greed, +20% Magnet, and +10 Amount, but loses 2 Amount every level until level 6, in which the Amount bonus is reduced to 0. He then gains +1 Amount every 20 levels until level 60.

One of a group of projectile characters that gain +1 Amount every 20 levels up to +3. Has one of the best late game starting weapons of the projectile characters group due to the defensive potential and high damage of the falling furniture from La Robba. Since he starts with +10 Amount at level 1, he is a great user of Game Killer. When playing as him, try not to collect any experience gems for as long as possible to make the most out of her early level passive bonus.

Builds:
C Tier Characters - 10
Divano Thelma
Starts with Laurel. Divano starts with 1 extra level. They have +1 Recovery, +30% Luck, -50% Greed, and +6 Banish. Gains +1 Armor every 5 levels up to +5 Armor total.

Pretty decent defensive character that starts with Laurel. With his Armor, Divano makes good use of Divine Bloodline, especially since Laurel's evolution, Crimson Shroud, makes good use of it.

Builds:

Familiar (CV)
Can choose to start with Refectio, Raging Fire, Fulgur, Ice Fang, or Rock Riot. They start with +20% Move Speed and get +1 Amount every 20 levels (max +3). The chosen weapon determines which familiar you play as.

One of a group of characters that gain +1 Amount every 20 levels up to +3. Refectio/Sanctuary and Ice Fang/Cocytus are the better weapons to start with. Rock Riot/Gemma Torpor can deal a massive amount of damage, but isn't good to start with.

Builds:
  • Twilight Faerie[mozzarellathicc.github.io] - Pick Faerie/Refectio and stack Curse through Wicked Season and items
  • Flame Cardinal[mozzarellathicc.github.io] - Pick Sacred Cardinal/Raging Fire, Gemini and Heart of Fire focused build

Shapeshifter Nino (EM)
Starts with Just Vent. Shapeshifter starts with +1 Recovery and +10% Movement Speed. Shapeshifter also leaves behind collectable body parts when damaged, which can heal them for 10-20 Health. Shapeshifting gives Shapeshifter Nino +1 Max Health.

Has a unique passive where he can self-heal from excess body parts and change forms. Some of the forms also do area damage. Just Vent is a terrible starting weapon by itself, but Shapeshifter can generally survive past it thanks to its strong early game passive. The effectiveness of the parts collecting passive greatly diminishes as the run progresses. The dropped body parts also act like Floor Chicken for a nice synergy with Gatti Amari.

Builds:
  • DB Slash Shapeshifter[mozzarellathicc.github.io] - Maximizes health and stats to deal damage. Picking Dominus Agony early will allow for more body part generation.
  • Shapeshifting Cats[danmer.github.io] - Uses Gatti Amari to get a large boost from dropped body parts

Bat Robbert
Starts with Pako Battiliar. Bat Robbert starts with 0.5 Recovery, +1 Armor and +20% Move Speed. He gains +16 Max Health and heals for 30% Max Health when his health drops below 20%.

He is a tanky character that can be difficult to kill, but Pako Battiliar/Mazo Familiar are only useful with Divine Bloodline. His passive healing can help save him and recharges when he fully heals. Divine Bloodline is recommended to make his starting weapon good and provide Robbert with a huge amount of Max Health.

Builds:
  • DB Robbert[danmer.github.io] - Non-DLC build that boosts Max Health to deal damage.

McCoy-Oni (LM)
Starts with 108 Bocce. McCoy-Oni starts with +8 Max Health, +1 Armor, and +20% Growth. His Area temporarily increases by +150% every second.

His fluctuating Area can provide a big boost to nearly all weapons. 108 Bocce, isn't that strong of a weapon, but does provide a nice protective zone around McCoy-Oni.

Builds:
D Tier Characters - 1
These characters are not necessarily bad, but fall behind many of the characters above them for one reason or another. The main reason is having a weak starting weapon or underwhelming passives. Like C Tier characters, they are outclassed by characters in the tiers above.

Bill Rizer (OG)
Starts with Long Gun. Bill starts with +50 Max Health, +20% Projectile Speed, +4 Skips, and +4 Banishes. Bill gains 2.5% Projectile Speed and 1% Might per kill threshold. Around 25K kills Projectile Speed hits the 50% cap and Might will be at +20%. At around 250K kills he has +30% Might. 400K kills he has +32% Might. Might increases slowly afterwards as the kill thresholds get larger. Can find Rapid Fires, Barriers, and Grenades from light sources.

The Operation Guns DLC's version of a base character. Bill gets a lot of Projectile Speed while getting a small amount of Might as he kills more enemies. His starting weapon isn't that great, so you will either want to evolve it quickly or make sure to get better weapons for your build.

Builds:

Engineer Gino (EM)
Starts with Lucky Swipe. Engineer starts with +20% Move Speed, +20 Reroll, +20 Skip, and +20 Banish. Engineer can choose an extra passive item at levels 2, 12 and 22.

Lucky Swipe can deal decent damage, but is awkward to use. Their passive ability and stats can greatly help with targeting specific builds. To maximize the benefit of their passive, get Lucky Swipe to at least level 2, pick up the Mini Engineer, and try to fill out your Passive Item pool before level 12 so you get 1 extra item in total by the time you evolve your weapon into Crossed Wires.

Builds:

Browny (OG)
Starts with Sonic Bloom. Browny starts with +40 Max Health, +1 Amor, +40% Move Speed, and +20% Luck. Gains 2% Area per -1% Cooldown, up to +100% additional Area. They can find Average Explosive Cars props, which deal 60 base damage to a large area around when hit. Can find Rapid Fires, Barriers, and Grenades from light sources.

Browny will struggle in the early game due to how slow and ineffective Sonic Bloom is. While playing Browny you want to go for Cooldown as soon as possible and make use of the exploding cars to survive. It is not recommended to use Sonic Bloom in a solo weapon build while playing harder game modes like Inverse and Hurry. The Cooldown to Area conversion can benefit a lot of builds as both Cooldown and Area are highly valuable stats.

Builds:

Arca Ladonna
Starts with Fire Wand. Arca starts with 10% Might. She also gains -5% Cooldown every 10 levels until level 30, for a total of -15% Cooldown.

Cooldown reduction is a powerful stat to have, although Fire Wand is a really weak weapon without Heart of Fire or other supporting weapons. If you want a character with Cooldown reduction there are usually better choices that aren't stuck with a bad weapon. Still, Arca can be a good character when new to the game.

Builds:

Ariana (OG)
Starts with Spread Shot. Ariana starts with +20% Move Speed, +20% Projectile Speed, and +10% Growth. Gains 1 Armor per 10% Move Speed. Can find Rapid Fires, Barriers, and Grenades from light sources.

Unlike Bill and Lance, Ariana does not get stats with levels and Move Speed isn't a desirable stat to chase after. Her advantage is that she has a decently good base weapon.

Builds:
  • Icy Hot Ariana[mozzarellathicc.github.io] - Exploding fire and ice build
D Tier Characters - 2
Ferryman (CV)
Can fly and has a hidden Acquazzone (similar to the Drowner) that damages everything below them.

Acquazzone deals 10 base damage with a base 5 second cooldown. Acquazzone can be strong at the start, but will no longer be relevant for killing enemies after the first 10 minutes of a typical stage. Since Ferryman doesn't start with a weapon, your initial weapon choices are important for the middle and later stages of the game. Picking a weapon that can target the top of the screen like Dark Rift, which can be purchased from the Librarian, would be recommended to provide coverage.

Builds:

Gennaro Belpaese
Starts with Knife. Gennaro starts with +20 Max Health and +1 Amount.

A great character when you are new to the game due to the strong +1 Amount bonus. He becomes less relevant once you have additional sources of Amount and due to other more powerful characters. His starting weapon, Knife, is also not good and is carried due to his passive.

Builds:

Antonio Belpaese
Everyone's first character.

Starts with Whip. Antonio starts with +20 Max Health and +1 Armor. He gains +10% Might every 10 levels until level 50, for a total of +50% Might.

Basic early game character. Whip is an okay starting weapon that is easy to use. Acts as a baseline for most other characters.

Builds:

Peppino
The "Don't Move Challenge" character.

Starts with Soul Eater. Peppino starts with +20 Max Health, +2 Armor, -60% Area, +100% Magnet, and most notably, -100% Move Speed. It gains an additional +10% Area on levels 2, 3, 5, 8, 13, and 21.

Soul Eater is an underwhelming evolved weapon, but still a strong starting weapon. Can move with Power Up Speed, and the Wings passive item. Notably starts with 100% additional Magnet, which it will definitely use. Due to its Magnet and starting with Soul Eater, Blood Astronomia can be a Peppino. Mad Groove is very necessary if you want stage items.

Builds:

Krochi Freetto
Starts with Cross. Krochi starts with +1 Revival and +30% Move Speed. He gains another Revival at level 33.

Cross is an okay starting weapon to have. Revives may help in the early game, but generally Revives are not that useful to have. This character pairs well with Awake Arcana.

Builds:
D Tier Characters - 3
Imelda Belpaese
Starts with Magic Wand. Imelda gains +10% Growth every 5 levels until level 15, for a total of +30% Growth.

One of the few characters with passive Growth. Her Growth isn't much, but it is still a good stat to have. Magic Wand/Holy Wand are really weak weapons without Jail of Crystal and Waltz of Pearls or stronger supporting weapons. Imelda can be a decent character when starting on, but falls behind on more difficult game modes and stages.

Builds:

Dommario
Starts with King Bible. Dommario has permanent +40% Projectile Speed and +40% Duration, at the cost of -40% Move Speed.

King Bible is a good defensive starting weapon. Dommario’s low Move Speed can cause issues at the start when your killing power is low. Projectile Speed and Duration are good starting stats for King Bible, but don't have a big impact on most other weapons.

Builds:

Pasqualina Belpaese
Starts with Runetracer. Pasqualina starts with +10% Projectile Speed. Additionally, she gains +10% Projectile Speed every 5 levels until level 15, for a total of +40 Projectile Speed for this character.

She has a decent starting weapon with Runetracer. Her weapon works best in levels that have close walls like Inlaid Library or Gallo Tower. The added projectile speed also helps increase the range coverage of weapons like Runetracer/NO FUTURE and other bouncing weapons.

Builds:

Lama Ladonna
Starts with Axe. Lama starts with +10 Max Health, +10% Might, +10% Move Speed, and +10% Curse. She gains another 5% Might, 5% Move Speed and 5% Curse every 10 levels, for a max increase of +20% or +30% in total.

Axe is a high damage weapon, but due to its projectile angle, can often leave the character exposed to damage. Lama’s starting Curse along with Axe can make the early game difficult. Once you obtain Death Spiral and get a good build going, her Curse will start to help her more than it hurts.

Builds:

Gav'Et-Oni (LM)
Starts with Mille Bolle Blue. Gav'Et-Oni gains +1 Amount every 20 levels until level 80, up to +4 Amount total. They also start with +20% Movement Speed.

One of a group of projectile characters that gain +1 Amount every 20 levels up to +4. Mille Bolle Blue/Boo Roo Boolle are not good weapons, but can be used defensively. Amount is a great stat to have and can benefit many different builds, but it is usually better to pick a similar character in the tiers above.

Builds:

Innocent Devil (CV)
Can choose to start with Svarog Statue, Trident, Summon Spirit, Garlic, Fire Wand + Lightning Ring + Magic Wand, or Curved Knife + Troll Bomb. They start with +20% Move Speed and gets +1 Amount every 20 levels (max +3). The chosen weapon(s) determine which familiar you play as.

One of a group of projectile characters that gain +1 Amount every 20 levels up to +3. Weapon options are generally weaker weapons, available from a vendor, or provide unwanted combinations, which is why Innocent Devil is ranked this low.

Builds:
  • Gemini Alleged Ghost[mozzarellathicc.github.io] - Pick Alleged Ghost/Summon Spirit, uses Gemini and glyph weapons
D Tier Characters - 4
Poe Ratcho
Starts with Garlic. Poe starts with -30 Max Health and +25% Magnet.

Poe is a meme within the Vampire Survivors community. He is an okay beginner character, but his low health can make him vulnerable should enemies get past Garlic. Garlic, while good at the start of the game, often ends up being a dead weapon by the middle and end of runs. Soul Eater is also not a good evolution and requires wasting a passive slot on Pummarola to evolve. In terms of stats he is a worse version of Peppino that can move.

Builds:

Rottin'Ghoul (TF)
Starts with Party Popper. Rottin'Ghoul gains +1 Amount every 20 levels until level 80, up to +4 Amount total. They also start with +20% Movement Speed.

One of a group of projectile characters that gain +1 Amount every 20 levels up to +4. Their starting weapon is really bad. If you want their passive bonuses, pick someone else.

Builds:

Horse (EM)
Starts with Hats. Horse gains +1 Amount every 20 levels until level 80, up to +4 Amount total. They also start with +20% Movement Speed.

One of a group of projectile characters that gain +1 Amount every 20 levels up to +4. Hats is a bad starting weapon that also scales in damage poorly. If you want their passive bonuses, pick someone else.

Builds:

Bianca Ramba
Starts with Carréllo. Ramba gains +1 Amount every 20 levels until level 60, for a total of +3 Amount.

One of a group of projectile characters that gain +1 Amount every 20 levels up to +3. Starting weapon can deal high damage, but has a very narrow attack zone and is overall not a good weapon. Amount is a great stat to have and can benefit many different builds, but it is usually better to pick a similar character in the tiers above.

Builds:

Cave Troll (CV)
Starts with Troll Bomb. Gets +1 Amount every 20 levels (max +4).

One of a group of projectile characters that gain +1 Amount every 20 levels up to +4. It is impossible to kill anything or survive long enough for Troll Bomb to go off at level one. Buy additional weapons off of the Merchant and the Librarian at the start of the game to ensure Cave Troll survives. Once Troll Bomb is leveled up and Cooldown reduction is obtained it becomes an extremely powerful weapon that can fully clear the screen and kill bosses in seconds. The +4 Amount is also very powerful for both Troll Bomb and other weapons. Cave Troll's access to Troll Bomb isn't special, since every character can purchase it from the Librarian at the start of the game.

Builds:
  • Ice Bomb Troll[mozzarellathicc.github.io] - Focuses on using Crystal Cries while waiting until Troll Bomb can be leveled and Limit Broken
F Tier Characters
Reserved for the worst characters.

Exdash Exiviiq
Starts with Ebony Wings. Exdash starts with -23 Max Health, -10% MoveSpeed, -10% Might, -10% Area, -50% Projectile Speed, -10% Duration, +10% Cooldown and +100% Luck.

Exdash has low stats and a weak weapon. Objectively the worst non-DLC character in the game outside of a badly rolled missingN▯. Still even a terrible character in the game can play and beat all levels with the right builds and weapons. Outside of a challenge there is little reason to use Exdash.

Builds:

Fleaman (CV)
The ultimate challenge character.

Starts with 1 Max Health and +100% Move Speed. Starts with an extra Arcana 0 - Game Killer and spawns a single experience gem at the start of the game. Can get up to 5 Arcana.

Fleaman is an extremely difficult character to play and easily the worst character in the game. He starts with no weapons and is forced to play with Game Killer while only having 1 Max Health. It is necessary to use a combination of Awake, Crystal Cries, and/or Divine Bloodline as soon as possible to survive. Buy additional weapons off of the Merchant and Librarian at the start of the game to get weapons. Icebrand and Crystal Cries are an extremely good combination for Fleaman, providing a source of Health, while the Growth will increase the game of Game Killer. Sword Brothers is another strong weapon to have on Fleaman, allowing him to have periods of invulnerability.

Builds:
  • Frozen Tears Awake Fleaman[mozzarellathicc.github.io] - An easy to play build that can clear most stages, replace Awake with Divine Bloodline for harder stages.
Weapon Tiers
For weapons they are weighed how good they are in roughly the following priority: Limit-Break Effectiveness, Non-Limit Break Effectiveness, Arcana Strengths, Defensive Capabilities, Utility, and Evolution Requirements. For base weapons a focus is given to how effective they are as you level them, especially when they are used by themselves or with few other weapons.
SS Tier Weapons
These weapons are far ahead of all others. Not only do they lead to guaranteed victories, but they beat kill and damage records as well.

Paranormal Scan (EM)
Evolution of Lifesign Scan, requiring Mini Ghost at max level. Benefits from Sarabande of Healing.

The best weapon in the game without contest. This increases your character's stats similar to Golden Eggs. It is a support weapon that requires other weapons to be good, but like Golden Eggs has infinite stat scaling potential. This can and should be used in every build if you want to minmax, with the possible exception of using it with Divine Bloodline due to the healing effect. When using limited-weapon Silent Old Sanctuary builds this weapon is recommended as the second weapon. If using full weapon builds, it is suggested to replace the weakest of the weapons with Paranormal Scan if wanting to maximize your build performance.

Ophion (TF)
Evolution of Shadow Servant, requiring Skull O'Maniac at max level. Benefits from Wicked Season and Gemini.

This weapon summons dark orbs that deal constant damage and have a Luck and Curse scaling instant kill chance, which can eventually reach 100%. While it starts off weak with low stats, it quickly outdamages and outscales every other weapon. Prioritizing Area is essential to maximize its screen coverage. Wicked Season, an already near-mandatory Arcana, further enhances its instant kill potential. Ophion remains highly effective even in high Curse and Endless runs.
S Tier Weapons - 1
These are weapons unmatched by most other weapons, especially when Limit Breaking them. These provide high damage, high stats, high defenses, or high utility. Equipping these can easily win games when selected on any character.

Seraphic Cry
Evolution of Santa Javelin, requiring Clover at max level. Benefits from Gemini, Twilight Requiem, Tragic Princess, and Slash.

Seraphic Cry deals extremely high damage and gains a constant damage effect when picking up a Rosary. Like its base form, its attacks are random, potentially leaving you vulnerable early on, but this drawback disappears with sufficient Amount and Area. Its Gemini counterpart benefits from Limit Break, helping to offset its targeting weakness by adding another attack source. This weapon becomes a true powerhouse when paired with Twilight Requiem and/or Slash, but even without Arcana, it is immediately powerful and fits well into many builds.

Legionnaire (TF)
Evolution of Eskizzibur, requiring Armor at max level. Benefits from Slash and Divine Bloodline.

Legionnaire slashes around the character while sending out clones in the last moved direction that deal retaliation damage. When paired with Divine Bloodline, it creates a nearly invincible, highly destructive synergy. The clones continuously trigger Divine Bloodline’s Max Health increase, massively boosting the damage of all weapons, including Legionnaire itself, allowing any character to become a powerhouse. While extremely strong, like all retaliation weapons, Legionnaire performs best in limited weapon runs, where it can serve as the primary damage source and benefit from focused Limit Break investments.

Dark Iron Shield (CV)
Evolution of Iron Shield, requiring Parm Aegis. Benefits from Divine Bloodline.

Like Iron Shield, this weapon requires intentionally taking damage to deal damage. When taking damage or dealing a critical hit, the shield will send out spinning swords in a curved shape in front of the shield. These swords can deal a lot of damage and the shield itself is effective at preventing excessive damage from the front. When paired with sources of self-damage like Muramasa, the Dominus weapons, or Power of Sire, it can rapidly trigger retaliation attacks, filling the screen, and scaling the missing Health-based damage increase from Divine Bloodline. The main downside to this weapon is that it requires Parm Aegis to evolve, which can only be obtained from Arma Dio or the Ode to Castlevania stage. Can be better than Legionnaire, but requires more investment.

Time Warp (OG)
Evolution of Prism Lass, requiring Weapon Power-Up and Wings. Benefits from Gemini, Out of Bounds, and Crystal Cries.

Creates a powerful circle of damage that defangs, pushes back, and freezes enemies. It has lower damage than its base weapon, but it attacks much faster. This weapon's combined offensive and defensive output makes it one of the best weapons in the game. Amount increases the number of rings and Area increases their size, making those two stats priorities when using this weapon. Due to the large freezing area Time Warp has one of the best synergies with Crystal Cries.

Godai Shuffle (LM)
Evolution of Four Seasons, requiring Candelabrador at max level. Benefits from Lost & Found Painting.

Causes five large zones of damage, four in each corner and one in the middle. It deals a massive amount of damage and can cover the entire screen. Amount and Duration increases the damage of Godai Shuffle instead of providing their normal effects. It doesn't directly benefit from any specific Arcana, but Lost & Found Painting can greatly augment the damage it deals.

Atmo-Torpedo (OG)
Evolution of Diver Mines, requiring Weapon Power-Up and Attractorb to evolve.

Shoots out damaging zones that attract enemies. This allows it to be used defensively as your character can stand behind the zones to avoid enemies. As you get more Area this can eventually fill the entire screen and deal constant damage everywhere.
S Tier Weapons - 2
Troll Bomb (CV)
Does not evolve. Can be purchased from the Master Librarian at the start.

Troll Bomb sends out a destructive wave, dealing massive damage to all enemies on screen. This is the highest damaging non-instant kill weapon in the game. At level 8 this deals an absurd 8000 base damage, with an equally absurd 60 second Cooldown. It is best used in builds that can bypass the long Cooldown such as Babi-Onna, Jonathan, Wind, using multiple Pumpkin Familiars, or Limit Breaking in Silent Old Sanctuary builds. Since you can buy Troll Bomb from the Librarian this weapon is immediately accessible to all characters. Amount increases the number of waves Troll Bomb sends out and should be prioritized along with Cooldown. A big downside to this weapon is once you're able to chain its effects your screen visibility will be greatly reduced.

Infinite Corridor
Evolution of Clock Lancet, requiring Silver Ring and Gold Ring both at max level. Benefits from Out of Bounds and Crystal Cries.

Almost unmatched in its ability to deal damage regardless of health scaling, Infinite Corridor freezes everything and takes half their health every time it triggers. At base the Clock Lancet effect triggers every 1 second and when it makes a full rotation (12 times) it will trigger the freeze and Health halving effect. With Empty Tome this effect triggers every 6 seconds and with max cooldown it triggers every 1 second. Works well with Out of Bounds. Infinite Corridor is also able to kill intangible beings like Stalkers, Drowners, and Tricksters. One of two weapons designed to kill the Reaper and trigger White Hand. Infinite Corridor can become an essential weapon at extremely high Curse levels and against enemies with high health scaling. Due to the large freezing area Infinite Corridor has one of the best synergies with Crystal Cries.

Photonstorm
Evolution of Phas3r, requiring Empty Tome at max level. Benefits from Wicked Season.

Deals an extremely high amount of damage in multiple musical horizontal beams. Has a chance to fire x5 as many projectiles which scales with Luck. Can quickly fill the screen and deal constant damage to everything even without Limit Breaking. Photonstorm's damage is spread out and not able to deal much focus damage when needed, however due to this it scales extremely well with sources of high Might stats or damage scaling effects like Divine Bloodline. Since it requires Empty Tome to evolve, it can easily fit into most builds.

Muramasa (LM)
Evolution of Night Sword, requiring Stone Mask at max level. Benefits from Sarabande of Healing, Divine Bloodline, Wicked Season, Slash, and Wandering the Jet Black.

Deals high damage and can retaliate. Healing chance scales with Luck. The damage you take can end up killing you if you lack additional sources of healing. This weapon is able to deal critical hits by default. Most importantly this weapon scales its damage with Greed. Each point of Greed increases the base damage by 1.5. This makes it great to use on characters that have stats in Greed or with Wicked Seasons. This also makes it one of the few weapons capable of infinite damage scaling. Can synergize with builds use Soul Eater and can make Divine Bloodline and Wandering the Jet Black much more powerful. When paired with Wandering the Jet Black it can produce one of the highest damage combos in the game.

**Bug: Always critical hitting and dealing Slash multiplier even without Slash.

Greatest Jubilee
Does not evolve. Benefits from Wicked Season, Heart of Fire, and Slash.

Deals great damage over a large area and summons light sources which drop pickups which interact with other weapons and Arcana. The light show finisher at level 9 deals critical hits that scale in damage with Luck. The main advantage of this weapon is the utility of spawning light sources, which is incredibly powerful and synergizes with many different weapons and Arcana. Characters that gain special pickups like those from the Operation Guns and Ode to Castlevania DLC get even more benefit while using Greatest Jubilee.
A Tier Weapons - 1
These are strong weapons that can make any character or build good. These often go well with a lot of other weapons, can synergize well with powerful Arcana, or can push the limits on what your character can do. The base weapon listed here can be played without evolving them and

Alucard Shield (CV)
Evolution of Alucard Swords, requiring 6 fully evolved weapons and 6 fully leveled passive items, which evolves from Alucart Sworb. Benefits from any Arcana that affect the absorbed weapons.

Will absorb all active evolved weapons including Alucard Swords and take on their effects, including Limit Break levels. This can allow you to obtain even more weapons after obtaining Alucard Shield. Once absorbed those weapons will no longer gain additional Limit Break levels. This can be great if your build or run doesn't need or use Limit Break for those weapons, or if you evolve this late in the game. Although, having too many weapons (including those in Alucard Shield) will negatively impact the game's framerate and performance.

Sanctuary (CV)
Evolution of Refectio, requiring Clover at max level. Benefits from Gemini, Twilight Requiem, Sarabande of Healing, and Wandering the Jet Black.

Sanctuary produces a screenwide purify that kills everything and heals all player characters to full Health. This effect has a base cooldown of 60 seconds. Unlike other instant kill weapons this works on all bosses and even the Reapers that spawn at the end of a non-Endless run. This is an extremely potent weapon that becomes an even more effective screenwipe than Gorgeous Moon. Unfortunately, this weapon does not Limit Break, which greatly limits how good it can be over the course of a run. When used with characters that bypass the Cooldown like Babi-Onna or Charlotte the effect cannot trigger more than once every ~6 seconds.

**Bug: Maintains the spell effects of Refectio if obtained before Sanctuary.

Crimson Shroud
Evolution of Laurel, requiring Metaglio Left and Metaglio Right both at max level. Benefits from Divine Bloodline.

Almost unmatched in its defensive capability, Crimson Shroud makes you nearly impossible to kill by capping damage at 10 minus whatever Armor you have. The shield stores damage up to 100 which is then multiplied by Might and Curse. Each point of Armor also increases the damage dealt additively by 10%. This can result in massive bursts of damage, which can occur more frequently the more Cooldown you have. Crimson Shroud is also able to kill intangible beings like Stalkers, Drowners, and Tricksters. One of two weapons designed to kill the Reaper and trigger White Hand. Crimson Shroud works best in limited weapon builds to make use of its retaliation shield effect. If enemies are unable to touch you, Crimson Shroud has limited use and actually becomes worse the better your other weapons are.

Power of Sire (CV)
Union of Dominus Anger, Dominus Hatred, and Dominus Agony.

Has the combined effects of its 3 union weapons: damaging projectiles, damaging meteors, and increasing Might, Speed, Duration, and Area by +48%. Drains 1 Health per second and 1 Health per projectile effect. Additionally, this weapon deals a screenwide high damage effect and makes the player invulnerable during the animation. This effect has a 30 second base cooldown. This weapon does not Limit Break, but does scale with all stats. At high Cooldown reduction the Health drain can be dangerous if you don't have a source of healing. When paired with a healing weapon it has an extremely strong synergy with Wandering the Jet Black. This is a powerful weapon once created, but can fall off later on due to the lack of Limit Break. The biggest negative is the special ability's visual completely blacks out the screen and makes it difficult to navigate.

Icebrand (CV)
Does not evolve. Benefits from Out of Bounds, Jail of Crystal, and Crystal Cries. Can be purchased from the Master Librarian at the start.

Summons icicles in a circle around the character that fire in a single direction and have a chance to freeze enemies. The direction rotates counterclockwise and can be slightly adjusted by moving. With enough Amount and Cooldown reduction this weapon can form a permanent circle of ice around the character. This is an immediate source of freeze at the start of the game and synergizes extremely well with Crystal Cries. While Icebrand is a highly defensive weapon, when used in full weapon builds it will often deal less damage than other weapons that have more screen coverage.

Gatti Amari
Evolves into Vicious Hunger, requiring Stone Mask. Benefits from Gemini and Wicked Season.

Summons cats that walk around the screen attacking everything: enemies, items, the player, and each other. One of the strongest weapons and has infinite damage scaling potential, however Gatti Amari is extremely bad at the start of a game due to the cats attacking the player indiscriminately. Luck is necessary if you want to make this weapon great and prevent it from killing you. Gatti Amari scales with every offensive stat in the game and gets double damage from Gemini. Wicked Seasons is a great Arcana for this due to the Luck bonus. Greatest Jubilee is an amazing weapon to pair it with due to increasing the amount of Floor Chicken that can spawn, which increases the base damage of this weapon and chance of positive effects. You want to avoid evolving Gatti Amari by either not picking up Stone Mask or sealing Vicious Hunger. Avoiding using it with Divine Bloodline at the start of the game until you get enough Luck or healing items. Definitely read the wiki for this weapon[vampire.survivors.wiki] as its mechanics are more complex than most.

Nightmare (CV)
Evolution of Hex, requiring Skull O'Maniac at max level. Benefits from Gemini and Twilight Requiem.

Nightmare summons a negative energy zone that damages enemies it touches and doublings the player's Curse while they are standing inside. The Curse doubling of the zones stack leading to absurd amounts of Curse during runs, while standing inside them also protects the character. As the Hex effect scales with Curse it is able to deal extremely high amounts of damage. Nightmare's negative zone damage is increased by Duration.

**Bug: Maintains the spell effects of Hex if obtained before Nightmare.
**Bug: Nightmare is scaling its damage with Duration, not Curse.

BFC2000-AD (OG)
Evolution of Blade Crossbow, requiring Weapon Power-Up and Clover to evolve.

Deals high Area damage. High luck can make the divine intervention effect almost constant. The Divine Intervention effect is vertical, so make sure to move horizontally when you see it active to maximize the benefit.
A Tier Weapons - 2
Rune Sword (CV)
Evolution of Tyrfing, requiring Spinach. Benefits from Slash. Benefits from Chaos in the Dark Night, Lost & Found Painting, and Boogaloo of Illusions.

Fires a single sword in an arch in from the character before quickly moving in a straight line back to the character. Its critical damage increases by 1 per point in Area, Projectile Speed, and Duration, allowing this to deal extremely high damage from stats you should be getting anyway. Since it can only target about a 1/4 of the screen at one time, you will need to frequently move your character in different directions to make the most out of its high damage.

Dominus Agony (CV)
Unites into Power of Sire, requiring Dominus Hatred and Dominus Anger.

Increases Might, Projectile Speed, Duration, and Area by 8% per level up to +48% for each stat. Drains 1 Health per second and can kill the player. This weapon is effectively 5 passive items in one package. This can greatly supplement existing weapons, however the Health drain can be dangerous if you don't have a source of healing. Can synergize extremely well with Wandering the Jet Black when paired with healing items, as long as the character isn't a vampire immune to the health drain effect. In multiplayer it increases the stats of all characters within the circle.

Echo Night (LM)
Evolution of Summon Night, requiring Duplicator at max level.

Deals extremely high damage with a large area effect that lingers on the screen. Also provides good defensive value as the damage zones can stop normal enemies from moving towards you. As you get more Area the fangs that come from the top and bottom will extend further down and get wider, eventually able to fill the screen.

Clock Tower (CV)
Union of Endo Gears, Peri Pendulum, Myo Lift, and Epi Head.

This weapon can cover the entire screen and deals heavy damage to everything. Clock Tower keeps the Limit Break levels of its component parts, but once united Clock Tower no longer Limit Breaks. Even without Limit Break this weapon is one of the stronger weapons in the game. It scales great with all stats. Damage is further increased by Amount and currently found Orologions. The main downside is that it requires 4 weapons, each with 20 rarity, to unite this weapon.

Celestial Voulge
Evolution of Glass Fandango, requiring Wings at max level. Benefits from Out of Bounds, Slash, and Crystal Cries.

Has two attack patterns: attacks faster in the faced direction and with stacked effects while moving or attacks at its standard speed in all directions while standing still Can be really powerful when paired with freezing weapons and ways to increase Orologion spawns like using Greatest Jubilee. Needs synergy and stats to work well, but can be one of the strongest weapons when invested in. Due to the large area attack it gains, it works really well with the Crystal Cries Darkana.

Soul Steal (CV)
Does not evolve. Can be purchased from the Master Librarian at the start.

Soul Steal instantly kills all enemies in sight and turns them into Little Hearts. This is an extremely strong weapon, but with an extremely long 60 second Cooldown at level 8. It is best used with characters that can rapidly trigger it either through levels/Limit Breaks or special abilities. Since you can buy Soul Steal from the Librarian this weapon is immediately accessible to all characters.

Spirit Tornado Tip (CV)
Evolution of Wind Whip, requiring Crown. Benefits from Wicked Season and Slash.

Functions the same as Wind Whip and activates a hidden Spirit Tornado for every 7th activation. The Spirit Tornados rush around the screen and collect experience gems. When collected they fired at the player, damaging enemies along the way and exploding when they reached the player. The Spirit Tornado effect is negligible compared to the powerful Wind Whip slashes. With high amounts of Growth, such as from Wicked Season or Crystal Cries, this is one of the strongest weapons in the game.

Wind Whip (CV)
Evolves into Spirit Tornado Tip, requiring Crown. Benefits from Wicked Season and Slash.

Attacks in a similar pattern to Whip, targeting the areas above and below the character. This weapon has great area coverage and can deal a lot of damage. Its damage is affected by Growth. Unlike most other whip weapons this one fully surrounds the character, protecting them from enemy damage. With high amounts of Growth, such as from Wicked Season or Crystal Cries, this is one of the strongest weapons in the game.

Luminaire (LM)
Evolution of Prismatic Missile, requiring Crown at max level. Benefits from Heart of Fire, Jail of Crystal, and Twilight Requiem (only one at a time).

High damage and area, increases the value of experience gems and gold. Luminaire will usually deal less damage than its base form, Prismatic Missile. Why Luminaire is ranked higher is due to the utility from increasing experience gem values. The value of the experience gems scales with Amount and the number gems and coins/coin bags on the screen. Luminaire conflicts with weapons like Gorgeous Moon or Summon Spirit Tornado that collect experience gems before they have had a chance to increase in value. This weapon also has synergies with many Arcanas, greatly enhancing its power and allowing it to fit many builds.

**Bug: Arcana are not applying correctly.

Pneuma Tempestas (CV)
Evolution of Gale Force, requiring Bracer at max level. Benefits from Gemini and Waltz of Pearls.

Pneuma Tempestas attacks a large tornado that covers the upper vertical part of the screen spreading outsward towards the edges, damaging all enemies it contacts. Area can creatly increase its attack range. This can deal a lot of focused damage in the tornado area, but can't get good screen coverage without Gemini and Area. Gemini produces a tornado that can target the bottom of the screen.

**Bug: Maintains the spell effects of Gale Force if obtained before Pneuma Tempestas.
A Tier Weapons - 3
La Borra
Evolution of Santa Water, requiring Attractorb. Benefits from Tragic Princess.

A strong weapon that surrounds the player with growing damaging puddles that gradually moves towards the player. This provides a nice defensive wall, although it does have limited range until you are able to get enough Area. Projectile Speed and Move Speed make the puddles move and grow faster. Duration slows down the growth rate of the puddle but not the movement.

Long Inus (CV)
Evolution of Javelin, requiring Spellbinder. Benefits from Iron Blue Will.

A massive upgrade over Javelin. Like Javelin this fires in an arch in the faced direction, but with a unique mechanic that allows the projectiles to wrap around the screen if they hit the screen edges. This makes Duration and Projectile Speed significantly benefit this weapon. These projectiles can very quickly fill the screen and deal a lot of damage to everything in their path.

SpellStrom (TF)
Union of SpellString, SpellStream, and SpellStrike. Benefits from Chaos in the Dark Night, Lost & Found Painting, and Boogaloo of Illusions.

A powerful weapon that grows stronger over time. It maintains the effects of its components, including Limit Break bonuses before combining. Every 40 seconds it generates a singularity that deals massive damage and scales with Duration, Projectile Speed, and Area. Each time the singularity goes off the weapon gains 5 base damage. This weapon can quickly cover the screen and prevent enemies from ever getting close to you.

Stamazza (CV)
Evolution of Mace, requiring Hollow Heart at max level.

Has a significantly increased Area compared to Mace. It attacks in a circle pattern with a fixed duration. By default, it is capable of dealing critical hits, which deal a massive 100x damage and have 1% chance to occur. This critical hit chance is affected by Luck. This is an extremely good weapon and highly effective at dealing with high health bosses and enemies. It will very quickly create a large circular zone that enemies are unable to pass due to the amount of damage it deals and how much screen cover it provides.

Millionaire (TF)
Evolution of Flash Arrow, requiring Bracer at max level to evolve. Benefits from Slash, Iron Blue Will, and Disco of Gold.

Flash Arrow had a glow up, this is an extremely big power boost over its base weapon. Gets improved by Iron Blue Will and Slash, as well as deals damage in an area based on the amount of gold picked up. Amount multiplies its damage instead of creating more projectile, but will multiply how many arrows rain down when collecting coins. Great for focus damage on boss enemies. Prioritize getting Luck when using this weapon to increase the critical hit chance. This weapon synergizes well with Luminaire, Vicious Hunger, Gemma Torpor, and Jewel Gun. Overall a powerful weapon, but it is held down by its terrible base weapon, Flash Arrow.

Trinum Custodem (CV)
Union of Dextro Custos, Sinestro Custos, and Centralis Custos.

This weapon alternates between bite attacks and fireballs from the three of Cerberus' heads. Both bites and fireballs burst are affected by all stat bonuses except Speed and Duration. This highly defensive weapon provides a flat +10 Armor, +2.0 Recovery, and -10% Cooldown. Is currently bugged and also providing an additional +10 Armor, +2.0 Recovery, and -10% Cooldown boost when the character is taking damage. The big downside is this weapon deals terrible damage and only attacks a small area of the screen. It should only be picked up if going for the stat bonuses.

**Bug: Maintains the spell effects of Centralis Custos if obtained before Trinum Custodem.

Vampire Killer (CV)
Evolution of Alchemy Whip, requiring Tirajisu. Benefits from Twilight Requiem, Slash, and Moonlight Bolero.

Functions the same as Alchemy Whip, while also shooting fire projectiles out every 3rd activation. Uses a sunlight beam attack against boss enemies. The sunbeam attack is extremely powerful and also allows you to better see the location of the boss if there are too many enemies and effects on screen. This is one of the better "whip" weapons in the game. Moonlight Bolero is highly recommended when using this weapon (or just in general) as it will spawn bosses to boost the damage of Vampire Killer.

Clear Asteroids (EM)
Evolution of Clear Debris, requiring Mini Guardian at max level.

A massive improvement over its base weapon. Deals random area damage across the screen. It can be somewhat predicted based on the green crosshair. Asteroids spawn on the right side of the screen, which can lead to that area being targeted more often. Amount increases the amount of explosions and allows this weapon to deal constant pulses of damage that can stunlock enemies and bosses. Area is highly recommended to make this weapon perform well.

Phieraggi
Union of Phiera Der Tuphello and Eight the Sparrow, requiring Tirajisu. Benefits from Gemini and Awake. Gemini weapons benefit from Jail of Crystal and Heart of Fire.

The number of lasers scales with revives, which can cover the whole screen and deal a lot of damage. The damage and Amount scaling with Revives means that you have to use the Awake Arcana or gain revives through a character passive or Paranormal Scanner to maximize the benefit. This can make this weapon feel like wasting additional passive and Arcana slots, as revives are only useful if you are dying outside of the damage boost for this weapon. You only need -42% Cooldown to get permanent uptime on the lasers. Additionally, Phieraggi gains a lot of damage from synergizing its Gemini weapons with Jail of Crystal/Out of Bounds and Heart of Fire.
A Tier Weapons - 4
NO FUTURE
Evolution of Runetracer, requiring Armor. Benefits from Jail of Crystal and Divine Bloodline.

Can deal a lot of damage through its screen bounces. Benefits from Jail of Crystal and Out of Bounds, which can greatly increase its area damage and boost its defensive utility. Can also provide retaliation triggers for Divine Bloodline. NO FUTURE's retaliation damage deals around twice as much damage as its main attack.

Crossed Wires (EM)
Evolution of Lucky Swipe, requiring Mini Engineer at max level to evolve.

Deal a high amount of damage over an area when the wires connect. Has additional defensive utility from the damaging zones. Cooldown and Area are extremely important stats for this, as at base the longer cooldown can allow enemies to rush in between the electrical wire damage zones. Moving vertically can help target and kill more enemies using the wires.

Death Spiral
Evolution of Axe, requiring Candelabrador. Benefits from Slash and Iron Blue Will.

Death Spiral shoots out high damage scythes in all directions and has effectively infinite Pierce. This is an extremely good weapon that can be obtained early in the game and is a staple for many Slash based builds. Iron Blue Will with Death Spiral can help in the early game, but is often outclassed by other Arcana such as Boogaloo of Illusion given the choice.

Sword Brothers (CV)
Does not evolve. Can be purchased from the Master Librarian at the start.

Screenwide area of effect that has a long 14 second base cooldown at max level and a strong knockback effect. Gives the character 2 seconds of invulnerability when activated. With enough Cooldown reduction and Duration this weapon can make your character permanently invulnerable. The swords that spawn near your character deal massive damage and send out a shockwave. The swords are affected by Might, but the shockwave will always deal 10 damage.

Vandalier
Union of Peachone and Ebony Wings. Benefits from Gemini. Gemini weapons benefit from Jail of Crystal and Heart of Fire.

Attacks using two circling zones that revolve around the player in opposite directions. A union of two of the worst weapons in the game. It is much stronger than Peachone and Ebony Wings, offering high damage and the same familiar aiming mechanics. If you are able to Limit Break it and gain a lot of Area, it can outperform many other stronger weapons. You want to prioritize Cooldown and Duration with this weapon to maximize uptime. Additionally, Vandalier gains a lot of damage from synergizing its Gemini weapons with Jail of Crystal/Out of Bounds and Heart of Fire.

Wave Beam (OG)
Evolution of Sonic Bloom, requiring Weapon Power-Up and Armor to evolve. Benefits from Waltz of Pearls.

This sends out small waves of damage in your facing direction while moving. While standing still it will Charge up larger waves that shoot out in damage direction. At base Wave Beam is underwhelming, but it scales extremely well with stats such as Amount and Area. When paired with Waltz of Pearls and Boogaloo of Illusions, Wave Beam can deal extremely high amounts of damage as the waves fill the screen.

Thunderbolt Spear (CV)
Evolution of Alucard Spear, requiring Wings.Benefits from Chaos in the Dark Night.

Functions similar to Alucard Spear. Every 7th activation triggers a special attack based on Projectile Speed. A strong weapon that attacks horizontally. Like Alucard Spear you want to constantly change the facing direction of the character to keep up the unique attack pattern. The special ability sends out several waves of multiple projectiles in all directions, which provides a great full screen damage effect.

Heaven Sword
Evolution of Cross, requiring Clover. Benefits from Slash and Waltz of Pearls.

A strong weapon that attacks in a line that boomerages back through the character. It can gain a lot of screen coverage with Waltz of Pearls and Area, but is underwhelming on its own. It has infinite pierce and greatly benefits from Amount to create more swords. Its damage and screen coverage can be comparable to Death Spiral, but it requires a bit more investment.

Gorgeous Moon
Evolution of Pentagram, requiring Crown. Benefits from Blood Astronomia.

Destroys all enemies on the screen periodically with a very telegraphed animation. Its main advantage is that it provides a large amount of experience when it triggers and vacuums all experience gems on the map. This makes it a great utility weapon for those looking to screen clear and gain experience without having to move. The main downside is that it has anti-synergy with Wicked Season and the weapon Luminaire. The instant kill effect also doesn't trigger often enough to be good offensively, except in Limit Break runs with few weapons. Gorgeous Moon is also able to kill intangible beings like Stalkers, Drowners, and Tricksters.

Gemma Torpor (CV)
Evolution of Rock Riot, requiring Stone Mask at max level. Benefits from Gemini and Waltz of Pearls.

Gemma Torpor triggers a rain of crystals that turn enemies into jewels (coins). The crystals follow the same positioning pattern as the rocks from Rock Riot. The falling crystals deal heavy damage, although since the positioning is always the same you will need to move around to spread out the falling area. With Waltz of Pearls the large cystals can target the middle of the screen and greatly increase the effectiveness of Gemma Torpor.

**Bug: Maintains the spell effects of Rock Riot if obtained before Gemma Torpor.
A Tier Weapons - 5
Vol Luminatio (CV)
Gifts Universitas, requiring Vol Umbra; evolution of Luminatio, requiring Crown at max level. Benefits from Wicked Season.

Attacks in a large expanding spiral pattern around the player character. Individual hits deal small amounts of damage, but the projectile covers a very large area. Damage, Speed, Area, and Duration affected by Growth. These stat increases occur at Growth thresholds with each 200% of total Growth adding 10 base damage, up to +50 base damage with 1000% Growth (+900%). Vol Luminatio can deal a lot of total damage and very quickly cover the entire screen. Because it scales with Growth, grabbing Wicked Seasons, Crystal Cries, or using it on a character that gets Growth per level is recommended. Through mechanisms unknown it will deal less damage than Vol Umbra when both are used in the same run, even though Vol Umbra is generally the weaker weapon.

Vol Umbra (CV)
Gifts Universitas, requiring Vol Luminatio; evolution of Umbra, requiring Attractorb at max level.

Attacks in a large expanding spiral pattern around the player character. Individual hits deal small amounts of damage, but the projectile covers a very large area. Damage, Speed, Area, and Duration affected by Magnet. These stat increases occur at Magnet thresholds with each 200 of total Magnet adding 10 base damage, up to +50 base damage with 1000 Magnet. Vol Umbra can deal a lot of total damage and very quickly cover the entire screen. Unlike Vol Luminatio, which scales with the easy to acquire Growth stat, Magnet is a harder stat to increase. Magnet can only be obtained from a character's initial stats, Attractorb, or through using Golden Eggs. Without a character starting with additional Magnet, Attractorb is not enough to reach 200 Magnet, the first stat increase threshold. Through mechanisms unknown it will deal more damage than Vol Luminatio when both are used in the same run, even though Vol Luminatio is generally the stronger weapon.

Valkyrie Turner
Evolution of Shadow Pinion, requiring Wings. Benefits from Heart of Fire.

Extremely high damage, but has the same difficult movement mechanic as Shadow Pinion, just a lot more forgiving. Requires Wings to evolve, which can feel like a waste of a Passive Item slot, but it benefits from the speed increase. Grabbing Bracers for the increased Projectile Speed is also recommended as it will allow the non-firing flames to drift away from you faster.

Vicious Hunger
Evolution of Gatti Amari, requiring Stone Mask. Benefits from Gemini and Disco of Gold.

Amazing for gold farming, not so much for normal gameplay unless you are playing Sammy. One of the few weapons that is worse than its base form. Compared to Gatti Amari it does gain more base damage, but It eats experience gems and will significantly slow down leveling. If levels aren’t a concern, this weapon does good damage. Its damage is further increased by however many Floor Chickens Gatti Amari was able to eat before evolving. Like Gatti Amari, this weapon has complex mechanics regarding its damage and gold coin generation, so read its page on the wiki[vampire.survivors.wiki] to get more information. Greatly benefits Disco of Gold and can synergize with Sarabande of Healing.

Melio Confodere (CV)
Evolution of Vol Confodere, which evolves from Condofere. Benefits from Slash and Chaos in the Dark Night.

Functions similar to Confodere and adds in a large directional attack. Projectile Speed affects Cooldown and damage and should be invested into with items like Bracers or the Chaos in the Dark Night Arcana. With sufficient Projectile Speed this can become a powerhouse of a weapon. Without Projectile Speed this has the same issues as its previous stage, being unable to kill enough enemies.

Tri-Bracelet
Evolution of Bi-Bracelet, which evolves from Bracelet. Benefits from Jail of Crystal, Twilight Requiem, Heart of Fire, and Sapphire Mist.

Does surprisingly good damage considering how bad its previous stages are. Can benefit from a lot of Arcana. Sapphire Mist acts like a multiplier for other Arcana and is highly recommended to get when using Tri-Bracelet. Without Arcana this is an underwhelming evolution. With beneficial Arcana this can be really powerful.

Fuwalafuwaloo
Union of Bloody Tear and Vento Sacro. Benefits from Sarabande of Healing, Slash, and Wandering the Jet Black.

This deals high damage with a lot of healing, but requires you to constantly move to maximize the benefit. Movement Speed increases its overall fire rate when moving, when the character stops it initiates the default Cooldown. Projectile Speed makes the slashes go further out horizontally. Fuwalafuwaloo gains bonus damage from moving nonstop.

Wrecking Ball (CV)
Evolution of Iron Ball, requiring Iron. Benefits from Iron Blue Will.

Functions similar to Iron Ball, but with added Area and a lot more damage. Armor will increase the damage of this weapon, making it a good weapon to pair with Centralis Custos/Trinum Custodem. This deals extremely high damage, but will mostly target the middle and bottom of the screen.

Pronto Beam (OG)
Evolution of C-U Laser, requiring Weapon Power-Up and Tiragisu to evolve. Benefits from Twilight Requiem, Jail of Crystal.

Fires a single beam in the direction you are facing. If you change direction during the firing animation, multiple shorter beams will form. Creates chained laser explosions at enemies hit by the primary beam. This has infinite pierce. This weapon can very quickly clear the screen by rapidly moving your character in different directions. Jail of Crystal can be paired with Out of Bounds for more damage or Crystal Cries for stat buffs.

Crissaegrim Tip (CV)
Evolution of Sonic Whip, requiring Skull O'Maniac. Benefits from Wicked Season and Slash.

Functions the same as Sonic Whip, including the instant-kill effect, and activates a hidden Valmanway for every 5th activation. A great improvement over Sonic Whip. While the horizontal targeting mechanic is still present, you gain a directional slash attack that can damage most of the screen by moving in circles. The slashes attack faster the faster the character moves, so you're encouraged not to stand still while using this weapon. Can kill intangible beings such as Drowners and Stalkers with its instant-kill hits.
B Tier Weapons - 1
Weapon evolutions listed here can work well in many games, but are not as exceptional as those in the higher tiers. Base weapons listed here can usually carry your character in the early game and often evolve into much stronger weapons.

Festive Winds (LM)
Evolution of Silver Wind, requiring Pummarola at max level. Benefits from Sarabande of Healing, Twilight Requiem, and Wandering the Jet Black.

Festive Winds shoots out orbs that hover around the character in an oval area. This deals moderate damage, has a chance to generate Little Hearts based on Luck, and applies a damage multiplier debuff to enemies. Each hit of Festive Winds adds a stacking debuff of 2% increased damage, up to 10,000%. Depending on your other weapons, this debuff can either be useful or barely have time to build up. Festive Wind's damage is greatly increased when using Twilight Requiem due to the large amount of projectiles it produces.

Rapidus Fio (CV)
Evolution of Sonic Dash, requiring Wings at max level. Benefits from Blood Astronomia, Chaos in the Dark Night, and Boogaloo of Illusions.

Creates a damaging shield around the player and increases the Move Speed by 80% per weapon activation stack. The Move Speed Bonus is capped at +500%. Area and Projectile Speed increases damage. Cooldown reduction and Duration allow you to reach the higher stacks of additional Move Speed. This weapon also makes it easy to clip through walls and terrain once you start moving extremely fast. The damaging shield itself deals a lot of damage and relies on the player ramming into enemies to kill quickly, while also providing great protection. Works really well with Tragic Princess due to the massive amount of Move Speed provided, allowing weapons like Seraphic Cry and Thunder Loop to deal even more damage.

Unholy Vespers
Evolution of King Bible, requiring Spellbinder. Benefits from Twilight Requiem.

Good damage and a great defensive weapon, although not a significant improvement over its base form. Area only makes the circle larger and does not increase the size of the books. A big disadvantage of this weapon is that it leaves your character open in the middle. If enemies are able to get past the circle, you may be unable to kill them if this is your only weapon. Is extremely powerful when used with Twilight Requiem and a high Curse stat.

Hydrostormer Tip (CV)
Evolution of Dragon Water Whip, requiring Attractorb. Benefits from Jail of Crystal and Slash.

Functions the same as Dragon Water Whip and Activates a hidden Hydro Storm for every 13th activation. The Hydro Storm effect deals constant screenwide damage. With enough Cooldown and Duration the rain will stay active. The rain's damage is low, but hits a lot of enemies, and continues to use the Dragon Water Whip effect to deal high damage to tougher enemies and bosses.

**Bug: Does not benefit from Jail of Crystal.

Mazo Familiar
Evolution of Pako Battiliar, requiring Hollow Heart at max level. Benefits from Divine Bloodline.

The damage isn't that strong at the start, but scales with Max Health and works extremely well with Divine Bloodline. This weapon gains +1 base damage per +20 Max Health or +0.05 damage per +1 Max Health. This has more bats than the base version. The bats come from the edges of the screen and not from your character like most weapons.The glowing bats that spawn from taking damage also deal retaliation damage which can scale Divine Bloodline's Max Health increase quickly. Metaglio Left is recommended as a late game pick once you have accumulated enough Max Health. Divine Bloodline is necessary to make this weapon perform well. While it functions similar to Legionnaire, it will generally deal much less damage. Due to how the bat projectiles function they have a tendency to bunch up and cover less area than other weapons.

Sacred Beasts Tower Shield (CV)
Evolution of Guardian's Targe, requiring Pummarola.

Functions similar to Guardian's Targe. Spawns many more and larger projectiles. Overhealing also now triggers a period of invulnerability. A good weapon that provides good defenses. Should be used as a ram to hit as many enemies as possible to spawn as many projectiles as possible.

Big Fuzzy Fist (OG)
Evolution of Metal Claw, requiring Weapon Power-Up and Empty Heart to evolve.

Attacks the highest health enemy on screen. It has a small Area starting out and will often randomly jump around the screen. This can make the weapon unreliable as unless a boss is on the screen you're not sure where it will attack. Getting a lot of Area will make the random targeting problem of the weapon disappear.

Rocket Science (EM)
Evolution of Science Rocks, requiring Mini Scientist at max level.

Deals a lot of large area damage, but you need to walk over blue buttons to detonate them. Walk over numbered buttons 1-5 to create the large rocket explosion. The mini-game can be distracting and hard to see when there are a lot of other effects occurring. Most of the time you won't be able to effectively pull off the rocket. To help with it, make sure you turn off damage numbers to improve visibility. Even if you don't activate the rocket, the standard explosion from the blue buttons is pretty good.

Meal Ticket (CV)
Evolution of Wine Glass, requiring Tirajisu at max level.

Functions similar to Wine Glass. Attacks random enemies with exploding wine glasses. The projectile will pierce through any enemies in its path before reaching the target and exploding. This weapon will prioritize attacking bosses as well. The wine glass leave behind food that damages the first enemy it touches. The food will quickly disappear if no enemy touches it. The damage of both the wine glasses and food increases by 10-20 base damage per Revival the character has.Characters with additional Revives, Tirajisu, Academy Badge, and the Awake Arcana benefit Meal Ticket.

Hydro Storm (CV)
Does not evolve. Can be purchased from the Master Librarian at the start. It is the weapon version of the passive effect of Hydrostormer Tip. Benefits from Chaos in the Dark Night and Lost & Found Painting.

Hydro Storm starts a rain that damages all enemies on screen. Amount has no effect, while Projectile Speed and Duration affects the damage the rain can deal. This can deal a lot of total damage and effectively acts as a persistent damage effect on all enemies. It is extremely strong in the early game when enemy health is low.
B Tier Weapons - 2
Dark Rift (CV)
Does not evolve. Can be purchased from the Master Librarian at the start.

Dark Rift creates a horizontal line of vertical continuously damaging zones. It is the weapon version of the passive effect of Mormegil Tip. With enough Area and Cooldown reduction the top half of the screen will be permanently covered by this weapon's effects. The main downside is that it can't target the bottom half of the screen. Moving upward into the damaging zones will increase its coverage and effectiveness.

Anima of Mortaccio
Morph of Bone while playing Mortaccio to level 80. Benefits from Twilight Requiem.

Acts similar to Bone along with an added effect. The arms of the giant skeleton will swing around and provide added defensive utility before being thrown as a bouncing projectile that then returns back to you.. Is received automatically when Mortaccio hits level 80, and you have collected the relic, and very rarely a reward from Gold Fingers.

Yatta Daikarin
Morph of Cherry Bomb while playing Yatta Cavallo to level 80. Benefits from Wicked Season and Slash.

Acts similar to Cherry Bomb along with an added effect. It creates constellations on the screen that deal damage with their lines. In addition once the seventh star is created, all of the stars explode in a large Area. Is received automatically when Cavallo hits level 80, and you have collected the relic, and very rarely a reward from Gold Fingers.

Nitesco (CV)
Evolution of Globus, requiring Empty Tome at max level. Benefits from Gemini.

Fires a constant piercing beam of energy in front of the character. This weapon can deal a lot of focus damage, but has absolutely no coverage for the back, top, and bottom of the character. This makes it extremely difficult to kill many enemies without taking damage, even if you are able to melt bosses. Picking up Gemini will allow you to keep a Gemini Globus that is able to compensate for the coverage weakness.

Cocytus (CV)
Evolution of Ice Fang, requiring Spellbinder at max level. Benefits from Gemini and Jail of Crystal.

Cocytus attacks using a horizontal blizzard that damages enemies in it. This doesn't increase the vertical damage area much from its evolution, but it can provide great coverage in the horizontal plane. Works really well with Gemini as the screen cover of this weapon doubles and no longer requires your character to switch directions.

**Bug: Maintains the spell effects of Ice Fang if obtained before Cocytus.

Acerbatus (CV)
Evolution of Optical Shot, requiring Koroma's Mana at max level.

Fires a large, piercing yellow light ball at faced direction with a short delay before traveling away. The faster the character is moving the farther the large yellow ball will get launched.The more enemies defeated, the more damage it deals. This maintains the projectile from Optical Shot, while now covering its weakness through the large projectile it launches. The weapon can deal a lot of damage as long as your character keeps moving in different directions.

The RPG (CV)
Evolution of Hand Grenade, requiring Candelabrador. Benefits from Heart of Fire.

Fires an explosive projectile at the nearest enemy while stationary or the facing direction while moving. The explosion will propagate and spread out into a fan pattern, dealing a lot of damage to all enemies hit. Heart of Fire can greatly increase the range of the explosion as well as provide some defensive utility to your character.

Profusione D'Amore
Morph of Celestial Dusting while playing O'Sole Meeo to level 80. Benefits from Sarabande of Healing, Twilight Requiem, and Wandering the Jet Black.

Acts similar to Celestial Dusting along with an added effect. Periodically, waves of flowers will radiate out from your character's position and fill the screen, which greatly improves the screen clearing capabilities over its base form. Is received automatically when O'Sole hits level 80, and you have collected the relic, and very rarely a reward from Gold Fingers.

Jewel Gun (CV)
Evolution of Silver Revolver, requiring Karoma's Mana.

This is an extremely high damage weapon with a narrow targeting range. Fires at the nearest enemy while stationary or the facing direction while moving. Much like Silver Revolver it is important not to miss with the bullets this fires. This is capable of critical hitting by default, but instead of a damage multiplier, this instantly kills the enemy and turns them into jewels (coins). While the damage can be devastating, this weapon can only attack in one direction, which can leave your character exposed from behind.

Emergency Meeting (weapon) (EM)
Evolution of Report!, requiring Mini Crewmate at max level.

Acts similar to Report!, but not the sound wave can target any direction instead of just left or right. In addition, this can wipe out a specific enemy type on screen. Depending on what other weapons you have and the diversity of enemies in your current wave, this is either a good weapon or forgettable one.
B Tier Weapons - 3
Prismatic Missile (TF)
Evolves into Luminaire, requiring Crown at max level. Benefits from Heart of Fire, Jail of Crystal, and Twilight Requiem.

One of the best base weapons in the game. This has extremely high damage, a large area effect, and can benefit from many Arcana like Twilight Requiem, Jail of Crystal, Out of Bounds, and Hear of Fire. With enough Cooldown this can stay up permanently and prevent enemies from touching you.

Cross Crasher Tip (CV)
Evolution of Platinum Whip, requiring Clover. Benefits from Awake and Slash.

Functions the same as Platinum Whip and activates a hidden Gran Cross for every 7th activation. The Grand Cross effect creates a vertical beam in the middle of the screen that deals high damage, and has a long Duration, and gains damage from Revivals.

Stellar Blade (CV)
Evolution of Discus, requiring Parm Aegis.

Functions similar to Discus, only now with much larger blades that are capable of traveling along the screen edges as well. Deals high damage and provides a good defensive coverage from its projectile movements. Works best on stages with many walls and solid objects.

Four Seasons (LM)
Evolves into Godai Shuffle, requiring Candelabrador. Benefits from Lost & Found Painting.

An extremely high damage base weapon that attacks with four explosions in the corners of the screen. Make sure you pair it with another weapon that can target the center because it moves to the edges of the screen as it levels up leaving your character vulnerable. Amount and Duration affect the damage of this weapon.

J'Odore (LM)
Evolution of Mirage Robe, requiring Attractob at max level. Benefits from Out of Bounds.

A great defensive weapon with decent damage output. Mirages that are sent out both distract and freeze enemies. Damage can be greatly increased by using Out of Bounds, turning the Mirages into explosive projectiles. Works well with the Crystal Cries Darkana. Make sure your character constantly moves in different directions to maximize the benefit of this weapon as the mirages are sent out in the direction you are facing.

Thunder Loop
Evolution of Lightning Ring, requiring Duplicator. Benefits from Tragic Princess and Twilight Requiem.

Initially deals good damage and provides a nice random spread of targeting, but the damage falls off compared to other weapons in the mid to late game. Also tends to do poor damage when used in full weapon builds as it usually attacks slower, unless augmenting it with Tragic Princess.

Valmanway (CV)
Does not evolve. Can be purchased from the Master Librarian at the start. It is the weapon version of the passive effect of Crissaegrim Tip.

Valmanway sends out quick slashes in the faced direction that fires faster when moving. When used with builds that focus on movement this can deal pretty good damage. Avoid using if your build generally stands still.

Mannajja
Evolution of Song of Mana, requiring Skull O'Maniac. Benefits from Blood Astronomia.

Trades a larger Area for a long Cooldown when evolved from Song of Mana, both function similarly. Enemies hit by Mannajja are permanently slowed down through a stacking Movement Speed debuff. Works well with Blood Astronomia.

La Robba
Does not evolve (yet). Benefits from Beginning.

The best scaling of the Merchant/non-evolving projectile weapons. While it is fairly unimpressive starting out, once you get a lot of stats and/or Limit Break, it can quickly become really powerful as the furniture can get extremely large and wedge itself between hordes of enemies dealing high amounts of damage. It is the second highest damage dealing base game base weapon after Gatti Amari.

Alucard Swords (CV)
Evolves into Alucard Shield, requiring 6 fully evolved weapons and 6 fully leveled passive items, evolution of Alucart Sworb.

Apparitions of Alucard seek out enemies. This weapon can deal a lot of damage and attacks the areas to the left and right of the character. Benefits greatly from Amount and Cooldown reduction.

Aurablaster Tip (CV)
Evolution of Vanitas Whip, requiring Hollow Heart. Benefits from Divine Bloodline, Slash, and Heart of Fire.

Functions the same as Vanitas Whip and activates a hidden Aura Blast for every 7th activation. Aura Blast creates a large cross explosion over your character. This weapon doesn't provide enough screen coverage on its own, requiring Heart of Fire to be good. Using this with Divine Bloodline can also greatly increase the damage of the pillars of fire.

Multistage Missiles (OG)
Evolution of Homing Miss, requiring Weapon Power-Up and Duplicator to evolve. Benefits from Heart of Fire.

Fires a large amount of projectiles in the facing direction that home onto enemies. Can often end up clearing the screen leaving many projectiles flying in circles and ready to hit additional enemies when they spawn.

Keremet Morbus (CV)
Evolution of Keremet Bubbles, requiring Armor at max level. Benefits from Gemini and Tragic Princess.

Keremet Morbus fires fast, homing projectiles that chase down and pierce enemies. This weapon can quickly fill the screen with homing projectiles. It can profile great screen coverage, even if the total damage isn't the best. Gemini doubles the amount of projectiles.

**Bug: Maintains the spell effects of Keremet Bubbles if obtained before Keremet.
B Tier Weapons - 4
Impostongue (EM)
Evolution of Sharp Tongue, requiring Mini Imposter at max level. Benefits from Gemini and Slash.

Acts similar to Sharp Tongue, but also includes a high damage focus type weapon that targets the strongest on-screen enemy. The targeting mechanic has a small area so even when it does hit more than one enemy, it is not a lot. It can be great for focusing damage on boss enemies, but doesn't fare well against large amounts of enemies. What is most impressive about this weapon is the damage scales with Recovery, so every +1 Recovery will add +100% more damage, turning this seemingly unimpressive weapon into a powerhouse. This is best used with characters with high Recovery like Cosmo, builds that use the Crystal Cries Darkana, and on builds that use Pummarola and Metaglio Left. Compared to Moon Rod this does more damage per hit, but hits less enemies.

Moon Rod (CV)
Evolution of Star Flail, requiring Pummarola at max level.

Moon Projectiles are summoned around the character and fire in the faced direction after a delay. Changing directions quickly while the weapon is firing can cause the projectile to move in different directions. The projectiles don't deal a lot of damage initially, but like Sharp Tongue/Impostongue has its damage multiplied by Recovery. Every +1 Recovery will add +100% more damage, turning this initially unimpressive weapon into a powerhouse. This is best used with characters with high Recovery like Cosmo, builds that use the Crystal Cries Darkana, and on builds that use Pummarola and Metaglio Left. Compared to Impostongue this does less damage per hit, but hits more enemies.

Ashes of Muspell
Evolution of Flames of Misspell, requiring Torrona's Box at max level. Benefits from Sapphire Mist and Heart of Fire.

Initially an underwhelming evolution, this gets +1 base damage per 5000 kills and scales really well with stats like Area, Duration, and Projectile Speed. Sapphire Mist can greatly boost the damage of this weapon, however it isn't that strong without it.

Salamender (CV)
Evolution of Raging Fire, requiring Spinach at max level. Benefits from Gemini and Heart of Fire.

Salamender summons a snake of fire that travels across the screen in a circular snaking pattern, damaging all enemies it contacts. This is a major upgrade over Ragic Fire and deals great damage when properly invested into. Works great with Duration and Amount. Amount increases the length of the snakes, while Duration can allow for many more of them to be on screen. Is generally underwhelming without Gemini, which greatly increases Salamender's coverage by doubling the amount of fire snakes.

**Bug: Maintains the spell effects of Raging Fire if obtained before Salamender.
**Bug: Heart of Fire not applying properly.

Endo Gears (CV)
Unites into Clock Tower, requiring Peri Pendulum, Myo Lift, and Epi Head.

Endo Gears summons spinning golden gears on the ground that damage enemies they contact. Also triggers other clockwork weapons. Damage increased by Amount and currently found Orologions. Of the clockwork weapons this one generally deals the most damage and can cover a large area of the screen. Gears can be used defensively by keeping your character on top of them.

Mormegil Tip (CV)
Evolution of Jet Black Whip, requiring Stone Mask. Benefits from Twilight Requiem and Slash.

Functions the same as Jet Black Whip and activates a hidden Dark Rift for every 8th activation. The Dark Rift causes a horizontal damage zone that extends upwards. To take advantage of this you are encouraged to move upwards into the zone as both protection and to lure enemies in.

Prism Lass (OG)
Evolves into Time Warp. requiring Weapon Power-Up and Wings to evolve. Benefits from Gemini, Jail of Crystal, Out of Bounds.

This sends out clones similar to J'Odore, except these have a narrower path, go farther, and do an area attack at the end of their trajectory. This can deal extremely high damage compared to other base weapons, although you will have to aim it properly to make the most use out of it. The clones have a low chance of freezing enemies, which can be greatly increased with Jail of Crystal. Synergizes really well with Gemini, enabling you to get greater screen coverage. If you can increase the freeze chance and damage area Prism Lass works great with Crystal Cries. Weapon Power-Up will appear in the level up screen when selecting this weapon and provide +1 Revive.

Rock Riot (CV)
Evolves into Gemma Torpor, requiring Stone mask at max level. Benefits from Gemini and Waltz of Pearls.

Rock Riot summons a light green magic circle at a fixed location at the top of the screen in front of the player's character faced direction and drops falling rock projectiles once activated. This deals extremely high damage, but leave the middle of the screen completely open. Picking up Gemini helps, but presents the same problem just on the other side of the screen. Other weapons capable of damaging the middle of the screen are necessary to survive when using this weapon. When used purely for damage and not defense this weapon can deal absurd amounts of damage.

Prototype C (OG)
Evolution of Spread Shot, requiring Weapon Power-Up and Empty Tome to evolve. Benefits from Iron Blue Will, Heart of Fire.

Same as Spread Shot, but double the projectiles and the second set of projectiles fires in the direction your character last moved. This allows for a large amount of projectile coverage. Make sure to constantly rotate your character so you can cover the entire screen. It is the strongest of the Prototype weapons.
B Tier Weapons - 5
Bloody Tear
Evolution of Whip, requiring Hollow Heart. Unites into Fuwalafuwaloo, requiring Vento Sacro. Benefits from Sarabande of Healing, Slash, and Wandering the Jet Black.

Has a similar attack pattern as Whip, but deals a lot more damage and heals the player character. It is overall a strong weapon, however it requires the undesirable passive item, Hollow Heart, to evolve.

SpellStrike (TF)
Unites into SpellStrom, with SpellString and SpellStream.

Attacks the nearest enemy with a area strike. Damage has a higher Might multiplier of 1.25x. This is one of the strongest base weapons in the game and the undeniable best of the SpellStrom union components.a good basic weapon.

Sole Solution
Gift of Victory Sword, requiring Torrona's Box at max level.

Deals 1 additional base damage per 5000 enemies killed and gives your character invulnerability during the galaxy screen-wiping animation. It is technically a Passive item so Sole Solution does not have Limit Break and only benefits from Might. The galaxy animation is extremely distracting and prevents you from picking up items while the effect is active. If you want Victory Sword without Sole Solution you can seal it in your Collection.

Peri Pendulum(CV)
Unites into Clock Tower, requiring Endo Gears, Epi Head, and Myo Lift.

Peri Pendulum summons pendulums that swing on screen and damage enemies they contact. Also triggers other clockwork weapons. Damage increased by Amount and currently found Orologions. Can deal a lot of damage and provide decent protection as the attack stays within the middle of the screen.

Myo Lift (CV)
Unites into Clock Tower, requiring Epi Head, Endo Gears, and Peri Pendulum.

Myo Lift summons pale blue lifts on both sides of the screen that repeatedly travel up and down and damage enemies they contact. Also triggers other clockwork weapons. Damage increased by Amount and currently found Orologions. Can deal a lot of damage and provide attack coverage on the left and right screen edges.

Unjust Ejection (EM)
Evolution of Just Vent, requiring Mini Shapeshifter at max level.

Sucks in enemies on the left and right sides of the screen. Deals extremely high damage, but has distracting visuals and will often not get most enemies on the screen. It is best to move away from the side of the screen that is open so you can get more enemies inside it. This means while using this weapon you will have to get used to moving back and forth horizontally to maximize the effect. This weapon works best when used with other weapons and it is not recommended to use it solo.

Universitas (CV)
Gift of Vol Luminatio and Vol Umbra.

Creates a tear in spacetime that deals a massive 50 base damage to all enemies in the center and then sends out meteors in all directions that also deal 50 base damage. This has a 30 second Cooldown with a Duration of 3 seconds at base. This weapon scales with most stats, but does not Limit Break. Deals decent additional damage without being obstructive like Sole Solution, the other Gift weapon.

Victory Sword
Gifts Sole Solution, requiring Torrona's Box at max level. Benefits from Slash and Divine Bloodline.

Deals high damage, but only attacks close up early on. Deals retaliation damage and gets a flat damage increase from Divine Bloodline. If you want to prevent getting Sole Solution as a gift, you can seal it in the collection. Victory Sword is also able to kill intangible beings like Stalkers, Drowners, and Tricksters.

Daybreaker Tip(CV)
Evolution of Vibhuti Whip, requiring Candelabrador. Benefits from Slash.

Functions the same as Vibhuti Whip and activates a hidden Arrow of Goth for every 7th activation. Critical hits increase the amount of projectiles and the amount of explosion clouds. A big improvement over Vibhuti Whip. This weapon's added effect targets the horizontal middle screen of the screen. The arrows will fire depending on your faced direction and will pierce through all enemies in the middle.
B Tier Weapons - 6
Yagyu Shuriken (CV)
Evolution of Shuriken, requiring Empty Tome. Benefits from Iron Blue Will.

Throws out a constant stream of projectiles at slight angles in the faced direction. Functions similarly to Thousand Edge. Iron Blue Will greatly increases the effectiveness of this weapon and allows it to have great screen coverage.

Sonic Dash (CV)
Evolves into Rapidus Fio, requiring Wings at max level. Benefits from Blood Astronomia, Chaos in the Dark Night, and Boogaloo of Illusions.

Surrounds the character in a green damaging shield and increases the Move Speed by 10% per item level up to 80% per weapon activation stack. The Move Speed Bonus is capped at +500%. Area and Projectile Speed increases damage. Cooldown reduction and Duration allow you to reach the higher stacks of additional Move Speed. This weapon also makes it easy to clip through walls and terrain once you start moving extremely fast. The damaging shield itself deals a lot of damage and relies on the player ramming into enemies to kill quickly, while providing great protection.

Phas3r
Evolves into Photostorm, requiring Empty Tome at max level.

High damage weapon that attacks randomly, but can quickly begin to damage everything on screen and push enemies far away from you.

Prototype A (OG)
Evolution of Long Gun, requiring Weapon Power-Up to evolve. Benefits from Iron Blue Will, Heart of Fire.

Similar to the Long Gun, but double the projectiles and the second set of projectiles fires in the direction your character last moved. Your character now fires two sets of large projectiles that overlap in a wave pattern, while the small airplanes shoot smaller projectiles like Long Gun.

Thousand Edge
Evolution of Knife, requiring Bracer. Benefits from Slash and Iron Blue Will.

Good damage, but covers a small Area and requires facing towards the target. Works extremely well with Iron Blue Will and Slash. Great for focus damage on boss enemies.

Arrow of Goth (CV)
Does not evolve. Can be purchased from the Master Librarian at the start. It is the weapon version of the passive effect of Daybreaker tip.

Has a 5% chance to critical hit by default. Critical hits maximize the number of projectiles (21 total) rather than increase the individual damage of the projectiles. This weapon attacks in a horizontal pattern with more projectiles aimed at the center of the screen. This weapon can deal good damage and cover a large area of the screen. Works really well with Cooldown reduction and Luck.

Song of Mana
Evolves into Mannajja, requiring Skull O'Maniac. Benefits from Divine Bloodline and Blood Astronomia.

One of the best early game and base weapons you can have. It isn't improved much by its evolution, but it gives you a nice start if you grab it early and is better than some evolutions. Works well with Blood Astronomia.

Santa Water
Evolves into La Borra, requiring Attractorb. Benefits from Tragic Princess and Divine Bloodline.

Great starting weapon that also does decent damage mid game before you evolve it. It drops area effects in a circle around your character, which provide a strong defense against hordes of enemies. With enough levels and Cooldown you can have a permanent ring protecting your character. Works well with Tragic Princess.
B Tier Weapons - 7
Familiar Forge (CV)
Allows you to summon one of 11 familiars: Ukoback, Bitterfly, Alleged Ghost, Imp, Sacred Dragon, Sacred Tiger, Sacred Turtle, Sacred Cardinal, Wood Rod, Pumpkin, Faerie.

The Familiars picked should depend on your needs and Arcana you are expecting to acquire. See the individual familiar entries in the Passive item section. Pumpkin is the highest DPS familiar while Faerie can be an additional source of healing. Besides those 2, the other familiars don't stand out significantly. Familiars are best used on characters that can obtain many of them as only having 1 or 2 will not significantly impact gameplay. Interestingly, selecting a Familiar on a non-Castlevania character will enable Castlevania pickups, which tend to be more powerful than other pickup items.

Alchemy Whip (CV)
Evolves into Vampire Killer, requiring Tirajisu. Benefits from Slash and Moonlight Bolero.

Attacks in a triple strike in front of the character and a single strike behind them. Grows stronger every time a boss enemy is defeated. A powerful base weapon that can easily carry runs. The whip lingers in position and allows your character to move with it, greatly increasing the effectiveness. Moonlight Bolero can be used to increase the number of boss kills you can get.

Summon Night (LM)
Evolves into Echo Night, requiring Duplicator at max level.

Good damage weapon that leaves vertical damaging zones at the top of the screen. Starting out this weapon will struggle to hit many many enemies, so it is best to level it as soon as possible. As you level it up and get passive items it quickly damages much of the screen. This weapon greatly benefits from Amount and Duration.

Bwaka Knife (CV)
Evolution of Curved Knife, requiring Bracer. Benefits from Iron Blue Will.

Projectiles bounce for as long as Duration allows. This can be a great weapon once it gets going and against hordes of enemies, but struggles when dealing with higher health enemies and bosses. Although it benefits from Iron Blue Will, it has yet to be seen if it does anything given this weapon's effect.

Lightning Ring
Evolves into Thunder Loop, requiring Duplicator. Benefits from Tragic Princess, Twilight Requiem, and Divine Bloodline.

Deals damage to random enemies on the screen using lightning strikes that damage everything in an area around the strike. Lightning Ring can deal a lot of damage and greatly benefits from Area and Cooldown. Random targeting in the early levels may cause issues, so it is best used with defensive weapons if you start with this.

Holy Wand
Evolution of Magic Wand, requiring Empty Tome. Benefits from Waltz of Pearls and Jail of Crystal.

Rapidly fires fast projectiles at the closest enemy. It is greatly enhanced by the Arcanas Waltz of Pearls and Jail of Crystal + Out of Bounds. Jail of Crystal and Crystal Cries is also a potent combination. Without Arcana, Holy Wand deals mediocre damage and falls behind most other evolved weapons.

Hellfire
Evolution of Fire Wand, requiring Spinach. Benefits from Heart of Fire and Waltz of Pearls.

Fires slow moving and piercing meteors. Hellfire deals high damage projectile damage, but has random targeting. The meteors can also pass through walls. Gains a large damage boost when using Heart of Fire and Waltz of Pearls, but without those Arcana Hellfire is a weak evolution.
C Tier Weapons - 1
This is where a majority of base weapons are. Evolved weapons that are in C tier are weak compared to other evolved weapons and should generally be avoided unless going for specific builds. Base weapons here are good to use and can effectively get you through the early game.

Boo Roo Boolle (LM)
Evolution of Mille Bolle Blu, requiring Spellbinder at max level. Benefits from Sapphire Mist.

Targets the closest enemy, the bubbles linger on the edges of the screen and will move with the character as they move. Generally deals low damage for an evolved weapon. With high amounts of Area and Amount this can fill up large areas of the screen and deal constant damage to enemies.

Bone
Morphs into Anima of Mortaccio while playing Mortaccio. Benefits from Beginning and Twilight Requiem.

Deals good damage and bounces off walls and enemies. With investment into Amount and Projectile Speed this can become a really strong base weapon. Works really well in Twilight Requiem builds as Bone produces a lot of projectiles that will expire at different parts of the screen.

Prototype B (OG)
Evolution of Short Gun, requiring Weapon Power-Up and Bracers to evolve. Benefits from Iron Blue Will, Heart of Fire.

Same as Short Gun, but double the projectiles and the second set of projectiles fires in the direction your character last moved. It is the weakest of the Prototype weapons and overall an underwhelming evolution weapon.

Soul Eater
Evolution of Garlic, requiring Pummarola. Benefits from Sarabande of Healing, Tragic Princess, Blood Astronomia, and Wandering the Jet Black.

Good damage, but requires Pummarola to evolve, one of the worst passive items in the game. Gains +1 damage per 60 Health healed up to 60 additional damage. It also reduces the knockback and freezing resistances of enemies. Healing at full health doesn't count toward healing damage conversion, so you have to make sure you take damage somehow such as pairing this with Muramasa. Best used with characters that have good Recovery that can intentionally take damage to boost its power.

Gungnir-Souris (CV)
Evolution of Trident, requiring Duplicator at max level.

Critical hits also fire a damaging beam. Has the same attack pattern of Trident with a much larger Area, more damage, and a beam attack that triggers on critical hits. At base this has a critical hit chance of 40% leading to the beam almost always firing as it will land a critical hit on at least one enemy. Like Trident this weapon struggles to kill enemies that are above and below the character which can cause you to take a lot of unwanted damage.

Alucard Spear (CV)
Evolves into Thunderbolt Spear, requiring Wings.

This sends out a close range spear to damage enemies. It has a unique effect where changing the character's horizontal direction will perform another attack and slightly extend the Duration. The is an extremely strong starting weapon when used properly. The unique effect requires an active playstyle where your character is constantly changing horizontal directions. Maintaining this attack pattern of changing directions provides excellent horizontal damage and coverage, while also providing some vertical coverage.

Night Sword (LM)
Evolves into Muramasa, requiring Stone Mask at max level. Benefits from Wicked Season, Sarabande of Healing, and Divine Bloodline.

Attacks the closest enemies with a series of slashes and can retaliate. Each point of Greed increases retaliation damage by 1.5, turning the Stone Mask needed for evolution into a massive damage booster. This also has a 1% chance to generate a Little Heart when killing enemies which scales with Luck, allowing this weapon to have decent sustain as well.

Hex (CV)
Evolves into Nightmare, requiring Skull O'Maniac at max level. Benefits from Gemini and Twilight Requiem.

Hex summons a purple magic circle that keeps a fixed distance away from the character in the faced direction. It can lock on an enemy before activating. Once activated, it will summon a skull that faces horizontally at the character and shoots out wavy projectile bursts and damaging enemies it touches. The damage is affected by Curse. With the scaling Curse this weapon can deal a lot of damage, although it can be difficult to aim and won't hit many enemies until it gets a lot of stats like Area and Amount. Gemini doubles the effectiveness of this weapon and is highly recommended to pick up.

Mace (CV)
Evolves into Stamazza, requiring Hollow Heart at max level.

Spins around the character for high damage. This is a really strong base weapon. It deals a lot of damage and effectively keeps enemies from touching the character.

Grand Cross (CV)
Does not evolve. Can be purchased from the Master Librarian at the start. It is the weapon version of the passive effect of Cross Crasher Tip. Benefits from Awake.

Once activated, Grand Cross creates a vertical light pillar with wooden crosses traveling across it in the middle of the screen damaging enemies it contacts. Its damage is affected by Revival. This deals very high damage, but suffers from a very long Cooldown as well. It must be used with other weapons to compensate for the long Cooldown. It is a decent weapon once fully leveled.

Fire-L3GS (OG)
Evolution of Firearm, requiring Weapon Power-Up and Candelabrador to evolve. Benefits from Heart of Fire.

Sends out a large wave of fire in the facing direction, however the overall damage of this wave is low compared to other evolved weapons. This weapon can be good on weaker waves, but will struggle against stronger enemies and bosses. Requires Heart of Fire to be good.

Silver Wind (LM)
]Evolves into Festive Winds, with Pummarola. Benefits from Sarabande of Healing, Twilight Requiem, Divine Bloodline, and Wandering the Jet Black.

This deals damage in a horizontal oval area surrounding your character. When killing enemies it has a 5% chance to generate Little Hearts, which is affected by Luck. Overall, a decent base weapon that provides nice sustain and a defensive attack pattern.

Sonic Whip (CV)
Evolves into Crissaegrim Tip, requiring Skull O'Maniac. Benefits from Wicked Season and Slash.

Attacks in a horizontal wave pattern in the direction the character is facing. The weapon also has a chance to instantly kill enemies based on Curse. If you quickly switch directions during the activation you can get this to attack on two sides, but that still leaves the top and bottom of the screen open. This weapon can be a challenge to use, especially if you can't get the movement right to make it good. Can kill intangible beings such as Drowners and Stalkers with its insta-kill hits.
C Tier Weapons - 2
King Bible
Evolves into Unholy Vespers, requiring Spellbinder. Benefits from Twilight Requiem and Divine Bloodline.

Summons a ring of bibles around the character. This is an effective starting weapon that can provide great protection and deals good damage to enemies. Works great with Duration and Amount as you want as many bibles as possible spinning for as long as possible. At low levels there are usually gaps in its defense, so it might be best to pair it with a weapon capable of targeting your character's position.

Wine Glass (CV)
Evolves into Meal Ticket requiring Tirajisu at max level.

Attacks random enemies with exploding wine glasses. The projectile will pierce through any enemies in its path before reaching the target and exploding. This weapon will prioritize attacking bosses as well. This deals great damage in an area, but because of the random attack pattern it can leave the player character vulnerable to enemies.

Svarog Statue (CV)
Does not evolve. Benefits from Heart of Fire. Can be purchased from the Master Librarian at the start.

Svarog Statue leaves a trail of fire on the ground when moving, which damages enemies that walk into it. The flames do not move, which can allow you to make defensive walls and circles for your character. Its main downside is the projectile Pool Limit of 100, which is extremely easy to hit using various combinations of Cooldown reduction, Duration, and Move Speed.

**Bug: Heart of Fire not applying properly.

108 Bocce (LM)
Does not evolve. Benefits from Wicked Season.

Becomes stronger with the difference between Curse and Luck, you need to focus on maxing out the difference to get the most benefit from this, Selecting a character that already has Luck or Curse higher than the other will help significantly with its early game weakness. Otherwise it has okay damage and acts similar to Garlic.

C-U-Laser (OG)
Evolves into Pronto Beam, requiring Weapon Power-Up and Tiragisu to evolve. Benefits from Twilight Requiem, Jail of Crystal.

Fires a single beam in the direction you are facing. If you change direction during the firing animation, multiple shorter beams will form. This has infinite pierce. Jail of Crystal can be paired with Out of Bounds for more damage or Crystal Cries for stat buffs. Weapon Power-Up will appear in the level up screen when selecting this weapon and provide +1 Revive.

Santa Javelin
Evolves into Seraphic Cry, requiring Clover at max level. Benefits from Gemini, Twilight Requiem, Tragic Princess, and Slash. Benefits from Lost & Found Painting.

Drops several large shards at an area. It deals extremely high area damage, but attacks randomly which can make you vulnerable to enemies. Duration increases the amount of projectiles. Its Gemini form mirrors its attack position, which can greatly help mitigate its defensive weakness.

Refectio (CV)
Evolves into Sanctuary, requiring Clover at max level. Benefits from Gemini, Twilight Requiem, Sarabande of Healing, and Wandering the Jet Black.

Refectio creates a blue magic circle under the character's feet. Once activated, the magic circle generates a holy zone with a cross above it, damaging enemies it contacts and healing characters on it. Amount affects the holy zone's Duration. Healing is increased by 1 Health for each 1 Recovery. Unlike the other spellbook weapons, Refectio's Gemini has a different targeting behavior where it will create a moving holy zone in the direction the character is facing. The holy zones deal good damage and also provide excellent defensive utility. Strategically moving around will allow you to spread the holy zones around the screen.

Optical Shot (CV)
Evolves into Acerbatus requiring Karoma's Mana.

Fires piercing projectiles at the nearest enemy while stationary or the facing direction while moving. This can deal a lot of damage and kill many enemies, however it has trouble killing enemies close to the player. This greatly benefits from Amount and Cooldown reduction.
C Tier Weapons - 3
Glass Fandango
Evolves into Celestial Voulge, requiring Wings at max level.

A high damage directional weapon that is boosted against frozen enemies. While moving it concentrates attack in one direction, while not moving it attacks in random directions for less damage.

Dragon Water Whip (CV)
Evolves into Hydrostormer Tip, requiring Attractorb. Benefits from Jail of Crystal and Slash.

Attacks in the direction the character is facing. As you get more Amount this will attack in up to 8 directions with larger attacks aimed horizontally and above the character. Every 7th activation this whip shoots out a snaking dragon projectile that penetrates enemies and walls.

**Bug: Does not benefit from Jail of Crystal.

Bi-Bracelet
Evolves into Tri-Bracelet, evolution of Bracelet. Benefits from Jail of Crystal, Twilight Requiem and Sapphire Mist.

Fires out several cloudy projectiles at a random enemy. Has more damage, Pierce, and projectiles than Bracelet, but still underwhelming for an evolution weapon. Like Bracelet, you want to level this up as soon as possible to make it better.

Science Rocks (EM)
Evolves into Rocket Science, requiring Mini Scientist at max level to evolve.

Scatters rocks with a purple aura around the character, when stepped on the rocks explode. Science Rocks deals good damage and has a large area, but requires additional inputs to make work. This can be both good and bad, as you have control over when the damage goes out, but the rocks can sometimes spawn in bad positions. When you have enough passive stats like Amount and Area this can be a really powerful weapon. Gets a Mini Scientist passive item that has Santa Water.

Luminatio (CV)
Evolves into Vol Luminatio, requiring Crown at max level; which further gifts Universitas, requiring Vol Umbra.

Attacks in an expanding spiral pattern around the player character. Individual hits deal small amounts of damage, but the projectile covers a large area.

Umbra (CV)
Evolves into Vol Umbra, requiring Attractorb at max level; which further gifts Universitas, requiring Vol Luminatio.

Attacks in an expanding spiral pattern around the player character. Individual hits deal small amounts of damage, but the projectile covers a large area.

SpellStream (TF)
Unites into Spellstrom, requiring SpellString and SpellStrike. Benefits from Boogaloo of Illusions.

Sends out a wave towards the nearest enemy that then boomerangs back towards the player. Damage scales with Area. Starts out really underwhelming, but gets much better with levels and stats. Deals high damage for a base weapon once it gets going.

Tenebris Tonitrus (CV)
Evolution of Fulgur, requiring Duplicator at max level. Benefits from Gemini and Tragic Princess.

Tenebris Tonitrus fires lightning balls at random directions. The lighting balls are slow moving and don't cover a large area. This weapon tends to have low damage overall, especially when used with other weapons that can kill enemies before the lightning balls can. Gemini will double the amount of projectiles, while Tragic Princess can allow it to fire rapidly while moving. Amount and Area can greatly improve this weapon, but it is best to avoid this evolution entirely.

**Bug: Maintains the spell effects of Fulgur if obtained before Tenebris Tonitrus.

Epi Head (CV)
Unites into Clock Tower, requiring Myo Lift, Peri Pendulum, and Endo Gears.

Epi Head summons heads that travel across the stage in a wavy path from outside of the screen to the other side of the screen. Also triggers other clockwork weapons. Damage increased by Amount and currently found Orologions. The most underwhelming of the clockwork weapons as the flying heads don't provide a lot of screen coverage despite their damage being good.

Eskizzibur (TF)
Evolves into Legionnaire, requiring Armor at max level. Benefits from Slash and Divine Bloodline.

Attacks in front of the character and gains a powerful ground strike at level 5. Amount causes consecutive swings that also attack behind. It is able to retaliate and really shines when paired with Divine Bloodline. Its evolution, Legionnaire, is one of the best weapons in the game.

Celestial Dusting
Morphs into Profusione D'Amore while playing O'Sole. Benefits from Beginning, Sarabande of Healing, Twilight Requiem, and Wandering the Jet Black.

Requires your character to move to be good, has a chance of healing you at max weapon level. The faster you move the more flowers that spawn. Can be used defensively by moving in a circle. Standing still will cause it to default to a higher cooldown and low range pattern.

Tyrfing (CV)
Evolves into Rune Sword, requiring Spinach. Benefits from Slash.

Fires swords at the faced direction that boomerang back to the character. It can deal critical hits by default. This weapon can deal really high focus damage, especially when using the Slash Arcana, but struggles with large groups of enemies when it is at low levels and stats. Benefits greatly from Luck, Amount, Area, and Projectile Speed.

Flames of Misspell
Evolves into Ashes of Muspell, requiring Torrona's Box at max level. Benefits from Sapphire Mist and Heart of Fire.

Acts like the Nduja Fritta Tanto pickup. This weapon has low damage at low weapon levels, but becomes a strong weapon when leveled up. Area and Cooldown reduction can greatly improve this weapon's performance and lethality.

Iron Shield (CV)
Evolves into Dark Iron Shield, requiring Parm Aegis. Benefits from Divine Bloodline.

Spawns a shield in front of the player character. This shield retaliates when taking damage and shoots out 6-pointed projectiles that linger in a curved line in front of the shield. This weapon requires taking damage to send out the projectiles. The shield itself will knock enemies back, but not trigger the projectiles. Works really well when paired with ways to reduce damage like Armor since you'll intentionally need to get hit. The weapon overall is effective at killing enemies and preventing getting overwhelmed.
C Tier Weapons - 4
Metal Claw (OG)
Evolves into Big Fuzzy Fist, requiring Weapon Power-Up and Hollow Heart to evolve.

Attacks immediately to the left and right of your character for high damage. Can be an extremely good base weapon, but the limited range holds it back somewhat. When used with other weapons that out range it, Metal Claw will deal significantly less damage. Weapon Power-Up will appear in the level up screen when selecting this weapon and provide +1 Revive.

Cherry Bomb
Morphs into Yatta Daikarin while playing Cavallo. Benefits from Beginning and Wicked Season.

Moderate damage, chance to explode that scales with Luck. With investment into Amount and Projectile Speed this can become a really strong base weapon.

Lifesign Scan (EM)
Evolves into Paranormal Scan, requiring Mini Ghost at max level to evolve. Benefits from Sarabande of Healing and Wandering the Jet Black.

Provides a pulse of healing that heals every player in range. Works well in multiplayer. Can pair well with Sarabande of healing and with enough Cooldown reduction it can keep your character healed to full even if taking constant damage from enemies. Gets a Mini Ghost passive item that has Clock Lancet.

Globus (CV)
Evolves into Nitesco, requiring Empty Tome at max level. Benefits from Gemini.

Fires two bouncing projectiles that travel diagonally. Amount increases Duration rather than adding more projectiles. The bouncing pattern of this weapon can make it hard to keep track of which enemies it will target. It can kill a lot of enemies, but much of the time they will be at various parts of the screen. Gemini really helps with the screen coverage and allows Globus to quickly fill the screen with projectiles.

Sharp Tongue (EM)
Evolves into Impostongue, requiring Mini Imposter at max level. Benefits from Gemini.

Good damage and targeting. Prioritizes targets in front of the character. It does leave a large blind spot behind your character, so it is good to constantly change directions while using this to get optimal targeting spread. Most notably this weapon's damage scales with Recovery, so +1 Recovery will turn into +100% more damage, which can make Sharp Tongue an amazingly strong weapon. This is best used with characters that have high recovery like Cosmo, and on builds that use Pummarola and Metaglio Left. Gets a Mini Imposter passive item that has Knife.

Centralis Custos (CV)
Unites into Trinum Custodem, requiring Sinestro Custos and Dextro Custos.

Cerberus' vengeful head occurs above the character, damaging enemies it touches. When taking damage it provides a +10 Armor, +2.0 Recovery, and -10% Cooldown boost, making your character hard to kill. This can be a useful weapon for quickly recovering from small amounts of damage and preventing further large hits. The damage aura acts like a stronger version of Garlic that only covers the top of your character.

Mirage Robe (LM)
Evolves into J'Odore, requiring Attractob at max level. Benefits from Out of Bounds.

Decent defensive weapon that can become a strong offensive weapon when using the Out of Bounds Arcana. On its own, outside of using characters with low cooldowns or on Babi-Onna it can be hard to use. Moving in circles will allow you to make a defensive wall that prevents enemies from getting near you.

Shadow Pinion
Evolves into Valkyrie Turner, requiring Wings. Benefits from Twilight Requiem.

The weapon deals a lot of damage, however the movement requirements can make it difficult to use and work well with other weapons. Shadow Pinion can be used defensively by running in a circle and not allowing the pinions to fire. To properly use Shadow Pinion, it is best to run in a curved pattern and stop while facing towards any large clusters of enemies. Projectile Speed will cause the pinions to drift away from you before firing. If you know how to use it, it is really good, if not then it will end up killing you.

Ice Fang (CV)
Evolves into Cocytus, requiring Spellbinder at max level. Benefits from Gemini and Jail of Crystal.

Ice Fang summons a light blue magic circle directly in front of the character's faced direction that glows brighter as it reaches full Charge. When fully Charged, Ice Fang sends out teeth-like icicles that attack enemies within its area. This can be a great defensive weapon especially when paired with Gemini as the fangs provide protection from all sides as long as your character stays in the effect. Works great with Cooldown and Duration to maintain the uptime on the weapon.

Guardian's Targe (CV)
Evolves into Sacred Beasts Tower Shield, requiring Pummarola.

Spawns a shield in front of the player character. Whenever the shield touches an enemy or the character overheals, this sends out projectiles that travel in a curve behind the character before accelerating in a straight downward diagonal line in front of the character. A great defensive weapon that can be used to ram into enemies to spawn more projectiles. This weapon benefits a lot from Move Speed and Recovery.

Keremet Bubbles (CV)
Evolves into Keremet Morbus, requiring Armor at max level. Benefits from Gemini and Tragic Princess.

Keremet Bubbles summons a green magic circle that keeps away from a fixed direction, whose angle can be controlled by the character's movement (starts at 9 o'clock). Once Charged, it fires green bubbles toward the character, which damages enemies they touch. This weapon starts out very weak and is unable to reach the middle of the screen without Duration or higher levels, but becomes stronger at later levels and with investments in Amount and Area. The targeting mechanic can be used to aim the projectiles at areas not previously hit. Gemini works great with this weapon.

SpellString (TF)
Unites into SpellStrom, requires SpellStream and SpellStrike. Benefits from Chaos in the Dark Night.

Attacks the closest enemies, similar to Magic Wand, but is much stronger. Damage scales with Projectile Speed. Once leveled and with enough stats, it can create a strong defensive circle around the character as it rapidly attacks enemies that come close.
C Tier Weapons - 5
Summon Spirit (CV)
Does not evolve. Can be purchased from the Master Librarian at the start.

Summons ghost-like homing projectiles that move in circles. This deals moderate damage and the targeting mechanism can make it difficult to handle large numbers of enemies. The circle patterns will often form a protective area around your character. Level this weapon up as soon as possible to gain Pierce. Amount, Projectile Speed, and Duration work really well with Summon Spirit.

Summon Spirit Tornado (CV)
Does not evolve. Can be purchased from the Master Librarian at the start. It is the weapon version of the passive effect of Spirit Tornado Tip.

Summons projectiles that dash around the screen collecting experience gems for the character. The gems collected fly towards the player and deal a small amount of damage to any enemies in their path. This weapon has utility for collecting gems, but the total damage is quite low.

Homing Miss (OG)
Evolves into Multistage Missiles, requiring Weapon Power-Up and Duplicator to evolve. Benefits from Heart of Fire.

Fires projectiles the faced direction in a curved path that home in on enemies. These end up circling the screen looking for enemies. Weapon Power-Up will appear in the level up screen when selecting this weapon and provide +1 Revive.

Cross
Evolves into Heaven Sword, requiring Clover. Benefits from Divine Bloodline and Waltz of Pearls.

Deals good damage and attacks the closest enemy before it spins in the opposite direction. Grabbing the Waltz of Pearls Arcana can allow it to bounce and damage many enemies across the screen.

Clock Lancet
Evolves into Infinite Corridor, requiring Silver Ring and Gold Ring at max level. Benefits from Out of Bounds and Blood Astronomia.

Fires a freezing beam in one of 12 directions and rotates clockwise. Has really good defensive utility, but can be weak if this is one of your only weapons. If used properly, you can indefinitely keep tougher enemies frozen by moving around them. Pairs well with Out of Bounds, Crystal Cries, and having high amounts of Cooldown.

Carréllo
Does not evolve (yet). Benefits from Beginning, Waltz of Pearls, Iron Blue WIll, and Tragic Princess.

High damage, but limited defensive capability and attacks in a strict horizontal line. Once the carts are sent out it is a lot harder to change your position as doing so will leave your character vulnerable to attacks. Using Arcana can make this weapon a lot better, but it is still an underwhelming choice, especially since it does not evolve. Best used on stages that are horizontal in layout.

Dominus Hatred (CV)
Unites into Power of Sire, requiring Dominus Anger and Dominus Agony.

Fires multiple thin green projectiles from above that attack vertically from the top of the screen. Drains 1 Health every time it activates, but will not take the player's Health below 1. At high Cooldown reduction the Health drain can be dangerous if you don't have a source of healing. Can synergize well with Wandering the Jet Black if you use a healing item with it.

Report! (EM)
Evolves into Emergency Meeting, requiring Mini Crewmate at max level to evolve.

Deals high directional area damage and has a strong knockback, however it only attacks the area immediately in front of your character in a cone pattern facing left or right. To maximize use, you would have to frequently switch directions, which can make this difficult to use. Gets a Mini Crewmate passive item that has Garlic.
Runetracer
Evolves into NO FUTURE, requiring Armor. Benefits from Jail of Crystal and Twilight Requiem.

Fires a projectile that bounces off walls in a straight line. Good damage, but not a lot of defensive utility. The bouncing projectile mechanics is really good on levels with walls and tight spaces. With the right combination of Arcana it can be extremely strong.

Gale Force (CV)
Evolves into Pneuma Tempestas, requiring Bracer at max level. Benefits from Gemini and Waltz of Pearls.

Gale Force summons a light green magic circle vertically directly in front of the player's character faced direction. Once activated, it shoots out projectiles that fly backwards. While this weapon attacks a large area, it doesn't provide any protection near the center of the screen, especially at low weapon levels. When paired with Gemini this is one of the few unevolved weapons capable of damaging most of the screen, although the individual hits aren't that strong.

Platinum Whip (CV)
Evolves into Cross Crasher Tip, requiring Clover. Benefits from Slash.

Attacks rapidly in a horizontal direction both in front and slightly behind the character. Every 3rd activation, it fires clones in the four cardinal directions. This weapon starts with a small attack area and needs stats like Area and Amount to make it better. Overall, a good base weapon that can deal good damage and clear out enemies.

Phiera Der Tuphello
Unites into Phieraggi, requires Eight The Sparrow and Tirajisu. Benefits from Iron Blue Will, Heart of Fire, and Gemini.

Shoots red energy bullets in the four ordinal directions. A simple weapon with good damage. Will often out-damage Eight of Sparrow due to firing first and having better Arcana. Phiera Der Tuphello's and its Gemini counterpart Red Muscle have better Arcana bonuses than Eight The Sparrow and its counterpart Twice Upon A Time. Level it up quickly to gain Pierce. Works great with Amount.

Eight The Sparrow
Unites into Phieraggi, requires Phiera Der Tuphello and Tirajisu. Benefits from Iron Blue Will, Jail of Crystal, and Gemini.

Shoots blue energy bullets in the four ordinal directions. A simple weapon with good damage. Phiera Der Tuphello's and its Gemini counterpart Red Muscle have better Arcana bonuses than Eight The Sparrow and its counterpart Twice Upon A Time. Level it up quickly to gain Pierce. Works great with Amount.
C Tier Weapons - 6
Star Flail (CV)
Evolves into Moon Rod, requiring Pummarola at max level.

Fires high damage close-ranged projectiles with a short Duration in the faced direction. These projectiles can form a defensive wall in front of the character. Greatly benefits from Cooldown reduction, Area, and Duration, however the most important stats for this weapon is Recovery. Every +1 Recovery will add +100% more damage, turning this initially unimpressive weapon into a powerhouse. This is best used with characters that have high recovery like Cosmo, and on builds that use Pummarola and Metaglio Left.

Iron Ball (CV)
Evolves into Wrecking Ball, requiring Armor. Benefits from Iron Blue Will.

Attacks similarly to Axe, with the projectiles being thrown in an upward arch before falling to the bottom of the screen. These projectiles shake and bounce at the bottom of the screen. Armor will increase the damage of this weapon, making it a good weapon to pair with Centralis Custos/Trinum Custodem. This deals high damage, but will mostly target the middle and bottom of the screen.

Dominus Anger (CV)
Unites into Power of Sire, requiring Dominus Agony and Dominus Hatred.

Fires red penetrating high damage projectiles that target the nearest enemy. Once activated the projectiles will stay still for a second before accelerating. Drains 1 Health every time it activates, but will not take the player's Health below 1. At high Cooldown reduction the Health drain can be dangerous if you don't have a source of healIng. Can synergize well with Wandering the Jet Black if you use a healing item with it.

Discus (CV)
Evolves into Stellar Blade, requiring Parm Aegis.

Fires a defensive saw blade that spins around the character before travelling in the faced direction. This weapon can also travel along walls/terrain. It deals high damage and can mow through many enemies. Investing in Cooldown and Area early are key to making this weapon work well. Works best on stages with many walls and solid objects. The main challenging part is that this requires Parm Aegis to evolve, which can only be obtained from an Arma Dio or on the Ode to Castlevania stage.

Vol Confodere (CV)
Evolves into Melio Confodere, evolution of Confodere. Benefits from Slash and Chaos in the Dark Night.

Functions similar to Confodere and adds in a horizontal attack. Projectile Speed increases damage. Like Confodere this suffers from only dealing damage in a small Area at a time, which makes it unreliable when you have few weapons.

Garlic
Evolves into Soul Eater, requiring Pummarola. Benefits from Tragic Princess, Divine Bloodline, and Blood Astronomia.

Creates a small damaging aura around the player. It is great for the early levels and helping new players, but falls off in damage hard as you level making it feel like a wasted slot. If starting out it is great to pair with King Bible as King Bible will hover outside the range of Garlic.

Trident (CV)
Evolves into Gungnir-Souris, requiring Duplicator at max level.

It attacks in a V pattern 3 times in the faced direction. This weapon can only attack to the left and right of the character. The attack pattern and limited range at levels makes it challenging to use, however it does deal good damage and with proper movement can kill a lot. Like most face-firing weapons, you want to move forward while using this and stay within the projectile animation.

Lucky Swipe (EM)
Evolves into Crossed Wires, requiring Mini Engineer at max level.

Good damage, but really low cooldown and awkward positioning. Luck below 100% increases the amount of swipes this weapon does. This weapon will leave the bottom of your character exposed to damage. Gets a Mini Engineer passive item that has Lightning Ring.
D Tier Weapons - 1
These weapons just perform on average worse than those in the tier above. They can still be played, but it may make the early game harder. The majority of these weapons cannot be used in solo weapon runs.

Pako Battiliar
Evolves into Mazo Familiar, requiring Hollow Heart at max level. Benefits from Divine Bloodline.

This weapon spawns bats from the edge of the screen on a long cooldown as well as when it retaliations. The attack direction is random and the bats push enemies back more than they kill. Since they spawn from the edge of the screen the bats are not effective at being used defensively. This weapon requires Divine Bloodline to be good and the retaliation projectiles can trigger Divine Bloodline's Max Health increase rapidly. On its own this weapon deals poor damage and cannot reliably be used without support from other weapons.

Hand Grenade (CV)
Evolves into The RPG, requiring Candelabrador at max level. Benefits from Heart of Fire.

Attacks a random enemy and generates a large continuous explosion at the area that damages nearby enemies. At a low level this has a long Cooldown and small Area, but gets much better when leveled up and with higher stats. While initially different to use, staying near the explosion will provide decent protection from enemies. Heart of Fire greatly improves its offensive and defensive capabilities.

Whip
Evolves into Bloody Tear, requiring Hollow Heart. Bloody Tear unites with Vento Sacro into Fuwalafuwaloo. Benefits from Slash.

The first weapon you get to use in the game. It attacks in a predictable horizontal pattern that leaves the bottom of your character exposed. Deals average damage. It will quickly be a weapon you outgrow, but it is still a good weapon overall.

Pentagram
Evolves into Gorgeous Moon, requiring Crown. Benefits from Blood Astronomia.

Summons a pentagram that instantly kills all enemies, except for certain bosses, on the screen. This weapon can also destroy experience gems and chests, so use with extreme caution. As it levels up and with Luck the chance to destroy gems and chests drops. Chests and gems can be saved by moving out of range of them when expecting a Pentagram trigger. Another big downside is that when you screen clear enemies, a large wave of them will respawn again which can overwhelm less prepared players. Requires another weapon or method of killing enemies during the initial long Cooldown when picking this weapon early.

Diver Mines (OG)
Evolves into Atmo-Torpedo, requiring Weapon Power-Up and Attractorb to evolve.

Sends out explosive projectiles in your faced direction that follow along walls and the edge of the screen. Best used on stages with decent wall coverage. Diver Mines will deal 4x damage to the main target and area damage to any enemies near it. This weapon arches downward in the direction you are facing, which can make killing enemies that are surrounding you difficult. Weapon Power-Up will appear in the level up screen when selecting this weapon and provide +1 Revive.

Party Popper (TF)
Does not evolve. Benefits from Gemini and Sapphire Mist.

Attacks in an arch pattern and the projectiles bound off the bottom of the screen when they land. Individually the projectiles deal good damage, but there are not enough of them to clear out enemies and it fires too slowly.

Hats (EM)
Does not evolve. Benefits from Waltz of Pearls, Out of Bounds, and Crystal Cries.

The hats deal high damage and can sometimes cause a big knockback effect, high pierce, bouncing projectiles, and even freeze. The randomness of the hats can make it difficult to determine where to move when there are many enemies. Despite not evolving, Hats gets a Mini-Horse passive item that has Greatest Jubilee.

Shadow Servant (TF)
Evolves into Ophion, requiring Skull O'Maniac at max level. Benefits from Gemini.

Can deal decent damage and has a 50% chance to slow enemies, which stacks. Starts off weak, but becomes a lot better the more levels and passives you get. Luck and Curse increase the chance to slow enemies. Can benefit from Gemini. Evolves into one of the best weapons in the game, Ophion.

Laurel
Evolves into Crimson Shroud, requiring Metaglio Left and Metaglio Right both at max level. Benefits from Blood Astronomia.

An invincibility shield that can be useful during the early stages of the game, but provides no offensive capability. It can store up to 3 shield charges that then take time to replenish. With -87.5% Cooldown it can make a character permanently invincible, however getting that much is not possible for most characters outside of Paranormal Scan and Golden Eggs. While helpful, there are better defensive weapons like Lifesign Scan or Clock Lancet.

Vanitas Whip (CV)
Evolves into Aurablaster Tip, requiring Hollow Heart. Benefits from Divine Bloodline, Slash, and Heart of Fire.

Attacks the nearest enemy and creates a perpendicular pillar of fire. Damaging fire zones are affected by Max Health and caps at +120 damage with 1700 Max Health. The damaging zones have a small area and have trouble effectively killing enemies to keep your character alive when this is your only weapon. Requires Heart of Fire to be good.

Jet Black Whip (CV)
Evolves into Mormegil Tip, requiring Stone Mask. Benefits from Twilight Requiem and Slash.

Attacks the nearest enemy and sends out a linear spike that damages enemies near it. The spike is affected by Amount and Area, but not Duration. The slashes deal a lot of damage, but affect so few enemies that you will quickly get overwhelmed if this is your only weapon.

Dextro Custos (CV)
Unites into Trinum Custodem, requiring Centralis Custos and Sinestro Custos.

Summons Cerberus' fiery head in the faced direction. The attack area is small, but deals a lot of damage. It doesn't cover the back of the player, so frequent direction switching is needed to ensure enemies are dealt with on both sides. Without a lot of stat investments this weapon is unreliable at killing enemies.

Sinestro Custos (CV)
Unites into Trinum Custodem, requiring Dextro Custos and Centralis Custos.

Summons Cerberus' icy head in the faced direction. The attack area is small, but deals a lot of damage. It doesn't cover the back of the player, so frequent direction switching is needed to ensure enemies are dealt with on both sides. Without a lot of stat investments this weapon is unreliable at killing enemies.
D Tier Weapons - 2
Axe
Evolves into Death Spiral, requiring Candelabrador. Benefits from Slash and Iron Blue Will.

High damage for a base weapon, throws in an arch pattern in the direction your character is facing. Due to the attack pattern it can be really hard to defend using this weapon as it leaves you exposed below and behind your character.

Long Gun (OG)
Evolves into Prototype A, requiring Weapon Power-Up to evolve. Benefits from Heart of Fire.

Fires rapidly in a line in the characters facing direction. The small projectiles move in a wave pattern and deal small, but rapid damage. Due to the narrow targeting and low damage this can be a difficult weapon to start with. Heart of Fire is recommended to make this weapon better. Weapon Power-Up will appear in the level up screen when selecting this weapon and provide +1 Revive.

Vibhuti Whip (CV)
Evolves into Daybreaker Tip, requiring Candelabrador. Benefits from Slash.

Attacks the nearest enemy and leaves behind small explosion clouds that damage enemies. This weapon deals unreliable damage and has a lot of difficulty handling large amounts of enemies.

Ebony Wings
Unites into Vandalier, requiring Peachone. Benefits from Gemini and Twilight Requiem.

The birds can be a pain on their own, but can be greatly improved by Gemini and Twilight Requiem. Their damage isn't bad, in fact when properly used they are strong, but their targeting mechanic and low cooldown make it hard to kill large amounts of enemies. Ebony Wings' Gemini counterpart Zhar Ptytsia benefits from Heart of Fire.

Peachone
Unites into Vandalier, requiring Ebony Wings. Benefits from Gemini and Twilight Requiem.

The birds can be a pain on their own, but can be improved by Gemini and Twilight Requiem. Their damage isn't bad, in fact when properly used they are strong, but their targeting mechanic and low cooldown make it hard to kill large amounts of enemies. Peachone's Gemini counterpart Cygnus benefits from Jail of Crystal.

Aura Blast (CV)
Does not evolve. Benefits from Heart of Fire. Can be purchased from the Master Librarian at the start. It is the weapon version of the passive effect of Aurablaster tip.

Shoots fire explosions sideways in a short distance. At level 4 it gains a blue cross effect that starts the area above the player character. Before level 4 it is extremely weak. Once leveled up it can deal good damage to the area above and around the player character, however still has a short range.

Flash Arrow (TF)
Evolves into Millionaire, requires Bracer at max level. Benefits from Slash and Iron Blue Will.

Fires an extremely high pierce and high damage arrow in the direction the character last moved. Can clear out enemies within a line, but has such a small area and long Cooldown that it cannot be used to effectively kill large groups. Amount multiplies damage instead of adding more arrows.Great for focus damage on bosses, but needs Iron Blue Will or another weapon that can cover its glaring weakness.

Knife
Evolves into Thousand Edge, requiring Bracer. Benefits from Slash and Iron Blue Will.

Deals focused damage in a small area in front of your character. Is really weak at the start, but once it gains additional Pierce it can become pretty good. Great for focus damage on boss enemies.

Shuriken (CV)
Evolves into Yagyu Shuriken, requiring Empty Tome. Benefits from Iron Blue Will.

This throws projectiles in the faced direction at slight angles. Functions similar to Knife. Iron Blue Will greatly increases the effectiveness of this weapon and allows it to have great screen coverage.

Magic Wand
Evolves into Holy Wand, requiring Empty Tome. Benefits from Waltz of Pearls and Jail of Crystal.

Can be decent to start out with, but it quickly falls behind other weapons. Targets the enemy closest to the player, which is really good.

Short Gun (OG)
Evolves into Prototype B. Requires Weapon Power-Up and Bracers to evolve. Benefits from Heart of Fire.

Fires left or right in a short range. The projectiles will bounce once when hitting an enemy or wall. Due to the low damage and range, this can be a difficult weapon to start with. Heart of Fire is recommended to make this weapon better. Weapon Power-Up will appear in the level up screen when selecting this weapon and provide +1 Revive.

Vento Sacro
Unites into Fuwalafuwaloo, requiring Bloody Tear. Benefits from Slash and Divine Bloodline.

It is a horizontal damage weapon that increases damage the more you move. As soon as you stop moving you lose the damage buff. The damage starts out low and it has a small range, so having to constantly move may just end up placing your character in danger. This is also capable of dealing critical hits by default.
F Tier Weapons - 1
These weapons will actively make the game harder due to their lack of kill potential or defensive utility. Unless these weapons have good evolutions, don't bother picking them up.

Blade Crossbow (OG)
Evolves into BFC2000-AD, requiring Weapon Power-Up and Clover to evolve.

Fires spinning blades in the faced direction that stop and increase in size when hitting enemies. Deals low damage andthe blades can't effectively clear out groups of enemies. With enough Area and Duration the blades can be used defensively by staying near them while they spin. Weapon Power-Up will appear in the level up screen when selecting this weapon and provide +1 Revive.

Alucart Sworb (CV)
Evolves into Alucard Sword, which further evolves into Alucard Shield, requiring 6 fully evolved weapons and 6 fully leveled passive items.

This weapon attacks rapidly and horizontally in the faced direction. Can deal decent damage, but has a very small attack range and cannot deal with large amounts of enemies.

Spread Shot (OG)
Evolves into Prototype C, requiring Weapon Power-Up and Empty Tome to evolve. Benefits from Heart of Fire.

Fires many smaller projectiles in a cone pattern in the direction your character is facing. Changing directions allows you to get full coverage if you move in a circle fast enough. Heart of Fire can greatly enhance its effectiveness. Weapon Power-Up will appear in the level up screen when selecting this weapon and provide +1 Revive.

Curved Knife (CV)
Evolves into Bwaka Knife, requiring Bracer. Benefits from Iron Blue Will.

Attacks with a bouncing, piercing sickle at random enemies. Starts out weak, but gets better with additional levels. Iron Blue Will greatly increases the effectiveness of this weapon and allows it to have great screen coverage.

Silver Revolver (CV)
Evolves into Jewel Gun, requiring Karoma's Mana.

Fires a high damage bullet on a long cooldown in the faced direction while moving or at the nearest enemy while stationary. Upon hitting an enemy the projectile splits into a cone pattern for 1/3rd the base damage. Additionally, every 6th activation the revolver will be thrown similar to Axe. Due to this weapon's long Cooldown and facing requirement it can be incredibly difficult to use this during the early stages of the game. A good strategy for using this is grabbing Armor or a defensive weapon and running/facing large groups of enemies to ensure the shotgun effect hits as many targets as possible. Every bullet is valuable and shouldn't be wasted by missing a shot or running away. Karoma's Mana can only be obtained from an Arma Dio or on the Ode to Castlevania stage, so evolving this will be a challenge.

Firearm (OG)
Evolves into Fire-L3GS, requiring Weapon Power-Up and Candelabrador to evolve. Benefits from Heart of Fire.

Fires a wheel of fire in the direction your character is facing. The fire doesn't deal a lot of damage and has extremely low coverage. Needs Heart of Fire to be good, otherwise it is near useless. Weapon Power-Up will appear in the level up screen when selecting this weapon and provide +1 Revive.

Mille Bolle Blu (LM)
Evolves into Boo Roo Boolle, requiring Spellbinder. Benefits from Sapphire Mist.

Low damage weapon, but it has an evolution, unlike the other projectile Merchant weapons. Fires damaging bubbles that have a slight pushback and stay on the ground. With enough Cooldown they can stack and produce a nice defensive area.

Raging Fire (CV)
Evolves into Salamender, requiring Spinach at max level. Benefits from Gemini and Heart of Fire.

Raging Fire summons a red magic circle in the faced direction that glows brighter as it reaches full Charge. The circle will lock onto an enemy until it fires or the enemy dies. Once activated, it summons a cluster of spreading flames, heavily damaging enemies above it. The flames deal good damage, but the awkward and slow targeting mechanic makes it difficult to hit enough enemies to be effective. Heart of Fire or Gemini becomes necessary to make this weapon usable.
F Tier Weapons - 2
Fulgur (CV)
Evolves into Tenebris Tonitrus, requiring Duplicator at max level. Benefits from Gemini and Tragic Princess.

Fulgur summons an azure magic circle at the facing edge of the screen that moves along that side when activated. The character will fire a piercing bolt each time the circle stops moving. The piercing bolt can clear out enemies in lined patterns, but doesn't deal much damage overall nor does it sufficiently protect your character. Fulgur works really well with Gemini.

Bracelet
Evolves into Bi-Bracelet, which further evolves into Tri-Bracelet. Benefits from Jail of Crystal and Sapphire Mist.

Shots out projeciles in a short range. At low levels it has extremely low damage and is unable to effectively kill enemies or deal damage on its own. Jail of Crystal can improve its defensiveness and adding Out of Bounds can make it deal more damage. While extremely weak, it does evolve into more powerful weapons without the need for Passive Items.

Sonic Bloom (OG)
Evolves into Wave Beam, requiring Weapon Power-Up and Armor to evolve. Benefits from Waltz of Pearls.

Sends out a directional damage cone that has a lot of knockback. The weapon cone is large, but has a long cooldown initially and since it requires facing enemies it can be difficult to survive with it early on. When using it go for Cooldown as soon as possible to ensure it is firing frequently enough. Weapon Power-Up will appear in the level up screen when selecting this weapon and provide +1 Revive.

Fire Wand
Evolves into Hellfire. Benefits from Heart of Fire and Waltz of Pearls.

This is a really weak weapon that hits only a few targets and attacks in random directions. Requires Heart of Fire or other supporting weapons to be viable. Prioritize Amount to get more projectiles.

Just Vent (EM)
Evolves into Unjust Ejection, requiring Mini Shapeshifter at max level.

Summons a below your character that instantly kills enemies and deals high damage to bosses. While the effect seems nice on paper, it triggers at such a slow pace that it ends up being incredibly weak overall. Needs to be used with another weapon to survive if your character starts with this or picks it up early. Can be used defensively by moving over a vent to attract enemies to it. Decent as a support weapon, but not as a main source of damage. Gets a Mini Shapeshifter passive item that has Bone.

Clear Debris (EM)
Evolves into Clear Asteroids, requiring Mini Guardian at max level.

Summons a chute that drops debris down onto enemies from the top of the screen. This starts with an extremely long Cooldown and low damage. The targeting is random, making it hard to plan around it. It cannot kill fast enough to have your character survive without additional support from other weapons. When used with other weapons it can be a good source of burst damage and defense by moving into the vertical columns that appear. Gets a Mini Guardian passive item that has Laurel.

Javelin (CV)
Evolves into Long Inus, requiring Spellbinder. Benefits from Iron Blue Will.

Throws a projectile at a curve in the faced direction. Unlike most other projectile weapons with low Pierce like Knife or Shuriken, Javelin has a limited Duration and long Cooldown. This, in addition to its low damage, makes this one of the worst weapons in the game. Even using Iron Blue Wil barely helps as it will often bounce off screen. Javelin's only redeeming quality is its evolution is good.

Confodere (CV)
Evolves into Vol Confodere, which further evolves into Melio Confodere. Benefits from Slash and Chaos in the Dark Night.

Rapidly attacks enemies within range of the crimson circle. Range indicator will also explode when it appears and disappears near enemies. Projectile Speed increases damage. This weapon doesn't deal damage to enough enemies to be good. It has an extremely short range and suffers from only attacking a few targets.
Weapon Selectors Ranked
Weapon selectors allow you to choose specific weapons when chosen. These are generally extremely rare and only one of each may be obtained in a single run cycle outside of Arcana or Random Events.

Super Candybox II Turbo
Weapon Selector. Gift of Candybox.

Can be almost any evolved weapon, with some exceptions. Appears in a chest only after a Candybox has been obtained, and you have a fully upgraded weapon and passive inventory. This along with Candybox are one of the few ways to get more than 6 weapons.

Candybox
Weapon Selector. Base weapon.

Can be any base weapon. Higher luck will increase the chance for it to appear. Will appear in chests after you max out your weapon slots and has a small chance to appear in the level up screen. This can also be spawned from Random events, Gold Fingers, and the Hail from the Future Darkana. This along with Super Candybox II Turbo are one of the few ways to get more than 6 weapons.

Belnades' Spellbook
Weapon Selector. Allows you to choose from a selection of 9 spells: Raging Fire, Ice Fang, Gale Force, Rock Riot, Fulgur, Keremet Bubbles, Hex, Refectio, and Summon Spirit Tornado.

Best weapons choices are generally Refectio/Sanctuary, Hex/Nightmare, Rock Riot/Gemma Torpor, and Gale Force/Pneuma Tempestas.

Coat of Arms
Weapon Selector. Allows you to choose from a selection of 20 vampire-killing tools: Curved Knight, Shuriken, Javelin, Iron Ball, Discus, Silver Revolver, Hand Grenade, Wine Glass, Whip, Axe, Knife, Santa Water, Runetracer, King Bible, Cross, Lightning Ring, Svarog Statue, Troll Bomb, Hydro Storm, and Grand Cross.

Best weapon choices are generally Iron Ball/Wrecking Ball, Wine Glass/Meal Ticket, Santa Water/La Borra, Axe/Death Spiral, King Bible/Unholy Vespers, Cross/Heaven Sword, Troll Bomb, and Hydro Storm.

Ebony Diabologue
Weapon Selector. Allows you to choose from a selection of 16 ambiguous powers (glyph weapons): Confodere, Optical Shot, Luminatio, Umbra, Globus, Sonic Dash, Dextro Custos, Sinestro Custos, Centralis Custos, Dominus Anger, Dominus Hatred, Dominus Agony, Summon Spirit, Dark Rift, Sword Brothers, and Soul Steal.

Most weapon choices for Ebony Diabologue are really good, with the exception of Summon Spirit.

Spectral Sword
Weapon Selector. Allows you to choose from a selection of 12 magic weapons: Alucart Sworb, Tyrfing, Alucard Spear, Trident. Mace, Star Flail, Iron Shield, Guardian's Targe, Valmanway, Icebrand, Arrow of Goth, and Aura Blast.

Best weapon choices are generally Alucart Sworb/Alucard Swords/Alucard Shield, Mace/Stamazza, and Iron Shield/Dark Iron Shield.

Morning Star
Weapon Selector. Allows you to choose from a selection of 8 magic whips: Alchemy Whip, Sonic Whip, Dragon Water Whip, Jet Black Whip, Wind Whip, Vibhuti, Platinum Whip, and Vanitas Whip.

Best weapon choices are generally Alchemy Whip/Vampire Killer and Wind Whip/Spirit Tornado Tip.

Arma Dio
Weapon Selector. This allows you to select any of the base game Passive Items.

Can be useful for rounding out your build or getting an extra passive item. This can also be chosen from a Candybox, but this is not recommended unless you are limiting your weapons through Silent Old Sanctuary or would not benefit from having an extra weapon. Most of the time additional Passive Items beyond the base 6 + stage items do not impact your gameplay too much, which is why this is lower than the Candyboxes and other weapon selectors.
Passive Item Tiers
Passive Items (also referred to as Passive Weapons) are ranked based on how effective they are at improving weapons and run outcomes.

This ranking should also be seen as an overall priority list for determining which 6 Passive Items you should get outside of evolution requirements. Ultimately, best judgement should be used depending on available stage items and targeted weapon evolutions.
S Tier and A Tier Passive Items
S Tier
Passives you almost always want to pick up. They greatly impact nearly every item in the game.

Empty Tome
Empty Tome has 5 levels. At max level, Empty Tome provides -40% Cooldown.

Cooldown is the best stat in the game. Get this item in every run unless using Babi-Onna. It is not necessary to try to match weapon evolutions with this as the Cooldown it provides is usually worth more than a specific weapon.

Torrona's Box
Torrona's Box has 9 levels. At max level, Torrona's Box provides +25% Omni (Might, Projectile Speed, Duration, and Area) and +100% Curse.

Gives a bunch of good stats. Banish it before level 9 if you don't want the 100% Curse. The only reason not to grab this is if you have no room in your passive item pool due to certain weapon evolution requirements. Like Empty Tome, it is usually worth more than getting a specific weapon.

A Tier
Passives that you should often pick up, they greatly benefit the vast majority of weapons.

Academy Badge (TF)
Academy Badge has 6 levels. At max level, Academy Badge provides -15% Growth, +3 Amount, and +2 Revival.

A great item, but it has no evolutions tied to it and is only found as a pick-up on Lake Foscari and Abyss Foscari or when playing Eleanor, Maruto, or Keitha. It benefits from being a predictable pickup, so you should always grab it after maxing out your passive items. The Growth trade-off for the additional Amount is almost always worth it, especially if you already have additional Growth from other sources. The Revives are good as well if you are in a bind or using a build that benefits from more lives.

Duplicator
Duplicator has 2 levels. At max level, Duplicator provides +2 Amount.

Amount is an amazing multiplier for damage, however falls off when Limit Breaking and getting additional sources of Amount. It is possible to hit the projectile Pool Limit on some weapons with too much Amount, but usually not something to worry about. Amount is best used with weapons that have fewer base projectiles. With only 2 levels, you can quickly level this up and spend your levels on other items.

Silver Ring
Silver Ring has 9 levels. At max level, Silver Ring provides +40% Duration and Area.

A combination of Candelabrador and Spellbinder. You should always pick it up after your passive item pool is filled. It is required to obtain Infinite Corridor and is usually located in a far point from the stage starting location.

Candelabrador
Candelabrador has 5 levels. At max level, Candelabrador provides +50% Area.

Area causes your weapons to deal damage to more enemies. Always a great stat. The larger a weapon is at base, the more it will benefit from area bonuses. While still a great item, Candelabrador becomes less necessary when using Boogaloo of Illusions.

Spinach
Spinach has 5 levels. At max level, Spinach provides +50% Might.

Might is a great stat to have and provides a good impact throughout the entire game. Might is an almost universal stat, with the only weapons not benefiting from it being those that deal no damage or with health-based damage. This is a great passive to select in most games.
B Tier and C Tier Passive Items
B Tier
Passives you usually want to pick up. They can be a great benefit to your weapons or provide gameplay conveniences.

Crown
Crown has 5 levels. At max level, Crown provides +40% Growth.

Grants more experience which allows for more levels and Limit Breaking more powerful weapons. The only reason this shouldn't be a high priority item is if you are not using Limit Break. On average this item produces 30% more levels at base, which usually makes up for the loss of not selecting an offensive passive item instead. It works well when combined with Attractorb as both contribute to increasing level gains. While still useful, Crown becomes less necessary when using Arcana like Wicked Season and Crystal Cries which provide a lot of Growth.

Armor (item)
Armor has 5 levels. At max level, Armor provides +5 Armor.

Powerful damage reduction for early game. Can allow you to play riskier or survive longer using a weaker weapon, but often has little impact late game. Additionally, Armor increases retaliatory damage for things such as Divine Bloodline or certain weapons.

Attractorb
Attractorb has 5 levels. At max level, Attractorb provides 3.98x Magnet.

Doesn't provide direct combat related stats, but instead provides convenience and utility by reducing the distance you have to travel to grab experience gems and pick up items. This can especially help in the early game when you want to avoid getting hit and need to grab as much experience as possible. Always grab if using Blood Astronomia and Wandering the Jet Black. Unlike other stats, Magnet is multiplicative, not additive, so characters with additional starting Magnet gain an even larger benefit from this.

Bracer
Bracer has 5 levels. At max level, Bracer provides +50% Projectile Speed.

Can be good if required for an evolution, but not strong on its own. Weapons that benefit from Projectile Speed can usually get a bigger boost from other passive items like Spinach or Candelabrador if given the choice. Projectile Speed is referred to as Speed in game, not to be confused with Move Speed.

Spellbinder
Spellbinder has 5 levels. At max level, Spellbinder provides +50% Duration.

Decent if required for an upgrade, but not that great on its own since many weapons do not gain anything from Duration. Most weapons that benefit from Duration can be improved better by other passive items unless most of your build uses Duration benefiting items.

Weapon Power-Up (OG)
Levels up a random equipped weapon and provides +1 Revive.

It will not appear in the level up pool if you already have it. It does not count against your passive item slots, but will not appear if your passive item slots are full. It is also consumed when you level up a Contra weapon. To get another Weapon Power-Up on a non-Operation Guns stage, you have to evolve one of your Operation Guns weapons first before it will appear again.

C Tier
These are passive Items that can be situationally good. Grab these if they are needed for an evolution or are a stage item, otherwise they should be a lower priority than those in the tiers above.

Karoma's Mana
Karoma's Mana has 5 levels. At max level, Karoma's Mana provides +50 Charm and +50% more duration on Gold Fevers and Gold Fingers.

Can only be obtained from Arma Dio or the Ode to Castlevania stage. Charm is a great stat to have as more enemies means more kills, damage, and experience gains. Charm directly affects the minimum enemy spawn counts for a wave and unlike Curse does not increase their health or speed. Still like Curse it can make the game harder if you cannot keep up with the number of enemies, but usually it is a net benefit.

Extended Gold Fever means more gold will be gained. Extended Gold Fingers means more enemy spawns and a better chance at getting higher tier rewards. Overall, this is a great passive item to have and is recommended to pick up if your build has room for it.

Clover
Clover has 5 levels. At max level, Clover provides +50% Luck.

Luck can be a good stat depending on your build. It is necessary for critical hit builds and freeze builds. It can boost your chance to get multiple items from chests, more consistent item choices, additional level up choices, higher drop chances from light sources, and the chance of positive events occurring. Since it acts as a game mechanic modifier the immediate combat bonuses are limited, however it can enhance the run over the long term.

Metaglio Left
Metaglio Left has 9 levels. At max level, Metaglio Left provides +0.8 Recovery and 1.477x Max Health.

More health and regen are not good on their own, but together they aren't that bad. By the time you get this item, you will already have 6 Passive Items, making this less of a bad choice than Hollow Heart and Pummarola. Like Hollow Heart the Max Health isn't retroactive and applies to whatever your current Max Health is. To not confuse Metaglio Left from Metaglio Right, these items aren't arrows, they form an X when both are collected.

Skull O'Maniac
Skull O'Maniac has 5 levels. At max level, Skull O'Maniac provides +50% Curse.

Good if you are powerful enough, bad if you aren't. Avoid selecting this item unless it is needed for an evolution or is a stage item.

Gold Ring
Gold Ring has 9 levels. At max level, Gold Ring provides +40% Curse.

Increases Curse by 5% per level. Good if you are powerful enough, bad if you aren't. Save for when you know your build can handle the increased health and quantity of enemies. It is required to obtain Infinite Corridor and is usually located in a far point from the stage starting location.

Metaglio Right
Metaglio Right has 9 levels. At max level, Metaglio Right provides +40% Curse.

Increases Curse by 5% per level. Good if you are powerful enough, bad if you aren't. Save for when you know your build can handle the increased health and quantity of enemies. It is required to obtain Crimson Shroud and is usually located in a far point from the stage starting location. To not confuse Metaglio Right from Metaglio Left, these items aren't arrows, they form an X when both are collected.
D Tier and F Tier Passive Items
D Tier
These passives are generally not that beneficial and are situationally used.

Tirajisú
Tirajisú has 2 levels. At max level, Tirajisú provides +2 Revival.

Can serve as a valuable safety net, helping you survive challenging moments in the game. While Tirajisú synergizes with a few abilities, weapons that scale with Revivals, and the Awake Arcana, it has minimal impact on gameplay beyond those specific interactions.

Wings
Wings has 5 levels. At max level, Wings provide +50% Move Speed.

Provides additional Move Speed (or Movement Speed), which is generally not that useful outside of specific synergies for certain weapons, characters, or the Tragic Princess Arcana. Wings can be picked as a comfort item, but it’s best avoided during level-ups unless it complements your build.

Hollow Heart
Hollow Heart has 5 levels. Each of them multiplies the current value of Max Health by 1.2 for a total of 2.488x Max Health.

The bonus to Max Health is generally not very useful, except for specific synergies with certain weapons, characters, and the Divine Bloodline Arcana. Hollow Heart does not contribute to healing, only increasing your Max Health. Additionally, it only boosts your current health at the time of pickup, making it less effective if taken early. If Hollow Heart is required for an evolution or found as a stage item, it’s best to collect it as late as possible if your character will gain Max Health from other sources.

F Tier
These passives have almost no combat utility and should only be selected for evolutions or stat scaling benefits.

Pummarola
Pummarola has 5 levels. At max level, Pummarola provides +1 Recovery.

Provides a single point of Health regeneration, which offers minimal impact during moments of active damage and has little effect on overall Recovery outside of those situations. Pummarola is best avoided unless used for weapon evolutions, Recovery-scaling weapons, or characters that benefit from overhealing.

Stone Mask
Stone Mask has 5 levels. At max level, Stone Mask provides +50% Greed.

Good for gold, not for killing things or surviving. Stone Mask is situationally useful for characters and weapons that scale with Greed, but even then it is generally not worth it.

Parm Aegis
Parm Aegis has 5 levels. At max level, Parm Aegis provides 0.250 seconds of additional invulnerability per tick of damage taken.

A purely defensive passive item. Can only be obtained from Arma Dio or the Ode to Castlevania stage. It is recommended to only pick this up if you need it for an evolution.
Familiar Summon Passive Items
These are summoned from the weapon Familiar Forge. Generally your character can only obtain one per game. Characters like Young Maria Renard, Hector, Maria Renard, and Issac get multiples. The Pumpkin Familiar far outperforms all others and should be the only one you pick up when you have a choice.

Pumpkin (CV)
Summoned by the Familiar Forge. Fully leveled, the familiar will have a level 8 Curved Knife, level 1 Troll Bomb, and level 5 Wings.

Highest DPS familiar and can beat out many weapons when used with a lot of stats. Has a "chaotic" AI, runs away from the character and distracts enemies.

Ukoback (CV)
Summoned by the Familiar Forge. Fully leveled, the familiar will have a level 7 Svarog Statue and level 5 Wings.

High DPS familiar. Has a "masochistic" AI, runs towards and distracts enemies.

Faerie (CV)
Summoned by the Familiar Forge. Fully leveled, the familiar will have a level 3 Refectio, level 5 Pummarola, and level 5 Wings. Benefits from Gemini.

Low DPS familiar, Medium DPS when used with a lot of stats. Can heal you. Has a "defensive" AI, stays close to the character.

Sacred Tiger (CV)
Summoned by the Familiar Forge. Fully leveled, the familiar will have a level 3 Ice Fang and level 5 Wings. Benefits from Gemini.

Medium DPS familiar, High DPS when used with a lot of stats. Has a "defensive" AI, stays close to the character.

Alleged Ghost (CV)
Summoned by the Familiar Forge. Fully leveled, the familiar will have a level 7 Summon Spirit and level 5 Wings.

Low DPS familiar. Has a "mirror" AI, moves opposite to the character's movement and distracts enemies.

Sacred Turtle (CV)
Summoned by the Familiar Forge. Fully leveled, the familiar will have a level 3 Rock Riot and level 5 Wings. Benefits from Gemini.

Medium DPS familiar. Has a "defensive" AI, stays close to the character.

Sacred Cardinal (CV)
Summoned by the Familiar Forge. Fully leveled, the familiar will have a level 3 Raging Fire and level 5 Wings. Benefits from Gemini.

Medium DPS familiar, High DPS when used with a lot of stats. Has a "defensive" AI, stays close to the character.

Sacred Dragon (CV)
Summoned by the Familiar Forge. Fully leveled, the familiar will have a level 3 Fulgur and level 5 Wings. Benefits from Gemini.

Medium DPS familiar. Has a "defensive" AI, stays close to the character.

Wood Rod (CV)
Summoned by the Familiar Forge. Fully leveled, the familiar will have a level 2 Fire Wand, level 2 Lightning Ring, level 2 Magic Wand, and level 5 Wings.

Medium DPS familiar. Has a "delayed position" AI and will copy player character movements, but with a short delay.

Bitterfly (CV)
Summoned by the Familiar Forge. Fully leveled, the familiar will have a level 7 Garlic, level 5 Spinach, and level 5 Wings.

Low DPS familiar. Has a "defensive" AI, stays close to the character. Can be useful early in the game when Garlic would be beneficial, but has almost no benefit in the mid and late game.

Imp (CV)
Summoned by the Familiar Forge. Fully leveled, the familiar will have a level 8 Trident and level 5 Wings.

Low DPS familiar. Has an "aggressive" AI and will chase after the nearest enemies. Is the worst familiar to select.
Emergency Meeting Passive Items
These items are only available after reaching level 2 of their respective weapon and are consumed upon evolving. These are roughly ranked by how useful they are, however since they are tied to weapons they are not ranked with other passive items.

Mini Horse (EM)
Mimics using Greatest Jubilee. It appears in the level up item pool after Hats reaches level 8. Unlike the other Emergency Meeting passives, this one does not disappear. The light sources generated by this can provide added utility by increasing the amount of pickup items you can collect.

Mini Crewmate (EM)
Mimics using Garlic. It appears in the level up pool after Report! reaches level 2 and is consumed upon evolving the weapon.

Mini Guardian (EM)
Mimics using Laurel. It appears in the level up pool after Clear Debris reaches level 2 and is consumed upon evolving the weapon.

Mini Ghost (EM)
Mimics using Clock Lancet. It appears in the level up pool after Lifesign Scan reaches level 2 and is consumed upon evolving the weapon.

Mini Scientist (EM)
Mimics using Santa Water. It appears in the level up pool after Science Rocks reaches level 2 and is consumed upon evolving the weapon.

Mini Engineer (EM)
Mimics using Lightning Ring. It appears in the level up pool after Lucky Swipe reaches level 2 and is consumed upon evolving the weapon.

Mini Shapeshifter (EM)
Mimics using Bone. It appears in the level up pool after Just Vent reaches level 2 and is consumed upon evolving the weapon.

Mini Impostor (EM)
Mimics using Knife. It appears in the level up pool after Sharp Tongue reaches level 2 and is consumed upon evolving the weapon.
Arcana and Darkana Tier List
Both Arcana and Darkana will be referred to as Arcana in this guide. With a few exceptions it is hard to separate Arcana from weapons. Many weapons are greatly amplified by Arcana and vice versa. High value is placed on damage per second (DPS) and defensive capability. For statistical DPS benefits of Arcana per some weapons see this image: https://i.imgur.com/npWEQPq.png

At base you can get up to 3 Arcana in a game. Playing on Inverse mode increases that to 4 Arcana, which is why it is always recommended to use as Arcana are a massive power booster. At the start of the game you will get 1 Arcana and 1 from the Merchant (in Inverse mode only), an Arcana chest will then drop at 11:00 and 21:00 in most stages (minute 5:00 and 10:00 in Boss Rash, Bat Country, and Tiny Bridge). Lake Foscari, Abyss Foscari, and Polus Replica will start with an Arcana Chest, allowing you to get your chest Arcana early. Hitting your Arcana limit will cause the Arcana chest to turn into a normal chest.
S Tier Arcana/Darkana
Unmatched by any other Arcana, can provide a massive benefit to any game they are selected in.

Hail from the Future (X)
Every level up a red ornate twenty-sided die containing a Candybox, Arma Dio, Rosary, Orologion, Vacuum, Gilded Clover, Gold Finger, Nduja Fritta Tanto, or Coin Bag/Rich Coin Bag pickup will fall from the sky and spawn in a half circle below the character. The Candyboxes and Arma Dios spawned are limited to 7 each. This Darkana is extremely powerful, allowing you to fully customize your build or overload your characters with weapons and passive items.

The Gold Finger drop is also especially powerful due to the invulnerability, increased Charm, maxed Cooldown, and prizes it provides. With builds that increase Growth through Wicked Season or Crystal Cries, this Darkana can quickly chain hundreds of drops over a short period of time. During the early game the Rosary, Orologion, and Nduja Fritta Tanto drops can also provide much needed utility if the enemies become too hard to deal with.

Weapon Synergies: None directly benefit, but Vicious Hunger, Celestial Voulge, and Seraphic Cry benefit from the items spawned.

Character Synergies: None, but Crewmate Dino gains additional benefits from the extra weapons and passive items.

Arcana Synergies: Gemini, Disco of Gold, and Crystal Cries.

Moonlight Bolero (VI)
Moonlight Bolero spawns a treasure boss every minute, dropping chests with unique rewards:

- Green Goblin: Drops evolution chests. (~88%)
- Blue Goblin: Drops Arcana chests. (~5%)
- Unknown Eye: Drops black chests, which can contain passive items if your other items are fully leveled. (7%)
Both Arcana and passive items from these chests bypass standard caps.

In a typical 30-minute run, this Arcana can provide several extra Arcana and passive items. In Endless mode, it allows players to potentially collect every Arcana and passive item, making it invaluable for most runs. Selecting Moonlight Bolero as your first Arcana has a small (~5%) chance of immediately spawning the Blue Goblin at 0:00. If it doesn't appear, restarting the stage until it does ensures this Arcana is always a net benefit. The additional chests enable you to complete builds faster and significantly enhance runs that benefit from more than the usual four Arcana, acting as a multiplier for your overall performance.

Weapon Synergies: None, but can assist with obtaining the Weapon Power-Ups for Operation Guns DLC weapons.

Character Synergies: None, but Crewmate Dino gains additional benefits from the extra passive items.

Arcana Synergies: None.

Wicked Season (XIII)
Allows for infinite scaling of the Growth, Luck, Greed, and Curse stats. While Curse can make things a lot harder, especially when it cycles, the ability to double your Growth periodically and increase it by 0.5% every level is extremely strong. When you have a really powerful build, gaining Curse is also really good as it allows you to kill more enemies faster. The scaling Luck can enable Luck based builds, increase chance of beneficial pickups, improve level up options, improve Random events, and much more. Greed is the least useful for combat purposes, but is good for extra gold.

Wicked Season takes practice to get used to, especially with the Curse cycles at 00:30 and 1:10 which can end runs for inexperienced players. Your goal with Wicked is to take advantage of the Growth cycles, especially the early ones at 00:00 and 01:00 to maximize its output. That means saving experience gems until the Growth cycle comes up. The cycle is always Growth > Luck > Greed > Curse > Growth at 10 second intervals.

Overall Wicked Season is almost always recommended to grab as one of your starting Arcana. The only exception would be if you are playing without Limit Break.

Weapon Synergies: Wind Whip/Spirit Tornado Tip, Vol Luminatio, Cherry Bomb, Gatti Amari, Pentagram, Greatest Jubilee, Photonstorm, 108 Bocce, Night Sword/Muramasa, Shadow Servant/Ophion, Sonic Whip/Crissaegrim Tip, and Hex/Nightmare.

Character Synergies: Charlotte Aulin, Colonel Bahamut, Vlad Tepes Dracula, and Megalo Dracula.

Arcana Synergies: Twilight Requiem, Jail of Crystal, Disco of Gold, and Sapphire Mist.

Divine Bloodline (IX)
The best defensive and offensive Arcana in the game.

Divine Bloodline causes retaliation damage to provides +5 Max Health. Additionally select weapons deal +5 flat damage per Armor up to +250 damage. Can make any character nigh-unkillable when paired with Legionnaire or Mazo Familiar. Massively increases the damage of all weapons based on missing health. Many weaker characters or weapons can be boosted by simply selecting this Arcana and grabbing armor and a weapon that retaliates. Stacking armor can greatly increase the damage of base weapons to the point that some are better than their evolutions. While using this Arcana it is best to pick up Max Health increasing items like Hollow Heart or Metaglio Left as late as possible to get the most benefit.

To maximize the benefit of this Arcana avoid using it with healing weapons and builds. The "Might" you see while using this Arcana is fake as this increases the base damage of weapons not the actual Might stat. Because this does not increase the Might stat, which has a stat cap of 1000% (or +900%) Divine Bloodline can infinitely scale weapon damage.

Weapon Synergies:
- Retaliation weapons: NO FUTURE, Victory Sword, Pako Battiliar/Mazo Familiar, Crimson Shroud, Night Sword/Muramasa, Eskizzibur/Legionnaire, and Iron Shield/Dark Iron Shield.
- Armor scaling weapons: Cross, King Bible, Garlic, Santa Water, Lightning Ring, Song of Mana, Vento Sacro, Victory Sword, Silver Wind.
- Other weapons: Armor, Hollow Heart, and Metaglio Left.

Character Synergies: Wind.

Arcana Synergies: Heart of Fire.
A Tier Arcana/Darkana
Powerful Arcana that should be a good choice in most runs. These Arcana are often build makers.

Crystal Cries (XII)
Defeating frozen enemies drop Crystalized Souls which each provide a small amount of Growth, Recovery, and Max Health that can add up really quickly. Additionally, this triggers an Orologion when Health drops to 20%, allowing this Darkana to be self-sustaining.

For builds that use freeze, this can quickly generate a massive amount of Max Health, Recovery, and Growth, making your character extremely hard to kill and able to gain levels far faster than with Wicked Seasons. With such massive Growth you can easily reach level 3000+ in a 30 minute run. Time Warp and Infinite Corridor work extremely well with this Darkana due to the large amount of enemies they are able to freeze. Additionally, weaker characters are able to use Crystal Cries to keep themselves alive by cycling the low Health freeze and rapid Recovery to full health.

Weapon Synergies: Orologion, Clock Lancet/Infinite Corridor, Celestial Voulge, Mirage Robe/J'Odore, Prism Lass (Prism Damsel)/Time Warp, Icebrand, Greatest Jubilee, and any Jail of Crystal Weapons.

Character Synergies: She-Moon Eta, Frozenshade.

Arcana Synergies: Jail of Crystal, Out of Bounds, and Hail from the Future.

Wandering the Jet Black (XXI)
A powerful Darkana that generates explosions when your character loses health or heals for more than 3.5 Health. These explosions increase in damage by total recovered Health and Magnet Bonus, while the Area is increased by Magnet. This Darkana turns healing based characters and weapons into massive damage dealers.

Since you need to lose health or heal for more than 3.5 to create explosions, it is necessary to pair this with self-damaging weapons and Recovery/healing weapons for an extremely powerful effect. This Arcana is so powerful when paired with Muramasa or another self-damaging weapon that it can be your highest source of damage by a large margin.

Weapon Synergies:
- Healing weapons: Pummarola, Metaglio Left, Bloody Tear/Fuwalafuwaloo, Soul Eater, Celestial Dustlng/Profusione D'Amore, Silver Wind/Festive Wind, Night Sword/Muramasa, Lifesign Scan/Paranormal Scan, Soul Steal, Refectio/Sanctuary (Speculo Refectio), and Centralis Custos/Trinum Custodem.
- Self damaging weapons: Muramasa, Power of Sire, Dominus Agony, Dominus Anger, Dominus Hatred.
- Other weapons: Attractorb and Greatest Jubilee.

Character Synergies: Any that starts with or gains Recovery or healing, notable examples are Cosmo, Queen Sigma, Shapeshifter, Julia Laforeze, and Sara Trantoul. Also any character that starts with a high Magnet stat such as Chaos, Brauner, Graham, Peppino, Avatar Infernas, Genevieve Gruyère, Je-Ne-Viv, Carrie Fernandez, and Yoko Belnades.

Arcana Synergies: Sarabande of Healing and Disco of Gold.

Silent Old Sanctuary (XX)
Enables extremely powerful Limit Break 1-3 weapon builds. This Arcana can allow certain characters to hit the Cooldown cap of -90%, which makes weapons fire 10 times faster than base. Most of the strongest builds in the game make use of this Arcana as the scaling potential of focusing on a single or few weapons is really high.

Also, while it may be tempting to immediately grab this as your 1st or 2nd Arcana, some limited weapon builds can hold off on selecting Silent Old Sanctuary until their 3rd Arcana. Furthermore, one of the greatest benefits of Silent Old Sanctuary is that due to limiting your weapons your game performance will be a lot better.

Weapon Synergies: All.

Character Synergies: All, except Babi-Onna.

Arcana Synergies: Beginning.

Boogaloo of Illusions (XVIII)
Increases Area by 1% every level and causes Area to continuously oscillate by 0.5 - 1.5x over a 10 second interval. Area is one of the best stats in the game and this Arcana gives an infinite amount of it, at least until the 1000% (or +900%) Area stat cap. Can turn even the worst weapons usable and is used by nearly every weapon in the game. The main downside of Boogaloo of Illusions is that it will negatively impact your game's frame rate.

This Arcana is an easy choice for nearly any build. Overall this can provide a 2-6x DPS increase to builds that use it.

Weapon Synergies: Nearly all weapons benefit. Area provides additional modifiers for SpellStream/SpellStrom, Sonic Dash/Rapidus Fio, and Rune Sword.

Character Synergies: None.

Arcana Synergies: Sarabande of Healing and Heart of Fire.

Sapphire Mist (I)
This is a pure damage multiplier and acts similar to Space Dude's passive. All weapons have a chance to fire twice, with select weapons firing more than twice. This flexible Darkana can work with any build and is a great capstone to have once you have your core Arcanas set up. This works well with Paranormal Scan, as it will trigger rapid stat gains.

Overall this can provide a 2-5x DPS increase to builds that use it.

Weapon Synergies: All weapons benefit. Bracelet/Bi-Bracelet/Tri-Bracelet, Flames of Misspell/Ashes of Muspell, Mille Bolle Blue/Boo Roo Boolle, and Party Popper (Party Pooper) have a chance to fire more than twice instead.

Character Synergies: None.

Arcana Synergies: Wicked Season.

Mad Groove (VIII)
Upon selection and at every even minute all stage items, chests, pickups, and light sources are moved to the player in a circle. Mad Groove provides extreme utility, allowing you to complete builds faster, level faster, and gain additional passive items from the stage. This can be a great Arcana choice at any stage of the game. Best used on the Special DLC stages as they have a high amount of stage items and some start with an Arcana chest. Mad Groove can also help with planning how to complete a stage, since all the items will be pulled near you, allowing you to have more control on when and what to pick up without having to physically move to it. Within this guide Mad Groove is rarely used in builds due to the situational and personal preference nature of it, however do not let that stop you from using it.

Weapon Synergies: Greatest Jubilee

Character Synergies: Characters with mobility issues like Peppino or Keremet.

Arcana Synergies: Moonlight Bolero and Hail from the Future.
B Tier Arcana
Good Arcana that can greatly benefit many weapons and synergize with other Arcana.

Slash (XVI)
Increases the damage of affected weapons by a massive amount, often as much as 2-3 times the damage depending on Luck. Many weapons can benefit from this Arcana, which allows for a lot of build flexibility.

Weapon Synergies: Whip/Bloody Tear, Vento Sacro/Fuwalafuwaloo, Knife/Thousand Edge, Heaven Sword, Victory Sword, Celestial Voulge, Santa Javelin (and Levelin'Eh)/Seraphic Cry, Greatest Jubilee, Yatta Daikarin, Muramasa, Eskizzibur/Legionnaire, Flash Arrow/Millionaire, Impostongue, Alchemy Whip/Vampire Killer, Wind Whip/Spirit Tornado Tip, Platinum Whip/Cross Crasher Tip, Dragon Water Whip/Hydrostormer Tip, Sonic Whip/Crissaegrim Tip, Jet Black Whip/Mormegil Tip, Vibhuti Whip/Daybreaker Tip, Vanitas Whip/Aurablaster Tip, Tyrfing/Rune Swrod, and Confodere/Vol Confodere/Melio Confodere.

Character Synergies: Reinhardt Schneider.

Arcana Synergies: Iron Blue Will and Wicked Season.

Gemini (I)
Gemini creates a functionally identical counterpart weapon to the affected weapons. With the exception of the Ode to Castlevania Spellbooks, all weapons only create unevolved counterparts. These weapons do not take up a weapon slot and level with their main weapons, or appear at max level if an evolved weapon is picked up. Only the Spellbook weapons and Flock Destroyer are worth considering for this Arcana. Many of the counterpart weapons are lackluster and several don't scale with Limit Break. Several of the Gemini weapons benefit from Twilight Requiem, Jail of Crystal, and Heart of Fire, which can make this Arcana a good multiplier for weapon effects.

Weapon Synergies: Nduja Fritta Tanto, Peachone and Ebony WIngs/Vandalier, Phiera Der Tupello and Eight the Sparrow/Phieraggi, Gatti Amari/Vicious Hunger, Santa Javelin/Seraphic Cry, Shadow Servant/Ophion, Party Popper, Share Tongue/Impostongue, Prism Lass/Time Warp, Ragic Fire/Salamender, Ice Fang/Cocytus, Rock Riot/Gemma Torpor, Gale Force/Pneuma Tempestas, Fulgur/Tenebris Tonitrus, Keremet Bubbles/Keremet Morbus, Hex/Nightmare, Refectio/Sanctuary, and Globus/Nitesco.

Character Synergies: None.

Arcana Synergies: Jail of Crystal, Heart of Fire, Twilight Requiem, Waltz of Pearls, Tragic Princess.

Twilight Requiem (II)
Affected weapons generate Curse-scaling explosions when they expire. Each +100% Curse increases the explosion damage by around 10-13.5. This Arcana can be a great pick during high Curse runs or with characters that gain stacking Curse per level. Unlike Might which caps at 1000% (or +900%), this Arcana is one of few infinitely scaling Arcana, however Cursed enemies tend to outscale the damage provided by Twilight Requiem. When picking this Arcana it is best to avoid large amounts of Duration, as that will reduce the amount of Twilight Requiem triggers. Additionally, weapons that produce many projectiles will be more effective than those that produce fewer. Unlike Heart of Fire, the damage of the weapon does not matter, only the player character Curse. The weapon Nightmare has a high synergy with Twilight Requiem, not only affected by the Arcana, but it provides a stacking Curse doubling effect.

Weapon Synergies: King Bible/Unholy Vespers, Lightning Ring/Thunder Loop, Peachone and Ebony (Cygnus and Zhar Ptysia), Runetracer (but not NO FUTURE), Shadow Pinion (but not Valkyrie Turner), Bone/Anima of Mortaccio, Celestial Dusting/Profusione D'Amore, Bi-Bracelet/Tri-Bracelet, Santa Javelin (and Gemini counterpart)/Seraphic Cry, Silver Wind/Festive Winds, Prismatic Missile/Luminaire, C-U-Laser/Pronto Beam, Vampire Killer, Jet Black Whip/Mormegil Tip, Refectio/Sanctuary (Speculo Refectio), and Hex/Nightmare (Speculo Hex).

Character Synergies: Gyorunton, Gyoruntin, Avatar Infernas, Je-Ne-Viv, Scientist Mina, Joachim, Blackmore, and Barlowe.

Arcana Synergies: Gemini, Wicked Season, and Sapphire Mist.

Heart of Fire (XIX)
Heart of Fire causes the projectiles of affected weapons to create an explosion on impact that deals 50% weapon damage. Additionally, this causes light sources to explode and provides a retaliatory explosion when the player is damaged. Many of the weapons Heart of Fire affects are on the weaker side and require this Arcana to be good. This can also be used as a great defensive Arcana in the early game, especially when starting with a weak weapon. Overall, Heart of Fire provides a great damage boost and considerably increases the area of effect for most weapons, however since many of these weapons were already not that strong, the potential of this Arcana is significantly less than many other stronger Arcana.

Weapon Synergies: Fire Wand/Hellfire, Phiera Der Tuphello (Red Muscle), Vakyrie Turner, Tri-Bracelet, Flames of Misspell/Ashes of Muspell, Prismatic Missile/Luminaire, Long Gun/Prototype A, Short Gun/Prototype B, Spread Shot/Prototype C, Firearm/Fire-L3GS, Homing Miss/Multistage Missiles, Vanitas Whip/Aurablaster Tip, Raging Fire/Salamender (Speculo Raging Fire), Hand Grenade/The RPG, Svarog Statue, Aura Blast, and Greatest Jubilee (spawns light sources).

Character Synergies: None.

Arcana Synergies: Gemini, Divine Bloodline, and Boogaloo of Illusions.

Out of Bounds (XII)
Out of Bounds causes enemies frozen to generate explosions. The explosions deal more damage the longer the run goes on, making it amazing for Endless runs. Additionally, this doubles the spawn chance of Orologions, allowing for more screenwide explosions. Out of Bounds can accumulate a lot of damage over the course of a run, especially when using weapons that can freeze most or all of the screen at once like Infinite Corridor, Time Warp, or Pronto Beam (with Jail of Crystal).

Weapon Synergies: Orologion, Clock Lancet/Infinite Corridor, Celestial Voulge, Mirage Robe/J'Odore, Prism Lass/Time Warp (Prism Damsel), Icebrand, Greatest Jubilee, and any Jail of Crystal Weapons.

Character Synergies: Eta Shee-Moon, Frozenshade.

Arcana Synergies: Jail of Crystal, Hail from the Future, and Crystal Cries.

Iron Blue Will (VII)
Iron Blue Will can provide select weapons up to three bounces, and may allow the projectiles to pass through enemies and walls. This greatly increases the power of the weapons it affects by allowing them to stay on the screen for longer. This can be an essential Arcana for weapons that struggle to kill large groups of enemies. The impact of Iron Blue Will is immediate, however it tends to matter less as more weapons and effects fill the screen, negating the need to have projeciles bounce.

Weapon Synergies: Knife/Thousand Edge, Axe/Death Spiral, Phiera Der Tuphello and Eight of Sparrow, Carréllo, Flash Arrow/Millionaire, Prototype A, Prototype B, Prototype C, Javelin/Long Inus, Iron Ball/Wrecking Ball, Curved Knife/Bwaka Knife, and Shuriken/Yagyu Shuriken.

Character Synergies: None.

Arcana Synergies: Chaos in the Dark Night and Slash.
C Tier Arcana
Situationally good Arcana that may not provide as big of a benefit as the Arcana in the tiers above.

Sarabande of Healing (VI)
Doubles all healing and triggers a damaging pulse that deals damage equal to the amount healed. Great for survivability or using a healing focused character. Can provide a decent early game boost for difficult stages and can scale infinitely the more your character heals. Has the added bonus of pushing enemies back.

Weapon Synergies: Pummarola, Metaglio Left, Bloody Tear/Fuwalafuwaloo, Soul Eater, Celestial Dustlng/Profusione D'Amore, Silver Wind/Festive Wind, Night Sword/Muramasa, Lifesign Scan/Paranormal Scan, Soul Steal, Refectio/Sanctuary (Speculo Refectio), Centralis Custos/Trinum Custodem, and Guardian's Targe/Sacred Beasts Tower Shield (benefits from overhealing).

Character Synergies:
- Any that starts with or gains Recovery or heals, notable examples are: Cosmo, Queen Sigma, Shapeshifter, Julia Laforeze, and Sara Trantoul.
- Characters with overhealing abilities: Miang Moonspell, WInd, Walter, Alucard, Barlowe, Maria Renard, Keremet, Vincent Dorin, Maxim Kischine, Sonia Belmont, and Grant Dynasty.

Arcana Synergies: Disco of Gold, Boogaloo of Illusions, Crystal Cries, and Wandering the Jet Black.

Jail of Crystal (XIV)
Allows affected weapons to freeze or increases their chance to freeze enemies. Freeze chance starts at 25% and is multiplied by Luck (max +300% Luck). The freezing can provide a decent defense in the early game. Jail of Crystal creates a powerful combination with Out of Bounds and Crystal Cries, but is underwhelming on its own.

Weapon Synergies: Garlic/Soul Eater (reduce freeze resistance), Magic Wand/Holy Wand, Runetracer/NO FUTURE, Eight the Sparrow (Twice Upon a Time), Cygnus (but not Peachone), Bracelet/Bi-Bracelet/Tri-Bracelet, Prismatic Missile/Luminaire, C-U-Laser/Pronto Beam, Prism Lass (Prism Damsel), Dragon Water Whip/Hydrostormer Tip, Ice Fang/Cocytus (Speculo Ice Fang), and Icebrand.

Character Synergies: None.

Arcana Synergies: Out of Bounds, Wicked Season, Lost & Found Painting, and Crystal Cries.

Waltz of Pearls (XI)
Provdes up to three bounces to select weapons. Can greatly increase the power of affected weapons. Works similar to Iron Blue Will, but the affected weapons of Waltz of Pearls are not as strong.

Weapon Synergies: Magic Wand/Holy Wand, Fire Wand/Hellfire, Cross/Heaven Sword, Carréllo, Hats, Sonic Bloom/Wave Beam, Gale Force/Pneuma Tempestas (Speculo Gale Force), and Rock Riot/Gemma Torpor (Speculo Rock Riot).

Character Synergies: None.

Arcana Synergies: Chaos in the Dark Night.

Disco of Gold (XV)
Extremely strong gold generator and source of healing. Can synergize with Sarabande of Healing to deal a lot of damage during Gold Fevers and heal for even more. Characters with overheal abilities can take advantage of the burst healing this provides.

Weapon Synergies: Stone Mask, Vicious Hunger, Millionaire, and Guardian's Targe/Sacred Beasts Tower Shield

Character Synergies: Sammy, Wind, Walter, Alucard, Barlowe, Maria Renard, Miang Moonspell, Keremet, Vincent Dorin, Maxim Kischine, Sonia Belmont, Grant Dynasty, Big Trouser, and Master Librarian.

Arcana Synergies: Sarabande of Healing and Wandering the Jet Black.

Chaos in the Dark Night (V)
Increases Speed (or Projectile Speed) by 1% every level and causes Projectile Speed to continuously oscillate by 0.5 - 1.5x over a 10 second interval. Projectile Speed is a slightly better stat to have than Duration, but like Lost & Found Painting this still gets completely outclassed by Boogaloo of Illusions providing Area. While many weapons benefit from Projectile Speed, ones that don't produce projectiles gain no benefit generally. Additionally, due to Projectile Speed having a stat cap of 500% (or +400%), this Arcana stops scaling far sooner than Boogaloo of Illusions.

Weapon Synergies: Any projectile based weapon. Projectile Speed provides additional modifiers for SpellString/SpellStrom, Confodere/Vol Confodere/Melio Confodere, Sonic Dash/Rapidus Fio, Hydro Storm, Rune Sword, and Thunderbolt Spear.

Character Synergies: Jonathan Morris and Newt Plissken.

Arcana Synergies: Waltz of Pearls and Iron Blue Will.

Lost & Found Painting (XVII)
Increases Duration by 1% every level and causes Duration to continuously oscillate by 0.5 - 1.5x over a 10 second interval. Duration is a decent stat to have, some weapons benefit from it far more than others, while several weapons aren't affected by Duration at all. Depending on your weapon, high Duration can cause you to hit the Pool Limit for the number of projectiles allowed on screen, causing weapons to stop working until the projectiles disappear. This gets completely outclassed by Boogaloo of Illusions providing Area. Additionally, due to Duration having a stat cap of 500% (or +400%), this Arcana stops scaling far sooner than Boogaloo of Illusions.

Weapon Synergies: Many weapons benefit. Duration provides additional modifiers for Four Seasons/Godai Shuffle, Hydro Storm, Rune Sword, and Javelin.

Character Synergies: None.

Arcana Synergies: Jail of Crystal.

Blood Astronomia (XXI)
Generates a damage zone based on the size of your Magnet. Damage is multiplied by Amount, to include Amount beyond the +10 cap. Each weapon affected by Blood Astronomia provides an additional weapon-specific effect. The damaging zone does not knockback. Unlike Sarabande of Healing and many other Arcana it does not enable builds to be super powerful, but can enhance existing builds and works well as a starting Arcana. Overall, without high Amount, such as through character passives or the Academy Badge + Duplicator, this does not deal enough damage to be worth using in most builds.

Weapon Synergies: Attractorb, Duplicator, Academy Badge, Garlic/Soul Eater, Pentagram/Gorgeous Moon, Song of Mana/Mannajja, Clock Lancet, Laurel, and Sonic Dash/Rapidus Fio

Character Synergies:
- Characters with high % Magnet: Brauner, Graham, Peppino, Avatar Infernas, Genevieve Gruyère, Je-Ne-Viv, Carrie Fernandez, and Yoko Belnades.
- Characters with high Amount: Mortaccio, Yatta Cavallo, Bianca Ramba, O'Sole Meeo, Gav'Et-Oni, Rottin'Ghoul, Horse, Simondo, Cornell, Blue Crescent Moon Cornell, Trevor Belmont, Familiar, Innocent Devil, Cave Troll, and Hammer.

Arcana Synergies: None.
D Tier Arcana
Extremely situational Arcana that should generally not be selected in most games.

Awake (IV)
Gives +3 Revivals and provides +10% Max Health, +1 Armor, and +5% Might, Area, Duration, and Projectile Speed. Awake is useful and even necessary for characters with really weak starts like Toastie and Smith. Characters with Revive based abilities like Cosmos, Luminaire, and Lucia can benefit the most from this Arcana. While the extra lives and stats are great if you have trouble surviving, most characters have no reason to select this Arcana. Its effectiveness also relies on your ability to die or not.

Weapon Synergies: Tirajisú, Academy Badge, Weapon Power-UpPhieraggi, Meal Ticket, Grand Cross, Cross Crasher Tip.

Character Synergies: Luminaire, Cosmo, Guardian, Lucia, Quincy, and other characters that have extra Revivals.

Arcana Synergies: None.

Tragic Princess (III)
Reduces the Cooldown of select weapons when moving. This Cooldown reduction is separate from the Cooldown stat and scales with how fast the character is moving. While sounding good on paper, this Arcana does affect enough strong weapons to make it a viable choice in most runs.

Weapon Synergies: WIngs, Garlic/Soul Eater, Santa Water/La Borra, Lightning Ring/Thunder Loop, Santa Javelin/Seraphic Cry, Carréllo, Fulgur/Tenebris Tonitrus, Keremet Bubbles/Keremet Morbus, and Sonic Dash/Rapidus Fio.

Character Synergies:
- Fast characters: Avatar Infernas, Master Librarian, Menya Moonspell, Megalo Menya Moonspell, Red Death, Saint Germain, Death, Megalo Death, Impostor, Megalo Impostor, Gyoruntin, Colonel Bahamut, Maxim Kischine, Young Maria Renard, Carmilla, Succubus, Sniper, and Malphas.
- Other characters: Scorej-Oni, Galamoth.

Arcana Synergies: Gemini.

Beginning (X)
Beginning gives your starting weapon +3 Amount and select weapons +1 Amount. Beginning is situationally good and should only be chosen at the start of the game where it would have the most impact. It can provide a well needed boost to some characters and allow them to snowball the early game. Generally due to both Limit Break and diminishing returns on Amount, this becomes much weaker the longer the game goes on.

Weapon Synergies: Bone, Cherry Bomb, Carréllo, Celestial Dusting, and La Robba.

Character Synergies: Simondo Belmont and characters that start with multiple weapons such as Pugnala Provola, Celia Fortner, and Soleil Belmont.

Arcana Synergies: Silent Old Sanctuary.

Game Killer (0)
A quirky and fun Arcana that lives up to its name. It changes the core function of the game by preventing experience gains and turning experience gems into bombs.

Game Killer changes the core function of the game by halting all experience gem gains and turning experience gems into exploding projectiles. In addition, chests will always give at least 3 Weapons or Passive Items. Game Killer can be powerful initially, but severely limits your build potential and power in game. Can also be a challenge Arcana for many characters if you just want to play something different. On certain stages it can make completing them extremely difficult as the Inverse multiplier can outscale the damage of the gems. Moonlight Bolero has an extremely high synergy with Game Killer and allows the Arcana to be competitive with non-Game Killer runs. The weapons from the Master Librarian like Icebrand, Sword Brothers, Troll Bomb, and Soul Steal are really useful in Game Killer runs.

Weapon Synergies: Crown, Gorgeous Moon, Luminaire, Summon Spirit Tornado, Spirit Tornado Tip.

Character Synergies: Porta Ladonna, Suor Clerici, Santa Ladonna, and Sir Ambrojoe.

Arcana Synergies: Moonlight Bolero.
Gold Farm Guide
Why Gold Farm?
Beyond being able to buy everything you need, it is an exercise of the most cyclic sisyphean order. You farm gold so you can buy Golden Eggs[vampire.survivors.wiki], which you can then use to farm more gold with. The dopamine hit of see a number rise higher and higher is truly a good feeling.

The display cap of gold in the main menus is 9,999,999. This is much lower than the amount of gold you will get in game. To get an accurate estimate of your gold you would have to see what is listed on the results screen. There is an internal gold and Golden Egg cap of 3.402823 E+38 or 340,282,300,000,000,000,000,000,000,000,000,000,000, which is the 32-bit floating point maximum.

Delicious stats

Who To Farm Gold With?
There are two main characters used for gold farming: Sammy or Trouser. Scientist Mina and Blackmore can be used in place of Trouser, but otherwise all other characters don't matter.

Sammy significantly outperforms Trouser at all Golden Eggs levels. If you think or heard otherwise, you are using OLD information from a time when Limit Breaking Sammy or using more than 5-15K Golden Eggs would cause major game performance issues. Vicious Hunger's lag issue was fixed in the 1.09 update in February 2024. Sammy is supreme now.

Only use Trouser if you don't have the DLC or you are running this game on a potato and are literally crashing from Limit Breaking Sammy.

How To Buy Golden Eggs
You can buy Golden Eggs from the Merchant that appears near the center on all stages after you have obtained the Glass Vizard relic. You can only buy Golden Eggs from him individually, so get to clicking and pressing.

Map of Moongolow

Eggman - Buy Bulk Golden Eggs
Once you have at least 5,000 Golden Eggs total and at least 1,000,000 gold, Eggman will spawn in the north of Moongolow (see the above map). He will allow you to spend all your gold to buy the maximum amount of Golden Eggs you can afford. Purchasing this option will lead to you buying fractions of Golden Eggs, so be aware of that.


Healer - Remove Move Speed Golden Eggs
Now once you have a bunch of Golden Eggs, you may have noticed you are moving extremely fast and can no longer control your character. To fix this, you will need to speak to the Healer in the south of Moongolow (see the above map) after your character has more than 25,000 Golden Eggs and they will remove all Move Speed Golden Eggs from that character. To help with reaching the Healer, make sure you disable your Golden Eggs in the character select screen so you can move properly.


With Tides of the Foscari DLC

Sammy just works. Follow these two builds and just let him sit there and become the infinite money machine that he is. Although we have Endless mode enabled, you do not want to let the game run for hours. You are able to make more gold by leaving games after 15-30 minutes, buying Golden Eggs, then starting a new game up again. This is because of the stats provided by Golden Eggs scale better than continuing to sit in the run.


Lower Egg Builds
Passives are a suggestion for 0 Eggs, but don't matter when you are at 10K+ Eggs. If have not unlocked the Disco of Gold Arcana yet you will have to level Sammy to 30 or collect a Gilded Clover to trigger Gold Fever, which is the main source of gold coin income.

Either of these two will work at low egg counts.


Higher Egg Build
Use once Gold Fever stops workings


Weapons: Vicious Hunger, Greatest Jubilee (Optional - drop Greatest Jubilee if experiencing low framerate or around E20 Golden Eggs) - Make sure to Limit weapons to 1, you can get Greatest Jubilee from a Chest Candybox if you want to use 2 weapons

Stage: Moongolow is the best stage both at 0 Golden Eggs and extremely high Golden Eggs amounts. Besides Moongolow, stage preference for Sammy gold farming goes Abyss Foscari (with button pressed) > Polus Replica > Bat Country > Lake Foscari > Mt. Moonspell

Modifiers: Hyper, Arcanas, Inverse, Endless, Limit Break (Make sure Limit Break is ON)

Arcana: Disco of Gold + Wicked Season at lower Golden Egg levels, Blood Astronomia + Wicked Season at higher Golden Eggs levels (Threshold unknown, it is whenever Gold Fever stops working and only shows $0.)
Gold Farm Guide...
Without Tides of the Foscari DLC


0-150,000 Golden Eggs
Start with Queen Sigma, but switch to Trouser after you have bought at least 5,000 Golden Eggs on him. It is at that point where he becomes better than Queen Sigma. Use Greatest Jubilee to generate light sources, which will drop gold. Make sure to select Wicked Season to level fast and gain Greed, and Disco of Gold to generate gold. Use Crimson Shroud for defense. The way this works is you will gain gold from level ups using the Gold Bag. It is also worth noting that while your levels are queued, you will be unable to open chests or interact with certain functions. Furthermore you are capped at around 2-4 levels per frame, so monitors with higher refresh rates will generate gold faster.

Queen Sigma Gold Farm Build
Use when starting out and until you have at least 5K Golden Eggs on Trouser

Make sure Sole Solution is sealed!


Trouser Low Egg Build
Needs 5K Golden Eggs minimum


Characters: Queen Sigma to start, use Trouser once he has at least 5K Golden Eggs.

Stage: Cappella Magna

Modifiers: Hyper, Arcanas, Inverse, Endless, make sure Limit Break is OFF

Arcana: Wicked Season + Disco of Gold + Silent Old Sanctuary (3rd)

Weapons: Greatest Jubilee + Crimson Shroud

Passive Items: Empty Tome, Candelabrador, Attractorb, Crown, Torrona's Box, Stone Mask

150,000-1,000,000,000 Golden Eggs
Normal weapons don't really kill enemies anymore, you will need another source of damage which is Sarabande of Healing. Gold Fevers boost the damage of Sarabande of Healing, while we still use Greatest Jubilee to generate light sources.

Although we have Endless mode enabled, you do not want to let the game run for hours. You are able to make more gold by leaving games after 15-30 minutes, buying Golden Eggs, then starting a new game up again. This is because of the stats provided by Golden Eggs overtaking you continuing to sit in the run.

Trouser Mid Egg Build


Stage: Cappella Magna

Modifiers: Hyper, Arcanas, Inverse, Endless, make sure Limit Break is OFF

Arcana: Sarabande of Healing + Disco of Gold + Wicked Season (3rd)

Weapons: Greatest Jubilee

Passive Items: Do not matter, either Seal them all or toggle Random Level Up

1,000,000,000+ Golden Eggs
At this point Gold Fevers are no longer worth perusing and Blood Astronomia starts to out damage Sarabande of Healing. The reason we are limiting ourselves to a single weapon is to reduce the impact of performance drops, due to frame rates affecting level up speed. Like before, you only want to run the game for 15-30 minutes if you can to optimize buying Golden Eggs and getting more gold.

Trouser High Egg Build


Stage: Bone Zone

Modifiers: Hyper, Arcanas, Inverse, Endless, make sure Limit Break is OFF

Arcana: Blood Astronomia + Wicked Season

Weapons: Laurel/Garlic/Pentagram (pick one, doesn't matter)

Passive Items: Do not matter, either Seal them all or toggle Random Level Up

Blackmore and Scientist Mina Option
If you have the Emergency Meeting or Ode to Castlevania DLC, but not Tides of the Foscari DLC, Scientist Mina or Blackmore can replace Trouser.

When playing as Scientist Mina or Blackmore you want to select a balance of Growth and Greed level up passives. The less Golden Eggs you have, the more important it is to have a few points in Growth, before fully investing in Greed, Ultimately the differences between Trouser and Scientist Mina/Blackmore doesn't matter much after billions of Golden Eggs, but when starting out it can save some time in getting more Gold Coins.

Good luck and happy farming.
Quick Start Guide


This section is aimed towards beginners and returning players. It should allow you to get everything in the game quickly and easily.

Warning: This can ruin a lot of the enjoyment of the game as you will burn through the content faster.

1) Have the Tides of the Foscari DLC, preferably the Legacy of the Moonspell or Operation Guns DLC as well.

2) Buy as little as possible. Avoid buying any characters unless you need them for the achievements listed below! Buying a character will increase the price of all characters by 10%, this stacks additively, so buying 10 characters will double Sammy's price.
  • Buying PowerUps is fine and recommended, especially since they can allow you to survive longer and kill stuff faster.
  • If you must purchase a few characters to make progression easier prioritize at least one of the following:
    • LM: Miang (coffin in Mt.Moonspell), who can be used to unlock Menya (evolve Silver Wind), both characters are absurdly strong in the early game and obtaining Menya is recommended over all others in this list
    • Non-DLC: Pugnala (coffin in Mad Forest, but only if you have unlocked Tirajisu so you can evolve her weapon) or Poppea (coffin in Dairy Plant)
    • TF: Eleanor (coffin in Lake Foscari), who can be used to unlock Maruto (unite Eleanor's three weapons), both are great characters

3) Unlock Stage 2 (Inlaid Library) by reaching level 20 in Mad Forest, which unlocks Lake Foscari. Note: Lake Foscari and other DLC stages are harder than normal, so progressing normally in non-DLC stages to get enough gold for PowerUps may be needed.
  • Obtaining the Milky Way Map in Dairy Plant can make the following steps much easier.

4) Kill 6,000 Sammies in Lake Foscari to unlock Sammy. See the map below for the two locations of the Sammies. The yellow right path is recommended, which will lead you to a hidden forest area.


5) You will need at least 50,000 gold to buy Sammy. The easiest ways to get gold are the 50,000 gold achievements that grant it upon completion, they are:
  • Evolve the Night Sword. - Legacy of the Moonspell (LM) - this is the recommended achievement to aim for as Night Sword can be found on the ground of Mt.Moonspell. Most other achievements below require additional characters to unlock. Below is the Mt. Moonspell Map, you will need to grab the Night Sword in the north along with the Stone Mask in the Northeast to evolve it into Muramasa. Grab the Stone Mask first along with Miang's coffin, so both will be unlocked in case you die.


  • Evolve the Metal Claw - Operation Guns (OG) - Requires Hollow Heart and Weapon Power-Up. This is the other recommended achievement besides evolving the Night Sword as Metal Claw is found in the bottom far right corner of Neo Galuga. You will be able to pick up a Weapon Power-Up along the way. The Hollow Heart can be chosen on level up.


  • Evolve the Mille Bolle Blu. (LM) - Requires Spellbinder
  • Evolve the Flash Arrow. (TF) - Requires Bracers
  • Evolve the Prismatic Missile. (TF) - Requires Crown, both are located on Abyss Foscari
  • Evolve the Shadow Servant. (TF) - Requires Skull O'Maniac, both are located on Abyss Foscari
  • Evolve the Just Vent. - Emergency Meeting (EM) - Requires Mini Shapeshifter
  • Evolve the Clear Debris. (EM) - Requires Mini Guardian
  • Evolve the Blade Crossbow - (OG) - Requires Clover and Weapon Power-Up
  • Evolve the Prism Lass (OG) - Requires Wings and Weapon Power-Up, all three are located on Neo Galuga
  • Evolve the Homing Miss (OG) - Requires Duplicator and Weapon Power-Up

6) Buy Sammy, its base cost is 50,000 gold, add 10% per character bought before Sammy.

7) Follow the Gold Farm Guide above. Note, until you have unlocked the Disco of Gold Arcana (reach minute 31 in Inlaid Library) you will be limited in how much gold you can get as Gold Fevers are harder to get. Sammy will trigger a Gold Fever at level 30 and when collecting a Gilded Clover. Gold Fever is more effective the more enemies and sources of gold you can find.

8) Buy everything as you now have unlimited money. Follow the Unlock menu order to gradually unlock everything. With unlimited money it should take you around 20 hours to unlock everything, but as you unlock more stuff you can be more selective of what you want to unlock next.

Recommended first unlocks:
  • Get Pentagram to level 7 - Unlocks Christine
  • Reach level 50 with Christine - Unlocks Wicked Season
  • Reach level 50 with Clerici - Unlocks Divine Bloodline
  • Find the coffin in Gallo Tower - Unlocks Concetta
  • Reach level 50 with Concetta - Unlocks Boogaloo of Illusion
  • Reach minute 31 in the Inlaid Library or defeat the Reaper - Unlocks Disco of Gold
  • Reach minute 31 in Mad Forest or defeat the Reaper - Unlocks Mad Groove
  • Reach minute 31 in Dairy Plant or defeat the Reaper - Unlocks Silent Old Sanctuary

8b) Alternatively, once you unlock the Secret menu, you can use Spells to unlock almost everything in game in under an hour. Link to the list of spells.[vampire.survivors.wiki]
Stages
(Work In Progress)
Closing Remarks
Thank you for viewing my guide. This guide took a lot of time to create and was built upon my previous work on my original Google Tier List document[docs.google.com].

I want to build up and add more information to this guide so it becomes as comprehensive as possible for creating builds and understanding the mechanics of the game at a higher level. If you see a Work in Progress (WIP) section, know that it will be added.

Please let me know in the comments if you have any suggestions or if there is any information you believe should be corrected or expanded upon.
107 commenti
AnorexicDugong 21 apr, ore 6:51 
oh and the Mad Groove Arcana actually affects Chaos as intended
AnorexicDugong 20 apr, ore 5:35 
Also for Ode to Castlevania DLC, the Dragon Water Whip / Hydrostormer Tip is now properly affected by the Jail of Crystal (XIV) Arcana, this also includes the screen-wide raining attack emit by the Hydrostormer Tip

Jet Black Whip / Mormegil Tip is also finally affected by the Twilight Requiem (II) Arcana
Moonbane 15 apr, ore 16:25 
Said new charge function is also on Diva no.5.

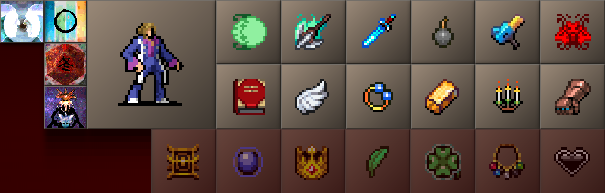
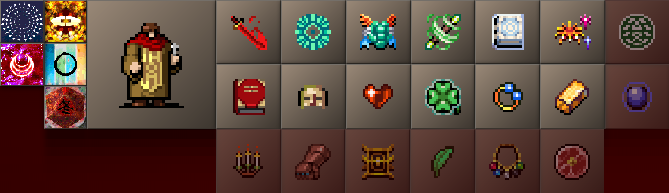
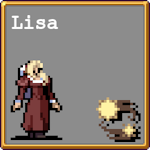
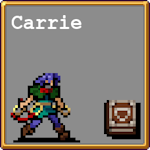
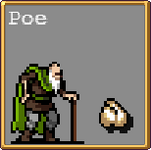
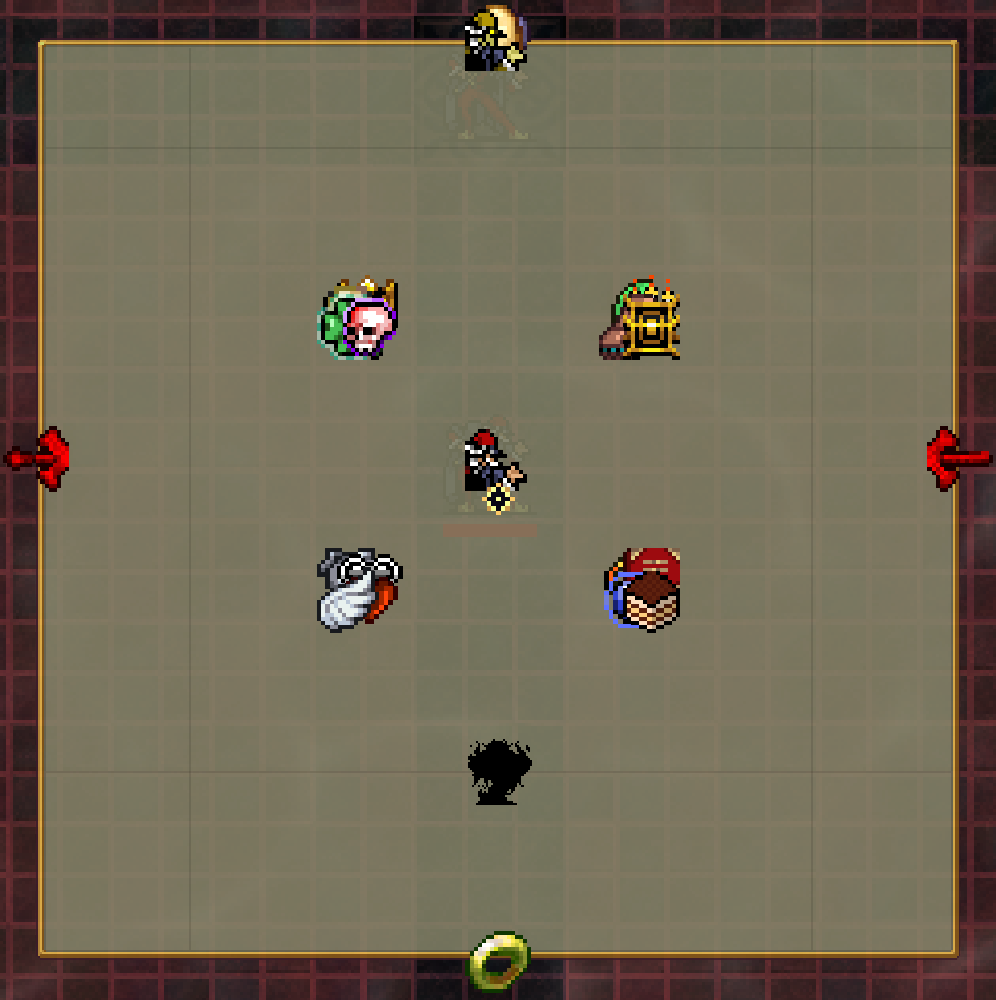
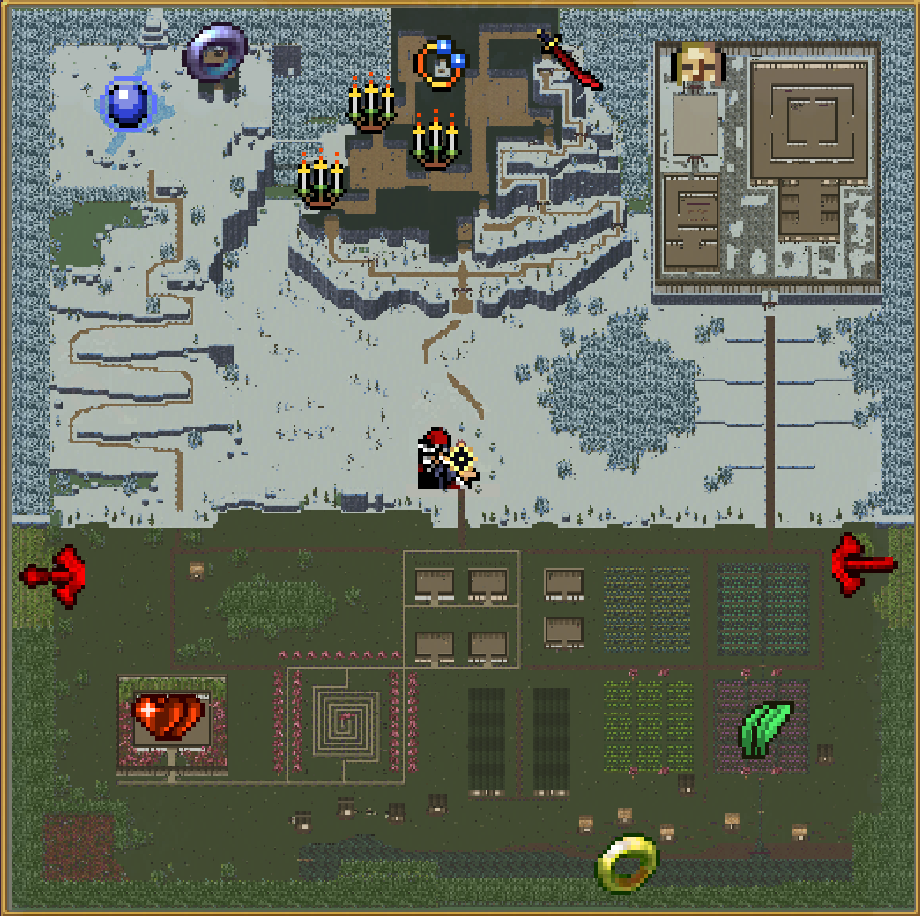
Bioness, I dont know if youve heard it already. But the Crystal Cries darkana synergies extremely well with the Diorama characters. When you hit critical health, showstopper activates for a massive buff to the player, as well freezing the whole screen. Perfect for laying into the monsters and gobbling up the special hearts to regenerate to full health, making you ready for next showstopper. Spirit Rings / Rings of Calamity works wonders for tagging a whole screenful of blue enemies.

Aidditionally, several of the diorama characters have various abilities that plays with showstopper. In particular of note is that Lolo and the kitten group spawns another permanent kitten everytime you showstop. And each kitten have its own specific tech it can activate depending on the color of the kitten. My best have been a tail of 7 kittens following the 'parents'
AnorexicDugong 14 apr, ore 5:16 
also I'm aware this will take some time to update, but I just want to highlight that they sneak-implemented a brand new Charge-based ability (also affected bh Luck) for Keitha Muort from Tides of the Foscari DLC
Bioness  [autore] 12 apr, ore 11:38 
@Moonbane, I've played a bit of the new content, but won't be able to effectively update this guide until May or so.
Moonbane 12 apr, ore 8:24 
Especially since overhealing rolls over.
Moonbane 12 apr, ore 8:23 
Infact I think its not needed to use Paranormal Scanner if using Hidden Anathema, overkill.

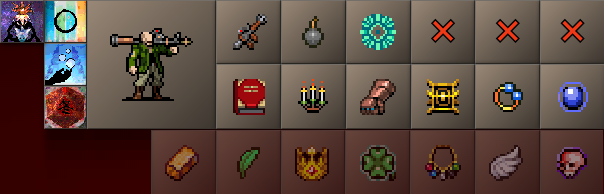
HA does a better job and frees you from needing to painstakingly setup the Paranormal Scanner.
Moonbane 12 apr, ore 8:12 
Gazebo the blue chicken needs some exposure. The new Darkana Hidden Anathema looks perfectly tailored to match with Gazebo and useage of the Gaze of Gaea/Embrace of Gaea weapon.
The more food you eat, the more powerful you become. Once the initial collections of food is found, your power will rapidly snowball. I think sarabande is a must, doubling food healing and damaging enemies around you.
Moonbane 11 apr, ore 11:17 
I am looking forward to see your thoughts on the new stuff. The new glimmer weapons is a massive kick upwards in power ratings for weapons.

Though I noted that none of the new characters have simple scaling bonuses like +1% might per level.
Bioness  [autore] 19 mar, ore 14:29 
@Ἀλληκτώ I'm not seeing any issues with pictures.

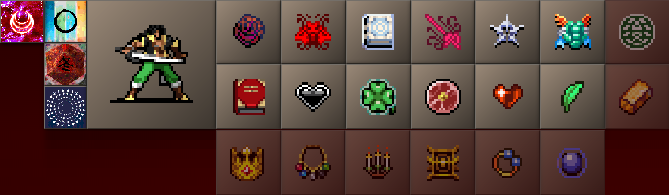
@thegreedyturtle I'm not sure I could make a section for that given the variety, but I could make a general tips sections that includes information on how to prioritize weapons. Generally, you would want to evolve the most powerful weapon first, if on a stage that doesn't have an evolution chest until later then focus on leveling up the stronger base weapons. Use their position on the tier list as a guide, but keep in mind that certain weapons don't work well on their own due to their targeting mechanic. Likewise for which weapons to Seal, I always say whatever doesn't rank really low on the tier list and isn't rare (no point in sealing Hats for example as you will rarely see it when leveling up).

@AnorexicDugong I added the Beginning Arcana benefit to its summary, as for the Magnet suggestion, I could possibly add a spell modifier section, but I know a lot of people just don't bother with spells after they unlock everything.