Halls of Torment

Halls of Torment

1,256 valoraciones
100% In-Depth Achievement Guide
Por Moldredd y 1 colaboradores
A guide to all achievements in Halls of Torment with hints and tips on how to unlock each and every single one of them, while providing bonuses such as boss information, hint/tips for abilities and more.
73
20
59
6
22
19
17
6
5
11
2
7
5
5
5
4
2
3
3
   
Premiar
Favoritos
Favorito
Quitar
Spanish Version


For the Spanish version of the guide. Please visit the following link.


https://steamcommunity.com/sharedfiles/filedetails/?id=3398035049
Introduction


First of all, thanks for being interested and taking the time to visit this guide.

The purpose of this guide is to give the reader the necessary tools and knowledge in order to unlock all the achievements in the game as quick as possible. For that matter, this guide will be limited to achievement name and hints/tips on how to unlock each one of them.

Another thing to point out is that this is, by no mean, a technical guide. For that kind of information, there are plenty of excellent guides in here, so don't forget to check them! I'm personally waiting for the game to finish development before investing in it's technicality. Although, the current information is enough to guide you into unlocking each achievement.

All achievements that are unlocked via natural progression will not be covered much by this guide. This game throws achievements even for breathing, so the last thing I'd like for the reader is to fall asleep.

Also some achievements with progression tiers such as ability mastery ones will be limited to the highest tier one, meaning that the information provided will also work for the lower tiered ones (Obviously) and therefore those will be excluded from the guide to avoid redundant information.

With this in mind, my aim is to keep this guide short, simple, and precise as possible.

For more information regarding the achievement such as, their rewards, unlock sequence, etc., then that information is easily found at the game's quests list menu. This is an achievement guide, after all.

Lastly, to search for specific achievements within this guide, press Ctrl+F to open the search menu.

Or if you need help with certain information not found anywhere on this guide, please check https://hot.fandom.com/wiki/Halls_of_Torment_Wiki for more precise information about Hall of Torment.

With all that being said, let's proceed.
Changelog


10-03-2024
  • Guide has been updated to Game Version 1.0.
  • Added new Final: The Vault, Milestone II (Consolidated in Milestones section), and Artifact sections.
  • Updated some sections, cleaned others.

Release [09-24-2024]

06-13-2024
  • Updated the Beast Tracker and Cold Fury sections with new achievement information regarding Untouchable II and Blood's Blessing respectively.
  • Updated some missing achievement icons in the Cold Fury section.

05-15-2024
  • Updated the Chambers of Dissonance, Cold Fury, and Beast Tracker sections with new achievement information.

03-14-2024
  • Updated the Ember Grounds, Steady Shield, and Beast Tracker sections.
  • Updated the Ability Masters/Specialists to include all new ability achievements that came with Patch-03-13-2024.
  • Removed the Class Masters sections in favor of the linked Max Agony Class Build Archive guide included within this one.
  • Added Guide Index section to include my other Halls of Torment guides that will be linked to this one.

02-25-2024
  • Added new section for Chambers of Dissonance achievements.
  • Added new sections for both new Landsknecht and Sage heroes.
  • Updated the Ability Masters/Specialists to include all new ability achievements that came with Patch-02-19-2024.
  • Various corrections throughout the guide.

02-19-2024
  • Removed the Max Agony video archive section in favor of moving it to it's dedicated guide. A link has been added in the new Guide Links section.
  • Added new section to link to other excellent guides.

01-13-2024
  • Updated the Ability Specialists section with information regarding the Dragon's Breath, Golem, Meteor Strike, Radiant Aura, and Ring Blades Specialist achievements.

12-14-2023
  • Updated the Ability Specialists section with information regarding the Arcane Splinters and Lightning Strikes Specialist achievements.

11-24-2023
  • Updated the Demonic Pact section with information regarding new Horde Summoner achievement.
  • Updated the Cold Fury section with information regarding new Warrior's Fervor achievement.
  • Fixed various images that got corrupted by Steam Servers.
11-04-2023
  • Divided the Agony V Archive section into sub-class categories in order to meet guide limitations.
11-01-2023
  • Updated the Forgotten Viaduct section with information regarding new Astronomer's Orbs Specialist, Crippling Strikes, and Phantom Needles Specialist achievements.
  • Updated the Swift as an Arrow section with information regarding new Transfixion Specialist achievement.
  • Added new Ability Specialists section for in-depth information regarding ability specialist achievements and how to obtain them.
10-18-2023
  • Updated the Frozen Depths section with information regarding new elemental ability, Hailstorm.
  • Updated the Ability Masters (Elemental) section with information on Hailstorm.
  • Updated the Class Masters section with updated illustration and item description for the Berserker Boots and Blazing Shell respectively.
09-17-2023
  • Guide released.

Early-Access
Guide Index


This section contains other guides that are linked and considered to be part of this one in order to keep this one as readable and organized as possible while keeping the segmented information present only when relevant/desired.

These guides will be constantly referred to by this one and will be considered as companion to it.


Heroes/Classes setups used in this guide
https://steamcommunity.com/sharedfiles/filedetails/?id=3164166010
Community Guides Index


This section contains some really good guides by other community members. These might help newcomer learn the ropes or veteran players refresh any knowledge within the game. Some of these guides may be outdated but the majority of the information provided could still be useful for some.

Community Guides
https://steamcommunity.com/sharedfiles/filedetails/?id=3034282250
https://steamcommunity.com/sharedfiles/filedetails/?id=3038035307
https://steamcommunity.com/sharedfiles/filedetails/?id=3172296902
Basic Information


General Information
  • Completion Time | 22-60 Hours
  • Difficulty | 6/10
  • Total Achievements | 500
  • Offline Achievements | 500
  • Online Achievements | 0
  • Bugged Achievements | 0

Terminology

General

AI
Artificial Intelligence
AoE
Area of Effect
DEF
Defense
DMG
Damage
DPS
Damage Per Second
HP
Short for Health Points.
RNG
Literally stands for Random Number Generator. Usually refers to Randomness of a thing, situation, and/or concept.
EXP
Short for Experience.

Potions
*Used in Class Masters section.

SW
To use a Strong Wine to reroll traits options during leveling up.
PO
To use a Potion of Oblivion to banish a trait from future selection permanently.
PD
To use a Reverberant Tinkture potion to double the potency of a trait.
PM
To use a Potion of Memories to save a trait for future selection until picked. It is usually done when you want to pick 2 traits of the same Tree/Tier. Always remember to pick the other trait before picking the one locked with the Potion of Memories.
PR
To use a Potion of Renewal to reroll ability options during selection.
HE
To use a Hallucinogenic Elixir in order to change the Chest options during selection.

Class Builds

Base
Hybrid
Pure
A class without a class Mark selected.
A class build with another class' Mark selected. (ex. Swordsman (Archer) or Swordsman (Arrow)
A class build with it's own Mark selected. (ex. Exterminator (Exterminator) or Exterminator (Incineration)

Understanding Trait Paths

The trait path will used in the class masters section in order to show the trait selection to make for the more specific and crucial aspects of a build. Every trait not covered by said trees is considered a banished or bonus trait and can be worked in any way the reader wants. Lastly, the title of each tree will specify what kind of trait path will be followed. Next, a small example of a trait path:

Trait paths name will include if it's general(multiple traits across class and main ability or specific to one class/ability traits.

Trait Path (General)
GT (Great Bonus Traits) - Greatrait1 | Greatrait2
PO (Potion of Oblivion) - Trait to banish1 | Trait to banish2 | Trait to banish3

Tier
Select
PM (Potion of Memories)
PD (Reverberant Tinkture)
I
AbilityName: Trait Type
CharacterTypeName: Trait Type1 | CharacterTypeName: Trait Type2
II
Proficient Stance: Divingsuit
III
Weapon Proficiency: Testdrive

Columns

Tier
The trait tiers. Classes base traits consist of 4 tiers while the abilities ones have 10 total tiers. This column indicates when a certain trait needs to be worked on.
Select
Traits inside this cell mean standard selection without the need of locking or doubling potions.
PM
Traits inside this cell need to be locked/secured with potions of memories in order to select them all. Out of common sense though, the last trait of a category is not locked with a potion, and instead is just selected first when all other desired sister traits have been locked/secured.
PD
Traits in this cell mean that their potency must be doubled with a Reverberant Tinkture potion. This is usually reserved to the later tiers of a trait which usually come with innate doubled stats.


Notes


    • Multiple traits are separated with a pipe (|) symbol as used throughout the guide although commas (,) are used in specific areas.
The Broken Record (General Tips for many quests to come)


Decided to create this section to put any information that I might find myself repeat over the guide on various achievements and/or any other tips/strategies I might come across and not covered else where. Will keep updating as time goes on.


Kill-Based Achievements
  • The artifacts Torment Banner, and Hastening Sands allow to spawn more enemies.

  • More soon...

Damage-Based Achievements
  • The Mountain Idol artifact on Agony is excellent as it gives you more durable targets to hit.

  • The Scales of Pain artifact gives a nice DMG boost.

  • Current Best DMG items: Blood Catcher has been dethroned. Currently evaluating...

  • Sage is Bananas.

Stack-Based Achievements
  • The Marching Ghosts walls on the Forgotten Viaduct is an excellent option to complete stacking achievements.

  • The Mountain Idol artifact is also a good way to get stacking achievements.

  • Exterminator and Norseman are currently the best heroes for elemental/debuff stacking applications due to their high Attack Speed.

  • The Warrior's Fervor/Holy Relic combo is an excellent tool for stacking effects, especially on Norseman.
Chapter I: Haunted Caverns


I see a skull.


Ability-Related
Astronomer's Orbs Mastery III
Check the Ability Mastery section for tips and hints on how to do 3,000,000 DMG.

Lightning Strike Mastery III
Check the Ability Mastery section for tips and hints on how to do 3,000,000 DMG.

Arcane Splinters Mastery III
Check the Ability Mastery section for tips and hints on how to do 3,000,000 DMG.

Phantom Needles Mastery III
Check the Ability Mastery section for tips and hints on how to do 3,000,000 DMG.


Natural Progression
Skeleton Slayer I
Should come naturally. Just keep killing skeletons until you reach the requirement. You can always check the quest to see how much you've killed.

Slime Slayer I
Should come naturally. Just keep killing slimes until you reach the requirement. You can always check the quest to see how much you've killed.

Hellhound Slayer I
Should come naturally. Just keep killing hellhounds until you reach the requirement. You can always check the quest to see how much you've killed.

Cavern Survivor III
This should come naturally as you level up and become stronger. No need to worry.


Specifics
Cavern Dominator III
Must be done in a single run and might take a few tries. The key is to obtain the abilities that cover the whole screen. As you keep completing quests you will be unlocking stronger abilities and traits, making this mission a lot easier. The kill count is displayed on the right side panel all the time in case you need to know if you got time or need to restart the run.

Lastly, the Agony mode is excellent for this, I however, don't recommend it for those starting out.

Cavern Berserker III
Requires to deal a total of 500,000,000 DMG within a run at the Haunted Caverns.

I suggest leaving these kind of quest for last since by that time you will have access to most blessings/artifacts/gear and EXP. Boost in order to make these significantly easier.

There are many ways to accomplish this. But my preferred methods are using the Mountain Idol artifact with either with Sage due to his obscene DMG output or going Full Crit/Block/Tank with Shield Maiden. For the latter, please check Indomitable Idol Head.

Army of the Dead
Killing 66,600 enemies requires having most blessings, traits, specific artifacts, and gear, without mentioning a bit of luck as you need to get the desired traits and uncommon variants of gear as soon as possible within the run. For that reason, I recommend leaving these kind of achievements for last.

You will need a high DPS hero such as Exterminator, Archer, Sorceress, Sage, Landsknecht, etc; and screen clearing abilities suck has Kugelblitz, Morning Star, Ringblades, etc.

There's really no 1 way to get this but I personally got it with the following setup:

Build: Full-Crit
Hero: Archer (Arrow)
Abilities: Phantom Needles/Ringblades/Morning Star/Kugelblitz

I focused on maximizing DMG/MS with Archer and DMG/Crit/Attack Speed/Area for the abilities.

Lastly, at the time, For artifacts I used the Hastening Sands and Killing Gaze. For gear, used Wind Crown, Blood Catcher, Wooden/Cooper Rings, Blood-Soaked Shirt, Hunting Gloves, Running Shoes.

Cavern Adept
Self explanatory. Don't use abilities during the run. Focus on Main Weapon-Only build. Should be fairly easy as you progress enough into the game and unlock blessings, traits and gear.

Cavern Secret
For this you need to obtain two pieces of a pendant located at the end of a blood trail on the floor and killing an amount of enemies inside the purple circles on the floow. Follow the trail back and forth to find the pieces, once you do, the achievement is yours.

For more information, please refer to the Lord of Pain section within this guide.


Bosses
The Imp Chieftain
First boss of the hall. Check it's dedicated section in this guide for information and tips on how to beat it.

The Skeleton Lord
Second boss of the hall. Check it's dedicated section in this guide for information and tips on how to beat it.

The Lich
Last boss before the Lord of the hall. Check it's dedicated section in this guide for information and tips on how to beat it.

Lord of Pain
Lord and final enemy of the hall. Check it's dedicated section in this guide for information and tips on how to beat it.
Chapter II: Ember Grounds 1/2


Wraith Warlord helmet?


Ability-Related
Ability Expert: Astronomer's Orbs
Upon obtaining the ability simply get it to at least level 3 by picking traits for it on level ups. This will allow you to get upgrades for it next time you pick a golden scroll. (Should come naturally)

Ability Expert: Lightning Strike
Upon obtaining the ability simply get it to at least level 3 by picking traits for it on level ups. This will allow you to get upgrades for it next time you pick a golden scroll. (Should come naturally)

Ability Expert: Arcane Splinters
Upon obtaining the ability simply get it to at least level 3 by picking traits for it on level ups. This will allow you to get upgrades for it next time you pick a golden scroll. (Should come naturally)

Ability Expert: Phantom Needles
Upon obtaining the ability simply get it to at least level 3 by picking traits for it on level ups. This will allow you to get upgrades for it next time you pick a golden scroll. (Should come naturally)

Flame Strike Mastery III
Check the Ability Mastery section for tips and hints on how to do 2,000,000 DMG.

Frost Avalanche Mastery III
Check the Ability Mastery section for tips and hints on how to do 3,000,000 DMG.

Flame Strike Specialist
Check the Ability Specialists section for tips and hints on how to deal 100,000 DMG with a single hit during a run.

Frost Avalanche Specialist
Check the Ability Specialists section for tips and hints on how to get 10,000 projectiles/obstacles per minute.


Natural Progression
Imp Slayer I
Should come naturally. Just keep killing imps until you reach the requirement. You can always check the quest to see how much you've killed.

Scorched Slayer I
Should come naturally. Just keep killing scorched until you reach the requirement. You can always check the quest to see how much you've killed.

Ember Survivor III
This should come naturally as you level up and become stronger.


Specifics
The Wellkeeper
During the second hall you will find a stranger locked in a cage, then you will be tasked in finding the key to his cage. Once you find and bring it to him you will release him. The achievement should unlock right after.

Finders, Keepers
After freeing the Wellkeeper some bosses will drop a chest when defeated, inside those chest there will be gear and/or items. Simply take them to the well and interact with it. This will send the item to the camp for you to buy it form the keeper. Achievement will unlock afterwards.

Additional Fees
After using the well to get the items to the camp, buy any of them from the keeper. Achievement will unlock afterwards.

Ember Adept
Straightforward, simply do a complete run at the Ember Grounds without using abilities.

Regardless of the description, the Hastening Sands artifact can be used without voiding the quest/achievement.

Simply play without abilities and the achievement should pop as soon as the timer reaches zero.

Ember Dominator III
Must be done in a single run and might take a few tries. The key is to obtain the abilities that cover the whole screen. As you keep completing quests you will be unlocking stronger abilities and traits, making this mission a lot easier. The kill count is displayed on the right side panel all the time in case you need to know if you got time or need to restart the run.

Ember Berserker III
Requires to deal a total of 500,000,000 DMG within a run at the Ember Grounds.

I suggest leaving these kind of quest for last since by that time you will have access to most blessings/artifacts/gear and EXP. Boost in order to make these significantly easier.

There are many ways to accomplish this. But my preferred methods are using the Mountain Idol artifact with either with Sage due to his obscene DMG output or going Full Crit/Block/Tank with Shield Maiden. For the latter, please check Indomitable Idol Head.

Ember Secret
This requires you to complete the hidden quest at the Ember Grounds. To do so, you must first find and get the Ember Eye. For that, keep on the lookout for some statues and/or an altar with a book gathered around the field. From there, simply go toward the direction the statues are facing at till you find the Ember Eye.

Once you find and get it, pay attention to your left panel, you will now see the Ember Eye in the same location as the Gatherer's Charm when equipped. It acts the same as the Charm, with that being said, follow the direction the Eye pinpoints till you find the Ember Golem optional Lord. Kill it and get the now Cracked Eye to finish this Quest/Achievement.

Having the Cracked Eye renders the Ember Ground's Lord bomb attacks useless.
Chapter II: Ember Grounds 2/2
Bosses
Flamedancer
First boss of the hall. Check it's dedicated section in this guide for information and tips on how to beat it.

Wraith Warlord
Second boss of the hall. Check it's dedicated section in this guide for information and tips on how to beat it.

Wyrm Queen
Last boss before the Lord of the hall. Check it's dedicated section in this guide for information and tips on how to beat it.

Lord of Regret
Lord and final enemy of the hall. Check it's dedicated section in this guide for information and tips on how to beat it.
Chapter III: Forgotten Viaduct 1/2


Ability / Effect-Related
Arcane Splinters Specialist
Check the Ability Specialists section for tips and hints on how to have 300 active splinters.

Astronomer's Orbs Specialist
Check the Ability Specialists section for tips and hints on how to hit 40,000 enemies with it.

Lightning Strikes Specialist
Check the Ability Specialists section for tips and hints on how to 1 shot 1000 enemies with at least 1000 HP.

Phantom Needles Specialist
Check the Ability Specialists section for tips and hints on how to perform a total of 10,000 double crits or better.


Natural Progression
Wraith Slayer I
Should come naturally. Just keep killing wraiths until you reach the requirement. You can always check the quest to see how much you've killed.

Gargoyle Slayer I
Should come naturally. Just keep killing gargoyles until you reach the requirement. You can always check the quest to see how much you've killed.

Viaduct Survivor III
This should come naturally as you level up and become stronger.


Specifics
The Cupbearer
Upon entering the Forgotten Viaduct (Or until you do the quest) you will be tasked to bring some flask to the Cupbearer. Follow the quest's instructions and markers and once you complete it, the achievement will be yours.

Viaduct Dominator III
Must be done in a single run and might take a few tries. The key is to obtain the abilities that cover the whole screen. As you keep completing quests you will be unlocking stronger abilities and traits, making this mission a lot easier. The kill count is displayed on the right side panel all the time in case you need to know if you got time or need to restart the run.

Viaduct Berserker III
Requires to deal a total of 500,000,000 DMG within a run at the Viaduct.

I suggest leaving these kind of quest for last since by that time you will have access to most blessings/artifacts/gear and EXP. Boost in order to make these significantly easier.

There are many ways to accomplish this. But my preferred methods are using the Mountain Idol artifact with either with Sage due to his obscene DMG output or going Full Crit/Block/Tank with Shield Maiden. For the latter, please check Indomitable Idol Head.

Crippling Strikes
Can be done on any hall. This achievement requires you applying a total of 100,000 slow stacks.

For this achievement I recommend going a Perma-Slow Cleric build on the Haunted Caverns on Agony as it provides a good density of enemies to stack on.

Equipment:
Head: Gorgon Mask
Neck: Irrelevant
Rings: Pest Ring
Garment: Broker's Cape
Hands: Irrelevant
Footwear: Bogged Boots

Stick to abilities that provide slow capabilities such as Frost Avalanche, Ring Blades, Transfixion, Phantom Needles, etc.

Might take a few tries due to good RNG but as long as you stick to your target you should get it in no time.


Up and Down
This must be done on Agony.

This one takes a little luck due to the chances of getting the movement speed traits as soon as possible and the first champion dropping a scroll, other than that, the approach is quite linear, First go toward the top scroll then go back down for the bottom one.

For this one, go Sage as you get two abilities at the start of the run, instead of one. For his build, go Full-Speed (Guiding Start, Gatherer's Charm, Running Shoes, etc.).

As soon as the run starts, check if the starting scroll is near your starting location, if it isn't, restart, otherwise get it and pick something to keep you alive, something like Transfixion. From there go toward the north scroll.

For each level up, focus on getting as much Swift Feet, Double Potion if necessary. This will ensure you reach the scrolls at the edges as soon as possible, before the 3 minutes mark.

For the Elites and Champions, ignore them as they will be teleported toward your location, instead, focus on getting the scrolls and only kill them when you get the scroll and another ability of your choice.

Should take a few tries due to RNG factors but shouldn't be that hard. Just be patient, it will come eventually.

Lastly, avoid enabling any artifact as it will make enemies tankier and we need to kill them with the least amount of effort to save time.

Proof of Concept / Juggernaut


The Marching Ghosts are the unique enemy to the Forgotten Viaduct. They spawn at the edges of the bridge and close in till the timer reaches zero and the Lord of Despair spawns.

This requires that you kill a total of 24 Marching Ghost, and by the amount required you probably guessed right. They are extremely durable.

However, there are many ways to kill them but my preferred method is with the Shieldmaiden.

Shieldmaiden (Shield)
Full-Block/Crit
  • Head: Helmet (Growth)
  • Neck: Collar of Confidence (Pull)
  • Garment: Plate Armor (Growth)
  • Rings: Wooden (Growth) / Cooper (Growth)
  • Hands: Fencing Gauntlets (Crit)
  • Boots: Plated Boots (Growth)
  • Ability 1: Morning Star (Spiked Chain/Butterfly Swing)
  • Ability 2: Ringblades (Cyclone/ Piercing Rings)

Build her as normal and when your block rating is high enough she will become an impenetrable tank. Enough to allow you to stand in the middle of the wall without taking much DMG and dealing obscene amounts of DMG, enough to finally break the wall with ease.

https://www.youtube.com/watch?v=2vfE1RI7ewc
Chapter III: Forgotten Viaduct 2/2
Viaduct Adept
Straightforward. Simply reach the end of a run in the Forgotten Viaduct without using abilities. Achievement will pop as soon as the timer reaches zero and the Lord spawns.

Viaduct Secret
It requires you to complete the hidden quest to find the Sentinel Orb.

Of all the hidden quest within the halls, this is amongst the simplest. To start it, simply be on the lookout for an altar with a peculiar Green-glowing raven. Once you approach the raven it will sing and signal to you to follow it. From there keep following it while dodging the enemies till you arrive at the Sentinel's tomb. Hit and break the tomb to expose the Orb. Once you grab the Orb, the quest will be complete and the achievement will pop.

The Orb neutralizes the Lord's Cloaking move which makes it invincible for a period of time. Without being able to cloak, the fight becomes much shorter.


Bosses
Wraith Horseman
First boss of the hall. Check it's dedicated section in this guide for information and tips on how to beat it.

Frost Knight
Second boss of the hall. Check it's dedicated section in this guide for information and tips on how to beat it.

Hydra
Last boss before the Lord of the hall. Check it's dedicated section in this guide for information and tips on how to beat it.

Lord of Despair
Lord and final enemy of the hall. Check it's dedicated section in this guide for information and tips on how to beat it.
Chapter IV: Frozen Depths


I see a stalactite.


Ability-Related
Arcane Rift Mastery III
Check the Ability Mastery section for tips and hints on how to do 3,000,000 DMG.

Arcane Rift Specialist
Check the Ability Specialists section for tips and hints on how to 1-Shot 2,000 enemies with it.

Natural Progression
Ghoul Slayer I
Should come naturally. Just keep killing ghouls until you reach the requirement. You can always check the quest to see how much you've killed.

Beast Slayer I
Should come naturally. Just keep killing beasts until you reach the requirement. You can always check the quest to see how much you've killed.

Ice Slayer I
Should come naturally. Just keep killing enemies in this hall till you reach the requirement. You can always check the quest to see how much you've killed.

Lastly, it is not recommended to do this one in Agony Mode as performing poorly during a run can significantly lower the enemy spawn count.

Depths Survivor III
This should come naturally as you level up and become stronger.


Specifics
Depths Dominator III
Must be done in a single run and might take a few tries.

As you keep completing quests you will be unlocking stronger abilities and traits, making this mission a lot easier. The kill count is displayed on the right side panel all the time in case you need to know if you got time or need to restart the run.

For this I'd suggest using a high damaging class build such as Exterminator, Archer, Sorceress, or Landsknecht. For further information about such, please refer my builds guide in order to have the details, it also provides demonstrations to have as reference.

Frozen Berserker III
Requires to deal a total of 500,000,000 DMG within a run at the Frozen Depths.

I suggest leaving these kind of quest for last since by that time you will have access to most blessings/artifacts/gear and EXP. Boost in order to make these significantly easier.

There are many ways to accomplish this. But my preferred methods are using the Mountain Idol artifact with either Sage due to his obscene DMG output or going Full Crit/Block/Tank with Shield Maiden. For the latter, please check Indomitable Idol Head.

Scriptor
Requires the exterminator or any weapon/ability with Burn-based DMG.

As you start the run in the Frozen Depths, check out for an Ice Pillar indicator on your screen, once you locate it, proceed to go toward it. Eventually you will find a big chunk of Ice in the middle of the room, once you are there, if you interact with it, you will see a cutscene that tells you to get Fire, which means you need Burn DMG in order to melt the ice. Once you melt it, the Scriptor will be there to greet you and thus, finishing the quest.

Improvement
Requires saving the Scriptor first. For more info., please check Scriptor.

Once you save the Scriptor at the Frozen Depths, he will show in the Campside. Simply interact with him and use his services. Once you do, the achievement will pop.

Frozen Adept
Must be done at the Frozen Depths

This requires doing a complete run without using abilities. There are many ways to accomplish this. My preferred method is with goind Full-Crit/Tank/Block with the Shield Maiden. For more info. about it, please check either Juggernaut or Indomitable Idol Head.

Frozen Secret
This quest requires you to complete the Frozen Depths' hidden quest.

As soon as you start the run, be on the lookout for some weird moving lights on the floor and the direction they move once you get near them, keep following their locations and moving direction till you find the Lord's Leutenant which is another optional Lord fight. Once you beat the Leutenant, it will drop the Frozen Heart. Once you get it, the achievement will pop.

The Frozen Heart stuns the Lord of Hate for a few seconds and damages it, reminding it that the Hateful lifestyle isn't healthy.


Bosses
Basilisk
First boss of the hall. Check it's dedicated section in this guide for information and tips on how to beat it.

Twisted Construct
Second boss of the hall. Check it's dedicated section in this guide for information and tips on how to beat it.

Elder Giant
Last boss before the Lord of the hall. Check it's dedicated section in this guide for information and tips on how to beat it.

Lord of Hate
Lord and final enemy of the hall. Check it's dedicated section in this guide for information and tips on how to beat it.
Chapter V: Chambers of Dissonance


Natural Progression
Capra Slayer I
Killing 10,000 Capra should come naturally.

Homunculus Slayer I
Killing 10,000 Homunculus should come naturally.

Construct Slayer I
Killing 10,000 Constructs should come naturally.

Dissonance Survivor III
This should come naturally.


Specifics
Dissonance Dominator III
Must be done in a single run and might take a few tries. I recommend going with a high DPS hero such as Archer, Exterminator, Landsknecht or Sorceress (For specific build information and demonstration, you can check the included build guides within this one). The kill count is displayed on the right side panel all the time in case you need to know if you got time or need to restart the run.

Important tips to get 17,000+ kills in this hall:

  • As aforementioned, a high DPS class is highly recommended here.
  • Avoid moving a lot for scrolls/powerups, focus on killing everything on screen. Just pick scrolls/powerups that happen to be on your way or plan a route to them. Just don't stop killing while taking a big detour.
  • There will be times where waves will have a high amount of enemies on screen and might force you play defensively and run away, DON'T, those are the wave where you will net 1,000-3,000+ kills. That alone might do/break your Dominator run.
  • Agony mode is always an option for these kind of achievements but should be totally doable in Normal mode. However, going Agony helps immensely in avoiding to focus on Hall scrolls, and instead, rely on the ones dropped by Champions/Elites.

Dissonance Berserker III
Requires to deal a total of 500,000,000 DMG within a run at the Chambers of Dissonance.

I suggest leaving these kind of quest for last since by that time you will have access to most blessings/artifacts/gear and EXP. Boost in order to make these significantly easier.

There are many ways to accomplish this. But my preferred methods are using the Mountain Idol artifact with either Sage due to his obscene DMG output or going Full Crit/Block/Tank with Shield Maiden. For the latter, please check Indomitable Idol Head.

Dissonance Agony
Can be done with any hero. However, this hall might prove to be challenging for some, if that would be the case then I recommend going with a strong hero such as Archer, Landsknecht or Sorceress, their builds should be straightforward and found in the Agony Builds Archive Guide in the Guide Index section.

Ivory Find
Must be done in one run.

Self-Explanatory. With the Ivory Dice artifact enabled, find 5 items. Can be done on any hall.

Obsidian Skill
Must be done in one run.

Self-Explanatory. With the Obsidian Dice artifact enabled, get at least 10 abilities/ability upgrades.

Dissonance Adept
Must be done at the Chambers of Dissonance.

This requires doing a complete run without using abilities. There are many ways to accomplish this. My preferred method is with goind Full-Crit/Tank/Block with the Shield Maiden. For more info. about the build, please check either Juggernaut or Indomitable Idol Head. The artifact isn't needed, of course.

Dissonance Speedster
Must be done at the Chambers of Dissonance.

This requires you to find and interact with the first device of the Chambers of Dissonance's hidden quest within the first 3 minutes of the run.

For this, go with either one of the faster heroes such as Archer, Norseman, or Sorceress and focus on getting some movement speed as soon as possible in order to cover more ground. With movement speed blessings, Gatherer's Charm, Guiding Star, and Running Shoes they become even better for it.

Might take some tries due to the starting location of the device but shouldn't take long.

Dissonance Secret
Must be done at the Chambers of Dissonance.

Going around of the map you will spot an Altar with a Book, next to it will be the Monolith which you need to ignite.

In order to complete the hidden quest you need to find and interact with the first lit rotating device (Will have a light source in the form of a beam) to ignite the Monolith. The puzzle consists of a series of similar rotating devices to guide the light to the next one till the light reaches the Monolith. Once the light does so, the Monolith will be ignited and a big circle with spawn on the map, covering the Monolith room. Simply stay within the circle and drag the horde toward you. Everything inside the circle will be damaged by the Monolith.

Once you deal a total of 100,000 DMG with the Monolith. The achievement will be yours.

To check your progress, you can go to the stats/inventory screen and check for Monolith.


Bosses
Void Caller
First boss of the hall. Check it's dedicated section in this guide for information and tips on how to beat it.

The Village
Second boss of the hall. Check it's dedicated section in this guide for information and tips on how to beat it.

Twisted Knight
Last boss before the Lord of the hall. Check it's dedicated section in this guide for information and tips on how to beat it.

Lord of Discord
Lord and final enemy of the hall. Check it's dedicated section in this guide for information and tips on how to beat it.
Final Chapter: The Vault


Final Boss
The Penny Dropped
Self-Explanatory. Simply beat the Lord of Greed and finish the game. The overall process to beat the Lord and Vault is the following:
  • Start building up DMG and MS.
  • Destroy all 4 energy altars to inactivate the Lord's Force Field.
  • Unleash your reckoning on the man that has been extorting you since the beginning.

It is worth mentioning that this must be done fast as the waves become more intense as time passes.


Specifics
Tribute III
Keep paying tribute until your balance is 150,000 or more.

Vault Challenge
For this one you need to pay tribute 4 times (5,200 Total). This will give you 4 actives modifiers at random, from there, simply enter the Vault.

Vault Challenger III
For this one you you need to beat the Lord of Greed in the Vault and collect 6 Torment Shards in a single run.

Before entering the Vault keep making tribute payments untill you see the +1 Torment Shard modifier for the 5th time (The Lord drops one on death by default). Then enter the vault and beat the Lord.

https://youtu.be/M9ZItVm8vSI?si=I8UIie4ADcvf8bHc

Vault Survivor III
For this one you need to survive for a total of 60 minutes during a run.

Technically can be done with any hero in the game. I'd normally say that I'd suggest doing it with the hero the player feels the most comfortable. But as a last resort. The Shield Maiden with a Full-Crit/Block/Tank build can greatly assist those having difficulty with this quest.

Vault Dominator III
For this one you need to kill a total of 30,000 enemies in one run.

Check Juggernaut for a good build for a 60 min run. Two birds, one stone.

Vault Berserker III
For this one you need to deal a total of 50,000,000 DMG in one run.

Check The Damage-Based Achievements General Tips in the Broken Record section for tips and tricks on how to get this.

Vault Speedster III
For this one you need to beat the Lord of Greed in 9 minutes.

This one can be tough for some, there's no shortcut but to learn the Vault's layout, what to do and understand the boss patterns and the overall process.

I'd recommend a fast moving character with high DMG output such as Archer, Exterminator, Sorceress, etc. Lastly, just pay the minimum value of 1,000 Gold, no need to make it harder than it has to be.

https://youtu.be/Yfo2Stx2jms?si=fp4B9m2kx0Yau4Vh
Story: Path of the Sword


A Sword


Ability-Related
Ringblade Mastery III
Check the Ability Mastery section for tips and hints on how to do 3,000,000 DMG.

Ring Blades Specialist
Check the Ability Specialist section for the corresponding information.


Specifics
Undaunted
Must be done as the Swordsman.

This achievement requires you to kill 10 bosses. Should come naturally.

Swordplay Mastery III
Must be done as the Swordsman.

Inflict a total of 3,000,000 DMG. For this, prioritize Critical DMG, Range, Collateral, DMG, and Attack Speed traits.

Power Hitter II
Must be done as the Swordsman.

Should come naturally as you get DMG related blessings and/or traits.

Strong Arms
Must be done as the Swordsman and in one run.

This achievement is self explanatory, simply acquire the Strength IV trait, as the Swordsman, in a run.

Blood's Taste II
Must be done as the Swordsman and in one run.

Heal for a total of 10,000 HP in one run.
For this, prioritize Metabolism and Vitality traits while healing from consumables scattered around the hall. Also don't forget to get hit a lot as any healing taking place at full health won't count. Would also recommend the Dissonance Hall on Agony as it will ensure you get hit a lot. For build items, I recommend: Blood-Soaked Shirt, Holy Relic, Mask of Madness, Blood Catcher, and Pace Setter Boots.

Just a Flesh Wound
Must be done as the Swordsman.

As the Swordsman simply get hit for a total of 500 times. This achievement should come naturally.

Forward (Removed?)
Must be done as the Swordsman and in one run.

As the Swordsman walk for a total of 5,000 meters in one run. For this achievement I suggest getting a good amount of movement speed and avoid stopping too frequently.

Wide Sweep II
Must be done as the Swordsman.

As the Swordsman hit 80 enemies with one attack. For this one I suggest focusing traits that increase your range and area of attacks such as Collateral Damage, Vanguard, and Swordsman's Coverage Weapon Proficiency and Reach Proficient Stance. This should be enough to get it within the first 10 minutes of a run. Lastly, in order to get it, wait for a large group of enemies to form and hit them all once you get enough range/area to cover the screen.

Master Swordsman
Must be done as the Swordsman and in the Haunted Caverns.

I suggest leaving the master achievements for last as you will need all available potions, the best gear and overall knowledge of the game.

Lastly, for information and tips, please refer to the dedicated Max Agony Class Build Archive guide at the beginning of this one.
Story: Swift as an Arrow


A Bow.


Ability-Related
Transfixion Mastery III
Check the Ability Mastery section for tips and hints on how to do 3,000,000 DMG.

Transfixion Specialist
Check the Ability Specialists section for tips and hints on how to apply 50,000 effect stacks with transfixion.


Specifics
Archery Master III
Must be done as the Archer.

For this one, try prioritizing Critical Chance traits, abilities and/or gear. For those having difficulty I suggest trying it on Agony runs.

Breathless
Must be done as the Archer.

Self explanatory. Simply acquire the trait Quick Hands IV in a run.

Confident
Must be done as the Archer.

This one should come naturally without even trying. Simply start 3 runs and survive for at least 10 minutes.

Forward Evermore
Must be done as the Archer.

Simply travel 50,000 meters. Should come naturally.

Guided by the Wind II
Must be done as the Archer.

Straightforward. Prioritize Movement Speed traits until you gather at least a total of 20 M/S from Archer's, other heroes' marks, and blessings. Also don't hesitate to use doubling potions to speed up the process. Lastly, gear with positive Movement Speed stats such as Runner's Shoes and/or Guiding Star also help. Also, Holy Relic for Angelic Boon drops.

Other option would be the Raven at Forgotten Viaduct.

Piercing Through
Must be done as the Archer and in one run.

Killing 20,000 enemies in one run might take a few tries. For that reason I suggest leaving this achievement for when a decent amount of traits, blessings and gear has been obtained.

Lastly, I suggest doing it during Agony runs as more enemies will spawn and therefore will help reaching the kill count significantly.

Taking Aim II
Must be done as the Archer. (Can be done at any time during a run).

This will become easier as you progress in the game due to having access to good gear, traits and blessings (especially the revives). Also would suggest the Haunted Caverns as it contains the lowest difficulty, or the Ember Grounds as the first elite will never step over you. Both on Normal Mode.

For gear, build straight DMG and Attack Speed. Also, make sure to use Collar of Confidence to give you a DMG boost whenever overwhelmed or the Duellist's Spark for initial DMG. Lastly, for obvious reason and/or proves to be too difficult, equip the Ring of Rebirth should you have it.

For traits, focus on DMG, and increasing your pickup range so you don't EXP starve while standing still, also to increase the Collar's effectiveness (If equipped).

For the ability, I suggest either one of Arcane Splinters for it's coverage or Phantom Needles for it's constant DMG output. Yes, you can attempt this quest at any time of the run, the quest description is misleading.

I suggest doing it at the very start of a run as it is when the lowest density of monsters and easiest elite enemies happen and it is overall easier to keep track of the timer. 360 seconds is 6 minutes, therefore, as soon as you get to the 6 minutes mark you should be done. Just make sure to move afterwards, as it is the last requirement to complete this achievement.

(Outdated demonstration showcasing the 180 seconds version, but the principles still apply)
https://www.youtube.com/watch?v=LZdI6HJKTVc

Untouchable II
Must be done as the Archer.

This can be done at any time during a run. Simply play passively for 9 minutes straight while avoiding getting cornered. Shouldn't give too much trouble. However, the Haunted Caverns hall on Normal is arguably the best place to try this as it has the lowest difficulty overall.

Dull Point
Must be done as the Archer.

There's probably other ways to do this. For this one you can go full-burn (Exterminator Mark) build with only the Firewalker Boots and Demonic Bond Ring as your DMG source. Turn off auto attacking, only get the spell tomes/scrolls for Exp., and focus on getting traits for survival (HP, Regen, Defense, Block, etc.).

The Haunted Caverns hall on Normal is arguably the best place to try this as it has the lowest difficulty overall, but still, Archer without Crits can be tough for some.

Sparking Eye
Must be done as the Archer.

For this go Full-Spark build (Sorceress Mark) and focus on Crit/Spark Chance. For abilities go Lightning Strikes (Electrifying Strikes) and Kugelblitz (Static Attraction, High Voltage).

Haven't tested it against the Ghost Wall on Viaduct but indeed got it on the Haunted Caverns on Agony, while using the Hasting Sands artifact, although, probably not necessary. Should get it during the latest minutes into the run with high spark chance and the density of enemies by then.

Master Archer
Must be done as the Archer and in the Haunted Caverns hall.

I suggest leaving the Master achievements for last as by that time you will have access to the best gear, blessings, traits, potions and you experience boost will be significant, making these a lot bearable as some of the Master achievements will take various attempts until the proper conditions are met when it comes to RNG.

For information and tips, please refer to the dedicated Max Agony Class Build Archive guide at the beginning of this one.
Story: Scorched Earth


Ability-Related
Dragon's Breath Mastery III
Check the Ability Mastery section for tips and hints on how to do 2,000,000 DMG.

Dragon's Breath Specialist
Check the Ability Specialist section for the corresponding information.

Specifics
Burning Masses II
Must be done as the Exterminator.
For this achievement I suggest going full burn build. You should prioritize Burn Chance traits, as sticking to abilities and gear that enhance Fire Damage. Also, if you have access to Reverberant Tinkture potions then don't hesitate to use them on the Burn Chance traits as you really want to get it as high as possible, preferably at 100%.

Once you have a high chance of burning enemies, simply gather a group and burn them all at once. This achievement can be done alongside the Firestarter III, Inferno III, Incinerated I ones as they all required the same approach.

Firestarter III
Must be done as the Exterminator.
For this achievement I suggest going full burn build. You should prioritize Burn Chance traits, as sticking to abilities and gear that enhance Fire Damage. Lastly, if you have access to Reverberant Tinkture potions then don't hesitate to use them on the Burn Chance traits as you really want to get it as high as possible, preferably at 100%.

Firewalker
Must be done as the Exterminator and in one run.
Prioritize Movement Speed traits, don't stop too often. It should come after a few tries.

Flammable
Must be done as the Exterminator.
Pretty straightforward and doesn't require to be in one run. Simply destroy any object you come across during your runs. Those objects can come in the form of crates, barrels, debri, etc. After destroying 200, the achievement will be yours.

Incinerated
Must be done as the Exterminator and in one run.
Do not confuse burn with fire damage. This achievement requires you to do a total of 3,000,000 DMG by burn effects, not hitting enemies with fire DMG. As usual, I suggest going full burn build. You should prioritize Burn Chance traits, as sticking to abilities and gear that enhance Fire Damage.

Lastly, if you have access to Reverberant Tinkture potions then don't hesitate to use them on the Burn Chance traits as you really want to get it as high as possible, preferably at 100%. This achievement can be done alongside the Firestarter III and Inferno III ones.

Inferno III
Must be done as the Exterminator and in one run.
I suggest going full burn build. You should prioritize Burn Chance traits, as sticking to abilities and gear that enhance Fire Damage.

Lastly, this achievement can be done alongside the Firestarter III and Incinerated I ones.

Pest Killer
Must be done as the Exterminator.
Should come naturally. Just kill 50,000 enemies across all runs as the Exterminator and the achievement is yours.

Prolonged Suffering
Must be done as the Exterminator.
As you will probably go full burn/fire build you will be killing enemies with burn DMG. With that being said, this achievement should pop up naturally as it doesn't require doing it in one run.

Cold as Fire
Must be done as the Exterminator.
For this go Full-Frost build (Norseman Mark) and focus on Frost Chance/DMG. The build items should be straightforward, anything that gives Frost-related stats. For abilities, go Hailstorm (Vortex, Spikes) and Frost Avalanche (Quick Freeze, Debris Avalanche).

For traits, focus on Frost Chance, Area, Range, Attack Speed (Main Weapon), DMG.

Lastly, recommend the Haunted Caverns on Agony.

Death by Fire
Must be done as the Exterminator.
This one should come naturally by playing the Exterminator as usual, Full-Burn. There's really no hidden trick, focus on Burn Chance/DMG while getting a decent amount of Area and Range. Should come naturally as you reach the end of a run due to the amount of enemies on screen.

However, if for some reason it proves too difficult. I recommend the Haunted Caverns and wait for the high density waves with lots of skeletons (Specially on Agony), stay still while aiming at a single direction and when you are about to get corneres, spin around while spreading your Flamethrower.

Critical Burn
Must be done as the Exterminator and in one run.
This requires you to reach 50% Crit Chance.

For this one you will need Archer's Mark, on Agony.

For gear, you will need Mask of Madness and the Wooden Ring and during the run you need to secure either of the Wooden Ring uncommon versions (Both if possible for best results).

For traits, you have access to (Don't forget to Doubling Potions if needed):
  • Cunning Technique
  • Archer Global Crit Chance traits
  • Archer's Global 30% Crit Chance Mastery V is available

Lastly, by beating the Vault under 15, you get a blessing for Base Crit Chance.

For a specific build, please check my Agony builds guide for my Exterminator Meltdown build.

Master Exterminator
Must be done as the Exterminator and in the Ember Grounds hall.
I suggest leaving the Master achievements for last as by that time you will have access to the best gear, traits, potions and you experience boost will be significant, making these a lot bearable as some of the Master achievements will take various attempts until the proper conditions are met when it comes to RNG.

For information and tips, please refer to the dedicated Max Agony Class Build Archive guide at the beginning of this one.
Story: Unholy Crusade


Ability-Related
Radiant Aura Mastery III
Check the Ability Mastery section for tips and hints on how to do 3,000,000 DMG.

Radiant Aura Specialist
Check the Ability Specialist section for the corresponding information.

Specifics
Fragile Stamina
Healing through consumables and/or health increasing traits will not foil the achievement.

I suggest using either the Sage or Warlock as they possess no base Health Regen. Also make sure to refund any Health Regen blessings from the Shrine and avoid any equipment that could give any sort of Health Regen properties. Lastly, avoid picking traits with Health Regen such as Metabolism etc. With all that being said, survive for 20 minutes with zero health regenerated and the achievement should pop.

Unholy Touch
Must be done as the Cleric.

Should come naturally while playing as the Cleric. While at it, you should focus on Fragile/Afliction debuff Change traits. Not much to say, this will simply come with natural progression.

Burning Belief
Must be done as the Cleric and in one run.

Do not confuse burn with fire damage. This achievement requires you to do a total of 500,000 DMG by burn effects, not hitting enemies with fire DMG. You should prioritize Burn Chance traits, as sticking to abilities and gear that enhance Fire Damage.

Broken Body
Must be done as the Cleric.

This no longer can be done against the Wraith Army in the Forgotten Viaduct. This might take a few tries but overall shouldn't be too difficult. Focus on traits, abilities, and equipment such as the Pest Ring. The targets for this would be the hall bosses and/or some tanky enemies in the Frozen Depths hall, to name a few.

Unction
Must be done as the Cleric and in one run.

Self explanatory. Simply Acquire the trait Metabolism V during a run.

Cleric's Stand II
Must be done as the Cleric and in one run.

For this I recommend maxing out both the Metabolism (and/or any other with Health Regen) trait and the Health Regen blessing from the Shrine.

I suggest going full tank with items such as Mask of Madness, Defiant Plate, Pace Setter, etc. to ensure survivability. By the time you get Metabolism V and the Cleric's last Penitent Dedication (Double potion if desired to speed up the process although, not necessary), he becomes nigh unkillable, so feel free to get hit, FOR FREE!

Heals by other means will not foil the achievement, however, that amount of healing will not count toward this achievement's progress. You need to regen a total of 10,000 HP.

Fragile Body
For this you must refund all Max Health blessings from the Shrine and avoid any equipment that would change your Max Health Total. Same goes for any trait you get in the way. With all that in mind, pretty much complete one full session with your original Max Health.

False Blessing III
Must be done as the Cleric and in one run.

Focus on magic-base traits, abilities and equipment alongside Critical DMG and Chance. Might take a few tries but nothing too bad. However, Agony is always an option for those having difficulty with these kind of achievements.

Taste Your Medicine
Must be done as the Cleric and in one run.

It requires you to play as the Cleric with the Flagellant's Foot Cuff artifact enabled.

Pretty straightforward, simply build as usual while focusing on maxing your effect chance, Area, Range and some survivability in other to survive the abuse.

With that being said, you need to get a total of 100,000 fragile stacks while being stacked yourself which your Main Weapon is more than capable enough, but if you need other fragile applications, abilities such as Radiant Aura, Ringblades and Transfixion have some innate and additional stacking capabilities.

Pacifist
This one requires you to not deal any sort of DMG for ten minutes. Seems intimidating at first but as you progress into the game and unlock blessings (Especially the Revive blessings for those 2 extra lives, should needed) and gear, it becomes significantly easier.

This can be done at any time during a run but I recommend starting right at the beginning of a run. For the build I recommend Fighter's Headband, Holy Relic, Seal of Rebirth, Maiden's Tear Necklace, Plate Armor. For hero choice, I'd pick between Norseman (Shield) (Mobile, Tanky), or Cleric (Best HP Regen). I'd personally avoid Shield Maiden for this as you could accidentally hurt someone with your shield tendencies.

For the hall, recommend the Haunted Caverns on Normal.

For the whole 10 minutes just walk around while avoiding getting cornered and get all the abilities scrolls for EXP. You are only leveling up once so for the upgrade I'd recommend Swift Feet to make it easier to avoid enemies.

Banish Evil
This one becomes easier as you progress into the game and unlock gear and blessings. For this one you need to deal a total of 15,000 DMG with a single hit.

Building Full-Crit with Fragile in mind should be more than enough to get this pretty quick into a run. However, if for some reason you can do enough DMG, I suggest enhancing your DMG output with gear such as Mask of Madness, Blood Catcher, etc.

Master Cleric
Must be done as the Cleric and in the Haunted Caverns hall.

I suggest leaving the Master achievements for last as by that time you will have access to the best gear, traits, potions and you experience boost will be significant, making these a lot bearable as some of the Master achievements will take various attempts until the proper conditions are met when it comes to RNG.

For information and tips, please refer to the dedicated Max Agony Class Build Archive guide at the beginning of this one.
Story: Demonic Pact


Ability-Related
Golem Mastery III
Check the Ability Mastery section for tips and hints on how to do 3,000,000 DMG.

Golem Specialist
Check the Ability Specialist section for the corresponding information.

Specifics
Demonic Commander III
Must be done as the Warlock and in one run.

For this achievement I suggest going full Summoner build. With that being said, prioritize everything that affects your Summons from traits, sticking to Summon type abilities (Spirit Warrior, Golem, Astronomer's Orbs, etc.). I also suggest, if you have them, the Imp and Skeleton rings.

In the end, with that build most of your DMG will come from Summons.

Demonic Exchange II
Must be done as the Warlock.

Make sure to refund any health increasing blessing from the shrine, avoid any equipment or trait that increases your health total, and pick the traits that reduce your health total till you get to 300 health or less. After that just spend a total of 5 minutes during a run and the achievement should pop.

If still having trouble reaching the goal, the Master's Vice Artifact will also allow you to reach lower levels of HP, although, risky.

Demonic Craze
Must be done as the Warlock.

Becomes easier the more Exp. Boost you have. For this you need the Master's Vice Artifact enabled. Make sure to avoid all blessings/gear that boost your HP total in order to make the process shorter.

For traits focus on the ones that decrease your HP total such as Demonic Exchange: Force, and Warlock's Bloodletting Dedication. You can also use Doubling Potions on them to speed up the process although not necessary as the Master's Vice will eventually take you to 1 HP.

For survivability focus on gear/traits that boost your Block chances.

Stepping Back II
Must be done as the Warlock.

Self explanatory, do not get hit for 10 minutes. Should be easy enough for experienced players, but, if for some reason you are finding yourself struggling with this one, you could always load the normal Haunted Caverns as it is arguably the easiest hall in the game.

Longliving
Must be done as the Warlock.
Pretty straightforward. Simply Acquire the trait Channeling V in a run as the Warlock.

Beastmaster
Must be done as the Warlock and in one run.

Might need a few tries but overall self explanatory. Kill 5,000 Hellhounds in one run. Agony also helps with the numbers, if you happen to struggle during normal runs.

The current halls with Hellhounds are: Haunted Caverns, Ember Grounds.

Observer
Must be done as the Warlock and in one run.

This might be tricky but in reality what you need is to have at least access to your starting ability scroll. From there you may go the full Summoner route with Summon type abilities and/or both Summon Rings, if you have them. But, in the end that build is optional as long as you can inflict enough DMG in order to not get overwhelmed.

Might take a few tries depending your overall progress within the game.

Lastly, NO Warlock/Beast Huntress Marks as they count as Main Weapons.

Mark of Madness
Must be done as the Warlock.

This achievement is straightforward and simple enough. Should come naturally without effort as you keep playing as the Warlock.

Horde Summoner II
Must be done as the Warlock and in one run.

You need to have 60 summons active at once. For this one focus on Force, Demonic Exchange: Force traits. Also make sure to equip the following:
  • Necromancers Clutch (Skeleton horde minions)
  • Demonic Bond (Imp horde minions)
  • Invocator's Grasp (Extends summon's lifespan and spawns, also spawns more Orbs)

Pick Astronomer's Orbs as your starting ability and focus on getting it's Inner Orbit upgrade as soon as possible as it will double your Orb count. Play as normal while making sure not to skip any of the aforementioned traits until the achievement pops. It is worth mentioning that the uncommon version of both rings will allow you to have way more minions around. Something to keep in mind during Agony, although not necessary.

Dog Walker
Must be done as the Warlock.

For this you need to deal a total of 20,000,000 DMG with the Hound, and for that you need to have the Beast Huntress' mark.

I suggest leaving this on for later as you will need a good anount of blessings/DMG and Exp. boost to help with the Process. For this one I suggest the Haunted Caverns or Forgotten Viaduct on Agony with the Scales of Pain and Mountain Idol Artifacts. The former gives you DMG, the latter gives you durable targets to inflict DMG upon.

For the build, go Full-Crit while focusing on maximizing summon/hound DMG and stats. For gear, go Mask of Madness, Blood Catcher, Wooden and Copper Rings, Blood-Soaked Shirt, Invocator's Grasp, Pace Setter Boots.

For traits focus on Summon Attack Speed and DMG. Also having Warlock's Tier V trait for 60% summon DMG in exchange of Multistrike will greatly help. Same goes for Demonic Exchange: Power, although risky, but still necessary.

For a specific build, please check my Agony builds guide for Warlock's MLC build.

Master Warlock
Must be done as the Warlock and in the Ember Grounds hall.

I suggest leaving the Master achievements for last as by that time you will have access to the best gear, traits, potions and you experience boost will be significant, making these a lot bearable as some of the Master achievements will take various attempts until the proper conditions are met when it comes to RNG.

For information and tips, please refer to the dedicated Max Agony Class Build Archive guide at the beginning of this one.
Story: Steady Shield 1/2


Ability-Related
Kugelblitz Mastery III
Check the Ability Mastery section for tips and hints on how to do 3,000,000 DMG.

Kugelblitz Specialist
Check the Ability Specialists section for tips and hints on how to apply the 20th stack with Kugelblitz to 1,000 enemies.


Specifics
Duelist
Must be done as the Shieldmaiden.

Self explanatory. Just defeat a boss while using the Shieldmaiden. This achievement should come naturally without effort.

Invincible
Must be done as the Shieldmaiden.

Self explanatory. Simply Acquire the trait Parry V during a run as the Shieldmaiden.

Direct Hits
Must be done as the Shieldmaiden and in one run.

Pretty straightforward. Simply Crit 2,000 enemies with your primary attack (Shield Bash does not Crits). For this achievement focus on Critical Chance traits. Shouldn't give too much trouble.

Bulwark
Must be done as the Shieldmaiden and in one run.

Although, this is straightforward, I recommend going tanky in order to sustain the DMG. With that being said, focus in Survivability traits and/or equipment in order to withstand the abuse.

Tower II
Must be done as the Shieldmaiden and in one run.

This will become easier as you progress in the game due to having access to good gear, traits and blessings (especially the revives). Also would suggest the Haunted Caverns as it contains the lowest difficulty, or the Ember Grounds since the first elite always keeps it's distance from you. Both on Normal Mode.

For gear I'd try any of the following:
  • Head - Fighter's Headband / Helmet
  • Neck - Collar of Confidence / Warrior's Fervor
  • Chest - Blazing Shell / Plate Armor
  • Hands - Thornfists / Longfinger Gloves / Fencer Gauntlets
  • Rings - Holic Relic / Demonic Bond / Necromancer's Clutch / Seal of Rebirth (if you need the extra help)
  • Foot - Pace Setter / Plated Boots

For traits, focus on DMG, DEF, Block, and increasing your pickup range so you don't EXP starve while standing still.

For the ability, I suggest either one of Lightning Strike for it's stun capabilities or Phantom Needles for it's constant DMG output.

I suggest doing it at the very start of a run as it is when the lowest density of monsters and easiest elite enemies happen and it is overall easier to keep track of the timer. 900 seconds is 15 minutes, therefore, as soon as you get to the 15 minutes mark you should be done. Just make sure to move after, as it is the last requirement to complete this achievement.

(The following are demonstration covering the short version of this achievement, but the principle still applies)
https://youtu.be/Rgcnb3g5klY
https://youtu.be/REHpQ4eERGg

Maiden's Blessing
Must be done as the Shieldmaiden.

For a speedy progress toward this achievement, I recommend having the Health Regen Blessing maxed out from the Shrine, prioritizing Health Regen traits and healing from consumables. Also, the Blood-Soaked Shirt will help if you have it. Simply put, any kind of healing works toward this achievement. Otherwise, it should come up naturally as you play with the Shieldmaiden.

Shield Mastery III
Must be done as the Shieldmaiden and in one run.

For this one, I recommend turning off auto attacks and avoid picking ability scrolls. The Shieldmaiden's Shield Bash is a special attack that happens each 0.275 seconds. Avoid attacking unless strictly necessary and try to gather as mush enemies together in order to maximize your DMG input. Avoid picking Critical-based stats for this one as the Shield Bash does not Crits, however instead, focus on getting as much Block Strength Stats from equipment and Parry, Bulwark, and other traits since the Shield DMG scales with it.

Or for experienced players, simply go MW-Only with her on Agony Mode:
https://www.youtube.com/watch?v=6nWRF888YYE

Stomp
Must be done as the Shieldmaiden.

Focus on Collateral and Vanguard traits in order to make your AoE big enough to hit 20 enemies at once. Otherwise, this should come naturally without much effort.

Indomitable Giant Head
Must be done with Shieldmaiden, on Agony

The Mountain Idol's guardian are an unique type of enemy that only appear when using the Mountain Idol artifact. They are a group of enormous stone head that fly toward you in order to corner you.

This requires that you kill at least 1 Head, and by the amount required you probably guessed right. They are extremely durable.

The following is the method I used to break them.

Shieldmaiden (Shield)
Full-Block/Crit
  • Head: Helmet (Growth)
  • Neck: Collar of Confidence (Pull)
  • Garment: Plate Armor (Growth)
  • Rings: Wooden (Growth) / Cooper (Growth)
  • Hands: Fencing Gauntlets (Crit)
  • Boots: Plated Boots (Growth)
  • Ability 1: Morning Star (Spiked Chain/Butterfly Swing)
  • Ability 2: Ringblades (Cyclone/ Piercing Rings)

Build her as normal and when your block rating is high enough she will become an impenetrable tank. Enough to allow you to stand in the middle of the group without taking much DMG and dealing obscene amounts of DMG, enough to finally break them down.

This is the same method used to kill the 24 Marching Ghosts at the Forgotten Viaduct (See Proof of Concept / Juggernaut)
Story: Steady Shield 2/2
Who needs defense?
Must be done as the Shieldmaiden.

Pretty much play a full session without defense boosting stats. With that said, refund all of your Defense Boosting Blessings from the Shrine. Avoid equipment that Boost your Defense, same goes for all traits. With all that being said, Don't forget that increasing HP, Regen, or Block is allowed.

At the 2 minutes mark, the achievement should pop.

Critical Prowess
Must be done as the Shieldmaiden.

With the recent rework to her traits, her Main Weapon scales heavily with both Block and Crit Bonuses. With that said, It should come naturally as you progress into the game as you will have access to DMG/Crit-related blessings/traits/gear and Exp. Boost to help you level up faster and further increase your DMG stats. Just build her Full Crit/Block and it should come naturally.

For a quick specific trait path, go standard:
Weapon Proficiency Both (I-IV)
Proficient Stance Both (I-IV)
Dedication: Striding.

Master Shieldmaiden
Must be done as the Shieldmaiden and in the Forgotten Viaduct hall.

I suggest leaving the Master achievements for last as by that time you will have access to the best gear, traits, potions and you experience boost will be significant, making these a lot bearable as some of the Master achievements will take various attempts until the proper conditions are met when it comes to RNG.

For information and tips, please refer to the dedicated Max Agony Class Build Archive guide at the beginning of this one.
Story: Lightning Storm


Ability-Related
Meteor Strike Mastery III
Check the Ability Mastery section for tips and hints on how to do 3,000,000 DMG.

Meteor Strike Specialist
Check the Ability Specialist section for the corresponding information.


Specifics
Queen of Thunder
For this achievement I recommend the Lightning build included in this guide. Stick to abilities that can Electrify (Astronomer's Orbs, Lightning Strike, Kugelblitz, etc), prioritize all traits that effect your Eletrify chances (Use Reverberant Tinkture potions if needed) and try to get as much Attack Speed as possible as that will help you get the threshold sooner.

This does not have to be done in one run so it should pop eventually.

Magic Step
Must be done as the Sorceress and in one run.
Self explanatory. For this get as much Parry/Block stats as possible. Might take a few tries but shouldn't be too bad.

Electrified
Must be done as the Sorceress and in one run.
Go full Lightning build included in this guide. Try to maximize your Electrify Chance and DMG (Use Reverberant Tinkture potions if needed). Stick to abilities that can Electrify at all costs. Might take a few tries but it is not that bad.

Thunderstrike
Must be done as the Sorceress and in one run.
Focus on raw Damage traits in order to boost your maximum Damage input. With that being said, hit 1,000 with at least 500 DMG during the run and the achievement should pop.

Hot Touch
Must be done as the Sorceress and in one run.
Prioritize Burn Chance if available (Also (Use Reverberant Tinkture potions if needed). The higher the Burn chances, the easier it will become. Might take a few tries but overall, it should not be too difficult.

Charged Up
Must be done as the Sorceress and in one run.
The best spot for trying this is any of the hall Lords, the Marching Ghosts at the Forgotten Viaduct or the Mountain Idol artifact's guardians. For this maximize your Electrify Chances, Attack Speed, and stick to abilities that can Electrify (Astronomer's Orbs, Lightning Strike, Kugelblitz). If you are killing stuff too fast, ignoring DMG buffing is an option here. This is one of the most tedious achievements in the game so it might take various tries.

Electrostasis II
Must be done as the Sorceress and in one run.
Self explanatory. As the Sorceress focus on Movement Speed traits till you amass a total of 25m/s. For this one, focus on granting as much movement speed as possible. I recommend starting with Guiding Star and Runner shoes on Agony.

Other alternatives for movement speed are Archer's Mark to gain access to her Agility Dedication, also her Agility Mastery V if available and the Swift Feet general trait. As the Raven on Forgotten Viaduct and the Angelic Boon Powerup.

Lastly, if possible focus on getting the uncommon version of Guiding Star (Try to keep both rings, common or uncommon), and Runner Shoes' uncommon variant.

Thunderstorm III
Must be done as the Sorceress and in one run.
For this achievement focus on Lightning DMG traits and abilities with Lightning DMG (Astronomer's Orbs, Lightning Strike, Kugelblitz, etc.). This should not be that difficult considering most of your DMG will be Lightning based but still might take a few tries before getting it right.

Fatal Strikes II
This one should pop up without issue while going your usual full crit/Spark Sorceress build which can be found in the Max Agony Build Guides in the Guide Index section of this one.

Death by Electrocution
Must be done as the Sorceress and in one run.
For this you need to kill 10,000 enemies with Spark in one run.

This one should come naturally on Agony due to the amount of enemies spawning during the run and the concentration of Spark DMG coming from the Sorceress' typical Full-Crit/Spark elemental build.

Master Sorceress
Must be done as the Sorceress and in the Forgotten Viaduct hall.
I suggest leaving the Master achievements for last as by that time you will have access to the best gear, traits, potions and you experience boost will be significant, making these a lot bearable as some of the Master achievements will take various attempts until the proper conditions are met when it comes to RNG.

For information and tips, please refer to the dedicated Max Agony Class Build Archive guide at the beginning of this one.
Story: Beast Tracker 1/2


Ability-Related
Spirit Warrior Mastery III
Check the Ability Mastery section for tips and hints on how to do 3,000,000 DMG.

Spirit Warrior Specialist
Check the Ability Specialist section for the corresponding information on how to deal 10,000,000 DMG with dashes/explosions.


Natural Progression
Capra Huntress
Kill 3 Capra champions at the Chambers of Dissonance.

Gargoyle Huntress
Kill 3 Gargoyle champions at the Forgotten Viaduct.

Ghoul Huntress
Kill 3 Frost Ghouls champions at the Frozen Depths.

Imp Huntress
Kill 3 Imp champions at the Ember Grounds.

Polar Huntress
Kill 2 Polar Beasts champions at the Frozen Depths.

Scorched Huntress
Kill 5 Scorched champions at the Ember Grounds.

Slime Huntress
Kill 3 Slime champions at the Haunted Caverns and/or Ember Grounds.

Sniffer
Must be done with the Beast Huntress.

Find and kill 3 Golden Slimes. For this one I suggest the Forgotten Viaduct due to how narrow it is, making it ideal to find more breakables than the rest of the halls.

Skeleton Huntress
Kill 3 Skeleton champions at the Haunted Caverns.

Wraith Huntress
Kill 3 Wraith champions at the Forgotten Viaduct.

Homunculus Huntress
Kill 3 Homunculus champions at the Chambers of Dissonance.
Story: Beast Tracker 2/2
Specifics
Deadly Fangs III
Must be done as the Beast Huntress and in one run.

In the latest interaction of the game doing 5,000,000 Physical with such characters has become from one of the most tedious tasks to just trivial. For this I suggest building the Huntress Full-Crit and should come naturally. However, if having issues remember that you could always used the Mountain Idol artifact to give yourself an endless supply of targets to inflict DMG upon.

Dog Trainer II
Must be done as the Beast Huntress.

Requires to deal a total of 10,000,000 DMG with the Hound.

The Hound's DMG and Critical Chance are quite decent so focusing on Critical DMG and Critical Chance will significantly help.

This becomes way easier if you have access to Beast Huntress' Mark as it will give you two Good Boys, instead of one. From there just build full-Crit and your companions will do the rest.

Lastly, recommend Agony as it will give you access to artifacts such as Mountain Idol which gives you huge flying Punching Bags for your Good Boys to chew on.

Blood's Blessing
Must be done as the Beast Huntress and in one run.

This achievement is pretty straightforward, it requires you to heal for a total of 5,000 HP.

With that being said, the latest halls will make sure you get hit a lot, especially on Agony, which is totally welcome for this one.

This can be done in many ways. But the principle is linear. Your build should consist on sustaining the abuse. For that I recommend focusing on Health, Regen, and healing. I'd recommend the following gear for the build:

  • Mask of Madness (To make sure you are getting damaged while buffing up.)
  • Blood-Catcher (Sustain and DMG)
  • Blood-Soaked Shirt (Sustain on kill)
  • Holy Relic (Sustain. Combining with Warrior's Fervor is favorable for survival if needed.)
  • Pace Setters (Sustain while stationary)

For traits, again, focus on HP and Regen.

I'd advice against taking Block and Armor as we want to lose as much HP in the shortest of times in order to heal all that up as the any healing/regen taking place while you are at full health won't count toward the process. That's right we are going Face-to-Foot style here.

Lastly, the Forgotten Viaduct might be the best hall to do this due to having access to unlimited damage taken potential in the for of your friendly Wraith Wall Armies.

Flight and Fight
Must be done with Beast Huntress using the Confusing Lens artifact.

This one is kind of misleading. What you need to do is improve your Movement Speed to a certain value after being nerfed by the initial -10 base value from the artifact.

Started the run with the following items:

  • Gatherer's Charm
  • Guiding Star / Holy Relic
  • Running Shoes

From there focus on MS traits such Dedication: Flight or any other from another Hero Mark as long as it is Percentage-based(%), avoid getting Swift Feet traits or any other with base values, till my progress stuck at 10/12 from there, the moment I got the Angelic Boon completed the quest.

On another note, the Raven on Viaduct will also give a huge MS boost when activated while going for the Viaduct Secret. Which should be more than enough to get the achievement.

It is worth noting that the Confusing Lens cripples Good Boy's MS (Not sure if intentional). Also, need to reiterate to avoid MS traits with base values as they make you slower rather than faster.

Gold Trail
Must be done with Beast Huntress using the Golden Scarab artifact.

This one is self explanatory. Simply collect a total of 1,000 gold using the artifact. As the artifact states, you will get damaged by the exact sum of gold you get, for that reason, you need to be wary of killing champions and accidentally getting a large amount of gold bags, should you get the gold reward, rather than chest or scroll/tome.

Pure Strength
Must be done with Beast Huntress.

Self explanatory. Simply play a run without killing any enemy with effects such as Burn, Frost, or Spark, etc. For that reason I recommend going Full-Crit physical build with Huntress with only Phantom Needles as your main and only ability, for the ability upgrade, just pick Phantom Split. A quick gear list before updating my Build guides in the future:

  • Head: Mask of Madness
  • Neck: Warrior's Fervor
  • Rings: Echoing Band (Reach) / Holy Relic
  • Garment: Blood-Soaked Shirt
  • Gloves: Hunting Gloves or Quickhand Gloves
  • Boots: Pace Setter

Lastly, be extremely careful of not breaking flammable objects within the halls as it will burn and kill smaller enemies, voiding your progress.

Championess
Must be done with Beast Huntress.

Self explanatory. Kill 15 champions in one run. Becomes easier as you progress within the game and get access to blessings/artifacts/gear/traits and Exp. Boosts. There's no specific way of getting this as long as you have a competent DPS to clear screen during Agony. Just make sure to have at least 4 artifacts enabled.

Master Beast Huntress
Must be done as the Beast Huntress and in the Frozen Depths hall.

I suggest leaving the Master achievements for last as by that time you will have access to the best gear, traits, potions and you experience boost will be significant, making these a lot bearable as some of the Master achievements will take various attempts until the proper conditions are met when it comes to RNG.

For information and tips, please refer to the dedicated Max Agony Class Build Archive guide at the beginning of this one.
Story: Cold Fury 1/2


Ability-Related
Hailstorm Mastery III
Check the Ability Mastery section for tips and hints on how to do 3,000,000 DMG.

Hailstorm Specialist
Check the Ability Specialists section for tips and hints on how to apply 50,000 frost stacks with it.


Specifics
Bladestorm III
Must be done as the Norseman and in one run.

5,000,000 Ice DMG with the Norseman might take a few tries but prioritizing Attack Damage, Attack Speed, Critical Chance and Damage, alongside Multistrike should be enough to reach the threshold.

Perma Frost II
Must be done as the Norseman and in one run.

For this one I recommend the first hall on Agony mode with a full Frost build.

Focus on Frost DMG/Chance% while getting as much Attack Speed/Range/Area for maximum Frost applications from your Main Weapon. For equipment, I personally like the Warrior's Fervor/Holy Relic combo. You could also go Frost Ring too for it's bonus Frost Chance% although it isn't really necessary.

For abilities, just go Hailstorm and with it, focus on Frost Chance% and making it fast and wider. For traits, focus on both of Norseman's Weapon Proficiencies and Proficient Stances, for Dedication, go Performance. The rest of the traits/build is the standard Norseman build with high amount of Attack speed, Area, Range, while maximizing Frost DMG/Chance%. A detailed Frost build will be found in my Max Agony Builds guide for those that might need the extra help.

You should have at least twice as much Frost DMG as the required amount by the end of the run. Shouldn't be too difficult with the latest rework to the Norseman.

Cold Rage II
Must be done as the Norseman and in one run.

For this one I suggest prioritizing Attack Speed and Multistrike traits. Hitting 200,000 enemies shouldn't be that difficult but in case you are having difficulties, you can always try during Agony with the Mountain Idol artifact as it will give you more targets to hit.

For the hall, the Forgotten Viaduct for it's Marching Ghost wall, combined with the Idol, it will give you lots of targets to hit. Should come fairly easy as you unlock blessing/traits/gear etc.

Frost Wave
Must be done as the Norseman.

Pretty simple considering the amount of enemies on screen during the later minutes of a run. It will probably unlock without trying.

Flash Freeze II
Must be done as the Norseman and in one run.

Should come naturally as Norseman is a Frost-based hero and you have access to both Frost Avalanche and Hailstorm.

Prioritize Frost DMG/Chance and should come naturally during Agony runs.

Warrior's Fervor II
Must be done as the Norseman and in one run.

For this one focus on health regen and keeping your health at max while looking around for power ups in breakables and/or map. Also recommend equipping the following:
  • Fighter's headband (Will spawn power ups when an elite and boss show up while you are at full health)
  • Blood-Soaked Shirt (To keep you at max health)
  • Holy Relic (Both uncommon if possible) (Drops power ups each 30 secs, at full health)

Vitality
Must be done as the Norseman and in one run.

Keeping yourself at at least max level of 500 or more should be easy as long as you get access to HP boost gear/blessings etc. The only thing you need to be mindful is leveling up, so for this one, I suggest a slightly more passive.
Story: Cold Fury 2/2
Berserker's Blood
Must be done as the Norseman and in one run at the Frozen Depths.

Requires to kill a total of 2,222 enemies within the first 5 minutes of the run. Can be tricky but is pretty doable. You just need Movement Speed, Attack Speed, and DMG. For that reason I suggest going Full-Burn or the Noodlemania Special (Fighter's Headband (Potions), Both Uncommon Holy Relic rings.

It becomes easier as you progress into the game as you will have access to blessings, traits, and gear, etc.

Hot Blooded
Must be done as the Norseman and in a run.

This requires a Burn-Based Norseman build. There's no one way to the build aside the standard, Ring of Fire, Firewalker Boots, Blazing Shell. If aiming for Ultra-Fire style, go Warrior Fervor with at least one Holy Relic, otherwise, traditional Elemental Resonator necklace with anything else for ring. Any ability with Fire/Burn properties will do, although, I personally prefer Dragon's Breath for it's Steam of Fire upgrade, or Flame Strike, for their burn application.

Should be fairly simple to reach the threshold, but if for some reason, proves difficult, remember to enable the Mountain Idol artifact on the Forgotten Viaduct for endless supply of targets for you to stack burn effects from.

For a specific build, please check my Agony Builds guide for my Norseman Muspelheim build.

Untouchable II
Must be done as the Norseman and in one run.

This requires you to not get hit for a total of 6 minutes during a run. There's no reason to make this difficult. For this one I'd suggest the Haunted Caverns on Normal.

For abilities go either Phantom Needles and/or Transfixion as they will help cleaning any enemy left alive by your early swings. For traits, focus on Range and Area to make your swings as big as possible in order to cover big areas and therefore, making your run easier.

For specific builds you could always check the Agony Masters Build guide for reference. Although, this achievement requires not specific way to play and is pretty straightforward. It should become trivial as blessings and gear are unlocked/earned.

Master Norseman
Must be done as the Norseman and in the Frozen Depths hall.

I suggest leaving the Master achievements for last as by that time you will have access to the best gear, traits, potions and you experience boost will be significant, making these a lot bearable as some of the Master achievements will take various attempts until the proper conditions are met when it comes to RNG.

For information and tips, please refer to the dedicated Max Agony Class Build Archive guide at the beginning of this one.
Story: Forward March


Ability-Related
Morning Star Mastery III
Check the Ability Mastery section for tips and hints on how to do 5,000,000 DMG.

Morning Star Specialist
Check the Ability Specialist section for the corresponding information.

Specifics
Grenadier II
Must be done as the Landsknecht.
While the builds located in my Max Agony guide mostly focus on her Main Weapon, they can still deal a lot of Grenade DMG. Might come naturally. Otherwise, focusing on Grenade rather her Rifle can definitely help.

Markswoman II
Must be done as the Landsknecht.
For this achievement I suggest following the build included in my Max Agony Class Build Archive guide within this guide which focus on projectiles and her main weapon. The build is designed to deal high amount of single hit DMG. Should come naturally.

Riflewoman III
Must be done as the Landsknecht.
For this achievement I suggest following the build included in my Max Agony Class Build Archive guide within the Guide Index section, which focus on projectiles and her main weapon, should be more than enough to get at least 10,000,000 DMG. Also, as usual, while not necessary, Agony is an option for those struggling to reach the goal in Normal.

Technician II
Must be done as the Landsknecht.

Important: There seem to be an issue with the base version of Echoing Band not registering for this achievement. For that reason it is adviced to replace it with an uncommon variant as soon as possible or un-equipping and re-equipping it should fix the problem.

For this achievement I suggest following the build included in this guide which is capable of high DMG output and equips the Echoing Band which should be enough for this. However, if for some reason it isn't enough, other good items for this are: Gorgon Mask (Best DMG output potential of all gear but not as effective if using this build), Thornfist, Broker's Cape, Spike Boots, Summoner rings (Not sure), Firewalker Boots, Blazing Shell, etc.

Lastly, as usual, while not necessary, Agony is an option for those struggling to reach the goal in Normal.

Bulletstorm
Must be done as the Landsknecht and in one run.
For this you need to hit 6,000 times with projectile-based DMG.

This one should come naturally as most of the DMG coming from Landsknecht is projectile-based and there's plenty of projectile-based abilities in the game. Personally like Phantom Needles (Best application), Transfixion, and Arcane Splinters but anything else under the same category will do just fine.

Holy Grenade
Must be done as the Landsknecht and in one run.
This one requires to deal a total of 50,000 with a single grenade.

This one doesn't really require a Grenade-specific build but going full Grenade-centric will obviously help. As a general rule, for these kind of requirements, go Full-Crit and focus on maximizing your Area and DMG as it will make your grenades' explosions wider, ensuring getting a bunch of enemies at once, and making the whole thing easier.

Should come naturally as you progress into a run with enough blessings/gear. But if for some reason you can't get it, then Agony is always an options.

Master Landsknecht
Must be done as the Landsknecht and in the Chambers of Dissonance hall.
I suggest leaving the Master achievements for last as by that time you will have access to the best gear, traits, potions and you experience boost will be significant, making these a lot bearable as some of the Master achievements will take various attempts until the proper conditions are met when it comes to RNG.

For information and tips, please refer to the dedicated Max Agony Class Build Archive guide at the beginning of this one.
Story: Ethereal Knowledge


Ability-Related
Spectral Fists Mastery III
Check the Ability Mastery section for tips and hints on how to do 10,000,000 DMG.

Spectral Fists Specialist
Check the Ability Specialist section for the corresponding information on how to deal 10,000+ DMG to 100 enemies. Overkill DMG counts

Specifics
Ability Focus II
Must be done as the Sage.

This achievement requires that you fully invest into an ability (Your main one) and stick to it. There are various high damaging abilities in Halls of Torment and each suit different players differently. However, if you are willing to take an advice, then I'd suggest to check any of the included build guides for a build suitable for dealing high amount of DMG.

Lastly, I highly suggest Agony Mode for this. This will give you access to artifact that will help you drastically for this. For more information, check the Damage-Base Achievements, in the The Broken Record section at the beginning of the guide.

Knowledge Collector II
Must be done as the Sage.

This requires you to get a total of abilities or ability upgrades within a run. I recommend Agony for this as it will ensure you get a lot of opportunities to get abilities due to the amount of Elite and Champion enemies, the starting ability, and the hall initial ones. Should come naturally due to the volume of scrolls/tomes spawning throughout the run.

Limited Knowledge
Must be done as the Sage.

Self-Explanatory. As the Sage play a run without getting any ability/ability upgrade for 26 minutes, in other words, you only have 4 minutes from the start of the run to get as much abilities/upgrades as you can, after that you can't get any more without risky voiding the progress.

This can be done in many ways. But I'd suggest doing it on Haunted Caverns. For the most easier experience, I'd recommend also to leave this one for when you get access to your initial free ability and the starting Tome in order to start with two and better deal with the early game. However, it is not guaranteed.

Overcritter
Must be done as the Sage.

Considering most Sage builds rely on going full ham with lot's of DMG and Crit stats. This should come smoothly. I however, would recommend doing it on Agony with the Mountain Idol artifact as it will provide you with endless targets to Crit. Should get this one during the end of a Agony run when the waves start to crash hard on you, even without the artifact, although I don't see a reason not to have extra help.

Ability Mastery III
Must be done as the Sage.

Both this and Ability Focus II can be done together, for more information check "Ability Focus II".

Experience Hoard
Must be done as the Sage.

Probably Sage's most tedious achievement. This will definitely be troublesome for some. This requires you to reach level 150 with Karl which needs a dedicated setup and strategy that will be explained below.

There are two ways of achieving this, a specialized Agony Run or the Vault. For the purpose of this guide I'll stick to the Agony run as I find it less time consuming and tedious. However, you still need to understand how to do it.

Artifacts: Hastening Sands, Scale of Pain, Restless Wheel (add more accordingly)

Mark: Knowledge
Head: Fighter's Headband (Potions)
Neck: Warrior's Fervor (Lingering)
Garment: Blood-Soaked Shirt (Rage)
Rings: Holy Relic (Both)
Gloves: Hunting (Growth)
Boots: Spiked Boots

Abilities (Bold is main): Transfixion (Amputation | Crippling Cuts), Arcane Splinters (Unrest | Shivers), Ring Blades (Cyclone | Piercing), Lightning Strikes (Concentrated)

Banish: Vitality, Metabolism, Bulwark, Thick Hide, Parry, Proficient Stance: Elements

Weapon Proficiency: Both
Proficient Stance: Concentration
Dedication: Both
Mastery V: Proficient Stance: Damage


Steps
  • Play as normal, gathering your abilities/upgrades and build traits etc.
  • Avoid getting any chest as they will be used later in the run to overcome the Exp. Dampening during the last 10 or so levels.
  • Once you have all your abilities with their upgrades, avoid getting any scroll/tome as they will be used for experience later on. Same way as chests.
  • Once your build is complete try to stay still to gather all the Exp drops in an area around you to avoid losing any Exp. on the map while moving around. Even less important if you have access to hands of Greed (Exp. Vacuum Pickup)
  • Once you Beat the Lord, start getting all chests/scrolls/tomes for their 50% Exp. to bypass the Exp. Dampener by that time, around Lv. 137+). You will need two to level up, so to give an example, by the time you reach Lv. 140 you will need 20 to reach the mark.

Lastly, this achievement becomes easier as you keep completing missions since it will give you a permanent Exp. Boost to your account, helping you level up faster during runs, meaning the more quests completed, the more Exp. and faster it will take you to the mark.

https://youtu.be/nBmpuy3PArY?si=5mImd6xQBaqMqjqA

Master Sage
Must be done as the Sage and in the Chambers of Dissonance hall.

I suggest leaving the Master achievements for last as by that time you will have access to the best gear, traits, potions and you experience boost will be significant, making these a lot bearable as some of the Master achievements will take various attempts until the proper conditions are met when it comes to RNG.

For information and tips, please refer to the dedicated Max Agony Class Build Archive guide at the beginning of this one.
Milestones


  • The following achievements are the highest tier within their category. All these should come with natural progression and barely keeping track of them.


General Milestones
Recovery III

Recover 150,000 HP over all runs.
Wanderer III

Walk a total distance of 500,000 meters.
Blacked Out

Consume a total of 500 Health Potions.
Treasurer

Collect a total of 200,000 gold.
Artifact Crusade

Collect 20 artifacts.
Power Boost III

Collect a total of 500 Power Ups.
Power Surge III

Collect a total of 50 Torment Shards.
Literate III

Acquire 500 abilities or ability upgrades.
Agony III

Increase Agony rank 150 times. (Increasing the same level in a run won't count)
Steadfast

Enter the Halls of Torment 20 times and survive at least 3 minutes.
Greed

Purchase 30 items from the Wellkeeper.
Hell Upside Down

Play for 999 minutes.
Legendary

Level up 5,000 times.


Combat Milestones
Horde Slayer III

Kill 500,000 enemies over all runs.
Elite Slayer III

Kill a total of 250 Elite enemies.
Champion Slayer III

Kill a total of 400 Champion enemies (Agony).
Boss Slayer III

Kill a total of 100 Bosses.
Survivor III

Kill a total of 50 lords.
Tank III

Block 300,000 DMG.
Attuned III

Deal 100,000,000 DMG with items over all runs.
Pinpoint III

Crit enemies 1,500,000 times.
Overcharged III

Hit 20+ DMG effect stacks 100,000. (Burn, Frost, or Spark)
Pestbringer III

Apply debuffs 1,000,000 times.
Tormentor III

Apply DMG effects 2,000,000 times.
Mass Destruction III

Deal 1,000,000,000 DMG over all runs.
Artifacts


The fastest way to unlock these achievements is by doing the Cracked Eye Secret Quest (see Ember Secret.) in the Amber Grounds and killing the Optional boss as it counts as a lord. Beating the hall Boss is not needed. - As of Hot Patch 2024-10-10, this isn't longer possible and requires to kill the Lord at the end of the run.


Hall-Specific Artifacts
These will always drop in their designated halls after killing the Boss.
Hall 1 - Haunted Caverns
Hall 2 - Ember Grounds
Hall 3 - Forgotten Viaduct
Hall 4 - Frozen Depths
Hall 5 - Chambers of Dissonance
Vault - Final Hall


Hastening Sands (Hall 1)

-10 Minutes Run Time
+50% Spawn Rate (Monsters)
+20% Movement Speed (All)
Magma Vessel (Hall 2)

Spawns lava eruptions near you that damage both you and your enemies.
Mountain Idol (Hall 3)

Spawns large and slow enemies that absorb a lot of damage.
Torment Banner (Hall 4)

Spawns additional basic enemies during the entire run.
Trickster's Chime (Hall 5)

Adds traps to the Halls.
Archeologist's Thread (Vault)

Spawns a shrine that serves as a well for uncommon items. This is a safe modifier as it doesn't penalize the player.


Random Drop Artifacts
These artifacts will drop at random, at any hall, after killing the Boss.

Silver Cut

All modifiers on the player are reduced by 20%.
Confusing Lens

-10m/s Base Movement Speed (All), inverts movement (Player).
Urn of the Damned
Killed enemies have a chance to spawn a ghost that chases you for a short time.
Scales of Pain

+100% Damage (Player) +50% Damage (Enemies)
Primordial Edict

Reduces the stack limit of effects by one third.
Apocryphal Curse

Negative modifiers are increased.
Restless Wheel

Agony ranks increase a lot faster.
Scorched Hand

Everything has a 20% chance to Burn on hit.
Mind Veil

-50% XP Bonus from quests
Malignant Mirror

Three Lords appear at the end of a run, instead of a single Lord.
Face of Regret

For every 50 enemies killed:
-1% Damage

-0.2% Effect Damage
Master's Vice

Each level-up reduces your max. health by 0.8%.
Obsidian Dice

All abilities from scrolls and tomes are randomly chosen for you.
Killing Gaze

Spawns additional ranged enemies during the entire run.
Idol of Hunger

Reduces all healing by 50%.
Burdening Stone

Reduces Movement Speed for every equipped item.
Ivory Dice

All items from chests are randomly chosen for you.
Living Darkness

A black fog reduces your range of vision.
Golden Scarab

Picking up gold deals damage equal to its value. Breakables hold more gold. (Be mindful of killing Treasure-reward Champions as they can Insta-Kill you if running low and not careful.
Fallen Star

Crystals rain down and damage you and your enemies.
Curse of Commitment

Uncommon/rare equipment cannot be unequipped during the run.
Flagellant's Foot Cuff

Get a Fragile stack for every 10 meters moved.
Hitless Dagger

Get a Slow stack for every triggered Main Weapon attack.
Demonic Cube

Elites, Bosses, and Lords gain additional abilities.
Boss Imperium | Haunted Caverns


The Imp Chieftain
First boss of the hall. It's attacks are very telegraphed so you should be able to dodge most of them.

The Skeleton Lord
Second boss of the hall. This boss has two attacks variations, both are AoE and can be easily spotted by markers placed on the floor. One of the attacks creates a circle around you but can be easily dodged by timing your movement around the explosions sequence. The other attack creates an AoE cone which can be easily avoided before it actually goes off.

The Lich
Last boss before the Lord of the hall. The Lich can definitely be difficult at the start with the lack of blessing and gear but as you progress into the game and unlock abilities and equipment, it becomes way easier. It likes to throw a lot of purple skeletons at you and some telegraphed attacks but what makes it challenging is the amount of enemies on screen when facing it that deep into the hall.

Lord of Pain
Lord and final enemy of the hall. This, in my opinion, is the hardest Lord of the Vanilla game. It's first form is the hardest part of the fight, during that phase, some of it's attack are telegraphed but as time goes on, it starts to move faster and attack more frequently. For this fight I seriously recommend a really good amount of Movement Speed in order to be able to stand your ground.

Cavern Secret (Optional): If proves to be too difficult, no matter what. The Lord can be weaken by doing the Cavern Secret, which consists of finding the altar with the bloodstained book (or starting following from either blood trail), and from there, following the two blood trails until you find a shrine at the end of each. Upon getting close to them, purple circles will spawn and you will need to kill a certain amount of enemies inside them until they disappear. When the requirements have been met, you will get rewarded with a dark crystal (one for each shrine for a total of two). Once you obtain both crystals, proceed to reach the end of the hall as normal and you will notice that the final fight has gotten a little easier...

It is important to mention that you MUST complete both shrines and bring both crystal in order for it to work. Otherwise the Lord will be unaffected.
Boss Imperium | Ember Grounds


Flamedancer
First boss of the hall. This boss is somewhat squishy but don't let that fool you as it has some decent attacks. Most of it's attacks are telegraphed and easy to dodge but you need to be mindful of it's Ring attack which traps you for the horde of enemies to collapse on you. Other than that, this shouldn't be that difficult.

Wraith Warlord
Second boss of the hall. This boss's attacks consist on spawning Wraiths and making them dash at your starting position from when they spawn. Once you learn the pattern of the attacks you shall be able to dodge them accordingly.

Wyrm Queen
Last boss before the Lord of the hall. This boss is really annoying due to the fact that it is quite fast and you don't just have to deal with it but the hordes of enemies at the same time. I suggest a good amount of Movement Speed in order to be able to deal sustained amounts of DMG. Might take a few tries and a decent amount of patience, before starting to feel comfortable beating it.

Lord of Regret
Lord and final enemy of the hall. This lord can be annoying due to the general spam of it's Mine attacks but overall, should not be that difficult as long as you don't let it cover the map with Mines. Just be mindful of his telegraphed and Scythe attacks while you deal with the Mines. As usual, I'd recommend a good amount of Movement Speed in order to run pass the Mines without getting hurt.
Boss Imperium | Forgotten Viaduct


Wraith Horseman
First boss of the hall. This boss isn't that bad as it just rides in a straight line while doing all sort of telegraphed attacks. Just be mindful to not let it linger for too long to avoid having to deal with it and the other Elite enemies that spawn afterwards.

Frost Knight
Second boss of the hall. This make this boss annoying is it's durability. Aside that, it's attacks are meant to trap you so that enemies can collapse on you. It has two types of attacks, trapping spikes and the enemy variation of Frost Avalanche.

Hydra
Last boss before the Lord of the hall. The Hydra is definitely tough. It has three types of attacks and it is very durable. What really makes it challenging is the amount of enemies on screen while facing it. For this fight I recommend a good amount of ranged abilities to avoid going too close as most of it's attacks are harder to dodge up close. Should take a few triest but eventually will become less tedious as you progress into the game and unlock upgrades, etc.

Lord of Despair
Lord and final enemy of the hall. This, in my opinion, is the easiest of the Lords. This Lord is a glorified Wraith Warlord. For this fight I recommend a good amount of Movement Speed in order to dodge the Hand and Wraith attacks. It might take a few tries as usual as Lords are meant to be the Cream of the Crop of adversaries. But overall should be very manageable.
Boss Imperium | Frozen Depths


Basilisk
First boss of the hall. For this boss, I recommend a good amount of Movement Speed to outmaneuver it's flame beam attacks, and ranged attacks so you don't have to go in much. For this fight, I recommend Spiked Boots for their Stun capabilities which really helps setting up for some sustained DMG.

Twisted Construct
Second boss of the hall. This boss can be really annoying when it comes to it's Bullet Hell capabilities.

For this boss I recommend avoiding fighting up close and totally relying on Ranged Attacks/Abilities/Summons, etc. Also, stunning it works too.

This boss alongside the hordes of enemies will prove to be a challenge for those starting with the game.

Elder Giant
Last boss before the Lord of the hall. This boss can be tough as it likes to trap a lot and has a lot of telegraphed attacks that come out in quick succession. This boss can be fought up close but be mindful, if you do, to not take unnecessary DMG due to visibility of the attacks during the mayhem on screen.

Lord of Hate
Lord and final enemy of the hall. Be mindful of it's spinning attacks that becomes more difficult to dodge as time goes on, and the fact he can easily follow you around.
Boss Imperium | Chambers of Dissonance


Void Caller
First boss of the hall. This boss has a lot of telegraphed AoE attacks. The one attack that you might need to be careful of is the orb sucking one. To dodge that attack you need to move away from it before the gaps between orbs shrink for you to dodge. The gaps are easily spotted by the directional spawn marks on the floor, just make sure not to stand right on top of where the markers were while moving away from it (Void Caller).

The Village
Second boss of the hall. Of all the bosses in this hall, this one is probably the easiest. Aside some easy to dodge telegraphed attacks, it like to throw babies at you which aren't that bad. Just be mindful to not get cornered within the mob.

Twisted Knight
Last boss before the Lord of the hall. What makes this boss challenging is it's attack's trapping capabilities. it's one attack you need to be mindful is it's own variation of Astronomer's Orbs which is tricky to dodge, let along, the hordes of monsters.

Lord of Discord
Lord and final enemy of the hall. Has a lot of telegraphed attacks and most are easy to dodge. In my opinion, it has become the easiest Lord in the game at the moment of the Chambers update.
Boss Imperium | The Vault


The Penny Dropped
The Lord of Greed is Halls of Torments Final Boss. As such, it is meant to be the hardest. Contrary of popular belief, I find the whole Vault to be the Final Boss itself, the Lord of Greed is but a mechanism to mask the concept.

This boss has two phases:
  • Breach - Where you need to take out 4 altars powering a force field protecting the Lord.
  • Battle - Where you need to take him to zero in order to finish the run and beat the game.

For the first phase, the altars will be located at the North, West, South, East segments of the Vault. Once taken out, the Force Field in the middle of the Vault shielding the Stage will banish, allowing you approach the Boss and start the real fight.

This Lord is by far the tankiest of the bunch and has a large arsenal of attacks, most are telegraphed though which guide you in dodging them. One of the attacks that I personally find it is it's most annoying is the one where it shoots a lot of fast straight projectiles at all directions that can be slightly bothersome in the beginning due to the lack of proper MS, but once you get enough MS, it becomes easier to evade. The rest of it's attacks aren't as annoying in my opinion and only get harder to deal with as the run keeps going and normal enemies start to become more tanky and deal way more DMG once passing the 30 minutes mark. For that reason I highly recommend finishing the run as fast as possible to low level players.

As the Lord's HP is depleted by half, it will start unleashing some new attacks regarding the ground gold, from floating cold coins to summoning Golden Skeletons toward it in the hopes of overwhelming you.

As a closing thought, I highly recommend focusing on MS and Raw DMG. You wanna be done with it, and fast.

For live demonstrations, please refer the Final Chapter: The Vault section.
Ability Masters


Notes


  • As of Update 02-19-2024 the Wraith Army at the Forgotten Viaduct no longer can be used for DMG farming. Same as Forgotten Viaduct's Lord's Wraiths. However, they can still be used for application farming.
  • As a rule of thumb, always aim to prioritize all traits and upgrades of those abilities that struggle to keep a good amount of Damage. While this is not necessary for all abilities some will greatly benefit from it.
  • As a last resort, the Agony Mode is a good place to try the Mastery Achievements as the amount of enemies is far greater than normal runs.
  • Abilities with an asterisk(*) in the Crucial section means that are available by external means such as equipping other character Marks and/or from equipment, etc.
  • Summon-based abilities can benefit from the Warlock and/or his Mark of Ritual character traits.
  • Magic-based abilities can benefit from the Cleric and/or his Mark of Sanctity character traits.
  • For any troubling ability, a high health/Scars of Toil build on classes with strong Vitality traits can greatly amplify all DMG, especially abilities'. Even more during Agony as you might find the uncommon version of the necklace to further amplify your DMG outputs.
  • With the introduction of the Sage hero, now players have another option for those DMG-related quests/achievements as he can greatly amplify abilities' power, making some quest/achievements significantly easier now.

Ability Masters | Magical
Arcane Rift Mastery III
Properties | AoE
Crucial Stats | Area, Size
Best Upgrade | Wandering Rifts
Arcane Rift is one of the most damaging abilities in the game, the only caveat is that you need to play a mini-game in order to set them off.

As mentioned, it is one of the most damaging abilities in the game and you invest deeply into it, you will have the DMG potential to unlock this achievement real fast.

Arcane Splinters Mastery III
Properties | Projectile
Crucial Stats | Range, Force, Multistrike
Best Upgrade | Arcane Unrest
I suggest fully investing into it while avoiding picking other abilities. The aim with this one is to fill the screen with small splinters and extending their lifespan so they can hit as many consecutive enemies before disappearing.

I'd advice against the Forgotten Viaduct hall for this one.

Radiant Aura Mastery III
Properties | AoE
Crucial Stats | Area, Force, DMG
Best Upgrade | Punitive Light
One of the best abilities in the game. Should be pretty easy to reach the threshold compared to others. Just invest deeply into it till it becomes as big as the screen itself and the DPS is high enough to melt the hordes.

I personally am a fan of the Might trait and pretty much always Reverberant Tinkture them when they show up.

Spectral Fists Mastery III
Properties | Summon, Melee
Crucial Stats | Power, Size, Precision, Conversion
Best Upgrade | Either depending style and/or build configuration
In order to deal 10,000,000 DMG you need to focus exclusively on DMG and critical stats.

For this achievement, I'd suggest the Forgotten Viaduct on Agony due to both it's overall cramped up space and high density of waves.

Also recommend the Sage as his traits can easily empower this ability in order to deal high amounts of DMG. For information about the build, please refer the Class Masters section of this guide.

Spirit Warrior Mastery III
Properties | Summon, Melee, Slow
Crucial Stats | Area, Range, Summon DMG*, Attack Speed
Best Upgrade | Spirit Orbs
For this one, I recommend the Forgotten Viaduct hall for it's narrowness and if you have access for either, the Warlock and/or the Warlock's Mark in order to have access to the Summon traits that are extremely beneficial for this achievement alongside the ability's own ones.

With the latest rework to the ability, the Twin Spirits upgrade is now gone in favor or manually increasing the warriors body count with Demonic Exchange: Force and the invocator's grasp gloves. By having many copies of warriors around you, it becomes significantly easier now.

Transfixion Mastery III
Properties | Projectile, Fragile
Crucial Stats | Multistrike, Effects on Hit, Attack Speed, Area
Best Upgrade | Painful Incision
For this ability I suggest prioritizing multistrike, Range, and Area in order to hit as much enemies per intervals. This ability doesn't cover much screen compared to others and therefore need to hit as hard as possible per attack.

Should take a few tries and a little RNG luck.
Ability Masters | Elemental
Dragon's Breath Mastery III
Properties | AoE, Burn
Crucial Stats | Area, Range, Multistrike, Attack Speed
Best Upgrade | Stream of Fire
For Dragon's Breath I always try to go for the Stream of Fire as soon as possible as it improves it's DPS significantly. Also, I don't find pushing enemies back too useful most of the time and rather focus on having my DMG output high enough to be able to wave clear consistently before getting overwhelmed. I also recommend going Inferno Build in order to further enhance it's DMG.

Flame Strike Mastery III
Properties | Melee, Burn
Crucial Stats | -10 Charge Duration, Charge Multiplier, Attack Speed
Best Upgrade | Preferably Both
One of the most damaging abilities in the game, if not the most when fully invested into. This is probably one of the easiest to get the achievement due to it's Raw DMG potential.

Frost Avalanche Mastery III
Properties | Frost, Projectile
Crucial Stats | Force, Base Avalanche, Attack Speed
Best Upgrade | Debris Avalanche
In my opinion, the most tedious ability in the game. It's attacks are diagonal meaning that they require good position in order to hit as much enemies at once.

For this one, I suggest avoiding picking up any other ability and sticking to fully upgrading it in order to ensure most of the DMG comes from it.

Lastly, the Forgotten Viaduct is by far, the best hall to do this as it's narrowness and enemy direction will ensure you hit lots of enemies in the process.

Hailstorm Mastery III
Properties | Elemental, AoE
Crucial Stats | Ice, Snow, Wind, Eyes
Best Upgrade | Hailstorm Spikes
This ability starts out weak but as you start maxing it out and getting both of it's upgrades, it becomes devastating real fast, but should keep in mind not to hold the satellites for long, just enough.

Also, It might not be intuitive at first but this ability scales with movement, meaning that the faster you cover distance, the faster it's DMG and size gets. I suggest going Spikes first for upgrade as it turns your surroundings in a sea of death. However, be mindful this might make your game lag really bad once you got both upgrades due to the amount of objects being instantiated while you hold the satellites and effects.

In short: When having both upgrades, hold the satellites for a while by moving for maximum DMG, stop moving to drop them when they have reached their threshold. Do not overextend here, the more you hold past it's threshold, the less effective it start to become.

I recommend trying it first on normal runs to avoid the aforementioned issue and only try on Agony as a last resort.

Kugelblitz Mastery III
Properties | Area, Projectile, Spark, Stun
Crucial Stats | Area, Attack Speed, Crits DMG/Chance
Best Upgrade | Preferably both
For this I recommend the Forgotten Viaduct hall for it overall narrowness, amount of tanky enemies in it.

Getting a good amount of Force, Area, and Shockwaves together with the essential traits will ensure that during the later minutes of a run, each Kugelblitz will travel for many seconds finding enemies to stick to before dissipating, meaning that the screen will be covered by them, inflicting a lot of Lightning and Spark DMG.

Lightning Strike Mastery III
Properties | Spark, Stun
Crucial Stats | +1 Lightning Strike, Area, Attack Speed
Best Upgrade | Explosive Strike
This ability hits enemies at random, for that reason, we need to shorten the attack intervals, add extra hits, and maximize it's DPS by investing on Crit Bonus and DMG.

Also, the sooner you get this ability the better because during it's first levels, this ability is somewhat slow and requires some investing.

Meteor Strike Mastery III
Properties | AoE, Projectile
Crucial Stats | Area, Attack Speed
Best Upgrade | Scattered Debris
For this ability I'd recommend going the Inferno build, prioritizing Fire DMG and investing deeply into this while avoiding picking other abilities in the process to ensure a big chunk of the DMG comes from this.
Ability Masters | Physical
Astronomer's Orbs Mastery III
Properties | Summon, AoE, Spark, Projectile
Crucial Stats | Movement Speed, +1 Orb, Summon DMG*, Summon Spawn*
Best Upgrade | Inner Orbit
The Astronomer's Orbs is excellent tool against mobs of enemies. This is one of the easiest abilities to meet the DMG threshold with as it is constant and doesn't have a cooldown. However, do take into consideration traits that negatively affect your Area, Orb Size, and especially, DMG. If compromises are to be made, I suggest reducing Area in favor of Close Range characters such as the Swordsman/Norseman. Otherwise, try to keep the Orb's radius on par with your ideal range of attacks.

Another important detail, the ability is categorized as Summon, meaning that it benefits from Summoner traits and therefore I highly recommend investing on Summon DMG, and Spawn (To add extra orbs).

Morning Star Mastery III
Properties | Projectile, Melee
Crucial Stats | Attack Speed, Range, Force, Area
Best Upgrade | Butterfly Swing
Morning Star starts weird at first but when invested on, it becomes quite effective at cleaning mobs and satisfying, to say the least.

For this achievement I totally recommend a Sage Main Weapon-only build at the Forgotten Viaduct for it's overall cramped up space. Doing so will also allow you to get the Specialist achievement in the process.

Lastly, although not necessary, Agony makes it faster to achieve but can become difficult for some.

Phantom Needles Mastery III
Properties | Projectile
Crucial Stats | Attack Speed, Range, Crit DMG/Change, Force
Best Upgrade | Phantom Split
What I like about Phantom Needles is it's Attack Speed because it ensures you are dealing a decent amount of DMG in small intervals, For it though, I recommend investing in a decent amount of Force and Range, these traits will make sure you cover a good amount of Area around you and/or have a decent amount of piercing to hit as many targets with a single Needle as possible.

Ring Blades Mastery III
Properties | Projectile, Fragile, Slow
Crucial Stats | Blade Size Cone Size, Multistrike, Range
Best Upgrade | Either
Fully investing in this ability while avoiding others should get you the achievement in a few tries due to the amount of Blades thrown during the later minutes of a run, capable of covering a really good amount of the screen.

Aside that, I recommend the Forgotten Viaduct hall due to it's narrowness and the amount of enemies capable of withstanding a lot of DMG before dying.

Lastly, both upgrades are good, but if you were to pick one, I'd go for Piercing blades during easy runs, and Crippling Blades for more harder runs such as the Agony ones, in order to keep some hard enemies off me.

Summon Golem Mastery III
Properties | Summon, Melee, Elemental, Burn, Spark
Crucial Stats | Area, Summon DMG*, Crits DMG/Chance, Attack Speed
Best Upgrade | Magma Fists
For this ability and some others it is recommended to get it as soon as possible during a run and invest heavily on it while avoiding others. That way you ensure most of the DMG comes from it.

If struggling, pick the Warlock or his mark to get access to his Summon traits to further enhance the Golem's capabilities.

It might take a few tries due to the inconsistent A.I. But overall, it isn't that bad.
Ability Specialists | Magical
Arcane Splinters Specialist
Can be done on any hall. This achievement requires you to have 200 active splinters on screen at one time during a run.

For this achievement I recommend going Sorceress for her affinity to Multistrike, and just picking Arcane Splinters in order th keep the trait pool manageable.

For the ability upgrade go:

Arcane Shivers (More splinters)

For the ability traits go (Use a PM at III, VI, X in order to pick both Fading and Split, speeding up the process):

Charging (I, II, IV, V, VII, VIII) (More frequent splinters)
Fading (PD-III, PD-VI, X) (Extending splinters' lifespan)
Split (PD-III, VI, X) (More splinters on screen)

Arcane Rift Specialist
Can be done on any hall. This achievement requires you to 1-Shot a total of 2,000 enemies during a run.

This achievement shouldn't give much trouble, focus on both DMG and Area to make the Rifts as big as possible to wrap a lot more enemies with it and wipe them up in the process.

Can be done on any hall and mode. However, for obvious reasons, go Haunted Caverns on Normal.

Radiant Aura Specialist
Can be done on any hall. This achievement requires you deal at least 100,000 DMG with a single hit.

There are many ways to achieve this but the following helped me achieve 100,000+ DMG to the Haunted Caverns' Lord at the end of the run:

Class: Exterminator
Head: Hood (More health scaling for Scars of Toil DMG buff)
Armor: Hunter's Garb (DMG buff when stationary)
Necklace: Scars of Toil (The more health, the higher the DMG when low)
Rings: Copper / Wooden (Critical DMG stats)
Hands: Spellcaster Gloves (Higher DMG when not attacking)

Radiant Aura traits to focus (Fully invested potions in order to get as much DMG% as possible PMs and PDs):
Focus (Primary): I, II, IV, V, VII, VIII
Blessing (Secondary)
Force (Secondary)
Might (Primary): PD-III, PD-VI, PD-X

For general traits go: Strength, Cunning Technique, Collateral Damage, Vitality, Piercing Wind

During the end of the run, at 10% health I was dealing 100,000+ DMG to the Lord of Pain on Normal.

Spectral Fists Specialist
This achievement requires you deal at least 10,000 DMG with a single hit to 100 enemies.

For this one I suggest going with Sage with a full crit build on the Forgotten Viaduct hall on Agony Mode. For information about the specific build, please refer the Max Agony Build guide below for the Sage build, which will be enough to get this achievement and the Spectral Fists Mastery III one in a single run.

Considering Spectral Fists is a summon based ability, I'd highly recommend getting as much DMG from Demonic Exchange: Damage traits as you can. Mind you, this will make you take a lot of DMG but at the same time it will greatly enhance yours.

You will be dealing around 40,000-90,000+ DMG per hit by the end of the run.

Here's a run focusing on Spectral Fists (Build info in my builds guide):
https://www.youtube.com/watch?v=sJ78sHupJrk
https://steamcommunity.com/sharedfiles/filedetails/?id=3164166010

Spirit Warrior Specialist
Can be done on any hall. This achievement requires you to deal 10,000,000 DMG with dashes or explosions.

For this one I recommend a full crit/high mobility build in order to amplify the dash/explosion DMG while allowing to position yourself properly for subsequent dashes. I'd also suggest against picking other abilities for this.

The ability traits to focus:

Strength: PM-I, PM-IV, VII, PM-PD-X
Cunning: PM-II, PM-V, VIII, PM-PD-IX
Ruthless: PM-I, PM-III, PM-V, PM-PD-IX
Coverage: PM-II, PM-IV, VI, PM-PD-X
Dashing: PM-III, VI

For upgrades, you only need Dash Impact.

The idea here is to make the dashes' Shockwave as wide as possible while keeping the DMG high.

Highly recommend Agony for this one as it will give more targets and experience to speed up the process.

As long as you keep your DMG output high, this should come around the middle of the run. However, if you are having issues with it, the Warlock and/or Sage can further amplify the ability's DMG.

Transfixion Specialist
Can be done on any hall. This achievement requires you to apply 50,000 effect stacks with transfixion.

For this achievement I recommend going a Perma-Slow Cleric build on the Forgotten Viaduct hall for it's overall Cramped up space.

Equipment:
Head: Gorgon Mask
Neck: Irrelevant
Rings: Pest Ring
Garment: Broker's Cape
Hands: Irrelevant
Footwear: Bogged Boots

For the ability traits go:

Spread
Cadence
Effectivity (I, III, V, VII, IX) (Even though not necessary, if you pick the first 4, then, you could drink a duplication potion at IX since the stats are doubled to reach 200% Effect chance and therefore guaranteed double stacking. Otherwise just picking all 5 will still give you 150% instead)


Lastly, I suggest doing this achievement alongside the Crippling Strike one. Two birds, one stone, so to speak.
Ability Specialists | Elemental 1/2
Dragon's Breath Specialist
This achievement requires you to trigger 10,000 direct burn DMG within a single run.

Below, the setup I used:

Hall: Forgotten Viaduct (Wraith Wall)
Mode: Normal
Class: Exterminator
Mark: Incineration
Head: Ruby Circlet
Necklace: Elemental Resonator
Rings: Guiding Star / Fire
Armor: Blazing Shell
Hands: Quickhand Gloves
Boots: Firewalker Boots

Dragon's Breath traits to focus:
Flammability (Primary): I, III, V, VII, IX
Recovery (Primary): II, IV, VI, VIII, X
Agony (Secondary): III, VI, X

The only upgrade needed would be Stream of Fire for consistent application.

For Class Traits focus:
Weapon Proficiency: Stream
Proficient Stance: Hellfire (PD if needed, especially for Mastery V)

For general traits go: Quick Hands, Fire Affinity

The idea of this build is to quickly apply stacks with your Main Weapon (focusing on Attack Speed and 100+% burn chance) and finishing the deed with Dragon's Breath. Although, just sticking with Dragon's Breath only with it's included setup here should be more than enough, although, slightly slower to complete.

Should get the achievement fairly quickly during the run.

Flame Strike Specialist
Can be done on any hall. This achievement requires you to deal a total of 100,000 DMG with a single hit during a run.

Flame Strike Trait path:

Deadly: I, V, VII, IX
Mighty: II, IV, VIII
Overpowered: III (PD), VI (PD), X (PD)

Will be enough to get the achievement during a run.

Frost Avalanche Specialist
This achievement requires to fire/place 5,000 projectiles/obstacles in a minute during a run.

For this achievement you need to focus on giving Frost Avalanche Attack Speed, extra waves, and range.

Setup:

Hero: Norseman (Knowledge)

Frost Avalanche traits to focus:

Force: I, PM-III, V, VII, PD-IX
Frequence: II, IV, PM-VI, VIII, PM-PD-X
Waves: PM-III, PM-VI, PM-PD-X

For Frost Avalanche upgrades, Debris Avalanche should be more than enough for this but there's nothing wrong in having Quick Freeze as well. Should pop up fairly quickly during Agony as you will level up faster and get to invest on Frost Avalanche quicker, but isn't required.

Hailstorm Specialist
This achievement requires to apply a total of 50,000 frost with Hailstorm during a run.

For this one I recommend the following setup:

Mode: Agony
Hall: Any (Preferably 1st or 2nd)
Beast Huntress (Knowledge)
Beast Huntress trait to Focus: Proficient Stance: Blizzard, Dedication: Flight

Hailstorm traits to focus:

Snow: PM-II, PM-III, PM-V, PM-VIII, PM-IX
Cold: PD-I, PM-PD-III, PM-V, VII, PM-PD-IX
Wind: PM-II, IV, PM-VI, PM-VIII, X
Eyes: PM-III
Updraft: PM-III, PM-VI

General Trait for focus:
Frost Affinity

It is crucial to get the Hailstorm Vortex upgrade as soon as possible as it will allow you to apply a lot of stacks in the least amount of time, becomes extremely efficient the more invested on the ability is. For that reason Sage's mark will help in getting the upgrade faster.

Also, I'd suggest to stick to just Hailstorm for abilities and stack lots of movement speed to improve your application capabilities.

Last but not least, save your doubling potions for the following traits for a big amount of Frost Chance percentage:

Hailstrom: Cold (I, IX)
Beast Huntress' Proficient Stance: Blizzard IV

Kugelblitz Specialist
Can be done on any hall. This achievement requires you to deal DMG by applying the 20th stack with Kugelblitz to 100 enemies during a run.

For this I recommend a low DMG-based hero such as Shieldmaiden on any of the halls that have high HP enemies such as 4, 5, etc.; on Normal. Focus on maxing your Spark chances from class/general traits.

For the Shieldmaiden build, focus un survivability rather than DMG in order to be able to stack. For equipment, equip the following:
  • Mark: Sorcery
  • Head: Thunder Crown
  • Ring: Ring of Thunder
  • Necklace: Elemental Resonator
  • Gloves: Quickhand Gloves
  • Boots: Electrostatic Treads
Class traits to focus: Proficient Stance: Voltage (Mark of Sorcery)
General traits to focus: Lightning Affinity, Metabolism, Vitality, Block, Thick Hide, Bulwark, etc.

Kugelblitz traits to focus and preference:
Voltage > Capacity > Resistance

Kugelblitz upgrade to prioritize:
Static Attraction

Avoid all DMG increasing traits as it will usually kill enemies before reaching max stacking. Instead, let the Spark stacking do the work. Also, once Kugelblitz has been invested enough. Try disabling auto attacks to ensure all stacking comes from the ability itself. For that reason, also make sure to only use Kugelblitz as your main and only ability for the run.

Lightning Strikes Specialist
Can be done on any hall. This achievement requires you to 1-Shot 100 enemies with at least 2,000 health pool.

For this achievement I recommend going Sorceress for her affinity to Multistrike and Lightning type, and just picking Lightning Strikes in order the keep the trait pool manageable. Also I highly recommend the Forgotten Viaduct hall as most enemies there meets the challenge criteria.

Ability upgrades are irrelevant but if you have to pick one, go for Electrifying Strikes.

For the ability traits you want attack speed and raw damage so go

Conductivity (Primary)
Conversion (Secondary)
Intensity (Primary)
Capacity (III, VI, X) (PD all three) (Primary)

For general traits, make sure to always pick Lightning Affinity and any other trait that would help here.

The only Sorceress trait you need is Proficient Stance: Stability.

Lastly, it is important to keep attention on your Lightning Strikes damage outputs. Once it starts consistently 1-Shotting enemies around the 4,000-6,000 DMG mark, turn off Auto-Attack in order to ensure most of your kills come from the ability. Only auto attack when necessary.

Don't stress it too much as you will easily be doing at least 9,000 critical damage at the run's end.
Ability Specialists | Elemental 2/2
Meteor Strike Specialist
This achievement requires you to deal 100 crits with a single Meteor within a single run.

There are many ways to achieve this but the following is what I used and recommned:

Class: Sage (100% ability Crit. Chance from Proficient Stance | Concentration II)
Rings: Wooden (at least Boost version preferably)

Meteor Strike traits you only need (Avoid Attack Speed and Multistrike completely):
Blast: I, PM-II, PM-IV, V, VII, VIII, PM-X
Heat: PD-II, PD-IV, PD-VI, VIII, X (Should be doubled with PD but you should get the achievement way before reaching Tier X)

I advice against getting any upgrades for Meteor Strike.

For general traits go: Collateral Damage, Cunning Technique

This one relies on a little luck but with this setting you should get it around 2/3 into the run. I personally got it with 14 minutes still left on the clock, on the Haunted Caverns on Normal.

The idea is to make the impact zones as huge as possible while baiting the enemy into big groups for your meteors to hit.

Lastly, try only auto attacking when really necessary in order to be able to group large amount of enemies.
Ability Specialists | Physical
Astronomer's Orbs Specialist
Can be done on any hall. This achievement requires hitting a total of 30,000 enemies with the ability.

For it I recommend going Warlock and/or his Mark. As he and his mark offer spawn and speed benefits outside of the ability's ones, and doing it on the Forgotten Viaduct hall as it gets really cramped up during segments, enough to hit a huge amount of enemies.

For equipment, the Invocator's Grasp is probably the only item you might need.

For the ability traits go:

Speed (Except during III, VI, IX, X)
Bodies (III, VI, X)
Irrelevant (IX)

For the ability's upgrade, just go Inner Orbit.

Shouldn't give much trouble as long as you keep to targets and the Wraith Wall.

Summon Golem Specialist
This requires you to accumulate a total of 15 minutes of Golem rolling within a single run.

Class: Warlock

Summon Golem traits you only need:
Inertia: I, II, IV, V, VII, VIII, PM-PD-X
Inexorable: PD-III, PD-VI, X

For general traits go: Channeling

Pretty straightforward, just max out roll extension and cooldowns for the Golem. Should be getting the achievement during the last minutes of the run. Otherwise, you could stay after beating the hall's Lord till you get it.

Morning Star Specialist
Morning Star traits to focus:

Multistar: I, MP-III, V, PD-IX
Handle: II, IV, MP-VI, VIII, MP-X
Chain: MP-III, MP-VI, MP-X (PD instead if needed)

Upgrade priority:
Spiked Chain > Butterfly Swing

There are many ways to do this, but I personally did it with a Sage Main Weapon-Only build that I will be including in this guide during Agony and focusing extensively on Morning Star traits. Saving all my memory/doubling potions on it (Morning Star), especially for the doubled stats ones at tiers IX and X. However, if having issues with this setup then I'd suggest saving your doubling potions for the Chain traits tree, as that will make your Morning Star as big and long in order to wrap/hit more enemies.

It is also crucial to get the Spiked Chains upgrade as soon as possible, for that reason, I highly suggest trying this on Agony as it will allow you to get them faster while having more enemies to hit.

https://steamcommunity.com/sharedfiles/filedetails/?id=3166711788

Phantom Needles Specialist
Can be done on any hall. This achievement requires you to perform a total of 5,000 overcrits (double crits or better, triple).

For this one, I suggest focusing on getting it's critical chance % to at least 200% (100% chance to over-crit) and it's attack speed for obvious reasons.

For upgrades, just get Phantom Split whenever you get the chance, to triple your application.

Phantom Needles traits to focus:
  • Firerate
  • Pinpoint (III, VI, X) (If possible, always use 1-2 Doubling Potions (Save the last one for Sage's Proficient Stance: Concentration II))

Optional Recommended Builds:

Option 1: Sage (Arrow) (Karl doing Karls things...)
  • Weapon Proficiency | Strengthen I/III (+0.050 base Crit. Chance)
  • Proficient Stance | Concentration II (100% Crit. Chance, 200% with a Doubling Potion!)
  • Rings | Wooden (With all versions available preferably) (To begin with 50/100% extra Crit. Chance)

Option 2: Archer (Arrow)
  • +0.5% Crit. Chance per Level Up (50% Chance at Level 100 during a run)
  • Proficient Stance | Critical Chance (30% Crit. Chance in exchange of -90% Main Weapon DMG)
  • Rings | Wooden (With all versions available preferably) (To begin with 50/100% extra Crit. Chance)

Lastly, many have found great success at the first 2 halls, I personally prefer the Forgotten Viaduct on Agony due to the overall tankiness of the enemies and the overall cramped up space, thus, making it more consistent regardless of RNG, although, harder.

Ring Blades Specialist
Can be done on any hall. This achievement requires you to have your Blades to travel a total distance of 250,000 within a single run.

Class: Norseman
Head: Wind Crown (Not necessary)
Rings: Guiding Star (Not necessary)
Hands: Quickhand Gloves (Not necessary)

Ring Blades traits to focus:
Fast: II, IV, V, VI, VIII, PD-X
Reaching: PD-III, PD-VI, X

It is important to try to get as many upgrades for the Ring Blades as it will allow you to throw more Blades on screen. For that, Agony might prove to be helpful for some due to the amount of dropped ability scrolls during runs thanks to champions. Although, not necessary.

For Class Traits focus: Proficient Stance: Fury

For general traits go: Quick Hands, Vanguard, Channeling, Multistrike

With this build you are guaranteed to fill the screen with long distance, fast moving, and highly frequent blades all over the screen.

As a last resort, you can leave your character idle after defeating the Lord to accumulate more distance.
Conclusion


With this, we have reached the end of the journey. I sincerely hope you found the guide helpful and easy to read and follow.

This guide will be updated regularly to meet expectations and standards.

With that being said, if you spot errors of any kind, please share them so I can further increase the quality of the information provided.

On another hand, I don't expect to please every single reader, but I do expect to be treated with respect. Therefore, any rude, disrespectful, hateful comment will be deleted on sight.

Once again, thank you for your interest and time in this guide. I appreciate it.

Lastly, I'd like to thank:

Chasing Carrots - For developing one of the most genuine and fun experiences. This game has blown expectations out of the park! It's been a total blast and honor going through this journey. Only wish this is only the beginning... Keep up the great work guys!

The HoT Community - You guys have been great! You are what keeps the show going with the overall interest and support. Saying you guys are amazing is simply an understatement!

Ulyaoth - For being a great and knowledgeable HoT member with a wealth of game info. source. But most important, for being a great friend.

Folks at hot.fandom.com - For having a well organized and pleasing to read source of game information used in many parts of this guide. Thank you!

You - For being interested in any of my guides and support. Thank you!
261 comentarios
dr_robert 9 MAY a las 6:37 
@Ulyaoth
This worked like a charm. Thank you!
Ulyaoth  [autor] 7 MAY a las 19:47 
@dr_robert
You want to invest as much as possible into Block, Equipment including.
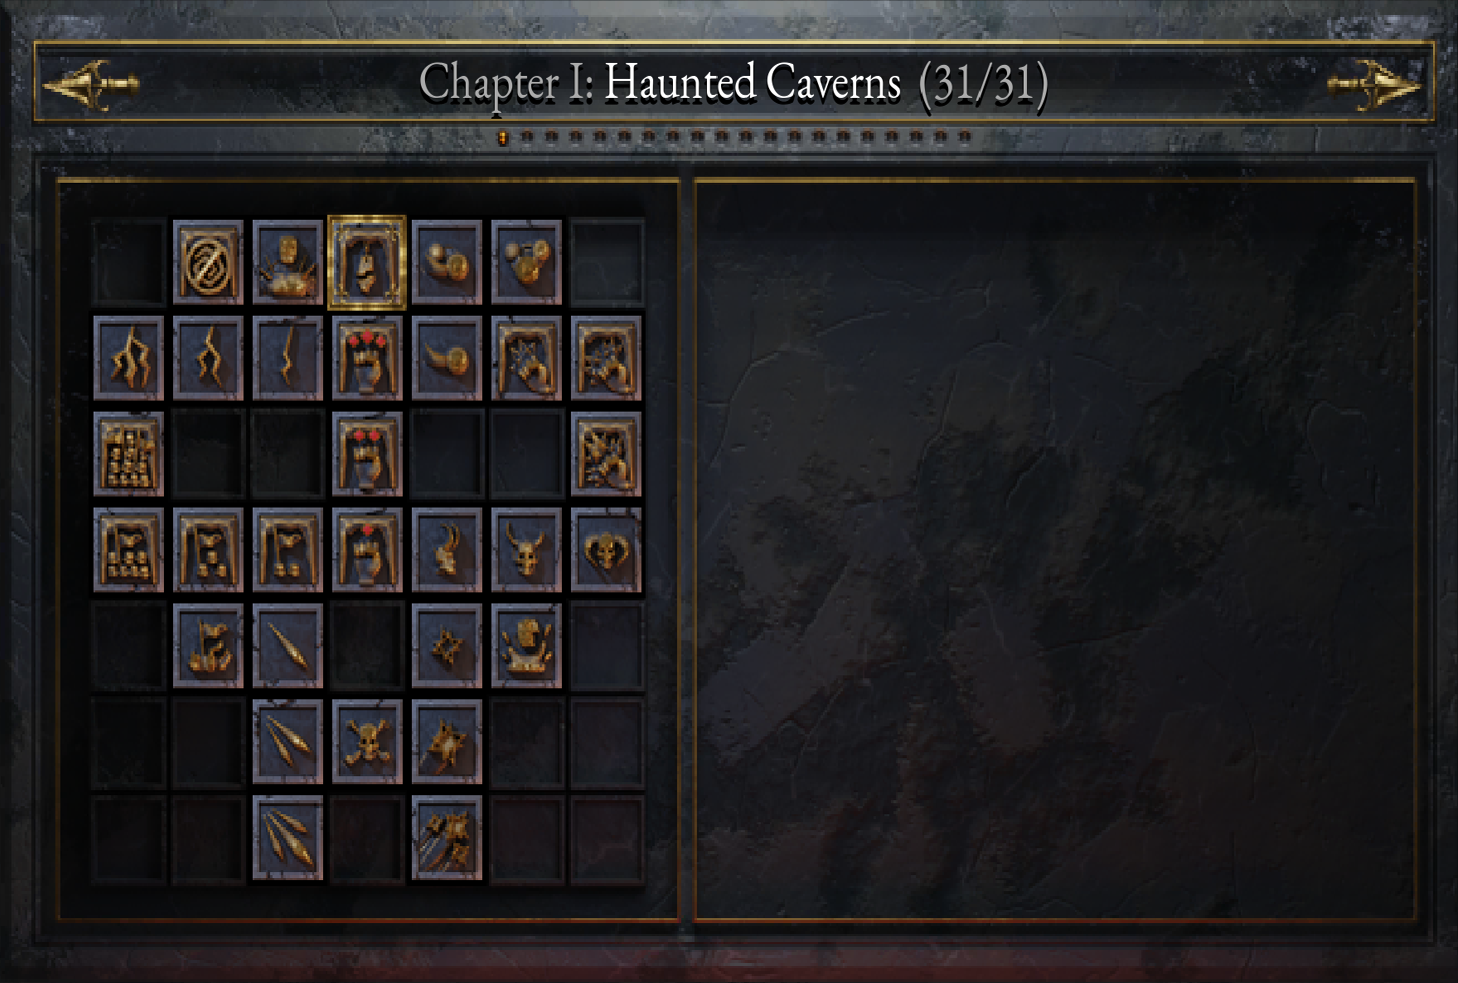
Easiest map to do this is on Haunted Caverns Normal.
The Skeletons deal low damage and after maxing out your Block, you can just yeet yourself into the lines.

You could also follow the two Shield Maiden Builds from this Guide for more details on how to maximize Block:
https://steamcommunity.com/sharedfiles/filedetails/?id=3038035307
dr_robert 7 MAY a las 19:39 
Appreciate the assistance. Do you have any advice on how to obtain the Immortal achievement for the Shield Maiden? I see this one is missing.
Moldredd  [autor] 30 ABR a las 5:11 
A pleasure to be of service.
Solferro 26 ABR a las 8:00 
Thanks for the help!
Ulyaoth  [autor] 10 MAR a las 2:57 
abstinent_furry 9 MAR a las 17:20 
I’m struggling so hard with Berserker’s Blood. Is there a guide that gives specific builds you can point to? I tried finding noodlemania but I couldn’t find it mentioned anywhere
Megalodon 6 MAR a las 14:23 
@Ulyaoth Fair enough, its still immensely helpful.
Ulyaoth  [autor] 6 MAR a las 13:46 
@Megalodon

You have character limits for each section and this guide is in almost every section at its limits.
There was another idea to split this guide up into more sections, but this made it even more confusing. Steam Guides arent the best for such large projects.
Megalodon 6 MAR a las 11:05 
Why wouldn't you add the quest descriptions, it would make this so much easier to search through.