Desynced

Desynced

72 vurderinger
[WIP] Desynced Basics, Logic, Behaviors and Automation
Av Eruannon
Guide to basics of Desynced, with focus on Automation, Logic and Behavior controllers.
5
6
4
6
2
   
Utmerkelse
Favoritt
Favoritter
Fjern som favoritt
Temporary Guide [Pre-release video series]
Unit and buildings basics:

Basic signals and basic logic:

Basic mining setup:

Advanced remote mining setup:

Point to point transport tutorial:
Note on WIP
all updated parts of the guide are BELOW this guide segment. Once the guides are complete previous, temporary segments will be removed

Current version was recorded primarily during pre-release phase of the game, changes happened, and videos will be updated step-by-step with accompanying text versions.

Crossed sections have already been included in the later part of the guide in form of text guide.

The guide will ultimately include the following topics:
  • UI Basics - the option of dragging items, clicking and moving it, dropping it onto units in the world...
  • Units, buildings and components( difference between buildings and units, or rather how little there is, basic component replacement and basic L/M/S/I slots]
  • Slots locking and basic logistics network
  • Register basics [note visual, goto and storage registers specifically, s[/strike]how use of transporter, and note the Robotics facility Rally Point function]
  • Portable radar - filters and basic use - "Roomba"
  • Simple and limited miner setup with no signals and slots locking
  • Signal basics [Signal reader, automatic assignment of ore for mining]
  • Generalized miner setup [mine commander's ore], and automatic construction/supply request (portable radar construction component automation)
  • Basic behaviors - how they work, and what can be done - Point to Point Transport as example
  • Intermediate behaviors - Behavior supplemented mining team, with most variables exposed. -
  • Hauler modification to automatically know what to transport and from what. Commander that does not facehug, power supply that does not facehug commander. Miner that does not hug' commander.
  • Advanced Signals - Anatomy of a signal and how to use it.
  • Advanced Signals - Behavior assisted signal system, or how to send multiple pieces of data using single signal register
  • Advanced Signals - Data multiplexing - or 'how to fit more data into a single signal value' (example - [KIL]Mining Team Commander's bot request, mined ore, detected enemy, energy efficiency across last day, time waiting for hauler when full, time waiting for any resources in storage system)
  • Drones and their uses
  • Re-simulation
  • Energy and optimization
  • Exploration basics - why is it beneficial, how to prepare bots for it
  • Combat - "We too want to be spaceship troopers reenactors" - how to fight bugs - basics.
Preface and disclaimers
Due to amount of question regarding basics of automation and logic I have decided to create this guide, to help new players get into (in my opinion) wonderful game of Desynced. I hope You will find this guide useful. Video versions may differ from the text versions as far as exact wording is concerned, but will cover the same topics, thus it will be unnecessary to view videos once You have read the guide, unless You want to see the topic discussed in real time, or to see how it looks in action. Additionally - small example videos will be provided during the text part, when appropriate.


Disclaimers:
  • This guide, while being created from perspective of some knowledge of the game, is absolutely not perfect. Any and all constructive feedback is welcome and appreciated.
  • This guide, is subjective, and as such - may or may not be fully in-line with Your personal opinions on units, buildings, components, stats, may and probably will differ.
  • Any base layouts or examples in video are examples only, mostly used to highlight how elements work, and are nowhere near being optimal ways to perform any specific action.
  • Guide is written with 0.1.11146-steam version in mind. If your game version in bottom left part of the screen in main menu is different from this version, there may be undocumented changes in this guide. If there are such discrepancies please message me here or on Discord, to fix those discrepancies.
  • Humans make errors. If you see any error in the guide please let me know, to fix it up.


Warning:
This guide is aimed at players of any skill and knowledge levels, it will include topics that You may consider too trivial. Feel free to skip them. Additionally due to wide array of knowledge of readers I will try to simplify the topics to make it easier to conceptualize. See the definitions for examples. As such while I could talk about 'value attached to reference to the entity', in some cases I will call it simply 'number and a unit' or in case of 'values attached to item type reference' (as an example) they will be simplified to 'value/number and icon'.

I will also be explaining theory behind concepts used in this guide, but this will be split from implementation examples. Feel free to skip those parts as well, if You're not interested or find it too boring.
Definitions and terms used through out the guide
For the purposes of clarity, I will be using the following terms. I will ask You to read through those, to make sure we are on the same page during entire guide.

  • Units - For our purposes all entities that are both mobile ('standard' units such as scout) and immobile (known also as buildings) will be called 'units'. This is caused by the fact that for almost all intents and purposes there are no differences between stationary and mobile units if they were to have the same slot layout. The trend is that buildings are larger with more and larger slots, which is the trade off for lack of mobility. The only differences between buildings and other units at this point in time known to me: Buildings are immobile (and all implications of it - so no, no teleporting here, as they cannot move into teleporter when unpacked). Buildings can take more space than just 1x1 tile. Buildings cannot perform item transfer actions by themselves, unless with portable transporter component. Due to being immobile and without ability to transfer items without use of component - they cannot perform logistic orders by themselves (so no Transport command in logistics, or perform orders). Thus - whenever I talk about 'Units', unless specified otherwise - you can add 'or buildings' to the term.
  • Registers - for our purposes all parameters in behaviors will be called 'registers', the same way as all other component registers, as there is no functional difference between them, with notable exception that non-parameter registers usually have additional function outside of being store of data.
  • Signals - for our purposes I will be talking about sets of value + entity/item type/information as 'a signal'. First it's to differentiate between 'value' of set of data (the number part), to make it simpler rather than listing 'item type, entity reference , filter or other information' every time. It is also the name used for (for ease of understanding) a set of 'an icon' and 'a number' in Factorio circuit networks, which some players might recognize and consistent terminology may help with understanding the concept. On top of that this is to highlight that the only difference between 'signals' and other information in registers is the location. In essence - if it fits register it's a signal. Signal register just allows other units to read one of our itnernal signals. This will be called 'Communication signal' to differentiate it.
UI basics - Groups, hovering, camera quick-focus
Before we start, let me quickly list few useful basic tools in Your arsenal.

=== Hovering for additional information ===

Desynced is quite complex game, if You decide to go beyond RTS controls, as such additional information and descriptions may be considered crucial in the long run.
Most basic way to get it is to hover over any icon, button or instruction, such as below. This will provide additional information about the 'thing' You are hovering over.


It should be noted that this information is not yet all that You can see in this mode.
If you press 'control' button a production breakdown will appear showing every step of the production down to the raw materials, as shown below:


If You want to see material breakdown per-material on the other hald, pressing 'alt' button will show You resource breakdown instead combined across the production chain:


And 3rd, and final additional hovering mode is shown by pressing 'shift' button. This in turn will show You all known recipes that uses this item in production. Please note: known does not mean all in game. As You progress in the game this data will change and will expand.

To showcase this functionality I chose crystal instead of turret:


=== Control groups and quick focus ===

As an RTS game (or at very least game with RTS elements) Desynced supports control groups.
Just as in standard game - Ctrl+1, Ctrl+2... Ctrl+0 will create a set of quick selection groups (or units).

This will allow You to quickly select unit that You want, by clicking the corresponding button.

If you press that button twice, or select a unit and press its icon in the bottom left part of the screen, it will center the view around on the selected unit.

Additionally 'HOME' button will get You back to Your home unit (usually - Command Center, unless manually changed). All of those can help You quickly find important units (such as e.g. mining team controllers), or Your base.
UI Basics - Unit interface and registers - Text version - part 1
Before we start talking about advanced gameplay or behaviors, or even logic, let us start by going around our initial screen. In the following screenshot I have selected Mobile Command Center, though outside of big 'Deploy Base' button every single unit or building will have exactly the same interface, and as such we have to understand what we are looking at.


I took a liberty to highlight 5 areas of interest, and we will be talking about them one at the time, starting with areas 1-4, that I will call 'unit interface'.


=== Section 1: Components ===


Let us start with the elephant in the room - Components, and an element that apparently is a first major hurdle in Desynced for players.

These are 'slots'. Each of those slots can fit a component of equal or smaller size. Large slots can fit any component. Internal slots, as the smallest can fit only internal components. Notably the opposite is also true - Internal components can fit anywhere, but usually have smallest impact, if the item has multiple versions. For example: Internal sized Portable Field Generator has much lower range than Small sized power relay.

How to find what sized slots does the selected unit have? By the letter on the left of the icon, and by the icon itself, if the slot is empty.

When a component is inserted however, the main icon will change into the component's icon, and the only way to check which component size is that will be to check the letter left of the icon.

Example can be seen on the 3rd component from the top - one of two I (internal, smallest) components - power cell. We will talk about power a bit later however. Now let us move to another part of the screen.


=== Section 2: Inventory ===

This line is where all non-used components and items are stored on bot. Components can be identified by a letter on bottom left part of the icon. Here we have 2 components: Fabricator, on the left, and turret on the right.

The icons on the right side of the window will allow You to sort items (so that similar items are next to eachother, the right one), and to request an item from local logistics network (the left one). Local logistics network will be talked about in further part of this guide, as we are familiarising ourselves with UI for now.

This however is a good place to explain how to fit or unfit components. We can click, and drag and drop any object we want to fit into unit, by dragging and dropping the component onto slot that is of the same or larger size. In this case both fabricator and turret can be fitted.

Alternatively we can simply left click on the icon of a component and then left click it on the target slot, instead of keeping the left mouse button held down, OR we can right click on the icon of component to see context menu and choose 'Equip Component'.

Outside of equipping the components all items can be transferred in the same ways by clicking the destination unit instead of component slot. Please note - in case of mobile units items can be dropped on 'free space' to drop it to the ground.

Just a side note, which will also be discussed in greater detail later - when a component is put into larger slot than it needs it will get slight bonus to working speed.

Here I would also like to let You know of second option regarding slots - those slots can be 'reserved' so that only a specific item can be fitted into that slot, or no item at all. To do so left click on empty slot, and either click 'lock empty' to make it so that this slot cannot be used (useful for example to limit production of items You will not need full cargohold of, to not overproduce the item), or click on 'fix slot to item' to only allow that specific item to be put into the slot. This can be used for example to make sure that miner will not hold any other item except for ore it is supposed to mine.


=== Section 3: Unit Registers ===

In-game those four icons are simply refererred to as 'registers', however in this guide I will refer to them as unit registers (i.e. registers that every unit/building has), or by their names from the left - Signal, Visual, Store and Goto registers respectively. Reason for that will be quite clear once we discuss more complex components, but let us first describe what these four registers do. They are key to Desynced automation, and are in fact the first method of basic automation.


Signal Register
Value shown here, or 'a signal' (I will be using this term quite often) can be read by other units using "Signal Reader" component. This will be our primary method of transfering data between units.


Visual Register
This register can store one or more visual signals. Either 'icons' or values, or both. Those will be visible on unit on main screen. Notably - if a visual signal has a value of 0 it will only show the icon. if a visual signal has a value of infinity it will count the number of items that are present in the unit.

Example of such behavior will be shown in a little bit when I will talk about example use of simple registers. Please keep in mind that Visual Register can hold information, and as such can be used as a source of information in basic automation. It is not limited to showing data alone. If multiple signals are 'linked' (see below) into this register multiple icons can be displayed, this however works only for buildings that are larger than 1x1.


Store Register
This register can target Your unit that will be set as a storage. Notably this register cannot be set manually to anything else than a unit (keep in mind this includes buildings) or coordinate, however it can be used as a store of information for values that are not units. If this register is set to be a unit, whenever our unit has nothing better to do, it will order a transfer of resources to storage unit. If it can perform the unloading order it will do so by itself, however if it cannot other unit will do the deed. This means that You can link factory's store register to output storage and transport will be performed automatically by the logistics network units.


Goto Register
This register is quite similar to store register in behavior. If unit has absolutely nothing better to do it will go to 'goto' target, and perform a right click action on it. While in most cases it is uninspiring (right clicking a building or a unit will order selected unit to go there), in few cases such as e.g. dropped of item this can be used to perform simple actions, such as - picking up dropped resource.

This register however is one that we will be using quite extensively in our automation, as this is the register that 'Rally point' function of robotics facility will set automatically, to be the same target as the robotic's facility rally point register.


UI Basics - Unit interface and registers - Text version - Part 2
=== Component Registers ===

Let us take a short break from going through our UI sections, and let us get back to section 1, where we had components.

Some components, including all factories, and logic components such as radars, signal readers, behavior controllers may have multiple registers, that I will call 'component registers' to differentiate from unit registers. There are two main differences between unit registers (as we mentioned before), and component registers:
  • Unit registers are always present on every unit, while component registers are present on components, and not every unit will have the same layout of component registers. To represent that component registers are always on the right side from the component that works with those.
  • Component registers come in two types: Read-Only registers (shown to be with darker background, and a triangle icon on the top side of the icon) which cannot be written into, and 'normal' (or read-and-write) registers - those are the same as all unit registers - they can be read from, they can be written into, and are represented by bright background and a circle on top part of the icon.

In our example we have 4 sets of registers. From the top:
- Robotics Assembler has the following registers from left: 'Production order' register, which tells the Robotics Assembler what to build, "Missing" register - which will show one of needed items, either resources or components that the Robotics Assembler still needs, but does not currently have in inventory to complete production, and 'Rally point' register. This is the register mentioned in unit register section, and if set when a bot is produced, the new bot's goto register will be immediately set to the same value as rally register. It will be copied. Notably it shares the icon with goto register.
- Assembler - Just like robotics assembler it has "Production Order" and "MIssing" registers, that work exactly the same.
- Portable Radar - First 3 registers from the left are 'filter' registers. They will tell us what we are looking for. In this case the first two are set to 'Owned' - so the radar will first look for nearest owned unit, and then it is looking for 'construction site'. This means that the radar will look for nearest construction site of our faction. While leftmost filter is crucial, others can make our filter more precise. More about them in radar section. Final register is read-only 'result' register. This is where the reference to the nearest entity fulfilling the requirements will be shown.
- Signal Reader - First register is target. This is the source of signal, and the second register is 'signal'. This is the content of 'signal register' of the unit that we targeted in the first register.


Here, I would also like to mention first way of automation - register linking. We can drag one register on top of the other, and if the second register is of the read and write variety (with circle on top and brighter blue) rather than read-only register (shown as a register with a triangle pointing upwards) it will create a link. This link will copy any value from the input register to output register. This link is shown as colored arrow on the interface that You will see in the screenshot below.

Below we have simplest linking and showcase of result of 'infinite' visual signal.
Please note that fabricator shown here shares register layout with Assembler, and that production order register can be source of information. Here we copy whatever is requested from fabricator into visual register, and as the amount is set to infinite our factories will count how many items they have stored.

The green arrow represents the register linking.

I would also like to point out that the production registers are read and write variety. This means that we can use e.g. signal reader to request something. Keep in mind that if link copies from empty register [one with no value and no icon], the link will be ignored.

There is also a linking priority. If there are two links going to single register the first linked will be more important. We will talk about it later on, but let us end this part regarding registers with an example.

To understand how it works all You have to know that I did not mention yet is the following detail:
Default signal of a construction site is one of items needed to finish construction. For construction signal reader acts just like assembler - target is our production order, while output is 'missing' register.

More detailed uses will be discussed later in the guide.

This example will request components to be made that we don't have for unit that we are currently making, but if we are not making any of those, it will look for nearest construction site within range of the radar, and then it will build items needed to complete the construction sites.

This is first example of how easily we can create advanced automation in Desynced.


=== Section 4: Power and Logistics ===

These two buttons are not going to be used too extensively, though You should be aware of them.

Button on the left is a power button - it will turn on or off all components and hull of the bot, with exception of behaviors. In that state all production and operation is halted, but so is energy use. Powered off state is also one that You may encounter involountarily during Your exploration.

Button on the right is logistics network button. One You will use more often. If it is highlighted - the unit is connected to power grid's logistics network. It will be able to take what it needs from other units within the network, or drop off items it has to units that need them. Unless doing specific actions, I would recommend keeping it on for buildings and units that are to transport materials around Your base. We can toggle it simply by left clicking on it.

If we right click it we will see additional options.

The most imporant options that You should be aware of are:
- High Priority - in this case if there are multiple units needing resources, or waiting for transport all units with high priority will have their orders filled first.
- Transport mode - this mode requires turning off the main network. In this mode our unit will go to unit in goto register, load anything this 'source' has in cargo hold, and then move to unit in 'store' register and dump everything our unit currently had in cargohold to the 'storage' or 'destination'.
This is simplest long-range transport that can work outside of logistics network.


=== Unit Information Plate ===
While not listed in a single section to reduce clutter, information plate is placed on bottom left part of the screen.

From top to bottom, left to right it contains:
  • Unit icon - this icon will show icon of a hull (in this case - worker bot), status icon (if any) - the purple/blue icon represents 'idle' unit. Explanation of icon can be seen by hovering over the bot icon.
  • Unit name (that we can change freely),
  • Current health [number, green health icon, and a green bar representing percentage of health in relation to maximum health]
  • Current efficiency [number], or how fast the unit is currently working, moving etc. in relation to fastest possible speed, Blue energy icon
  • Current internal capacitor energy [brighter blue line] - This represents how much battery the bot still has. Every unit has internal capacitor with storage of 2000 energy units. We will talk about that in detail in section talking about power
  • Efficiency bar - this is graphical representation of current efficiency, in darker blue.

Desynced Basics - Factions
Before we get to the 5th, and final section of the interface that we will talk about - Faction controls, let us answer the question "What the heck is a faction in the first place".

Faction in Desynced is combination of all units and technologies that share the controller.
It can be distinguished by a (usually unique) name, and color.

When You play in Desynced single player You play as a faction, with all your units, all your techs belonging to this faction.

And here comes a question. If all your units are same faction.... why not call it 'player units'?
The answer is rather simple. Players are not factions. Player or players control factions.

Each faction is independent and players can freely change between the factions, by pressing esc, and choosing 'switch faction' button. This allows a player to have multiple factions in a world even in a single player game, every faction independent of the other.

This in turn means that all of the following are possible:
- Factions without players [though their capability is usually extremely limited]
- Factions with single players as controllers [normal single player gameplay is example]
- Factions with multiple players as controllers, basically sharing units [You can think of it as 'archon' mode shown in Starcraft 2].

And what is more notable - all of those can coexist in a single world on a single server in Desynced.

Please note: while factions can be 'allied', 'neutral' or 'hostile' to eachother, I would like to ask You to stay civil, and avoid going into random servers trying to make chaos.

It should be noted that if a faction has similar color (primary colors seem to be good examples), selecting a unit will show the faction on the bottom middle part of the screen

On this screenshot we can see 3 different factions, with not-our faction unit being selected.

UI Basics - Faction interface - Library - Text version [obsolete]
=== Section 5: Faction Interface ===

As we leave the unit section, and now whe know what factions are let us go to the rightmost part of the screen. These icons represent from top:
  • Research Menu - or a tech tree - here You can select next research, and what to spend resources on discovering. please note - First tech tree is unlocked after fitting first Uplink into medium slot.


  • Build Menu - shown above here You can find all of Your building blueprints, and basic variants. Each of the elements below the available buildings represents one library folder, which contains at least 1 building blueprint.
  • Progress - series of goals that You might find useful when playing the game. Includes end-game goals.
  • Codex - useful in-game manual.
  • Library - main way to create and edit blueprints for both units and buildings.
  • Control Center. Here we can change our faction's name, color, lock it, but also see imporant statistics such as production or power generation history.

In this section we will focus on the last two options - Library and Control Center.


Let us start with library, as an extremely useful Quality of Life tool, and crucial part in mass automation.

We can open the library using second button from bottom on the right part of the screen, or by pressing L.

We will start with behavior library, as it has less elements.


This screen is split into 3 parts:
1 - Red - Folder navigation. This allows You to move between folders, and organize the behaviors in groups. Primary use in behaviors is to declutter main library from over a dozen behaviors in some cases. It should be noted that as of the writing of this guide, Desynced does not support Nested folders, It means that There can be no folders inside of other folders.
2 - Green - Main behavior area. This is where Your currently saved behaviors are. They are slightly brighter and have 3 buttons on the right part of the screen. From the left:
- Edit behavior (allowing You to edit any saved behavior without having to spawn it in the world and then save it again) If we click it we will go into 'edit behavior' interface.
- Copy button (it copies the behavior code into clipboard, that You can later save)
- Delete button (it allows You to, well, delete the behavior. Most useful for obsolete behaviors, bad behaviors, or simply copies of copies.
It should be noted that You can change the order in which behaviors are shown by dragging behaviors by clicking and holding the 3 bars on the left side next to behavior's name, and then going up and down to desired location.
3 - Yellow - New behavior area. Here we have one or two options. Upper option will appear only if You have a behavior in clipboard (copied if You prefer).
Second will be completely new behavior. This allows You to design behaviors even before You have behavior controller unlocked, and play with them if You want to try some ideas out.

Primary limitations of a behavior library are inability to run it and test it, and inability to set parameters.

In order to load behavior from text, you first load entirety of behavior (those start with "DSC"), go to red section (3), You will see the name of the behavior, and to save it simply press the only button next to the name of the behavior You copied. In the screenshot that would be the Berggeist Mining Hauler behavior.

Let us go to the blueprint library on the bottom part of the screen.

Blueprint library is analogous to the behavior library, however it does have few minor changes. This time let us show the full view, with all of the folders.

Once again, section 1 is folder navigation. 1a points us to the location where we can create a new folder, which will move us to the screen quite similar to that seen previously,

Section 2 is a blueprint section, and as You can see - there are few minor changes.
First - Edit button has been moved all the way to the left, and to the right additional icons appear. Those represent hull and components of the unit that the blueprint is describing. Here we can see a 2x1 1M1S building, with Assembler and Behavior Controller. This in turn is total cost of construction of this unit. Notably - it will NOT complete until both assembler and behavior controller are delivered, however behavior will start automatically, and any settings made in blueprint editor will be used as 'starting settings' Including any linking, preset values etc.

Section 3 is, again, new blueprint area. I will however use a new screenshot for it:
Unlike behavior section - here we can have up to 3 'new' options.
- First is the same as it was in behaviors - Here we can save copied blueprints (these ones start with "DSB").
- Second option however is new. This one will allow us to save almost perfect copy of any unit we are currently selecting. This however does not include internal state of behaviors, and some settings. Notably - no world reference will be saved. (So no references to buildings, and no references to coordinates).
- Third option will be to make a new unit. This one however will first require selection of a hull. Hull is the only piece of blueprint that cannot be changed without making a new blueprint. All components can be edited, the same way You would in main game segment. Notably however You cannot replace a component by simply dragging a new component on top of previous one. You will need to first drag the existing component out of the slot to remove it.


Desynced Logic Components
In this section I will do a quick overview of basic logic components. In general however all factory-like building and uplinks will have 1st register [the one on the left] being 'what needs to be built/researched', while second will be what is needed to complete the request.

With that out of the way let's get into more interesting modules:


=== Signal Reader ===

This is a signal reader. When register nr 1 [left] is linked to a unit, register nr 2 will return whatever is in signal register of that unit. This is our basic method of transfering data between units, and will be core in example of early dynamic miner design that we will talk about in the next chapter.

However this is not the only thing that this reader can provide. Two most important uses are:
- When used on Explorable - it will show what resource is needed to solve the explorable.
- When used on construction site - it will show You one of resources that are needed to complete the building.

Together with Radar it can be used to automate production of components for nearby structures, and as we're at it.


=== Radar ===


This is portable radar. This is first available radar in line of radars, though all work the same way.
When filters are set (registers 1-3, start from leftmost) the 4th register, output, will provide NEAREST unit that fulfills ALL of those filters.
For example if we were to set:
- Owned - Construction Site, it will nearest of our faction's construction sites.
- ENEMY filter will always target nearest enemy, which can be useful to find enemies beyond visual range [usually 10 or 15 blocks, with even portable radar having 25 tiles]

We can also use it to 'ally' 'damaged' on a bot with repairer, which will automatically repair any nearby allied bot.
WARNING: ALLY filter will NOT target Your own units.

One of most common uses would be 'Roomba' style bot - where a bot gathers resources in a range. To do it we set filter to 'dropped items' and link it to 'goto' register (which will 'right click' on dropped resource picking it up).

Notably - this is tool that we will be using with behaviors whenever we need long-range detection.


=== Radio ===


These two are radio receiver (left) and radio transmitter/sender (right).

This is one of most powerful communication tools, and by far easiest way to provide valuable information between units without use of behaviors.

Transmitter can be thought of as additional signal register, that you set on register 2. Register 1 says 'readers on which channel can see it'. Think of it as of TV station. You select correct station on register 1, and it will broadcast the programme which is channel 2. Notably channel is value sensitive, so for example channel Iron Bar [0], is different from channel Iron Bar [1].

Meanwhile Radio Receiver is acting like a signal reader, however unlike signal reader You do not select specific unit, but specific channel instead. If there is more than one signal sent on the channel, You will see them one at the time.

This set is equivalent to linking registers across units.

Notably - both radio and signal reader have infinite range.


=== Behavior controller ===


And finally - this is behavior controller, component that is by far the most useless, and the most overpowered component in the game at the same time bar none.

When not used well it can replace signal reader, create a simple request demands, or simply be waste of resources.

With simple behaviors, copy on every unit will make Your entire faction nearly immune to the effects of virus, or improve mining teams to allow for more simultaneous miners.

With advanced behaviors You may be able to create a fully autonomous faction, if You so desire.

Unfortunately it is also the most complex piece of equipment in game, and learning how to use it, or worse yet - use it well may be difficult, especially as more complex automation may involve topic called 'Signal Multiplexing', or in simpler words "how to fit more information into signal register", but
for that we will get back after we stop talking about automation without them for a bit. One of most common mistakes people do when playing with them is to act as if they were independent pieces of tech from everything else. Linking of behaviors and normal register linking can save You time and a lot of hassle.

Keep in mind - behaviors are NOT necessary to play the game or finish it. They are also NOT the only valid way to play Desynced. You can safely ignore them, and in some cases You might be better than a player than insists on automating everything.


Basic Automation - Behaviorless Roomba. Anchored Edition.
From now on we will be moving into a bit more useful things, as we now have theory to work with, we can talk a bit more about how automation works in practice, by giving few examples, with detailed explanations how and why it works. In those examples we will limit behavior use for now, and we will start by adding behaviors as a support tool, and ultimately end up with behaviors doing the heavy lifting of logic. For now let us start with one of the most common tools in our arsenal: "roomba" style bot, or a bot designed to go around the base, or at least part of it and gather dropped items.

Here I will also introduce the style we will be using when talking about designs.

=== DATASHEET ===


Behaviorless Anchored Roomba.

This bot will gather all dropped items within radar range (30 tiles), and unload to storage selected as 'Store' register. When idle the bot will return to the storage as an 'idle' location. For safety assume 29 circle around destination storage.

Setup:
- Select destination storage, to which all picked up items will be delivered, by e.g. dragging and dropping store register onto the target storage.

Linking order
As linking order is important in this specific design the following order has to be used to replicate it:
- First drag a line from radar output register into goto movement
- Secondly drag storage register onto goto register

Logic explanation:
- Currently the range of portable radar is 30 tiles. Our bot will constantly be looking for any and all dropped items in that range.
- When it does find an item in the rage the output register [4] will be set to the dropped item.
- Due to linking priority (first links being most important) whenever target is found the closest found target will be a 'goto' register priority.
- As unit arrives to the target, 'goto' 'interact' part (emulation of right click) is performed picking up the resource
- If a unit is full and cannot fit any more objects from target (either due to being limited by stack size or by item type) the unit will return to storage to unload.
- If all resources within radar range have been gathered (and realistically - some beyond that radar range) the bot will not have any results in radar output register so it will pull second priority register, storage register as goto register target and return to storage.

Additional notes:
The design is extremely simple, and will look for all items in and outside of power grid. Additional filter of 'in-power-grid' may be used for the bot not to leave powered zone.
Additionally the bot is simple in terms of component complexity giving it wide array of usable components, including but not limited to additional capacitors for range, or storage expanders for increase cargospace.

Blueprint code:
DSBV3W4tTa1z7LSI00VSKK00e9B323aWYa1meNlH1kJSaI1mZxqc1p9u3G22WoW728CEUI1sZ5Pf28CVKh1kNFL525tJJZ00RtDt00e9B400e9fl1zM5OT2731Q1000gce3AQQ2k25sgYo1rArVv1rBxEy1q0ayr07gkXg26ABKn00VjVd1uWyUf22Utlp271Mzi1BwXXn22UbSY0amGIM20FkYM21chjm0BnqQTb
27 kommentarer
Dark Helmet 4. mai kl. 17.58 
@ Denhin It is easier if the behavior is in the building you want foundation around. I can give you my behavior, just put it in a building and set the x and y parameters to like 8 each and they will place foundation in a 8x8 square
DSCUV2gXTqK1Bi0zx1s3bge1XkOPd3SbR7o1QlhNT00FRQY2uMf8m3wes8y3ow1MI03GxE12Vyby3097xJb23sqZt2V2fSb28573R0wBiGU3wNJTb3p3akJ4Nbjfu0NgZqt1KNVFS2T4tdA1wtrFm2omf220LmRWE1vQFVu36CQaj0M7hw23l0eJy28MIrq34rA460YX2u216EHgp3jZ9r30eMymA4aIRLq1uhRG83QO37z0hgaz24HvE601db3NK2LDTfE0dQzgQ2FuOAd2SLFqm3O7Y4d497bXn04op4j4Yudj91mmxky1fmyqb0h7mIZ32nrlN0SQr9E1NR1083uJ0me06HeEO3LZDBB3kwHX23vanvQ4LBVMA2xUadZ3axkXl2SX8Ji3Hn8MW1aB2in14ZItV3ttMLK2056Qz3PKhLo2wdLPf26Dx7f2M2azP4J2XeB3Ihil731ObMR0uSxOM2GXATr2YuDDs2SNVE23mqEuU1r1d484QZhvI3lwO6G3YJx173XzRBF3JfzdS37bYVO3U62l23HyyYY3HNf1a1Apea212l3SA2ul70L15tVux32lQCi1dwiHM3axcoW41t7r42SzmNo2hn5DS0cZpbv29407D1MYQX54SSQuE1gZFl71gr
Eruannon  [skaper] 26. mars kl. 8.35 
If it is the latter however the issue becomes a bit more problematic due to there being no innate ability to refer to empty title, and check if it is powered. Simple method would be to perform exactly what is done above, but also - add a script to move around in a pattern [for example - square spiral] around a reference point [usually - HQ/home]. Whether a spot can be accessed can be done by checking 'is moving' instruction, whether 'path blocked' path is triggered.

The later could work like this:
- Check Is_Moving.
a) IF path is blocked - select new target.
b) IF unit is moving - wait,
c) IF unit is stationary - go to next step.
- Perform paving on own tile [as described above].
- Select new target by getting to 'next' step of the square spiral.
Eruannon  [skaper] 26. mars kl. 8.35 
@Denhin depending whether You want to make a bot that paves any spot that it is on with foundation as long as it is within network [basically creating a roads based on use], or pave entire base the difficulty changes.

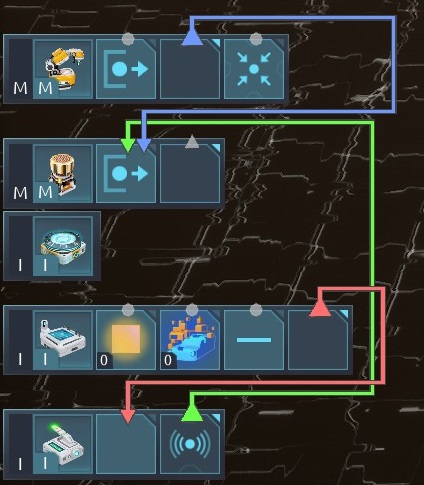
If it is the former it can be done rather simply by getting self, get home [HQ], check if they are in the same grid (we assume here the bot doesn't expand power field itself, otherwise it may overpave the map), if they are - get location from self, and then place construction of foundation [best one, depending on unlocking level for example], to that coordinate.
Denhin 26. mars kl. 7.30 
I wonder how to make a bot so that it automatically covers with foundation all the fields that are powered by the network.
Blade 12. okt. 2024 kl. 9.58 
@almaravarion it still holds true to this build as well.
Eruannon  [skaper] 7. okt. 2024 kl. 22.54 
@Blade - when the guide was first made all blueprints and behaviors were saved and encoded in profile.sav file in
%appdata%\local\Desynced\Saved\Save Games
folder. You can access it easier from game by going to options -> system -> open saved games folder.

Currently, after the combat update change to the library the PROFILE [or player] library is stored in profile.sav, while the FACTION library on the moment of save is saved in the individual save files.

Unfortunately I do not know a method to export the data directly, without using Desynced itself.

If You want to backup some of Your blueprints/behaviors from Your personal library and remove the rest I would recommend making a new save, 'uploading' the blueprint You want to save to factional library, save the game, then remove or rename the profile.sav file. [Preferably the later].
Blade 7. okt. 2024 kl. 16.21 
@Almaravarion where are in game blueprints stored on you computer?
KOBRA 27. des. 2023 kl. 21.16 
Amazing Videos thank you take my points!
kostermw 21. aug. 2023 kl. 11.06 
The volume of the videos is extremely low. I must set volume to max to hear what is actually said. Content is very useful though.
Eruannon  [skaper] 20. aug. 2023 kl. 5.38 
@newman55 - if all of those factories are of the same type, it shouldn't be too difficult; Loop entities range, with range 1; For each entity add the non-zero signals together (compare item, compare signal from the entity to blank, if different add it to the sum, where factories are putting the resource they produce into the output signal), and then it should be possible to put it through get ingredients to get toal number of needed resources (or even ratio). There is only 1 component that needs more than 3 resources, which would make it impossible to get all needed resources within a behavior without use of 'lacking items'.