
Asenna Steam
kirjaudu sisään
|
kieli
简体中文 (yksinkertaistettu kiina)
繁體中文 (perinteinen kiina)
日本語 (japani)
한국어 (korea)
ไทย (thai)
български (bulgaria)
Čeština (tšekki)
Dansk (tanska)
Deutsch (saksa)
English (englanti)
Español – España (espanja – Espanja)
Español – Latinoamérica (espanja – Lat. Am.)
Ελληνικά (kreikka)
Français (ranska)
Italiano (italia)
Bahasa Indonesia (indonesia)
Magyar (unkari)
Nederlands (hollanti)
Norsk (norja)
Polski (puola)
Português (portugali – Portugali)
Português – Brasil (portugali – Brasilia)
Română (romania)
Русский (venäjä)
Svenska (ruotsi)
Türkçe (turkki)
Tiếng Việt (vietnam)
Українська (ukraina)
Ilmoita käännösongelmasta


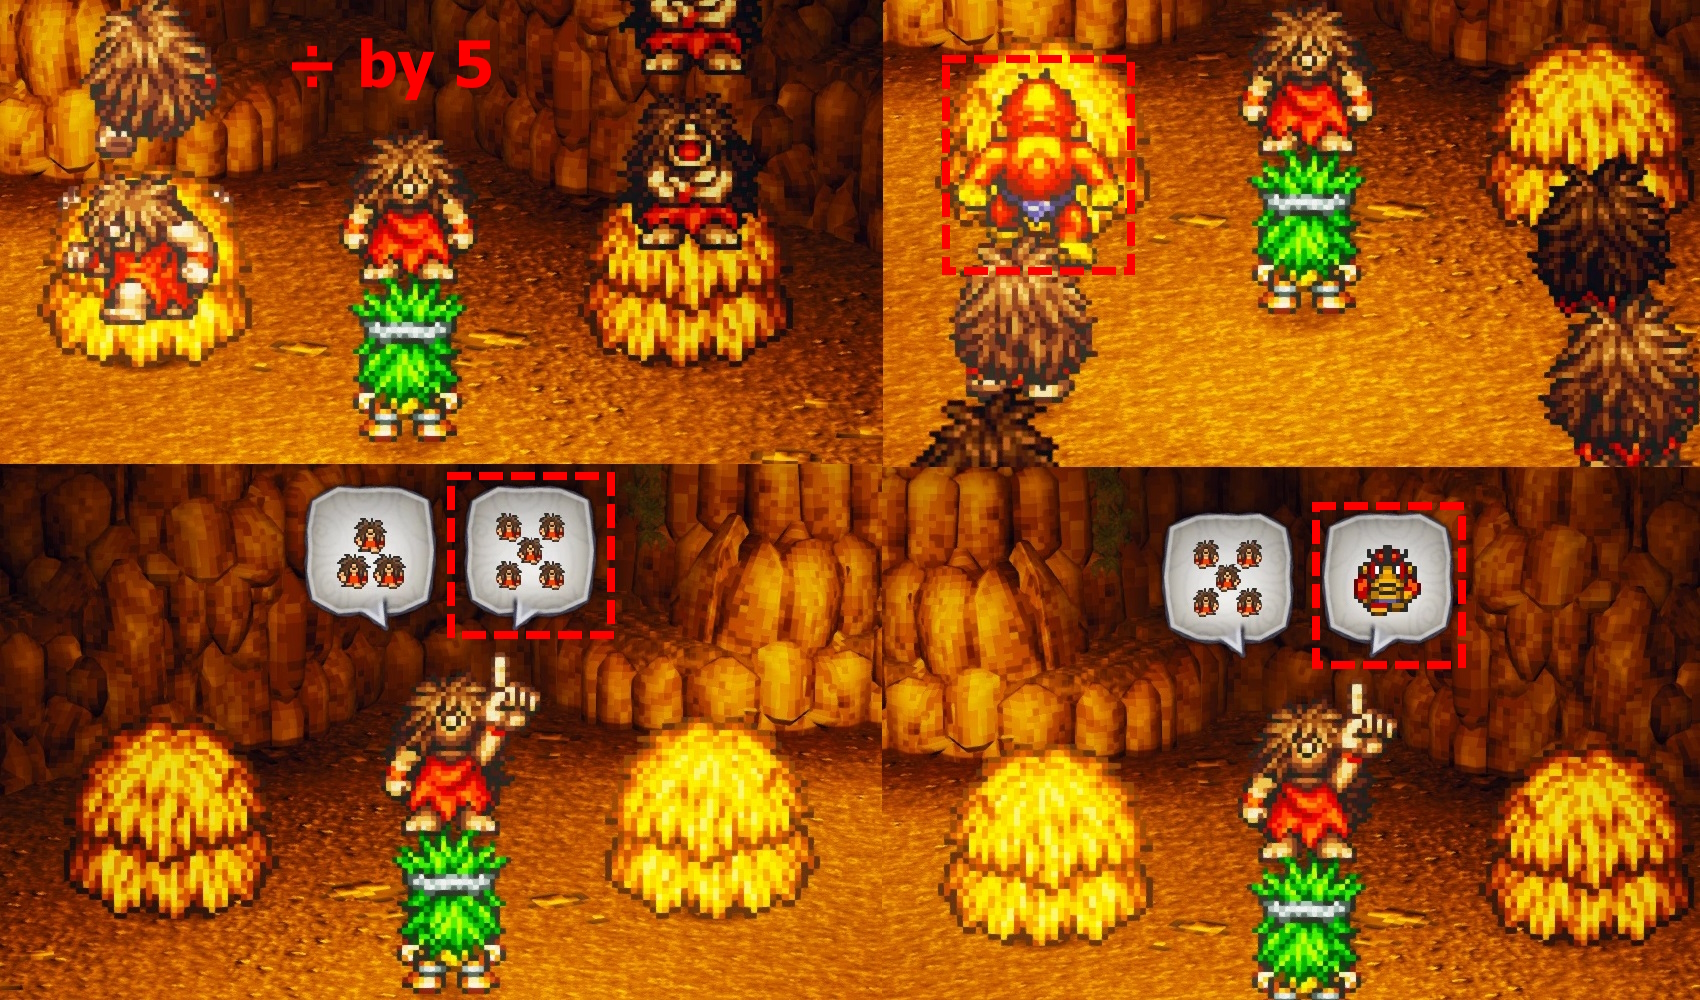


When he points to the three, he wants the stack that has less men in it. When he points to the five, he wants the stack with more.