Sid Meier's Civilization V

Sid Meier's Civilization V

209 ratings
Zigzagzigal's Guide to the Shoshone (BNW)
By Zigzagzigal
The Shoshone come with one of the game's strongest starts and an unrivalled ability to grab land. This guide goes into plenty of detail about Shoshone strategies, uniques and how to play against them.
   
Award
Favorite
Favorited
Unfavorite
Introduction
Note: This guide assumes you have all game-altering DLC and expansion packs (all Civ packs, Wonders of the Ancient World, Gods & Kings and Brave New World)


It takes little to drive a people to victory with sheer numbers and a massive technological advantage. It takes everything to face them. You are to lead the Shoshone peoples, and the Comanche (which splintered from the Shoshone over 300 years ago) - both of which were placed in such an impossible position. Even before the Europeans aimed to take Shoshone and Comanche lands, their diseases wiped out vast numbers of your peoples. In the mid-19th century, the Shoshone and Comanche were forced onto ever-smaller reservations of land as America grew and seeked to take all the land it could for itself.

But out of such destruction, there is hope yet. In the early 20th century, movements for Native American rights led to greater freedoms, and the ending of the process of land being seized from them. And into this brave new world, the fate of the Shoshone and the Comanche peoples rest in your hands. Out of great hardship, you can create a better future, a lasting legacy, a civilization to stand the test of time.


Before I go into depth with this guide, here's an explanation of some terminology I'll be using throughout for the sake of newer players.

Beelining - Focusing on obtaining a technology early by only researching technologies needed to research it and no others. For example, to beeline Bronze Working, you'd research Mining and Bronze Working and nothing else until Bronze Working was finished.
Builder Nation/Empire - A generally peaceful nation seeking victories other than Domination.
Finisher - The bonus for completing a Social Policy tree (e.g. Free Great Person for Liberty.)
Melee Units - Throughout this guide, "melee units" typically refers to all non-ranged military units - whether on the land or sea. "Standard melee units" refer to Warriors, Swordsmen, Longswordsmen, Spearmen, Pikemen and replacement units for them.
Opener - The bonus for unlocking a Social Policy tree (e.g. +1 culture for every city for Liberty's opener)
Spotter - A unit which allows a ranged unit (usually a siege unit) a line of sight with its target. Typically, siege units have a higher maximum range than their sight radius, hence the need for spotters.
Uniques - Collective name for Unique Abilities, Units, Buildings, Tile Improvements and Great People
UA - Unique Ability - The unique thing a Civilization has which doesn't need to be built.
UB - Unique Building - A replacement for a normal building that can only be built by a single Civilization.
UU - Unique Unit - A replacement for a normal unit that can only be built by one Civilization or provided by Militaristic City-States when allied.
Wide empire - A high number of cities with a low population each.
XP - Experience Points - Get enough and you'll level up your unit, giving you the ability to heal your unit or get a promotion.
ZOC - Zone of Control - A mechanic that makes a unit use up all its movement points if it moves from a tile next to an enemy to an adjacent tile next to the same enemy.
At a glance (Part 1/2)
Start Bias

The Shoshone have no starting bias.

Uniques

You can make use of the Shoshone UA and one of their UUs right away. The other UU comes all the way over in the industrial era.

Unique Ability: Great Expanse

  • Start the game with a Pathfinder (the Shoshone Scout UU) instead of a Warrior
  • Founded cities receive 8 additional tiles, on top of the default 7
    • These tiles are typically those which would have been favoured by the city gaining those tiles via culture
    • These tiles do not raise the culture or gold cost of the next tiles (so the first tile the city gains through culture will cost the same as it does for any other Civ.)
  • Military land units receive a 15% bonus to combat within friendly territory
    • Air and naval units do not gain this bonus. Helicopter Gunships don't get the bonus unless they've been upgraded to from an Anti-Tank Gun.

Unique Unit 1: Pathfinder (Replaces the Scout)


A recon melee unit

Technology
Obsoletion
Upgrades from
Upgrades to
Production cost
Purchase cost
Resource needed
Available from start

Scientific Theory
Industrial era
1st column
(10th column overall)
N/A

Composite Bowman
(Ancient Ruins upgrade only)
45Production*
220Gold*
None
*Assumes a normal speed game.

Strength
Ranged Strength
Moves
Range
Sight
Negative Attributes
Positive Attributes
8Strength
N/A
2Movement Points
N/A
2
None
  • Ignores terrain movement cost
  • Can choose benefit when entering Ancient Ruins (Native Tongue)

Negative changes

  • Costs 45 production in normal-speed games, up from 25 (+80%)
  • Costs 220 gold in normal-speed games, up from 140 (+57%)

Positive one-off changes

  • 8 strength, up from 5 (+60%)
  • Upgrades to a Composite Bowman rather than an Archer via Ancient Ruins

Positive stay-on-upgrade changes

Note: The ability to ignore terrain movement costs, held by all Scouts, also is kept on upgrade.
  • Can choose benefit when entering Ancient Ruins (Native Tongue)
    • Options include gaining culture, gold, faith, a technology, a point of population in one of your cities, revealing part of the map, revealing nearby Barbarian encampments and upgrading the unit. On Settler difficulty, you have the two additional options of a free Worker or a free Settler.
    • Has a "cooldown" - must explore two ruins between each choice of the same option. (e.g. Technology -> Culture -> Population bonus -> Technology.)
    • The faith option cannot be chosen until turn 20 (on normal speed games.) Once you've founded a Pantheon, the faith offered by it triples, and its cooldown resets. Once you've founded a religion, you can no longer choose the option.
    • You cannot choose to upgrade a unit via Ancient Ruins if it has already received an upgrade from them.
    • The technology option only works for ancient-era technologies, and as such, cannot be picked once you have all of them.

Unique Unit 2: Comanche Riders (Replaces the Cavalry)


A mounted melee unit

Technology
Obsoletion
Upgrades from
Upgrades to
Production cost
Purchase cost
Resource needed

Military Science
Industrial era
1st column
(10th column overall)

Combustion
Modern era
2nd column
(13th column overall)

Knight
(170Gold)*

Landship**
(310Gold)*
200Production*
680Gold*

1 Horse
*Assumes a normal speed game.
**Requires 1 Oil resource.

Strength
Ranged Strength
Moves
Range
Sight
Negative Attributes
Positive Attributes
34Strength
N/A
5Movement Points
N/A
2
  • No defensive terrain bonuses
  • 33% combat penalty when attacking cities
  • Can move after attacking

Negative changes

  • Costs 310 gold to upgrade in normal-speed games, up from 260 (+19%)

Positive one-off changes

  • Costs 200 production in normal-speed games, down from 225 (-11%)
  • Costs 680 gold in normal-speed games, down from 740 (-8%)
  • Costs 170 gold to upgrade to in normal-speed games, down from 220 (-22%)

Positive stay-on-upgrade changes

  • +1 movement point (Full Moon Striker)
At a glance (Part 2/2)
Victory Routes

Note these scores are a matter of personal opinion based on experiences with the Civilization. You may discover a way of utilising the Civ more effectively in unconventional ways.

Cultural: 6/10
Diplomatic: 6/10
Domination: 8/10
Scientific: 7/10

The Shoshone can make a good attempt of any victory route. Probably the most effective way to string all three uniques together is to use a strong start to grab plenty of land, then play scientifically until Comanche Riders. Then, use them along with Artillery for world conquest. If you feel like taking a more peaceful route, you can use your UA to guarentee good strong city spots to build tall for a scientific victory.

As another thing to consider, the Shoshone ability to grab lots of land tends to give them particularly high scores relative to their actual power. I wouldn't recommend actively seeking out a score victory, but it's something they have a mild advantage to.

Similar Civs and uniques

Overall

The Shoshone game is very much like that of America - strong early exploration, good tile acquisition and a late-game military unit you can finish off the game with. The Shoshone have a stronger start than America, but America has better UUs for later-game warfare.

Russia, like the Shoshone, have a bonus to tile acquisition (via their Kreposts) and a Cavalry UU with a useful keep-on-upgrade feature.

Same start bias

The Shoshone lack of a start bias is shared with America, China, Ethiopia, France, Germany, Greece, the Maya, Persia and Rome.

Similar to the UA

The Shoshone are one of three Civs to have a direct bonus to tile acquisition, the others being America and Russia (via their Krepost UB.) The Shoshone are distinctive within this group for getting tiles immediately when founding a city, rather than building up an advantage over time.

Similar to Pathfinders

Pathfinders are the only unique recon unit, but their strength and cost makes them act like mobile Warriors. For an actual Warrior UU with lots of mobility, that's the Aztec Jaguar you're looking for.

Similar to Comanche Riders

Other uniques that replace Cavalry include Austrian Hussars, Russia's Cossacks and Moroccan Berber Cavalry.

Perhaps the unit most alike Comanche Riders, however, is Germany's Panzer. Both UUs enable you to have extra-fast tanks, which work brilliantly with Autocracy's Lightning Warfare.
Unique Ability: Great Expanse


From the very first turn, it's obvious what the Shoshone have that's different from other Civs. Your capital (as will all your other cities) will start with over twice as many tiles, and instead of the tried-and-trusted starting Warrior, you'll have a Pathfinder instead.

So, what to do? Well, set your capital to build another Pathfinder, that's what. Maybe even a third after that, maybe not. The potential early-game boost from Pathfinders is huge, and not something you want to miss out on. Of course, you shouldn't neglect infrastructure, so don't hold off building a Worker for too long.

Now, let's look at all those tiles you have. Immediately, your capital may be working better tiles than it would be able to otherwise. That may seem minor, but even small advantages early on make a huge difference over the course of the game. There's a good chance most of the resources in range of your capital's working area will be covered by those starting tiles, meaning you can grab them as soon as you've got the technology for them rather than waiting for your borders to expand.

Expansion

The Shoshone should generally start building cities early, in order to grab plenty of resources. The number of cities you build is a different matter. You can use the extra tiles to guarentee optimum city locations for building tall (without other Civs settling cities nearby and taking good tiles) which works well heading towards a scientific victory, or you can build wide and use the land-grabbing capabilities to get plenty of strategic resources towards a domination victory.

If you're building wide, building plenty of cities close (but not too close) to each other is an excellent way to "drown out" a continent with your cities, making it difficult for other Civs to expand. Taking the Tradition Opener for its fast tile accumulation can be helpful to make it even harder for everyone else.

Defence


Above: Notice that 15% bonus in friendly lands - that's the other part of the Shoshone UA in practice!

If grabbing lots of land wasn't obnoxious enough to your enemies, your land units have a 15% bonus within your own lands, making it harder for them to take cities off you. Don't neglect defences, though - settling lots of cities is bound to make other Civs angry, 15% will only go so far and the bonus doesn't apply to naval units, making you just as vulnerable by the sea. Still, as your lands will cover a larger area than other Civs with the same number of cities, it's a little more useful than such a bonus would be to anyone else.

The 15% bonus is also useful for holding lands you've just conquered, but if you're not interested in conquest, then the bonus will still be handy for giving you the upper hand against invaders. It, your extra-large borders and the Great Wall wonder together will pretty much guarentee you safety until the late-game.

Summary

  • You can use your UA's extra tiles to grab lots of land early, or secure strong city spots and build tall
  • By placing a city of your own near an opponent's city, you can deprive them of lots of good tiles
  • Your 15% defensive bonus helps, but don't rely too much on it - it only affects your land units
Unique Unit I: Pathfinder (Part 1/2)


Pathfinders combine the mobility of a Scout with the strength of a Warrior, and the distinct feature of being able to choose what you get out of Ancient Ruins they discover. This is a very complicated UU, and one with lots of strange rules and features not shown in the Civilopedia.

The strange world of recon units

Scouts and Pathfinders have a special classification of unit all of their own - the recon unit. They're similar to standard melee units in that they use melee attacks and have defensive bonuses, but they ignore terrain costs (making them better at exploring) and have a unique set of promotions. With any Civ, it's a good idea to build a Scout early (or even first, before anything else) to find City-States, full Civs and Ancient Ruins quickly, and to find good potential city spots.

As a Scout or Pathfinder gains experience, you'll find the set of promotions recon units have is built around discovery and keeping alive, rather than encouraging direct combat. Here's the full set.

Promotion
Requires
Effect
Scouting I
None
+1 sight radius
Scouting II
Scouting I
+1 sight radius
Scouting III
Scouting II
+1 movement point
Survivalism I
None
Heals 5HP per turn extra when healing outside of friendly territory. +25% strength while defending.
Survivalism II
Survivalism I
Heals 5HP per turn extra when healing outside of friendly territory. +25% strength while defending.
Survivalism III
Survivalism II
Unit heals every turn, even when performing an action. Chance to withdraw to an adjacent unoccupied land tile if attacked by a non-ranged land unit
Medic
Scouting II or Survivalism II
Adjacent units heal 5HP per turn extra while healing.
Medic II
Medic
Adjacent units heal 5HP per turn extra while healing. This unit heals 5HP per turn extra while healing and outside of friendly territory.

Remember that experience from fighting Barbarians is capped, so you can typically only get two promotions without declaring war on a Civ or City-State. That makes it difficult to reach anything beyond Scouting II or Survivalism II.

Nonetheless, recon promotions are rather powerful. The Scouting promotions are excellent for discovering new land, preventing Barbarian encampments spawning, spying on other Civs, checking land to see if an army's coming or acting as a spotter for siege weapons. Survivalism promotions are good for making your Scouts/Pathfinders hard targets to kill relative to their low cost.

The relevance of all this is that it sets out the role of Scouts and therefore Pathfinders - an affordable and versatile unit, intended for early-game discovery and mid-game espionage. Their low cost makes them decent as a "throw-away" unit - distracting a strong enemy unit or city attack rather than your more important military units being attacked.

But, recon units have their downsides. Most notable among these is the fact you can't directly upgrade Scouts or Pathfinders - the only way is by finding advanced weapons in Ancient Ruins. This means if you build lots and lots of recon units, you'll be eventually left with a drain on your gold reserves via unit maintenance with little to show for it. Scouts also have the joint-lowest strength of any non-unique unit making them unviable for directly fighting other Civs with.

Pathfinders, production and strength

So, we've established what Scouts can and can't do. Now, let's get on to Pathfinders. Before considering the complex "choose benefit from Ancient Ruins" ability, let's start by looking at the other features these units have.

Firstly, their strength. Pathfinders are equally as strong as Warriors, hence making it not a problem that you'll start the game with the former instead of the latter. That strength is good for resisting Barbarian attacks so they can focus on exploration rather than having to spend ages healing up after them, and goes particularly well with the Survivalism promotions (with Survivalism II, Pathfinders defend at essentially strength 12 before taking into account other defensive bonuses.)

Due to the fact Pathfinders can do everything Warriors can, and more, they're a lot more expensive than normal Scouts - 80% more expensive than usual, or 13% more expensive than a Warrior. Don't be put off building them early on though - their advantages are too good to ignore or postpone.

The mechanics of choosing ruins benefits

Now onto the good stuff. In the earliest years of the game, Ancient Ruins will appear dotted around the landscape (unless you've gone ahead and disabled them in the game setup options.) For any unit other than the Pathfinder, moving in to will receive a random benefit. There's great stuff, like a free technology or faith, good stuff like free culture, and worthless stuff like revealing Barbarian encampments. Pathfinders have a way of cutting out the useless stuff, as moving them into Ancient Ruins gives you a menu of options to choose from.


Here are all the possible options:
  • Lump sum of gold
  • Lump sum of culture
  • Lump sum of faith (Unavailable until turn 20 on normal-speed games or if you have a religion. After founding a Pantheon, the faith offered is tripled)
  • +1 population point in one of your cities
  • Free technology (Ancient-era technologies only)
  • Revealing part of the map near to the Ancient Ruins
  • Revealing nearby Barbarian encampments (If there are none nearby, you can't choose this option.)
  • Upgrading the unit (Pathfinders become Composite Bowmen. You can't use this option on a unit which has already been upgraded this way.)

If for some strange reason you're playing on Settler difficulty, these options are available too:
  • Free Settler
  • Free Worker

Some options are better than others. Putting aside the Settler difficulty-only options, culture, faith, the free technology, the population point and the unit upgrade are the five most useful ones on offer here. More on that later.

There's a catch, though - you can't choose the same option more than once in three consecutive explored ruins. For example, if you chose a free technology first, you can't choose it second or third, but you can choose it from your fourth Ancient Ruins.

To make matters even more complicated, Ancient Ruins explored by units without Pathfinders' Native Tongue promotion count for purposes of this "cooldown". For example, if you randomly got a free technology in Ancient Ruins from a non-Pathfinder unit, you can't choose a free technology as your option in the next Ancient Ruins you explore, or the one after that. As a second example, if you chose a free technology as your first option, and culture as your second, then followed it up with revealing Barbarian encampments as a random result from Ancient Ruins not explored by a Pathfinder, you would be able to pick a free technology again as your fourth option. You can avoid this entire confusing paragraph simply by not using units other than Pathfinders to explore Ancient Ruins.
Unique Unit I: Pathfinder (Part 2/2)
Making good use of Ancient Ruins

The ability to choose the benefit of Ancient Ruins is part of the Shoshone's strong start to the game. As I've already mentioned, the five most powerful options are the population point, the culture, the free technology, the faith and the unit upgrade. I'm going to go through each one and explain why they're important. Other options not listed here aren't worthless, though - just more situationally useful. Keep in mind this section is a guideline and not a firm order of how you should choose your ruin benefits - use your own judgement, too.

The population point

It might not seem much, but a free point of population in the very earliest turns makes a world of difference. At first, your capital won't have any Workers or buildings, so the only way it'll get any better is by getting more people. An extra point of population means more food and/or production, cutting the time for the city to mature, or to build more Pathfinders to track down even more Ancient Ruins. Plus, a point of population means an extra point of science.

The free population point might actually be your strongest option prior to turn 20 (on normal-speed games) due to the early boost to infrastructural advantages it offers. It's less useful as time goes on, but overall it's more powerful than it may at first appear.

The culture

The cultural boost from Ancient Ruins will typically be just a little less than enough for you to grab your first Social Policy. Whether you're building tall with Tradition or wide with Liberty, this cuts the number of turns for you to finish the tree and reap all its rewards.

If you intend to pick the culture option, pick it very early on - it doesn't scale as well as some of the other choices.

The free technology

A free technology means a early boost to science, meaning more units or buildings available earlier. Keep in mind this option often finishes the technology you're currently working on (unless it's a relatively expensive tech,) so for maximum efficiency, keep a Pathfinder next to it until you've finished your technology and then move in. Note that the free technology only works on ancient-era ones, so don't hold off for too long!

The free technology is a good option at any point you can pick it, though in the very earliest turns the free population point will probably be more useful. From turn 20 until you have a Pantheon, the faith will probably be more effective.

The faith

Starting on turn 20 in normal-speed games, you have the option of selecting faith. This allows you to secure a Pantheon without having to build a Shrine, getting lucky with discovering religious City-States or settling next to a faith-granting Natural Wonder. Once you've founded a Pantheon, the cooldown on this option resets (so in this case only, you can choose it twice in a row) and the faith offered triples. The description of the faith option after founding a Pantheon says "Discover a Great Prophet!" but it lies. You'll just get a decent-sized chunk of faith.

As soon as the option's available, it's the top-priority choice if you don't have a Pantheon yet. It's best to choose a faith-giving Pantheon so you can more easily secure a religion. Choosing the faith option after founding a Pantheon is still powerful, cutting off a considerable number of turns until your first Great Prophet, hence giving you a head start to founding a religion.

Once you have a religion, you can no longer choose the faith option.

Unit upgrade

This is the really interesting one. Normally, when a Scout enters an Ancient Ruin and finds "advanced weapons", it turns into an Archer (but keeps its ability to ignore terrain movement costs, and any recon promotions it has earned are still relevant.) Pathfinders, however, being stronger, turn into Composite Bowmen. A ranged unit with the damage output of a Spearman (without being damaged itself when it attacks) with the mobility of a Scout (and the Native Tongue promotion, which it keeps) available in the first few turns is something that could be exploited towards an early rush against an opponent, but generally the best role for it is the same as a regular Pathfinder - exploration, safe in the knowledge that Barbarians are unlikely to be any threat.

How effective the unit upgrade is can vary. Although a popular first choice of Ancient Ruin reward, chances are you won't be able to make more than a couple of Composite Bowmen this way. On smaller maps, you probably won't have enough ruins to be able to create a large enough Composite Bowman army, but the defensive potential is often more useful as other Civs may be closer to you. Personally, I'd tend to favour the more infrastructure-boosting bonuses over this unless I'm sure I can secure a high number of ancient ruins.

Later ruins

Sometimes, you may have unexplored continents or islands later in the game (typically ones inaccessible prior to Astronomy) which contain Ancient Ruins. On non-single continent map types, it can be worth hanging on to a Pathfinder (or one upgraded to a ranged unit) in case of such events.

At this point, the unit upgrades and point of population are probably the two most useful options still available. Other possible bonuses are likely to be too small to make much difference at all.

Summary

  • Pathfinders combine the roles of Scouts and Warriors
  • Don't let Pathfinders' higher costs put you off - I'd recommend building one immediately
  • Prioritise faith, population, culture, technology and unit upgrading in Ancient Ruins above other choices, unless you have an unusual situation that calls for it. Prior to having a Pantheon, faith is typically the top priority.
  • The stronger start choosing Ancient Ruins gives you combines nicely with your UA to make one of the game's strongest early games.

Special promotions kept on upgrade

This promotion is kept by all Scouts being upgraded:

  • Ignores terrain movement cost

And Pathfinders also have this:

  • May choose Ancient Ruins benefit (Native Tongue)

As already mentioned, the only way to upgrade a Scout or Pathfinder is via Ancient Ruins. This creates the rather powerful unit nicknamed the "Scout Archer", with both high mobility and a ranged attack keeping it safe from harm.

Remember that ranged units can't receive new recon promotions, but do benefit from them. If you're feeling particularly crazy, you could try surrounding some Ancient Ruins with your units so no-one else can take it, training up a Pathfinder through war to get a whole load of recon promotions, then sending it to the Ancient Ruins to get it upgraded into a very mighty Composite Bowman. Even a Composite Bowman with one recon promotion will work well - Scouting I for example lets it use its maximum range at all times if it also has Logistics, and lets it act as a spotter for other Logistics ranged units.
Unique Unit II: Comanche Riders


Your UA can be boiled down to land-grabbing, giving your cities a stronger start and defending your lands a little better. Pathfinders can be boiled down to super-Scouts, giving you a mildly stronger start. So, what's your second UU about? Well, that varies greatly depending on how you've played your game.

Comanche Riders are the Shoshone's last, simplest and least-powerful unique, but they've still got their uses. They're a little cheaper than regular Cavalry (hence cheaper to upgrade to from Knights, but more expensive to upgrade to Landships) making them good for a quick defence or to bulk up an army, but more importantly, they have an extra point of movement which unlike any other unit with such a bonus, keeps when the unit's upgraded.

If you've decided to build tall and go for a scientific victory route, Comanche Riders are a good rapid defence force. With their fast movement and low cost, you can quickly churn them out and rush them to lands you own under attack.

If instead you're building wide, aiming to grab lots of land and strategic resources, Comanche Riders are great at rushing in, surrounding units and getting flanking bonuses. Be sure to accompany them with Artillery to deal with cities, and you've got yourself a decent, if not particularly exceptional, industrial-era army.


Above: There's quite a few manoeuvres you can pull off with 5 movement points you can't with 4. For example, it's possible in flat land to move from outside a city's attack radius, attack it and withdraw outside it again. Comanche Riders still have a penalty against cities, making this risky, but Landships have no such problem.

Special promotions kept on upgrade

  • +1 movement point (Full Moon Striker)


Now, here's where the fun really begins. Comanche Riders promote into armoured units - Landships, Tanks, Modern Armour and eventually even Giant Death Robots - all while keeping the extra movement point. This essentially gives you half the benefit of Germany's Panzers (the speed but not the strength) spread across multiple units rather than just one. Combine this with Autocracy's Lightning Warfare, and you've got incredibly fast armoured units with a 15% bonus to attack and ignore Zone of Control. The only problem is that these units will move faster than your Great Generals can keep up with, but that's minor in the grand scheme of things.

If you're after a domination victory, it's worth spending the end-game pushing towards armoured unit technologies (Combustion, Combined Arms, Lasers, Nuclear Fusion.) You shouldn't neglect things like siege, (Artillery, Rocket Artillery and bomber-class aircraft work well here) and anti-air, but if you've been consolidating your strong early-game well and have built up a good advantage, that won't be so much of a problem.
Social Policies
The Shoshone Social Policy route is fairly straightforward. Take Liberty or Tradition depending on whether you want to respectively build wide or tall. If you took Liberty, consider taking Tradition's Opener to grab even more land afterwards. As soon as the renaissance era starts, either way you should head into Rationalism. If there's some spare policies between your first tree and Rationalism, Commerce is a good place to put them in, giving you money for either maintaining an army or Research Agreements.

Liberty

Opener

Your cities may already start with a lot of tiles, but with Liberty's Opener, all your new cities can expand their borders immediately and hence take even more. Often, there'll be little need to buy tiles, saving you a little cash early on for whatever you want to use it for. In addition to this, Liberty's Opener offsets slightly the increased Social Policy cost the more cities you have.

Republic

An early production boost really helps in getting new cities off the ground, if having lots of tiles wasn't enough already.

Collective Rule

This policy is great for ensuring you can grab lots of land early, by allowing you to more easily spam Settlers in your capital. Make sure not to neglect happiness (or else all those cities settled will grind your empire to a halt) and resist the temptation to settle next to highly-aggressive Civs (your 15% friendly lands bonus only goes so far.)

Citizenship

With all the tiles you have, there's a lot of resources there that'll need improving. A free Worker and faster Worker speed will certainly help to address that problem.

Representation

A free Golden Age means a bit of money, culture and production, but more importantly, settling new cities won't slow down your accumulation of Social Policies so much.

Meritocracy

If you've got happiness problems, take this before Representation. Otherwise, because your UA allows you to soak up far more tiles earlier, you're likely to have faster access to luxury resources and hence can safely postpone this policy until last.

Finisher

If you haven't got a religion already, grabbing a Great Prophet isn't a bad idea, but if you're unsure what to pick as a free Great Person, Great Scientists are probably the best all-round choice. Plant an Academy with one next to a city either adjacent to a mountain or one that has the National College.

Tradition

Opener

Whether you're intending to use your strong start to build tall, or to build wide, Tradition's Opener is still useful as it enables your cities to rapidly acquire tiles by culture. Combined with your UA, it's very easy to deny nearby rival cities lots of good tiles without having to spend any money.

Oligarchy

If you're building wide, this isn't a bad policy to take as it can free up quite a bit of cash in unit maintenance. Ironically, despite being in the Tradition tree, it's a little less useful for tall empires, but cash is cash.

Legalism

The rest of the Tradition tree is generally better if you intend to build tall towards a peaceful victory - Legalism for example only affects your first four cities. Still, free cultural buildings are nice to have, making you gain tiles in those cities even faster and helping to cut through early Social Policies.

Landed Elite

This thing helps to grow your capital taller. An early population boost from a Pathfinder combined with this ensures it'll be at a good size by the time you need to fill scientist specialist slots.

Monarchy

And growing your capital taller now won't be so much a drain on your happiness, and you get some gold for it, too.

Aristocracy

Faster wonder building is useful, but it's worth holding it off until this point as it's hard to secure early wonders. Plus, the 10th point of population in a city is unhappiness-free.

Finisher

Now all your first four cities can grow faster, and you don't have to worry about building Aquaducts. Being able to buy Great Engineers with faith in the late-game is useful, too.

Commerce

Opener

Commerce makes a good filler tree between Liberty/Tradition and Rationalism. The gold on offer, for example by this Opener, is helpful whether you're trying to support a large army or squeeze in yet another Research Agreement.

Wagon Trains

An excellent way to recover cash, especially if you're building wide. This can make you upwards of 50 gold per turn in the late-game if you've got quite a few cities linked by railways.

Mercenary Army

Landsknechte are cheap and a good way of rushing out a defence when needed, but consider also that buying them and upgrading them to Lancers is cheaper than buying Lancers directly (and you can always do this as they never obsolete.) Landsknechte upgraded to Lancers keep their special promotions (such as double city capture gold) making them excellent units to capture cities with. However, they're rather less effective if promoted further - Anti-Tank Guns are slow and Helicopter Gunships can't capture cities.

Mercantilism

If you're playing peacefully and intend to take the Freedom ideology towards a scientific victory, this policy makes spaceship parts bought via Space Procurements quite a bit cheaper. If you're into war, purchasing units is more affordable, helping you to really churn out those Comanche Riders. And for both routes, the science offered by gold buildings is helpful, too.

Rationalism

Opener

So long as you keep your empire happy, you get a global 10% happiness bonus. That's a little harder to do if you're building wide and conquering cities, but even a 10% bonus some of the time is useful.

Humanism

If you need more gold, head to the left side of Rationalism first. If you want some immediate science and have plenty of specialists, take Secularism first. Otherwise, Free Thought is a powerful policy for boosting science output and Humanism's on the way there.

Free Thought

The bonuses on offer here are good for building tall and wide alike. If you're building wide, consider cutting back the number of food tiles your cities work and making them work trading posts instead. That way, the cities won't grow so fast that they drain your happiness dry, and you'll get both gold and science out of it.

Secularism

If you're building tall, this is probably the most effective first pick in Rationalism after the Opener due to the immediate boost to science on offer. While all specialists will now offer science, be careful to manage the generation of Great Engineers, Merchants and Scientists - generating one increases the cost of all the others, and Great Scientists are usually better than Great Merchants.

Sovereignity

Better for wide empires, this recovers a decent amount of gold from the maintenance of scientific buildings.

Scientific Revolution

Better for peaceful empires, combined with the Porcelain Tower, you'll always get more science from Research Agreements than the other Civ does. Even if you can't get any Research Agreements going, this is on the way to the powerful Finisher, so it's worth picking up.

Finisher

Cut down the amount of time either to build the spaceship or to build strong late-game units with a free technology. Being able to buy Great Scientists with faith also really helps in that regard.
Ideology
Here's where it gets a bit messy. The Shoshone can viably take any of the three ideologies, and I'll cover the best options of the first "inverted pyramid" (three level one tenets, two from level two, one from level three) of each.

If you're looking for a domination victory, Autocracy is your best choice if you don't care about not having a scientific backup route. The Lightning Warfare tenet in particular goes very well with upgraded Comanche Riders. If you do want the scientific backup, or you favour quantity rather than quality of units, Order will work better (in this section, I'm assuming you're warmongering if taking Order.) If you're building tall and going for science, take Freedom.

Level One Policies - Autocracy

Industrial Espionage

While you're busy with the military technologies on the bottom half of the technology tree, peaceful Civs will be focused on the top. With use of Spies, you can take those technologies allowing you to both have a military advantage and not fall behind on more infrastructure-based technologies.

Fortified Borders

This is a maintenance-free source of happiness. If you like puppeting cities, they're rather likely to build defensive buildings and hence make use of this tenet.

Elite Forces

This closes the strength gap between wounded units and those at full health by 25%, meaning your units will be able to deal a little more damage before they have to retreat.

Level Two Policies - Autocracy

Lightning Warfare

Comanche Riders upgrade into Landships, meaning you can combine their extra movement with the extra movement, damage and ignoring of Zone of Control offered here. It's easy to slip through enemies, surround them and make use of flanking bonuses to kill them quickly.

Third Alternative

Pick Nationalism instead if you're really struggling for gold. Otherwise, Third Alternative ensures you're ready for whichever strategic resource you need. After all, Comanche Riders on the upgrade path to Giant Death Robots use four different resource types (horses, oil, aluminium and uranium) and it's unlikely you'll have masses of all those resources.

Level Three Policy - Autocracy

Clausewitz's Legacy

Time this tenet right, and the attack bonus should be exactly what you need to take over the world with. Use your former-Comanche Riders to take out most land units, use Bombers or Rocket Artillery to deal with the rest as well as cities and bring some kind of anti-air unit so your former Comanche Riders don't get bombed to death.

Level One Policies - Order

Socialist Realism

A ridiculously easy way of getting happiness.

Hero of the People

Just because you're warmongering doesn't mean you can't go and generate Great People. Great Scientists are pretty much as useful when you're going for domination as when you're going for a scientific win, so go ahead and assign some scientist specialists.

Young Pioneers

Another source of happiness, which isn't too difficult to make use of.

Level Two Policies - Order

Worker's Faculties

Keeping ahead on science is important. This tenet makes that goal that little bit easier, as well as building Factories in new cities (which are at first rather expensive.)

Five-Year Plan

The production potential here is quite large, making it much easier to raise a large army, or build the spaceship if you decide a domination victory isn't going to be possible.

Level Three Policy - Order

Iron Curtain

If you're having trouble maintaining International Trade Routes, just keep them internally and make use of the extra production (or food). Additionally, if you want to annex a few cities (such as to build an Airport in so you can rapidly bring units in) then Courthouses are free in cities you capture beyond this point, making unhappiness less of a problem.

Level One Policies - Freedom

Avant Garde

More Great Scientists will reduce the number of turns needed towards victory. Taking this tenet first ensures it makes as much difference as possible.

Civil Society

You should have quite a few specialists around by this point, so cutting the food they need in half makes a significant difference in helping your cities to grow faster.

Covert Action

Economic Union works well in this slot as well if there's another Freedom-taking Civ with good potential Trade Route yields. Otherwise, consider that by the end of the game, it's likely you'll have more Spies than cities (and most other Civs will only send Spies of their own to your capital) freeing up a few. By planting them in nearby City-States, you can cheaply hold alliances, freeing up some gold for Space Procurements.

Level Two Policies - Freedom

New Deal

More science on Academies and more production on Manufactories helps get the spaceship up sooner.

Universal Suffrage

Longer Golden Ages is the main advantage here. They'll give you more gold (obviously) which will be useful for buying spaceship parts with.

Level Three Policies - Freedom

Space Procurements

The costs of spaceship parts are rather high (parts exceed 3000 gold each on normal-speed games without taking Commerce's Mercantilism or the Big Ben wonder) so you shouldn't neglect production to build some of the parts the old-fashioned way. Still, you can cut off a few turns towards victory this way.
Religion
Using Pathfinders to get faith out of Ancient Ruins is a good way to secure a Pantheon, and a faith-giving Pantheon is a good way to secure a full religion. In this section, I'll cover the best options for religious beliefs for the Shoshone arranged by priority order in each type. I'm not covering highly-situational ones (which includes nearly all faith-giving Pantheons) so use some of your own judgement.

Note the use of "Scientific Shoshone favoured" or "Warmongering Shoshone favoured" on some beliefs. Those work better on the respective victory routes, assuming that you're building wide if you're going for a domination victory or building tall if you're going for a scientific one.

Pantheon

Messenger of the Gods

Whether you're building tall or wide, early science is powerful. This is probably your strongest option if you feel you can secure a full religion without a faith Pantheon.

God of Craftsmen

Useful for getting your smaller cities off the ground, or squeezing in a little extra production for early wonders. As cities will typically work few production tiles at first if left to their own devices, even 1 point of production makes a more significant difference than may be at first apparent.

Fertility Rites (Scientific Shoshone favoured)

This offers a little extra growth. Not a lot, but by the end of the game, the extra population points can make quite a difference.

Ancestor Worship (Warmongering Shoshone favoured)

Building wide, Social Policy gain is likely to be a problem. This belief helps address that issue by adding some culture to a cheap building.

Sacred Waters (Warmongering Shoshone favoured)

If you're careful to settle as many of your cities on rivers as possible, this is a reasonable early source of happiness to help support them all.

Founder

Tithe or Church Property

Whether it's money for Research Agreements or unit maintenance you want, these gold-giving Founder beliefs are good for that.

Interfaith Dialogue

An unusual, if not greatly powerful, extra source of science.

Pilgrimage

Works well with faith building beliefs to buy your way to happiness. Also alright if you can manage to spread your religion rapidly early on, and want to preserve your advantage by having more faith than anyone else.

World Church

Struggling to keep up with Social Policies, but feel like you're going to have a strong religion? This'll help out.

Follower

Pagodas (Warmongering Shoshone favoured)

Probably the ultimate wide empire Follower belief. Exchange faith for more faith, culture and most importantly, two points of local city happiness. It's amazing how often this belief can save you from unhappiness issues.

Mosques (Warmongering Shoshone favoured)

A reasonable backup (or complement to) Pagodas. Less happiness but more faith, meaning you can buy them a little more rapidly than Pagodas.

Religious Community (Scientific Shoshone favoured)

Grow your cities tall and you're rewarded with a rather effective production bonus - great for Wonders and Spaceship parts.

Swords into Plowshares (Scientific Shoshone favoured)

A decent source of city growth if you don't intend to go to war. Goes well with Religious Community.

Asceticism (Warmongering Shoshone favoured)

If your faith generation is low or you can't manage to pick up Pagodas, here's another option. Getting a Shrine and reaching 3 followers in a city is not a hard thing to achieve, after all.

Cathedrals (Warmongering Shoshone favoured)

Divide Pagodas' effectiveness by 2 and add a Great Art slot and you've got Cathedrals. The extra Great Art slot isn't that useful for a non-cultural Civ, but the extra happiness on offer is still useful.

Divine Inspiration (Scientific Shoshone favoured)

Building tall rather than wide gives you a disadvantage in faith generation but an advantage to wonder building. You can use the latter to solve the problem of the former with this belief.

Choral Music (Scientific Shoshone favoured)

If you want to eat through Social Policies a little faster, here's a possible way.

Peace Gardens (Warmongering Shoshone favoured)

If you took Sacred Waters, you should have many cities capable of building Gardens. They're only a little more expensive than Colosseums and offer the same amount of happiness with this belief.

Enhancer

Itinerant Preachers or Religious Texts

Both of these are faith-free methods of spreading your religion more easily.

Missionary Zeal or Holy Order

And both of these are methods of more effectively spreading your religion if you have a little faith to spare.
World Congress
Here's a list of World Congress decisions and brief notes on importance of some. Ones missing depend greatly on the situation you're in. Voting choices may vary depending on your game (for example, if you get lots of Natural Wonders, Natural Heritage Sites may be worthwhile, otherwise not.)

Arts Funding

Medium priority
Vote no

Sciences funding is better for nearly every non-cultural Civ than Arts funding, due to the power of Great Engineers and Scientists.

Cultural Heritage Sites

Low priority
Vote yes if you're playing scientifically
Vote no otherwise

Building tall can secure you a few wonders, and this gives a good sum of culture for it.

Embargo City-States

High priority if you're warmongering
Low priority otherwise
Vote no if you're warmongering
Abstain otherwise

If you're warmongering, it's often hard to trade with full Civs as there's a good chance they'll all hate you and may declare war on you (and embargo your trade routes) at any moment.

Historical Landmarks

Low priority
Vote no

International Games

Medium priority
Vote yes if you can spare enough production

International Space Station

Very High priority if you're warmongering
Medium-High priority otherwise
Vote yes if you can spare the production and/or are playing scientifically

Natural Heritage Sites

Low priority
Vote no unless you have Natural Wonders of your own

Nuclear Non-Proliferation

High priority
Vote yes if you have plenty of nuclear weapons, you lack uranium and other players have it or you're the only player with nuclear weapons. Vote no otherwise.

Sciences Funding

High priority
Vote yes

Standing Army Tax

Very High priority if you're warmongering
Low priority otherwise
Vote no if you're warmongering
Vote yes otherwise

World's Fair

Low priority
Vote no unless you can spare the production
Wonders
Your choice of wonders is likely to vary greatly depending on whether you're building tall or wide. Remember that tall-building Civs have an advantage to wonder building, so if you're building wide, be sure only to go for the wonders you're close to certain you can pick up. Here's a list of some of the best wonders for the Shoshone, arranged alphabetically in each era.

Ancient Era

Great Library

You can use your strong early start to make a stab at this highly-competitive wonder. Get it, and the scientific advantages will keep you in a strong position for the rest of the game. On the higher difficulties, it's probably too competitive to be viable.

Pyramids (Liberty Only, Wide-building Shoshone favoured)

A highly-uncompetitive wonder, the Pyramids is basically a second Citizenship Social Policy with a second free Worker for good measure. Due to all the tiles you're likely to own, this wonder is probably more powerful for the Shoshone than it is for most other Civs, if not them all.

Stonehenge (Tall-building Shoshone favoured)

If you don't think faith from Ancient Ruins and/or your Pantheon will be enough to secure a religion, and you don't have many cities to build Shrines in, here's another way. It's a fairly competitive wonder, though, so be careful not to leave it too late if you intend to build it.

Temple of Artemis (Tall-building Shoshone favoured)

While the bonus to ranged unit production is helpful for defence, the 10% food bonus offered here is the really useful advantage. It's not a growth bonus as the tooltip says - it modifies the base amount of food a city produced, not the speed in which it gains population points, meaning it increases the maximum size your cities can reach.

Classical Era

Great Wall

A horrible thing for your enemies to face. Your 15% friendly lands bonus for your land units and large borders combined with this wonder slowing their units down will dent would-be attackers' aims for world domination.

Hanging Gardens (Tradition Only, Tall-building Shoshone favoured)

A Hanging Gardens city will grow rapidly, letting it make use of all the strongest tiles sooner for even faster development.

Oracle

This is one of the only pre-University sources of Great Scientist points, and the free Social Policy will help finish Liberty or Tradition faster, letting you make use of their rewards sooner.

Medieval Era

Alhambra (Warmongering Shoshone favoured)

Alhambra gives a free Drill I promotion to eligible units in its city, which can get a unit straight to Drill III, Medic II, Cover II, Siege or Charge (if it's a mounted or armoured unit) with an Armoury. Get Alhambra, the Brandenburg Gate and a Military Academy in the same city and you can build new Comanche Riders starting immediately with the March promotion.

Angkor Wat (Wide-building Shoshone favoured)

Not particularly a high-priority wonder, (there's a lot of important other ones around) but an interesting one if you really want to flood continents with your tiles, as it makes both gold and culture-based accumulation of tiles cheaper.

Machu Picchu

Some extra cash for unit maintenance/Research Agreements, and some faith, too. The restriction to cities near mountains tends to make this wonder less competitive than most in the same era.

Notre Dame (Wide-building Shoshone favoured)

The 10 points of happiness are global, rather than local happiness, meaning you'll always get the full 10 points while you have the wonder. It's a fairly competitive one, though, so if you can't manage it, you can always try capturing it from someone else.

Renaissance Era

Himeji Castle

Unless you're aiming for a mid-game war, the Himeji Castle is awkwardly placed on tech tree making it more a wonder to capture than one to build. It offers a friendly-territory strength bonus to your units which stacks with your UA to allow an even smaller defensive force in your own lands.

Leaning Tower of Pisa

A competitive wonder to pick up, but a free Great Person of your choice and faster Great Person accumulation makes it worthwhile. A Great Scientist or Engineer are probably your best choices for the free Great Person. One effective trick is to use a free Great Engineer to rush the Porcelain Tower, which gives you a free Great Scientist.

Porcelain Tower (Rationalism Only)

Even if you can't manage any Research Agreements, the free Great Scientist will help you on your way to advanced technologies sooner. If you are running Research Agreements, you can be safe in the knowledge that no matter what, the Civ you've got an agreement with won't make more science than you out of it.

Industrial Era

Big Ben (Commerce Only)

This cuts the cost of purchasing units, buildings and spaceship parts. Whether you're focused on war or science, it'll be useful.

Brandenburg Gate (Warmongering Shoshone favoured)

Coming at the same technology as Comanche Riders, it's possible you'll have a good head start to building this wonder. I've already mentioned how powerful it is with Alhambra in the same city, but even without it, the Brandenburg Gate combined with a Military Academy gets new units immediately to having three promotions.

Modern Era

Cristo Redentor

If you're finding your Social Policy gain a bit slow, Cristo Redentor helps in that regard.

Kremlin (Order Only, Warmongering Shoshone favoured)

Just because you've got a Unique Unit with a keep-on-upgrade benefit which upgrades into armoured units doesn't mean that you shouldn't build new armoured units. The Kremlin makes it very cheap to do so, meaning you can use your new armoured units in riskier attacks while keeping your former-Comanche Riders to somewhat less risky moves.

Neuschwanstein (Warmongering Shoshone favoured)

Particularly good if you've taken Autocracy's Fortified Borders as it and this wonder makes Castles worth 2 points of happiness each (in addition to 2 points of culture and 3 gold.) Certainly useful for supporting conquests even without it.

Prora (Autocracy Only)

Another wonder that provides happiness, one of the most important resources in the game when warmongering.

Statue of Liberty (Freedom Only)

Production on every specialist really helps out with those late-game wonders and spaceship parts.

Atomic Era

Great Firewall (Scientific Shoshone favoured)

You won't want someone stealing all your technologies, so place this in your capital or whichever city you have with the highest science output. By making that city impossible to steal technologies from, you can free up the counter-Spy you'll have there for other things, like rigging City-State elections or maybe even spying on another Civ.

Pentagon (Warmongering Shoshone favoured)

While upgrading atomic-era units to information-era ones is cheap, many upgrade paths before then are not. By default in normal-speed games, for example, upgrading Comanche Riders costs 310 gold each - not a small amount of money. Reducing the costs of upgrades reduces the time it takes to get your entire army up to date.

Information Era

CN Tower (Wide-building Shoshone favoured)

In a wide empire, 1 extra point of population in every city is massive. Especially considering it's unhappiness-free. Plus, a free Broadcast Tower in every city is a rather decent end-game culture boost for any last-minute Social Policies you want to take.

Hubble Space Telescope (Scientific Shoshone favoured)

After you've got Rocketry and have started working on the Apollo Program, research Satellites and start work on this. It'll cut the time it takes to build spaceship parts, meaning you should build spaceship parts faster than you can reach the technologies for them.
Pitfalls to Avoid
The Shoshone are certainly a complicated Civ in the earlier turns, and hence one where mistakes make a bigger difference. Here's some examples of potential errors and why you shouldn't make them.

Not building Pathfinders very early on

Unless you're starting on a small island, your starting Pathfinder won't be enough to ensure you get plenty of Ancient Ruins. It's a good idea to set a Pathfinder as the first thing for your capital to build, so you can track down plenty.

Mindlessly rushing Civs with Pathfinders

Pathfinders aren't any stronger than Warriors - their only combat advantage is being more mobile, and their different set of promotions make them more inclined towards defence than attack. With the Scouting promotions, they make good spotters for other units, and their low cost by the mid-game makes them decent throw-away units, but they're not really any good for attacking cities with.

Too slow expansion

Your UA helps to get you the maximum potential out of optimum city spots, but if you wait too long to build cities, there'll be fewer optimum city spots left, and instead of grabbing lots of resources with your UA's extra tiles, you'll be stuck with lots of ordinary tiles.

Settling too close to warmongers in singleplayer

In singleplayer, settling cities too close to warmongering Civs makes it very likely you'll be attacked by them. The advantage of denying them a few tiles will be short-lived unless you can support the city with a strong defence.

Relying on Ancient Ruins alone to secure a religion

Just one lot of faith from Ancient Ruins (unless a lot of Pantheons have been picked already) is enough to found a Pantheon, but you'll need at least four to secure a religion after that assuming no other method of gaining faith. That requires at least 11 ruins assuming your first ruin secures you a Pantheon and taking into account the "cooldown" of Ancient Ruin options. Usually, that's not possible. Instead, try getting a good faith-giving Pantheon so you can safely and reliably secure a full religion.

Neglecting defence

It's particularly easy to do this if you're building wide and going for a domination victory. If you have lots of cities, then there's a lot more angles a possible invasion can come in from. That means you need a lot more units to act as a local defence before you can bring in reinforcements from elsewhere in the empire, or else the first city is likely to fall very quickly.

As for playing for a domination victory, it's so easy to neglect building many military units until Comanche Riders, assuming because you're warmongering, you can't be invaded yourself. Plus, it's easy to think of your defensive bonus as adequate to see off any threat - it's not. It helps, but you need more than just that to see off attackers.

Linking to this general point is defence in the classical and medieval eras. It's easy to assume that your Pathfinders will do - they won't. They're good at fighting Barbarians, but up against the well-organised armies of a full Civ, they won't last.

Not building Comanche Riders

Comanche Riders are useful whether you're playing offensively or defensively. They're one of the most mobile things on land, and are excellent for rapidly going to distant parts of your lands being attacked. Just because they're your weakest unique doesn't make them useless.
Pocatello Panics: The Counter-Strategies
While the Shoshone can be annoying in their land-grabbing and defensive abilities, their relative lack of a focus towards a particular victory route can leave them vulnerable. If they get a poor start, they'll have trouble catching up.

Playing against the UA: Great Expanse

The Shoshone capital immediately has a better start than any other Civ's, so their first few turns will go rather well. There's not really a lot you can do about that. You could send an early attack to distract them from exploration and wonder-building, but it'd set you back the same way.

Instead, if you want to launch an attack on the Shoshone, wait a bit. The classical, medieval or renaissance eras are good times - Shoshone lands will be full of weak Pathfinders that can't be upgraded making their army rather vulnerable at this point. To make your chances at conquest easier, grab the Great Wall wonder so they can't. It's a nasty thing to face at the best of times, and if the Shoshone grab it, it'll be so much worse.

Alternatively, attack by the sea. The Great Wall doesn't affect naval units, and neither does the Shoshone 15% combat bonus in friendly lands.

The great thing about conquering Shoshone cities is that you'll steal their extra-large borders. Which means those cities will be off to a good start, and it'll be harder for anyone else to take those cities as they'll have further to go.

But, if you're not interested in war, what do you do? If possible, planting a city at a chokepoint stopping the Shoshone expanding into good spots will be effective. If not, be prepared to save up money for rapid tile purchases before the Shoshone can steal tiles that are rightfully yours off you. You may need to expand faster than you normally would.

Don't be worried about the Shoshone getting a huge score. Due to their land-grabbing abilities, that's something that's likely to happen. If they start snatching every wonder in sight or are clearly in first place for literacy, then you might have something to worry about. Their land-grabbing abilities are likely to anger a few Civs, so you can probably bribe one into fighting them.

Playing against Pathfinders

If you're not fighting Pathfinders, you can treat them the same way as you would for regular Scouts - you can try and anticipate which way they're moving and move there first, or try to block their way with a few units to deny them as many Ancient Ruins as possible.

If you are fighting Pathfinders, think of them as extra-mobile Warriors. It's fairly risky to use regular Archers against them in rough terrain, as they're 60% stronger than the defensive strength of Archers and can catch up to them, but using Warriors or Spearmen of your own should be alright.

The real weakness of Pathfinders is the fact they can't be directly upgraded, leaving the Shoshone with more of them than they know what to do with. The classical era is hence an excellent time to attack - bring some Composite Bowmen and some melee units, and you can cut through their units and their cities.

Playing against Comanche Riders

Comanche Riders aren't too hard to fight. Lancers are still cheaper than them and fight on about a level footing. Riflemen with their defensive bonuses work well, too. You can deal with Comanche Riders' fast speed by keeping the units you want to keep alive (e.g. Artillery) protected by a line of Riflemen.

As Comanche Riders are upgraded to armoured units, they'll be vulnerable to Anti-Tank Guns, and they'll still be unable to outrun Helicopter Gunships. If you don't have these, Infantry will work reasonably well to defend against them.

One strategy that should work well against the Shoshone is to send in fast units to pillage their oil, as well as their Trade Routes, hence making it particularly hard to upgrade their Comanche Riders. Then, they should be easy to pick off. They can't ever build Comanche Riders again once Landships are available, so they can't get back that +1 movement bonus.

Strategy by Style

Early-game Warmongers - An early UU should be able to compensate for the Shoshone's defensive bonuses and good start, so long as you ensure your army's big enough. Pathfinders won't prove too much of a problem.

Mid-game Warmongers - It's probably a good idea to pick up the Great Wall wonder so the Shoshone don't get it. Sending a distraction attack in one side of their vast land and invading via the other end is one way of more easily invading them.

Late-game Warmongers - Make good use of aircraft and naval units - the Shoshone lack advantages on the sea and in the air. Again, sending a distraction attack before the main one is probably a good idea.

Cultural Players - The Shoshone are likely to take many tiles which would contain Antiquity Sites. Try grabbing Archaeology early so you can send in the Archaeologists in and take the sites for yourself before they take them for themselves.

Diplomatic Players - Settle quickly so you can take good city spots before the Shoshone drown them all out. Settling quickly also increases the odds they'll decide to settle next to a warmongering Civ. Then, all you have to do is bribe them into war.

Scientific Players - Settle some cities early before the good mountain spots are taken. Keep some cash around in case you need to rapidly buy tiles to stop the Shoshone stealing them.
Other Guides
If you like these guides and want to send a tip, you can click here![ko-fi.com]

Meta-guides

These guides cover every Civ in the game and can be used as quick reference guides.

Civ-specific guides, in alphabetical order

All 43 Civs are covered in in-depth guides linked below. In brackets are the favoured victory routes of each Civ.
71 Comments
AblazinGrace Sep 7, 2023 @ 2:51pm 
I love shoshonii-chan. Snowball hard af early game and be full eras ahead of the rest of the world. Easy mode civ.
AlphaSwag Feb 21, 2022 @ 4:30pm 
shoshone da best
Zigzagzigal  [author] Oct 24, 2016 @ 7:20pm 
Eventually, but I need to get a grasp on all the game mechanics, and wait until the initial round of post-release patching is done.
nemo Oct 24, 2016 @ 4:11pm 
Are you planning to do civ 6 guides?
Zigzagzigal  [author] Feb 6, 2016 @ 4:15am 
Diplomatic Civs are generally more vulnerable to domination than any other victory route, as keeping a technological advantage is less of a priority for them, and war can pick off their City-States to deprive them of allies easily.

On the other hand, diplomatic Civs tend to be good against scientific Civs as World Leader votes can begin as soon as anyone enters the information era, and a technological advantage in the late-game gives very little advantage to winning over City-States.
Rok Wisdawn Feb 6, 2016 @ 4:01am 
Thanks, Zigzagzigal. I was thinking that war is the only solution, but was really hoping to avoid it, because that's how I play for a Science Victory; I try to be as diplomatic as possible with everyone, even if it's impossible to make everyone happy, especially towards the end of the game.
Zigzagzigal  [author] Jan 31, 2016 @ 11:52am 
If you have a technological advantage, you have a militaristic advantage. Try going to war with the diplomatic Civ. A quick war can pillage most of their trade routes and perhaps some of their gold-producing tiles as well, giving their economy and hence their influence gain a brief setback.

You can also try taking over the Civ's allied City-States. Be sure to start a war with the allied Civ rather than the City-State itself; declaring war directly on too many City-States gives you a penalty to influence gain.
Rok Wisdawn Jan 31, 2016 @ 11:16am 
With such civs like the Shoshone, and with focus on only Tradition (or maybe Liberty if one's lucky at higher difficulties to accommodate it) and Rationalism, ending up without innate abilities with City-States and without Patronage either, how do you defend against Diplomatic Victory by one of the AI?

I had this issue in one of my recent games, where I was technologically more advanced than others, and aiming for a Science Victory, but was left helpless to do anything to prevent a Diplomatic Victory by the AI, having allied itself with all CSs. It's way too expensive to bribe CSs enough to overcome an alliance that is in the upper 100s or 200s; and the quests are mostly about luck, and the relationship deteriorates too quickly. It's really such a challenge, especially at higher difficulties.
Zigzagzigal  [author] Jan 30, 2016 @ 11:17am 
Scout-spotters can work okay for Artillery, but once your opponents have Artillery, Battleships or aircraft of their own, they can be very easily killed before they can even provide a line of sight.

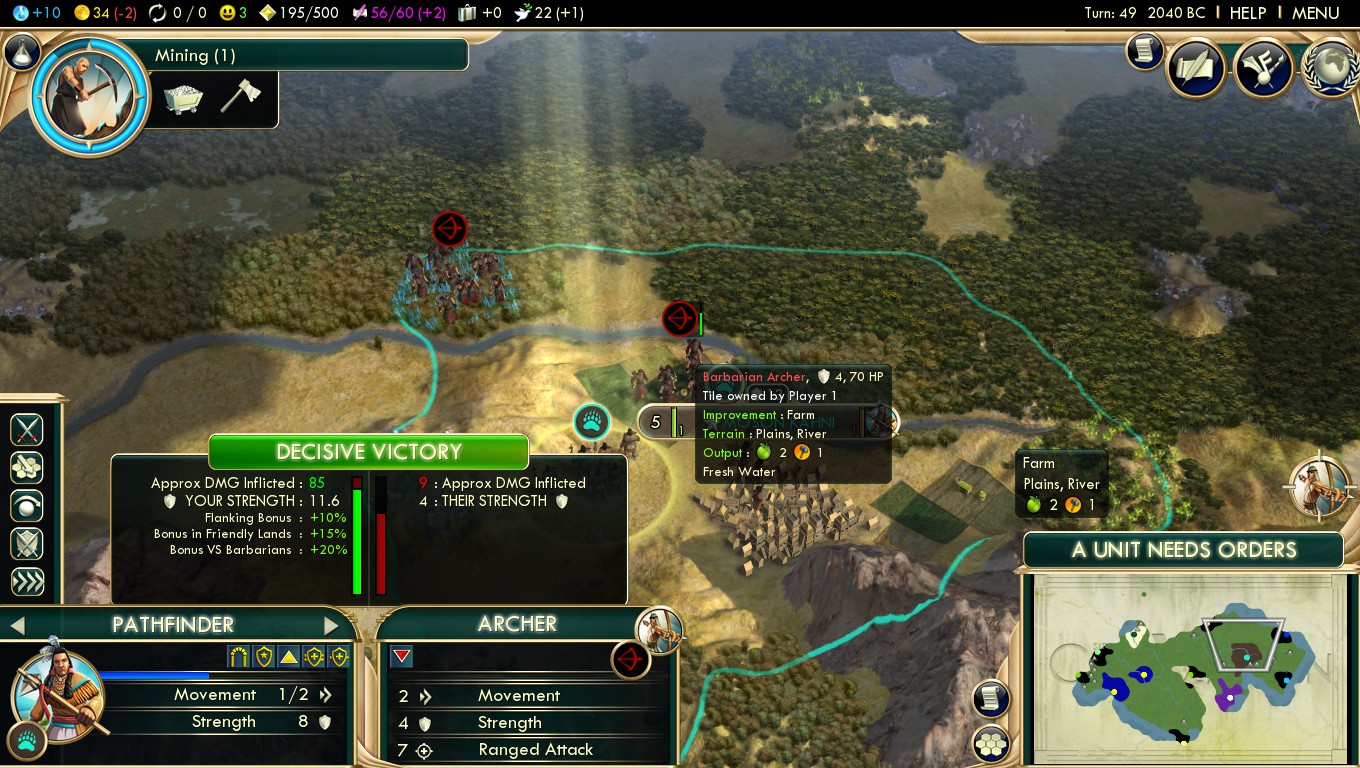
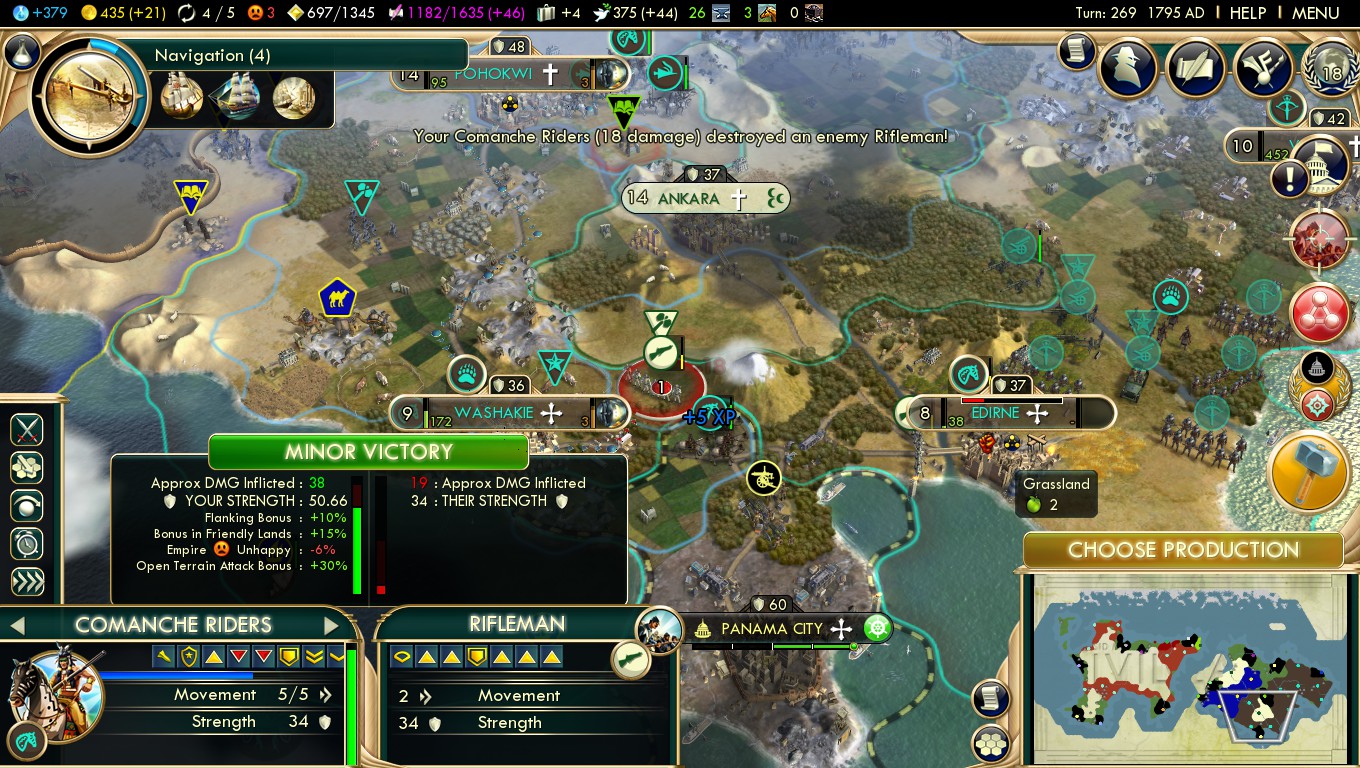
Cavalry and Tanks make less risky spotters - just move in so the city's in sight, hit it with your siege weapons and move out again.
Yensil Jan 29, 2016 @ 11:17pm 
When i'm playing a domination oriented civ and I'm able to rush brandenburg gate, I tend to build a few late game scouts (if there's enough unrevealed territory to make it worht it) so I'm able to take them all the way to Scouting III, since scouts obsolete on scientpillageific theory, on the other side of the tree. I found this particularly useful for Japan, as I could use scouts to spot for Artillery while my upgraded Samurai focused on unit killing and pillaging. I don't know if this would be as useful for the shoshone however, since the comanchee riders can act as moving spotters.