Deep Rock Galactic

Deep Rock Galactic

183 ratings
How to be the best Scout on Hoxxes IV
By Professional Idiot

This guide will go over all of the basic, advanced, and fine details of how to be the best Scout player there is in Deep Rock Galactic. I myself have a gold rank scout, but feel that I have reached a sufficient level of expertise with the class that I can pool my knowledge into a formidable tool to teach new and intermediate players.
4
2
4
   
Award
Favorite
Favorited
Unfavorite
Disclaimer

It is worth mentioning that this guide is not only a guide on how I personally believe Scout is best played, but also a semi-build guide. It will go over certain overclocks you should have, perks, and gear modifications.

I do not claim that this class or 'build' is inherently better than any other class, but only that it is extremely effective in my eyes!
The Introduction & Basics


Originally posted by Scout:
Yeah, I don't so much scout as make this operation possible.

This quote is an excellent way to open into the rest of this guide. Your scout holds the keys to a successful mission, through and through, whether it's being well-supplied, quickly done, properly handled, or all of the above. As a scout, you control how easy it is for your team to complete the mission. Once you're a good enough scout, the need for an engineer or driller to support you will practically disappear- although it is almost always beneficial to have one on your team.

A scout is role with countless responsibilities, capabilities, and strengths. I will try to go over the most important areas within this guide.


As a scout, you are equipped with 3 unique tools:
  • Your grappling hook
    The grappling hook is the '3' slot for the Scout, and a tool that allows you to zip around caverns at high speed. Upgrades will vary the speed and range at which you can traverse, and also potentially reduce fall damage.

  • Your flare gun
    The flare gun is the '4' slot for the Scout, and is used to fire a projectile light source used for illuminating large, open areas in caverns and caves. The torch embeds itself in any material other than dwarven equipment (ie. the drop pod, morkite drill rig, etc.)

  • Your grenade
    The scout has access to four different grenades that serve different uses, but for the purposes of this guide, and this build, the only one we'll be concerning ourselves with is the IFG.

    The IFG is a grenade that creates a medium sized (3m) field of static energy at the point of delivery. All enemies short of certain bosses and special units will have their movement speed and attack speed drastically reduced, by 75% [reduced to 0.25 speed], and will sustain 30% more damage than usual. There are a great many deal of pros and useful applications for this grenade, and I will list them below.


    - High grenade count (6 by default).
    - 15 seconds of field life.
    - Sticks to whatever it hits, no matter the material.
    - Enemies considered 'electrocuted' while inside, meaning that all weapons with modifiers that deal more damage to electrocuted enemies will apply.
    - Perfect for choke points in tunnels (mined dirt walls)
    - An excellent method of slowing hordes of grunts and swarmers that would otherwise easily overwhelm you, giving you time to escape.
    - During this slowed state, it is much easier to land headshots on bugs.


    Each of these tools are imperative to the survival of both yourself and your team. I will break down each of the tools to their basic and advanced uses in the following sections.
Grappling Hook


The Grappling Hook is the absolute single most important tool to you as a scout. Without a grappling hook, your class would be incomprehensibly hindered, and while there would be ways to play Scout still, you would not be nearly as effective, and would fall behind other classes in terms of utility and usefulness.

Originally posted by Scout:
From A to D, skipping B and C!

Most people will think that the grapple hook is a tool to get you from point A to B, but in truth, it is most effectively used as a tool of momentum. The number one thing you have to your advantage as Scout, is that you are punished only for vertical downwards momentum, not horizontal momentum. This means that you could fly at Mach V into a straight wall and take absolutely no damage. This also means that the greater your downwards momentum, the more damage you are going to take. This is the fastest and easiest way to die as a Scout if you are not careful of controlling your motion.

You want to use the grappling hook like you're Spiderman. It's a sling, and once you master the speed that the line propels you at, the momentum you carry as you sail through the air, and your precision with the tool, you will be able to accurately gauge your destination point from your starting point. Once you achieve this, you have already taken the intermediate steps from being a novice scout to being an adept scout.

Take the following gif as a very basic example of what I mean:


To build the best grappling hook, you want two things:
  • Low hook cooldown
  • High hook range (This is very important)
Other options on the list may look enticing, but the best things you can do for yourself is guarantee yourself both a way in and out of the stickiest situations. For the ideal selections, ensure you build your gun like so:


[Longer Cable]
This upgrade adds +5 range to your grapple gun.


[Greater Cable Stretch]
This upgrade is the only one you can invest in for this row, but adds another +5 to your range. You'll begin to see how this adds up.


[Overcharged Winch]
This can be argued upon, as both upgrades offer alternative options on how to get your dwarf out of the area, but I'm of the mind that the bonus 750 speed to extraction is always a tough boon to beat. This means the space you're in will be vacated significantly faster once your hook has landed elsewhere. The increased speed will also greatly contribute to the level of momentum your character will have from whatever point in time that you release the catch on your grapple. This means greater distance achievement, and greater control over your manoeuvrability.


[Bypassed Integrity Check]
This one is an obvious choice for the scout, the less time your grapple hook takes to recharge the better. Temporary fall damage reduction sound sweet and alluring, but it is a crutch that you can't afford to indulge in. The longer you play scout, the less potential fall damage and instant death you will risk. Mistakes will become less frequent, and your reaction time will improve to the point where needing a reduction on fall damage in this capacity versus imperative options such as faster cooldown speed are a no brainer choice.

Consider too that at higher Hazard Levels such as 4 and 5, you will spend a majority of your time slinging through the air and gaining different ground rather than running around on the ground, and for good reason.


An important part to grapple play is being able to easily maneuver the map and aid your fallen teammates. With your hook, you should be able to safely reach the destination of a fallen teammate 3-5x faster than any of your other allies. As a scout, the responsibility of keeping your teammates on their feet should be almost solely yours, especially if they are in a hard to reach spot. Once you've resurrected them, either with a normal revive, or using the instant revive granted by the Field Medic perk, immediately vacate the area, up and out of harm's way.
Flare Gun


I'll just start by saying that without a Scout's flares, it a team is at least 3x more hindered during combat. Without the ability to cognitively pinpoint targets based on quantity, quality, and level of danger, coupled with the inability to see more than a small cone infront of you, makes it vastly more difficult to survive a wave.

A well placed flare is imperative to the survival of your team, on all missions and maps, but some more than others. Some caves are inherently darker and absorb light more than others, making it even more important to place flares with the utmost efficiency, in the right places and at the right times.

There are X times you want to deploy a flare:
  • Perimeter Defence
    Any time the team is in combat during a wave, an event, or a boss in a room, ensure that the room is efficiently lit with 2 - 3 flares. Being able to not only make out the position, but also the quantity and type of enemy approaching is imperative for your offensive teamates (gunner, driller). Also being able to see the terrain and avoiding being caught on an odd angle can make the difference between a living dwarf and a dead dwarf.

  • New Cavern Exploration
    As a scout, you are not so unsurprisingly well equipped for, well, scouting. You will often be the first one into a new cavern. Your first and only responsibility the moment you clear the tunnel or chokepoint into a new cavern is to light the ceiling. Cave leaches are uncommon enough to forget about, but deadly enough to start a good expedition off on the wrong foot. Make sure that the upper-mid level of the cavern is well lit while you enter and navigate throughout.


  • Resource Gathering
    Your tertiary role as scout with the flare gun is to light the path for both yourself and your team to find minerals to harvest, whether it's Nitra (the most important resource in the game), or secondary resources like Gold, Croppa, etc. This is where the importance of well places flares and efficiency comes in hand. You will not always be so graced with abundant Nitra in every cavern, and so you have to ride the line of a well lit cavern and preserving your flares. With my build, you will have a healthy amount of ammo, but you will find with bigger caves that the ammo goes very quickly.

    Place your flares on the most central, mid-level, thin columns of terrain, or at the tip of hanging juts to ensure that it will light as much of the surrounding area as possible. Below is a diagram to illustrate the importance of properly placed flares.


Above is an example of bad flare placement, three flares placed at the red dots illustrated at the image above.


Above is an example of good flare placement. Three flares are placed on either of the green dots illustrated above.

Overall, with good flare placement, more light is spread to the upper, mid, and lower sections of the cave, whilst bad flare placement lacks exponential coverage over the ceiling and does not extend as far into the cave.

To build the best flare gun, you want two things:
  • High ammunition
  • Magazine capacity
Many will argue over having longer lasting flares versus a greater quantity, but ultimately as long as you have MORE flares, you will always be more useful. I will explain below. Make sure you build your gun like so:


[Expanded Ammo Bags]
Increases flare count by 3


[High Capacity Magazine]
Allows for one additional flare in your magazine at a time for a total of 4. This upgrade is not so important, but I still value the importance of having a fuller magazine versus being able to quickfire flares. A good flare takes a moment of precision and thought to place anyway.


[Expanded Ammo Bags]
Increases flare count by 3. Easily beats the 'automatic reload' option in terms of usefulness. While the flares have to be used on the fly, they are seldom crucial to use at an exact moment.

Flares by default have a lifetime of 1 minute and 15 seconds. Two 'Expanded Ammo Bags' will increase your total flare ammo capacity from 12 to 18. Alternatively, two 'duration upgrades' will increase the total lifetime of the flare from 1 minute and 15 seconds to 1 minute and 45 seconds.

The difference in total flare time between the two is relatively minimal, but still my Expanded Ammo Bags method comes out on top with a total of 22 minutes and 30 seconds, while the duration upgrade method comes out at 21 minutes on the dot. This means that you get more flares to divide usage over, whilst ultimately getting more total flare lifetime.


While it's important to be frugal with your flares and pays to be careful with how you deploy them, your team's survival is vastly more important. Prioritise using your flares to light a dark area where your teammates are locked in combat over anything else. A scout is responsible for keeping their team alive in more ways than ones. It is absolutely necessary for a scout to remain on top of lighting a room that the team is fighting in, especially during the uplink portion in salvage operations, or machine events.
Primary Weapon & Overclock

The weapons and the overclocks that you use for them are equal parts important when deciding what you want your focus as scout to be. Our focus is to be as versatile as possible with the limited tools this class gives us, and thankfully we can come very close to achieving just that.

I will go over two weapons, and a special mention, because I think it can also be a useful tool from time to time. The first of these weapons is the M1000 Classic, your primary weapon.


The M1000 Classic is the second most important tool to the Scout, and a remarkably good weapon, especially so if built correctly for our intended use of it. The M1000 is the choice weapon for our ideal scout, excelling in both medium-long range accuracy and weak-point exploitation. This weapon also serves as one of the key components to safe and effective maneuverability for the Scout. How, you ask? It's simple, and all because of a single overclock. I will save further explanation of this topic for when I delve deeper into overclocks further down. For now, let's review how you should build your ideal M1000 Classic:


Increased Caliber Rounds
Increases damage by 10. More damage is always good with this weapon, as long as your shots are well placed.


Fast Charging Coils
Focusing a shot is 25% faster. This is especially important to optimise the overclock, and makes rapid-firing at a weak spot much more efficient. We don't focus on armor shredding, because this weapon will rely on exploiting exposed weak spots for high damage shots. The stability option is good, but the recoil can be controlled.


Killer Focus
Increases the focus shot damage of 25%. More reason to use focus shots on higher health enemies. The additional 4 rounds in the magazine might be useful, but ultimately isn't as important as the damage boost.


Hollow-Point Bullets
Increases weak-point damage by 20%. Now you might begin to see how all of these percentages add up to big time damage to traditionally ruthless and bothersome units. Quickdraw a swarm of Mactera Spawn like popping a McCree ult. Swat acid and web spitters off of the ceiling with a flick of your wrist.


Hitting Where It Hurts
Focused shots will stagger non-boss enemies for three seconds. This is a colossal boon that ties all the little perfect perks of this weapon together into the perfect elite killer. The shot can hit the creature anywhere that isn't armored, and it will succeed in staggering. This turns taking out enemies like the Warden and Praetorian into trivial tasks, as you can then line up several focused shots into the stunned elite's weak-spot immediately after.

This leads me into the final evolution of this weapon to complete it's usefulness to the Scout in the most spectacular way;


The Hoverclock overclock is a revolutionary modification, and drastically changes the way you're able to play your scout. Takes express grapple routes that ignore the greatest danger of all, vertical downwards momentum. When equipped, the hoverclock feature will slow you to a gradual, complete stop if you are mid-air while charging a focused shot with the M1000 Classic. Yes, this has it's uses for trick shots, and complex weak-point angle shots, however that is not it's primary strength. If timed very precisely, the hoverclock can be triggered moments before the Scout hits the ground, dampening your inertia until you are within a safe distance of the ground.


This is a complex task to achieve, and requires some practice to perfect, as triggering it too late can result in not slowing fast enough and still sustaining fall damage or death. Triggering the effect too soon will have a similar effect, beause once the approximate two seconds of suspended motion expires, your body will just as quickly resume the previous inertia that the hoverclock had momentarily dampened.
Secondary Weapon & Overclock


The Zhukov NUK17 machine pistols are an excellent contrasting compliment to your fixed role M1000, providing a close range, high rate of fire alternative for taking care of swarmers, grunts, and even guards and slashers if need be. The reality of being a Scout is that sometimes you are going to be swarmed no matter what you do, and frankly sometimes you'll be forced into a situation where you have to do a bit more wave clearing legwork than ordinarily expected. The Zhukovs take the medium to fill that role, as a well balanced secondary.

The only con I believe that is worth of note is that the ammunition goes very quickly if you don't conserve ammunition. This weapon should not be used as a primary weapon, and should be used in careful balance with your M1000 for clearing out enemies when necessary.

As opposed to some of our earlier building, I believe the best approach to a solid Zhukov secondary is balance, while still leaning towards serving a general purpose. Let's get into the build details for this weapon:


High Velocity Rounds
This adds +1 damage to the weapon. Doesn't sound like much, but the Zhukovs fire fast, and shred faster than you would expect.


High Capacity Magazine
We don't necessarily want a higher rate of fire, and the reload time option is negligible, but upping the magazine size by ten counts for quite a bit. Accuracy is our intended purpose with the Zhukovs, as they'll primarily be used as a weak-spot exploiting kiting weapon for pursuing grunts, swarmers, guards, and slashers. The longer we have to fire before having to reload, the better.


Better Weight Balance
This decreases the base spread down by 60%, which is a vast improvement in comparison to another single point of damage. Headshots become drastically easier to achieve within a IFG stasis field, or even out.


Hollow-Point Bullets
This increases the weak point damage bonus of the Zhukovs by 30% which just makes headshots that much better- and seeing as you'll primarily be using these weapons as a close quarters weapon, it makes that potential much more realistic.


Conductive Bullets
Remember when I mentioned that everything inside the IFG field is considered electrocuted? Well, this mod gives the Zhukovs a 33% bonus in damage against electrified targets. You'll begin to see how the Zhukovs get turned from a decent sidearm into a brilliant self defense method when used correctly.


In order to use the Zhukovs to the best of your advantage, make sure to use them within an IFG field and kite enemies through it while aiming for the head. You will make short work of the tougher non-elite units, and even some tougher enemies like the Praetorian and Oppressor when focusing their weak-spot.


What better way to round off a balanced sidearm with an equally balanced overclock? The Custom Casings overclock is nothing special, and is probably the least unique of all the Zhukov Overclocks, considering Cryo Minelets, Embedded Detonators, Gas Recycling, and Minimal Magazines, but in my opinion it perfectly completes the ideal tool we've been building all this time.

The rate of fire is reduced by 4, from 30 to 26, but a magazine now carries 90 rounds as opposed to 60 by default. This goes along well with our earlier philosophy of the longer it takes to reload our weapon the better, and the rate of fire does not inherently negatively affect the weapon so much as it gives more of a reason to capitalise on accuracy.
Armor Modifications, Perks & Your Pickaxe


The final part of our build guide covers the importance of carefully considered armor modifications for our Scout. The biggest struggle you will face in higher hazard levels is survivability against swarms of average mobs, Mactera spawn snipers, and acid spitters. Even with all of the incredible tools at our disposal provided by this build, there will come a time when you are down to your last line of defence: Your armor and shields. Let's visit the armor modifications and see what's best for our finely curated Scout so far.


Boosted Converter
Adds 2 seconds onto initial shield recharge delay, but charges 100% faster. Ultimately worth it, when the alternative only reduces the recharge delay by 1 second.


Healthy
Raises base health from 125 to 145. I chose a greater amount of health over the smaller amount of increased shields. Red Sugar is a commodity that the scout has the most frequent access to in comparison to other classes. Make good use of this advantage.


Shock Absorbers
Provides 33% fall damage reduction. Absolutely necessary for Scout. I use this as an example when people ask me why skill and experience isn't the only factor involved with surviving higher hazard missions. Small weapon/armor mods like this are hidden away in the upper tiers of the tools that act as a detriment to you if you don't have them unlocked.


Breathing Room
I swapped from Shockwave to Breathing Room while writing this guide, solely on the reasoning that an extra 3 seconds of invulnerability upon revive is enough time to revive a nearby teammate, or consume one of the equipment refills on a nearby resupply pod, which can give you an immediate edge on your escape and recovery.

That about sums it up for armor modifications. I will now swiftly move into perks for Scout, and what best compliments what we have so far.


I think of perks a lot like some games have sub-classes, which change the way you play your class and alter your habits. For a scout, we capitalise on being as fast as possible while filling in gaps with benefits to our survivability to give us just a bit more of an edge in every area where we can find it.

[Thorns] Every Tier up to 4 increases damage dealt to melee attacks against the dwarf by 6. At tier 5, Thorns deals 24 damage to melee attacks for every hit. Thorns is a formidable perk option for scout, seeing as some of our primary menaces tend to be swarmers and weaker hordes of enemies. The damage is more than enough to 1 hit a swarmer on any hazard difficulty.
Tier
Damage
I
6
II
12
III
18
IV
24

[Strong Arm] is a quality of life perk for the Scout, enabling you to throw both hand-flares and heavy objects (gold, jadiz, aquaqs, etc.) with greater force. Starts at 20% bonus flare force, and 10% bonus heavy object force.
Tier
Torch Force
Heavy Obj Force
I
20%
10%
II
30%
10%
III
40%
20%
IV
50%
20%

[Resupplier] is an imperative perk to our ideological scout. This perk allows you to resupply faster at the resupply pod, meaning you spend less time taking damage when what you really need is health and ammo! This perk also increases the amount of health you receive from resupplying.
Tier
Resupply Speed
Health Bonus
I
20%
10%
II
30%
15%
III
40%
20%
IV
50%
25%


[Field Medic] is an incredible perk to have and as I keep saying, compliments the speedy nature of our class as a support. Each tier in this perk increases the speed at which you revive teamates. Just having the perk equipped allows you to instantly revive a teammate once per round.

Tier
Revive Speed
Bonus
I
15%
N/A
II
20%
N/A
III
25%
N/A
IV
30%
Nearby enemies flee on revive.

[Iron Will] is a perk that everybody should have, no matter what, period. When downed, temporarily resurrect yourself for anywhere from 6 - 12 seconds based on tier. Ultimately, this perk is best used when everyone on the team is down, and you have to clutch as Scout, reviving all your teamates on the go.
Tier
Last Stand Time
I
6s
II
8s
III
10s
IV
12s


If you have Iron Will equipped, keep in mind that gaining any modicum of health through any manner, be it resupply pod or red sugar, will cancel your timer and allow you to keep moving on without being downed again! This is useful for if you need a little bit more time to strategize your game-saving clutch plan.


Your pickaxe spec is more important than you might think. I'll briefly list the modifications here, and expand upon it more in depth in the Tips and Tricks section, near the end of the guide.


Power Attack
A powerful addition to your pickaxe, making it worthy in combat against bugs. M2 + M1 to activate.


Better Weight Balance
Significantly reduces the cooldown time on the pickaxe Power Attack, making it much easier to perform Scout maneuvers and tricks involving terrain and momentum.
Tips & Tricks


There are two major tips and tricks I want to bestow onto the readers of this guide, and those two things are power climbing and Inertia-maxing, or I-Maxing for short.


Power Climbing is the act of eliminating the need for an engineer in your party by slinging yourself at a slanted or linear surface and power-attacking it as to make a dwarf-sized pocket in the side of the wall next to whatever desirable resource you're pursuing.

This method can be dangerous without proper backup measures such as the M1000 Classic Hoverclock overclock, or the Jury-Rigged Boomstick with Special Powder. However, once barely pocketed in the wall, make sure to keep running against it, and to mine even more of it out to ensure you don't fall.

Example given below:


I-Maxing is a personal favorite of mine, and a trick that is easy to learn and hard to master. To do it right every time takes a lot of time, but it is very rewarding.

Sometimes, especially if you're playing solo Scout, you can't quite launch that Aquarq or Gold chunk up over that ledge, even with Strong Arm. That's when I-Maxing comes in handy.

I-Maxing is the act of positioning yourself at the base of the cliff, looking directly up, throwing the mineral at full charge upwards, using your grapple to propel yourself towards the chunk and the ceiling at high speeds, catching the mineral mid air, and sailing up with it via your inertia from the grapple.

An example is given below:

Conclusion


Thank you for visiting and reading my guide. If you have any suggestions on things to add that might compliment this build, or more ideas for tips and tricks, please comment or message me and let me know and I'll credit you!

I made this guide in one night and am now just finishing up at 5:15 AM. I just hope it's worth it, and somebody takes something from it.

Cheers lads, and:

48 Comments
Professional Idiot  [author] Jan 16 @ 5:34pm 
Thanks for the comment @Dracolyn! They don't really, I just made those monikers up for the sake of distinction.

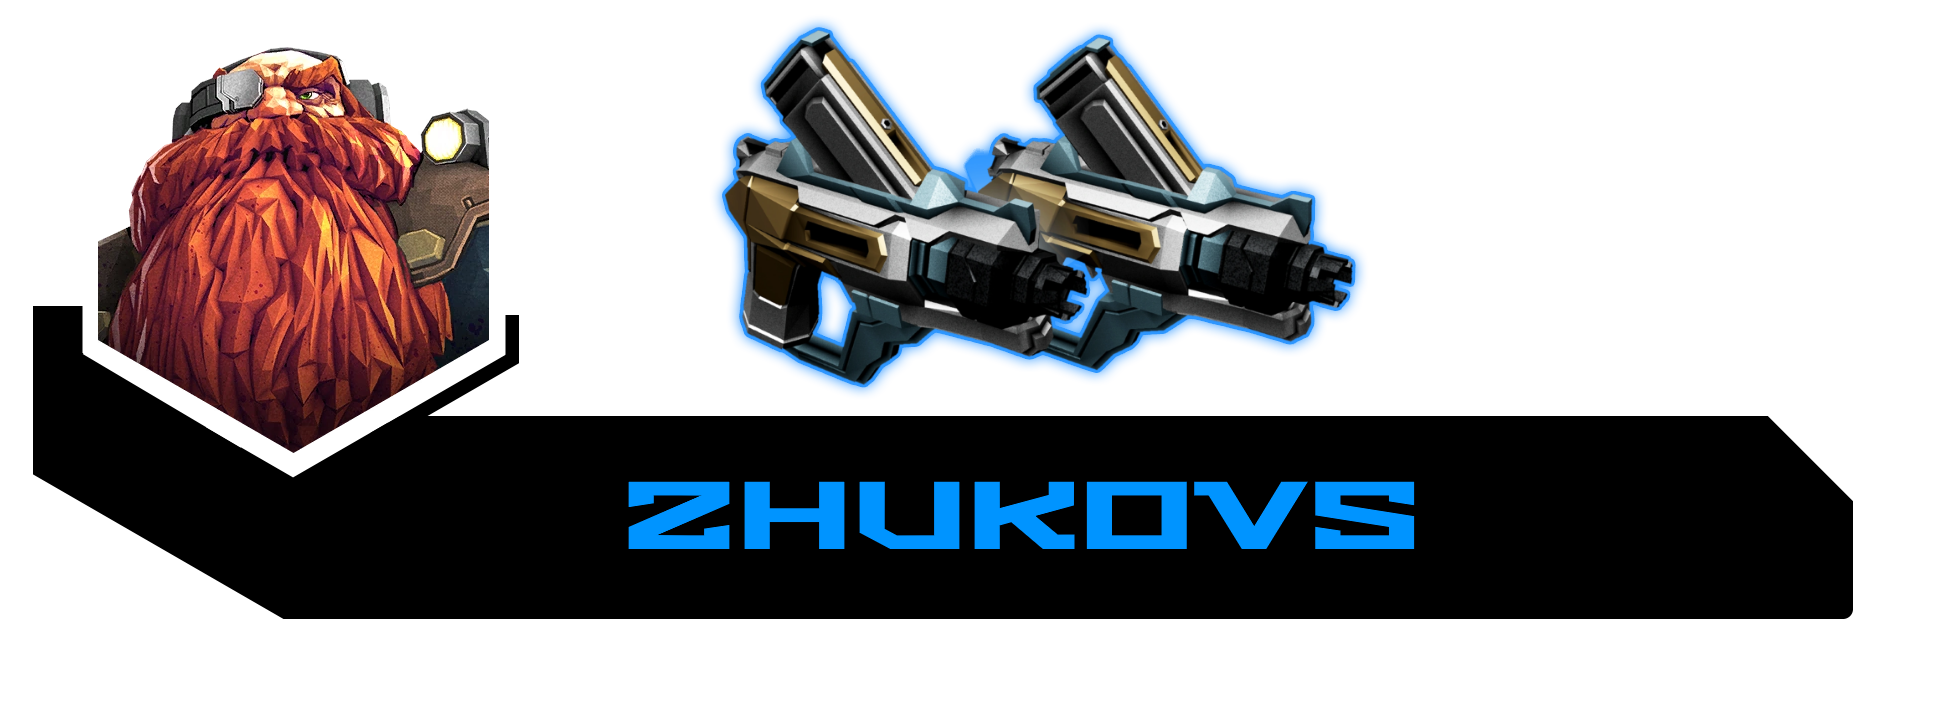
I think the weapon choice is the least important part of this guy, to be fair; I just wanted to outline my favourite choices for the class, but good scout etiquette is far more important! Thanks for reading!
Dracolyn Jan 10 @ 4:15pm 
Wow, this really feels like how I play Scout! I use Deepcore and Boltshark though. I also do both I-maxing AND power climbing, although I didn't know they had names.
Professional Idiot  [author] Nov 4, 2024 @ 4:46pm 
I simply play with people who don't shoot me. : )
genghisjayder Oct 29, 2024 @ 8:08am 
Yeah thorns sucks when you could use second wind, deep pockets, or friendly
Sein Oct 28, 2024 @ 12:48pm 
don't use thorns btw, you're better off using anything else
Professional Idiot  [author] Oct 15, 2024 @ 6:34pm 
thank you so much @Vcoke27 !
Vcoke27 Sep 29, 2024 @ 8:31am 
Genuinely a great and well written article!
tuna Nov 27, 2023 @ 11:31pm 
how to be the best scout: dont get blown up by the c4
genghisjayder Jul 14, 2023 @ 10:33pm 
I wish I could up vote comments that make me laugh on steam, but I am so dumb that I actually listen to engi so sadly I don't know the trick
shrieking freaker Jul 14, 2023 @ 10:31pm 
everyone knows the optimal way to play scout is, since hes only good at single target, never help in a swarm. ever.
and ignore every engi who pings nitra or morkite. (remind him he can do it himself)
:steamthumbsup: