IdleOn - The Idle RPG

IdleOn - The Idle RPG

61 ratings
A Guide to Idleon Endgame
By CataliN.
A complete guide to increase your gains.
6
3
   
Award
Favorite
Favorited
Unfavorite
Your Cornerstone Classes
Most of your characters will be more or less stuck in the lab to get the great bonuses it gives. Your progress and gains will be centered around 4 characters:

Bubonic Conjurer
This will be your main active farming character. He will farm cash, statues and drops.

Maestro
This will be your second active farming character. He can farm cash/statues, but more importantly will be the one killing bosses/minibosses as Maestro can get more total drop rate.

Bowman
Your bowman will farm kills for your death note and green mushroom kills to improve your lab bonus to money. This will support your bubonic conjurer.

Blood Berserker
Your berserker will be cooking. He can produce large amounts of ladles each day to get you those significant cooking bonuses.
Bubonic Conjurer
Your bubonic conjurer will make use of his Raise Dead skill to actively farm mobs with great efficiency.


Setup:

Talents
Increase his max talent on Raise Dead, Chemical Warfare, Flatulent Spirit, Tenteyecle and Cranium Cooking to the 160 cap. You also want the Crystals 4 Dayys star talent maxed. You'll want these skills on your bar in this order. Do not put other fighting talents as they will interfere with the optimal casting of these skills.


Cards
You want the genie card and poop card maxed and using the card doubler chips (250% extra crystal spawn chance). For the other cards, you want drop rate, money or XP while active, depending on current goal

Star Signs
  • 15% Class EXP when fighting actively
  • 4% Mob Respawn
  • 15% Total Damage/-7% AFK OR 2% respawn
Post Office
  • Non-Predatory Loot Box capped for drop rate and crystal spawn chance
  • Potion Package capped for Cranium Cooking time increase
  • Magician Starterpack to reduce cooldowns
  • Utilitarian Capsule for cash from mobs
Shrines
  • Clover
  • Crescent
Lab Chips
  • Chocolatey Chip
  • Potato Chip
  • Omega Nanochip
  • Omega Motherboard
  • Silkrode Nanochip
  • Silkrode Processor
  • Silkrode Motherboard (if you have Beach Bro)
Other
Drop rate and money obols. Beach Bro trophy if you have it. Don't forget to equip all speed potions. If you have enough damage to insta-kill everything with poison, use the spear so your char moves around picking up items to help reduce lag.


Active Farming

Money & Alchemy
The ideal spot to farm money is Flomberges in world 4. You will get the most money from crystals there, as well as fastest proc of Raise Dead and Cranium Cooking thanks to Tenteyecle and the large amount of Flomberges on a small map.

World 1 Statues
There is a lack of good maps with a lot of mobs in Raise Dead range to farm statues. You are likely better off using Maestro for this. The ideal map is likely Rats or Giga Frogs.

World 2 Statues
Sand Castles is the best place to farm, although you could also try Sandy Pots for glass shards to improve the capacity stamp.

World 3 Statues
Mammooths is a small map with relatively high mob count. It is perfect to farm statues in World 4, although the only statue of interest not in other worlds is the skill experience one.
Maestro
Your Maestro will farm the bosses/minibosses, as well as statues on maps with rare drops where your Bubonic Conjurer cannot effectively use Raise Dead. Your Maestro will also boost the skill efficiency of all your other characters.

Only get enough skill levels to equip the best tools on your other chars. This will help keep your Maestro ahead.


Setup:

Talents
You want Cmon Out Crystals, Gimme Gimme, Rares Everywhere!, Crystal Countdown, Printer Go Brrr, and Right Hand of Action capped. All the rest doesn't need to be capped but more damage is better. Level the talent Curse of Mr Looty Booty as much as you can while still one-hitting the crystals.

Cards

You want the genie card and poop card maxed and using the card doubler chips (250% extra crystal spawn chance). For the other cards, you want drop rate, money or XP while active, depending on current goal.

Star Signs
  • 15% Class EXP when fighting actively OR 5% Drop Chance
  • 4% Mob Respawn
  • 15% Total Damage/-7% AFK

Post Office
  • Non-Predatory Loot Box capped for drop rate and crystal spawn chance
  • Magician Starterpack to reduce cooldowns
  • Any of the boxes that help with damage/skill gains

Shrines
  • Clover
  • Crescent

Prayers
  • Midas Minded while killing bosses/minibosses. Also for crystals you can 1-hit with the prayer active.

Lab Chips
  • Chocolatey Chip
  • Potato Chip
  • Omega Nanochip
  • Omega Motherboard
  • Silkrode Nanochip
  • Silkrode Processor
  • Silkrode Motherboard (if you have Beach Bro)

Other
Drop rate and money obols. Beach Bro trophy if you have it. Don't forget to equip all speed potions.


Active Farming

Money
The ideal spot to farm money is Clammies in world 4. They give good money but most importantly you will be needing Pealer Shells for various tools/bags.

World 1 Statues
Slimes is the best map, although if you don't have full POP obols, farm Giga Frogs. The imporant part is never being idle waiting for mobs to respawn.


World 2 Statues
Sand Castles is the best place to farm, although you could also try Sandy Pots for glass shards to improve the capacity stamp. Moonmoons are also good if you need ghosts.

World 3 Statues
A lot of maps will work here. You can go for any maps where you don't end up idling, if you need materials/rares from that specific mob.

Bosses & Minibosses
Farm them on Maestro with the Midas Minded prayer and capped Curse of Mr Looty Booty. Switch to full drop rate cards. Be sure to have your obol boards completed with all drop rate obols. You want to maximize rare/candy drops. Maestro has talents which allows to reach highest drop rate possible in the game.
Bowman
Your Bowman is the AFK MVP. He'll be using your candies on perfecting your Death Note and amassing Green Mushroom kills.


Setup:

Talents
You want Featherweight, Idle Shooting, Broken Time, Robbinghood, Smeltin' Erryday, ACME Anvil, SpeeDNA capped. For the rest, go for as much damage talents as possible.

Cards
You want Chaotic Amarok, Boop and Clammie cards. For the rest you want damage/drop rate.

Star Signs
  • 6% AFK / -50% - 80% HP
  • 4% Fight AFK
  • 4% Mob Respawn
Alchemy Bubbles

  • Hammer Hammer (will net you lots of anvil materials when using candy)
  • Mr Massacre (very strong)
  • Kill per Kill (minor help)
Post Office
  • Civil War Memory Box for fight AFK
  • Utilitarian Capsule for multikill per tier
  • Blacksmith Box for more production while using candy
  • Carepack From Mum cause you'll be using lots of speed potions
  • Bug Hunting Supplies for sampling bugs
  • Any of the other boxes that help with damage/skill gains
  • Non-Predatory Loot Box for drop rate
Shrines
  • Woodular
  • Clover
  • Undead
Prayers
  • Balance of Pain for the multikill
Lab Chips
  • 15% Fight AFK
  • Conductive Processor
  • Omega Nanochip
  • Omega Motherboard
  • Silkrode Nanochip
  • 2x Wood Chips (Respawn chips or Silkrode Processor with respawn pendant otherwise)
Other
Put all speed potions on your bowman as he gets damage from movement speed. Bowman's damage talent can scale indefinitely unlike other classes. Just keep working on speed statues and feasty to enhance your speed potions.


AFK Farming


World 1
You'll mostly get stuck in World 1 at all time. Work up your Death Note to the highest tier on all mobs and improve your gear/damage. Then use candy on Green Mushrooms. With the laboratory's Fungi Finger Pocketer and the gem boosting it, each 1 million Green Mushroom kills will add 3.5% to your money gains. It's possible to exceed 500k kills per hour, so your Bowman will be working on supporting your Bubonic Conjurer's money gains.

You will also generate a lot of bars from the forge thanks to the Smelting talent, and anvil items thanks to Hammer Hammer bubble. Don't forget to regularly claim your anvil materials while using up candy.
Blood Berserker
Your blood berserker cooks.


Setup:

Talents
Increase the caps on his cooking/skill efficiency talents.

Cards
  • Amarok and Bunny cards for AFK Gains
  • Chaotic Troll for skill efficiency
  • Chaotic Efaunt and Mutated Mush for cooking EXP
Star Signs
  • OG Skiller
  • 2% Skill AFK
  • 4% Skill AFK
Post Office
  • Chefs Essentials
  • Myriad Crate
Prayers
  • Skilled Dimwit
Lab Chips
  • Omega Nanochip
  • Omega Motherboard
  • Conductive Processor
  • Silkrode Nanochip
  • Silkrode Processor
  • 2x Galvanic Motherboard
Other
Persephone's bouquet of course is a must, which is doubled to 30% AFK gains with the Silkrode Processor. You'll also want the upgraded Chef Hat Shoes and 2x Chef Ring. If you don't have those, farm them with your Maestro or Bubonic Conjurer.

Don't forget to chow all the mobs first.
Other Characters
Your other characters will be stuck in the lab, and sample materials for the 3D printer. If they need more points to cap all their skill talents, take them out a bit for some progression and active crystal farming in world 4.

Only get enough skill levels to equip the best tools on your other chars. Then stop leveling and only sample. This will help keep your Maestro ahead.

You want their obols board to be filled with obols for their main skill.

Use Royal Sampler prayer on all your chars. Sampling caps at 90% so only level your prayer to about 30% sampling gains.

Those characters are there to keep the strong lab bonuses active for your main characters and sample materials for your alchemy/gear/stamps. That's their only purpose. It's good since that's less stuff to manage.

Stamps
Stamps are good for you, but the costs get prohibitive. Your Bubonic Conjurer will make sure you earn plenty of money for upgrading them.
Obols
You can reroll up to +1 misc value on your obols. When combining obols, the resulting obols will keep the reroll bonus of the obol in the left slot. So reroll +1% drop rate/money on your obols before merging.

You don't need to reroll your merged obols. The reroll value isn't added to base stats, so rerolling the merged obol will just delete your reroll bonus and roll a new one. You reroll once before merges since it's cheaper to reroll on the lowest obol.

Peak performance:
Alchemy
Focus on bubbles multiplying passive bubbles of that color when using that class, as well as the bubbles giving a discount for the cauldron's bubbles. Don't forget to be on a character of the right class when upgrading bubbles, since the multiplier bubble will also work on the discount bubble, so you need to right class to benefit from the multiplier bubble.

Important bubbles to focus on:
  • The two multiplier bubbles in each cauldron
  • The discount bubbles (caps at 95% with multi bubbles)
  • Mr Massacre for Bowman's AFK gains
  • Cookin Roadkill for active Bubonic Conjurer
  • Hammer Hammer for Bowman candy usage (+ everyone else)
  • Base stat bubbles
  • Equipable skill bubbles for sampling
  • Skill gain bubbles
  • Diamond Chef
  • Money gain bubbles
Construction
You want to have a Squire in the middle of a square all pointing to your Squire. With row/column cogs pointing to the Squire, forming a sort of plus. All boost cogs should give the "+% Player Construct XP" bonus. All other cogs should focus on the Bonus Construct EXP stat.

You will mostly get construction speed from your squire's construction level, not cogs, so your focus should be maximizing your squire's XP gains

Mine is not complete, but should have all these boost cogs pointing to squire:
Laboratory
Once you have the connection range jewel, combined with the Viral Connection node and the Spelunker Obol node, you get some pretty good range on your connections. Remember that line width is the connection range between characters. Bonuses to connection range to nodes and jewels are expressly marked as "connection range."

This is the typical endgame lab setup, requiring 6 characters:


You will usually have out of your lab:
  • Bubonic Conjurer or Maestro as active
  • Bowman at mobs
  • Blood Berserker cooking

Your 4th out of lab character is optional, usually a 2nd cook or bowman. If active on Bubonic Conjurer, and if needed, 4th can also be Maestro to maintain his skills as highest for Right Hand talent.
Rate, Reward & Add To Favorite! 💜💜💜

.gif]
8 Comments
idealgalaxy9232 Jul 5, 2024 @ 5:47am 
░░░░░░█▐▓▓░████▄▄▄█▀▄▓▓▓▌█
░░░░░▄█▌▀▄▓▓▄▄▄▄▀▀▀▄▓▓▓▓▓▌█ Help
░░░▄█▀▀▄▓█▓▓▓▓▓▓▓▓▓▓▓▓▀░▓▌█ Doge
░░█▀▄▓▓▓███▓▓▓███▓▓▓▄░░▄▓▐█▌ Take
░█▌▓▓▓▀▀▓▓▓▓███▓▓▓▓▓▓▓▄▀▓▓▐█ Over
▐█▐██▐░▄▓▓▓▓▓▀▄░▀▓▓▓▓▓▓▓▓▓▌█▌ Steam
█▌███▓▓▓▓▓▓▓▓▐░░▄▓▓███▓▓▓▄▀▐█ Copy
█▐█▓▀░░▀▓▓▓▓▓▓▓▓▓██████▓▓▓▓▐█ And
▌▓▄▌▀░▀░▐▀█▄▓▓██████████▓▓▓▌█▌Paste
▌▓▓▓▄▄▀▀▓▓▓▀▓▓▓▓▓▓▓▓█▓█▓█▓▓▌█
█▐▓▓▓▓▓▓▄▄▄▓▓▓▓▓▓█▓█▓█▓█▓▓▓ DO IT
Maerkuz Apr 23, 2024 @ 4:35pm 
is this still viable for 2024?
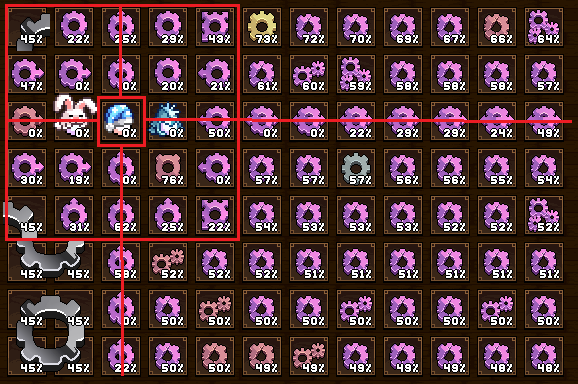
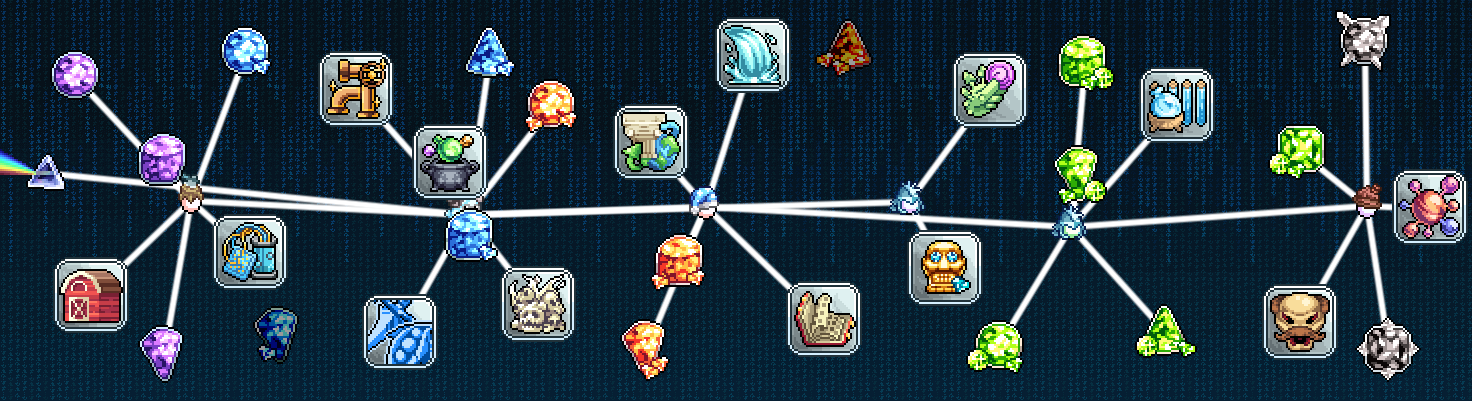
I'm nowhere near this stage yet, but I like planning ahead so I know what to build towards.
the gamer axolotl May 28, 2023 @ 9:18pm 
█▐█▓▀░░▀▓▓▓▓▓▓▓▓▓██████▓▓▓▓▐█
▌▓▄▌▀░▀░▐▀█▄▓▓██████████▓▓▓▌█▌
▌▓▓▓▄▄▀▀▓▓▓▀▓▓▓▓▓▓▓▓█▓█▓█▓▓▌█
█▐▓▓▓▓▓▓▄▄▄▓▓▓▓▓▓█▓█▓█▓█▓▓▓


i killed doge
masquacks Mar 6, 2023 @ 12:19pm 
░░░░░░█▐▓▓░████▄▄▄█▀▄▓▓▓▌█
░░░░░▄█▌▀▄▓▓▄▄▄▄▀▀▀▄▓▓▓▓▓▌█ Help
░░░▄█▀▀▄▓█▓▓▓▓▓▓▓▓▓▓▓▓▀░▓▌█ Doge
░░█▀▄▓▓▓███▓▓▓███▓▓▓▄░░▄▓▐█▌ Take
░█▌▓▓▓▀▀▓▓▓▓███▓▓▓▓▓▓▓▄▀▓▓▐█ Over
▐█▐██▐░▄▓▓▓▓▓▀▄░▀▓▓▓▓▓▓▓▓▓▌█▌ Steam
█▌███▓▓▓▓▓▓▓▓▐░░▄▓▓███▓▓▓▄▀▐█ Copy
█▐█▓▀░░▀▓▓▓▓▓▓▓▓▓██████▓▓▓▓▐█ And
▌▓▄▌▀░▀░▐▀█▄▓▓██████████▓▓▓▌█▌Paste
▌▓▓▓▄▄▀▀▓▓▓▀▓▓▓▓▓▓▓▓█▓█▓█▓▓▌█
█▐▓▓▓▓▓▓▄▄▄▓▓▓▓▓▓█▓█▓█▓█▓▓▓ DO IT
𝙨𝙞𝙢𝙤𝙣 Oct 18, 2022 @ 8:55am 
<3
aka kasvaa Oct 17, 2022 @ 6:52am 
rate my new guide
join my group and follow me please :truelove13:
six Oct 16, 2022 @ 1:56pm 
It gives me an error when i try to rate it :/